“`html
Table of Contents
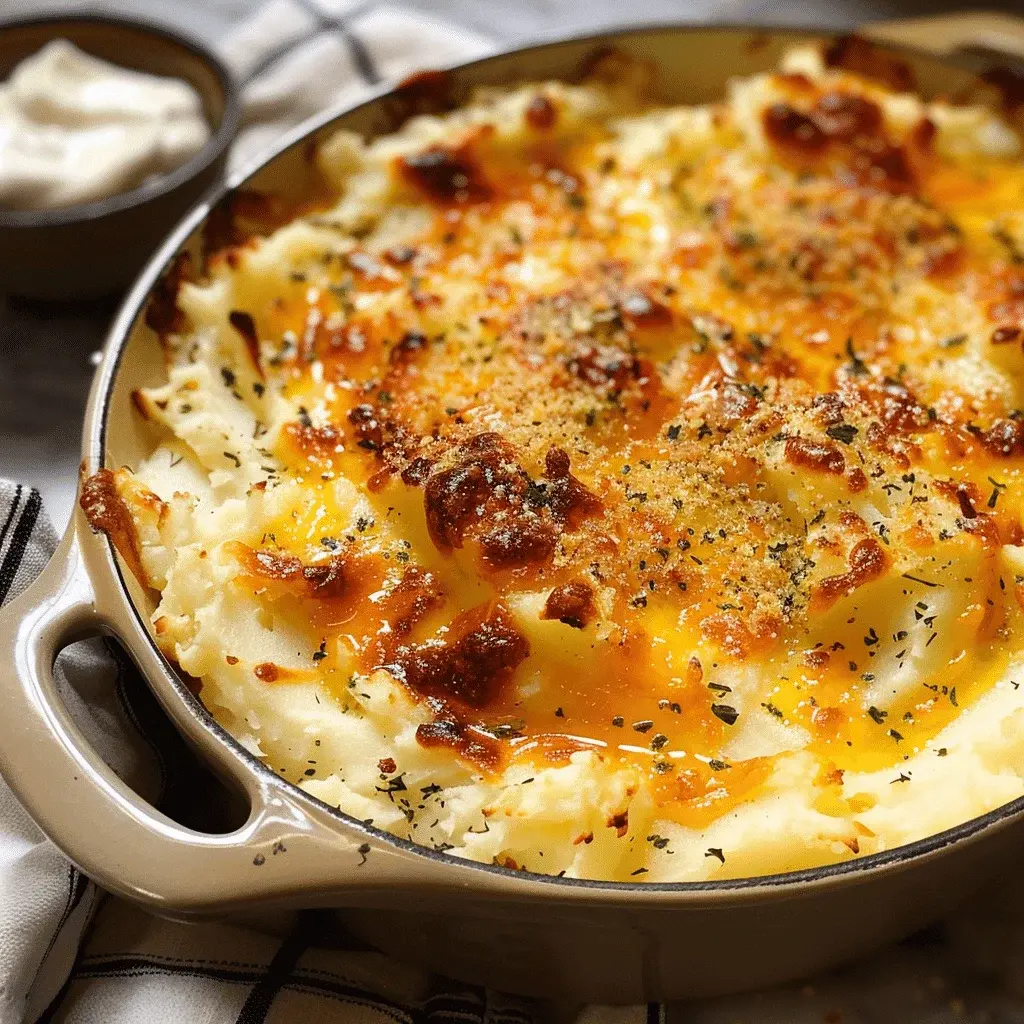
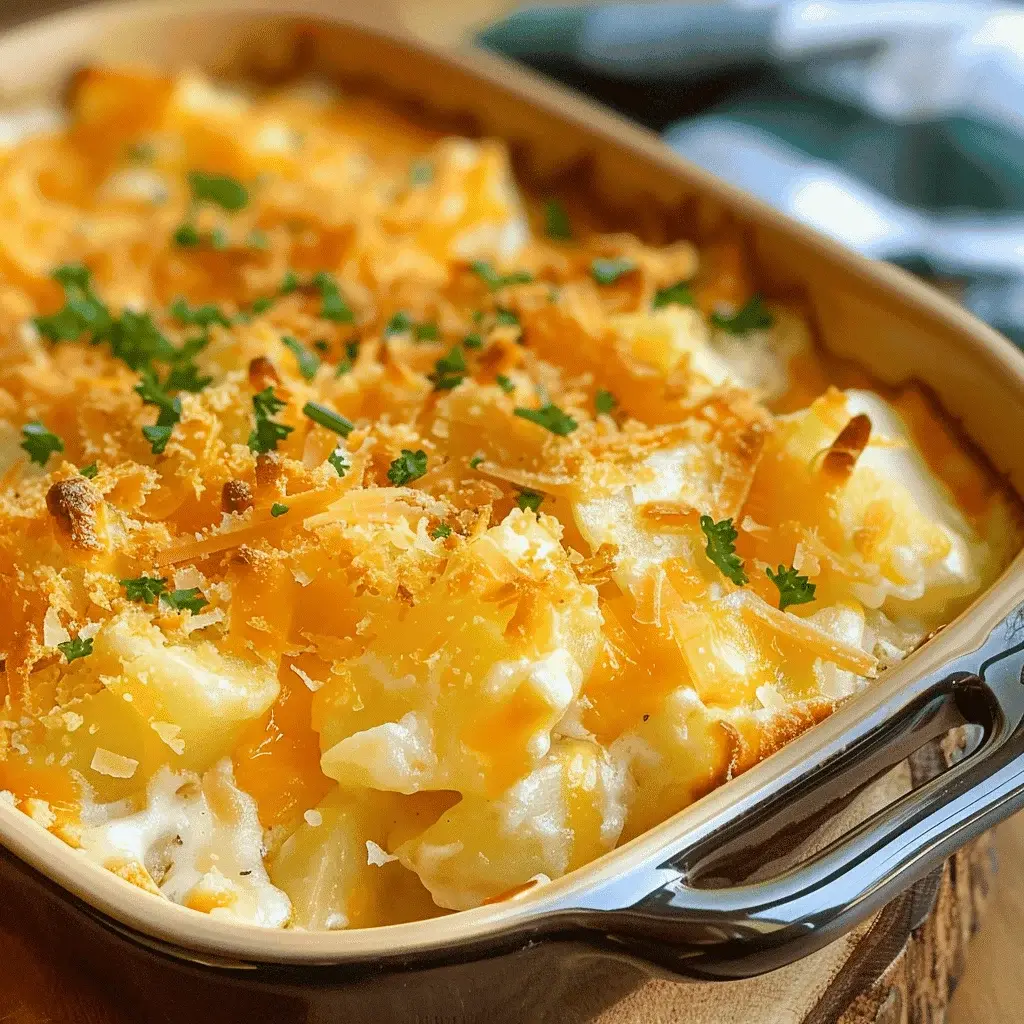
Mashed Potato Casserole Recipe
Introduction
Did you know that mashed potatoes are the number one requested side dish for holiday meals in the United States? This classic comfort food gets a show-stopping upgrade in this Mashed Potato Casserole Recipe, transforming simple spuds into a creamy, cheesy, and crunchy masterpiece that will steal the spotlight at any dinner table. More than just reheated leftovers, this casserole is engineered for flavor and texture, featuring layers of rich, fluffy potatoes and a golden, savory topping that provides the perfect contrast in every bite.
Perfect for feeding a crowd, this dish is the ultimate make-ahead solution for holiday feasts, potlucks, or Sunday family dinners. The combination of tangy sour cream, sharp cheddar, and the smoky crunch of bacon creates a symphony of flavors that far surpasses your standard mashed potatoes. Let’s dive into how you can create this crowd-pleasing side dish that promises to have everyone asking for seconds.
Ingredients List
Gather these simple ingredients to create magic. For best results, use full-fat dairy for maximum creaminess.
- For the Mashed Potato Base:
- 3 lbs Russet Potatoes – Peeled and quartered. Russets are ideal for their high starch content, yielding a fluffy, light mash. Substitution: Yukon Gold potatoes for a naturally buttery flavor and creamier texture.
- 1/2 cup (1 stick) Unsalted Butter – Softened. This adds rich, velvety depth. Substitution: Salted butter (reduce added salt slightly) or plant-based butter for a dairy-free version.
- 1 cup Sour Cream – Room temperature. Provides a delightful tang and incredible moisture. Substitution: Full-fat Greek yogurt for a protein boost with a similar tang.
- 1 cup Whole Milk or Heavy Cream – Warmed. Heavy cream will make the casserole supremely decadent. Substitution: Half-and-half or warmed buttermilk for extra tang.
- 2 cups Sharp Cheddar Cheese – Shredded, divided. Sharp cheddar melts beautifully and offers a bold flavor that cuts through the richness.
- 1/4 cup Fresh Chives – Finely chopped, plus more for garnish. They add a mild, fresh onion flavor and a pop of color.
- 1 1/2 tsp Salt – To taste. Essential for enhancing all the other flavors.
- 1 tsp Black Pepper – Freshly ground is best.
- 1 tsp Garlic Powder – For a subtle, savory backbone.
- For the Crunchy Topping:
- 1 cup Panko Breadcrumbs – These Japanese-style breadcrumbs stay extra crispy. Substitution: Regular breadcrumbs or crushed butter crackers (like Ritz).
- 4 slices Thick-Cut Bacon – Cooked until crisp and crumbled. Adds a smoky, salty, umami punch. Substitution: 1/2 cup real bacon bits or diced pancetta.
- 2 tbsp Unsalted Butter – Melted. This helps the panko toast to a perfect golden brown.
- Reserved 1/2 cup Cheddar Cheese – For a cheesy, bubbly top layer.
Timing
Compared to the average mashed potato recipe which takes about 30 minutes total, this casserole requires extra time for assembly and baking. However, this investment pays off with a dish that holds beautifully for hours, doesn’t get cold quickly, and offers a gourmet texture contrast that standard mashed potatoes lack. The active prep time is very manageable, and you can complete the potato boiling and mixing while the oven preheats.

Step-by-Step Instructions
Step 1: Prepare the Potatoes
Place your peeled and quartered russet potatoes in a large pot. Cover them with cold water by at least an inch and add a generous pinch of salt. Starting with cold water ensures they cook evenly from the outside in. Bring to a boil over high heat, then reduce to a steady simmer. Cook for 15-20 minutes, or until the potatoes are fork-tender. You should be able to easily pierce them with no resistance. Pro Tip: Don’t overcook them to mush, or they’ll absorb too much water and become gluey.
Step 2: Mash and Season
Drain the potatoes thoroughly in a colander and let them steam-dry for a minute. Return them to the warm pot. Using a potato ricer, food mill, or hand masher, mash the potatoes until smooth. For this casserole, avoid using a food processor or hand mixer, as they can overwork the starch and create a gummy texture. Now, add the softened butter, sour cream, and warm milk. Stir gently until fully incorporated and creamy. Fold in 1 1/2 cups of the shredded cheddar cheese, the fresh chives, salt, pepper, and garlic powder. Taste and adjust seasoning—remember, the topping is salty, so the base should be well-seasoned but not overly salty.
Step 3: Assemble the Casserole
Preheat your oven to 375°F (190°C). Lightly grease a 9×13 inch baking dish with butter or non-stick spray. Transfer the creamy mashed potato mixture to the prepared dish. Use a spatula to spread it into an even layer. This is your delicious, cheesy canvas.
Step 4: Create the Topping
In a medium bowl, combine the panko breadcrumbs, crumbled bacon, and melted butter. Toss until the panko is evenly coated. This butter will help the topping achieve a deep, golden brown color and fantastic crunch. Sprinkle the remaining 1/2 cup of cheddar cheese evenly over the potato layer, then top with the panko-bacon mixture, distributing it evenly.
Step 5: Bake to Perfection
Place the casserole in the preheated oven and bake for 35-40 minutes. You’re looking for the edges to be bubbly and the topping to be a deep, golden brown. If the topping is browning too quickly, you can loosely tent the dish with aluminum foil. Once baked, remove from the oven and let it rest for 5-10 minutes. This allows the casserole to set slightly, making it easier to serve. Garnish with extra fresh chives before serving.
Nutritional Information
(Approximate values per serving, based on 10 servings):
- Calories: 420 kcal
- Total Fat: 28g
- Saturated Fat: 16g
- Cholesterol: 75mg
- Sodium: 680mg
- Total Carbohydrates: 30g
- Dietary Fiber: 2g
- Sugars: 3g
- Protein: 14g
Healthier Alternatives
You can lighten up this casserole without sacrificing the comforting essence:
- Potatoes: Swap half the russets for cauliflower florets. Steam and mash them with the potatoes for added nutrients and fewer carbs.
- Dairy: Use low-fat sour cream or plain, unsweetened almond milk yogurt. Substitute the whole milk with 2% or unsweetened almond milk. Reduce the butter by 2 tablespoons—the sour cream provides plenty of fat for creaminess.
- Cheese: Opt for a reduced-fat sharp cheddar. It melts well and retains good flavor.
- Topping: Use center-cut bacon or turkey bacon to reduce fat. For the panko, spray it lightly with olive oil cooking spray instead of tossing with melted butter.
Serving Suggestions
This casserole is the ultimate versatile side. Serve it alongside:
- Holiday Feast: Roast turkey, honey-glazed ham, or prime rib.
- Weeknight Dinner: Simple roasted chicken, meatloaf, or pan-seared pork chops.
- Vegetarian Pairing: A hearty lentil loaf or stuffed portobello mushrooms.
- Garnish with extra fresh chives, a dollop of sour cream, or a drizzle of turkey gravy for the ultimate comfort food experience.
Common Mistakes
- Watery Potatoes: Ensure potatoes are thoroughly drained and allowed to steam-dry after boiling. Excess water makes a soggy casserole.
- Overmixing: Using electric beaters or over-stirring after adding dairy can release too much starch, creating a gluey, dense texture instead of light and fluffy.
- Underseasoning: Potatoes need a good amount of salt. Season the boiling water and the mash itself. Taste before baking!
- Skipping the Rest: Letting the casserole sit for 5-10 minutes after baking allows it to set, making for cleaner servings.
Storing Tips
- Make-Ahead: Assemble the casserole completely (through adding the topping), cover tightly, and refrigerate for up to 24 hours before baking. Add 5-10 minutes to the bake time if going straight from fridge to oven.
- Leftovers: Store cooled leftovers in an airtight container in the refrigerator for up to 4 days.
- Reheating: Reheat individual portions in the microwave. For larger amounts, cover with foil and reheat in a 350°F oven until warmed through (about 20 minutes). For best texture, broil for the last minute to re-crisp the topping.
- Freezing: Freeze before or after baking. Wrap the unbaked or baked casserole tightly in plastic wrap and foil. Thaw overnight in the fridge before baking/reheating. Note: The topping may lose some crispiness after freezing.
Easy Cheesy Potatoes Recipe

“`html
Table of Contents
Easy Cheesy Potatoes Recipe
Introduction
Did you know that comfort food consumption increases by nearly 40% during colder months, according to food psychology studies? This statistic perfectly explains why our Easy Cheesy Potatoes recipe has become a beloved staple in households across the country. This delightful comfort food dish masterfully combines the humble hash brown with creamy, savory elements and a signature crispy topping, creating a side dish that often steals the spotlight at any meal.
The magic of this recipe lies in its beautiful simplicity and crowd-pleasing nature. Whether you’re hosting a holiday gathering, a casual family dinner, or a potluck with friends, this dish consistently delivers on flavor and satisfaction. The creamy interior, packed with melted cheese and tangy sour cream, contrasts perfectly with the golden, crunchy cornflake crust, creating a textural symphony in every bite.
What truly sets this recipe apart is its forgiving nature. It’s a culinary hug—warm, reassuring, and incredibly adaptable. You can prepare it ahead of time, customize it with different cheeses or add-ins, and trust that it will emerge from the oven bubbling and glorious. Let’s dive into creating this timeless classic that promises to become a requested favorite in your recipe rotation.
Ingredients List
Gathering the right ingredients is the first step to cheesy potato perfection. Here’s what you’ll need, along with sensory notes and smart substitutions.
- 1 (30 oz) package frozen shredded hash browns – Thawed. These provide the perfect starchy base that soaks up all the creamy goodness. Substitution: You can use diced frozen potatoes or even freshly shredded russet potatoes (pat them very dry).
- 2 cups (8 oz) sharp cheddar cheese, shredded – The star of the show! Sharp cheddar offers a bold, tangy flavor that cuts through the richness. Substitution: For a milder taste, use Colby Jack. For extra kick, try Pepper Jack.
- 1 (10.5 oz) can cream of chicken soup – This is the secret to the luxuriously creamy, cohesive sauce. Substitution: For a vegetarian version, use cream of mushroom or celery soup.
- 1 cup sour cream – Adds a delightful tang and incredible moisture. Use full-fat for the creamiest texture. Substitution: Plain Greek yogurt can be used for a protein boost, though the flavor will be slightly less rich.
- 1/2 cup unsalted butter, melted – Divided. Butter enriches the potato mixture and helps create the crispy topping.
- 1/2 cup yellow onion, finely diced – Provides a sweet, aromatic base note. Substitution: 1 tsp onion powder in a pinch.
- 1 tsp garlic powder – For savory depth.
- 1/2 tsp black pepper – Freshly ground is best.
- 1 tsp salt – Adjust to taste, especially if using salted butter.
- 2 cups cornflakes, lightly crushed – The key to the iconic crispy, golden-brown crust. Substitution: Crushed potato chips, panko breadcrumbs, or French fried onions work wonderfully.
Timing
15 minutes
50-55 minutes
~70 minutes
This recipe clocks in at just over an hour from start to finish, with most of that time being hands-off baking. Compared to many from-scratch potato gratin or scalloped potato recipes that can take 90+ minutes and involve meticulous slicing and layering, this Easy Cheesy Potatoes recipe is a significant time-saver. The 15-minute prep is efficient and straightforward—mostly mixing and spreading—making it an ideal choice for busy weeknights or when you need to prepare multiple dishes for an event.
Step-by-Step Instructions
Step 1: Prepare the Potato Mixture
Preheat your oven to 350°F (175°C). Lightly grease a 9×13 inch baking dish. In a very large mixing bowl—I cannot stress “large” enough—combine the thawed hash browns, shredded cheddar cheese, cream of chicken soup, sour cream, finely diced onion, garlic powder, black pepper, salt, and 1/4 cup of the melted butter. Use a sturdy spatula or clean hands to mix everything together until it’s uniformly combined. You should see every shred of potato coated in the creamy, cheesy mixture. The smell at this stage is already incredible—savory, cheesy, and promising.
Step 2: Create the Crispy Topping
In a separate medium bowl, place the lightly crushed cornflakes. Pour the remaining 1/4 cup of melted butter over them. Use a fork to toss until every flake is glistening and lightly coated. This butter is what will transform the cereal into a deeply golden, shatteringly crisp crust as it bakes.
Step 3: Assemble and Bake
Transfer the potato mixture to your prepared baking dish. Spread it out into a smooth, even layer, gently pressing it down. Now, evenly sprinkle the buttery cornflakes over the entire surface. Don’t press them in; let them sit loosely on top to maximize crispiness. Place the dish in the preheated oven on the center rack. Bake for 50 to 55 minutes. You’re looking for the edges to be bubbly and the topping to be a deep, uniform golden brown. If the top is browning too quickly, you can loosely tent it with foil for the last 10-15 minutes of baking.
Step 4: Rest and Serve
Once out of the oven, resist the urge to dive in immediately! Let the casserole rest for 10 minutes. This allows the creamy interior to set slightly, making it easier to scoop and serve beautiful portions. It also gives the flavors a moment to meld perfectly.
Nutritional Information
(Approximate values per serving, based on 8 servings)
- Calories: ~420 kcal
- Total Fat: 28g
- Saturated Fat: 16g
- Cholesterol: 75mg
- Sodium: 780mg
- Total Carbohydrates: 32g
- Dietary Fiber: 2g
- Sugars: 3g
- Protein: 11g
Note: Nutritional information is an estimate and can vary based on specific ingredients and brands used.
Healthier Alternatives
You can easily adapt this recipe for dietary preferences without sacrificing the soul-satisfying comfort it provides.
- Lighter Creaminess: Swap full-fat sour cream for light sour cream or plain, non-fat Greek yogurt. Use a reduced-fat cream of chicken soup.
- Cheese Choice: Opt for a reduced-fat sharp cheddar. The sharp flavor is so potent you won’t miss the full fat.
- Butter & Topping: Reduce the butter in the topping to 2 tablespoons and spray the cornflakes lightly with cooking spray before sprinkling. Alternatively, use whole-grain panko breadcrumbs tossed with a tablespoon of olive oil.
- Boost Nutrition: Stir in 1-2 cups of finely chopped broccoli florets or spinach into the potato mixture for added vitamins and fiber.
Serving Suggestions
These potatoes are incredibly versatile. Here are some perfect pairings:
- Classic Holiday Spread: Serve alongside a glazed ham, roasted turkey, or prime rib with some green bean casserole and dinner rolls.
- Weeknight Hero: Pair with simple grilled chicken breasts, pan-seared pork chops, or baked meatloaf for a comforting family dinner.
- Brunch Star: These are fantastic with eggs, bacon, and fresh fruit for a decadent weekend brunch.
- As a Main (for vegetarians): Add a can of drained, rinsed black beans or white beans to the potato mixture and serve with a big, crisp green salad on the side.
Common Mistakes
- Using Frozen Hash Browns Straight from the Freezer: This leads to excess water and a soggy casserole. Always thaw completely and consider patting them dry with paper towels.
- Overmixing After Adding Topping: Once the cornflakes are on, your work is done. Stirring or pressing will ruin the crispy layer.
- Underseasoning: Potatoes and dairy need ample seasoning. Taste your mixture before baking (it’s safe to eat raw) and adjust salt and pepper. Remember, the soup and cheese contain salt.
- Skipping the Rest Time: Serving immediately results in a lava-hot, soupy mess. The 10-minute rest is non-negotiable for the perfect texture.
Storing Tips
- Refrigeration: Cool completely, cover tightly with plastic wrap or foil, or transfer to an airtight container. It will keep in the fridge for 3-4 days.
- Freezing: Assemble the casserole (without baking) in a freezer-safe dish, cover tightly with plastic wrap and foil, and freeze for up to 2 months. Thaw overnight in the fridge before baking as directed. You can also freeze leftovers in portions.
- Reheating: For best results, reheat portions in the oven at 350°F until warmed through (15-20 mins) to restore crispiness. The microwave is quick but will soften the topping.
Conclusion
This Easy Cheesy Potatoes recipe is more than just a side dish; it’s a guaranteed crowd-pleaser, a time-tested comfort classic, and a testament to the fact that the most beloved recipes are often the simplest. With its creamy, cheesy interior and irresistible crispy topping, it delivers maximum flavor with minimal fuss. Whether you’re feeding your family on a Tuesday or hosting a holiday feast, this dish is a reliable choice that will earn you compliments and requests for the recipe.
Ready to make your own? Gather your ingredients and give this recipe a