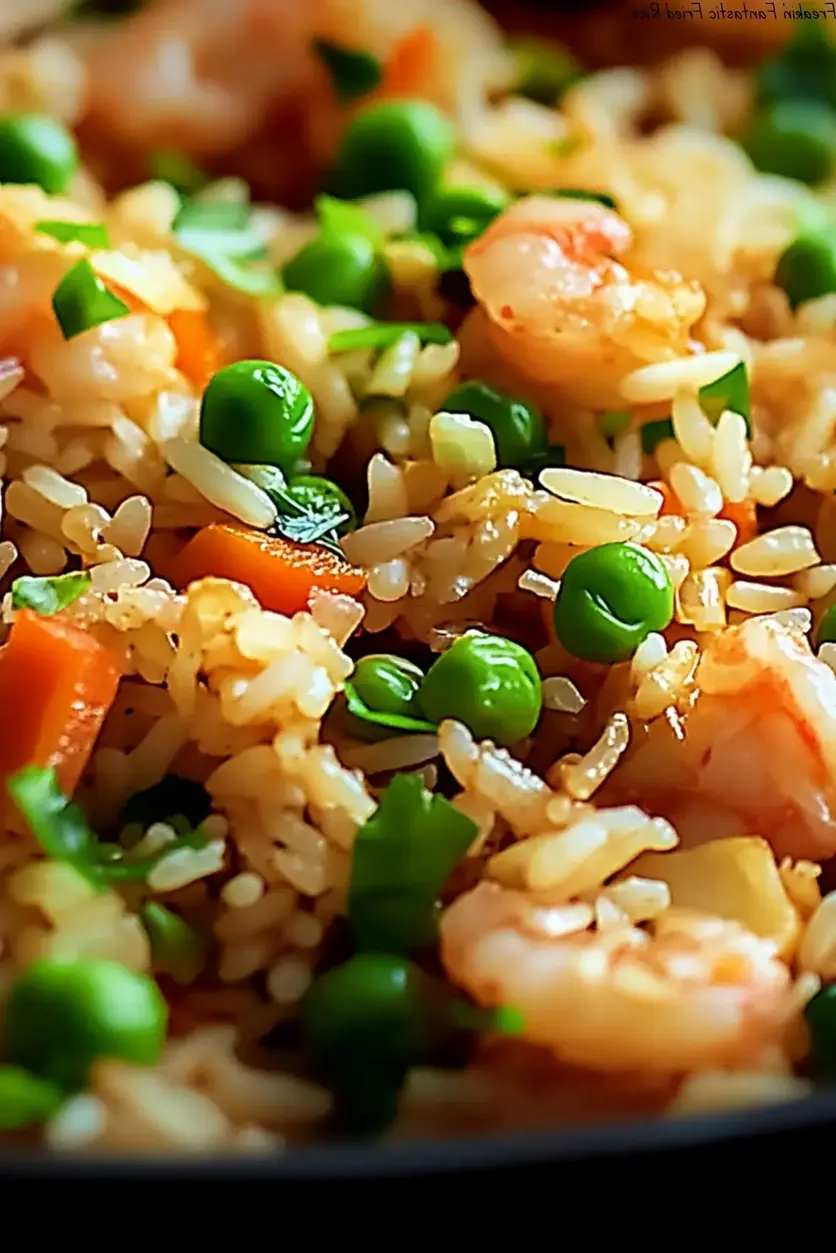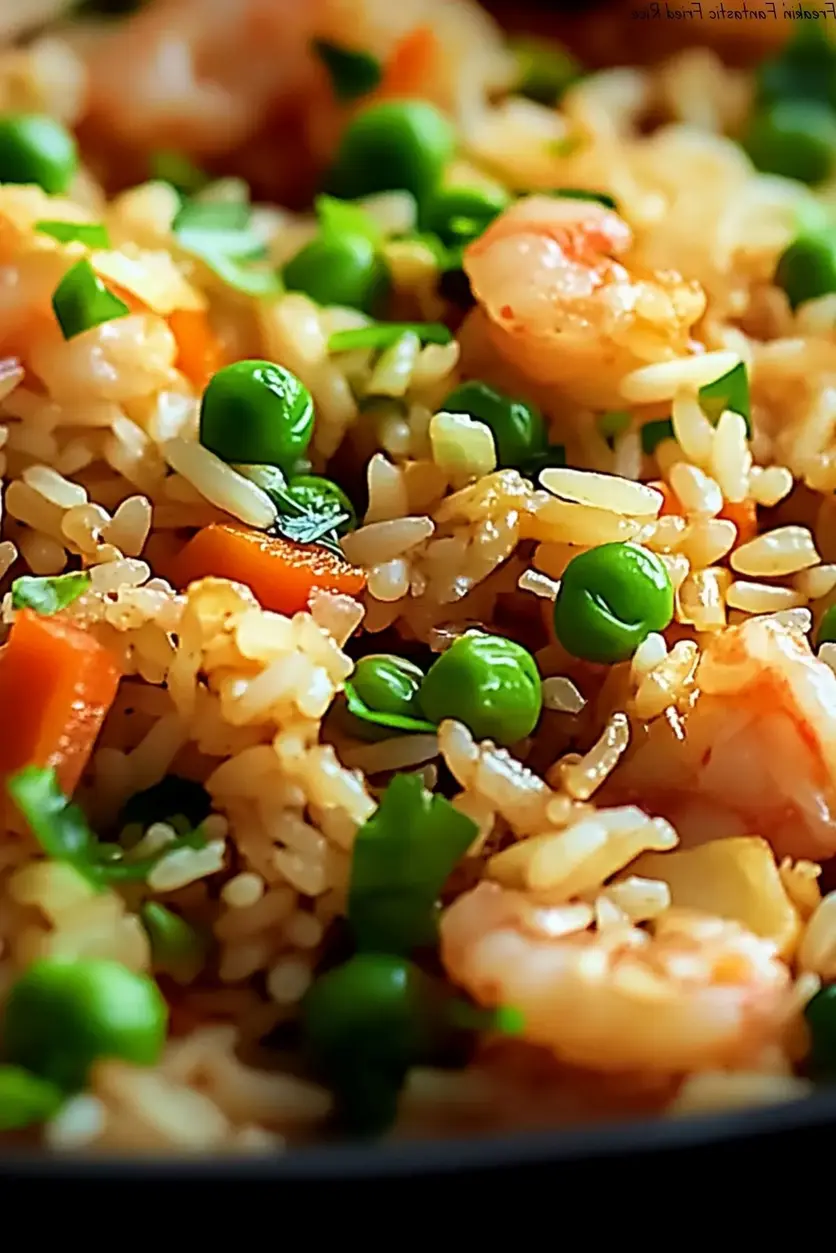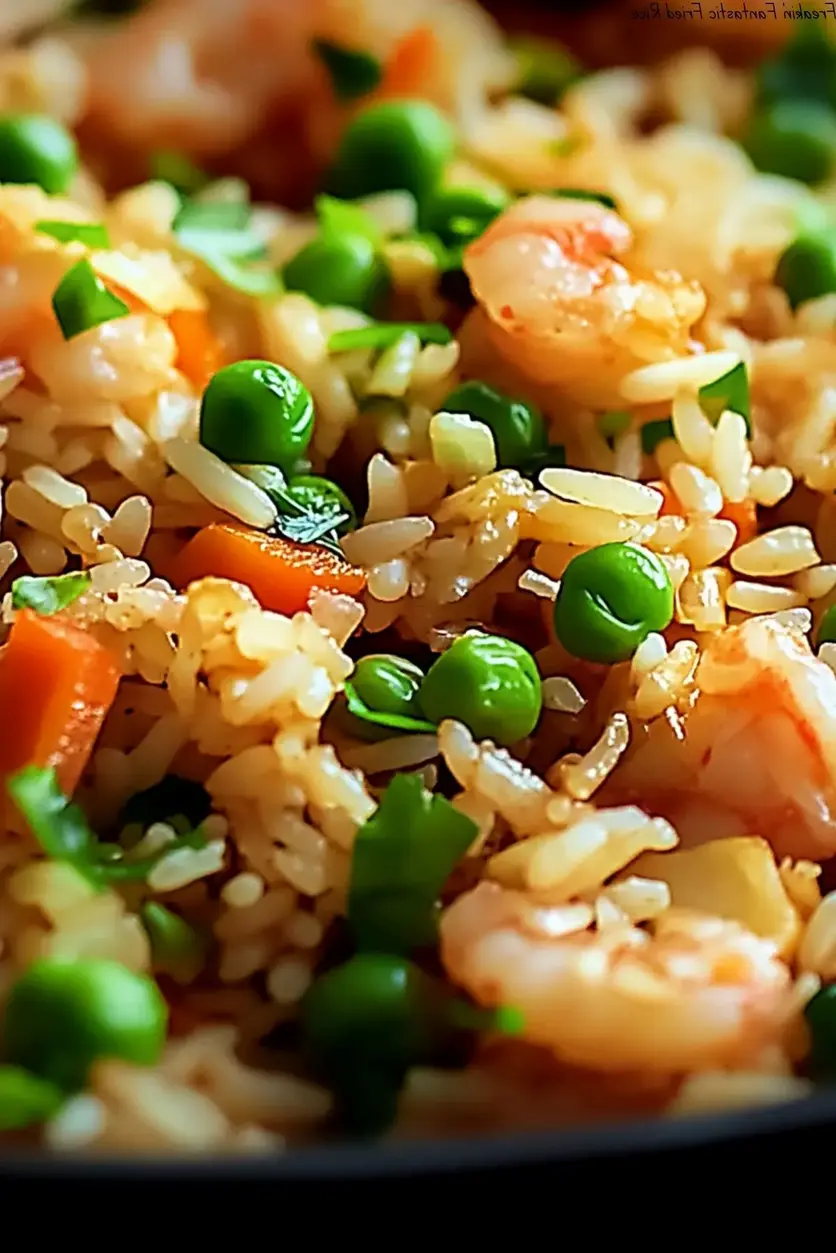
Freakin’ Fantastic Fried Rice

Freakin’ Fantastic Fried Rice: The Ultimate Guide to a Flawless Takeout Fakeout

Prep Time
15 minutes
Cook Time
15 minutes
Total Time
30 minutes
Servings
4-6 people
Difficulty
Easy

Let’s be honest: we’ve all had disappointing fried rice. Gummy, bland, or soggy, it’s a dish that seems simple but is deceptively easy to mess up. That ends today. This isn’t just another fried rice recipe—this is your blueprint for Freakin’ Fantastic Fried Rice. We’re talking about a vibrant, savory, and deeply satisfying dish with distinct, fluffy grains, the perfect salty-sweet balance, and that elusive “wok hei” (breath of the wok) flavor you crave from the best takeout spots. The best part? You can achieve it in about 30 minutes with ingredients you likely already have. This recipe is more than a meal; it’s a confidence-building kitchen victory that will become your go-to for cleaning out the fridge, feeding a crowd, or satisfying a specific, powerful craving.
What Makes This Fried Rice So Freakin’ Fantastic?

Great fried rice is a symphony of texture and technique, not just a jumble of leftovers. This recipe is meticulously crafted to avoid every common pitfall. First, we insist on cold, day-old rice. This is non-negotiable. Freshly cooked rice is too moist and will steam into a mushy mess. Cold rice has dried out slightly, ensuring each grain fries independently, resulting in that perfect, slightly chewy texture. Second, we use a generous amount of butter alongside high-heat cooking. While many recipes use oil, butter adds an unparalleled depth of flavor and richness that oil simply can’t match, creating a luxurious base for the soy sauce to cling to.

Finally, our method is intentional. Cooking the vegetables first builds a flavor foundation. Incorporating the soy sauce directly with the rice allows it to caramelize slightly in the pan. And scrambling the eggs in a cleared section of the skillet ensures they cook quickly into soft, large curds rather than disappearing into the mix. Every step has a purpose, culminating in a dish that’s greater than the sum of its parts.

💡 The Kitchen Team’s Pro Tip: For the ultimate flavor, use a well-seasoned carbon steel wok or a large cast-iron skillet. These materials retain and distribute heat incredibly evenly, allowing for the high-heat “flash frying” that gives authentic fried rice its signature character.

Freakin’ Fantastic Fried Rice Ingredients

Simplicity is key here. Each ingredient plays a specific role in creating the final masterpiece. Here’s what you’ll need and why it’s important.

Ingredient Quantity Notes & Purpose
Cold, Cooked Long-Grain White Rice (like Jasmine) 4 cups The Star. MUST be cold (preferably day-old). This ensures dry, separate grains that fry instead of steam.
Unsalted Butter 3 tablespoons The Flavor Base. Adds rich, nutty notes that oil can’t provide. Unsalted lets you control the sodium.
Yellow Onion, diced 1 medium The Aromatic Foundation. Sweetens as it cooks, providing a savory backbone.
Frozen Peas & Carrots Mix 12 oz bag Color & Sweetness. Frozen veggies are flash-frozen at peak freshness, adding convenience, color, and nutrients.
Soy Sauce (or Tamari) 1/2 cup The Salty-Umami Engine. Use regular or low-sodium. Tamari is a great gluten-free alternative with a richer flavor.
Large Eggs, beaten 3 Protein & Texture. Scrambled in the pan, they add soft, fluffy curds and richness.
Optional Garnishes Sliced green onions, toasted sesame seeds, a drizzle of sesame oil or chili crisp.

How to Make Freakin’ Fantastic Fried Rice: Step-by-Step

Follow these steps closely for foolproof results. Have all your ingredients measured and ready to go (mise en place)—this is a fast-paced dish!

Step 1: Prep & Heat

Ensure your rice is cold and clumps are broken up with a fork. Dice your onion. Beat the eggs in a small bowl. Place your skillet or wok over medium-high heat and let it get hot for a full minute.

Step 2: Sauté the Aromatics

Add the 3 tablespoons of butter to the hot skillet. Once melted and sizzling, add the diced onion. Cook, stirring frequently, for 3-4 minutes until the onion is soft and translucent. You’re not looking for color here, just tenderness.

Step 3: Cook the Vegetables

Add the entire 12 oz bag of frozen peas and carrots directly to the skillet. No need to thaw! Stir constantly for 4-5 minutes. The goal is to heat them through and evaporate any excess moisture they release. The skillet should be very hot, so you’ll hear a good sizzle.

Step 4: Incorporate the Rice & Soy Sauce

Reduce heat to medium. Add all 4 cups of cold rice to the skillet. Immediately pour the 1/2 cup of soy sauce evenly over the rice. Using a sturdy spatula or wooden spoon, press down and fold the rice mixture continuously. Break up any remaining clumps. Cook for 3-4 minutes, allowing the soy sauce to coat every grain and slightly caramelize. The rice should start to jump in the pan.

💡 The Kitchen Team’s Pro Tip: Don’t stir too gently! Use a pressing and folding motion to ensure the rice makes contact with the hot pan, which is essential for that lightly toasted, fried flavor.

Step 5: Scramble the Eggs

Push the entire rice mixture to one half of the skillet, clearing a space on the other half. Pour the beaten eggs into the empty space. Let them sit for 15-20 seconds to set on the bottom, then gently scramble them with your spatula until they form soft, cooked curds (about 1-2 minutes total).

Step 6: Final Combine & Serve

Once the eggs are cooked, mix them thoroughly into the rice. Taste and adjust—if you want more saltiness, you can add a splash more soy sauce. Remove from heat immediately. Serve hot, garnished generously with sliced green onions and a sprinkle of sesame seeds.

Serving Your Masterpiece

This fried rice is a complete meal on its own, but it also shines as part of a larger spread. For a classic takeout experience, pair it with Simple Egg Drop Soup or Quick Steamed Dumplings. To make it a more substantial protein-packed dinner, serve it alongside Teriyaki Chicken Thighs, Honey Garlic Shrimp, or Pan-Seared Tofu. For a fresh contrast, a simple side of sliced cucumbers with a rice vinegar dressing is perfect. It’s also the ultimate companion to a crispy, runny-yolk fried egg placed right on top.

Storage & Reheating Instructions

Leftovers store beautifully, often tasting even better the next day as the flavors continue to meld.

Method Instructions Result
Refrigeration Cool completely, then store in an airtight container for up to 4 days. Best for next-day lunches.
Freezing Freeze in a sealed container or freezer bag for up to 2 months. Thaw overnight in fridge. Texture may soften slightly, but flavor remains great.
Reheating (Best Method) Reheat in a skillet/wok over medium heat with 1 tsp of oil or water. Stir until piping hot. Restores the fried texture. Avoids sogginess.
Reheating (Quick Method) Microwave in 60-second intervals, fluffing with a fork between intervals. Add a damp paper towel over the top. Convenient, but can make rice a bit chewy.

Get Creative: Flavor Variations

The beauty of this recipe is its adaptability. Use it as a base and let your fridge and cravings guide you.

  • Protein Power-Up: Add 1 cup of diced cooked chicken, shrimp, pork, or crumbled tofu when you add the frozen veggies.
  • Pork Fried Rice: Stir in 1/2 cup of diced Chinese char siu (barbecued pork) or ham at the end.
  • Kimchi Fried Rice: Add 1 cup of chopped kimchi (with its juice) when you add the rice. Reduce soy sauce to 1/3 cup. Top with a fried egg.
  • Pineapple Fried Rice: Add 1 cup of fresh pineapple chunks with the veggies. Use a touch less soy sauce and garnish with cilantro and cashews.
  • Spicy Sriracha Fried Rice: Whisk 1-2 tablespoons of sriracha into the soy sauce before adding it to the pan.
  • Vegetable Lover’s: Swap the pea/carrot mix for 3 cups of any chopped fresh veggies like bell peppers, broccoli, mushrooms, or corn.

Frequently Asked Questions (FAQ)

1. Can I use freshly cooked rice?

We strongly advise against it. Fresh rice contains too much surface moisture, which will cause it to steam and become gummy when fried. If you’re in a pinch, spread freshly cooked rice on a baking sheet and let it cool in the refrigerator for at least an hour to dry out.

2. What’s the best rice to use?

Long-grain varieties like Jasmine or Basmati are ideal. They have less starch than short-grain rice (like sushi rice), which helps them stay separate and fluffy. Medium-grain rice can work in a pinch but may be slightly stickier.

3. Can I make this gluten-free?

Absolutely! Simply substitute the soy sauce for an equal amount of gluten-free tamari or a certified gluten-free soy sauce alternative. The flavor will be just as fantastic.

4. My fried rice is soggy. What went wrong?

The most common culprits are: 1) Using warm/fresh rice, 2) Overcrowding the pan (which lowers the temperature and steams the food), or 3) Adding too much liquid (soy sauce or from frozen veggies). Ensure your pan is very hot and your ingredients are dry.

5. Can I use oil instead of butter?

Yes, you can use a neutral oil like avocado or vegetable oil. However, butter provides a unique, rich flavor that is a signature of this recipe. For a hybrid approach, use 2 tbsp oil and 1 tbsp butter.

6. How can I get more of that “restaurant” smoky flavor?

That’s the coveted “wok hei.” To approximate it at home: 1) Use the highest heat your stove and pan can handle, 2) Don’t overcrowd the pan—cook in batches if doubling the recipe, 3) Let the rice sit undisturbed for 30-45 seconds at a time to get a slight sear before stirring.

7. Is 1/2 cup of soy sauce too much?

For 4 cups of rice, it’s the perfect amount to fully season every grain without being overly salty. Remember, you’re not adding any other salt. If you’re concerned, start with 1/3 cup and add more to taste. Using low-sodium soy sauce is also a great option.

8. Can I add garlic or ginger?

Please do! Adding 2-3 minced garlic cloves and 1 tablespoon of minced ginger when you cook the onions will elevate the flavor profile tremendously. Just be careful not to burn them.

📌 Pin This Freakin’ Fantastic Fried Rice for Later!

Don’t lose this recipe! Pin the image below to your Dinner Ideas or Meal Prep board on Pinterest so you always have it handy.

Follow @cookingwithemy on Pinterest for more easy and delicious recipes!

[INSERT PIN-WORTHY VERTICAL IMAGE OF THE FRIED RICE HERE]

Click the “Pin It” button above or drag the image to your Pinterest browser button.

clock clock iconcutlery cutlery iconflag flag iconfolder folder iconinstagram instagram iconpinterest pinterest iconfacebook facebook iconprint print iconsquares squares iconheart heart iconheart solid heart solid icon

Freakin Fantastic Fried Rice


  • Author:
    Chef Emy

Description

This Freakin Fantastic Fried Rice recipe is a delicious and satisfying dish that combines fluffy rice with savory soy sauce, colorful vegetables, and scrambled eggs. It’s a perfect balance of flavors and textures that will leave you craving for more.


Ingredients


Scale
  • 4 cups cold, cooked rice
  • 3 tablespoons butter
  • 1 onion, diced
  • 12 oz frozen peas and carrots
  • 1/2 cup soy sauce
  • 3 eggs, beaten

Instructions

  1. Heat butter in a large skillet, then add diced onions and cook until translucent. Add frozen peas and carrots and cook until heated through.
  2. Stir in the cold, cooked rice and soy sauce. Cook for a few minutes, stirring occasionally.
  3. Push the rice to one side of the skillet and pour beaten eggs into the other side. Cook until scrambled, then mix with the rice.
  4. Enjoy your Freakin Fantastic Fried Rice hot and garnish with green onions or sesame seeds if desired.
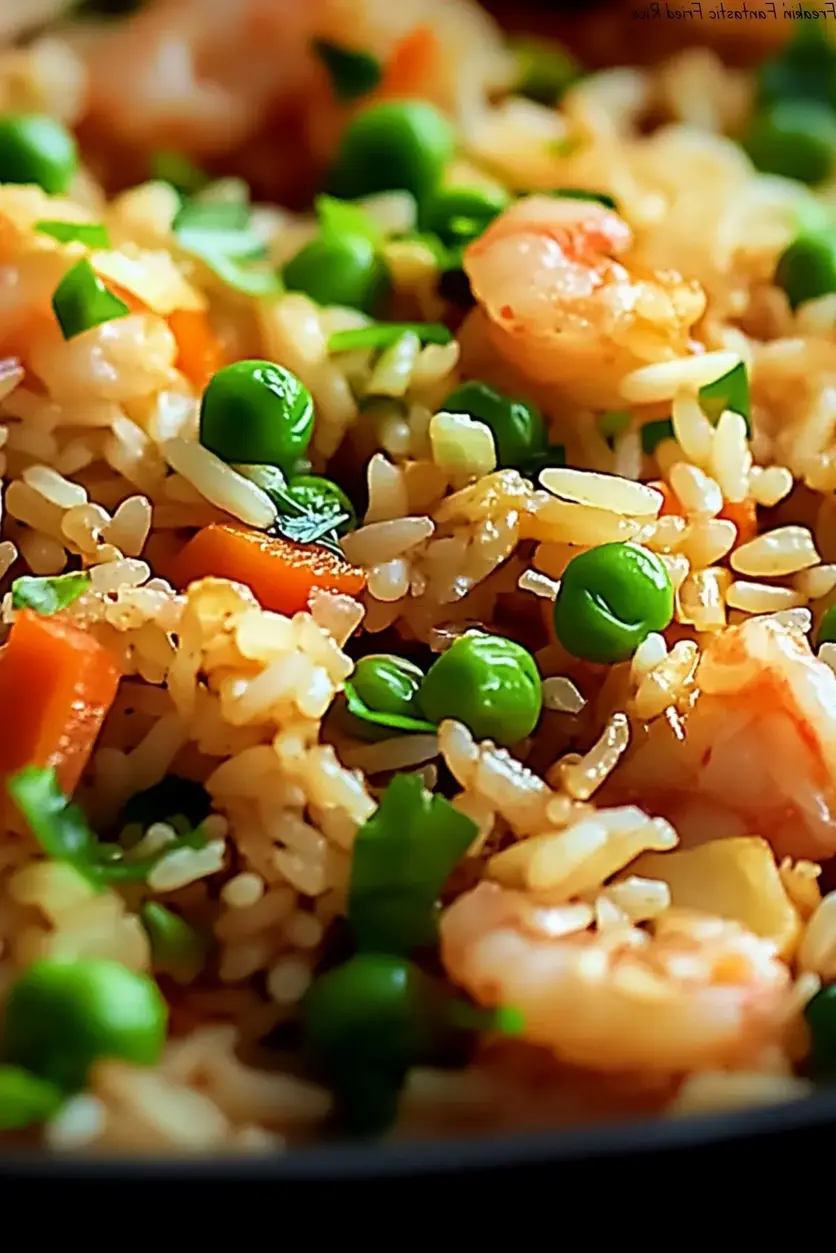
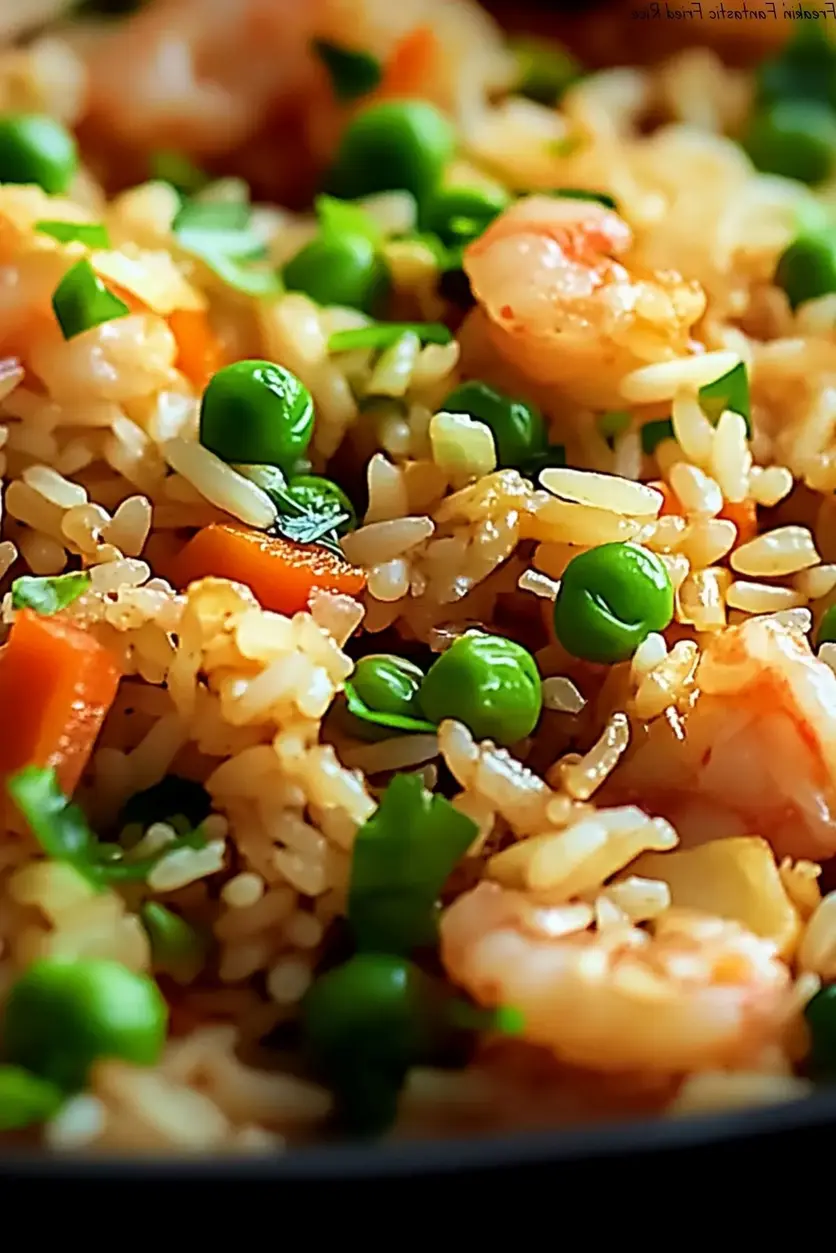
Freakin’ Fantastic Fried Rice

The Ultimate Freakin’ Fantastic Fried Rice: Your New Weeknight Hero

Prep Time Cook Time Total Time Servings Difficulty
15 minutes 15 minutes 30 minutes 4-6 people Easy

Why This Fried Rice is Freakin’ Fantastic

Let’s be honest: we’ve all had disappointing fried rice. Gummy, bland, or soggy, it’s a dish that promises so much but often delivers so little. That ends today. This Freakin’ Fantastic Fried Rice recipe is a game-changer. It’s not just another side dish; it’s a vibrant, flavor-packed meal that stands proudly on its own. Born from the need to transform simple leftovers into something extraordinary, this recipe is the culmination of countless tests to achieve the perfect balance of savory soy sauce, fluffy grains, colorful veggies, and rich, scrambled egg. It’s the answer to your “what’s for dinner?” dilemma, a crowd-pleaser for family meals, and a surprisingly impressive option for casual entertaining. The magic lies in a few simple, non-negotiable techniques that guarantee restaurant-quality results right from your own skillet. Get ready to fall in love with fried rice all over again.


The Secret to the Best Fried Rice

What elevates this from good to “freakin’ fantastic”? It’s a combination of science and smart cooking. First, we insist on cold, day-old rice. Freshly cooked rice is too moist and steamy, causing it to clump and become mushy in the hot pan. Cold rice has dried out slightly, giving each grain structural integrity so it can fry up separately, achieving that essential light and fluffy texture. Second, we use high heat and a generous amount of butter. The butter not only adds a rich, nutty flavor that oil alone can’t provide but also helps in creating a slight crispness on the rice. The high heat ensures a quick cook, which keeps the vegetables crisp-tender and prevents the dish from becoming oily or stewed.

💡 The Kitchen Team’s Pro Tip: For the ultimate flavor base, consider using a mix of butter and a neutral oil like avocado or canola. The oil has a higher smoke point, allowing you to maintain high heat without burning the butter, giving you the best of both worlds: rich flavor and perfect sear.

Finally, the order of operations is sacred. Cooking the onions first builds a sweet foundation. Adding the frozen peas and carrots directly (no need to thaw!) introduces quick-cooking vegetables that won’t release too much water. The rice is then toasted in the savory soy sauce before the eggs are scrambled directly in the pan. This method ensures every component is cooked to perfection, resulting in a harmonious dish where every bite is a delight.

Ingredients for Freakin’ Fantastic Fried Rice & Why They Matter

Great recipes start with great ingredients. Here’s exactly what you need and why each one plays a starring role.

Ingredient Quantity Purpose & Notes
Cold, Cooked Long-Grain White Rice (like Jasmine) 4 cups The Foundation. Must be cold and day-old for dry, separate grains that fry perfectly.
Unsalted Butter 3 tablespoons For Flavor & Texture. Adds unparalleled richness and helps crisp the rice.
Yellow Onion, diced 1 medium The Aromatic Base. Provides a sweet, savory depth as it caramelizes.
Frozen Peas & Carrots Mix 12 oz bag Color & Nutrition. Convenient, cost-effective, and adds sweetness and texture. No thawing needed!
Soy Sauce (or Tamari for gluten-free) 1/2 cup The Salty, Umami Heart. Seasons the entire dish and gives it its classic color.
Large Eggs, beaten 3 For Protein & Creaminess. Scrambled in the pan, they create tender, fluffy ribbons.
Optional Garnishes: Sliced Green Onions, Toasted Sesame Seeds For serving The Finishing Touch. Adds freshness, color, and a final layer of flavor and crunch.

Step-by-Step Instructions for Perfect Fried Rice

Follow these steps closely for foolproof, fantastic results every single time.

Step 1: Prep Your Station

Ensure all your ingredients are measured, chopped, and ready to go by the stove. Fried rice cooks quickly, and there’s no time to search for the soy sauce mid-process. Have your cold rice broken up with a fork so no large clumps remain.

💡 The Kitchen Team’s Pro Tip: Beat your eggs with a tiny splash of water or milk before scrambling. This introduces steam during cooking, leading to fluffier, more tender scrambled eggs in your final dish.

Step 2: Sauté the Aromatics

Place a large skillet or wok over medium-high heat. Add the 3 tablespoons of butter. Once melted and sizzling, add the diced onion. Cook, stirring frequently, for 3-4 minutes until the onion is soft and translucent. You’re not looking for deep browning here, just a softened sweetness.

Step 3: Cook the Vegetables

Add the entire bag of frozen peas and carrots directly to the skillet. Stir to combine with the onions. Cook for 4-5 minutes, stirring occasionally, until the vegetables are completely heated through and any ice crystals have evaporated. The high heat will prevent them from getting mushy.

Step 4: Fry the Rice

Add the 4 cups of cold, cooked rice to the skillet. Pour the 1/2 cup of soy sauce evenly over the rice. Using a sturdy spatula, stir and fold the mixture continuously for about 5-7 minutes. Your goal is to heat the rice through, coat every grain in the savory soy-butter mixture, and allow some of the rice to get slightly toasted on the edges. You should hear a gentle sizzle.

Step 5: Scramble the Eggs

Push the entire rice mixture to one side of the skillet, clearing about one-third of the cooking surface. Tilt the pan slightly so any residual butter/oil pools in the cleared space. Pour the beaten eggs into this empty space. Let them set for 30 seconds, then gently scramble them with your spatula until they are just cooked through but still soft.

Step 6: Combine and Finalize

Once the eggs are scrambled, immediately mix them into the rice and vegetable mixture. Stir everything together until evenly combined. Taste and adjust if needed (though the soy sauce usually provides perfect seasoning). Remove from heat.

Step 7: Serve Immediately

Transfer your Freakin’ Fantastic Fried Rice to a serving platter or bowls. Garnish generously with sliced green onions and a sprinkle of toasted sesame seeds for that professional finish. Serve hot for the best texture and flavor.

Serving & Presentation Ideas

This fried rice is a complete meal, but it also plays wonderfully with others. For a classic takeout-at-home experience, pair it with Simple Egg Drop Soup or Crispy Baked Spring Rolls. If you’re serving it as part of a larger spread, it complements Honey Garlic Chicken, Teriyaki Salmon, or Black Pepper Beef beautifully. For presentation, serve it in a large, shallow bowl or on a platter. Use the green onions and sesame seeds for color, and consider adding a few extra peas or carrot shreds on top. A lime wedge on the side adds a bright, optional acidity that some guests love.

Storage & Reheating Guide

Storage: Allow any leftovers to cool completely to room temperature. Transfer to an airtight container and refrigerate for up to 4 days. We do not recommend freezing, as the texture of the rice and vegetables can become mushy upon thawing.

Reheating for Best Results: The stovetop is king for reviving fried rice. Place a non-stick skillet over medium heat. Add a teaspoon of oil or butter, then add the cold fried rice. Stir and cook for 5-7 minutes until piping hot throughout. The skillet will help restore some of the original texture. The microwave is a quicker option (1-2 minutes, stirring halfway through), but it will steam the rice, making it softer.

💡 The Kitchen Team’s Pro Tip: When reheating, sprinkle a tiny amount of water (1 teaspoon) over the rice before microwaving. This creates just enough steam to reheat it evenly without making it soggy. For the stovetop, a light drizzle of fresh soy sauce at the end can refresh the flavors.

Creative Variations to Try

The beauty of this recipe is its adaptability. Once you’ve mastered the base, make it your own!

  • Protein Power: Add 1 cup of diced cooked chicken, shrimp, pork, or tofu when you add the rice.
  • Pineapple Fried Rice: Stir in 1 cup of fresh or canned pineapple chunks (drained) with the vegetables for a sweet and savory tropical twist.
  • Spicy Kick: Add 1-2 teaspoons of sriracha or chili-garlic sauce to the soy sauce, or garnish with sliced fresh chili peppers.
  • Ginger-Garlic Boost: Sauté 1 tablespoon of minced garlic and 1 teaspoon of minced ginger with the onions for an extra aromatic punch.
  • Brown Rice Version: Use cold, cooked brown rice for a whole-grain, nuttier alternative. You may need an extra minute or two of frying time.

Your Freakin’ Fantastic Fried Rice Questions Answered

Can I use freshly cooked rice?

We strongly advise against it. Fresh rice is too moist and will lead to gummy, clumpy fried rice. If you’re in a pinch, spread freshly cooked rice on a baking sheet and let it cool in the refrigerator for an hour to dry out slightly.

What’s the best type of rice to use?

Long-grain varieties like Jasmine or Basmati are ideal because they stay separate and fluffy when cooked. Medium-grain rice (like Calrose) can work but may be slightly stickier. Avoid short-grain or sushi rice.

My fried rice is soggy. What went wrong?

The most common culprits are: 1) Using warm, moist rice, 2) Overcrowding the pan (which steams instead of fries), or 3) Adding too much liquid (like soy sauce) at once. Ensure your pan is large and hot, and your rice is cold.

Can I make this gluten-free?

Absolutely! Simply substitute the soy sauce for an equal amount of gluten-free tamari or a certified gluten-free soy sauce alternative. All other base ingredients are naturally gluten-free.

Can I use different vegetables?

Yes! Bell peppers, corn, broccoli florets, or snap peas are excellent additions. For harder vegetables like broccoli, add them with the onions to ensure they cook through. For tender veggies like spinach, stir them in at the very end.

Is 1/2 cup of soy sauce too much?

It provides the primary seasoning for the entire dish. If you’re sensitive to salt, you can start with 1/3 cup and add more to taste. Remember, low-sodium soy sauce is also a great option.

Can I make this recipe ahead of time?

You can prep all ingredients ahead, but for the best texture, fry and serve immediately. Leftovers reheat very well, as outlined in the storage section.

What can I use instead of butter?

For a dairy-free version, use a neutral high-heat oil like avocado, grapeseed, or refined coconut oil. You’ll lose the buttery flavor, so consider finishing with a dash of toasted sesame oil for depth.

Made This Recipe? Share the Love!

If this Freakin’ Fantastic Fried Rice made your weeknight easier and more delicious, we’d love to hear about it! Share your creation with us on social media by tagging @cookingwithemy. Your feedback and photos inspire our entire Kitchen Team!

Save This Recipe for Later!

Pin the image below to your Dinner Ideas or Meal Prep board on Pinterest to keep this Freakin’ Fantastic Fried Rice recipe handy whenever the craving strikes.

Follow us on Pinterest @cookingwithemy for more easy, flavor-packed recipes!

[PINTEREST-EMBED: Image of the finished Freakin’ Fantastic Fried Rice in a skillet, garnished with green onions and sesame seeds]

clock clock iconcutlery cutlery iconflag flag iconfolder folder iconinstagram instagram iconpinterest pinterest iconfacebook facebook iconprint print iconsquares squares iconheart heart iconheart solid heart solid icon

Freakin Fantastic Fried Rice


  • Author:
    Chef Emy

Description

This Freakin Fantastic Fried Rice recipe is a delicious and satisfying dish that combines fluffy rice with savory soy sauce, colorful vegetables, and scrambled eggs. It’s a perfect balance of flavors and textures that will leave you craving for more.


Ingredients


Scale
  • 4 cups cold, cooked rice
  • 3 tablespoons butter
  • 1 onion, diced
  • 12 oz frozen peas and carrots
  • 1/2 cup soy sauce
  • 3 eggs, beaten

Instructions

  1. Heat butter in a large skillet, then add diced onions and cook until translucent. Add frozen peas and carrots and cook until heated through.
  2. Stir in the cold, cooked rice and soy sauce. Cook for a few minutes, stirring occasionally.
  3. Push the rice to one side of the skillet and pour beaten eggs into the other side. Cook until scrambled, then mix with the rice.
  4. Enjoy your Freakin Fantastic Fried Rice hot and garnish with green onions or sesame seeds if desired.

Freakin’ Fantastic Fried Rice

Freakin’ Fantastic Fried Rice: The Secret to Perfect Takeout at Home

⏱️ Prep Time: 15 minutes
🍳 Cook Time: 15 minutes
🕒 Total Time: 30 minutes
🍽️ Servings: 6
📊 Difficulty: Easy

Why This Fried Rice is Freakin’ Fantastic

Let’s be honest: we’ve all had disappointing fried rice. Mushy rice, bland flavors, or a greasy mess that leaves you reaching for the takeout menu. That ends today. This Freakin’ Fantastic Fried Rice recipe isn’t just another side dish—it’s a masterclass in texture, flavor balance, and weeknight cooking efficiency. Born from the need to transform leftover rice into something extraordinary, this recipe has been perfected in our kitchen to deliver that elusive “wok hei” (the breath of the wok) flavor using a standard home skillet.

What sets this apart? It’s the meticulous attention to three core principles: cold rice, high heat, and layered seasoning. This dish celebrates simplicity without compromising depth. The savory umami of soy sauce, the sweet pop of peas and carrots, the richness of scrambled eggs, and the aromatic base of onions cooked in butter create a symphony in your mouth. It’s a versatile canvas, equally at home as a quick family dinner, a impressive potluck contribution, or a clever way to clean out your fridge. Get ready to make your favorite Chinese restaurant jealous.

What Makes This The Best Fried Rice Recipe?

Anyone can stir-fry rice, but achieving that perfect, separate-grain texture with explosive flavor is an art. Here’s why this recipe consistently delivers freakin’ fantastic results:

The Science of Cold Rice: This is the non-negotiable rule. Freshly cooked rice is moist and sticky, destined to become a gummy disaster in the skillet. Using rice that has been cooled (preferably overnight) allows the starches to retrograde, firming up the grains so they fry up beautifully separate and absorb flavors without becoming mushy.

Butter vs. Oil: While traditional fried rice uses a neutral oil, our recipe starts with butter. Why? Butter adds a rich, nutty depth that oil simply can’t. It browns the onions to sweet perfection and gives the entire dish a luxurious mouthfeel. It’s our secret weapon for restaurant-quality taste.

The Scramble-Within Method: Instead of cooking eggs separately, we scramble them right in the pan with the rice. This technique allows the eggs to coat the rice grains lightly, distributing their richness throughout every bite rather than leaving them in isolated chunks.

💡 The Kitchen Team’s Pro Tip: For an even more authentic flavor, use *day-old* rice that’s been spread on a baking sheet and uncovered in the fridge. This dries it out perfectly for frying.

Ingredients & Why They Work

Great fried rice starts with great ingredients. Here’s exactly what you need and why each component is essential.

Ingredient Quantity Key Role & Notes
Cold, Cooked Rice 4 cups The Foundation. Use long-grain like Jasmine or Basmati. Must be cold to prevent mushiness.
Unsalted Butter 3 tablespoons The Flavor Base. Provides rich, nutty undertones that oil lacks. Unsalted lets you control sodium.
Yellow Onion, diced 1 medium The Aromatic. Sweetens as it cooks, building a foundational flavor layer.
Frozen Peas & Carrots 12 oz bag Color & Sweetness. Frozen ensures perfect texture and convenience. No thawing needed.
Soy Sauce (regular or low-sodium) 1/2 cup The Umami Engine. Adds saltiness and deep, savory flavor. Tamari is a great gluten-free swap.
Large Eggs, beaten 3 Protein & Texture. Creates ribbons of richness that bind the rice.
Optional Garnishes Sliced green onions, toasted sesame seeds, or a drizzle of sesame oil for finishing.

Step-by-Step Cooking Instructions

Follow these steps precisely for foolproof, fantastic fried rice every single time.

Step 1: Prep & Heat

Ensure all your ingredients are measured and within arm’s reach. Fried rice cooks fast! Place your large skillet or wok over medium-high heat and let it get hot for a full minute. Add the butter and swirl until melted and just beginning to foam.

Step 2: Cook the Aromatics

Add the diced onion to the hot butter. Cook, stirring frequently, for 3-4 minutes until the onions are soft, translucent, and just starting to take on a golden edge. This step builds the flavor foundation.

💡 The Kitchen Team’s Pro Tip: Don’t rush the onions! Letting them cook slowly in the butter until sweet is crucial for depth of flavor.

Step 3: Add Vegetables

Add the entire bag of frozen peas and carrots directly to the skillet. No need to thaw! Stir constantly for 4-5 minutes. You’ll hear the sizzle—this is good. The veggies should be heated through and any ice crystals evaporated.

Step 4: Incorporate the Rice

Reduce heat to medium. Add the cold rice to the skillet. Use your spatula to break up any large clumps. Pour the soy sauce evenly over the rice. Now, stir-fry! Use a folding motion to combine everything evenly for about 3-4 minutes. The rice should heat through and turn a uniform light brown from the soy sauce.

Step 5: The Egg Scramble

Here’s the signature move: Push the rice mixture to one side of the skillet, creating an empty space. Pour the beaten eggs into that empty space. Let them sit for 30 seconds to set on the bottom, then gently scramble them with your spatula until just cooked through but still soft. Now, integrate the scrambled eggs into the rice, folding gently until evenly distributed.

Step 6: Final Touches & Serve

Give everything one final toss. Taste and adjust seasoning (you likely won’t need extra salt). Transfer to a serving dish and immediately garnish with sliced green onions and sesame seeds if desired. Serve hot for the best texture and flavor.

Serving Suggestions & Perfect Pairings

This fried rice is a star on its own, but it also plays incredibly well with others. Here’s how to build a complete meal.

As a Main Dish: For a hearty vegetarian meal, top with a crispy fried egg or mix in extra protein like cubed tofu, edamame, or chickpeas during the veggie step.

As a Side Dish: It’s the perfect companion to simpler proteins. Try it alongside Ginger-Soy Glazed Salmon, Easy Teriyaki Chicken Thighs, or 5-Spice Pork Chops. The rice soaks up any extra sauces beautifully.

Build a Takeout-Style Feast: Serve it with egg rolls, steamed dumplings, and a simple cucumber salad for a full DIY Chinese food night at home.

Storage & Reheating Guide

Leftovers? They reheat wonderfully if you do it right.

Storage: Cool completely, then transfer to an airtight container. It will keep in the refrigerator for up to 4 days.

Freezing: Pack in a freezer-safe container for up to 2 months. Thaw overnight in the fridge before reheating.

Reheating for Best Results:

Skillet Method (Recommended): Reheat in a non-stick skillet over medium heat with a tiny splash of water or broth. Cover for a minute to steam, then uncover and stir-fry to restore texture.

Microwave Method: Place in a microwave-safe bowl, sprinkle with 1 teaspoon of water, cover with a damp paper towel, and heat in 60-second intervals, fluffing with a fork between intervals.

💡 The Kitchen Team’s Pro Tip: Avoid the microwave if you can. The skillet reheat method truly restores the “fresh-fried” texture and prevents the rice from becoming rubbery.

Creative Variations to Try

Once you’ve mastered the base recipe, the world is your oyster sauce! Here are some of our favorite twists.

Variation Name Ingredient Swaps/Add-Ins Flavor Profile
Pork & Pineapple “Aloha” Fried Rice Add 1 cup diced ham or cooked Spam + 1 cup fresh pineapple chunks with the veggies. Use 1/4 cup soy sauce + 1/4 cup teriyaki. Sweet, Salty, Tropical
Spicy Kimchi Fried Rice Stir in 1 cup chopped kimchi (with juice) with the rice. Top with a fried egg and nori strips. Reduce soy sauce to 1/3 cup. Fermented, Spicy, Umami-Bomb
Thai Basil Fried Rice Add 1 tbsp fish sauce with soy sauce. Stir in 1 cup fresh basil leaves and 1 sliced Thai chili at the very end. Herbaceous, Aromatic, Spicy
Breakfast Fried Rice Use diced breakfast sausage instead of veggies. Add with onions. Top with a sunny-side-up egg. Savory, Hearty, Comforting

Your Fried Rice Questions Answered (FAQ)

Can I use freshly cooked rice?

We strongly advise against it. Fresh rice has too much moisture and will steam and clump in the pan, resulting in a gummy texture. If you’re in a pinch, spread freshly cooked rice on a baking sheet and pop it in the freezer for 20-30 minutes to quickly chill and dry the surface.

What’s the best type of rice to use?

Long-grain varieties like Jasmine or Basmati are ideal because they have a firmer, less sticky texture. Medium-grain rice (like Calrose) can work if it’s very cold. Avoid short-grain or sushi rice, as they are too starchy.

My fried rice is soggy. What went wrong?

Sogginess usually stems from two issues: 1) Using warm/ fresh rice, or 2) Overcrowding the pan. Cook in batches if your skillet isn’t large enough. The rice should be in a single layer to fry, not steam.

Can I make this gluten-free?

Absolutely! Simply swap the regular soy sauce for tamari or a certified gluten-free soy sauce. All other base ingredients are naturally gluten-free.

Can I add chicken or shrimp?

Yes! For chicken, cook 1 lb of diced chicken breast in the butter before the onions, then remove and add back with the rice. For shrimp, add peeled, raw shrimp with the veggies and cook until pink.

Is 1/2 cup of soy sauce too much?

It distributes across 4 cups of rice and a full bag of veggies, so it’s perfectly balanced. For less sodium, use a low-sodium soy sauce or replace half with broth. Taste before adding extra.

What can I use instead of peas and carrots?

Any quick-cooking veggie works: corn, diced bell peppers, chopped broccoli florets, or snap peas. For harder veggies (like broccoli), add them with the onions to give them more time to cook.

How do I get more “restaurant-style” flavor?

Two secret weapons: 1) Finish with a few drops of toasted sesame oil off-heat for aroma. 2) A tiny pinch of white pepper adds a classic, subtle heat.

Loved this Freakin’ Fantastic Fried Rice recipe? Save this article to your Dinner Ideas board on Pinterest to keep it handy for your next meal prep!

Follow us on Pinterest @cookingwithemy for more easy, flavor-packed recipes.

We are The Kitchen Team at cookingwithemy.com. We hope this recipe becomes a freakin’ fantastic staple in your home kitchen. Happy cooking!

clock clock iconcutlery cutlery iconflag flag iconfolder folder iconinstagram instagram iconpinterest pinterest iconfacebook facebook iconprint print iconsquares squares iconheart heart iconheart solid heart solid icon

Freakin Fantastic Fried Rice


  • Author:
    Chef Emy

Description

This Freakin Fantastic Fried Rice recipe is a delicious and satisfying dish that combines fluffy rice with savory soy sauce, colorful vegetables, and scrambled eggs. It’s a perfect balance of flavors and textures that will leave you craving for more.


Ingredients


Scale
  • 4 cups cold, cooked rice
  • 3 tablespoons butter
  • 1 onion, diced
  • 12 oz frozen peas and carrots
  • 1/2 cup soy sauce
  • 3 eggs, beaten

Instructions

  1. Heat butter in a large skillet, then add diced onions and cook until translucent. Add frozen peas and carrots and cook until heated through.
  2. Stir in the cold, cooked rice and soy sauce. Cook for a few minutes, stirring occasionally.
  3. Push the rice to one side of the skillet and pour beaten eggs into the other side. Cook until scrambled, then mix with the rice.
  4. Enjoy your Freakin Fantastic Fried Rice hot and garnish with green onions or sesame seeds if desired.
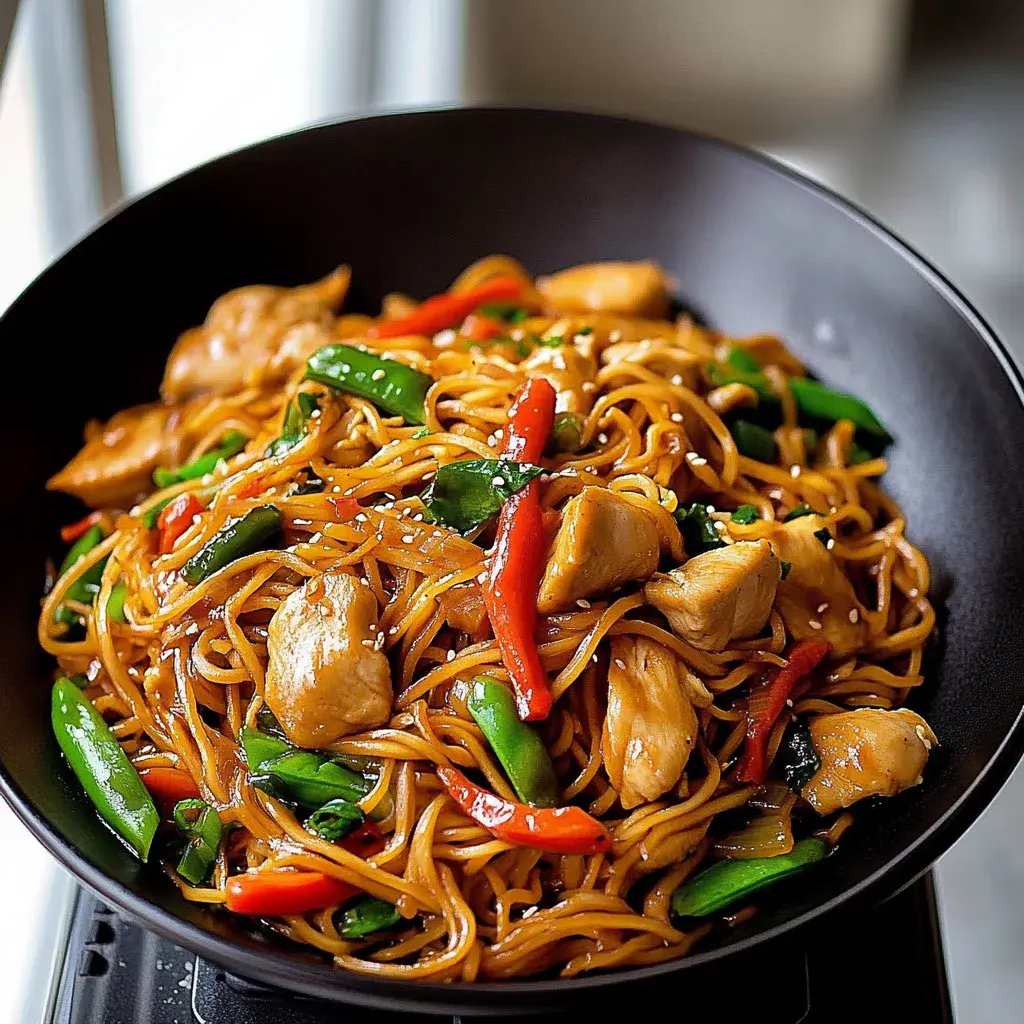

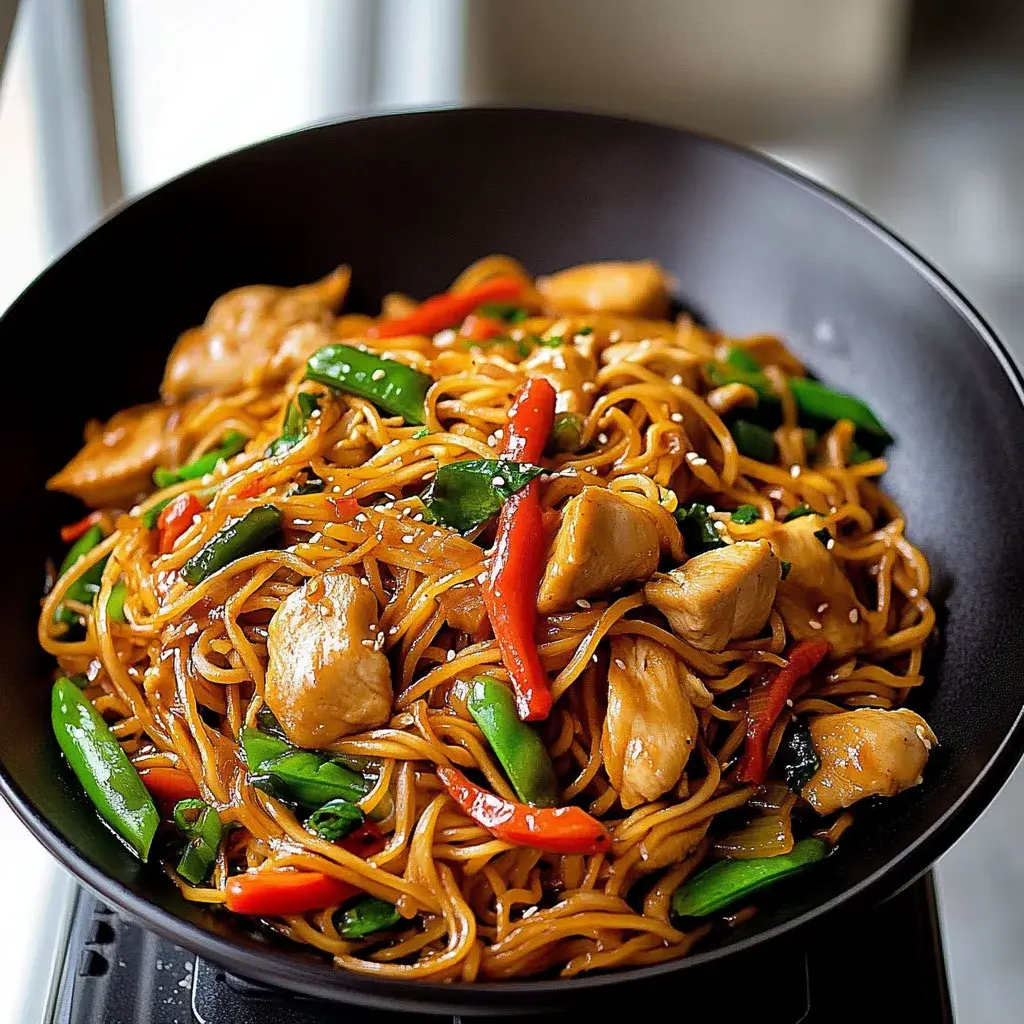
Easy Chicken Lo Mein Recipe

The 30-Minute Weeknight Wonder: Our Ultimate Easy Chicken Lo Mein Recipe

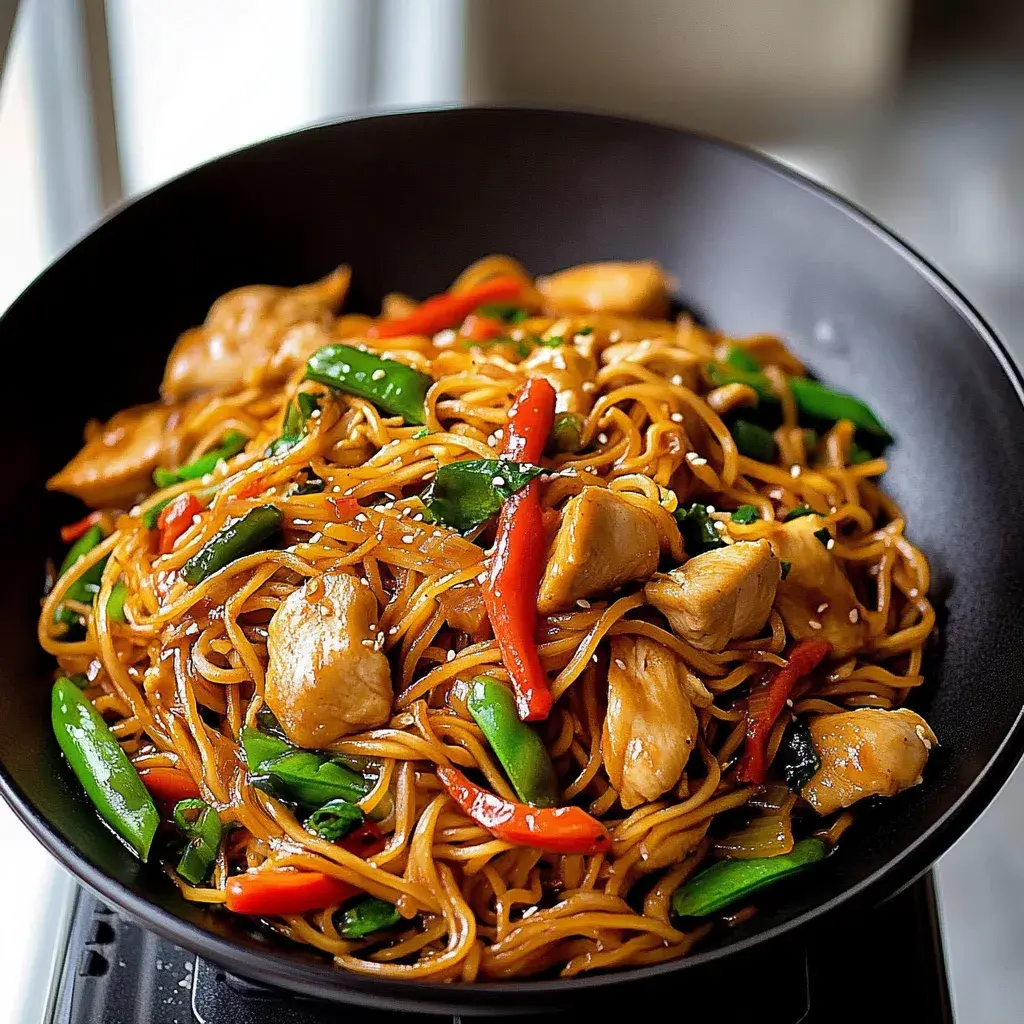
Forget waiting for delivery or spending a fortune on restaurant takeout. We’re about to show you how to create a better-than-takeout Chicken Lo Mein right in your own kitchen, in less time than it takes for a driver to arrive. This easy chicken lo mein recipe is the ultimate solution for busy weeknights, craving-satisfying weekends, and impromptu dinners with friends. It’s a vibrant, flavor-packed stir-fry that combines tender, marinated chicken, crisp-tender vegetables, and chewy noodles all coated in a savory, glossy sauce that’s the very definition of comfort food.

At Cooking With Emy, we believe that incredible food shouldn’t be complicated. This recipe is a testament to that philosophy. It uses simple techniques and accessible ingredients to deliver a result that will have your family convinced you’ve been secretly training under a Chinese cuisine master. The aroma of garlic and sesame oil sizzling in the wok, the colorful confetti of bell peppers and carrots, and the satisfying slurp of perfectly cooked noodles—this dish is a full sensory experience that brings joy to both the cook and the lucky people at the table.

Prep TimeCook TimeTotal TimeServingsDifficulty
15 minutes15 minutes30 minutes4 peopleEasy

Why This Is The Best Easy Chicken Lo Mein Recipe You’ll Find

You might be wondering what sets this particular easy chicken lo mein recipe apart from the dozens of others online. The answer lies in the details. First, we focus on building layers of flavor. Instead of just tossing everything into a sauce at the end, we take a moment to marinate the chicken, which infuses it with savory depth from the inside out. Searing the chicken properly creates fond—those delicious browned bits at the bottom of the pan—which becomes the flavor foundation for the entire dish.

Second, we prioritize texture contrast. The magic of a great lo mein is in the bite: the tender chew of the noodles, the juicy give of the chicken, and the crisp snap of the vegetables. Our cooking method ensures each component is cooked just right, so nothing is mushy or overcooked. Finally, our sauce is the perfect balance of salty, savory, and subtly sweet, clinging to every strand of noodle without being gloppy or overpowering. It’s a harmonious blend that tastes authentic without requiring a trip to a specialty market.

💡 The Kitchen Team’s Pro Tip: For the most authentic restaurant-style “wok hei” (breath of the wok) flavor at home, make sure your pan or wok is screaming hot before you add the ingredients. Don’t overcrowd the pan—cook in batches if necessary—to allow for proper searing and caramelization, not steaming.

Ingredients for the Perfect Easy Chicken Lo Mein

One of the best things about this easy chicken lo mein recipe is its flexibility. The core ingredients are pantry and fridge staples, and the vegetables can be swapped based on what you have on hand. Here’s what you’ll need to create this masterpiece.

IngredientQuantityNotes & Possible Substitutes
Boneless, Skinless Chicken Breasts or Thighs1 lb (about 2-3 breasts)Thighs are more forgiving and flavorful. Slice thinly against the grain for tenderness.
Lo Mein Noodles12 oz (fresh or dried)Fresh noodles cook in 2-3 mins. Spaghetti or linguine work in a pinch!
Red Bell Pepper1 largeAdds sweetness and color. Orange or yellow pepper works too.
Yellow Bell Pepper1 largeFor color variety. Can use all one color.
Carrots2 mediumSlice into thin matchsticks or use a peeler for ribbons.
Green Onions (Scallions)4-5Separate white/light green parts (for cooking) and dark green tops (for garnish).
Garlic4-5 cloves, mincedFresh is non-negotiable for the best flavor.
Low-Sodium Soy Sauce1/3 cupLow-sodium lets you control saltiness. Tamari for gluten-free.
Toasted Sesame Oil2 tsp (for sauce) + 1 tbsp (for cooking)The toasted kind is key for flavor. Use a neutral oil (canola, vegetable) for stir-frying.
Oyster Sauce2 tbspSecret ingredient for depth! Vegetarian oyster sauce or hoisin are subs.
Rice Vinegar or Shaoxing Wine1 tbspAdds brightness. Dry sherry or mirin can substitute.
Brown Sugar1 tspBalances the saltiness. Honey or maple syrup also work.
Cornstarch1 tbspMixed with 2 tbsp water to thicken the sauce beautifully.

Step-by-Step Instructions for Flawless Lo Mein

Step 1: Prep is Everything (Mise en Place)

Chinese stir-frying is a fast process, so having everything ready to go is crucial. This is called mise en place. Thinly slice your chicken against the grain. Julienne your bell peppers and carrots (cut into thin matchsticks). Mince the garlic. Separate the green onions, chopping the white and light green parts, and slicing the dark green tops for garnish. In a small bowl, whisk together the soy sauce, oyster sauce, rice vinegar, brown sugar, and the 2 teaspoons of toasted sesame oil. In another tiny bowl, mix the cornstarch with 2 tablespoons of cold water to make a slurry. Now, you’re a stir-fry ninja ready for action.

Step 2: Cook the Noodles

Bring a large pot of salted water to a boil. Cook your lo mein noodles according to package directions until just al dente (usually 2-3 minutes for fresh, 4-5 for dried). They will finish cooking in the sauce. Drain immediately and rinse briefly under cool water to stop the cooking and prevent sticking. Toss with a tiny bit of neutral oil to keep them from clumping. Set aside.

💡 The Kitchen Team’s Pro Tip: Undercook your noodles by about 1 minute from the package’s al dente suggestion. They will soak up the sauce and finish cooking when you toss them in the hot wok, preventing them from becoming mushy.

Step 3: Stir-Fry the Chicken

Heat a large wok or heavy-bottomed skillet (like cast iron) over high heat until it’s very hot. Add 1 tablespoon of a neutral high-heat oil (like canola or peanut oil). Swirl to coat. Add the sliced chicken in a single layer, letting it sear undisturbed for 1-2 minutes to get a good brown. Then, stir-fry for another 3-4 minutes until the chicken is just cooked through. Remove the chicken to a clean plate, leaving any juices in the wok.

Step 4: Stir-Fry the Vegetables

In the same hot wok (add a touch more oil if it’s dry), add the white/light green parts of the green onions, carrots, and bell peppers. Stir-fry for 2-3 minutes. You want them to become vibrant and slightly tender but still retain a crisp bite (this is “tender-crisp”). Add the minced garlic and stir-fry for just 30 seconds until fragrant—be careful not to burn it!

Step 5: Bring It All Together with the Sauce

Return the cooked chicken (and any accumulated juices) to the wok with the vegetables. Give your pre-mixed sauce a quick stir and pour it over everything. Bring it to a simmer—it will happen quickly. Give the cornstarch slurry another stir (it settles) and drizzle it into the center of the wok while stirring constantly. The sauce will thicken into a glossy, luxurious coating within 30 seconds.

Step 6: The Grand Finale – Add the Noodles

Add the drained, cooked noodles to the wok. Using two utensils (tongs and a spatula work great), gently but thoroughly toss and fold everything together until every strand of noodle and piece of chicken and vegetable is beautifully coated in that shiny, savory sauce. This should take 1-2 minutes over the heat.

Step 7: Serve Immediately

Remove from heat. Drizzle with an extra 1/2 teaspoon of toasted sesame oil for aroma. Transfer to a serving platter or individual bowls and garnish generously with the reserved dark green parts of the green onions. Serve hot!

How to Serve Your Easy Chicken Lo Mein

This dish is a complete meal in a bowl, but it pairs wonderfully with simple sides. For a classic Chinese takeout experience at home, serve it with crispy egg rolls or steamed pork dumplings as a starter. A light, refreshing cucumber salad with rice vinegar provides a cool, crisp contrast to the savory noodles. If you want to add more vegetables, a side of simply steamed broccoli or bok choy is perfect. For drinks, consider green tea, a light lager, or a crisp Riesling.

Storage & Reheating Instructions

To Store: Allow leftovers to cool completely. Transfer to an airtight container and refrigerate for up to 3-4 days. The noodles will continue to absorb sauce, so they may dry out a bit.

To Reheat for Best Results: The microwave can make noodles rubbery. For best results, reheat in a wok or skillet over medium heat. Add a splash of water, broth, or a tiny bit of extra soy sauce to loosen the sauce and refresh the dish. Stir frequently until heated through. You can also reheat single portions in a microwave-safe bowl with a damp paper towel over the top to add steam, heating in 30-second intervals, stirring in between.

Creative & Delicious Recipe Variations

The beauty of this easy chicken lo mein recipe framework is its adaptability. Don’t be afraid to make it your own!

  • Protein Swap: Use thinly sliced beef (flank or sirloin), shrimp, pork tenderloin, or firm tofu (pressed and cubed). Adjust cooking time accordingly.
  • Vegetable Bounty: Add or substitute with sliced mushrooms, snap peas, broccoli florets, baby corn, water chestnuts, or cabbage. Add harder veggies (like broccoli) a minute before the peppers.
  • Spicy Chicken Lo Mein: Add 1-2 teaspoons of chili-garlic sauce (sambal oelek) or a few dried red chili flakes to the sauce mixture.
  • Thai-Inspired: Swap the oyster sauce for 2 tbsp of fish sauce and add a big squeeze of lime juice at the end. Garnish with cilantro and crushed peanuts.
💡 The Kitchen Team’s Pro Tip: For a vegetarian or vegan version, use extra-firm tofu or a plant-based chicken alternative. Swap the oyster sauce for vegetarian oyster sauce or more soy sauce, and use a vegan sweetener like agave. The result is just as satisfying!

Frequently Asked Questions (FAQ)

Can I make this easy chicken lo mein recipe ahead of time?
You can prep all components ahead: slice chicken and veggies, make the sauce, and cook the noodles. Store separately in the fridge for up to 24 hours. When ready to eat, stir-fry from step 3. The actual stir-fry is best done just before serving for optimal texture.
What’s the best substitute for lo mein noodles?
Spaghetti or linguine are the most accessible substitutes and work surprisingly well! Ramen noodles (discard the seasoning packet) or udon noodles are also great. The key is to cook them al dente.
Why is my lo mein soggy or mushy?
This usually happens from overcooking the noodles or overcrowding the wok, which steams the ingredients instead of frying them. Ensure your noodles are al dente, your wok is very hot, and cook in batches if your pan isn’t large enough.
How can I make my sauce thicker or thinner?
For a thicker sauce, add a bit more cornstarch slurry (mix equal parts cornstarch and cold water). Add it slowly while stirring. For a thinner sauce, add a splash of chicken broth, water, or more soy sauce at the end of cooking.
Is this recipe gluten-free?
It can be! Use tamari instead of soy sauce, ensure your oyster sauce is a gluten-free brand (or use hoisin, but check labels), and use rice noodles or a certified gluten-free pasta. Cornstarch is naturally gluten-free.
Can I freeze chicken lo mein?
We don’t recommend it. The cooked noodles and vegetables become very mushy and lose their texture upon thawing and reheating. This dish is best enjoyed fresh or stored in the fridge for a few days.
What’s the difference between lo mein and chow mein?
Great question! Lo mein (“tossed noodles”) features soft, boiled noodles tossed in a sauce. Chow mein (“stir-fried noodles”) often uses crisper noodles that are pan-fried. Our recipe is for lo mein—softer, saucier noodles.
My sauce isn’t as dark as restaurant lo mein. Why?
Restaurants often use “dark soy sauce,” which is slightly sweeter, less salty, and adds a deep color. You can add 1 teaspoon of dark soy sauce to your mix for that authentic color, or a tiny bit of molasses. But our version tastes just as amazing!

We hope this easy chicken lo mein recipe becomes a star in your weekly rotation. It’s proof that with a few simple techniques and fresh ingredients, you can create a meal that’s faster, healthier, and more delicious than anything from a takeout box. Happy cooking from all of us at The Kitchen Team!

clock clock iconcutlery cutlery iconflag flag iconfolder folder iconinstagram instagram iconpinterest pinterest iconfacebook facebook iconprint print iconsquares squares iconheart heart iconheart solid heart solid icon

Chicken Lo Mein Recipe


  • Author: Chef Emy

Description

Experience the delightful flavors of this Chicken Lo Mein recipe! This dish features tender, marinated chicken stir-fried with vibrant vegetables and chewy lo mein noodles, all tossed in a savory sauce that captures the essence of Chinese cuisine. Perfect for weeknight dinners or special occasions, this easy-to-make meal requires minimal prep time and allows for customization based on your preferences. Enjoy the aroma wafting through your kitchen as you prepare this comfort food classic that will leave your family asking for seconds!


Ingredients

Scale
  • 34 boneless, skinless chicken breasts
  • Lo Mein noodles (fresh or dried)
  • 1 red bell pepper
  • 1 yellow bell pepper
  • 2 carrots (thinly sliced)
  • 2 green onions (chopped)
  • ¼ cup low-sodium soy sauce
  • 1 tablespoon sesame oil
  • 3 cloves fresh minced garlic

Instructions

  1. Gather all ingredients and chop vegetables into bite-sized pieces. Cook lo mein noodles according to package instructions until al dente; drain and set aside.
  2. Heat a large skillet or wok over medium-high heat. Add oil and sauté the chicken until golden brown and fully cooked, about 6-8 minutes. Remove from skillet.
  3. In the same pan, stir-fry bell peppers, carrots, and green onions until tender yet crisp, about 3-4 minutes.
  4. Return cooked chicken to the skillet with vegetables. Add lo mein noodles, soy sauce, sesame oil, minced garlic, and any additional spices. Toss everything together until well mixed.
  5. Serve hot with extra soy sauce if desired.

Freakin’ Fantastic Fried Rice

Freakin’ Fantastic Fried Rice: The Ultimate Guide to Restaurant-Quality Fried Rice at Home

Category Details
Prep Time 15 minutes
Cook Time 15 minutes
Total Time 30 minutes
Servings 4-6 people
Difficulty Easy
Cuisine Asian-American

Why This Fried Rice is Freakin’ Fantastic

Let’s be honest: we’ve all had disappointing fried rice. That soggy, bland, greasy mess that makes you wish you’d just ordered takeout. Well, friends, those days are over. This Freakin’ Fantastic Fried Rice recipe isn’t just another side dish—it’s a flavor-packed, texture-perfect main event that will legitimately change your weeknight dinner game. Born from the need to transform leftover rice and simple fridge staples into something extraordinary, this recipe delivers that elusive “wok hei” (the breath of the wok) flavor using a regular home skillet.

What sets this recipe apart is its beautiful simplicity meeting profound depth of flavor. We’re talking fluffy, separate grains of rice coated in a savory, umami-rich sauce, studded with sweet pops of peas and carrots, intertwined with soft scrambled eggs and the aromatic base of sautéed onion. It’s comfort food that feels exciting, a budget-friendly meal that tastes like a million bucks, and a versatile canvas ready for your personal touch. Whether you’re a kitchen novice or a seasoned home cook, this guide from The Kitchen Team will walk you through every secret to fried rice perfection.

What Makes This Recipe The Best: The Science of Success

Great fried rice is a culinary balancing act, and this recipe is engineered for success. The magic starts with cold, cooked rice. This is non-negotiable. Freshly cooked rice is too moist and steamy, causing it to clump and become mushy in the skillet. Rice that has been cooled (preferably overnight in the fridge) has dried out slightly, giving each grain structural integrity. This allows them to sear properly instead of steam, resulting in that perfect, slightly chewy texture that defines excellent fried rice.

Next, our fat of choice: butter. While many recipes use a neutral oil, butter provides a rich, nutty foundation that oil simply cannot match. It browns the onions to sweet perfection and helps create fond (those delicious browned bits) on the bottom of the pan, which then deglazes with the soy sauce to create a complex, layered sauce.

💡 The Kitchen Team’s Pro Tip: For an even deeper flavor, use half butter and half toasted sesame oil. The butter gives richness, while the sesame oil provides an authentic, nutty aroma that screams “fried rice!”

The use of frozen peas and carrots is a stroke of genius for both convenience and quality. Frozen vegetables are flash-frozen at peak ripeness, locking in nutrients and flavor. They also release just the right amount of moisture into the dish as they heat through, helping to distribute the sauce without making anything soggy. Finally, the technique of scrambling the eggs directly in the pan ensures they stay tender and integrate seamlessly into the rice, rather than becoming a dry, separate omelet strip.

Ingredients & Why They Work

Every ingredient in this recipe has a purpose. Here’s your complete shopping and prep list, with explanations to turn you from a recipe follower into a recipe understander.

Ingredient Quantity Role in the Recipe
Cold, Cooked Long-Grain White Rice (like Jasmine) 4 cups The Star. Provides the base. Cold rice fries without getting gummy.
Unsalted Butter 3 tablespoons The Flavor Base. Brownes for nuttiness and helps achieve perfect sear.
Yellow Onion, diced 1 medium The Aromatic. Sweetens as it cooks, building foundational flavor.
Frozen Peas & Carrots Mix 12 oz bag Color & Sweetness. Adds vibrancy, texture, and a touch of natural sugar.
Soy Sauce (regular or low-sodium) 1/2 cup The Umami Engine. Salty, savory, and gives the rice its classic color.
Large Eggs, beaten 3 Protein & Texture. Creates tender, creamy ribbons throughout the dish.
Optional Garnishes: Sliced Green Onions, Toasted Sesame Seeds For serving The Finish. Adds freshness, color, and a final layer of texture and flavor.

Step-by-Step Cooking Instructions

Follow these steps carefully for foolproof results every single time.

Step 1: Prep is Everything

Ensure all your ingredients are measured, chopped, and within arm’s reach of the stove (this is called “mise en place”). Fried rice cooks quickly, and you won’t have time to rummage through the fridge. Crack and beat your eggs in a small bowl. Dice your onion. Have your frozen veggies, soy sauce, and cold rice ready to go.

Step 2: Building the Flavor Base

Place a large skillet, wok, or cast-iron pan over medium-high heat. Add the butter. Once it’s melted and just starting to foam, add the diced onion. Cook, stirring frequently, for 3-4 minutes until the onion is soft and translucent. You’re not looking for color here, just sweetness.

💡 The Kitchen Team’s Pro Tip: Don’t crowd the pan! If your skillet is smaller than 12 inches, cook in two batches. Overcrowding steams the ingredients instead of frying them, leading to soggy rice.

Step 3: Adding Vegetables & Rice

Add the entire bag of frozen peas and carrots to the skillet. Stir and cook for 2-3 minutes until they are completely thawed and heated through. Now, add the cold rice. Use your spatula to break up any large clumps, ensuring the grains are separate. Pour the soy sauce evenly over the rice and vegetable mixture. Stir thoroughly to combine. Let the rice cook, undisturbed, for 1-2 minutes at a time before stirring. This allows it to develop a slight crispness on the bottom—that’s flavor!

Step 4: The Egg Technique

This is the signature move. Push all the rice mixture to one side of the skillet, tilting the pan slightly so any excess liquid runs to the other side. Pour the beaten eggs into the empty space. Let them set for about 30 seconds, then gently scramble them with your spatula until they are just cooked through but still soft and slightly runny—they will finish cooking in the next step.

Step 5: The Final Mix & Serve

Now, integrate the scrambled eggs into the rice mixture, folding gently until everything is evenly distributed. Taste and adjust—if you used low-sodium soy sauce, you might want an extra splash. Remove from heat immediately to prevent the eggs from overcooking. Transfer to a serving bowl and garnish generously with sliced green onions and a sprinkle of toasted sesame seeds.

Serving Suggestions & Perfect Pairings

This fried rice is hearty enough to stand alone, but it also plays incredibly well with others. Here are The Kitchen Team’s favorite ways to serve it:

  • The Classic Combo: Serve alongside crispy egg rolls, steamed dumplings (potstickers), and a simple cucumber salad for a full DIY takeout feast.
  • Protein Power-Up: Top individual bowls with grilled teriyaki chicken, shrimp, thinly sliced steak, or crispy tofu for a more substantial meal.
  • Soup & Rice: Pair with a light, brothy soup like egg drop soup or miso soup for a comforting and complete dinner.
  • Brunch Brilliance: Serve it as a base for a fried egg, with the runny yolk mixing into the rice for an unforgettable breakfast or brunch dish.

Storage & Reheating Guide

Leftovers? They might be even better the next day! Store cooled fried rice in an airtight container in the refrigerator for up to 4 days.

Reheating for Best Results: The microwave can make fried rice soggy. For best results, reheat it in a skillet over medium heat with a tiny splash of water or broth. Cover for a minute to steam it through, then uncover and stir-fry for a minute to re-crisp the grains. You can also use the air fryer at 350°F for 3-4 minutes, shaking halfway through.

💡 The Kitchen Team’s Pro Tip: Fried rice freezes beautifully! Portion it into freezer-safe bags, press out the air, and freeze for up to 3 months. Thaw overnight in the fridge before reheating in a skillet.

Creative Recipe Variations

The beauty of this recipe is its adaptability. Make it your own with these easy twists:

Variation Ingredient Swap/Add Result
Pineapple Fried Rice Add 1 cup diced fresh pineapple with the veggies. Use 1 tbsp less soy sauce. Tropical, sweet & savory balance.
Spicy Kimchi Fried Rice Add 1 cup chopped kimchi and 1 tbsp gochujang with the rice. Tangy, fermented, and pleasantly spicy.
Garlic & Ginger Fried Rice Sauté 2 tbsp minced garlic & 1 tbsp minced ginger with the onions. An aromatic powerhouse with a flavor kick.
“Clean Out the Fridge” Fried Rice Add diced bell peppers, corn, broccoli, or mushrooms. Zero-waste, nutrient-packed, and unique every time.
Brown Rice Power Bowl Use cold cooked brown rice or quinoa instead of white rice. Higher fiber, nuttier flavor, and extra chew.

Your Fried Rice Questions Answered (FAQ)

1. Can I use freshly cooked rice if I’m in a hurry?

We strongly advise against it. Fresh rice is too moist. If you’re desperate, spread freshly cooked rice in a thin layer on a baking sheet and pop it in the freezer for 15-20 minutes to rapidly chill and dry the surface. It’s not perfect, but it’s better than using steaming rice.

2. What’s the best type of rice to use?

Long-grain varieties like Jasmine or Basmati are ideal because they have less starch and stay separate when cooked. Medium-grain rice (like Calrose) can work but may be slightly stickier. Avoid short-grain or sushi rice for this application.

3. My fried rice always sticks to the pan. Help!

Ensure your pan is properly preheated before adding the butter, and use enough fat. A well-seasoned cast iron or carbon steel wok is the best non-stick tool. Also, don’t stir constantly—let the rice sit and form a slight crust before flipping.

4. Can I make this gluten-free or vegetarian?

Absolutely! For gluten-free, use tamari or a certified gluten-free soy sauce. The recipe is naturally vegetarian as written. For a vegan version, omit the eggs and butter, using a neutral oil instead, and consider adding cubed firm tofu for protein.

5. Is 1/2 cup of soy sauce too much? It seems like a lot.

It distributes over 4 cups of rice and a bag of vegetables, so it’s perfectly balanced. Remember, soy sauce is the primary seasoning agent. If you’re concerned about sodium, use a low-sodium variety and you can always add a little more at the end if needed.

6. Can I add meat to this recipe?

Yes! For chicken, shrimp, or pork, dice it small and cook it in the butter before adding the onions. Remove it from the pan, then add it back in with the rice. For pre-cooked meat (like leftover roast pork or ham), add it with the frozen veggies to just heat through.

7. Why is my fried rice mushy?

The #1 culprit is rice that is too wet (not cold enough). The #2 culprit is overcrowding the pan, which steams the rice. The #3 culprit is stirring too often, which prevents evaporation and searing.

8. What can I use instead of soy sauce?

Coconut aminos are a great, slightly sweeter alternative. You could also use a combination of oyster sauce (for depth) and a little water, or a teriyaki sauce for a different flavor profile.

Made This Recipe? Share the Love!

If this Freakin’ Fantastic Fried Rice made your dinner awesome, we’d be thrilled if you shared it with your friends and family! Tag us on social media @cookingwithemy so we can see your masterpiece.

📌 Save This Recipe for Later!

Don’t lose this guide to perfect fried rice! Pin the image below to your Dinner Ideas or Meal Prep board on Pinterest so you always have it handy.

Follow us on Pinterest for more fantastic recipes: Pinterest.com/cookingwithemy

[Image: A vibrant, high-quality photo of the finished Freakin’ Fantastic Fried Rice in a bowl, garnished with green onions and sesame seeds, with chopsticks resting on the side.]

Click the “Save” button on the image above to pin it!

From all of us at The Kitchen Team at cookingwithemy.com, thank you for cooking with us! We hope this recipe becomes a freakin’ fantastic staple in your home.

clock clock iconcutlery cutlery iconflag flag iconfolder folder iconinstagram instagram iconpinterest pinterest iconfacebook facebook iconprint print iconsquares squares iconheart heart iconheart solid heart solid icon

Freakin Fantastic Fried Rice


  • Author:
    Chef Emy

Description

This Freakin Fantastic Fried Rice recipe is a delicious and satisfying dish that combines fluffy rice with savory soy sauce, colorful vegetables, and scrambled eggs. It’s a perfect balance of flavors and textures that will leave you craving for more.


Ingredients


Scale
  • 4 cups cold, cooked rice
  • 3 tablespoons butter
  • 1 onion, diced
  • 12 oz frozen peas and carrots
  • 1/2 cup soy sauce
  • 3 eggs, beaten

Instructions

  1. Heat butter in a large skillet, then add diced onions and cook until translucent. Add frozen peas and carrots and cook until heated through.
  2. Stir in the cold, cooked rice and soy sauce. Cook for a few minutes, stirring occasionally.
  3. Push the rice to one side of the skillet and pour beaten eggs into the other side. Cook until scrambled, then mix with the rice.
  4. Enjoy your Freakin Fantastic Fried Rice hot and garnish with green onions or sesame seeds if desired.

Easy Chicken Lo Mein Recipe

Better Than Takeout: The Ultimate 30-Minute Easy Chicken Lo Mein Recipe

Prep TimeCook TimeTotal TimeServingsDifficulty
⏱️15 minutes🍳15 minutes🕒30 minutes🍽️4 peopleEasy

Craving the savory, umami-packed delight of restaurant-style chicken lo mein but dread the greasy takeout containers and sky-high delivery fees? You’ve landed in the right kitchen. This Easy Chicken Lo Mein Recipe is your golden ticket to a flavorful, satisfying, and incredibly quick meal that will have your family convinced you’ve secretly trained under a Chinese culinary master. We’re talking tender, marinated chicken, a vibrant rainbow of crisp-tender vegetables, and chewy lo mein noodles, all enveloped in a deeply savory, glossy sauce that clings to every strand. The best part? It all comes together in one pan in about 30 minutes, making it the undisputed champion of busy weeknight dinners.

Here at Cooking With Emy, we believe that incredible flavor shouldn’t be complicated or time-consuming. This recipe is a cornerstone of that philosophy. It demystifies the techniques behind a classic stir-fry, breaking it down into simple, foolproof steps. Whether you’re a seasoned home cook looking for a reliable go-to or a beginner taking your first wok-toss, this guide will equip you with everything you need to create a meal that’s not just easy, but authentically delicious. So, tie on your apron, grab your favorite skillet or wok, and let’s transform simple ingredients into a takeout triumph that’s healthier, more affordable, and cooked with your own two hands.

Why This Is The Best Easy Chicken Lo Mein Recipe

You might be wondering what sets this particular easy chicken lo mein recipe apart from the dozens you can find online. The answer lies in the details—the small tweaks and professional secrets that elevate a simple stir-fry to something extraordinary.

First, we focus on layered flavor development. Instead of just tossing everything into a sauce at the end, we build the flavor in stages. The chicken gets a quick marinade in a portion of the sauce, ensuring it’s seasoned from the inside out. We then sear it to golden-brown perfection, creating fond (those delicious browned bits) on the bottom of the pan that becomes the flavor foundation for the entire dish. The vegetables are stir-fried just until they reach their peak “crisp-tender” state, preserving their color, texture, and nutritional value.

Second, our sauce is the star. It’s a perfectly balanced blend of savory soy sauce, aromatic sesame oil, and fresh garlic, with a depth that comes from cooking it briefly with the other ingredients. It’s not just a coating; it’s an integral part of the dish that gets absorbed by the noodles and chicken.

💡 The Kitchen Team’s Pro Tip: For the most authentic texture, seek out fresh lo mein noodles in the refrigerated section of your Asian grocery store. If you can’t find them, dried lo mein or even linguine make excellent substitutes. The key is to cook them until just al dente, as they will continue to cook slightly when tossed in the hot stir-fry.

Finally, this recipe is built for adaptability and speed. We provide clear instructions for the classic version but also include a wealth of variations and substitution ideas later in this post. Have broccoli instead of bell peppers? No problem. Want to make it spicy? We’ve got you covered. This isn’t just a recipe; it’s a template for endless delicious, easy meals.

Ingredients For The Perfect Chicken Lo Mein

Gathering your mise en place (everything in its place) is the secret to a smooth, stress-free stir-fry. Here’s what you’ll need for this foolproof easy chicken lo mein recipe.

IngredientQuantity & NotesPurpose & Substitution Ideas
Boneless, Skinless Chicken Breast1 lb (about 2 medium breasts), cut into thin stripsProvides lean protein. Can substitute with chicken thighs, shrimp, beef, tofu, or tempeh.
Lo Mein Noodles8 oz (fresh preferred, or dried)The chewy, satisfying base. Substitute: linguine, spaghetti, or udon noodles.
Red Bell Pepper1 large, thinly slicedAdds sweetness, color, and crunch. Substitute: orange or green bell pepper.
Yellow Bell Pepper1 large, thinly slicedAdds a different sweetness and vibrant color.
Carrots2 medium, julienned or thinly slicedAdds earthy sweetness and texture.
Green Onions3-4, chopped (separate white/light green parts from dark green tops)White parts for cooking (aromatics), green tops for fresh garnish.
Low-Sodium Soy Sauce1/3 cupThe savory, salty backbone of the sauce. Use tamari for gluten-free.
Toasted Sesame Oil1 1/2 tablespoonsProvides irreplaceable nutty aroma. Do not substitute with regular oil.
Fresh Garlic4-5 cloves, mincedEssential for aromatic depth. Use fresh, not jarred.
Neutral Oil (like avocado, canola, or vegetable)2 tablespoons, dividedFor high-heat stir-frying.
Optional for Sauce Depth: Oyster sauce, hoisin sauce, or a pinch of sugar1 tbsp oyster sauce OR 2 tsp hoisin OR 1 tsp sugarAdds a touch of sweetness and complex umami. Highly recommended!
💡 The Kitchen Team’s Pro Tip: Cutting your chicken and vegetables into uniform, bite-sized pieces is crucial for even cooking. Take the extra 5 minutes during prep to ensure everything is sliced thinly and consistently. This guarantees that every component finishes cooking at the same time, preventing overcooked veggies or undercooked chicken.

Step-By-Step Cooking Instructions

Follow these steps in order for a seamless cooking experience. Remember, stir-frying is fast, so having everything prepped and within arm’s reach is the key to success.

Step 1: Prepare the Components

  1. Marinate the Chicken: In a medium bowl, whisk together 2 tablespoons of the low-sodium soy sauce and 1/2 tablespoon of the sesame oil. Add the sliced chicken strips, toss to coat thoroughly, and set aside to marinate while you prep the vegetables (at least 10 minutes).
  2. Cook the Noodles: Bring a large pot of salted water to a boil. Cook the lo mein noodles according to package directions until al dente (usually 3-4 minutes for fresh, 6-8 for dried). Drain, rinse briefly with cool water to stop cooking, and toss with a tiny drizzle of neutral oil to prevent sticking. Set aside.
  3. Chop the Veggies: Thinly slice the bell peppers and carrots. Mince the garlic. Chop the green onions, keeping the white and light green parts separate from the dark green tops.
  4. Make the Sauce: In a small bowl or measuring cup, combine the remaining soy sauce, remaining 1 tablespoon sesame oil, and any optional sauce enhancers (oyster sauce, hoisin, or sugar). Whisk well and set aside.

Step 2: The Stir-Fry Dance

  1. Cook the Chicken: Heat a large wok or heavy-bottomed skillet (like cast iron or stainless steel) over medium-high heat until very hot. Add 1 tablespoon of neutral oil and swirl to coat. Add the marinated chicken in a single layer, letting it sear undisturbed for 2-3 minutes. Flip and cook until golden brown and cooked through, about 3-4 more minutes. Remove the chicken to a clean plate.
  2. Sauté the Aromatics: To the same hot pan, add the remaining 1 tablespoon of oil. Immediately add the white/light green parts of the green onions and the minced garlic. Stir-fry for just 30-60 seconds until fragrant—be careful not to burn the garlic.
  3. Stir-Fry the Vegetables: Add the sliced bell peppers and carrots to the pan. Increase the heat to high. Stir-fry, tossing constantly, for 3-4 minutes. You want the vegetables to become brightly colored and slightly softened but still retain a pleasant crunch.
  4. Bring It All Together: Return the cooked chicken and any accumulated juices to the pan with the vegetables. Add the cooked, drained noodles. Give your prepared sauce a final whisk and pour it over everything in the pan.
  5. The Final Toss: Using tongs or two large spoons, vigorously toss and stir everything together for 1-2 minutes. This allows the noodles to heat through and absorb the delicious sauce, coating every ingredient in that glossy, savory goodness.

Step 3: Serve Immediately

Transfer your glorious creation to a serving platter or individual bowls. Garnish generously with the reserved dark green parts of the chopped green onions. For an extra touch, a sprinkle of sesame seeds or a drizzle of chili oil is fantastic. Serve hot and enjoy the accolades!

Serving Suggestions & Pairings

This easy chicken lo mein recipe is a complete meal in a bowl, packed with protein, vegetables, and carbs. However, if you’re looking to create a larger Asian-inspired feast or simply round out the meal, here are some perfect pairings:

  • Simple Starters: A light, refreshing cucumber salad with a rice vinegar dressing or a bowl of hot and sour soup are excellent ways to begin the meal.
  • Classic Sides: Serve alongside steamed or fried dumplings (potstickers), a small bowl of egg drop soup, or some simple steamed broccoli with garlic.
  • For a Crowd: This lo mein pairs beautifully with other takeout favorites like our Easy Beef and Broccoli or a batch of crispy spring rolls. It turns a simple dinner into a festive occasion.
  • Beverage Pairings: A crisp, cold lager or a light Pinot Grigio complements the savory flavors wonderfully. For a non-alcoholic option, jasmine tea or sparkling water with lime is perfect.

Storage & Reheating Instructions

Leftovers? They’re arguably just as good the next day! Follow these tips to keep your lo mein tasting fresh.

  • Storage: Allow the lo mein to cool completely. Transfer to an airtight container and refrigerate for up to 3-4 days.
  • Reheating (Best Methods):
    • Skillet/Wok: This is the preferred method. Reheat a portion in a non-stick skillet or wok over medium heat with a tiny splash of water or broth. Toss frequently until heated through. This helps revive the texture.
    • Microwave: Place in a microwave-safe bowl, cover loosely with a damp paper towel (this adds steam), and heat in 60-second intervals, stirring in between, until hot.
  • Freezing: We don’t recommend freezing this dish as the noodles and vegetables can become mushy upon thawing and reheating.
💡 The Kitchen Team’s Pro Tip: If you know you’ll have leftovers, consider slightly undercooking the vegetables during the initial stir-fry. They will soften to the perfect texture when reheated, avoiding that dreaded soggy vegetable texture.

Delicious Recipe Variations To Try

The beauty of this easy chicken lo mein recipe is its versatility. Think of it as your culinary canvas. Here are some popular twists:

  • Protein Swap: Use thinly sliced flank steak, shrimp, or firm tofu (pressed and cubed) instead of chicken. Adjust cooking times accordingly.
  • Vegetable Bounty: Add or substitute with broccoli florets, snap peas, sliced mushrooms, baby corn, or water chestnuts. Add harder veggies like broccoli earlier in the stir-fry process.
  • Spicy Chicken Lo Mein: Add 1-2 teaspoons of chili-garlic sauce (like Sambal Oelek) or a few dried red chilies to the sauce, or garnish with chili oil or crushed red pepper flakes.
  • Vegetarian/Vegan Lo Mein: Omit the chicken. Use extra-firm tofu or tempeh as your protein, and double up on the vegetables. Ensure your soy sauce and optional sauces are vegan (oyster sauce is not vegan).
  • Extra “Restaurant” Flavor: Add a teaspoon of grated fresh ginger with the garlic, and finish the dish with a tiny drizzle of dark soy sauce for color and depth.

Frequently Asked Questions (FAQ)

Can I use a different type of noodle? Absolutely! While lo mein noodles are traditional, linguine, spaghetti, udon, or even ramen noodles (discard the seasoning packet) work well in a pinch. The goal is a chewy, wheat-based noodle.

My stir-fry is sticking to the pan. What did I do wrong? This usually means your pan wasn’t hot enough before adding the oil and ingredients, or you’re overcrowding the pan. Cook in batches if necessary. Also, ensure you’re using a high-heat tolerant oil.

How can I make this recipe gluten-free? It’s easy! Use tamari instead of soy sauce, and ensure your lo mein noodles are a gluten-free variety (many rice-based noodles work). Check labels on any optional sauces like oyster or hoisin for gluten-free versions.

Can I make the sauce ahead of time? Yes! The sauce can be whisked together and stored in the refrigerator for up to 5 days. This makes weeknight assembly even faster.

Why is my finished lo mein a bit dry? This can happen if the noodles were overcooked and absorbed all the sauce, or if the heat was too high during the final toss. Next time, ensure your noodles are al dente and have a splash of chicken broth or water on hand to add during the final toss if it seems dry.

What’s the difference between lo mein and chow mein? Great question! Lo mein means “tossed noodles,” where cooked noodles are tossed with the sauce and ingredients. Chow mein means “fried noodles,” where the noodles are often par-cooked and then pan-fried until crispy before being combined with toppings.

Can I add eggs to this recipe? Definitely! A classic addition. After stir-frying the vegetables, push them to the side of the pan, add a little more oil, and scramble 2 beaten eggs. Once set, mix them in with the veggies before adding everything else back.

Is sesame oil used for frying? No! Toasted sesame oil is a finishing oil for flavor and aroma. It has a low smoke point and will burn if used for high-heat stir-frying. Always use a neutral oil for cooking and add the sesame oil to your sauce.

How can I make this dish lower in sodium? Use low-sodium soy sauce as called for, and increase the flavor with fresh garlic, ginger, a splash of rice vinegar, and the optional pinch of sugar to balance without adding more salt.

My family doesn’t like bell peppers. What can I use instead? No problem! Swap them out for an equal amount of broccoli florets, snap peas, sliced cabbage, or mushrooms. The recipe is completely adaptable to your taste preferences.

We hope this comprehensive guide to our Easy Chicken Lo Mein Recipe inspires you to skip the takeout menu and create something truly special at home. It’s a recipe that proves with a little know-how and 30 minutes, you can achieve restaurant-quality results that are tailored exactly to your liking. Happy cooking from all of us at The Kitchen Team!

Loved this recipe? Share the love and save it for later!

📌 Save This “Better Than Takeout” Recipe to Pinterest!

Don’t let this ultimate Easy Chicken Lo Mein Recipe get lost! Click the button below or the image to save it directly to your “Weeknight Dinner” or “Asian Recipes” board on Pinterest. Follow @cookingwithemy for more delicious, foolproof recipes every day!

(Pinterest embed code or “Save” button would be placed here in a live WordPress environment)

clock clock iconcutlery cutlery iconflag flag iconfolder folder iconinstagram instagram iconpinterest pinterest iconfacebook facebook iconprint print iconsquares squares iconheart heart iconheart solid heart solid icon

Chicken Lo Mein Recipe


  • Author: Chef Emy

Description

Experience the delightful flavors of this Chicken Lo Mein recipe! This dish features tender, marinated chicken stir-fried with vibrant vegetables and chewy lo mein noodles, all tossed in a savory sauce that captures the essence of Chinese cuisine. Perfect for weeknight dinners or special occasions, this easy-to-make meal requires minimal prep time and allows for customization based on your preferences. Enjoy the aroma wafting through your kitchen as you prepare this comfort food classic that will leave your family asking for seconds!


Ingredients

Scale
  • 34 boneless, skinless chicken breasts
  • Lo Mein noodles (fresh or dried)
  • 1 red bell pepper
  • 1 yellow bell pepper
  • 2 carrots (thinly sliced)
  • 2 green onions (chopped)
  • ¼ cup low-sodium soy sauce
  • 1 tablespoon sesame oil
  • 3 cloves fresh minced garlic

Instructions

  1. Gather all ingredients and chop vegetables into bite-sized pieces. Cook lo mein noodles according to package instructions until al dente; drain and set aside.
  2. Heat a large skillet or wok over medium-high heat. Add oil and sauté the chicken until golden brown and fully cooked, about 6-8 minutes. Remove from skillet.
  3. In the same pan, stir-fry bell peppers, carrots, and green onions until tender yet crisp, about 3-4 minutes.
  4. Return cooked chicken to the skillet with vegetables. Add lo mein noodles, soy sauce, sesame oil, minced garlic, and any additional spices. Toss everything together until well mixed.
  5. Serve hot with extra soy sauce if desired.

Easy Chicken Lo Mein Recipe

Jump to Section
Why This Recipe is a Game-Changer
Why This is the BEST Chicken Lo Mein
Ingredients & Substitutions
Step-by-Step Instructions
Serving Suggestions
Storage & Reheating
Creative Variations
Frequently Asked Questions

The Ultimate 30-Minute Easy Chicken Lo Mein Recipe (Better Than Takeout!)

Prep Time: 15 minutesCook Time: 15 minutes
Total Time: 30 minutesServings: 4
Difficulty: Easy

Are you tired of the same old weeknight dinners and craving the savory, umami-packed flavors of your favorite Chinese restaurant? Welcome to your new kitchen staple. This Easy Chicken Lo Mein Recipe is designed to deliver a spectacular, crowd-pleasing meal in just 30 minutes flat. We’re talking about tender, marinated chicken stir-fried to perfection with a rainbow of crisp-tender vegetables and chewy lo mein noodles, all enveloped in a deeply savory, glossy sauce that clings to every strand. Forget waiting for delivery or paying premium prices—this recipe empowers you to create a restaurant-quality experience right on your stovetop, with ingredients you can control and customize. It’s the perfect solution for busy families, meal prep enthusiasts, and anyone who believes a delicious, satisfying dinner shouldn’t be a complicated affair.

Why This is the BEST Easy Chicken Lo Mein Recipe You’ll Find

You might be wondering what sets this particular recipe apart from the dozens of others online. The answer lies in the details and the tested techniques we’ve perfected. First, we focus on maximizing flavor with minimal effort. The secret starts with a quick, effective marinade for the chicken that uses common pantry staples to ensure every bite is juicy and flavorful, not bland or dry. Second, our sauce is a perfectly balanced blend of salty, sweet, and aromatic elements—it’s not just soy sauce! We incorporate depth with ingredients like toasted sesame oil and fresh garlic, creating a complex flavor profile that mimics your favorite takeout spot.

Furthermore, we provide clear, fail-proof instructions for achieving the ideal texture: al dente noodles, crisp-tender vegetables, and perfectly seared chicken. Many recipes result in soggy noodles or overcooked veggies, but our method ensures every component shines. Finally, this recipe is built for adaptability. Whether you need to swap proteins, use up leftover veggies, or adjust the sauce to be gluten-free or lower in sodium, we’ve got you covered with smart, practical variations. This isn’t just a recipe; it’s a reliable framework for endless delicious meals.

Ingredients for Easy Chicken Lo Mein & Smart Substitutions

Gathering your ingredients is the first step to success. Here’s everything you’ll need, along with expert notes on why each component matters and how you can swap things based on your pantry or dietary needs.

IngredientQuantityPurpose & Best Substitutes
Boneless, Skinless Chicken Breasts1 lb (about 2-3 breasts)Provides lean protein. For more flavor/tenderness, use chicken thighs. For a vegetarian option, use extra-firm tofu (pressed and cubed) or seitan.
Lo Mein Noodles8 ozThe star! Use fresh or dried. Can substitute with spaghetti, linguine, udon, or ramen noodles (discard seasoning packets).
Red Bell Pepper1, slicedAdds sweetness and color. Substitute with orange or green bell pepper, snap peas, or broccoli florets.
Yellow Bell Pepper1, slicedAdds sweetness and color. See above.
Carrots2, julienned or thinly slicedAdds crunch and sweetness. Substitute with shredded cabbage or matchstick zucchini.
Green Onions3-4, choppedProvides fresh, sharp flavor. Use white parts for cooking, green tops for garnish. Substitute with a small diced yellow onion for cooking.
Low-Sodium Soy Sauce1/3 cupBase of the sauce. For gluten-free, use tamari or coconut aminos (which is also sweeter).
Toasted Sesame Oil1 tbspProvides irreplaceable nutty aroma. Do not substitute with regular oil. Find it in the Asian aisle.
Fresh Garlic3-4 cloves, mincedEssential for aroma. Use 1 tsp garlic powder in a pinch, but fresh is highly preferred.
Fresh Ginger1 tbsp, gratedAdds bright, warm flavor. Substitute with 1 tsp ground ginger.
Oyster Sauce*2 tbspAdds rich, savory depth (umami). For vegetarian, use mushroom stir-fry sauce.
Brown Sugar or Honey1 tbspBalances saltiness with a touch of sweetness. Maple syrup also works.
Vegetable or Canola Oil2 tbspFor high-heat stir-frying. Use peanut or avocado oil.
Cornstarch1 tsp (optional)Used to lightly coat chicken for a velvety texture. Can be omitted.

💡 The Kitchen Team’s Pro Tip: Always have your ingredients prepped and within arm’s reach before you turn on the stove. Stir-frying is a fast process, and there’s no time to chop garlic while your chicken is cooking. This “mise en place” is the golden rule of successful stir-fries.

Step-by-Step Instructions for Perfect Chicken Lo Mein

Follow these detailed steps to ensure your lo mein turns out flawless every single time. We break down the “why” behind each step to make you a more confident cook.

Step 1: Prep & Marinate the Chicken

Cut 1 lb of chicken breasts into thin, bite-sized strips or cubes. Place them in a medium bowl. Add 1 tablespoon of the soy sauce, 1 teaspoon of cornstarch (if using), and a pinch of black pepper. Toss until the chicken is evenly coated. Let it marinate for at least 10-15 minutes while you prep the vegetables. The cornstarch creates a light barrier that helps lock in juices and gives the chicken a silky, restaurant-style texture when seared.

Step 2: Cook the Noodles

Bring a large pot of salted water to a boil. Cook your lo mein noodles according to the package directions, but aim for al dente (slightly firm to the bite). They will finish cooking later in the sauce. Drain the noodles, rinse briefly with cool water to stop the cooking, and toss with a tiny bit of oil to prevent sticking. Set aside.

Step 3: Stir-Fry the Chicken

Heat a large wok or heavy-bottomed skillet (like cast iron) over medium-high heat. Add 1 tablespoon of vegetable oil. Once the oil is shimmering hot, add the marinated chicken in a single layer. Let it sear undisturbed for 1-2 minutes to get a good color, then stir-fry for 4-6 minutes total until cooked through and no longer pink. Remove the chicken to a clean plate.

Step 4: Stir-Fry the Vegetables

In the same pan, add the remaining 1 tablespoon of oil. Add the sliced bell peppers and julienned carrots. Stir-fry for 3-4 minutes until they are vibrant in color and tender-crisp. Add the minced garlic and grated ginger and stir-fry for an additional 30-60 seconds until incredibly fragrant. Be careful not to burn the garlic.

Step 5: Combine Everything & Sauce It

Return the cooked chicken and any accumulated juices to the pan with the vegetables. Add the cooked noodles. In a small bowl, whisk together the remaining low-sodium soy sauce, oyster sauce, brown sugar (or honey), and toasted sesame oil. Pour this sauce over the noodle mixture.

Step 6: The Final Toss

Using tongs or two large spoons, toss everything together vigorously for 1-2 minutes over medium heat. This allows the noodles to soak up the sauce and everything to heat through evenly. The sauce will thicken slightly and coat every ingredient beautifully.

Step 7: Garnish & Serve

Remove from heat. Stir in most of the chopped green onions (reserving some for garnish). Transfer to a serving platter or individual bowls. Garnish with the remaining green onions and optionally, a sprinkle of sesame seeds or a drizzle of chili oil for heat.

How to Serve Your Homemade Chicken Lo Mein

This dish is a complete meal in a bowl, but you can easily turn it into a larger feast. For a classic Chinese takeout experience at home, serve it alongside simple sides like steamed jasmine rice (for those who want extra carbs), crispy spring rolls, or hot and sour soup. A light, refreshing cucumber salad with a rice vinegar dressing makes a perfect palate cleanser. To elevate the presentation, serve it family-style on a large platter with lime wedges and extra chili crisp on the side for customizable heat.

Storage, Reheating, & Meal Prep Instructions

Storage: Allow leftovers to cool completely. Store in an airtight container in the refrigerator for up to 3-4 days.

Reheating: The best way to reheat lo mein while preserving texture is on the stovetop. Add a small splash of water or broth to a non-stick skillet over medium heat. Add the lo mein and toss until heated through. You can also use the microwave: place in a microwave-safe dish, sprinkle with a few drops of water, cover loosely, and heat in 60-second intervals, stirring in between.

Meal Prep: This recipe is a meal prep superstar! Cook the entire recipe and divide it into 4 single-serving containers. It reheats beautifully for lunch. You can also prep components: chop veggies and store them in a bag; make the sauce and store it in a jar; marinate and cook the chicken. Assemble and toss with freshly cooked noodles when ready to eat.

Creative Variations on Easy Chicken Lo Mein

The beauty of this recipe is its adaptability. Don’t be afraid to make it your own!

  • Shrimp or Beef Lo Mein: Substitute chicken with 1 lb of peeled large shrimp (cook for 2-3 minutes) or thinly sliced flank steak or sirloin.
  • Vegetable Lo Mein: Omit the chicken and double up on veggies like broccoli, mushrooms, baby corn, water chestnuts, and snow peas. Add cubed tofu for protein.
  • Spicy Szechuan Lo Mein: Add 1-2 teaspoons of Szechuan chili paste or a few dried red chilies to the sauce. Finish with Szechuan peppercorns for that signature tingly numbness.
  • Teriyaki Lo Mein: Swap the sauce for a homemade teriyaki glaze (soy sauce, mirin, brown sugar, ginger, and a bit of cornstarch slurry to thicken).
  • Low-Carb/”Zoodle” Lo Mein: Replace noodles with spiralized zucchini or yellow squash. Stir-fry the “zoodles” very briefly at the end (1-2 minutes) to avoid sogginess.

Frequently Asked Questions (FAQ)

Can I make this Easy Chicken Lo Mein recipe ahead of time?

Absolutely. You can prep all vegetables and the sauce 1-2 days in advance. Store them separately in the fridge. For best results, cook the noodles and chicken fresh when you’re ready to assemble and serve, as reheating pre-cooked noodles can make them mushy.

What’s the difference between Lo Mein and Chow Mein?

My noodles turned out sticky/gummy. What did I do wrong?

How can I make this recipe gluten-free?

Can I use frozen vegetables?

Is toasted sesame oil the same as regular sesame oil?

How can I add more protein to this dish?

My sauce is too salty. How can I fix it?

We hope this comprehensive guide to our Easy Chicken Lo Mein Recipe inspires you to ditch the takeout menu and create something truly special at home. It’s fast, flavorful, and endlessly customizable—everything a weeknight hero should be.

Did you make this recipe? We’d love to see your creation! Tag us on social media @cookingwithemy and use the hashtag #CookingWithEmy.

If you loved this recipe, please share it with your friends and family who need a quick and delicious dinner idea!

Love This Recipe? Save It For Later!

Pin the image below to your Dinner Ideas or Asian Recipes board on Pinterest so you always have this easy Chicken Lo Mein recipe handy.

Follow us on Pinterest for more delicious inspiration: @cookingwithemy

Simply hover over any image on this page and click the “Save” button to pin it!

clock clock iconcutlery cutlery iconflag flag iconfolder folder iconinstagram instagram iconpinterest pinterest iconfacebook facebook iconprint print iconsquares squares iconheart heart iconheart solid heart solid icon

Chicken Lo Mein Recipe


  • Author: Chef Emy

Description

Experience the delightful flavors of this Chicken Lo Mein recipe! This dish features tender, marinated chicken stir-fried with vibrant vegetables and chewy lo mein noodles, all tossed in a savory sauce that captures the essence of Chinese cuisine. Perfect for weeknight dinners or special occasions, this easy-to-make meal requires minimal prep time and allows for customization based on your preferences. Enjoy the aroma wafting through your kitchen as you prepare this comfort food classic that will leave your family asking for seconds!


Ingredients

Scale
  • 34 boneless, skinless chicken breasts
  • Lo Mein noodles (fresh or dried)
  • 1 red bell pepper
  • 1 yellow bell pepper
  • 2 carrots (thinly sliced)
  • 2 green onions (chopped)
  • ¼ cup low-sodium soy sauce
  • 1 tablespoon sesame oil
  • 3 cloves fresh minced garlic

Instructions

  1. Gather all ingredients and chop vegetables into bite-sized pieces. Cook lo mein noodles according to package instructions until al dente; drain and set aside.
  2. Heat a large skillet or wok over medium-high heat. Add oil and sauté the chicken until golden brown and fully cooked, about 6-8 minutes. Remove from skillet.
  3. In the same pan, stir-fry bell peppers, carrots, and green onions until tender yet crisp, about 3-4 minutes.
  4. Return cooked chicken to the skillet with vegetables. Add lo mein noodles, soy sauce, sesame oil, minced garlic, and any additional spices. Toss everything together until well mixed.
  5. Serve hot with extra soy sauce if desired.

Salmon Crispy Rice


Salmon Crispy Rice: The Ultimate Restaurant-Quality Appetizer You Can Make at Home

Prep Time Cook Time Total Time Servings Difficulty
30 minutes (plus 4+ hours chilling) 20 minutes 5+ hours (mostly inactive) 16 pieces (serves 4-6) Medium

The Viral Sensation: Why This Dish Broke the Internet

If you’ve spent any time on food TikTok or Instagram lately, you’ve undoubtedly seen the glorious, golden stacks of salmon crispy rice. This isn’t just another food trend; it’s a culinary phenomenon for a reason. It masterfully combines textures and flavors that seem almost impossible to achieve outside a high-end sushi bar: the intense, shattering crisp of pan-fried rice, the cool creaminess of ripe avocado, and the rich, spicy kick of seasoned salmon. Here at Cooking With Emy, we’ve perfected the method to bring this viral favorite directly to your kitchen. Forget waiting for a reservation at that trendy spot—this recipe guides you to create an even more delicious, impressive, and shareable appetizer that will have everyone thinking you’re a professional chef.

The magic lies in the contrast. Each component plays a vital role. The rice cake isn’t just crispy; it’s a sturdy, flavorful base with a subtle tang from seasoned vinegar. The salmon mixture, often called “spicy salmon,” is a harmonious blend of fat, heat, and umami. When topped with a fresh slice of jalapeño and a sprinkle of toasted sesame seeds, you achieve a bite that is truly greater than the sum of its parts. This guide from The Kitchen Team will not only give you the recipe but will dive deep into the “why” behind each step, ensuring your success on the first try.

Why This Is The Best Salmon Crispy Rice Recipe

Many online recipes for crispy rice salmon skip crucial steps that make all the difference between a good bite and an extraordinary one. Our version is meticulously tested by The Kitchen Team to guarantee restaurant-quality results. First, we insist on properly seasoning and chilling the rice. This isn’t just about flavor—it’s a textural necessity. The vinegar mixture seasons every grain, while the extended chilling firms up the rice, allowing it to fry up incredibly crispy on the outside while remaining slightly tender within. We also emphasize the importance of sushi-grade salmon, a non-negotiable for both safety and sublime taste.

Furthermore, our balance of sauces in the salmon mixture is perfect. We use Kewpie mayo for its unique umami-rich creaminess, combined with sriracha, soy sauce, and a hint of sesame oil. This creates a complex flavor profile that isn’t just spicy but deeply savory. We also provide detailed frying techniques to achieve that perfect, uniform golden crust without greasiness. This recipe is designed for the home cook who wants to impress, providing all the pro tips and detailed explanations you need to master this iconic dish.

💡 The Kitchen Team’s Pro Tip: The key to ultra-crispy rice that holds its shape is patience during the chilling phase. Don’t rush the 4-hour minimum chill time. Overnight is even better. This allows the rice starches to fully set, creating a solid cake that won’t crumble in the pan.

Ingredients & What You’ll Need

Gathering the right ingredients is the first step to success. Here’s your complete shopping list, broken down by component. Using high-quality ingredients here is paramount, especially for the salmon and rice.

Quantity Ingredient Notes & Substitutions
3 cups Cooked Sushi Rice (short-grain) Must be short-grain (like Calrose or Japanese rice). Cook it slightly firmer than usual.
2 tbsp Rice Vinegar Seasoned or unseasoned is fine. If unseasoned, you’ll add the sugar and salt separately.
1 tbsp Granulated Sugar Balances the vinegar’s acidity.
1 tsp Salt Sea salt or kosher salt preferred.
As needed Vegetable Oil (for frying) Use a neutral, high-smoke-point oil like avocado, canola, or grapeseed.
1 lb Sushi-Grade Salmon CRITICAL: Must be labeled “sushi-grade” or “sashimi-grade” from a trusted fishmonger.
4 tbsp Kewpie Mayo Japanese mayo. In a pinch, regular mayo with a tiny squeeze of lemon can work.
2 tbsp Sriracha Adjust to your preferred spice level.
2 tbsp Scallions, finely chopped Both green and white parts.
2 tsp Soy Sauce Use low-sodium if preferred.
2 tsp Sesame Oil Use toasted sesame oil for maximum flavor.
2 Ripe Avocados Sliced just before assembly to prevent browning.
1 Fresh Jalapeño Thinly sliced. Remove seeds for less heat.
For garnish Toasted Black & White Sesame Seeds Toasting enhances their nutty flavor dramatically.

Step-by-Step Instructions

Part 1: Preparing & Chilling the Rice Cakes

Step 1: Season the Rice. In a small bowl, combine the rice vinegar, sugar, and salt. Stir vigorously until the sugar and salt are completely dissolved. Place your warm, freshly cooked sushi rice in a large, non-reactive bowl (glass or ceramic is ideal). Pour the vinegar mixture over the rice. Using a rice paddle or a flat spatula, use a slicing and folding motion to mix. Be gentle yet thorough to coat every grain without mashing the rice. Fan the rice as you mix to help it cool slightly and become glossy.

Step 2: Form and Chill. Line an 8×8 inch baking pan with plastic wrap, leaving plenty of overhang on all sides. Transfer the seasoned rice to the pan. Using slightly damp hands or a flat-bottomed glass wrapped in plastic, press the rice down firmly and evenly into a uniform layer. The tighter you pack it, the better the cakes will hold together. Fold the overhanging plastic wrap over the top to seal. Refrigerate for at least 4 hours, but ideally overnight. This step cannot be rushed.

💡 The Kitchen Team’s Pro Tip: When pressing the rice, place a second sheet of plastic wrap directly on the surface before pressing. This prevents the rice from sticking to your tools and allows you to apply even, firm pressure for a perfectly compacted block.

Part 2: Making the Spicy Salmon Mixture

Step 3: Prepare the Salmon. Ensure your sushi-grade salmon is very cold. Using a sharp knife, chop the salmon into small, uniform pieces (about 1/4-inch). You can also pulse it a few times in a food processor, but be careful not to puree it—you want texture. Transfer the chopped salmon to a mixing bowl.

Step 4: Combine. To the salmon, add the Kewpie mayo, sriracha, chopped scallions, soy sauce, and sesame oil. Using a fork or spatula, fold everything together until just combined. Be careful not to overmix, as this can break down the salmon’s texture too much. Taste and adjust seasoning if desired (you might want more sriracha). Cover the bowl tightly and return it to the refrigerator until you’re ready to assemble.

Part 3: Frying the Rice & Final Assembly

Step 5: Cut and Fry. Remove the chilled rice block from the pan using the plastic wrap as handles. Place it on a cutting board. Using a sharp, wet knife, cut the block into 16 even rectangles (cut in half, then each half into 8 pieces). Pat any loose grains off the sides. In a large, heavy-bottomed skillet or cast-iron pan, heat about 1/4 inch of vegetable oil over medium heat. To test if it’s ready, drop a single grain of rice in—it should sizzle immediately. Carefully add the rice cakes in a single layer, not crowding the pan. Fry for 3-4 minutes per side, or until deeply golden brown and incredibly crispy. Transfer to a wire rack set over a baking sheet or a plate lined with paper towels to drain. Repeat with remaining cakes, adding more oil as needed.

Step 6: Assemble. Work quickly while the rice cakes are still warm. Place a slice of avocado on each crispy rice cake, gently pressing to adhere. Top with a generous tablespoon of the spicy salmon mixture. Garnish with a thin slice of jalapeño and a generous sprinkle of toasted sesame seeds. A tiny extra dot of sriracha on top adds color and heat. Serve immediately.

Serving & Presentation

Presentation is key for this stunning appetizer. Arrange the assembled salmon crispy rice bites on a large, elegant platter or a sleek slate board. Scatter a few extra scallion greens or microgreens around for a pop of color. Serve with small appetizer plates and napkins, as these are a one-or-two-bite wonder. They pair beautifully with a crisp, dry white wine like Sauvignon Blanc or Pinot Grigio, a light lager, or even a ginger-forward cocktail. This dish is perfect for dinner parties, holiday gatherings, or as an extravagant start to a homemade sushi night.

Storage & Make-Ahead Tips

Make-Ahead: This recipe is fantastic for planning. You can prepare the seasoned rice block and the spicy salmon mixture up to 24 hours in advance. Keep both tightly covered in the refrigerator. Fry the rice cakes and assemble just before serving for the ultimate texture.

Storage: Leftovers are best stored deconstructed. Keep unfried, cut rice cakes in an airtight container in the fridge for 1 day. Store leftover spicy salmon in a sealed container for 1 day. We do not recommend storing assembled bites, as the rice will lose its crispness and the avocado will brown. Fried (but un-topped) rice cakes can be reheated in a 400°F air fryer or oven for a few minutes to re-crisp.

Creative Variations

The basic framework of crispy rice is a canvas for creativity. Here are some delicious twists from The Kitchen Team:

Variation Ingredient Swap/Addition Flavor Profile
Tuna Crispy Rice Substitute sushi-grade tuna for the salmon. Leaner, slightly meatier flavor. Add a bit of mashed avocado to the tuna mix for creaminess.
Spicy Crab Use lump crab meat mixed with kewpie, sriracha, and a dash of lemon zest. Sweet, delicate, and luxurious.
Vegetarian “Unagi” Top with grilled eggplant brushed with unagi (eel) sauce. Smoky, sweet, and savory—perfect for vegetarians.
Dynamite Shrimp Top with tempura shrimp tossed in a spicy mayo sauce. Extra crunchy and packed with flavor.
Wasabi Pea Crunch Add crushed wasabi peas to the salmon mixture or as a final garnish. Adds an incredible crunchy texture and a nose-clearing heat.

Frequently Asked Questions (FAQ)

1. Can I use regular long-grain rice instead of sushi rice?

No, we do not recommend it. Short-grain sushi rice has a much higher starch content (amylopectin), which is essential for the rice sticking together and achieving the desired chewy-yet-crispy texture. Long-grain rice will not hold together properly.

2. How do I know if salmon is truly “sushi-grade”?

“Sushi-grade” is not a USDA-regulated term. It means the fish has been frozen to a specific temperature (-31°F or below for a certain period) to kill parasites. Always purchase from a reputable fishmonger or market you trust. Tell them you plan to eat it raw. Never use regular grocery store salmon fillets for raw consumption.

3. Can I bake or air fry the rice cakes instead of pan-frying?

You can, but the texture will differ. For baking, brush rice cakes generously with oil and bake at 425°F on a parchment-lined sheet until golden, flipping once. In an air fryer, spray with oil and cook at 400°F for 10-12 minutes, flipping halfway. Pan-frying yields the most authentic, uniformly crispy result.

4. My rice cakes are falling apart. What did I do wrong?

This is usually due to: 1) Insufficient chilling time (the rice must be completely cold and set), 2) Not pressing the rice firmly enough into the pan, or 3) Using the wrong type of rice. Ensure you’re using short-grain, packed it tightly, and chilled it thoroughly.

5. Can I make this gluten-free?

Absolutely! Ensure your soy sauce is a certified gluten-free tamari or coconut aminos. All other ingredients in this recipe are naturally gluten-free.

6. How far in advance can I assemble the bites?

We recommend assembling immediately before serving, ideally within 10-15 minutes. The steam from the warm rice cake will start to soften the crispy exterior and wilt the garnishes if left too long.

7. What’s the best way to reheat leftover fried rice cakes?

Reheat them in an air fryer at 375°F for 3-4 minutes or in a conventional oven at 400°F on a wire rack for 5-7 minutes. This will help re-crisp the exterior. A microwave will make them soggy.

8. Is there a substitute for Kewpie mayo?

Yes, you can use regular American mayo. To mimic Kewpie’s unique flavor, add a tiny pinch of MSG (or a dash of dashi powder) and a small squeeze of lemon juice to the regular mayo before mixing it with the salmon.

Love This Recipe? Save It For Later!

Pin this image to your favorite appetizer or sushi board on Pinterest to save this ultimate Salmon Crispy Rice recipe for your next party!

Follow us on Pinterest: @cookingwithemy for more viral recipes and pro cooking tips.

[Image: A beautifully styled platter of golden salmon crispy rice bites, garnished with sesame seeds and jalapeños, on a dark slate background.]

Tag @cookingwithemy when you make this! We love seeing your creations.


clock clock iconcutlery cutlery iconflag flag iconfolder folder iconinstagram instagram iconpinterest pinterest iconfacebook facebook iconprint print iconsquares squares iconheart heart iconheart solid heart solid icon

Salmon Crispy Rice


  • Author:
    Chef Emy

Ingredients


Scale
  • 3 cup Cooked Sushi Rice (short grain rice)
  • 2 tbsp Rice Vinegar
  • 1 tbsp Sugar
  • 1 tsp Salt
  • Vegetable Oil (for frying)
  • 1 lb Sushi-grade Salmon
  • 4 tbsp Kewpie Mayo
  • 2 tbsp Sriracha
  • 2 tbsp Scallion
  • 2 tsp Soy Sauce
  • 2 tsp Sesame Oil
  • Sliced Avocado
  • Jalapeno (thinly sliced)
  • Black and White Sesame Seed (toasted)

Instructions

  1. In a small mixing bowl, combine rice vinegar with sugar and salt then stir until dissolved. Pour the rice vinegar over cooked sushi rice and mix until well combined.
  2. Transfer the rice to a baking pan lined with a plastic wrap. Gently press the rice to even it out. Cover and let it chill in the fridge for at least 4 hours or overnight.
  3. Chop the sushi-grade salmon into a small pieces, transfer it a a bowl then combine the salmon with mayo, sriracha, soy sauce, scallion and sesame oil. Mix well and set aside in the fridge until ready to use.
  4. Once the rice chilled, cut into 16 rectangles. Heat vegetable oil in a pan over medium heat, fry the rice until both sides turns nice and golden. Remove from the heat and let it cool on a paper towel.
  5. Top the crispy rice with a sliced avocado, a tablespoon of salmon mixture and sliced of jalapeno. Sprinkle it with black and white sesame seeds. Serve immediately.


Why This Easy Chicken Stir Fry Beats Takeout (It’s the Sauce Ratio)

Why This Easy Chicken Stir Fry Beats Takeout (It’s the Sauce Ratio)

Discover the secret sauce ratio that makes this homemade chicken stir fry faster, healthier, and more flavorful than any takeout. A 30-minute weeknight hero!

Prep Time Cook Time Total Time Servings Difficulty
15 minutes 15 minutes 30 minutes 4 people Easy

Why This Recipe is a Game-Changer

We’ve all been there. It’s 6 PM, the family is hungry, and the siren call of the takeout menu is strong. But what if you could create a meal that’s not only faster than delivery but also tastes better, costs less, and lets you control exactly what goes into it? That’s the promise of this Easy Chicken Stir Fry. This isn’t just another stir-fry recipe. This is a meticulously tested formula built around a perfect, balanced sauce ratio that clings to every piece of chicken and vegetable, delivering a symphony of savory, sweet, and umami flavors in every bite. Forget gloopy, overly sweet, or one-note sauces from the carton. Our sauce—a simple blend of soy sauce, honey, chicken broth, and cornstarch—is the golden ratio for stir fry perfection. It’s the reason this dish doesn’t just rival your favorite takeout; it decisively beats it. Join The Kitchen Team as we break down the science of a great stir fry, from the sear on the chicken to the crisp-tender vegetables, all united by that unforgettable sauce.

Why This Easy Chicken Stir Fry Beats Takeout

Let’s count the ways. First, speed. From fridge to table in 30 minutes flat, you’ll be eating before a delivery driver even rings your doorbell. Second, health. You control the sodium, the quality of the oil, and the freshness of the produce. No hidden MSG or excessive sugar. Third, and most importantly, flavor. Takeout sauces are often designed for mass appeal and shelf stability, leading to a generic taste. Our sauce ratio is designed for impact: the soy sauce provides deep umami saltiness, the honey adds a floral sweetness that caramelizes in the hot pan, the chicken broth adds savory depth, and the cornstarch creates a glossy, clingy texture that coats rather than pools. It’s a sauce with purpose.

Furthermore, the vegetable combination here—broccoli, bell peppers, carrots—is chosen for color, texture, and cooking time. They create a vibrant plate that’s as beautiful as it is nutritious. The ginger and garlic aren’t afterthoughts; they’re sautéed briefly to unlock their aromatic oils, creating the fragrant foundation of the dish. This recipe respects each component, resulting in a harmonious final product where the chicken is juicy, the veggies are crisp, and the sauce is the star.

💡 The Kitchen Team’s Pro Tip: The key to a great stir fry is mise en place—having all your ingredients chopped, measured, and ready to go before you heat the pan. The cooking process is fast and furious, and there’s no time to mince garlic while your chicken is burning.

Ingredients & The Sauce Ratio Secret

Simple ingredients, extraordinary results. Here’s what you’ll need, with special attention to the sauce components that make the magic happen.

Ingredient Quantity Notes
Boneless, skinless chicken breasts 3 (about 1.5 lbs) Cut into uniform 1-inch pieces for even cooking.
Salt & Black Pepper 1/2 tsp each For seasoning the chicken.
Olive Oil (or neutral oil), divided 2 tbsp High smoke point oils like avocado or peanut also work great.
Broccoli Florets 2 cups (bite-sized) Fresh is best for crunch.
Yellow Bell Pepper 1/2, cut into 1″ pieces Adds sweetness and bright color.
Red Bell Pepper 1/2, cut into 1″ pieces For color and a slightly earthier sweetness.
Shredded Carrots 1/2 cup Buy pre-shredded to save time, or use a julienne peeler.
Ground Ginger 1/2 tsp Fresh grated ginger (1 tsp) can be used for more zing.
Minced Garlic 2 tsp Freshly minced is always superior to jarred.
Sesame Seeds 2 tbsp For garnish and a nutty finish.
The Sacred Sauce Ratio
Cornstarch 1 tbsp The thickener. Do not substitute flour; cornstarch gives that classic glossy finish.
Low-Sodium Chicken Broth 1/4 cup Adds savory depth without making the sauce too salty.
Soy Sauce (or Tamari) 1/4 cup The umami backbone. Use low-sodium if preferred.
Honey 2 tbsp The balancing sweetness. Maple syrup or agave can be used.

This 1:1/4:1/4:2 ratio (cornstarch:broth:soy sauce:honey) is the heart of the recipe. It’s been tested to provide the ideal consistency and flavor balance. The cornstarch is just enough to thicken the liquid into a luxurious glaze without becoming pasty.

Step-by-Step Instructions

Follow these steps for foolproof, restaurant-quality results every single time.

Step Action Visual Cue
1. Prep & Sauce Dice chicken, chop all vegetables. In a small bowl, whisk together the cornstarch, chicken broth, soy sauce, and honey until completely smooth. Set aside. A smooth, slightly thick liquid with no cornstarch lumps.
2. Cook Chicken Heat 1 tbsp oil in a large skillet or wok over medium-high heat. Season chicken with salt and pepper. Add to the hot skillet in a single layer. Let it sear undisturbed for 2-3 minutes, then stir and cook for 5-7 minutes total. Chicken is golden brown on the outside and no longer pink inside. Transfer to a clean plate.
3. Sauté Vegetables Add remaining 1 tbsp oil to the skillet. Add broccoli, bell peppers, and carrots. Stir-fry for 4-5 minutes. Vegetables are brightened in color and tender-crisp (fork-tender but still with a snap).
4. Add Aromatics Push veggies to the side. Add the ground ginger and minced garlic to the center of the pan. Cook for 30-60 seconds until incredibly fragrant. The garlic should sizzle and smell amazing but not burn (burnt garlic turns bitter).
5. Combine & Sauce Return the cooked chicken to the skillet. Give the prepared sauce a quick re-whisk (cornstarch can settle), then pour it over the chicken and vegetables. Immediate sizzle and steam.
6. Thicken & Finish Stir everything together constantly. The sauce will begin to bubble and thicken into a shiny glaze within 1-2 minutes. Sauce coats the back of a spoon and clings to the ingredients. Remove from heat.
7. Garnish & Serve Transfer to a serving dish and immediately sprinkle with sesame seeds. A vibrant, glossy stir fry ready to devour.
💡 The Kitchen Team’s Pro Tip: For maximum “wok hei” (the coveted smoky flavor), let your skillet get screaming hot before adding the oil and chicken. Don’t overcrowd the pan—cook in batches if needed. Overcrowding steams the food instead of searing it.

Serving Suggestions

This stir fry is a complete meal on its own, but it loves company. For a traditional takeout experience, serve it over a bed of steamed jasmine or white rice to soak up every last drop of sauce. For a healthier, low-carb option, cauliflower rice is a fantastic substitute. You can also pair it with lo mein noodles, ramen noodles, or even quinoa. Garnish with extra sesame seeds, sliced green onions, or a sprinkle of red pepper flakes for a touch of heat. A simple side of steamed edamame or a light cucumber salad completes the meal perfectly.

Storage & Reheating

Storage: Allow leftovers to cool completely before transferring to an airtight container. They will keep in the refrigerator for up to 3-4 days.
Freezing: While you can freeze this stir fry for up to 2 months, note that the texture of the vegetables will become softer upon thawing. Store in a freezer-safe container.
Reheating: The best method is on the stovetop. Add a splash of chicken broth or water to a skillet over medium heat, add the stir fry, and cover until heated through, stirring occasionally. This helps rehydrate the sauce and prevents drying. Microwave reheating is quick but can make the veggies mushy; use a microwave-safe dish, cover loosely, and heat in 60-second intervals, stirring in between.

Delicious Variations

The beauty of this recipe is its adaptability. Once you’ve mastered the sauce ratio, the world is your oyster (sauce).

  • Protein Swap: Use thinly sliced flank steak, shrimp, pork tenderloin, tofu, or tempeh. Adjust cooking times accordingly.
  • Vegetable Bounty: Swap in or add snap peas, mushrooms, baby corn, water chestnuts, bok choy, or zucchini.
  • Sauce Twists:
    • Spicy: Add 1-2 tsp of sriracha or chili-garlic sauce to the sauce mix.
    • Teriyaki: Substitute the honey with 2 tbsp of brown sugar and add 1 tsp of grated fresh ginger.
    • Orange: Replace the chicken broth with fresh orange juice and add 1 tsp of orange zest.
  • Gluten-Free: Ensure you use tamari instead of soy sauce and a certified gluten-free chicken broth.

Frequently Asked Questions

Can I use chicken thighs instead of breasts?

Absolutely! Boneless, skinless chicken thighs are a fantastic choice. They are more forgiving and stay juicier due to their higher fat content. Cut them into 1-inch pieces and follow the same cooking instructions.

My sauce didn’t thicken. What went wrong?

The most common culprit is that the cornstarch wasn’t fully dissolved in the cold liquid before adding, or the sauce wasn’t brought to a sufficient simmer. Always whisk the sauce ingredients vigorously until completely smooth. When you add it to the hot pan, let it come to a full bubble, stirring constantly. If it’s still thin, mix 1 more teaspoon of cornstarch with 1 tablespoon of cold water and stir it in.

Can I make this stir fry ahead of time?

You can do all the prep ahead: chop vegetables, make the sauce, and cut the chicken (store separately). When ready to cook, everything comes together in 15 minutes. I don’t recommend cooking it fully ahead, as the vegetables will lose their crisp-tender texture upon reheating.

Is this recipe freezer-friendly?

Yes, but with a caveat. Freeze in an airtight container for up to 2 months. Thaw overnight in the fridge. Reheat on the stovetop with a little broth. Be aware that the broccoli and peppers will be much softer after freezing and thawing.

What’s the best pan to use?

A large, heavy-bottomed skillet or a wok is ideal. You need a pan that can hold high heat and has enough surface area to cook everything quickly without steaming. Non-stick is fine, but stainless steel or carbon steel will give you a better sear.

Can I use frozen vegetables?

You can, but you’ll get better results with fresh. If using frozen, don’t thaw them first. Add them directly to the hot pan, but expect more liquid to release as they cook. You may need to increase the cook time by a minute or two and possibly simmer a bit longer to thicken the extra liquid.

How can I make this dish less salty?

Use low-sodium soy sauce and low-sodium chicken broth. You can also reduce the soy sauce by 1 tablespoon and replace it with 1 tablespoon of water or additional broth. Taste and adjust at the end.

What can I use instead of honey?

Pure maple syrup, agave nectar, or brown sugar are all excellent substitutes. The flavor will vary slightly, but the sweetness balance will remain.

Love This Recipe? Save It for Later!

Did this Easy Chicken Stir Fry beat takeout at your house? We’d love to hear about it! Share your creation with us on Pinterest @cookingwithemy. Pin the image below to your favorite “Weeknight Dinner” or “Better Than Takeout” board so you always have the secret sauce ratio handy!

Follow us on Pinterest for more flavor-packed recipes that make cooking a joy.

[Image: A vibrant, glossy chicken stir fry in a skillet, garnished with sesame seeds and green onions.]

Pin this for later!

From all of us at The Kitchen Team, happy cooking! Remember, great meals don’t have to be complicated—they just need the right ratio.

clock clock iconcutlery cutlery iconflag flag iconfolder folder iconinstagram instagram iconpinterest pinterest iconfacebook facebook iconprint print iconsquares squares iconheart heart iconheart solid heart solid icon

Easy Chicken Stir Fry Recipe


  • Author:
    Chef Emy

Description

Easy Chicken Stir Fry Recipe is bursting with flavor but so simple to make. No need to grab take out when you can make this amazing dish in just minutes.


Ingredients


Scale
  • 3 boneless chicken breasts ((diced into 1 inch pieces) )
  • 1/2 tsp salt
  • 1/2 tsp pepper
  • 2 tbsp olive oil ((divided) )
  • 2 cups broccoli florets ((diced into bite size pieces) )
  • 1/2 Yellow Bell Pepper ((cut into 1 inch pieces) )
  • 1/2 red bell pepper ((cut into 1 inch pieces) )
  • 1/2 cup carrots ((shredded) )
  • 1/2 tsp ground ginger
  • 2 tsp minced garlic
  • 2 tbsp sesame seeds
  • 1 tbsp cornstarch
  • 1/4 cup chicken broth
  • 1/4 cup soy sauce
  • 2 tbsp honey

Instructions

  1. In a small bowl, whisk together 1 tablespoon cornstarch, ¼ cup chicken broth, ¼ cup soy sauce, and 2 tablespoons honey. Set the stir fry sauce aside.
  2. Heat 1 tablespoon olive oil in a large skillet over medium-high heat. Add 3 boneless chicken breasts (diced into 1-inch pieces) and season with ½ teaspoon salt and ½ teaspoon pepper. Sauté the chicken for 35 minutes until browned and cooked through. Remove the chicken from the skillet to a separate plate.
  3. Add the remaining 1 tablespoon olive oil to the skillet. Add 2 cups broccoli florets (cut into bite-size pieces), ½ yellow bell pepper (cut into 1-inch pieces), ½ red bell pepper (cut into 1-inch pieces), and ½ cup shredded carrots. Cook, stirring occasionally, until the vegetables are tender but still crisp.
  4. Stir in ½ teaspoon ground ginger and 2 teaspoons minced garlic. Cook for 12 minutes until the garlic is fragrant.
  5. Add the cooked chicken back to the skillet. Pour the prepared stir fry sauce over the chicken and vegetables and stir to coat evenly. Bring the mixture to a boil, stirring occasionally, and let it boil for 1 minute to thicken the sauce.
  6. Top with 2 tablespoons sesame seeds and serve as is or over rice. Enjoy.


Freakin’ Fantastic Fried Rice

The Secret to Freakin’ Fantastic Fried Rice: A Restaurant-Quality Recipe at Home

Prep Time: 15 minutes
Cook Time: 15 minutes
Total Time: 30 minutes
Servings: 4
Difficulty: Easy

Why This Fried Rice is Freakin’ Fantastic

Let’s be honest: we’ve all had disappointing fried rice. Mushy grains, bland flavor, or worse—a soggy, oily mess. That ends today. This Freakin’ Fantastic Fried Rice recipe isn’t just another side dish; it’s a masterclass in texture, flavor balance, and simple technique that delivers a restaurant-quality meal from your own skillet. Born from the need to transform leftover rice into something extraordinary, this recipe has become a cornerstone of quick, satisfying dinners at cookingwithemy.com.

The magic lies in a few non-negotiable rules: cold rice, high heat, and the layering of savory umami. Whether you’re a weeknight warrior short on time or a meal-prepper looking for a versatile staple, this fried rice is your answer. It’s a blank canvas, too—perfect for cleaning out the veggie drawer or adding leftover protein. Get ready to retire those takeout menus for good.

What Makes This Freakin’ Fantastic Fried Rice Recipe The Best

You might wonder what sets this recipe apart from the hundreds of fried rice recipes online. The difference is in the details—the science of starch, the chemistry of heat, and the philosophy of flavor.

First, we insist on cold, day-old rice. Freshly cooked rice is too moist and steamy, causing it to clump and steam-fry instead of achieving those perfect, separate, slightly chewy grains. The refrigeration process dries out the rice slightly and changes the starch structure, making it ideal for frying.

Second, our butter and soy sauce combination is a game-changer. While many recipes use a neutral oil, butter adds a rich, nutty depth that oil simply can’t provide. When combined with the salty, fermented punch of soy sauce, it creates a complex base flavor that coats every grain.

💡 The Kitchen Team’s Pro Tip: For an even deeper flavor, use half butter and half toasted sesame oil. The sesame oil has a low smoke point, so add it at the end, off the heat, to preserve its aromatic quality.

Finally, the technique of scrambling the eggs directly in the pan with the rice is intentional. It allows the eggs to cook quickly in their own space, then integrate seamlessly, creating ribbons of egg throughout rather than large, separate chunks. This is the hallmark of authentic, fantastic fried rice.

Ingredients for Freakin’ Fantastic Fried Rice & Why They Work

Gathering your ingredients is the first step to success. Here’s exactly what you need and the role each component plays in creating the final, freakin’ fantastic dish.

Ingredient Quantity Purpose & Notes
Cold, Cooked Long-Grain White Rice (like Jasmine) 4 cups The Foundation. Must be cold and day-old for dry, separate grains. Fresh rice will become mushy.
Unsalted Butter 3 tablespoons The Flavor Base. Adds rich, nutty notes that oil can’t match. Unsalted lets you control the sodium.
Yellow Onion, diced 1 medium The Aromatic Sweetness. Cooks down to add a sweet, savory foundation to the dish.
Frozen Peas & Carrots Mix 12 oz bag Color & Texture. Frozen veggies are flash-frozen at peak freshness, adding sweetness, color, and nutrients without prep work.
Soy Sauce (or Tamari for GF) 1/2 cup The Umami Powerhouse. Provides saltiness and deep, savory flavor. Low-sodium soy sauce is a great option.
Large Eggs, beaten 3 Protein & Texture. Create soft, fluffy ribbons of egg throughout the rice for added protein and texture.
Optional Garnishes: Thinly sliced green onions, toasted sesame seeds, a drizzle of sriracha or chili crisp.

Step-by-Step Instructions for Perfect Fried Rice

Follow these steps carefully. Fried rice comes together fast, so having all your ingredients prepped and measured (a French technique called mise en place) is crucial for success.

Step 1: Prep Your Pan & Aromatics

Place a large skillet, wok, or cast-iron pan over medium-high heat. Let it get hot for a full minute. Add the butter. Once it melts and just begins to foam, add the diced onion. Sauté for 3-4 minutes, stirring occasionally, until the onion turns soft and translucent. You’re not looking for color here, just softening to sweeten its flavor.

💡 The Kitchen Team’s Pro Tip: If your pan seems too dry at any point, don’t be afraid to add a touch more butter or a neutral oil like avocado oil. A little fat prevents sticking and helps with flavor distribution.

Step 2: Cook the Vegetables

Add the entire bag of frozen peas and carrots directly to the pan. There’s no need to thaw them. Stir to combine with the onions. Cook for 5-7 minutes, stirring every minute or so, until the vegetables are completely heated through and any excess ice crystals have evaporated. You should see vibrant color in the carrots and peas.

Step 3: Incorporate the Rice & Soy Sauce

Now, add all 4 cups of cold rice to the skillet. Use your spatula to break up any large clumps. Pour the 1/2 cup of soy sauce evenly over the rice. Stir everything together vigorously, ensuring the soy sauce coats the rice and vegetables evenly. Let this cook, undisturbed, for 2 minutes. Then, stir again. Repeat this process—cook, stir, cook—for about 5-6 minutes total. This allows some rice to get slightly crispy on the bottom (a desirable texture called “wok hei” in restaurant cooking).

Step 4: Cook the Eggs In-Situ

Here’s the signature move. Push the entire rice mixture to one side of the skillet, exposing the bare pan surface on the other side. If the pan looks dry, add a tiny pat of butter to the empty side. Immediately pour your beaten eggs onto the empty side of the pan. Let them set for 30 seconds, then gently scramble them with your spatula right there in their own section of the pan until they are softly set but still slightly moist.

Step 5: The Grand Finale – Integration

Once the eggs are cooked, it’s time to bring it all together. Simply mix the scrambled eggs into the rice mixture until they are evenly distributed as lovely yellow ribbons throughout. Your fried rice is now ready! Taste and adjust—though it’s unlikely to need anything else.

How to Serve Your Freakin’ Fantastic Fried Rice

This dish is incredibly versatile. Serve it straight from the skillet while it’s piping hot. Transfer to a large serving platter or individual bowls. Garnish generously with sliced green onions and a sprinkle of toasted sesame seeds for color, crunch, and a final flavor boost.

Perfect Pairings: While fantastic on its own as a vegetarian main, it also pairs beautifully with:

  • Simple Proteins: Grilled chicken thighs, pan-seared shrimp, or crispy tofu.
  • Asian-Inspired Sides: A light cucumber salad, egg drop soup, or steamed edamame.
  • For a Takeout Fake-Out: Serve alongside store-bought or homemade egg rolls and sweet and sour sauce.

Storage & Reheating Guide

Leftover fried rice is a gift! Store it properly to enjoy it again.

Refrigeration: Allow the rice to cool completely (to avoid steam creating condensation). Transfer to an airtight container and refrigerate for up to 4 days.

Freezing: For longer storage, spread cooled rice on a baking sheet to flash-freeze for 1 hour, then transfer to a freezer bag. It will keep for up to 2 months. Thaw overnight in the fridge before reheating.

Reheating for Best Results: The microwave can make fried rice soggy. Reheat it on the stovetop: place a non-stick skillet over medium heat, add a teaspoon of oil or water, and add the rice. Stir frequently until steaming hot throughout. This restores the texture far better.

Creative Variations on Freakin’ Fantastic Fried Rice

Once you’ve mastered the base recipe, the world is your oyster (sauce)! Here are some of our favorite twists.

Variation Name Ingredient Swaps/Add-Ins Instructions Adjustment
Pork & Pineapple “Aloha” Fried Rice Add 1 cup diced ham or cooked Spam + 1 cup fresh pineapple chunks. Add diced ham with the onions. Stir in pineapple chunks in the last 2 minutes of cooking.
Spicy Kimchi & Bacon Fried Rice Add 4 slices cooked/crumbled bacon + 1 cup chopped kimchi + 1 tbsp kimchi juice. Cook bacon first, remove, then use bacon fat instead of butter. Add kimchi with the veggies.
Thai Basil Chicken Fried Rice Add 1 lb ground chicken + 1 cup fresh Thai basil leaves + 2 tbsp fish sauce. Cook chicken first, remove. Use 1/4 cup soy sauce & 2 tbsp fish sauce. Stir in basil at the very end.
Vegetarian “Garden Power” Fried Rice Swap peas/carrots for broccoli florets, bell peppers, corn, and snap peas. If using fresh veggies, sauté a few minutes longer until crisp-tender before adding rice.

Frequently Asked Questions (FAQ)

1. Can I use freshly cooked rice if I’m in a pinch?

We strongly advise against it for the best texture. However, if you must, spread your freshly cooked rice on a baking sheet and let it cool in the refrigerator for at least 30-45 minutes to dry out the surface moisture as much as possible.

2. What’s the best type of rice to use?

Long-grain varieties like Jasmine or Basmati are ideal because they are less sticky than short-grain rice. Medium-grain rice can work in a pinch, but avoid sushi or Arborio rice, which are too starchy.

3. My fried rice turned out soggy. What happened?

The two most common culprits are: 1) Using warm, moist rice, or 2) Overcrowding the pan. Ensure your rice is cold and your pan is large enough (a 12-inch skillet minimum) so the rice can fry, not steam.

4. Can I make this gluten-free?

Absolutely! Simply substitute the soy sauce for an equal amount of gluten-free tamari or coconut aminos (note: coconut aminos are sweeter and less salty).

5. How can I add more protein?

Easy! Add 1-2 cups of cooked, diced protein (chicken, shrimp, pork, tofu, or extra firm crumbled tofu) when you add the frozen vegetables. Ensure it’s already cooked through, as the fry time is short.

6. Is 1/2 cup of soy sauce too much? It seems like a lot.

It’s the perfect amount for 4 cups of rice to achieve a deeply savory, well-coated dish without being overly salty. Remember, you’re seasoning a large volume of plain rice and vegetables. If you’re concerned, start with 1/3 cup and add more to taste.

7. Can I use brown rice?

Yes, but the texture will be different—chewier and more nutty. Use cold, cooked brown rice and note it may absorb a bit more sauce. You may want to add an extra tablespoon of soy sauce or a splash of water if it seems dry.

8. How do I get that “restaurant” smoky flavor?

That’s the elusive “wok hei.” You can approximate it by: 1) Using the highest heat your stove can safely manage, 2) Letting the rice sit undisturbed to get a slight sear, and 3) A final drizzle of toasted sesame oil off the heat.

Love This Recipe? Share the Love!

If this Freakin’ Fantastic Fried Rice has become a new favorite in your home, we’d be thrilled if you shared it with friends and family! Pin the image below to your Pinterest boards to save it for later, or share it on Facebook and Instagram. Don’t forget to tag @cookingwithemy so we can see your fantastic creations!

Pin this for later:

A bowl of Freakin' Fantastic Fried Rice with chopsticks, garnished with green onions and sesame seeds.

Follow us on Pinterest for more delicious inspiration!

clock clock iconcutlery cutlery iconflag flag iconfolder folder iconinstagram instagram iconpinterest pinterest iconfacebook facebook iconprint print iconsquares squares iconheart heart iconheart solid heart solid icon

Freakin Fantastic Fried Rice


  • Author: Chef Emy

Description

This Freakin Fantastic Fried Rice recipe is a delicious and satisfying dish that combines fluffy rice with savory soy sauce, colorful vegetables, and scrambled eggs. It’s a perfect balance of flavors and textures that will leave you craving for more.


Ingredients

Scale
  • 4 cups cold, cooked rice
  • 3 tablespoons butter
  • 1 onion, diced
  • 12 oz frozen peas and carrots
  • 1/2 cup soy sauce
  • 3 eggs, beaten

Instructions

  1. Heat butter in a large skillet, then add diced onions and cook until translucent. Add frozen peas and carrots and cook until heated through.
  2. Stir in the cold, cooked rice and soy sauce. Cook for a few minutes, stirring occasionally.
  3. Push the rice to one side of the skillet and pour beaten eggs into the other side. Cook until scrambled, then mix with the rice.
  4. Enjoy your Freakin Fantastic Fried Rice hot and garnish with green onions or sesame seeds if desired.