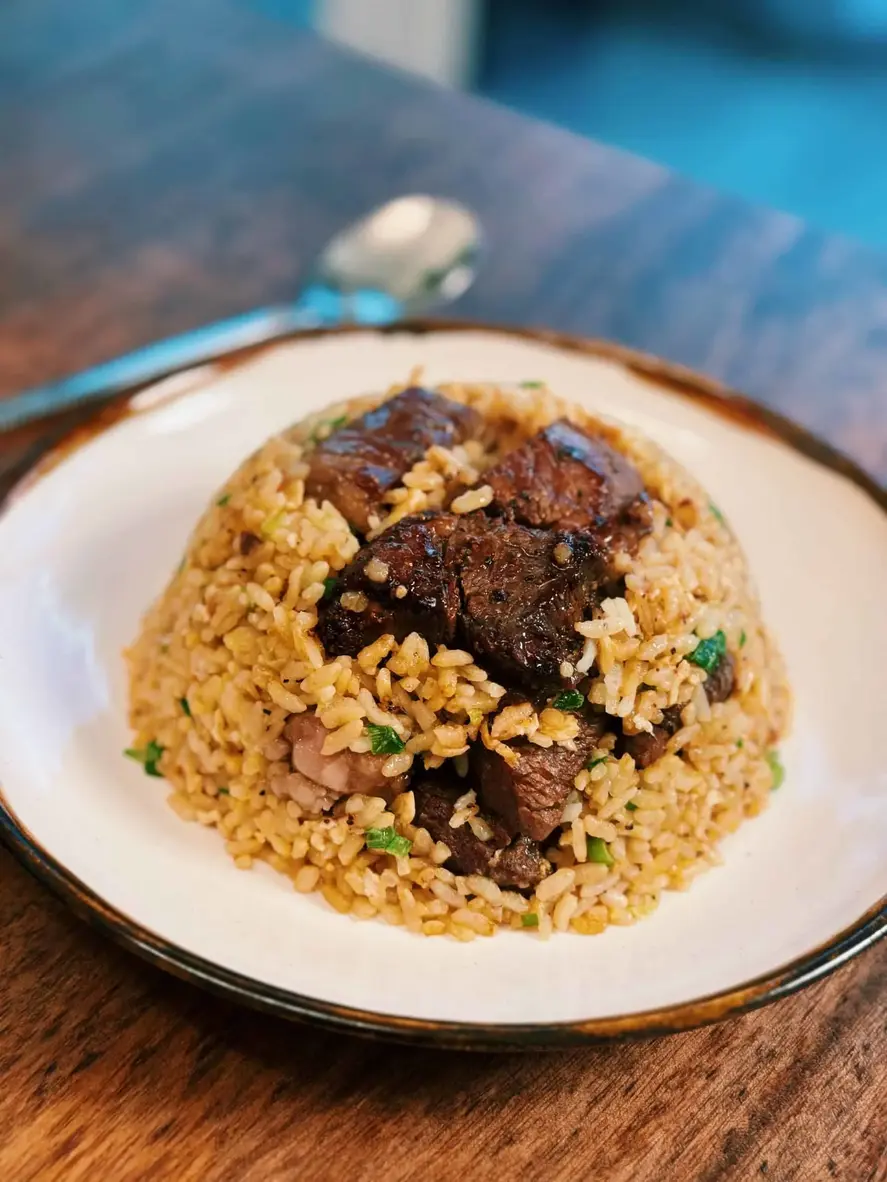
Golden Steak Fried Rice

Golden Steak Fried Rice: The Secret to Perfectly Golden Grains & Juicy Steak

Welcome to CookingWithEmy.com! We’re The Kitchen Team, and today we’re unlocking the secrets to a legendary one-pan wonder: Golden Steak Fried Rice. This isn’t just another fried rice recipe. This is a masterclass in transforming simple ingredients—cold rice, eggs, and affordable steak—into a sizzling, restaurant-quality feast that promises perfectly golden, separate grains and impossibly juicy, flavorful steak in every single bite. The magic lies in a few key techniques we’ll share, making this the most satisfying, flavor-packed fried rice you’ll ever make at home.

⏱️Prep Time
20 minutes

🔥Cook Time
15 minutes

🕒Total Time
35 minutes

🍽️Servings
4 people

⚙️Difficulty
Easy

Why This Golden Steak Fried Rice Recipe is Unbeatable

What sets this golden steak fried rice apart from the rest? It’s a symphony of technique and flavor. First, we marinate the steak with a touch of baking soda—a chef’s secret for tenderizing less expensive cuts, ensuring every cube is melt-in-your-mouth tender. Second, and most crucially, we coat cold day-old rice with egg yolks only before it ever hits the pan. This is the golden ticket. As the rice fries, each grain becomes individually coated, crisped, and turns a beautiful, uniform gold, creating that iconic “golden fried rice” color and texture without clumping. Finally, we build layers of flavor by cooking in stages: searing the steak, sautéing aromatics, scrambling whites, and then bringing it all together with a final hit of butter for richness. The result is a balanced dish where the savory, umami-packed steak complements the fluffy, golden rice, creating a complete meal that’s greater than the sum of its parts.

Golden Steak Fried Rice Ingredients

Gathering the right ingredients is the first step to success. Here’s your complete shopping list. For the best golden steak fried rice, use cold, day-old jasmine or long-grain white rice. Freshly cooked rice is too moist and will steam and clump in the pan.

IngredientQuantityNotes & Purpose
Steak (e.g., Sirloin, Ribeye)12 oz (two 6 oz steaks)Cut into ¾-inch cubes. The star protein.
Soy Sauce (divided)4.5 tbsp total2 tbsp for marinade, 2.5 tbsp for rice. Use regular for depth.
Oyster Sauce1.5 tbspAdds a savory, sweet umami base to the marinade.
Black Pepper1 tspFreshly ground is best for the marinade.
Baking Soda½ tspThe tenderizing secret for the steak.
Baking Powder (optional)½ tspCan help create a slightly crispier sear on the steak.
Cold Cooked White Rice4 cups (packed)MUST be day-old and cold. The foundation.
Large Eggs4Separated. Yolks for the rice, whites scrambled in.
Unsalted Butter2 tbspAdded at the end for a rich, glossy finish.
Green Onions3 stalksWhites and greens separated. For aroma and fresh finish.
Garlic, minced1.5 tbsp (about 4-5 cloves)The essential aromatic.
Neutral Oil (e.g., avocado, canola)2-3 tbspFor frying the steak and aromatics.

💡 The Kitchen Team’s Pro Tip: Why separate egg yolks and whites? This technique gives you maximum control. The yolks coat the rice for that signature golden color and richness, while the scrambled egg whites add distinct, fluffy curds throughout the dish, creating a better texture than scrambling whole eggs into the rice.

How to Make Golden Steak Fried Rice: Step-by-Step Guide

Step 1: Prep & Marinate the Steak

Pat your steak cubes completely dry with paper towels. This is non-negotiable for a good sear. In a medium bowl, combine 2 tablespoons of soy sauce, 1.5 tablespoons of oyster sauce, 1 teaspoon of black pepper, ½ teaspoon of baking soda, and the optional ½ teaspoon of baking powder. Add the steak cubes and toss vigorously until every piece is thoroughly coated. Let it marinate on the counter for 15-20 minutes while you prep everything else. The baking soda will begin to work its tenderizing magic.

Step 2: Create the Golden Rice Base

Place your 4 cups of cold, day-old rice in a large bowl. Use your fingers or a fork to break up any large clumps. Separate your 4 eggs, placing the yolks in a small bowl and the whites in another. Beat the egg yolks until smooth, then pour them over the cold rice. Now, using a spatula or your hands (we prefer hands for control), mix and massage the egg yolk into the rice until every single grain is evenly coated. It will look yellow and slightly sticky—this is perfect. Set this “golden rice” aside. Lightly beat the egg whites and set them aside separately.

Step 3: Cook the Steak to Perfection

Heat a large wok or heavy-bottomed skillet (cast iron is great) over medium-high heat. Add 1-2 tablespoons of neutral oil and swirl to coat. Once the oil is shimmering and just starting to smoke, add the marinated steak cubes in a single layer. Let them sear undisturbed for 45-60 seconds to develop a deep brown crust. Then, stir-fry for another 2-3 minutes until the steak is cooked to your desired doneness (3-4 minutes total for medium). Remove the steak with a slotted spoon to a clean plate, leaving the flavorful juices in the pan.

💡 The Kitchen Team’s Pro Tip: Don’t crowd the pan! If your pan isn’t large enough, cook the steak in two batches. Overcrowding steams the meat instead of searing it, preventing that delicious caramelized crust from forming.

Step 4: Build the Flavor Foundation

In the same hot pan with the steak drippings, add the chopped white parts of the green onions and the minced garlic. Stir-fry for just 30 seconds until incredibly fragrant—be careful not to burn the garlic. Push the aromatics to one side of the pan. Pour the beaten egg whites into the cleared space. Let them set for about 20 seconds, then scramble them gently until just cooked through but still soft.

Step 5: Fry the Rice & Final Assembly

Increase the heat to high. Add the yolk-coated rice to the pan, along with the remaining 2.5 tablespoons of soy sauce. Using a sturdy spatula, press and toss the rice continuously for 2-3 minutes. You want to hear a slight sizzling sound as the rice fries. Break up any remaining clumps. The rice should become dry, separate, and turn a deeper golden color. Now, add back the cooked steak (and any accumulated juices) and the 2 tablespoons of butter. Toss everything together for another minute until the butter is melted and glazing the entire dish. Turn off the heat and fold in the chopped green onion greens.

How to Serve Golden Steak Fried Rice

Serve your golden steak fried rice immediately while it’s piping hot and sizzling! We love to dish it directly from the wok to warm bowls. For a restaurant-style presentation, you can press the rice into a small bowl and invert it onto a plate for a neat dome. Garnish with extra sliced green onions, a sprinkle of sesame seeds, or a light drizzle of chili oil or sriracha for heat. This dish is a complete meal on its own, but it pairs beautifully with a simple side of steamed broccoli, a quick cucumber salad, or egg drop soup for a fuller spread.

Storage & Reheating Instructions

Storage: Allow leftovers to cool completely, then transfer to an airtight container. It will keep in the refrigerator for up to 3-4 days. We do not recommend freezing, as the rice texture can become mushy upon thawing.

Reheating for Best Results: The stovetop is king for reviving fried rice. Heat a non-stick skillet over medium heat with a tiny splash of oil or water. Add the rice and stir-fry, breaking it up, until heated through and re-crisped. The microwave is a quicker option—place rice in a microwave-safe bowl, sprinkle with a few drops of water, cover loosely, and heat in 60-second intervals, fluffing between each, until hot.

Delicious Recipe Variations to Try

  • Spicy Kimchi Steak Fried Rice: Add ½ cup of chopped kimchi and 1 tablespoon of gochujang (Korean chili paste) when you add the rice.
  • Pineapple “Hawaiian” Style: Stir in ¾ cup of diced fresh pineapple in the final minute of cooking for a sweet and savory twist.
  • Vegetable-Packed: Add 1 cup of mixed vegetables (like diced carrots, peas, and corn) when sautéing the garlic and green onion whites.
  • Chicken or Shrimp: Substitute the steak with bite-sized chicken thigh pieces or medium shrimp. Marinate the same way (baking soda works great on chicken too!).
  • Extra “Wok Hei” (Breath of the Wok): For that authentic smoky flavor, carefully tilt the pan toward your gas flame for a second at the end of cooking, or add a few drops of toasted sesame oil off-heat just before serving.

Golden Steak Fried Rice: Frequently Asked Questions

Can I use freshly cooked rice?

We strongly advise against it. Fresh rice has too much moisture and will steam and turn to mush in the hot pan, resulting in clumpy, soggy fried rice. Day-old, cold rice is drier, with firmer grains that fry up separate and perfect.

What’s the purpose of baking soda in the marinade?

Baking soda is an alkaline tenderizer. It raises the pH on the surface of the steak, helping to break down proteins more quickly, resulting in a noticeably more tender and juicy bite, especially helpful for leaner or less expensive cuts.

I don’t have oyster sauce. What can I use?

You can substitute with an equal amount of hoisin sauce for a sweeter note, or use an extra ½ tablespoon of soy sauce mixed with ½ teaspoon of brown sugar for a quick umami-sweet substitute.

Can I make this gluten-free?

Absolutely! Use certified gluten-free tamari or coconut aminos in place of the soy sauce, and ensure your oyster sauce substitute (like hoisin) is gluten-free.

Why is my fried rice soggy or clumpy?

The two most common reasons are 1) Using warm/fresh rice, or 2) Not using high enough heat when frying. Your pan needs to be very hot to quickly evaporate moisture and fry the rice, not steam it.

What’s the best cut of steak to use?

Sirloin, flank, skirt, or ribeye are all excellent choices. Sirloin offers great flavor and value. Ribeye is richer and more tender. The baking soda marinade makes even tougher cuts like flank steak wonderfully tender for fried rice.

Can I prep any components ahead of time?

Yes! Cube and marinate the steak up to 4 hours ahead (store covered in the fridge). Separate your eggs and chop your aromatics ahead of time. The rice must be cooked and chilled at least a few hours ahead, ideally overnight.

Is a wok necessary?

While a carbon steel wok is ideal for its high heat and sloped sides, a large, heavy-bottomed skillet or cast-iron pan works perfectly well. The key is having a cooking surface that gets and stays very hot.

Loved This Recipe? Share It!

If this Golden Steak Fried Rice brought some sizzle to your kitchen, please share it with friends and family! Your support helps The Kitchen Team at CookingWithEmy.com create more amazing recipes for you.

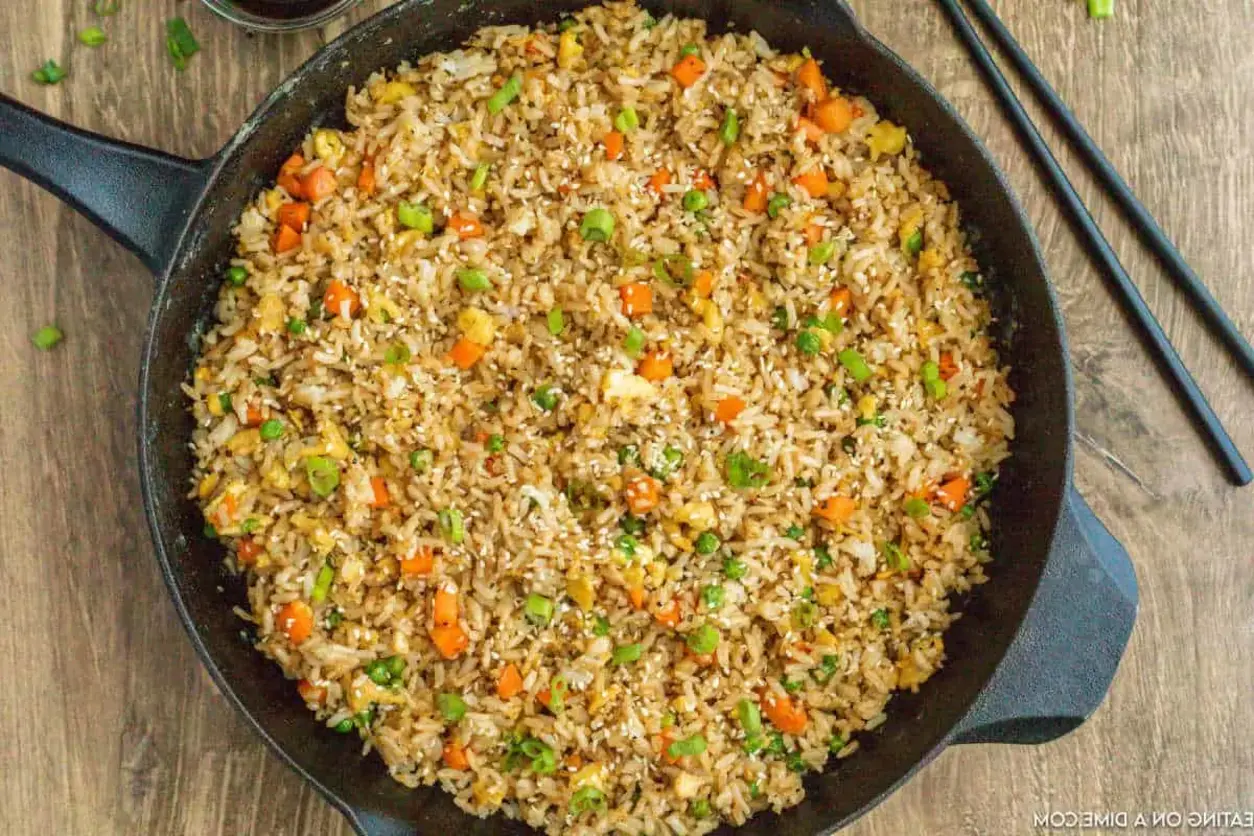
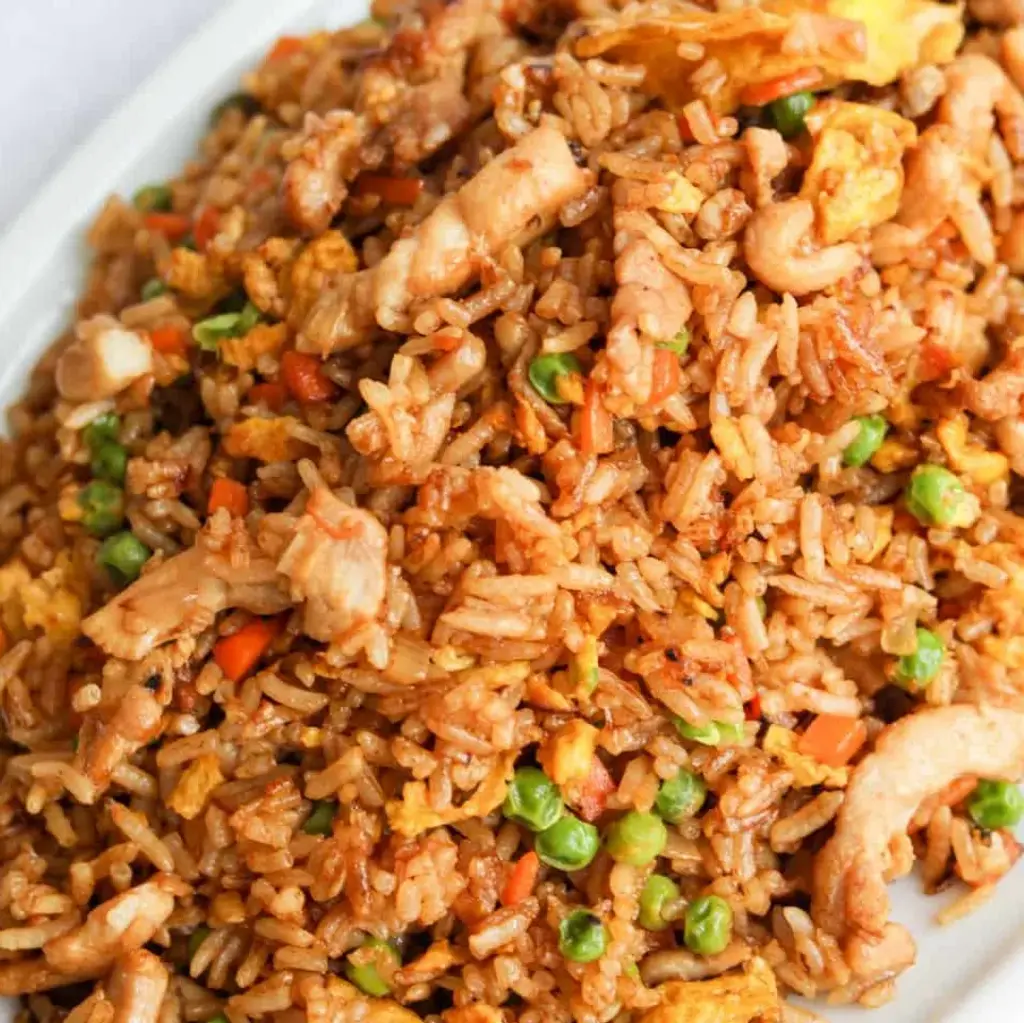
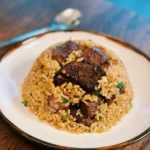
Golden Steak Fried Rice in a black cast iron wok, garnished with green onions

Pin this recipe for later! Save this image to your favorite Pinterest board so you always have the secrets to perfect golden fried rice at your fingertips.
clock clock iconcutlery cutlery iconflag flag iconfolder folder iconinstagram instagram iconpinterest pinterest iconfacebook facebook iconprint print iconsquares squares iconheart heart iconheart solid heart solid icon

Golden Steak Fried Rice


  • Author: Chef Emy

Description

One dish that never fails to deliver on both flavor and satisfaction is the glorious Golden Steak Fried Rice. There’s something comforting about a sizzling wok, the aroma of savory ingredients dancing in the air.


Ingredients

Scale
  • 2 Steak (6 oz each, cube)
  • 2 tablespoon Soy Sauce
  • 1.5 tablespoon Oyster Sauce
  • 1 tsp Black Pepper
  • 0.5 tsp baking soda
  • 0.5 tsp baking powder (optional)
  • 4 Cups Cold Cooked Rice
  • 4 Eggs (separate yolks and whites)
  • 2 tbsp Butter
  • 3 Green Onion (separate whites and greens)
  • 1.5 tbsp Garlic (minced)
  • 2.5 tbsp Soy Sauce

Instructions

  1. Cut steak into bite-size cubes and marinate the steak with soy sauce, oyster sauce, black pepper, baking soda, and baking powder. Set it aside while you prep the rest of the ingredients.
  2. Add the egg yolk to cold-cooked day-old rice and mix well to ensure every grain of rice is coated in the egg yolk.
  3. In a pan, drizzle in oil and turn the heat to medium-high. Once the oil is hot, add in the beef.
  4. Let it set for around 30 seconds before pan-frying for 3-4 minutes or until all sides of the steak are brown. You can add additional cooking time depending on how you like your steak! Remove and set aside.
  5. In the same pan, add the white parts of the green onion and garlic. Saute for 30 seconds.
  6. Push everything to the side, and add beaten egg whites. Let the egg whites sit for 20 seconds before scrambling them.
  7. Next, add the rice and soy sauce. Saute on high heat for 2-3 minutes.
  8. Finally, add butter, the rest of the green onion, steak, and saute on high heat for 1-2 minutes.
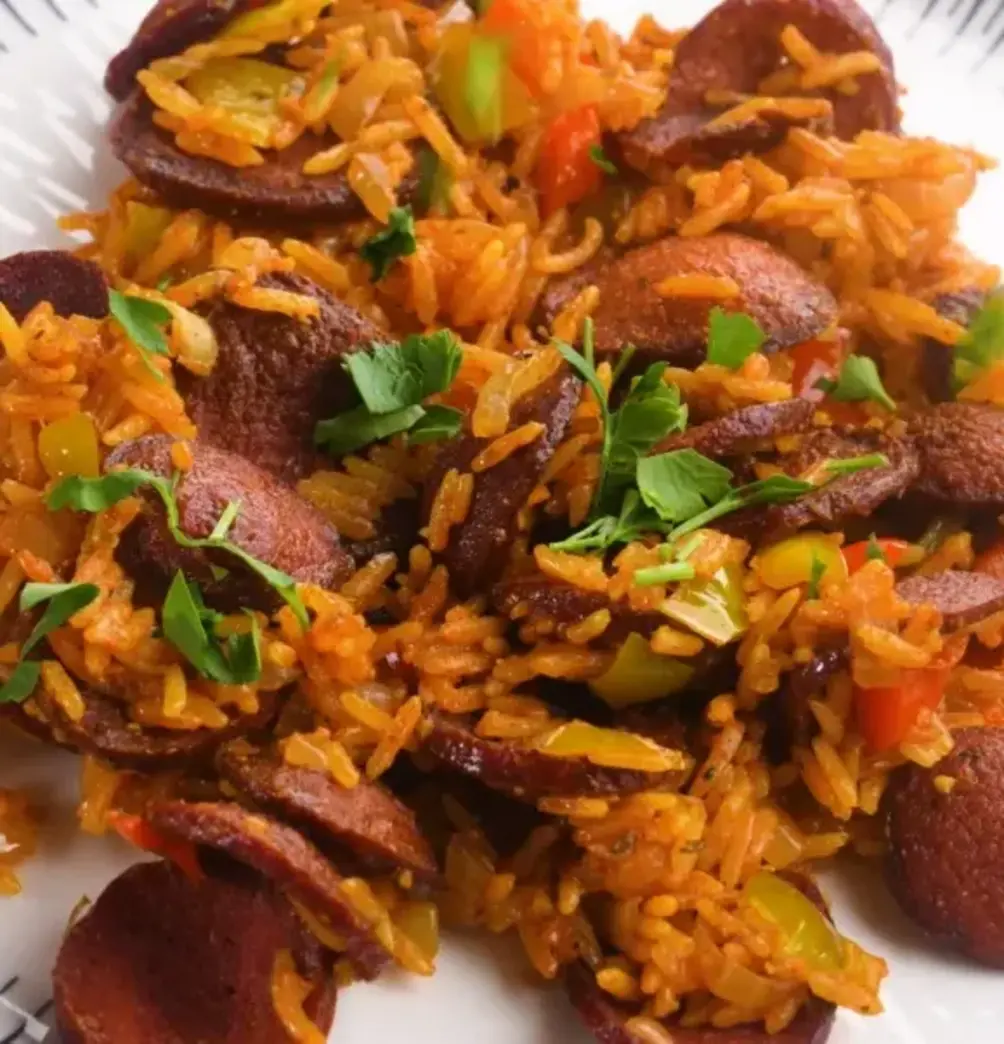
Cajun Sausage and Rice Skillet (One-Pan Dinner in 30 minutes!)

The Ultimate 30-Minute Cajun Sausage and Rice Skillet: Your New Weeknight Hero

Craving the bold, smoky flavors of Louisiana but short on time? This Cajun Sausage and Rice Skillet is your one-pan ticket to a deeply satisfying dinner that comes together in just 30 minutes. It’s the perfect fusion of convenience and big flavor, making it an unbeatable solution for busy weeknights.

Prep Time Cook Time Total Time Servings Difficulty
10 minutes 20 minutes 30 minutes 4 people Easy

Why This Skillet Dinner is a Game-Changer

Let’s be honest: weeknight cooking can feel like a chore. The allure of takeout is strong when you’re tired, the fridge seems empty, and the clock is ticking. That’s where this recipe shines. It transforms a handful of simple, affordable ingredients—smoked sausage, rice, bell peppers, and a robust Cajun seasoning—into a complete, comforting meal using just one pan. The magic lies in the technique: we brown the sausage to develop fond (those delicious browned bits at the bottom of the pan), sauté the vegetables in the rendered fat for maximum flavor, and then simmer the rice right in the same skillet, allowing it to soak up every last drop of that savory, spicy goodness. The result? Minimal cleanup and a dinner that tastes like you spent hours in the kitchen. This isn’t just a recipe; it’s a reliable strategy for winning weeknights.

Why This is the Best Cajun Sausage and Rice Skillet Recipe

You might find other one-pan rice recipes, but this one is meticulously crafted for foolproof success and layered flavor. First, we insist on rinsing the rice. This crucial step removes excess surface starch, preventing a gummy, sticky final product and ensuring each grain is distinct and perfectly cooked. Second, we build the flavor in stages. Browning the sausage first isn’t just about cooking it through; it’s about creating a flavor base. The fond left behind is liquid gold for your sauce. Third, our seasoning balance is key. Using a full two tablespoons of Cajun seasoning might seem bold, but when distributed through the rice and broth, it creates a harmonious heat that’s flavorful, not overwhelming. Finally, the 20-minute simmer is hands-off but essential, allowing the rice to become tender and fully absorb the spiced broth. This attention to detail is what separates a good skillet dinner from a great one you’ll make on repeat.

💡 The Kitchen Team’s Pro Tip: For an even deeper flavor, use a homemade Cajun seasoning blend. Combine 2 tsp paprika, 1 tsp each of garlic powder, onion powder, and dried oregano, ½ tsp each of cayenne pepper, black pepper, and white pepper, and ¼ tsp dried thyme. It’s fresher and lets you control the salt and heat level perfectly.

Ingredients & Simple Swaps

This recipe’s beauty is in its simplicity. Here’s what you’ll need, along with flexible substitutions to make it work with what you have on hand.

Ingredient Quantity Notes & Possible Substitutes
Smoked Sausage (Andouille or Kielbasa) 12 oz Andouille is traditional for authentic Cajun flavor. Kielbasa is a great milder option. For a lighter version, use smoked chicken or turkey sausage.
Long-Grain White Rice 1 cup Rinsed. Do not skip rinsing! You can substitute with an equal amount of long-grain brown rice, but increase the broth by ¼ cup and cook time by 15-20 minutes.
Bell Peppers (red & green) 1 of each, diced Any color bell pepper works. A mix adds visual appeal and slight flavor differences. For more heat, add a diced jalapeño.
Yellow or White Onion 1 medium, diced The aromatic base. Shallots or a sweet onion like Vidalia are fine substitutes.
Garlic 3 cloves, minced Fresh is best. In a pinch, use ¾ tsp garlic powder added with the Cajun seasoning.
Chicken Broth 1 ½ cups Use low-sodium if your Cajun seasoning is salty. Vegetable broth works for a pescatarian version.
Cajun Seasoning 2 tbsp Store-bought (like Tony Chachere’s or Slap Ya Mama) or homemade (see Pro Tip above).
Olive Oil 1 tbsp For sautéing. Any neutral cooking oil like avocado, canola, or vegetable oil will work.
Salt & Black Pepper To taste Season at the end, especially if using a pre-seasoned broth or salty sausage.
For Garnish/Serving Fresh parsley, sliced green onions, and hot sauce (like Crystal or Tabasco) are highly recommended.

Step-by-Step Instructions for Perfect Results

Follow these simple steps for a flawless one-pan meal every single time.

Step 1: Prep All Ingredients

Slice the smoked sausage into ½-inch rounds. Dice the bell peppers and onion. Mince the garlic. Place the rice in a fine-mesh strainer and rinse under cold running water for 1-2 minutes, until the water runs clear. This step is non-negotiable for perfect, non-sticky rice. Have your chicken broth and Cajun seasoning measured and ready to go. This “mise en place” (everything in its place) makes the 20-minute cook time seamless.

Step 2: Brown the Sausage

Heat 1 tablespoon of olive oil in a large, deep skillet or Dutch oven over medium heat. Add the sliced sausage in a single layer. Cook for 5-7 minutes, stirring occasionally, until the pieces are beautifully browned and crispy on the edges. Using a slotted spoon, transfer the sausage to a clean plate, leaving the flavorful oil and fond in the pan.

💡 The Kitchen Team’s Pro Tip: Don’t crowd the pan when browning the sausage. If necessary, brown it in two batches. Crowding steams the meat instead of searing it, and you’ll miss out on those crucial caramelized bits.

Step 3: Sauté the Aromatics

In the same skillet with the sausage drippings, add the diced onion and bell peppers. Sauté for 3-4 minutes, stirring frequently, until they begin to soften and the onion turns translucent. Add the minced garlic and cook for an additional 30-60 seconds, just until fragrant. Be careful not to burn the garlic.

Step 4: Toast the Rice and Season

Add the rinsed and drained rice to the skillet. Stir constantly for about 1 minute, coating each grain in the oil and toasting it slightly. This adds a subtle nutty flavor. Now, sprinkle the 2 tablespoons of Cajun seasoning over the rice and vegetable mixture. Stir for another 30 seconds to toast the spices, unlocking their full aromatic potential.

Step 5: Simmer to Perfection

Pour in the 1 ½ cups of chicken broth. Use a wooden spoon to gently scrape up any browned bits (fond) from the bottom of the pan—this is pure flavor! Bring the liquid to a lively simmer. Once simmering, reduce the heat to low. Cover the skillet tightly with a lid. Let it cook, undisturbed, for 18-20 minutes. Do not lift the lid! This lets the steam properly cook the rice.

Step 6: Fluff and Finish

After 20 minutes, remove the skillet from the heat. Keep it covered and let it rest for 5 minutes. This final rest allows the rice to finish steaming and firm up slightly. Then, remove the lid. Add the browned sausage back into the skillet. Use a fork to gently fluff the rice and combine everything. Taste and adjust seasoning with salt and pepper if needed.

Step 7: Garnish and Serve

Transfer the hearty skillet mixture to serving bowls or plates. Garnish generously with freshly chopped parsley or sliced green onions for a pop of color and freshness. Serve immediately with your favorite hot sauce on the side for those who want an extra kick.

Serving Suggestions: From Simple to Spectacular

This skillet is a complete meal on its own, but it also plays wonderfully with simple sides. For a light contrast, serve it with a simple green salad dressed with a bright lemon vinaigrette or a cooling cucumber and tomato salad. If you’re feeding a crowd or want to stretch the meal, a side of cornbread, buttermilk biscuits, or garlic bread is perfect for soaking up any extra flavor. For a low-carb option, spoon the sausage and vegetable mixture over cauliflower rice (cook it separately). And don’t forget the beverages! A cold beer, a glass of iced tea, or a crisp white wine like Sauvignon Blanc balances the spices beautifully.

Storage, Reheating, and Meal Prep Tips

This dish is a meal-prep superstar. Let it cool completely, then store it in an airtight container in the refrigerator for up to 4 days. To reheat, the best method is on the stovetop. Add a splash of broth or water to a skillet over medium-low heat, add the rice mixture, and stir until heated through. This prevents dryness. You can also reheat individual portions in the microwave, covered, for 1-2 minutes, stirring halfway. Can you freeze it? Yes, but with a caveat. The texture of the rice can become slightly grainy upon thawing. For best freezing results, spread the cooled mixture on a baking sheet to flash-freeze, then transfer to a freezer bag for up to 2 months. Thaw overnight in the fridge before reheating.

Creative Variations to Keep It Exciting

Once you’ve mastered the base recipe, the customization possibilities are endless!

  • Jambalaya-Style: Add ½ lb of peeled raw shrimp or diced chicken breast in the last 5 minutes of cooking (ensure chicken is cooked through).
  • Cheesy Cajun Skillet: After fluffing, stir in 1 cup of shredded pepper jack or cheddar cheese until melted.
  • Creole Version: Add a 14.5 oz can of diced tomatoes (undrained) with the broth for a tangier, Creole-inspired dish.
  • Spicy “Dirty” Rice: Add ½ lb of ground pork or turkey when browning the sausage, and include diced celery with the peppers and onion (the “Holy Trinity” of Cajun cooking).
  • Vegetarian/Vegan: Omit the sausage. Use a plant-based smoked sausage substitute or a can of drained and rinsed red kidney beans. Use vegetable broth.

Your Top Cajun Skillet FAQs Answered

Can I use instant or minute rice?

We don’t recommend it for this recipe. The cooking method and liquid ratio are designed for traditional long-grain rice. Instant rice would become mushy. If you must, follow the package instructions for liquid and cook time separately, then combine at the end, but you’ll lose the one-pan simplicity.

My rice is still hard after 20 minutes. What happened?

This usually means the heat was too low, the lid wasn’t tight (letting steam escape), or you lifted the lid during cooking. Ensure you have a steady, low simmer before covering. If it’s still undercooked, add 2-3 tablespoons of hot broth, cover, and cook for another 5 minutes on low.

Is it really a 30-minute meal?

Absolutely! With 10 minutes of active prep and 20 minutes of mostly hands-off simmering, you’ll have dinner on the table in half an hour. The key is doing your prep (chopping, rinsing) before you start cooking.

Can I make this less spicy for kids?

Yes! Use a mild smoked sausage like kielbasa and reduce the Cajun seasoning to 1 tablespoon. You can also use a “salt-free” Cajun blend, which is often less spicy, and add salt separately. Serve hot sauce on the side for adults to add their own heat.

What’s the difference between Cajun and Creole seasoning?

Great question! Cajun seasoning is typically a blend of peppers, garlic, onion, and herbs without tomatoes. Creole seasoning often includes paprika and dried herbs but can also contain tomato powder or be used in tomato-based dishes. For this recipe, a classic Cajun blend is ideal.

Do I have to use a skillet? Can I use a rice cooker?

The skillet is essential for developing the fond and building flavor in layers. A rice cooker won’t achieve the same result. However, you can adapt it: brown sausage and sauté veggies in a pan, then transfer everything to the rice cooker with the broth and cook on the white rice setting.

Can I double this recipe?

Yes, but you’ll need a very large skillet or Dutch oven (at least 12 inches) to ensure everything cooks evenly. Double all ingredients except the oil—you may only need 1.5 tbsp. The cook time should remain roughly the same.

What can I use instead of bell peppers?

If you’re not a fan of bell peppers, try diced poblano peppers for a milder flavor, or use a combination of diced carrots and celery for a different vegetable profile.

We hope this Cajun Sausage and Rice Skillet becomes a trusted favorite in your home! If you loved this recipe, please share it with friends and family.

Love This Recipe? Save It For Later!

Pin the image below to your Dinner Ideas or Easy Weeknight Meals board on Pinterest to always have this 30-minute lifesaver handy.

Follow us on Pinterest @cookingwithemy for more delicious and easy recipes!

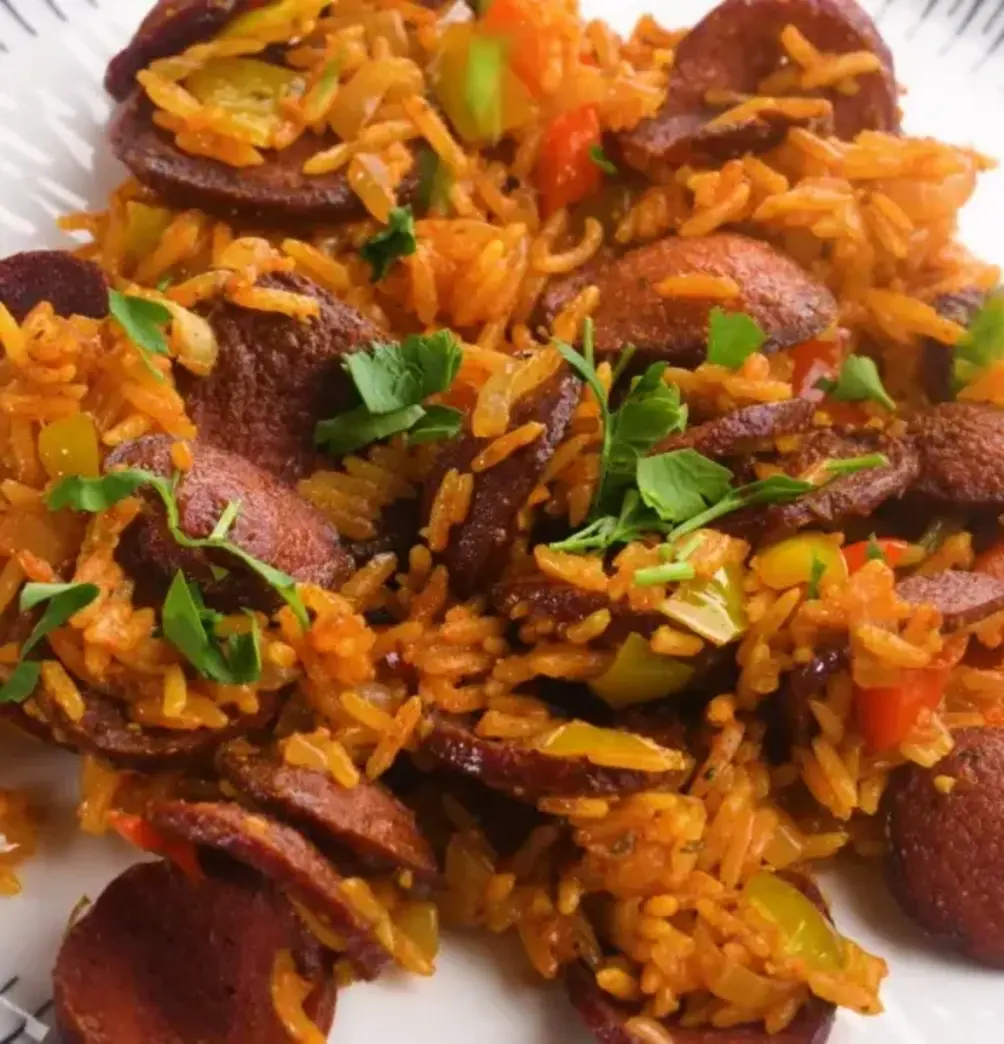
[Image: A vibrant, overhead photo of the finished Cajun Sausage and Rice Skillet in a cast-iron skillet, garnished with green onions, with a piece of cornbread on the side.]

Pin this idea!

clock clock iconcutlery cutlery iconflag flag iconfolder folder iconinstagram instagram iconpinterest pinterest iconfacebook facebook iconprint print iconsquares squares iconheart heart iconheart solid heart solid icon

Cajun Sausage and Rice Skillet


  • Author:
    Chef Emy

Description

This Cajun Sausage and Rice Skillet is a one-pan wonder that’s as easy to make as it is full of bold, smoky flavors.With just a few ingredients, including smoked sausage, rice, bell peppers, and Cajun seasoning, you can have a satisfying meal on the table in under 30 minutes.


Ingredients


Scale
  • 12 oz Smoked Sausage such as Andouille or Kielbasa (sliced into ½-inch rounds)
  • 1 cup Rice (long-grain white rice, rinsed)
  • 1 Bell Pepper (red, diced)
  • 1 Bell Pepper (green, diced)
  • 1 medium Onion (yellow or white, diced)
  • 3 cloves Garlic (minced)
  • 1 ½ cups Chicken Broth
  • 2 tbsp Cajun Seasoning (store-bought or homemade)
  • 1 tbsp Olive Oil
  • Salt and Pepper (to taste)
  • Fresh Parsley (optional, for garnish)
  • Green Onions (optional, for garnish)
  • Hot Sauce (optional, for serving)

Instructions

  1. Slice the sausage into ½-inch rounds.
  2. Dice the bell peppers and onion, and mince the garlic.
  3. Rinse the rice under cold water until the water runs clear.
  4. Heat 1 tablespoon of olive oil in a large skillet over medium heat.
  5. Add the sliced sausage and cook for 5-7 minutes until browned and crispy on the edges. Remove the sausage from the skillet and set aside.
  6. In the same skillet, add the diced onion and bell peppers. Sauté for about 3 minutes, until softened.
  7. Add the minced garlic and cook for an additional minute until fragrant.
  8. Add the rinsed rice to the skillet and stir to combine with the vegetables and oil. Toast the rice for about 2 minutes, stirring occasionally, until it starts to smell fragrant.
  9. Pour in the chicken broth and sprinkle in the Cajun seasoning, stirring to combine. Bring to a boil.
  10. Once boiling, reduce the heat to low, cover, and simmer for 15-20 minutes, or until the rice is tender and the liquid is absorbed.
  11. Once the rice is cooked, add the sausage back to the skillet. Stir everything together to combine, and cook for an additional 3-5 minutes to allow the flavors to meld.
  12. Serve hot, garnished with chopped parsley, green onions, and a drizzle of hot sauce if desired.


Cajun Sausage and Rice Skillet (One-Pan Dinner in 30 minutes!)

The Ultimate 30-Minute Cajun Sausage and Rice Skillet: Your New One-Pan Hero

Craving the bold, smoky flavors of Louisiana but short on time and energy? This Cajun Sausage and Rice Skillet is your answer. It’s a complete, flavor-packed one-pan dinner that delivers maximum satisfaction with minimal cleanup, all in under 30 minutes. Perfect for busy weeknights, lazy weekends, or anytime you need a reliable, crowd-pleasing meal.

30 min
Total Time
10 min
Prep Time
20 min
Cook Time
4-6
Servings
Easy
Difficulty

Why This Skillet is a Weeknight Game-Changer

Let’s be honest: after a long day, the last thing you want is a sink full of dishes and a complicated recipe. That’s where this one-pan wonder shines. It harnesses the holy trinity of Cajun cooking—onions, bell peppers, and celery (in spirit!)—and combines it with smoky sausage and perfectly cooked rice, all infused with a homemade Cajun seasoning blend that’s far superior to anything from a jar. The result? A deeply flavorful, hearty, and balanced meal that feels indulgent but is deceptively simple to make. It’s the kind of recipe that becomes a permanent fixture in your dinner rotation because it works every single time.

Why This is The Best Cajun Sausage & Rice Recipe

You might find other skillet recipes online, but this one is meticulously crafted for foolproof success and layered flavor. First, we brown the sausage properly to render its flavorful fats, which then become the cooking base for our vegetables, adding a deep, meaty essence. We rinse the rice to remove excess starch, ensuring grains that are separate and not gummy. The liquid ratio is precisely tested—using broth instead of water builds a richer foundation. Finally, the “dump and go” method is avoided; we build flavors in stages. Sautéing the aromatics and toasting the rice with the seasoning before adding liquid unlocks their full potential, creating a dish where every bite is infused with bold, smoky, and slightly spicy Cajun character.

💡 The Kitchen Team’s Pro Tip: For an even deeper flavor, take an extra 2 minutes to get a good sear on your sausage slices. Don’t crowd the pan—cook in batches if needed. Those crispy, caramelized edges are little pockets of concentrated flavor that will elevate the entire dish.

Ingredients & Smart Swaps

This recipe’s beauty lies in its simplicity and flexibility. Here’s what you’ll need, along with our tested recommendations for substitutions.

Ingredient Quantity Notes & Substitutions
Smoked Sausage (Andouille or Kielbasa) 12 oz The star. Andouille is traditional, but any smoked sausage works. For a lighter option, use chicken or turkey smoked sausage.
Long-Grain White Rice 1 cup Rinsed. Do not skip rinsing. For brown rice, add ½ cup extra broth and 10-15 minutes cook time.
Bell Peppers (Red & Green) 1 of each, diced Use any color combo. Yellow or orange peppers add sweetness.
Yellow Onion 1 medium, diced White onion or a sweet Vidalia onion are great alternatives.
Garlic 3 cloves, minced Fresh is best! ¾ tsp of garlic powder can be used in a pinch.
Chicken Broth 1 ½ cups Vegetable broth works for a pescatarian version. Use low-sodium to control salt.
Cajun Seasoning 2 tbsp Store-bought is fine, but our homemade blend (see FAQ) is highly recommended for balanced heat.
Olive Oil 1 tbsp Any neutral cooking oil like avocado or canola oil.
Salt & Black Pepper To taste Season in layers. Taste before adding salt at the end, as broth and sausage add salt.
Garnishes (Parsley, Green Onions, Hot Sauce) Optional Highly recommended for freshness and a flavor boost!

Step-by-Step Instructions

Follow these simple steps for a perfect skillet every time. Remember, the key to great flavor is building it in layers.

Step 1: Prep Your Ingredients

Slice the smoked sausage into ½-inch rounds. Dice the bell peppers and onion. Mince the garlic. Place the rice in a fine-mesh strainer and rinse under cold running water for 1-2 minutes, until the water runs clear. This removes surface starch and prevents clumping. Have your broth and seasoning ready.

💡 The Kitchen Team’s Pro Tip: This is a “mise en place” (everything in its place) recipe. Having all your ingredients prepped and measured before you turn on the heat makes the 20-minute cook time stress-free and seamless.

Step 2: Brown the Sausage

Heat the olive oil in a large, deep skillet or Dutch oven over medium-high heat. Add the sausage slices in a single layer. Cook for 5-7 minutes, turning occasionally, until beautifully browned and crispy on the edges. Using a slotted spoon, transfer the sausage to a clean plate, leaving the flavorful rendered fat in the pan.

Step 3: Sauté the Vegetables

Reduce the heat to medium. Add the diced onion and bell peppers to the hot fat in the skillet. Sauté for 3-4 minutes, stirring occasionally, until they begin to soften and the onions turn translucent.

Step 4: Add Aromatics & Rice

Add the minced garlic and cook for 1 minute until incredibly fragrant. Then, add the rinsed and drained rice and the Cajun seasoning to the skillet. Stir constantly for 1-2 minutes. This toasts the rice and blooms the spices in the oil, creating a deeper, more complex flavor base.

Step 5: Simmer to Perfection

Pour in the chicken broth and give everything a good stir, scraping up any browned bits from the bottom of the pan (that’s flavor!). Bring the mixture to a boil. Once boiling, reduce the heat to low, cover the skillet tightly with a lid, and simmer for 15-18 minutes. Do not lift the lid! This allows the rice to steam properly.

Step 6: Finish and Fluff

After 15 minutes, check if the rice is tender and the liquid is absorbed. If it’s still a bit wet, cover and cook for 2-3 more minutes. Turn off the heat. Add the browned sausage back into the skillet. Gently fluff and fold everything together with a fork. Let it sit, covered, for 5 minutes off the heat to allow the flavors to meld and the rice to firm up slightly.

Step 7: Garnish and Serve

Season with a final pinch of salt and pepper if needed. Garnish generously with chopped fresh parsley or green onions. Serve immediately with your favorite hot sauce on the side for those who want an extra kick.

How to Serve It Like a Pro

This skillet is a complete meal on its own, but with a few simple pairings, you can turn it into a feast. For a classic Southern spread, serve it with a side of buttery cornbread or flaky biscuits to soak up any extra flavor. A simple, crisp green salad with a tangy vinaigrette cuts through the richness beautifully. For a vegetable boost, add a side of sautéed collard greens or blackened green beans. It’s also fantastic stuffed into warmed flour tortillas for Cajun-inspired burritos or wrapped in lettuce leaves for a low-carb option.

Storage, Reheating & Make-Ahead Tips

Storage: Allow the skillet to cool completely. Transfer to an airtight container and refrigerate for up to 4 days. You can also freeze it for up to 3 months. Thaw overnight in the fridge before reheating.

Reheating for Best Results: The microwave is quick but can dry out the rice. For best results, reheat in a skillet on the stovetop over medium-low heat. Add a splash of broth or water to reintroduce moisture, cover, and heat through, stirring occasionally. This method restores the texture perfectly.

Make-Ahead Magic: You can prep this dish through Step 1 (chopping veggies, slicing sausage, rinsing rice) up to 2 days in advance. Store components separately in the fridge. When ready to cook, simply proceed from Step 2—you’ll have dinner ready in 20 minutes flat.

Creative Variations to Keep It Exciting

  • Jambalaya-Style: Add ½ lb of peeled raw shrimp or diced chicken breast in the last 5 minutes of cooking.
  • Cheesy Cajun Skillet: After fluffing, stir in 1 cup of shredded pepper jack or cheddar cheese until melted.
  • Creole Version: Add a 14.5 oz can of diced tomatoes (undrained) with the broth for a tangier, Creole profile.
  • Spicy Kick: Add 1-2 diced jalapeños (seeds removed for less heat) with the bell peppers.
  • Vegetarian/Vegan: Omit sausage, use vegetable broth, and add a 15 oz can of drained and rinsed red kidney beans or black-eyed peas when you add the broth.

Your Top Questions, Answered (FAQ)

1. Can I use instant or minute rice?

We don’t recommend it. The texture and flavor won’t be the same. The recipe relies on the 15-18 minute simmer for the rice to absorb all the seasoned broth properly. Instant rice will become mushy.

2. My rice is still hard/uncooked after 18 minutes. What happened?

This usually means the heat was too high, causing the liquid to evaporate before the rice could cook, or the lid wasn’t tight. Always cook on *low* heat with a *tight-fitting lid*. If it’s undercooked, add ¼ cup hot broth, cover, and cook for another 5 minutes on low.

3. How can I make my own Cajun seasoning?

Absolutely! Combine: 2 tsp paprika, 1 tsp each garlic powder, onion powder, and dried oregano, ½ tsp each cayenne pepper (adjust to heat preference), black pepper, and white pepper, and ¼ tsp dried thyme. This makes about 1.5 tbsp—double it for this recipe.

4. Is this dish spicy?

It has a warm, smoky flavor with a mild to medium kick, depending on your Cajun seasoning. For less heat, use a mild seasoning blend or reduce the amount to 1 tbsp. For more heat, add extra cayenne or serve with hot sauce.

5. Can I cook this in a rice cooker?

Yes, with a modification! Sauté the sausage, veggies, and garlic in a pan first. Transfer everything (including the toasted rice, seasoning, and broth) to the rice cooker pot. Cook on the white rice setting. Stir in the sausage at the end.

6. What’s the best type of skillet to use?

A 12-inch deep skillet or a 3.5 to 5-quart Dutch oven is ideal. It needs a tight-fitting lid and enough surface area to brown the sausage properly without steaming.

7. Can I double this recipe?

Yes, but you’ll need a very large skillet or Dutch oven (at least 5 quarts). Double all ingredients. You may need to add 2-3 extra minutes to the simmering time for the rice to cook through.

8. What can I use instead of bell peppers?

Try diced celery (for the true “holy trinity”), poblano peppers for a milder flavor, or chopped zucchini. The recipe is very forgiving with vegetables.

Love This Recipe? Save It for Later!

Pin this image to your Dinner Ideas or One-Pan Meals board on Pinterest to keep this easy recipe handy for your next busy night!

Follow us on Pinterest @cookingwithemy for more delicious, time-saving recipes.

(Pinterest rich pin image would be automatically generated here from the post’s featured image.)

Recipe developed and tested by The Kitchen Team at cookingwithemy.com. We love hearing from you! If you make this Cajun Sausage and Rice Skillet, tag us on social media or leave a comment on the blog post.

clock clock iconcutlery cutlery iconflag flag iconfolder folder iconinstagram instagram iconpinterest pinterest iconfacebook facebook iconprint print iconsquares squares iconheart heart iconheart solid heart solid icon

Cajun Sausage and Rice Skillet


  • Author:
    Chef Emy

Description

This Cajun Sausage and Rice Skillet is a one-pan wonder that’s as easy to make as it is full of bold, smoky flavors.With just a few ingredients, including smoked sausage, rice, bell peppers, and Cajun seasoning, you can have a satisfying meal on the table in under 30 minutes.


Ingredients


Scale
  • 12 oz Smoked Sausage such as Andouille or Kielbasa (sliced into ½-inch rounds)
  • 1 cup Rice (long-grain white rice, rinsed)
  • 1 Bell Pepper (red, diced)
  • 1 Bell Pepper (green, diced)
  • 1 medium Onion (yellow or white, diced)
  • 3 cloves Garlic (minced)
  • 1 ½ cups Chicken Broth
  • 2 tbsp Cajun Seasoning (store-bought or homemade)
  • 1 tbsp Olive Oil
  • Salt and Pepper (to taste)
  • Fresh Parsley (optional, for garnish)
  • Green Onions (optional, for garnish)
  • Hot Sauce (optional, for serving)

Instructions

  1. Slice the sausage into ½-inch rounds.
  2. Dice the bell peppers and onion, and mince the garlic.
  3. Rinse the rice under cold water until the water runs clear.
  4. Heat 1 tablespoon of olive oil in a large skillet over medium heat.
  5. Add the sliced sausage and cook for 5-7 minutes until browned and crispy on the edges. Remove the sausage from the skillet and set aside.
  6. In the same skillet, add the diced onion and bell peppers. Sauté for about 3 minutes, until softened.
  7. Add the minced garlic and cook for an additional minute until fragrant.
  8. Add the rinsed rice to the skillet and stir to combine with the vegetables and oil. Toast the rice for about 2 minutes, stirring occasionally, until it starts to smell fragrant.
  9. Pour in the chicken broth and sprinkle in the Cajun seasoning, stirring to combine. Bring to a boil.
  10. Once boiling, reduce the heat to low, cover, and simmer for 15-20 minutes, or until the rice is tender and the liquid is absorbed.
  11. Once the rice is cooked, add the sausage back to the skillet. Stir everything together to combine, and cook for an additional 3-5 minutes to allow the flavors to meld.
  12. Serve hot, garnished with chopped parsley, green onions, and a drizzle of hot sauce if desired.


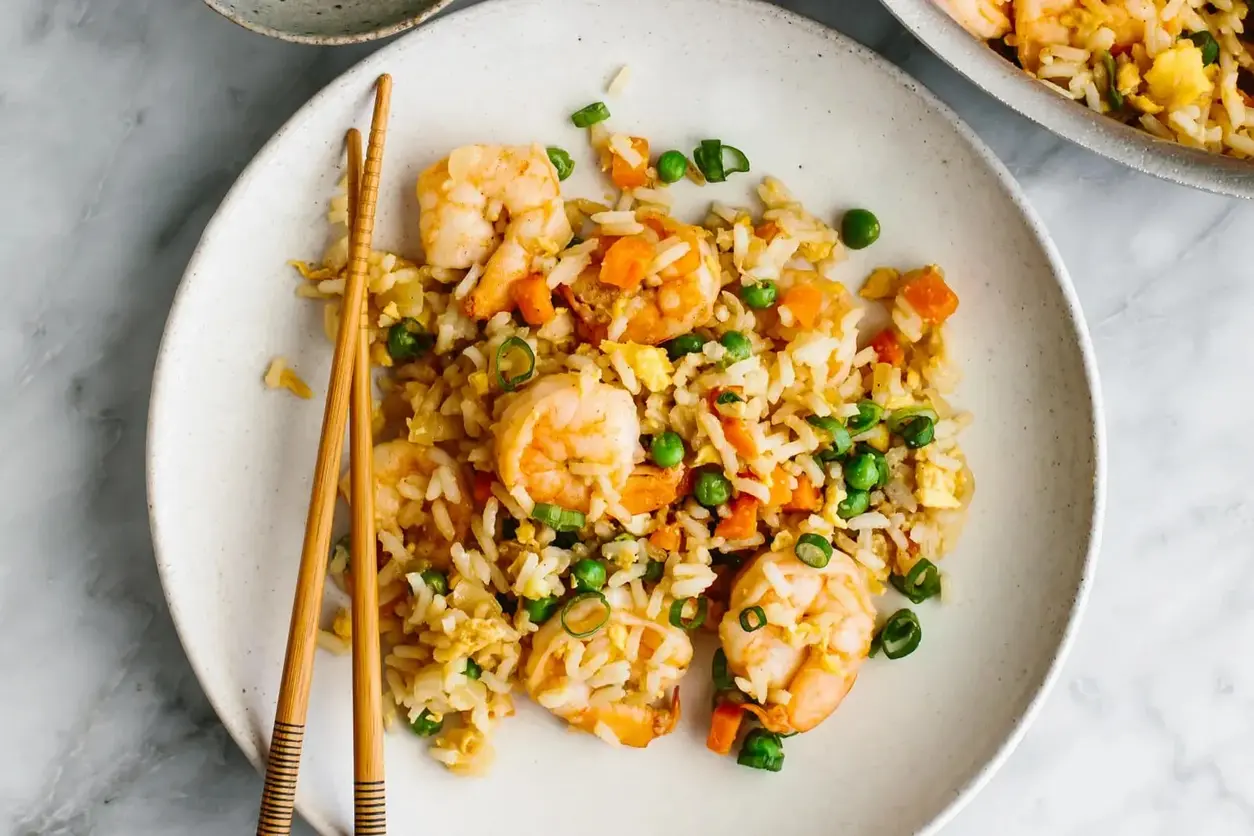
Easy Shrimp Fried Rice


Easy Shrimp Fried Rice: Your 20-Minute Ticket to Takeout Bliss at Home

Prep Time Cook Time Total Time Servings Difficulty
10 minutes 10 minutes 20 minutes 4 servings Easy

Craving the savory, satisfying comfort of Chinese takeout but want it faster, fresher, and healthier? You’ve landed in the right kitchen. This Easy Shrimp Fried Rice is our absolute go-to weeknight hero, delivering incredible restaurant-quality flavor in just 20 minutes from start to finish. Forget waiting for delivery or dealing with soggy, greasy containers. This recipe captures the essential “wok hei” – the coveted breath of the wok – with simple techniques you can master in your own kitchen.

We’re not just tossing shrimp and rice together. This is a methodical, flavor-layering process that ensures every bite is packed with plump, juicy shrimp, fluffy scrambled eggs, crisp-tender vegetables, and rice that’s perfectly seasoned and just slightly chewy. It’s a complete, balanced meal in one pan, making cleanup as easy as the cooking process. Whether you’re a stir-fry novice or a seasoned home cook, this recipe will become a trusted staple in your dinner rotation.

Why This Is The Best Shrimp Fried Rice Recipe

Not all fried rice recipes are created equal. Many fall victim to common pitfalls: mushy rice, rubbery shrimp, or a bland, one-note flavor. Our recipe is engineered for success, focusing on three non-negotiable principles that guarantee takeout-level results every single time.

First, we treat the shrimp with respect. A quick sear over high heat locks in their natural sweetness and gives them a beautiful, light crust without overcooking. They’re removed from the pan early so they can be added back at the end, remaining tender and juicy.

Second, we understand the science of rice. The single most important ingredient is day-old, cold rice. Its dried-out surface fries beautifully, resulting in distinct, separate grains that soak up sauce instead of clumping into a gummy mess. Freshly cooked rice steams and becomes soggy—a disaster we help you avoid.

💡 The Kitchen Team’s Pro Tip: No day-old rice? Spread freshly cooked rice on a baking sheet and pop it in the freezer for 15-20 minutes. This rapidly chills and dries the surface, mimicking the texture of leftover rice perfectly.

Third, we build flavors in layers. We don’t just dump everything in at once. By cooking the aromatics (onion, garlic, ginger) first, we create a fragrant foundation. The vegetables are added next to bring color and texture, followed by the eggs for richness. Finally, the rice and sauces are incorporated, allowing each component to shine while creating a harmonious final dish.

Ingredients for Perfect Shrimp Fried Rice

This recipe uses accessible, pantry-friendly ingredients that come together to create something far greater than the sum of their parts. Here’s what you’ll need, along with our tested substitution guide.

Ingredient Quantity Notes & Substitutions
Large Shrimp 1 pound Peeled and deveined. For best results, use thawed frozen shrimp patted very dry. Chicken, tofu, or leftover pork make great substitutes.
Kosher Salt & White Pepper 1 tsp salt, ½ tsp pepper White pepper is traditional for its earthy heat. Black pepper works in a pinch.
Avocado Oil 3 tablespoons Its high smoke point is ideal for stir-frying. Canola, peanut, or vegetable oil are fine.
Aromatics ½ onion, 2 scallions, 2 garlic cloves, ½ tsp ginger The flavor base. Use shallots instead of onion, or ¼ tsp dried ginger if fresh isn’t available.
Frozen Peas & Carrots 1 ½ cups No need to thaw! Adds color and convenience. Use any frozen stir-fry veggie mix.
Large Eggs 3 Beaten. Adds protein and richness.
Cooked White Rice 4 cups CRUCIAL: Must be cold and day-old for best texture. Jasmine or long-grain rice preferred.
Tamari or Soy Sauce 3 tablespoons Tamari is gluten-free and slightly richer. Coconut aminos are a sweeter, soy-free alternative.
Toasted Sesame Oil 2 teaspoons Adds the finishing aromatic flavor. Do not substitute with regular sesame oil; the flavor is different.

Step-by-Step Instructions: How to Make Easy Shrimp Fried Rice

Follow these steps in order for flawless results. Have all your ingredients prepped and within arm’s reach of the stove—once you start cooking, it goes quickly!

Step 1: Season & Sear the Shrimp

In a medium bowl, toss the peeled and deveined shrimp with 1 teaspoon of kosher salt and ½ teaspoon of white pepper. Heat 2 tablespoons of avocado oil in a large wok or heavy-bottomed skillet over medium-high heat until it shimmers. Add the shrimp in a single layer and cook undisturbed for 1-2 minutes, until the bottoms turn pink and get a slight sear. Flip and cook for only another 30 seconds, until just opaque. Immediately transfer to a clean plate. They will continue to cook slightly from residual heat.

💡 The Kitchen Team’s Pro Tip: Don’t crowd the shrimp! Cook in two batches if your pan isn’t large enough. Crowding creates steam, which prevents proper searing and leads to boiled, rubbery shrimp.

Step 2: Sauté the Aromatics

In the same pan, you’ll have delicious shrimp-infused oil. Add the diced onion and the white parts of the sliced scallions. Stir-fry for about 1 minute until they begin to soften. Add the minced garlic and ginger and cook for just 30 more seconds until incredibly fragrant. Be careful not to burn the garlic.

Step 3: Cook the Vegetables & Eggs

Add the frozen peas and carrots directly to the pan (no thawing needed). Stir-fry for 1-2 minutes until they are heated through and any ice crystals have evaporated. Next, push the vegetable mixture to one side of the pan. Pour the beaten eggs into the empty space. Let them set for a few seconds, then gently scramble them with your spatula until they are softly set and pillowy.

Step 4: Bring It All Together

Now, add the cold, day-old rice to the pan. Use your spatula to break up any clumps. Pour the tamari (or soy sauce) and toasted sesame oil over the rice. Increase the heat to high and stir-fry vigorously for 2-3 minutes, ensuring the rice is evenly coated in the sauce and heated through. You should hear a slight sizzling sound—that’s the “wok hei” magic happening.

Step 5: Final Combine & Serve

Return the cooked shrimp (and any accumulated juices) to the pan. Add the green parts of the scallions. Toss everything together for one final minute, just until the shrimp are reheated. Taste and adjust seasoning with an extra splash of tamari if needed. Serve immediately while hot and sizzling.

How to Serve Your Shrimp Fried Rice

This fried rice is a complete meal on its own, but it also plays wonderfully with others. For a true takeout feast at home, consider pairing it with these simple sides:

  • Classic Egg Drop Soup: A light, brothy start to the meal.
  • Quick Steamed Broccoli: Drizzled with a little oyster sauce or more sesame oil.
  • Asian Cucumber Salad: A crisp, vinegar-based salad cuts the richness perfectly.
  • Spring Rolls or Dumplings: Store-bought, air-fried for ease, or homemade if you’re feeling ambitious.

Garnish each bowl with extra sliced scallions, a sprinkle of sesame seeds, or a drizzle of chili crisp or sriracha for heat.

Storage & Reheating Instructions

Leftovers store beautifully, making this an excellent meal prep option.

To Store: Allow the fried rice to cool completely, then transfer to an airtight container. Refrigerate for up to 3 days. We do not recommend freezing, as the texture of the shrimp and rice can become rubbery and mushy upon thawing.

To Reheat (The Right Way): The microwave is the enemy of good leftover fried rice, making it soggy. For best results, reheat in a wok or skillet over medium heat with a tiny splash of water or broth. Cover for a minute to steam, then uncover and stir-fry until hot and sizzling again. This restores the texture far better than a microwave ever could.

Delicious Variations to Try

Once you’ve mastered the basic formula, the wok is your canvas! Here are some of our favorite twists:

  • Pineapple Shrimp Fried Rice: Add 1 cup of fresh diced pineapple with the vegetables for a sweet and tangy Hawaiian-inspired version.
  • Spicy Kimchi Fried Rice: Substitute the shrimp with chopped kimchi and a bit of its juice. Add a tablespoon of gochujang (Korean chili paste) with the soy sauce.
  • Vegetarian “Shrimp” Fried Rice: Omit the shrimp. Use extra-firm cubed tofu (pressed and pan-fried) or a can of drained chickpeas for plant-based protein.
  • Pork & Shrimp Combo: Add ½ cup of diced Chinese char siu (barbecued pork) or ham when you add the shrimp back in.

Frequently Asked Questions (FAQ)

We’ve answered the most common questions from our community to ensure your fried rice success.

Can I use freshly cooked rice?

We strongly advise against it. Fresh rice contains too much moisture and will steam and clump in the pan, resulting in a mushy, gummy texture. Day-old, cold rice is non-negotiable for authentic fried rice. See our Pro Tip in the “Why Best” section for a quick fix if you don’t have leftovers.

What’s the best type of rice to use?

Long-grain varieties like Jasmine or Basmati are ideal because they have a lower starch content, which helps the grains stay separate. Medium-grain rice can work but may be slightly stickier. Avoid short-grain or sushi rice.

My fried rice is soggy. What went wrong?

Sogginess usually stems from one of three issues: 1) Using warm, fresh rice, 2) Overcrowding the pan, which steams instead of fries the ingredients, or 3) Adding too much sauce. Ensure your pan is very hot and you’re stir-frying, not steaming.

Can I make this gluten-free?

Absolutely! Simply use tamari (which is naturally gluten-free) or coconut aminos instead of traditional soy sauce. Double-check that your oyster sauce substitute (if using) is also gluten-free.

What can I use instead of a wok?

A large, heavy-bottomed skillet (like cast iron or stainless steel) is a perfect substitute. The key is having a pan with plenty of surface area to allow for quick evaporation and proper searing.

How do I get that “restaurant” smoky flavor?

That’s the elusive “wok hei.” You can approximate it by ensuring your pan is screaming hot before adding ingredients and by not moving the rice constantly. Let it sit for 20-30 seconds between stirs to develop a slight sear on the rice.

Can I add other vegetables?

Yes! Bell peppers, corn, broccoli florets, or snap peas are excellent additions. For harder veggies (like broccoli), blanch or steam them briefly before adding to ensure they cook through in the short stir-fry time.

Is white pepper really necessary?

While black pepper works, white pepper is traditional in many Asian cuisines for fried rice. It has a distinct, earthy, more direct heat that blends seamlessly without the visible black specks. It’s worth seeking out for an authentic flavor profile.

Save This Recipe for Later!

Pin the image below to your Dinner Ideas or Asian Recipes board on Pinterest so you always have this easy 20-minute meal handy.


Follow us on Pinterest @cookingwithemy for more quick and delicious recipes!

[PINTEREST-RICH-PIN-IMAGE: Easy Shrimp Fried Rice in a black wok, garnished with scallions]


clock clock iconcutlery cutlery iconflag flag iconfolder folder iconinstagram instagram iconpinterest pinterest iconfacebook facebook iconprint print iconsquares squares iconheart heart iconheart solid heart solid icon

Shrimp Fried Rice (Easy 20-Min Recipe)


  • Author:
    Chef Emy

Description

This shrimp fried rice highlights the best of Chinese takeout in a quick 20 minute recipe. Aka – it’s the best stir-fry recipe for dinner! Watch the video below to see how I make it in my kitchen.


Ingredients


Scale
  • 1 pound large shrimp (peeled and deveined)
  • 1 teaspoon kosher salt
  • ½ teaspoon ground white pepper
  • 3 tablespoons avocado oil
  • ½ small onion (diced)
  • 2 green scallions (thinly sliced (white and green parts separated))
  • 2 garlic cloves (minced)
  • ½ teaspoon minced ginger
  • 1 ½ cup frozen peas and carrots
  • 3 large eggs (beaten)
  • 4 cups cooked white rice
  • 3 tablespoons tamari soy sauce or coconut aminos
  • 2 teaspoons toasted sesame oil

Instructions

  1. Season the shrimp. In a medium bowl, season the shrimp with salt and pepper. Set aside.
  2. Sear the shrimp. Heat 2 tablespoons of avocado oil in a large wok or skillet over medium-high heat until shimmering. Add the shrimp in a single layer and cook for 1 to 2 minutes, then flip and cook for another 30 seconds, until just cooked through and opaque. Remove to a plate.
  3. Add the aromatics. Add the onion, white parts of the green onion, garlic, and ginger, and stir-fry for a minute, until fragrant.
  4. Cook the veggies. Add the frozen carrots and peas (no need to thaw), and stir-fry for 1 to 2 minutes until warmed through.
  5. Cook the eggs. Move the veggies to the side, then add the beaten eggs and quickly scramble them until they’re pillowy soft.
  6. Stir-fry the rice, seasoning, and shrimp. Add the rice, shrimp, soy sauce, and sesame oil, and stir-fry until the rice and shrimp are warmed through, about 2 minutes.
  7. Garnish with green onions. Stir in the green parts of the green onions before serving.


Copycat PF Chang’s Fried Rice Recipe

Better-Than-Takeout Copycat PF Chang’s Fried Rice Recipe (Ready in 30 Minutes!)

Prep Time
15 minutes
Cook Time
15 minutes
Total Time
30 minutes
Servings
4 people
Difficulty
Easy

Why This Copycat PF Chang’s Fried Rice Recipe Beats Takeout Every Time

There’s something magical about PF Chang’s fried rice. That perfect balance of savory, slightly sweet, and utterly satisfying flavor keeps us coming back for more. But what if you could recreate that iconic restaurant-quality dish in your own kitchen, in less time than it takes for delivery to arrive? With this meticulously tested copycat PF Chang’s fried rice recipe, you absolutely can.

As The Kitchen Team at CookingWithEmy.com, we’ve deconstructed this beloved menu item to its core. We’ve tested, tweaked, and perfected every component—from the specific soy sauce blend to the technique for achieving that signature “wok hei” (breath of the wok) flavor at home. The result is a foolproof, 30-minute recipe that delivers all the depth and excitement of the original, with the added benefits of being fresher, more affordable, and completely customizable to your taste.

This isn’t just another fried rice recipe. This is your ticket to unlocking one of America’s favorite Chinese-inspired dishes. Whether it’s a busy weeknight, a weekend feast, or you’re simply craving that PF Chang’s experience, this recipe is your answer. Let’s turn your kitchen into your new favorite Asian bistro.

What Makes PF Chang’s Fried Rice So Special? The Secret’s in the Sauce.

Many fried rice recipes are simple combinations of soy sauce, rice, and veggies. PF Chang’s version stands apart due to its complex, layered sauce. Our copycat PF Chang’s fried rice recipe zeroes in on that signature flavor profile, which comes from a carefully balanced blend of savory soy sauce, aromatic ginger and garlic, a hint of sharpness from ground mustard, and the deep, rich sweetness of molasses.

This combination creates a glossy, clingy sauce that coats every grain of rice and vegetable without being greasy or overly salty. Furthermore, the restaurant’s technique involves spreading the rice thinly in the hot pan to maximize contact with the surface, creating those delightful slightly crispy bits that offer an incredible textural contrast.

💡 The Kitchen Team’s Pro Tip: The single most important step for authentic flavor is to mix your sauce ingredients before adding them to the wok. This allows the molasses to fully integrate and the ginger and garlic to meld, creating a unified flavor bomb rather than separate, competing notes.

We also emphasize the use of day-old, chilled jasmine rice. Freshly cooked rice is too moist and sticky, leading to clumpy, mushy fried rice. Chilled rice has dried out slightly, resulting in separate, distinct grains that fry up perfectly. This one tip is a non-negotiable game-changer.

Copycat PF Chang’s Fried Rice Ingredients & Smart Substitutions

Gathering your mise en place (everything in its place) is key for a quick and smooth stir-fry process. Here’s everything you need for this iconic copycat PF Chang’s fried rice recipe.

Ingredient Quantity Notes & Substitutions
Jasmine Rice (uncooked) 1 cup Must be day-old and chilled. You can use white or brown jasmine. Long-grain white rice works in a pinch.
Chicken Broth (or water) 1 ¾ cups Broth adds more flavor. Use low-sodium if concerned about salt. Vegetable broth works for a vegetarian version.
Sesame Oil 3 teaspoons Use toasted sesame oil for maximum flavor. Do not substitute with plain oil.
Large Eggs 2 Scrambled directly in the wok for best integration.
Shoestring Carrots ⅓ cup Buy pre-cut or julienne a regular carrot. Frozen diced carrots can be used.
Frozen Peas ⅓ cup No need to thaw. You can use peas and carrots mix.
Green Onion (sliced) ¼ cup + more for garnish Separate white/light green parts (for cooking) from dark green tops (for garnish).
Fresh Bean Sprouts ⅓ cup Adds crunch. Can be omitted if unavailable.
Soy Sauce 3 tablespoons Use regular, not dark soy. Tamari is a great gluten-free alternative.
Ground Mustard ½ teaspoon The secret ingredient! Adds depth. In a pinch, a tiny dab of Dijon can work.
Minced Ginger ½ teaspoon Fresh is best. ¼ tsp ground ginger can substitute.
Minced Garlic 1 teaspoon Fresh is best. ¼ tsp garlic powder can substitute.
Molasses 2 teaspoons The key to the signature color and sweet note. Do not skip. Honey or brown sugar can sub in a 1:1 ratio.

How to Make Copycat PF Chang’s Fried Rice: Step-by-Step Guide

Follow these steps closely for flawless, restaurant-worthy fried rice every single time.

Step 1: Prepare the Rice (The Foundation)

If you don’t have day-old rice: Cook 1 cup of jasmine rice with 1 ¾ cups chicken broth according to package directions. Immediately spread the hot cooked rice in a thin layer on a baking sheet, cover loosely, and refrigerate for at least 2 hours (preferably overnight). This drying step is crucial.

Step 2: Create the Signature Sauce

In a small bowl, whisk together the 3 tablespoons of soy sauce, ½ teaspoon ground mustard, ½ teaspoon minced ginger, 1 teaspoon minced garlic, and 2 teaspoons of molasses. Whisk until the molasses is completely dissolved and the mixture is smooth. Set this flavor-packed sauce aside.

💡 The Kitchen Team’s Pro Tip: Taste your sauce now. It should be powerfully salty, sweet, and pungent. Don’t worry—it will mellow and distribute perfectly when tossed with all the rice and vegetables.

Step 3: Scramble the Eggs

Heat a large wok or heavy-bottomed skillet over medium-high heat. Add 1 teaspoon of the sesame oil. Once the oil is shimmering, crack the two eggs directly into the wok. Let them set for 10 seconds, then quickly scramble them with a spatula until just cooked through and in small curds. Remove the scrambled eggs to a clean plate and set aside.

Step 4: Stir-Fry the Vegetables

Add another 1 teaspoon of sesame oil to the hot wok. Immediately add the shoestring carrots, the white/light green parts of the green onions, frozen peas, and fresh bean sprouts. Stir-fry vigorously for 3-4 minutes until the vegetables are heated through and the carrots have softened slightly but still retain a crunch.

Step 5: Fry the Rice

Push the vegetables to the side of the wok. Add the final 1 teaspoon of sesame oil to the center. Add your chilled, day-old rice to this spot. Use your spatula to break up any clumps and stir-fry the rice by itself for about 1 minute to heat it through. Then, combine the rice with the vegetables.

Step 6: The Final Sear & Sauce Integration

Here’s the pro move: Spread the rice and vegetable mixture up around the sides of the hot wok, maximizing surface area. Let it cook undisturbed for 60-90 seconds. You should hear a gentle sizzle. This creates those coveted crispy bits. Return the scrambled eggs to the wok and toss everything together.

Give your pre-mixed sauce a final stir and pour it evenly over the rice. Immediately begin tossing and stir-frying continuously for 2-3 minutes, ensuring every grain is coated in that glossy, dark sauce. The rice should be piping hot and fragrant.

Step 7: Serve

Transfer your copycat PF Chang’s fried rice to a serving platter or bowls. Garnish generously with the reserved dark green parts of the sliced green onions. Serve immediately while hot and sizzling!

How to Serve Your Homemade PF Chang’s Fried Rice

This fried rice is a superstar side dish or a satisfying main course. To build a full PF Chang’s-inspired feast at home, pair it with:

  • As a Main Dish (Add Protein): Simply stir-fry ½ lb of diced chicken breast, shrimp, or thinly sliced beef in a bit of oil with salt and pepper before you start the eggs. Remove, then add back in with the eggs at the end.
  • Classic Pairings: Serve alongside our Copycat PF Chang’s Lettuce Wraps, a simple beef and broccoli, or sweet and sour chicken.
  • With Toppings: Offer extra soy sauce, chili crisp, or sriracha on the side for those who like extra heat. A sprinkle of toasted sesame seeds adds nice visual appeal.

Storage & Reheating Instructions

Storage: Allow leftover fried rice to cool completely. Transfer to an airtight container and refrigerate for up to 4 days.

Reheating (The Right Way): Microwaving leads to soggy rice. For best results, reheat in a wok or skillet over medium heat with a tiny splash of water or broth. Cover for a minute to steam, then uncover and stir-fry until hot and sizzling again. This restores the texture.

💡 The Kitchen Team’s Pro Tip: Fried rice freezes surprisingly well! Portion cooled rice into freezer bags, press out air, and freeze for up to 3 months. Reheat from frozen in a skillet with a little oil, breaking it up as it thaws.

Creative Variations on the Copycat PF Chang’s Fried Rice Recipe

Once you’ve mastered the base recipe, make it your own with these delicious twists:

  • Pork Fried Rice: Add ½ cup of diced Chinese char siu (barbecued pork) or cooked ham with the vegetables.
  • Vegetarian Delight: Use vegetable broth and add diced tofu (pressed and pan-fried until golden) or edamame beans.
  • Spicy Kick: Add 1-2 teaspoons of chili-garlic sauce or a diced fresh chili pepper to the sauce mixture.
  • Pineapple Fried Rice: Stir in ½ cup of small diced fresh pineapple at the very end for a sweet and tangy Hawaiian twist.
  • “Dirty” Fried Rice: Add 2 tablespoons of finely minced Chinese sausage (lap cheong) to the oil before scrambling the eggs for an incredibly rich flavor.

Frequently Asked Questions (FAQ)

Can I use freshly cooked rice for this copycat PF Chang’s fried rice recipe?

We strongly advise against it. Fresh rice is too moist and will result in a sticky, clumpy, and mushy fried rice. The chilled, dried-out grains of day-old rice are essential for achieving the perfect separate, slightly chewy texture.

What can I use if I don’t have molasses?

Dark brown sugar or honey are the best substitutes. Use 2 teaspoons of either. The flavor will be slightly different but still delicious. Avoid maple syrup as it’s too thin and flavorful.

Is this recipe gluten-free?

It can be easily made gluten-free by substituting the soy sauce with an equal amount of tamari or a certified gluten-free soy sauce. Ensure all other ingredients (like broth) are gluten-free.

My fried rice turned out soggy. What went wrong?

The most common culprits are: 1) Using freshly cooked/warm rice, 2) Overcrowding the wok (cooks in steam instead of frying), or 3) Adding too much sauce/liquid. Ensure your rice is cold, your wok is very hot, and you’re stir-frying, not steaming.

Can I make this recipe vegetarian or vegan?

Absolutely! For vegetarian, use vegetable broth. For vegan, use vegetable broth and omit the eggs or substitute with scrambled firm tofu. Ensure your molasses and other ingredients are vegan-friendly.

What’s the best type of pan to use?

A carbon steel wok is ideal because it heats evenly and has high sides for easy tossing. A large, heavy-bottomed skillet (like cast iron or stainless steel) is an excellent second choice. Avoid non-stick for this high-heat cooking.

Can I add other vegetables?

Yes! Diced bell peppers, corn, water chestnuts, or baby corn are great additions. Add harder veggies (like peppers) with the carrots, and softer/canned ones at the end just to heat through.

How do I get more of that “restaurant” smoky flavor?

That’s the “wok hei” we mentioned! To approximate it at home, ensure your wok is screaming hot before adding ingredients, don’t overcrowd it, and use the technique of spreading the rice up the sides to sear it. A small amount of liquid smoke (a drop!) in the sauce can also hint at that flavor.

We are The Kitchen Team! Did you make this incredible Copycat PF Chang’s Fried Rice? Share a photo and tag us @cookingwithemy on social media—we love seeing your creations!

Love This Recipe? Save It For Later!

Pin the image below to your Dinner Ideas or Copycat Recipes board on Pinterest to keep this easy Copycat PF Chang’s Fried Rice recipe handy anytime you need a quick, delicious meal.

Follow us on Pinterest for more amazing recipes and cooking tips!

[PINTEREST-EMBED: Image of finished Copycat PF Chang’s Fried Rice in a bowl, garnished with green onions, with text overlay “Copycat PF Chang’s Fried Rice – Ready in 30 Min!”]

clock clock iconcutlery cutlery iconflag flag iconfolder folder iconinstagram instagram iconpinterest pinterest iconfacebook facebook iconprint print iconsquares squares iconheart heart iconheart solid heart solid icon

PF Changs Fried Rice


  • Author:
    Chef Emy

Description

PF Chang’s Fried Rice is a huge favorite among my friends and I!! Its really pretty easy to make and ready in less than 30 minutes and you can add chicken to it to make it a meal.


Ingredients


Scale
  • 1 cup Jasmine rice
  • 1 3/4 cup chicken broth (or water)
  • 3 tsp sesame oil
  • 2 eggs
  • 1/3 cup shoestring carrots
  • 1/3 cup frozen peas
  • 1/4 cup green onion (sliced)
  • 1/3 cup fresh bean sprouts
  • 3 tbsp soy sauce
  • 1/2 tsp ground mustard
  • 1/2 tsp minced ginger
  • 1 tsp minced garlic
  • 2 tsp molasses

Instructions

  1. Heat chicken broth (or water) in sauce pan to boiling
  2. Add rice and turn down to simmer for 15 minutes until liquid is gone and rice is fluffy
  3. While rice is cooking, whisk together soy sauce, mustard, ginger, garlic and molasses and set aside
  4. Once rice is ready remove from heat
  5. Place stir fry pan on heat and add 1 tsp of sesame oil
  6. Crack eggs into pan and scramble in pan
  7. Once eggs are scrambled, add 1 tsp sesame oil to pan
  8. Add carrots, green onion, peas and bean sprouts stir fry for 3-4 minutes
  9. Add remaining tsp of sesame oil and rice and stir fry for 3-4 minutes
  10. Spread rice around pan up around sides so rice is spread out as much as possible
  11. Add soy sauce mixture and stir fry additional 3-4 minutes
  12. Serve and top with green onions


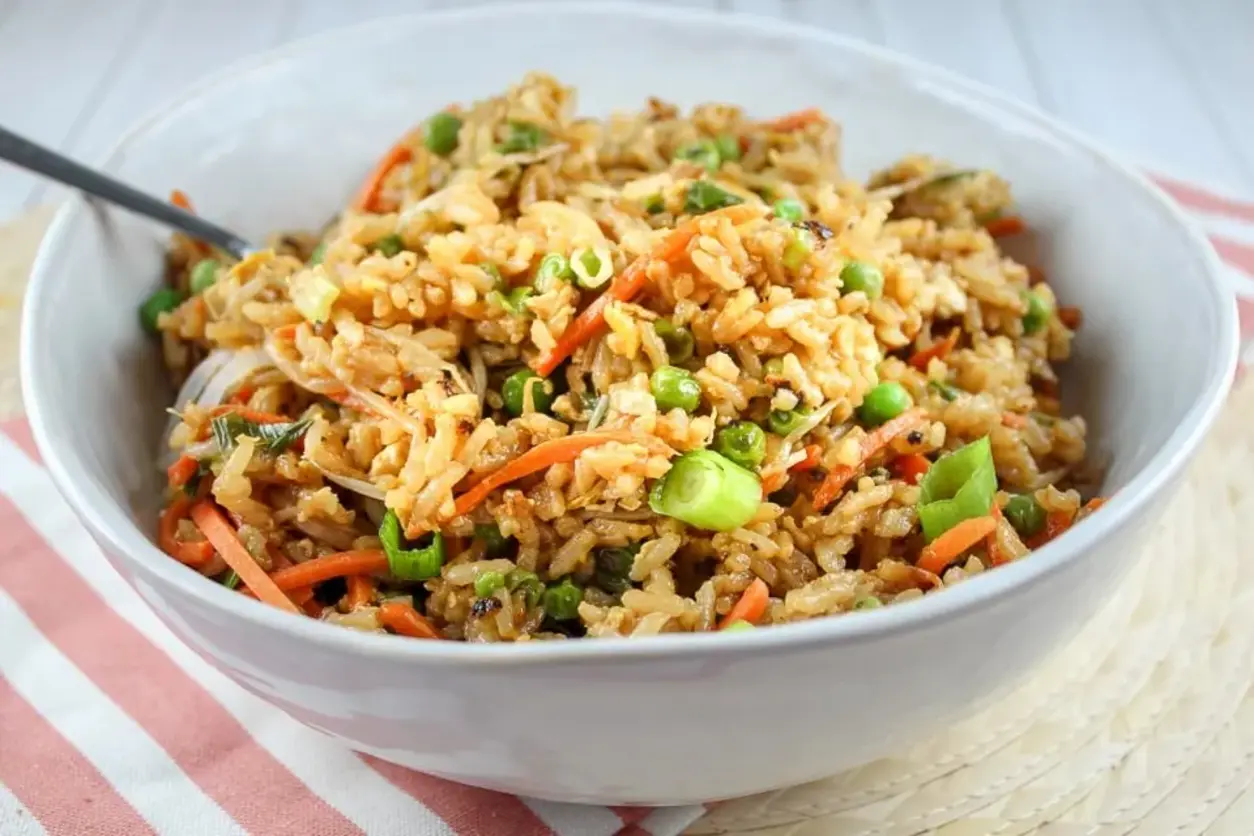
EASY FRIED RICE RECIPE

The 10-Minute Miracle: Our Easy Fried Rice Recipe That Beats Takeout Every Time

Prep Time: 5 minutes
Cook Time: 10 minutes
Total Time: 15 minutes
Servings: 4 people
Difficulty: Easy

Why This Fried Rice is a Weeknight Game-Changer

Let’s be honest: when the clock strikes 6 PM and hunger hits, the siren call of takeout is powerful. But what if you could have a steaming plate of delicious, customizable fried rice on your table in less time than it takes for a delivery driver to find your house? This easy fried rice recipe is that reality. It’s our secret weapon for busy weeknights, empty fridge clean-outs, and those “I need something satisfying NOW” moments. Forget soggy, greasy takeout containers. This recipe delivers perfectly separate grains of rice, packed with flavor from sesame oil and soy sauce, vibrant pops of color from peas and carrots, and hearty protein from scrambled eggs. It’s a complete meal in one skillet, ready in about 10 minutes of active cooking. We’ve perfected the method to ensure you get authentic-tasting fried rice with minimal effort and maximum payoff. This isn’t just a recipe; it’s your new weeknight liberation.


Why This is Truly the Best Easy Fried Rice Recipe

You might be wondering what sets this easy fried rice recipe apart from the hundreds of others online. The answer lies in its unbeatable combination of simplicity, speed, and technique. First, we use common pantry staples—no trip to a specialty store required. Second, the order of operations is designed for efficiency: cooking the veggies first to build a flavor base, scrambling the eggs right in the same pan, and then incorporating the rice. This method locks in flavor at every step. Most importantly, we emphasize the use of cold, day-old cooked rice. This is the non-negotiable secret to achieving that perfect, slightly chewy texture without mushiness. We also balance the savory soy sauce with the nutty depth of sesame oil and the freshness of green onions. This recipe is forgiving, flexible, and foolproof, making it the best easy fried rice recipe for home cooks of all skill levels.

💡 The Kitchen Team’s Pro Tip: The single most important ingredient for perfect fried rice isn’t even listed in the ingredients section—it’s patience. Don’t stir the rice constantly! Let it sit in the hot skillet for 45-60 seconds at a time before stirring. This allows it to develop those delightful, slightly crispy bits that are the hallmark of great fried rice.

Ingredients & Simple Swaps

This easy fried rice recipe is built on a foundation of accessible ingredients. Here’s what you’ll need and how you can adapt it based on what’s in your kitchen.

Ingredient Quantity Purpose & Possible Substitutes
Sesame Oil 2 tablespoons Provides authentic, nutty aroma and flavor. For a milder taste, use 1 tbsp sesame oil + 1 tbsp more vegetable oil.
Vegetable Oil 2 tablespoons Has a high smoke point for frying. Canola, peanut, or avocado oil work well.
Cooked White Rice (cooled) 4 cups Must be cold and day-old for best texture. Jasmine or long-grain rice is ideal. Brown rice works but may be chewier.
Soy Sauce 3 tablespoons Adds salty, umami depth. Use tamari for gluten-free, or coconut aminos for a less salty, soy-free option.
Salt & Black Pepper 1/2 tsp & 1 tsp Seasoning. Adjust to taste after adding soy sauce.
Frozen Peas & Diced Carrots Blend 1 cup Adds color, sweetness, and nutrients. Use any frozen veggie mix (corn, green beans) or fresh diced bell peppers.
Large Eggs (lightly beaten) 3 Adds protein and richness. For an egg-free version, add extra-firm tofu, crumbled and sautéed.
Green Onions (for garnish) 2-3, sliced Adds a fresh, sharp finish. Substitute with a sprinkle of chives or omit.

Step-by-Step Instructions for Perfect Fried Rice

Follow these simple steps for flawless fried rice every single time. We recommend having all your ingredients measured and ready to go before you heat the skillet—this is called “mise en place” and is key for a fast, stress-free cooking process.

Step 1: Heat the Oils & Sauté the Vegetables

Place a large skillet or wok over medium-high heat. Add the 2 tablespoons of sesame oil and 2 tablespoons of vegetable oil. Allow the oils to heat for about 60 seconds until they shimmer. Add the 1 cup of frozen peas and carrots. Cook, stirring occasionally, for 3-5 minutes until the vegetables have thawed and softened slightly. You want them tender-crisp, not mushy.

Step 2: Scramble the Eggs

Once the veggies are cooked, push them to the perimeter of the skillet, creating a well in the center. If the pan seems dry, add a tiny splash of oil to the center. Pour the 3 lightly beaten eggs into the center. Let them set for 15-20 seconds, then gently scramble them with your spatula until they are just cooked through and fluffy, about 1-2 minutes.

Step 3: Incorporate the Rice

Now, add the 4 cups of cold, cooked rice to the skillet. Use your spatula to break up any large clumps. Pour the 3 tablespoons of soy sauce evenly over the rice, and sprinkle with the 1/2 teaspoon of salt and 1 teaspoon of black pepper.

Step 4: The Final Fry

Here’s where the magic happens. Stir everything together until the rice, vegetables, eggs, and sauce are well combined. Then, press the rice mixture down into an even layer in the skillet. Let it cook undisturbed for 45-60 seconds. Stir again, press down, and let it cook for another 45-60 seconds. Repeat this process 3-4 times total. This technique heats the rice through and creates those desirable toasted, slightly crispy bits.

Step 5: Garnish and Serve

Once the rice is steaming hot and has the texture you love, remove the skillet from the heat. Taste and adjust seasoning with an extra dash of soy sauce or pepper if needed. Transfer to a serving dish and immediately garnish with a generous handful of sliced green onions. Serve hot!

💡 The Kitchen Team’s Pro Tip: No day-old rice? Spread 4 cups of freshly cooked rice in a thin layer on a baking sheet and pop it in the freezer for 15-20 minutes. This rapidly chills and dries it out, mimicking the texture of leftover rice perfectly for this easy fried rice recipe.

Serving Suggestions: Beyond the Bowl

This easy fried rice recipe is a fantastic standalone meal, but it also plays incredibly well with others. For a classic takeout-at-home spread, pair it with simple egg drop soup, steamed dumplings, or crispy baked spring rolls. It’s the perfect side for proteins like teriyaki chicken, honey garlic shrimp, or grilled salmon. For a fun presentation, serve it in hollowed-out bell pepper “bowls” or packed into lettuce cups for a low-carb option. Leftover fried rice makes an incredible filling for omelets the next morning. The possibilities are endless!

Storage, Reheating & Freezing Guide

Storage: Allow leftover fried rice to cool completely. Transfer it to an airtight container and refrigerate for up to 4 days.
Reheating (Best Methods):

  • Skillet: Reheat in a non-stick skillet over medium heat with a tiny splash of water or broth. Stir until hot. This method best restores texture.
  • Microwave: Place in a microwave-safe bowl, sprinkle with 1 teaspoon of water, cover loosely, and heat in 60-second intervals, fluffing with a fork between intervals.

Freezing: This easy fried rice recipe freezes surprisingly well! Portion cooled rice into freezer-safe bags or containers, press out excess air, and freeze for up to 3 months. Thaw overnight in the fridge before reheating.

Creative Variations to Keep It Exciting

Once you’ve mastered the basic formula, make this easy fried rice recipe your own with these delicious twists:

Variation Name Key Add-Ins/Changes Flavor Profile
Protein Power Fried Rice Add 1 cup of diced cooked chicken, shrimp, pork, or beef with the rice. Heartier, more substantial meal.
Spicy Kimchi Fried Rice Stir in 1/2 cup of chopped kimchi and 1 tsp of gochujang (Korean chili paste) with the soy sauce. Tangy, spicy, and deeply flavorful.
Pineapple “Hawaiian” Fried Rice Add 1/2 cup of diced ham and 3/4 cup of small pineapple chunks with the vegetables. Sweet, savory, and tropical.
Garden Veggie Delight Use 2 cups of mixed fresh veggies (zucchini, mushrooms, bell peppers, broccoli) instead of frozen blend. Fresh, crunchy, and nutrient-packed.

Your Fried Rice Questions Answered (FAQ)

Can I use freshly cooked rice for this easy fried rice recipe?

We strongly advise against it. Freshly cooked rice is too moist and steamy, which will lead to a gummy, clumpy final dish. Using cold, day-old rice that has dried out slightly in the fridge is the #1 secret to perfect texture with separate grains.

What type of rice is best for fried rice?

Long-grain varieties like jasmine or basmati are ideal because they are less starchy and stay separate when cooked. Medium-grain rice can work in a pinch, but avoid short-grain or sushi rice as they are too sticky.

My fried rice turned out soggy. What went wrong?

The most common culprits are: 1) Using warm, fresh rice, 2) Overcrowding the skillet (which steams the rice instead of frying it), or 3) Adding too much liquid (soy sauce). Ensure your rice is cold, use a large enough pan, and measure your soy sauce accurately.

Can I make this recipe gluten-free?

Absolutely! Simply substitute the regular soy sauce with an equal amount of tamari or a certified gluten-free soy sauce alternative. All other core ingredients are naturally gluten-free.

How can I add more flavor to my fried rice?

Try adding 1-2 minced garlic cloves with the vegetables, a teaspoon of grated fresh ginger, or a dash of oyster sauce or fish sauce along with the soy sauce. A teaspoon of rice vinegar at the end can add a nice bright note.

Is it okay to use brown rice?

Yes, you can use cold, cooked brown rice. The texture will be chewier and the grains may be a bit firmer, but it’s a delicious and healthy whole-grain alternative.

Can I make fried rice ahead of time?

You can prep the ingredients ahead (chop veggies, beat eggs, measure sauces), but for the best texture, we recommend cooking it just before serving. Leftovers reheat very well, however.

What can I use if I don’t have sesame oil?

While sesame oil provides signature flavor, you can make the recipe with all vegetable oil. The finished dish will lack the nutty aroma but will still be tasty. Consider topping with toasted sesame seeds for a similar flavor note.

Loved This Easy Fried Rice Recipe? Share the Love!

If this easy fried rice recipe saved your weeknight dinner, we’d be thrilled if you shared it with friends and family! Pin the image below to your Pinterest boards to save it for later, or share it on Facebook and Instagram. Don’t forget to tag us @cookingwithemy—we love seeing your culinary creations!

📌 Pin this Easy Fried Rice Recipe for Later!

Find more delicious and easy dinner inspiration on our Pinterest page: Pinterest.com/cookingwithemy

(Imagine a beautiful, vertical pin image titled “10-Minute Easy Fried Rice Recipe That Beats Takeout” here)

clock clock iconcutlery cutlery iconflag flag iconfolder folder iconinstagram instagram iconpinterest pinterest iconfacebook facebook iconprint print iconsquares squares iconheart heart iconheart solid heart solid icon

Easy Fried Rice Recipe


  • Author:
    Chef Emy

Description

Enjoy this easy Fried Rice Recipe in less than 10 minutes making it perfect for busy weeknights. Make this rice in less time than it takes to get take out.


Ingredients


Scale
  • 2 tablespoon sesame oil
  • 2 tablespoon vegetable oil
  • 4 cups cooked rice (cooled)
  • 3 tablespoon soy sauce
  • 1/2 teaspoon salt
  • 1 teaspoon pepper
  • 1 cup frozen peas and diced carrots blend
  • 3 larges eggs (light beaten)

Instructions

  1. In a large skillet, pan fry the carrots and the peas in the skillet with the sesame oil and vegetable oil for about 3-5 minutes or until soft.
  2. Slide the vegetables to the side and pour in the eggs.
  3. Scramble the eggs.
  4. Then stir in the rice, soy sauce, salt, and pepper.
  5. Stir for a few minutes until rice is heated through and sauce is mixed through.
  6. Top with sliced green onions.


Chinese Chicken Fried Rice

This is the best Chinese Chicken Fried Rice recipe! Savoury and fluffy fried rice with juicy chicken, eggs, peas, carrots with garlic and shallots. This meal is perfect for dinner or lunch and works well as leftovers, if there are any left! Ready in just 30 minutes with cooked rice #best fried rice recipe ever #chinese fried rice recipe #chicken fried rice easy #fried rice #chinese food

Print

clock clock iconcutlery cutlery iconflag flag iconfolder folder iconinstagram instagram iconpinterest pinterest iconfacebook facebook iconprint print iconsquares squares iconheart heart iconheart solid heart solid icon

Quick & Easy Chicken Fried Rice


  • Author: Chef Emy

Description

Seasoned rice stir-fried with tender chicken, eggs, vegetables, and aromatics. This quick and easy chicken fried rice is ready in less than 30-minutes! A delicious main, meal, or side dish for the whole family to enjoy. It’s also better-than-takeout!Note: the recipe has been slightly modified for improvement as of Sep 3, 2025.


Ingredients

Scale
  • 4 ½ cups cooked jasmine rice (cold day-old (or see Notes below to prepare uncooked rice for this recipe))
  • ½ lb skinless boneless chicken thighs (thinly sliced)
  • 1.5 cups frozen peas and carrots (or frozen vegetable mix (corn, peas, carrots, green beans))
  • 3 large eggs (beaten)
  • 1 small shallot (or 1/4 onion, finely diced)
  • 3 garlic cloves (minced)
  • 4 teaspoon vegetable oil (or any neutral tasting oil)
  • 1 teaspoon regular soy sauce (or light soy sauce)
  • 1 teaspoon Shaoxing Cooking Wine (or dry sherry / dry white wine / chicken broth)
  • 1 teaspoon cornstarch
  • 1 teaspoon vegetable oil (or any neutral tasting oil)
  • 2 tablespoon regular soy sauce (or light soy sauce)
  • ½ tablespoon dark soy sauce
  • 2 teaspoon sesame oil
  • 1 teaspoon chicken bouillon powder ((a.k.a. chicken stock powder))
  • teaspoon white pepper (or black pepper)

Instructions

  1. In a medium-sized bowl, marinate sliced chicken thighs with marinade ingredients as listed above. Set aside to marinate for 5-10 minutes.
  2. In a small bowl, combine the sauce ingredients as listed above and set aside.
  3. Heat 1 teaspoon / 5 ml of vegetable oil in a large pan on medium-high heat. Fry chicken until fully cooked. Remove from the pan.
  4. Add 1 teaspoon / 5 ml of vegetable oil into the pan. Sauté garlic and shallots for 10 seconds. Add peas and carrots and fry for 10 seconds. Push everything to the side of the pan.
  5. Add remaining oil into empty space of the pan. Add in beaten eggs and let them sit for 20 seconds before scrambling and breaking into bite-sized pieces. Then toss everything together.
  6. Add rice and chicken and toss everything together until incorporated.
  7. Pour sauce around the rice or along the edges of the pan and let the sauce toast for 5 seconds for extra flavor before tossing. Toss everything together until all the rice grains are brown. Enjoy!

Chinese Beef and Broccoli (One Pan Take-Out)

This beef and broccoli is a popular Chinese take-out meal and it’s also easy enough to make at home. It’s also healthier than most take-out meal options. With juicy tender beef and crisp broccoli brought together in a rich brown sauce, this quick dinner is as colorful as it is delicious. Serve it over hot rice for an authentic Chinese take-out dinner. {Gluten-Free Adaptable}

Print

clock clock iconcutlery cutlery iconflag flag iconfolder folder iconinstagram instagram iconpinterest pinterest iconfacebook facebook iconprint print iconsquares squares iconheart heart iconheart solid heart solid icon

Chinese Beef and Broccoli


  • Author: Chef Emy

Description

This beef and broccoli is a popular Chinese take-out meal and it’s also easy enough to make at home. It’s also healthier than most take-out meal options. With juicy tender beef and crisp broccoli brought together in a rich brown sauce, this quick dinner is as colorful as it is delicious. Serve it over hot rice for an authentic Chinese take-out dinner. {Gluten-Free Adaptable}To make this dish gluten-free, use dry sherry instead of Shaoxing wine, and use tamari instead of soy sauce.


Ingredients

Scale
  • 1 lb flank steak (, skirt steak, or other cut (*see footnote 1))
  • 1 tablespoon soy sauce
  • 1 tablespoon peanut oil ((or vegetable oil))
  • 1 tablespoon cornstarch
  • 1/2 teaspoon baking soda ((Optional) (*see footnote 1))
  • 1/2 cup chicken stock ((or beef stock))
  • 2 tablespoons Shaoxing wine ((or dry sherry))
  • 2 tablespoons soy sauce
  • 1 teaspoon dark soy sauce ((*footnote 2))
  • 2 teaspoons brown sugar ((or white sugar))
  • 1 tablespoon cornstarch
  • 1 head broccoli (, cut to bite-size florets)
  • 1 tablespoon peanut oil (or vegetable oil) ((*Footnote 3))
  • 3 garlic cloves (, minced)
  • 2 teaspoons ginger (, minced)

Instructions

  1. Slice the beef against the grain into 0.5 cm (1/4 inch) thick slices or 1-cm (1/2 inch) sticks. Transfer to a small bowl. Add soy sauce, peanut oil, and cornstarch (*Footnote 1). Gently mix well by hand until all the slices are coated with a thin layer of sauce. Marinate for 10 minutes while preparing the other ingredients.
  2. Combine all the ingredients for the sauce in a medium-sized bowl. Mix well.
  3. Add 1/4 cup water into a large nonstick skillet over medium-high heat until the water begins to boil. Add the broccoli and cover. Steam until the broccoli just turns tender and the water evaporates,1 minute or so. Transfer broccoli to a plate. Wipe the pan with a paper towel held in a pair of tongs if theres any water left.
  4. Add the oil and swirl to coat the bottom. Heat over medium high heat until hot. Spread the steak in a single layer. Allow to cook without touching for 30 seconds, or until the bottom side is browned. Flip to cook the other side for a few seconds. Stir and cook until the surface is lightly charred and the inside is still pink.
  5. Add the garlic and ginger. Stir a few times to release the flavor and fragrance.
  6. Return the broccoli to the pan. Stir the sauce again to dissolve the cornstarch completely and pour it into the skillet. Cook and stir until the sauce thickens, about 1 minute. Transfer everything to a plate immediately. Serve hot as a main dish.

Chinese Chicken Fried Rice

This is the best Chinese Chicken Fried Rice recipe! Savoury and fluffy fried rice with juicy chicken, eggs, peas, carrots with garlic and shallots. This meal is perfect for dinner or lunch and works well as leftovers, if there are any left! Ready in just 30 minutes with cooked rice #best fried rice recipe ever #chinese fried rice recipe #chicken fried rice easy #fried rice #chinese food

Print

clock clock iconcutlery cutlery iconflag flag iconfolder folder iconinstagram instagram iconpinterest pinterest iconfacebook facebook iconprint print iconsquares squares iconheart heart iconheart solid heart solid icon

Quick & Easy Chicken Fried Rice


  • Author: Chef Emy

Description

Seasoned rice stir-fried with tender chicken, eggs, vegetables, and aromatics. This quick and easy chicken fried rice is ready in less than 30-minutes! A delicious main, meal, or side dish for the whole family to enjoy. It’s also better-than-takeout!Note: the recipe has been slightly modified for improvement as of Sep 3, 2025.


Ingredients

Scale
  • 4 ½ cups cooked jasmine rice (cold day-old (or see Notes below to prepare uncooked rice for this recipe))
  • ½ lb skinless boneless chicken thighs (thinly sliced)
  • 1.5 cups frozen peas and carrots (or frozen vegetable mix (corn, peas, carrots, green beans))
  • 3 large eggs (beaten)
  • 1 small shallot (or 1/4 onion, finely diced)
  • 3 garlic cloves (minced)
  • 4 teaspoon vegetable oil (or any neutral tasting oil)
  • 1 teaspoon regular soy sauce (or light soy sauce)
  • 1 teaspoon Shaoxing Cooking Wine (or dry sherry / dry white wine / chicken broth)
  • 1 teaspoon cornstarch
  • 1 teaspoon vegetable oil (or any neutral tasting oil)
  • 2 tablespoon regular soy sauce (or light soy sauce)
  • ½ tablespoon dark soy sauce
  • 2 teaspoon sesame oil
  • 1 teaspoon chicken bouillon powder ((a.k.a. chicken stock powder))
  • teaspoon white pepper (or black pepper)

Instructions

  1. In a medium-sized bowl, marinate sliced chicken thighs with marinade ingredients as listed above. Set aside to marinate for 5-10 minutes.
  2. In a small bowl, combine the sauce ingredients as listed above and set aside.
  3. Heat 1 teaspoon / 5 ml of vegetable oil in a large pan on medium-high heat. Fry chicken until fully cooked. Remove from the pan.
  4. Add 1 teaspoon / 5 ml of vegetable oil into the pan. Sauté garlic and shallots for 10 seconds. Add peas and carrots and fry for 10 seconds. Push everything to the side of the pan.
  5. Add remaining oil into empty space of the pan. Add in beaten eggs and let them sit for 20 seconds before scrambling and breaking into bite-sized pieces. Then toss everything together.
  6. Add rice and chicken and toss everything together until incorporated.
  7. Pour sauce around the rice or along the edges of the pan and let the sauce toast for 5 seconds for extra flavor before tossing. Toss everything together until all the rice grains are brown. Enjoy!

Garlic Turmeric Rice

Golden Garlic Turmeric Rice: Your 20-Minute Secret to Restaurant-Quality Meals

Prep Time Cook Time Total Time Servings Difficulty
5 minutes 15 minutes 20 minutes 6 servings Easy

Imagine a side dish so vibrant, so fragrant, and so effortlessly delicious that it transforms a simple weeknight dinner into a memorable feast. Welcome to our Golden Garlic Turmeric Rice. This isn’t just another rice recipe—it’s a culinary powerhouse that brings a burst of sunshine to your plate and a depth of flavor to your meals that you simply can’t get from plain rice. In just 20 minutes on the stovetop, you can create soft, fluffy, and incredibly aromatic rice that complements everything from grilled chicken to roasted vegetables.

At Cooking With Emy, we believe the best dishes are often the simplest. This one-pot wonder, fragranced with melted butter, savory garlic, sweet onion, and the warm earthiness of turmeric, is a testament to that philosophy. It’s a staple in Middle Eastern and South Asian cuisines for a reason: it’s foolproof, versatile, and always a crowd-pleaser. Whether you’re a seasoned cook or just starting out, this recipe will become a trusted favorite in your rotation.

Why This is the Best Garlic Turmeric Rice Recipe You’ll Find

You might be wondering what sets this recipe apart from the dozens of turmeric rice recipes online. The answer lies in the details and our tested techniques.

First, the technique of toasting the rice. Sautéing the rinsed rice in the butter and spice mixture for a minute or two before adding the liquid is a game-changer. This crucial step seals the starch on the outside of each grain, leading to distinct, fluffy rice that never turns out gummy or clumpy. It also allows the rice to better absorb the flavors of the garlic and turmeric, creating a more profound taste in every bite.

Second, the perfect liquid-to-rice ratio. After extensive testing in The Kitchen Team’s lab, we’ve found that a 1:1.5 ratio (rice to stock) is ideal for most long-grain rice like basmati when using the absorption method. This yields rice that is perfectly tender, not soggy. Using a flavorful stock instead of water builds a foundational layer of savoriness that water simply cannot provide.

Finally, the resting period. Letting the rice sit, covered and off the heat, for 5 minutes after cooking is non-negotiable. This allows the steam to redistribute evenly throughout the pot, finishing the cooking process gently and ensuring the bottom layer isn’t overcooked. It’s the secret to rice that’s perfect from top to bottom.

💡 The Kitchen Team’s Pro Tip: For an even more vibrant yellow color and a slightly more complex flavor, try using 1/2 teaspoon of turmeric powder and adding a pinch of saffron threads soaked in a tablespoon of warm stock. The saffron will impart a beautiful golden hue and a luxurious aroma.

Ingredients for Golden Garlic Turmeric Rice

Gather these simple ingredients to create magic in your kitchen. Each one plays a specific role in building the flavor and texture of this iconic dish.

Ingredient Quantity Notes
Unsalted Butter (or Coconut Oil) 2 tbsp Butter adds richness; coconut oil is a great dairy-free alternative that pairs wonderfully with turmeric.
Medium Onion, finely diced 1/2 Yellow or white onion works best. Finely dicing ensures it melts into the rice.
Garlic Cloves, minced 4 Fresh is best! Adjust to your love for garlic.
Turmeric Powder 1 tsp The star spice! Ensure it’s fresh for the brightest color and flavor.
Basmati Rice (or long-grain) 2 cups (370g) Rinsed and drained. This removes excess starch for fluffier rice.
Chicken Stock or Vegetable Stock 3 cups Low-sodium recommended so you can control the salt level. Adds immense flavor.
Salt 1/2 tsp (or to taste) Always season in layers. Start with this, taste at the end.
Black Pepper 1/4 tsp Freshly ground pepper enhances turmeric’s bioavailability.
Fresh Parsley, chopped (optional garnish) For garnish Adds a fresh, green contrast to the golden rice.

How to Make Garlic Turmeric Rice: Step-by-Step Guide

Follow these simple steps for perfect rice every single time. We’ve broken it down to ensure success from the first sauté to the final fluff.

Step 1: Sauté the Aromatics

In a medium-sized pot or Dutch oven with a tight-fitting lid, melt the butter (or coconut oil) over medium heat. Once melted and shimmering, add the finely diced onion. Sauté for 2-3 minutes until the onion becomes translucent and soft. Add the minced garlic and sauté for another 30-60 seconds until incredibly fragrant. Be careful not to burn the garlic, as it will turn bitter.

💡 The Kitchen Team’s Pro Tip: Have all your ingredients measured and prepped before you turn on the stove (mise en place). Cooking with aromatics moves quickly, and having everything ready prevents burning and makes the process smooth and enjoyable.

Step 2: Bloom the Turmeric

Add the teaspoon of turmeric powder to the pot with the onions and garlic. Stir constantly for about 30 seconds. You’ll notice the color deepen and the aroma become more potent. This process, called “blooming,” heats the spices in fat, releasing their essential oils and maximizing their flavor potential.

Step 3: Toast the Rice

Add the rinsed and drained basmati rice to the pot. Stir vigorously for 1-2 minutes, ensuring every grain is coated in the golden butter and spice mixture. The rice will start to smell nutty, and the grains may become slightly translucent at the edges. This toasting step is your insurance against mushy rice.

Step 4: Add Liquid and Simmer

Carefully pour in the chicken or vegetable stock. It will sizzle and steam—that’s good! Add the salt and black pepper. Give everything one good stir to combine. Increase the heat to high and bring the mixture to a rolling boil.

As soon as it boils, immediately reduce the heat to the lowest possible setting. Cover the pot tightly with its lid. Set a timer for 15 minutes and let it simmer undisturbed. Do not lift the lid. This traps the steam, which is essential for cooking the rice properly.

Step 5: Rest and Fluff

After 15 minutes, turn off the heat. Keep the lid on and let the pot sit, off the burner, for 5 full minutes. This resting period is crucial for perfect texture. Finally, remove the lid and fluff the rice gently with a fork, bringing the bottom layers to the top. Garnish with fresh chopped parsley if desired, and serve immediately.

What to Serve With Garlic Turmeric Rice

This rice is the ultimate supporting actor—it makes everything else on the plate shine. Here are some of our favorite pairings:

  • Protein Power: Serve alongside Marinated Chicken Kebabs, grilled shrimp, pan-seared salmon, or slow-cooked lamb chops. The rice soaks up any juices or sauces beautifully.
  • Vegetarian/Vegan Feast: Pair it with roasted cauliflower steaks, a hearty chickpea curry, spiced black beans, or a colorful array of grilled vegetables like zucchini, bell peppers, and eggplant.
  • Bowl Builder: Use it as the base for a nourishing bowl. Top with crispy tofu, avocado slices, pickled red onions, a drizzle of tahini sauce, and a sprinkle of seeds.
  • Simple Side: It’s fantastic all on its own with a dollop of Greek yogurt or a simple cucumber salad on the side.

How to Store and Reheat Leftovers

This rice stores wonderfully, making it perfect for meal prep.

Storage: Allow the rice to cool completely to room temperature (no more than 2 hours after cooking). Transfer it to an airtight container and refrigerate for up to 4-5 days. You can also freeze it for up to 2 months in a freezer-safe bag or container.

Reheating for Best Results:

  • Stovetop (Preferred): Place the rice in a saucepan with a splash of water or stock per cup of rice. Cover and heat over low-medium heat, fluffing occasionally, until heated through (5-7 minutes).
  • Microwave: Place rice in a microwave-safe bowl. Sprinkle with a tablespoon of water. Cover loosely with a damp paper towel or a microwave-safe lid. Heat on high in 30-second intervals, fluffing between each, until hot.
💡 The Kitchen Team’s Pro Tip: Turmeric can stain plastic containers. For storing, use glass containers if possible, or be at peace with a little golden hue on your plastic!

Creative Variations to Try

Once you’ve mastered the basic recipe, make it your own with these delicious twists!

  • Lemon Herb Turmeric Rice: Stir in the zest of one lemon and 2 tablespoons of chopped fresh dill or cilantro after fluffing.
  • Coconut Turmeric Rice: Replace half of the stock with full-fat coconut milk for a creamy, tropical version.
  • Pilaf-Style with Nuts & Fruits: After toasting the rice, add 1/4 cup of raisins or chopped dried apricots and 2 tablespoons of pine nuts or slivered almonds to the pot before adding the stock.
  • Spanish-Inspired “Yellow Rice”: Add 1/2 teaspoon smoked paprika and a pinch of saffron with the turmeric. Stir in 1/2 cup of frozen peas after the resting period.
  • Whole-Grain Version: Substitute brown basmati rice or jasmine rice. You will need to increase the liquid to 3.5 cups and the simmering time to 35-40 minutes, followed by the 5-minute rest.

Frequently Asked Questions (FAQ)

Can I make this garlic turmeric rice in a rice cooker?

Absolutely! Use the “sauté” function on your rice cooker (if it has one) to cook the onions, garlic, and turmeric in the butter. Then add the rinsed rice and stock, stir, and cook on the standard white rice setting. If your rice cooker doesn’t have a sauté function, simply melt the butter and cook the aromatics in a skillet on the stove, then transfer everything to the rice cooker pot to finish cooking.

My rice turned out mushy. What went wrong?

The most common causes are: 1) Not rinsing the rice before cooking (excess starch causes gumminess), 2) Using too much liquid, or 3) Disturbing the rice while it’s simmering by lifting the lid. Ensure you follow the rinsing step, measure your liquid accurately, and keep that lid on tight during the 15-minute simmer.

Can I use fresh turmeric instead of powder?

Yes! Grate about 1 tablespoon of fresh turmeric root (using a microplane) and add it with the garlic. Be aware that fresh turmeric stains very easily, so use gloves if you’re concerned about yellow fingers. The flavor will be brighter and slightly more peppery.

Is this recipe gluten-free and vegan?

It is naturally gluten-free. To make it vegan, simply use coconut oil or a plant-based butter and ensure you use vegetable stock instead of chicken stock.

What’s the best way to rinse rice?

Place the rice in a fine-mesh strainer and run cool water over it, using your fingers to gently agitate the grains, until the water runs mostly clear. This usually takes 1-2 minutes. Shake the strainer well to drain excess water.

Can I double this recipe?

You can, but use a pot that’s large enough to accommodate the increased volume (the rice will expand). Keep the liquid-to-rice ratio the same (1:1.5). The cooking time will remain the same, but the resting time is even more important for a larger batch.

Why add black pepper with turmeric?

Black pepper contains piperine, a compound that enhances the absorption of curcumin (the active, beneficial compound in turmeric) by the body by up to 2000%. It’s a powerful nutritional synergy!

My turmeric isn’t very yellow. How can I get a brighter color?

The color can vary by brand and freshness. Ensure your turmeric powder is fresh (it should have a vibrant scent). Blooming it in fat, as we do in Step 2, also intensifies its color. For an intense golden hue, a tiny pinch of saffron works wonders.

Nutrition Information (Per Serving, approximately 1 cup)
Calories: ~240 Carbohydrates: 42g Protein: 4g
Fat: 6g Saturated Fat: 3.5g Fiber: 1g
Sugar: 1g Sodium: ~350mg Vitamin A: 2% DV

*Nutritional information is an estimate based on using unsalted butter and low-sodium chicken stock. Values may vary based on specific ingredients used.

Share the Love!

Did you make this Golden Garlic Turmeric Rice? We are The Kitchen Team at Cooking With Emy, and nothing makes us happier than seeing your creations! Share a photo of your vibrant, golden rice on Instagram and tag us @cookingwithemy or use the hashtag #CookingWithEmy. We feature our favorite reader recipes every week!

If you loved this recipe, please consider leaving a 5-star rating below. It helps other home cooks find this guide and encourages us to keep creating foolproof recipes for you.

📌 Save This Recipe for Later!

Don’t lose this easy 20-minute side dish! Pin this image to your “Dinner Ideas” or “Meal Prep” board on Pinterest so you always have it handy.

Follow us on Pinterest: @cookingwithemy for more delicious, easy recipes every day!

[PINTEREST RICH PIN IMAGE EMBED – GOLDEN GARLIC TURMERIC RICE IN A WHITE BOWL WITH A FORK AND SPRIG OF PARSLEY]

clock clock iconcutlery cutlery iconflag flag iconfolder folder iconinstagram instagram iconpinterest pinterest iconfacebook facebook iconprint print iconsquares squares iconheart heart iconheart solid heart solid icon

Garlic Turmeric Rice


  • Author:
    Chef Emy

Description

This soft & fluffy turmeric rice is so easy to make yet loaded with heavenly aromas in every bite. Fragranced with garlic, butter, and onion, this one-pot middle eastern rice comes together in less than 20 minutes on the stovetop.


Ingredients


Scale
  • 2 tbsp unsalted butter (or coconut oil)
  • 1/2 medium onion (finely diced)
  • 4 cloves garlic (minced)
  • 1 tsp turmeric powder
  • 2 cups (370g) basmati rice (or your choice of long-grain rice, rinsed and drained)
  • 3 cups chicken stock (or vegetable stock)
  • 1/2 tsp salt (or to taste)
  • 1/4 tsp black pepper (or to taste)
  • parsley (for garnish, optional)
  • marinated chicken kebabs (or any grilled veggies, seafood, or meat to serve)

Instructions

  1. Melt butter in a pot over medium heat. Add onion and garlic and sauté for about 1-2 minutes or until fragrant. Add turmeric powder and stir to combine. Mix in the rice until the grains are evenly coated and lightly toasted.
  2. Add stock, salt, and pepper. Mix to combine and bring to a boil. Cover, reduce the heat to low, and simmer for 15 minutes. Remove from heat and set aside for about 5 minutes before fluffing the rice with a fork. Enjoy!