Best Grill Pan Honey Glazed Steak Strips Recipe

best-grill-pan-honey-steak

“`html

Introduction

There’s something undeniably satisfying about the sizzle of steak hitting a hot grill pan, especially when it’s coated in a sticky-sweet honey glaze that caramelizes into pure perfection. If you’ve ever craved a restaurant-quality dish without the hassle, this Grill Pan Honey Glazed Steak Strips Recipe is your answer. Whether you’re cooking for a weeknight dinner or impressing guests, these tender strips deliver bold flavor with minimal effort. Plus, the aroma alone will have everyone gathered in the kitchen, forks at the ready. Trust me, once you try this recipe, it’ll earn a permanent spot in your rotation.

About This Recipe

The Grill Pan Honey Glazed Steak Strips Recipe combines simplicity with gourmet flair, making it a standout for any home cook. Thinly sliced steak cooks quickly on a grill pan, locking in juiciness while the honey glaze adds a balance of sweetness and depth. Unlike complicated dishes, this one requires just a handful of ingredients—most of which you likely already have. Moreover, it pairs beautifully with everything from fluffy rice to crisp salads, making it a versatile choice for any meal.

What sets this recipe apart is its adaptability. You can tweak the glaze with a splash of soy sauce for umami or a pinch of chili flakes for heat. The blog’s tone leans toward approachable yet elevated cooking, and this dish fits perfectly. It’s a gateway to experimenting with flavors without overwhelming beginners. For more inspiration, check out our guide to perfect steak temperatures or explore easy weeknight dinners for busy cooks.

Beyond practicality, this recipe celebrates the joy of cooking. The process feels rewarding, and the results consistently wow. Whether you’re a seasoned chef or a kitchen newbie, these steak strips prove that great food doesn’t need to be complicated. They’re a reminder that sometimes, the simplest recipes leave the biggest impression.

Why I Love This Recipe

This Grill Pan Honey Glazed Steak Strips Recipe holds a special place in my heart because it’s the dish that made me fall in love with cooking. Years ago, I prepared it for a hesitant date who later became my spouse—proof that good food truly brings people together. The combination of savory steak and sweet glaze feels nostalgic yet exciting every time I make it. Even now, it’s my go-to for celebrations and cozy nights alike. It’s more than a recipe; it’s a reminder of how cooking can create connections and memories.

“`

Health and Nutrition

Why it’s good for your body

Grill Pan Honey Glazed Steak Strips Recipe packs a powerful nutritional punch while delivering irresistible flavor. First, lean steak provides high-quality protein, which helps build and repair muscles. Additionally, the honey glaze adds natural sweetness without refined sugars, offering a healthier alternative to processed sauces. Moreover, the dish includes garlic and spices, which boast anti-inflammatory and immune-boosting properties.

Beyond protein, Grill Pan Honey Glazed Steak Strips Recipe delivers essential nutrients like iron and zinc. Iron supports healthy blood flow, while zinc strengthens your immune system. Furthermore, cooking the steak on a grill pan reduces excess fat, making it a leaner choice compared to frying. The balanced combination of savory and sweet also satisfies cravings, helping you avoid less nutritious snacks.

Finally, this recipe incorporates simple, whole ingredients, avoiding artificial additives. For example, honey contains antioxidants, and fresh garlic promotes heart health. Whether you need a post-workout meal or a satisfying dinner, Grill Pan Honey Glazed Steak Strips Recipe fuels your body efficiently. With every bite, you get taste and nutrition in one delicious package.

How it fits in a healthy lifestyle

Grill Pan Honey Glazed Steak Strips Recipe fits seamlessly into a balanced diet. If you follow a high-protein or low-carb plan, this dish delivers lean protein without unnecessary carbs. It also works well for gluten-free eaters since the recipe naturally avoids wheat-based ingredients. For those focused on heart health, the lean cut of steak and minimal added fats make it a smart choice.

Pairing this recipe with fiber-rich sides, like roasted vegetables or a crisp salad, creates a well-rounded meal. If you need more meal prep ideas, check out our meal prep tips for busy weeknights. The honey glaze adds just enough sweetness to curb sugar cravings, helping you stay on track with healthier eating habits.

Busy lifestyles demand quick, nutritious options, and this recipe delivers. It cooks in under 30 minutes, making it perfect for weeknights. For more easy, healthy recipes, explore our quick and nutritious family dinners. Grill Pan Honey Glazed Steak Strips Recipe proves that eating well doesn’t mean sacrificing flavor or convenience.

Print
clock clock iconcutlery cutlery iconflag flag iconfolder folder iconinstagram instagram iconpinterest pinterest iconfacebook facebook iconprint print iconsquares squares iconheart heart iconheart solid heart solid icon

Grill Pan Honey Glazed Steak Strips


  • Author: Chef Emy

Description

Juicy steak strips glazed with a sweet and savory honey sauce, cooked to perfection on a grill pan.


Ingredients

Scale

For the Crust:

  • 1 lb flank steak, sliced into strips
  • 3 tbsp honey
  • 2 tbsp soy sauce
  • 1 tbsp olive oil
  • 2 cloves garlic, minced
  • 1 tsp smoked paprika
  • 1/2 tsp black pepper
  • 1/4 tsp salt
  • 1 tbsp fresh parsley, chopped (for garnish)

Instructions

1. Prepare the Crust:

  1. In a bowl, whisk together honey, soy sauce, olive oil, minced garlic, smoked paprika, black pepper, and salt.
  2. Add the steak strips to the marinade, ensuring they are well coated. Let marinate for at least 10 minutes.
  3. Heat a grill pan over medium-high heat. Once hot, add the steak strips in a single layer, reserving the marinade.
  4. Cook for 3-4 minutes per side or until desired doneness. Remove steak strips and set aside.
  5. Pour the reserved marinade into the pan and simmer for 2-3 minutes until slightly thickened.
  6. Return the steak strips to the pan, tossing to coat with the glaze. Garnish with fresh parsley before serving.

Notes

You can customize the seasonings to taste.

How to Prepare This Dish

Steps and time-saving tips

Start by slicing your steak into thin strips against the grain for maximum tenderness. Meanwhile, whisk together honey, soy sauce, minced garlic, and a splash of apple cider vinegar in a bowl to create the glaze. Heat your grill pan over medium-high heat and lightly brush it with oil to prevent sticking. Once the pan is hot, lay the steak strips in a single layer, working in batches if needed to avoid overcrowding. Sear the strips for about 2-3 minutes per side until they develop a rich caramelized crust. Then, drizzle the honey glaze over the steak and toss gently to coat every piece evenly. Let the strips cook for another minute or two until the glaze thickens and clings to the meat. Finally, transfer the steak to a plate and garnish with sesame seeds or chopped green onions for a fresh finish. To save time, prep the glaze ahead and store it in the fridge, or use pre-sliced steak from your butcher. Keep the heat consistent to avoid undercooking or burning the glaze, and always let the steak rest for a few minutes before serving to lock in the juices.

Mistakes I’ve made and learned from

Early on, I rushed the searing process and ended up with tough, chewy steak strips because I didn’t let the pan get hot enough. Now, I always test the heat by flicking a drop of water onto the grill pan—if it sizzles immediately, it’s ready. Another mistake? Overloading the pan, which steamed the steak instead of searing it. I learned that patience pays off, and cooking in batches delivers better results. If you’re new to grilling meats, my guide on grilling tips for perfect steaks covers these pitfalls in detail. Also, I once burned the glaze by leaving it on too long, but now I remove the steak just before it looks done since carryover cooking finishes the job. For more on balancing sweet and savory flavors, check out my guide to mastering glazes. Trust me, these small tweaks make all the difference.

Cultural Connection and Variations

Where this recipe comes from

The Grill Pan Honey Glazed Steak Strips Recipe pulls inspiration from the sweet-and-savory flavor profiles found in many global cuisines. For instance, Asian cultures often pair honey with soy sauce for a glossy, umami-rich glaze, while Southern U.S. cooks might add a touch of bourbon for depth. In my family, we’ve always made this dish during summer gatherings, searing the steak strips on a grill pan to get those perfect charred edges without firing up the outdoor grill.

Around the world, variations of this recipe shine. In Korea, you’ll find similar strips marinated in gochujang for a spicy kick. Meanwhile, Mediterranean versions might swap honey for pomegranate molasses and toss in herbs like rosemary. The beauty of the Grill Pan Honey Glazed Steak Strips Recipe lies in its adaptability—whether you’re serving it over rice, stuffing it into tacos, or pairing it with roasted veggies.

How it fits in today’s cooking

Today, the Grill Pan Honey Glazed Steak Strips Recipe fits seamlessly into busy weeknights and special occasions alike. Modern cooks love it because it’s quick enough for a 30-minute dinner but fancy enough to impress guests. Plus, it’s a great way to use affordable cuts like flank or skirt steak, making it a budget-friendly favorite.

Many home chefs also tweak the recipe to match dietary preferences, like using coconut aminos instead of soy sauce or drizzling the glaze over grilled vegetables for a vegetarian twist. Whether you’re meal-prepping for the week or hosting a backyard BBQ, this dish stays relevant by blending tradition with modern convenience.

Taste and Texture

What makes it delicious

The Grill Pan Honey Glazed Steak Strips Recipe delivers a mouthwatering balance of sweet, savory, and smoky flavors. Each bite starts with a caramelized crust from the honey glaze, which crackles slightly before giving way to tender, juicy steak strips. Meanwhile, the garlic and soy sauce deepen the umami richness, while a hint of black pepper adds a warm, subtle kick. As you chew, the texture stays satisfyingly meaty yet effortless—no toughness here. Best of all, the aroma of sizzling steak and honey wafts through the air, making the Grill Pan Honey Glazed Steak Strips Recipe impossible to resist.

Boosting the flavor

For an extra flavor boost, try swapping honey with maple syrup for a deeper, earthy sweetness. Alternatively, a sprinkle of smoked paprika or chili flakes will add a smoky or spicy twist. If you love bold sauces, drizzle the steak strips with a garlic herb butter or a tangy balsamic reduction right before serving. Pair them with a bright, crunchy side like lemony asparagus to contrast the rich glaze. With these tweaks, your Grill Pan Honey Glazed Steak Strips Recipe will shine even brighter.

Tips for Success

Best practices for results

Always pat the steak strips dry before seasoning to help the honey glaze stick better. Meanwhile, preheat your grill pan over medium-high heat for even cooking. For the best flavor, marinate the steak strips for at least 30 minutes before grilling. Additionally, brush the honey glaze in layers during the last few minutes of cooking to build a glossy, caramelized finish. Finally, let the Grill Pan Honey Glazed Steak Strips Recipe rest for 5 minutes before serving to lock in juices.

Mistakes to avoid

Avoid overcrowding the grill pan, as this steams the steak strips instead of searing them. Instead, cook in batches for perfect browning. Also, don’t skip the resting step—cutting too soon releases all the flavorful juices. If your glaze burns, reduce the heat slightly and apply it later in the cooking process. For more grilling tips, check out our guide on grill pan secrets. And if you’re unsure about marinating times, our steak marinades breakdown has all the details.

Serving and Pairing Suggestions

How to serve this dish

For a stunning presentation, arrange the Grill Pan Honey Glazed Steak Strips Recipe on a wooden board or slate platter to highlight their caramelized edges. Meanwhile, drizzle extra glaze over the top and sprinkle with fresh thyme or sesame seeds for a pop of color. These steak strips shine at casual gatherings, whether you serve them as an appetizer with toothpicks or as the star of a weeknight dinner. If you’re hosting a summer barbecue, layer them over a bed of crisp greens for a hearty salad that impresses guests effortlessly.

What goes well with it

Pair the Grill Pan Honey Glazed Steak Strips Recipe with garlic butter roasted potatoes for a satisfying contrast of sweet and savory flavors. Alternatively, try a light cucumber avocado salad to balance the richness of the dish. For drinks, a chilled glass of citrus-infused iced tea or a bold red wine enhances the honey glaze beautifully. If you love bold flavors, our spicy mango habanero wings make a fiery companion. Craving something creamy? Whip up a batch of our tangy cilantro lime dressing for dipping.

What cut of steak works best for Grill Pan Honey Glazed Steak Strips?

Flank steak or sirloin works best for Grill Pan Honey Glazed Steak Strips because they’re lean, tender, and slice easily. These cuts absorb the honey glaze well and cook quickly on a grill pan without becoming tough. Avoid thicker cuts like ribeye for this recipe.

How long should I marinate the steak for honey glazed strips?

For Grill Pan Honey Glazed Steak Strips, marinate the steak for at least 30 minutes, but no more than 4 hours. The honey in the marinade can start to break down the meat fibers if left too long. 1-2 hours delivers optimal flavor without compromising texture.

Can I make Grill Pan Honey Glazed Steak Strips without a grill pan?

Yes! While a grill pan creates perfect sear marks, you can use a regular skillet or cast iron pan for Grill Pan Honey Glazed Steak Strips. Just heat your alternative pan to medium-high before adding the strips. The key is getting that caramelized glaze while keeping the steak tender.

What sides pair well with honey glazed steak strips?

Grill Pan Honey Glazed Steak Strips pair beautifully with roasted vegetables, garlic mashed potatoes, or a crisp green salad. The sweetness of the glaze complements savory sides, while lighter options balance the rich flavors. For Asian-inspired variations, serve with jasmine rice and stir-fried veggies.

Best Slow Cooker Peanut Chicken Recipe

best-slow-cooker-peanut-chicken

“`html

Introduction

There’s something incredibly comforting about coming home to a meal that’s been simmering all day, filling the house with irresistible aromas. If you’re craving a dish that’s both easy and packed with flavor, this Slow Cooker Peanut Chicken Recipe is your answer. Perfect for busy weeknights or lazy weekends, it delivers tender chicken in a rich, creamy peanut sauce that’ll have everyone asking for seconds. Whether you’re a slow cooker pro or just starting out, this recipe promises minimal effort with maximum reward. Plus, it’s a fantastic way to bring global flavors to your table without the hassle.

About This Recipe

The Slow Cooker Peanut Chicken Recipe combines juicy chicken thighs with a luscious blend of peanut butter, coconut milk, and warm spices. Unlike complicated takeout orders, this dish comes together with simple ingredients you likely already have. Simply toss everything into the slow cooker, let it work its magic, and return to a meal that tastes like you spent hours in the kitchen. What makes it special? It’s versatile enough for meal prep, family dinners, or even impressing guests. If you love bold flavors but hate the cleanup, this recipe fits seamlessly into your routine.

Moreover, this dish aligns perfectly with our blog’s mission to deliver approachable, flavorful recipes. Whether you’re a fan of our easy weeknight dinners or our global flavors made simple series, you’ll appreciate how this recipe bridges convenience and excitement. The slow cooker does most of the work, freeing you to focus on what matters—whether that’s relaxing or tackling your to-do list. And because it’s naturally gluten-free and dairy-free (depending on your ingredients), it caters to diverse dietary needs without sacrificing taste.

Why I Love This Recipe

This Slow Cooker Peanut Chicken Recipe holds a special place in my heart because it reminds me of cozy family gatherings. My aunt used to make a stovetop version, but the slow cooker adaptation lets me enjoy those same nostalgic flavors with even less effort. The first time I tested it, my kitchen smelled like my childhood, and the first bite transported me back to her table. Now, it’s my go-to when I need a meal that feels like a hug—or when I want to introduce friends to the magic of peanut sauce. It’s proof that the best recipes aren’t just about taste; they’re about the memories they create.

“`

Health and Nutrition

Why it’s good for your body

Slow Cooker Peanut Chicken Recipe packs a powerful nutritional punch while delivering rich, satisfying flavors. First, the lean chicken breast provides high-quality protein to support muscle growth and repair. Additionally, the natural peanut butter adds healthy fats that keep your heart strong and your energy levels steady. Together, these ingredients make Slow Cooker Peanut Chicken Recipe a balanced meal that fuels your body efficiently.

Moreover, this dish includes garlic and ginger, which boast anti-inflammatory properties. These spices not only enhance the taste but also help your immune system stay resilient. Furthermore, the slow cooking process preserves nutrients better than high-heat methods, ensuring you get the most from every bite. Whether you need a post-workout meal or a comforting dinner, Slow Cooker Peanut Chicken Recipe delivers both nourishment and satisfaction.

Finally, the recipe incorporates coconut milk, which offers medium-chain triglycerides for quick energy. Since it avoids refined sugars and processed ingredients, Slow Cooker Peanut Chicken Recipe keeps blood sugar levels stable. With its combination of protein, healthy fats, and antioxidants, this dish proves that delicious food can also be incredibly good for you.

How it fits in a healthy lifestyle

Slow Cooker Peanut Chicken Recipe fits seamlessly into a balanced diet, whether you focus on high-protein meals, gluten-free eating, or heart-healthy choices. The lean chicken and natural peanut butter make it ideal for fitness enthusiasts, while the absence of gluten-containing ingredients caters to those with sensitivities. Plus, the healthy fats support cardiovascular wellness, aligning with heart-smart dietary goals.

For busy weeknights, this recipe simplifies meal prep without sacrificing nutrition. Pair it with quinoa or steamed veggies for a complete, nutrient-dense plate. If you love easy, wholesome recipes, explore our meal prep ideas for more time-saving options. And if you’re curious about other high-protein dishes, check out our protein-packed dinners to keep your energy levels high. Slow Cooker Peanut Chicken Recipe proves that eating well doesn’t have to be complicated or bland.

Print
clock clock iconcutlery cutlery iconflag flag iconfolder folder iconinstagram instagram iconpinterest pinterest iconfacebook facebook iconprint print iconsquares squares iconheart heart iconheart solid heart solid icon

Slow Cooker Peanut Chicken


  • Author: Chef Emy

Description

A delicious and easy slow cooker chicken dish with a rich peanut sauce, perfect for busy weeknights.


Ingredients

Scale

For the Crust:

  • 1.5 lbs boneless, skinless chicken thighs
  • 1/2 cup peanut butter
  • 1/4 cup soy sauce
  • 1/4 cup honey
  • 2 tbsp rice vinegar
  • 2 cloves garlic, minced
  • 1 tsp ginger, grated
  • 1/2 tsp red pepper flakes
  • 1/4 cup chicken broth
  • 2 tbsp chopped peanuts (for garnish)
  • 2 tbsp chopped cilantro (for garnish)

Instructions

1. Prepare the Crust:

  1. Place chicken thighs in the slow cooker.
  2. In a bowl, whisk together peanut butter, soy sauce, honey, rice vinegar, garlic, ginger, red pepper flakes, and chicken broth until smooth.
  3. Pour the sauce over the chicken, ensuring it is evenly coated.
  4. Cover and cook on low for 4-5 hours or high for 2-3 hours, until chicken is tender.
  5. Shred the chicken slightly with a fork and stir to coat in the sauce.
  6. Garnish with chopped peanuts and cilantro before serving.

Notes

You can customize the seasonings to taste.

“`html

How to Prepare This Dish

Steps and time-saving tips

First, gather all your ingredients for the Slow Cooker Peanut Chicken Recipe to streamline the process. Then, whisk together the peanut butter, soy sauce, honey, and lime juice in a small bowl until smooth. Next, layer the chicken breasts at the bottom of your slow cooker and pour the sauce evenly over them. For extra flavor, sprinkle minced garlic and grated ginger on top before covering. Set your slow cooker to low for 6 hours or high for 3 hours, depending on your schedule. Meanwhile, chop green onions and cilantro for garnish—this prep step saves time later. Once the chicken cooks, shred it directly in the slow cooker using two forks, then stir to coat every piece with the rich peanut sauce. Serve over rice or noodles, and drizzle with a bit of extra sauce for a restaurant-worthy finish. If you’re short on time, use pre-minced garlic and ginger from the store. Also, doubling the recipe ensures leftovers for quick meals later in the week.

Mistakes I’ve made and learned from

Early on, I rushed the sauce mixing for my Slow Cooker Peanut Chicken Recipe, leaving clumps of peanut butter that didn’t blend well. Now, I warm the peanut butter slightly or thin it with a tablespoon of hot water for a smoother consistency. Another hiccup? Overcrowding the slow cooker with too much chicken, which led to uneven cooking. I learned to arrange the breasts in a single layer, as recommended in my slow cooker basics guide. Also, skipping the garnish seemed harmless, but fresh herbs and a squeeze of lime brighten the dish immensely—something I picked up from my flavor boosters post. These small tweaks made all the difference.

“`

Cultural Connection and Variations

Where this recipe comes from

The Slow Cooker Peanut Chicken Recipe draws inspiration from West African and Southeast Asian flavors, where peanut-based sauces have deep roots. In Ghana, for example, groundnut stew (a close cousin) brings families together during celebrations. Meanwhile, Thai cooks often balance the richness of peanut sauce with bright lime and chili. This dish bridges continents, offering a cozy twist on tradition.

My grandmother first introduced me to a stovetop version of Slow Cooker Peanut Chicken Recipe, simmering it for hours with extra ginger. Some families add sweet potatoes for heartiness, while others toss in greens like spinach for freshness. Across the American South, you might find it served over cornbread instead of rice. No matter the variation, the creamy peanut flavor always takes center stage.

How it fits in today’s cooking

Today, the Slow Cooker Peanut Chicken Recipe shines as a weeknight hero. Busy cooks love how the slow cooker does the work while they tackle other tasks, like baking a batch of gluten-free muffins for tomorrow’s breakfast. It’s also a star at potlucks, where its crowd-pleasing flavors pair perfectly with vibrant summer salads.

Modern twists include using almond butter for dietary needs or tossing in quinoa for extra protein. Some even repurpose leftovers into tacos or grain bowls. Whether you crave comfort food or need a freezer-friendly meal, this recipe adapts effortlessly to today’s kitchens. After all, good food only gets better when it works with your life.

Taste and Texture

What makes it delicious

The Slow Cooker Peanut Chicken Recipe delivers a rich, savory-sweet experience that lingers on the palate. Tender chicken shreds effortlessly, soaking up a velvety peanut sauce with hints of garlic, ginger, and a touch of honey. Each bite offers a creamy, slightly nutty texture, balanced by the bright tang of lime juice. Meanwhile, the aroma of toasted peanuts and warm spices fills the kitchen, making it irresistible even before the first taste. Whether served over rice or noodles, the Slow Cooker Peanut Chicken Recipe satisfies with its comforting yet vibrant flavors.

Boosting the flavor

For an extra flavor kick, try swapping creamy peanut butter for crunchy to add subtle texture. A sprinkle of crushed peanuts or fresh cilantro brightens each serving, while a dash of sriracha brings heat. Pair it with a side of garlic butter green beans for contrast or drizzle with honey lime dressing to enhance the sweetness. Experiment with coconut milk for a silkier sauce or double the ginger for a bolder zing. The Slow Cooker Peanut Chicken Recipe adapts beautifully to creative tweaks.

Tips for Success

Best practices for results

Always brown the chicken before adding it to the slow cooker for deeper flavor in your Slow Cooker Peanut Chicken Recipe. Meanwhile, stir the peanut butter well before mixing it into the sauce to prevent clumping. For even cooking, arrange the chicken in a single layer and avoid overfilling the slow cooker. Additionally, check the sauce consistency halfway through and thin it with broth if needed. Finally, garnish with fresh cilantro and crushed peanuts just before serving for extra texture and brightness.

Mistakes to avoid

One common mistake is skipping the step of deglazing the pan after browning the chicken. This step captures all the flavorful bits, so always scrape them into the slow cooker. Another error is overcooking the chicken, which can make it dry. Instead, follow our guide on slow cooker times for perfect doneness. Also, avoid using old or separated peanut butter, as it can ruin the sauce’s texture. For more tips on handling ingredients, check out our peanut butter sauces article.

Serving and Pairing Suggestions

How to serve this dish

For a stunning presentation, serve your Slow Cooker Peanut Chicken Recipe over a bed of fluffy jasmine rice or colorful quinoa. Meanwhile, garnish with fresh cilantro, chopped peanuts, and a squeeze of lime to brighten the flavors. Alternatively, pack it into lettuce cups for a fun, hands-on meal that works great for casual gatherings. Whether you’re hosting a weeknight dinner or a potluck, this dish brings warmth and comfort to any table.

What goes well with it

Pair your Slow Cooker Peanut Chicken Recipe with crisp, refreshing sides like a tangy cucumber salad or steamed bok choy. Additionally, a side of garlic butter noodles adds a rich contrast to the creamy peanut sauce. For drinks, try a chilled glass of Riesling or a citrusy iced tea to balance the dish’s savory notes. If you’re craving more Asian-inspired flavors, our vegetable spring rolls or miso soup make perfect starters.

Can I use crunchy peanut butter in Slow Cooker Peanut Chicken Recipe?

Yes, crunchy peanut butter works well in Slow Cooker Peanut Chicken Recipe and adds a pleasant texture. However, smooth peanut butter creates a more consistent sauce. Choose based on your preference—both versions taste delicious after slow cooking.

How long should I cook Slow Cooker Peanut Chicken on high?

For best results, cook Slow Cooker Peanut Chicken Recipe on high for 3–4 hours. This ensures the chicken becomes tender while allowing the peanut sauce to thicken properly. Always check that the chicken reaches 165°F internally before serving.

What sides go well with Slow Cooker Peanut Chicken?

Slow Cooker Peanut Chicken Recipe pairs perfectly with jasmine rice, steamed vegetables, or a fresh cucumber salad. For extra crunch, try serving with crushed peanuts or crispy wonton strips on top. The creamy peanut sauce complements these sides beautifully.

Can I make Slow Cooker Peanut Chicken Recipe ahead of time?

Absolutely! Slow Cooker Peanut Chicken Recipe actually tastes better when the flavors meld overnight. Store it in an airtight container in the fridge for up to 3 days, then reheat gently on the stove or in the microwave.

Easy Homemade Stromboli Recipe – Perfect for Dinner

easy-homemade-stromboli-recipe-dinner

Introduction

There’s something undeniably comforting about pulling a golden, bubbling Homemade Stromboli Recipe out of the oven. The aroma of melted cheese, savory meats, and warm dough fills the kitchen, instantly transporting you to cozy family dinners or lively game-day gatherings. Whether you’re a seasoned home cook or just starting your culinary journey, this stromboli delivers that perfect balance of simplicity and indulgence. Plus, it’s endlessly customizable, so you can make it your own with whatever fillings you love most. Let’s dive into why this dish deserves a spot in your recipe rotation and how it captures the heart of home cooking.

What Is Stromboli?

Unlike its cousin, the calzone, a Homemade Stromboli Recipe rolls its delicious fillings into a log-shaped masterpiece before baking to crispy perfection. Originating in the United States, stromboli combines Italian-inspired flavors with the convenience of a handheld meal. Think of it as a cross between a pizza and a sandwich, packed with gooey cheese, robust meats, and your favorite veggies. What makes it special? First, it’s incredibly versatile. You can swap ingredients based on what’s in your fridge or dietary preferences. Second, it’s a crowd-pleaser. Serve it sliced for parties or pack it for picnics—it always disappears fast.

This recipe fits perfectly with the warm, approachable tone of our blog, where we celebrate fuss-free cooking that brings people together. If you love dishes like our Easy Homemade Pizza Dough, you’ll appreciate how stromboli uses similar techniques but with a fun twist. Plus, it’s a fantastic way to repurpose leftovers, reducing food waste while creating something new and exciting. For more inspiration on creative meals, check out our guide to Quick Weeknight Dinners.

Why I Love This Recipe

Stromboli holds a special place in my heart because it reminds me of Sunday nights growing up. My dad would roll out the dough while my siblings and I argued over fillings—pepperoni for me, mushrooms for my sister, and extra olives for Mom. Even now, the process of shaping the dough and watching it puff in the oven feels like a little ritual of love. It’s not just food; it’s a way to slow down, get creative, and share something delicious with the people who matter most. That’s the magic of a Homemade Stromboli Recipe: it’s as much about the memories as it is about the meal.

Health and Nutrition

Why it’s good for your body

Homemade Stromboli Recipe packs a nutritious punch while satisfying your cravings. First, it delivers a balanced mix of protein, carbs, and healthy fats. For instance, the cheese and meat provide protein, while the whole-wheat dough offers fiber-rich carbs. Additionally, you can load it with veggies like spinach or bell peppers for extra vitamins.

Moreover, making Homemade Stromboli Recipe at home lets you control the ingredients. You can skip processed additives and opt for lean meats or plant-based proteins. Furthermore, the tomatoes in the sauce add lycopene, an antioxidant that supports heart health. Pair it with a side salad, and you boost your meal’s nutrient density even more.

Finally, Homemade Stromboli Recipe fuels your body with energy. The complex carbs from the dough digest slowly, keeping you full longer. Meanwhile, the protein helps repair muscles, making it a great post-workout option. Whether you enjoy it for lunch or dinner, this dish balances taste and nutrition effortlessly.

How it fits in a healthy lifestyle

Homemade Stromboli Recipe fits perfectly into a balanced diet. You can customize it to match dietary goals, like using gluten-free dough or low-fat cheese. For heart-healthy options, try turkey pepperoni and part-skim mozzarella. If you need more protein, add grilled chicken or tofu.

Planning meals ahead? Homemade Stromboli Recipe freezes well for quick, wholesome dinners. Pair it with our Easy Vegetable Soup for a fiber-rich combo. Or, serve it alongside our Avocado Chopped Salad for extra healthy fats. Either way, you get a satisfying meal without sacrificing nutrition.

Busy weeknights don’t have to mean unhealthy takeout. With simple swaps and smart pairings, Homemade Stromboli Recipe keeps your eating habits on track. It’s proof that comfort food can be both delicious and nourishing.

Print
clock clock iconcutlery cutlery iconflag flag iconfolder folder iconinstagram instagram iconpinterest pinterest iconfacebook facebook iconprint print iconsquares squares iconheart heart iconheart solid heart solid icon

Homemade Stromboli Recipe


  • Author: Chef Emy

Description

A delicious and easy-to-make stromboli filled with savory meats, cheese, and vegetables.


Ingredients

Scale

For the Crust:

  • 1 lb pizza dough
  • 1/2 cup marinara sauce
  • 8 slices pepperoni
  • 8 slices salami
  • 1 cup shredded mozzarella cheese
  • 1/2 cup sliced bell peppers
  • 1/2 teaspoon Italian seasoning
  • 1 tablespoon olive oil

Instructions

1. Prepare the Crust:

  1. Preheat oven to 375°F (190°C) and line a baking sheet with parchment paper.
  2. Roll out the pizza dough into a rectangle on a floured surface.
  3. Spread marinara sauce evenly over the dough, leaving a 1-inch border.
  4. Layer pepperoni, salami, mozzarella cheese, and bell peppers on top of the sauce.
  5. Sprinkle Italian seasoning over the fillings.
  6. Roll the dough tightly from one long side to the other, sealing the edges.
  7. Brush the top with olive oil and bake for 25-30 minutes or until golden brown.
  8. Let cool for 5 minutes before slicing and serving.

Notes

You can customize the seasonings to taste.

How to Prepare This Dish

Steps and time-saving tips

Start by preheating your oven to 375°F so it’s ready when your Homemade Stromboli Recipe dough is prepped. While the oven heats, roll out your pizza dough on a lightly floured surface into a rectangle about ¼-inch thick. Next, layer your favorite deli meats and cheeses evenly over the dough, leaving a 1-inch border around the edges. For extra flavor, drizzle a thin line of marinara sauce down the center before adding toppings. Carefully fold one long side over the fillings, then tuck and roll tightly to seal the edges. Transfer the stromboli to a parchment-lined baking sheet, seam-side down, and brush the top with olive oil or an egg wash for a golden finish. Bake for 20-25 minutes until the crust turns crispy and the cheese bubbles. Let it cool for 5 minutes before slicing—this prevents the fillings from oozing out. To save time, prep your fillings in advance or use store-bought dough for quicker assembly. If you’re short on ingredients, check out my quick pizza dough replacement guide for easy swaps.

Mistakes I’ve made and learned from

My first attempt at this Homemade Stromboli Recipe ended in a leaky mess because I overstuffed it. The fillings burst through the seams mid-bake, leaving a cheesy disaster in my oven. Now, I stick to a moderate layer of toppings and press the edges firmly to seal. Another lesson? Skipping the egg wash made the crust pale and less appealing. A quick brush before baking gives that perfect golden crunch. If your dough tears, don’t panic—patch it with a small piece of extra dough, just like I learned from my fixing torn pizza dough post. Trust me, a little patience goes a long way with stromboli!

Cultural Connection and Variations

Where this recipe comes from

The Homemade Stromboli Recipe traces its roots back to Italian-American kitchens, where creative cooks transformed traditional pizza dough into a portable, hearty meal. Unlike its cousin, the calzone, stromboli rolls ingredients inside the dough before baking, creating a crispy outer layer with a gooey, flavorful center. Many believe it originated in Philadelphia in the 1950s, though some argue it has ties to Sicily. Either way, this dish quickly became a staple for families who wanted something satisfying yet easy to customize.

Today, you’ll find endless twists on the Homemade Stromboli Recipe. In some regions, they stuff it with spicy soppressata and provolone, while others prefer a veggie-packed version with roasted peppers and mozzarella. My family always adds a layer of garlic butter for extra richness—a trick my grandmother swore by. Whether you keep it classic or experiment, stromboli adapts to whatever ingredients you love most.

How it fits in today’s cooking

The Homemade Stromboli Recipe still shines in modern kitchens because it’s versatile and crowd-pleasing. Busy parents love it for weeknight dinners, while foodies dress it up with artisanal cheeses and cured meats. It’s also a star at game-day gatherings, where slices disappear faster than you can say “pass the marinara.” Plus, stromboli freezes beautifully, making it a smart choice for meal prep alongside dishes like easy freezer meals.

Many cooks now put their own spin on it, like using whole-wheat dough or adding global flavors like pesto or chorizo. For those who crave a sweet-and-savory twist, stromboli even pairs well with desserts like decadent chocolate tart. No matter how you serve it, this dish proves that comfort food never goes out of style.

Taste and Texture

What makes it delicious

Homemade Stromboli Recipe delivers a mouthwatering blend of flavors and textures that make every bite irresistible. The golden, slightly crisp crust gives way to a soft, chewy interior, while melted cheese stretches with each pull. Savory Italian meats like pepperoni or salami add a rich, salty depth, and the tangy marinara sauce ties everything together with a bright, herb-infused kick. Fresh herbs like basil or oregano lend a fragrant aroma, and the buttery dough carries a subtle sweetness that balances the bold fillings. Whether served warm or at room temperature, Homemade Stromboli Recipe satisfies with its hearty, comforting layers.

Boosting the flavor

Elevate your Homemade Stromboli Recipe with a few easy tweaks. Swap standard mozzarella for smoked provolone to add a deeper, smoky flavor, or mix in caramelized onions for a touch of sweetness. A sprinkle of red pepper flakes or a drizzle of garlic-infused olive oil before baking amps up the heat and aroma. For dipping, pair it with a zesty homemade ranch dressing or a spicy arrabiata sauce to complement the savory fillings. Experiment with different cheeses or add roasted vegetables for extra texture and freshness—every variation makes it even more delicious.

Tips for Success

Best practices for results

Always chill the dough for at least 30 minutes before rolling it out—this prevents tearing and makes shaping easier. Use parchment paper when baking your Homemade Stromboli Recipe to ensure even cooking and a crisp bottom. For the best flavor, layer your fillings evenly but avoid overstuffing, as this can cause leaks. Additionally, brush the crust with olive oil or egg wash for a golden, professional finish every time.

Mistakes to avoid

One common mistake is rolling the dough too thin, which leads to holes and filling spills. Instead, aim for a quarter-inch thickness to keep your Homemade Stromboli Recipe sturdy. Another error is skipping the vent slits on top, which traps steam and creates a soggy crust. For more dough-handling tips, check out our guide on perfect pizza dough. Also, avoid using cold cheese straight from the fridge—room-temperature ingredients melt better, as explained in our cheese selection guide.

Serving and Pairing Suggestions

How to serve this dish

Slice your Homemade Stromboli Recipe into thick, diagonal pieces for a restaurant-worthy presentation. Meanwhile, arrange them on a wooden board or rustic platter to highlight the golden crust and cheesy filling. For a festive touch, garnish with fresh basil or parsley and serve with a side of marinara sauce for dipping. Whether you’re hosting game day, a family gathering, or a casual weeknight dinner, this dish always impresses. Additionally, warm it slightly before serving to keep the cheese perfectly gooey.

What goes well with it

Pair your Homemade Stromboli Recipe with a crisp Caesar salad for a balanced meal—the crunchy greens contrast beautifully with the rich, savory flavors. Alternatively, try it alongside roasted garlic Parmesan potatoes for a hearty combo. For drinks, a chilled craft beer or sparkling lemonade complements the dish wonderfully. If you love dipping sauces, our homemade ranch dressing or tangy marinara sauce elevate every bite. Finally, don’t forget to check out our garlic knots or Italian antipasto platter for a full spread.

What dough is best for Homemade Stromboli Recipe?

Pizza dough works best for Homemade Stromboli Recipe because it’s sturdy yet pliable. You can use store-bought dough for convenience or make your own for a fresher taste. The dough should be rolled thin to ensure even cooking and a crisp crust.

Can I freeze Homemade Stromboli before baking?

Yes, you can freeze Homemade Stromboli after assembling it but before baking. Wrap it tightly in plastic wrap and foil, then store for up to 3 months. Thaw in the refrigerator overnight before baking for best results.

What fillings go well in a Homemade Stromboli Recipe?

Classic fillings for Homemade Stromboli Recipe include Italian meats like pepperoni, salami, and ham, plus mozzarella cheese and marinara sauce. You can also add veggies like bell peppers or mushrooms. Avoid overfilling to prevent leaks during baking.

How do I prevent my Homemade Stromboli from getting soggy?

To prevent sogginess in your Homemade Stromboli Recipe, pat dry any wet ingredients like veggies before adding them. Brush the dough with olive oil to create a moisture barrier, and avoid overloading with sauce. Bake on a preheated pizza stone or baking sheet for a crispier crust.

Best Cheeseburger Pie Recipe – Easy and Delicious

best-cheeseburger-pie-recipe

Introduction

There’s something undeniably comforting about biting into a juicy cheeseburger, but what if you could enjoy all those flavors in a warm, sliceable pie? This Cheeseburger Pie Recipe brings together the best of both worlds—savory ground beef, melty cheese, and a buttery crust—for a dish that feels like a hug on a plate. Whether you’re craving a weeknight dinner that’s both easy and satisfying or need a crowd-pleaser for game day, this recipe delivers. Plus, it’s a fantastic way to sneak in veggies for picky eaters. Trust me, one bite and you’ll wonder why you haven’t been making this all along.

About This Recipe

The Cheeseburger Pie Recipe is a hearty, family-friendly dish that combines classic burger ingredients with the simplicity of a pie. Imagine seasoned ground beef, sharp cheddar, and a golden crust coming together in under an hour. Unlike traditional burgers, this version skips the bun but keeps all the flavor, making it perfect for gluten-free adjustments or low-carb diets. Moreover, it’s incredibly versatile. You can customize it with your favorite toppings, like diced tomatoes or crispy bacon, just as you would with our Loaded Potato Skillet.

What makes this recipe stand out is its balance of nostalgia and convenience. It reminds me of the dinners my mom used to make, yet it’s effortless enough for busy weeknights. The pie format also makes it ideal for meal prep or potlucks, much like our Easy Chicken Pot Pie. The blog’s tone leans toward approachable, flavorful recipes that don’t require fancy techniques, and this dish fits right in. Whether you’re a seasoned cook or a beginner, you’ll find the steps straightforward and the results delicious.

Why I Love This Recipe

This Cheeseburger Pie Recipe holds a special place in my heart because it’s the first dish I ever made for my now-husband. Back in our tiny apartment kitchen, I nervously layered the ingredients, hoping it would turn out okay. The moment he took a bite and grinned, I knew it was a keeper. Over the years, I’ve tweaked the recipe—adding a dash of Worcestershire sauce or swapping cheeses—but the joy it brings hasn’t changed. It’s more than just food; it’s a reminder of how simple meals can create lasting memories.

Health and Nutrition

Why it’s good for your body

Cheeseburger Pie Recipe packs a nutritious punch while satisfying comfort food cravings. First, it delivers a solid dose of protein from ground beef and cheese, which helps build muscle and keeps you full longer. Additionally, the eggs in the recipe provide essential amino acids and support healthy metabolism. Because the dish includes wholesome ingredients like onions and garlic, it also offers antioxidants that boost immunity.

Moreover, Cheeseburger Pie Recipe balances indulgence with nourishment. While it tastes rich and hearty, you can easily tweak the recipe to reduce fat by using lean ground beef or low-fat cheese. The crustless version cuts carbs, making it a great option for those watching their intake. Furthermore, the dish contains calcium from cheese, which strengthens bones and supports nerve function.

Finally, Cheeseburger Pie Recipe fits into various dietary preferences. For instance, you can swap regular cheese for a dairy-free alternative if needed. Since it’s a one-dish meal, it simplifies healthy eating without sacrificing flavor. Whether you’re fueling up after a workout or feeding a family, this recipe delivers both taste and nutrition.

How it fits in a healthy lifestyle

Cheeseburger Pie Recipe works well in a balanced diet because it’s versatile and nutrient-dense. If you’re focusing on high-protein meals, this dish fits perfectly, especially when paired with a fresh side salad. For gluten-free eaters, simply skip the traditional crust or use a gluten-free alternative like almond flour.

Planning meals ahead? Cheeseburger Pie Recipe stores beautifully, making it a practical choice for meal prep. Pair it with roasted vegetables or a light soup for a well-rounded dinner. If you’re exploring heart-healthy options, check out our guide to healthy dinner ideas for more inspiration. For those tracking macros, this recipe adapts easily—try our tips in this meal prep strategies post to keep your nutrition on track. With simple adjustments, Cheeseburger Pie Recipe becomes a smart part of your everyday eating habits.

Print
clock clock iconcutlery cutlery iconflag flag iconfolder folder iconinstagram instagram iconpinterest pinterest iconfacebook facebook iconprint print iconsquares squares iconheart heart iconheart solid heart solid icon

Cheeseburger Pie


  • Author: Chef Emy

Description

A savory pie that combines the flavors of a classic cheeseburger in a delicious, easy-to-make dish.


Ingredients

Scale

For the Crust:

  • 1 lb ground beef
  • 1/2 cup chopped onion
  • 1/2 teaspoon salt
  • 1/4 teaspoon black pepper
  • 1 cup shredded cheddar cheese
  • 1/2 cup milk
  • 1/2 cup biscuit baking mix
  • 2 eggs

Instructions

1. Prepare the Crust:

  1. Preheat oven to 400°F (200°C).
  2. In a skillet, cook beef and onion over medium heat until beef is browned. Drain excess fat and stir in salt and pepper.
  3. Spread beef mixture in a pie plate and sprinkle with cheese.
  4. In a bowl, whisk together milk, biscuit mix, and eggs. Pour over beef and cheese.
  5. Bake for 25 minutes or until golden brown and set in the center.

Notes

You can customize the seasonings to taste.

How to Prepare This Dish

Steps and time-saving tips

Start by preheating your oven to 375°F so it’s ready when you need it. While the oven heats, brown the ground beef in a skillet over medium heat, breaking it into small crumbles with a wooden spoon. Drain any excess grease, then stir in diced onions and seasonings like garlic powder, salt, and pepper for extra flavor. Meanwhile, whisk together eggs, milk, and biscuit mix in a separate bowl until smooth—this creates the perfect creamy layer for your Cheeseburger Pie Recipe. Spread the cooked beef mixture into a greased pie dish, then sprinkle shredded cheddar cheese evenly over the top. Pour the egg mixture over the cheese, ensuring it covers everything. Bake for 25-30 minutes until the center sets and the edges turn golden brown. Let it cool for 5 minutes before slicing so it holds together. For a time-saving hack, prep the beef filling ahead and store it in the fridge—just assemble and bake when ready. If you’re short on time, use pre-shredded cheese or frozen diced onions to speed things up.

Mistakes I’ve made and learned from

I once rushed the baking time for this Cheeseburger Pie Recipe, pulling it out too early because the top looked done. The center was still jiggly, and it fell apart when sliced. Now I always check with a toothpick—if it comes out clean, it’s ready. Another mistake? Overloading the pie with toppings, which made the egg mixture sink and bake unevenly. Stick to the recommended cheese and beef ratios for the best texture. If you’re new to savory pies, my Perfect Pie Crust Guide has tips for avoiding soggy bottoms, and this Cheese Melting Secrets post will help you get that gooey, golden finish every time. Trust me, a little patience pays off with this dish!

Cultural Connection and Variations

Where this recipe comes from

Cheeseburger Pie Recipe feels like a love letter to American comfort food, blending the heartiness of a classic burger with the cozy simplicity of a pie. Originally, it likely emerged from Midwestern home kitchens in the 1950s or 60s, when busy families needed a way to stretch ground beef into a filling meal. However, some argue it has Southern roots, where biscuit-topped casseroles reign. Either way, this dish captures the spirit of resourcefulness and nostalgia.

Around the world, cooks put their own spin on the concept. In Australia, they might add beetroot or a fried egg, nodding to their iconic “burger with the lot.” Meanwhile, in Mexico, you’ll find versions with jalapeños or chorizo for extra kick. Even within the U.S., some families swear by a Bisquick crust, while others layer tater tots or swap cheddar for pepper jack. The beauty of Cheeseburger Pie Recipe lies in its adaptability—it’s a blank canvas for creativity.

How it fits in today’s cooking

Today, Cheeseburger Pie Recipe still earns its spot as a weeknight hero. Busy parents adore it because it’s faster than grilling burgers but just as satisfying. Plus, modern twists keep it fresh—think gluten-free crusts, plant-based meat, or even sneaking in veggies like spinach or mushrooms. It’s also a star at potlucks, where it pairs perfectly with easy side dishes that round out the meal.

Seasonally, it shines in fall and winter, offering warmth when the air turns crisp. Yet, it’s versatile enough for summer picnics if you serve it room-temperature with a crisp refreshing salad. Whether you’re craving nostalgia or need a crowd-pleaser, this recipe bridges generations and tastes. After all, who can resist the magic of burger flavors baked into a golden, cheesy pie?

Taste and Texture

What makes it delicious

Cheeseburger Pie Recipe delivers a mouthwatering blend of savory, cheesy, and slightly tangy flavors that mimic your favorite burger in pie form. The ground beef sizzles with umami richness, while melted cheddar adds a creamy, gooey texture that stretches with every bite. A buttery, flaky crust crumbles perfectly, contrasting the tender filling. Meanwhile, diced onions and a hint of mustard or Worcestershire sauce deepen the flavor with a subtle kick. The aroma alone—a mix of toasted pastry, sizzled beef, and bubbling cheese—will have everyone gathering around the table. Whether served warm or at room temperature, Cheeseburger Pie Recipe satisfies cravings with its hearty, comforting layers.

Boosting the flavor

Elevate your Cheeseburger Pie Recipe by stirring caramelized onions into the beef for a sweet, smoky depth. For extra tang, swirl in a spoonful of homemade pickles or top slices with a drizzle of burger sauce. Crumbled bacon or a sprinkle of smoked paprika amps up the savoriness, while a dash of garlic powder enhances the overall warmth. If you love a crispy finish, try adding a layer of golden breadcrumbs before baking. Small tweaks like these keep the dish exciting without overpowering its classic appeal.

Tips for Success

Best practices for results

Always preheat your oven before baking the Cheeseburger Pie Recipe to ensure even cooking. For the best texture, press the crust firmly into the pan so it holds together after baking. Additionally, drain excess grease from the beef mixture to prevent a soggy bottom layer. If you want extra flavor, sprinkle shredded cheese on top during the last few minutes of baking. Finally, let the pie cool slightly before slicing so the layers set properly.

Mistakes to avoid

Avoid overmixing the crust, as this can make it tough instead of flaky. Instead, gently combine the ingredients until just incorporated. Many cooks also forget to blind bake the crust, which helps prevent sogginess—check out our guide on blind baking for perfect pies for details. Another common misstep is using cold toppings straight from the fridge, so always bring ingredients like sour cream or diced tomatoes to room temperature first. For more tips on balancing flavors, explore our savory pie seasoning guide to elevate your Cheeseburger Pie Recipe.

Serving and Pairing Suggestions

How to serve this dish

Slice your Cheeseburger Pie Recipe into generous wedges and serve it warm for the best flavor and texture. For a fun twist, top each piece with a dollop of sour cream, a sprinkle of fresh chives, or even a few pickles to mimic classic burger toppings. Meanwhile, if you’re hosting a casual gathering, consider pairing it with a build-your-own topping bar so guests can customize their slices. Alternatively, serve it at brunch alongside other hearty dishes for a crowd-pleasing meal. Finally, for a visually appealing presentation, place the pie on a rustic wooden board or colorful platter to highlight its golden crust and cheesy filling.

What goes well with it

A crisp, refreshing side like this Easy Cucumber Salad balances the richness of the Cheeseburger Pie Recipe perfectly. Additionally, a tangy dipping sauce such as sriracha mayo or classic ketchup adds an extra layer of flavor. For drinks, try a chilled craft beer or a fizzy soda to cut through the savory notes. If you’re craving something heartier, pair it with these Garlic Parmesan Fries for the ultimate comfort food experience. Each pairing enhances the dish while keeping the meal satisfying and well-rounded.

What is cheeseburger pie made of?

Cheeseburger Pie Recipe typically includes ground beef, onions, cheddar cheese, and a biscuit or pie crust base. Some versions add ingredients like pickles, mustard, or tomatoes to mimic classic cheeseburger flavors.

Can I make cheeseburger pie without a crust?

Yes! For a low-carb version of Cheeseburger Pie Recipe, simply omit the crust and bake the meat-and-cheese mixture in a greased pie dish. The eggs and cheese will bind everything together as it cooks.

How do you keep cheeseburger pie from getting soggy?

To prevent a soggy Cheeseburger Pie Recipe, drain excess grease from the cooked beef and pat it dry. Pre-baking the crust for 5-7 minutes (blind baking) also helps create a crispier base.

What sides go well with cheeseburger pie?

Classic burger sides complement Cheeseburger Pie Recipe perfectly – try serving with crispy fries, a simple green salad, or pickles. For a heartier meal, add roasted vegetables or baked beans.

Best Slow Cooker Beef Stroganoff – Easy Comfort Food

best-slow-cooker-beef-stroganoff

“`html

Introduction

There’s something undeniably comforting about coming home to a warm, hearty meal that practically cooks itself. If you’re craving rich flavors with minimal effort, this Slow Cooker Beef Stroganoff Recipe is your answer. Picture tender beef, savory mushrooms, and a creamy sauce that hugs every bite of egg noodles—all without babysitting the stove. Whether you’re juggling a busy schedule or simply want a fuss-free dinner that feels like a hug in a bowl, this recipe delivers. Plus, it’s the kind of dish that makes everyone at the table ask for seconds, no matter the season.

About This Recipe

Slow Cooker Beef Stroganoff Recipe transforms a classic comfort dish into an effortless weeknight staple. Traditionally, beef stroganoff requires constant stirring and attention, but the slow cooker does all the work for you. Simply toss in the ingredients, let them simmer, and return to a meal that tastes like you spent hours in the kitchen. This version keeps the soul-warming essence of the original—succulent beef, earthy mushrooms, and a tangy sour cream sauce—while fitting seamlessly into modern, busy lives.

What makes this recipe stand out is its versatility. You can use budget-friendly cuts like chuck roast, which become melt-in-your-mouth tender after slow cooking. Meanwhile, the creamy sauce balances richness with a hint of brightness from mustard and Worcestershire sauce. It’s a crowd-pleaser that works for family dinners, potlucks, or even meal prep. If you love easy, flavorful dishes, you’ll also appreciate our comfort food recipes collection, which features more time-saving favorites.

This blog thrives on recipes that blend simplicity with big flavor, and Slow Cooker Beef Stroganoff Recipe nails that balance. It’s approachable for beginners yet satisfying for seasoned cooks. For more slow cooker inspiration, check out our slow cooker magic guide, packed with tips to elevate your meals. Above all, this dish embodies what we love: food that brings people together without the stress.

Why I Love This Recipe

This Slow Cooker Beef Stroganoff Recipe holds a special place in my heart because it reminds me of snowy evenings growing up. My mom would make it on hectic days, and the aroma would fill the house, promising warmth and togetherness. Now, I rely on it when life gets chaotic—it’s my go-to for cozy nights or when friends drop by unexpectedly. The best part? It always tastes like home, no matter how little effort I put in. That’s the magic of a truly great recipe.

“`

Health and Nutrition

Why it’s good for your body

Slow Cooker Beef Stroganoff Recipe packs a nutritious punch while delivering rich, comforting flavors. First, the lean beef provides high-quality protein, which helps build and repair muscles. Additionally, it contains iron and B vitamins, supporting energy levels and a healthy metabolism. Since the slow cooking process tenderizes the meat, your body absorbs these nutrients more easily.

Moreover, the mushrooms in Slow Cooker Beef Stroganoff Recipe offer immune-boosting benefits. They’re rich in antioxidants and selenium, which help protect cells from damage. Meanwhile, the onions and garlic add anti-inflammatory properties, promoting heart health. Together, these ingredients create a dish that’s as good for your body as it is for your taste buds.

Finally, the Greek yogurt or sour cream in Slow Cooker Beef Stroganoff Recipe adds probiotics for gut health. If you opt for Greek yogurt, you’ll also get extra protein and calcium. With balanced macros and micronutrients, this meal keeps you satisfied without weighing you down. Whether you’re fueling up after a workout or need a hearty family dinner, it’s a smart choice.

How it fits in a healthy lifestyle

Slow Cooker Beef Stroganoff Recipe fits seamlessly into a balanced diet. For protein-focused eaters, it delivers a hearty portion of lean beef to support muscle maintenance. If you’re watching carbs, simply serve it over zucchini noodles or cauliflower rice instead of pasta. The dish also works well for meal prep, saving time on busy weeknights.

For those following gluten-free diets, this recipe easily adapts by using gluten-free flour or cornstarch as a thickener. Heart-healthy eaters will appreciate the lean protein and vegetable-rich ingredients, which align with balanced diet tips. Plus, the slow cooker method locks in nutrients without excess oil, keeping calories in check.

Pair Slow Cooker Beef Stroganoff Recipe with a crisp side salad or steamed greens for extra fiber. If you love easy, wholesome meals, explore our healthy weeknight dinners for more inspiration. It’s a versatile dish that proves comfort food can be both delicious and nutritious.

Print
clock clock iconcutlery cutlery iconflag flag iconfolder folder iconinstagram instagram iconpinterest pinterest iconfacebook facebook iconprint print iconsquares squares iconheart heart iconheart solid heart solid icon

Slow Cooker Beef Stroganoff


  • Author: Chef Emy

Description

A creamy and comforting beef stroganoff made effortlessly in the slow cooker.


Ingredients

Scale

For the Crust:

  • 1.5 lbs beef stew meat
  • 1 onion, sliced
  • 8 oz mushrooms, sliced
  • 3 cloves garlic, minced
  • 1 cup beef broth
  • 1 tbsp Worcestershire sauce
  • 1 tsp Dijon mustard
  • 1/2 tsp salt
  • 1/4 tsp black pepper
  • 1/2 cup sour cream
  • 2 tbsp all-purpose flour
  • 8 oz egg noodles, cooked

Instructions

1. Prepare the Crust:

  1. Place beef, onion, mushrooms, garlic, beef broth, Worcestershire sauce, Dijon mustard, salt, and pepper in the slow cooker.
  2. Cover and cook on low for 7-8 hours or high for 3-4 hours, until beef is tender.
  3. In a small bowl, whisk together sour cream and flour. Stir into the slow cooker and cook for an additional 15 minutes.
  4. Serve the stroganoff over cooked egg noodles.

Notes

You can customize the seasonings to taste.

How to Prepare This Dish

Steps and time-saving tips

Start by browning the beef in a skillet over medium-high heat to lock in flavor—this step takes just 5 minutes but makes a huge difference. While the beef sears, whisk together the broth, Worcestershire sauce, and seasonings in your slow cooker. Next, transfer the beef to the slow cooker and stir in the mushrooms and onions. Cover and cook on low for 6-7 hours or high for 3-4 hours, depending on your schedule. For a time-saving hack, prep the ingredients the night before and refrigerate them in separate containers.

About 30 minutes before serving, stir in the sour cream and cream cheese until smooth. If the sauce seems too thin, mix a tablespoon of cornstarch with cold water and blend it in. Meanwhile, cook the egg noodles separately to avoid sogginess. Finally, garnish with fresh parsley and serve the Slow Cooker Beef Stroganoff Recipe over the noodles. For extra richness, drizzle a touch of melted butter over the noodles first. Leftovers? Store them in an airtight container—the flavors deepen overnight.

Mistakes I’ve made and learned from

I once rushed the browning step and ended up with bland beef—now I never skip it. Another time, I added the dairy too early, which curdled the sauce. Lesson learned: stir in sour cream and cream cheese at the very end. If you’re new to slow cooking, check out my guide on slow cooker basics to avoid common pitfalls. Also, don’t overcrowd the skillet when browning; work in batches for even caramelization. For more tips on balancing creamy sauces, my perfect sauces post breaks it down. Trust me, a little patience pays off with this Slow Cooker Beef Stroganoff Recipe.

Cultural Connection and Variations

Where this recipe comes from

Slow Cooker Beef Stroganoff Recipe carries a rich history that stretches back to 19th-century Russia. Originally, chefs prepared it with sautéed beef in a sour cream sauce, serving it as a luxurious dish for aristocracy. Over time, families across Europe and America adapted it, turning it into a beloved comfort food. In some regions, cooks swap beef for mushrooms or chicken, while others add a splash of brandy for depth.

My grandmother made her version of Slow Cooker Beef Stroganoff Recipe with tender chunks of chuck roast and a dollop of Dijon mustard. She swore it added a tangy kick. Meanwhile, in Hungary, they might stir in paprika for warmth, and in Sweden, they often serve it over mashed potatoes instead of egg noodles. No matter the twist, the dish always feels like a hug in a bowl.

Today, this recipe bridges generations. Whether you stick to the classic or experiment with modern twists, Slow Cooker Beef Stroganoff Recipe remains a timeless favorite. It’s the kind of meal that sparks stories around the dinner table, connecting us to flavors and memories from around the world.

How it fits in today’s cooking

Slow Cooker Beef Stroganoff Recipe fits perfectly into today’s busy lifestyles. With just a few minutes of prep, the slow cooker does the heavy lifting, making it ideal for weeknights or cozy weekends. Many home cooks now lighten it up with Greek yogurt instead of sour cream or toss in extra veggies for a nutrient boost. It’s also a star at potlucks, where it pairs wonderfully with easy dinner ideas like roasted Brussels sprouts or garlic bread.

During colder months, this dish becomes a staple for family gatherings. Some even serve it as part of their holiday spread, alongside comfort food classics like mashed potatoes and green bean casserole. Whether you’re feeding a crowd or just craving something hearty, Slow Cooker Beef Stroganoff Recipe delivers warmth and nostalgia in every bite.

Taste and Texture

What makes it delicious

Slow Cooker Beef Stroganoff Recipe delivers a rich, comforting experience with every bite. Tender beef melts in your mouth, while the creamy sauce—infused with earthy mushrooms and tangy sour cream—coats each piece luxuriously. Fragrant garlic and onions deepen the savory notes, and a hint of Dijon mustard adds a subtle kick. Meanwhile, the slow cooking process ensures the flavors meld perfectly, creating a dish that’s both hearty and velvety. Whether served over egg noodles or mashed potatoes, Slow Cooker Beef Stroganoff Recipe promises a satisfying balance of umami depth and silky texture.

Boosting the flavor

For an extra flavor boost, try stirring in a splash of Worcestershire sauce or a sprinkle of smoked paprika before serving. If you love bold herbs, fresh thyme or rosemary elevates the earthy profile. Craving more richness? Swap sour cream for crème fraîche or stir in a dollop of garlic herb butter for a luxurious finish. Pair it with a side of roasted garlic bread to soak up every last drop of the creamy sauce. Small tweaks can transform Slow Cooker Beef Stroganoff Recipe into your new weeknight favorite.

Tips for Success

Best practices for results

For the best Slow Cooker Beef Stroganoff Recipe, always sear the beef before adding it to the slow cooker. This step locks in flavor and keeps the meat tender. Additionally, stir in the sour cream at the very end to prevent curdling, and use full-fat versions for the creamiest texture. Finally, taste and adjust the seasoning just before serving, as slow cooking can mellow flavors over time.

Mistakes to avoid

Avoid overcrowding the slow cooker, as this can lead to uneven cooking. Instead, cut the beef into uniform pieces so everything cooks evenly. Also, resist the urge to lift the lid frequently, since this releases heat and extends cooking time. For more slow cooker tips, check out our guide on slow cooker basics. Another common mistake is using low-quality broth, which weakens the dish’s depth. For richer flavor, try our homemade beef broth recipe instead.

Serving and Pairing Suggestions

How to serve this dish

Slow Cooker Beef Stroganoff Recipe shines when you serve it over a bed of buttery egg noodles or fluffy mashed potatoes. For a festive touch, sprinkle fresh chopped parsley or chives on top to add color and freshness. Meanwhile, a dollop of sour cream or a swirl of Dijon mustard can elevate the creamy texture. This dish works beautifully for cozy family dinners, yet it also impresses guests at holiday gatherings. To make it extra special, pair it with warm crusty bread for soaking up every last bit of the rich sauce.

What goes well with it

First, try pairing Slow Cooker Beef Stroganoff Recipe with a crisp green salad like our Easy Avocado Salad to balance the richness. The creamy avocado and tangy dressing cut through the hearty flavors perfectly. Next, a glass of dry red wine or a light lager enhances the savory notes of the dish. Finally, for a comforting side, our Garlic Herb Dinner Rolls add warmth and a hint of garlic that complements the stroganoff beautifully. Each pairing brings out the best in this classic comfort food.

What cut of beef is best for Slow Cooker Beef Stroganoff Recipe?

Chuck roast or stew meat works best for Slow Cooker Beef Stroganoff Recipe because they become tender during long cooking. Avoid lean cuts like sirloin, as they can turn tough. The marbling in chuck roast adds rich flavor to the dish.

Can I make Slow Cooker Beef Stroganoff Recipe without sour cream?

Yes, you can substitute Greek yogurt or cream cheese for sour cream in Slow Cooker Beef Stroganoff Recipe. For a dairy-free option, try coconut cream. Add any substitutes at the end of cooking to prevent curdling.

How long should I cook Slow Cooker Beef Stroganoff Recipe on high?

Cook Slow Cooker Beef Stroganoff Recipe for 4-5 hours on high or until the beef shreds easily. Cooking on low for 7-8 hours yields even more tender results. Always check for doneness before serving.

Can I freeze leftover Slow Cooker Beef Stroganoff Recipe?

Yes, Slow Cooker Beef Stroganoff Recipe freezes well for up to 3 months. Store without noodles and add fresh pasta when reheating. Thaw overnight in the fridge and warm gently on the stove.

Easy Crockpot Chicken and Gravy Recipe

easy-crockpot-chicken-gravy

“`html

Introduction

There’s something incredibly comforting about coming home to the rich aroma of tender chicken simmering in savory gravy, especially when your Crockpot does all the work. Whether you’re juggling a busy schedule or simply craving a hearty, no-fuss meal, this Crockpot Chicken and Gravy Recipe delivers every time. It’s the kind of dish that feels like a warm hug—simple, satisfying, and packed with flavor. Plus, with minimal prep and hands-off cooking, you’ll have more time to relax or enjoy with family. If you love easy, crowd-pleasing meals, this recipe will quickly become a staple in your kitchen.

About This Recipe

The Crockpot Chicken and Gravy Recipe is a classic comfort dish that combines juicy chicken with a velvety, flavorful gravy, all cooked low and slow for maximum tenderness. Unlike fussy recipes that demand constant attention, this one lets your slow cooker handle the heavy lifting. Simply toss in the ingredients, set it, and forget it. What makes this dish special is its versatility. Serve it over mashed potatoes, rice, or even biscuits for a meal that satisfies everyone at the table. It’s perfect for weeknight dinners, potlucks, or even meal prep—because who doesn’t love leftovers that taste even better the next day?

This recipe fits perfectly with the cozy, approachable vibe of our blog, where we celebrate simple yet delicious meals that bring people together. If you’re looking for more easy dinner ideas, check out our quick weeknight meals roundup. And if you’re new to slow cooking, our slow cooker tips will help you master the basics in no time. Whether you’re a seasoned cook or a beginner, this Crockpot Chicken and Gravy Recipe is a foolproof way to create a meal that feels both indulgent and effortless.

Why I Love This Recipe

This Crockpot Chicken and Gravy Recipe holds a special place in my heart because it reminds me of Sunday dinners at my grandma’s house. She always knew how to make the simplest ingredients taste extraordinary, and this dish captures that same magic. I love how it brings people together—whether it’s my kids asking for seconds or friends raving about the creamy gravy. Plus, on hectic days, it’s a lifesaver. There’s nothing better than knowing dinner is ready when I walk in the door, filling the house with warmth and nostalgia. It’s more than just a recipe; it’s a little piece of comfort I get to share every time I make it.

“`

Health and Nutrition

Why it’s good for your body

Crockpot Chicken and Gravy Recipe delivers a hearty dose of lean protein, thanks to its tender chicken. Protein helps repair muscles and keeps you full longer, making this dish a smart choice for active lifestyles. Additionally, the slow-cooking process locks in nutrients, ensuring you get the most from every bite.

Moreover, Crockpot Chicken and Gravy Recipe includes simple, wholesome ingredients like onions and garlic. These add antioxidants that support immune health. Since the recipe avoids heavy creams or excessive butter, it stays light yet flavorful. You can enjoy comfort food without compromising on nutrition.

Furthermore, the gravy in Crockpot Chicken and Gravy Recipe thickens naturally as it cooks, reducing the need for processed thickeners. This means fewer additives and more real food benefits. Pair it with steamed veggies or a fresh salad, and you have a well-rounded meal. Slow cooking also enhances digestion by breaking down proteins gently.

How it fits in a healthy lifestyle

Crockpot Chicken and Gravy Recipe fits seamlessly into a balanced diet. Its high-protein content makes it ideal for muscle recovery, while the moderate fat and carb levels keep energy steady. For gluten-free eaters, simply swap the flour for a gluten-free alternative like cornstarch or almond flour.

If you follow a heart-healthy diet, this recipe works well because it uses lean chicken and minimal saturated fats. For meal preppers, Crockpot Chicken and Gravy Recipe stores beautifully, so you can enjoy it throughout the week. Check out our meal prep guide for more time-saving ideas.

Busy families will love how this dish requires little hands-on time. Just set it and forget it. Plus, it pairs perfectly with whole grains or nutritious sides for a complete meal. Whether you need a weeknight dinner or a cozy weekend meal, this recipe supports healthy habits without sacrificing flavor.

Print
clock clock iconcutlery cutlery iconflag flag iconfolder folder iconinstagram instagram iconpinterest pinterest iconfacebook facebook iconprint print iconsquares squares iconheart heart iconheart solid heart solid icon

Crockpot Chicken and Gravy


  • Author: Chef Emy

Description

Tender chicken slow-cooked in a rich, savory gravy for a comforting meal.


Ingredients

Scale

For the Crust:

  • 4 boneless, skinless chicken breasts
  • 1 packet (0.87 oz) dry chicken gravy mix
  • 1 packet (0.87 oz) dry onion soup mix
  • 1 can (10.5 oz) cream of chicken soup
  • 1 cup chicken broth
  • 1/2 teaspoon garlic powder
  • 1/2 teaspoon black pepper

Instructions

1. Prepare the Crust:

  1. Place chicken breasts in the bottom of the crockpot.
  2. In a bowl, whisk together gravy mix, onion soup mix, cream of chicken soup, chicken broth, garlic powder, and black pepper.
  3. Pour the mixture over the chicken in the crockpot.
  4. Cover and cook on low for 6-7 hours or high for 3-4 hours until chicken is tender.
  5. Shred or slice the chicken and serve with the gravy over mashed potatoes or rice.

Notes

You can customize the seasonings to taste.

“`html

How to Prepare This Dish

Steps and time-saving tips

Start by seasoning your chicken generously with salt, pepper, and a touch of garlic powder for extra flavor. Next, heat a skillet over medium-high heat and sear the chicken for 2-3 minutes per side until golden brown. This step locks in juices and adds depth to your Crockpot Chicken and Gravy Recipe. Meanwhile, whisk together chicken broth, cream of chicken soup, and a splash of Worcestershire sauce in your slow cooker. Once the chicken is seared, transfer it to the crockpot and spoon the gravy mixture over the top. Cover and cook on low for 4-5 hours or until the chicken is tender and fully cooked. For a time-saving hack, use pre-cut chicken thighs or breasts to skip the chopping step. About 30 minutes before serving, stir in a cornstarch slurry to thicken the gravy if needed. Finally, garnish with fresh parsley for a pop of color and serve over mashed potatoes or rice.

Mistakes I’ve made and learned from

One of my biggest blunders with this Crockpot Chicken and Gravy Recipe was overcooking the chicken, leaving it dry and stringy. I learned that checking the internal temperature with a meat thermometer at the 4-hour mark prevents this. Another mistake? Skipping the sear. The first time I tried this recipe, I tossed raw chicken straight into the slow cooker, and the flavor fell flat. Now, I always take those extra few minutes to brown the chicken—it makes all the difference. If you’re new to slow cooking, my guide on crockpot basics covers these pitfalls in detail. Also, if your gravy turns out too thin, don’t panic. My gravy-thickening tips will help you fix it in no time.

“`

Cultural Connection and Variations

Where this recipe comes from

Every bite of Crockpot Chicken and Gravy Recipe tells a story of comfort and tradition. This dish roots itself in Southern American cooking, where slow-cooked meals bring families together around hearty, flavorful food. Originally, cooks simmered chicken with simple pantry staples like broth and flour, letting time work its magic. Today, the recipe still carries that same soul-warming essence, but with endless twists depending on where you go.

In the Midwest, you might find Crockpot Chicken and Gravy Recipe served over mashed potatoes with a side of green beans. Meanwhile, in Louisiana, someone could add a Cajun kick with paprika and cayenne. Across the pond, the British version leans into herbs like thyme and rosemary, while in Asia, cooks might swap the gravy for a soy-based sauce. Even in my own family, we stir in a splash of white wine for extra depth. No matter the variation, the core remains: tender chicken swimming in rich, savory gravy.

How it fits in today’s cooking

Crockpot Chicken and Gravy Recipe fits perfectly into modern life because it’s both nostalgic and practical. Busy parents love how the slow cooker does the work while they tackle everything else. Meanwhile, foodies appreciate how easy it is to tweak—whether they’re adding mushrooms for umami or using gluten-free flour for dietary needs. It’s a staple for Sunday dinners, but also shines during holidays when families crave familiar flavors.

Seasonal twists keep it fresh year-round. In fall, try pairing it with roasted root vegetables, or in summer, serve it alongside a crisp salad. For more inspiration, check out our guide to easy weeknight dinners or explore how to balance comfort food with lighter sides in our healthy meal prep ideas. No matter how you spin it, this dish proves that some classics never go out of style.

Taste and Texture

What makes it delicious

The Crockpot Chicken and Gravy Recipe delivers a melt-in-your-mouth experience with tender, juicy chicken smothered in rich, velvety gravy. Each bite bursts with savory depth, thanks to slow-cooked onions and garlic that infuse the dish with a fragrant, umami-packed aroma. The gravy coats every piece of chicken in a silky, luscious layer, while a hint of thyme adds earthy warmth. Meanwhile, the chicken itself stays incredibly moist, effortlessly shredding under a fork. Whether served over mashed potatoes or buttery noodles, the Crockpot Chicken and Gravy Recipe balances comfort and flavor in every spoonful.

Boosting the flavor

For an extra flavor boost, try stirring in a splash of white wine or a dollop of sour cream to brighten the gravy’s richness. If you love herbs, fresh rosemary or sage will add a fragrant punch. Craving more texture? Top your Crockpot Chicken and Gravy Recipe with crispy fried onions or toasted breadcrumbs for a satisfying crunch. Pair it with a side of garlic herb roasted potatoes or a light lemony spring salad to balance the dish’s hearty warmth. Small tweaks can transform this classic into something even more memorable.

Tips for Success

Best practices for results

For the best Crockpot Chicken and Gravy Recipe, always sear the chicken first to lock in flavor. Additionally, use fresh herbs like thyme or rosemary to enhance the gravy’s depth. Meanwhile, stir the gravy occasionally to prevent clumping and ensure even thickening. Finally, keep the slow cooker on low for tender chicken that falls apart effortlessly.

Mistakes to avoid

Avoid overcrowding the Crockpot Chicken and Gravy Recipe with too much chicken, as this slows cooking and dilutes the gravy. Instead, layer ingredients evenly for consistent results. Also, skip adding cold broth directly to the pot, since it lowers the temperature and extends cooking time. For more slow cooker tips, check out our guide on slow cooker basics. Another common mistake is using flour without whisking it into a slurry first, which creates lumps. For smoother gravy, follow our gravy perfection techniques.

Serving and Pairing Suggestions

How to serve this dish

For a cozy family dinner, serve Crockpot Chicken and Gravy Recipe over a bed of fluffy mashed potatoes or buttery egg noodles. Alternatively, spoon it into a warm bread bowl for a fun, rustic twist. To elevate the presentation, garnish with fresh thyme or a sprinkle of cracked black pepper. Meanwhile, for holiday gatherings, pair it with elegant side dishes and serve it in a deep platter with a ladle for easy sharing. Whether it’s a weeknight meal or a special occasion, this dish always shines.

What goes well with it

First, try pairing Crockpot Chicken and Gravy Recipe with roasted garlic green beans for a crisp, flavorful contrast. The earthy notes of the beans balance the rich gravy perfectly. Next, a side of honey-glazed carrots adds a touch of sweetness that complements the savory chicken. For drinks, a chilled glass of crisp white wine or sparkling apple cider enhances the meal. If you love hearty sides, our creamy mashed potatoes or buttery dinner rolls make excellent companions. No matter what you choose, these pairings turn a simple dish into a satisfying feast.

How long does it take to cook Crockpot Chicken and Gravy?

This Crockpot Chicken and Gravy Recipe typically takes 4-6 hours on low heat or 2-3 hours on high. Cooking times may vary slightly depending on your slow cooker, but the chicken should reach an internal temperature of 165°F. The longer cook time on low helps the gravy develop richer flavors.

What’s the best cut of chicken for Crockpot Chicken and Gravy?

Boneless, skinless chicken thighs work best for this Crockpot Chicken and Gravy Recipe because they stay moist during slow cooking. You can use chicken breasts, but they may dry out faster. Thighs also add more flavor to the gravy as they cook.

Can I make Crockpot Chicken and Gravy without cream of chicken soup?

Yes! For a homemade version, mix 2 cups chicken broth with 3 tablespoons flour or cornstarch as a thickener. This Crockpot Chicken and Gravy Recipe becomes even more flavorful when you use real ingredients instead of canned soup. Add seasonings like garlic powder and thyme for extra depth.

What sides go well with Crockpot Chicken and Gravy?

This comforting Crockpot Chicken and Gravy Recipe pairs perfectly with mashed potatoes, rice, or egg noodles to soak up the delicious gravy. For vegetables, try steamed green beans, roasted carrots, or a crisp garden salad. A side of warm biscuits completes the meal.

Best Creamy Cajun Chicken Penne Pasta Recipe

best-creamy-cajun-chicken-penne

“`html

Introduction

There’s something undeniably comforting about a bowl of pasta that’s rich, creamy, and packed with bold flavors. If you’re craving a dish that delivers both warmth and a little kick, this Creamy Cajun Chicken Penne Pasta Recipe is your answer. Whether you’re cooking for a busy weeknight dinner or impressing guests at a weekend gathering, this recipe strikes the perfect balance between indulgence and simplicity. The tender chicken, smoky Cajun spices, and velvety sauce clinging to every bite of penne will make it an instant favorite. Plus, it comes together in under 30 minutes—because great food shouldn’t require hours in the kitchen.

About This Recipe

Creamy Cajun Chicken Penne Pasta Recipe is a vibrant twist on classic pasta dishes, blending tender chicken, al dente penne, and a luxuriously spiced cream sauce. What sets it apart is the bold Cajun seasoning, which adds depth and just the right amount of heat. Unlike heavier Alfredo-based pastas, this version keeps things lively with a balance of garlic, paprika, and a touch of cayenne. It’s the kind of meal that feels special without demanding complicated techniques or hard-to-find ingredients. In fact, you likely have most of the staples—like chicken, pasta, and heavy cream—already in your pantry.

This recipe fits perfectly with the approachable yet flavorful style of cooking we champion here. If you love dishes that deliver big taste with minimal fuss, you’ll appreciate how effortlessly this comes together. For more quick and satisfying meals, check out our Easy Weeknight Dinners collection. And if you’re new to Cajun flavors, don’t worry—this dish is a fantastic introduction. The spices are bold but not overwhelming, making it a crowd-pleaser for both spice lovers and those who prefer milder flavors. For more tips on balancing heat in your cooking, explore our guide on Spice Blends 101.

Why I Love This Recipe

This Creamy Cajun Chicken Penne Pasta Recipe holds a special place in my heart because it’s the dish that turned my skeptical family into Cajun cuisine fans. The first time I made it, my kids—who usually shy away from anything spicy—cleaned their plates and asked for seconds. There’s something magical about how the cream tames the heat just enough to let the spices shine without overpowering. It’s also my go-to when I need a quick but impressive meal for friends. Every time I serve it, someone asks for the recipe, and that’s the best compliment a home cook can get. Simple, satisfying, and full of personality—that’s why this pasta never fails to make me smile.

“`

Health and Nutrition

Why it’s good for your body

Creamy Cajun Chicken Penne Pasta Recipe packs a nutritious punch while delivering bold flavors. First, the lean chicken breast provides high-quality protein, which helps build and repair muscles. Additionally, the Cajun seasoning adds more than just heat—it often contains spices like paprika and garlic, which offer antioxidants. These compounds fight inflammation and support overall wellness.

Moreover, the creamy sauce in this dish often includes ingredients like Greek yogurt or light cream, which add richness without excessive calories. When you enjoy Creamy Cajun Chicken Penne Pasta Recipe, you also get a dose of complex carbs from the penne pasta. These carbs fuel your energy levels steadily, unlike refined sugars. Furthermore, if you use whole-grain penne, you’ll boost the fiber content, aiding digestion.

Finally, this dish incorporates vegetables like bell peppers or onions, adding vitamins and minerals. For instance, bell peppers deliver vitamin C, which strengthens immunity. Because of its balanced macronutrients and micronutrients, Creamy Cajun Chicken Penne Pasta Recipe keeps you satisfied and nourished. Whether you need a post-workout meal or a comforting dinner, it’s a smart choice.

How it fits in a healthy lifestyle

Creamy Cajun Chicken Penne Pasta Recipe fits seamlessly into a balanced diet. If you’re watching your protein intake, the chicken provides a lean source to meet your goals. For those focusing on heart health, swapping regular pasta for whole-grain or legume-based options can increase fiber and reduce refined carbs. You can also adjust the creaminess by using lighter alternatives like almond milk or low-fat yogurt.

This dish works well for meal prep too. Pair it with a simple side salad from our Easy Green Salad Recipe for extra nutrients. If you’re exploring gluten-free options, simply substitute the penne with a gluten-free pasta blend. For more ideas on balancing indulgent meals, check out our Healthy Eating Tips. Creamy Cajun Chicken Penne Pasta Recipe proves that flavorful food can still align with your wellness goals.

Print
clock clock iconcutlery cutlery iconflag flag iconfolder folder iconinstagram instagram iconpinterest pinterest iconfacebook facebook iconprint print iconsquares squares iconheart heart iconheart solid heart solid icon

Creamy Cajun Chicken Penne Pasta


  • Author: Chef Emy

Description

A rich and spicy pasta dish featuring tender chicken and penne in a creamy Cajun sauce.


Ingredients

Scale

For the Crust:

  • 8 oz penne pasta
  • 2 boneless, skinless chicken breasts, sliced
  • 1 tbsp Cajun seasoning
  • 2 tbsp olive oil
  • 1 red bell pepper, sliced
  • 1 small onion, diced
  • 2 cloves garlic, minced
  • 1 cup heavy cream
  • 1/2 cup chicken broth
  • 1/2 cup grated Parmesan cheese
  • Salt and pepper to taste
  • Fresh parsley for garnish

Instructions

1. Prepare the Crust:

  1. Cook penne pasta according to package instructions. Drain and set aside.
  2. Season chicken slices with Cajun seasoning. Heat olive oil in a large skillet over medium-high heat and cook chicken until browned and cooked through, about 5-6 minutes. Remove and set aside.
  3. In the same skillet, add bell pepper, onion, and garlic. Sauté until softened, about 3-4 minutes.
  4. Pour in heavy cream and chicken broth. Bring to a simmer, then stir in Parmesan cheese until melted and sauce thickens slightly.
  5. Return cooked chicken to the skillet and add the cooked penne. Toss to coat everything in the sauce. Season with salt and pepper to taste.
  6. Garnish with fresh parsley and serve hot.

Notes

You can customize the seasonings to taste.

How to Prepare This Dish

Steps and time-saving tips

Start by seasoning your chicken breasts generously with Cajun spice, making sure every inch gets coated for maximum flavor. While the chicken rests, bring a large pot of salted water to a boil for the penne pasta. Cook the pasta until al dente, then drain and set aside. Meanwhile, heat olive oil in a large skillet over medium-high heat and sear the chicken for about 6 minutes per side until golden and cooked through. Remove the chicken, let it rest for a few minutes, then slice it into thin strips. In the same skillet, melt butter and sauté minced garlic until fragrant, then whisk in heavy cream and a touch of chicken broth for a silky sauce. Stir in grated Parmesan until melted, then fold in the cooked penne and sliced chicken. For a time-saving hack, prep your Cajun seasoning in bulk ahead of time or use a store-bought blend. If the sauce thickens too quickly, just splash in a little extra broth to loosen it up. Finish with a sprinkle of fresh parsley and serve immediately.

Mistakes I’ve made and learned from

Early on, I made the mistake of overcrowding the skillet when searing the chicken, which steamed it instead of giving it that perfect crust. Now I cook in batches if needed, and the results are so much better. Another lesson? Don’t skip resting the chicken before slicing—those juices will run everywhere, leaving your meat dry. I also learned the hard way that overcooked pasta turns mushy in the sauce, so I set a timer religiously. For more foolproof tips, check out my guide on perfectly seared chicken and my troubleshooting post on fixing thick sauces. Trust me, a little patience goes a long way with this Creamy Cajun Chicken Penne Pasta Recipe.

Cultural Connection and Variations

Where this recipe comes from

The Creamy Cajun Chicken Penne Pasta Recipe bursts with the bold flavors of Louisiana, where Cajun cuisine thrives. Originating from the Acadian settlers, this dish blends French techniques with Southern spices. Families in New Orleans often tweak the recipe, adding extra heat with cayenne or balancing it with a splash of heavy cream. Meanwhile, in Italy, chefs might swap penne for pappardelle and skip the Cajun seasoning altogether, favoring herbs like rosemary and thyme.

In my own kitchen, the Creamy Cajun Chicken Penne Pasta Recipe became a weeknight hero after a trip to Baton Rouge. A local chef shared his secret: a dash of smoked paprika for depth. Some home cooks toss in bell peppers or mushrooms, while others keep it simple with just chicken and pasta. No matter the variation, the dish always brings people together, whether at a backyard BBQ or a cozy family dinner.

How it fits in today’s cooking

Today, the Creamy Cajun Chicken Penne Pasta Recipe fits perfectly into busy lives. Modern cooks love its versatility, often pairing it with a crisp summer salad for a balanced meal. Others adapt it for meal prep, storing portions for quick lunches. During holidays, it’s a crowd-pleaser at potlucks, especially when served alongside holiday appetizers.

Thanks to its rich flavors and easy customization, this dish remains a staple. Whether you’re craving comfort food or hosting friends, the Creamy Cajun Chicken Penne Pasta Recipe delivers every time. Plus, with gluten-free or dairy-free swaps, it caters to nearly any diet without losing its soul.

Taste and Texture

What makes it delicious

The Creamy Cajun Chicken Penne Pasta Recipe delivers a bold, satisfying experience with every bite. Tender, juicy chicken coated in smoky Cajun spices pairs perfectly with al dente penne, while the velvety cream sauce wraps everything in rich, indulgent comfort. Fresh garlic and onions add a fragrant depth, and a hint of Parmesan cheese brings a salty, umami finish. Meanwhile, the slight crunch of bell peppers contrasts beautifully with the dish’s creamy texture. Every forkful of this Creamy Cajun Chicken Penne Pasta Recipe bursts with warmth, spice, and just the right amount of heat—making it impossible to resist a second helping.

Boosting the flavor

Elevate your Creamy Cajun Chicken Penne Pasta Recipe with a few easy tweaks. For extra heat, stir in a dash of cayenne or top with pickled jalapeños. If you love freshness, sprinkle chopped parsley or a squeeze of lemon to brighten the dish. Crumbled bacon or sautéed mushrooms add a savory punch, while a drizzle of garlic herb sauce enhances the creamy base. For a lighter twist, swap heavy cream with coconut milk and toss in extra veggies like spinach or zucchini. Don’t forget to pair it with a side of buttery garlic bread for the ultimate comfort meal.

Tips for Success

Best practices for results

For the best Creamy Cajun Chicken Penne Pasta Recipe, always cook your pasta al dente since it will continue to soften in the sauce. Meanwhile, generously season your chicken with Cajun spice before searing to lock in bold flavor. Additionally, use heavy cream instead of milk for a richer, velvety texture. Finally, toss the pasta in the sauce off the heat to prevent overcooking and ensure even coating.

Mistakes to avoid

Avoid overcrowding the pan when searing chicken, as this steams the meat instead of creating a crispy crust. Instead, cook in batches if needed. Also, don’t skip deglazing the pan with broth after browning the chicken—those browned bits add depth to your Creamy Cajun Chicken Penne Pasta Recipe. For more on balancing spices, check out our Cajun seasoning guide. Finally, resist overcooking the sauce; if it thickens too much, simply thin it with reserved pasta water as shown in our pasta sauce tips.

Serving and Pairing Suggestions

How to serve this dish

For a stunning presentation, plate your Creamy Cajun Chicken Penne Pasta Recipe in wide, shallow bowls to showcase the rich sauce and vibrant colors. Meanwhile, garnish with fresh parsley or a sprinkle of grated Parmesan for an extra touch of elegance. This dish shines at casual weeknight dinners yet also impresses at gatherings like potlucks or holiday feasts. To make it even more inviting, serve with crusty bread on the side for soaking up every last bit of the creamy Cajun sauce.

What goes well with it

Pair your Creamy Cajun Chicken Penne Pasta Recipe with a crisp, refreshing salad like this Avocado Salad to balance the bold spices. Alternatively, a glass of chilled white wine or sparkling lemonade enhances the dish’s creamy texture and zesty kick. For heartier meals, try serving it alongside these Garlic Butter Rolls, which add a buttery contrast to the Cajun flavors. Each pairing elevates the dining experience while keeping the focus on the main dish.

What makes Cajun chicken penne pasta creamy?

The creaminess in Creamy Cajun Chicken Penne Pasta Recipe comes from a rich sauce made with heavy cream, Parmesan cheese, and butter. Some recipes also use cream cheese or a roux for extra thickness, balancing the spicy Cajun flavors.

How spicy is creamy Cajun chicken pasta?

Creamy Cajun Chicken Penne Pasta Recipe typically has a mild to medium spice level, but you can adjust the heat by using more or less Cajun seasoning. The cream sauce helps mellow the spice, making it flavorful without overwhelming heat.

Can I use a different pasta for creamy Cajun chicken pasta?

Yes! While penne works great in Creamy Cajun Chicken Penne Pasta Recipe, you can substitute fettuccine, rigatoni, or bowtie pasta. Just ensure the pasta holds the creamy sauce well for the best texture.

What sides go well with creamy Cajun chicken pasta?

Pair Creamy Cajun Chicken Penne Pasta Recipe with garlic bread, a crisp green salad, or roasted vegetables. The sides complement the dish’s richness and add freshness to balance the meal.

Best Chicken Orzo Soup – Easy Homemade Recipe

best-chicken-orzo-soup-recipe

“`html

Introduction

There’s something deeply comforting about a warm bowl of Chicken Orzo Soup Recipe, especially on those days when you need a little extra coziness. Whether you’re fighting off a chilly evening or simply craving a hearty, wholesome meal, this dish delivers every time. With tender chicken, delicate orzo pasta, and a rich, savory broth, it’s the kind of recipe that feels like a hug in a bowl. Plus, it’s incredibly easy to make, which means you can enjoy it even on your busiest weeknights. Let’s dive into why this soup deserves a spot in your regular meal rotation.

About Chicken Orzo Soup

Chicken Orzo Soup Recipe combines simple ingredients into a dish that’s both nourishing and deeply satisfying. Unlike heavier soups, this one strikes the perfect balance between lightness and richness, making it ideal for any season. The orzo, a small rice-shaped pasta, adds a delightful texture while soaking up the flavorful broth. Meanwhile, the chicken provides lean protein, and the vegetables contribute freshness and nutrients. Whether you’re meal prepping or serving a crowd, this recipe adapts effortlessly to your needs.

What makes this soup stand out is its versatility. You can customize it with your favorite herbs, swap in seasonal veggies, or even make it creamy by stirring in a splash of heavy cream. Additionally, it pairs wonderfully with crusty bread or a crisp salad, like this Simple Avocado Toast for a light lunch. For those who love one-pot wonders, this dish fits right in with other easy favorites, such as our Quick Pasta Recipes collection.

Beyond its practicality, Chicken Orzo Soup Recipe embodies the heartwarming, approachable vibe of this blog. It’s the kind of meal that brings people together without demanding hours in the kitchen. Whether you’re a seasoned cook or just starting out, this recipe guarantees success—and plenty of compliments.

Why I Love This Recipe

This Chicken Orzo Soup Recipe holds a special place in my heart because it reminds me of family gatherings and quiet Sunday dinners. My grandmother used to make a similar version, and the aroma alone would draw everyone to the table. Now, whenever I prepare it, I feel that same sense of warmth and connection. It’s more than just a meal—it’s a reminder of love, comfort, and the simple joys of home cooking. Every spoonful feels like a little piece of tradition, and I hope it becomes a favorite in your kitchen too.

“`

Health and Nutrition

Why it’s good for your body

Chicken Orzo Soup Recipe packs a nutritious punch while comforting your taste buds. First, the lean chicken breast delivers high-quality protein to support muscle repair and keep you full longer. Additionally, the orzo pasta provides energizing carbohydrates, making this soup a balanced meal. Moreover, the vegetables like carrots, celery, and onions add fiber, vitamins, and antioxidants to boost immunity and digestion.

Since Chicken Orzo Soup Recipe simmers in a savory broth, it hydrates your body while delivering essential minerals. The broth also contains collagen from the chicken, which may support joint health. Furthermore, the garlic and herbs often used in the recipe offer anti-inflammatory benefits. Whether you’re fighting a cold or just craving a wholesome dish, this soup nourishes you from the inside out.

Finally, Chicken Orzo Soup Recipe is naturally low in fat, especially if you skim excess grease. By choosing whole-grain orzo, you can even increase the fiber content. With its blend of protein, veggies, and comforting warmth, this recipe is as good for your body as it is for your soul.

How it fits in a healthy lifestyle

Chicken Orzo Soup Recipe fits seamlessly into a balanced diet. If you’re watching your gluten intake, simply swap regular orzo for a gluten-free version. The soup also aligns with heart-healthy eating, thanks to its lean protein and vegetable-rich base. For those focusing on high-protein meals, adding extra chicken or even white beans can boost the nutritional profile.

This recipe is perfect for meal prep, as it reheats well and stays flavorful for days. Pair it with a crisp salad or whole-grain bread for a complete meal. If you’re looking for more ways to incorporate healthy soups into your routine, check out our vegetable soup roundup. For tips on balancing comfort food and nutrition, explore our guide to healthy comfort food swaps. Whether you’re fueling a busy week or enjoying a cozy night in, Chicken Orzo Soup Recipe keeps your goals on track.

Print
clock clock iconcutlery cutlery iconflag flag iconfolder folder iconinstagram instagram iconpinterest pinterest iconfacebook facebook iconprint print iconsquares squares iconheart heart iconheart solid heart solid icon

Chicken Orzo Soup


  • Author: Chef Emy

Description

A comforting and hearty soup with tender chicken, orzo pasta, and fresh vegetables.


Ingredients

Scale

For the Crust:

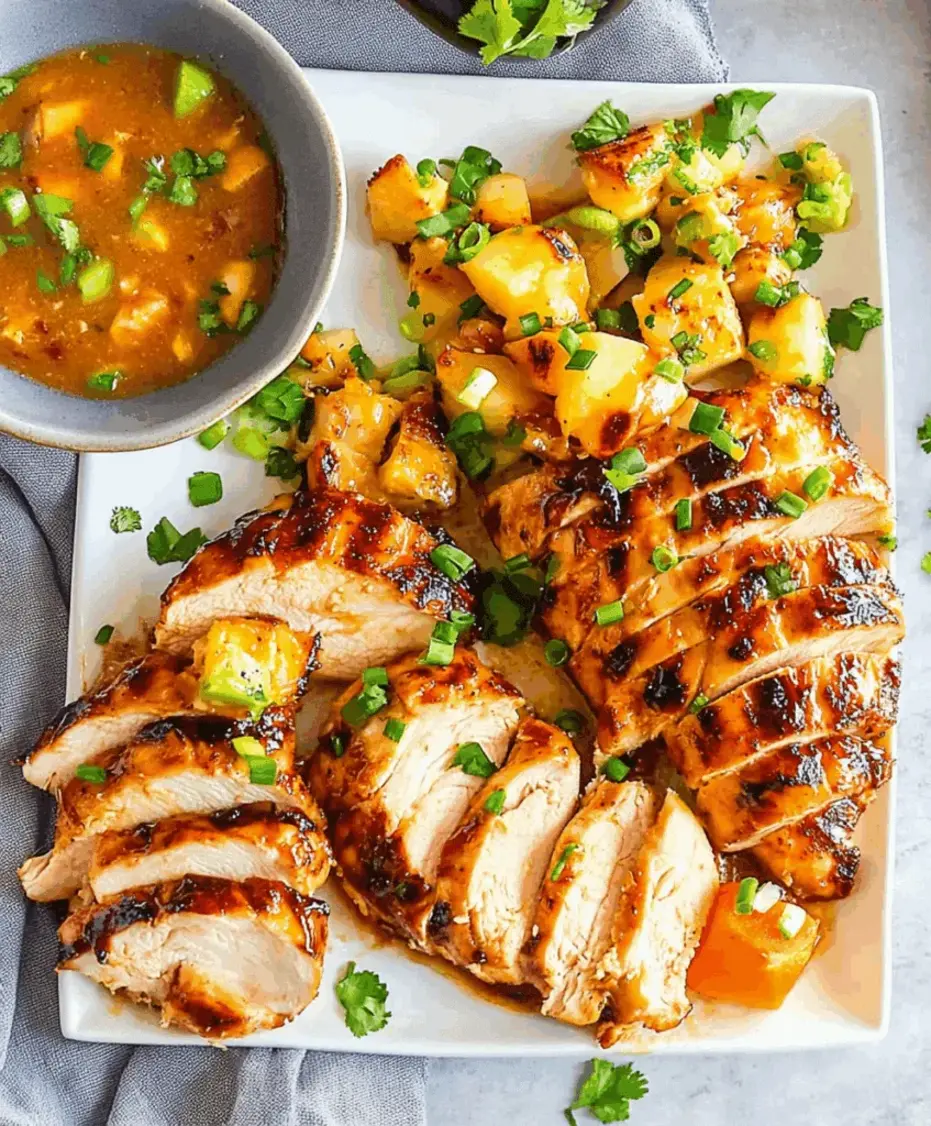
  • 1 lb boneless, skinless chicken breasts
  • 1 cup orzo pasta
  • 4 cups chicken broth
  • 2 cups water
  • 1 medium onion, diced
  • 2 carrots, sliced
  • 2 celery stalks, sliced
  • 2 cloves garlic, minced
  • 1 tsp dried thyme
  • 1 tsp dried oregano
  • Salt and pepper to taste
  • 2 tbsp olive oil
  • Fresh parsley for garnish

Instructions

1. Prepare the Crust:

  1. Heat olive oil in a large pot over medium heat. Add onion, carrots, and celery. Cook until softened, about 5 minutes.
  2. Add garlic, thyme, and oregano. Cook for 1 minute until fragrant.
  3. Pour in chicken broth and water. Bring to a boil.
  4. Add chicken breasts and reduce heat to a simmer. Cook for 15-20 minutes until chicken is cooked through.
  5. Remove chicken, shred it, and return to the pot.
  6. Add orzo pasta and cook for 8-10 minutes until tender.
  7. Season with salt and pepper to taste.
  8. Garnish with fresh parsley before serving.

Notes

You can customize the seasonings to taste.

“`html

How to Prepare This Dish

Steps and time-saving tips

Start by heating a large pot over medium heat and drizzling in olive oil. Add diced onions, carrots, and celery, then sauté until they soften, about 5 minutes. Stir in minced garlic for just 30 seconds to release its aroma without burning. Next, pour in chicken broth and bring the mixture to a gentle boil. Meanwhile, shred pre-cooked chicken or use a rotisserie chicken to save time. Once the broth simmers, add the chicken and uncooked orzo, stirring well to prevent sticking. Reduce the heat to medium-low and let the Chicken Orzo Soup Recipe simmer for 10-12 minutes, or until the orzo turns tender. For extra flavor, toss in a bay leaf or a sprinkle of dried thyme. Before serving, squeeze fresh lemon juice over the top and garnish with chopped parsley. If the soup thickens too much, just thin it with a splash of broth or water.

Mistakes I’ve made and learned from

Early on, I overcooked the orzo, turning it mushy and ruining the texture of my Chicken Orzo Soup Recipe. Now, I set a timer and taste-test a piece at the 9-minute mark. Another blunder? Skipping the lemon juice. It seemed optional, but that bright acidity balances the richness perfectly. If you’re new to soups, my guide on common soup mistakes covers these pitfalls in detail. Also, I once used low-sodium broth without adjusting the seasoning—resulting in a bland pot. Now, I always taste and tweak with salt, pepper, or even a dash of umami boosters like soy sauce. Trust me, these small fixes make all the difference.

“`

Cultural Connection and Variations

Where this recipe comes from

Chicken Orzo Soup Recipe carries the warmth of Mediterranean kitchens, where simple ingredients transform into soul-soothing meals. Originating in Greece, this dish blends tender chicken, tiny orzo pasta, and vibrant vegetables into a broth that feels like a hug in a bowl. Families there often serve it year-round, but it shines brightest during chilly winters or after festive gatherings. Meanwhile, in Italy, cooks might swap orzo for pastina or add a splash of lemon for brightness. Some versions even include avgolemono, a creamy egg-lemon sauce that thickens the broth.

In my own kitchen, Chicken Orzo Soup Recipe became a staple during busy weeknights. My grandmother taught me to simmer the bones for extra richness, a trick she learned from her Lebanese neighbors. Across the Middle East, similar soups feature fragrant spices like cinnamon or turmeric, proving how one dish can weave through cultures. Whether you prefer it classic or with a twist, this soup bridges traditions and tastes.

How it fits in today’s cooking

Today, Chicken Orzo Soup Recipe fits perfectly into modern lifestyles. Busy parents love it for quick, nourishing dinners, while meal preppers batch-cook it for easy lunches. During flu season, it’s a go-to remedy, packed with protein and veggies to boost immunity. Many cooks now adapt it for Instant Pots or slow cookers, like the ones featured in our kitchen hacks guide, to save time without losing flavor.

It’s also a star at holiday gatherings, especially alongside dishes from our seasonal menus. Whether you serve it as a starter or the main event, this soup brings comfort to any table. From its Mediterranean roots to today’s kitchens, Chicken Orzo Soup Recipe remains a timeless favorite—simple, adaptable, and always delicious.

Taste and Texture

What makes it delicious

Chicken Orzo Soup Recipe delivers a comforting, savory experience with every spoonful. The tender shredded chicken melts in your mouth, while the orzo pasta adds a satisfyingly chewy texture. Fragrant garlic and fresh herbs like thyme and parsley infuse the broth with earthy, aromatic notes. Meanwhile, the carrots and celery bring a subtle sweetness and crisp bite, balancing the rich, velvety broth. Whether you crave warmth or a hearty meal, Chicken Orzo Soup Recipe wraps you in layers of cozy flavor.

Boosting the flavor

For an extra flavor kick, try stirring in a splash of lemon juice or a sprinkle of grated Parmesan just before serving. If you love heat, a pinch of red pepper flakes or a drizzle of homemade chili oil adds a spicy depth. For a creamier twist, swap half the broth with coconut milk or stir in a spoonful of garlic herb compound butter. These small tweaks elevate the soup without overpowering its comforting essence.

Tips for Success

Best practices for results

Always use fresh, high-quality chicken for the best flavor in your Chicken Orzo Soup Recipe. Additionally, toast the orzo lightly before adding broth to deepen its nutty taste. Stir the soup frequently while simmering to prevent the orzo from sticking. For extra richness, finish with a splash of lemon juice right before serving. Finally, let the soup rest for 5 minutes off the heat to allow the flavors to meld perfectly.

Mistakes to avoid

Avoid overcooking the orzo, as it can turn mushy in the Chicken Orzo Soup Recipe. Instead, check for doneness a minute or two before the package instructions suggest. Also, don’t skip sautéing the vegetables first—this step builds a flavorful base. If your soup thickens too much, simply thin it with a bit of broth or water. For more tips on balancing flavors, check out our guide on seasoning soups. And if you’re unsure about cooking times, our pasta perfection article will help you nail the texture every time.

Serving and Pairing Suggestions

How to serve this dish

Serve your Chicken Orzo Soup Recipe in deep, rustic bowls to highlight its comforting texture. For a pop of color, sprinkle fresh parsley or dill on top. Meanwhile, a squeeze of lemon brightens the flavors just before serving. This dish shines at cozy family dinners, but it also makes a thoughtful meal for sick days or chilly evenings. If you’re hosting, pair it with crusty bread for a satisfying touch.

What goes well with it

For a complete meal, try pairing Chicken Orzo Soup Recipe with a crisp garden salad. The fresh greens balance the soup’s richness perfectly. Alternatively, warm garlic knots or our soft pretzel bites add a delightful crunch. If you prefer drinks, a chilled glass of Sauvignon Blanc or sparkling water with lemon elevates the experience. For dessert, our cinnamon roll cake offers a sweet finish without overpowering the savory notes.

How long does it take to make Chicken Orzo Soup Recipe?

This Chicken Orzo Soup Recipe typically takes about 30-40 minutes from start to finish. It’s a quick one-pot meal where you sauté the vegetables, cook the chicken, and simmer the orzo in broth. Perfect for busy weeknights when you want a comforting bowl of soup fast.

Can I use leftover chicken in Chicken Orzo Soup Recipe?

Absolutely! Using leftover rotisserie or grilled chicken works great in this Chicken Orzo Soup Recipe. Just shred or dice the cooked chicken and add it during the last 5 minutes of cooking to warm through. This shortcut saves time while keeping the soup flavorful.

What can I substitute for orzo in Chicken Orzo Soup Recipe?

If you don’t have orzo, try small pasta like ditalini, pastina, or even rice in your Chicken Orzo Soup Recipe. Adjust cooking times accordingly since different grains cook at varying speeds. The soup will still taste delicious with these easy swaps.

How do I store and reheat Chicken Orzo Soup Recipe leftovers?

Store your Chicken Orzo Soup Recipe in an airtight container in the fridge for up to 4 days. When reheating, add a splash of broth or water since the orzo absorbs liquid. Gently warm it on the stove or in the microwave, stirring occasionally.

Easy Cajun Cream Cheese Chicken Pasta Bake Recipe

easy-cajun-cream-cheese-chicken

“`html

Introduction

Craving a comforting, flavor-packed dish that brings the whole family to the table? Look no further than this Cajun Cream Cheese Chicken Pasta Bake Recipe. With its creamy, spicy sauce, tender chicken, and perfectly baked pasta, it’s the ultimate weeknight dinner that feels like a hug in a dish. Whether you’re a busy parent, a college student missing home-cooked meals, or just someone who loves bold flavors, this recipe delivers. Plus, it’s easy to customize, so you can make it as mild or as fiery as your taste buds desire. Trust me, one bite and you’ll understand why this dish deserves a permanent spot in your meal rotation.

About This Recipe

The Cajun Cream Cheese Chicken Pasta Bake Recipe combines the rich, tangy creaminess of melted cream cheese with the bold, smoky heat of Cajun seasoning. This dish layers juicy chicken, al dente pasta, and a velvety sauce into a casserole that bakes to golden perfection. What makes it special? It’s a one-pan wonder that balances convenience with restaurant-quality flavor. Unlike fussy recipes that demand constant attention, this bake lets you prep quickly and relax while the oven does the work. It’s perfect for potlucks, family dinners, or even meal prep—just reheat and enjoy.

If you love hearty, creamy pasta dishes, you’ll appreciate how this recipe elevates classic comfort food with a spicy twist. The Cajun seasoning adds depth, while the cream cheese ensures every bite stays luxuriously smooth. For more inspiration on easy, crowd-pleasing meals, check out our One-Pot Wonders collection. And if you’re new to Cajun cooking, don’t worry—this recipe keeps things simple without sacrificing authenticity. For a deeper dive into Cajun flavors, explore our guide on Essential Spice Blends.

Why I Love This Recipe

This Cajun Cream Cheese Chicken Pasta Bake Recipe holds a special place in my heart because it’s the dish that won over my picky eaters. The first time I made it, my kids devoured every bite—even the veggies I sneaked in. Now, it’s our go-to for birthdays, lazy Sundays, and everything in between. I love how the creamy sauce clings to the pasta, and how the Cajun spice wakes up your taste buds without overwhelming them. Most of all, I adore the way it brings everyone together, sparking conversations and creating memories around the table. That’s the magic of good food.

“`

Health and Nutrition

Why it’s good for your body

Cajun Cream Cheese Chicken Pasta Bake Recipe packs a flavorful punch while delivering key nutrients your body loves. First, the chicken provides lean protein to support muscle repair and keep you full longer. Meanwhile, the creamy sauce combines cream cheese and spices for a satisfying texture without excessive heaviness. Additionally, the Cajun seasoning adds a metabolic boost thanks to its blend of peppers and spices.

Moreover, this dish includes pasta, which offers energizing carbohydrates for sustained fuel. When you enjoy Cajun Cream Cheese Chicken Pasta Bake Recipe in moderation, you get a balanced meal that satisfies cravings without derailing your nutrition goals. The cream cheese also contributes calcium for strong bones, while the veggies often mixed in—like bell peppers or onions—add fiber and vitamins.

Finally, the bold flavors mean you won’t need excessive salt or unhealthy additives. Because Cajun Cream Cheese Chicken Pasta Bake Recipe relies on natural spices, it enhances taste without compromising health. Whether you need a post-workout meal or a comforting dinner, this dish delivers both flavor and nourishment.

How it fits in a healthy lifestyle

Cajun Cream Cheese Chicken Pasta Bake Recipe fits seamlessly into a balanced diet when paired with mindful eating habits. For protein-focused goals, the chicken offers a lean source to help build and maintain muscle. If you prefer gluten-free options, simply swap regular pasta for a gluten-free alternative—many brands now offer great texture and taste.

This dish also works well for meal prep, saving you time while keeping nutrition on track. Pair it with a fresh side salad or steamed veggies for extra fiber and vitamins. If you’re exploring heart-healthy choices, consider using low-fat cream cheese and whole-grain pasta. For more ideas on balancing indulgent meals, check out our guide to healthy meal prep or discover high-protein dinner recipes to mix into your rotation.

Ultimately, Cajun Cream Cheese Chicken Pasta Bake Recipe proves that comfort food can align with wellness. By adjusting ingredients to suit your needs, you create a versatile dish that supports your lifestyle without sacrificing flavor.

Print
clock clock iconcutlery cutlery iconflag flag iconfolder folder iconinstagram instagram iconpinterest pinterest iconfacebook facebook iconprint print iconsquares squares iconheart heart iconheart solid heart solid icon

Cajun Cream Cheese Chicken Pasta Bake


  • Author: Chef Emy

Description

A creamy, spicy, and comforting pasta bake with tender chicken and Cajun flavors.


Ingredients

Scale

For the Crust:

  • 1 lb boneless, skinless chicken breasts, diced
  • 8 oz penne pasta
  • 8 oz cream cheese, softened
  • 1 cup heavy cream
  • 1/2 cup chicken broth
  • 1 tbsp Cajun seasoning
  • 1 tsp garlic powder
  • 1 tsp onion powder
  • 1 cup shredded mozzarella cheese
  • 1/2 cup grated Parmesan cheese
  • 2 tbsp olive oil
  • Salt and pepper to taste

Instructions

1. Prepare the Crust:

  1. Preheat oven to 375°F (190°C). Cook pasta according to package instructions until al dente. Drain and set aside.
  2. Heat olive oil in a large skillet over medium-high heat. Add diced chicken, Cajun seasoning, garlic powder, onion powder, salt, and pepper. Cook until chicken is browned and cooked through.
  3. Reduce heat to medium-low. Add cream cheese, heavy cream, and chicken broth to the skillet. Stir until cream cheese is melted and sauce is smooth.
  4. Combine cooked pasta with the chicken and sauce mixture. Transfer to a greased baking dish.
  5. Top with mozzarella and Parmesan cheeses. Bake for 15-20 minutes until cheese is bubbly and golden.
  6. Let cool for 5 minutes before serving.

Notes

You can customize the seasonings to taste.

How to Prepare This Dish

Steps and time-saving tips

Start by preheating your oven to 375°F so it’s ready when you finish prepping. Next, cook the pasta al dente—it’ll soften more while baking, so undercooking slightly saves texture. Meanwhile, season diced chicken generously with Cajun spice, then sear it in a hot skillet until golden. Remove the chicken and use the same pan to sauté onions and garlic, which adds depth without extra dishes. Whisk cream cheese into warm milk until smooth, then stir in shredded cheese for a rich, velvety sauce. Combine the cooked pasta, chicken, and sauce in a baking dish, topping with extra cheese for a golden crust. Bake uncovered for 20 minutes, then broil for 2-3 minutes to crisp the top. Let it rest 5 minutes before serving—this helps the sauce thicken. For a time-saving twist, use rotisserie chicken or prep ingredients ahead. If you love bold flavors, double the Cajun seasoning or add a dash of smoked paprika.

Mistakes I’ve made and learned from

I once rushed the sauce and added cold cream cheese straight from the fridge—it clumped stubbornly! Now I let it soften first or warm it gently in the microwave. Another time, I overbaked the dish, drying out the chicken. A meat thermometer solved that; pull it out at 165°F for juicy results. If your pasta turns mushy, check out my guide on perfect pasta textures for foolproof timing. Also, don’t skip resting time—my first attempt was a saucy puddle because I dug in too soon. For more Cajun-inspired tricks, my spice blend tips help balance heat without overpowering the dish.

Cultural Connection and Variations

Where this recipe comes from

The Cajun Cream Cheese Chicken Pasta Bake Recipe bursts with the bold flavors of Louisiana, where Cajun cooking turns simple ingredients into unforgettable meals. Originally, Cajun cuisine relied on the “holy trinity” of bell peppers, onions, and celery, but this dish adds a creamy, modern twist with tangy cream cheese and tender chicken. Families in the South often serve it at gatherings, where the spicy kick and rich texture make it a crowd-pleaser.

Across the globe, similar pasta bakes take on local flavors. In Italy, they might skip the Cajun spices and use fresh basil and tomatoes. Meanwhile, in the Midwest, home cooks sometimes swap the cream cheese for cheddar or add a crunchy breadcrumb topping. Even in my own kitchen, I’ve tweaked the Cajun Cream Cheese Chicken Pasta Bake Recipe by tossing in extra veggies or using shrimp instead of chicken. No matter the variation, the heart of the dish stays the same—comfort in every bite.

How it fits in today’s cooking

Today, the Cajun Cream Cheese Chicken Pasta Bake Recipe fits perfectly into busy weeknights and cozy weekend dinners. Its one-pan simplicity appeals to modern cooks who crave flavor without fuss. Plus, it’s a great way to use leftover chicken or pantry staples, making it a practical choice for meal prep. For a lighter twist, some swap regular pasta for whole wheat or zucchini noodles, proving how adaptable this dish truly is.

Seasonally, it shines in fall and winter, but spicy food lovers enjoy it year-round. It’s also a hit at potlucks, much like our easy party appetizers, which bring people together effortlessly. And if you’re looking for another crowd-pleaser, try pairing it with a side from our quick salad recipes to balance the richness. Whether you stick to tradition or put your own spin on it, this bake never goes out of style.

Taste and Texture

What makes it delicious

The Cajun Cream Cheese Chicken Pasta Bake Recipe delivers a bold, comforting experience with every bite. Creamy, tangy cheese sauce coats tender pasta, while juicy chicken pieces soak up the smoky Cajun spices. Each forkful bursts with rich, savory flavors, balanced by a hint of heat that lingers just enough to keep you coming back. The dish smells irresistible too—aromatic garlic, earthy paprika, and a touch of thyme fill the air as it bakes. Meanwhile, the texture contrasts perfectly: silky sauce, al dente pasta, and slightly crisp edges from the golden-baked cheese topping make this recipe a standout.

Boosting the flavor

For an extra flavor kick, try stirring in a spoonful of homemade Cajun seasoning to deepen the spice profile. Alternatively, top your Cajun Cream Cheese Chicken Pasta Bake Recipe with buttery breadcrumbs or a sprinkle of fresh parsley for crunch and brightness. If you love heat, a drizzle of creamy sriracha sauce adds a tangy twist. Experiment with smoked Gouda instead of cream cheese for a bolder, smokier finish—every small tweak can elevate this dish to new heights.

Tips for Success

Best practices for results

For the best Cajun Cream Cheese Chicken Pasta Bake Recipe, always cook your pasta al dente since it will soften further while baking. Additionally, use room-temperature cream cheese to ensure a smooth, lump-free sauce. Meanwhile, toast the Cajun seasoning in the pan for 30 seconds before adding other ingredients to deepen the flavor. Finally, let the dish rest for 5 minutes after baking so the sauce thickens perfectly.

Mistakes to avoid

Avoid overcooking the chicken, as it can turn dry during baking. Instead, sear it just until golden before combining it with the pasta. Also, don’t skip the step of reserving pasta water—it helps adjust the sauce consistency if needed. For more on balancing spices, check out our guide to Cajun seasoning blends. Furthermore, resist overloading the dish with cheese, which can make it greasy. Learn the right cheese ratios in our perfect pasta bakes tutorial.

Serving and Pairing Suggestions

How to serve this dish

For a stunning presentation, serve your Cajun Cream Cheese Chicken Pasta Bake Recipe in a rustic ceramic dish or individual cast-iron skillets. Top it with fresh chopped parsley or thinly sliced green onions to add a pop of color. Meanwhile, if you’re hosting a casual gathering, let guests scoop portions straight from the baking dish for a cozy, family-style meal. This dish shines at potlucks, weeknight dinners, or even holiday feasts where bold flavors take center stage. To elevate the experience, pair it with warm garlic bread or a crisp side salad for contrast.

What goes well with it

A chilled glass of citrusy Sauvignon Blanc balances the rich, spicy notes of Cajun Cream Cheese Chicken Pasta Bake Recipe perfectly. Alternatively, try a crisp lager to cut through the creaminess. For sides, roasted garlic green beans or a tangy cucumber salad add freshness without overpowering the dish. If you love bold flavors, our Spicy Honey Glazed Carrots bring a sweet-heat contrast that complements the Cajun seasoning. Finally, don’t forget our Buttery Herb Dinner Rolls for soaking up every last bit of the creamy sauce.

What’s the best pasta to use for Cajun Cream Cheese Chicken Pasta Bake?

Penne or rigatoni works best for Cajun Cream Cheese Chicken Pasta Bake because their ridges hold the creamy sauce well. Avoid delicate pasta like angel hair, as it may become mushy during baking. The recipe’s hearty texture pairs perfectly with these sturdy shapes.

Can I make Cajun Cream Cheese Chicken Pasta Bake ahead of time?

Yes! Assemble the Cajun Cream Cheese Chicken Pasta Bake up to 24 hours in advance and refrigerate it covered. Add 5–10 minutes to the baking time if cooking straight from the fridge. This dish reheats beautifully, making it ideal for meal prep.

How spicy is Cajun Cream Cheese Chicken Pasta Bake?

The spice level depends on your Cajun seasoning blend—most store-bought mixes offer mild to medium heat. For a milder Cajun Cream Cheese Chicken Pasta Bake, reduce the seasoning by half. The cream cheese balances the heat, creating a rich, flavorful dish.

What sides go well with Cajun Cream Cheese Chicken Pasta Bake?

Pair this hearty bake with a crisp green salad or roasted vegetables like asparagus. Garlic bread complements the creamy Cajun Cream Cheese Chicken Pasta Bake perfectly. For contrast, serve with a tangy coleslaw to cut through the richness.

Best Cheesy French Onion Chicken Recipe

best-cheesy-french-onion-chicken

“`html

Introduction

There’s something undeniably comforting about the rich, savory flavors of caramelized onions and melted cheese. Now, imagine those classic French onion soup vibes wrapped around juicy, tender chicken—that’s exactly what you get with this Cheesy French Onion Chicken Recipe. Whether you’re craving a cozy weeknight dinner or need a showstopping dish for guests, this recipe delivers big on flavor with minimal fuss. It’s the kind of meal that feels like a warm hug, and trust me, once you try it, you’ll want to make it on repeat.

About This Recipe

The Cheesy French Onion Chicken Recipe takes everything you love about French onion soup—sweet, slow-cooked onions, gooey Gruyère, and a hint of thyme—and transforms it into a hearty, protein-packed main dish. Instead of bread and broth, we layer those iconic flavors over seared chicken breasts, creating a meal that’s both familiar and exciting. Plus, it’s versatile enough to pair with everything from mashed potatoes to a crisp green salad. If you’re a fan of easy yet impressive dinners, this recipe belongs in your rotation.

What makes this dish special is how effortlessly it elevates simple ingredients. Caramelizing onions might take time, but the depth of flavor they bring is worth every minute. Meanwhile, the cheese melts into a golden, bubbly blanket that makes each bite irresistible. This recipe fits perfectly with our blog’s mission to share approachable, flavor-forward meals that feel like a treat without requiring chef-level skills. For more inspiration, check out our guide to comfort food classics or explore our tips for quick weeknight dinners.

Why I Love This Recipe

This Cheesy French Onion Chicken Recipe holds a special place in my heart because it’s the dish that won over my pickiest eater. The first time I made it, my skeptical nephew cleaned his plate and asked for seconds—a rare victory. Beyond that, I love how it balances indulgence with simplicity. The caramelized onions remind me of chilly evenings growing up, while the cheesy topping feels like a little celebration. It’s the kind of recipe that turns an ordinary Tuesday into something memorable, and that’s exactly what good food should do.

“`

Health and Nutrition

Why it’s good for your body

Cheesy French Onion Chicken Recipe packs a nutritious punch while delivering rich, satisfying flavors. First, the chicken provides lean protein, which helps build and repair muscles. Additionally, caramelized onions add antioxidants that support immune health. Meanwhile, the melted cheese offers calcium for strong bones.

Moreover, this dish balances indulgence with wholesome ingredients. For instance, the onions contain prebiotic fibers that promote gut health. Furthermore, garlic in the recipe has anti-inflammatory properties. Cheesy French Onion Chicken Recipe also includes herbs like thyme, which may boost respiratory health.

Finally, this meal keeps you full longer thanks to its protein and healthy fats. Because it combines savory and nutritious elements, Cheesy French Onion Chicken Recipe satisfies cravings without compromising wellness. Transitioning to a healthier diet becomes easier when meals taste this good.

How it fits in a healthy lifestyle

Cheesy French Onion Chicken Recipe fits seamlessly into balanced eating plans. If you follow a high-protein diet, this dish delivers plenty of fuel for active lifestyles. It also works well for gluten-free eaters since it naturally avoids grains. For heart-healthy choices, simply opt for low-fat cheese and olive oil.

Pair this recipe with a fresh salad or roasted veggies for a complete meal. Planning ahead? Check out our meal prep guide to make weeknight dinners effortless. If you love flavorful, nutrient-dense dishes, explore our healthy comfort food collection for more ideas. Cheesy French Onion Chicken Recipe proves that eating well never means sacrificing taste.

Print
clock clock iconcutlery cutlery iconflag flag iconfolder folder iconinstagram instagram iconpinterest pinterest iconfacebook facebook iconprint print iconsquares squares iconheart heart iconheart solid heart solid icon

Cheesy French Onion Chicken


  • Author: Chef Emy

Description

A delicious twist on classic French onion soup, featuring tender chicken topped with caramelized onions and melted cheese.


Ingredients

Scale

For the Crust:

  • 4 boneless, skinless chicken breasts
  • 2 large yellow onions, thinly sliced
  • 2 tbsp butter
  • 1 tbsp olive oil
  • 1 tsp sugar
  • 1/2 tsp salt
  • 1/4 tsp black pepper
  • 1 tsp thyme
  • 1 cup beef broth
  • 1 cup shredded Gruyere cheese
  • 1/2 cup shredded mozzarella cheese

Instructions

1. Prepare the Crust:

  1. Preheat oven to 375°F (190°C).
  2. In a large skillet, melt butter with olive oil over medium heat. Add onions, sugar, salt, and pepper. Cook for 20-25 minutes, stirring occasionally, until onions are caramelized.
  3. Season chicken breasts with salt, pepper, and thyme. Push onions to one side of the skillet and add chicken. Cook for 3-4 minutes per side until lightly browned.
  4. Pour beef broth over the chicken and onions. Bring to a simmer.
  5. Sprinkle both cheeses evenly over the chicken and onions. Transfer skillet to the oven and bake for 15-20 minutes until cheese is bubbly and chicken is cooked through.
  6. Serve hot, spooning the cheesy onion mixture over each chicken breast.

Notes

You can customize the seasonings to taste.

“`html

How to Prepare This Dish

Steps and time-saving tips

Start by preheating your oven to 375°F so it’s ready when you finish prepping the Cheesy French Onion Chicken Recipe. While the oven heats, slice two large onions thinly and sauté them in a skillet with butter over medium heat. Stir occasionally until they turn golden brown and caramelized, which takes about 15 minutes. Meanwhile, season four chicken breasts with salt, pepper, and a pinch of garlic powder for extra flavor. Once the onions soften, remove them from the skillet and set aside. In the same skillet, sear the chicken for 3 minutes per side until lightly browned. Transfer the chicken to a baking dish and layer the caramelized onions on top. Sprinkle a generous amount of shredded Gruyère cheese over the onions, then bake for 20 minutes until the cheese melts and bubbles. For a crispy finish, broil for 2 minutes at the end. Serve hot with a side of crusty bread to soak up the delicious juices.

To save time, caramelize the onions ahead and store them in the fridge for up to two days. You can also use pre-shredded cheese, though freshly grated Gruyère melts smoother. If you’re short on time, skip searing the chicken and bake it directly with the onions and cheese—just add 5 extra minutes to the cooking time. For an even quicker version, try using a store-bought French onion soup mix, but reduce the salt since the mix is already seasoned. Always let the chicken rest for 5 minutes after baking to keep it juicy. This Cheesy French Onion Chicken Recipe is forgiving, so don’t stress over perfection—the flavors will shine no matter what.

Mistakes I’ve made and learned from

One of my biggest mistakes with this Cheesy French Onion Chicken Recipe was rushing the caramelized onions. I cranked the heat to high, hoping to speed things up, but they burned instead of turning sweet and golden. Now I patiently cook them low and slow, stirring often, and the difference is night and day. Another blunder? Overcrowding the skillet when searing the chicken. The pieces steamed instead of browning, resulting in a less flavorful dish. I fixed this by cooking in batches, and it made all the texture difference. If you’re new to caramelizing onions, my guide on caramelizing onions perfectly breaks it down step by step. Also, don’t skip the broiling step—I did once, and the cheese lacked that irresistible golden crust. For more cheese-melting tips, check out my melting cheese like a pro post. Trust me, these small tweaks elevate the dish from good to unforgettable.

“`

Cultural Connection and Variations

Where this recipe comes from

The Cheesy French Onion Chicken Recipe blends two beloved culinary traditions into one irresistible dish. French onion soup, with its deep caramelized flavors and gooey cheese topping, inspires the soul of this recipe. Meanwhile, the simplicity of baked chicken makes it a weeknight favorite across American kitchens. Together, they create a meal that feels both nostalgic and fresh.

In France, cooks might prepare a similar dish with Gruyère or Comté cheese, staying true to their classic onion soup roots. However, here in the U.S., we often swap in sharp cheddar or mozzarella for a meltier finish. Some families even add a splash of white wine to the onions for extra depth, while others keep it kid-friendly with a sprinkle of Parmesan. No matter the twist, the Cheesy French Onion Chicken Recipe always delivers comfort.

Seasonally, this dish shines in fall and winter when onions sweeten and hearty meals take center stage. Yet, thanks to its versatility, you’ll find it year-round at potlucks or cozy family dinners. Whether served over mashed potatoes or alongside a crisp salad, it bridges cultures and cravings effortlessly.

How it fits in today’s cooking

Today, the Cheesy French Onion Chicken Recipe remains a staple because it adapts to modern lifestyles without losing its charm. Busy cooks love that it works for meal prep, and foodies appreciate how easily it dresses up for date nights. For example, pairing it with a side of garlic herb roasted potatoes turns a simple dinner into something special.

Health-conscious tweaks, like using low-fat cheese or air-frying the chicken, keep it relevant too. Meanwhile, its rich flavors make it a hit during holidays, especially when served alongside honey-glazed carrots for a sweet-savory balance. Whether you stick to tradition or experiment, this recipe proves that comfort food never goes out of style.

Taste and Texture

What makes it delicious

The Cheesy French Onion Chicken Recipe delivers a rich, savory experience that comforts with every bite. Imagine tender chicken breasts smothered in caramelized onions, their sweetness balancing the deep, umami notes of beef broth. Melted Gruyère cheese adds a creamy, nutty layer, while a golden breadcrumb topping provides a satisfying crunch. Each forkful blends juicy chicken with fragrant thyme and garlic, creating a harmony of flavors. The dish smells irresistible, filling the kitchen with warm, toasty aromas. Whether you serve it straight from the oven or let it rest, the Cheesy French Onion Chicken Recipe stays irresistibly gooey and hearty.

Boosting the flavor

Elevate your Cheesy French Onion Chicken Recipe with a few easy tweaks. For extra depth, swap Gruyère with sharp cheddar or smoked Gouda. A drizzle of balsamic glaze adds tangy sweetness, while crispy bacon bits bring a salty punch. Love herbs? Stir fresh rosemary into the onions or sprinkle chopped parsley for brightness. Pair it with garlic parmesan potatoes to soak up the cheesy sauce. A pinch of red pepper flakes or a dash of Worcestershire sauce can also kick up the savoriness. Get creative—every small change makes this dish even more memorable.

Tips for Success

Best practices for results

First, caramelize the onions slowly to bring out their natural sweetness, as this builds the rich flavor base for your Cheesy French Onion Chicken Recipe. Meanwhile, use freshly grated cheese instead of pre-shredded for better melt and texture. Additionally, pat the chicken dry before seasoning to ensure a golden sear. Finally, broil the dish just before serving to get that perfect bubbly, golden cheese topping every time.

Mistakes to avoid

Avoid overcrowding the pan when browning the chicken, since this steams the meat instead of creating a crisp crust. Instead, cook in batches if needed. Also, don’t skip deglazing the pan after caramelizing the onions—scraping up those browned bits adds depth to your Cheesy French Onion Chicken Recipe. For more on perfect caramelization, check out our guide on caramelizing onions. Lastly, resist covering the dish while baking, as trapped moisture makes the topping soggy. For extra cheese tips, explore our cheese melting guide.

Serving and Pairing Suggestions

How to serve this dish

For a stunning presentation, plate your Cheesy French Onion Chicken Recipe over a bed of golden mashed potatoes or crusty bread to soak up the rich sauce. Meanwhile, sprinkle fresh thyme or parsley on top for a pop of color and freshness. This dish shines at cozy family dinners, yet it also makes an impressive centerpiece for holiday gatherings. If you want to elevate the experience, serve it in individual cast-iron skillets for a rustic touch that keeps the cheese bubbly and warm.

What goes well with it

Pair your Cheesy French Onion Chicken Recipe with a crisp green salad to balance the dish’s richness. Alternatively, roasted garlic asparagus adds a savory crunch that complements the tender chicken perfectly. For drinks, try a dry white wine like Chardonnay or a refreshing sparkling water with lemon. If you’re craving more comfort food pairings, our creamy garlic mashed potatoes or buttery dinner rolls make excellent companions. Either way, these pairings will turn your meal into a memorable feast.

What ingredients do I need for Cheesy French Onion Chicken Recipe?

You’ll need chicken breasts, French onion soup mix, shredded cheese (like Gruyère or mozzarella), sour cream, and breadcrumbs. These ingredients create the rich, savory flavor that makes Cheesy French Onion Chicken Recipe so delicious. Don’t forget fresh herbs like thyme for extra depth!

Can I make Cheesy French Onion Chicken Recipe in a slow cooker?

Yes! Layer chicken breasts, French onion soup mix, and cheese in the slow cooker, then cook on low for 4–6 hours. The slow cooker method keeps the Cheesy French Onion Chicken Recipe tender and infuses the flavors deeply. Top with extra cheese and broil for a crispy finish.

What sides go well with Cheesy French Onion Chicken Recipe?

Pair this dish with garlic mashed potatoes, roasted green beans, or a crisp Caesar salad. The creamy, cheesy flavors of the Cheesy French Onion Chicken Recipe complement starchy or fresh sides perfectly. Crusty bread is also great for soaking up the sauce.

How do I store leftover Cheesy French Onion Chicken Recipe?

Store leftovers in an airtight container in the fridge for up to 3 days. Reheat the Cheesy French Onion Chicken Recipe in the oven at 350°F to maintain crispiness. For longer storage, freeze individual portions for up to 2 months.