“`html
Table of Contents
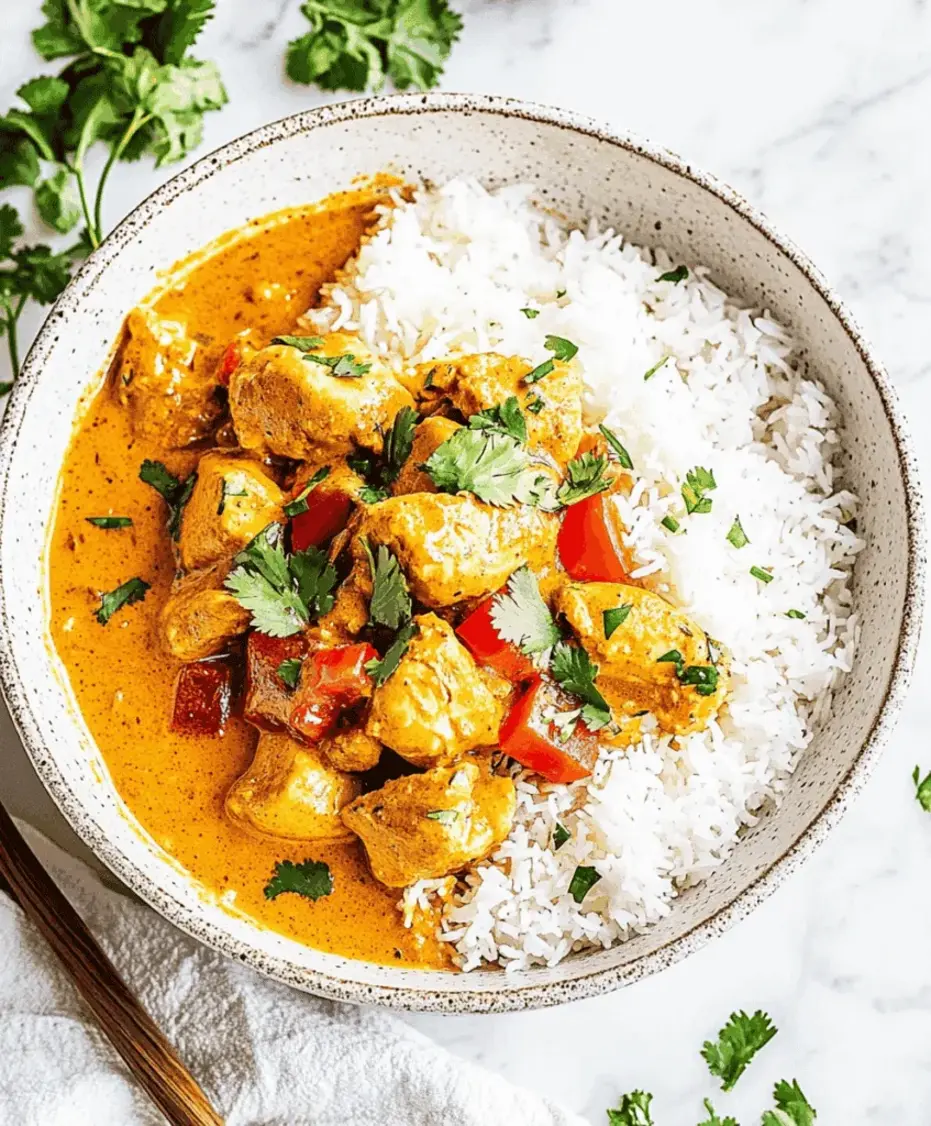
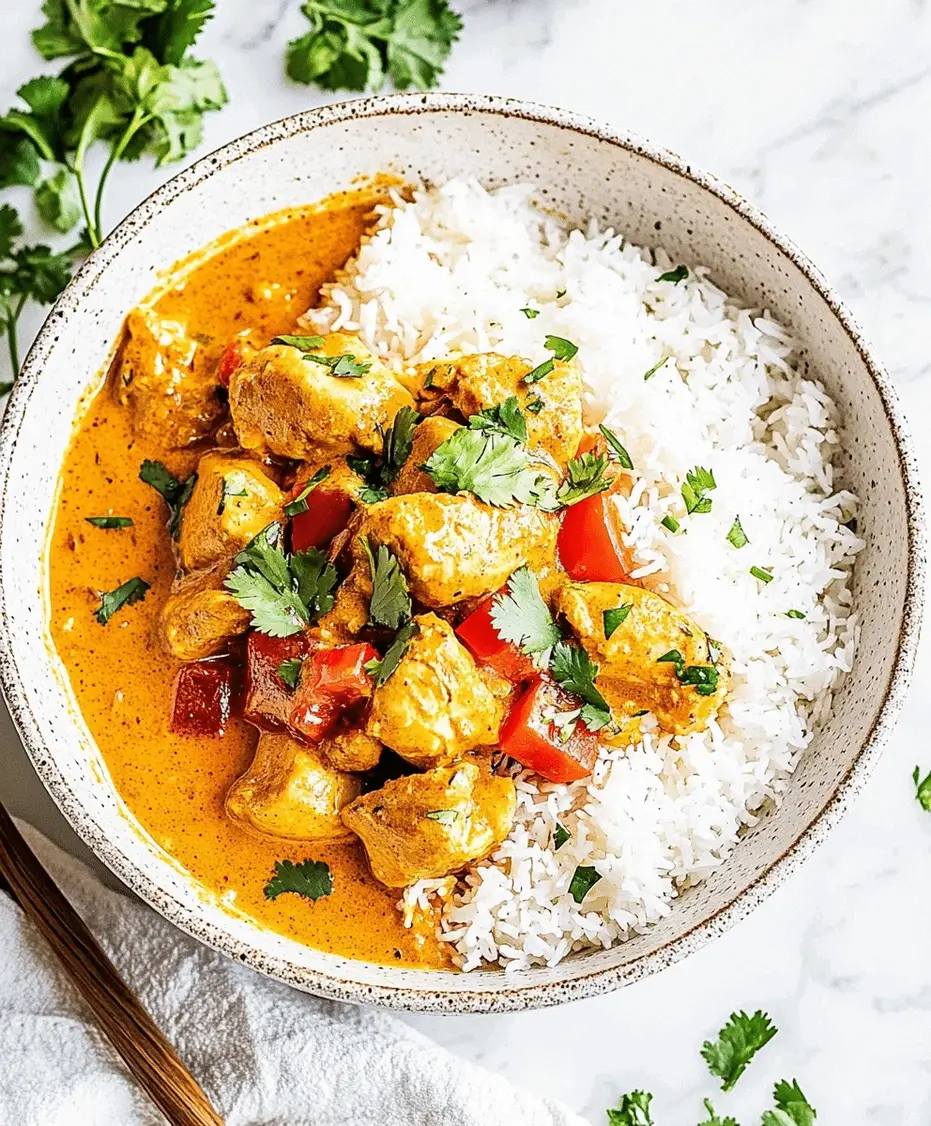
Coconut Curry Chicken Recipe
Craving a Flavorful Weeknight Dinner? This Coconut Curry Chicken is Your Answer!
Are you tired of the same old rotation of weeknight meals? Do you find yourself searching for dishes that are both incredibly delicious and surprisingly easy to whip up? If you’re nodding along, then you’re in the right place! This Coconut Curry Chicken recipe is designed to satisfy those cravings for something exotic, comforting, and bursting with flavor, all without demanding hours in the kitchen. It’s the perfect solution for busy evenings when you want a restaurant-quality meal that your whole family will love. We’ll guide you through creating a rich, creamy sauce infused with aromatic spices, embracing tender chicken pieces that melt in your mouth. Get ready to transform your dinner routine with this irresistible dish!
Flavorful Ingredients for Your Creamy Coconut Curry Chicken
The magic of this dish lies in the harmonious blend of simple, yet impactful ingredients. We’ve focused on creating a balanced flavor profile that is both aromatic and satisfying.
- Chicken: 1.5 lbs boneless, skinless chicken thighs or breasts, cut into bite-sized pieces. Chicken thighs offer more moisture and flavor, but breasts work wonderfully too.
- Fat for Sautéing: 2 tablespoons coconut oil or your preferred cooking oil. Coconut oil enhances the creamy flavor.
- Aromatics:
- 1 large onion, finely chopped (a sweet yellow or white onion works best)
- 3-4 cloves garlic, minced (use fresh for the most pungent aroma)
- 1 tablespoon grated fresh ginger (or 1 teaspoon ground ginger if fresh isn’t available) – ginger adds a warm, subtle kick.
- Spices:
- 2 tablespoons curry powder (a good quality Madras curry powder is recommended for depth)
- 1 teaspoon ground cumin (adds an earthy, smoky note)
- 1 teaspoon ground coriander (offers a citrusy, floral aroma)
- ½ teaspoon turmeric powder (for vibrant color and earthy undertones)
- ¼ teaspoon cayenne pepper (or more, to taste, for a touch of heat)
- Salt and freshly ground black pepper, to taste
- Liquid Gold: 1 (13.5 oz) can full-fat coconut milk (shake well before opening; this is crucial for creaminess!) – *Substitution: Light coconut milk can be used for a lighter version, but the sauce will be less rich.*
- Acidity & Depth: 1 (14.5 oz) can diced tomatoes, undrained (adds a pleasant tanginess and body to the sauce).
- Sweetness & Balance: 1 teaspoon sugar (optional, to balance the acidity of tomatoes and spice).
- Freshness: Fresh cilantro, chopped, for garnish – its herbaceous notes cut through the richness.
Recipe Timing: Quick Enough for Any Night!
This Coconut Curry Chicken clocks in at a total of 45 minutes, which is significantly faster than the average curry recipe that often requires marinating or long simmering times. It proves that you don’t need to spend hours in the kitchen to create something wonderfully flavorful and satisfying.
Step-by-Step Culinary Journey
Step 1: Sauté Aromatics
Grab a large skillet or Dutch oven and heat your coconut oil over medium heat. Once shimmering, add your chopped onion and sauté until it begins to soften and turn translucent, which should take about 5-7 minutes. This process builds a sweet foundation for your curry. Next, stir in the minced garlic and grated ginger. Cook for another minute until fragrant, being careful not to burn the garlic, as burnt garlic can turn bitter.
Step 2: Brown the Chicken
Add your bite-sized chicken pieces to the skillet. Season them generously with salt and pepper. Cook the chicken, stirring occasionally, until it’s browned on all sides. It doesn’t need to be cooked through at this stage; we’re just searing it to lock in juices and add a bit of color and flavor. This browning step is crucial for developing a richer taste.
Step 3: Bloom the Spices
Push the chicken and onions to one side of the pan, or temporarily remove them. Add the curry powder, cumin, coriander, turmeric, and cayenne pepper to the empty space in the skillet (or directly into the pan if you removed everything). Stir the spices in the hot oil for about 30-60 seconds until they become very fragrant. This is called “blooming” the spices, and it awakens their essential oils, intensifying their flavor and aroma significantly. Then, stir them into the chicken and onion mixture.
Step 4: Simmer in Coconut Milk
Pour in the full-fat coconut milk and the can of diced tomatoes (with their juices). Add the optional sugar if you’re using it. Stir everything together, scraping up any browned bits from the bottom of the pan – these bits are packed with flavor! Bring the mixture to a gentle simmer. Reduce the heat to low, cover the skillet, and let it simmer for about 15-20 minutes, or until the chicken is cooked through and the sauce has thickened slightly. Stir occasionally to prevent sticking.
Step 5: Thicken and Finish
Once the chicken is cooked and the sauce has reached your desired consistency, taste and adjust seasonings. Does it need more salt? A pinch more cayenne for heat? If the sauce is too thin for your liking, you can let it simmer uncovered for a few more minutes, or create a slurry with 1 tablespoon of cornstarch mixed with 2 tablespoons of water and stir it in, simmering until thickened. Stir in most of the fresh cilantro just before serving.
Nutritional Snapshot
While exact nutritional values can vary based on specific ingredients and portion sizes, a typical serving of this Coconut Curry Chicken (approximately 1/4 of the recipe, served with rice) offers:
- Calories: 450-550 kcal
- Protein: 25-35g
- Fat: 25-35g (primarily from coconut milk and oil)
- Carbohydrates: 15-25g (varies based on additions like rice)
- Fiber: 3-5g
This dish provides a good balance of protein and healthy fats, making it a satisfying meal.
Making it Lighter: Healthier Swaps
Looking to lighten up this already delicious dish without sacrificing flavor? Here are a few smart swaps:
- Leaner Protein: Opt for chicken breast or tofu instead of chicken thighs.
- Light Coconut Milk: Use “light” or “reduced-fat” coconut milk. While this will result in a thinner sauce, it significantly cuts down on saturated fat. You can thicken it with a bit more cornstarch slurry if needed.
- Load Up on Veggies: Bulk up the curry with extra vegetables like spinach, bell peppers, broccoli florets, green beans, or cauliflower. They add volume, nutrients, and fiber with minimal calories. Stir them in during the last 5-10 minutes of simmering.
- Reduced Oil: Use cooking spray or just 1 tablespoon of oil for sautéing aromatics.
Perfect Pairings: Serving Suggestions
This versatile Coconut Curry Chicken shines when served with:
- Steamed Basmati or Jasmine Rice: The classic and most popular pairing. The fluffy rice soaks up the delicious curry sauce beautifully.
- Naan Bread or Roti: Perfect for scooping up every last drop of sauce. Warm them up for the best experience.
- Quinoa: A healthier, protein-rich alternative to rice.
- Cauliflower Rice: For a low-carb option.
- A Side Salad: A simple green salad with a light vinaigrette can offer a refreshing contrast.
Common Mistakes to Avoid
Steer clear of these common pitfalls for the best curry results:
- Not Blooming the Spices: This is non-negotiable for a flavorful curry! Properly heating spices in oil releases their aromatic compounds.
- Using Water Instead of Coconut Milk: Coconut milk provides the essential creaminess and rich flavor. Water will result in a bland, thin sauce.
- Overcooking the Chicken: Especially if using chicken breast, overcooking can lead to dry, tough meat. Stir it in towards the end if you’re worried about this, or use thighs.
- Burning the Garlic/Ginger: These aromatics are delicate. Cook them until fragrant, not browned or burnt.
- Not Tasting and Adjusting: Every batch of spices and coconut milk can vary. Always taste and adjust salt, spice, and sweetness at the end.
Storing Your Delicious Curry
Leftover Coconut Curry Chicken is a treasure! Properly stored, it can last:
- In the Refrigerator: Allow the curry to cool completely, then store it in an airtight container. It will keep well for 3-4 days. The flavors often meld and deepen overnight, making leftovers even more delicious.
- In the Freezer: For longer storage, transfer cooled curry to freezer-safe containers or heavy-duty freezer bags. It can be frozen for up to 2-3 months. Thaw overnight in the refrigerator before reheating.
When reheating, you might need to add a splash of water or broth if the sauce has thickened too much. Gently warm on the stovetop or in the microwave.
Your New Go-To Curry Awaits!
This Coconut Curry Chicken recipe is more than just a meal; it’s an experience. It’s proof that you can create deep, complex flavors with relatively simple ingredients and a bit of kitchen magic. Whether you’re a seasoned cook or just starting your culinary adventure, this recipe is designed to bring joy and deliciousness to your table. So, gather your ingredients, embrace the warm spices, and get ready to enjoy a truly satisfying dish. Don’t forget to share your creations with us—we love seeing what you make!
Frequently Asked Questions
***Can I make this recipe vegetarian or vegan?***
Absolutely! To make this a vegetarian or vegan dish, simply swap the chicken for firm or extra-firm tofu, chickpeas, or a mix of your favorite vegetables like cauliflower, sweet potatoes, and bell peppers. Ensure your curry powder doesn’t contain any animal products if you need it to be strictly vegan.
***How spicy is this curry?***
The heat level depends largely on the cayenne pepper. The recipe includes ¼ teaspoon, which provides a mild warmth. If you prefer a spicier curry, feel free to increase the cayenne pepper to ½ teaspoon or more. You can also add a pinch of red pepper flakes or a fresh chili pepper along with the aromatics.
***What kind of curry powder should I use?***
For this recipe, a good quality Madras curry powder is highly recommended. Madras curry powder typically has a robust, well-balanced flavor profile with a good amount of spice. However, feel free to use your favorite brand or blend. Each can have a slightly different spice mix, so adjust accordingly.
***Can I make this ahead of time?***
Yes, this curry is an excellent candidate for meal prep! The flavors deepen and meld beautifully when made a day in advance. Just store it in an airtight container in the refrigerator. Reheat gently on the stovetop or in the microwave, adding a splash of water or coconut milk if it seems too thick.
***Why is my curry sauce not creamy enough?***
The creaminess primarily comes from full-fat coconut milk. Ensure you’re using a good quality, full-fat version and that you’ve shaken the can well before opening. If it’s still too thin after simmering, you can thicken it with a cornstarch slurry (1 tbsp cornstarch mixed with 2 tbsp cold water) stirred into the simmering sauce.
Coconut Curry Chicken Recipe
Description
This Coconut Curry Chicken recipe features tender chicken simmered in a creamy coconut milk curry sauce with bold spices. A flavorful, easy-to-make dish perfect for weeknight dinners or meal prep. Serve it over rice or with naan for a complete meal.
Ingredients
- 1 ½lbs boneless, skinless chicken thighs or breasts, cut into bite-sized pieces
- 1 tablespooncoconut oil or vegetable oil
- 1medium onion, diced
- 3cloves garlic, minced
- 1 tablespoonfresh ginger, grated
- 2 tablespoonsred curry paste or curry powder
- 1can (13.5 oz) full-fat coconut milk
- 1 tablespoonfish sauce or soy sauce
- 1 tablespoonbrown sugar (optional)
- Salt and pepper to taste
- Fresh cilantro, chopped (for garnish)
- Cooked rice or naan (for serving)
Instructions
Notes
You can adjust the spiciness by using more or less curry paste.
Use light coconut milk for a lower-calorie version.
Add veggies like bell peppers or spinach for added nutrition.
Great for leftovers—flavors deepen overnight!
Nutrition
- Calories: 390
- Sugar: 5g
“`