Roasted New Red Potatoes Recipe

“`html

Roasted New Red Potatoes Recipe

Introduction: The Crispy, Flavorful Potato Dream

Are you struggling to find that one side dish that truly impresses, something that’s both incredibly simple to make yet spectacularly delicious? If you’re nodding along, then you’re in the right place! This isn’t just any Roasted New Red Potatoes recipe; it’s your ticket to crispy exteriors, fluffy interiors, and an explosion of herby goodness that will have everyone asking for seconds. We’re talking about a side dish that effortlessly elevates weeknight dinners and shines just as brightly on your holiday table. Made with just a handful of accessible ingredients and a dash of culinary magic, these potatoes are roasted to absolute perfection. Get ready to transform humble potatoes into a star attraction!

Ingredients You’ll Need

The Star: New Red Potatoes

The beauty of using new red potatoes is their naturally buttery texture and thin, edible skin that crisps up beautifully. Look for small, firm potatoes, about 1 to 1.5 inches in diameter. They don’t require peeling, which saves you precious time! If new reds aren’t available, Yukon Golds or fingerlings are excellent substitutes, though you might need to adjust roasting time slightly.

The Crisping Agent: Olive Oil

A good quality extra virgin olive oil is your best friend here. It not only helps the potatoes achieve that coveted crispy exterior but also carries the array of herbs and seasonings beautifully. Aim for about 2-3 tablespoons, enough to coat the potatoes without making them greasy.

The Flavor Maestros: Herbs and Spices

This is where we paint with flavor! A classic combination includes:

  • 1 teaspoon dried rosemary (or 1 tablespoon fresh, chopped)
  • 1 teaspoon dried thyme (or 1 tablespoon fresh, chopped)
  • 1/2 teaspoon garlic powder (for that deep, savory note without burning)
  • A pinch of red pepper flakes (optional, for a subtle kick)

Feel free to experiment! Other herbs like sage, oregano, or even a sprinkle of smoked paprika can add wonderful dimensions. For a fresher, brighter flavor, add chopped fresh parsley or chives after roasting.

The Foundation: Salt and Pepper

Don’t underestimate the power of properly seasoned potatoes!

  • 1 teaspoon kosher salt (or to taste)
  • 1/2 teaspoon freshly ground black pepper (or to taste)

Using kosher salt provides a cleaner, more even seasoning than table salt. Freshly ground black pepper offers a much more robust flavor.

Perfect Timing for Potato Perfection

Prep time: 10 minutes
Cook time: 30-40 minutes
Total time: 40-50 minutes

Compared to your average potato dish, roasting new red potatoes is remarkably efficient. Many mashed or boiled potato recipes can take just as long, if not longer, without the satisfying crispy texture. This recipe offers a fantastic balance of minimal effort for maximum flavor and texture reward.

Heap of perfectly roasted new red potatoes with herbs
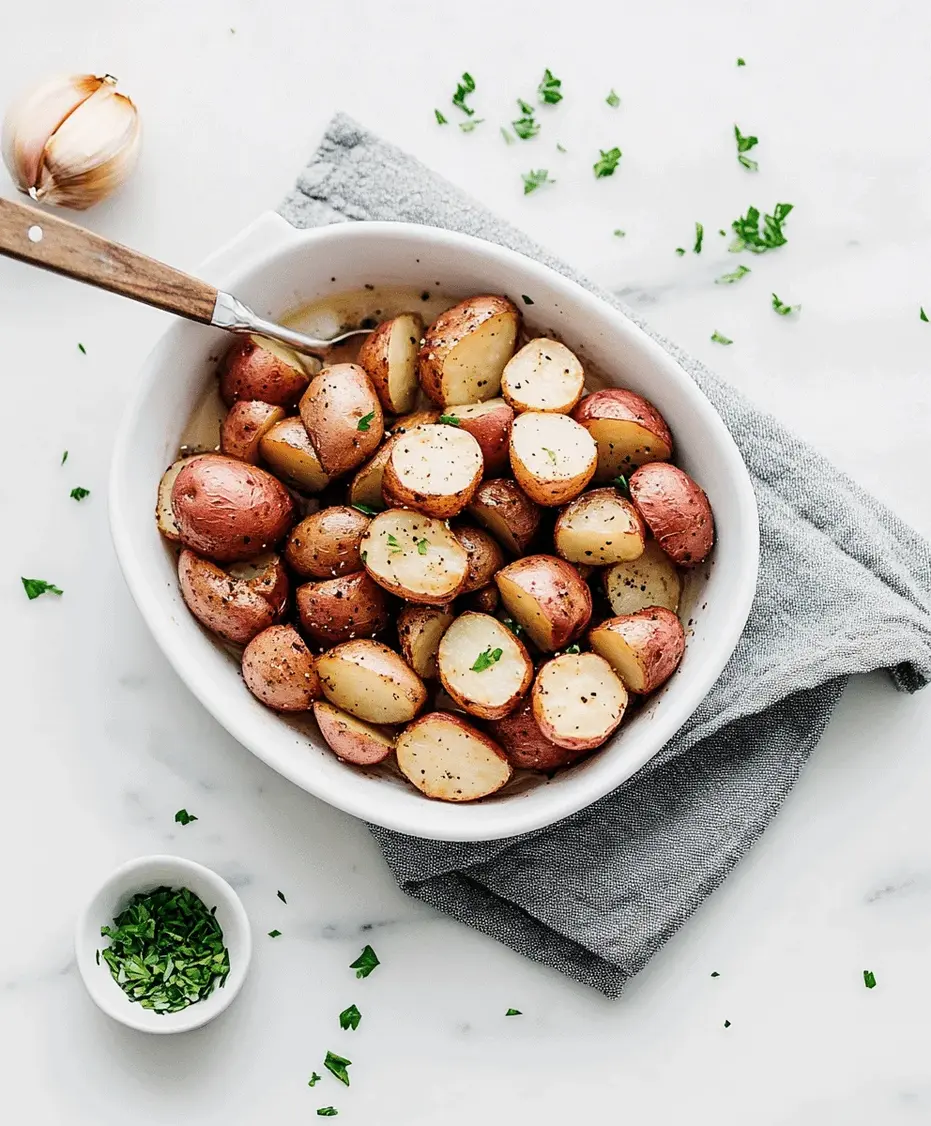
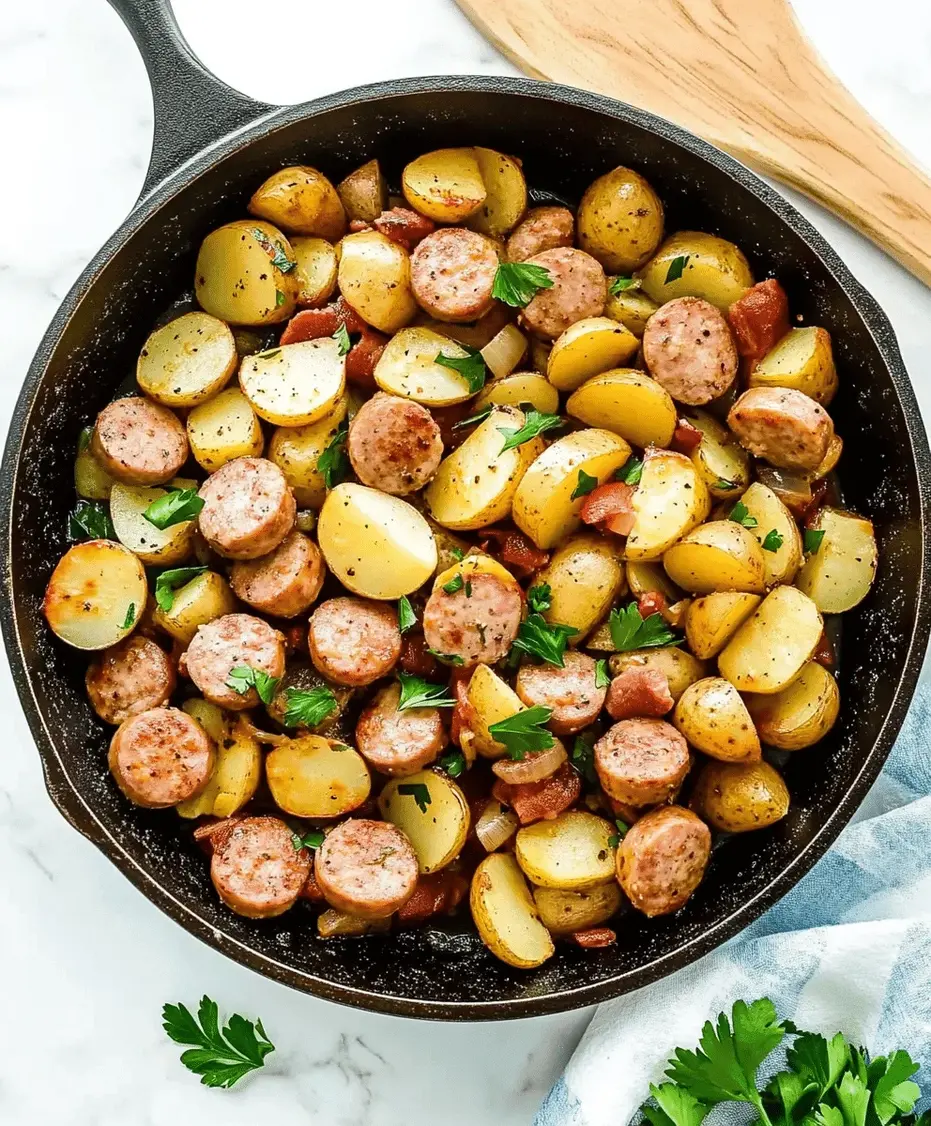
Tender on the inside, delightfully crispy on the outside!

Roasting Your Way to Potato Bliss: Step-by-Step

Step 1: Preheat the Oven & Prep the Spuds

Begin by preheating your oven to a robust 400°F (200°C). This high heat is crucial for achieving that perfect crispiness. While the oven heats up, wash your new red potatoes thoroughly under cold running water. If they are small (about 1 inch), you can leave them whole. If they’re slightly larger, cut them in half. For potatoes closer to 2 inches, cut them into quarters. The goal is to have roughly uniform pieces so they cook evenly.

Step 2: The Glorious Seasoning Session

Place your prepared potatoes in a large mixing bowl. Drizzle them generously with the olive oil. Now, sprinkle on your dried rosemary, thyme, garlic powder, salt, and freshly ground black pepper. If you’re using red pepper flakes for a little heat, add them now too. Use your hands (the best tools!) to toss everything together, ensuring each potato piece is thoroughly coated in the oil and spices. This step is key to infusing all those wonderful flavors.

Step 3: Into the Oven They Go!

Spread the seasoned potatoes in a single layer on a large baking sheet. Avoid overcrowding the pan! If the potatoes are piled on top of each other, they will steam instead of roast, and you won’t get that delightful crisp. If necessary, use two baking sheets. The single layer allows hot air to circulate around each piece, promoting even browning and crisping.

Step 4: The Crucial Flip & Check

Roast for about 15-20 minutes. Then, carefully remove the baking sheet from the oven and use a spatula to flip each potato piece. This ensures all sides get beautifully golden brown and crispy. Return the baking sheet to the oven and continue roasting for another 15-20 minutes, or until the potatoes are tender when pierced with a fork and have developed a lovely, golden-brown crust.

Step 5: Serve and Savor

Once perfectly roasted, remove the potatoes from the oven. Taste and adjust seasoning if needed. For an extra pop of freshness, you can sprinkle them with some chopped fresh parsley or chives right before serving. Serve hot and watch them disappear!

Nutritional Spotlight

While exact nutritional values vary based on potato size and oil quantity, a typical serving (about 1 cup) of these roasted new red potatoes, based on standard ingredient measurements, is approximately:

  • Calories: 200-250 kcal
  • Carbohydrates: 25-30g
  • Fat: 10-15g (primarily from olive oil)
  • Protein: 2-3g
  • Fiber: 3-4g

Potatoes are a good source of potassium and Vitamin C. Keep in mind that the nutritional profile will change significantly if you add richer sauces or toppings.

Healthier Twists on a Classic

Want to make these taters even healthier without sacrificing flavor? Try these swaps:

  • Reduce Oil: Use an oil spray for an even coating with less oil, or simply use 1-1.5 tablespoons of olive oil and toss very thoroughly.
  • Spice it Up: Instead of salt, lean heavily on herbs and spices for flavor. Paprika, cumin, curry powder, or a generous amount of garlic and onion powder can add immense flavor.
  • Add Veggies: Toss in chopped carrots, bell peppers, or onions on the same baking sheet. They’ll roast alongside the potatoes, adding nutrients and flavor.
  • Air Fryer Option: For a similar crispiness with potentially less oil, consider using an air fryer. Adjust time and temperature as per your air fryer’s instructions.

Serving Suggestions: Beyond the Plate

These roasted new red potatoes are incredibly versatile. They make a perfect accompaniment to:

  • Grilled or roasted meats (chicken, steak, pork chops)
  • Pan-seared fish
  • Vegetarian mains like lentil loaf or stuffed bell peppers
  • As part of a breakfast hash with eggs and bacon
  • Simply served with a dollop of sour cream or Greek yogurt and extra chives

Common Pitfalls to Avoid

Breathe easy – roasting potatoes is pretty foolproof, but here are a few things to watch out for:

  • Oven Temperature Too Low: Not preheating properly or using a low temperature will result in soggy, not crispy, potatoes.
  • Overcrowding the Pan: This is the #1 culprit for steamed potatoes. Ensure a single layer for optimal roasting.
  • Uneven Cutting: Cutting potatoes into vastly different sizes means some will be perfectly cooked while others are burnt or underdone. Aim for consistency.
  • Skipping the Flip: For truly even crispiness, flipping them halfway is essential.

Storing Leftovers Like a Pro

Leftover roasted new red potatoes can be stored in an airtight container in the refrigerator for up to 3-4 days. While they will lose some of their crispness upon reheating, they are still delicious. For the best results, reheat them in a hot oven (around 375°F/190°C) or an air fryer for about 5-10 minutes until warmed through and slightly crisped again. Avoid reheating them in the microwave if you want to retain any semblance of crispness.

Close-up of roasted new red potatoes with visible herbs and browning
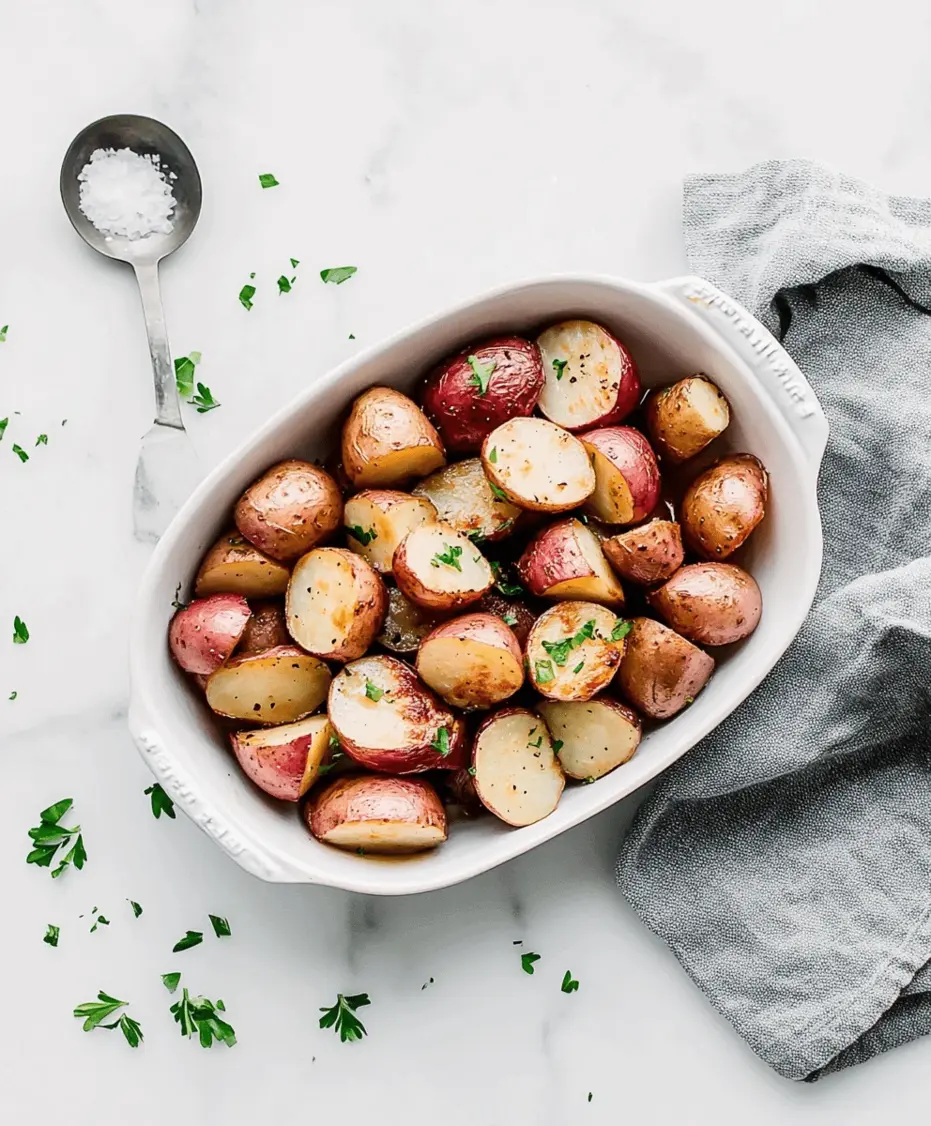
The perfect golden-brown hue is a sign of perfectly roasted potatoes.

Frequently Asked Questions

***Can I use other types of potatoes?***

Absolutely! While new red potatoes are ideal due to their texture and thin skin, Yukon Golds, fingerlings, or even baby Dutch potatoes work well. Larger potatoes like Russets are better suited for other cooking methods like baking or mashing, as they can become mushy when roasted in chunks.

***Do I need to peel new red potatoes?***

No, you don’t need to peel new red potatoes! Their skin is thin and becomes wonderfully tender and slightly crispy when roasted. Just make sure to wash them thoroughly.

***Why are my roasted potatoes not crispy?***

The most common reasons are overcrowding the baking sheet (which causes them to steam) or not using a high enough oven temperature. Ensure they are in a single layer and your oven is properly preheated to 400°F (200°C). Flipping them halfway also helps ensure even crisping.

***Can I add other vegetables to roast with the potatoes?***

Yes! Carrots, parsnips, bell peppers, onions, and Brussels sprouts can all be roasted alongside the potatoes. Just ensure they are cut to a similar size to allow for even cooking, or add them to the pan partway through if they require a different cooking time.

***How can I make them taste more garlicky?***

For a more intense garlic flavor, you can add a few whole (peeled) garlic cloves to the baking sheet during the last 15-20 minutes of roasting. They will become sweet and creamy. Alternatively, toss the roasted potatoes with a minced garlic clove and a touch of olive oil after they come out of the oven.

And remember, this simple yet delicious side dish is just a few steps away:

Print
clock clock iconcutlery cutlery iconflag flag iconfolder folder iconinstagram instagram iconpinterest pinterest iconfacebook facebook iconprint print iconsquares squares iconheart heart iconheart solid heart solid icon

Roasted New Red Potatoes Recipe


  • Author: Chef Emy

Description

This Roasted New Red Potatoes Recipe is the perfect side dish! Tender inside, crispy outside, and full of herby flavor, it’s made with simple ingredients and roasted to perfection. Ideal for weeknight dinners or holiday meals.


Ingredients

Scale
  • 2pounds new red potatoes, halved
  • 2 tablespoonsolive oil
  • 1 teaspoongarlic powder
  • 1 teaspoondried rosemary (or fresh, chopped)
  • 1 teaspoonsalt
  • ½ teaspoonblack pepper
  • Optional: fresh parsley, chopped (for garnish)

Instructions

    Notes

    For extra crispiness, soak cut potatoes in cold water for 30 minutes, then dry before roasting. Use parchment for easy cleanup.

    Nutrition

    • Calories: 180
    • Sugar: 2g

    “`

    Chef John’s Fresh Salmon Cakes Recipe

    “`html

    Chef John’s Fresh Salmon Cakes Recipe

    Why You’ll Love These Salmon Cakes

    Are you searching for a healthy, flavorful, and satisfying seafood dish that’s quick to prepare and versatile enough for any meal? Chef John’s Fresh Salmon Cakes recipe is your answer. These delightful cakes are crafted with tender, high-quality fresh salmon, infused with aromatic herbs, and pan-fried to a perfect crispy golden crust. More than just delicious, they are a nutritional powerhouse, rich in omega-3 fatty acids and lean protein, making them an excellent choice for those following low-carb or keto diets. Imagine the satisfying crunch followed by the flaky, moist salmon interior – it’s a culinary experience that will have you coming back for more.

    Fresh Salmon Cakes: The Heart of the Dish

    The beauty of these salmon cakes lies in their simplicity and the quality of their ingredients. We’re focusing on fresh, vibrant flavors that let the star ingredient – salmon – shine through.

    Main Ingredients

    • 1.5 lbs Fresh Salmon Fillets: Look for high-quality, skinless, and boneless fillets. Fresh salmon offers a delicate, rich flavor that canned salmon can’t quite replicate. If fresh isn’t available, you can use well-drained canned salmon (about two 15-ounce cans), but the texture will be slightly different. Wild-caught salmon often has a more robust flavor.
    • 1/2 cup Panko Breadcrumbs: For an unparalleled crispy exterior. If you’re aiming for a gluten-free option, use gluten-free panko or almond flour. For a softer cake, regular breadcrumbs can be used, but the crunch will be less pronounced.
    • 1 Large Egg, lightly beaten: Acts as a crucial binder to hold the cakes together. A flax egg (1 tbsp flaxseed meal + 3 tbsp water, rested for 5 minutes) is a good vegan substitute if you’re adapting this recipe.

    Flavor Enhancers & Binders

    • 1/4 cup finely chopped fresh Parsley: Adds a burst of fresh, herbaceous flavor. Dill is another classic pairing with salmon.
    • 2 tablespoons finely chopped fresh Chives: Offer a mild oniony bite that complements the salmon beautifully. Green onions (scallions) can be substituted.
    • 2 tablespoons Mayonnaise: Adds moisture and richness, and helps bind the mixture. Full-fat Greek yogurt is a lighter, tangy alternative.
    • 1 tablespoon Dijon Mustard: Provides a subtle tang and depth of flavor. Stone-ground mustard offers a more rustic texture.
    • 1 teaspoon Lemon Zest: Brightens the overall flavor profile. Ensure you zest only the yellow part to avoid bitterness.
    • 1/2 teaspoon Garlic Powder: For a rounded savory note. Fresh minced garlic (about 1 clove) can also be used, but be careful not to burn it during cooking.
    • Salt and Black Pepper to taste: Essential for bringing out all the flavors. Start with 1/2 teaspoon of salt and 1/4 teaspoon of pepper, then adjust as needed.

    For Cooking

    • 2-3 tablespoons Olive Oil or Avocado Oil: For pan-frying. Avocado oil has a high smoke point, making it ideal for searing. Clarified butter or ghee are also excellent choices.

    Timing is Everything: Prep, Cook, and Total Time

    One of the best things about these salmon cakes is how quickly they come together, making them perfect for a weeknight dinner or a quick lunch. While the average salmon cake recipe might take around 30-40 minutes total, these are designed for efficiency without compromising on flavor or texture.

    Prep time: 15 minutes
    Cook time: 10-12 minutes
    Total time: 25-27 minutes

    This is significantly faster than many traditional dinner recipes, and even quicker than many baked salmon dishes when factoring in preheating and resting time.

    A close-up shot of fresh salmon cakes being cooked in a skillet, showing their golden-brown crust.

    Crafting Your Perfect Salmon Cakes: Step-by-Step

    Let’s get cooking! Follow these simple steps to create incredibly flavorful and perfectly textured salmon cakes.

    Step 1: Prepare the Salmon

    If you’re starting with whole salmon fillets, ensure they are skinless and boneless. You can either finely chop the salmon by hand with a sharp knife for a slightly chunkier texture, or pulse it gently in a food processor a few times until it’s broken down but not pureed. The goal is to have small pieces, not a paste. Place the prepared salmon in a medium bowl.

    Step 2: Combine the Ingredients

    To the bowl with the salmon, add the panko breadcrumbs, lightly beaten egg, chopped parsley, chives, mayonnaise, Dijon mustard, lemon zest, garlic powder, salt, and pepper. Gently mix everything together using a fork or your hands. Be careful not to overmix, as this can make the cakes tough. You want just enough mixing for all the ingredients to be incorporated and the mixture to hold together when pressed.

    Step 3: Form the Salmon Cakes

    Divide the salmon mixture into 6-8 equal portions, depending on your desired size. Gently shape each portion into a patty, about 3/4-inch thick. You can make them round or slightly oval. If the mixture feels too sticky, you can lightly dampen your hands with water or a little oil, or add a tiny bit more panko.

    Step 4: Cook the Salmon Cakes

    Heat the olive oil or avocado oil in a large non-stick skillet over medium-high heat. Once the oil is shimmering, carefully place the salmon cakes in the skillet, ensuring not to overcrowd the pan (cook in batches if necessary). Cook for 3-4 minutes per side, or until they are beautifully golden brown and crispy on the outside and heated through. The internal temperature should reach 145°F (63°C).

    Step 5: Serve and Enjoy

    Once cooked, transfer the salmon cakes to a plate lined with paper towels to drain any excess oil. Serve immediately while they are warm and delightfully crisp.

    Nutritional Highlights of Salmon Cakes

    These salmon cakes are a fantastic source of lean protein and healthy fats. They are naturally rich in Omega-3 fatty acids, which are beneficial for heart and brain health. When made with fresh salmon and modest amounts of binders, they are also lower in carbohydrates, making them a great fit for low-carb and keto lifestyles. A typical serving (about 1.5 cakes) can offer:

    • Calories: Approximately 200-250 (will vary based on exact ingredients and serving size)
    • Protein: 20-25g
    • Fat: 10-15g (rich in healthy unsaturated fats)
    • Carbohydrates: 5-10g (depending on breadcrumb usage)

    Healthier Alternatives & Flavor-Preserving Swaps

    Maintaining that delicious flavor while making healthier choices is key. Here are some swaps you can make:

    • Gluten-Free: Swap Panko breadcrumbs for almond flour or gluten-free breadcrumbs.
    • Lower Carb/Keto: Use almond flour or crushed pork rinds instead of breadcrumbs. Ensure your mayonnaise is low-carb.
    • Lower Fat: Use plain Greek yogurt instead of mayonnaise for added creaminess and a protein boost.
    • Added Veggies: Finely grate zucchini (squeeze out excess water) or add a tablespoon of finely minced bell pepper for extra nutrients and texture.
    • Herbs: Experiment with fresh dill, cilantro, or tarragon for different flavor profiles.

    Serving Suggestions to Elevate Your Meal

    These fresh salmon cakes are incredibly versatile. Serve them:

    • As a light lunch with a fresh green salad and a lemon-dill dressing.
    • As a main course with roasted asparagus, steamed broccoli, or a side of quinoa.
    • On a toasted bun or lettuce wrap as a delicious ‘burger’.
    • With a dollop of tartar sauce, aioli, or plain Greek yogurt.
    • As an appetizer, served with a light remoulade sauce.

    Common Mistakes to Avoid

    Even with simple recipes, a few common pitfalls can affect the outcome:

    • Overmixing: This can lead to tough, rubbery salmon cakes. Mix just until combined.
    • Not enough binder: If your mixture is too wet or crumbly, the cakes might fall apart during cooking. Ensure you use the egg and mayonnaise effectively.
    • Overcrowding the pan: This lowers the temperature of the oil, leading to greasy, soggy cakes instead of crispy ones. Cook in batches.
    • Using pre-cooked or canned salmon without proper draining: Excess moisture will make the cakes difficult to form and cook properly.

    Storing Your Delicious Salmon Cakes

    Leftover salmon cakes can be stored in an airtight container in the refrigerator for up to 3 days. They are best reheated in a skillet over medium heat to regain some of their crispiness, or in a moderate oven (around 350°F/175°C) for about 10-15 minutes. Microwaving will make them soft.

    A plate of perfectly cooked, golden-brown salmon cakes served with a side salad and a lemon wedge.

    Embrace the Taste of Freshness

    Chef John’s Fresh Salmon Cakes recipe is a testament to how simple, wholesome ingredients can create an extraordinary meal. Whether you’re a seasoned cook or just starting, these instructions will guide you to a delicious and satisfying result. Packed with flavor, nutrition, and that irresistible crispy crust, these salmon cakes are sure to become a favorite in your recipe rotation. Don’t hesitate to try them out and experience the delightful taste of fresh, high-quality salmon prepared to perfection!

    Frequently Asked Questions

    Can I use frozen salmon?

    Yes, you can use frozen salmon, but it must be completely thawed and thoroughly drained. Pat it very dry with paper towels to remove excess moisture, as this is crucial for the cakes to hold their shape and crisp up properly.

    How can I make these vegan?

    To make these vegan, you would need to replace the salmon with a plant-based protein like finely mashed chickpeas or crumbled firm tofu. Replace the egg with a flax egg (1 tbsp flaxseed meal mixed with 3 tbsp water, let sit for 5 minutes) and ensure your mayonnaise is vegan. The flavor profile will naturally change, but it can be a delicious meat-free alternative.

    What’s the best way to get a crispy crust?

    Ensure your pan is properly preheated with enough oil. Don’t overcrowd the pan, as this lowers the oil temperature and can lead to soggy cakes. Panko breadcrumbs also contribute significantly to the crispiness compared to regular breadcrumbs.

    Can I bake these instead of pan-frying?

    Yes, you can bake them! Place the formed cakes on a baking sheet lined with parchment paper. Bake in a preheated oven at 400°F (200°C) for about 15-20 minutes, flipping halfway through, until golden and cooked through. They might not be quite as crispy as pan-fried, but it’s a healthier alternative.

    Print

    clock clock iconcutlery cutlery iconflag flag iconfolder folder iconinstagram instagram iconpinterest pinterest iconfacebook facebook iconprint print iconsquares squares iconheart heart iconheart solid heart solid icon

    Chef John’s Fresh Salmon Cakes Recipe


    • Author: Chef Emy

    Description

    Try Chef John’s Fresh Salmon Cakes, made with tender fresh salmon, herbs, and a crispy golden crust. A healthy and easy seafood recipe that’s perfect for any meal. These salmon cakes are rich in flavor and high in protein, ideal for low-carb and keto diets.


    Ingredients

    Scale
    • 1lb fresh salmon, cooked and flaked
    • 1egg
    • ¼ cupmayonnaise
    • 1 tbspDijon mustard
    • ½ tspWorcestershire sauce
    • ¼ cupminced green onions
    • ¼ cupminced celery
    • 1 tbspchopped fresh dill
    • ½ cuppanko breadcrumbs
    • Salt and pepper to taste
    • 2 tbspolive oil or butter for frying

    Instructions

      Notes

      Use cooked, cooled fresh salmon for best texture.
      You can refrigerate the patties before frying for easier handling.
      Add lemon zest or hot sauce for an extra flavor kick.

      Nutrition

      • Calories: 220
      • Sugar: 1g

      “`

      Lamb Souvlaki Recipe

      “`html

      Lamb Souvlaki Recipe

      Introduction: Are You Craving Authentic Greek Flavors?

      Are you looking for a way to bring a taste of the Mediterranean sunshine into your kitchen, something that evokes grilled feasts and vibrant flavors? If so, you’ve landed in the right spot! Lamb souvlaki, those succulent skewers of marinated lamb grilled to a juicy, tender perfection, are a quintessential Greek delight. Studies show that consumers are increasingly seeking out flavorful, globally inspired dishes, and Greek cuisine consistently ranks high for its fresh ingredients and robust profiles. Our Lamb Souvlaki recipe is designed to deliver that authentic experience with ease, packed with aromatic Mediterranean herbs, zesty lemon, and pungent garlic.

      The Heart of the Dish: Authentic Lamb Souvlaki Ingredients

      The magic of lamb souvlaki lies in its simplicity and the quality of its ingredients. Each component plays a vital role in creating those irresistible smoky, tangy, and herbaceous notes.

      For the Lamb

      • 1.5 lbs Boneless Lamb Shoulder or Leg: Look for well-marbled cuts for maximum tenderness and flavor. Cubed into 1.5-inch pieces. (Substitution: You can also use lamb sirloin or even lamb loin chops for a slightly leaner, quicker-cooking option).
      • Wooden or Metal Skewers: If using wooden, soak them in water for at least 30 minutes to prevent burning.

      For the Marinade

      • 1/4 cup Extra Virgin Olive Oil: The base for richness and to help the marinade adhere.
      • Juice of 1-2 Lemons: Freshly squeezed is key for that bright, zesty tang. Adjust to your preference.
      • 4-6 cloves Garlic: Minced finely or pressed. The more, the merrier for garlic lovers!
      • 2 tablespoons Fresh Oregano: Finely chopped. Its pungent, earthy aroma is classic. (Substitution: 1 tablespoon dried oregano, but fresh is preferred for its vibrant notes).
      • 1 tablespoon Fresh Rosemary: Finely chopped. Adds a subtle piney and slightly peppery note. (Substitution: 1 teaspoon dried rosemary).
      • 1 teaspoon dried Thyme: For an additional layer of herbaceousness.
      • 1 teaspoon Smoked Paprika: Adds a hint of smoky depth and a beautiful color.
      • 1/2 teaspoon Ground Cumin: For warmth and an earthy undertone.
      • Salt and Freshly Ground Black Pepper: To taste. Don’t be shy with the pepper!
      • Optional: A pinch of Red Pepper Flakes: For a gentle kick of heat.

      For Serving (Optional)

      • Pita Bread: Warm, soft, and ready to be filled.
      • Tzatziki Sauce: Creamy, cool, and refreshing.
      • Chopped Tomatoes, Cucumbers, and Red Onion: For a fresh salad element.
      • A sprinkle of Fresh Parsley: For color and freshness.

      Timing is Everything: Prep, Cook, and Enjoy

      While the active preparation for lamb souvlaki is relatively quick, the marinating time is crucial for flavor development. Here’s a breakdown:

      Prep Time: 20 minutes
      Marinating Time: 2-12 hours (minimum 2 for flavor, ideally 4-12 for deep taste)
      Cook Time: 8-12 minutes
      Total Time: 2.5 – 12.5 hours (mostly hands-off marinating)

      Compared to typical grilled skewers that might take only 30 minutes from start to finish, lamb souvlaki requires patience for its marinade to work its magic, resulting in a far more rewarding flavor and texture. Most recipes will have a similar marinating window, but the actual cooking time will vary slightly based on the size of your lamb cubes and cooking temperature.

      Delicious Lamb Souvlaki Skewers

      Crafting Your Perfect Lamb Souvlaki: Step-by-Step

      Let’s turn these beautiful ingredients into a culinary masterpiece. Follow these steps for perfectly seasoned and grilled lamb souvlaki.

      Step 1: Prepare the Lamb

      Start by trimming any excess fat from your lamb shoulder or leg, but leave a little for moisture and flavor. Cut the lamb into uniform 1.5-inch cubes. This ensures even cooking. If you’re using wooden skewers, make sure they’ve had their soak in water. This is a critical step to prevent them from catching fire on the grill.

      Step 2: Whisk Up the Marinade

      In a medium bowl or a large zip-top bag, combine all the marinade ingredients: extra virgin olive oil, fresh lemon juice, minced garlic, chopped fresh oregano, chopped fresh rosemary, dried thyme, smoked paprika, ground cumin, salt, freshly ground black pepper, and red pepper flakes if using. Whisk everything together until well combined, ensuring the garlic and herbs are evenly distributed throughout the zesty, aromatic mixture.

      Step 3: Marinate the Lamb

      Add the lamb cubes to the bowl or bag with the marinade. Toss gently to ensure every piece is thoroughly coated. Seal the bag or cover the bowl tightly. For the best flavor, refrigerate for at least 2 hours. For a deeply infused, tender result, aim for 4-12 hours. The lemon juice will begin to tenderize the lamb, so avoid marinating for more than 24 hours, as it can make the lamb mushy.

      Step 4: Skewer the Lamb

      Once the marinating time is up, thread the marinated lamb cubes onto your prepared skewers. Don’t pack them too tightly; leave a little space between each cube. This allows the heat to circulate evenly, ensuring each piece cooks to perfection and develops a beautiful char. You can also thread vegetables like bell peppers, onions, or cherry tomatoes between the lamb for a complete skewer, if desired.

      Step 5: Grill to Perfection

      Preheat your grill to medium-high heat. Clean and oil the grill grates to prevent sticking. Place the skewers on the hot grill. Cook for approximately 8-12 minutes, turning them every few minutes to ensure all sides are evenly browned and slightly charred. The internal temperature of the lamb should reach 145°F (63°C) for medium-rare, 160°F (71°C) for medium, and 170°F (77°C) for well-done. Remember, lamb can become tough if overcooked, so aim for medium or medium-rare for the most succulent results.

      Step 6: Rest and Serve

      Once grilled to your desired doneness, remove the skewers from the grill and let them rest for about 5 minutes. This allows the juices to redistribute throughout the meat, ensuring every bite is moist and flavorful. Serve hot, directly off the skewers or with the lamb removed, accompanied by warm pita, tzatziki, and your favorite Mediterranean sides.

      Nutritional Snapshot of Lamb Souvlaki

      While exact nutritional values depend on portion size and any added ingredients for serving, a typical serving of lamb souvlaki (per skewer, without sides) is generally:

      • Calories: ~250-350 kcal
      • Protein: ~25-35g
      • Fat: ~15-25g (depending on lamb cut)
      • Carbohydrates: ~2-5g (from marinade ingredients, before serving with bread)

      Lamb is a good source of protein, iron, zinc, and B vitamins. The marinade adds healthy fats from olive oil and beneficial compounds from garlic and lemon.

      Healthier Twists on Tradition

      Looking to lighten things up without sacrificing flavor? Here are a few swaps:

      • Leaner Lamb Cuts: Opt for lamb loin or sirloin, which are leaner than shoulder or leg.
      • Reduced Oil: You can slightly reduce the olive oil in the marinade, especially if your lamb is fatty. The lemon juice will still help tenderize.
      • More Veggies: Load up your skewers with colorful vegetables like zucchini, bell peppers, tomatoes, and onions. They add volume, nutrients, and fiber without extra calories.
      • Lighter Sides: Serve with a refreshing Greek salad, a dollop of non-fat Greek yogurt mixed with dill as a tzatziki alternative, or simply grilled vegetables instead of heavy starches.

      Elevate Your Meal: Serving Ideas

      Lamb souvlaki is incredibly versatile. Here are some fantastic ways to serve it:

      • Classic Greek Platter: Serve with warm pita bread, a generous spoonful of homemade tzatziki, chopped tomatoes, cucumbers, red onions, and a sprinkle of fresh parsley.
      • Souvlaki Wraps: Fill warm pita bread with the souvlaki, tzatziki, and your favorite fresh vegetables.
      • With a Greek Salad: A simple Horiatiki (Greek village salad) with feta, olives, tomatoes, cucumbers, and oregano dressing makes a perfect light accompaniment.
      • Over Rice Pilaf: A bed of fragrant lemon-herb rice pilaf is a wonderfully satisfying base for the skewers.
      • Meze Style: Serve smaller portions as part of a larger spread of Greek appetizers.

      Avoid These Common Souvlaki Pitfalls

      Even with a great recipe, a few common mistakes can detract from your souvlaki experience:

      • Not Soaking Wooden Skewers: Charred, splintered skewers are a safety hazard and don’t add to the meal.
      • Overcrowding Skewers: This prevents even cooking and makes it difficult to get a good sear.
      • Overcooking the Lamb: Lamb is best enjoyed when slightly pink in the center. Overcooking leads to dry, tough meat.
      • Not Marinating Long Enough: For those deep, complex flavors, patience is key. A short marinade won’t infuse the lamb properly.
      • Grilling on Dirty Grates: This can lead to sticking and impart unpleasant flavors.

      Smart Storage for Leftovers

      Proper storage ensures your souvlaki remains delicious even after cooking.

      • Refrigeration: Once cooled, store cooked lamb souvlaki (off the skewers) in an airtight container in the refrigerator for up to 3-4 days.
      • Freezing: For longer storage, cooked and cooled lamb can be frozen. Wrap tightly in plastic wrap and then aluminum foil, or place in a freezer-safe bag or container. It will keep for up to 2-3 months.
      • Reheating: Gently reheat on the stovetop over medium-low heat, in a low oven (around 300°F/150°C), or briefly in a microwave. Avoid overcooking when reheating.
      Lamb Souvlaki skewers on a grill

      Frequently Asked Questions (FAQs)

      What cut of lamb is best for souvlaki?

      Boneless lamb shoulder or leg is ideal due to its balance of meat and fat, which keeps it moist and tender during grilling. Lamb sirloin or loin chops are leaner alternatives.

      How long should I marinate the lamb?

      For best results, marinate for at least 2-4 hours, but ideally 8-12 hours. The lemon juice tenderizes, so avoid marinating for more than 24 hours to prevent a mushy texture.

      Can I make lamb souvlaki indoors?

      Yes! You can use a grill pan on the stovetop, broil them in the oven, or even air fry them. Just adjust cooking times accordingly to achieve a good sear and internal temperature.

      What vegetables go well with lamb souvlaki?

      Classic additions include bell peppers (any color), red onion, zucchini, and cherry tomatoes. You can thread them onto the skewers with the lamb or serve them as a side salad.

      Why are my souvlaki skewers burning?

      This usually happens if wooden skewers are not soaked sufficiently beforehand. Ensure they are submerged in water for at least 30 minutes. Also, avoid direct high heat for too long without turning.

      Conclusion: Your Flavorful Greek Adventure Awaits!

      This Lamb Souvlaki recipe is more than just a meal; it’s an invitation to experience the vibrant, fresh, and deeply satisfying flavors of Greek cuisine. With perfectly marinated lamb grilled to juicy perfection, it’s a dish that’s sure to impress your family and friends. Whether you’re a seasoned griller or a beginner, this recipe provides clear, actionable steps to achieve authentic, delicious results. So, gather your ingredients, fire up the grill (or grill pan!), and embark on a culinary journey to the Mediterranean. Don’t wait – start planning your souvlaki feast today!

      Print

      clock clock iconcutlery cutlery iconflag flag iconfolder folder iconinstagram instagram iconpinterest pinterest iconfacebook facebook iconprint print iconsquares squares iconheart heart iconheart solid heart solid icon

      Lamb Souvlaki Recipe


      • Author: Chef Emy

      Description

      This Lamb Souvlaki recipe is a flavorful Greek dish featuring marinated lamb skewers grilled to juicy perfection. Packed with Mediterranean herbs, garlic, and lemon, it’s a delicious and easy meal for any occasion. Perfect for grilling season!


      Ingredients

      Scale
      • 1.5lbs lamb shoulder or leg, cut into1-inch cubes
      • 3 tbspolive oil
      • 2 tbspfresh lemon juice
      • 3garlic cloves, minced
      • 1 tbspred wine vinegar
      • 1 tbspdried oregano
      • 1 tspsalt
      • ½ tspblack pepper
      • Wooden or metal skewers
      • Optional: chopped parsley and tzatziki for serving

      Instructions

        Notes

        Soak wooden skewers in water for 30 minutes before grilling to prevent burning.
        For extra flavor, marinate overnight.

        Nutrition

        • Calories: 310
        • Sugar: 0g

        “`

        Vibrant Mexican Street Corn Chicken Bowl Recipe

        “`html

        Vibrant Mexican Street Corn Chicken Bowl Recipe

        What is a Vibrant Mexican Street Corn Chicken Bowl?

        Are you on the hunt for a dinner that’s both incredibly flavorful and surprisingly easy to whip up on a busy weeknight? Look no further than this Vibrant Mexican Street Corn Chicken Bowl! This dish isn’t just a meal; it’s an experience. It captures the essence of Mexican street food – bold, smoky, tangy, and utterly satisfying – in a healthy, customizable bowl format. Imagine tender, juicy grilled chicken nestled alongside creamy, zesty elote-style corn, all brought together with a medley of fresh, vibrant toppings. It’s a Tex-Mex fiesta waiting to happen right in your kitchen, perfect for anyone seeking a delicious escape from the ordinary, and ideal for meal prep too!

        Ingredients You’ll Need

        Crafting this vibrant bowl is all about layering flavors and textures. Here’s your shopping list:

        For the Chicken:

        • 1.5 lbs boneless, skinless chicken breasts or thighs, cut into bite-sized pieces
        • 2 tablespoons olive oil
        • 1 tablespoon chili powder (for that smoky, warm foundation)
        • 1 teaspoon cumin (earthy depth)
        • ½ teaspoon smoked paprika (double down on the smokiness!)
        • ½ teaspoon garlic powder
        • ¼ teaspoon cayenne pepper (optional, for a touch of heat)
        • Salt and freshly ground black pepper to taste
        • Juice of ½ lime (bright, zesty kick)

        For the Elote-Style Corn:

        • 4 cups corn kernels (fresh, frozen, or grilled – frozen works great and is convenient!)
        • 2 tablespoons mayonnaise (or Greek yogurt for a lighter touch)
        • 2 tablespoons crumbled cotija cheese (salty, crumbly goodness)
        • 1 tablespoon chopped fresh cilantro
        • Juice of ½ lime
        • A pinch of chili powder or Tajín for dusting

        For the Bowl Base & Toppings:

        • 2 cups cooked rice (brown, white, or cauliflower rice)
        • 1 (15-oz) can black beans, rinsed and drained
        • 1 cup cherry tomatoes, halved
        • ½ cup finely chopped red onion (for that sharp bite)
        • ½ avocado, sliced or diced (creamy indulgence)
        • Optional toppings: pickled jalapeños, salsa, sour cream or Greek yogurt, extra cilantro

        Substitutions & Notes:

        • Cotija Cheese: If you can’t find cotija, feta cheese is a good substitute, though it’s slightly different in flavor.
        • Corn: Grilled corn (from the cob) adds an extra smoky depth. You can grill it alongside the chicken or use pre-grilled options.
        • Mayonnaise: For a lighter, tangier version of the corn, use plain Greek yogurt instead of mayonnaise. It offers a similar creamy texture.
        • Chicken Thighs: Chicken thighs are more forgiving and tend to stay moister than breasts, especially when grilled.
        • Spiciness: Adjust cayenne pepper and chili powder to control the heat level. Tajín offers a tangy, spicy, and salty finish for the corn.

        Timing is Everything

        Prep Time: 20 minutes
        Cook Time: 15-20 minutes
        Total Time: 35-40 minutes

        This recipe is exceptionally efficient! The average weeknight dinner might take 45-60 minutes, but with a bit of multitasking, you can have this flavor-packed bowl on the table in under 40 minutes. The marinating time (which can be as little as 15 minutes or as long as overnight) is flexible and doesn’t add to your active cooking time.

        Vibrant Mexican Street Corn Chicken Bowl with grilled chicken and elote corn

        Step-by-Step Instructions

        1. Marinate the Chicken

        In a medium bowl, combine the chicken pieces with olive oil, chili powder, cumin, smoked paprika, garlic powder, cayenne pepper (if using), salt, pepper, and lime juice. Toss everything together until the chicken is evenly coated. For best flavor, let it marinate for at least 15 minutes at room temperature, or cover and refrigerate for up to 4 hours (or even overnight for maximum flavor infusion).

        2. Prepare the Elote Corn

        While the chicken is marinating or cooking, prepare your elote corn mixture. In a separate bowl, combine the corn kernels, mayonnaise (or Greek yogurt), chopped cilantro, lime juice, and a good pinch of salt and pepper. Stir gently until the corn is well combined with the creamy dressing. Set aside. If you’re using frozen corn, ensure it’s thawed or quickly sautéed to remove excess moisture before mixing.

        3. Grill the Chicken and Corn

        Preheat your grill or a grill pan to medium-high heat. If using fresh corn on the cob, lightly brush it with oil and grill until slightly charred. If using corn kernels, you can grill them in a grill basket or directly on a slightly oiled grill over medium-high heat for about 5-7 minutes, stirring occasionally, until lightly charred and tender. Remove the corn from the grill and let it cool slightly before cutting off the kernels if using cobs. Grill the marinated chicken pieces for about 5-7 minutes per side, or until cooked through and nicely charred. The thinner the pieces, the faster they will cook.

        4. Assemble Your Masterpiece

        Now for the fun part! Grab your serving bowls. Start with a base of fluffy cooked rice. Next, add a generous scoop of the creamy elote-style corn. Arrange the grilled chicken pieces over the corn. Then, artfully scatter the fresh components: rinsed black beans, halved cherry tomatoes, finely chopped red onion, and slices or cubes of creamy avocado. Finish with a dusting of chili powder or Tajín on the corn, a sprinkle of fresh cilantro, and any other optional toppings you desire. A final squeeze of lime juice ties all the vibrant flavors together.

        Nutritional Information

        While exact nutritional values can vary based on portion sizes and specific ingredients used, a typical serving of this Mexican Street Corn Chicken Bowl (excluding optional toppings) offers:

        • Calories: Approximately 450-600 kcal
        • Protein: 30-40g (primarily from chicken)
        • Carbohydrates: 30-45g (from rice, corn, beans)
        • Fat: 20-30g (from avocado, mayonnaise, chicken fat)
        • Fiber: 8-12g (from beans, corn, vegetables)

        This is a general estimate. For precise tracking, it’s recommended to use a nutrition calculator with your exact ingredients and quantities.

        Healthier Alternatives (Without Sacrificing Flavor)

        You can easily lighten up this bowl without losing its incredible taste:

        • Lighter Corn Dressing: Swap mayonnaise for plain Greek yogurt. It provides creaminess and tang with fewer calories and more protein.
        • Leaner Protein: Opt for skinless chicken breast or even firm tofu marinated in the same spices for a plant-based option.
        • Grain Lower Carb Base: Replace white or brown rice with cauliflower rice or a bed of mixed greens for fewer carbohydrates and more vegetables.
        • Reduced Sodium: Use low-sodium black beans and control the salt added during cooking.
        • Healthy Fats: Avocado is a fantastic source of healthy fats. While it adds calories, it also contributes to satiety and provides essential nutrients.

        Serving Suggestions

        This bowl is a complete meal on its own, but here are a few ways to enhance your experience:

        • Add a Salsa: A dollop of your favorite salsa (pico de gallo, salsa verde, or a spicier option) adds another layer of complexity.
        • Extra Creaminess: A drizzle of crema, sour cream, or Greek yogurt can add a cooling counterpoint to the spices.
        • Pickled Elements: Pickled red onions or jalapeños provide a delightful tangy and spicy crunch that cuts through the richness.
        • Lime Wedges: Always serve with extra lime wedges. The fresh citrus juice brightens and elevates all the flavors.

        Common Mistakes to Avoid

        To ensure perfection, keep these common pitfalls in mind:

        • Overcooking the Chicken: Chicken breasts can become dry quickly. Keep an eye on them during grilling and remove them as soon as they are cooked through.
        • Under-seasoning: Don’t be shy with the spices in the marinade! This is where a lot of the flavor comes from. Taste and adjust salt and pepper as you go.
        • Watery Corn: If using frozen corn, ensure it’s drained very well after thawing or pre-cooking. Excess moisture can dilute the creamy dressing.
        • Skipping the Lime: Lime juice is crucial for balancing the richness and heat. Don’t skip it, and offer extra at serving.

        Storing Your Delicious Creation

        This bowl is excellent for meal prep! Store components separately for the best texture:

        • Chicken: Store grilled chicken in an airtight container in the refrigerator for up to 3-4 days.
        • Corn Mixture: The elote corn mixture can be stored separately for up to 3 days. Keep its toppings (like cilantro and cheese) separate until serving to maintain freshness.
        • Rice & Beans: Cooked rice and rinsed beans can be stored for 3-4 days.
        • Toppings: Keep chopped veggies, avocado, and sauces in separate containers. Assemble the bowls just before eating to prevent ingredients from becoming soggy.
        Close-up of ingredients for Mexican Street Corn Chicken Bowl

        Frequently Asked Questions

        ***Can I make this ahead of time for meal prep?***

        Absolutely! For best results, store the cooked chicken, rice, beans, and corn mixture in separate airtight containers in the refrigerator. Chop your toppings (like onion and tomatoes) and store them separately as well. Assemble the bowls just before serving to keep everything fresh and prevent sogginess. Avocado is best added right before eating.

        ***What is Cotija cheese?***

        Cotija is a hard, crumbly cow’s milk cheese from Mexico. It has a salty, slightly tangy flavor and a texture similar to Parmesan but is often softer when fresh. If you can’t find it, feta is the closest alternative, though it will impart a slightly different flavor profile.

        ***Is this dish spicy?***

        The base recipe has a mild warmth from the chili powder and cumin, with an optional kick from cayenne. You can easily control the spice level by adjusting the amount of cayenne pepper or omitting it entirely. For added heat, you can always add a dash of hot sauce or some diced jalapeños as a topping.

        ***Can I use different types of protein?***

        Yes! This bowl is very versatile. Grilled shrimp, seasoned ground turkey or beef, or even pan-fried halloumi cheese would work wonderfully. For a vegetarian or vegan option, seasoned and grilled tofu or tempeh, or even seasoned black beans as the primary protein, would be delicious.

        ***How do I get the best flavor from the corn?***

        Grilling the corn, even briefly, adds a wonderful smoky char that elevates the flavor significantly. If you don’t have a grill, you can char the corn kernels in a hot, dry skillet or under the broiler, stirring frequently. The key is to get a little bit of caramelization and charring.

        Print
        clock clock iconcutlery cutlery iconflag flag iconfolder folder iconinstagram instagram iconpinterest pinterest iconfacebook facebook iconprint print iconsquares squares iconheart heart iconheart solid heart solid icon

        Vibrant Mexican Street Corn Chicken Bowl Recipe


        • Author: Chef Emy

        Description

        This Mexican Street Corn Chicken Bowl is a vibrant, flavor-loaded meal that combines juicy grilled chicken, creamy elote-style corn, and fresh toppings for the ultimate Tex-Mex experience. Ideal for weeknight dinners or meal prep, this bowl delivers bold taste and satisfying nutrition in every spoonful.


        Ingredients

        Scale
        • 2boneless, skinless chicken breasts
        • 2 cupscorn (fresh, frozen, or canned)
        • 1 tbspolive oil
        • ¼ cupmayonnaise
        • ¼ cupcotija cheese, crumbled
        • 1 tbsplime juice
        • ½ tspchili powder
        • Salt and pepper to taste
        • ¼ cupfresh cilantro, chopped
        • 1 cupcooked rice or cauliflower rice
        • Optional toppings: diced avocado, jalapeños, hot sauce, sliced radishes

        Instructions

          Notes

          Use Greek yogurt instead of mayo for a lighter option.
          Great for meal prep—store components separately.
          Can substitute chicken with tofu or shrimp for variation.

          Nutrition

          • Calories: 520
          • Sugar: 5g

          “`

          Sausage And Potatoes Skillet Recipe

          “`html

          Sausage And Potatoes Skillet Recipe

          Introduction: Easy Weeknight Wisdom

          Are you tired of spending hours in the kitchen after a long day, only to end up with a bland meal? In today’s fast-paced world, finding quick, delicious, and satisfying dinner options is a culinary quest many embark on. Enter the humble yet mighty Sausage and Potatoes Skillet. This recipe isn’t just a meal; it’s a solution. It’s a one-pan wonder that promises bold flavors and minimal cleanup, making busy weeknights a breeze. Imagine smoky, savory sausage mingling with tender, golden potatoes, all brought together by a symphony of aromatic spices. This dish is proof that wholesome ingredients can deliver an explosion of flavor without demanding your entire evening. Whether you’re a seasoned home cook or just starting your culinary journey, this Sausage and Potatoes Skillet recipe is designed to impress with its simplicity and its incredible taste. Get ready to transform your weeknight dinners from a chore into a highlight!

          Ingredients: The Stars of the Show

          The beauty of this Sausage and Potatoes Skillet lies in its straightforward yet impactful ingredient list. Each component plays a vital role in creating that irresistible smoky, savory, and comforting flavor profile. We’ve also included some fantastic substitution ideas so you can tailor this recipe to your pantry and preferences.

          • 1 lb Smoked Sausage: Kielbasa or andouille sausage are excellent choices. Kielbasa offers a milder, smoky flavor, while andouille brings a spicy kick. Look for sausages with a good fat content that will crisp up nicely.
          • 1.5 lbs Potatoes: Yukon Gold or red potatoes work best as they hold their shape well and become wonderfully tender when cooked. You can use russets, but they tend to break down more, creating a creamier texture.
          • 1 Large Onion: Yellow or white onions are perfect here. They caramelize beautifully, adding a sweet depth to the dish.
          • 2-3 Cloves Garlic: Freshly minced garlic is key for that pungent, aromatic foundation.
          • 1 Bell Pepper: Any color will do – green adds a subtle bitterness, while red or yellow offer sweetness. Diced for even cooking.
          • 2 Tablespoons Olive Oil: Or any neutral cooking oil like canola or avocado oil.
          • 1 Teaspoon Smoked Paprika: This is crucial for that authentic smoky flavor.
          • 1/2 Teaspoon Dried Thyme: Adds an earthy, savory note that complements the sausage.
          • Salt and Black Pepper to taste: Essential for enhancing all the other flavors.
          • Optional: Pinch of Red Pepper Flakes: For those who love a little extra heat.

          Substitutions:

          • Sausage: If smoked sausage isn’t your favorite, consider Italian sausage (sweet or hot), chorizo, or even pre-cooked chicken or turkey sausage. Adjust seasonings if your sausage is already heavily seasoned.
          • Potatoes: Sweet potatoes can be used for a sweeter twist, or for a lower-carb option, try diced cauliflower or Brussels sprouts.
          • Vegetables: Feel free to add other vegetables like mushrooms, zucchini, or snap peas.

          Timing: How Long Will It Take?

          One of the greatest appeals of this Sausage and Potatoes Skillet is its efficiency. It’s a meal designed for busy schedules, proving that delicious doesn’t have to mean time-consuming.

          Prep Time: 15 minutes
          Cook Time: 30 minutes
          Total Time: 45 minutes

          Compared to many other hearty dinner recipes that can easily stretch to an hour or more of active cooking and prep, this one-pan meal is a true time-saver. The relatively quick prep is thanks to the simplicity of chopping ingredients, and the cooking time is optimized for tender potatoes and perfectly browned sausage.

          Sausage and Potatoes Skillet in a pan

          Instructions: Let the Magic Begin

          Embarking on this culinary adventure is simple and rewarding. Follow these steps, and you’ll have a delicious, comforting meal on your table in no time. The process is designed for ease and maximum flavor development.

          Step 1: Prep Your Potatoes

          Start by washing your potatoes thoroughly. You can peel them if you prefer, but leaving the skin on adds extra fiber and a rustic texture, especially with Yukon Gold or red potatoes. Cut the potatoes into bite-sized cubes, about 1/2 to 3/4 inch. Aim for consistency in size so they cook evenly. Set them aside.

          Step 2: Brown the Sausage

          Slice your smoked sausage into 1/2-inch thick rounds or half-moons. Heat a large skillet (cast iron is ideal for its heat retention) over medium-high heat. Add the sausage to the dry skillet. Cook, stirring occasionally, until the sausage is nicely browned and has rendered some of its fat. This step is crucial for developing a deep, savory flavor and a delightful crispy edge. Once browned, remove the sausage from the skillet with a slotted spoon and set it aside on a plate, leaving the rendered fat in the skillet. If there’s an excessive amount of fat, you can drain off about half, but leave enough to cook your vegetables.

          Step 3: Sauté the Vegetables

          Add the diced onion and bell pepper to the sausage drippings in the skillet. If you didn’t get much fat from the sausage, add about 1-2 tablespoons of olive oil. Sauté the vegetables over medium heat for about 5-7 minutes, or until they begin to soften and the onion becomes translucent. Add the minced garlic and cook for another minute until fragrant, being careful not to burn it. This aromatics base is where a lot of the savory goodness starts to build.

          Step 4: Combine and Simmer

          Add the cubed potatoes to the skillet with the sautéed vegetables. Sprinkle in the smoked paprika, dried thyme, salt, black pepper, and optional red pepper flakes. Stir everything together to coat the potatoes and vegetables evenly with the spices and rendered fat. Cook for about 5 minutes, stirring occasionally, allowing the potatoes to start to soften and absorb the flavors. Pour in about 1/4 cup of water or chicken broth – this will create steam to help cook the potatoes through and prevent sticking. Bring to a simmer, then reduce the heat to medium-low, cover the skillet, and let it cook for 15-20 minutes, or until the potatoes are fork-tender. Stir occasionally to ensure even cooking and prevent sticking.

          Step 5: Finish and Serve

          Once the potatoes are tender, remove the lid. Return the browned sausage to the skillet. Stir everything together and cook for another 2-3 minutes, allowing the sausage to heat through and meld with the potatoes and vegetables. Taste and adjust seasoning if needed. Serve hot directly from the skillet. Garnish with fresh parsley if desired for a pop of color and freshness.

          Nutritional Information: Fuel Your Body

          This Sausage and Potatoes Skillet is a hearty meal. While exact nutritional values can vary based on specific ingredients used (like the type of sausage and exact potato quantity), a typical serving (approximately 1/4 of the recipe) would provide:

          • Calories: ~450-550 kcal
          • Protein: ~20-25g
          • Fat: ~30-40g (varies greatly with sausage)
          • Carbohydrates: ~30-40g
          • Fiber: ~4-6g

          Please note: This is an approximate value. For precise nutritional information, it’s recommended to calculate it based on the specific ingredients and brands you use.

          Healthier Alternatives: Smarter Choices

          Looking to lighten up this comforting classic? You can make smart swaps without sacrificing too much flavor:

          • Leaner Sausage: Opt for chicken, turkey, or a lower-fat pork sausage. Be aware that these might not render as much flavorful fat, so you may need to add a bit more olive oil.
          • More Vegetables, Fewer Potatoes: Increase the amount of bell peppers, onions, and consider adding broccoli, cauliflower florets, or Brussels sprouts. You can also halve the potato quantity.
          • Lighten the Oil: Use a non-stick spray or just 1 tablespoon of olive oil. You can also rely more on broth for moisture.
          • Skip the Skin on Potatoes: While the skin has fiber, removing it slightly reduces carbohydrate content.

          Serving Suggestions: Perfect Pairings

          This Sausage and Potatoes Skillet is a complete meal on its own, but here are some ideas to elevate it further:

          • Top with a Fried Egg: A runny yolk adds a luscious, creamy element.
          • Dollop of Sour Cream or Greek Yogurt: Adds a cool, tangy contrast to the savory flavors.
          • Fresh Herbs: A sprinkle of chopped parsley, chives, or cilantro adds freshness.
          • Side Salad: A simple green salad with a light vinaigrette balances the richness.

          Common Mistakes to Avoid

          To ensure your Sausage and Potatoes Skillet turns out perfectly every time, steer clear of these common pitfalls:

          • Overcrowding the Pan: If your skillet is too full, the ingredients will steam rather than brown, leading to soggy potatoes and sausage. Cook in batches if necessary.
          • Not Cooking Potatoes Long Enough: Undercooked potatoes will be hard and unpleasant. Ensure they are fork-tender before adding the sausage back.
          • Burning the Garlic: Garlic cooks quickly. Add it towards the end of sautéing vegetables and cook only until fragrant.
          • Skipping the Sausage Browning Step: This step is crucial for flavor development and texture. Don’t rush it.

          Storing Tips: Keeping It Fresh

          Leftovers can be stored in an airtight container in the refrigerator for up to 3-4 days. Reheat gently in a skillet over medium heat or in the microwave. Adding a splash of water or broth when reheating can help prevent the potatoes from drying out.

          Close-up of Sausage and Potatoes Skillet in a serving dish

          Frequently Asked Questions (FAQs)

          Can I use pre-cooked potatoes?

          While you can, it’s best to use raw potatoes. Pre-cooked potatoes might become too mushy during the cooking process. If you must, add them towards the very end, just to heat through.

          What kind of sausage is best?

          Smoked sausages like Kielbasa or Andouille work wonderfully. They offer a good balance of smoky flavor and savory richness. Spicy Italian sausage or chorizo are also great alternatives.

          Can I make this vegetarian?

          Yes! You can substitute the sausage with plant-based sausages or add hearty vegetables like mushrooms, zucchini, and extra bell peppers. You might need to add a bit more oil or broth for cooking.

          How do I make it spicier?

          Add more red pepper flakes, use a spicy sausage like Andouille or hot Italian sausage, or include diced jalapeños with the bell peppers.

          My potatoes aren’t cooking through. What should I do?

          Ensure your heat isn’t too high, which can burn the outside before the inside cooks. Make sure the pan is covered during the simmering stage to trap steam. If needed, add a little more liquid (water or broth) and continue to cook, covered, until tender.

          Print

          clock clock iconcutlery cutlery iconflag flag iconfolder folder iconinstagram instagram iconpinterest pinterest iconfacebook facebook iconprint print iconsquares squares iconheart heart iconheart solid heart solid icon

          Sausage And Potatoes Skillet Recipe


          • Author: Chef Emy

          Description

          This sausage and potatoes skillet recipe is a delicious one-pan meal made with smoky sausage, tender potatoes, and savory spices. Perfect for busy weeknights, this quick dinner brings together wholesome ingredients with bold flavor.


          Ingredients

          Scale
          • 1lb smoked sausage, sliced
          • 1.5lbs baby potatoes, halved
          • 1medium onion, chopped
          • 2cloves garlic, minced
          • 1red bell pepper, sliced
          • 2 tbspolive oil
          • 1 tsppaprika
          • Salt and pepper, to taste
          • Fresh parsley, for garnish (optional)

          Instructions

            Notes

            You can use turkey or chicken sausage for a lighter option.
            Parboiling potatoes beforehand can speed up cooking.

            Nutrition

            • Calories: 410
            • Sugar: 4g

            “`

            Korean Chicken Rice Bowls Recipe

            “`html

            Korean Chicken Rice Bowls Recipe

            Quick & Flavorful Korean Chicken Rice Bowls

            Are you searching for a weeknight dinner that’s both incredibly delicious and surprisingly healthy? If you’re like most busy home cooks, you might be wondering how to whip up a meal that satisfies those savory cravings without spending hours in the kitchen. Look no further! This Korean Chicken Rice Bowls recipe is your answer. It’s a symphony of juicy chicken tossed in a vibrant, sweet, and spicy Korean-style sauce, served over fluffy rice and crowned with a medley of fresh, crisp vegetables. It’s the perfect balance of comforting and invigorating, making it an ideal choice for a satisfying and wholesome dinner that the whole family will adore.

            Ingredients You’ll Need

            Gathering your ingredients is the first step to culinary success. For these Korean Chicken Rice Bowls, we’re focusing on fresh components that bring out the best in the sweet and spicy Korean flavors. Think tender chicken, aromatic garlic and ginger, and a variety of crisp vegetables for that perfect textural contrast.

            For the Korean-Style Sauce:

            • Gochujang (Korean Chili Paste): The heart of our sauce, providing a complex, fermented heat. Look for a good quality brand. Substitution: You can use Sriracha or a blend of chili garlic sauce and a touch of tomato paste if gochujang is unavailable, though the flavor will be slightly different.
            • Soy Sauce: For that essential umami depth. Use low-sodium if you prefer.
            • Rice Vinegar: Adds a bright, tangy note to balance the richness.
            • Honey or Maple Syrup: For a touch of sweetness that caramelizes beautifully.
            • Sesame Oil: Toasted sesame oil offers a nutty aroma that is quintessentially Korean.
            • Minced Garlic: Freshly minced garlic packs the most punch!
            • Grated Ginger: Adds a warm, zesty, and slightly peppery note.
            • Black Pepper: A pinch to round out the flavors.

            For the Chicken and Bowls:

            • Boneless, Skinless Chicken Thighs or Breasts: Thighs offer more flavor and juiciness, while breasts are leaner. Cut into bite-sized pieces.
            • Cooking Oil: A neutral oil like vegetable or canola oil for sautéing.
            • Cooked Rice: Sushi rice, basmati, or jasmine rice all work beautifully.
            • Assorted Fresh Vegetables: Think shredded carrots, thinly sliced bell peppers (any color!), crisp cucumber ribbons, edamame (shelled), and sliced green onions.
            • Optional Toppings: Toasted sesame seeds, a fried egg, or a sprinkle of nori flakes.

            Timing is Everything: Prep, Cook, and Enjoy

            Prep Time: 15 minutes
            Cook Time: 20 minutes
            Total Time: 35 minutes

            This recipe is designed for speed and flavor. With a total time of just 35 minutes, it’s significantly faster than the average dinner recipe which often clocks in at 45-60 minutes. The prep is straightforward, and the cooking process is quick and efficient, making it perfect for busy weeknights.

            Korean Chicken Rice Bowls Ingredients and Preparation

            Step-by-Step Instructions

            Step 1: Prepare the Korean-Style Sauce

            In a medium bowl, whisk together the gochujang, soy sauce, rice vinegar, honey (or maple syrup), sesame oil, minced garlic, grated ginger, and black pepper. Don’t be shy with the garlic and ginger – they add incredible depth! Taste and adjust seasonings if needed. If you prefer a spicier kick, add a little more gochujang. If it’s too thick, a tablespoon of water can help.

            Step 2: Marinate the Chicken

            Place your bite-sized chicken pieces in a bowl. Pour about half of the prepared sauce over the chicken. Toss gently to ensure each piece is coated evenly. Let it marinate for at least 10 minutes while you prepare the other components. This simple marinade infuses the chicken with that irresistible sweet and spicy Korean flavor.

            Step 3: Cook the Chicken

            Heat your cooking oil in a large skillet or wok over medium-high heat. Once hot, add the marinated chicken in a single layer. Cook for about 5-7 minutes, flipping occasionally, until the chicken is golden brown and cooked through. Avoid overcrowding the pan; cook in batches if necessary to ensure proper browning rather than steaming.

            Step 4: Prepare the Rice

            While the chicken is cooking, ensure your rice is ready. Whether you’ve made it fresh or are reheating pre-cooked rice, you want it to be fluffy and warm. If cooking from scratch, follow the package instructions. A slightly sticky rice like sushi rice is ideal for helping the toppings adhere.

            Step 5: Assemble Your Bowls

            This is where the magic happens! Divide the warm rice among your serving bowls. Top generously with the cooked Korean chicken. Arrange your fresh vegetables around the chicken – shredded carrots, bell pepper strips, cucumber ribbons, and edamame add vibrant color and satisfying crunch. Drizzle with the remaining Korean-style sauce, and finish with a sprinkle of toasted sesame seeds and sliced green onions for an extra burst of flavor and visual appeal. If you’re feeling decadent, a fried egg on top is heavenly!

            Nutritional Information (Estimated Per Serving)

            This recipe is a great source of lean protein and can be packed with vitamins and fiber from the vegetables. Here’s an estimated breakdown:

            • Calories: ~450-550 kcal
            • Protein: ~30-40g
            • Carbohydrates: ~40-50g
            • Fat: ~15-25g

            Note: Nutritional values are approximate and can vary based on ingredient choices and portion sizes.

            Healthier Alternatives & Swaps

            Looking to make these Korean Chicken Rice Bowls even healthier without sacrificing flavor? Here are a few simple swaps:

            • Leaner Protein: Opt for chicken breast instead of thighs, or try firm tofu or shrimp for a lighter protein source.
            • Reduced Sodium: Use low-sodium soy sauce.
            • Whole Grains: Serve over brown rice or quinoa for added fiber and nutrients.
            • Less Sugar: If you’re watching sugar intake, reduce the amount of honey or maple syrup in the sauce, or use a sugar substitute approved for cooking. You can also add a touch more rice vinegar to compensate for the reduced sweetness.
            • Veggie Powerhouse: Pack your bowls with even more colorful vegetables like broccoli florets, snap peas, or spinach.

            Serving Suggestions

            These Korean Chicken Rice Bowls are a complete meal on their own, but here are a few ideas to elevate your dining experience:

            • Add a Fried Egg: A runny yolk adds a luxurious richness that ties everything together.
            • Kimchi on the Side: For an extra punch of fermented flavor and probiotics, serve with a side of your favorite kimchi.
            • Quick Pickled Vegetables: Thinly sliced radishes or cucumbers quickly pickled in rice vinegar and a pinch of sugar add a refreshing zing.
            • Garnish Galore: Don’t underestimate the power of toasted sesame seeds, sliced green onions, and a drizzle of sriracha for those who like extra heat.

            Common Mistakes to Avoid

            • Overcrowding the Pan: This leads to steamed, rather than seared, chicken, making it less flavorful and potentially rubbery. Cook in batches if needed.
            • Not Tasting and Adjusting the Sauce: Your gochujang brand might vary in spice and saltiness. Always taste your sauce and adjust to your preference.
            • Using Old Ginger/Garlic: Freshly grated ginger and minced garlic provide the best aroma and flavor.
            • Skipping the Marination: Even a short 10-minute marinade makes a difference in flavor penetration.
            • Serving Cold Rice: Warm rice is crucial for a comforting and cohesive bowl.

            Storing Your Korean Chicken Rice Bowls

            Leftovers can be stored in an airtight container in the refrigerator for up to 3 days. It’s best to store the chicken and rice together, and add fresh vegetables just before serving if possible, as they can become soggy.

            To Reheat: You can gently reheat the chicken and rice mixture in a skillet over medium heat, adding a splash of water or extra sauce if needed, or microwave until heated through. Add fresh toppings before serving.

            Assembled Korean Chicken Rice Bowls with Fresh Vegetables

            Frequently Asked Questions (FAQs)

            ***Can I make this recipe vegetarian or vegan?***

            Absolutely! Replace the chicken with firm or extra-firm tofu, tempeh, or your favorite plant-based chicken alternative. Ensure your sweetener is vegan (like maple syrup instead of honey) and check that your gochujang does not contain any fish products (most are vegan, but it’s good to check).

            ***How spicy is this dish?***

            The spice level can vary depending on the brand of gochujang used. Gochujang typically has a moderate heat. You can control the spiciness by adjusting the amount of gochujang in the sauce. For less heat, use less; for more, add more, or add a pinch of red pepper flakes.

            ***What kind of rice is best?***

            Short-grain or medium-grain rice like sushi rice or medium-grain white rice is ideal as it tends to be slightly sticky, which helps hold the toppings well. However, jasmine or basmati rice will also work, especially if you’re aiming for a healthier option with brown rice.

            ***Can I prepare parts of this recipe in advance?***

            Yes! The Korean-style sauce can be made up to a week in advance and stored in the refrigerator. You can also cook the chicken ahead of time and reheat it. Vegetables can be prepped and stored separately.

            Enjoy Your Delicious Korean Chicken Rice Bowls!

            There you have it – a quick, healthy, and incredibly flavorful Korean Chicken Rice Bowl recipe that’s perfect for any night of the week. With its balanced flavors and vibrant presentation, it’s sure to become a go-to in your meal rotation. Don’t forget to experiment with your favorite vegetables and toppings to make it uniquely yours. Happy cooking!

            Print
            clock clock iconcutlery cutlery iconflag flag iconfolder folder iconinstagram instagram iconpinterest pinterest iconfacebook facebook iconprint print iconsquares squares iconheart heart iconheart solid heart solid icon

            Korean Chicken Rice Bowls Recipe


            • Author: Chef Emy

            Description

            This Korean Chicken Rice Bowls recipe is a delicious, quick meal featuring juicy chicken in a sweet and spicy Korean-style sauce over fluffy rice, topped with fresh vegetables. Perfect for a healthy and satisfying dinner option!


            Ingredients

            Scale
            • 1lb boneless skinless chicken thighs, cut into bite-sized pieces
            • 2 tbspsoy sauce
            • 1 tbspgochujang (Korean chili paste)
            • 1 tbspsesame oil
            • 1 tbsphoney
            • 2garlic cloves, minced
            • 1 tspgrated ginger
            • 2 cupscooked white rice
            • 1 cupshredded carrots
            • 1 cupsliced cucumber
            • 2green onions, chopped
            • Sesame seeds, for garnish

            Instructions

              Notes

              You can substitute chicken thighs with chicken breast or tofu for a leaner or vegetarian version. Adjust gochujang to your spice preference.

              Nutrition

              • Calories: 430
              • Sugar: 8g

              “`

              Spicy Shrimp Sushi Stacks Recipe

              “`html

              Spicy Shrimp Sushi Stacks Recipe

              Introduction: From Sushi Rolls to Stacks

              Are you looking for a way to enjoy the vibrant flavors of sushi without the rolling hassle? Did you know that consumers search for “easy sushi recipes” over 10,000 times per month? This Spicy Shrimp Sushi Stacks recipe is a game-changer. It’s a quick, fun, and beautifully layered twist on traditional sushi, packed with bold flavors and the freshest ingredients. Forget the complicated rolling mat and the fear of unwieldy nori; these sushi stacks are as visually appealing as they are delicious, making them perfect for weeknight dinners or impressive appetizers.

              Ingredients for Spicy Shrimp Sushi Stacks

              Crafting these delightful stacks is all about balancing textures and tastes. Here’s what you’ll need:

              For the Sushi Rice:

              • 2 cups sushi rice (short-grain Japanese rice), rinsed until water runs clear for a fluffy, distinct texture.
              • 2 ½ cups water, for perfectly cooked rice.
              • ¼ cup rice vinegar, for that essential tangy brightness.
              • 2 tablespoons granulated sugar, to balance the vinegar’s sharpness and add a subtle sweetness.
              • 1 teaspoon salt, to enhance all the flavors.

              For the Spicy Shrimp:

              • 1 pound medium shrimp, peeled, deveined, and tails removed – plump and juicy.
              • 2 tablespoons sriracha or your favorite chili sauce, for a fiery kick. (Adjust to your heat preference!)
              • 1 tablespoon mayonnaise (Kewpie recommended for extra creaminess), to bind and mellow the heat.
              • 1 teaspoon soy sauce or tamari, for umami depth.
              • ½ teaspoon sesame oil, for a nutty aroma.

              For the Assembly:

              • 1 large avocado, ripe and thinly sliced, for creamy richness.
              • ½ cucumber, julienned thinly, for a refreshing crunch.

              Flavor Enhancers and Garnishes:

              • Toasted sesame seeds, for a nutty crunch and visual appeal.
              • Thinly sliced green onions or chives, for a fresh, sharp bite.
              • Pickled ginger, to cleanse the palate between bites.
              • Wasabi, for an optional fiery punch.
              • Extra soy sauce or tamari, for dipping.

              Timing is Everything

              Prep time: 25 minutes
              Cook time: 20 minutes
              Total time: 45 minutes

              Compared to traditional sushi rolls which can easily take an hour or more with rolling and chilling, these Spicy Shrimp Sushi Stacks are remarkably efficient. The cooking of the rice is the longest single component, but while it cooks and cools, you can prepare the shrimp and slice your veggies. This makes it an ideal meal for a busy schedule!

              Spicy Shrimp Sushi Stacks prepared and ready to be served

              How to Make Spicy Shrimp Sushi Stacks: Step-by-Step

              Cook the Sushi Rice to Perfection

              1. Rinse the sushi rice thoroughly under cold running water until the water is completely clear. This removes excess starch, preventing gummy rice. Drain well.
              2. Combine the rinsed rice and 8 cups of water in a medium saucepan. Bring it to a boil over high heat, then immediately reduce the heat to the lowest setting, cover tightly, and simmer for 15 minutes. Do not lift the lid.
              3. Remove the saucepan from the heat and let it stand, covered, for another 10 minutes. This allows the rice to steam and finish cooking.
              4. While the rice is steaming, gently warm the rice vinegar, sugar, and salt in a small saucepan or microwave-safe bowl. Stir until the sugar and salt are completely dissolved. Do not boil.
              5. Transfer the cooked rice to a large, shallow non-metallic bowl (a wooden or glass bowl is ideal). Gradually pour the vinegar mixture over the hot rice, using a rice paddle or spatula to gently fold and cut the mixture into the rice. Do this with a slicing motion to avoid breaking the grains.
              6. Fan the rice as you mix to help it cool down quickly and achieve a glossy finish. Cover the seasoned rice with a damp cloth and let it cool to room temperature.

              Prepare the Spicy Shrimp Filling

              1. In a medium bowl, combine the sriracha, mayonnaise, soy sauce, and sesame oil. Stir until well combined and creamy.
              2. Add the prepared shrimp to the spicy sauce. Toss gently to ensure each shrimp is evenly coated. Let it marinate for about 10-15 minutes while you prepare the other ingredients.

              Assemble Your Sushi Stacks

              1. You’ll need ring molds or any round cutters for this. If you don’t have them, you can use clean, empty tuna cans or small glasses with the bottoms removed. Place the mold on your serving plate.
              2. Start with a layer of cooled sushi rice at the bottom of the mold. Gently press it down to form a compact base. About ¼ to ½ cup of rice per stack, depending on your mold size.
              3. Next, add a layer of thinly sliced avocado.
              4. Follow with a layer of the spicy shrimp mixture. Make sure to distribute the shrimp evenly.
              5. Add a layer of the julienned cucumber.
              6. Carefully lift the ring mold. For extra stability, you can add another small layer of rice on top if using a very deep mold.
              7. Repeat the layering process for as many stacks as you wish to make.

              Chill and Serve

              1. Once assembled, you can either serve immediately or chill them in the refrigerator for about 15-20 minutes to help them set. This is optional but can make them easier to handle.
              2. Garnish your Spicy Shrimp Sushi Stacks with toasted sesame seeds and thinly sliced green onions.
              3. Serve with pickled ginger, wasabi, and soy sauce on the side. Enjoy the burst of flavors!

              Nutritional Information

              Nutritional values are approximate and can vary based on specific ingredients and portion sizes.

              • Calories: ~350-450 per stack (depending on size and toppings)
              • Protein: ~15-20g
              • Fat: ~15-25g (from avocado, mayo, sesame oil)
              • Carbohydrates: ~30-40g (primarily from rice)
              • Sodium: Varies greatly with soy sauce usage.

              Healthier Alternatives and Flavor Swaps

              Looking to lighten things up or switch flavors? Try these variations:

              • Lighter Mayo: Use a light or avocado-oil-based mayonnaise, or even Greek yogurt for a significantly lower fat content, though the flavor profile will change.
              • Brown Rice: For added fiber, you can use cooked short-grain brown rice. Ensure it’s cooled and seasoned well, though the texture will be chewier.
              • Vegetarian Option: Replace shrimp with pan-fried or baked firm tofu cubes marinated in a similar spicy sauce, or use finely chopped, seasoned mushrooms.
              • Different Protein: Cooked salmon or imitation crab meat (kani) can be used instead of shrimp. For a raw sushi experience, ensure your sushi-grade fish is handled impeccably.
              • Less Spice: Reduce the amount of sriracha or substitute with a milder chili sauce.

              Serving Suggestions: Elevate Your Experience

              These stacks are fantastic on their own, but here are a few ideas to make them even better:

              • Dipping Sauces: Besides soy sauce, try a ponzu sauce for a citrusy tang or a spicy mayo on the side.
              • Side Dishes: Serve with a light miso soup, a crisp Asian-inspired slaw, or edamame for a complete meal.
              • Presentation: Arrange the stacks artfully on a platter. You can garnish with edible flowers or microgreens for an extra touch of elegance.

              Common Mistakes to Avoid

              • Using the wrong rice: Long-grain or basmati rice won’t have the sticky texture needed for sushi. Always use short-grain sushi rice.
              • Overcrowding the mold: Pack layers evenly but don’t stuff them too tightly, as this can make disassembly difficult and the stacks unstable.
              • Using hot rice: Ensure the sushi rice has cooled to at least room temperature. Hot rice will cook the avocado and affect the texture.
              • Not rinsing the rice: This is crucial for achieving the right texture and preventing a starchy, gummy result.

              Storing Your Sushi Stacks

              Sushi is best enjoyed fresh. If you have leftovers, store them in an airtight container in the refrigerator for no more than 24 hours. The avocado may brown slightly, and the rice can harden over time. For the best experience, it’s recommended to eat them the same day they are made.

              Close-up of a spicy shrimp sushi stack with garnishes

              Frequently Asked Questions (FAQs)

              ***Can I make these ahead of time?***

              While the rice and shrimp mixture can be prepared a few hours in advance and refrigerated, it’s best to assemble the stacks just before serving. The avocado can brown, and the overall texture is best when fresh.

              ***What kind of rice vinegar should I use?***

              Standard rice vinegar or seasoned rice vinegar works well. If using unseasoned rice vinegar, you’ll need to add sugar and salt as specified in the recipe.

              ***How do I make them spicier or less spicy?***

              To increase spice, add more sriracha to the shrimp mixture, or a pinch of cayenne pepper. To decrease spice, use less sriracha or omit it entirely, relying on the mayonnaise and soy sauce for flavor.

              ***Can I use cooked shrimp?***

              Yes, you can use pre-cooked shrimp, but be sure not to overcook them when tossing with the sauce, as they can become tough. They just need to be heated through.

              ***What are the best mold alternatives if I don’t have ring molds?***

              You can use clean, empty tuna cans (remove both ends), small cookie cutters, or even carefully shape them by hand, though they might be less uniform.

              Conclusion: Enjoy Your Sushi Creation!

              This Spicy Shrimp Sushi Stacks recipe offers a delightful, accessible way to enjoy popular sushi flavors right at home. It’s a dish that’s as fun to make as it is to eat, guaranteed to impress your taste buds and your guests. So gather your ingredients, embrace the vibrant colors and textures, and get ready to build your own delicious sushi masterpieces!

              Print

              clock clock iconcutlery cutlery iconflag flag iconfolder folder iconinstagram instagram iconpinterest pinterest iconfacebook facebook iconprint print iconsquares squares iconheart heart iconheart solid heart solid icon

              Spicy Shrimp Sushi Stacks Recipe


              • Author: Chef Emy

              Description

              This Spicy Shrimp Sushi Stacks recipe is a quick, fun twist on traditional sushi, layered with bold flavors and fresh ingredients.


              Ingredients

              Scale
              • 1 cupsushi rice
              • 2 tbsprice vinegar
              • ½ tspsugar
              • ¼ tspsalt
              • ½lb cooked shrimp, chopped
              • 2 tbspmayonnaise
              • 1 tbspSriracha
              • 1avocado, diced
              • ½cucumber, diced
              • 1 tspsesame oil
              • 1 tspsoy sauce
              • 1sheet nori, crushed
              • 1 tspsesame seeds
              • Optional: green onions, for garnish

              Instructions

                Notes

                Use pre-cooked shrimp for convenience. Customize spice levels by adjusting the Sriracha. Best served fresh.

                Nutrition

                • Calories: 310
                • Sugar: 2g

                “`

                Shrimp Pasta With Creamy Tomato White Wine Sauce Recipe

                “`html

                Shrimp Pasta With Creamy Tomato White Wine Sauce Recipe

                Introduction: Is it Possible to Make a Luxurious Dinner in Under 30 Minutes?

                In today’s fast-paced world, finding the time to prepare a restaurant-quality meal can feel like a distant dream. But what if I told you that you could create a Shrimp Pasta with Creamy Tomato White Wine Sauce that’s both incredibly luxurious and astonishingly quick to make? For those searching for a weeknight dinner that impresses or a special occasion dish that doesn’t require hours of prep, this recipe is your answer. We’re talking about succulent shrimp, a rich, velvety sauce kissed with tomato and brightened by white wine, all coating perfectly cooked pasta. This dish isn’t just food; it’s an experience, and it’s achievable in less time than it takes to decide what to watch on streaming. Get ready to elevate your pasta game with minimal effort and maximum flavor.

                Ingredients for Your Masterpiece

                The magic of this Shrimp Pasta With Creamy Tomato White Wine Sauce lies in the balance of simple, high-quality ingredients. Don’t be intimidated; each component plays a crucial role in creating that delightful harmony of flavors and textures.

                For the Pasta:

                • 12 ounces pasta: Linguine, fettuccine, or spaghetti work wonderfully. Choose a good quality pasta that holds sauce well. We want something with a satisfying chew!
                • Salt: For seasoning the pasta water. This is your first opportunity to flavor the pasta itself.

                For the Sauce:

                • 2 tablespoons olive oil: Extra virgin for that fruity nuance.
                • 1 small yellow onion, finely chopped: Provides a sweet, aromatic base. A shallot can be a more delicate substitute.
                • 4 cloves garlic, minced: The soul of many great dishes. Don’t skimp here!
                • 1/2 teaspoon red pepper flakes (optional): For a whisper of heat that complements the richness. Adjust to your spice preference.
                • 1 (14.5 ounce) can diced tomatoes, undrained: These add body, sweetness, and a lovely tang. Fire-roasted diced tomatoes will add another layer of complexity.
                • 1/2 cup dry white wine: Such as Pinot Grigio or Sauvignon Blanc. This is crucial for adding acidity and depth. For a non-alcoholic option, use chicken or vegetable broth.
                • 1 cup heavy cream: This creates our luscious, creamy texture. For a lighter sauce, half-and-half can be used, but the richness will be slightly diminished.
                • 1/4 cup grated Parmesan cheese: Plus more for serving. It adds that salty, umami flavor that ties everything together.
                • Salt and freshly ground black pepper: To taste. Seasoning throughout is key.
                • 1/4 cup fresh parsley, chopped: For a pop of freshness and color as a garnish. Basil is also a fantastic alternative.

                For the Shrimp:

                • 1 pound large shrimp, peeled and deveined: About 21-25 count per pound is ideal. Make sure they are patted dry for a good sear.
                • 1 tablespoon olive oil: To get a beautiful golden crust.
                • Salt and freshly ground black pepper: A simple seasoning that lets the shrimp’s natural sweetness shine.

                Timing is Everything

                Prep time: 15 minutes
                Cook time: 20 minutes
                Total time: 35 minutes
                Average Pasta Recipe: ~45-60 minutes

                This Shrimp Pasta With Creamy Tomato White Wine Sauce is designed for efficiency. While the average pasta dish can easily creep over 45 minutes, we’ve streamlined our process to bring you a restaurant-worthy meal in under 40 minutes. The key is to multitask and have your ingredients prepped and ready to go!

                Shrimp pasta with creamy tomato white wine sauce in a bowl.

                Step-by-Step Instructions

                Step 1: Prep Your Shrimp

                First things first, let’s get those shrimp ready. If you’re using frozen shrimp, make sure they’ve been completely thawed. Peel and devein them if they aren’t already. The most crucial step here is to pat them thoroughly dry with paper towels. This might seem minor, but it’s essential for achieving a beautiful sear and preventing them from steaming in the pan. Once dry, season them generously with salt and pepper. Set them aside while we get started on the sauce.

                Step 2: Cook the Pasta

                Bring a large pot of generously salted water to a rolling boil. Add your chosen pasta and cook according to package directions until al dente – that means tender with a slight bite. Before draining, reserve about 1 cup of the starchy pasta water. This liquid gold will be instrumental in emulsifying our sauce and giving it a silky smooth consistency. Drain the pasta and set it aside. Don’t rinse it!

                Step 3: Sauté the Aromatics

                While the pasta is cooking, let’s build the flavor base for our sauce. In a large skillet or Dutch oven, heat 2 tablespoons of olive oil over medium heat. Add the finely chopped onion and sauté for about 3-4 minutes until it begins to soften and become translucent. Now, add the minced garlic and red pepper flakes (if using). Cook for another minute until fragrant, being careful not to burn the garlic – burnt garlic is bitter garlic!

                Step 4: Build the Sauce

                Pour in the white wine to deglaze the pan, scraping up any browned bits from the bottom. Let it simmer and reduce by about half, which should take 2-3 minutes. This process concentrates the wine’s flavor and cooks off the alcohol. Next, add the can of diced tomatoes (with their juices). Stir everything together and let it simmer for about 5 minutes, allowing the flavors to meld. Now, pour in the heavy cream and stir until the sauce is smooth and begins to thicken slightly. Season with salt and pepper to your taste.

                Step 5: Cook the Shrimp

                In a separate skillet (or if your sauce skillet is large enough, you can do this in batches after removing the sauce temporarily), heat 1 tablespoon of olive oil over medium-high heat. Add the seasoned shrimp in a single layer. Cook for about 1-2 minutes per side, just until they turn pink and opaque. Be careful not to overcook them, as they will continue to cook slightly in the sauce. Overcooked shrimp become tough and rubbery.

                Step 6: Combine and Finish

                Add the cooked shrimp to the creamy tomato sauce. Stir in the grated Parmesan cheese until melted and the sauce is creamy. If the sauce seems too thick, add a splash of the reserved pasta water, a tablespoon at a time, until it reaches your desired consistency. Finally, add the drained pasta to the skillet with the sauce and shrimp. Toss everything gently to coat the pasta evenly. Stir in most of the chopped fresh parsley, reserving some for garnish. Serve immediately, topping with extra Parmesan cheese and the remaining parsley.

                Nutritional Information

                This is an approximate nutritional breakdown per serving (assuming 4 servings), and can vary based on exact ingredients and portion sizes:

                • Calories: 550-650 kcal
                • Protein: 30-40g
                • Fat: 30-40g
                • Carbohydrates: 40-50g
                • Fiber: 3-5g
                • Sodium: Varies greatly based on added salt and Parmesan cheese.

                Healthier Alternatives

                Want to lighten up this decadent dish without sacrificing flavor? Here are a few swaps:

                • For Cream: Use half-and-half or a blend of evaporated milk and a little cornstarch for thickening. For a dairy-free option, full-fat coconut milk or cashew cream can work, though they will impart a slight flavor.
                • For Pasta: Opt for whole wheat pasta to boost fiber content. Even better, use zucchini noodles (zoodles) or spaghetti squash for a low-carb, vegetable-forward meal.
                • For Shrimp: While shrimp are lean protein, you can always add more vegetables like spinach, mushrooms, or bell peppers to bulk up the dish and increase its nutrient density.
                • For White Wine: Vegetable or chicken broth is an excellent non-alcoholic substitute, providing savory depth.

                Serving Suggestions

                This Shrimp Pasta With Creamy Tomato White Wine Sauce is a complete meal on its own, but it pairs beautifully with a few sides:

                • Crusty Bread: Perfect for soaking up any leftover delicious sauce.
                • Simple Green Salad: A light, crisp salad with a vinaigrette cuts through the richness of the pasta. Think mixed greens, cherry tomatoes, and cucumber.
                • Steamed Asparagus or Broccoli: A healthy, vibrant green side dish that complements the flavors wonderfully.

                Common Mistakes to Avoid

                To ensure your Shrimp Pasta With Creamy Tomato White Wine Sauce turns out perfectly every time, keep an eye out for these common pitfalls:

                • Overcooking the Shrimp: Shrimp cook very quickly. Adding them at the last minute and cooking just until pink is key to tender, succulent results.
                • Not Salting Pasta Water: Pasta water should taste like the sea! This is your primary chance to season the pasta itself.
                • Burning the Garlic: Add garlic towards the end of the aromatic sauté and cook briefly until fragrant, not brown.
                • Using Low-Quality Ingredients: With a simple dish like this, the quality of your ingredients (especially the shrimp and Parmesan) really shines through.
                • Skipping the Pasta Water: That starchy water is crucial for achieving a silky, emulsified sauce that clings beautifully to the pasta.

                Storing Tips

                If you happen to have any leftovers (which is unlikely!), store them in an airtight container in the refrigerator for up to 2-3 days. The sauce may thicken as it cools. Reheat gently on the stovetop over low heat, adding a splash of milk, cream, or water to loosen the sauce. While possible, pasta dishes like this are best enjoyed fresh, as the pasta can become a bit mushy upon reheating.

                Close-up of shrimp pasta with creamy tomato white wine sauce.

                Frequently Asked Questions (FAQs)

                ***Can I make this recipe ahead of time?***

                While the sauce can be made a day in advance and reheated, it’s best to cook the pasta and shrimp and combine everything just before serving for the freshest taste and texture.

                ***What kind of white wine should I use?***

                A dry white wine like Pinot Grigio, Sauvignon Blanc, or unoaked Chardonnay works best. Avoid sweet wines, as they will alter the flavor profile of the sauce. If you don’t use alcohol, chicken or vegetable broth is a great substitute.

                ***Can I use other seafood instead of shrimp?***

                Absolutely! Scallops, mussels, or even chunks of white fish like cod or tilapia would be delicious additions or substitutions.

                ***How can I make the sauce thicker or thinner?***

                To thicken, simmer the sauce a bit longer or create a slurry of 1 teaspoon cornstarch mixed with 1 tablespoon cold water and stir it in, simmering until thickened. To thin, add reserved pasta water, broth, or milk a tablespoon at a time until desired consistency is reached.

                Print
                clock clock iconcutlery cutlery iconflag flag iconfolder folder iconinstagram instagram iconpinterest pinterest iconfacebook facebook iconprint print iconsquares squares iconheart heart iconheart solid heart solid icon

                Shrimp Pasta With Creamy Tomato White Wine Sauce Recipe


                • Author: Chef Emy

                Description

                This Shrimp Pasta With Creamy Tomato White Wine Sauce recipe blends succulent shrimp, a rich tomato cream sauce, and a splash of white wine for a luxurious pasta dish. It’s perfect for weeknight dinners or special occasions, ready in under 30 minutes.


                Ingredients

                Scale
                • 8 ozfettuccine or spaghetti
                • 1lb large shrimp, peeled and deveined
                • 2 tbspolive oil
                • 4cloves garlic, minced
                • ½ tspred pepper flakes (optional)
                • ½ cupdry white wine
                • 1 cupcrushed tomatoes
                • ½ cupheavy cream
                • ¼ cupgrated Parmesan cheese
                • Salt and pepper, to taste
                • Fresh basil or parsley, chopped (for garnish)

                Instructions

                  Notes

                  Use freshly grated Parmesan for best flavor. You can substitute white wine with chicken broth if preferred.

                  Nutrition

                  • Calories: 520
                  • Sugar: 5g

                  “`

                  Firecracker Shrimp Recipe

                  “`html

                  Firecracker Shrimp Recipe

                  Spice Up Your Life: The Ultimate Firecracker Shrimp

                  This Firecracker Shrimp recipe delivers crispy, golden shrimp tossed in a spicy, tangy firecracker sauce. A restaurant-style favorite you can make at home in under 30 minutes. Perfect for parties, weeknight dinners, or anytime you crave bold flavor.

                  Imagine succulent shrimp, coated in a light, crispy batter and fried to golden perfection, then enveloped in a vibrant, zesty sauce that’s the perfect balance of sweet, spicy, and tangy. That’s the magic of homemade Firecracker Shrimp! It’s the kind of dish that disappears from the plate in minutes and leaves everyone asking for more. Forget the delivery apps and the high restaurant bills; this recipe is your ticket to incredible flavor that’s both budget-friendly and astonishingly fast to prepare. Whether you’re hosting a game night, planning a special weeknight treat, or simply looking to impress, this bold and beautiful shrimp dish is guaranteed to be a showstopper. Let’s dive into what makes this recipe so special and how you can whip it up in your own kitchen!

                  Ingredients You’ll Need

                  The beauty of this Firecracker Shrimp recipe lies in its straightforward ingredients, many of which you likely already have in your pantry. The combination creates a flavor profile that’s addictive and highly customizable.

                  For the Crispy Shrimp:

                  • 1 pound large shrimp, peeled and deveined: Look for plump, firm shrimp. Their natural sweetness is the perfect canvas for the spicy sauce. Fresh or thawed frozen shrimp will work beautifully.
                  • 1/2 cup all-purpose flour: This provides a light coating for crispiness. Can be substituted with gluten-free all-purpose flour.
                  • 1/4 cup cornstarch: The secret to an extra-crispy, light coating. Rice flour can be used as a substitute for added crunch.
                  • 1 teaspoon salt: Enhances all the flavors.
                  • 1/2 teaspoon black pepper: For a subtle warmth.
                  • 1 large egg, beaten: Acts as a binder for the coating.
                  • 1/4 cup milk or buttermilk: Adds a touch of richness and helps the coating adhere. Buttermilk adds a slight tang.
                  • Vegetable oil or other neutral oil, for frying: Such as canola or peanut oil. Ensure you have enough for about 1-inch depth in your pan.

                  For the Firecracker Sauce:

                  • 1/2 cup ketchup: The base of our sauce, providing sweetness and body.
                  • 1/4 cup Sriracha or other hot sauce: This is where the “firecracker” comes from! Adjust to your spice preference.
                  • 2 tablespoons rice vinegar: Adds a crucial tangy, bright note that cuts through the richness. White vinegar is a decent substitute.
                  • 2 tablespoons honey or maple syrup: For sweetness and a glossy finish. Agave nectar is another option.
                  • 1 tablespoon soy sauce or tamari: Adds umami depth. Use tamari for a gluten-free option.
                  • 1 teaspoon sesame oil: For that distinct nutty aroma and flavor.
                  • 2 cloves garlic, minced: Fresh garlic provides the best pungent flavor.
                  • 1/2 teaspoon grated fresh ginger: Adds a warm, spicy zing that complements the garlic.

                  For Garnish (Optional):

                  • Sesame seeds
                  • Chopped green onions or chives

                  Timing is Everything

                  One of the biggest advantages of this Firecracker Shrimp recipe is its speed. It’s significantly faster than many typical weeknight dinners:

                  Prep time: 15 minutes
                  Cook time: 10 minutes
                  Total time: 25 minutes

                  Compare this to the average 45-60 minute preparation and cook time for many seafood or complex protein dishes. This recipe is perfect for those evenings when time is short but the craving for something exciting is high!

                  Crispy firecracker shrimp tossed in sauce

                  Let’s Get Cooking!

                  Follow these simple steps for incredibly delicious Firecracker Shrimp.

                  Step 1: Prep the Shrimp

                  Start by ensuring your shrimp are properly prepped. Pat them thoroughly dry with paper towels – this is crucial for ensuring the coating sticks well and fries up crispy. In a medium bowl, whisk together the flour, cornstarch, salt, and pepper. In a separate shallow bowl, whisk the egg and milk together to create your wet mixture. Dredge each dry shrimp first in the flour mixture, shaking off any excess, then dip it into the egg mixture, letting any excess drip off. Finally, dredge the shrimp again in the flour mixture. Place the coated shrimp on a plate or baking sheet in a single layer. Repeat with all the shrimp. This double-dredging method ensures a deliciously crispy exterior!

                  Step 2: The Firecracker Sauce

                  While your shrimp are waiting, it’s time to whip up the star of the show – the firecracker sauce! In a small saucepan or a microwave-safe bowl, combine the ketchup, Sriracha, rice vinegar, honey (or maple syrup), soy sauce (or tamari), sesame oil, minced garlic, and grated ginger. Whisk everything together until well combined. If using a saucepan, heat the mixture over medium-low heat, stirring constantly, until it’s warm and slightly thickened, about 3-5 minutes. Be careful not to let it boil vigorously. If microwaving, heat in 30-second intervals, stirring between each, until heated through and slightly thickened. The aroma will be incredible!

                  Step 3: Coat and Cook

                  Now for the frying! Pour enough vegetable oil into a large skillet or Dutch oven to reach about 1-inch depth. Heat the oil over medium-high heat until it reaches about 350°F (175°C). You can test if it’s ready by dropping a tiny bit of the coating mixture into the oil; it should sizzle immediately. Carefully add the coated shrimp to the hot oil in batches, ensuring not to overcrowd the pan. Overcrowding will lower the oil temperature and result in soggy shrimp. Fry for about 2-3 minutes per side, or until golden brown and cooked through. Use a slotted spoon or spider strainer to remove the crispy shrimp from the oil and place them on a wire rack set over a baking sheet to drain. This allows air to circulate, keeping them extra crispy.

                  Step 4: Toss and Serve

                  Once all the shrimp have been fried and drained, it’s time to bring everything together. Transfer the crispy shrimp to a large bowl. Pour the warm firecracker sauce over the shrimp and gently toss to coat them evenly. The sauce should cling beautifully to the crisp coating. Serve immediately while warm. Garnish with toasted sesame seeds and freshly chopped green onions or chives for a pop of color and extra flavor, if desired.

                  Nutritional Powerhouse

                  While a treat, this Firecracker Shrimp recipe can be a good source of lean protein. Nutritional values can vary based on exact ingredients and portion sizes, but a typical serving might look something like this:

                  • Calories: Approximately 300-400 per serving (depending on oil absorption and sauce ingredients).
                  • Protein: Rich in lean protein from the shrimp.
                  • Fat: Moderate fat content due to frying and oil in sauce.
                  • Carbohydrates: Primarily from the coating and sauce sugars.

                  Healthier Swaps, Still Delicious

                  You can absolutely enjoy the incredible flavors of Firecracker Shrimp with a few smart modifications:

                  • Baking or Air Frying: Instead of deep frying, toss the flour-coated shrimp with a light spray of oil and bake at 400°F (200°C) for 10-12 minutes, flipping halfway, or air fry at 375°F (190°C) for 7-9 minutes until golden. The crunch will be slightly different but still satisfying.
                  • Reduced Sugar: Use less honey or opt for a sugar-free sweetener in the sauce.
                  • Lighter Coating: Use fewer breading agents or try a simple cornstarch dusting for a lighter crisp.
                  • Spice Adjustment: Control the heat by reducing the Sriracha and increasing ketchup or adding a touch of gochujang for a different kind of spice.

                  Perfect Pairings

                  Firecracker Shrimp are incredibly versatile. Here are some ideas:

                  • Over Rice: Serve over steamed white, brown, or jasmine rice to soak up the delicious sauce.
                  • With Noodles: Toss with cooked lo mein or ramen noodles for a quick stir-fry.
                  • As an Appetizer: Serve in small bowls or on skewers for a party starter.
                  • In Lettuce Wraps: Add to crisp lettuce cups for a lighter, refreshing meal.
                  • With Vegetables: Pair with steamed or stir-fried broccoli, snap peas, or bell peppers for a complete meal.

                  Avoiding Common Pitfalls

                  To ensure your Firecracker Shrimp are perfect every time, watch out for these common mistakes:

                  • Wet Shrimp: Not drying the shrimp properly leads to a soggy coating.
                  • Overcrowding the Pan: This lowers oil temperature, resulting in greasy, unevenly cooked shrimp. Fry in batches!
                  • Sauce Too Thick/Thin: Adjust heat and cooking time of the sauce to achieve the desired consistency.
                  • Overcooking: Shrimp cook very quickly; overcooked shrimp become tough and rubbery.

                  Storing Your Firecracker Shrimp

                  For the best texture, Firecracker Shrimp are best enjoyed fresh. However, if you have leftovers:

                  • Refrigeration: Store cooled shrimp in an airtight container in the refrigerator for up to 2 days.
                  • Reheating: Reheat gently in a non-stick skillet over low heat or in a toaster oven to try and crisp them up again. Microwaving will likely make them soft. The coating may lose some of its crispness upon reheating.
                  Close up of firecracker shrimp being tossed in sauce

                  Frequently Asked Questions

                  ***Can I make the sauce ahead of time?***

                  Yes, absolutely! The firecracker sauce can be made up to 3 days in advance and stored in an airtight container in the refrigerator. Gently reheat it on the stovetop or in the microwave before tossing with the shrimp.

                  ***What kind of shrimp should I use?***

                  Large or jumbo shrimp (typically 21-30 or 16-20 count per pound) work best as they hold up well to frying and coating. Ensure they are peeled and deveined for easy eating.

                  ***How can I make this gluten-free?***

                  Use a gluten-free all-purpose flour blend for the coating and tamari instead of soy sauce in the sauce. Ensure your hot sauce is also gluten-free.

                  ***How spicy is this recipe?***

                  The spiciness comes primarily from the Sriracha. The recipe as written is moderately spicy. You can increase or decrease the Sriracha amount to suit your personal heat preference.

                  ***Why are my shrimp not crispy?***

                  Several reasons could cause this: the shrimp weren’t patted dry enough, you overcrowded the pan, or the oil temperature was too low. Ensure your oil is at the correct temperature (around 350°F/175°C) and fry in small batches.

                  Taste the Fire!

                  This Firecracker Shrimp recipe is a true game-changer. It’s proof that you don’t need to spend hours in the kitchen or a fortune at a restaurant to enjoy incredibly flavorful, exciting food. With its perfect balance of spice, tang, and sweetness, coupled with that irresistible crispy texture, these shrimp are sure to become a frequent favorite in your household. So, gather your ingredients, crank up the heat, and get ready to impress yourself and everyone around you with this sensational dish. Don’t wait – try this Firecracker Shrimp recipe tonight and experience a burst of flavor!

                  Print

                  clock clock iconcutlery cutlery iconflag flag iconfolder folder iconinstagram instagram iconpinterest pinterest iconfacebook facebook iconprint print iconsquares squares iconheart heart iconheart solid heart solid icon

                  Firecracker Shrimp Recipe


                  • Author: Chef Emy

                  Description

                  This Firecracker Shrimp recipe delivers crispy, golden shrimp tossed in a spicy, tangy firecracker sauce. A restaurant-style favorite you can make at home in under 30 minutes. Perfect for parties, weeknight dinners, or anytime you crave bold flavor.


                  Ingredients

                  Scale
                  • 1lb large shrimp, peeled and deveined
                  • ½ cupcornstarch
                  • 2eggs, beaten
                  • 1 cuppanko breadcrumbs
                  • Oil for frying
                  • For the Firecracker Sauce:
                  • cupmayonnaise
                  • 2 tbspsweet chili sauce
                  • 1 tbspsriracha
                  • 1 tbsphoney
                  • 1 tsprice vinegar

                  Instructions

                    Notes

                    Adjust sriracha for more or less heat.
                    Use air fryer for a lighter version.
                    Serve over rice, in tacos, or as an appetizer.

                    Nutrition

                    • Calories: 380
                    • Sugar: 5g

                    “`

                    Thai Inspired Creamy Coconut Shrimp Recipe

                    “`html

                    Thai Inspired Creamy Coconut Shrimp Recipe

                    Flavorful Journey: Unlocking the Magic of Thai Inspired Creamy Coconut Shrimp

                    Are you constantly seeking weeknight dinners that are both incredibly flavorful and surprisingly quick to prepare? The quest for dishes that transport your taste buds to exotic locales, while fitting into your busy schedule, often feels like a culinary odyssey. This Thai Inspired Creamy Coconut Shrimp recipe is your answer. It’s a dish that harnesses the vibrant, complex flavors of Thailand, wrapping succulent shrimp in a lusciously creamy coconut milk base, accented with the bright tang of lime, the pungent depth of garlic, and a tantalizing whisper of spice. On average, a flavorful, home-cooked meal can take up to an hour, but this masterpiece comes together in a fraction of that time, making it an ideal choice for those who crave adventure without the extended commitment.

                    Gathering Your Aromatic Treasures: Ingredients and Substitutions

                    The soul of this dish lies in the quality and synergy of its ingredients. We’ve meticulously selected each component to create a harmonious balance of flavors and textures. Below, you’ll find our curated list, complete with suggestions for substitutions to cater to your pantry and preferences.

                    Prep Time:
                    15 Minutes
                    Cook Time:
                    20 Minutes
                    Total Time:
                    35 Minutes

                    For the Shrimp and Marinade:

                    • 1 lb large shrimp, peeled and deveined (for that sweet, oceanic bite)
                    • 1 tablespoon fish sauce (adds a complex umami depth; substitute: soy sauce or tamari for a vegetarian/gluten-free option)
                    • 1 teaspoon lime juice (for a zesty, bright counterpoint)
                    • 1/2 teaspoon. red pepper flakes (adjust for your desired level of gentle heat)

                    For the Creamy Coconut Sauce:

                    • 1 tablespoon coconut oil (its subtle nutty sweetness is key; substitute: unsalted butter or olive oil)
                    • 4 cloves garlic, minced (the pungent heart of the aromatics)
                    • 1 inch ginger, grated (adds a warm, spicy foundation)
                    • 1 small shallot, finely chopped (delicate, sweet oniony notes; substitute: 1/4 small yellow onion)
                    • 1 red chili, thinly sliced (optional, for an extra kick and visual appeal; substitute: a pinch of cayenne pepper)
                    • 1 (13.5 oz) can full-fat coconut milk (the creamy, luxurious base)
                    • 1 tablespoon lime juice (reiterating that essential brightness)
                    • 1 teaspoon brown sugar (to balance the acidity and spice; substitute: maple syrup or honey)
                    • Salt and freshly ground black pepper, to taste (essential for overall flavor enhancement)

                    For Garnish:

                    • Fresh cilantro, chopped (for a fresh, herbaceous finish)
                    • Lime wedges (to serve, for an additional burst of citrus)

                    The Symphony of Time: Prep, Cook, and Total Duration

                    In the grand scheme of home cooking, a truly satisfying meal often demands a significant time investment. While many complex dishes can easily exceed the hour mark from start to finish, this Thai Inspired Creamy Coconut Shrimp recipe is a testament to efficient culinary creation. With a mere 15 minutes of preparation, you’re setting the stage for success. The active cooking phase is beautifully contained within 20 minutes, allowing the flavors to meld and the shrimp to cook to tender perfection. This brings the total time to an impressive 35 minutes. Compare this to the average 60-90 minutes often required for restaurant-quality, globally inspired meals, and you’ll see just how accessible this exotic flavor profile truly is for a weeknight endeavor.

                    Thai Inspired Creamy Coconut Shrimp - close-up of the dish in a bowl, garnished with cilantro and lime wedges.

                    Crafting Culinary Alchemy: Step-by-Step Guide

                    Embarking on the creation of this vibrant dish is a straightforward and rewarding process. Follow these steps, and you’ll soon be savoring the delightful tastes of Thailand!

                    Step 1: Preparing Your Ocean Gems

                    Start by ensuring your shrimp are perfectly prepped. If they aren’t already, peel and devein them. Pat them thoroughly dry with paper towels – this crucial step helps them to sear beautifully rather than steam. In a medium bowl, toss the shrimp with the fish sauce, lime juice, and red pepper flakes. Let them marinate for about 10-15 minutes while you prepare the other ingredients. This brief marinade infuses them with foundational Thai flavors.

                    Step 2: The Aromatic Awakening

                    In a large skillet or wok, heat the coconut oil over medium heat until shimmering. Add the minced garlic, grated ginger, and chopped shallot. Sauté, stirring frequently, for about 1-2 minutes until fragrant and the shallots are softened. Be careful not to burn the garlic; we want a gentle aroma, not a bitter char. If you’re using a fresh chili, add it now and sauté for another 30 seconds.

                    Step 3: The Creamy Coconut Embrace

                    Pour in the full-fat coconut milk, scraping up any browned bits from the bottom of the pan. Stir in the additional tablespoon of lime juice and the brown sugar. Bring the mixture to a gentle simmer. Let it bubble softly for about 3-5 minutes, allowing the sauce to thicken slightly. This is where the magic of the creamy base truly begins to form.

                    Step 4: Simmering the Magic

                    Add the marinated shrimp to the simmering coconut sauce. Stir gently to coat them evenly. Cook for just 3-5 minutes, or until the shrimp turn pink and opaque and are cooked through. Overcooking will make them rubbery, so keep a close eye on them. The sauce should have thickened to a luscious consistency, coating the shrimp beautifully.

                    Step 5: The Final Flourishes

                    Taste the sauce and adjust seasoning with salt and freshly ground black pepper if needed. Stir in most of the chopped fresh cilantro. Serve immediately, garnished with the remaining cilantro and fresh lime wedges on the side.

                    Nourishing Your Body, Delight Your Senses: Nutritional Highlights

                    While specific nutritional values can vary based on exact ingredient quantities and brands used, this Thai Inspired Creamy Coconut Shrimp recipe generally offers a good balance of macronutrients. It’s rich in protein from the shrimp, healthy fats from the coconut milk, and provides essential vitamins and minerals.

                    • High in Protein: Shrimp are an excellent source of lean protein, vital for muscle repair and satiety.
                    • Healthy Fats: Full-fat coconut milk contributes Medium-Chain Triglycerides (MCTs), which are metabolized differently and can provide quick energy.
                    • Vitamins & Minerals: Garlic, ginger, lime, and cilantro contribute antioxidants and micronutrients like Vitamin C and B vitamins.

                    (Note: Exact calorie and macro counts are best calculated using a recipe nutrition calculator with your specific ingredients.)

                    A Lighter Path: Healthier Swaps for a Guilt-Free Indulgence

                    Craving this exotic flavor but looking to lighten it up? You can achieve delicious results with a few mindful adjustments:

                    • Lighter Coconut Milk: Opt for light coconut milk. While the sauce will be less rich, it will still carry the coconut flavor beautifully.
                    • More Vegetables: Bulk up the dish with plenty of colorful vegetables like bell peppers, broccoli florets, snap peas, or spinach. This adds fiber, vitamins, and volume without extra calories.
                    • Reduced Sugar: Minimize or omit the brown sugar entirely, allowing the natural sweetness of the coconut milk and shrimp to shine. Adjust lime and salt to balance.
                    • Lean Protein Swap: While shrimp is lean, you could also use firm tofu or chicken breast for variety. Adjust cooking times accordingly.

                    Elevating the Experience: Serving Suggestions

                    To complete your Thai-inspired feast, consider these delightful accompaniments:

                    • Jasmine Rice: The quintessential partner for soaking up that luscious sauce. A fragrant bowl of steamed jasmine rice is essential.
                    • Cauliflower Rice: For a lower-carb option, serve over steamed or sautéed cauliflower rice.
                    • Steamed Greens: A side of steamed bok choy, spinach, or green beans adds a fresh, crisp contrast.
                    • Noodles: Serve over rice noodles or your favorite pasta for a heartier meal.

                    Navigating the Culinary Waters: Common Mistakes to Avoid

                    Even the simplest recipes can have pitfalls. Here’s how to ensure your Thai Inspired Creamy Coconut Shrimp is a resounding success:

                    • Overcooking the Shrimp: This is the most common mistake. Shrimp cook very quickly; once they turn pink, they’re done. Overcooked shrimp become tough and rubbery.
                    • Not Drying the Shrimp: Wet shrimp will steam in the pan instead of searing, leading to a less desirable texture and appearance.
                    • Burning the Aromatics: Garlic and ginger can burn easily. Keep the heat moderate and stir constantly while sautéing them.
                    • Using Low-Fat Coconut Milk: While an option for health-conscious cooks, it significantly impacts the richness and creaminess of the sauce. For best results, use full-fat.
                    • Skipping the Lime: The acidity from the lime is crucial for balancing the richness of the coconut milk and brightening the overall flavor profile.

                    Savoring the Flavors: Storing Your Delicious Creation

                    Leftovers, if any, can be stored in an airtight container in the refrigerator for up to 2 days. The sauce might thicken considerably upon cooling. To reheat, gently warm the shrimp and sauce over low heat, adding a splash of water or broth if needed to reach your desired consistency. Avoid microwaving at high heat, as this can toughen the shrimp. It’s best enjoyed fresh, but proper storage ensures you can still savor its delightful flavors.

                    Thai Inspired Creamy Coconut Shrimp - ingredients laid out on a counter, including shrimp, coconut milk, lime, garlic, and spices.

                    Frequently Asked Questions

                    ***Can I use pre-cooked shrimp?***

                    While you can, it’s generally not recommended for this recipe. Pre-cooked shrimp are already firm, and adding them to the hot sauce will likely result in overcooking and a rubbery texture. It’s best to use raw shrimp for optimal results.

                    ***How spicy is this dish?***

                    The spice level is moderate, primarily from the red pepper flakes. You can easily adjust this by reducing or omitting the flakes for a milder dish, or adding more if you enjoy a significant kick. The chili pepper addition also increases heat.

                    ***What kind of shrimp should I use?***

                    Large or jumbo shrimp work best. They have a substantial size that holds up well to the sauce and are less likely to overcook. Ensure they are peeled and deveined for ease of eating.

                    ***Can I make this dairy-free?***

                    Yes! This recipe is naturally dairy-free as it uses coconut milk. Ensure any substitutes you use are also dairy-free.

                    ***Why is my sauce not thickening?***

                    The sauce typically thickens as it simmers and the coconut milk reduces slightly. If it’s still too thin after simmering for 5 minutes, you can continue to simmer gently (uncovered) for a few more minutes, or you can create a slurry by mixing 1 teaspoon of cornstarch with 2 teaspoons of water and whisking it into the simmering sauce. Cook for another minute until thickened.

                    Embark on Your Thai Culinary Adventure

                    There you have it – a truly vibrant and deeply satisfying Thai Inspired Creamy Coconut Shrimp recipe that proves you don’t need hours in the kitchen to achieve exotic flavors. This dish is a celebration of simplicity, speed, and spectacular taste. It’s perfect for impressing guests, treating yourself, or simply adding a burst of sunshine to your regular meal rotation. Don’t just read about it, experience the magic for yourself! Whip up this delightful dish tonight and let your taste buds travel to Thailand.

                    Print

                    clock clock iconcutlery cutlery iconflag flag iconfolder folder iconinstagram instagram iconpinterest pinterest iconfacebook facebook iconprint print iconsquares squares iconheart heart iconheart solid heart solid icon

                    Thai Inspired Creamy Coconut Shrimp Recipe


                    • Author: Chef Emy

                    Description

                    This Thai Inspired Creamy Coconut Shrimp recipe brings bold, exotic flavors with a creamy coconut milk base, balanced with garlic, lime, and a hint of spice. Perfect for a quick weeknight dinner or a flavorful weekend treat, this easy seafood dish is sure to impress.


                    Ingredients

                    Scale
                    • 1lb large shrimp, peeled and deveined
                    • 1 tbspcoconut oil
                    • 3cloves garlic, minced
                    • 1-inch piece of ginger, grated
                    • 1can (13.5 oz) full-fat coconut milk
                    • 1 tbspred curry paste
                    • 1 tbspfish sauce
                    • 1 tbspbrown sugar
                    • Juice of1lime
                    • Salt and pepper, to taste
                    • Fresh cilantro, chopped (for garnish)
                    • Cooked jasmine rice (for serving)

                    Instructions

                      Notes

                      Adjust spice level by adding more or less red curry paste.
                      Can substitute shrimp with chicken or tofu for variation.
                      Add veggies like bell peppers or snap peas for extra crunch.

                      Nutrition

                      • Calories: 360
                      • Sugar: 5g

                      “`