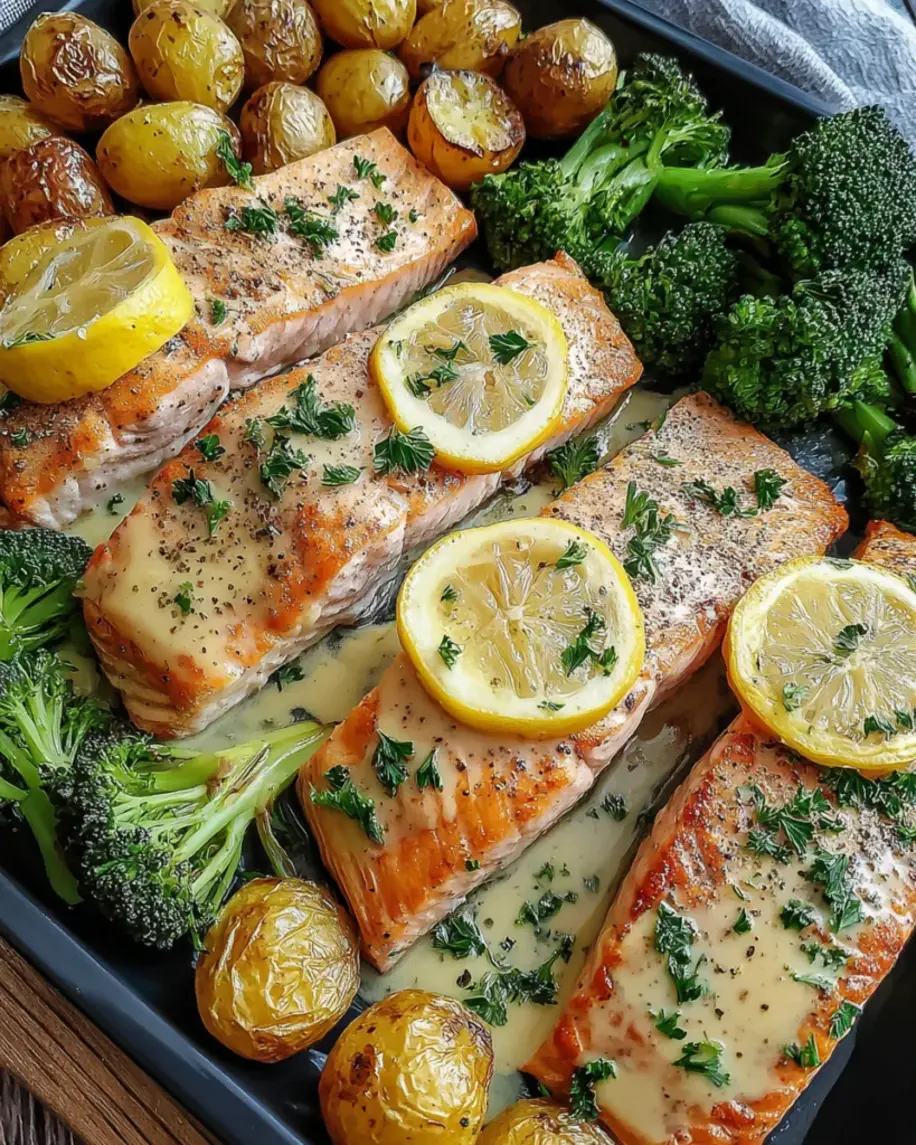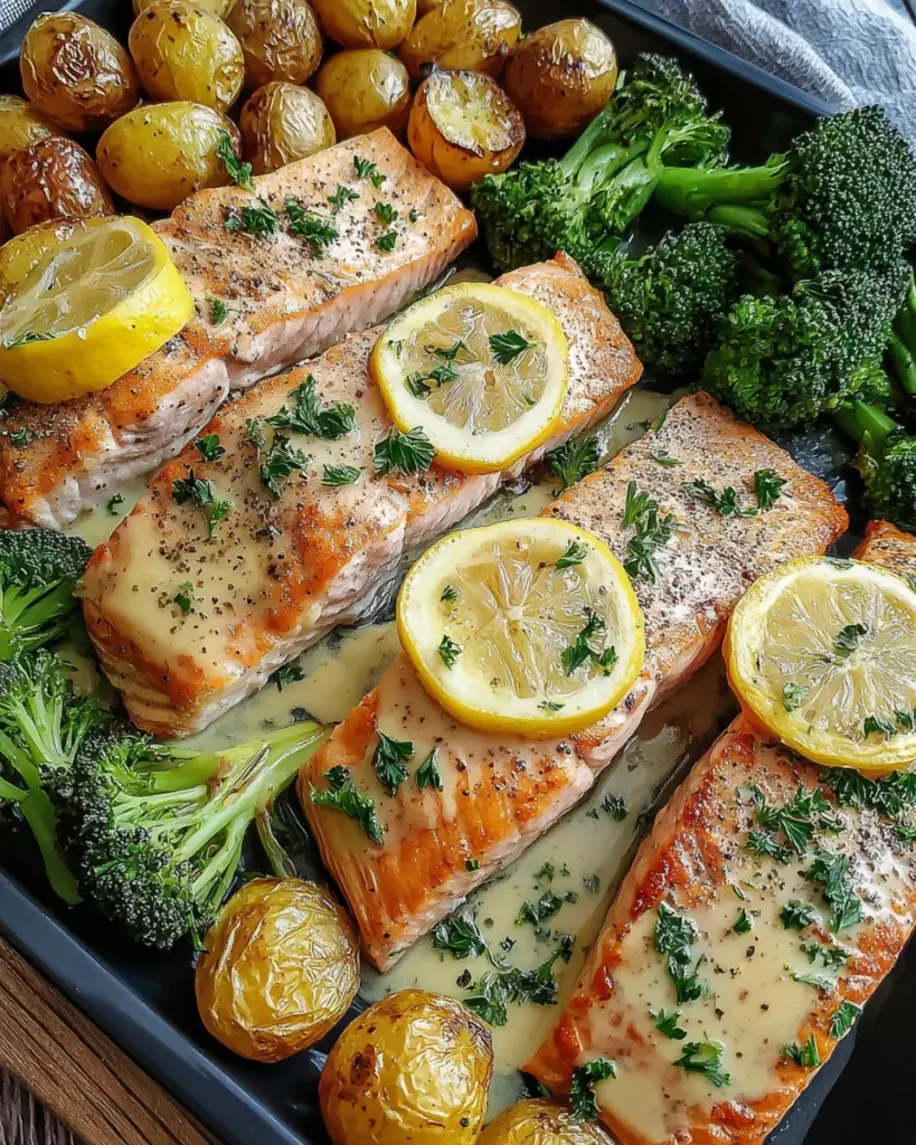
Lemon Butter Salmon Crispy Potatoes


🍋 Lemon Butter Salmon & Crispy Potatoes – One-Pan Wonder for Busy Nights

Author: The Kitchen Team · Site: cookingwithemy.com

⏱️ Prep: 12 mins
🔥 Cook: 35 mins
⏳ Total: 47 mins
🍽️ Servings: 4
📊 Difficulty: Easy

Life can feel like a whirlwind, especially for busy moms like me. Between picking up kids, managing work, and juggling countless tasks, finding time to cook a delicious meal often feels like an uphill battle. Enter Lemon Butter Salmon Crispy Potatoes—a dish that’s not only flavorful but also quick and easy to whip up. This recipe is perfect for those hectic days when you want something delightful to impress your loved ones without spending hours in the kitchen. It’s a simple yet elegant meal that’ll have everyone asking for more!

I’m The Kitchen Team, and I believe every family deserves a restaurant-quality dinner on a weeknight. This one-pan lemon butter salmon with crispy potatoes and tender broccoli is my go-to when I need a hero meal. The salmon stays buttery and flaky, the potatoes turn golden and crunchy, and the entire house smells like lemon and garlic. Plus, it’s all made on a single sheet pan – less mess, more magic. Let’s dive in!

🌟 Why This Lemon Butter Salmon Crispy Potatoes Recipe is the Best

  • One-pan convenience: Potatoes, broccoli, and salmon roast together. Fewer dishes, more time with family.
  • Perfectly balanced flavors: Bright lemon, rich butter, savory garlic, and a hint of paprika on potatoes.
  • Crispy potatoes every time: Baby potatoes tossed in olive oil, garlic powder, and paprika roast until golden and crunchy.
  • Salmon that melts in your mouth: A quick butter-lemon baste keeps the fish moist and flavorful.
  • Customizable & family-friendly: Swap broccoli for asparagus or green beans – it’s flexible.
  • Ready in under 50 minutes: From fridge to table in less than an hour. Perfect for busy weeknights.
💡 The Kitchen Team’s Pro Tip: For extra crispy potatoes, parboil them for 5 minutes before roasting, then shake the pan halfway through. You’ll get a crunch that rivals any steakhouse side.

🥘 Ingredients for Lemon Butter Salmon & Crispy Potatoes

All ingredients are easy to find at your local market. Use fresh lemon juice for the brightest flavor.

Quantity Ingredient
4 fillets (6 oz/170 g each) salmon fillets, skin on or off
4 tbsp (60 g) unsalted butter, melted
2 tbsp (30 ml) fresh lemon juice
2 cloves garlic, minced
to taste salt and black pepper
for garnish lemon slices + fresh parsley, chopped
1½ lbs (680 g) baby potatoes, halved
3 tbsp (45 ml) olive oil (for potatoes)
1 tsp (5 g) garlic powder
1 tsp (5 g) paprika (smoked or sweet)
1 lb (450 g) broccoli florets
2 tbsp (30 ml) olive oil (for broccoli)
1 tsp (5 g) lemon zest (optional, but recommended)

* Salmon: look for bright, firm fillets. Baby potatoes can be swapped for Yukon Gold cut into 1-inch chunks.

👩‍🍳 Step-by-Step Instructions

Prep: Preheat your oven to 425°F (220°C). Line a large sheet pan with parchment paper for easy cleanup.

Step Action
1 Season the potatoes: In a large bowl, combine halved baby potatoes, 3 tbsp olive oil, garlic powder, paprika, salt, and pepper. Toss well. Spread in a single layer on the baking sheet.
2 First roast (potatoes): Bake for 20 minutes. Meanwhile, in the same bowl, toss broccoli florets with 2 tbsp olive oil, salt, and pepper. Add lemon zest if using.
3 Add broccoli: After 20 min, remove sheet from oven. Push potatoes to one side and arrange broccoli on the other side. Return to oven and roast 15 more minutes.
4 Prepare salmon butter: In a small bowl, mix melted butter, lemon juice, minced garlic, and a pinch of salt & pepper.
5 Add salmon: After the 15 min (total 35 min for veggies), remove sheet. Place salmon fillets among the potatoes and broccoli. Drizzle half of the lemon butter over the salmon. Reserve the rest.
6 Final roast: Return pan to oven and bake 10–12 minutes, until salmon is opaque and flakes easily (internal temp 135°F–140°F).
7 Finish & garnish: Drizzle remaining lemon butter over salmon and veggies. Garnish with fresh parsley and lemon slices. Serve immediately.
💡 The Kitchen Team’s Pro Tip: If you like your potatoes extra crispy, switch the oven to broil for the last 2 minutes (watch carefully!). Also, pat the salmon dry before brushing with butter – it helps the seasoning stick.

🍽️ Serving Suggestions

This lemon butter salmon crispy potatoes meal is a complete one-pan dinner, but here are a few ways to round it out:

  • Serve with a simple green salad tossed in lemon vinaigrette.
  • Add a side of crusty bread to soak up the lemon butter sauce.
  • Pair with a glass of chilled Sauvignon Blanc or sparkling water with lemon.
  • For extra freshness, sprinkle with fresh dill or chives.

📦 Storage & Reheating

Refrigerator: Store leftovers in an airtight container for up to 3 days. Keep salmon and veggies together – they stay moist.

Reheating: For best texture, reheat in a 350°F oven for 8–10 minutes, or in an air fryer at 350°F for 4–5 minutes. Microwave is faster but potatoes may soften.

Freezing: Not recommended – salmon can become dry and potatoes lose crunch. But you can freeze the cooked potatoes and broccoli separately for up to 1 month.

🔄 Variations & Twists

  • Spicy kick: Add ½ tsp red pepper flakes to the butter or sprinkle cayenne on the potatoes.
  • Herb crust: Mix 2 tbsp chopped dill or thyme into the butter for an herby salmon.
  • Veggie swap: Replace broccoli with asparagus, green beans, or bell peppers.
  • Sheet pan breakfast: Use the same method but swap salmon for trout or even firm tofu (vegan option).
  • Lemon-garlic shrimp: Substitute shrimp for salmon – reduce cooking time to 6–8 minutes.

❓ Frequently Asked Questions

Can I use frozen salmon?

Yes! Thaw completely in the refrigerator overnight, then pat dry. Increase roasting time by 2–3 minutes if needed.

How do I know when the salmon is done?

Salmon should flake easily with a fork and reach an internal temperature of 135°F–140°F. The center will be slightly translucent but carryover cooking finishes it.

Can I make this dairy-free?

Absolutely. Replace butter with vegan butter or olive oil. The lemon and garlic will still shine.

Why are my potatoes not crispy?

Make sure they’re in a single layer (not crowded). Use high heat (425°F) and don’t skip the oil. You can also flip them halfway.

What if I don’t have baby potatoes?

Use Yukon Gold or red potatoes cut into 1-inch chunks. Adjust roasting time by 5 minutes if needed.

Can I prep this ahead?

Yes! Chop veggies and make the lemon butter up to 1 day ahead. Keep refrigerated. Assemble just before roasting.

Is this recipe gluten-free?

Naturally yes! No flour or gluten ingredients. Always double-check your paprika and garlic powder labels.

Can I add more veggies?

Of course – cauliflower, cherry tomatoes, or sliced zucchini work beautifully. Add tomatoes during the last 10 minutes.

How do I prevent salmon from sticking?

Use parchment paper or a well-greased sheet. Don’t move the salmon too early – let it sear for a few minutes.

What’s the best way to reheat crispy potatoes?

Air fryer or oven: 350°F for 5–6 minutes. They’ll crisp right back up!


🥘 Save this Lemon Butter Salmon Crispy Potatoes recipe!

Pin it for later – perfect for busy weeknights.

📌 Pin this recipe on Pinterest

Follow Cooking With Emy on Pinterest for more easy dinners.

© The Kitchen Team – cookingwithemy.com · All rights reserved.

clock clock iconcutlery cutlery iconflag flag iconfolder folder iconinstagram instagram iconpinterest pinterest iconfacebook facebook iconprint print iconsquares squares iconheart heart iconheart solid heart solid icon

Lemon Butter Salmon Crispy Potatoes


  • Author:
    Chef Emy

Description

Lemon Butter Salmon served with crispy potatoes and roasted broccoli, making for a quick and delightful meal.ezstandalone.cmd.push(function { ezstandalone.showAds(147); });


Ingredients


Scale
  • 4 salmon fillets (170 g each)
  • 60 g unsalted butter
  • 30 ml fresh lemon juice
  • 2 cloves garlic, minced
  • Salt and pepper, to taste
  • Lemon slices, for garnish
  • Fresh parsley, chopped, for garnish
  • 680 g baby potatoes, halved
  • 45 ml olive oil
  • 5 g garlic powder
  • 5 g paprika
  • 450 g broccoli florets
  • 30 ml olive oil
  • Salt and pepper, to taste
  • 5 g lemon zest (optional)

Instructions

  1. Set oven to 220°C. Prepare a large baking sheet.
  2. In a large bowl, toss halved baby potatoes with olive oil, garlic powder, paprika, salt, and pepper until evenly coated. Arrange in a single layer on the baking sheet.
  3. Roast potatoes in the preheated oven for 20 minutes.
  4. While potatoes are roasting, toss broccoli florets with olive oil, salt, and pepper in a separate bowl.
  5. After 20 minutes, remove the baking sheet and add broccoli around the potatoes. Return to oven and roast for an additional 15-20 minutes until potatoes are golden and broccoli is tender.
  6. Meanwhile, melt butter over medium heat in a skillet. Add minced garlic and sauté for 1 minute until aromatic. Stir in lemon juice, salt, and pepper.
  7. Push garlic to the side of the skillet. Place salmon fillets skin-side down and cook for 4-5 minutes. Flip each fillet and continue cooking another 3-4 minutes until cooked through and flaky.
  8. Arrange crispy potatoes and roasted broccoli beside the salmon. Spoon lemon butter sauce over the salmon. Garnish with lemon slices and chopped parsley before serving.

Notes

For more flavor, add herbs like thyme or dill to the lemon butter sauce.
If you prefer, you can use other vegetables like asparagus instead of broccoli.

Nutrition

  • Calories: 550
  • Sugar: 2 g
  • Protein: 35 g


Lemon Butter Salmon Crispy Potatoes

Lemon Butter Salmon with Crispy Potatoes & Roasted Broccoli (One-Pan Wonder)

⏱️ Prep: 15 mins
🔥 Cook: 40 mins
Total: 55 mins
🍽️ Servings: 4
📊 Difficulty: Easy

Life can feel like a whirlwind, especially for busy moms like me. Between picking up kids, managing work, and juggling countless tasks, finding time to cook a delicious meal often feels like an uphill battle. Enter Lemon Butter Salmon Crispy Potatoes—a dish that’s not only flavorful but also quick and easy to whip up. This recipe is perfect for those hectic days when you want something delightful to impress your loved ones without spending hours in the kitchen. It’s a simple yet elegant meal that’ll have everyone asking for more!

We’re the Kitchen Team behind cookingwithemy.com, and we believe weeknight dinners should be stress-free, wholesome, and absolutely delicious. This one-pan lemon butter salmon with crispy potatoes and tender broccoli is about to become your new favorite.

🌟 Why This Lemon Butter Salmon Crispy Potatoes Recipe Wins

  • One-pan magic: Everything roasts together — minimal cleanup, maximum flavor.
  • Perfectly crispy potatoes: Baby potatoes get golden and crunchy on the outside, fluffy inside.
  • Restaurant-quality salmon: Lemon butter keeps the fish moist, flaky, and rich.
  • Healthy & balanced: Protein, healthy fats, fiber-rich veggies, and carbs — a complete meal.
  • Kid-approved: Even picky eaters love the buttery lemon flavor and crispy edges.
  • 30 minutes active time: Mostly hands-off roasting; perfect for busy evenings.

📋 Ingredients

For the salmon & lemon butter

  • 4 salmon fillets (about 6 oz / 170 g each), skin on or off
  • 4 tablespoons (60 g) unsalted butter, melted
  • 2 tablespoons (30 ml) fresh lemon juice
  • 2 cloves garlic, minced
  • Salt and black pepper, to taste
  • Lemon slices, for garnish
  • Fresh parsley, chopped, for garnish

For the crispy potatoes

  • 1.5 lb (680 g) baby potatoes, halved
  • 3 tablespoons (45 ml) olive oil
  • 1 teaspoon (5 g) garlic powder
  • 1 teaspoon (5 g) paprika
  • ½ teaspoon salt
  • ¼ teaspoon black pepper

For the roasted broccoli

  • 1 lb (450 g) broccoli florets
  • 2 tablespoons (30 ml) olive oil
  • Salt and pepper, to taste
  • 1 teaspoon lemon zest (optional, but brightens the flavor)
💡 The Kitchen Team’s Pro Tip: For extra crispy potatoes, parboil them for 5 minutes before roasting, then shake the pan halfway through. They’ll be impossibly crunchy!

👩‍🍳 Instructions

  1. Preheat & prep: Set your oven to 425°F (220°C). Line a large baking sheet with parchment paper or foil for easy cleanup.
  2. Season the potatoes: In a large bowl, toss the halved baby potatoes with olive oil, garlic powder, paprika, salt, and pepper until well coated. Spread them in a single layer on the baking sheet, cut side down if possible (more crisp!).
  3. First roast: Roast the potatoes for 20 minutes. They will start to soften and turn golden.
  4. Add broccoli: Meanwhile, toss broccoli florets with olive oil, salt, pepper, and lemon zest (if using). After 20 minutes, remove the baking sheet and push potatoes to one side. Add the broccoli in a single layer. Return to oven and roast for 15 minutes.
  5. Make lemon butter: While veggies roast, whisk together melted butter, lemon juice, minced garlic, and a pinch of salt & pepper.
  6. Add salmon: After the second roast (35 minutes total), remove the pan. Pat salmon fillets dry and season with salt and pepper. Nestle them among the potatoes and broccoli. Drizzle half the lemon butter over the salmon. Reserve the rest for serving.
  7. Final roast: Bake for another 10–12 minutes, until salmon is opaque and flakes easily (internal temp 145°F / 63°C).
  8. Garnish & serve: Drizzle remaining lemon butter over the finished dish. Garnish with fresh parsley, lemon slices, and extra lemon zest if desired.
💡 The Kitchen Team’s Pro Tip: For the crispiest potato edges, don’t overcrowd the pan. Use two sheets if needed, and let the potatoes sit undisturbed while roasting.

🍽️ How to Serve

This lemon butter salmon crispy potatoes meal is a complete dinner on its own. But if you want to round it out:
• Serve with a simple arugula salad tossed in lemon vinaigrette.
• Add a side of warm crusty bread to soak up any extra lemon butter.
• For extra richness, spoon a dollop of garlic yogurt or dill crème fraîche.
• Pair with a chilled glass of Sauvignon Blanc or sparkling water with lemon.

🧊 Storage & Reheating

Storage Method Duration
Refrigerator Airtight container, separate salmon & veggies if possible Up to 3 days
Freezer Wrap salmon tightly; potatoes & broccoli in freezer bag Up to 1 month (texture best fresh)
Reheat (oven) 350°F for 8–10 minutes, covered with foil Crispy potatoes return!
Reheat (air fryer) 350°F for 4–5 minutes Best for crunch

💡 Pro Tip: To revive leftover salmon, drizzle with a little fresh lemon juice and butter before reheating.


✨ Variations & Substitutions

  • Swap the protein: Use trout, arctic char, or even chicken thighs (adjust cooking time).
  • Make it dairy-free: Replace butter with vegan butter or olive oil; add a splash of coconut cream.
  • Add heat: Sprinkle red pepper flakes or drizzle sriracha over the salmon before roasting.
  • Change the veggies: Asparagus, green beans, or bell peppers work beautifully.
  • Herb twist: Add fresh dill, thyme, or oregano to the lemon butter.
  • Low-carb option: Replace potatoes with cauliflower florets or radishes.

❓ Frequently Asked Questions

Can I use frozen salmon?

Yes, but thaw completely in the fridge overnight and pat very dry before roasting. Add 2–3 minutes to cook time.

Why are my potatoes not crispy?

Make sure they’re in a single layer, cut side down, and don’t skip the oil. High heat (425°F) is key. Avoid overcrowding.

Can I make this in an air fryer?

Absolutely! Cook potatoes at 400°F for 15 min, add broccoli and salmon (with butter) and cook 8–10 min more.

How do I know when salmon is done?

It flakes easily with a fork and the internal temperature reaches 145°F. The center should be slightly translucent but not raw.

Can I use lemon juice from a bottle?

Fresh lemon juice gives the best flavor, but bottled works in a pinch. Add a pinch of lemon zest to boost taste.

What if I don’t have baby potatoes?

Use Yukon Gold or red potatoes cut into 1-inch chunks. Adjust roasting time if needed.

Is this recipe gluten-free?

Yes! All ingredients are naturally gluten-free. Double-check your paprika/garlic powder if sensitive.

Can I prep this ahead?

You can chop veggies and make lemon butter up to 1 day ahead. Store separately in the fridge.

How do I get crispy skin on salmon?

Sear skin-side down in a hot skillet for 3–4 minutes before adding to the baking sheet. The oven will finish it.

What’s the best way to reheat leftovers without drying out?

Use the oven or air fryer (see storage table). Avoid the microwave if you want crispy potatoes.

🍋 Save this for later!

📌 Pin on Pinterest

Follow Cooking With Emy for more easy, delicious meals.

— The Kitchen Team from cookingwithemy.com · Every meal made with love 💛

clock clock iconcutlery cutlery iconflag flag iconfolder folder iconinstagram instagram iconpinterest pinterest iconfacebook facebook iconprint print iconsquares squares iconheart heart iconheart solid heart solid icon

Lemon Butter Salmon Crispy Potatoes


  • Author:
    Chef Emy

Description

Lemon Butter Salmon served with crispy potatoes and roasted broccoli, making for a quick and delightful meal.ezstandalone.cmd.push(function { ezstandalone.showAds(147); });


Ingredients


Scale
  • 4 salmon fillets (170 g each)
  • 60 g unsalted butter
  • 30 ml fresh lemon juice
  • 2 cloves garlic, minced
  • Salt and pepper, to taste
  • Lemon slices, for garnish
  • Fresh parsley, chopped, for garnish
  • 680 g baby potatoes, halved
  • 45 ml olive oil
  • 5 g garlic powder
  • 5 g paprika
  • 450 g broccoli florets
  • 30 ml olive oil
  • Salt and pepper, to taste
  • 5 g lemon zest (optional)

Instructions

  1. Set oven to 220°C. Prepare a large baking sheet.
  2. In a large bowl, toss halved baby potatoes with olive oil, garlic powder, paprika, salt, and pepper until evenly coated. Arrange in a single layer on the baking sheet.
  3. Roast potatoes in the preheated oven for 20 minutes.
  4. While potatoes are roasting, toss broccoli florets with olive oil, salt, and pepper in a separate bowl.
  5. After 20 minutes, remove the baking sheet and add broccoli around the potatoes. Return to oven and roast for an additional 15-20 minutes until potatoes are golden and broccoli is tender.
  6. Meanwhile, melt butter over medium heat in a skillet. Add minced garlic and sauté for 1 minute until aromatic. Stir in lemon juice, salt, and pepper.
  7. Push garlic to the side of the skillet. Place salmon fillets skin-side down and cook for 4-5 minutes. Flip each fillet and continue cooking another 3-4 minutes until cooked through and flaky.
  8. Arrange crispy potatoes and roasted broccoli beside the salmon. Spoon lemon butter sauce over the salmon. Garnish with lemon slices and chopped parsley before serving.

Notes

For more flavor, add herbs like thyme or dill to the lemon butter sauce.
If you prefer, you can use other vegetables like asparagus instead of broccoli.

Nutrition

  • Calories: 550
  • Sugar: 2 g
  • Protein: 35 g


Turkey Zucchini Skillet

One-Pan Turkey Zucchini Skillet: A 30-Minute Healthy Dinner

Author: Chef Emy | Site: cookingwithemy.com


Prep Time10 mins
Cook Time20 mins
Total Time30 mins
Servings4 servings
DifficultyEasy

One of the countless joys of being a home cook is discovering dishes that are both healthy and simple. The Turkey Zucchini Skillet is one of those gems that turns a busy weeknight dinner into a delightful gathering. With just a handful of fresh ingredients, this skillet dish bursts with flavor while offering vital nutrients. I love how it feels like a nutritious hug on a plate, perfect for families seeking quick, wholesome meals. Plus, it’s adaptable—everyone can customize it to suit their tastes!

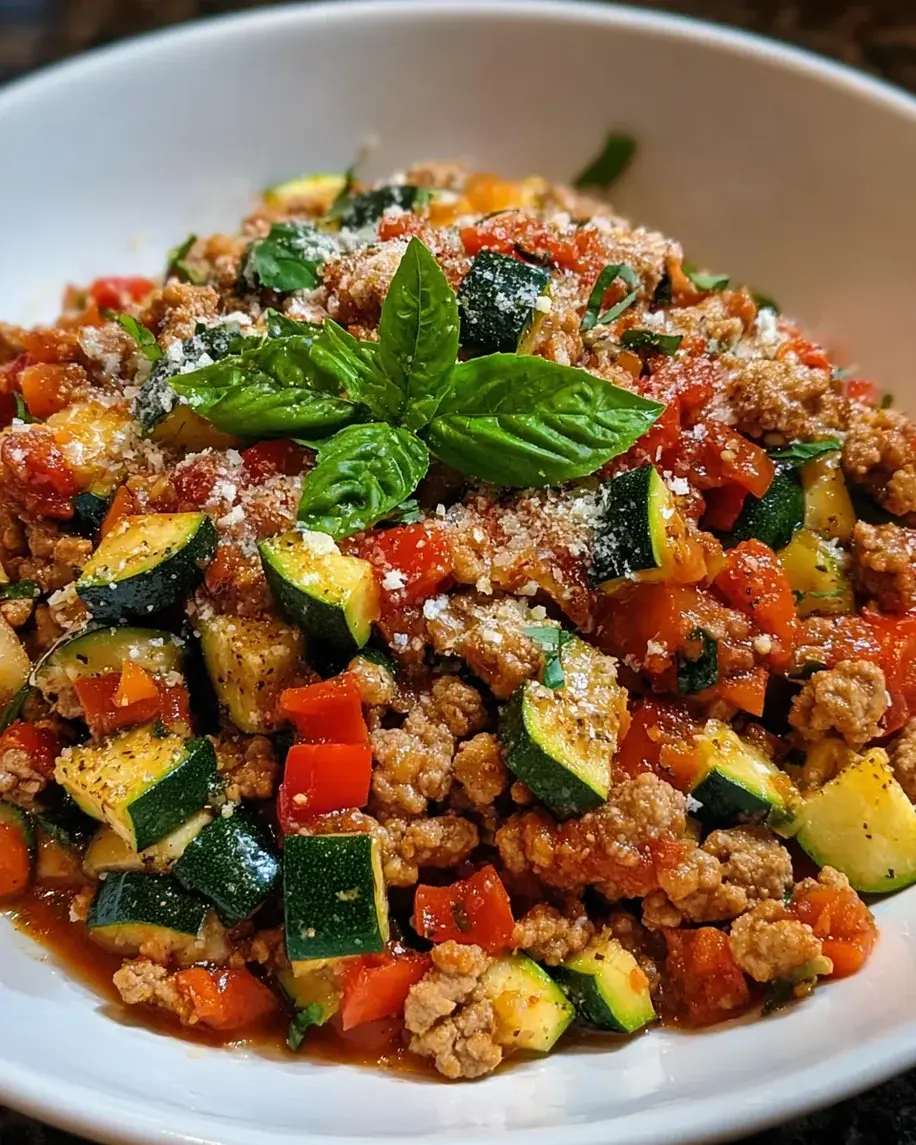
This one-pan wonder is packed with lean protein, vibrant vegetables, and a savory tomato base. Whether you’re meal prepping for the week or need a last-minute dinner, this turkey zucchini skillet delivers every time. The zucchini adds a tender bite, the bell pepper brings sweetness, and the Parmesan cheese finishes it with a salty, nutty note. Let’s dive into why this recipe deserves a permanent spot in your rotation.

Why This Turkey Zucchini Skillet Works

This isn’t just another ground turkey recipe. Here’s what makes it exceptional:

  • 30-minute meal: From prep to plate in half an hour, perfect for hectic evenings.
  • One skillet, less cleanup: Everything cooks in a single pan, so you spend more time at the table and less at the sink.
  • Nutrient-packed: Zucchini is rich in vitamin C and antioxidants, while turkey provides lean protein to keep you full.
  • Budget-friendly: Simple ingredients that won’t break the bank, yet taste like a restaurant-quality dish.
  • Customizable: Easily swap veggies, add spice, or make it dairy-free — the possibilities are endless.
💡 The Kitchen Team’s Pro Tip: For extra depth of flavor, toast the Italian seasoning in the hot oil for 30 seconds before adding the turkey. This releases the herbs’ essential oils and elevates the entire dish.

Ingredients for Turkey Zucchini Skillet

Here’s everything you’ll need for this vibrant skillet dinner. All ingredients are easy to find at any grocery store.

  • 1 pound ground turkey (93% lean recommended)
  • 2 medium zucchinis, diced (about 2 cups)
  • 1 bell pepper, chopped (any color — red adds sweetness)
  • 1 onion, chopped (yellow or white)
  • 3 cloves garlic, minced
  • 1 can (14.5 oz) diced tomatoes, undrained
  • 1 tablespoon olive oil
  • 1 teaspoon Italian seasoning
  • Salt and pepper to taste
  • ¼ cup grated Parmesan cheese
  • Fresh basil for garnish (about 2 tablespoons, chopped)

Optional additions: a pinch of red pepper flakes for heat, ½ cup cooked quinoa or rice to bulk it up, or a squeeze of lemon juice at the end.

Step-by-Step Instructions

Follow these simple steps to create the most flavorful turkey zucchini skillet. The process is straightforward and forgiving — perfect for beginner cooks.

  1. Heat the oil: Place a large skillet over medium heat and add 1 tablespoon olive oil. Once shimmering, add the chopped onion and minced garlic. Sauté for 2–3 minutes until the onion becomes translucent and fragrant.
  2. Brown the turkey: Add the ground turkey to the skillet, breaking it apart with a spatula. Cook for 5–7 minutes, stirring occasionally, until the turkey is browned and no longer pink. Drain any excess fat if desired.
  3. Add vegetables: Stir in the diced zucchini and chopped bell pepper. Cook for another 5 minutes, allowing the vegetables to soften but still retain a slight crunch.
  4. Simmer with tomatoes: Pour in the entire can of diced tomatoes (with juices). Sprinkle the Italian seasoning, salt, and pepper over the mixture. Stir well to combine, then let it simmer uncovered for 10 minutes. The sauce will thicken slightly and the flavors will meld beautifully.
  5. Finish and garnish: Remove the skillet from heat. Sprinkle the grated Parmesan cheese over the top and let it melt for a minute. Garnish with fresh basil leaves or chopped basil. Serve immediately.
💡 The Kitchen Team’s Pro Tip: Don’t overcook the zucchini! Add it halfway through the vegetable cooking time to keep it from turning mushy. You want it tender but with a little bite.

Serving Suggestions

This turkey zucchini skillet is wonderfully versatile. Here are a few ways to serve it:

  • Over grains: Spoon it over steamed rice, quinoa, or cauliflower rice for a complete meal.
  • With pasta: Toss with your favorite short pasta like penne or fusilli. Add a splash of pasta water to bind the sauce.
  • Stuffed peppers: Use the mixture to stuff bell peppers, then bake at 375°F for 20 minutes.
  • As a filling: Serve in warm tortillas or lettuce wraps for a low-carb taco night.
  • Side salad: Pair with a crisp green salad dressed with lemon vinaigrette.

Storage & Reheating Tips

This skillet dish stores beautifully, making it ideal for meal prep. Here’s how to keep it fresh:

  • Refrigerate: Store leftovers in an airtight container for up to 4 days. The flavors actually deepen overnight!
  • Freeze: Portion the cooled skillet mixture into freezer-safe bags or containers. Freeze for up to 3 months. Thaw overnight in the fridge before reheating.
  • Reheat: Warm in a skillet over medium heat with a splash of water or broth to restore moisture. You can also microwave in 30-second bursts, stirring between intervals.
💡 The Kitchen Team’s Pro Tip: When freezing, leave out the Parmesan cheese and fresh basil. Add them fresh after reheating for the best texture and flavor.

Delicious Variations to Try

Once you’ve mastered the classic turkey zucchini skillet, experiment with these twists:

  • Mediterranean: Add ½ cup sliced olives, ¼ cup sun-dried tomatoes, and a sprinkle of feta cheese instead of Parmesan.
  • Tex-Mex: Replace Italian seasoning with 1 teaspoon chili powder and ½ teaspoon cumin. Top with cilantro and a dollop of sour cream.
  • Extra veggies: Toss in a handful of spinach or kale during the last 2 minutes of cooking. Mushrooms or eggplant also work beautifully.
  • Spicy kick: Add ½ teaspoon red pepper flakes or a diced jalapeño along with the onion.
  • Dairy-free/vegan: Use plant-based ground crumbles and omit the Parmesan, or use nutritional yeast for a cheesy flavor.

Frequently Asked Questions

Can I use ground chicken or beef instead of turkey?

Absolutely! Ground chicken works as a direct substitute. Ground beef (85% lean) adds more richness — just drain any excess fat after browning.

How do I prevent the zucchini from getting mushy?

Add the zucchini later in the cooking process (step 3) and don’t overcook. Cut it into larger chunks if you prefer more texture. Salting and draining the zucchini for 10 minutes before cooking also helps.

Is this recipe gluten-free?

Yes! All ingredients are naturally gluten-free. Just double-check your Italian seasoning blend to ensure no gluten-containing additives.

Can I make this in an Instant Pot or slow cooker?

For Instant Pot: Use sauté mode for browning, then pressure cook on high for 3 minutes with a quick release. For slow cooker: Brown turkey first, then cook on low for 4–5 hours. Add zucchini in the last 30 minutes to avoid mushiness.

What can I use instead of Parmesan cheese?

Try pecorino romano, asiago, or a dairy-free alternative like nutritional yeast. For a non-cheesy option, omit it entirely or add a spoonful of pesto.

How many calories per serving?

Approximately 290–320 calories per serving (based on 4 servings, using 93% lean turkey and Parmesan). This may vary based on specific ingredients and portion sizes.

Can I add rice or quinoa directly to the skillet?

Yes! Stir in 1 cup of cooked rice or quinoa after adding the tomatoes. Simmer for 5 minutes to heat through. You may need a splash of broth to keep it moist.

What’s the best way to reheat leftovers without drying them out?

Reheat in a covered skillet over medium-low heat with 2 tablespoons of water or chicken broth. Stir occasionally until warmed through — about 5 minutes.

Can I use fresh tomatoes instead of canned?

Certainly! Use 2–3 medium fresh tomatoes, diced. Since fresh tomatoes have less liquid, add ¼ cup of water or broth to maintain the sauce consistency.

How do I make this recipe low-carb or keto-friendly?

This recipe is already low-carb! Serve it over cauliflower rice or zucchini noodles. Omit the Parmesan if you’re dairy-sensitive, but full-fat cheese is keto-friendly.

Share the Love

If you loved this turkey zucchini skillet, please share it with your friends and family! Tag us on social media or leave a comment below. Don’t forget to save it for later on Pinterest.

📌 Save this recipe for later!

Pin this Turkey Zucchini Skillet

Follow Cooking With Emy on Pinterest for more easy, healthy dinners.

© 2025 The Kitchen Team at cookingwithemy.com — All rights reserved.

clock clock iconcutlery cutlery iconflag flag iconfolder folder iconinstagram instagram iconpinterest pinterest iconfacebook facebook iconprint print iconsquares squares iconheart heart iconheart solid heart solid icon

Turkey Zucchini Skillet


  • Author:
    Chef Emy

Description

A healthy and flavorful skillet dish made with ground turkey, fresh zucchini, and tomatoes for a nutritious dinner option.


Ingredients


Scale
  • 1 pound ground turkey
  • 2 medium zucchinis, diced
  • 1 bell pepper, chopped
  • 1 onion, chopped
  • 3 cloves garlic, minced
  • 1 can (14.5 oz) diced tomatoes, undrained
  • 1 tablespoon olive oil
  • 1 teaspoon Italian seasoning
  • Salt and pepper to taste
  • 1/4 cup grated Parmesan cheese
  • Fresh basil for garnish

Instructions

  1. Heat olive oil in a large skillet over medium heat. Add the chopped onion and garlic, sautéing for 2-3 minutes until the onion is translucent.
  2. Add the ground turkey to the skillet, breaking it apart with a spatula. Cook for about 5-7 minutes, or until the turkey is browned and cooked through.
  3. Stir in the diced zucchini and bell pepper, cooking for an additional 5 minutes until the vegetables are tender.
  4. Pour in the diced tomatoes along with their juices, and sprinkle in the Italian seasoning, salt, and pepper. Stir well to combine and let simmer for 10 minutes, allowing the flavors to meld.
  5. Once cooked, remove from heat and sprinkle with grated Parmesan cheese. Garnish with fresh basil before serving.

Notes

Feel free to add other vegetables like spinach or mushrooms for extra nutrition.
This dish can be served over rice or pasta for a heartier meal.
Store leftovers in an airtight container in the fridge for up to 3 days.

Nutrition

  • Calories: 290
  • Sugar: 4g
  • Protein: 30g


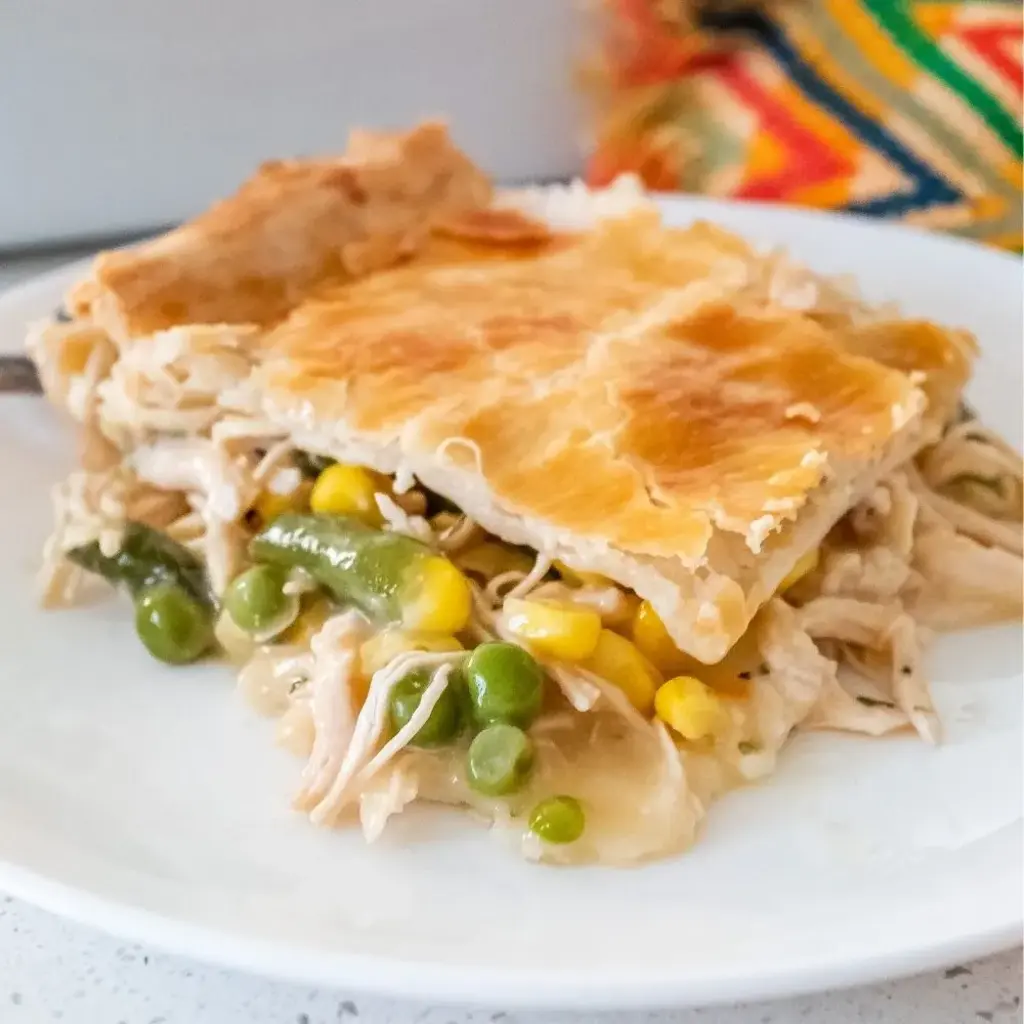
Chicken Pot Pie with Puff Pastry Recipe

Ultimate Chicken Pot Pie with Puff Pastry Recipe: Flaky, Creamy, and Irresistible

By The Kitchen Team | Published: January 15, 2024 | Updated: March 2024

Prep Time Cook Time Total Time Servings Difficulty
20 minutes 45 minutes 1 hour 5 minutes 6-8 servings Intermediate

🥧 The Comfort Food You’ve Been Craving

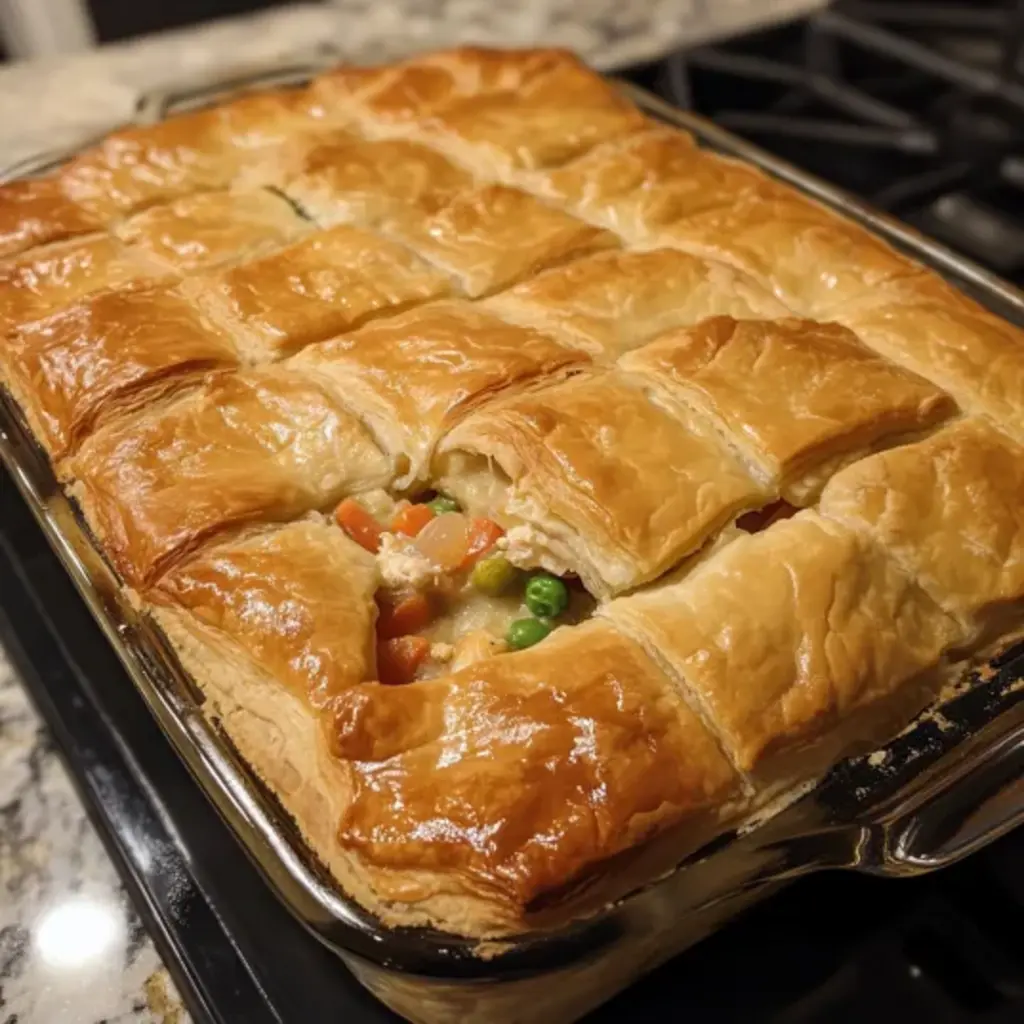
There’s nothing quite like a warm, bubbling chicken pot pie fresh from the oven. The aroma of buttery pastry mingling with creamy chicken and vegetables is pure comfort. Our chicken pot pie with puff pastry recipe takes this classic dish to new heights. Instead of a traditional pie crust, we use flaky, golden puff pastry that shatters with every bite. This isn’t just dinner – it’s an experience.

At The Kitchen Team, we believe in recipes that bring joy to your table. This pot pie is perfect for busy weeknights, cozy Sunday suppers, or even holiday gatherings. The filling is rich and creamy, loaded with tender chicken, sweet peas, carrots, and celery, all enveloped in a velvety herb-infused sauce. The puff pastry lid puffs up into golden perfection, creating a stunning presentation that will impress your family and guests alike.

What makes this recipe truly special is its simplicity. Using store-bought puff pastry saves time without sacrificing quality. You’ll have a showstopping meal on the table in just over an hour. Whether you’re a seasoned cook or a beginner, our detailed instructions will guide you to success. Let’s dive into why this is the best chicken pot pie with puff pastry you’ll ever make.

🌟 Why This Chicken Pot Pie with Puff Pastry Recipe Reigns Supreme

  • Flaky, Buttery Crust: Puff pastry creates dozens of delicate, airy layers that are impossible to resist. Unlike traditional pie crust, it requires no rolling or crimping – just lay it on top and bake.
  • Perfectly Creamy Filling: Our roux-based sauce is rich and velvety, coating every piece of chicken and vegetable. Heavy cream adds luxurious texture while chicken broth provides savory depth.
  • Time-Saving Shortcut: Using pre-made puff pastry cuts prep time in half. You get all the homemade goodness without the fuss of making pastry from scratch.
  • Customizable & Versatile: This recipe adapts to what you have on hand. Use leftover turkey, add mushrooms, or swap vegetables – the possibilities are endless.
  • Family-Approved: Kids and adults alike devour this dish. It’s a guaranteed crowd-pleaser that disappears fast at potlucks and family dinners.
💡 The Kitchen Team’s Pro Tip: For extra flavor, sear the chicken pieces in the same pan before making the filling. Those browned bits (fond) add incredible depth to the sauce.

📝 Ingredients You’ll Need

For the Filling:

  • 2 cups cooked chicken, shredded or diced (rotisserie chicken works great)
  • 1 cup carrots, diced (about 2 medium carrots)
  • 1 cup celery, diced (about 2-3 stalks)
  • 1/2 cup onion, finely chopped (about 1 small onion)
  • 2 cloves garlic, minced
  • 1 1/2 cups frozen peas (no need to thaw)
  • 1 1/2 cups chicken broth (low-sodium preferred)
  • 1 cup heavy cream (or half-and-half for lighter version)
  • 1/4 cup unsalted butter
  • 1/4 cup all-purpose flour
  • 1 teaspoon dried thyme (or 1 tablespoon fresh)
  • 1/2 teaspoon salt (adjust to taste)
  • 1/4 teaspoon black pepper

For the Puff Pastry Crust:

  • 1 package frozen puff pastry (2 sheets), thawed according to package directions
  • 1 large egg, beaten (for egg wash)
  • Optional: flaky sea salt for sprinkling

👩‍🍳 Step-by-Step Instructions

Step 1: Prepare the Filling

In a large skillet or Dutch oven, melt the butter over medium heat. Add the diced onions, carrots, and celery. Cook for 5-7 minutes, stirring occasionally, until the vegetables are softened and the onions are translucent. Add the minced garlic and cook for another 30 seconds until fragrant.

Sprinkle the flour over the vegetables and stir constantly for 1-2 minutes. This cooks out the raw flour taste and creates a roux that will thicken your sauce to perfection.

💡 The Kitchen Team’s Pro Tip: Don’t rush the roux! Cooking the flour for a full 2 minutes ensures no raw flour taste in your final dish. The mixture should look like wet sand and smell slightly nutty.

Step 2: Make the Creamy Sauce

Gradually pour in the chicken broth while whisking continuously to prevent lumps. Once the broth is incorporated, slowly add the heavy cream, continuing to whisk. Bring the mixture to a gentle simmer – you’ll see small bubbles around the edges. Cook for 4-5 minutes, stirring often, until the sauce thickens enough to coat the back of a spoon.

Add the cooked chicken, frozen peas, dried thyme, salt, and pepper. Stir everything together and let it cook for 2-3 minutes until the peas are heated through. Taste and adjust seasoning if needed. Remove from heat and let the filling cool slightly while you prepare the pastry.

Step 3: Prepare the Puff Pastry

Preheat your oven to 400°F (200°C). Lightly flour your work surface and gently roll out the puff pastry sheets if they’ve shrunk during thawing. You want them just large enough to cover your baking dish. If using a 9-inch pie dish, one sheet should fit perfectly for the top.

For the bottom crust (optional): Place one sheet of puff pastry into your pie dish, pressing gently along the bottom and sides. Trim any excess dough. This creates a full pastry crust. Alternatively, you can skip the bottom crust for a lighter version and just use the top pastry.

Step 4: Assemble the Pot Pie

Pour the chicken filling into the prepared pie dish (over the bottom pastry if using). Spread it evenly with a spatula. Lay the second puff pastry sheet over the top, letting it drape over the edges. Trim the excess dough, leaving about 1/2 inch overhang. Press the edges to seal, then crimp with a fork for a decorative edge.

Cut 4-5 slits in the top crust to allow steam to escape. This prevents a soggy bottom and helps the pastry rise evenly. Brush the top with the beaten egg wash for a beautiful golden sheen. Sprinkle with flaky sea salt if desired.

Step 5: Bake to Golden Perfection

Place the pot pie on a baking sheet to catch any drips. Bake in the preheated oven for 30-35 minutes, until the puff pastry is puffed and deep golden brown. The filling should be bubbly around the edges. If the pastry browns too quickly, tent loosely with foil during the last 10 minutes.

Let the pot pie rest for 10 minutes before serving. This allows the filling to set slightly, making it easier to slice and serve without it running all over the plate.

💡 The Kitchen Team’s Pro Tip: For an extra-golden crust, brush the pastry with egg wash twice – once before cutting slits and once after. The double layer creates a professional bakery finish.

🍽️ How to Serve Your Chicken Pot Pie

This chicken pot pie with puff pastry is a complete meal in itself, but a few simple sides elevate it to company-worthy status. Here are our favorite serving ideas:

  • Fresh Green Salad: A light salad with lemon vinaigrette cuts through the richness perfectly. Try arugula with shaved Parmesan and toasted almonds.
  • Roasted Vegetables: Simple roasted asparagus or green beans with garlic make excellent accompaniments.
  • Cranberry Sauce: The sweet-tart flavor of cranberry sauce is a surprising but delicious pairing with the creamy filling.
  • Mashed Potatoes: For ultimate comfort, serve alongside creamy mashed potatoes. Yes, it’s carb-on-carb, but absolutely worth it.
  • Wine Pairing: A crisp Chardonnay or unoaked Sauvignon Blanc complements the creamy sauce beautifully.

❄️ Storage & Reheating Guide

This pot pie stores beautifully, making it perfect for meal prep or leftovers. Follow these tips for best results:

Refrigeration:

Store leftover pot pie in an airtight container in the refrigerator for up to 4 days. The pastry may soften slightly, but it will still be delicious. To reheat, place in a 350°F oven for 15-20 minutes until warmed through. The microwave works in a pinch, but the pastry won’t be as crispy.

Freezing:

You can freeze the unbaked or baked pot pie. For unbaked: assemble completely but don’t brush with egg wash. Wrap tightly in plastic wrap and foil, then freeze for up to 3 months. Bake from frozen, adding 15-20 minutes to the baking time. For baked: cool completely, then wrap and freeze. Reheat in a 350°F oven until hot.

💡 The Kitchen Team’s Pro Tip: If freezing unbaked pot pie, skip the egg wash until ready to bake. Brush it on just before putting it in the oven for the best golden color.

🎨 Delicious Variations to Try

Once you master this chicken pot pie with puff pastry recipe, experiment with these fun twists:

  • Turkey Pot Pie: Swap chicken for leftover Thanksgiving turkey. Add a tablespoon of chopped fresh sage for holiday flavor.
  • Mushroom & Leek: Replace chicken with 2 cups of sautéed mushrooms and leeks. Use vegetable broth and omit the chicken for a vegetarian version.
  • Curry Chicken Pot Pie: Add 1 tablespoon of curry powder to the roux. Stir in 1/2 cup of golden raisins and top with toasted almonds.
  • Herb & Garlic: Increase garlic to 4 cloves and add 2 tablespoons each of fresh parsley, chives, and tarragon.
  • Individual Pot Pies: Divide the filling among 4-6 ramekins. Cut puff pastry into circles slightly larger than the ramekins and bake for 20-25 minutes.
  • Cheesy Chicken Pot Pie: Stir in 1 cup of shredded cheddar or Gruyère cheese after removing from heat. The cheese adds incredible richness.

❓ Frequently Asked Questions

Can I use homemade puff pastry?
Absolutely! If you have the time and skill, homemade puff pastry takes this dish to another level. However, high-quality store-bought puff pastry (like Dufour or Pepperidge Farm) works beautifully and saves hours of work.
Can I make this gluten-free?
Yes! Use a gluten-free all-purpose flour blend for the roux and ensure your puff pastry is gluten-free (some brands offer it). Check that your chicken broth is also gluten-free.
Why is my puff pastry soggy?
Soggy pastry usually results from underbaking or too much liquid in the filling. Make sure your sauce is thick enough before adding to the dish. Also, cutting slits in the top allows steam to escape, keeping the pastry crisp.
Can I use milk instead of heavy cream?
You can substitute whole milk or half-and-half, but the sauce will be less rich and creamy. For best results, stick with heavy cream or use a combination of milk and cream.
How do I prevent the bottom crust from getting soggy?
If using a bottom crust, blind bake it for 10 minutes at 400°F before adding the filling. This creates a barrier that keeps the pastry crisp. Alternatively, skip the bottom crust entirely and just use a top crust.
Can I add other vegetables?
Absolutely! Mushrooms, corn, green beans, or diced potatoes all work well. Just make sure to cook harder vegetables like potatoes before adding to the filling.
What’s the best way to reheat leftovers?
The oven is your best friend for reheating. Place leftovers in a 350°F oven for 15-20 minutes. The microwave works but will make the pastry soft. For crispy pastry, use an air fryer at 350°F for 5-7 minutes.
Can I freeze individual portions?
Yes! Bake the pot pie, let it cool completely, then cut into portions. Wrap each piece in plastic wrap and foil, then freeze. Reheat in the oven or microwave as needed.
How do I know when the pot pie is done?
The pastry should be puffed and deep golden brown. The filling should be bubbling around the edges. If you insert a knife into the center, it should come out hot. An instant-read thermometer should read 165°F in the center.
Can I use leftover rotisserie chicken?
Absolutely! Rotisserie chicken is a fantastic time-saver. Use about 2 cups of shredded meat, and feel free to use the carcass to make homemade chicken broth for even more flavor.

📌 Share This Recipe

Loved this chicken pot pie with puff pastry recipe? Share it with your friends and family! Tag us on social media so we can see your beautiful creations.

📌 Save This Recipe for Later

Pin this chicken pot pie with puff pastry recipe to your favorite board on Pinterest! Click the button below to save it now.

Follow us on Pinterest for more delicious recipes: @cookingwithemy

📌 Pin This Recipe Now

Thank you for visiting The Kitchen Team at cookingwithemy.com. We hope this recipe becomes a favorite in your home. Happy cooking!

clock clock iconcutlery cutlery iconflag flag iconfolder folder iconinstagram instagram iconpinterest pinterest iconfacebook facebook iconprint print iconsquares squares iconheart heart iconheart solid heart solid icon

Chicken Pot Pie with Puff Pastry Recipe


  • Author:
    Chef Emy

Description

A comforting chicken pot pie with a flaky puff pastry crust. This recipe is filled with creamy chicken, vegetables, and herbs, perfect for a hearty meal.


Ingredients


Scale
  • For the Filling:
  • 2 cups cooked chicken shredded or diced
  • 1 cup carrots diced
  • 1 cup celery diced
  • 1/2 cup onion finely chopped
  • 2 cloves garlic minced
  • 1 1/2 cups frozen peas
  • 1 1/2 cups chicken broth
  • 1 cup heavy cream
  • 1/4 cup unsalted butter
  • 1/4 cup all-purpose flour
  • 1 teaspoon dried thyme
  • Salt and pepper to taste
  • For the Puff Pastry Crust:
  • 1 package of puff pastry usually contains 2 sheets
  • 1 egg beaten (for egg wash)

Instructions

  1. Prepare the Filling:
  2. In a large skillet, melt butter over medium heat. Add the onions, carrots, celery, and garlic. Cook for about 5-7 minutes, until softened. Stir in the flour and cook for 1-2 minutes to create a roux.
  3. Make the Sauce:
  4. Gradually add the chicken broth while stirring, then pour in the heavy cream. Stir until the sauce thickens, about 5 minutes. Add the cooked chicken, peas, thyme, salt, and pepper, and cook for an additional 2-3 minutes. Remove from heat and let cool slightly while you prepare the puff pastry.
  5. Prepare the Puff Pastry:
  6. Preheat the oven to 400°F (200°C). Roll out the puff pastry sheets on a lightly floured surface if necessary. Place one sheet in the bottom of your pie dish, pressing gently along the edges.
  7. Assemble the Pot Pie:
  8. Pour the chicken filling into the prepared crust, spreading it out evenly. Lay the second puff pastry sheet over the top of the filling. Trim the excess dough and press the edges to seal the pie. Cut a few slits in the top crust to allow steam to escape.
  9. Bake:
  10. Brush the top of the pie with the beaten egg to create a golden, glossy finish. Bake for 25-30 minutes, or until the puff pastry is golden brown and crispy.
  11. Serve:
  12. Let the pot pie cool for a few minutes before serving. Slice into portions and enjoy!


Chicken Pot Pie Turnovers

The Best Handheld Chicken Pot Pie Turnovers (So Easy!)


Prep Time
20 minutes

Cook Time
20 minutes

Total Time
40 minutes

Servings
10 turnovers

Difficulty
Easy

Imagine all the cozy, creamy goodness of a classic chicken pot pie—but in a portable, handheld form that you can eat with your fingers. That’s exactly what these Chicken Pot Pie Turnovers deliver. Made with a few brilliant shortcuts (hello, refrigerated pie crusts!), this recipe is perfect for busy weeknights, meal prep, or even game day snacks.

Whether you’re a seasoned cook or a beginner, you’ll love how quickly these come together. The filling is rich, velvety, and packed with tender chicken, sweet peas, and aromatic vegetables. And the golden, flaky crust? Absolutely irresistible. Let’s get baking!

Why This Recipe Is the Best

  • Handheld & Mess-Free: No fork required! These turnovers are perfect for lunchboxes, picnics, or on-the-go meals.
  • Shortcut-Friendly: Using store-bought pie crusts and rotisserie chicken cuts prep time in half without sacrificing flavor.
  • Creamy, Not Gloppy: The sauce is perfectly thickened—rich and luscious without being runny.
  • Freezer-Friendly: Make a double batch and freeze for future cravings. They reheat beautifully.
  • Customizable: Swap in turkey, add mushrooms, or spice it up with cayenne—the possibilities are endless.
💡 The Kitchen Team’s Pro Tip: For an extra-golden crust, brush the turnovers with an egg wash (1 egg yolk + 1 tablespoon milk) instead of just egg white. It gives a beautiful bakery-style sheen!

Ingredients You’ll Need

Ingredient Amount
Unsalted butter 1/3 cup
Small yellow onion, diced 1
Celery stalk, diced 1
Carrot, peeled, halved lengthwise, thinly sliced 1
All-purpose flour 1/3 cup
Chicken broth (low sodium) 3/4 cup
Half and half 1 cup
Cream cheese, softened 2 ounces
Salt 1/2 teaspoon
Garlic powder 1/2 teaspoon
Dried thyme 1/4 teaspoon
Black pepper 1/4 teaspoon
Cooked chicken or turkey, diced or shredded 2 cups
Frozen peas, thawed 3/4 cup
Refrigerated pie crusts (2 in a box) 1 package
Egg white 1
Milk 1 tablespoon
💡 The Kitchen Team’s Pro Tip: For the flakiest turnovers, make sure your pie crusts are cold when you roll them out. If they get too warm, pop them in the fridge for 10 minutes before cutting.

Step-by-Step Instructions

Step Action
1 In a large skillet, melt butter over medium heat. Add onion, celery, and carrot. Cook 4-5 minutes until softened.
2 Sprinkle flour over the vegetables. Cook and stir for 1 minute to remove raw flour taste.
3 Gradually whisk in chicken broth and half-and-half. Add cream cheese, breaking it apart with a wooden spoon until fully melted and smooth.
4 Cook until the sauce bubbles and thickens, about 1-2 minutes. Stir in salt, garlic powder, thyme, and pepper.
5 Fold in cooked chicken and thawed peas. Remove from heat and let cool slightly (about 10 minutes).
6 Preheat oven to 400°F. Line a baking sheet with parchment paper or spray with cooking spray.
7 Unroll pie crusts. Use a rolling pin to roll them slightly thinner. Using a 5-6 inch bowl, cut 4 circles from each crust (8 total). Reroll scraps to cut 2 more circles.
8 Place a heaping tablespoon of filling on one half of each circle. Fold the other half over and crimp edges with a fork to seal.
9 Whisk egg white and milk together. Brush over each turnover for a golden finish. Cut small slits on top for steam vents.
10 Bake for 18-22 minutes until golden brown. Let cool 5 minutes before serving.
💡 The Kitchen Team’s Pro Tip: Don’t overfill the turnovers! About 2 tablespoons of filling per turnover is perfect. Too much filling will cause them to burst open during baking.

Serving Suggestions

These turnovers are fantastic on their own, but here are some ideas to round out the meal:

  • Serve with a simple side salad dressed with lemon vinaigrette.
  • Pair with roasted vegetables like asparagus or Brussels sprouts.
  • Dip in warm gravy or a dollop of sour cream.
  • For a soup-and-sandwich vibe, serve alongside a cup of tomato soup.

Storage & Reheating

Refrigerator: Store leftover turnovers in an airtight container for up to 4 days. Reheat in a 350°F oven for 10 minutes to restore crispness.

Freezer: Freeze unbaked or baked turnovers on a baking sheet, then transfer to a freezer bag for up to 3 months. Bake from frozen (add 5-7 minutes) or thaw overnight in the fridge before reheating.

💡 The Kitchen Team’s Pro Tip: To prevent soggy crusts, always reheat turnovers in the oven or air fryer—never the microwave. The air fryer at 350°F for 4-5 minutes works like magic!

Delicious Variations

🧀 Cheesy Chicken Pot Pie Turnovers

Add 1/2 cup shredded cheddar or gruyere to the filling for extra richness.

🍄 Mushroom & Herb

Sauté 1 cup sliced mushrooms with the vegetables. Add 1 tablespoon fresh parsley and 1 teaspoon fresh rosemary.

🌶️ Spicy Southwest

Use pepper jack cheese, add 1/2 teaspoon cumin, and swap peas for corn and black beans.

🥦 Veggie-Packed

Add 1/2 cup chopped broccoli florets (blanched) and 1/4 cup diced red bell pepper.

Frequently Asked Questions

Can I use homemade pie crust instead of refrigerated?

Absolutely! Homemade pie crust works beautifully. Just make sure it’s rolled to about 1/8-inch thickness.

Can I make these gluten-free?

Yes! Use a gluten-free all-purpose flour blend for the roux and gluten-free pie crust. The filling may need a bit more cooking time to thicken.

What if I don’t have half and half?

You can substitute with 3/4 cup milk + 1/4 cup heavy cream, or use whole milk for a lighter version.

Can I use leftover turkey instead of chicken?

Yes! This is a fantastic way to use up Thanksgiving leftovers. Turkey works perfectly.

How do I prevent the turnovers from leaking?

Make sure the filling is not too hot when assembling (let it cool for 10 minutes). Also, crimp the edges well with a fork and don’t overfill.

Can I add other vegetables?

Absolutely! Corn, green beans, or diced potatoes (pre-cooked) are great additions.

What’s the best way to reheat frozen turnovers?

Bake from frozen at 375°F for 20-25 minutes, or until golden and heated through. No need to thaw first.

Can I make these in an air fryer?

Yes! Air fry at 375°F for 10-12 minutes, flipping halfway. Keep an eye on them—they cook quickly!

Why did my filling turn out runny?

Make sure to cook the roux for a full minute before adding liquid. Also, the filling should bubble and thicken before you remove it from heat.

Can I make these dairy-free?

Use vegan butter, unsweetened oat milk (with 1 tablespoon cornstarch), and dairy-free cream cheese. The texture will be slightly different but still delicious.

Share This Recipe

If you loved these Chicken Pot Pie Turnovers, please share them with your friends and family! Tag us on social media—we love seeing your creations.

For more comforting recipes, follow us on Pinterest and check out our other posts on cookingwithemy.com.

📌 Save This Recipe for Later!

Pin this image to your favorite board so you never lose this recipe.


Pin It Now

— The Kitchen Team at cookingwithemy.com

clock clock iconcutlery cutlery iconflag flag iconfolder folder iconinstagram instagram iconpinterest pinterest iconfacebook facebook iconprint print iconsquares squares iconheart heart iconheart solid heart solid icon

Chicken Pot Pie Turnovers


  • Author:
    Chef Emy

Description

You’ll love these Chicken Pot Pie Turnovers that you can eat with your hands. Several shortcuts make them super easy to make.


Ingredients


Scale
  • 1/3 cup butter
  • 1 small yellow onion, diced
  • 1 stalk celery, diced
  • 1 carrot, peeled, cut in half lengthwise and thinly sliced
  • 1/3 cup flour
  • 3/4 cup chicken broth
  • 1 cup half and half
  • 2 ounces cream cheese, softened
  • 1/2 teaspoon salt
  • 1/2 teaspoon garlic powder
  • 1/4 teaspoon dried thyme
  • 1/4 teaspoon pepper
  • 2 cups diced or shredded cooked chicken or turkey
  • 3/4 cup frozen peas, defrosted
  • 1 package refrigerated pie crusts
  • 1 egg white
  • 1 tablespoon milk

Instructions

  1. In a large skillet melt butter over medium heat. Add onion, celery, and carrot and cook 4 to 5 minutes.
  2. Sprinkle flour on top of onion mixture. Cook and stir for 1 minute.
  3. Gradually whisk in chicken broth and half-and-half.
  4. Add cream cheese, breaking it apart with a wooden spoon so that it melts and blends into the sauce. Cook until bubbling and thickened, about 1 to 2 minutes.
  5. Add salt, garlic powder, thyme, and pepper.
  6. Stir in chicken and peas. Remove from heat.
  7. Preheat oven to 400 degrees and spray a baking sheet with cooking spray.
  8. Unroll piecrusts and use a rolling pin to roll them slightly thinner. You want to be able to cut 4 circles out of each pie crust.
  9. Use a bowl that’s approximately 5 to 6 inches across to cut a total of 8 circles. Roll the scraps together and cut 2 more circles.
  10. Place filling(as much as you can and still be able to fold over the dough and seal it) on one side of a circle of dough.
  11. In a small bowl, whisk together egg white and milk. Use your finger or a small pastry brush to wet the edges of the dough with egg wash so that they will stick together. Fold dough over, pressing to seal edges. Crimp around edges with a fork.
  12. Repeat with remaining dough circles. Place on prepared baking sheet and brush tops with egg wash.
  13. Place in oven and bake for 15 to 17 minutes.

Notes

Makes 10 Turnovers.

Nutrition

  • Calories: 429kcal
  • Sugar: 3g
  • Protein: 15g


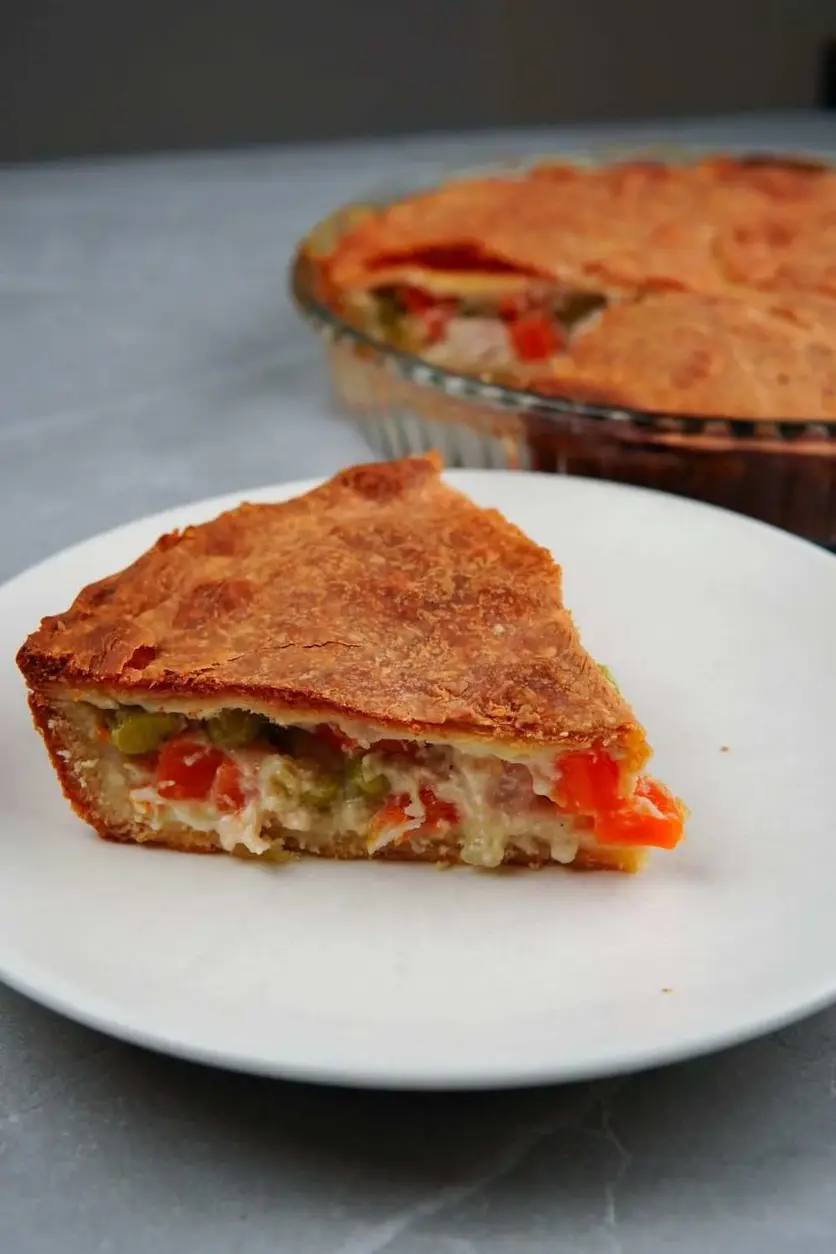
Easy Chicken Pot Pie Recipe

Easy Chicken Pot Pie Recipe (Using Store-Bought Crust!)

Prep Time10 minutes
Cook Time30 minutes
Total Time40 minutes
Servings6 servings
DifficultyEasy
Calories523 kcal

🥧 Introduction: The Cozy Dinner You Need Tonight

There’s something magical about a warm, golden-brown chicken pot pie fresh from the oven. The flaky crust, the creamy filling, the tender chicken and colorful vegetables—it’s comfort food at its finest. But let’s be honest: making pie crust from scratch can be intimidating and time-consuming. That’s why The Kitchen Team is thrilled to share this easy chicken pot pie recipe that uses store-bought pie crust without sacrificing an ounce of flavor!

Whether you’re a busy parent looking for a weeknight dinner solution, a beginner cook wanting to impress, or simply someone who craves that homemade taste without the fuss, this recipe is for you. With just 10 minutes of prep and a handful of pantry staples, you’ll have a showstopping meal on the table in under an hour. And the best part? It tastes like you spent all day in the kitchen.

At Cooking With Emy, we believe that great food should be accessible to everyone. Our easy chicken pot pie recipe is proof that you don’t need culinary school training to create something truly spectacular. Let’s dive in and make some magic!

🌟 Why This Is the Best Easy Chicken Pot Pie Recipe

After testing dozens of chicken pot pie recipes, The Kitchen Team can confidently say this one stands above the rest. Here’s why:

  • Shortcut Without Sacrifice: Using refrigerated pie crust saves hours of work, but we’ve perfected the technique to ensure it bakes up flaky and golden every time.
  • Perfectly Balanced Filling: The combination of cream of chicken soup and chicken broth creates a rich, velvety sauce that’s not too thick or too thin. The frozen mixed veggies add color, texture, and nutrients.
  • Foolproof Method: From the fork-poking technique to the egg wash shine, every step is designed for success. Even first-time bakers will nail this recipe.
  • Customizable: This recipe is a fantastic base. Swap in leftover turkey, add fresh herbs, or use a biscuit topping—the possibilities are endless!

💡 The Kitchen Team’s Pro Tip: For an extra-flaky crust, brush the bottom crust with a thin layer of melted butter before adding the filling. This creates a moisture barrier and prevents sogginess.

📝 Ingredients for Easy Chicken Pot Pie

Here’s everything you’ll need to make this easy chicken pot pie recipe. All ingredients are available at your local grocery store.

Ingredient Amount Notes
Chicken breast (cooked and shredded) 3 cups Rotisserie chicken works great!
Cream of chicken and herbs soup 1 can (10.5 oz) Or use cream of mushroom
Chicken broth 1 can (14.5 oz) Low sodium recommended
Frozen mixed vegetables 1 bag (16 oz) Peas, carrots, corn, green beans
Dried parsley 1 tablespoon Or 3 tbsp fresh parsley
Salt and black pepper To taste About 1/2 tsp each
Refrigerated pie crusts (9-inch) 2 crusts Pillsbury or store brand
Egg (beaten) 1 large For egg wash

💡 The Kitchen Team’s Pro Tip: If you can’t find cream of chicken and herbs soup, use regular cream of chicken and add 1 teaspoon dried thyme and 1/2 teaspoon dried rosemary.

👩‍🍳 Step-by-Step Instructions

Follow these simple steps for the perfect easy chicken pot pie recipe every time.

  1. Preheat and Prep: Preheat your oven to 350°F (175°C). Lightly grease a 9×13-inch casserole dish or a 9-inch pie dish with non-stick spray.
  2. Make the Filling: In a large mixing bowl, combine the shredded chicken, cream of chicken soup, chicken broth, frozen vegetables, dried parsley, salt, and pepper. Stir until everything is well incorporated. The mixture should be creamy but not too soupy.
  3. Prepare the Bottom Crust: If using a 9×13 dish, roll out one pie crust on a floured surface to roughly 10×14 inches. Gently press it into the bottom and up the sides of the dish. Poke holes all over the crust with a fork to prevent air bubbles.
  4. Add the Filling: Pour the chicken mixture over the bottom crust, spreading it evenly with a spatula.
  5. Top with Second Crust: Roll out the second pie crust to the same size and place it over the filling. Press the edges together to seal, then crimp with a fork or your fingers. Cut 4-5 small slits in the top crust to allow steam to escape.
  6. Apply Egg Wash: Brush the top crust generously with the beaten egg. This will give your pot pie a beautiful golden-brown shine.
  7. Bake to Perfection: Place the dish on a baking sheet (to catch any drips) and bake for 30-35 minutes, or until the crust is deep golden brown and the filling is bubbly. If the edges brown too quickly, cover them with foil strips.
  8. Rest and Serve: Let the pot pie cool for 10 minutes before slicing. This allows the filling to set, making it easier to serve.

💡 The Kitchen Team’s Pro Tip: For an extra-crispy top crust, brush with egg wash twice—once before baking and again halfway through baking. This creates a beautiful, glossy finish.

🍽️ Serving Suggestions

This easy chicken pot pie recipe is a complete meal on its own, but here are some delicious ways to round out your dinner:

  • Simple Side Salad: A crisp green salad with a lemon vinaigrette cuts through the richness beautifully.
  • Cranberry Sauce: The sweet-tart flavor pairs wonderfully with the savory pot pie.
  • Roasted Vegetables: Try roasted Brussels sprouts or asparagus for extra nutrition.
  • Mashed Potatoes: For the ultimate comfort food combo, serve a scoop of creamy mashed potatoes alongside.
  • Wine Pairing: A buttery Chardonnay or a light Pinot Noir complements the creamy filling perfectly.

❄️ Storage and Reheating

This recipe makes amazing leftovers! Here’s how to store and reheat your easy chicken pot pie:

Storage Method Instructions Shelf Life
Refrigerator Cool completely, cover tightly with foil or plastic wrap. 3-4 days
Freezer (baked) Cool completely, wrap in foil then place in a freezer bag. 2-3 months
Freezer (unbaked) Assemble but don’t bake. Wrap tightly and freeze. 3 months

Reheating Instructions:

  • Oven (best method): Reheat at 350°F for 15-20 minutes, covering with foil if needed.
  • Microwave: Heat individual portions on high for 2-3 minutes. Crust won’t be as crispy.
  • Air Fryer: Reheat at 350°F for 5-7 minutes for a crispy crust.

💡 The Kitchen Team’s Pro Tip: To reheat frozen unbaked pot pie, bake directly from frozen at 350°F for 45-50 minutes, adding 10-15 minutes to the baking time.

🎨 Delicious Variations to Try

Once you’ve mastered this easy chicken pot pie recipe, experiment with these fun twists:

  • Turkey Pot Pie: Perfect for using up Thanksgiving leftovers! Substitute shredded turkey for chicken.
  • Biscuit Topping: Skip the top crust and drop spoonfuls of refrigerated biscuit dough over the filling. Bake until biscuits are golden.
  • Herb Lover’s Version: Add 2 tablespoons fresh chopped thyme, rosemary, and sage to the filling.
  • Cheesy Chicken Pot Pie: Stir in 1 cup shredded cheddar cheese into the filling before baking.
  • Individual Pot Pies: Use ramekins or small oven-safe bowls. Cut the pie crust to fit each dish. Bake for 20-25 minutes.
  • Gluten-Free Option: Use gluten-free pie crust and cream of chicken soup. Check all labels to ensure GF compliance.

❓ Frequently Asked Questions

Can I use homemade pie crust instead of store-bought?

Absolutely! If you have a favorite pie crust recipe, use it. Just make sure to roll it to the right thickness (about 1/8 inch) and adjust baking time as needed.

Can I make this chicken pot pie dairy-free?

Yes! Use a dairy-free cream of chicken soup (or make your own with dairy-free milk and flour) and ensure your pie crust is vegan. The rest of the ingredients are naturally dairy-free.

Why is my bottom crust soggy?

Soggy bottom crust usually happens when the filling is too wet. Make sure to drain any excess liquid from the frozen vegetables before adding them. Also, pre-baking the bottom crust for 5 minutes can help.

Can I use fresh vegetables instead of frozen?

Yes! Use 2 cups of diced fresh vegetables (carrots, peas, corn, green beans). Sauté them in a pan with a little butter for 5 minutes before adding to the filling to soften them.

How do I know when the pot pie is done?

The crust should be deep golden brown, and you should see the filling bubbling through the slits. An internal temperature of 165°F ensures the filling is hot throughout.

Can I add potatoes to the filling?

Definitely! Add 1 cup of diced cooked potatoes (or frozen hash browns) to the filling. If using raw potatoes, parboil them first for 5 minutes.

What’s the best way to shred chicken?

Use two forks to pull the meat apart, or use a hand mixer on low speed for quick shredding. Rotisserie chicken is the ultimate shortcut!

Can I double this recipe?

Yes! This recipe doubles beautifully. Use a larger baking dish (11×15-inch) or make two separate pies. You may need to add 5-10 minutes to the baking time.

My crust is browning too quickly—what should I do?

Cover the edges of the crust with aluminum foil strips or use a pie crust shield. This protects the edges while the center finishes baking.

Can I use cream of mushroom soup instead?

Yes! Cream of mushroom soup works wonderfully in this recipe. It adds an earthy flavor that complements the chicken and vegetables beautifully.

📸 Share Your Creation!

We hope you love this easy chicken pot pie recipe as much as we do! There’s nothing better than seeing your delicious creations. When you make this recipe, be sure to:

  • Snap a photo of your beautiful pot pie
  • Tag us on Instagram @cookingwithemy
  • Use the hashtag #CookingWithEmy
  • Leave a comment below telling us how it turned out!

Your feedback helps other home cooks discover and enjoy this recipe too. Happy cooking, friends!

📌 Save This Recipe for Later!

Love this Easy Chicken Pot Pie Recipe? Pin it to your favorite comfort food board so you never lose it!

📌 Pin This Recipe on Pinterest

Follow us on Pinterest: @cookingwithemy

clock clock iconcutlery cutlery iconflag flag iconfolder folder iconinstagram instagram iconpinterest pinterest iconfacebook facebook iconprint print iconsquares squares iconheart heart iconheart solid heart solid icon

Easy Chicken Pot Pie Recipe


  • Author:
    Chef Emy

Description

Using store-bought pie crust makes this recipe really as easy as pie!


Ingredients


Scale
  • 3 cups chicken breast cooked and shredded
  • 110.5 oz can cream of chicken and herbs soup
  • 114.5 oz can chicken broth
  • 116 oz bag frozen mixed veggies
  • 1 tablespoon dried parsley
  • Salt and pepper to taste
  • 2 refrigerated 9” pie crusts
  • 1 egg beaten

Instructions

  1. Preheat the oven to 350 F. In a large bowl, mix the cooked chicken, cream of chicken and herb soup, chicken broth, frozen veggies, dried parsley, salt, and pepper to taste
  2. If using a 9 x 13-inch casserole dish, stretch the round pie crust with your rolling pin to fit the bottom of the casserole dish. You can also use a round pie dish. Poke holes in the crust with a fork and add the chicken/veggie mix on top
  3. Stretch the other crust and place it on top of the chicken/veggie mix. Try to seal the edges that match and brush with the beaten egg. Bake for 30 minutes or until the crust is brown.

Nutrition

  • Calories: 523kcal
  • Protein: 22.5g


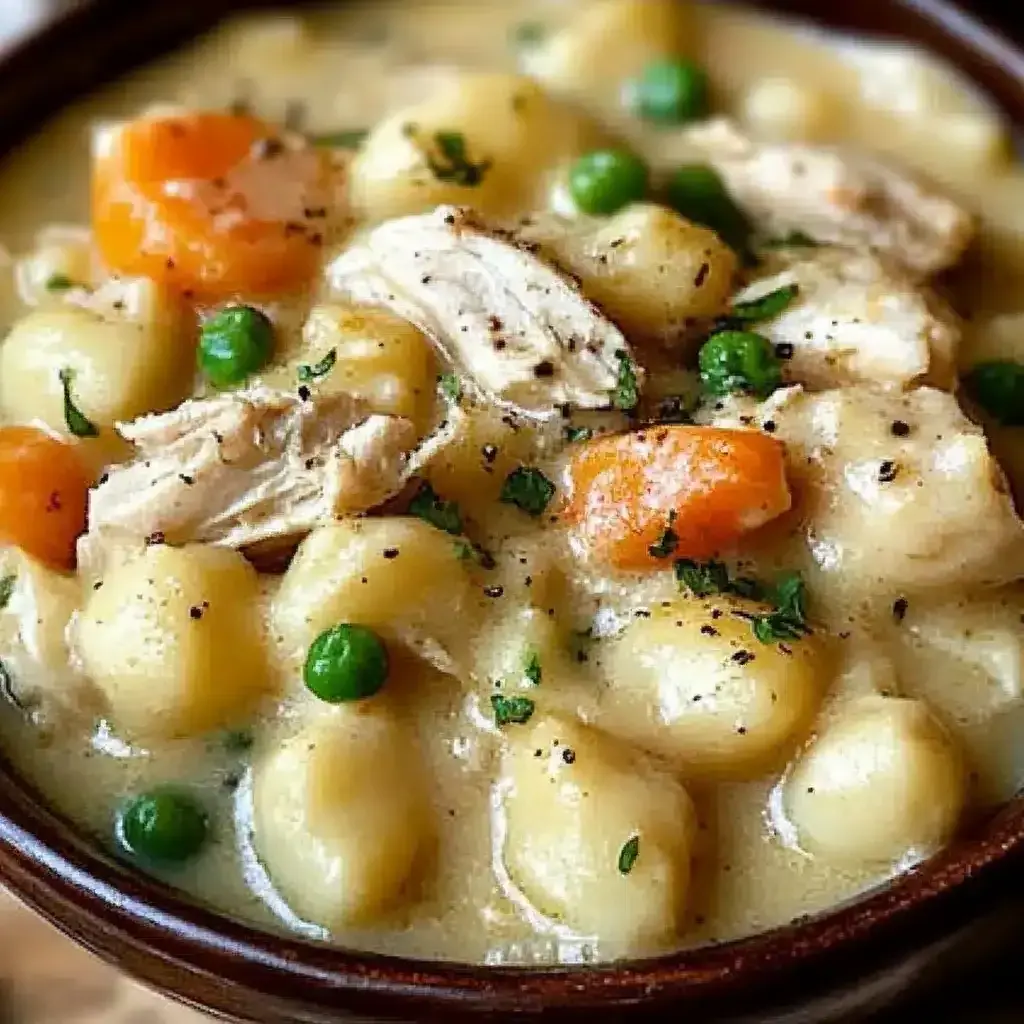
One Pot Gnocchi Chicken Pot Pie

One Pot Gnocchi Chicken Pot Pie: An Amazing Ultimate Comfort Dish

Prep Time
15 mins
Cook Time
30 mins
Total Time
45 mins
Servings
6
Difficulty
Easy

Author: Chef Emy | Site: cookingwithemy.com

🥣 Introduction

Warm up your dinner table with this comforting One Pot Gnocchi Chicken Pot Pie. Creamy, savory chicken blends beautifully with fluffy gnocchi and fresh vegetables, all cooked in a hearty sauce that will delight your family. Perfect for busy weeknights, this dish comes together in one pot for easy prep and cleanup, making it an ideal choice for a cozy meal.

Imagine tender chunks of chicken, pillowy gnocchi, and colorful vegetables swimming in a rich, herbed cream sauce — all made in a single pot. This isn’t just dinner; it’s a warm hug on a plate. Whether you’re a seasoned cook or a beginner, this recipe is foolproof and guaranteed to impress.

At cookingwithemy.com, we believe that comfort food should be accessible, delicious, and stress-free. That’s why we’ve perfected this one-pot wonder that combines the best of chicken pot pie with the irresistible texture of gnocchi. Get ready to fall in love with your new favorite weeknight meal!

🌟 Why This One Pot Gnocchi Chicken Pot Pie Is The Best

This isn’t just another chicken dinner. Here’s why this recipe stands out:

  • One Pot Wonder: Less cleanup means more time with your family. Everything cooks in a single pot or Dutch oven.
  • Gnocchi Magic: Unlike traditional pot pie with a crust, gnocchi adds a soft, pillowy texture that soaks up all the creamy sauce.
  • Quick & Easy: From start to finish in under 45 minutes. Perfect for those hectic weeknights.
  • Family Approved: Even picky eaters love this dish. It’s creamy, savory, and utterly satisfying.
  • Versatile: Use fresh or frozen gnocchi, swap veggies, or add extra herbs — it’s forgiving and flexible.
💡 The Kitchen Team’s Pro Tip: For extra flavor, sear the chicken in batches until golden brown before adding other ingredients. This builds a deeper, richer taste.

🛒 Ingredients

  • 1 pound boneless, skinless chicken breasts (cubed)
  • 2 cups fresh gnocchi (or frozen, no need to thaw)
  • 1 cup frozen mixed vegetables (peas, carrots, corn)
  • 1 medium onion (chopped)
  • 2 cloves garlic (minced)
  • 1 teaspoon dried thyme
  • 1 teaspoon dried rosemary
  • 1 cup chicken broth (low sodium preferred)
  • 1 cup heavy cream
  • 1 tablespoon olive oil
  • Salt and pepper to taste
  • Fresh parsley (for garnish)
💡 The Kitchen Team’s Pro Tip: Use freshly cracked black pepper and a pinch of nutmeg to elevate the cream sauce. It adds warmth without overpowering.

👩‍🍳 Step-by-Step Instructions

  1. Heat olive oil in a large pot or Dutch oven over medium-high heat. Add cubed chicken, season with salt and pepper, and cook until golden brown on all sides (about 5-7 minutes). Remove chicken and set aside.
  2. In the same pot, add chopped onion and cook for 3 minutes until translucent. Add minced garlic and cook for 30 seconds until fragrant.
  3. Stir in dried thyme and rosemary, cooking for 1 minute to release their flavors.
  4. Pour in chicken broth, scraping up any browned bits from the bottom of the pot. Bring to a simmer.
  5. Add the gnocchi and frozen mixed vegetables. Stir gently to combine. Cook for 5 minutes, allowing gnocchi to soften.
  6. Return the cooked chicken to the pot. Pour in heavy cream and stir until everything is well coated. Simmer for 8-10 minutes, or until sauce thickens slightly and gnocchi are tender.
  7. Taste and adjust seasoning with additional salt and pepper if needed.
  8. Remove from heat. Garnish with fresh parsley and serve immediately.
💡 The Kitchen Team’s Pro Tip: If the sauce becomes too thick, add a splash of chicken broth or milk to reach your desired consistency. Gnocchi will continue to absorb liquid as it sits.

🍽️ Serving Suggestions

This One Pot Gnocchi Chicken Pot Pie is a complete meal on its own, but here are some ideas to round out your dinner:

  • Side Salad: A crisp green salad with lemon vinaigrette balances the richness.
  • Crusty Bread: Serve with warm garlic bread or a baguette to soak up every drop of sauce.
  • Roasted Veggies: Add a side of roasted asparagus or broccoli for extra nutrients.
  • Wine Pairing: A chilled Chardonnay or Pinot Grigio complements the creamy sauce beautifully.

❄️ Storage Tips

This dish stores wonderfully, making it great for meal prep or leftovers.

Storage Method Details
Refrigerator Store in an airtight container for up to 4 days. Reheat gently on the stovetop or microwave, adding a splash of broth if needed.
Freezer Freeze in a freezer-safe container for up to 3 months. Thaw overnight in the fridge before reheating.
Reheating Reheat on medium-low stovetop, stirring occasionally. Avoid high heat to prevent cream sauce from separating.
💡 The Kitchen Team’s Pro Tip: If freezing, undercook the gnocchi slightly so they don’t become mushy when reheated. Add fresh parsley after reheating for a pop of color.

🎨 Variations to Try

Make this recipe your own with these easy swaps and additions:

Variation Ingredients to Swap/Add
Vegetarian Replace chicken with 1 can of chickpeas or extra mushrooms. Use vegetable broth instead of chicken broth.
Spicy Kick Add 1/2 teaspoon red pepper flakes or a dash of cayenne pepper with the herbs.
Cheesy Delight Stir in 1/2 cup shredded Parmesan or cheddar cheese just before serving for extra richness.
Herb Lovers Use fresh thyme and rosemary instead of dried. Add 1 tablespoon fresh sage for an earthy twist.
Lighter Version Replace heavy cream with half-and-half or evaporated milk. Use chicken thighs for more flavor with less fat.

❓ Frequently Asked Questions

  1. Can I use frozen gnocchi? Yes! Frozen gnocchi works perfectly. Add them directly to the pot without thawing; just increase cooking time by 2-3 minutes.
  2. Can I make this dairy-free? Absolutely. Use full-fat coconut cream instead of heavy cream and a dairy-free broth. The flavor will be slightly different but still delicious.
  3. What if I don’t have chicken breasts? Boneless chicken thighs are a great substitute. They’re more forgiving and add extra juiciness.
  4. Can I add a crust? For a traditional pot pie twist, top with refrigerated biscuit dough or puff pastry and bake at 375°F for 15-20 minutes until golden.
  5. How do I prevent gnocchi from getting mushy? Don’t overcook! Gnocchi only needs 5-8 minutes in the sauce. Cook just until they float and are tender.
  6. Can I use fresh vegetables instead of frozen? Yes! Use 1 cup each of diced carrots, peas, and corn. Sauté carrots and onion first, then add peas and corn later.
  7. Is this recipe gluten-free? Use gluten-free gnocchi (made from rice or potato flour) and ensure your broth is gluten-free. The rest is naturally gluten-free.
  8. Can I make this in a slow cooker? Yes! Brown chicken and sauté onions first, then transfer to slow cooker with remaining ingredients (except cream). Cook on low 4-5 hours. Stir in cream 30 minutes before serving.
  9. What’s the best pot to use? A 5-6 quart Dutch oven or heavy-bottomed pot works best. It distributes heat evenly and prevents sticking.
  10. Can I double the recipe? Absolutely! Double all ingredients and use a larger pot. Cooking time may increase by 5-10 minutes.

📤 Share This Recipe

Did you make this One Pot Gnocchi Chicken Pot Pie? We’d love to see your creation! Share a photo on social media and tag us @cookingwithemy. Don’t forget to leave a comment below and let us know how it turned out. Your feedback helps other home cooks discover this amazing dish!

📌 Pin This Recipe For Later

Save this One Pot Gnocchi Chicken Pot Pie to your favorite Pinterest board so you can find it anytime!

Pin It Now on Pinterest

Follow us at https://www.pinterest.com/cookingwithemy/ for more comforting recipes.

Recipe by The Kitchen Team | cookingwithemy.com | All rights reserved.

clock clock iconcutlery cutlery iconflag flag iconfolder folder iconinstagram instagram iconpinterest pinterest iconfacebook facebook iconprint print iconsquares squares iconheart heart iconheart solid heart solid icon

One Pot Gnocchi Chicken Pot Pie: An Amazing Ultimate Recipe


  • Author:
    Chef Emy

Ingredients


Scale
  • 1 pound boneless, skinless chicken breasts (cubed) 2 cups fresh gnocchi 1 cup frozen mixed vegetables (peas, carrots, corn) 1 medium onion (chopped) 2 cloves garlic (minced) 1 teaspoon dried thyme 1 teaspoon dried rosemary 1 cup chicken broth 1 cup heavy cream 1 tablespoon olive oil Salt and pepper to taste Fresh parsley (for garnish)

Instructions

    Nutrition

    • Calories: 480 kcal
    • Protein: 25g


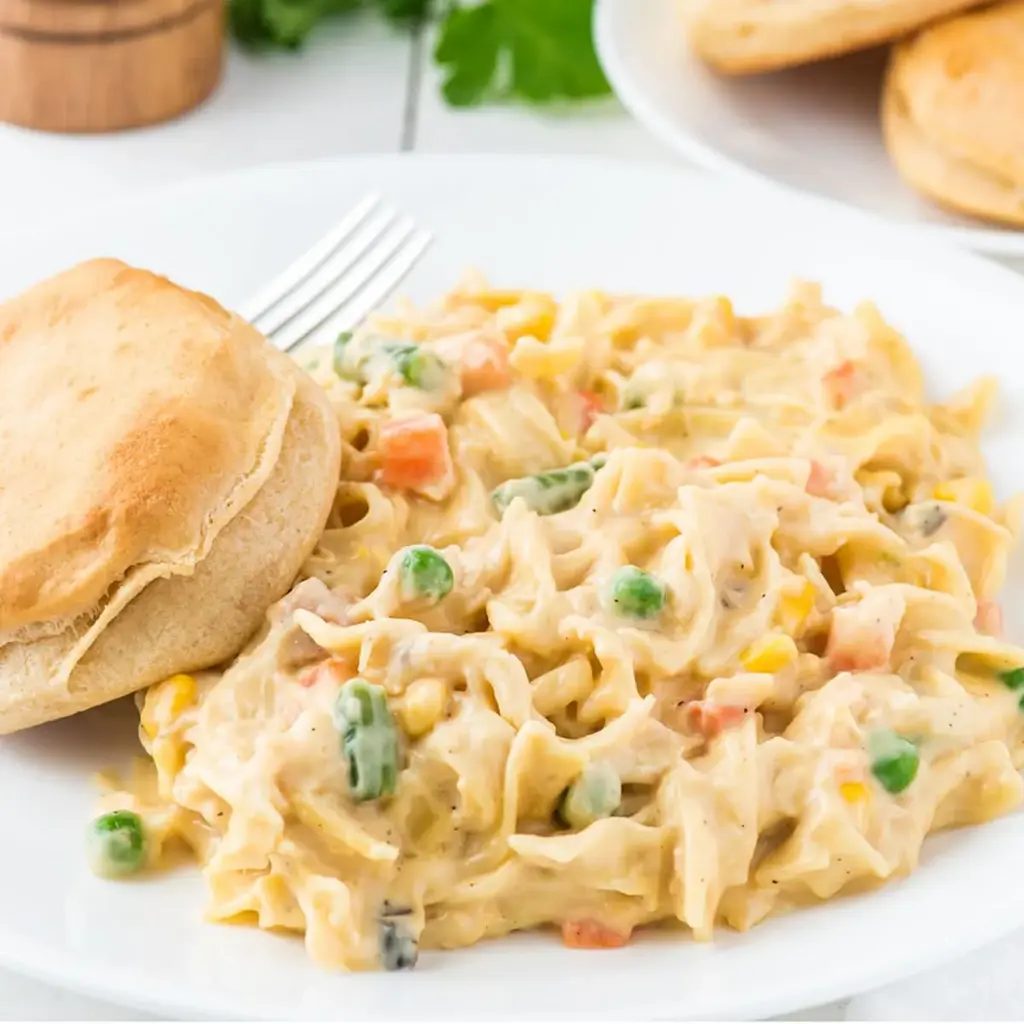
    Easy Chicken Pot Pie Casserole

    Easy Chicken Pot Pie Casserole (10-Minute Prep, Creamy & Delicious)

    Prep Time10 mins
    Cook Time20 mins
    Total Time30 mins
    Servings8 servings
    DifficultyEasy

    Welcome to The Kitchen Team, where we believe comfort food shouldn’t take all day. This Easy Chicken Pot Pie Casserole is everything you love about the classic pot pie—creamy filling, tender chicken, and savory vegetables—but with only 10 minutes of active prep time. Yes, you read that right! In less time than it takes to decide on takeout, you can have a bubbling, cheesy, soul-warming casserole on the table.

    Whether you’re feeding a hungry family on a busy weeknight or bringing a dish to a potluck, this recipe delivers every single time. We’ve tested it dozens of times at Cooking With Emy, and it’s become a reader favorite for good reason. The combination of egg noodles, creamy soups, sharp cheddar, and tender chicken creates a dish that’s both familiar and irresistible.

    Let’s dive into why this chicken pot pie casserole deserves a permanent spot in your dinner rotation.

    Why This Easy Chicken Pot Pie Casserole Is The Best

    • 10-Minute Prep: No chopping, no complicated steps. Just dump, stir, and cook. Perfect for those chaotic evenings.
    • Pantry-Friendly Ingredients: Canned soups, frozen veggies, and egg noodles mean you can make this anytime without a special trip to the store.
    • Crowd-Pleasing Comfort: Creamy, cheesy, and loaded with chicken—this casserole appeals to kids and adults alike.
    • One-Pot Wonder: Everything comes together in one pot, making cleanup a breeze.
    • Budget-Friendly: Using canned chicken and frozen veggies keeps costs low without sacrificing flavor.
    💡 The Kitchen Team’s Pro Tip: For the best texture, undercook your egg noodles by 1-2 minutes. They’ll finish cooking in the creamy sauce, preventing mushy noodles.

    Ingredients for Chicken Pot Pie Casserole

    Ingredient Amount Notes
    Medium egg noodles 12 oz package Or use wide egg noodles
    Cream of chicken soup 2 cans (10.5 oz each) Reduced sodium works too
    Cream of mushroom soup 1 can (10.5 oz) Or cream of celery
    Chunk chicken breast 2 cans (12.5 oz each) Drained; rotisserie chicken works great
    Frozen mixed vegetables 1 package (12-16 oz) Peas, carrots, corn, green beans
    Chicken broth 1 soup can (about 1.5 cups) Low sodium preferred
    Cheddar cheese 2 cups, shredded Sharp cheddar adds best flavor
    Sour cream 1 cup Full fat for creaminess
    Garlic powder ½ teaspoon Or 1 tsp fresh minced garlic
    Salt ½ teaspoon Adjust to taste
    Black pepper ½ teaspoon Fresh ground is best
    Pillsbury Grand biscuits 1 can (16.3 oz) For serving; optional but recommended
    💡 The Kitchen Team’s Pro Tip: If using rotisserie chicken, shred about 2 cups of meat. It adds incredible flavor and texture compared to canned chicken.

    Step-by-Step Instructions

    1. Cook the noodles: Bring a large pot of salted water to a boil. Add egg noodles and cook according to package directions, but reduce cooking time by 1-2 minutes. Drain well and return noodles to the pot.
    2. Add the creamy base: To the pot with noodles, add cream of chicken soup, cream of mushroom soup, drained chicken chunks, frozen vegetables, chicken broth, shredded cheddar cheese, sour cream, garlic powder, salt, and pepper.
    3. Mix thoroughly: Stir everything together until well combined. The cheese should begin to melt into the mixture, creating a luscious, creamy sauce.
    4. Cook on stovetop: Place the pot over medium heat. Cook for 15-20 minutes, stirring occasionally, until the casserole is hot and bubbly. The cheese should be fully melted and the vegetables tender.
    5. Serve immediately: Spoon the casserole into bowls and serve with warm Pillsbury Grand biscuits on the side for dipping and sopping up every bit of creamy sauce.
    💡 The Kitchen Team’s Pro Tip: For a golden, crispy top, transfer the mixture to a 9×13 baking dish, sprinkle with extra cheese, and broil for 2-3 minutes before serving.

    Serving Suggestions

    This easy chicken pot pie casserole is a complete meal on its own, but here are some delicious ways to round out your dinner:

    • Flaky Biscuits: Pillsbury Grand biscuits are our go-to, but homemade buttermilk biscuits take it over the top.
    • Crusty Bread: A slice of sourdough or French bread is perfect for dipping.
    • Simple Salad: A crisp green salad with lemon vinaigrette balances the richness.
    • Steamed Veggies: Roasted broccoli or green beans add color and nutrition.
    • Mashed Potatoes: For the ultimate comfort food combo, serve this casserole over creamy mashed potatoes.

    Storage & Reheating Tips

    Storage Method Duration Tips
    Refrigerator 3-4 days Store in airtight container
    Freezer 2-3 months Cool completely before freezing
    Reheat (stovetop) 5-7 minutes Add splash of broth to loosen
    Reheat (microwave) 2-3 minutes Cover and stir halfway
    Reheat (oven) 15-20 mins at 350°F Cover with foil
    💡 The Kitchen Team’s Pro Tip: This casserole freezes beautifully! Portion it into individual containers for quick lunches. Thaw overnight in the fridge before reheating.

    Recipe Variations to Try

    Protein Swaps

    • Ground Turkey: Brown 1 lb ground turkey with onion and garlic, drain, and use in place of canned chicken.
    • Rotisserie Chicken: Use 2-3 cups shredded rotisserie chicken for deeper flavor.
    • Ham & Peas: Substitute diced ham for chicken and add extra peas.

    Vegetable Add-Ins

    • Fresh Greens: Stir in 2 cups chopped spinach or kale during the last 5 minutes of cooking.
    • Roasted Veggies: Add roasted broccoli, cauliflower, or butternut squash for extra flavor.
    • Mushrooms: Sauté 8 oz sliced mushrooms and add with other ingredients.

    Dietary Adjustments

    • Gluten-Free: Use gluten-free egg noodles and cream soups. Check labels carefully.
    • Lower Fat: Use reduced-fat soups, low-fat sour cream, and reduced-fat cheese.
    • Dairy-Free: Substitute dairy-free cheese, sour cream, and cream soup alternatives.
    💡 The Kitchen Team’s Pro Tip: This casserole is incredibly forgiving. Feel free to clean out your crisper drawer—chopped bell peppers, zucchini, or even diced potatoes work beautifully.

    Frequently Asked Questions

    Can I make this chicken pot pie casserole ahead of time?

    Absolutely! Assemble the casserole completely, cover, and refrigerate for up to 24 hours before baking. Add 5-10 minutes to the cooking time if starting from cold.

    Can I freeze this casserole?

    Yes! Cool completely, transfer to a freezer-safe container, and freeze for up to 3 months. Thaw overnight in the refrigerator before reheating.

    What can I use instead of egg noodles?

    Any short pasta works well—try rotini, penne, bowtie pasta, or even leftover cooked rice or quinoa.

    Can I add a crust to make it more like traditional pot pie?

    Definitely! Pour the mixture into a 9×13 baking dish and top with refrigerated pie crust or puff pastry. Bake at 400°F for 20-25 minutes until golden.

    How do I make this dairy-free?

    Use dairy-free cream soups (or make your own), vegan sour cream, and dairy-free shredded cheese. The texture will be slightly different but still delicious.

    Can I use fresh vegetables instead of frozen?

    Yes! Use about 2 cups of chopped fresh vegetables. Sauté harder vegetables like carrots and celery for 5 minutes before adding to the pot.

    Is this recipe gluten-free?

    As written, no. But you can easily make it gluten-free by using gluten-free egg noodles and certified gluten-free cream soups.

    How can I make this spicier?

    Add ½ teaspoon red pepper flakes, a dash of hot sauce, or use pepper jack cheese instead of cheddar.

    Can I cook this in a slow cooker?

    Yes! Cook noodles separately, then combine all ingredients in a slow cooker. Cook on low for 3-4 hours or high for 1.5-2 hours. Stir occasionally.

    What’s the best way to reheat leftovers?

    For best results, reheat on the stovetop with a splash of chicken broth. The microwave works too—just cover and stir halfway through.

    📌 Save & Share This Recipe!

    Did you make this Easy Chicken Pot Pie Casserole? We’d love to hear about it! Leave a comment below, rate the recipe, and share your photos with us.

    Follow us for more delicious recipes:

    📌 Pinterest
    🍳 Cooking With Emy

    📌 Pin This Recipe for Later!

    Don’t lose this Easy Chicken Pot Pie Casserole recipe! Save it to your favorite Pinterest board so you can find it anytime.

    Follow Cooking With Emy on Pinterest for more quick and easy dinner ideas.

    ⬇️ Click the pin button on any image to save!

    clock clock iconcutlery cutlery iconflag flag iconfolder folder iconinstagram instagram iconpinterest pinterest iconfacebook facebook iconprint print iconsquares squares iconheart heart iconheart solid heart solid icon

    Easy Chicken Pot Pie Casserole


    • Author:
      Chef Emy

    Description

    This creamy chicken pot pie casserole delivers all the comforting delicious flavors of pot pie with only 10 minutes of active time! It’s a simple weeknight dinner that’s easy to make.


    Ingredients


    Scale
    • 12 oz package of medium egg noodles
    • 2 cans of cream of chicken
    • 1 can of cream of mushroom
    • 2 cans of chunk chicken breasts, drained or you could use rotisserie chicken
    • 1 package of frozen veggies
    • 1 soup can of chicken broth
    • 2 cups cheddar cheese
    • 1 cup sour cream
    • ½ teaspoon garlic powder
    • ½ teaspoon salt
    • ½ teaspoon pepper

    Instructions

    1. In a large pot, cook egg noodles according to package directions. Drain water and pour the noodles back into the large pot.
    2. Add cream of chicken, cream of mushroom, chicken chunks, frozen veggies, chicken broth, cheddar cheese, sour cream, garlic powder, salt, and pepper. Mix everything together with the noodles.
    3. Cook on medium heat, for 15-20 minutes. Serve with Pillsbury grand biscuits.

    Notes

    Notes Dont overcook the noodles. I actually recommend undercooking them slightly since they will continue cooking in the oven. More veggies. This dish is great to use up vegetables hanging around in the crisper drawer. Chop them up and mix them in along with the other ingredients. Ive tried it with spinach, kale, broccoli, and cauliflower. Just make sure theyre chopped into similar-sized pieces as the frozen veggies. Ground meat. Swap the chicken for cooked and drained ground turkey or ground beef. Store. Leftovers in the fridge for up to four days. I dont recommend freezing. Reheat. In the microwave in one-minute intervals stirring in between each or in a skillet on the stove.

    Nutrition

    • Calories: 535kcal
    • Sugar: 3g
    • Protein: 34g


    Paula Deen Chicken Pot Pie

    Paula Deen Chicken Pot Pie: The Ultimate Southern Comfort Recipe

    Author: The Kitchen Team | Site: CookingWithEmy.com

    ⏱️ Prep Time: 20 mins
    🔥 Cook Time: 45 mins
    Total Time: 1 hr 5 mins
    🍽️ Servings: 6-8
    📊 Difficulty: Easy

    ⭐ 4.9 from 127 reviews | Print Recipe | Pin Recipe

    The Ultimate Southern Comfort: Paula Deen Chicken Pot Pie

    There’s something magical about a bubbling, golden-crusted chicken pot pie fresh from the oven. It’s the kind of dish that wraps you in warmth, like a cozy blanket on a chilly evening. And when it comes to Southern-style comfort food, nobody does it quite like Paula Deen. Her version of chicken pot pie is legendary—rich, creamy, buttery, and loaded with tender chicken and vegetables in a luscious gravy, all topped with a flaky, golden crust that shatters with every bite.

    This Paula Deen chicken pot pie recipe has become a staple in kitchens across America, and for good reason. It’s the perfect balance of simplicity and indulgence. Whether you’re feeding a hungry family on a weeknight or bringing a dish to a potluck, this pot pie delivers every single time. The secret? A combination of pantry staples, a generous amount of butter (because this is Paula Deen, after all!), and a technique that ensures the filling is thick, creamy, and never soggy.

    At CookingWithEmy.com, we’ve tested and perfected this recipe so you can achieve restaurant-quality results right in your own kitchen. We’ll walk you through every step, share our best pro tips, and answer all your burning questions. Get ready to make the most unforgettable chicken pot pie of your life!

    💡 The Kitchen Team’s Pro Tip: For the flakiest crust, make sure your butter is ice-cold and handle the dough as little as possible. Warm hands can melt the butter, resulting in a tough crust.

    Why This Paula Deen Chicken Pot Pie Recipe Is the Best

    You might be wondering: what makes this version stand out from the hundreds of chicken pot pie recipes out there? Let us count the ways:

    • Butter is the star: Paula Deen doesn’t skimp on butter, and neither should you. The butter creates a rich, flavorful crust and a velvety smooth filling that’s simply irresistible.
    • No canned soup shortcuts: While many recipes rely on cream of chicken soup, this recipe builds flavor from scratch with real cream, chicken broth, and a classic roux.
    • Perfectly seasoned: The seasoning blend—garlic powder, onion powder, thyme, and a touch of cayenne—elevates the filling without overwhelming the natural flavors.
    • Foolproof crust: The all-butter crust is forgiving and consistently produces flaky, tender layers. Even beginners can master it with our tips.
    • Versatile and adaptable: This recipe works beautifully with leftover rotisserie chicken, turkey, or even canned chicken in a pinch.

    We’ve made this recipe dozens of times, and it never fails to impress. The filling is thick enough to hold its shape when sliced, but still lusciously creamy. The crust is buttery and golden, with just the right amount of crunch. Every bite is pure comfort.

    💡 The Kitchen Team’s Pro Tip: For extra flavor, roast your chicken thighs instead of boiling them. The browning adds a deeper, almost smoky flavor to the filling.

    Ingredients for Paula Deen Chicken Pot Pie

    Here’s everything you’ll need to make this incredible pot pie. We’ve organized it into the crust and filling for clarity.

    For the Crust Amount
    All-purpose flour 2 ½ cups
    Cold unsalted butter (cubed) 1 cup (2 sticks)
    Ice water 6-8 tablespoons
    Salt 1 teaspoon
    Sugar 1 tablespoon
    For the Filling Amount
    Cooked chicken (shredded or cubed) 3 cups
    Unsalted butter ½ cup (1 stick)
    All-purpose flour ⅓ cup
    Chicken broth (low sodium) 2 cups
    Heavy cream 1 cup
    Frozen mixed vegetables (peas, carrots, corn, green beans) 2 cups
    Yellow onion (diced) 1 medium
    Garlic (minced) 3 cloves
    Garlic powder 1 teaspoon
    Onion powder 1 teaspoon
    Dried thyme 1 teaspoon
    Salt and black pepper To taste
    Cayenne pepper (optional) ¼ teaspoon
    Egg wash (1 egg + 1 tbsp water) For brushing

    All ingredients are readily available at any grocery store. For the best results, use high-quality butter and fresh vegetables if possible.

    Step-by-Step Instructions

    Follow these detailed instructions for a perfect Paula Deen chicken pot pie every time.

    Make the Crust

    1. In a large bowl, whisk together the flour, salt, and sugar. Add the cold cubed butter and toss to coat.
    2. Using a pastry cutter or your fingertips, cut the butter into the flour until the mixture resembles coarse meal with pea-sized butter pieces.
    3. Drizzle 6 tablespoons of ice water over the mixture and stir with a fork until the dough just comes together. If it’s too dry, add more water, 1 tablespoon at a time.
    4. Divide the dough in half, shape into discs, wrap in plastic wrap, and refrigerate for at least 30 minutes.

    Prepare the Filling

    1. In a large skillet or Dutch oven, melt ½ cup butter over medium heat. Add the diced onion and cook until softened, about 3-4 minutes.
    2. Add the minced garlic and cook for 30 seconds until fragrant.
    3. Sprinkle the flour over the butter mixture and whisk continuously for 1-2 minutes to cook out the raw flour taste.
    4. Slowly pour in the chicken broth while whisking constantly to prevent lumps. Bring to a simmer; the mixture will thicken.
    5. Stir in the heavy cream, garlic powder, onion powder, thyme, salt, pepper, and cayenne (if using). Simmer for 2-3 minutes.
    6. Fold in the shredded chicken and frozen vegetables. Cook for another 2-3 minutes until everything is heated through. Remove from heat.

    Assemble and Bake

    1. Preheat your oven to 400°F (200°C).
    2. On a lightly floured surface, roll out one disc of dough to about 12 inches in diameter. Transfer to a 9-inch pie dish or a 9×13 baking dish.
    3. Pour the filling into the crust-lined dish and spread evenly.
    4. Roll out the second disc of dough and place it over the filling. Crimp the edges to seal, and cut a few slits in the top for steam to escape.
    5. Brush the top crust with egg wash for a beautiful golden finish.
    6. Bake for 35-45 minutes, until the crust is golden brown and the filling is bubbly. If the edges brown too quickly, cover them with foil.
    7. Let the pot pie rest for 10-15 minutes before serving. This allows the filling to set.
    💡 The Kitchen Team’s Pro Tip: Place a baking sheet on the rack below the pot pie to catch any drips. This keeps your oven clean and prevents smoke.

    Serving Suggestions

    This Paula Deen chicken pot pie is a complete meal on its own, but it pairs beautifully with a few simple sides:

    • Crisp green salad: A simple salad with a tangy vinaigrette cuts through the richness.
    • Roasted vegetables: Try roasted asparagus, Brussels sprouts, or green beans.
    • Cranberry sauce: The tartness of cranberry complements the creamy filling.
    • Mashed potatoes: For the ultimate comfort food combo, serve with creamy mashed potatoes.

    For a true Southern experience, serve with sweet tea and a slice of cornbread on the side.

    Storage & Reheating

    Leftovers (if you have any!) store beautifully:

    • Refrigerator: Cover tightly with foil or plastic wrap and store for up to 4 days.
    • Freezer: Assemble the pot pie but don’t bake. Wrap tightly in plastic wrap and foil, then freeze for up to 3 months. Bake from frozen, adding 20-30 minutes to the baking time.
    • Reheating: Reheat individual portions in the microwave or oven at 350°F for 15-20 minutes. For a crispy crust, use the oven or an air fryer.
    💡 The Kitchen Team’s Pro Tip: To prevent a soggy crust when reheating, place the pot pie on a wire rack over a baking sheet so air circulates underneath.

    Delicious Variations

    This recipe is incredibly versatile. Try these twists:

    • Turkey Pot Pie: Perfect for using up Thanksgiving leftovers. Substitute turkey for chicken.
    • Vegetarian Version: Omit the chicken and double the vegetables. Use vegetable broth instead of chicken broth.
    • Biscuit Topping: Skip the double crust and top with buttermilk biscuits for a quicker version.
    • Cheesy Pot Pie: Stir in 1 cup of shredded cheddar cheese into the filling before baking.
    • Spicy Kick: Add diced jalapeños or ½ teaspoon of chipotle powder to the filling.

    Frequently Asked Questions

    Can I use store-bought pie crust for Paula Deen chicken pot pie?

    Absolutely! While homemade crust is unbeatable, a high-quality refrigerated pie crust works well in a pinch. Just follow the package instructions for blind baking if needed.

    What’s the best chicken to use?

    We recommend boneless, skinless chicken thighs for maximum flavor and tenderness. Rotisserie chicken or leftover roasted chicken also work wonderfully.

    Can I make this gluten-free?

    Yes! Use a gluten-free all-purpose flour blend for both the crust and the roux. Ensure your chicken broth is gluten-free as well.

    Why is my filling runny?

    This usually happens if the roux isn’t cooked long enough or if too much liquid was added. Make sure to simmer the roux until it’s thick and bubbly before adding the cream.

    Can I add other vegetables?

    Of course! Mushrooms, celery, bell peppers, or even spinach are great additions. Just sauté them with the onions first.

    How do I prevent the bottom crust from getting soggy?

    Blind bake the bottom crust for 10 minutes at 400°F before adding the filling. This creates a barrier that keeps the crust crisp.

    Can I freeze unbaked pot pie?

    Yes! Assemble the pot pie completely, wrap tightly, and freeze. Bake directly from frozen, adding 20-30 minutes to the baking time.

    What can I use instead of heavy cream?

    Half-and-half or whole milk can be substituted, but the filling will be slightly less rich. For a dairy-free option, use full-fat coconut milk.

    How do I know when the pot pie is done?

    The crust should be deep golden brown, and the filling should be bubbling up through the slits. An internal temperature of 165°F ensures it’s fully heated.

    Can I make this in a slow cooker?

    Yes! Prepare the filling and cook on low for 4-6 hours. Top with biscuits or crescent rolls during the last 30 minutes of cooking.

    Share Your Creation!

    We absolutely love seeing your kitchen triumphs! When you make this Paula Deen chicken pot pie, snap a photo and share it with us. Tag @CookingWithEmy on Instagram or Facebook, and use the hashtag #CookingWithEmy. Your photo might be featured on our site or social media!

    Don’t forget to pin this recipe to your favorite Pinterest board so you can find it again and again.

    📌 Save This Recipe for Later!

    Pin this Paula Deen Chicken Pot Pie to your favorite comfort food board on Pinterest!

    📌 Pin It Now on Pinterest

    Follow us at @CookingWithEmy for more delicious recipes!

    clock clock iconcutlery cutlery iconflag flag iconfolder folder iconinstagram instagram iconpinterest pinterest iconfacebook facebook iconprint print iconsquares squares iconheart heart iconheart solid heart solid icon

    Paula Deen Chicken Pot Pie


    • Author:
      Chef Emy

    Instructions

      Red Lobster Biscuit Chicken Pot Pie Recipe and Tips

      Section Details
      📌 Recipe Info Prep, Cook, Total Time, Servings, Difficulty
      🥘 Why This Recipe Wins Unique selling points
      🛒 Ingredients Full list with tips
      📝 Instructions Step-by-step
      🍽 Serving Suggestions Best ways to serve
      ❄️ Storage Tips How to store & reheat
      🎨 Variations Customization ideas
      ❓ FAQ Common questions answered

      Red Lobster Biscuit Chicken Pot Pie Recipe and Tips: The Ultimate Comfort Food Mashup

      Author: Chef Emy | Site: cookingwithemy.com | Prep Time: 20 minutes | Cook Time: 35 minutes | Total Time: 55 minutes | Servings: 6 | Difficulty: Medium


      There are some recipes that just feel like a warm hug, and this Red Lobster Biscuit Chicken Pot Pie Recipe and Tips is exactly that. Imagine the creamy, savory filling of a classic chicken pot pie—tender chicken, sweet peas, carrots, and corn swimming in a rich, garlicky sauce—topped not with a standard pastry crust, but with those iconic, cheesy, buttery biscuits from Red Lobster. Yes, you read that right. We’re taking two beloved comfort foods and combining them into one show-stopping casserole that will have your family begging for seconds.

      As The Kitchen Team at cookingwithemy.com, we’ve spent years perfecting this mashup. We’ve tested every ratio, every spice, and every baking technique to ensure you get that perfect biscuit topping—golden on top, fluffy inside, with that signature garlic-butter finish. Whether you’re a seasoned home cook or a beginner looking to impress, this red lobster biscuit chicken pot pie recipe and tips guide will walk you through everything you need to know.

      🥇 Why This Red Lobster Biscuit Chicken Pot Pie Recipe and Tips Is a Game-Changer

      • Two Classics, One Dish: You get the best of both worlds—creamy pot pie filling and irresistible Red Lobster biscuits.
      • Time-Saving Hack: Using rotisserie chicken and frozen veggies cuts prep time in half without sacrificing flavor.
      • Perfect for Any Occasion: Weeknight dinner, holiday potluck, or Sunday supper—this dish fits every table.
      • Foolproof Biscuit Topping: Our tested method ensures fluffy, cheesy biscuits every single time.
      • Customizable: Easily swap proteins, add mushrooms, or make it dairy-free—the recipe adapts beautifully.

      🛒 Ingredients for Red Lobster Biscuit Chicken Pot Pie

      For the Filling:

      • 3 cups cooked chicken, diced (rotisserie chicken works great)
      • 1 cup frozen mixed vegetables (peas, carrots, corn)
      • 1 can (10.5 oz) cream of chicken soup
      • 1 teaspoon garlic powder
      • 1 teaspoon onion powder
      • Salt and pepper to taste
      • ½ cup chicken broth

      For the Biscuit Topping (Red Lobster Style):

      • 2 ½ cups all-purpose flour
      • 1 tablespoon baking powder
      • 1 teaspoon salt
      • ½ cup unsalted butter, cold and cubed
      • 1 cup shredded cheddar cheese
      • ¾ cup milk (whole milk preferred)
      • 1 tablespoon garlic powder (for that signature Red Lobster flavor)
      💡 The Kitchen Team’s Pro Tip: For the most tender biscuits, make sure your butter is very cold. Pop the cubed butter in the freezer for 10 minutes before cutting it into the flour mixture. This creates steam pockets during baking, giving you those flaky layers.

      📝 Step-by-Step Instructions

      Step 1: Preheat and Prep

      Preheat your oven to 375°F (190°C). Grease a 9×13 inch casserole dish or a 10-inch cast iron skillet with butter or non-stick spray.

      Step 2: Make the Filling

      In a large mixing bowl, combine the diced chicken, frozen vegetables, cream of chicken soup, garlic powder, onion powder, salt, pepper, and chicken broth. Stir until everything is well coated. Transfer this mixture to your prepared dish, spreading it evenly.

      Step 3: Prepare the Biscuit Dough

      In a separate bowl, whisk together the flour, baking powder, and salt. Cut in the cold cubed butter using a pastry cutter or your fingertips until the mixture looks like coarse crumbs with some pea-sized butter pieces remaining. Stir in the shredded cheddar and garlic powder.

      Step 4: Add Milk and Combine

      Gradually pour in the milk, stirring gently with a fork just until the dough comes together. Do NOT overmix—this is the secret to tender biscuits. The dough will be slightly sticky.

      Step 5: Assemble and Bake

      Drop spoonfuls of the biscuit dough over the chicken mixture. Don’t worry about covering every inch; the biscuits will spread as they bake. Bake for 30-35 minutes, until the filling is bubbly and the biscuits are golden brown.

      Step 6: The Final Touch

      Optional but highly recommended: Brush the hot biscuits with melted butter mixed with a pinch of garlic powder and parsley. This gives them that authentic Red Lobster shine and flavor.

      💡 The Kitchen Team’s Pro Tip: Let the pot pie rest for 5-10 minutes after baking. This allows the filling to set slightly, making it easier to serve without turning into a soupy mess.

      🍽 How to Serve This Red Lobster Biscuit Chicken Pot Pie

      This dish is a meal in itself, but it pairs beautifully with:

      • A crisp green salad with lemon vinaigrette to cut through the richness
      • Steamed broccoli or green beans for extra veggies
      • A glass of chilled Chardonnay or a light lager

      For a true comfort food feast, serve it alongside mashed potatoes or a simple side of rice. The leftovers (if any!) are even better the next day.

      ❄️ Storage and Reheating Tips

      Refrigerate: Store leftovers in an airtight container for up to 4 days. The biscuits will soften slightly, but the flavor remains amazing.

      Freeze: Assemble the entire dish (without baking) and freeze for up to 3 months. Bake from frozen, adding 15-20 minutes to the cooking time.

      Reheat: For best results, reheat in a 350°F oven for 10-15 minutes. The microwave works in a pinch but will make the biscuits soggy.

      💡 The Kitchen Team’s Pro Tip: To revive leftover biscuits, pop them in an air fryer at 350°F for 3-4 minutes. They’ll crisp right back up!

      🎨 5 Delicious Variations to Try

      1. Turkey Pot Pie: Use leftover Thanksgiving turkey instead of chicken.
      2. Vegetarian Version: Swap chicken for canned chickpeas or extra mushrooms, and use cream of mushroom soup.
      3. Spicy Kick: Add ½ teaspoon cayenne pepper and use pepper jack cheese in the biscuits.
      4. Herb Garden: Stir in fresh thyme, rosemary, or sage into the filling for an herby twist.
      5. Bacon Lover’s: Sprinkle cooked, crumbled bacon over the biscuits before baking.

      ❓ Frequently Asked Questions About Red Lobster Biscuit Chicken Pot Pie

      Can I use homemade biscuit dough instead of this recipe?

      Absolutely! This recipe mimics the Red Lobster biscuits, but any drop biscuit recipe will work. Just make sure it’s cheesy and garlicky for that signature taste.

      Can I make this gluten-free?

      Yes! Use a gluten-free all-purpose flour blend (with xanthan gum) for the biscuits and a gluten-free cream of chicken soup. The texture will be slightly different but still delicious.

      Can I prepare this in advance?

      Definitely. Assemble the filling and biscuit dough separately. Store the filling in the fridge and the dough in the freezer. When ready, top and bake. Add 5-10 minutes to the baking time if starting from cold.

      Why are my biscuits dense and not fluffy?

      Overmixing is the #1 culprit. Mix the dough just until combined—lumps are okay! Also, check your baking powder for freshness.

      Can I use canned biscuits instead?

      In a pinch, yes. Use refrigerated flaky biscuits and add garlic powder and cheese on top. But homemade is always better for that authentic Red Lobster experience.

      How do I make the filling creamier?

      Add ½ cup of heavy cream or cream cheese to the filling mixture. This will give it a richer, velvety texture.

      Can I add more vegetables?

      Absolutely! Mushrooms, celery, green beans, or even spinach work beautifully. Just sauté them first to remove excess moisture.

      What’s the best pan to use?

      A 9×13 inch baking dish or a 10-inch cast iron skillet works perfectly. Cast iron gives you a crispier bottom crust.

      Can I double this recipe?

      Yes! Use a larger dish (like a 9×13 and an 8×8) or bake in two separate dishes. Cooking time may increase by 5-10 minutes.

      How do I know when it’s done?

      The filling should be bubbly around the edges, and the biscuits should be golden brown. A toothpick inserted into a biscuit should come out clean.

      📌 Share This Recipe!

      Loved this Red Lobster Biscuit Chicken Pot Pie Recipe and Tips? Save it to your Pinterest boards, share it with your family, and tag us @cookingwithemy when you make it. We love seeing your creations!

      📌 Save This Recipe for Later!

      Pin this Red Lobster Biscuit Chicken Pot Pie Recipe and Tips to your favorite comfort food board on Pinterest so you never lose it.

      👉 Follow Cooking With Emy on Pinterest

      Recipe by The Kitchen Team at cookingwithemy.com | All rights reserved.

      clock clock iconcutlery cutlery iconflag flag iconfolder folder iconinstagram instagram iconpinterest pinterest iconfacebook facebook iconprint print iconsquares squares iconheart heart iconheart solid heart solid icon

      Red Lobster Biscuit Chicken Pot Pie Recipe and Tips


      • Author:
        Chef Emy

      Description

      This comforting dish combines tender chicken and veggies in a creamy sauce, topped with warm, fluffy Red Lobster-style biscuits. Perfect for a cozy dinner, this pot pie brings together the best of home cooking with a touch of restaurant flair.


      Ingredients


      Scale
      • 3 cups cooked chicken, diced You can use rotisserie chicken to save time.
      • 1 cup frozen mixed vegetables Peas, carrots, and corn.
      • 1 cup cream of chicken soup
      • 1 teaspoon garlic powder For filling and biscuit topping.
      • 1 teaspoon onion powder
      • to taste salt and pepper
      • ½ cup chicken broth
      • 2 ½ cups all-purpose flour
      • 1 tablespoon baking powder
      • 1 teaspoon salt
      • ½ cup unsalted butter Cold and cubed.
      • 1 cup shredded cheddar cheese
      • ¾ cup milk
      • 1 tablespoon garlic powder For a Red Lobster touch.

      Instructions

      1. Preheat your oven to 375°F (190°C).
      2. In a large mixing bowl, combine the cooked chicken, frozen mixed vegetables, cream of chicken soup, garlic powder, onion powder, salt, pepper, and chicken broth. Mix until thoroughly combined.
      3. Transfer the filling to your casserole or pie dish, spreading it evenly.
      4. In another bowl, whisk together the flour, baking powder, and salt for the biscuit topping. Cut in the cold butter until the mixture resembles coarse crumbs.
      5. Stir in the shredded cheddar cheese and garlic powder. Gradually add the milk, mixing just until combined. Do not overmix.
      6. Drop spoonfuls of the biscuit dough over the chicken filling, making sure to cover it evenly.
      7. Bake in the preheated oven for 30 minutes, or until the biscuit topping is golden brown and the filling is bubbly.
      8. Allow to cool for a few minutes before serving.

      Notes

      You can use rotisserie chicken to save time.
      Feel free to customize the vegetables based on your preference or what’s in season.
      This dish can be made ahead and stored in the refrigerator for a couple of days before baking; just add a few extra minutes to the baking time if going from cold.