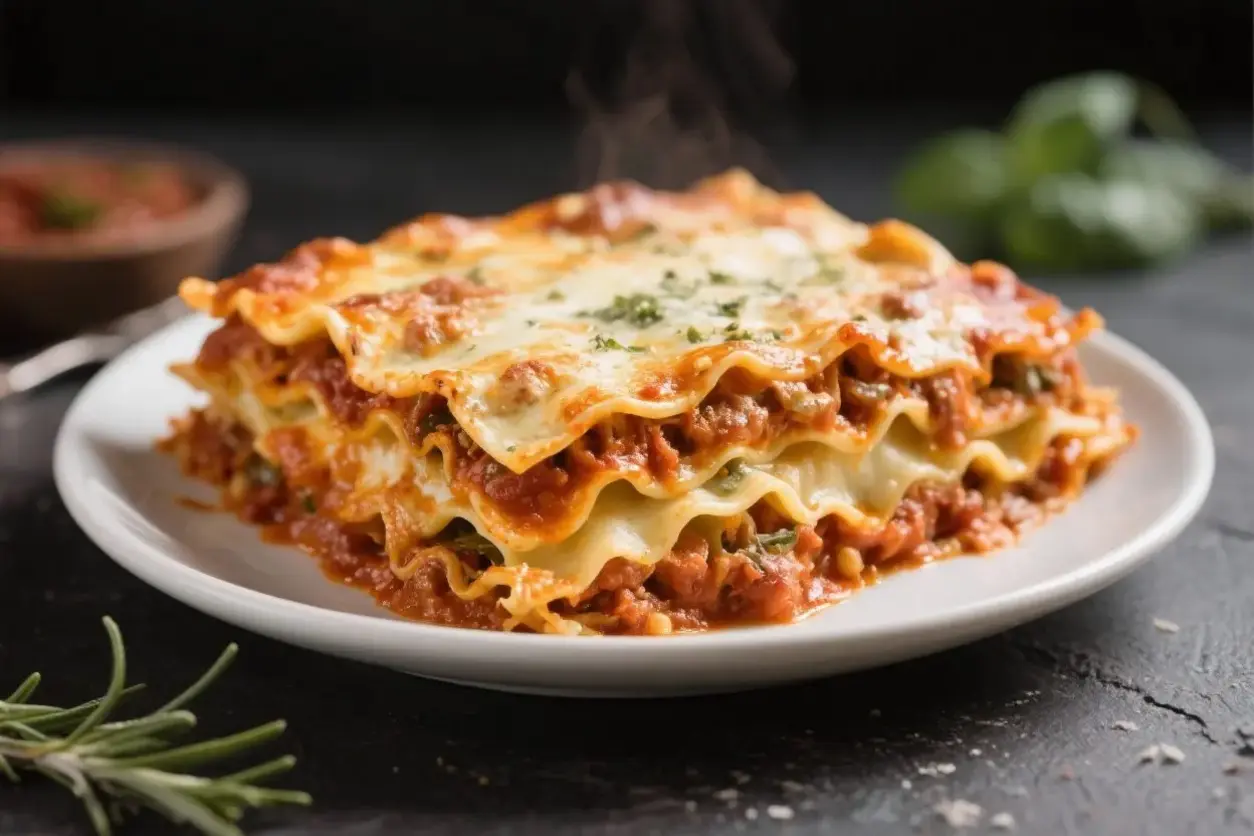
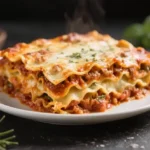
Classic From-Scratch Lasagna

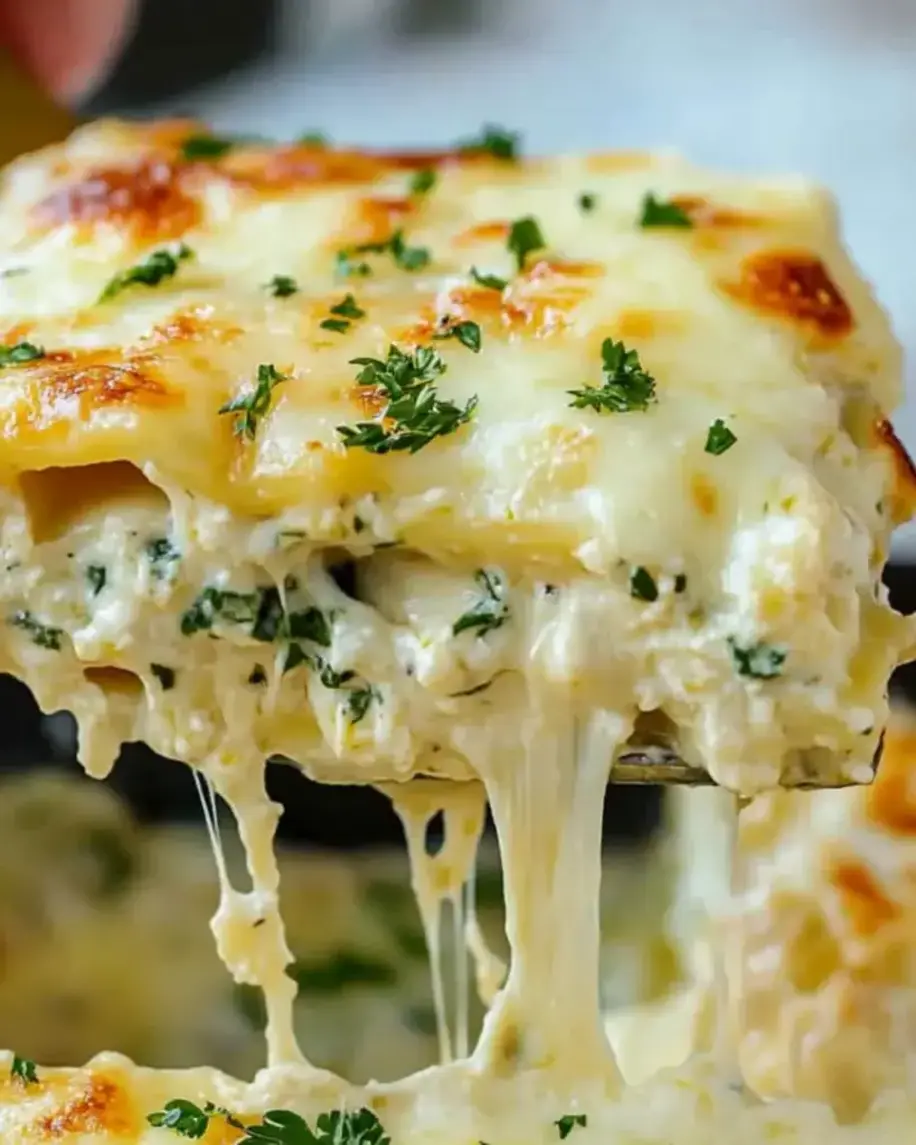
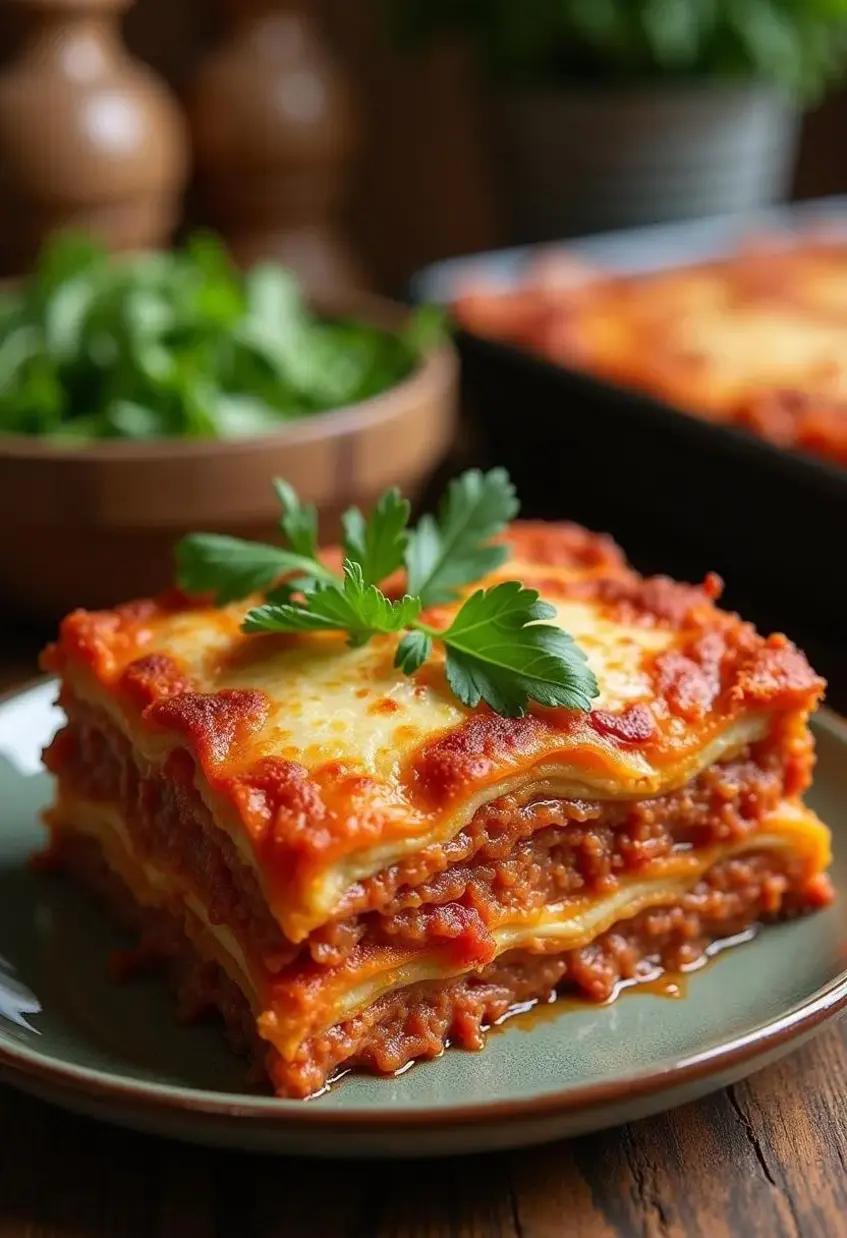
This classic homemade lasagna is layered with savory meat sauce, smooth ricotta, and generous amounts of melted cheese. It’s a comforting, crowd-pleasing dinner that’s perfect for family meals or special gatherings. Made with straightforward ingredients and traditional flavors, it delivers that timeless homemade taste. This is a dependable recipe you’ll turn to whenever you’re craving a hearty Italian-inspired dish.

Print

clock clock iconcutlery cutlery iconflag flag iconfolder folder iconinstagram instagram iconpinterest pinterest iconfacebook facebook iconprint print iconsquares squares iconheart heart iconheart solid heart solid icon

Classic Homemade Lasagna Recipe Comforting, Saucy, and Cheesy


  • Author: Chef Emy

Description

Few dishes feel as comforting as a pan of classic homemade lasagna bubbling out of the oven. Its layered with rich meat sauce, creamy ricotta, and plenty of gooey cheese. This version keeps things simple and reliable, with familiar flavors and a straightforward method.


Ingredients

Scale
  • 1 pound (450 g) ground beef (8590% lean) or a mix of beef and Italian sausage
  • 1 medium yellow onion, finely diced
  • 4 cloves garlic, minced
  • 1 can (28 ounces/800 g) crushed tomatoes
  • 1 can (15 ounces/425 g) tomato sauce
  • 2 tablespoons tomato paste
  • 1 teaspoon sugar (optional, to balance acidity)
  • 1 teaspoon dried oregano
  • 1 teaspoon dried basil
  • ½ teaspoon dried thyme or Italian seasoning
  • ½ teaspoon red pepper flakes (optional, for mild heat)
  • Salt and black pepper, to taste
  • 2 tablespoons olive oil
  • 12 lasagna noodles (regular or no-boil)
  • 15 ounces (425 g) ricotta cheese
  • 1 large egg
  • ½ cup grated Parmesan cheese, plus extra for topping
  • 2 tablespoons chopped fresh parsley, plus more for garnish (or 1 teaspoon dried)
  • 34 cups shredded mozzarella cheese
  • Water for boiling noodles (if using regular)

Instructions

  1. Prep the oven and pan: Preheat the oven to 375°F (190°C). Lightly oil a 9×13-inch baking dish or similar casserole pan.
  2. Cook the noodles (if not using no-boil): Bring a large pot of salted water to a boil.Cook lasagna noodles until very al dente, about 2 minutes less than package time. Drain and lay flat on a lightly oiled sheet to prevent sticking.
  3. Brown the meat: Heat olive oil in a large skillet or pot over medium-high heat. Add ground beef (and sausage if using) and cook, breaking it up, until browned and no longer pink.Drain excess fat if needed.
  4. Sauté aromatics: Add onion and cook until softened, about 45 minutes. Stir in garlic and cook 30 seconds until fragrant.
  5. Build the sauce: Stir in crushed tomatoes, tomato sauce, and tomato paste. Add oregano, basil, thyme, red pepper flakes (if using), sugar (if needed), and a generous pinch of salt and pepper.Reduce heat and simmer 1520 minutes, stirring occasionally. Taste and adjust seasoning.
  6. Mix the ricotta layer: In a bowl, combine ricotta, egg, Parmesan, parsley, a pinch of salt, and a few grinds of black pepper. Mix until smooth.
  7. Layer the lasagna: Spread a thin layer of sauce on the bottom of the baking dish.Add a layer of noodles, slightly overlapping.
  8. First layer: Spread one-third of the ricotta mixture over the noodles. Sprinkle with mozzarella. Spoon sauce over the top.
  9. Repeat layers: Add another layer of noodles, then ricotta, mozzarella, and sauce.Repeat for a total of three layers, ending with sauce on top.
  10. Finish with cheese: Sprinkle remaining mozzarella and a handful of Parmesan over the top. Cover the pan loosely with foil, tenting it so the cheese doesnt stick.
  11. Bake: Bake covered for 25 minutes. Remove foil and bake another 1520 minutes, until the top is bubbly and lightly golden.
  12. Rest before slicing: Let the lasagna rest for at least 1520 minutes.This helps it set, making cleaner slices and better texture.
  13. Serve: Garnish with extra parsley and a little Parmesan. Slice and serve warm.

30-Minute Chicken Lasagna Recipe

30-Minute Chicken Lasagna Recipe: The Ultimate Weeknight Dinner Savior

Prep Time10 minutes
Cook Time20 minutes
Total Time30 minutes
Servings8 servings
DifficultyEasy

Welcome to The Kitchen Team, where we believe that comfort food shouldn’t take all day to make. Today, we’re sharing our 30-Minute Chicken Lasagna Recipe that will revolutionize your weeknight dinner game. This isn’t just any lasagna – it’s a creamy, cheesy, utterly satisfying masterpiece that comes together faster than you can order takeout.

Lasagna is the ultimate comfort food, but traditional recipes can take hours. Between boiling noodles, making sauce, browning meat, and layering everything, you’re looking at a serious time commitment. That’s why we created this quick chicken lasagna that uses smart shortcuts without sacrificing any of that homemade flavor you crave.

Whether you’re a busy parent, a working professional, or just someone who loves great food but values their time, this recipe is for you. We’ve tested this in our own kitchens countless times to ensure every bite is as delicious as the last. Ready to make the best chicken lasagna of your life in just 30 minutes? Let’s get cooking!

Why This Is the Best 30-Minute Chicken Lasagna Recipe

We’ve perfected this recipe to be faster, easier, and more flavorful than any other chicken lasagna you’ll find. Here’s why it works:

  • No-boil noodles are the secret weapon – They cook perfectly in the oven while absorbing all that creamy sauce, saving you 10-15 minutes of boiling time.
  • Rotisserie chicken is your best friend – Using pre-cooked rotisserie chicken eliminates the need to cook and shred chicken from scratch. This alone saves 20+ minutes!
  • A creamy shortcut sauce – Our spinach cream sauce comes together in just 10 minutes, no need to make a traditional béchamel that takes twice as long.
  • One-pan assembly – Everything comes together in a single baking dish, meaning fewer dishes to wash and less stress.
💡 The Kitchen Team’s Pro Tip: For the creamiest lasagna, let it rest for 5 minutes after baking before cutting. This allows the layers to set and prevents a soupy mess on your plate. Patience pays off!

Ingredients for 30-Minute Chicken Lasagna

Here’s everything you’ll need for this quick and easy chicken lasagna. We’ve organized it by component for easy shopping and prep.

For the Noodles & Chicken

  • 9 no-boil lasagna noodles (regular or gluten-free)
  • 4 cups shredded rotisserie chicken (about 1 large chicken)
  • 1 tablespoon olive oil

For the Spinach Cream Sauce

  • 1 medium onion, finely chopped
  • 4 tablespoons unsalted butter
  • 1/3 cup all-purpose flour
  • 2 1/2 cups chicken broth (low sodium preferred)
  • 1 1/2 cups half and half (or equal parts heavy cream and milk)
  • 5 ounces fresh spinach, coarsely chopped
  • 2 teaspoons sea salt
  • 1/2 teaspoon black pepper
  • 3 cloves garlic, minced

For the Ricotta Cheese Mixture

  • 15 ounces ricotta cheese (whole milk for best texture)
  • 1 large egg
  • 1/4 cup fresh parsley, chopped
  • 1/4 cup Parmesan cheese, grated
  • 1/2 teaspoon salt
  • 1/4 teaspoon black pepper

For Topping

  • 3 cups mozzarella cheese, shredded (divided)
  • Extra Parmesan for garnish
  • Fresh basil or parsley for garnish

Step-by-Step Instructions

Follow these simple steps for the best 30-minute chicken lasagna of your life. We’ve timed everything so you can have dinner on the table in exactly 30 minutes.

Step 1: Preheat and Prep (5 minutes)

  1. Preheat your oven to 375°F (190°C).
  2. Shred your rotisserie chicken, removing skin and bones. You should have about 4 cups of shredded meat.
  3. Chop the onion, mince the garlic, and roughly chop the spinach.

Step 2: Make the Spinach Cream Sauce (10 minutes)

  1. In a large skillet or saucepan, heat olive oil over medium heat. Add the chopped onion and sauté until softened, about 3 minutes.
  2. Add the butter and let it melt completely. Sprinkle in the flour and whisk continuously for 1-2 minutes until the mixture turns a light golden color (this is your roux).
  3. Gradually pour in the chicken broth while whisking constantly to prevent lumps. Then add the half and half, continuing to whisk until smooth.
  4. Bring the sauce to a gentle simmer and cook for 3-4 minutes, stirring occasionally, until it thickens enough to coat the back of a spoon.
  5. Stir in the minced garlic and chopped spinach. Cook for 1-2 minutes until the spinach wilts. Remove from heat and set aside.
💡 The Kitchen Team’s Pro Tip: If your sauce seems too thick, add a splash of chicken broth or milk to thin it out. If it’s too thin, let it simmer a minute longer. The perfect sauce should coat a spoon but still pour easily.

Step 3: Prepare the Ricotta Mixture (3 minutes)

  1. In a medium bowl, combine the ricotta cheese, egg, 1 cup of shredded mozzarella, Parmesan cheese, parsley, salt, and pepper.
  2. Mix well until everything is evenly combined. Set aside.

Step 4: Assemble the Lasagna (5 minutes)

  1. Spread a thin layer of the spinach cream sauce (about 1/2 cup) on the bottom of a 9×13 inch baking dish.
  2. Place 3 no-boil lasagna noodles on top, breaking them if needed to fit.
  3. Spread 1/3 of the ricotta mixture over the noodles, then top with 1/3 of the shredded chicken.
  4. Pour 1/3 of the remaining cream sauce over the chicken, spreading it evenly.
  5. Repeat the layers: noodles, ricotta mixture, chicken, cream sauce – two more times.
  6. For the final layer, top with the remaining cream sauce and sprinkle the remaining 2 cups of mozzarella cheese evenly over the top.

Step 5: Bake and Serve (12 minutes)

  1. Cover the baking dish with foil (spray the foil with cooking spray to prevent sticking) and bake for 10 minutes.
  2. Remove the foil and bake for an additional 5-8 minutes, or until the cheese is bubbly and golden brown on top.
  3. Remove from the oven and let rest for 5 minutes before cutting. This is crucial for clean slices!
  4. Garnish with fresh parsley or basil, and extra Parmesan if desired. Serve hot and enjoy!
💡 The Kitchen Team’s Pro Tip: For an extra golden, bubbly top, switch your oven to broil for the last 1-2 minutes of baking. Watch it carefully so it doesn’t burn – you want that perfect cheesy crust!

Serving Suggestions

This 30-minute chicken lasagna is a complete meal on its own, but here are some delicious ways to round out your dinner:

  • Garlic Bread: Serve with crusty garlic bread or breadsticks to soak up any extra sauce.
  • Simple Salad: A crisp green salad with lemon vinaigrette balances the richness of the lasagna perfectly.
  • Roasted Vegetables: Try roasted broccoli, asparagus, or zucchini for extra nutrients and color.
  • Wine Pairing: A crisp Pinot Grigio or light Chardonnay complements the creamy sauce beautifully.

Storage & Reheating Tips

This lasagna stores beautifully, making it perfect for meal prep or leftovers.

Refrigerating

Store leftovers in an airtight container in the refrigerator for up to 4 days. The flavors actually meld together and get even better the next day!

Freezing

This lasagna freezes wonderfully. Assemble the entire dish but don’t bake it. Cover tightly with foil and freeze for up to 3 months. When ready to bake, thaw overnight in the refrigerator, then bake as directed (you may need to add 10-15 minutes to the baking time).

Reheating

For best results, reheat individual portions in the microwave for 1-2 minutes, or reheat the whole dish in a 350°F oven for 15-20 minutes. Add a splash of milk or broth if the lasagna seems dry after reheating.

Delicious Variations to Try

Once you’ve mastered this easy chicken lasagna recipe, try these fun variations to keep things exciting:

  • Vegetarian Version: Skip the chicken and add sautéed mushrooms, zucchini, and bell peppers. Use vegetable broth instead of chicken broth.
  • Spicy Southwest Lasagna: Add 1 teaspoon cumin, 1/2 teaspoon chili powder, and a can of diced green chiles to the cream sauce. Use pepper jack cheese instead of mozzarella.
  • Broccoli Chicken Lasagna: Replace the spinach with 2 cups of steamed broccoli florets. Add 1/2 teaspoon nutmeg to the ricotta mixture for extra warmth.
  • Gluten-Free Option: Use gluten-free no-boil lasagna noodles and substitute the all-purpose flour with a 1:1 gluten-free flour blend.
  • Low-Carb/Keto: Replace the noodles with thinly sliced zucchini or eggplant. Use heavy cream instead of half and half, and reduce the flour to 2 tablespoons.
💡 The Kitchen Team’s Pro Tip: When making substitutions, remember that the moisture content of vegetables can affect the final dish. If using zucchini or mushrooms, sauté them first to remove excess water before adding to the lasagna.

Frequently Asked Questions

Can I use regular lasagna noodles instead of no-boil?

Yes, but you’ll need to boil them first according to package directions. This will add about 10 minutes to your prep time. Just be sure to drain them well and lay them flat on a baking sheet so they don’t stick together.

Can I make this chicken lasagna ahead of time?

Absolutely! You can assemble the entire lasagna up to 24 hours in advance. Just cover and refrigerate. When ready to bake, add 10-15 minutes to the baking time since you’re starting with a cold dish.

What can I use instead of ricotta cheese?

Cottage cheese (blended smooth in a food processor) works beautifully as a substitute. You can also use mascarpone for an even creamier texture, or a dairy-free ricotta alternative.

Can I use leftover turkey instead of chicken?

Yes! This is a fantastic way to use up leftover Thanksgiving turkey. Just shred it and use it exactly as you would the chicken. It works perfectly.

How do I prevent my lasagna from being watery?

Make sure your sauce is thick enough before layering (it should coat a spoon). Also, if using frozen spinach, thaw it completely and squeeze out all excess moisture before adding it to the sauce.

Can I add more vegetables to this recipe?

Definitely! Sautéed mushrooms, zucchini, or bell peppers make great additions. Just cook them first to remove excess moisture, then layer them with the chicken.

Is this recipe freezer-friendly?

Yes, it freezes beautifully! Assemble the lasagna in a freezer-safe dish, cover tightly with foil and plastic wrap, and freeze for up to 3 months. Thaw overnight in the refrigerator before baking.

What’s the best way to reheat leftover lasagna?

For individual portions, microwave for 1-2 minutes. For larger portions, reheat in a 350°F oven covered with foil for 15-20 minutes. Add a splash of milk if it seems dry.

Can I use heavy cream instead of half and half?

Absolutely! Heavy cream will make the sauce even richer and creamier. You can also use whole milk for a lighter version, though the sauce won’t be as thick.

How do I know when the lasagna is done baking?

The lasagna is done when the sauce is bubbly around the edges and the cheese on top is melted and golden brown. A knife inserted into the center should come out hot to the touch.

Share This Recipe!

If you loved this 30-minute chicken lasagna recipe, we’d be so grateful if you shared it with your friends and family! Tag us on social media when you make it – we love seeing your creations.

Don’t forget to save this recipe to your Pinterest boards for later!

📌 Save This Recipe for Later!

Pin this 30-Minute Chicken Lasagna Recipe to your favorite dinner board so you never lose it!

Follow Cooking With Emy on Pinterest

clock clock iconcutlery cutlery iconflag flag iconfolder folder iconinstagram instagram iconpinterest pinterest iconfacebook facebook iconprint print iconsquares squares iconheart heart iconheart solid heart solid icon

Chicken Lasagna Recipe


  • Author:
    Chef Emy

Description

This Chicken Lasagna is a creamy and delicious twist on a classic Italian dish. Layers of pasta, tender chicken, and a rich spinach cream sauce are topped with a blend of cheeses and baked to perfection.


Ingredients


Scale
  • 9 lasagna noodles, cooked al dente
  • 4 cups shredded rotisserie chicken (or cooked chicken breast)
  • 1 tablespoon olive oil
  • 1 medium onion, finely chopped
  • 4 tablespoons unsalted butter
  • 1/3 cup all-purpose flour
  • 2 1/2 cups chicken broth
  • 1 1/2 cups half and half (or equal parts heavy cream and milk)
  • 5 ounces fresh spinach, coarsely chopped
  • 2 teaspoons sea salt
  • 1/2 teaspoon black pepper
  • 3 cloves garlic, minced
  • 15 ounces ricotta cheese
  • 1 large egg
  • 1/4 cup parsley, chopped
  • 1/4 cup Parmesan cheese, grated
  • 3 cups mozzarella cheese, shredded, divided

Instructions

  1. Cook noodles and prep: Preheat oven to 375°F (190°C). Cook lasagna noodles according to package directions. Rinse with cold water and drain. Shred chicken.
  2. Make spinach cream sauce: Sauté onion in olive oil until softened. Add butter and whisk in flour until golden. Gradually whisk in chicken broth and half and half until smooth. Simmer for 5 minutes, or until thickened. Stir in garlic and spinach; remove from heat.
  3. Make ricotta cheese sauce: In a bowl, combine ricotta cheese, egg, 2 cups mozzarella cheese, Parmesan cheese, and parsley.
  4. Assemble lasagna: Spread a thin layer of spinach cream sauce in a 9×13 inch baking dish. Layer 3 noodles, half of the ricotta mixture, half of the chicken, and 1/3 of the spinach sauce. Repeat layers. Top with remaining noodles, spinach sauce, and 1 cup mozzarella cheese.
  5. Bake: Cover with foil (use toothpicks to prevent sticking) and bake for 45 minutes. Uncover and broil for 2-3 minutes to brown the cheese. Let rest for 10 minutes before slicing and serving.

Notes

You can use different types of pasta, but adjust cooking time as needed.
Leftovers can be stored in the refrigerator for up to 3 days.

Nutrition

  • Calories: 490kcal
  • Sugar: 5g
  • Protein: 30g


Gordon Ramsay’s Healthy Vegetarian Lasagna Recipe

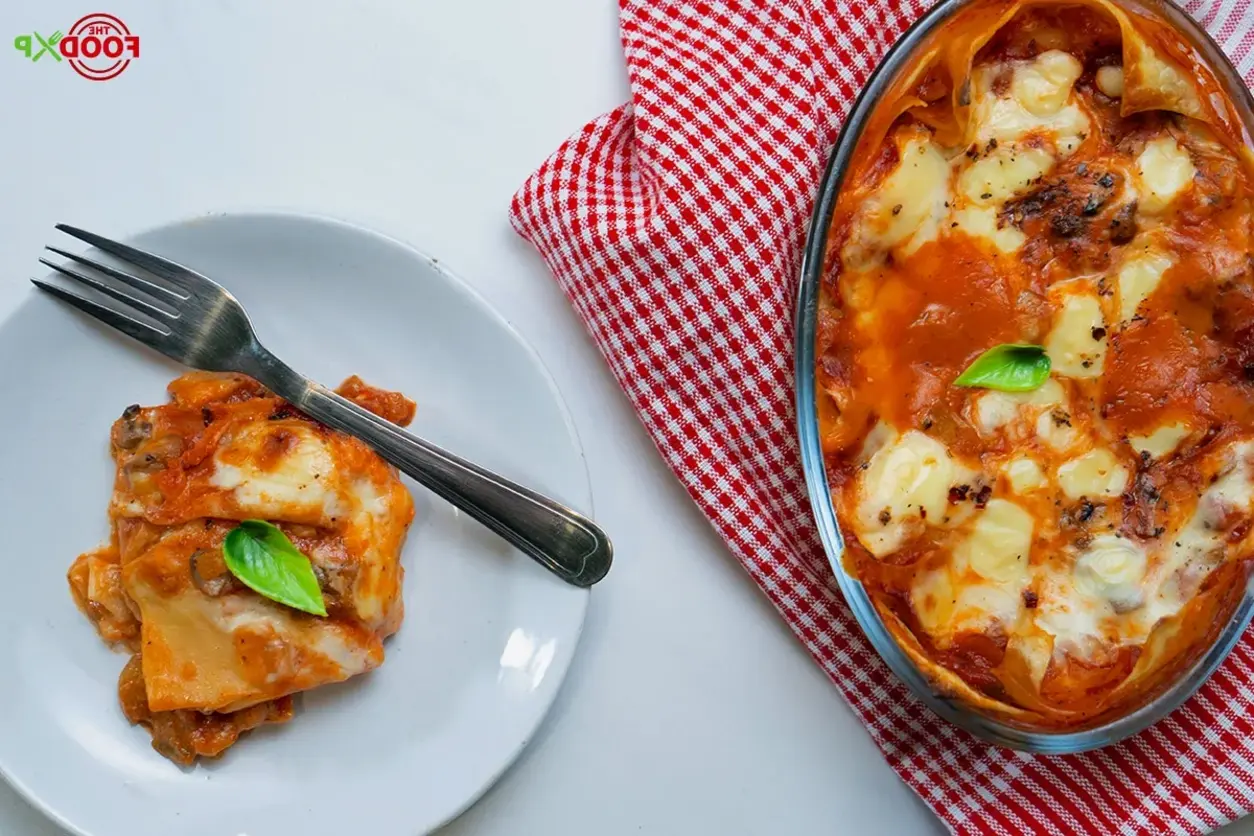
Make this delicious Gordon Ramsay’s Vegetarian Lasagna in just 3 easy steps. Fresh vegetables, tomato sauce, and cheese make this the best vegetarian lasagna. Try this recipe from THEFOODXP blog. #gordonramsayvegetarianlasagna #gordonramsayvegetarianlasagnarecipe #gordonramsayrecipes #vegetarianlasagna #vegetarianlasagnarecipe #vegetarianlasagnahealthy

Print

clock clock iconcutlery cutlery iconflag flag iconfolder folder iconinstagram instagram iconpinterest pinterest iconfacebook facebook iconprint print iconsquares squares iconheart heart iconheart solid heart solid icon

Gordon Ramsay Vegetarian Lasagna Recipe


  • Author: Chef Emy

Description

This Gordon Ramsay Vegetarian lasagna is cheesy, creamy, and packed with flavor. Filled with nutritious veggies and a crowd-pleasing lunch/dinner idea, it is better than any restaurant version of lasagna. It is a simple make-ahead recipe that is easy to store and freeze. Everyone loves this satisfying recipe on weekdays or weekends.


Ingredients

Scale
  • 2 Tablespoon Oil
  • 67 Lasagna Sheets
  • 1 Tablespoon Butter
  • 1 Tablespoon Flour
  • 3 Cups Milk
  • 1 Cup Cheddar Cheese
  • 4 Chopped Onions
  • 4 Cloves Garlic
  • 3 Chili Peppers
  • 200 Gm Butternut Squash
  • 50 Gm Mushrooms
  • 4 No Tomatoes
  • 1 Cup Tomato Puree
  • 2 Cup Vegetable Stock
  • Black Pepper
  • 1 Tablespoon Oregano
  • Salt

Instructions

  1. Finely chop app the vegetables
  2. Pan-fry onions, chili peppers, butternut squash, and mushrooms. Cook the veggies until they are translucent. Season them with salt, pepper, and oregano.
  3. Then, add tomatoes, tomato puree, and vegetable stock. Simmer the sauce until it is thickened.
  4. Further, prepare the bechamel sauce in another pan. Add butter, flour, and milk to prepare the roux. Mix the roux nicely. Finally, add cheddar cheese to the pan and let the sauce thicken evenly.
  5. Meanwhile, you can put the lasagna sheets to boil.
  6. Take a large oven-proof dish to put together all the elements. Spray the ovenproof dish with the cooking spray. Spread the red tomato sauce into the pan, and pour the bechamel sauce over the red sauce, followed by boiled lasagna sheets.
  7. Repeat the same process for the next layering. Garnish it with cheddar cheese on the top to achieve a creamy and cheesy filling.
  8. Finally, it is time to bake the vegetarian lasagna. Place the dish in the oven and bake the lasagna for 20 minutes at 180 C.
  9. Your Gordon Ramsay style Lasagna is ready.

Notes

Notes I like to boil my lasagna sheets at high heat until they are al dente; otherwise, they can get soggy while cooking. Another common tip to prevent my lasagna sheets from sticking is drizzling some olive oil after they are boiled. I like to use some trustworthy veggies in this recipe: zucchini, mushrooms, squash, broccoli, carrots, potatoes, cauliflower, and broccoli. Gordon Ramsays vegetarian lasagna at home is flavorful because I avoid adding store-bought sauces. Instead, I make the béchamel roux at home, adding the essence of yummy lasagna. I know its difficult to resist the temptation to jump in, but let the lasagna sit for at least 15 minutes before serving. This allows the lasagna to stay firm and prevent it from falling apart. I made a rookie mistake earlier by not dicing my veggies properly. This led to uneven filling and uneven cooking time. If you dont want to bite into raw mushrooms and veggies, cut them into small bite-sized pieces, allowing the sauce to blend properly. Dont leave empty loopholes in your lasagna.

🍝 The Godfather Sicilian Lasagna – A Rich, Flavorful Feast! 🍷

Section Details
📋 Recipe Overview Title, prep/cook time, servings, difficulty
🥘 Introduction Story behind The Godfather Sicilian Lasagna
⭐ Why This Recipe Works Unique selling points
🛒 Ingredients Complete list with quantities
👩‍🍳 Instructions Step-by-step cooking guide
🍽️ Serving Suggestions Best ways to serve
❄️ Storage Tips How to store and reheat
🔄 Variations Customization ideas
❓ FAQ Common questions answered
📌 Share & Pin Social sharing & Pinterest

🍝 The Godfather Sicilian Lasagna – A Rich, Flavorful Feast! 🍷

An offer you can’t refuse: layers of tender pasta, savory meat sauce, and creamy ricotta—just like Nonna used to make!

⏱️ Prep: 20 mins
🔥 Cook: 45 mins
⏳ Total: 1 hr 5 mins
👥 Servings: 8
📊 Difficulty: Medium
🔥 Calories: ~420 per slice

🥘 The Godfather Sicilian Lasagna: A Cinematic Culinary Masterpiece

Welcome to cookingwithemy.com, where we bring the flavors of Italy straight to your kitchen! Today, we’re unveiling a recipe that’s as legendary as the film that inspired it: The Godfather Sicilian Lasagna. This isn’t just any lasagna—it’s a rich, flavorful feast that pays homage to the hearty, rustic cooking of Sicily.

Imagine layers of tender pasta enveloped in a slow-simmered meat sauce, punctuated by creamy ricotta and a blanket of melted mozzarella. Every bite is a journey to the sun-drenched hills of Sicily, where family dinners are sacred and recipes are passed down through generations. Whether you’re hosting a Sunday feast or simply craving comfort food, this lasagna delivers an experience that’s both nostalgic and indulgent.

Our version stays true to Sicilian traditions—using a blend of ground beef and pork for depth, crushed tomatoes for a robust sauce, and a trio of cheeses that melt into pure heaven. It’s the kind of dish that makes you want to pour a glass of red wine, gather your loved ones, and savor every moment. Ready to channel your inner Nonna? Let’s get cooking!

⭐ Why This Is the Best Sicilian Lasagna Recipe

  • Authentic Sicilian Flavors: We use a combination of ground beef and pork, slow-simmered with garlic, oregano, and basil—just like traditional Sicilian ragù.
  • Perfectly Balanced Layers: The ratio of meat sauce to ricotta to pasta is meticulously calculated so every forkful is harmonious.
  • No-Boil Noodles Option: Save time with no-boil lasagna noodles without sacrificing texture or flavor.
  • Make-Ahead Friendly: Assemble the night before and bake when ready—perfect for busy families.
  • Crowd-Pleasing Portions: Generously serves 8, making it ideal for dinner parties or meal prep.
💡 The Kitchen Team’s Pro Tip: For an extra layer of flavor, add a pinch of cinnamon to the meat sauce—a secret Sicilian trick that adds warmth without overpowering.

🛒 Ingredients for The Godfather Sicilian Lasagna

Everything you need to create this masterpiece. We recommend using high-quality ingredients for the best results.

For the Meat Sauce:

  • 1 pound ground beef (80/20 blend)
  • 1 pound ground pork
  • 1 large onion, finely chopped
  • 4 cloves garlic, minced
  • 2 (28-ounce) cans crushed tomatoes
  • 1 (15-ounce) can tomato sauce
  • 1 teaspoon dried oregano
  • 1 teaspoon dried basil
  • Salt and freshly ground black pepper, to taste
  • 2 tablespoons olive oil

For the Cheese Mixture:

  • 32 ounces (4 cups) whole milk ricotta cheese
  • 2 large eggs, beaten
  • 1 cup grated Parmesan cheese, divided
  • ½ cup chopped fresh parsley (optional)

For Assembly:

  • 1 pound lasagna noodles (regular or no-boil)
  • 2 cups shredded mozzarella cheese
  • Fresh basil leaves, for garnish

👩‍🍳 Step-by-Step Instructions

Follow these detailed steps to create the perfect Sicilian lasagna. Don’t rush the sauce—it’s the heart of the dish!

Step 1: Prepare the Meat Sauce

  1. Heat olive oil in a large Dutch oven or heavy-bottomed pot over medium-high heat. Add ground beef and pork, breaking it apart with a wooden spoon. Cook until browned, about 8-10 minutes. Drain excess grease, leaving about 2 tablespoons for flavor.
  2. Add chopped onion and minced garlic. Sauté for 3-4 minutes until softened and fragrant.
  3. Stir in crushed tomatoes, tomato sauce, oregano, basil, salt, and pepper. Bring to a gentle boil, then reduce heat to low. Simmer uncovered for at least 30 minutes, stirring occasionally. The longer it simmers, the richer the flavor becomes.

Step 2: Cook the Noodles

  1. While the sauce simmers, bring a large pot of salted water to a boil. Cook lasagna noodles according to package directions until al dente (about 8-10 minutes). Drain and rinse with cold water to stop cooking. Lay flat on parchment paper to prevent sticking.
  2. If using no-boil noodles, skip this step—they’ll cook perfectly during baking.

Step 3: Prepare the Ricotta Mixture

  1. In a medium bowl, combine ricotta cheese, beaten eggs, ½ cup Parmesan cheese, and parsley (if using). Mix until smooth and well combined. Season with a pinch of salt and pepper.

Step 4: Assemble the Lasagna

  1. Preheat oven to 375°F (190°C). Spread a thin layer of meat sauce (about 1 cup) on the bottom of a 9×13-inch baking dish.
  2. Layer 4-5 lasagna noodles over the sauce, slightly overlapping if needed.
  3. Spread ⅓ of the ricotta mixture over the noodles, followed by ⅓ of the remaining meat sauce, and ⅓ of the mozzarella cheese. Repeat layers two more times: noodles, ricotta, sauce, mozzarella.
  4. Finish with a final layer of noodles, remaining sauce, remaining mozzarella, and the remaining ½ cup Parmesan cheese.

Step 5: Bake to Perfection

  1. Cover the dish with aluminum foil (spray the foil with cooking spray to prevent sticking). Bake for 25 minutes.
  2. Remove foil and bake for an additional 15-20 minutes, until the cheese is bubbly and golden brown.
  3. Let the lasagna rest for 10 minutes before slicing. This allows the layers to set, making for clean slices.
  4. Garnish with fresh basil leaves and serve warm.
💡 The Kitchen Team’s Pro Tip: For a crispy top, switch the oven to broil for the last 2-3 minutes of baking. Watch carefully to avoid burning!

🍽️ Serving Suggestions

This Sicilian lasagna is a meal in itself, but pair it with these sides for an unforgettable feast:

  • Garlic Bread: Crusty Italian bread brushed with garlic butter and toasted.
  • Simple Green Salad: Arugula, cherry tomatoes, and shaved Parmesan with lemon vinaigrette.
  • Red Wine: A bold Chianti or Nero d’Avola complements the rich meat sauce perfectly.
  • Roasted Vegetables: Eggplant, zucchini, and bell peppers drizzled with olive oil.

❄️ Storage & Reheating Tips

Storage Method Instructions Duration
Refrigerator Cool completely, cover tightly with foil or plastic wrap. Up to 5 days
Freezer (baked) Wrap in foil, then place in a freezer bag. Up to 3 months
Freezer (unbaked) Assemble but don’t bake. Wrap tightly. Up to 3 months
Reheating Bake at 350°F for 20-25 minutes (from refrigerated) or 45 minutes (from frozen).

🔄 Delicious Variations to Try

  • Vegetarian Version: Replace meat with sautéed mushrooms, spinach, and zucchini. Use a mushroom-based marinara.
  • Spicy Sicilian: Add 1 teaspoon red pepper flakes to the meat sauce for a kick.
  • Seafood Lasagna: Substitute shrimp and scallops for the meat, and use a white béchamel sauce instead of tomato.
  • Gluten-Free: Use gluten-free lasagna noodles and ensure all other ingredients are certified gluten-free.
  • Lighter Version: Use ground turkey and part-skim ricotta. Reduce cheese by half.

❓ Frequently Asked Questions

1. Can I make this lasagna ahead of time?

Absolutely! Assemble the lasagna completely, cover, and refrigerate for up to 24 hours before baking. You may need to add 10-15 minutes to the baking time.

2. Can I freeze The Godfather Sicilian Lasagna?

Yes! Both baked and unbaked lasagna freeze beautifully. Wrap tightly in foil and freeze for up to 3 months. Thaw overnight in the refrigerator before reheating.

3. What’s the best cheese to use?

Whole milk ricotta is essential for creaminess. Freshly grated Parmesan and low-moisture mozzarella work best. Avoid pre-shredded cheeses as they contain anti-caking agents.

4. Why is it called “The Godfather” lasagna?

This recipe is inspired by the rich, hearty cooking of Sicilian families, much like the Corleone family traditions portrayed in The Godfather films. It’s a nod to the powerful, comforting flavors of Sicily.

5. Can I use no-boil noodles?

Yes! No-boil lasagna noodles work perfectly. Just increase the sauce slightly (add ½ cup water) to ensure they soften during baking.

6. How do I prevent watery lasagna?

Drain your ricotta well, and don’t overcook the sauce. Let the lasagna rest for 10-15 minutes after baking to allow excess moisture to be absorbed.

7. Can I add vegetables to this recipe?

Definitely! Sautéed spinach, mushrooms, or zucchini make excellent additions. Layer them between the ricotta and sauce.

8. What’s the secret to a rich meat sauce?

Simmering the sauce for at least 30 minutes (or up to 2 hours) develops deep flavors. A splash of red wine added after browning the meat also adds complexity.

9. How many calories per serving?

Each serving (1/8 of the recipe) contains approximately 420 calories. Nutritional values vary based on ingredient brands and substitutions.

10. Can I use ground turkey instead of beef/pork?

Yes! Ground turkey works well, but add a tablespoon of olive oil to prevent dryness. The flavor will be slightly milder.

📌 Love This Recipe? Save It for Later!

Pin this The Godfather Sicilian Lasagna to your favorite Italian recipes board on Pinterest!


📍 Follow Cooking With Emy on Pinterest

Share with friends and family—this feast is too good to keep to yourself! 🍝🍷

— The Kitchen Team at cookingwithemy.com ❤️

clock clock iconcutlery cutlery iconflag flag iconfolder folder iconinstagram instagram iconpinterest pinterest iconfacebook facebook iconprint print iconsquares squares iconheart heart iconheart solid heart solid icon

The Godfather Sicilian Lasagna


  • Author:
    Chef Emy

Description

Experience the deliciousness of The Godfather Sicilian Lasagna, a hearty dish inspired by Sicilian cuisine and the iconic movie. This layered pasta dish is filled with rich meat sauce, creamy ricotta, and melted cheese, making it perfect for any occasion.


Ingredients


Scale
  • 1 pound ground beef
  • 1 pound ground pork
  • 1 large onion, chopped
  • 4 cloves garlic, minced
  • 2 (28 ounce) cans crushed tomatoes
  • 1 (15 ounce) can tomato sauce
  • 1 teaspoon dried oregano
  • 1 teaspoon dried basil
  • Salt and pepper to taste
  • 1 pound lasagna noodles
  • 32 ounces ricotta cheese
  • 2 cups shredded mozzarella cheese
  • 1 cup grated Parmesan cheese
  • 2 large eggs, beaten
  • Fresh basil leaves for garnish

Instructions

  1. Brown the ground beef and pork in a skillet over medium-high heat. Drain excess grease. Add onion and garlic, and cook until softened.
  2. Stir in crushed tomatoes, tomato sauce, oregano, basil, salt, and pepper. Simmer for at least 30 minutes.
  3. Cook lasagna noodles according to package directions until al dente. Drain and lay flat.
  4. In a bowl, mix ricotta, beaten eggs, and half a cup of Parmesan cheese.
  5. Preheat oven to 375°F (190°C). Spread a layer of meat sauce in a baking dish, followed by layers of noodles, ricotta mixture, mozzarella, and meat sauce. Repeat layers and finish with meat sauce and cheese.
  6. Cover with foil and bake for 30 minutes, then remove foil and bake an additional 15-20 minutes until cheese is bubbly. Let rest before serving.

Notes

Use quality ingredients for the best flavor.
Cook noodles al dente to avoid mushiness.
Let the lasagna rest after baking for easier slicing.
Customize with vegetables if desired.
Can be prepared ahead of time and refrigerated before baking.

Nutrition

  • Calories: 600 Kcal
  • Sugar: 8g
  • Protein: 35g


Pickle-Fix Egg Potato Muffins


🥒 Pickle-Fix Egg Potato Muffins: Tangy Breakfast Cups

By The Kitchen Team · Published on CookingWithEmmy.com

Prep Time 10 minutes
Cook Time 28 minutes
Total Time 38 minutes
Servings 12 muffins
Difficulty Easy

Have you ever had one of those mornings when time seems to slip through your fingers? The coffee is brewing, the kids need lunches, and you’re still in your pajamas at 7:45 a.m. That’s where my Pickle-Fix Egg Potato Muffins come to the rescue! These delightful little bites are not only a quick solution for a busy day but also a savory treat that can impress your loved ones. Picture waking up to the aroma of baked eggs, crispy potatoes, and tangy dill pickles filling your kitchen. These muffins are perfect for breakfast or a satisfying snack, seamlessly fitting into your family’s busy lifestyle while offering a taste of joy. The combination of tender shredded potatoes, fluffy eggs, and the unmistakable zip of dill pickles creates a flavor explosion that will have everyone reaching for seconds. Plus, they’re naturally gluten-free and packed with protein to keep you full until lunch. Let’s get cooking!

⭐ Why These Pickle-Fix Egg Potato Muffins Are the Best

  • Bold pickle flavor: Dill pickles add a tangy, briny kick that cuts through the richness of eggs and cheese.
  • Make-ahead friendly: Bake a batch on Sunday and enjoy quick breakfasts all week.
  • Perfect texture: Shredded potatoes create a tender, almost hash-brown-like base.
  • Customizable: Swap cheese, add bacon, or go vegetarian — the options are endless.
  • Kid-approved: Even picky eaters love these fun, handheld muffin cups.
💡 The Kitchen Team’s Pro Tip: For extra crispy edges, let the muffins cool in the tin for 5 minutes, then run a knife around each cup before removing. The residual steam will keep them moist inside while the edges stay golden.

📋 Ingredients

Makes 12 standard muffin cups

Ingredient Amount
Large eggs 4
Shredded potatoes (squeezed dry) 1 cup
Diced dill pickles ½ cup
Shredded cheddar cheese ½ cup
Chopped scallions ¼ cup
Whole milk ¼ cup
Chopped fresh dill 2 tablespoons
Garlic powder ½ teaspoon
Kosher salt ½ teaspoon
Freshly ground black pepper ¼ teaspoon
Olive oil (for greasing) 1 tablespoon

For the Tangy Pickle Dip (optional but recommended)

Ingredient Amount
Sour cream ½ cup
Mayonnaise 2 tablespoons
Finely chopped fresh dill 1 tablespoon
Lemon juice 1 teaspoon
Garlic powder ¼ teaspoon
Salt and pepper to taste
💡 The Kitchen Team’s Pro Tip: Squeeze the shredded potatoes in a clean kitchen towel to remove as much moisture as possible. This prevents soggy muffins and ensures a firm, fluffy texture.

👩‍🍳 Step-by-Step Instructions

  1. Preheat & prepare: Preheat oven to 375°F (190°C). Grease a 12-cup muffin tin with olive oil or nonstick spray. Make sure every cup is well coated.
  2. Whisk the eggs: In a large mixing bowl, whisk together the eggs and whole milk until light and frothy, about 30 seconds.
  3. Add the mix-ins: Stir in the shredded potatoes (squeezed dry!), diced dill pickles, cheddar cheese, scallions, fresh dill, garlic powder, salt, and pepper. Mix until everything is evenly distributed.
  4. Fill the muffin cups: Divide the mixture evenly among the 12 cups, filling each about ¾ full. Use a spoon to gently press the mixture down so it’s evenly packed.
  5. Bake: Bake for 25–30 minutes, or until the muffins are puffed, golden brown on top, and a toothpick inserted into the center comes out clean. The edges should be slightly crispy.
  6. Cool & serve: Let the muffins cool in the tin for 5 minutes, then carefully remove them to a wire rack. Serve warm with the tangy pickle dip (mix all dip ingredients in a small bowl).
💡 The Kitchen Team’s Pro Tip: For a fun twist, sprinkle a little extra shredded cheddar on top of each muffin during the last 5 minutes of baking. It creates a cheesy, golden crust that’s absolutely irresistible.

🍽️ Serving Suggestions

These Pickle-Fix Egg Potato Muffins are incredibly versatile. Here are some of our favorite ways to enjoy them:

  • Serve alongside a simple green salad dressed with lemon vinaigrette for a light lunch.
  • Pair with crispy bacon or sausage links for a hearty brunch spread.
  • Wrap in foil and take them on the go — they’re perfect for picnics, road trips, or busy school mornings.
  • Top with a dollop of the tangy pickle dip and a sprinkle of fresh chives for an elegant appetizer.
  • Slice in half and toast lightly, then add a fried egg for an extra protein boost.

❄️ Storage & Reheating

These muffins store beautifully, making them a meal-prep superstar.

  • Refrigerator: Store in an airtight container for up to 5 days. Place a paper towel in the container to absorb excess moisture.
  • Freezer: Wrap each muffin individually in plastic wrap, then place in a freezer bag. Freeze for up to 3 months.
  • Reheating: Microwave for 30–45 seconds from refrigerated, or 60–90 seconds from frozen. For a crispy exterior, reheat in a 350°F oven or toaster oven for 8–10 minutes.
💡 The Kitchen Team’s Pro Tip: To refresh frozen muffins, wrap them in foil and reheat at 325°F for 12 minutes. The foil traps steam and keeps them moist while the oven crisps the edges.

🎨 Flavor Variations

Don’t be afraid to get creative! Here are some delicious twists on the original recipe:

  • Bacon & Pickle: Add ¼ cup cooked, crumbled bacon to the batter for a smoky, salty crunch.
  • Spicy Southwest: Swap cheddar for pepper jack, add 2 tablespoons canned green chiles, and use pickled jalapeños instead of dill pickles.
  • Everything Bagel: Sprinkle the tops with everything bagel seasoning before baking. Serve with cream cheese mixed with chopped pickles.
  • Veggie-Packed: Add ¼ cup finely chopped bell peppers, spinach, or zucchini (squeeze out excess water).
  • Dairy-Free: Use dairy-free cheese and unsweetened almond milk. The texture will still be fantastic.

❓ Frequently Asked Questions

Can I use frozen shredded potatoes?

Yes! Thaw them completely and squeeze out as much water as possible with a kitchen towel. Frozen potatoes often contain more moisture, so this step is crucial.

Can I make these egg muffins without pickles?

Absolutely. Omit the pickles and add ¼ cup finely chopped roasted red peppers or sun-dried tomatoes for a different flavor profile.

Are these muffins gluten-free?

Yes, this recipe contains no wheat or gluten. Just be sure your pickles and cheese are certified gluten-free if you have celiac disease.

Can I use a different type of cheese?

Definitely! Gouda, mozzarella, feta, or Monterey Jack all work beautifully. Feta adds a nice salty tang that pairs well with pickles.

Why are my muffins soggy?

Sogginess usually comes from excess moisture in the potatoes. Always squeeze the shredded potatoes very dry. Also, avoid overmixing the batter.

Can I make these in a mini muffin tin?

Yes! Reduce the baking time to 12–15 minutes. Mini muffins are perfect for party appetizers or kid-friendly snacks.

How do I prevent the muffins from sticking?

Grease the muffin tin generously with olive oil or butter. Using a silicone muffin pan also works great and requires less greasing.

Can I add meat to this recipe?

Sure! Cooked sausage, ham, or turkey bacon are excellent additions. Add ¼ cup finely diced meat to the batter.

What can I use instead of fresh dill?

Dried dill works in a pinch — use 2 teaspoons. Or try fresh parsley, chives, or a pinch of dried tarragon for a different herbaceous note.

Can I double this recipe?

Yes! It doubles perfectly. Use two muffin tins and bake in the center of the oven, rotating halfway through for even browning.

📌 Save This Recipe for Later

Pin this image to your Breakfast or Meal Prep board on Pinterest so you never lose it!

📌 Pin on Pinterest

Follow us on @CookingWithEmmy for more delicious recipes!

© 2025 The Kitchen Team – CookingWithEmmy.com. All rights reserved.

clock clock iconcutlery cutlery iconflag flag iconfolder folder iconinstagram instagram iconpinterest pinterest iconfacebook facebook iconprint print iconsquares squares iconheart heart iconheart solid heart solid icon

Pickle-Fix Egg Potato Muffins


  • Author:
    Chef Emy

Description

Delicious muffins made with eggs, shredded potatoes, and dill pickles, perfect for a savory snack or breakfast.


Ingredients


Scale
  • 4 large eggs
  • 1 cup shredded potatoes, squeezed dry
  • 1/2 cup diced dill pickles
  • 1/2 cup shredded cheddar cheese
  • 1/4 cup chopped scallions
  • 1/4 cup whole milk
  • 2 tablespoons chopped fresh dill
  • 1/2 teaspoon garlic powder
  • 1/2 teaspoon kosher salt
  • 1/4 teaspoon freshly ground black pepper
  • 1 tablespoon olive oil, for greasing
  • 1/2 cup sour cream
  • 2 tablespoons mayonnaise
  • 1 tablespoon finely chopped fresh dill
  • 1 teaspoon lemon juice
  • 1/4 teaspoon garlic powder
  • Salt and pepper, to taste

Instructions

  1. Preheat oven to 375°F (190°C) and grease a 12-cup muffin tin with olive oil or nonstick spray.
  2. In a large mixing bowl, whisk together the eggs and milk until well blended.
  3. Add shredded potatoes, diced pickles, cheddar cheese, scallions, dill, garlic powder, salt, and pepper. Mix until evenly combined.
  4. Divide the mixture evenly among the prepared muffin cups, filling approximately 75% full.
  5. Bake for 25-30 minutes, or until the muffins are puffed and golden, and a toothpick inserted into the center comes out clean.
  6. While muffins bake, whisk together sour cream, mayonnaise, dill, lemon juice, garlic powder, salt, and pepper in a small bowl until smooth.
  7. Allow muffins to cool in the pan for 5 minutes. Run a knife around the edges and remove. Serve warm with the dill drip on the side.

Notes

Make sure to squeeze out excess moisture from the shredded potatoes for the best texture.
These muffins can be stored in the refrigerator for up to 3 days.
Feel free to add more vegetables or cheese based on your preferences.

Nutrition

  • Calories: 150
  • Sugar: 1g
  • Protein: 6g


Pickle-Fix Egg Potato Muffins

Pickle-Fix Egg Potato Muffins: The Tangy Breakfast Bake That Saves Your Mornings

By The Kitchen Team | Published on cookingwithemy.com

Prep: 15 mins
Cook: 28 mins
Total: 43 mins
Servings: 12 muffins
Difficulty: Easy

Introduction: The Morning Miracle You Didn’t Know You Needed

Have you ever had one of those mornings when time seems to slip through your fingers? You blink, and suddenly the school bus is rounding the corner, your coffee is cold, and your stomach is growling. That’s where my Pickle-Fix Egg Potato Muffins come to the rescue! These delightful little bites are not only a quick solution for a busy day but also a savory treat that can impress your loved ones. Picture waking up to the aroma of baked eggs, crispy potatoes, and tangy dill pickles filling your kitchen. These muffins are perfect for breakfast or a satisfying snack, seamlessly fitting into your family’s busy lifestyle while offering a taste of joy.

I developed this recipe after a late-night pickle craving collided with a fridge full of leftover shredded potatoes. The result? A portable, protein-packed muffin that tastes like a loaded baked potato but with a briny twist. Whether you’re meal-prepping for the week or need a grab-and-go breakfast, these muffins deliver comfort, crunch, and a zing that wakes up your taste buds. Let’s dive into why this recipe is a game-changer.

Why These Pickle-Fix Egg Potato Muffins Are the Best

There are thousands of egg muffin recipes online, but none quite like this one. Here’s what sets our pickle-fix egg potato muffins apart:

  • Bold, Tangy Flavor: The diced dill pickles and fresh dill create a bright, acidic contrast to the rich eggs and cheese. It’s like a breakfast pickleback – but better.
  • Perfect Texture: Shredded potatoes (squeezed dry!) ensure a crispy exterior and tender interior. No soggy muffins here.
  • High Protein, Low Effort: Each muffin packs about 8g of protein from eggs and cheese, keeping you full until lunch. Yet the prep is just 15 minutes.
  • Meal Prep Champion: These muffins refrigerate and freeze beautifully. Make a batch on Sunday and enjoy all week.
  • Kid-Approved (Even Picky Eaters): The pickle flavor is subtle enough for kids, but the fun shape makes them a hit. My own kids call them “pickle cupcakes.”
💡 The Kitchen Team’s Pro Tip: For the crispiest potatoes, use a clean kitchen towel to wring out every drop of moisture after shredding. This step is non-negotiable for golden, non-mushy muffins.

Ingredients for Pickle-Fix Egg Potato Muffins

Here’s everything you need to make 12 savory muffins. Most ingredients are pantry staples – the star is the humble dill pickle!

Ingredient Amount Notes
Large eggs 4 Room temperature for best texture
Shredded potatoes (squeezed dry) 1 cup Frozen hash browns work too (thaw & squeeze)
Diced dill pickles ½ cup Use your favorite brand – Claussen or Bubbies are great
Shredded cheddar cheese ½ cup Sharp cheddar adds more flavor
Chopped scallions ¼ cup Green and white parts
Whole milk ¼ cup Or 2% – any milk works
Chopped fresh dill 2 tbsp Or 2 tsp dried dill
Garlic powder ½ tsp Not granulated garlic
Kosher salt ½ tsp Reduce if pickles are salty
Freshly ground black pepper ¼ tsp To taste
Olive oil (for greasing) 1 tbsp Or nonstick spray

For the Tangy Dill Dipping Sauce (Optional but Recommended)

Ingredient Amount
Sour cream ½ cup
Mayonnaise 2 tbsp
Fresh dill, finely chopped 1 tbsp
Lemon juice 1 tsp
Garlic powder ¼ tsp
Salt & pepper To taste

Step-by-Step Instructions

Follow these simple steps for perfect pickle-fix egg potato muffins every time. Don’t skip the pro tips – they make all the difference!

  1. Preheat & Prepare: Preheat your oven to 375°F (190°C). Generously grease a 12-cup muffin tin with olive oil or nonstick spray. This ensures easy release.
  2. Mix the Base: In a large bowl, whisk together the 4 eggs and ¼ cup milk until light and frothy. This aerates the eggs, making the muffins fluffier.
  3. Add the Goodies: Fold in the squeezed-dry shredded potatoes, diced pickles, cheddar cheese, scallions, fresh dill, garlic powder, salt, and pepper. Stir until everything is evenly coated in the egg mixture.
  4. Fill the Muffin Tin: Divide the mixture evenly among the 12 cups, filling each about ¾ full. Don’t overfill – they puff up slightly during baking.
  5. Bake to Golden Perfection: Bake for 25-30 minutes, or until the muffins are puffed, golden brown around the edges, and a toothpick inserted in the center comes out clean. The internal temperature should reach 165°F.
  6. Cool & Serve: Let the muffins rest in the pan for 5 minutes, then run a knife around the edges to loosen. Transfer to a wire rack. Serve warm with the tangy dill sauce.
💡 The Kitchen Team’s Pro Tip: For extra crispy tops, switch the oven to broil for the last 1-2 minutes. Watch closely to avoid burning. The pickles will caramelize slightly – incredible flavor!

Serving Suggestions

These muffins are incredibly versatile. Here are my favorite ways to serve them:

  • Breakfast Plate: Pair 2-3 muffins with a side of fresh fruit or a simple arugula salad dressed with lemon vinaigrette.
  • Brunch Star: Arrange on a platter with the dill dipping sauce, plus extra pickles and cherry tomatoes for a stunning brunch spread.
  • Lunchbox Hero: Pack cold or reheated – they’re delicious at room temperature. Add a small container of sauce for dipping.
  • Post-Workout Snack: The protein and carbs make these an excellent recovery bite. I often grab two after a morning run.

Storage & Reheating

One of the best things about this recipe is how well it stores. Here’s how to keep them fresh:

Method Details Duration
Refrigerator Place cooled muffins in an airtight container with paper towels to absorb moisture. Up to 5 days
Freezer Wrap individually in plastic wrap, then place in a freezer bag. Remove as much air as possible. Up to 3 months
Reheat (Oven) Bake at 350°F for 8-10 minutes (from fridge) or 15 minutes (from frozen).
Reheat (Microwave) Microwave on high for 30-45 seconds. The texture will be softer but still delicious.
💡 The Kitchen Team’s Pro Tip: To refresh frozen muffins, wrap in a damp paper towel before microwaving. This adds steam and prevents them from drying out.

Delicious Variations to Try

Once you master the base recipe, experiment with these twists:

  • Spicy Pickle Muffins: Add 1-2 tablespoons of pickle brine and a minced jalapeño (seeds removed) for heat. Use pepper jack cheese instead of cheddar.
  • Bacon & Pickle: Crumble 4 slices of cooked bacon into the batter. The smoky saltiness pairs beautifully with dill.
  • Everything Bagel Style: Sprinkle the tops with everything bagel seasoning before baking. Serve with cream cheese thinned with pickle juice.
  • Veggie Loaded: Sauté ½ cup diced bell peppers and onions, then fold into the batter. Adds sweetness and color.
  • Low-Carb Version: Replace shredded potatoes with riced cauliflower (squeezed dry). Bake 5 minutes less. Still delicious!

Frequently Asked Questions

Can I use frozen hash browns instead of fresh potatoes?

Absolutely! Thaw them completely and squeeze out as much moisture as possible with a kitchen towel. Frozen hash browns are actually more consistent in texture.

Why did my muffins turn out soggy?

This usually happens when the potatoes aren’t squeezed dry enough. Also, avoid overmixing the batter – that can make the eggs tough and release water. Follow the squeeze test: you should see very little liquid coming out.

Can I make these dairy-free?

Yes! Use a plant-based milk (unsweetened almond or oat) and dairy-free cheese shreds. The texture will be slightly less fluffy but still tasty. Omit the dipping sauce or use vegan sour cream.

How do I know when the muffins are fully baked?

Insert a toothpick into the center of a muffin – it should come out clean or with just a few moist crumbs. The internal temperature should reach 165°F. The edges will be golden and pulling away from the pan.

Can I use a mini muffin tin?

Yes! Reduce baking time to 12-15 minutes. You’ll get about 24 mini muffins. Perfect for parties or kids’ lunches.

What kind of pickles work best?

Dill pickles are essential – sweet pickles will make the muffins taste odd. I prefer crunchy spears diced small. Kosher dills or Claussen are my top picks.

Can I add meat to these muffins?

Definitely! Cooked breakfast sausage, crumbled bacon, or diced ham all work well. Add ½ cup of cooked meat and reduce the potatoes by ¼ cup to keep the batter balanced.

How do I prevent sticking to the muffin tin?

Grease generously with olive oil or use silicone muffin liners. I recommend greasing even if using nonstick pans – the cheese can stick stubbornly.

Can I skip the dipping sauce?

Sure! The muffins are delicious on their own. But the sauce adds a creamy, tangy element that really complements the pickles. It takes 2 minutes to whisk together.

Are these muffins gluten-free?

Yes, as written! There is no flour in this recipe. Just double-check that your pickles and cheese are certified gluten-free if needed.

Share This Recipe!

If you loved these Pickle-Fix Egg Potato Muffins, please share them with your friends and family. Tag us on social media – we love seeing your creations!

📌 Save This Recipe on Pinterest!

Click the button below to pin these Pickle-Fix Egg Potato Muffins to your favorite breakfast board. Never lose a great recipe!


Pin This Recipe

Follow us on Pinterest: @cookingwithemy

© 2025 The Kitchen Team at cookingwithemy.com. All rights reserved. This recipe is original and may not be reproduced without permission.
clock clock iconcutlery cutlery iconflag flag iconfolder folder iconinstagram instagram iconpinterest pinterest iconfacebook facebook iconprint print iconsquares squares iconheart heart iconheart solid heart solid icon

Pickle-Fix Egg Potato Muffins


  • Author:
    Chef Emy

Description

Delicious muffins made with eggs, shredded potatoes, and dill pickles, perfect for a savory snack or breakfast.


Ingredients


Scale
  • 4 large eggs
  • 1 cup shredded potatoes, squeezed dry
  • 1/2 cup diced dill pickles
  • 1/2 cup shredded cheddar cheese
  • 1/4 cup chopped scallions
  • 1/4 cup whole milk
  • 2 tablespoons chopped fresh dill
  • 1/2 teaspoon garlic powder
  • 1/2 teaspoon kosher salt
  • 1/4 teaspoon freshly ground black pepper
  • 1 tablespoon olive oil, for greasing
  • 1/2 cup sour cream
  • 2 tablespoons mayonnaise
  • 1 tablespoon finely chopped fresh dill
  • 1 teaspoon lemon juice
  • 1/4 teaspoon garlic powder
  • Salt and pepper, to taste

Instructions

  1. Preheat oven to 375°F (190°C) and grease a 12-cup muffin tin with olive oil or nonstick spray.
  2. In a large mixing bowl, whisk together the eggs and milk until well blended.
  3. Add shredded potatoes, diced pickles, cheddar cheese, scallions, dill, garlic powder, salt, and pepper. Mix until evenly combined.
  4. Divide the mixture evenly among the prepared muffin cups, filling approximately 75% full.
  5. Bake for 25-30 minutes, or until the muffins are puffed and golden, and a toothpick inserted into the center comes out clean.
  6. While muffins bake, whisk together sour cream, mayonnaise, dill, lemon juice, garlic powder, salt, and pepper in a small bowl until smooth.
  7. Allow muffins to cool in the pan for 5 minutes. Run a knife around the edges and remove. Serve warm with the dill drip on the side.

Notes

Make sure to squeeze out excess moisture from the shredded potatoes for the best texture.
These muffins can be stored in the refrigerator for up to 3 days.
Feel free to add more vegetables or cheese based on your preferences.

Nutrition

  • Calories: 150
  • Sugar: 1g
  • Protein: 6g


Flavor-Packed Chicken Pitas

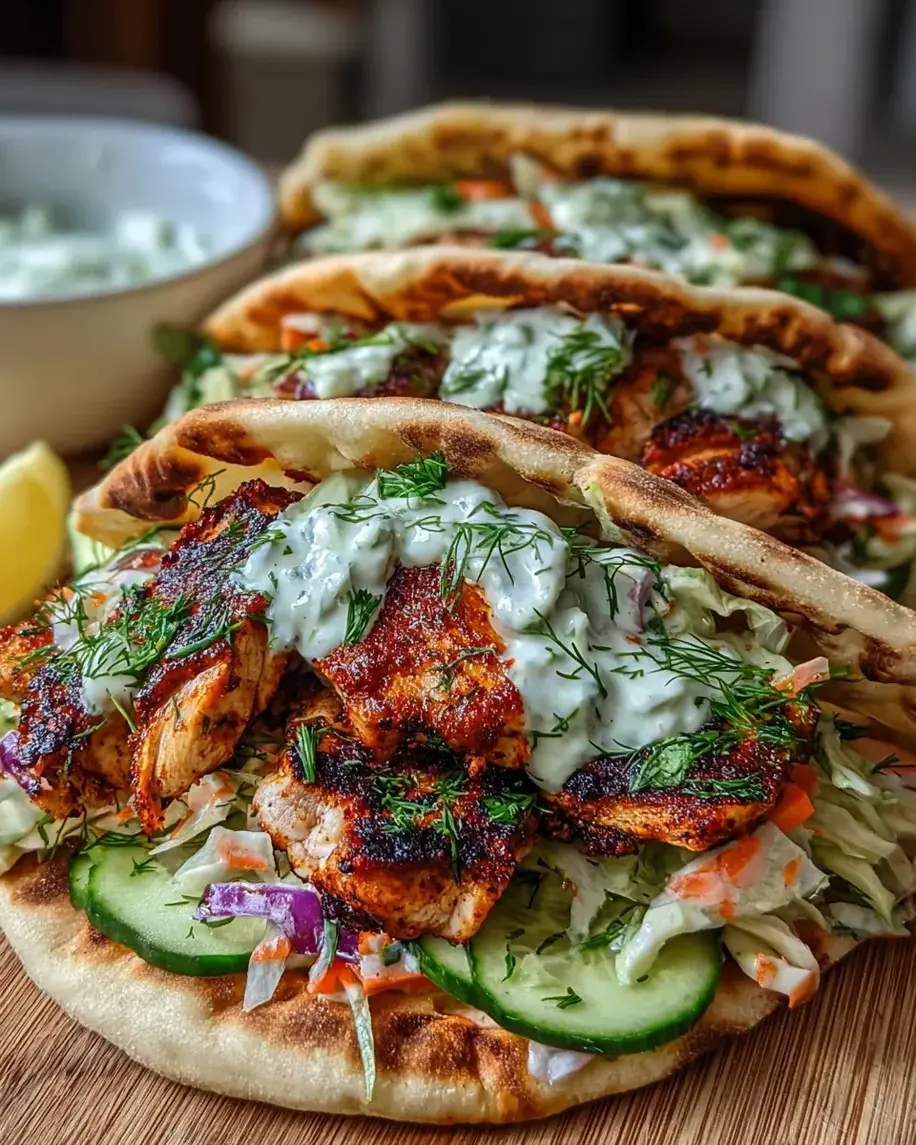
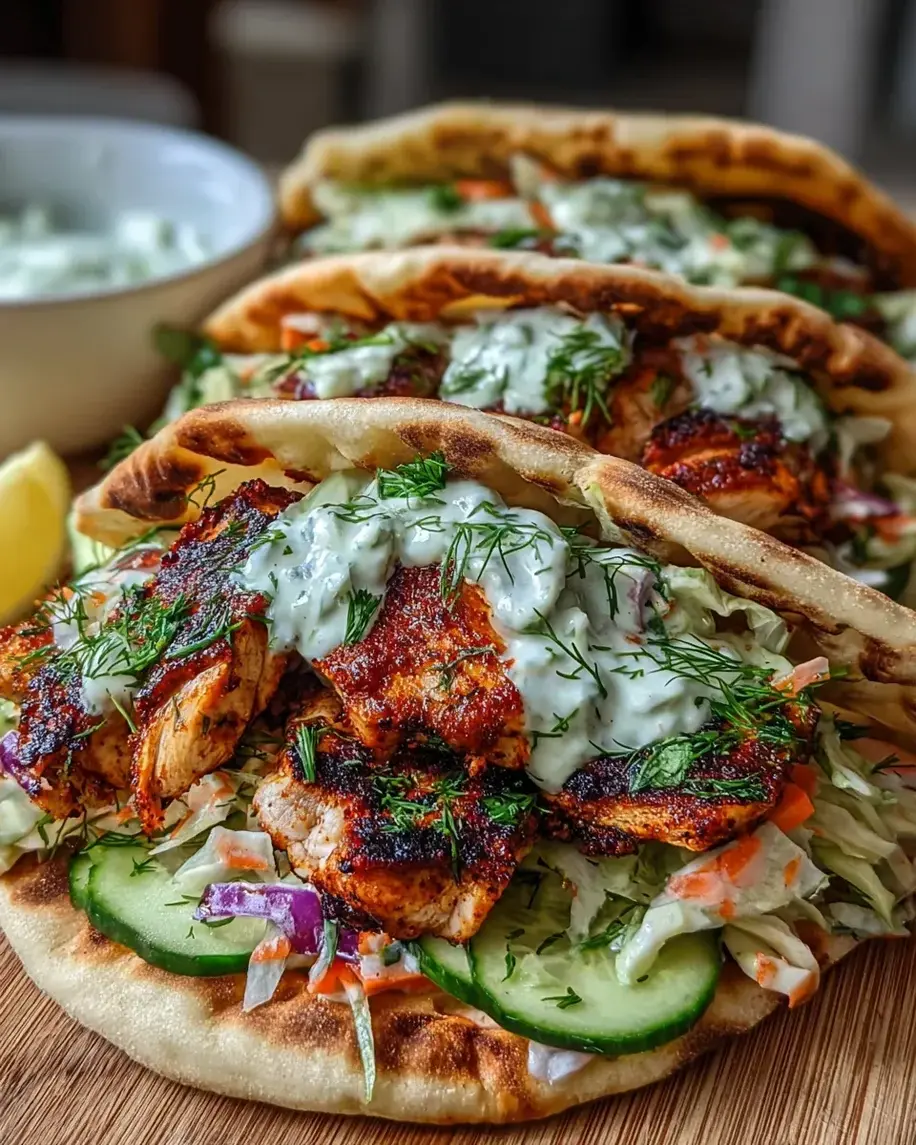
Let’s face it—busy days can leave us scrambling for meal ideas that are both quick and delicious. That’s where my Flavor-Packed Chicken Pitas come in, ready to save the day! Picture juicy chicken marinated in zesty spices, nestled in warm pita bread, topped with creamy herby ranch slaw. It’s a delightful dish that’ll have everyone asking for seconds. Whether you’re looking to impress family or need a satisfying meal after a long day, these pitas are the perfect solution. Trust me, they’ll become a staple in your kitchen!

Print

clock clock iconcutlery cutlery iconflag flag iconfolder folder iconinstagram instagram iconpinterest pinterest iconfacebook facebook iconprint print iconsquares squares iconheart heart iconheart solid heart solid icon

Flavor-Packed Chicken Pitas


  • Author: Chef Emy

Description

Flavor-packed chicken pitas filled with juicy marinated chicken and creamy herby ranch slaw, perfect for a delicious meal.


Ingredients

Scale
  • 1.1 lb boneless, skinless chicken breasts or thighs
  • 2 tablespoons olive oil
  • 1 teaspoon smoked paprika
  • 1 teaspoon ground cumin
  • 0.5 teaspoon garlic powder
  • 0.5 teaspoon onion powder
  • 0.5 teaspoon dried oregano
  • 0.5 teaspoon salt
  • 0.25 teaspoon black pepper
  • Juice of 0.5 lemon
  • 2 cups finely shredded green cabbage
  • 1 cup shredded carrots
  • 0.5 small red onion, thinly sliced
  • 0.5 cup mayonnaise
  • 3 tablespoons buttermilk or plain yogurt
  • 1 tablespoon fresh dill, chopped
  • 1 tablespoon fresh parsley, chopped
  • 1 tablespoon fresh chives, chopped
  • 1 teaspoon Dijon mustard
  • 1 small garlic clove, minced
  • 0.5 teaspoon salt
  • 0.25 teaspoon black pepper
  • 1 teaspoon lemon juice
  • 4 pita breads, warmed
  • Sliced cucumbers, optional
  • Cherry tomatoes, optional
  • Fresh herbs for garnish, optional

Instructions

  1. Prepare the Chicken: In a bowl, combine olive oil, smoked paprika, cumin, garlic powder, onion powder, oregano, salt, pepper, and lemon juice. Add chicken and toss to coat evenly. Marinate for 10 to 15 minutes, or up to 1 hour for deeper flavor development.
  2. Cook the Chicken: Heat a grill pan or skillet over medium-high heat. Cook chicken 5 to 7 minutes per side until golden and cooked through. Transfer to a cutting board and rest for 5 minutes before slicing thinly.
  3. Make the Herby Ranch Slaw: In a large bowl, whisk together mayonnaise, buttermilk, dill, parsley, chives, Dijon mustard, minced garlic, salt, pepper, and lemon juice until smooth. Add cabbage, carrots, and red onion, then toss to coat evenly.
  4. Assemble the Pitas: Cut pita breads in half to form pockets or keep whole and layer fillings. Fill each pita with sliced chicken, a generous portion of ranch slaw, and optional toppings such as cucumbers or tomatoes. Garnish with fresh herbs if desired and serve immediately.

Notes

For best flavor, marinate the chicken for 1 hour if time allows.
Use Greek yogurt instead of mayonnaise for a lighter version of the ranch slaw.
Add any fresh vegetables of your choice for extra crunch.

Nutrition

  • Calories: 450
  • Sugar: 4g
  • Protein: 25g

Flavor-Packed Chicken Pitas

Let’s face it—busy days can leave us scrambling for meal ideas that are both quick and delicious. That’s where my Flavor-Packed Chicken Pitas come in, ready to save the day! Picture juicy chicken marinated in zesty spices, nestled in warm pita bread, topped with creamy herby ranch slaw. It’s a delightful dish that’ll have everyone asking for seconds. Whether you’re looking to impress family or need a satisfying meal after a long day, these pitas are the perfect solution. Trust me, they’ll become a staple in your kitchen!

Print

clock clock iconcutlery cutlery iconflag flag iconfolder folder iconinstagram instagram iconpinterest pinterest iconfacebook facebook iconprint print iconsquares squares iconheart heart iconheart solid heart solid icon

Flavor-Packed Chicken Pitas


  • Author: Chef Emy

Description

Flavor-packed chicken pitas filled with juicy marinated chicken and creamy herby ranch slaw, perfect for a delicious meal.


Ingredients

Scale
  • 1.1 lb boneless, skinless chicken breasts or thighs
  • 2 tablespoons olive oil
  • 1 teaspoon smoked paprika
  • 1 teaspoon ground cumin
  • 0.5 teaspoon garlic powder
  • 0.5 teaspoon onion powder
  • 0.5 teaspoon dried oregano
  • 0.5 teaspoon salt
  • 0.25 teaspoon black pepper
  • Juice of 0.5 lemon
  • 2 cups finely shredded green cabbage
  • 1 cup shredded carrots
  • 0.5 small red onion, thinly sliced
  • 0.5 cup mayonnaise
  • 3 tablespoons buttermilk or plain yogurt
  • 1 tablespoon fresh dill, chopped
  • 1 tablespoon fresh parsley, chopped
  • 1 tablespoon fresh chives, chopped
  • 1 teaspoon Dijon mustard
  • 1 small garlic clove, minced
  • 0.5 teaspoon salt
  • 0.25 teaspoon black pepper
  • 1 teaspoon lemon juice
  • 4 pita breads, warmed
  • Sliced cucumbers, optional
  • Cherry tomatoes, optional
  • Fresh herbs for garnish, optional

Instructions

  1. Prepare the Chicken: In a bowl, combine olive oil, smoked paprika, cumin, garlic powder, onion powder, oregano, salt, pepper, and lemon juice. Add chicken and toss to coat evenly. Marinate for 10 to 15 minutes, or up to 1 hour for deeper flavor development.
  2. Cook the Chicken: Heat a grill pan or skillet over medium-high heat. Cook chicken 5 to 7 minutes per side until golden and cooked through. Transfer to a cutting board and rest for 5 minutes before slicing thinly.
  3. Make the Herby Ranch Slaw: In a large bowl, whisk together mayonnaise, buttermilk, dill, parsley, chives, Dijon mustard, minced garlic, salt, pepper, and lemon juice until smooth. Add cabbage, carrots, and red onion, then toss to coat evenly.
  4. Assemble the Pitas: Cut pita breads in half to form pockets or keep whole and layer fillings. Fill each pita with sliced chicken, a generous portion of ranch slaw, and optional toppings such as cucumbers or tomatoes. Garnish with fresh herbs if desired and serve immediately.

Notes

For best flavor, marinate the chicken for 1 hour if time allows.
Use Greek yogurt instead of mayonnaise for a lighter version of the ranch slaw.
Add any fresh vegetables of your choice for extra crunch.

Nutrition

  • Calories: 450
  • Sugar: 4g
  • Protein: 25g

Creamy Cajun Sausage Pasta

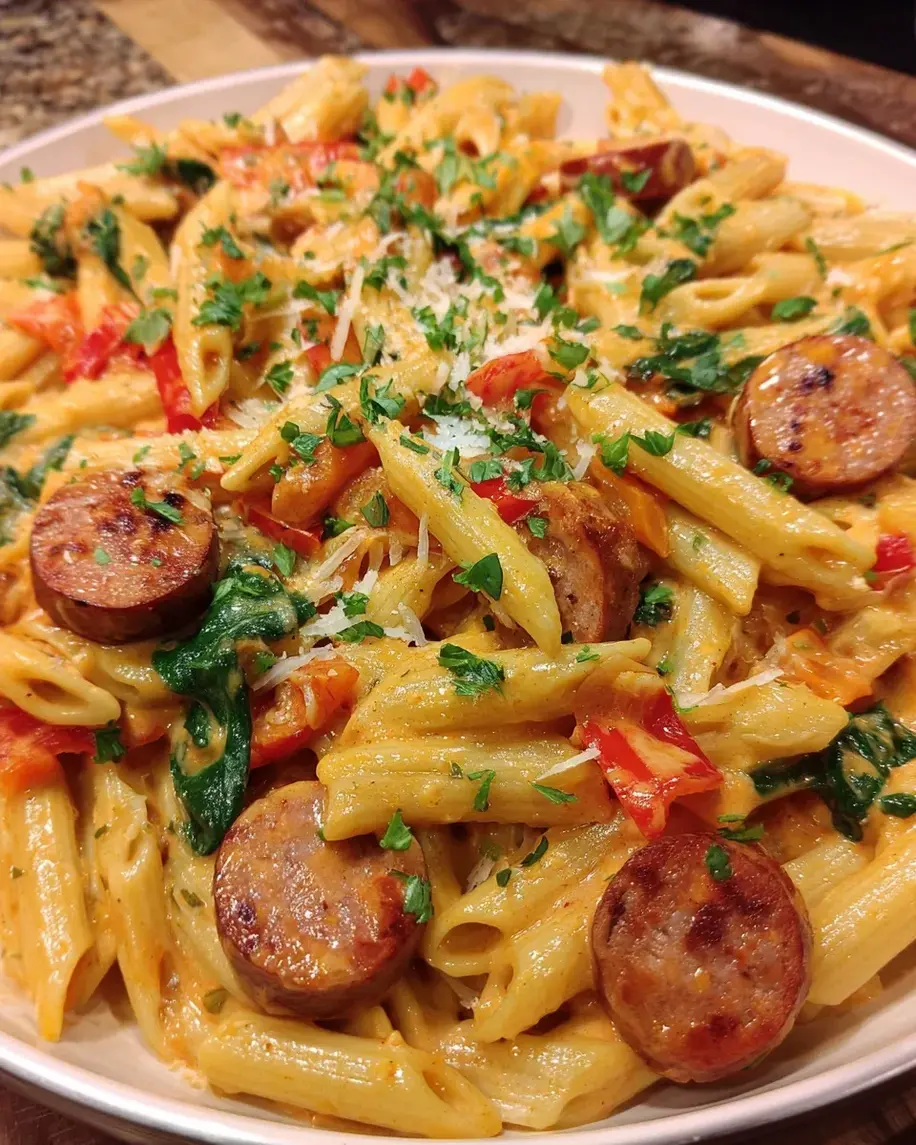
🔥 30-Minute Creamy Cajun Sausage Pasta (One-Pot Wonder)

⏱️ Prep Time 10 minutes
🍳 Cook Time 20 minutes
⌛ Total Time 30 minutes
🍽️ Servings 4 servings
📊 Difficulty Easy
🔥 Calories ~620 kcal/serving

Author: Chef Emy • Published on cookingwithemy.com

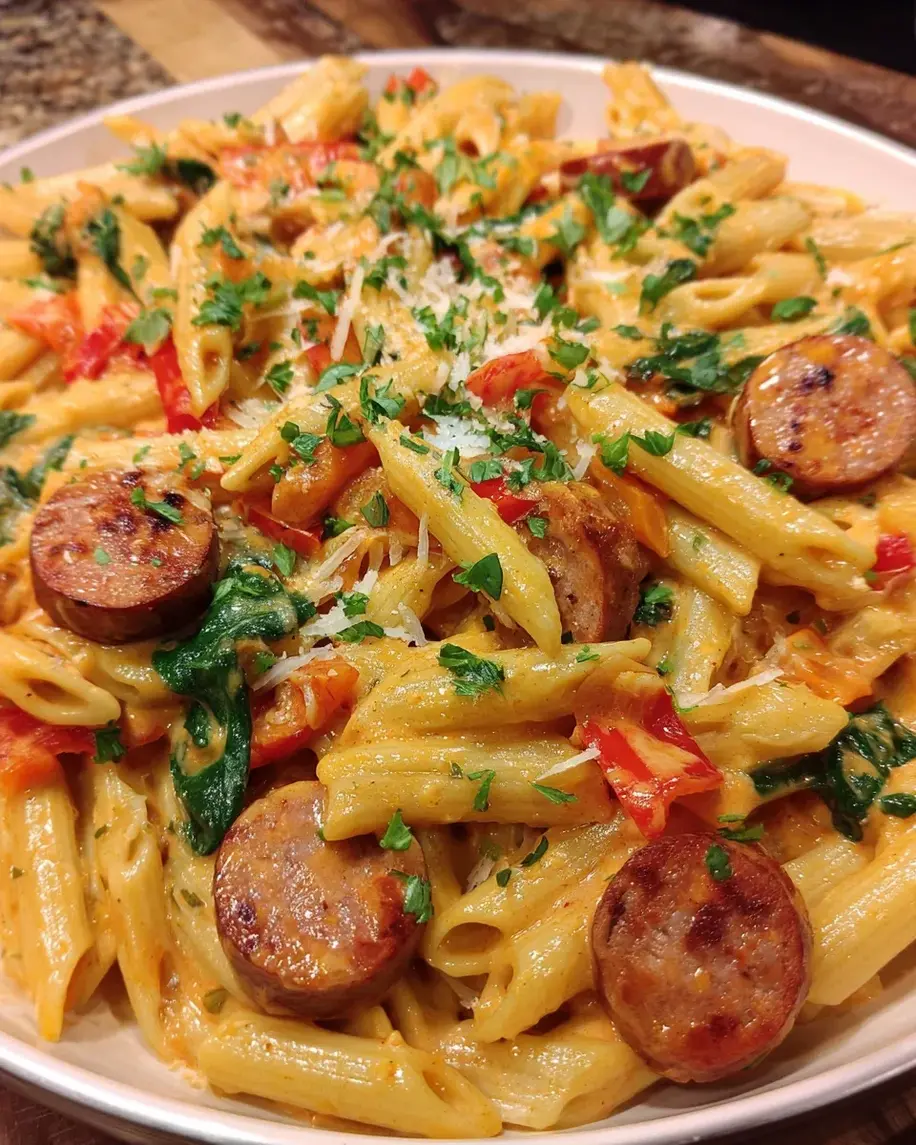
Are you in search of a quick and satisfying meal that doesn’t skimp on flavor? Then let me introduce you to my absolute favorite weeknight hero: Creamy Cajun Sausage Pasta. It’s simple, ridiculously delicious, and comes together in just 30 minutes from start to finish! This recipe is tailor-made for busy moms, professionals, and anyone who craves a hearty dinner without spending hours in the kitchen.

Packed with smoky Andouille sausage, colorful bell peppers, and a luxuriously creamy sauce with a kick of Cajun spice, every bite is a celebration of bold Louisiana-inspired flavors. The best part? It’s a one-pot wonder – less cleanup, more time to relax. Trust me, you can’t go wrong here! Print this recipe, save it to your Pinterest board, and get ready for the best pasta night ever.

🥇 Why This Creamy Cajun Sausage Pasta Is the Best

We’ve tested dozens of creamy pasta recipes, and this one stands out for three big reasons:

  • 30-Minute Magic: From cutting board to dinner table in half an hour. Perfect for those “what’s for dinner?” emergencies.
  • Bold, Balanced Flavor: The Cajun seasoning brings heat and depth, while heavy cream and Parmesan mellow it into a velvety, irresistible sauce.
  • One Pot, Zero Stress: Everything cooks in a single skillet or pot. Less mess, more flavor (and fewer dishes!).

Plus, it’s incredibly adaptable – swap the protein, add veggies, or adjust the spice level. Every time you make it, it feels custom-made.

📝 Ingredients (US Measurements)

  • 10 oz (285 g) smoked sausage (Andouille or kielbasa), sliced into rounds
  • 4 oz (115 g) pasta (penne or rigatoni)
  • 1 cup mixed bell peppers, diced (about 150 g)
  • ½ cup onion, diced (about 60 g)
  • 1 cup fresh spinach (optional, about 30 g)
  • 2 cups low-sodium chicken broth (480 ml)
  • 1 cup heavy cream (240 ml)
  • ¾ cup Parmesan cheese, shredded (about 80 g)
  • 1 tablespoon Cajun seasoning
  • 1 tablespoon olive oil (15 ml)
  • ½ teaspoon garlic powder
  • ¼ teaspoon cayenne pepper (optional, for extra heat)
  • Chopped parsley, for garnish
💡 The Kitchen Team’s Pro Tip: For the deepest flavor, use andouille sausage – it’s smoky and spicy. If you prefer milder heat, choose kielbasa and reduce the cayenne.

👩‍🍳 Step-by-Step Instructions

Step 1: Slice the smoked sausage into thin rounds. Dice the bell peppers and onion. Measure out the Cajun seasoning, heavy cream, and shredded Parmesan.
Step 2: Heat olive oil in a large skillet or pot over medium-high heat. Add the sliced sausage and cook until browned on both sides (about 4 minutes). Remove sausage and set aside.
Step 3: In the same pot, add diced bell peppers and onion. Cook for 3–5 minutes until softened. Sprinkle Cajun seasoning and garlic powder over the vegetables. Stir well to coat evenly.
Step 4: Pour in the chicken broth and bring to a gentle simmer, scraping any browned bits from the bottom of the pot. Add the uncooked pasta and stir. Cover and cook for 10–12 minutes, stirring occasionally, until pasta is al dente.
Step 5: Reduce heat to low. Stir in heavy cream, shredded Parmesan, and the cooked sausage. Add spinach if using, and stir until wilted (about 1 minute). Taste and adjust seasoning – add cayenne if you want more heat.
Step 6: Serve immediately, garnished with chopped parsley. Enjoy your creamy, spicy, comforting bowl of heaven!
💡 The Kitchen Team’s Pro Tip: Don’t skip deglazing the pan with broth – those browned bits are pure flavor. Also, use freshly shredded Parmesan; it melts smoother than pre-shredded.

🍽️ Serving Suggestions

This creamy Cajun pasta is a meal in itself, but it pairs beautifully with:

  • A crisp green salad with lemon vinaigrette to cut the richness.
  • Garlic bread or crusty French bread for sopping up every drop of sauce.
  • Roasted broccoli or steamed green beans for extra veggies.

For a low-carb option, serve the creamy sausage and sauce over cauliflower rice or zucchini noodles.

🧊 Storage & Reheating

Refrigerate: Store leftovers in an airtight container for up to 4 days. The sauce will thicken – that’s normal!

Reheat: Warm in a skillet over medium-low heat with a splash of chicken broth or milk to loosen the sauce. Microwave in 30-second bursts, stirring between each.

Freeze: This dish freezes well for up to 2 months. Thaw overnight in the fridge and reheat gently. Note: pasta may soften slightly, but flavor remains excellent.

💡 The Kitchen Team’s Pro Tip: For best texture, undercook the pasta by 1 minute if you plan to freeze – it will finish cooking when reheated.

♻️ Delicious Variations

Variation What to Change
Chicken Cajun Pasta Replace sausage with 2 diced chicken breasts; cook until golden, then proceed.
Vegetarian Version Skip sausage, add 1 can drained chickpeas + extra bell peppers and mushrooms.
Extra Veggie Boost Add 1 cup sliced zucchini or yellow squash with the peppers.
Spicy Seafood Twist Use shrimp instead of sausage; add during last 3 minutes of cooking.
Dairy-Free / Lighter Use full-fat coconut milk instead of heavy cream, and omit Parmesan or use nutritional yeast.

❓ Frequently Asked Questions

Can I use a different pasta shape?

Absolutely! Penne, rigatoni, fusilli, or even fettuccine work great. Adjust cooking time accordingly.

Is this recipe very spicy?

It has a mild to medium kick from Cajun seasoning. For less heat, use mild Cajun blend and skip the cayenne. For more, add extra cayenne or hot sauce.

Can I make this gluten-free?

Yes! Use gluten-free pasta and ensure your Cajun seasoning and broth are certified GF. The rest is naturally gluten-free.

Why did my sauce turn out too thick?

Pasta absorbs liquid as it sits. Stir in a splash of warm broth or milk when reheating to restore creamy consistency.

Can I use pre-shredded Parmesan?

You can, but freshly shredded melts much smoother and has better flavor. Pre-shredded contains anti-caking agents that can make sauce grainy.

How do I store leftovers?

Keep in an airtight container in the fridge for up to 4 days. See storage section above for reheating tips.

Can I add more vegetables?

Definitely! Mushrooms, zucchini, cherry tomatoes, or kale are all excellent additions. Sauté them with the peppers.

What’s the best Cajun seasoning brand?

We love Slap Ya Mama or Tony Chachere’s. You can also make your own with paprika, garlic powder, onion powder, oregano, thyme, and cayenne.

Can I double this recipe?

Yes! Use a large pot or Dutch oven. You may need to increase cooking time by a few minutes. Keep the liquid ratios the same.

Is this recipe freezer-friendly?

Yes, freeze for up to 2 months. Thaw overnight in the fridge and reheat gently with a little extra cream or broth.

📌 Save & Share This Recipe

If you loved this Creamy Cajun Sausage Pasta, please share it with your friends and family! Pin it to your favorite dinner board, tag us on social media, and leave a comment below.

📌 Don’t lose this recipe!

📌 Pin It on Pinterest

Follow us @cookingwithemy for more easy weeknight dinners.

© 2025 The Kitchen Team – cookingwithemy.com. All rights reserved.

clock clock iconcutlery cutlery iconflag flag iconfolder folder iconinstagram instagram iconpinterest pinterest iconfacebook facebook iconprint print iconsquares squares iconheart heart iconheart solid heart solid icon

Creamy Cajun Sausage Pasta


  • Author:
    Chef Emy

Description

A rich and creamy Cajun sausage pasta dish featuring smoked sausage, vegetables, and a flavorful sauce.


Ingredients


Scale
  • 285 g smoked sausage, Andouille or kielbasa, sliced into rounds
  • 115 g pasta, penne or rigatoni
  • 1 cup (about 150 g) mixed bell peppers, diced
  • 60 g onion, diced
  • 30 g fresh spinach (optional)
  • Chopped parsley, to garnish
  • 480 ml low-sodium chicken broth
  • 240 ml heavy cream
  • 80 g Parmesan cheese, shredded
  • 1 tablespoon Cajun seasoning
  • 1 tablespoon (15 ml) olive oil
  • 1/2 teaspoon garlic powder
  • 1/4 teaspoon cayenne pepper (optional, for extra spice)

Instructions

  1. Slice the smoked sausage into thin rounds. Dice the bell peppers and onion. Measure out the Cajun seasoning, heavy cream, and shredded Parmesan.
  2. Heat olive oil in a large skillet or pot over medium-high heat. Add the sliced sausage and cook until browned on both sides, then remove from the pot and set aside.
  3. Add diced bell peppers and onion to the same pot. Cook for 35 minutes until softened.
  4. Sprinkle Cajun seasoning and garlic powder over the sautéed vegetables. Stir well to coat evenly.
  5. Pour in the chicken broth and bring to a gentle simmer, scraping any browned bits from the bottom.
  6. Add pasta directly into the pot. Stir occasionally and cook uncovered for 1012 minutes, or until the pasta is just al dente and most liquid has reduced.
  7. Reduce the heat to low. Stir in the heavy cream and shredded Parmesan cheese until the cheese melts and the sauce becomes creamy.
  8. Return the browned sausage to the pot. Add cayenne pepper and fresh spinach if desired. Stir to mix thoroughly and warm the sausage through. Taste and adjust seasoning with salt and extra black pepper as needed.
  9. Garnish with chopped parsley and optionally additional Parmesan or red pepper flakes. Serve immediately.

Notes

For a spicier version, add more cayenne pepper.
This dish can be made ahead of time and reheated.
Store leftovers in the refrigerator for up to 3 days.

Nutrition

  • Calories: 650
  • Sugar: 3 g
  • Protein: 25 g


Creamy Cajun Sausage Pasta

The Best 30-Minute Creamy Cajun Sausage Pasta (One-Pot Wonder)

Author: The Kitchen Team | Site: cookingwithemy.com

Prep Time10 mins
Cook Time20 mins
Total Time30 mins
Servings4
DifficultyEasy
Calories~580 kcal

Are you in search of a quick and satisfying meal that doesn’t skimp on flavor? Then let us introduce you to our favorite dish: Creamy Cajun Sausage Pasta. It’s simple, delicious, and comes together in just 30 minutes! This recipe is perfect for busy moms and professionals like us who still want to whip up something fantastic for family dinners.

Packed with smoky sausage and colorful vegetables, it’s a delightful blend of comfort and excitement that’ll have everyone asking for seconds. Trust us, you can’t go wrong here! The rich, velvety sauce clings to every piece of pasta, while the Cajun spices add just the right amount of warmth and depth. Whether you’re a seasoned cook or a beginner, this one-pot wonder will become your go-to weeknight hero.

💡 The Kitchen Team’s Pro Tip: For the most intense flavor, use andouille sausage and let it develop a deep brown crust before setting it aside. That fond (browned bits) is liquid gold for your sauce!

Why This Creamy Cajun Sausage Pasta Is The Best

We’ve tested dozens of Cajun pasta recipes, and this one wins every time. Here’s why:

  • 30-Minute Magic: From start to finish, this dish is ready in half an hour. No marinating, no complicated steps.
  • One Pot, Less Mess: Everything cooks in a single skillet or pot, meaning fewer dishes to wash.
  • Bold Cajun Flavor: Our blend of Cajun seasoning, garlic powder, and optional cayenne delivers authentic Louisiana-style heat.
  • Creamy Without Being Heavy: Heavy cream and Parmesan create a luscious sauce that’s indulgent but not overwhelming.
  • Customizable & Forgiving: Swap the protein, add more veggies, or adjust the spice level—this recipe adapts to what you have.

🧂 Ingredients for Creamy Cajun Sausage Pasta

Makes 4 generous servings

Ingredient Amount Notes
Smoked sausage (Andouille or kielbasa) 285 g (10 oz) Sliced into rounds
Pasta (penne or rigatoni) 115 g (4 oz) Or any short pasta
Mixed bell peppers 1 cup (150 g) Diced (red, yellow, green)
Onion 60 g (½ medium) Finely diced
Fresh spinach 30 g (1 cup) Optional, for color
Low-sodium chicken broth 480 ml (2 cups) Or vegetable broth
Heavy cream 240 ml (1 cup) Room temperature
Parmesan cheese 80 g (¾ cup) Freshly shredded
Cajun seasoning 1 tablespoon Store-bought or homemade
Olive oil 1 tablespoon (15 ml) For sautéing
Garlic powder ½ teaspoon Not garlic salt
Cayenne pepper ¼ teaspoon Optional, for extra heat
Fresh parsley For garnish Chopped
💡 The Kitchen Team’s Pro Tip: For the best texture, use a block of Parmesan and shred it yourself. Pre-shredded cheese contains anti-caking agents that can make your sauce grainy.

👩‍🍳 Step-by-Step Instructions

  1. Prep your ingredients: Slice the smoked sausage into thin rounds. Dice the bell peppers and onion. Measure out the Cajun seasoning, heavy cream, and shredded Parmesan. This mise en place makes cooking a breeze.
  2. Brown the sausage: Heat olive oil in a large skillet or pot over medium-high heat. Add the sliced sausage and cook until browned on both sides (about 3-4 minutes per side). Remove from the pot and set aside on a plate.
  3. Sauté the vegetables: Add diced bell peppers and onion to the same pot. Cook for 3-5 minutes until softened and fragrant. The fond from the sausage will infuse the veggies with smoky flavor.
  4. Bloom the spices: Sprinkle Cajun seasoning and garlic powder over the sautéed vegetables. Stir well to coat evenly and cook for 30 seconds until fragrant. This step awakens the spices’ full potential.
  5. Build the sauce: Pour in the chicken broth and bring to a gentle simmer, scraping any browned bits from the bottom of the pan. Let it reduce slightly (about 2 minutes).
  6. Cook the pasta: Add the uncooked pasta directly to the simmering broth. Cover and cook according to package directions (usually 10-12 minutes), stirring occasionally. The pasta will absorb the flavorful liquid.
  7. Make it creamy: Reduce heat to low. Stir in the heavy cream and shredded Parmesan cheese. Mix until the cheese melts and the sauce becomes silky smooth. If using spinach, add it now and stir until wilted (about 1 minute).
  8. Finish and serve: Return the browned sausage to the pot. Stir everything together and heat through for 1-2 minutes. Taste and adjust seasoning—add a pinch of salt or extra cayenne if desired. Garnish with fresh parsley and serve immediately.

🍽️ How to Serve Creamy Cajun Sausage Pasta

This dish is a complete meal on its own, but here are some ideas to round out your dinner table:

  • Side Salad: A crisp garden salad with lemon vinaigrette balances the richness.
  • Garlic Bread: Warm, buttery garlic bread is perfect for sopping up every drop of sauce.
  • Roasted Vegetables: Try roasted broccoli or asparagus for extra nutrients.
  • Wine Pairing: A chilled Sauvignon Blanc or light Pinot Noir complements the creamy Cajun flavors beautifully.

❄️ Storage & Reheating

Refrigerate: Store leftovers in an airtight container for up to 4 days. The pasta will absorb some sauce, so it may thicken.

Reheat: Warm in a skillet over medium-low heat with a splash of milk or broth to loosen the sauce. Microwave in 30-second bursts, stirring between intervals.

Freeze: This dish freezes well for up to 2 months. Thaw overnight in the fridge and reheat gently. Note that the cream sauce may separate slightly—just whisk it back together.

💡 The Kitchen Team’s Pro Tip: To prevent the pasta from becoming mushy when reheating, slightly undercook it in step 6 (by about 1 minute). It will finish cooking when you reheat it later.

🎨 Delicious Variations

Make this recipe your own with these easy swaps:

  • Protein Swap: Use chicken breast (diced and cooked first), shrimp, or plant-based sausage.
  • Vegetable Boost: Add mushrooms, zucchini, or sun-dried tomatoes along with the peppers.
  • Lighter Version: Replace heavy cream with half-and-half or evaporated milk. Use turkey sausage.
  • Spice Level: For milder heat, reduce Cajun seasoning to 2 teaspoons and omit cayenne. For extra fire, add hot sauce or chopped jalapeños.
  • Pasta Shape: Try fettuccine, rotini, or even tortellini for a different texture.

❓ Frequently Asked Questions

Can I use milk instead of heavy cream?

Yes, but the sauce will be thinner. For a thicker result, mix 1 tablespoon cornstarch with 2 tablespoons cold milk and stir it in at the end.

What pasta works best for this recipe?

Short, sturdy shapes like penne, rigatoni, or fusilli hold the sauce best. Avoid delicate pastas like angel hair.

Is this recipe gluten-free?

Use gluten-free pasta and ensure your Cajun seasoning and broth are certified gluten-free. The rest is naturally GF.

Can I make this dairy-free?

Absolutely! Use full-fat coconut cream instead of heavy cream and dairy-free Parmesan. The coconut adds a subtle sweetness.

How do I prevent the sauce from curdling?

Make sure your cream is at room temperature, and add it over low heat while stirring constantly. Avoid boiling after adding cream.

Can I cook the pasta separately?

Yes, but you’ll lose some flavor. If doing so, cook pasta al dente, reserve ½ cup pasta water, and add it with the cream for silkiness.

What if I don’t have Cajun seasoning?

Make your own: mix 1 tsp paprika, ½ tsp each garlic powder, onion powder, dried oregano, dried thyme, and cayenne, plus ¼ tsp black pepper.

How many calories per serving?

Approximately 580 calories per serving (based on 4 servings). This can vary based on specific brands and substitutions.

Can I add more vegetables?

Definitely! Diced celery, carrots, or even corn would be delicious. Sauté them with the onions and peppers.

Why is my sauce too thick?

Add a splash of warm chicken broth or milk while stirring until it reaches your desired consistency.

📌 Save This Recipe for Later!

Pin this Creamy Cajun Sausage Pasta to your favorite board on Pinterest and never lose it!

Follow Cooking With Emy on Pinterest

Click the button above to follow us for more quick & delicious recipes!

📤 Share the Love

If you tried this Creamy Cajun Sausage Pasta, leave a comment below or tag us on social media! Your feedback helps us create more recipes you’ll love.

Happy cooking from The Kitchen Team at cookingwithemy.com!

clock clock iconcutlery cutlery iconflag flag iconfolder folder iconinstagram instagram iconpinterest pinterest iconfacebook facebook iconprint print iconsquares squares iconheart heart iconheart solid heart solid icon

Creamy Cajun Sausage Pasta


  • Author:
    Chef Emy

Description

A rich and creamy Cajun sausage pasta dish featuring smoked sausage, vegetables, and a flavorful sauce.


Ingredients


Scale
  • 285 g smoked sausage, Andouille or kielbasa, sliced into rounds
  • 115 g pasta, penne or rigatoni
  • 1 cup (about 150 g) mixed bell peppers, diced
  • 60 g onion, diced
  • 30 g fresh spinach (optional)
  • Chopped parsley, to garnish
  • 480 ml low-sodium chicken broth
  • 240 ml heavy cream
  • 80 g Parmesan cheese, shredded
  • 1 tablespoon Cajun seasoning
  • 1 tablespoon (15 ml) olive oil
  • 1/2 teaspoon garlic powder
  • 1/4 teaspoon cayenne pepper (optional, for extra spice)

Instructions

  1. Slice the smoked sausage into thin rounds. Dice the bell peppers and onion. Measure out the Cajun seasoning, heavy cream, and shredded Parmesan.
  2. Heat olive oil in a large skillet or pot over medium-high heat. Add the sliced sausage and cook until browned on both sides, then remove from the pot and set aside.
  3. Add diced bell peppers and onion to the same pot. Cook for 35 minutes until softened.
  4. Sprinkle Cajun seasoning and garlic powder over the sautéed vegetables. Stir well to coat evenly.
  5. Pour in the chicken broth and bring to a gentle simmer, scraping any browned bits from the bottom.
  6. Add pasta directly into the pot. Stir occasionally and cook uncovered for 1012 minutes, or until the pasta is just al dente and most liquid has reduced.
  7. Reduce the heat to low. Stir in the heavy cream and shredded Parmesan cheese until the cheese melts and the sauce becomes creamy.
  8. Return the browned sausage to the pot. Add cayenne pepper and fresh spinach if desired. Stir to mix thoroughly and warm the sausage through. Taste and adjust seasoning with salt and extra black pepper as needed.
  9. Garnish with chopped parsley and optionally additional Parmesan or red pepper flakes. Serve immediately.

Notes

For a spicier version, add more cayenne pepper.
This dish can be made ahead of time and reheated.
Store leftovers in the refrigerator for up to 3 days.

Nutrition

  • Calories: 650
  • Sugar: 3 g
  • Protein: 25 g