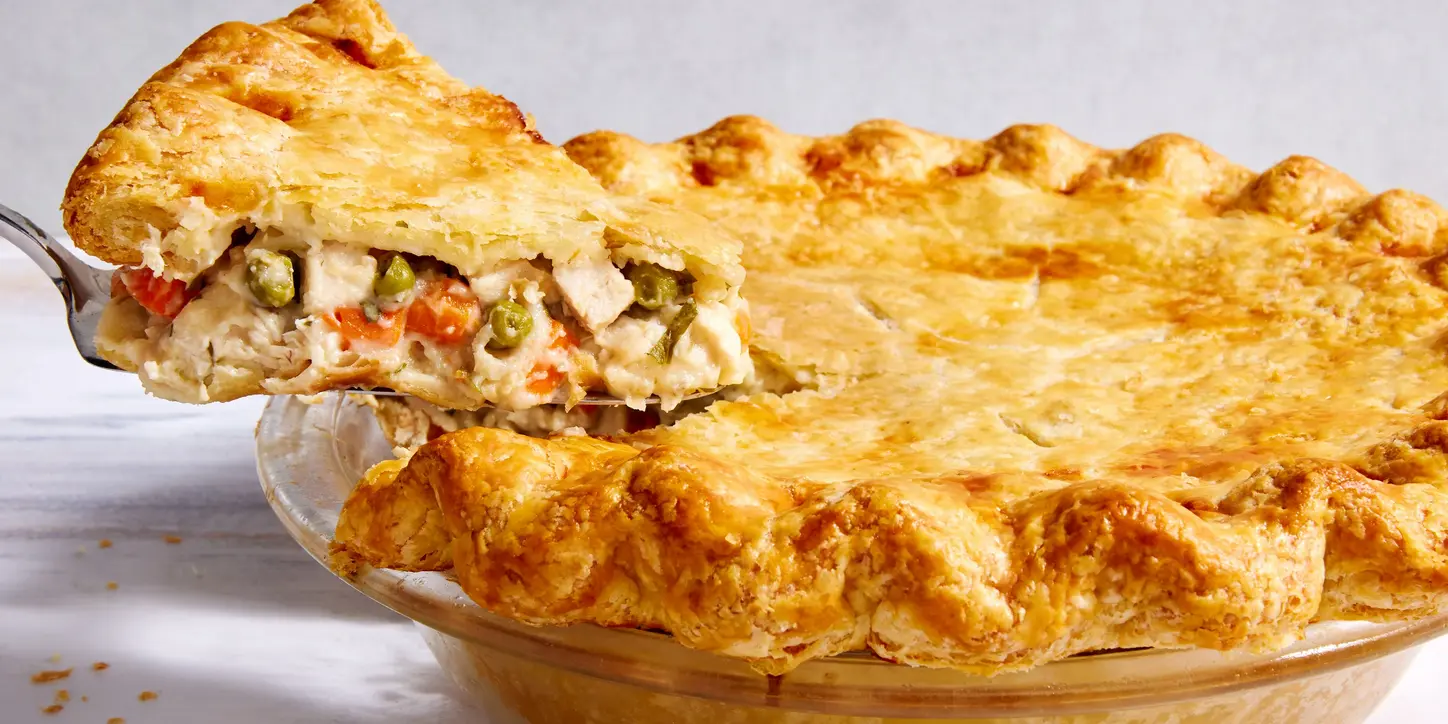
Easy Homemade Chicken Pot Pie

🥧 The Ultimate Easy Homemade Chicken Pot Pie (No Soggy Crust!)

Author: The Kitchen Team | Site: cookingwithemy.com

Prep Time: 25 minutes | Cook Time: 45 minutes | Total Time: 1 hour 10 minutes

🍽️ Servings: 6-8 | Difficulty: Medium

Introduction

There’s nothing quite like the comfort of a warm, flaky easy homemade chicken pot pie straight from the oven. But let’s be honest — nothing ruins this classic dish faster than a soggy, sad crust. We’ve all been there: you pull that beautiful pie out of the oven, cut into it, and instead of a golden, crispy crust, you’re met with a wet, doughy mess. Disappointing, right?

Well, not anymore! Today, The Kitchen Team is sharing our foolproof method for creating the best easy homemade chicken pot pie with a perfectly thick, creamy filling that never, ever makes your crust soggy. This isn’t just any chicken pot pie recipe — this is the one that will become your family’s go-to comfort meal.

We’ve tested this recipe dozens of times in our own kitchen, and the secret is all in the filling. You need a filling that’s thick enough to hold its shape, not a soupy mixture that seeps into your crust before it bakes. Our method ensures every bite is packed with tender chicken, colorful vegetables, and a rich, velvety sauce that stays perfectly inside that flaky crust.

Ready to impress your family and friends? Let’s dive into the easy homemade chicken pot pie recipe that will change your comfort food game forever. Don’t forget to follow us on Pinterest for more amazing recipes!

Why This Easy Homemade Chicken Pot Pie Is the Best

After years of testing and tweaking, we’ve perfected this recipe. Here’s what makes it stand out from the rest:

  • No Soggy Crust Guarantee: Our secret? We cook the filling until it’s thick and luscious before it ever touches the crust. No watery fillings here!
  • From Scratch Goodness: While you can use store-bought crust, we’ll show you how to make an incredibly flaky homemade crust that’s worth every minute.
  • Perfectly Seasoned: A blend of thyme, rosemary, and a touch of garlic creates a savory depth that elevates this easy homemade chicken pot pie to restaurant quality.
  • Versatile & Foolproof: Whether you use rotisserie chicken or leftover turkey, this recipe adapts beautifully. It’s forgiving enough for beginners but impressive enough for experienced cooks.
  • Rich, Creamy Texture: We use a combination of chicken broth and heavy cream (or milk) to create a sauce that’s rich without being heavy.
💡 The Kitchen Team’s Pro Tip: For the thickest, most luxurious filling, let your roux cook for a full 2 minutes before adding liquid. This removes the raw flour taste and ensures your sauce thickens properly.

Ingredients for Easy Homemade Chicken Pot Pie

Here’s everything you’ll need for this easy homemade chicken pot pie. We’ve organized it into a handy table for easy shopping!

Ingredient Amount Notes
Butter (unsalted) 6 tbsp For the filling & crust
All-purpose flour 1/3 cup For thickening
Chicken broth (low sodium) 2 cups Use good quality
Heavy cream or whole milk 1 cup Heavy cream = richer
Cooked chicken (shredded) 3 cups Rotisserie works great
Frozen mixed vegetables 2 cups Peas, carrots, corn, green beans
Yellow onion (diced) 1 medium About 1 cup
Garlic (minced) 3 cloves Fresh is best
Fresh thyme leaves 1 tsp Or 1/2 tsp dried
Fresh rosemary (chopped) 1 tsp Or 1/2 tsp dried
Salt & black pepper To taste Start with 1 tsp salt, 1/2 tsp pepper
Pie crust (homemade or store-bought) 2 (9-inch) One for bottom, one for top
Egg (for egg wash) 1 large Beaten with 1 tbsp water
💡 The Kitchen Team’s Pro Tip: If using frozen vegetables, don’t thaw them first! Add them frozen — they’ll cook perfectly in the filling and won’t release excess water that could thin your sauce.

Step-by-Step Instructions for Easy Homemade Chicken Pot Pie

Follow these steps carefully for the perfect easy homemade chicken pot pie every time:

Step 1: Prepare Your Crust

If using homemade crust, prepare it ahead and chill for at least 30 minutes. If using store-bought, let it sit at room temperature for 15 minutes to soften slightly. Roll out one disk to fit a 9-inch pie dish, leaving a 1-inch overhang. Place it in the dish and refrigerate while you make the filling.

Step 2: Sauté the Aromatics

In a large skillet or Dutch oven, melt 4 tablespoons of butter over medium heat. Add the diced onion and cook for 4-5 minutes until translucent. Add the minced garlic and cook for 30 seconds until fragrant.

Step 3: Make the Roux

Sprinkle the flour over the onion mixture and stir constantly for 2 minutes. This cooks out the raw flour taste and ensures a smooth, thick sauce. The mixture should be golden and bubbly.

Step 4: Build the Sauce

Slowly pour in the chicken broth while whisking continuously to prevent lumps. Once smooth, add the heavy cream. Continue whisking until the sauce thickens, about 3-4 minutes. It should coat the back of a spoon.

Step 5: Add Chicken & Vegetables

Stir in the shredded chicken, frozen vegetables, thyme, rosemary, salt, and pepper. Cook for 5 minutes, stirring occasionally. The filling should be very thick — this is key for avoiding a soggy crust!

💡 The Kitchen Team’s Pro Tip: If your filling seems too thin, mix 1 tablespoon of cornstarch with 2 tablespoons of cold water and stir it in. Cook for 2 more minutes until thickened.

Step 6: Assemble the Pie

Preheat your oven to 400°F. Pour the filling into the prepared bottom crust. Roll out the second crust and place it on top. Crimp the edges to seal, then cut 4-5 slits in the top for steam to escape. Brush with the beaten egg wash for a golden finish.

Step 7: Bake to Perfection

Place the pie on a baking sheet (to catch any drips) and bake for 35-45 minutes, until the crust is golden brown and the filling is bubbling through the slits. If the edges brown too quickly, cover them with foil or a pie shield.

Step 8: Rest Before Serving

This is crucial! Let the pie rest for at least 15 minutes before cutting. This allows the filling to set up further, ensuring clean slices and no runny filling. Your patience will be rewarded!

Serving Suggestions for Easy Homemade Chicken Pot Pie

This easy homemade chicken pot pie is a complete meal on its own, but here are some delicious ways to serve it:

  • Classic Pairing: Serve with a simple green salad dressed with lemon vinaigrette to cut through the richness.
  • Mashed Potatoes: For the ultimate comfort food feast, serve alongside creamy mashed potatoes.
  • Cranberry Sauce: A dollop of tart cranberry sauce adds a wonderful contrast to the savory filling.
  • Roasted Vegetables: Extra roasted carrots or Brussels sprouts make a great side.
  • Wine Pairing: A crisp Chardonnay or a light Pinot Noir complements this dish beautifully.

Storage & Reheating Tips

One of the best things about this easy homemade chicken pot pie is how well it stores. Here’s how to keep it fresh:

Refrigerator Storage

Cover leftover pie tightly with foil or plastic wrap. It will keep in the refrigerator for up to 4 days. The flavors actually meld and improve overnight!

Freezer Storage

You can freeze the unbaked pie or the baked pie. For unbaked: assemble completely, wrap tightly in plastic wrap and foil, and freeze for up to 3 months. Bake directly from frozen, adding 20 minutes to the bake time. For baked: let cool completely, wrap well, and freeze for up to 2 months.

Reheating Instructions

For best results, reheat in a 350°F oven for 15-20 minutes (if refrigerated) or 30-40 minutes (if frozen). The microwave works in a pinch, but the crust won’t be as crispy. For individual slices, an air fryer at 350°F for 5-7 minutes works wonders!

💡 The Kitchen Team’s Pro Tip: To refresh leftover pot pie and bring back that crispy crust, brush the top with a little melted butter before reheating in the oven. It’s like magic!

Delicious Variations of Easy Homemade Chicken Pot Pie

Once you’ve mastered the basic easy homemade chicken pot pie, try these fun twists:

  • Turkey Pot Pie: Perfect for using up Thanksgiving leftovers! Substitute turkey for chicken and add a tablespoon of fresh sage.
  • Vegetarian Pot Pie: Omit the chicken and double the vegetables. Add mushrooms, potatoes, and extra herbs for a hearty meatless version.
  • Biscuit-Topped Pot Pie: Skip the top crust and drop spoonfuls of biscuit dough over the filling. Bake until biscuits are golden and fluffy.
  • Mini Pot Pies: Use ramekins or a muffin tin for individual servings. Reduce bake time to 20-25 minutes.
  • Cheddar Crust: Add 1/2 cup of shredded sharp cheddar cheese to your pie crust dough for an extra savory, cheesy twist.
  • Spicy Chicken Pot Pie: Add 1 diced jalapeño to the onion mixture and a pinch of cayenne pepper to the filling for some heat.

Frequently Asked Questions About Easy Homemade Chicken Pot Pie

1. Why is my chicken pot pie filling runny?

The most common reason is not cooking the filling long enough before adding it to the crust. Our recipe ensures a thick filling by cooking the roux fully and simmering the sauce until it coats a spoon. Also, make sure to let the pie rest after baking.

2. Can I use store-bought rotisserie chicken?

Absolutely! Rotisserie chicken is a fantastic time-saver for this easy homemade chicken pot pie. Just remove the skin and shred the meat. You’ll need about 3 cups, which is roughly one large rotisserie chicken.

3. How do I prevent the bottom crust from getting soggy?

Besides ensuring a thick filling, you can blind bake the bottom crust for 10 minutes at 400°F before adding the filling. Also, placing the pie on the lowest oven rack helps the bottom crust cook faster.

4. Can I make this easy homemade chicken pot pie ahead of time?

Yes! You can assemble the pie completely (without the egg wash) and refrigerate it for up to 24 hours. Add the egg wash just before baking. You may need to add 5-10 minutes to the bake time since it starts cold.

5. What’s the best way to reheat leftover pot pie?

The oven is best for maintaining crust crispiness. Reheat at 350°F for 15-20 minutes. If you’re in a hurry, the microwave works but the crust will be soft. An air fryer at 350°F for 5-7 minutes is our favorite quick method.

6. Can I use milk instead of heavy cream?

Yes, you can substitute whole milk or even 2% milk for the heavy cream. The filling will be slightly less rich and creamy, but still delicious. Avoid skim milk as it may make the sauce too thin.

7. How do I know when my chicken pot pie is done?

The crust should be deep golden brown and the filling should be bubbling through the steam vents. An instant-read thermometer inserted into the filling should read at least 165°F. The pie should also be fragrant and the edges should be set.

8. Can I freeze chicken pot pie?

Yes! Both baked and unbaked pot pies freeze well. Wrap tightly in plastic wrap and foil. Unbaked pies can be frozen for up to 3 months; baked pies for up to 2 months. Bake from frozen, adding extra time as needed.

9. What vegetables can I use in this easy homemade chicken pot pie?

This recipe is very flexible! Classic choices include peas, carrots, corn, and green beans. You can also add diced potatoes, celery, mushrooms, or even broccoli. Just make sure all vegetables are cut into small, uniform pieces.

10. Can I make this recipe gluten-free?

Absolutely! Use a gluten-free all-purpose flour blend for the roux (like Bob’s Red Mill 1-to-1) and a gluten-free pie crust. The rest of the ingredients are naturally gluten-free. The texture will be slightly different but still delicious!

Did You Make This Easy Homemade Chicken Pot Pie?

We’d love to hear from you! Share a photo of your creation and tag us on social media. Don’t forget to follow The Kitchen Team on Pinterest for more amazing recipes like this one. Your support helps us create more delicious content for you!

Happy cooking, and remember — the secret to the perfect easy homemade chicken pot pie is a thick, luscious filling that never makes your crust soggy. Now go impress your loved ones with this incredible comfort food classic!

📌 Save This Recipe for Later!

Pin this Easy Homemade Chicken Pot Pie to your favorite comfort food board on Pinterest so you never lose it!

📌 Pin This Recipe Now

Follow us on Pinterest for daily recipe inspiration!
clock clock iconcutlery cutlery iconflag flag iconfolder folder iconinstagram instagram iconpinterest pinterest iconfacebook facebook iconprint print iconsquares squares iconheart heart iconheart solid heart solid icon

Classic Chicken Pot Pie


  • Author:
    Chef Emy

Instructions

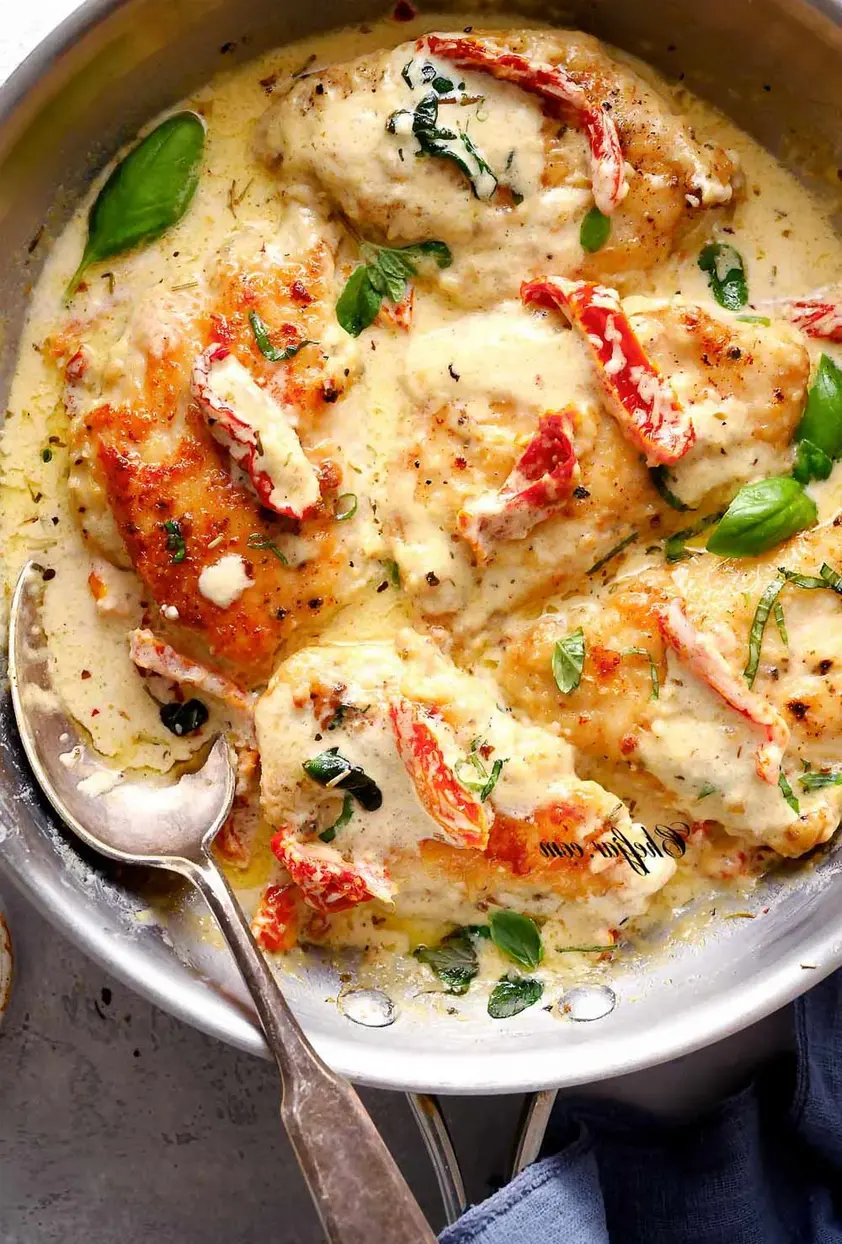
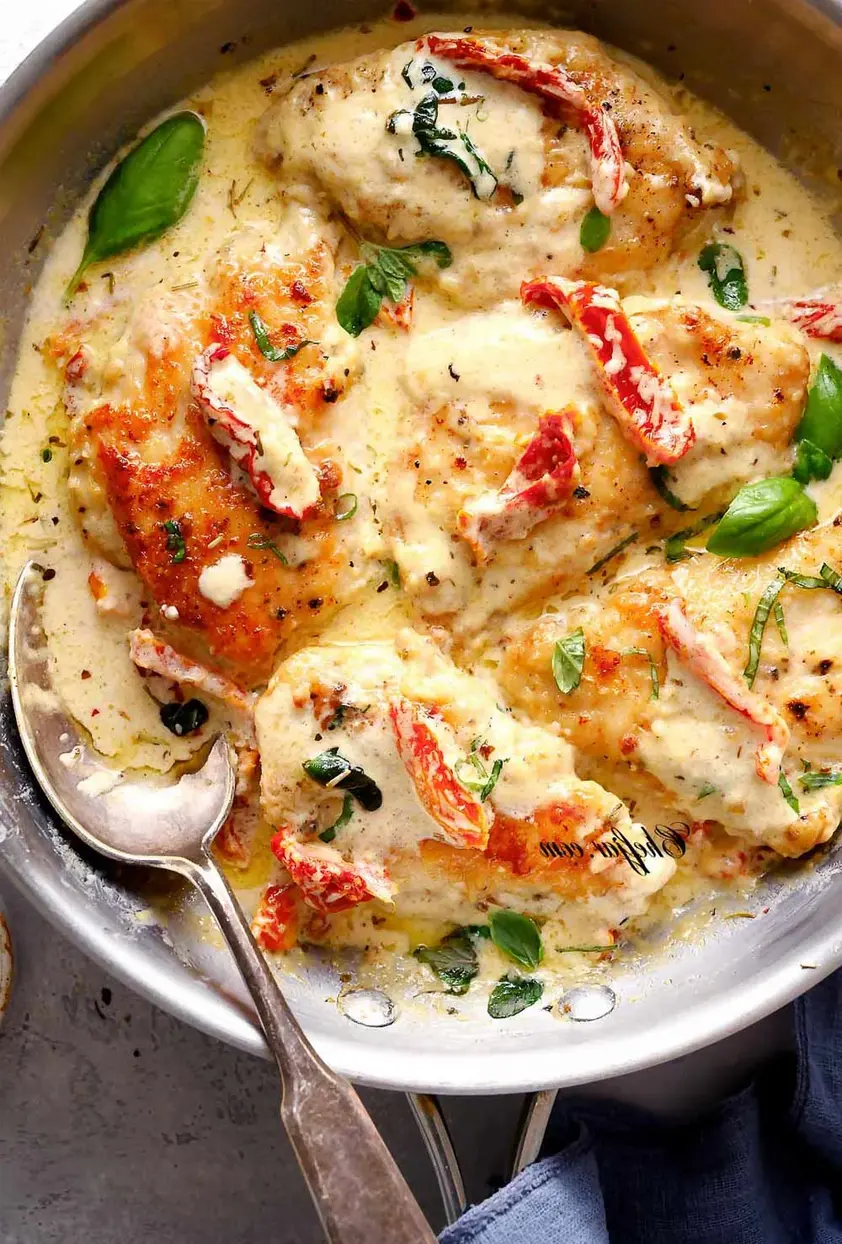
    Marry Me Chicken | Chefjar

    This Marry Me Chicken is quick 30 minute recipe. An excellent dinner idea with chicken, sundried tomatoes, creamy and thick parmesan garlic cream sauce….

    Print

    clock clock iconcutlery cutlery iconflag flag iconfolder folder iconinstagram instagram iconpinterest pinterest iconfacebook facebook iconprint print iconsquares squares iconheart heart iconheart solid heart solid icon

    Easy Marry Me Chicken


    • Author: Chef Emy

    Ingredients

    Scale
    • 3 medium boneless and skinless chicken breast, cut in half horizontally to make 6 fillets
    • Salt and ground pepper, as needed
    • 1/3 cup all-purpose flour
    • 2 tablespoons olive oil
    • 2 tablespoons unsalted butter
    • 4 garlic cloves, minced
    • 1/2 cup chicken stock or broth
    • 1 1/2 cup heavy cream
    • 3/4 cup fresh grated Parmesan cheese
    • 1/2 teaspoon chili flakes
    • 1 teaspoon Italian seasoning
    • 5 ounces 150 grams jarred sun dried tomato strips, drained
    • 1 tablespoon fresh basil leaves
    • 1 tablespoon fresh oregano or parsley

    Instructions

    1. Season chicken with salt and pepper on both sides. Dredge in flour and shake off any excess.
    2. Heat olive oil and melt butter over medium-high heat in a large skillet. Sear the chicken for 6-8 minutes each side, or until cooked through and golden brown. Work in batches not to overcrowd the pan. Transfer to a plate, cover, and set aside.
    3. In the same skillet cook garlic until fragrant, about 30 seconds to 1 minute. Add in the chicken stock, deglaze the pan, scraping any brown bits stuck to the bottom of the skillet with a wooden spatula.
    4. Reduce the heat to low-medium heat, add the heavy cream and parmesan cheese. Bring to a gentle simmer, while stirring from time to time. Season with Italian seasoning, chili flakes, salt and pepper.
    5. Add the sun dried tomatoes and cook further for a couple of minutes or until the sauce thickens slightly.
    6. Return the chicken back into the skillet; garnish with fresh basil and oregano leaves.
    7. Serve over pasta, steamed veggies or rice.
    8. Enjoy!

    Notes

    Chicken cutlets are actually commonly available in many supermarkets, so you can save yourself a step and buy them pre-made. That said, its pretty easy to just halve a chicken breast yourself, so its up to you which one youd prefer.
    When sauteeing the garlic, throw in a little (a teaspoon or so) bit of the sundried tomato oil. This will add some sweetness and the characteristic subtle tartness of sundried tomatoes to your sauteed garlic!
    Avoid light or half and half cream for this recipe. It wont thicken your sauce enough, and the key to this recipe is the thick, indulgent sauce.
    If you can, buy yourself a block of parmesan cheese or better yet, parmigiano-reggiano and grate it yourself. The cheese will be moister, fresher, and more flavorsome compared with the pre-grated stuff you can buy at the store. Store-bought pre-grated cheese wont melt right or provide enough flavoring for your sauce.

    Nutrition

    • Calories: 534kcal
    • Sugar: 11g
    • Protein: 32g

    Marry Me Chicken | Chefjar

    This Marry Me Chicken is quick 30 minute recipe. An excellent dinner idea with chicken, sundried tomatoes, creamy and thick parmesan garlic cream sauce….

    Print

    clock clock iconcutlery cutlery iconflag flag iconfolder folder iconinstagram instagram iconpinterest pinterest iconfacebook facebook iconprint print iconsquares squares iconheart heart iconheart solid heart solid icon

    Easy Marry Me Chicken


    • Author: Chef Emy

    Ingredients

    Scale
    • 3 medium boneless and skinless chicken breast, cut in half horizontally to make 6 fillets
    • Salt and ground pepper, as needed
    • 1/3 cup all-purpose flour
    • 2 tablespoons olive oil
    • 2 tablespoons unsalted butter
    • 4 garlic cloves, minced
    • 1/2 cup chicken stock or broth
    • 1 1/2 cup heavy cream
    • 3/4 cup fresh grated Parmesan cheese
    • 1/2 teaspoon chili flakes
    • 1 teaspoon Italian seasoning
    • 5 ounces 150 grams jarred sun dried tomato strips, drained
    • 1 tablespoon fresh basil leaves
    • 1 tablespoon fresh oregano or parsley

    Instructions

    1. Season chicken with salt and pepper on both sides. Dredge in flour and shake off any excess.
    2. Heat olive oil and melt butter over medium-high heat in a large skillet. Sear the chicken for 6-8 minutes each side, or until cooked through and golden brown. Work in batches not to overcrowd the pan. Transfer to a plate, cover, and set aside.
    3. In the same skillet cook garlic until fragrant, about 30 seconds to 1 minute. Add in the chicken stock, deglaze the pan, scraping any brown bits stuck to the bottom of the skillet with a wooden spatula.
    4. Reduce the heat to low-medium heat, add the heavy cream and parmesan cheese. Bring to a gentle simmer, while stirring from time to time. Season with Italian seasoning, chili flakes, salt and pepper.
    5. Add the sun dried tomatoes and cook further for a couple of minutes or until the sauce thickens slightly.
    6. Return the chicken back into the skillet; garnish with fresh basil and oregano leaves.
    7. Serve over pasta, steamed veggies or rice.
    8. Enjoy!

    Notes

    Chicken cutlets are actually commonly available in many supermarkets, so you can save yourself a step and buy them pre-made. That said, its pretty easy to just halve a chicken breast yourself, so its up to you which one youd prefer.
    When sauteeing the garlic, throw in a little (a teaspoon or so) bit of the sundried tomato oil. This will add some sweetness and the characteristic subtle tartness of sundried tomatoes to your sauteed garlic!
    Avoid light or half and half cream for this recipe. It wont thicken your sauce enough, and the key to this recipe is the thick, indulgent sauce.
    If you can, buy yourself a block of parmesan cheese or better yet, parmigiano-reggiano and grate it yourself. The cheese will be moister, fresher, and more flavorsome compared with the pre-grated stuff you can buy at the store. Store-bought pre-grated cheese wont melt right or provide enough flavoring for your sauce.

    Nutrition

    • Calories: 534kcal
    • Sugar: 11g
    • Protein: 32g

    Chicken Francese

    🍋 Creamy Chicken Francese (with Condensed Soup Shortcut)

    ⏱ Prep: 15 mins
    🔥 Cook: 20 mins
    ⌛ Total: 35 mins
    🍽 Servings: 4
    📊 Difficulty: Easy

    Author: The Kitchen Team · Site: cookingwithemy.com

    Introduction – A Lemon Lover’s Dream

    Welcome to the most luscious, creamy chicken francese you’ll ever make at home. This isn’t just another chicken cutlet recipe — we’ve taken the classic Italian-American favorite and given it a silky, rich upgrade using condensed cream of chicken soup. The result? A foolproof pan sauce that’s velvety, tangy with fresh lemon, and utterly irresistible.

    Whether you’re a busy weeknight cook or planning a special dinner, this chicken francese delivers restaurant-quality flavor with minimal fuss. The golden, egg-dipped cutlets are pan-fried to perfection, then bathed in a lemony cream sauce that comes together in minutes. Serve it over pasta, rice, or with crusty bread — every bite is pure comfort.

    At cookingwithemy.com, we believe that great food doesn’t need complicated techniques. This recipe is a testament to that philosophy: simple ingredients, smart shortcuts, and spectacular taste.

    ✨ Why This Chicken Francese Is The Best

    • Ultra-creamy sauce – Condensed cream of chicken soup creates a stable, velvety base that won’t curdle or separate.
    • Bright lemon flavor – Fresh lemon juice + thin lemon slices infuse the sauce with citrusy brightness.
    • Crispy yet tender chicken – The egg-and-parmesan coating gives a delicate crust that stays juicy inside.
    • 30-minute meal – From prep to plate in about 35 minutes, perfect for busy evenings.
    • Pantry-friendly – Most ingredients are already in your kitchen or easily found at any grocery store.
    💡 The Kitchen Team’s Pro Tip: For an even richer flavor, use half chicken broth and half dry white wine in the sauce. The acidity balances the creaminess beautifully.

    🥘 Ingredients For Chicken Francese

    Ingredient Quantity Notes
    Thin-sliced chicken breast (boneless, skinless) 1 ¼ lb (about 4 cutlets) Pound to ¼-inch even thickness
    Large eggs 2 Room temperature
    Grated Parmesan cheese 2 tablespoons Freshly grated preferred
    All-purpose flour 1 cup For dredging
    Vegetable oil ¼ cup (for frying) Or canola/avocado oil
    Garlic cloves, minced 2 Fresh is best
    Crushed red pepper flakes ⅛ teaspoon Optional, for gentle heat
    Swanson® Chicken Broth (or any low-sodium) 1 cup Use Natural Goodness® for best taste
    Condensed cream of chicken soup 1 can (10.5 oz) Undiluted
    Fresh lemon 1 whole Juiced + thinly sliced
    Fresh parsley, chopped ¼ cup For garnish
    Salt and black pepper To taste Season chicken and sauce

    Optional: 2 tablespoons butter for extra richness.

    👩‍🍳 How To Make Chicken Francese (Step by Step)

    1. Prep the chicken: Pat chicken cutlets dry with paper towels. Season both sides with salt and pepper. If cutlets are thick, place between plastic wrap and gently pound to ¼-inch even thickness.
    2. Set up dredging station: In a shallow bowl, whisk eggs with 2 tablespoons grated Parmesan until frothy. Place 1 cup flour in another shallow bowl.
    3. Coat the cutlets: Dredge each chicken piece in flour, shaking off excess. Then dip into egg mixture, letting excess drip off. Place on a wire rack.
    4. Pan-fry the chicken: Heat ¼ cup vegetable oil in a large skillet over medium-high heat. Cook chicken in batches (2 at a time) for 3–4 minutes per side, until golden brown and cooked through (internal temp 165°F). Transfer to a plate; tent with foil.
    5. Start the sauce: Pour off excess oil, leaving about 1 tablespoon in the skillet. Reduce heat to medium. Add minced garlic and crushed red pepper; sauté 30 seconds until fragrant.
    6. Build the creamy lemon sauce: Pour in chicken broth, scraping up any browned bits. Whisk in the entire can of condensed cream of chicken soup until smooth. Bring to a gentle simmer.
    7. Add lemon: Stir in juice of ½ lemon and add 3–4 thin lemon slices. Simmer for 2–3 minutes until sauce thickens slightly. Taste and adjust salt/pepper.
    8. Return chicken to skillet: Nestle the fried cutlets into the sauce, spooning sauce over the tops. Simmer for 2 minutes to meld flavors.
    9. Garnish and serve: Sprinkle with fresh parsley and remaining lemon slices. Serve immediately.
    💡 The Kitchen Team’s Pro Tip: For an extra silky sauce, whisk in 1 tablespoon cold butter at the very end, off the heat. It adds shine and richness.

    🍽 How To Serve Chicken Francese

    This creamy lemon chicken pairs beautifully with almost any side. Here are our favorite ways to enjoy it:

    • Over pasta: Toss with angel hair or fettuccine and extra lemon zest.
    • With rice: Serve over fluffy jasmine rice or lemon-herb rice to soak up the sauce.
    • Alongside vegetables: Steamed asparagus, roasted broccoli, or a crisp arugula salad.
    • With crusty bread: Use it to mop up every last drop of that luscious sauce.

    ❄️ Storage & Reheating Instructions

    Refrigerate: Store leftover chicken francese in an airtight container for up to 3 days. The sauce will thicken as it cools.

    Reheat gently: Warm in a skillet over low heat, adding a splash of chicken broth or milk to loosen the sauce. Avoid microwaving on high, as it can toughen the chicken.

    Freeze: You can freeze the cooked chicken and sauce for up to 2 months. Thaw overnight in the fridge and reheat slowly.

    💡 The Kitchen Team’s Pro Tip: If freezing, undercook the chicken slightly by 1 minute. When reheating, it will finish cooking and stay tender.

    🔄 Delicious Variations To Try

    • Chicken Francese with Wine: Replace ¼ cup broth with dry white wine (like Pinot Grigio) for extra depth.
    • Herb-infused: Add 1 teaspoon dried thyme or oregano to the flour dredge.
    • Lighter version: Use 98% fat-free condensed soup and skip the butter. Still delicious!
    • Spicy kick: Increase crushed red pepper to ¼ teaspoon or add a pinch of cayenne.
    • Dairy-free: Use a dairy-free condensed cream of mushroom soup and vegan Parmesan.

    ❓ Frequently Asked Questions About Chicken Francese

    What is chicken francese?

    Chicken francese is an Italian-American dish of egg-dipped, pan-fried chicken cutlets served in a lemon-butter or lemon-cream sauce. It’s similar to chicken piccata but uses a richer, creamier sauce.

    Can I use chicken thighs instead of breasts?

    Absolutely! Boneless, skinless thighs work wonderfully. Adjust cooking time slightly — thighs may need 4–5 minutes per side.

    Why is my sauce lumpy?

    Lumps usually happen if the condensed soup isn’t whisked thoroughly. Whisk the soup with broth before adding to the pan, and keep the heat medium-low.

    Can I make this gluten-free?

    Yes! Use gluten-free all-purpose flour blend for dredging, and ensure your condensed soup is certified gluten-free.

    How do I keep the chicken crispy?

    Serve the sauce on the side or spoon it over the chicken just before eating. If you let it sit too long, the coating softens.

    Can I use bottled lemon juice?

    Fresh lemon is strongly recommended for brightness. Bottled juice can taste flat and may affect the sauce consistency.

    What’s the best pan for this recipe?

    A large stainless steel or nonstick skillet works best. Cast iron is also great but watch the heat to avoid burning the sauce.

    Can I add capers like chicken piccata?

    Definitely! Add 1–2 tablespoons drained capers along with the lemon slices for a briny twist.

    Is this recipe freezer-friendly?

    Yes, but the texture of the sauce may change slightly. Reheat gently and stir in a splash of cream or broth to refresh.

    How do I know when the chicken is done?

    Use an instant-read thermometer: 165°F in the thickest part. The cutlets should be golden and firm to the touch.

    📲 Share This Recipe

    Did you make this chicken francese? We’d love to see your creation! Tag @cookingwithemy on Instagram or leave a comment below. Don’t forget to pin for later!

    📌 Follow us on Pinterest: https://www.pinterest.com/cookingwithemy/

    📌 Save This Recipe For Later

    Pin the image below to your favorite board so you never lose this creamy chicken francese!

    📌 Pin This Recipe Now

    📸 Tag us: @cookingwithemy • #chickenfrancese

    Recipe by The Kitchen Team for cookingwithemy.com. All images and content are copyright protected. Please do not republish without permission.

    clock clock iconcutlery cutlery iconflag flag iconfolder folder iconinstagram instagram iconpinterest pinterest iconfacebook facebook iconprint print iconsquares squares iconheart heart iconheart solid heart solid icon

    Cream of Chicken Soup


    • Author:
      Chef Emy

    Instructions

      Chicken Francese

      🥇 Creamy Chicken Francese (Lemon Pan Sauce with a Secret Shortcut)

      Published by The Kitchen Team · Updated March 2025

      ⏱️ Prep Time 15 minutes
      🔥 Cook Time 20 minutes
      ⌛ Total Time 35 minutes
      🍽️ Servings 4 servings
      📊 Difficulty Easy (beginner friendly)

      Creamy Chicken Francese with lemon slices and parsley

      If you’ve ever ordered Chicken Francese at a classic Italian-American restaurant, you know the allure: delicate, egg-dipped chicken cutlets swimming in a bright, buttery lemon sauce. But here’s the thing — most home cooks struggle to get that silky, creamy sauce without a mountain of butter and heavy cream. That’s where The Kitchen Team comes in with our secret shortcut.

      Welcome to the ultimate Chicken Francese recipe, where we use Condensed Cream of Chicken Soup as the creamy base. Yes, you read that right. This humble can of soup creates the most luscious, foolproof lemon pan sauce in minutes. No whisking roux, no tempering eggs, no stress. Just pure, golden, lemony comfort.

      This isn’t just any chicken francese — it’s Creamy Chicken Francese with a luscious, velvety sauce that clings to every forkful. We’ve tested this method with our own Chef Emy (find her on Pinterest @cookingwithemy), and it’s become a weeknight hero. Ready to impress your family? Let’s dive in.

      Why This Is the Best Chicken Francese Recipe

      • Unbelievably creamy sauce – The cream of chicken soup gives you a rich, smooth texture without heavy cream or a roux.
      • Bright lemon flavor – Fresh lemon juice + thin lemon slices infuse the sauce with citrusy tang.
      • Quick & easy – From start to table in 35 minutes. Perfect for busy weeknights or date night.
      • Uses pantry staples – Eggs, flour, chicken broth, and a can of soup – you probably have everything already.
      • Kid-friendly yet elegant – The mild lemony cream sauce pleases even picky eaters, but looks fancy enough for guests.
      💡 The Kitchen Team’s Pro Tip: For the thinnest, most tender cutlets, place your chicken breasts between two sheets of plastic wrap and gently pound to ¼-inch thickness. This ensures even cooking and that signature Francese tenderness.

      📋 Ingredients for Creamy Chicken Francese

      All measurements are US standard.

      2 large eggs
      2 tbsp. grated Parmesan cheese (plus more for serving)
      1 cup all-purpose flour
      1 ¼ lb. thin-sliced skinless boneless chicken breast halves (about 4-6 cutlets)
      as needed vegetable oil, for frying (about ¼ cup)
      2 cloves garlic, minced
      ⅛ tsp. crushed red pepper flakes (optional, for heat)
      1 cup Swanson® Natural Goodness Chicken Broth (low sodium preferred)
      1 can (10.5 oz) Condensed Cream of Chicken Soup (we recommend Campbell’s or store brand)
      1 lemon, thinly sliced (plus 2 tbsp. fresh lemon juice)
      2 tbsp. fresh chopped parsley (for garnish)

      Pantry: salt and black pepper to taste.

      👩‍🍳 Step-by-Step Instructions

      Step 1: Prep the Chicken

      Pat the chicken cutlets dry with paper towels. Season both sides with salt and pepper. In a shallow bowl, whisk the eggs and grated Parmesan together until frothy. Place the flour in a separate shallow dish.

      Step 2: Dredge & Fry

      Heat about ¼ cup vegetable oil in a large nonstick skillet over medium-high heat. Working one at a time, dip each chicken cutlet into the flour, shaking off excess, then into the egg-Parmesan mixture, letting any excess drip off. Immediately place in the hot skillet. Cook 3–4 minutes per side, until golden brown and cooked through (internal temp 165°F). Transfer to a plate; tent with foil. Repeat with remaining chicken, adding a little more oil if needed.

      Step 3: Build the Creamy Lemon Sauce

      Reduce heat to medium. In the same skillet, add a splash of oil if dry, then sauté minced garlic and crushed red pepper for 30 seconds until fragrant. Pour in the chicken broth and bring to a simmer, scraping up any browned bits from the pan (that’s flavor!). Whisk in the condensed cream of chicken soup until smooth. Add the lemon slices and 2 tablespoons fresh lemon juice. Simmer gently for 3–4 minutes, stirring often, until the sauce thickens slightly and becomes velvety. Taste and adjust salt/pepper.

      Step 4: Combine & Finish

      Return the chicken cutlets to the skillet, nestling them into the sauce. Spoon sauce over the tops. Simmer for 2 minutes to heat through. Garnish with fresh parsley and extra Parmesan if desired.

      💡 The Kitchen Team’s Pro Tip: For an extra silky sauce, stir in 1 tablespoon of cold butter at the very end, off the heat. It adds a beautiful gloss and richness without making the sauce heavy.

      🍋 How to Serve Chicken Francese

      This creamy chicken francese is incredibly versatile. Here are our favorite ways to serve it:

      • Over pasta: Toss with angel hair, linguine, or fettuccine – spoon extra sauce on top.
      • With rice: Jasmine rice or buttery risotto soaks up every drop of lemon sauce.
      • Alongside roasted vegetables: Asparagus, broccoli, or green beans add freshness.
      • With crusty bread: A warm baguette or garlic bread is perfect for mopping up the sauce.

      We love a simple side salad with lemon vinaigrette to balance the richness. Dinner is ready in 35 minutes!

      🧊 Storage & Reheating Tips

      Refrigerate: Store leftovers in an airtight container for up to 3 days. The sauce may thicken as it sits – that’s normal.

      Reheat gently: Place chicken and sauce in a skillet over medium-low heat, adding a splash of chicken broth or water to loosen the sauce. Microwave is okay but use 50% power in 30-second bursts to avoid drying out the chicken.

      Freeze: We don’t recommend freezing this dish because the creamy sauce can separate upon thawing. Best enjoyed fresh!

      💡 The Kitchen Team’s Pro Tip: If you’re meal prepping, keep the sauce separate from the chicken and combine when reheating. The cutlets stay crispier that way.

      🔄 Variations & Substitutions

      • Lighter version: Use 98% fat-free cream of chicken soup and skip the oil – use nonstick spray. Reduce Parmesan to 1 tbsp.
      • Extra lemony: Add 1 teaspoon lemon zest to the egg mixture and another teaspoon to the sauce.
      • Herb twist: Stir in 1 tsp dried thyme or oregano with the garlic. Fresh basil also works beautifully.
      • Gluten-free: Use gluten-free all-purpose flour blend (cup-for-cup) and certified gluten-free cream of chicken soup.
      • Dairy-free: Use dairy-free cream of mushroom soup and omit Parmesan – still delicious!
      • Chicken thighs: Boneless skinless thighs work great; just adjust cooking time to 5–6 minutes per side.

      ❓ Frequently Asked Questions About Chicken Francese

      What is Chicken Francese?

      Chicken Francese is an Italian-American dish where chicken cutlets are dipped in egg and Parmesan, then pan-fried and served in a lemon butter or lemon cream sauce. Our version uses cream of chicken soup for a shortcut that tastes homemade.

      Can I use chicken tenders instead of cutlets?

      Absolutely! Chicken tenders cook even faster – reduce cook time to 2–3 minutes per side. Perfect for a quick meal.

      Why is my sauce lumpy?

      Lumps usually happen if the soup isn’t whisked thoroughly into the broth. Whisk constantly and add the soup slowly. If lumps appear, use a whisk or immersion blender to smooth it out.

      Can I make this without condensed soup?

      Yes! Replace the soup with 1 cup heavy cream + 1 tablespoon cornstarch whisked together. Simmer until thickened. The flavor will be slightly different but still delicious.

      Is Chicken Francese the same as Chicken Marsala?

      No. Chicken Marsala uses a mushroom-wine sauce (Marsala wine). Francese is defined by its egg dip and lemon-forward sauce. Both are Italian-American classics.

      Can I bake the chicken instead of frying?

      For a lighter version, bake the breaded cutlets at 400°F on a wire rack for 15–18 minutes, then add to the sauce. The texture won’t be as golden but still tasty.

      What’s the best lemon to use?

      Meyer lemons are sweeter and less acidic; regular Eureka lemons work perfectly. Always use fresh lemon juice – bottled juice lacks brightness.

      How do I keep the chicken crispy?

      Serve immediately after adding to the sauce. If you need to hold it, keep chicken and sauce separate until serving. The sauce will soften the coating over time.

      Can I double this recipe?

      Yes! Use a larger skillet or work in batches. Double all ingredients. The sauce may need an extra minute to thicken.

      What wine pairs with Chicken Francese?

      Pinot Grigio, Sauvignon Blanc, or a dry Chardonnay complement the lemon cream sauce beautifully. For red lovers, a light Pinot Noir works.

      📌 Love this Creamy Chicken Francese?

      📌 Pin this recipe now

      Follow @cookingwithemy on Pinterest for more delicious dinners!

      Tag us when you make it — #CookingWithEmy #ChickenFrancese


      Recipe by The Kitchen Team · © cookingwithemy.com · All rights reserved.

      clock clock iconcutlery cutlery iconflag flag iconfolder folder iconinstagram instagram iconpinterest pinterest iconfacebook facebook iconprint print iconsquares squares iconheart heart iconheart solid heart solid icon

      Cream of Chicken Soup


      • Author:
        Chef Emy

      Instructions

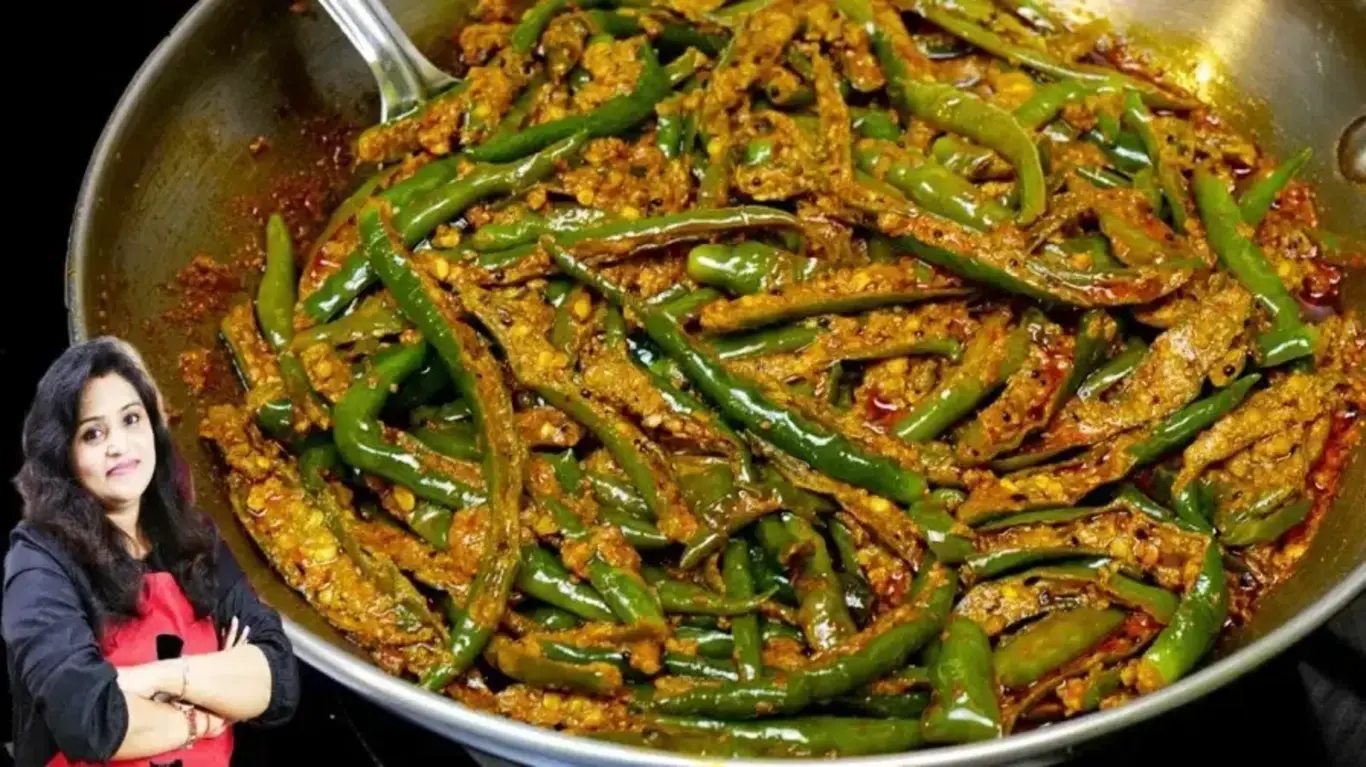
        Delicious Dahi Mirchi Fry Recipe – A Spicy and Tangy Delight!

        Delicious Dahi Mirchi Fry Recipe – A Spicy and Tangy Delight! (Crispy Yogurt-Marinated Chilies)

        🕐 Prep: 10 mins
        🔥 Cook: 15 mins
        ⏱ Total: 25 mins
        🍽 Servings: 4
        📊 Difficulty: Easy

        📖 Table of Contents

        • 1. Why This Dahi Mirchi Fry Is the Best
        • 2. Ingredients You’ll Need
        • 3. Step-by-Step Instructions
        • 4. Serving Suggestions
        • 5. Storage Tips
        • 6. Variations to Try
        • 7. Frequently Asked Questions
        • 8. Share & Pin This Recipe

        Welcome to The Kitchen Team at cookingwithemy.com! Today we’re bringing you a show-stopping Indian snack that’s spicy, tangy, and absolutely addictive – our Delicious Dahi Mirchi Fry Recipe. This dish features fresh green chilies marinated in a spiced yogurt mixture, then pan-fried until golden and crispy. It’s the perfect appetizer for parties, a fantastic side dish for dal-rice, or even a unique topping for burgers and sandwiches. The combination of creamy yogurt, aromatic spices, and the heat of chilies creates a flavor explosion you won’t forget. Whether you’re a seasoned cook or a beginner, this easy recipe will guide you to perfection. Let’s dive into the world of bold Indian flavors!


        🔥 Why This Dahi Mirchi Fry Is the Best

        What sets our Dahi Mirchi Fry apart? First, we use a special tempering technique that enhances every spice. Second, the yogurt marinade tenderizes the chilies and balances their heat with a tangy creaminess. Third, we’ve perfected the cooking time so you get crispy edges without burning the chilies. This recipe is also incredibly versatile – adjust the spice level by choosing milder or hotter chilies. Plus, it’s naturally gluten-free and can be made vegan with plant-based yogurt. Trust us, once you try this version, you’ll never go back to plain fried chilies!

        💡 The Kitchen Team’s Pro Tip: For the best texture, always slit the chilies lengthwise and remove the seeds if you prefer less heat. This allows the yogurt marinade to penetrate deep into the chili, giving you flavor in every bite.

        🥘 Ingredients You’ll Need

        • Green Chilies – 250 grams (about 20-25 medium-sized, adjust heat by variety)
        • Mustard Oil – 2 tablespoons (or any neutral oil)
        • Mustard Seeds – 1 teaspoon
        • Cumin Seeds – ½ teaspoon
        • Fenugreek Seeds – ¼ teaspoon
        • Fennel Seeds – 1 teaspoon
        • Asafoetida (Hing) – ½ teaspoon (plus extra for marinade)
        • Turmeric Powder – 1 teaspoon
        • Kashmiri Red Chili Powder – 1 teaspoon (for color and mild heat)
        • Coriander Powder – 3 teaspoons
        • Garam Masala – ½ teaspoon
        • Fennel Powder – 1 teaspoon
        • Thick Yogurt (Curd) – 3 to 4 tablespoons, whisked smooth
        • Salt – to taste
        • Water – ¼ cup
        • Fresh Coriander – for garnish (optional)

        👩‍🍳 Step-by-Step Instructions

        1. Prepare the Chilies: Wash 250 grams of green chilies thoroughly. Pat them dry. Cut off the stems, then slit each chili lengthwise into two halves. For milder flavor, remove the seeds and white membranes. Set aside.
        2. Temper the Spices: Place a heavy-bottomed pan on medium heat. Add 2 tablespoons of mustard oil and heat until it shimmers (but not smoking). Add 1 tsp mustard seeds, ½ tsp cumin seeds, ¼ tsp fenugreek seeds, 1 tsp fennel seeds, and ½ tsp asafoetida. Let them crackle for 10-15 seconds – this releases incredible aroma.
        3. Cook the Chilies: Add the slit green chilies to the pan. Stir well to coat them in the tempered oil. Add salt to taste and 1 teaspoon turmeric powder. Roast the chilies for 2-3 minutes, stirring occasionally, until they start to soften and get slight char marks.
        4. Add the Spice Powders: Sprinkle 1 tsp Kashmiri red chili powder, 3 tsp coriander powder, and ½ tsp garam masala over the chilies. Mix everything thoroughly. Cook for another minute, allowing the spices to bloom. If the mixture seems dry, add a splash of water (about 2 tablespoons).
        5. Create the Yogurt Marinade: In a small bowl, whisk together 3-4 tablespoons of thick yogurt, 1 tsp fennel powder, and ½ tsp asafoetida. Add this mixture to the pan. Stir gently to coat each chili piece. The yogurt will create a creamy, tangy sauce that clings to the chilies.
        6. Finish Cooking: Pour in ¼ cup of water. Stir well, then cover the pan. Let it cook on low heat for 5-7 minutes, stirring once halfway. The chilies should be tender but still hold their shape, and the gravy should thicken slightly. Uncover and cook for another minute to evaporate excess moisture.
        7. Garnish and Serve: Turn off the heat. Garnish with fresh coriander leaves if desired. Serve hot as a side dish or snack. Enjoy with roti, paratha, or as a spicy topping for your meals!
        💡 The Kitchen Team’s Pro Tip: For extra crispiness, after cooking, you can briefly fry the chilies in a little more oil for 1-2 minutes per side. This gives them a beautiful golden crust while keeping the inside creamy.

        🍽 Serving Suggestions

        Our Dahi Mirchi Fry is incredibly versatile. Serve it as a spicy appetizer with mint chutney or tamarind sauce. It pairs wonderfully with dal-chawal (rice and lentils), roti, or naan. You can also chop it up and use it as a topping for baked potatoes, nachos, or even in wraps and sandwiches. For a complete Indian thali experience, serve alongside raita, pickle, and papad. The tangy yogurt and spicy chilies will elevate any meal!

        📦 Storage Tips

        Store any leftover Dahi Mirchi Fry in an airtight container in the refrigerator for up to 3 days. To reheat, place in a pan over medium heat with a splash of water to revive the gravy. Avoid microwaving as it can make the chilies soggy. You can also freeze the cooked dish for up to a month – thaw overnight in the fridge and reheat on the stovetop. For best results, consume fresh as the chilies lose their crunch over time.

        🔄 Variations to Try

        • Less Spicy: Use large, mild green chilies like banana peppers or Italian frying peppers. Remove all seeds.
        • Extra Tangy: Add 1 teaspoon of lemon juice or amchur (dry mango powder) along with the yogurt.
        • Vegan Version: Substitute yogurt with thick coconut yogurt or cashew cream. Use coconut oil instead of mustard oil.
        • Stuffed Dahi Mirchi: Make a thicker slit and stuff with a mixture of spiced paneer or boiled potato before frying.
        • Air Fryer Option: After marinating, arrange chilies in an air fryer basket and cook at 375°F for 8-10 minutes, shaking halfway.

        ❓ Frequently Asked Questions

        1. What kind of green chilies should I use?
        Use fresh, firm green chilies. Indian varieties like Bhavnagri or Jwala are ideal for their heat and flavor. For milder taste, choose banana peppers or Anaheim chilies.
        2. Can I make this dish without yogurt?
        Yes! Replace yogurt with a mixture of 2 tablespoons of lemon juice and 3 tablespoons of water, plus 1 tablespoon of gram flour (besan) to thicken. This gives a tangy, dairy-free version.
        3. How do I reduce the spiciness?
        Remove the seeds and white pith from the chilies. Also, use Kashmiri red chili powder (which is milder) and add a pinch of sugar to balance heat.
        4. Can I prepare this in advance?
        Absolutely! You can marinate the slit chilies in the yogurt-spice mixture for up to 2 hours before cooking. Store in the fridge. Cook just before serving for best texture.
        5. Is this recipe gluten-free?
        Yes, all ingredients are naturally gluten-free. Ensure your asafoetida brand is gluten-free (some contain wheat flour). Check labels to be safe.
        6. Why did my chilies become mushy?
        Overcooking or using too much water can make chilies soft. Cook on medium heat and only add water as needed. Also, avoid stirring too vigorously once the yogurt is added.
        7. Can I double the recipe?
        Yes! This recipe scales easily. Use a larger pan to avoid overcrowding. Cook in batches if necessary to ensure even browning.
        8. What can I serve with Dahi Mirchi Fry?
        It pairs perfectly with plain yogurt rice, dal khichdi, or as a side with any Indian curry. It also makes a fantastic pizza topping or taco filling!
        9. How do I make it less oily?
        Use a non-stick pan and reduce oil to 1 tablespoon. You can also bake the marinated chilies at 400°F for 12-15 minutes, flipping halfway.
        10. Can I use dried red chilies instead?
        This recipe is designed for fresh green chilies. Dried red chilies would require different preparation (soaking and grinding) and won’t have the same texture.

        📌 Share & Pin This Recipe

        If you loved this Delicious Dahi Mirchi Fry Recipe, please share it with your friends and family! Leave a comment below to let us know how it turned out. Don’t forget to follow us on Pinterest for more spicy, tangy, and delicious Indian recipes. Happy cooking from The Kitchen Team at cookingwithemy.com!

        📌 Love this recipe? Save it to your Pinterest board!

        📌 Pin This Recipe Now

        Follow us @cookingwithemy for daily recipe inspiration!
        clock clock iconcutlery cutlery iconflag flag iconfolder folder iconinstagram instagram iconpinterest pinterest iconfacebook facebook iconprint print iconsquares squares iconheart heart iconheart solid heart solid icon

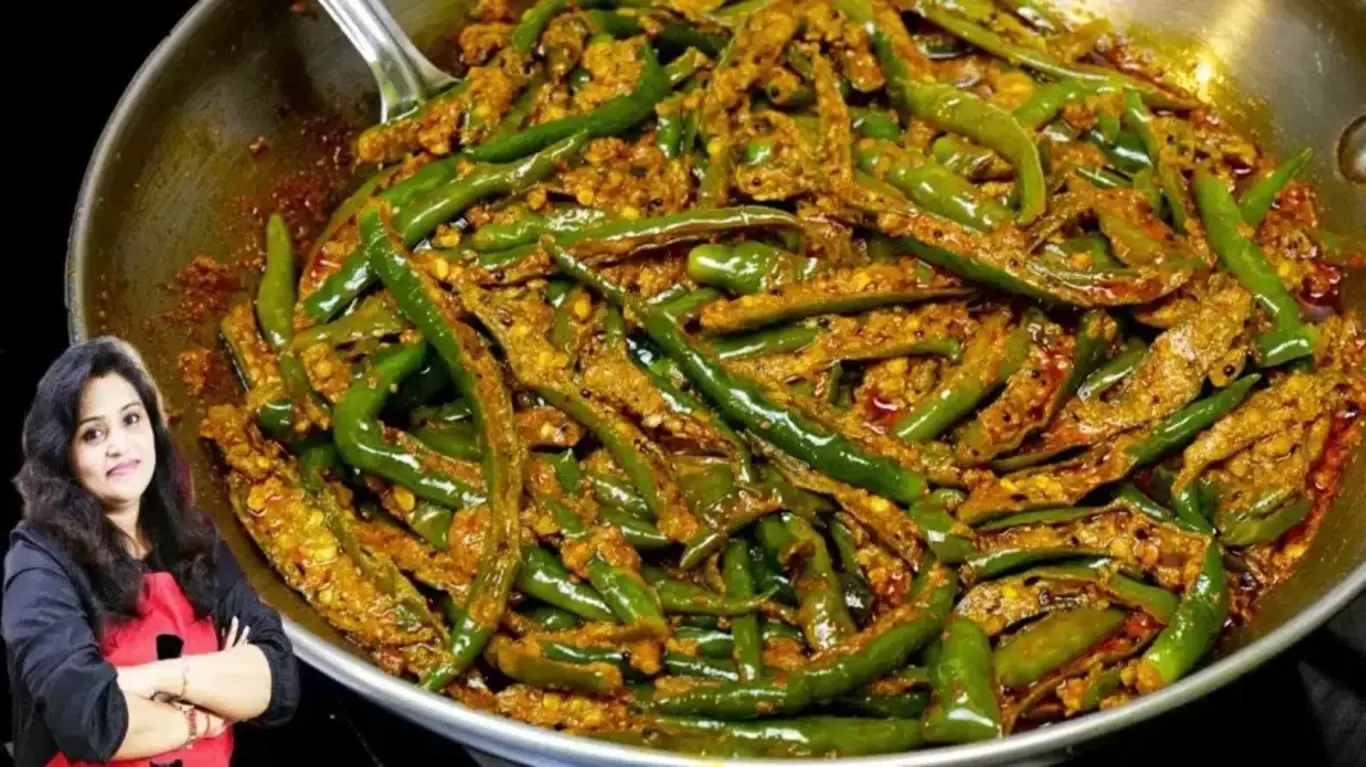
        Dahi Mirchi Fry Recipe | How to make Dahi Mirchi Fry | Dahi Mirchi Ki Sabzi


        • Author:
          Chef Emy

        Description

        In this post, you will see an easy and step-by-step recipe to make the most tasty and perfect Dahi Mirchi Fry at home without any mistakes or difficulty.


        Ingredients


        Scale
        • Green Chilli 250 gm
        • Mustard Oil 2 tbsp
        • Mustard 1 tsp
        • Cumin Seed 1/2 tsp
        • Fenugreek Seed 1/4 tsp
        • Fennel Seed 1 tsp
        • Asafoetida
        • Salt as per taste
        • Turmeric Powder 1 tsp
        • Kashmiri Red Chilli Powder 1 tsp
        • Coriander Powder 3 tsp
        • Garam Masala 1/2 tsp
        • Water 1/4 cup
        • Fennel Powder 1 tsp
        • Asafoetida 1/2 tsp
        • Curd 3 to 4 tsp

        Instructions

        1. To make the perfect Dahi Mirchi Fry, take 250 grams of green chili, wash well, and cut the stem.
        2. Now, split all the chilies into two parts, like in the following image.
        3. Now place a pan on the flame, add 2 tablespoons of mustard oil, and heat well.
        4. After the hot oil, add 1 tsp of mustard seeds, 1/2 tsp of cumin seeds, 1/2 tsp of kalonji, 1/4 tsp of fenugreek seed, 1 tsp of fennel seeds, and 1/2 tsp of asafoetida.
        5. Now add chopped green chillies, salt as per taste, one teaspoon of turmeric powder, and roast well.
        6. Now add 1 tsp of Kashmiri red chili powder, 3 tsp of coriander powder, and 1/2 tsp of garam masala, and mix everything well.
        7. After a minute, add 1/4 cup of water, 1 tsp of fennel powder, and 1/2 tsp of dry mango powder, and cook for a minute.
        8. After a minute, turn the flame to low, add 34 tablespoons of curd, and mix well.
        9. After 5 minutes, turn off the flame and serve your Dahi Mirchi Fry.
        10. Now your perfect Dahi Mirchi Fry is completely ready, and you can enjoy it.


        Delicious Dahi Mirchi Fry Recipe – A Spicy and Tangy Delight!

        Delicious Dahi Mirchi Fry Recipe – A Spicy and Tangy Delight! 🔥🌶️

        Prep Time
        10 mins
        Cook Time
        15 mins
        Total Time
        25 mins
        Servings
        4
        Difficulty
        Easy
        Cuisine
        Indian

        🌶️ Introduction: Why You’ll Love This Dahi Mirchi Fry

        Welcome to The Kitchen Team, where we bring you the most authentic and delicious Indian recipes right to your kitchen! Today, we’re excited to share our take on a classic Indian snack that’s taking the internet by storm – the Delicious Dahi Mirchi Fry Recipe – A Spicy and Tangy Delight!

        Imagine this: crispy, golden-fried green chilies, marinated in a tangy yogurt mixture, bursting with aromatic spices that dance on your palate. That’s exactly what this recipe delivers! Whether you’re looking for a quick evening snack, a side dish for your dal-rice, or a show-stopping appetizer for your next dinner party, this Dahi Mirchi Fry checks all the boxes.

        What makes this recipe truly special is the perfect balance of heat and tanginess. The yogurt marinade tames the fiery kick of green chilies while adding a creamy, tangy layer that complements the earthy spices beautifully. Plus, it’s incredibly easy to make with simple pantry ingredients!

        At cookingwithemy.com, we believe that great food doesn’t have to be complicated. This recipe is a testament to that philosophy – using just a handful of ingredients and 25 minutes of your time, you can create something truly extraordinary. Let’s dive into the world of bold flavors and aromatic spices!

        🌟 Why This Dahi Mirchi Fry Recipe Works Best

        1. Perfectly Balanced Flavors

        The combination of yogurt and spices creates a harmonious blend where no single flavor overpowers another. The tanginess of yogurt cuts through the heat of chilies, while the aromatic spices add depth and complexity.

        2. Foolproof Technique

        Our step-by-step method ensures that even beginners can achieve restaurant-quality results. From splitting the chilies to the perfect frying temperature, we’ve got you covered.

        3. Versatile Serving Options

        This dish works beautifully as a snack, side dish, or even a main course accompaniment. Pair it with roti, paratha, or enjoy it on its own with a cup of chai!

        4. Healthier Alternative

        Unlike deep-fried snacks, this recipe uses minimal oil while still delivering that satisfying crunch. The yogurt also adds probiotics, making it a gut-friendly option.

        5. Budget-Friendly Ingredients

        All ingredients are easily available in your local grocery store or Indian market. No exotic or expensive items required!

        💡 The Kitchen Team’s Pro Tip: For the best results, use fresh, firm green chilies. Avoid overripe or soft chilies as they can become mushy during cooking. Also, adjust the number of chilies based on your spice tolerance – you can always use fewer chilies for a milder version!

        📋 Ingredients for Dahi Mirchi Fry

        Here’s everything you need to make this delicious dish. All measurements are in US standard units.

        Ingredient Quantity Notes
        Green Chilies 250 gm (about 9 oz) Fresh, firm, and medium-spicy
        Mustard Oil 2 tbsp Can substitute with vegetable oil
        Mustard Seeds 1 tsp For tempering
        Cumin Seeds ½ tsp Adds earthy flavor
        Fenugreek Seeds ¼ tsp Optional but recommended
        Fennel Seeds 1 tsp Crushed slightly for more flavor
        Asafoetida (Hing) ½ tsp + ½ tsp Divided use
        Turmeric Powder 1 tsp For color and health benefits
        Kashmiri Red Chili Powder 1 tsp For color without too much heat
        Coriander Powder 3 tsp Freshly ground is best
        Garam Masala ½ tsp Homemade or store-bought
        Fennel Powder 1 tsp Adds sweetness
        Plain Yogurt (Curd) 3-4 tbsp Thick and creamy
        Salt To taste Approximately ½ tsp
        Water ¼ cup For adjusting consistency
        💡 The Kitchen Team’s Pro Tip: If you’re sensitive to spice, remove the seeds from the green chilies before cooking. This will significantly reduce the heat while keeping the flavor intact. Also, using thick yogurt (Greek yogurt works great) prevents the dish from becoming watery.

        👩‍🍳 Step-by-Step Instructions

        Follow these detailed steps to create the perfect Dahi Mirchi Fry. Take your time and enjoy the process!

        1. Prepare the Green Chilies: Wash 250 gm of fresh green chilies thoroughly under running water. Pat them dry with a clean kitchen towel. Using a sharp knife, cut off the stems. Then, make a slit lengthwise down each chili, keeping the ends intact to create a pocket. If you prefer less heat, gently remove the seeds and white membranes.
        2. Heat the Oil: Place a heavy-bottomed pan or kadhai on medium heat. Add 2 tablespoons of mustard oil and heat until it reaches its smoking point. Mustard oil should be heated well to remove its pungent taste. If using regular oil, heat until it shimmers.
        3. Temper the Spices: Once the oil is hot, reduce the heat to low. Carefully add 1 tsp mustard seeds, ½ tsp cumin seeds, ¼ tsp fenugreek seeds, 1 tsp fennel seeds, and ½ tsp asafoetida. Let them crackle for about 30 seconds, being careful not to burn them. The aroma at this stage is incredible!
        4. Add the Green Chilies: Increase the heat to medium and add the prepared green chilies to the pan. Stir well to coat them with the tempered spices. Add salt to taste and 1 tsp turmeric powder. Roast the chilies for 2-3 minutes, stirring occasionally, until they start to soften and develop slight char marks.
        5. Add the Spice Powders: Sprinkle 1 tsp Kashmiri red chili powder, 3 tsp coriander powder, and ½ tsp garam masala over the chilies. Mix everything thoroughly, ensuring each chili is evenly coated with the spice mixture. Cook for another minute to allow the spices to bloom.
        6. Create the Gravy: Pour in ¼ cup of water and stir gently. Let the mixture simmer for 2-3 minutes, allowing the chilies to absorb the flavors and the gravy to thicken slightly. The water helps create a light sauce that coats the chilies beautifully.
        7. Add Yogurt and Fennel Powder: In a small bowl, whisk 3-4 tbsp of thick yogurt until smooth. Add this to the pan along with 1 tsp fennel powder and the remaining ½ tsp asafoetida. Stir gently to combine. Cook on low heat for 2-3 minutes, stirring occasionally. The yogurt will add creaminess and tanginess to the dish.
        8. Final Adjustments: Taste and adjust seasoning if needed. If the dish seems too dry, add a splash of water. If too watery, let it simmer uncovered for a minute or two. The final consistency should be slightly thick, coating the chilies nicely.
        9. Garnish and Serve: Turn off the heat. Garnish with a sprinkle of fresh coriander leaves or a pinch of chaat masala for extra flavor. Serve hot with roti, paratha, or as a side dish with your main meal.
        💡 The Kitchen Team’s Pro Tip: For the best texture, avoid overcooking the chilies. They should be tender but still have a slight bite. Also, always cook the yogurt on low heat to prevent it from curdling. If you’re using store-bought yogurt, make sure it’s at room temperature before adding to the pan.

        🍽️ Serving Suggestions

        This versatile dish can be enjoyed in numerous ways. Here are our favorite serving ideas:

        Traditional Pairings

        • With Roti or Paratha: Serve as a side dish with Indian flatbreads for a complete meal.
        • With Dal and Rice: Add it to your dal-chawal combo for an extra kick of flavor.
        • As a Snack: Enjoy it on its own with a cup of hot masala chai.

        Creative Serving Ideas

        • In Wraps: Use it as a filling for wraps or rolls with fresh veggies.
        • On Toast: Top crusty bread with cream cheese and Dahi Mirchi Fry for an appetizer.
        • With Rice Bowls: Add it to grain bowls for a spicy twist.
        💡 The Kitchen Team’s Pro Tip: For a beautiful presentation, serve the Dahi Mirchi Fry in a traditional copper or brass bowl. Garnish with fresh coriander, a drizzle of yogurt, and a sprinkle of red chili powder. This dish also pairs wonderfully with a cooling cucumber raita!

        📦 Storage Tips

        Proper storage ensures your Dahi Mirchi Fry stays fresh and delicious for longer.

        Refrigeration

        • Store in an airtight container in the refrigerator for up to 3-4 days.
        • Allow the dish to cool completely before storing to prevent condensation.
        • Reheat gently in a pan or microwave before serving.

        Freezing

        • This dish can be frozen for up to 1 month.
        • Portion into freezer-safe containers or bags.
        • Thaw overnight in the refrigerator before reheating.
        💡 The Kitchen Team’s Pro Tip: If you’re meal-prepping, consider storing the fried chilies and the yogurt sauce separately. Combine them only when reheating to maintain the best texture. The chilies tend to become softer if stored in the sauce for too long.

        🎨 Delicious Variations to Try

        1. Vegan Dahi Mirchi Fry

        Replace yogurt with thick coconut yogurt or cashew cream. Use coconut oil instead of mustard oil for a different flavor profile.

        2. Stuffed Dahi Mirchi

        Make a larger slit in the chilies and stuff them with a mixture of crumbled paneer, spices, and herbs before cooking.

        3. Air Fryer Version

        For a healthier twist, air fry the marinated chilies at 375°F for 8-10 minutes, shaking halfway through. Toss with the yogurt mixture after cooking.

        4. Extra Spicy Version

        Add 1-2 finely chopped green chilies or a teaspoon of green chili paste to the tempering for an extra kick.

        5. Protein-Packed Version

        Add boiled chickpeas or paneer cubes along with the chilies for a more substantial dish.

        💡 The Kitchen Team’s Pro Tip: Don’t be afraid to experiment! This recipe is incredibly forgiving. Try different spice combinations or add vegetables like bell peppers or onions for added texture and flavor.

        ❓ Frequently Asked Questions

        Can I use any type of green chili?
        Yes, but we recommend using medium-spicy varieties like Thai green chilies or Indian bhavnagri chilies. Avoid extremely hot varieties like bird’s eye chilies unless you have a high spice tolerance.
        How do I reduce the spiciness?
        Remove the seeds and white membranes from the chilies before cooking. You can also add more yogurt or a teaspoon of sugar to balance the heat.
        Can I make this dish ahead of time?
        Absolutely! This dish tastes even better the next day as the flavors meld together. Simply reheat gently before serving.
        What can I use instead of mustard oil?
        Vegetable oil, canola oil, or coconut oil work well. For a similar pungent flavor, add a pinch of mustard powder to the oil.
        Is this dish gluten-free?
        Yes, all ingredients are naturally gluten-free. However, always check the labels of spice powders to ensure no cross-contamination.
        Can I double the recipe?
        Yes, simply double all ingredients. Use a larger pan to avoid overcrowding, which can lead to steaming instead of frying.
        Why did my yogurt curdle?
        Yogurt can curdle if added to high heat or if it’s too cold. Always use room temperature yogurt and add it on low heat while stirring continuously.
        Can I use dried spices instead of fresh?
        Yes, all spices listed are dried powders. However, using freshly ground spices will give you a more aromatic and flavorful result.
        How do I know when the chilies are cooked?
        The chilies should be tender but still hold their shape. They will have slight char marks and will have reduced in size slightly.
        Can I serve this cold?
        While traditionally served hot, this dish can be enjoyed at room temperature as a salad or side dish. The flavors actually become more pronounced as it cools.

        📤 Share This Recipe

        Loved this Delicious Dahi Mirchi Fry Recipe – A Spicy and Tangy Delight!? Share it with your friends and family! Tag us on social media when you try this recipe – we love seeing your creations!

        Don’t forget to subscribe to our newsletter at cookingwithemy.com for more amazing recipes delivered straight to your inbox. Happy cooking! 🎉

        📌 Pin This Recipe for Later!

        Save this Delicious Dahi Mirchi Fry Recipe to your favorite Pinterest board so you can find it easily when you’re ready to cook!

        Follow Us on Pinterest

        Visit our Pinterest profile for more mouthwatering recipes and cooking inspiration!

        clock clock iconcutlery cutlery iconflag flag iconfolder folder iconinstagram instagram iconpinterest pinterest iconfacebook facebook iconprint print iconsquares squares iconheart heart iconheart solid heart solid icon

        Dahi Mirchi Fry Recipe | How to make Dahi Mirchi Fry | Dahi Mirchi Ki Sabzi


        • Author:
          Chef Emy

        Description

        In this post, you will see an easy and step-by-step recipe to make the most tasty and perfect Dahi Mirchi Fry at home without any mistakes or difficulty.


        Ingredients


        Scale
        • Green Chilli 250 gm
        • Mustard Oil 2 tbsp
        • Mustard 1 tsp
        • Cumin Seed 1/2 tsp
        • Fenugreek Seed 1/4 tsp
        • Fennel Seed 1 tsp
        • Asafoetida
        • Salt as per taste
        • Turmeric Powder 1 tsp
        • Kashmiri Red Chilli Powder 1 tsp
        • Coriander Powder 3 tsp
        • Garam Masala 1/2 tsp
        • Water 1/4 cup
        • Fennel Powder 1 tsp
        • Asafoetida 1/2 tsp
        • Curd 3 to 4 tsp

        Instructions

        1. To make the perfect Dahi Mirchi Fry, take 250 grams of green chili, wash well, and cut the stem.
        2. Now, split all the chilies into two parts, like in the following image.
        3. Now place a pan on the flame, add 2 tablespoons of mustard oil, and heat well.
        4. After the hot oil, add 1 tsp of mustard seeds, 1/2 tsp of cumin seeds, 1/2 tsp of kalonji, 1/4 tsp of fenugreek seed, 1 tsp of fennel seeds, and 1/2 tsp of asafoetida.
        5. Now add chopped green chillies, salt as per taste, one teaspoon of turmeric powder, and roast well.
        6. Now add 1 tsp of Kashmiri red chili powder, 3 tsp of coriander powder, and 1/2 tsp of garam masala, and mix everything well.
        7. After a minute, add 1/4 cup of water, 1 tsp of fennel powder, and 1/2 tsp of dry mango powder, and cook for a minute.
        8. After a minute, turn the flame to low, add 34 tablespoons of curd, and mix well.
        9. After 5 minutes, turn off the flame and serve your Dahi Mirchi Fry.
        10. Now your perfect Dahi Mirchi Fry is completely ready, and you can enjoy it.


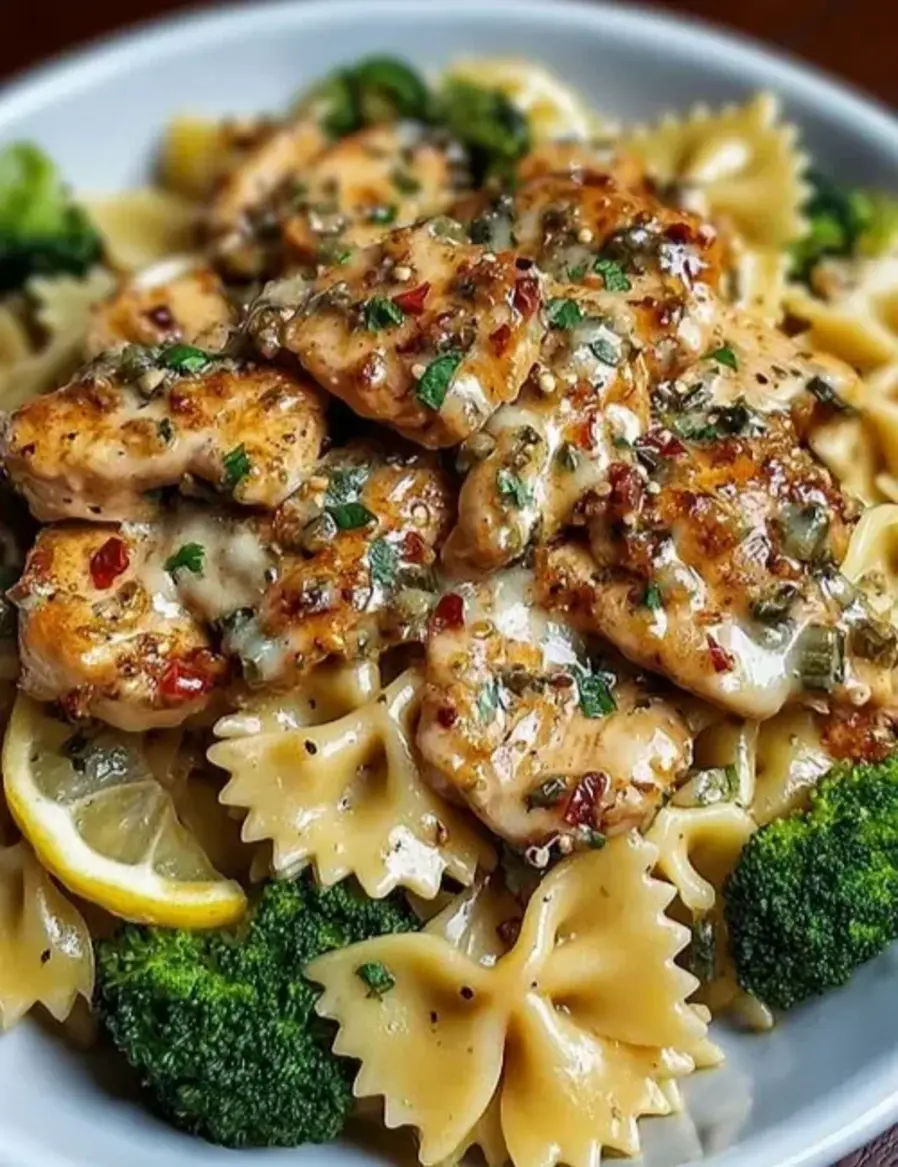
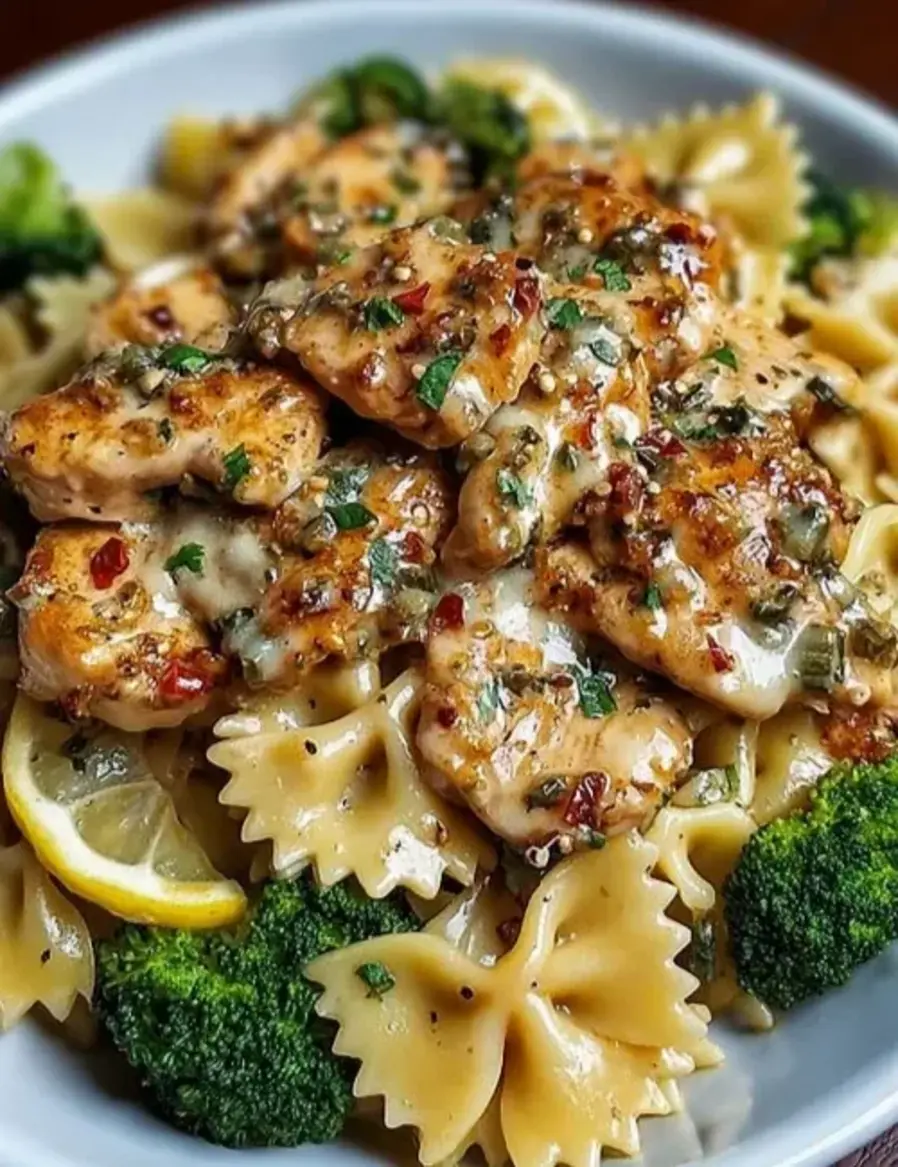
        Cowboy Butter Lemon Bowtie Chicken Pasta with Broccoli for Dinner

        Savor this Cowboy Butter Lemon Bowtie Chicken with Broccoli recipe! Perfect for easy dinners, it’s packed with flavor and a budget-friendly choice. This delicious chicken bow tie pasta dish will be a hit with the whole family. Try it tonight and elevate your homecooked meals! #PastaRecipes #DinnerRecipes #ChickenRecipes

        Print

        clock clock iconcutlery cutlery iconflag flag iconfolder folder iconinstagram instagram iconpinterest pinterest iconfacebook facebook iconprint print iconsquares squares iconheart heart iconheart solid heart solid icon

        Cowboy Butter Lemon Bowtie Chicken with Broccoli


        • Author: Chef Emy

        Description

        A delightful dish featuring savory chicken, bright lemon, and tender broccoli mixed with creamy bowtie pasta, perfect for weeknight dinners.


        Ingredients

        Scale
        • 1 lb boneless, skinless chicken breasts, cut into bite-sized pieces
        • 12 oz bowtie (farfalle) pasta
        • 2 cups broccoli florets

        Instructions

        1. Bring a large pot of salted water to a boil. Add bowtie pasta and cook until al dente.
        2. In the last 3 minutes, add broccoli florets. Reserve 1/2 cup pasta water, then drain and set aside.
        3. In a bowl, season chicken pieces with Cajun seasoning, garlic powder, smoked paprika, salt, and pepper.
        4. Heat olive oil in a skillet over medium-high heat. Cook chicken for 6-7 minutes, turning occasionally, until golden and cooked through. Remove and set aside.
        5. In the same skillet over medium heat, melt butter. Add garlic and sauté for 1-2 minutes until fragrant.
        6. Stir in red pepper flakes, Dijon mustard, lemon juice, and zest. Mix in parsley and chives, seasoning with salt and pepper.
        7. Add pasta, broccoli, and chicken back to the skillet. Toss to coat in the sauce, adding reserved pasta water as needed.
        8. Stir in Parmesan cheese until creamy and well combined.
        9. Serve warm with extra Parmesan, fresh parsley, and a squeeze of lemon juice.

        Notes

        For a creamier sauce, add more butter and Parmesan cheese. Use gluten-free pasta for a healthier option. Toss quickly to prevent sticking.

        Cowboy Butter Lemon Bowtie Chicken Pasta with Broccoli for Dinner

        Savor this Cowboy Butter Lemon Bowtie Chicken with Broccoli recipe! Perfect for easy dinners, it’s packed with flavor and a budget-friendly choice. This delicious chicken bow tie pasta dish will be a hit with the whole family. Try it tonight and elevate your homecooked meals! #PastaRecipes #DinnerRecipes #ChickenRecipes

        Print

        clock clock iconcutlery cutlery iconflag flag iconfolder folder iconinstagram instagram iconpinterest pinterest iconfacebook facebook iconprint print iconsquares squares iconheart heart iconheart solid heart solid icon

        Cowboy Butter Lemon Bowtie Chicken with Broccoli


        • Author: Chef Emy

        Description

        A delightful dish featuring savory chicken, bright lemon, and tender broccoli mixed with creamy bowtie pasta, perfect for weeknight dinners.


        Ingredients

        Scale
        • 1 lb boneless, skinless chicken breasts, cut into bite-sized pieces
        • 12 oz bowtie (farfalle) pasta
        • 2 cups broccoli florets

        Instructions

        1. Bring a large pot of salted water to a boil. Add bowtie pasta and cook until al dente.
        2. In the last 3 minutes, add broccoli florets. Reserve 1/2 cup pasta water, then drain and set aside.
        3. In a bowl, season chicken pieces with Cajun seasoning, garlic powder, smoked paprika, salt, and pepper.
        4. Heat olive oil in a skillet over medium-high heat. Cook chicken for 6-7 minutes, turning occasionally, until golden and cooked through. Remove and set aside.
        5. In the same skillet over medium heat, melt butter. Add garlic and sauté for 1-2 minutes until fragrant.
        6. Stir in red pepper flakes, Dijon mustard, lemon juice, and zest. Mix in parsley and chives, seasoning with salt and pepper.
        7. Add pasta, broccoli, and chicken back to the skillet. Toss to coat in the sauce, adding reserved pasta water as needed.
        8. Stir in Parmesan cheese until creamy and well combined.
        9. Serve warm with extra Parmesan, fresh parsley, and a squeeze of lemon juice.

        Notes

        For a creamier sauce, add more butter and Parmesan cheese. Use gluten-free pasta for a healthier option. Toss quickly to prevent sticking.

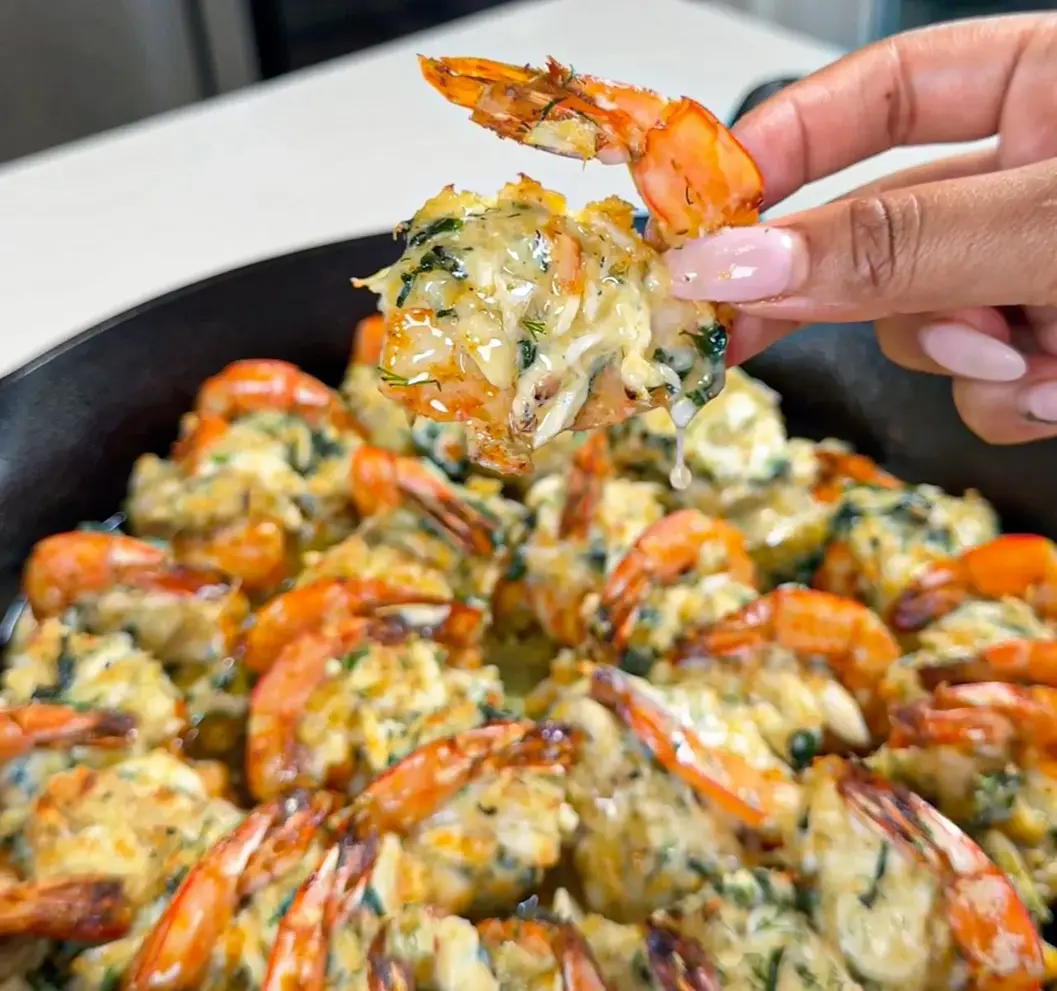
        Quick & Romantic Baked Stuffed Shrimp for Valentine’s Day

        Elevate your Valentine’s Day dinner with our Quick & Romantic Baked Stuffed Shrimp recipe! In under 35 minutes, serve a delectable appetizer that sets the mood for love. Perfect for impressing your significant other with a homemade gourmet experience. Dive into the recipe and start your evening with a burst of flavor! #romanticdinnerideas #quickappetizers #valentinesdaycooking

        Print

        clock clock iconcutlery cutlery iconflag flag iconfolder folder iconinstagram instagram iconpinterest pinterest iconfacebook facebook iconprint print iconsquares squares iconheart heart iconheart solid heart solid icon

        Stuffed Shrimp


        • Author: Chef Emy

        Description

        Delicious Crab Stuffed Shrimp


        Ingredients

        Scale
        • 2 lbs 16-20 Shrimp deveined and butterflied
        • 2 teaspoons smoked paprika
        • 1 tbsp olive oil
        • 1 tsp old bay
        • 1 tsp garlic powder
        • 1 tsp onion powder
        • 1/2 tsp Italian seasoning
        • 1/2 tsp pepper

        Instructions

        1. Preheat oven to 350 degrees.
        2. Season the deveined, butterflied shrimp with a mix of olive oil, smoked paprika, Old Bay, garlic powder, onion powder, dried herbs, and pepper.
        3. In a separate bowl, create the filling by combining lump or claw crab meat, cooked and strained spinach, chopped artichokes, mayo, breadcrumbs, cheese of choice, minced garlic, garlic powder, dried herbs, and garlic salt.
        4. Fill each butterflied shrimp with the prepared stuffing mixture.
        5. Bake until the shrimp are cooked through, for about 20-25 minutes. Add butter sauce on top for serving.