Quick & Romantic Baked Stuffed Shrimp for Valentine’s Day

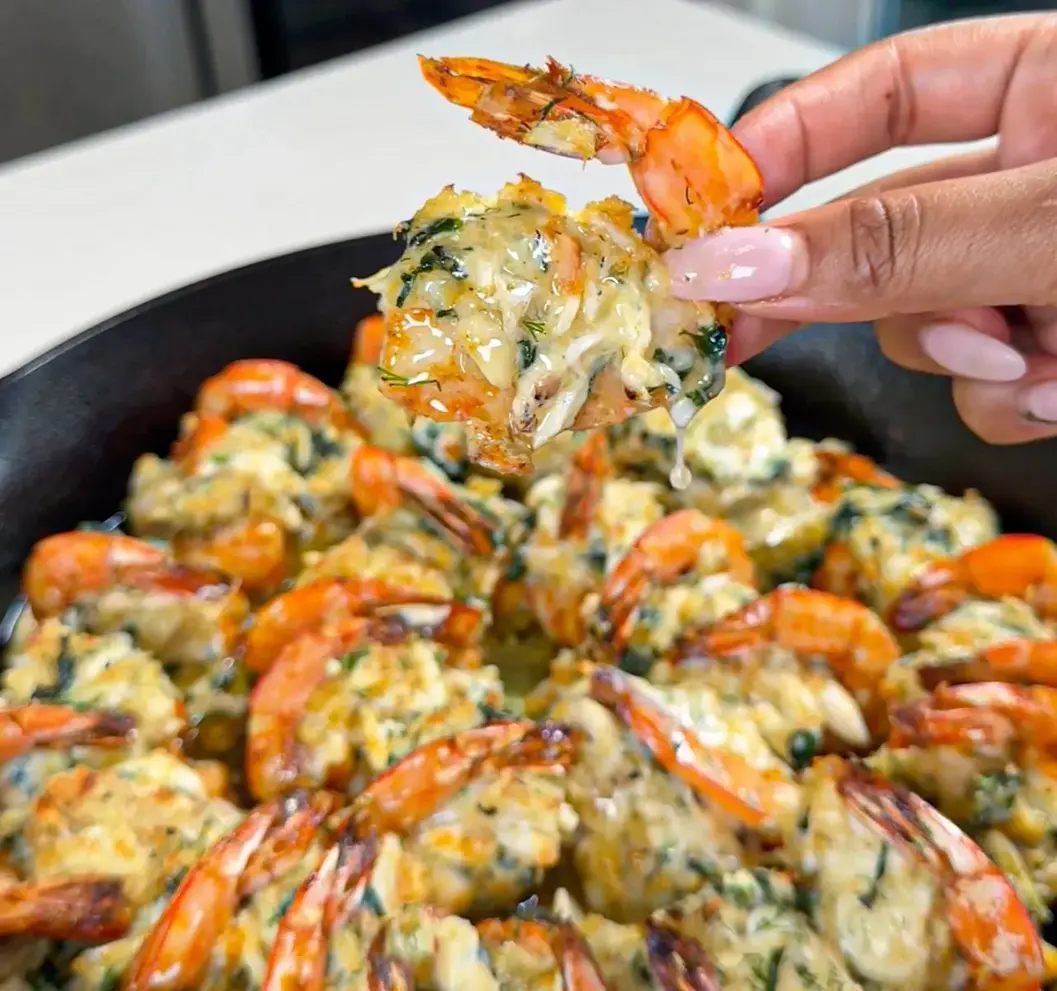
Elevate your Valentine’s Day dinner with our Quick & Romantic Baked Stuffed Shrimp recipe! In under 35 minutes, serve a delectable appetizer that sets the mood for love. Perfect for impressing your significant other with a homemade gourmet experience. Dive into the recipe and start your evening with a burst of flavor! #romanticdinnerideas #quickappetizers #valentinesdaycooking

Print
clock clock iconcutlery cutlery iconflag flag iconfolder folder iconinstagram instagram iconpinterest pinterest iconfacebook facebook iconprint print iconsquares squares iconheart heart iconheart solid heart solid icon

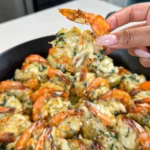
Stuffed Shrimp


  • Author: Chef Emy

Description

Delicious Crab Stuffed Shrimp


Ingredients

Scale
  • 2 lbs 16-20 Shrimp deveined and butterflied
  • 2 teaspoons smoked paprika
  • 1 tbsp olive oil
  • 1 tsp old bay
  • 1 tsp garlic powder
  • 1 tsp onion powder
  • 1/2 tsp Italian seasoning
  • 1/2 tsp pepper

Instructions

  1. Preheat oven to 350 degrees.
  2. Season the deveined, butterflied shrimp with a mix of olive oil, smoked paprika, Old Bay, garlic powder, onion powder, dried herbs, and pepper.
  3. In a separate bowl, create the filling by combining lump or claw crab meat, cooked and strained spinach, chopped artichokes, mayo, breadcrumbs, cheese of choice, minced garlic, garlic powder, dried herbs, and garlic salt.
  4. Fill each butterflied shrimp with the prepared stuffing mixture.
  5. Bake until the shrimp are cooked through, for about 20-25 minutes. Add butter sauce on top for serving.
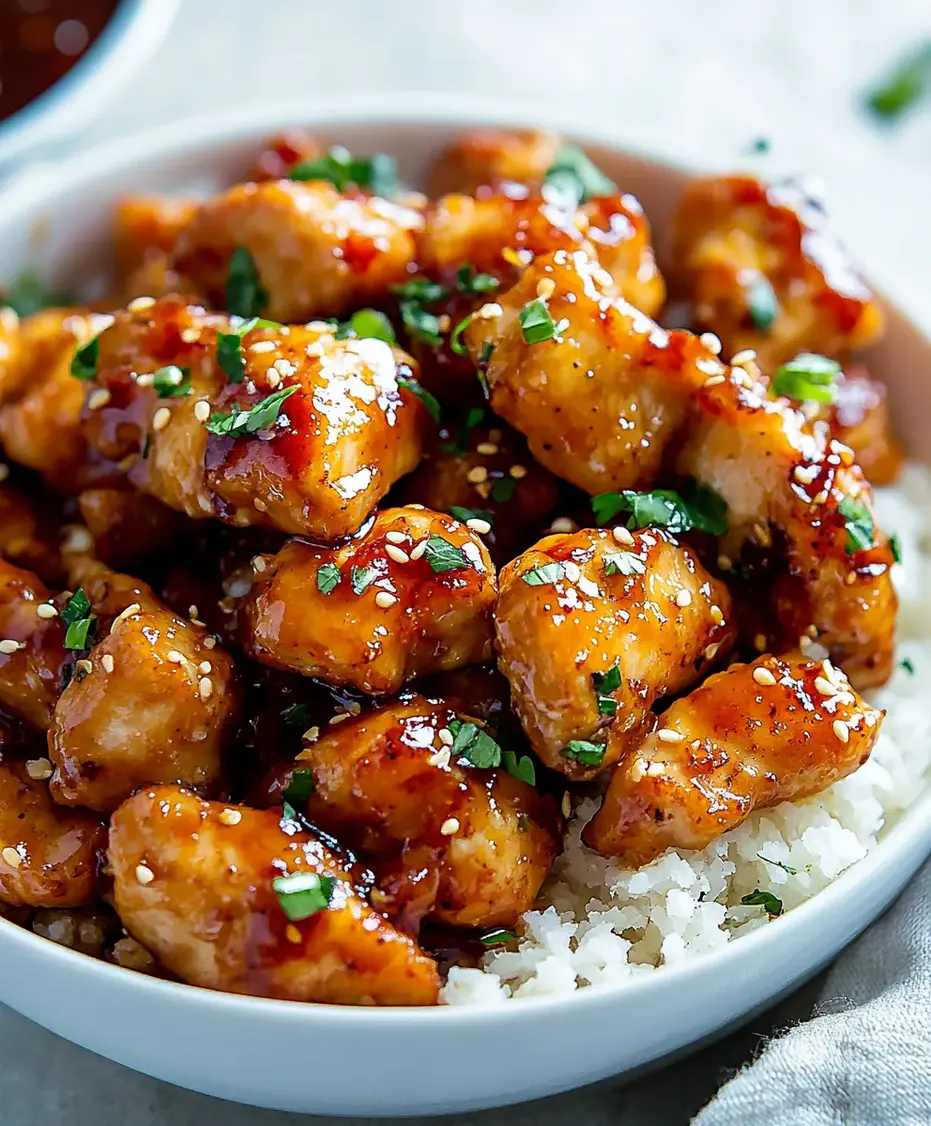
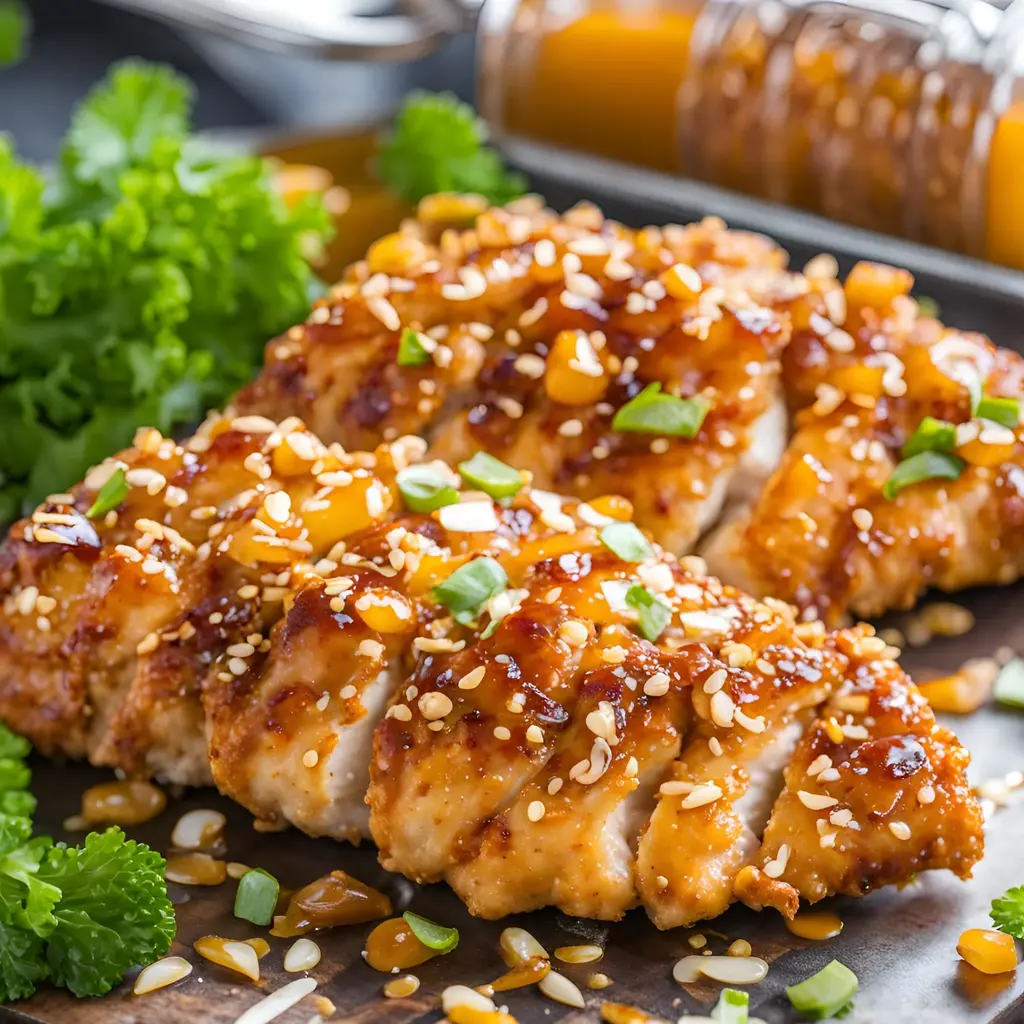
Honey Garlic Chicken Recipe

Discover an easy dinner solution with this Honey Garlic Chicken Recipe. It’s a quick chicken dinner that pairs well with rice or veggies, making it an ideal choice for busy weeknights while delivering incredible flavor to your table.

Print

clock clock iconcutlery cutlery iconflag flag iconfolder folder iconinstagram instagram iconpinterest pinterest iconfacebook facebook iconprint print iconsquares squares iconheart heart iconheart solid heart solid icon

Honey Garlic Chicken Recipe


  • Author: Chef Emy

Description

Honey Garlic Chicken is a sweet and savory dish featuring tender chicken cooked in a flavorful sauce made from honey, garlic, soy sauce, and a hint of ginger. This easy recipe is perfect for busy weeknights, offering a perfect balance of sweet and salty flavors. The chicken is pan-seared until golden and then coated in a sticky, rich honey garlic glaze. Serve it with rice and veggies for a complete, satisfying meal.


Ingredients

  • Chicken thighs or breasts
  • Honey
  • Garlic (minced)
  • Soy sauce
  • Olive oil
  • Ginger (optional)
  • Cornstarch (optional for thickening)
  • Salt and pepper
  • Green onions (optional)

Instructions

  1. Season chicken with salt and pepper.
  2. Heat olive oil in a pan over medium-high heat and cook chicken for 6-8 minutes per side until browned and cooked through.
  3. In a small bowl, mix honey, soy sauce, minced garlic, and ginger.
  4. Remove chicken from the pan and add the honey garlic mixture.
  5. Simmer for 2-3 minutes, then return the chicken to the pan to coat in sauce.
  6. Garnish with green onions and serve warm.

Notes

For a thicker sauce, mix a teaspoon of cornstarch with water and stir into the sauce. You can also bake the chicken for a hands-off version, or use chicken thighs for a juicier result.

Nutrition

  • Calories: 400
  • Sugar: 20g

Honey Garlic Chicken Recipe

Discover an easy dinner solution with this Honey Garlic Chicken Recipe. It’s a quick chicken dinner that pairs well with rice or veggies, making it an ideal choice for busy weeknights while delivering incredible flavor to your table.

Print

clock clock iconcutlery cutlery iconflag flag iconfolder folder iconinstagram instagram iconpinterest pinterest iconfacebook facebook iconprint print iconsquares squares iconheart heart iconheart solid heart solid icon

Honey Garlic Chicken Recipe


  • Author: Chef Emy

Description

Honey Garlic Chicken is a sweet and savory dish featuring tender chicken cooked in a flavorful sauce made from honey, garlic, soy sauce, and a hint of ginger. This easy recipe is perfect for busy weeknights, offering a perfect balance of sweet and salty flavors. The chicken is pan-seared until golden and then coated in a sticky, rich honey garlic glaze. Serve it with rice and veggies for a complete, satisfying meal.


Ingredients

  • Chicken thighs or breasts
  • Honey
  • Garlic (minced)
  • Soy sauce
  • Olive oil
  • Ginger (optional)
  • Cornstarch (optional for thickening)
  • Salt and pepper
  • Green onions (optional)

Instructions

  1. Season chicken with salt and pepper.
  2. Heat olive oil in a pan over medium-high heat and cook chicken for 6-8 minutes per side until browned and cooked through.
  3. In a small bowl, mix honey, soy sauce, minced garlic, and ginger.
  4. Remove chicken from the pan and add the honey garlic mixture.
  5. Simmer for 2-3 minutes, then return the chicken to the pan to coat in sauce.
  6. Garnish with green onions and serve warm.

Notes

For a thicker sauce, mix a teaspoon of cornstarch with water and stir into the sauce. You can also bake the chicken for a hands-off version, or use chicken thighs for a juicier result.

Nutrition

  • Calories: 400
  • Sugar: 20g

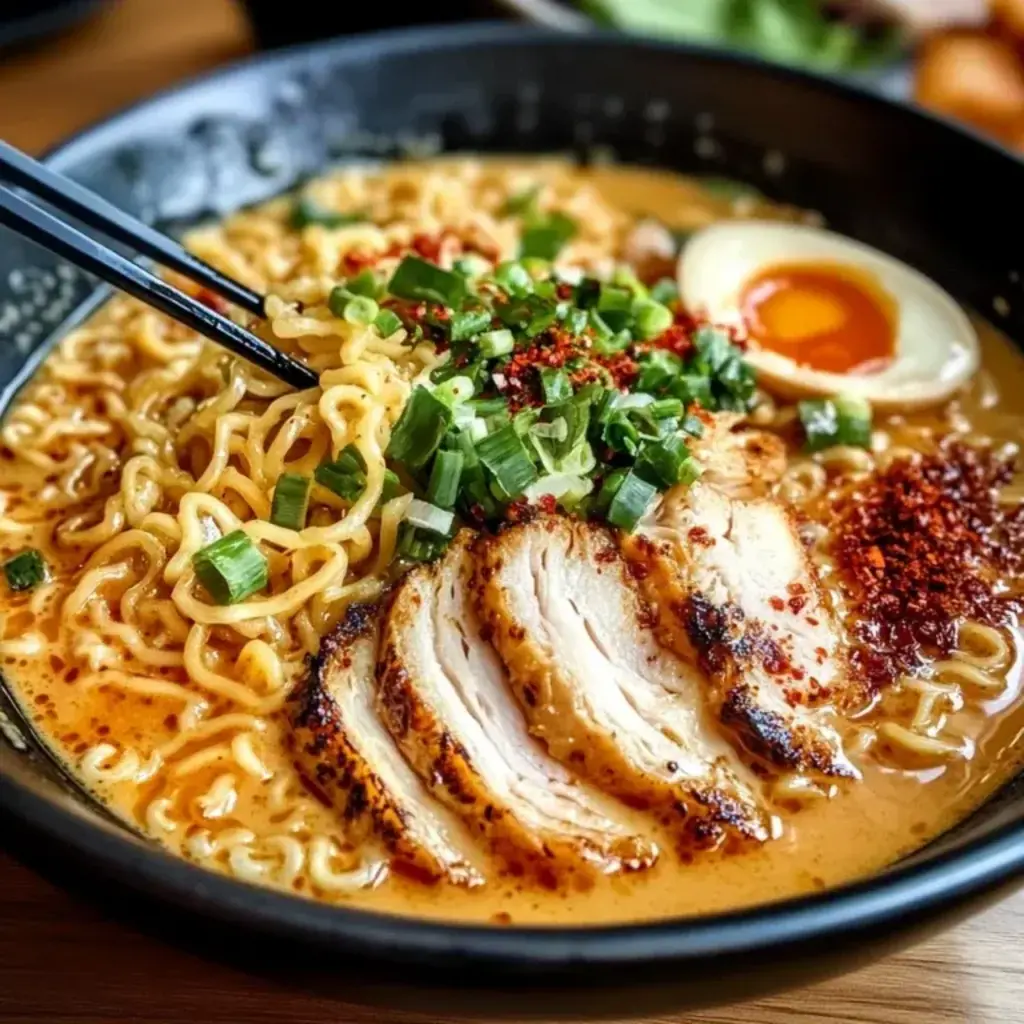
Creamy Garlic Chicken Ramen

Experience a delightful twist on a classic favorite with this Creamy Garlic Chicken Ramen recipe. Tender chicken, fresh vegetables, and perfectly cooked noodles are enveloped in a rich, velvety garlic sauce, creating a comforting bowl that’s perfect for weeknight dinners. Quick and easy to prepare, this dish is sure to become a family favorite, delivering both flavor and satisfaction in every bite.

Print

clock clock iconcutlery cutlery iconflag flag iconfolder folder iconinstagram instagram iconpinterest pinterest iconfacebook facebook iconprint print iconsquares squares iconheart heart iconheart solid heart solid icon

Creamy Garlic Chicken Ramen: An Incredible Ultimate Recipe


  • Author: Chef Emy

Ingredients

Scale
  • 2 boneless, skinless chicken breasts 4 cups chicken broth 2 cups water 3 packs of ramen noodles (discard the seasoning packets) 1 cup heavy cream 4 cloves garlic, minced 1 tablespoon olive oil 1 tablespoon soy sauce 1 tablespoon cornstarch (mixed with 2 tablespoons water) 1 teaspoon ginger, grated 1 teaspoon red pepper flakes (optional) Salt and pepper to taste 2 green onions, sliced (for garnish) Fresh cilantro (for garnish, optional) Vegetables of your choice (e.g., spinach, bok choy, bell peppers)

Instructions

    Nutrition

    • Calories: 563 kcal
    • Protein: 36g

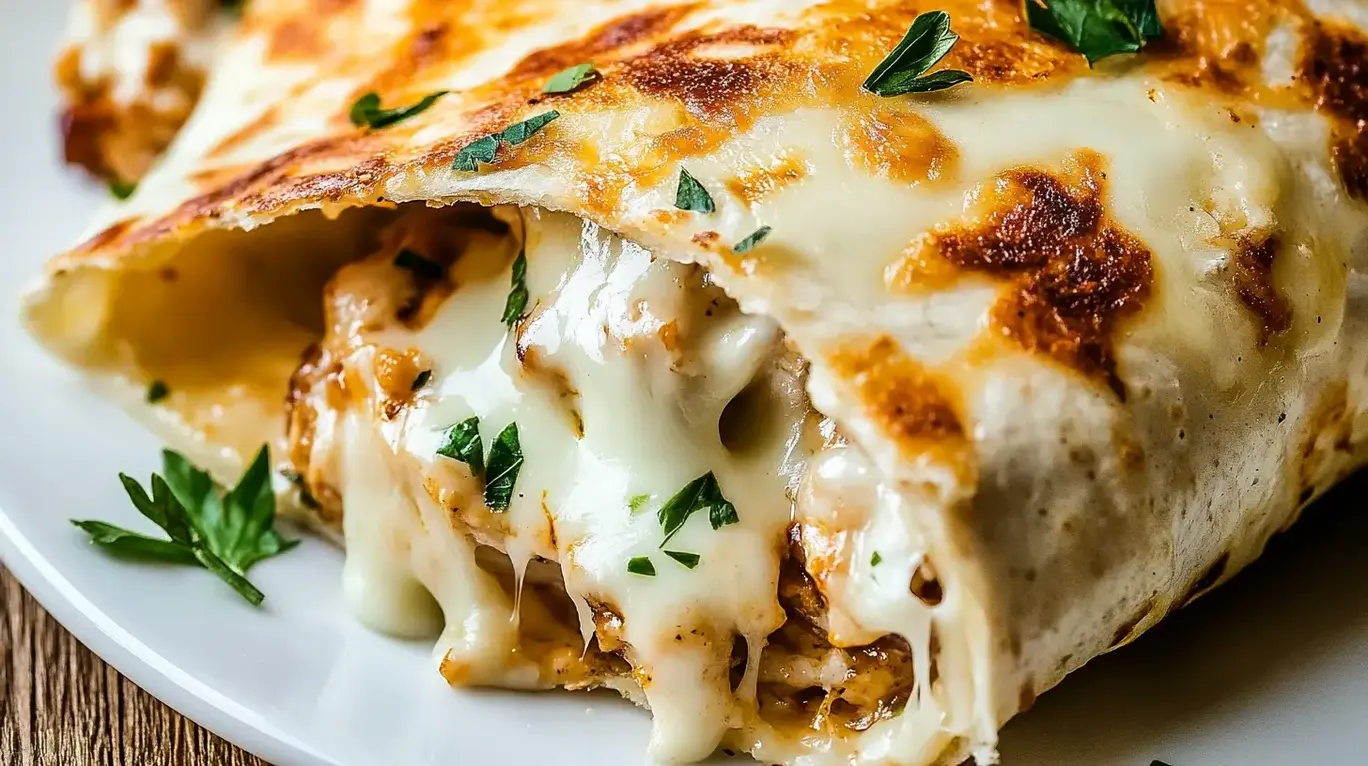
    Cheesy Garlic Chicken Wraps – The Ultimate Flavor Explosion!

    Wrap up your cravings with these cheesy garlic chicken wraps! Warm, crispy, and bursting with savory goodness, this easy-to-make recipe is perfect for a quick lunch or dinner that everyone will love.

    Print

    clock clock iconcutlery cutlery iconflag flag iconfolder folder iconinstagram instagram iconpinterest pinterest iconfacebook facebook iconprint print iconsquares squares iconheart heart iconheart solid heart solid icon

    Cheesy Garlic Chicken Wraps


    • Author: Chef Emy

    Description

    Enjoy our Cheesy Garlic Chicken Wraps, featuring tender chicken, creamy garlic aioli, and melted cheddar in a soft tortilla.


    Ingredients

    Scale
    • 2 cups cooked chicken (shredded)
    • 1/2 cup garlic aioli
    • 1 cup cheddar cheese (shredded)
    • 4 large tortillas
    • Salt and pepper to taste

    Instructions

    1. Mix Chicken: Combine shredded chicken with garlic aioli in a bowl. Season with salt and pepper.
    2. Assemble Wraps: Place chicken mix and cheddar cheese on each tortilla.
    3. Wrap: Fold tortillas tightly around the filling.
    4. Grill: Heat wraps in a skillet over medium heat until golden and cheese melts.
    5. Serve: Slice and enjoy warm.

    Notes

    Nutrition Information (per serving):

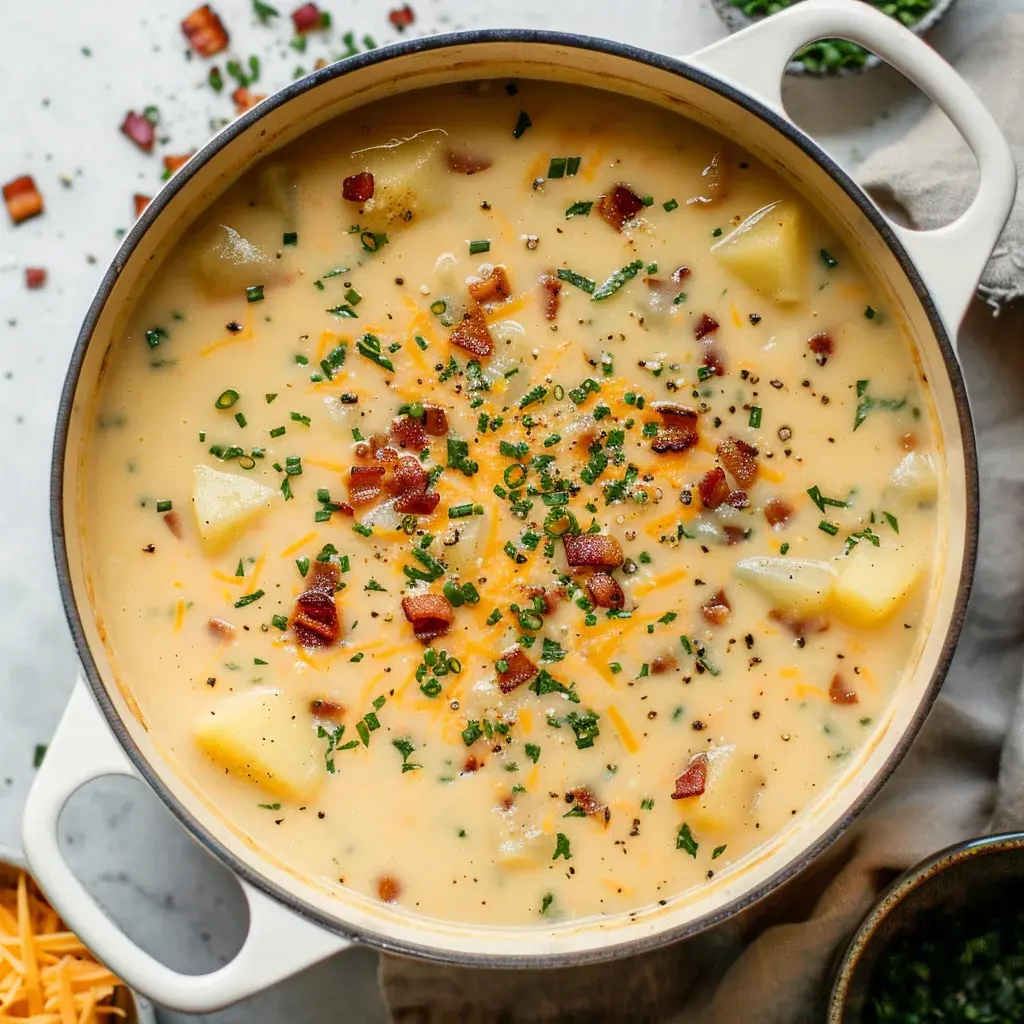
    The Best Homemade Loaded Potato Soup

    Make the best homemade Loaded Potato Soup in no time with this simple recipe! Packed with flavor and topped with crispy bacon, it’s a comforting dish that warms you from the inside out.

    Print

    clock clock iconcutlery cutlery iconflag flag iconfolder folder iconinstagram instagram iconpinterest pinterest iconfacebook facebook iconprint print iconsquares squares iconheart heart iconheart solid heart solid icon

    OUTBACK POTATO SOUP


    • Author: Chef Emy

    Description

    Watch Recipe Video Below!


    Ingredients

    Scale
    • water , enough to cover the potatoes and boil
    • 4 large russet or golden potatoes
    • 8 slices of bacon, cooked and crumbled
    • 2 1/2 cups chicken stock, you can also use chicken broth
    • 1 cups cold water
    • 3/4 cups cheddar cheese, plus more for topping optional
    • 3/4 cups heavy whipping cream
    • 1/2 cup butter
    • 1/3 cup all-purpose flour
    • 1/4 cup green onion, diced
    • 1/2 sweet yellow onion, diced optional
    • 1/2 teaspoon salt
    • 1/2 teaspoon ground black pepper

    Instructions

    1. Begin by dicing the potatoes into bite-sized pieces and boiling them until theyre tender. Once cooked, set them aside for later use.
    2. In a large pot, combine the broth, diced onions, salt, pepper, and water. Bring the mixture to a gentle simmer over medium heat and allow it to cook for about 20 minutes, ensuring the flavors meld together.
    3. In a separate saucepan, melt 1/2 cup of butter over medium heat. Once melted, gradually whisk in 1/3 cup of flour until a smooth paste forms. Allow the roux to cook for a couple of minutes to remove the raw flour taste.
    4. Slowly incorporate the roux into the simmering broth, whisking continuously to prevent lumps from forming. This will help thicken the soup and give it a creamy consistency.
    5. Pour in approximately 3/4 cups of heavy cream, stirring gently as you do so. This will further enrich the soup and add a luxurious creaminess.
    6. Allow the soup to simmer for an additional 20 minutes, stirring occasionally to ensure it doesnt stick to the bottom of the pot. This gives the flavors a chance to meld together beautifully.
    7. Once the soup has simmered and thickened to your liking, gently add the diced potatoes. Stir well to distribute them evenly throughout the soup.
    8. Ladle the soup into bowls and garnish each serving with a generous sprinkle of Colby-Monterey Jack cheese, crispy bacon bits, and finely chopped green onions. These toppings add both flavor and visual appeal to the dish.
    9. Serve the soup hot and enjoy the comforting flavors of this creamy potato soup with its delightful garnishes.

    Creamy Gnocchi with Spinach and Feta Recipe | Healthy Dinner Inspiration

    Experience creamy gnocchi with spinach and feta recipe for a delicious and easy meal! This dinner recipe is loved by women in their 40s looking for healthy recipes and comfort food. Enjoy it for quick dinners, family gatherings, or meal prep. Perfect for anyone who loves Healthy Meals, Family Dinners, Easy Cooking, Weeknight Dinners. You’ll find this dinner idea on repeat for busy weeknights. Don’t forget—this is a must-save! Pin it now so you don’t forget.

    Print

    clock clock iconcutlery cutlery iconflag flag iconfolder folder iconinstagram instagram iconpinterest pinterest iconfacebook facebook iconprint print iconsquares squares iconheart heart iconheart solid heart solid icon

    Crispy Gnocchi With Spinach And Feta: A Childhood Memory In Flavor


    • Author: Chef Emy

    Description

    This delightful dish features crispy pan-fried gnocchi paired with vibrant spinach and tangy feta cheese, creating a satisfying and flavorful meal. It is quick to prepare and is perfect for a weeknight dinner or a weekend treat.


    Ingredients

    Scale
    • 1 pound gnocchi
    • 2 tablespoons olive oil
    • 4 cups fresh spinach About 120 g.
    • 4 ounces feta cheese, crumbled About 115 g.
    • 2 cloves garlic, minced
    • Salt To taste.
    • Black pepper To taste.
    • 1 teaspoon red pepper flakes Optional, for heat.

    Instructions

    1. Bring a large pot of salted water to a boil. Add the gnocchi and cook according to package instructions until they float to the surface, usually about 2-3 minutes. Use a slotted spoon to remove the gnocchi and set them aside to drain.
    2. In a large frying pan, heat the olive oil over medium-high heat. Once hot, add the cooked gnocchi and cook undisturbed for about 2-3 minutes until they become golden brown and crispy on one side.
    3. Gently stir the gnocchi and cook for another 2-3 minutes, ensuring they get crispy on all sides.
    4. Reduce the heat to medium and add the minced garlic to the pan. Sauté for about 1 minute until fragrant, being careful not to burn it.
    5. Add the fresh spinach to the pan, stirring gently until it wilts, which takes about 2-3 minutes.
    6. Season the mixture with salt, black pepper, and red pepper flakes (if using). Remove from heat.
    7. Stir in the crumbled feta cheese, allowing it to combine with the other ingredients. Serve immediately on plates.

    Notes

    For a variation, add cherry tomatoes or other vegetables like bell peppers or zucchini.
    Ensure the pan is hot enough before adding the gnocchi for the perfect crispy texture.
    You can substitute the spinach with other leafy greens such as kale or Swiss chard.
    This dish is best served fresh but can be stored in an airtight container in the fridge for 1-2 days. Reheat on a pan to maintain crispiness.

    Cheesy garlic rolls

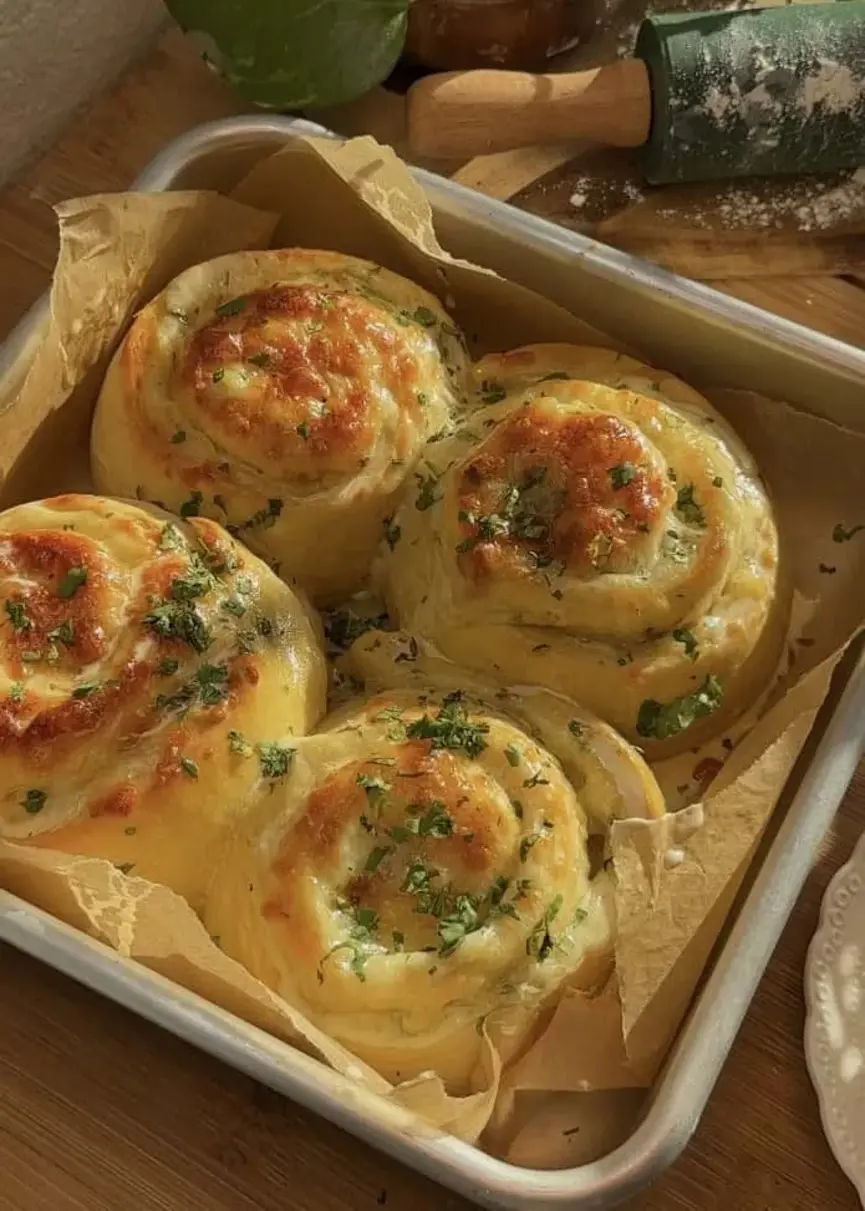
    Cheese garlic rolls — RECIPE: in our website www.archersfood.com linked in our instagram bio — JOIN our channel to receive the link to the recipe every time we post! If you try this recipe please, leave us a review it helps us so much. Happy baking🤍 #garlicbread #foodtok #baking #bread

    Print

    clock clock iconcutlery cutlery iconflag flag iconfolder folder iconinstagram instagram iconpinterest pinterest iconfacebook facebook iconprint print iconsquares squares iconheart heart iconheart solid heart solid icon

    Buttery cheese Garlic Rolls


    • Author: Chef Emy

    Description

    Buttery Cheese Garlic Rolls These rolls are incredibly soft, fluffy, and loaded with melted, bubbly mozzarella cheese. So addictive, you wont be able to stop at just one! Here, youll find the best melt-in-your-mouth garlic cheese rolls recipe thats perfect for any occasion.


    Ingredients

    Scale
    • 3 garlic heads, peeled
    • 4 tbsp extra virgin olive oil
    • Pinch of salt
    • 2 eggs
    • ½ cup (120 ml) warm milk
    • 2 1/2 tsp(8 g) active dry yeast
    • 1 tbsp honey
    • Slightly over 1 ¾ cups (230 g) all-purpose flour
    • 1/3 cup (50 g) bread flour
    • 1 1/2 tsp salt
    • 1 tbsp granulated sugar
    • 2 ½ tbsp (35 g) soft, unsalted butter
    • 1 tbsp chopped fresh parsley
    • 2 cups, after shredded (200 g) mozzarella cheese
    • ½ cup, freshly grated (45 g) parmesan cheese
    • 3 ½ tbsp (50 g) soft, unsalted butter
    • 3 tbsp parsley
    • Pinch of salt
    • Previously roasted garlic
    • 1 egg, beaten

    Instructions

    1. Start by roasting the garlic. Peel 3 garlic heads and place them in a ramekin, drizzle 4 tbsp of extra virgin olive oil, and just a pinch of salt. Cover in aluminum foil and bake at 302 F (150 C) for about 1 hour and 45 minutes.
    2. Prepare the dough. Grab a mixing bowl or a stand mixer bowl and combine ½ cup (120 ml) warm milk, 2 ½ tsp (8 g) active dry yeast and 1 tsp honey. Stir and let this mixture sit in a warm environment for 10-15 minutes, or until you see a foam layer on top.
    3. To this mixture add 2 eggs, slightly over 1 ¾ cups (230 g) all-purpose flour, 1/3 cup (50 g) bread flour, 1 1/2 tsp salt, and 1 tbsp granulated sugar. Use a stand mixer with the dough hook attachment and knead the dough on medium- low speed for 15 minutes. After 15 minutes, add 2 ½ tbsp (35 g) soft, unsalted butter. Knead for 10 extra minutes. The dough should be very soft and slightly sticky.
    4. Let the dough proof for 1 hour and 30 minutes to 2 hours, at a temperature of 80.6 F (27 C).
    5. While the dough proofs, chop parsley to have about 4 tbsp, and grate mozzarella to have 2 cups (200 g) and to have ½ cup (45 g) of parmesan cheese.
    6. Prepare the garlic butter, in a bowl or plate, mash 3 ½ tbsp (50 g) soft unsalted butter, 3 tbsp fresh and chopped parsley, a pinch of salt, and the previously roasted garlic
    7. Roll out the dough, spread the prepared garlic butter, add the 2 cups (200 g) of mozzarella cheese and ½ cup (45 g) parmesan cheese.
    8. Cut the dough into 6 strips and roll each one individually. Place them in a prepared pan with parchment paper. proof again for 30 more minutes.
    9. Preheat the oven to 355F (180 °C), beat one egg to prepare the egg wash, and brush each one of the rolls with the egg. Bake for 25-30 minutes.

    Notes

    If you try this recipe, please leave us a review on our website! And if you have any questions, feel free to ask in the commentsIll try to reply as fast as I can. Happy baking!

    Nutrition

    • Calories: 470 kcal
    • Sugar: 6 g
    • Protein: 18 g

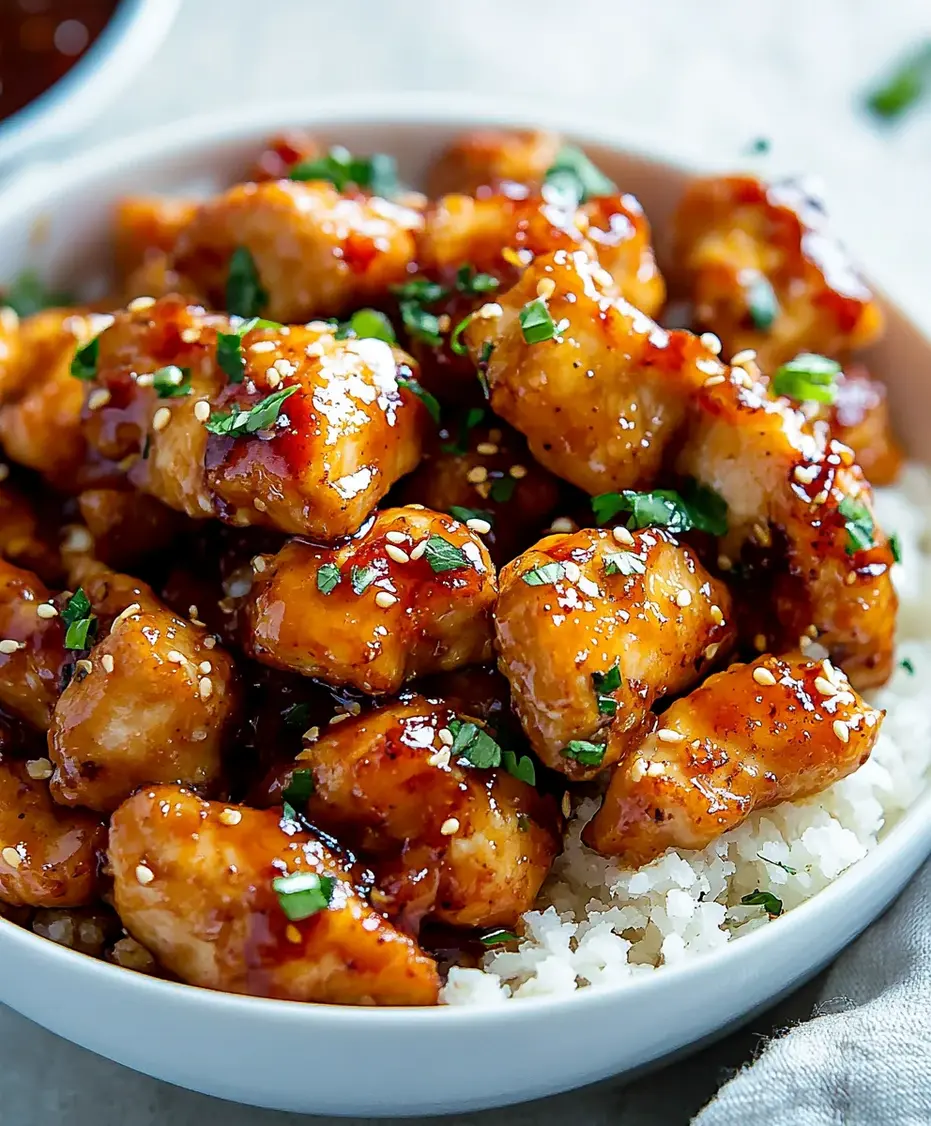
    Sesame Chicken

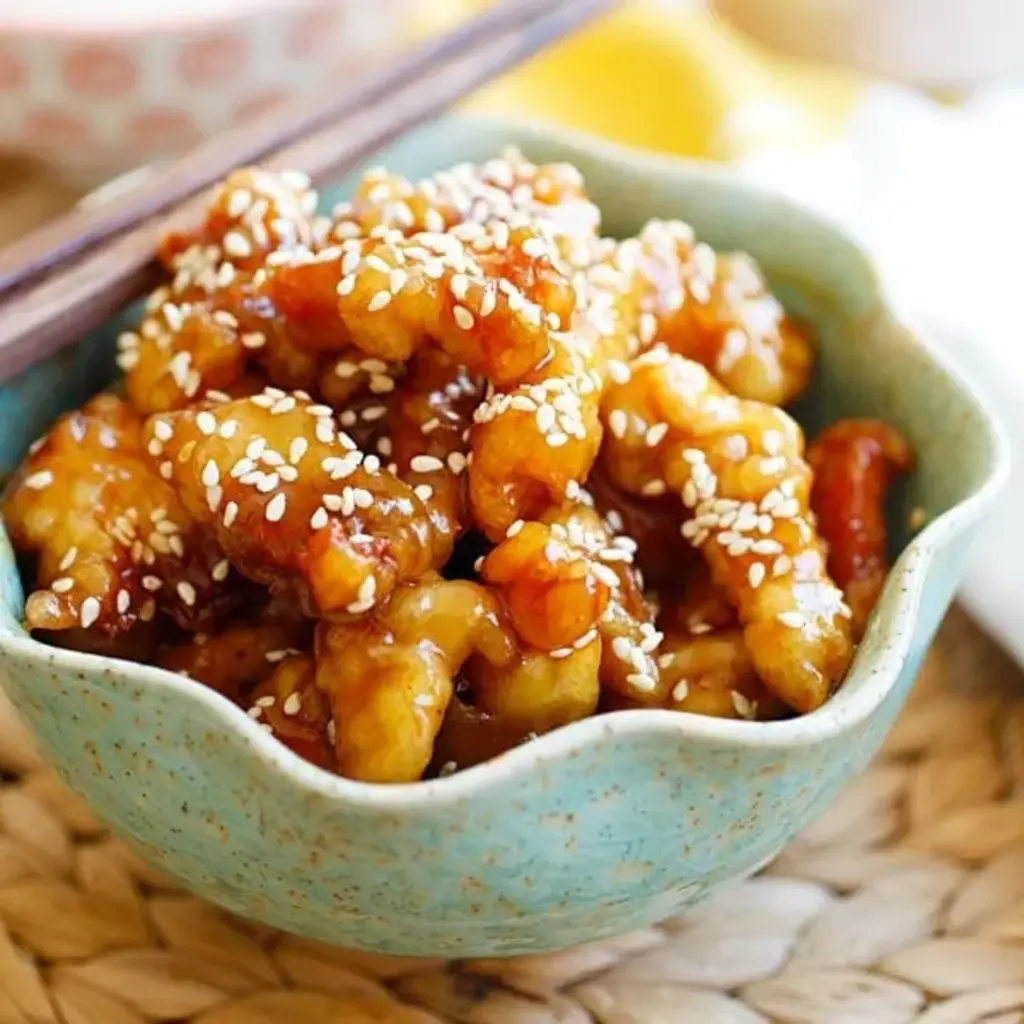
    Sesame Chicken – crispy chicken with sweet, savory sauce with lots of sesame seeds. This recipe is better than Chinese takeout, click to get the full recipe | rasamalaysia.com #chinesefood #chicken

    Print

    clock clock iconcutlery cutlery iconflag flag iconfolder folder iconinstagram instagram iconpinterest pinterest iconfacebook facebook iconprint print iconsquares squares iconheart heart iconheart solid heart solid icon

    Sesame Chicken


    • Author: Chef Emy

    Description

    Easy, healthy and homemade Chinese Sesame Chicken recipe with sesame sauce. This is the BEST recipe you’ll find online and tastes just like takeout restaurants.


    Ingredients

    Scale
    • 8 oz. (230g) boneless and skinless chicken breast, cut into strips
    • oil, for deep-frying
    • 2 tablespoons oil
    • 1 clove garlic, minced
    • white sesame seeds, for garnishing

    Instructions

    1. Mix all the ingredients in the Sauce until well combined. Set aside.
    2. Mix all the ingredients for the Frying Batter in a bowl until well combined. Stir a few times to ensure there are no lumps and the batter is smooth. Add the chicken to the batter and stir to coat it evenly.
    3. Heat 2 to 3 inches (5 to 7.5 cm) of oil in a wok or stockpot to 350°F (175°C) for deep-frying. Gently drop the chicken into the hot oil and immediately loosen them with a spatula to prevent the pieces from clumping together.
    4. Deep-fry the chicken until golden brown. Remove the chicken from the oil using a strainer or slotted spoon, allowing the excess oil to drain by placing the chicken on a dish lined with paper towels. Discard the oil.
    5. Heat 2 tablespoons of oil in a wok or skillet over high heat. Add the garlic and stir-fry until fragrant, then pour in the sauce.
    6. As soon as the sauce thickens, add the fried chicken to the wok or skillet. Stir continuously until the chicken is evenly coated with the sauce. Dish out, garnish with white sesame, and serve immediately with steamed rice.

    Notes

    Watch the cooking video on this page for step-by-step guide.
    My batter is very thick because it will make the chicken extra crispy, even after adding the sauce. If it’s too thick to work with, add 1-2 tablespoons water to loosen it up.

    Nutrition

    • Calories: 306kcal
    • Sugar: 12g
    • Protein: 15g

    Baked Crunchy Hot Honey Chicken Recipe

    Baked Crunchy Hot Honey Chicken Recipe | Cheff Recipes

    Print

    clock clock iconcutlery cutlery iconflag flag iconfolder folder iconinstagram instagram iconpinterest pinterest iconfacebook facebook iconprint print iconsquares squares iconheart heart iconheart solid heart solid icon

    Baked Crunchy Hot Honey Chicken Recipe


    • Author: Chef Emy

    Description

    If you’re looking for a dish that combines the irresistible combination of crispy, crunchy chicken with a sweet and spicy kick, this Baked Crunchy Hot Honey Chicken is the perfect choice. It’s easy to make, healthier than deep-fried alternatives, and packed with flavor. Let’s dive into the recipe!


    Ingredients

    Scale
    • For the Chicken:
    • 4 boneless, skinless chicken breasts or thighs (about 1.5 lbs)
    • 1 cup all-purpose flour
    • 1 teaspoon salt
    • 1 teaspoon black pepper
    • 1 teaspoon garlic powder
    • 1 teaspoon onion powder
    • 1/2 teaspoon smoked paprika (optional)
    • 2 large eggs, beaten
    • 1 1/2 cups panko breadcrumbs (for extra crunch)
    • For the Hot Honey Sauce:
    • 1/4 cup honey
    • 2 tablespoons hot sauce (adjust to your preferred heat level)
    • 1 tablespoon unsalted butter
    • 1/2 teaspoon red pepper flakes (optional, for extra heat)
    • 1 teaspoon apple cider vinegar or lemon juice (optional, for tang)
    • For Garnish (optional):
    • Fresh chopped parsley
    • Sesame seeds or crushed peanuts (for added crunch)

    Instructions

    1. Preheat your oven to 400°F (200°C). Line a baking sheet with parchment paper or a silicone baking mat for easy cleanup.
    2. Pat the chicken dry with paper towels.
    3. In a shallow dish, combine flour, salt, pepper, garlic powder, onion powder, and smoked paprika.
    4. In another shallow dish, beat the eggs.
    5. In a third shallow dish, place the panko breadcrumbs.
    6. Coat each chicken piece first in the flour mixture, then dip in the egg, and finally coat with the panko breadcrumbs. Press gently to make sure the breadcrumbs stick.
    7. Place the breaded chicken on the prepared baking sheet. Lightly spray with cooking spray or drizzle with olive oil to help the coating crisp up.
    8. Bake for 25-30 minutes, or until the chicken is fully cooked (internal temperature should reach 165°F/74°C), and the crust is golden brown and crispy.
    9. While the chicken is baking, prepare the hot honey sauce. In a small saucepan, combine the honey, hot sauce, butter, and red pepper flakes (if using). Heat over medium heat, stirring occasionally, until the butter is melted and the sauce is smooth.
    10. If you like a little tang, add a teaspoon of apple cider vinegar or lemon juice to the sauce and stir to combine.
    11. When the chicken is done baking, remove it from the oven and drizzle the hot honey sauce over the top. If you like extra sauce, you can toss the chicken in the sauce for more coverage.
    12. Garnish with chopped parsley and sesame seeds or crushed peanuts if desired.
    13. Serve with your favorite sides, like roasted vegetables, mashed potatoes, or a fresh salad.