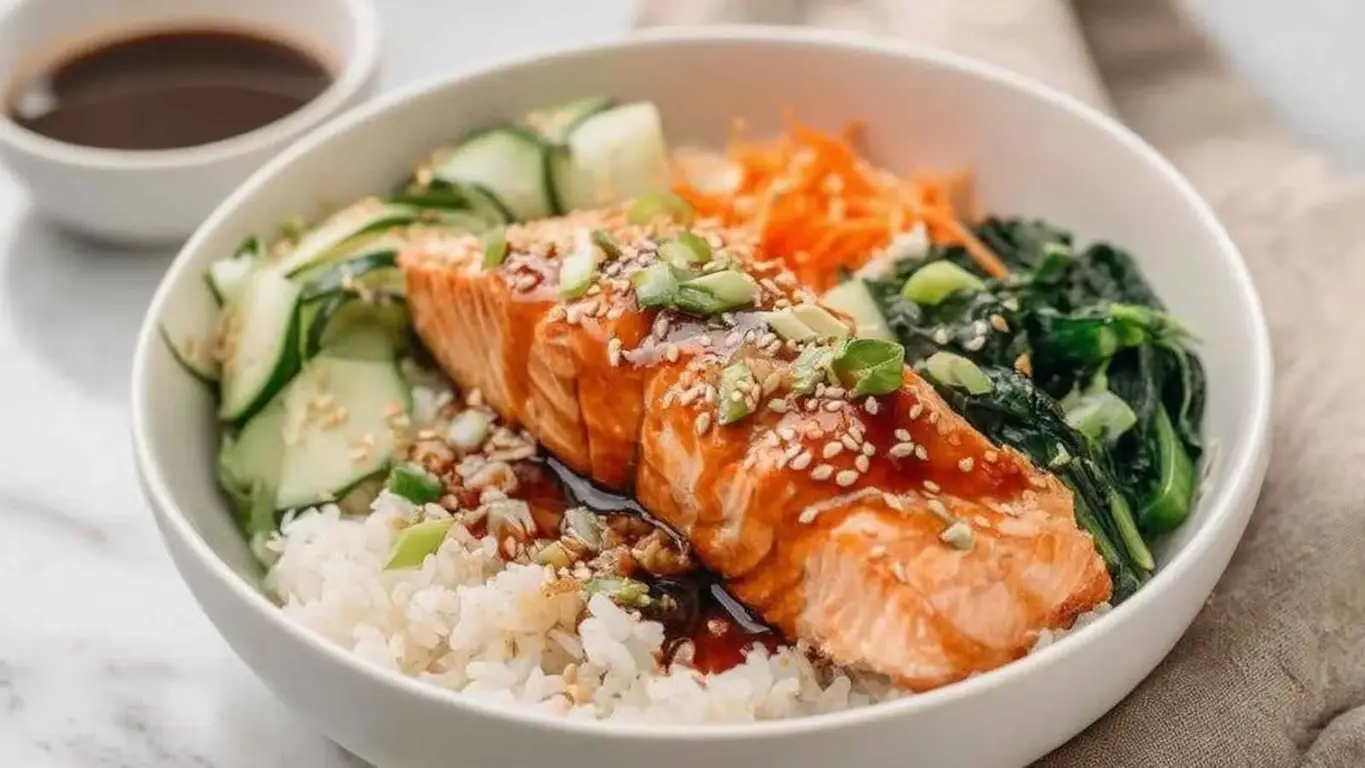
Teriyaki Salmon Bowls | 25g Protein in 30 Minutes

Ready for a delicious dinner that won’t keep you in the kitchen for long? These teriyaki salmon bowls are packed with flavor and a hefty dose of protein, making them a satisfying choice for any weeknight. Enjoy tender salmon, fluffy rice, and crisp veggies—all in under 30 minutes! Perfect for busy nights or lunchboxes. 🌟

Print
clock clock iconcutlery cutlery iconflag flag iconfolder folder iconinstagram instagram iconpinterest pinterest iconfacebook facebook iconprint print iconsquares squares iconheart heart iconheart solid heart solid icon

High Protein Low Calorie Teriyaki Salmon Bowls


  • Author: Chef Emy

Description

Bold, fresh, and satisfying teriyaki salmon bowls with homemade lighter teriyaki glaze, fluffy rice, and crisp veggies. High protein, lower calorie, and meal prep friendly.


Ingredients

Scale
  • 4 salmon fillets, skin-on 4 to 6 oz each
  • 1/3 cup low-sodium soy sauce or tamari
  • 2 tbsp rice vinegar or apple cider vinegar
  • 1.5 tbsp honey or maple syrup, adjust to taste
  • 1 tsp toasted sesame oil
  • 2 garlic cloves, minced
  • 1 tsp fresh ginger, grated or 1/4 tsp ground ginger
  • 2 tsp cornstarch mixed with 2 tsp cold water
  • 2 cups cooked jasmine or brown rice or cauliflower rice for low-carb
  • 2 cups broccoli florets steamed or sauteed
  • 1 cup cucumber, sliced
  • 1/2 cup shredded carrots
  • 1/2 cup shelled edamame
  • 2 green onions, sliced
  • 1 tbsp sesame seeds
  • 1 lime, cut into wedges optional for serving
  • red pepper flakes or sriracha optional for heat

Instructions

  1. Cook rice according to package directions. While rice cooks, steam or saute broccoli florets until just tender and bright green, about 4 to 5 minutes. Slice cucumbers, shred carrots, and chop green onions. Set all components aside.
  2. In a small saucepan over medium heat, whisk together soy sauce, rice vinegar, honey, sesame oil, minced garlic, and grated ginger. Bring to a gentle simmer. Mix cornstarch with cold water in a small bowl until smooth, then whisk into the saucepan. Simmer 1 to 2 minutes, stirring constantly, until the sauce is glossy and coats the back of a spoon. Remove from heat.
  3. Pat salmon fillets completely dry with paper towels. Season lightly with salt and pepper. Brush a thin layer of teriyaki sauce over the tops of the fillets.
  4. To bake: place salmon on a lined baking sheet and cook at 400 degrees F (205 degrees C) for 10 to 12 minutes until just opaque and flaky. To air fry: cook at 390 degrees F (200 degrees C) for 7 to 9 minutes. Pull salmon as soon as it flakes easily with a fork. Immediately brush with a second coat of teriyaki sauce for a glossy finish.
  5. Add 1/2 cup cooked rice to each bowl. Arrange broccoli, cucumber, carrots, and edamame around the bowl. Place one glazed salmon fillet on top, whole or flaked. Drizzle with reserved teriyaki sauce, then top with sesame seeds, green onions, a squeeze of lime, and red pepper flakes if desired. Serve immediately.

Notes

Store components separately in airtight containers for up to 3 days. Reheat salmon at 50% microwave power for 45 to 60 seconds with a drizzle of teriyaki sauce. Teriyaki sauce keeps refrigerated for up to 1 week. For low-carb, use cauliflower rice. For gluten-free, use tamari or coconut aminos.
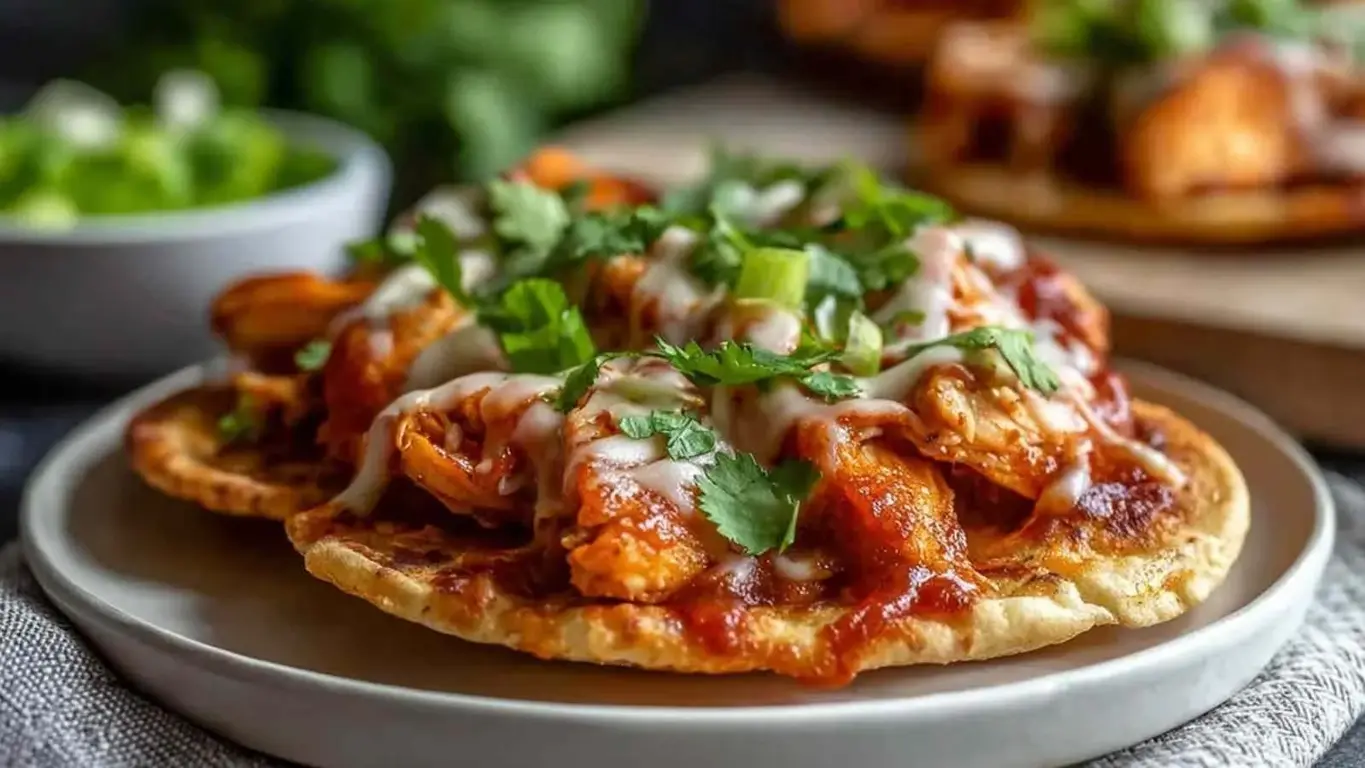
BBQ Chicken Flatbreads | Quick Family Dinner in 25 Minutes

Get ready for a delicious dinner with these BBQ chicken flatbreads! Perfect for busy weeknights, they pack a protein punch and are quick to make. Customize them with your favorite toppings and enjoy a meal that everyone will love. Perfect for family fun or a cozy night in!

Print

clock clock iconcutlery cutlery iconflag flag iconfolder folder iconinstagram instagram iconpinterest pinterest iconfacebook facebook iconprint print iconsquares squares iconheart heart iconheart solid heart solid icon

High-Protein BBQ Chicken Flatbreads


  • Author: Chef Emy

Description

Crispy BBQ chicken flatbreads loaded with shredded chicken, mozzarella, and cheddar cheese. Ready in under 25 minutes with about 30 grams of protein per serving.


Ingredients

Scale
  • 4 pre-cooked flatbreads naan, pita, or pre-made pizza crusts
  • 1.5 cups shredded cooked chicken breast rotisserie chicken recommended
  • 0.5 cup BBQ sauce your favorite brand
  • 1 cup shredded mozzarella cheese low-moisture whole milk recommended
  • 0.5 cup shredded cheddar cheese sharp cheddar preferred
  • 0.25 red onion thinly sliced
  • 2 tbsp fresh cilantro chopped, for garnish

Instructions

  1. Preheat your oven to 400°F (200°C). Place flatbreads directly on a baking sheet with space between each one. If frozen, let them thaw for a few minutes first.
  2. In a medium bowl, combine the shredded chicken breast with the BBQ sauce. Stir until every piece of chicken is well coated and glossy.
  3. Spread an even layer of the BBQ chicken mixture over each flatbread, leaving about a half-inch border around the edges. Do not overload or the crust will become soggy.
  4. Sprinkle the shredded mozzarella and cheddar cheeses generously over the chicken layer. Scatter the thinly sliced red onion evenly across the top.
  5. Bake for 12 to 15 minutes until the cheese is fully melted and bubbly with light golden edges and the crust is firm and crispy.
  6. Remove from the oven and immediately sprinkle with fresh chopped cilantro. Let rest for 1 to 2 minutes before slicing into wedges and serving hot.

Notes

Use rotisserie chicken for best flavor and convenience. Do not overload toppings to keep the crust crispy. Reheat leftovers in a toaster oven at 375°F for 5 to 7 minutes. BBQ chicken mixture can be prepped up to 2 days in advance.

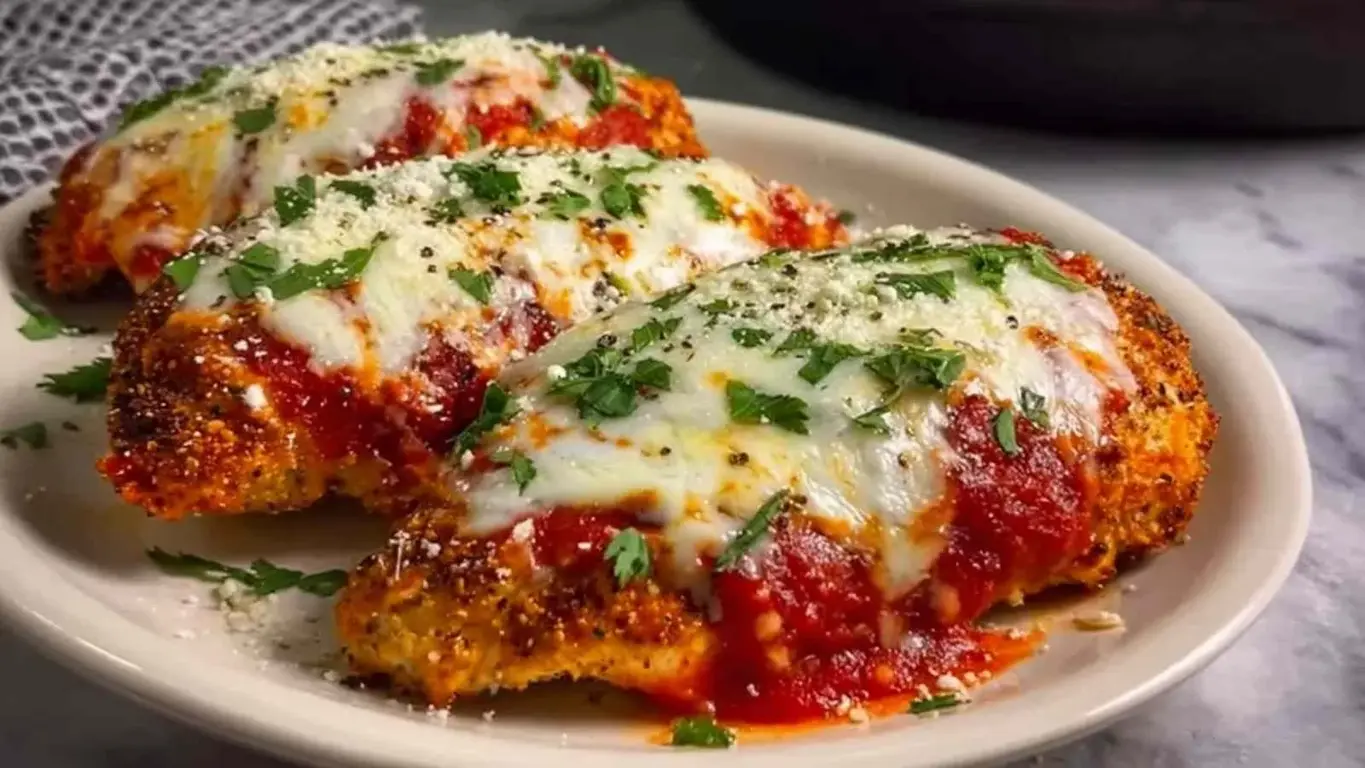
High-Protein Chicken Parm | Weeknight Winner Dish

Get ready to savor this delightful chicken dish that’s bursting with flavor! This high-protein chicken parm is not only quick to prepare but also packs a punch of cheesy goodness, making it a family favorite. Serve it up with some veggies for a wholesome meal that’s perfect for busy weeknights. Enjoy a comforting classic with a nutritious twist! 🍽️

Print

clock clock iconcutlery cutlery iconflag flag iconfolder folder iconinstagram instagram iconpinterest pinterest iconfacebook facebook iconprint print iconsquares squares iconheart heart iconheart solid heart solid icon

High-Protein Chicken Parm


  • Author: Chef Emy

Description

Tender seared chicken breast topped with marinara and a creamy cottage cheese and Parmigiano Reggiano blend, baked to golden perfection for a protein-packed twist on a classic Italian favorite.


Ingredients

Scale
  • 615 g chicken breast patted dry, pounded to even thickness
  • 1 tsp olive oil
  • salt, pepper, and garlic powder to taste
  • 100 g marinara sauce quality jarred variety recommended
  • 90 g 2% cottage cheese drained of excess liquid
  • 20 g Parmigiano Reggiano freshly grated
  • dried oregano and red chili flakes to taste

Instructions

  1. Pat chicken breast dry with paper towels, then pound to an even thickness of about 3/4 inch using a meat mallet. Season both sides generously with salt, pepper, and garlic powder.
  2. Heat 1 tsp olive oil in an oven-safe skillet over medium heat. Once shimmering, add chicken and sear 3 to 4 minutes per side until golden brown.
  3. While chicken sears, mix 90g drained cottage cheese with 20g freshly grated Parmigiano Reggiano in a small bowl. Set aside.
  4. Transfer seared chicken to a baking dish. Spoon 100g marinara evenly over each piece, then spread the cottage cheese mixture on top. Sprinkle with dried oregano and red chili flakes.
  5. Bake in a preheated oven at 180C (350F) for 12 to 15 minutes, until the cheese is melted and golden and the chicken reaches an internal temperature of 165F. Rest for 2 minutes before serving.

Notes

Store leftovers in an airtight container in the fridge for up to 3 days or freeze for up to 2 months. Reheat at 160C (320F) for best results. Keep extra marinara stored separately to prevent soggy chicken.

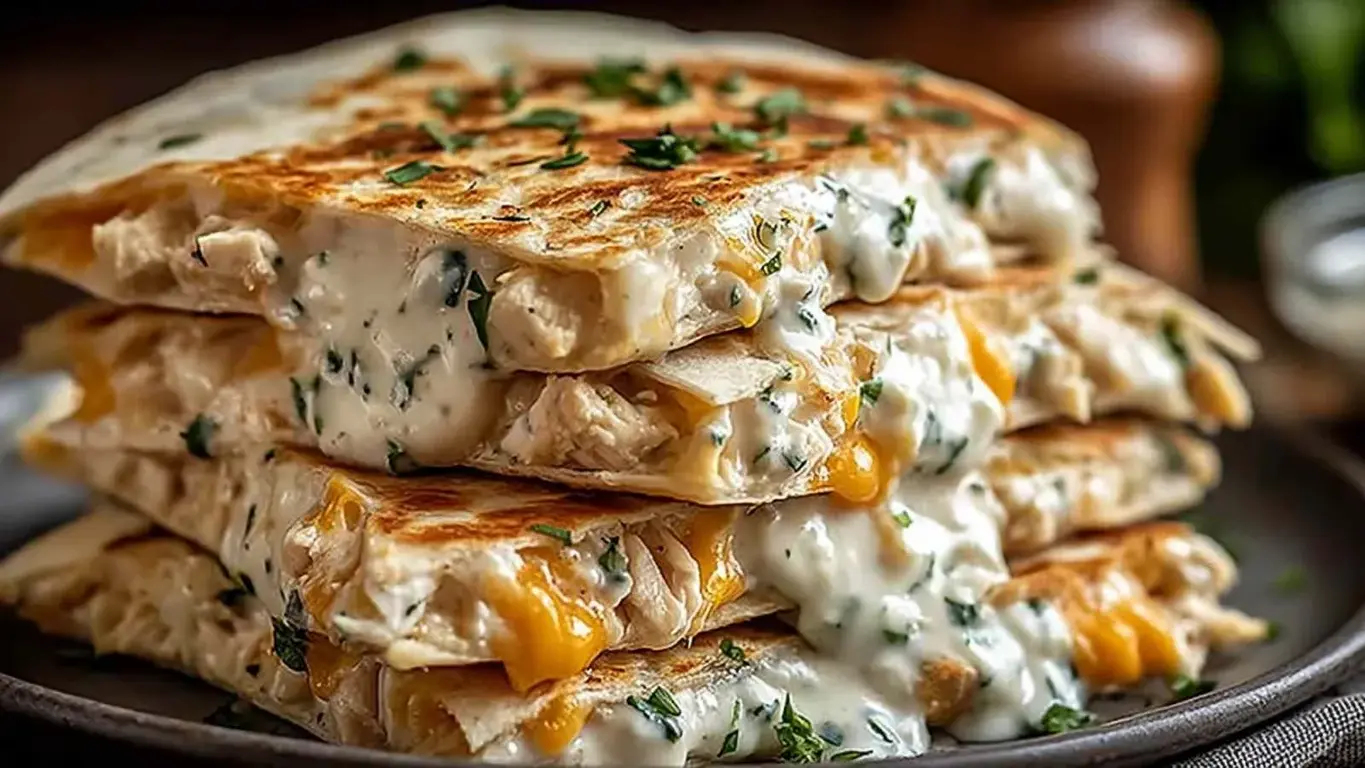
High Protein Chicken Ranch Quesadilla | Quick & Delicious

Get ready for a flavor-packed meal with these High Protein Chicken Ranch Quesadillas! Whip them up in under 45 minutes for a quick and satisfying dinner that the whole family will love. Perfect for busy weeknights or game day gatherings, these quesadillas are loaded with delicious chicken and cheesy goodness—easy to customize too! 🥙✨

Print

clock clock iconcutlery cutlery iconflag flag iconfolder folder iconinstagram instagram iconpinterest pinterest iconfacebook facebook iconprint print iconsquares squares iconheart heart iconheart solid heart solid icon

High Protein Chicken Ranch Quesadilla


  • Author: Chef Emy

Description

A crispy, cheesy high protein chicken ranch quesadilla made in one pan with bold ranch flavor, juicy chicken, and melted cheddar. Ready in under 30 minutes and perfect for meal prep.


Ingredients

Scale
  • 1 cup cooked chicken diced; rotisserie or grilled works great
  • 0.5 cup ranch dressing full-fat buttermilk ranch preferred
  • 1 cup shredded cheddar cheese freshly shredded for best melt
  • 4 large flour tortillas 10-inch tortillas recommended
  • 0.25 cup green onions sliced
  • 1 tbsp olive oil
  • 1 tsp garlic powder
  • 1 tsp onion powder

Instructions

  1. In a medium mixing bowl, combine the diced chicken, ranch dressing, garlic powder, onion powder, and sliced green onions. Stir until the chicken is evenly coated and the mixture looks creamy and well-seasoned.
  2. Heat a large non-stick skillet over medium heat and add 1 tablespoon of olive oil. Let the oil warm for about 1 minute until it shimmers slightly.
  3. Lay one flour tortilla flat in the pan. Sprinkle 1/4 cup of shredded cheddar evenly over one half of the tortilla, then spoon a generous portion of the chicken mixture on top of the cheese. Do not overfill or the filling will spill when folding.
  4. Fold the empty half of the tortilla over the filled side to create a half-moon shape. Press down gently with a spatula. Cook for 3 to 4 minutes until the bottom is deep golden brown and the cheese starts to melt.
  5. Carefully flip the quesadilla using a wide spatula and cook the other side for another 3 to 4 minutes until equally golden and crispy. If cheese is not fully melted, reduce heat slightly and cover the pan for 1 minute.
  6. Transfer to a cutting board, let it rest for 1 minute, then cut into 3 wedges. Repeat with remaining tortillas and filling. Serve immediately with extra ranch dressing on the side.

Notes

The chicken filling can be made up to 3 days ahead and stored in the fridge. Reheat quesadillas in a dry skillet over medium heat for best crispiness. For a gluten-free version, use certified gluten-free corn tortillas. Add sliced jalapenos or diced bell peppers to the filling for extra flavor.

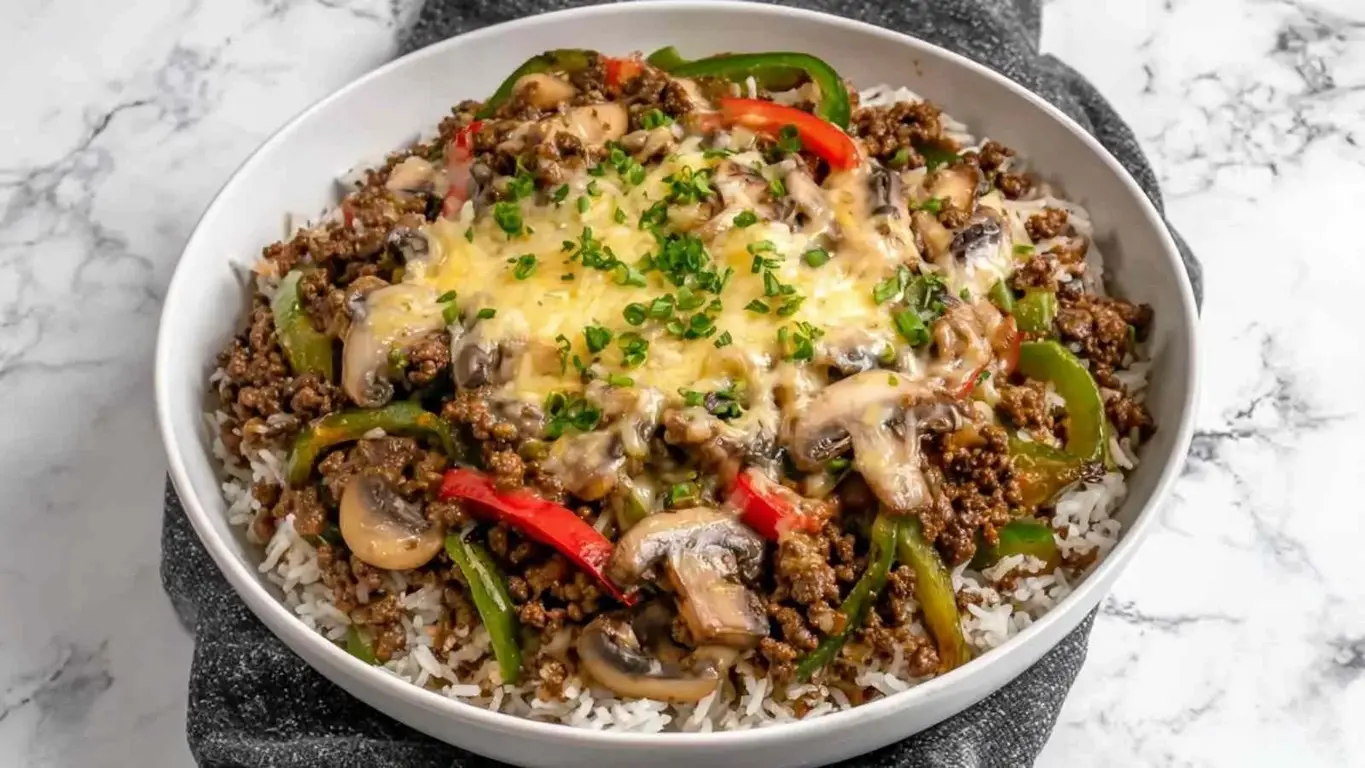
Ground Beef Philly Cheesesteak | One-Pan Meal Prep

Dinner just got easier with this Ground Beef Philly Cheesesteak meal prep! Ready in just 35 minutes, this one-pan dish is packed with savory flavors and loads of protein. Perfect for quick lunches throughout the week, it’s customizable and family-approved. Give it a try and make your meal prep a breeze! Perfect for busy nights or lunchboxes. 🍽️

Print

clock clock iconcutlery cutlery iconflag flag iconfolder folder iconinstagram instagram iconpinterest pinterest iconfacebook facebook iconprint print iconsquares squares iconheart heart iconheart solid heart solid icon

Ground Beef Philly Cheesesteak Meal Prep


  • Author: Chef Emy

Description

Juicy ground beef with caramelized peppers, onions, mushrooms, and melted cheese served over fluffy basmati rice. A bold, satisfying high-protein meal prep ready in 35 minutes.


Ingredients

Scale
  • 3 lbs lean ground beef 90/10 recommended
  • 2 medium green bell peppers diced
  • 2 small yellow onions sliced thin
  • 4 cups sliced mushrooms cremini or white button
  • 4 tsp seasoned soy sauce
  • 0.5 cup beef broth low-sodium preferred
  • 2 cups shredded Colby Jack or provolone cheese
  • 4 cups cooked basmati rice rinsed before cooking for fluffier results

Instructions

  1. Cook basmati rice according to package directions if not pre-cooked. Rinse before cooking for fluffier results. Set aside.
  2. Heat a large skillet over medium heat. Add diced bell peppers, sliced onions, and mushrooms. Sauté for 5 to 7 minutes until softened and just starting to caramelize. Transfer to a plate.
  3. In the same skillet, cook ground beef over medium-high heat, breaking into crumbles, for 6 to 8 minutes until no pink remains. Drain excess fat using a colander.
  4. Return drained beef to skillet. Stir in seasoned soy sauce and beef broth. Simmer for 2 to 3 minutes until liquid reduces slightly. Add cooked vegetables back in and mix well.
  5. Sprinkle shredded cheese evenly over the beef mixture. Cover with a lid and cook on low for 1 to 2 minutes until cheese is fully melted.
  6. Divide cooked rice evenly among 8 meal prep containers. Top each with the cheesesteak mixture. Seal and refrigerate for up to 4 days.

Notes

Undercook vegetables slightly so they hold texture during reheating. Freeze portions without cheese for up to 3 months add fresh cheese when reheating. For a low-carb version, swap basmati rice for cauliflower rice.

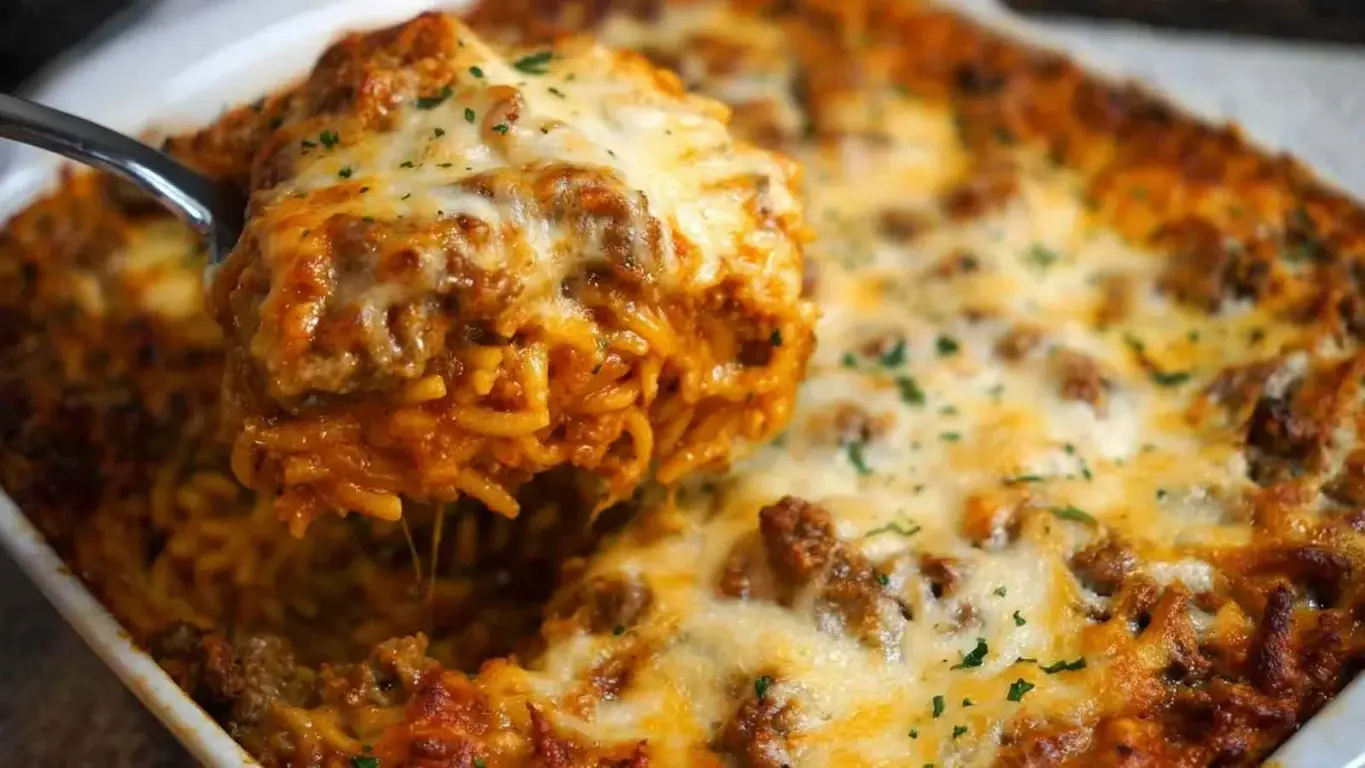
Southern Baked Spaghetti Casserole | Family Favorite Meal Prep

Get ready for a comforting dish that brings everyone together! This Southern Baked Spaghetti Casserole is a high-protein delight, perfect for busy weeknights or family gatherings. With its rich flavors and cheesy goodness, it’s an easy make-ahead meal that everyone will love. Perfect for potlucks or cozy dinners! 🍽️

Print

clock clock iconcutlery cutlery iconflag flag iconfolder folder iconinstagram instagram iconpinterest pinterest iconfacebook facebook iconprint print iconsquares squares iconheart heart iconheart solid heart solid icon

Southern Baked Spaghetti Casserole


  • Author: Chef Emy

Description

A hearty, high-protein Southern Baked Spaghetti Casserole made with lean ground beef, al dente pasta, fresh herbs, marinara, and melted mozzarella. Perfect for family dinners, potlucks, and freezer meal prep.


Ingredients

Scale
  • 1 tbsp olive oil
  • 1 lb lean ground beef 93% lean recommended
  • 1 medium yellow onion diced
  • 1 green bell pepper diced
  • 3 cloves garlic minced
  • 14.5 oz canned diced tomatoes drained
  • 24 oz marinara sauce up to 32 oz for a saucier casserole; Raos Homemade recommended
  • 1 tbsp fresh basil chopped; substitute 1 tsp dried
  • 1 tbsp fresh oregano chopped; substitute 1 tsp dried
  • 1 tsp salt or to taste
  • black pepper to taste
  • 12 oz spaghetti Barilla Protein Plus recommended for extra protein
  • 0.5 cup parmesan cheese freshly shredded
  • 1.5 cup shredded mozzarella cheese

Instructions

  1. Preheat your oven to 350°F. Heat olive oil in a large skillet over medium heat.
  2. Add ground beef and cook, breaking it apart with a spoon, until no pink remains, about 78 minutes.
  3. Add the diced onion, green pepper, and minced garlic. Cook, stirring often, until softened and fragrant, about 45 minutes.
  4. Drain excess liquid from the meat mixture. Stir in the drained diced tomatoes, marinara sauce, fresh basil, oregano, salt, and pepper. Reduce heat to low and simmer for 10 minutes.
  5. Meanwhile, bring a large pot of salted water to a boil. Cook spaghetti al dente, about 12 minutes less than package directions. Drain well but do not rinse.
  6. Grease a 9×13 inch baking dish generously. Add the spaghetti and toss with parmesan cheese. Pour meat sauce over the top and stir gently to combine. Sprinkle mozzarella evenly across the top.
  7. Bake uncovered at 350°F for 30 minutes, until the cheese is melted, bubbly, and lightly golden. If cheese browns too quickly, tent with foil for the last 10 minutes. Let rest 5 minutes before serving.

Notes

Use Barilla Protein Plus pasta for an extra 16g of protein per recipe. Cook pasta al dente to prevent mushiness when baked. Do not rinse pasta after draining. Adjust marinara from 24 to 32 oz based on desired sauciness. Freezer instructions: assemble unbaked, wrap with foil, freeze up to 3 months, thaw overnight before baking.

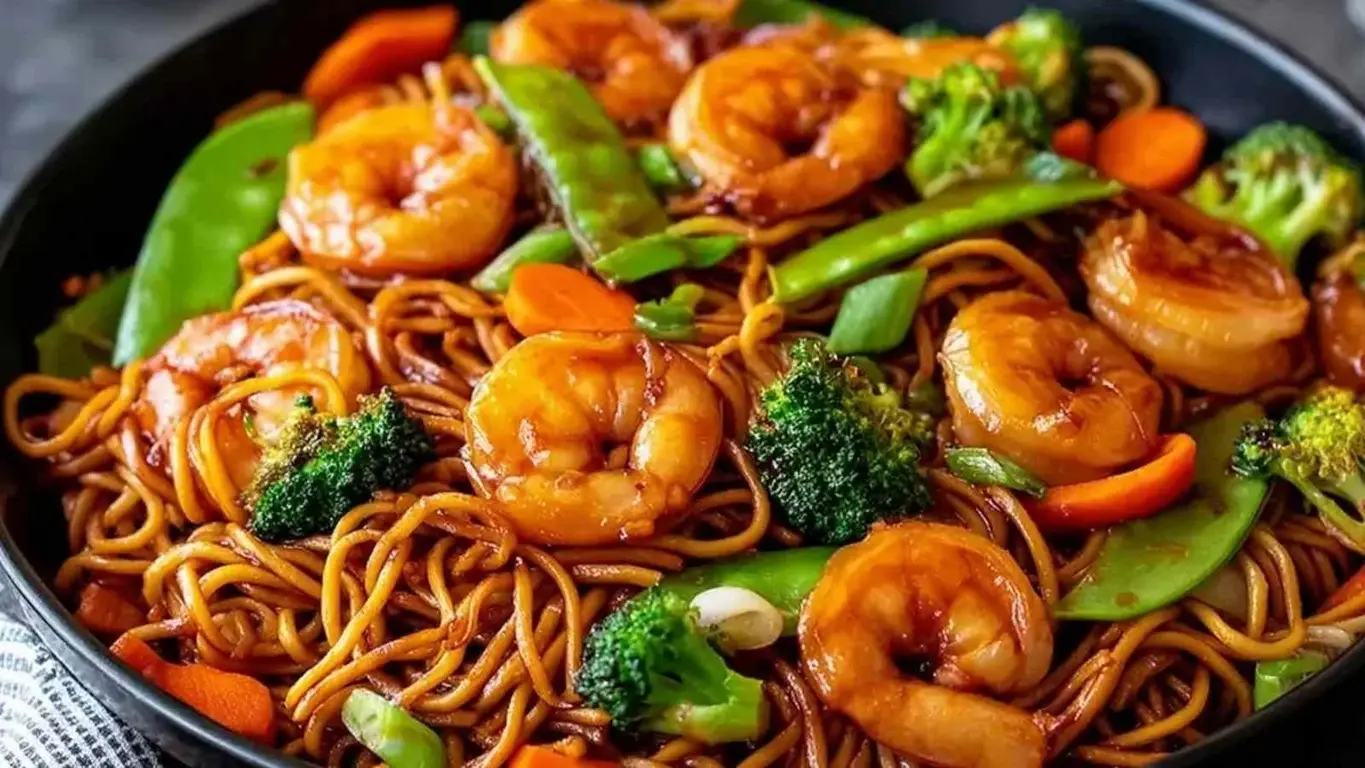
Shrimp Stir Fry Noodles | Quick & Packed with Veggies

Looking for a quick and tasty dinner? These shrimp stir fry noodles are not only packed with protein but also loaded with colorful veggies for a nutritious boost! Perfect for busy nights or meal prep, you’ll love how easily customizable this dish is. Dive into a flavorful Asian-inspired meal that the whole family will enjoy! 🍜✨

Print

clock clock iconcutlery cutlery iconflag flag iconfolder folder iconinstagram instagram iconpinterest pinterest iconfacebook facebook iconprint print iconsquares squares iconheart heart iconheart solid heart solid icon

High Protein Shrimp Stir Fry Noodles


  • Author: Chef Emy

Description

A quick and flavorful Asian-inspired shrimp stir fry with protein-enriched noodles, colorful vegetables, and a savory-sweet sauce made in one skillet.


Ingredients

Scale
  • 1 lb large shrimp peeled and deveined
  • 8 oz protein-enriched noodles or whole wheat noodles
  • 2 tbsp olive oil divided
  • 3 cloves garlic minced
  • 1 tbsp fresh ginger grated
  • 1 red bell pepper sliced
  • 1 cup snap peas
  • 1 medium carrot julienned
  • 0.5 cup edamame shelled
  • 3 tbsp low-sodium soy sauce
  • 1 tbsp oyster sauce
  • 1 tsp sesame oil
  • 1 tbsp honey or maple syrup
  • 1 tbsp cornstarch
  • 0.25 cup water
  • 2 green onions sliced
  • 1 tbsp sesame seeds for garnish

Instructions

  1. Cook the noodles according to package directions. Drain and toss with a small drizzle of sesame oil to prevent clumping. Set aside.
  2. In a small bowl, whisk together the soy sauce, oyster sauce, sesame oil, honey, cornstarch, and water until fully smooth. Set aside within arms reach.
  3. Heat 1 tablespoon of olive oil in a large skillet or wok over medium-high heat. Add the shrimp in a single layer and cook for 2 to 3 minutes until pink and just opaque. Remove from the skillet and set aside on a plate.
  4. Add the remaining tablespoon of olive oil to the same skillet. Add the garlic, ginger, and bell pepper. Stir-fry for 1 to 2 minutes until fragrant and slightly softened.
  5. Add the snap peas, carrot, and edamame. Stir-fry for 3 to 4 minutes until the vegetables are tender-crisp and bright in color.
  6. Return the shrimp and cooked noodles to the skillet. Pour the sauce over everything and toss well to coat. Cook for 2 to 3 more minutes, stirring frequently, until the sauce thickens and clings evenly to the noodles.
  7. Remove from heat. Stir in the sliced green onions and garnish with sesame seeds before serving.

Notes

Do not overcook the shrimp since they finish cooking in the sauce. Swap in any vegetables you have on hand. For extra protein, add cubed tofu or diced cooked chicken. Store leftovers in an airtight container for up to 3 days. Freezing is not recommended.

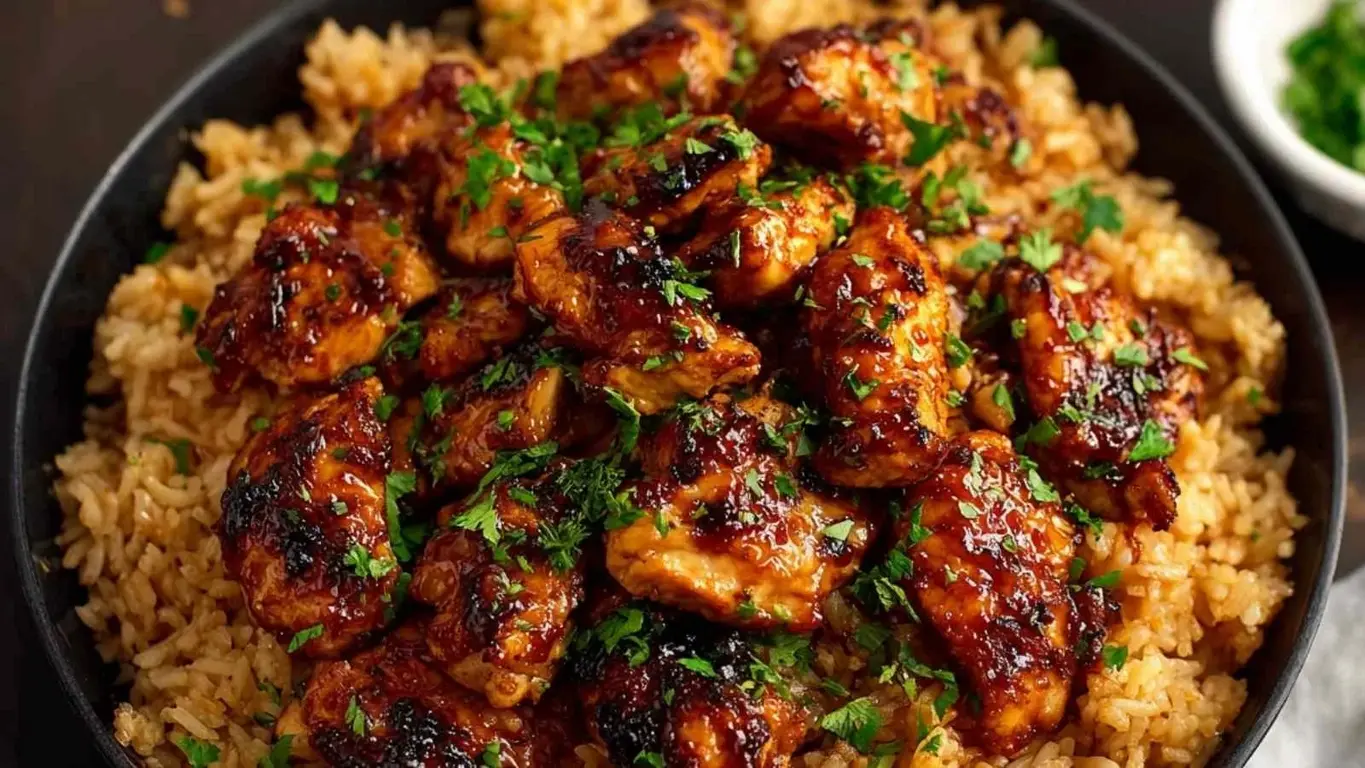
One Pan Honey BBQ Chicken Rice | Quick Family Meal

Looking for a quick and tasty dinner? This one-pan honey BBQ chicken rice is a delightful blend of tender chicken and savory BBQ sauce, all in one dish! It’s high in protein and perfect for busy weeknights or family meals. Enjoy a tasty homemade dinner with minimal cleanup! 🍽️

Print

clock clock iconcutlery cutlery iconflag flag iconfolder folder iconinstagram instagram iconpinterest pinterest iconfacebook facebook iconprint print iconsquares squares iconheart heart iconheart solid heart solid icon

One Pan Honey BBQ Chicken Rice


  • Author: Chef Emy

Description

A hearty and easy weeknight skillet dinner with tender chicken, sweet-smoky BBQ sauce, and fluffy rice all cooked together in one pan with over 30g protein per serving.


Ingredients

Scale
  • 1 lb boneless skinless chicken breasts cut into 1-inch pieces
  • 1 tbsp olive oil extra virgin preferred
  • 1 cup uncooked white rice long-grain preferred
  • 1.5 cup chicken broth low-sodium recommended
  • 0.5 cup honey BBQ sauce use a thick variety for best results
  • 1 cup frozen corn and peas mixed, no need to thaw
  • 0.5 medium onion diced
  • 2 cloves garlic minced
  • 1 tsp smoked paprika
  • salt and pepper to taste
  • 2 green onions sliced, for garnish
  • 0.25 cup shredded cheddar cheese optional, for serving

Instructions

  1. Heat olive oil in a large skillet over medium-high heat. Season chicken pieces with salt, pepper, and smoked paprika until well coated.
  2. Add chicken to the skillet and cook for 5 to 6 minutes, turning occasionally, until browned on all sides. Do not crowd the pan. Chicken does not need to be fully cooked through at this stage.
  3. Add diced onion and minced garlic. Cook for 2 to 3 minutes until softened and fragrant. Lower heat slightly if garlic starts to darken.
  4. Add uncooked rice and stir for 1 minute to lightly toast.
  5. Pour in chicken broth and honey BBQ sauce. Stir well to combine and scrape up any browned bits from the bottom of the pan. Bring to a full boil.
  6. Reduce heat to low and cover tightly with a lid. Simmer for 15 to 18 minutes without lifting the lid. The trapped steam cooks the rice evenly.
  7. Stir in frozen corn and peas. Cover and cook for 2 to 3 more minutes until vegetables are heated through.
  8. Remove from heat and let rest, still covered, for 5 minutes. Fluff rice with a fork, garnish with sliced green onions, and serve hot with optional shredded cheddar cheese.

Notes

Do not lift the lid while rice is simmering. Use a thick BBQ sauce to avoid mushy rice. If rice is still firm after 18 minutes, add 1/4 cup more broth, cover, and cook for 3 to 5 more minutes. Leftovers taste even better the next day. Stores in the refrigerator up to 3 days or freezer up to 3 months.

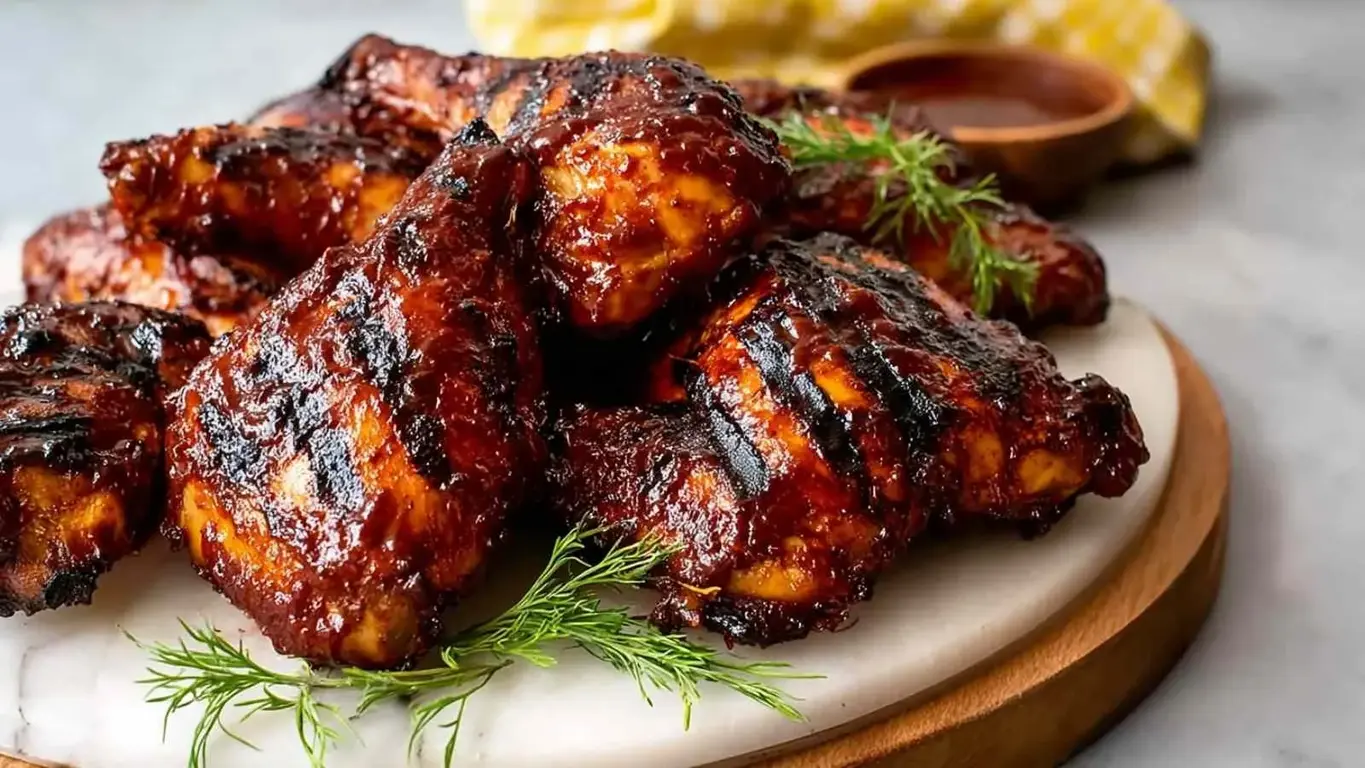
Smoky BBQ Chicken | Juicy & Packed with Flavor

Get ready to savor the mouthwatering goodness of smoky BBQ chicken! This high-protein dish is bursting with flavor and is super easy to whip up, whether on the grill or in the oven. It’s perfect for family dinners or meal prep, making weeknight meals a breeze. Your taste buds will thank you! 🥳 Perfect for busy nights or lunchboxes.

Print

clock clock iconcutlery cutlery iconflag flag iconfolder folder iconinstagram instagram iconpinterest pinterest iconfacebook facebook iconprint print iconsquares squares iconheart heart iconheart solid heart solid icon

Smoky BBQ Chicken


  • Author: Chef Emy

Description

Juicy, tender chicken breasts coated in a bold smoky spice rub and glazed with tangy BBQ sauce. A high-protein dinner perfect for grilling or baking.


Ingredients

Scale
  • 4 boneless skinless chicken breasts about 1.5 lbs total, similar size for even cooking
  • 2 tbsp olive oil
  • 1 tbsp smoked paprika Spanish smoked paprika preferred
  • 1 tsp garlic powder
  • 1 tsp onion powder
  • 0.5 tsp black pepper
  • 0.5 tsp salt
  • 0.5 tsp cumin
  • 0.25 tsp cayenne pepper optional, for added heat
  • 1 cup BBQ sauce smoky-tangy variety recommended, such as Sweet Baby Rays Hickory and Brown Sugar

Instructions

  1. In a small bowl, combine smoked paprika, garlic powder, onion powder, black pepper, salt, cumin, and cayenne pepper (if using). Stir until evenly mixed.
  2. Pat chicken breasts dry with paper towels. Coat each breast with olive oil, then press the spice mixture firmly onto all sides to create an even rub.
  3. For grilling: Preheat grill to medium-high heat (400 to 425 degrees F). Grill chicken for 6 to 8 minutes per side without moving. Flip once to develop a good sear.
  4. For baking: Preheat oven to 400 degrees F (200 degrees C). Place chicken in a lightly oiled baking dish and bake for 20 to 25 minutes.
  5. During the last 5 minutes of cooking, brush a generous layer of BBQ sauce over each chicken breast. Look for the sauce to turn glossy and slightly darker at the edges. Watch closely to avoid burning.
  6. Remove chicken from heat. Use a meat thermometer to confirm an internal temperature of 165 degrees F (74 degrees C). Let rest for 5 minutes before slicing and serving.

Notes

For extra smoky flavor, add a few drops of liquid smoke to the spice rub. Leftovers are great sliced in wraps, sandwiches, or salads. Freeze pre-sliced portions for easy meal prep.

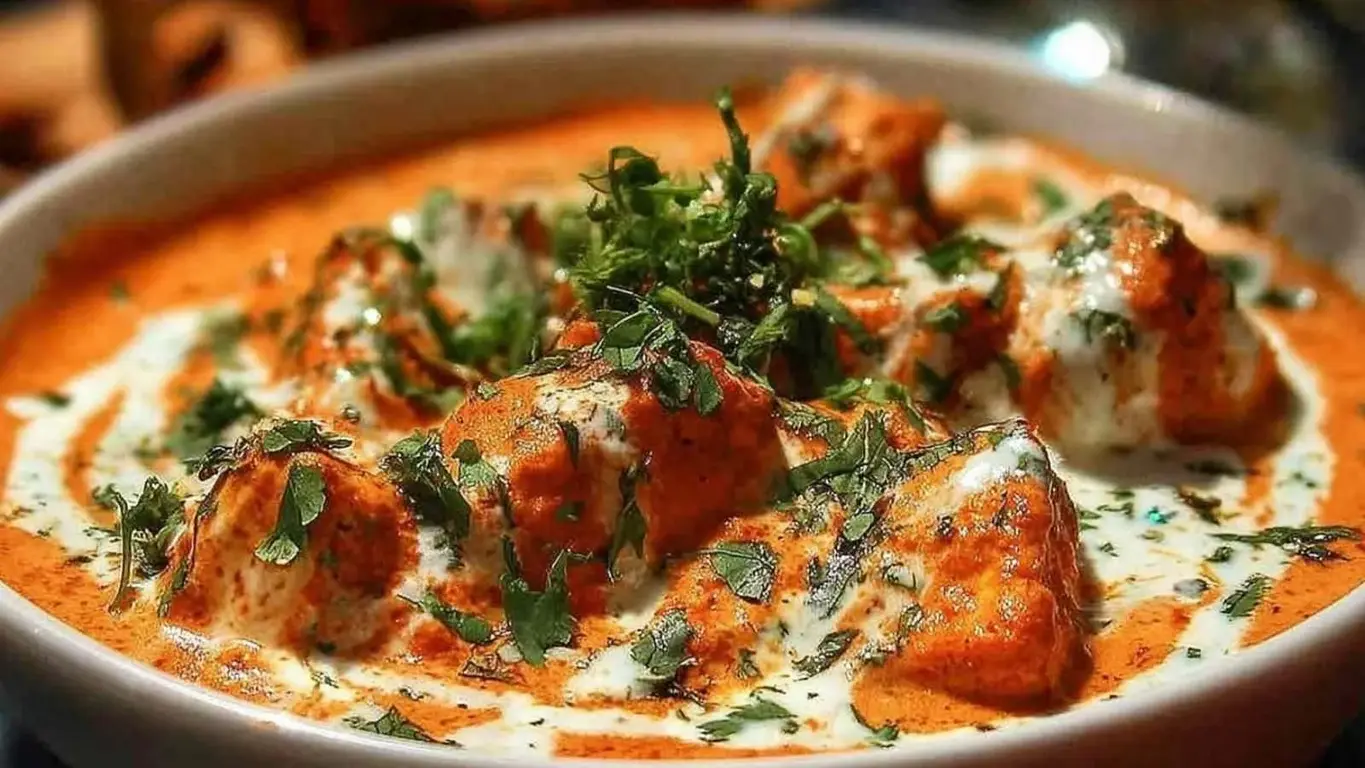
Halloumi Makhani | Creamy & High Protein Delight

Get ready to savor a delightful twist on a classic dish with this Halloumi Makhani! This creamy, protein-packed recipe combines grilled Halloumi cheese and a rich, spiced tomato sauce, making it a quick and flavorful meal. Perfect for busy weeknights or a cozy dinner with loved ones!

Print

clock clock iconcutlery cutlery iconflag flag iconfolder folder iconinstagram instagram iconpinterest pinterest iconfacebook facebook iconprint print iconsquares squares iconheart heart iconheart solid heart solid icon

Halloumi Makhani


  • Author: Chef Emy

Description

Golden, pan-fried halloumi cheese folded into a rich and creamy spiced tomato makhani sauce. A high-protein vegetarian main thats bold, satisfying, and ready in 30 minutes.


Ingredients

Scale
  • 7 oz halloumi cheese cubed and patted dry
  • 1 medium onion finely chopped
  • 2 cloves garlic minced
  • 1 inch fresh ginger grated
  • 1.75 cups tomato puree passata, plain and unseasoned
  • 0.33 cup heavy cream or full-fat coconut cream for dairy-free
  • 2 tbsp butter or ghee ghee preferred for richer flavor
  • 1 tsp garam masala
  • 1 tsp cumin
  • 0.5 tsp paprika
  • 0.5 tsp chili powder adjust to taste
  • salt and pepper to taste
  • fresh cilantro for garnish

Instructions

  1. Melt the butter or ghee in a large skillet over medium heat. Add the finely chopped onion and cook for 5 to 7 minutes, stirring occasionally, until soft and fully translucent.
  2. Add the minced garlic and grated ginger. Stir and cook for about 1 minute until fragrant. Watch closely so the garlic does not burn.
  3. Combine the garam masala, cumin, paprika, and chili powder in a small bowl. Add the spice blend to the pan and toast for 30 to 60 seconds, stirring constantly, until the mixture smells warm and aromatic.
  4. Pour in the tomato puree, season with salt and pepper, and stir well. Bring to a gentle simmer, reduce heat to low, cover, and cook for 10 minutes.
  5. While the sauce simmers, heat a separate non-stick pan over medium-high heat. Add the halloumi cubes in a single layer. Pan-fry for 2 to 3 minutes per side without moving them until deep golden brown. If the halloumi sticks when you try to flip, let it cook another 30 seconds and try again. Remove from pan and set aside.
  6. Remove the sauce from heat briefly and stir in the heavy cream until fully combined. Return to low heat.
  7. Gently fold the fried halloumi cubes into the creamy makhani sauce. Cook together for 2 to 3 minutes until the halloumi is heated through.
  8. Remove from heat, taste for seasoning, garnish with fresh cilantro, and serve immediately.

Notes

Pat halloumi dry before frying for the best golden crust. For a lighter sauce, substitute heavy cream with plain Greek yogurt added off the heat to prevent curdling. Freezing is not recommended as the cream sauce may separate. Store leftovers in an airtight container in the fridge for up to 3 days.