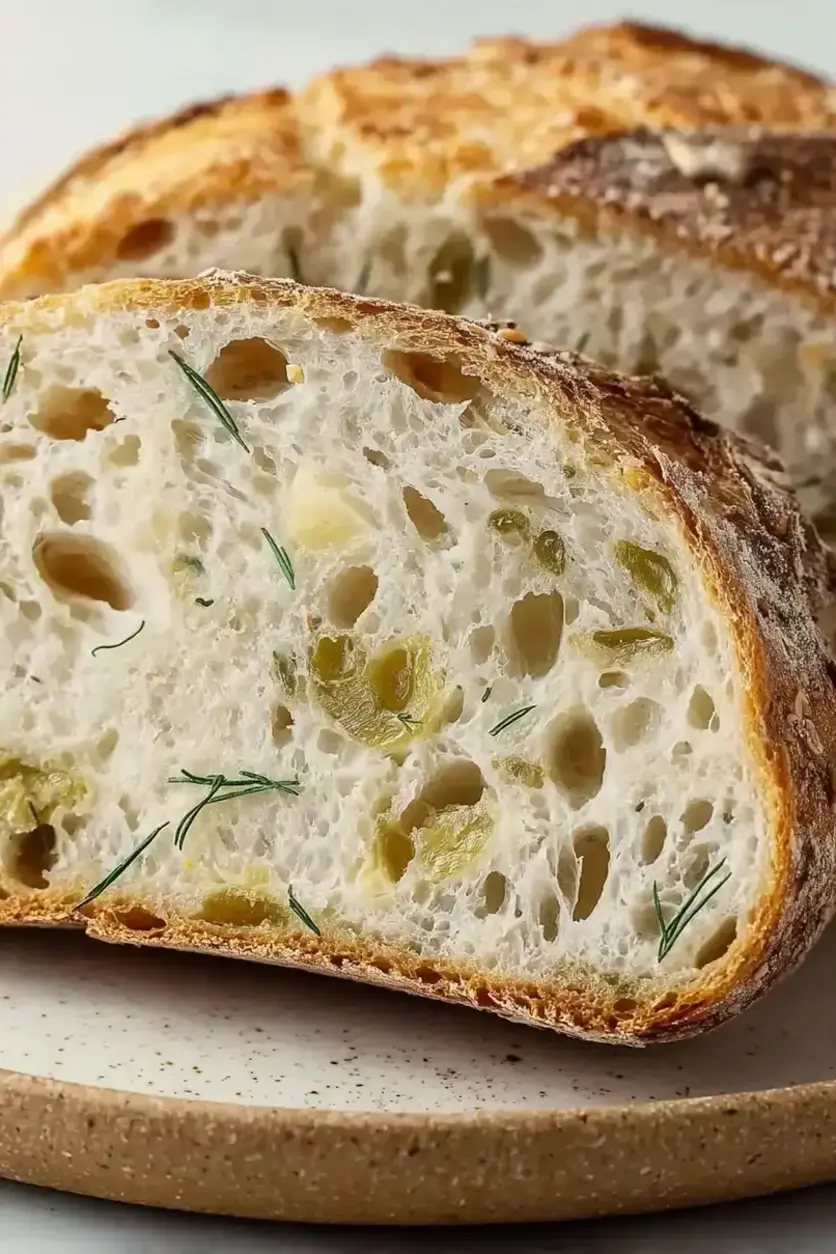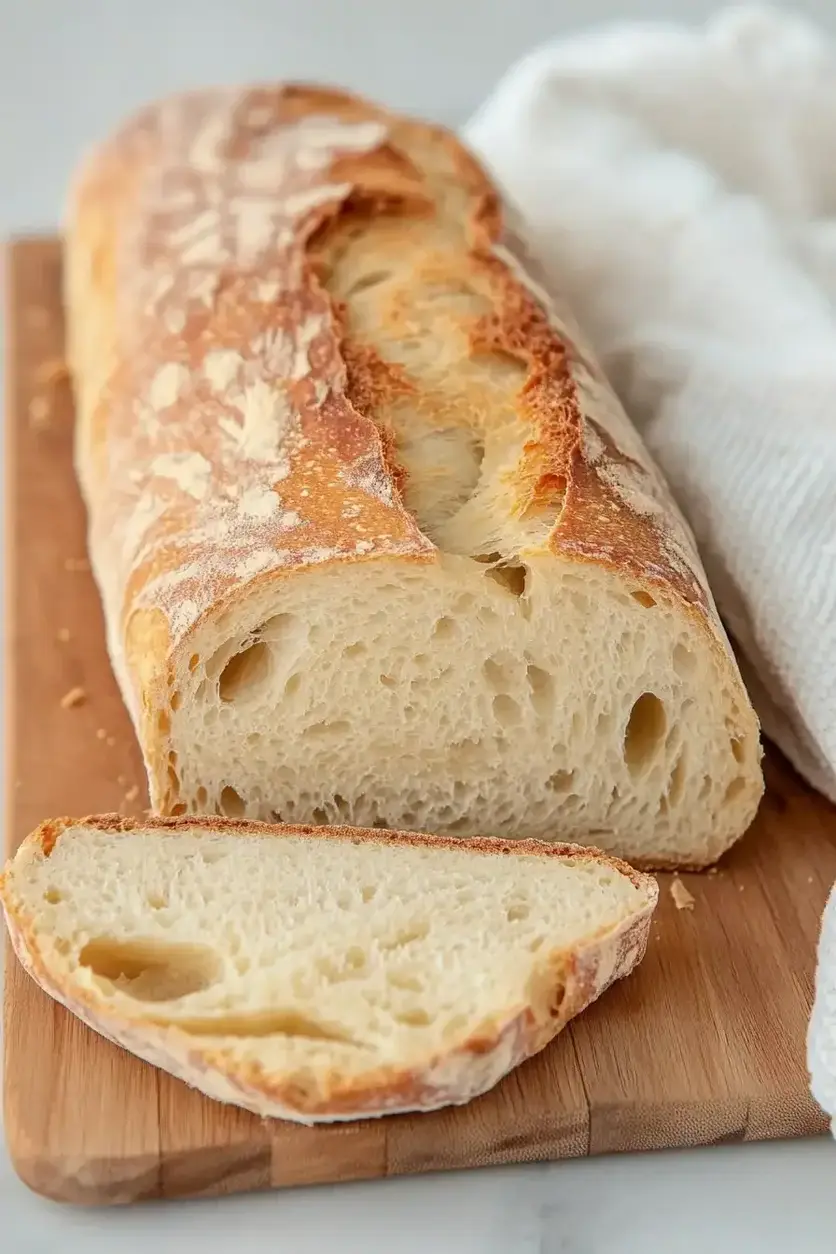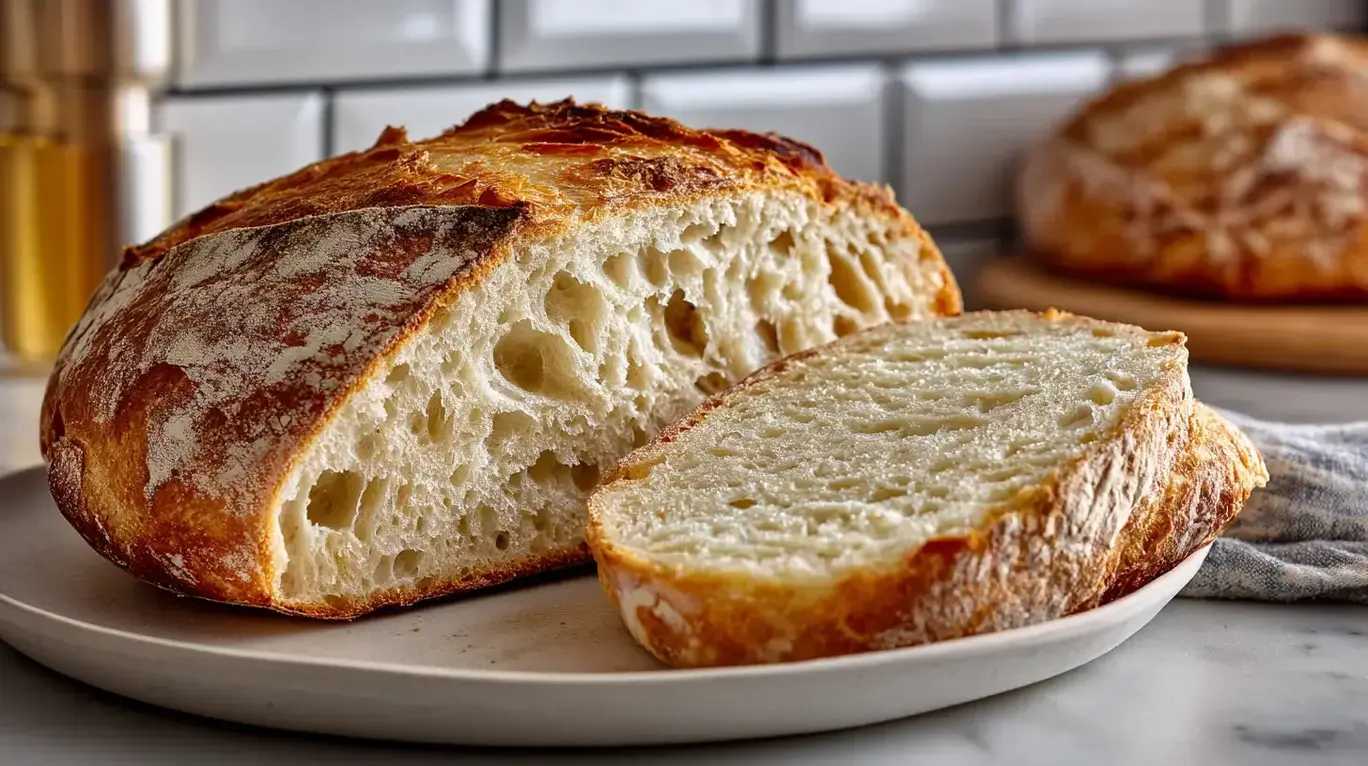
Cheesy Garlic Bread Recipe – Bake with Zoha

This easy cheesy garlic bread recipe is a must-have for your holiday dinner table. Whether you’re hosting Thanksgiving or Christmas, this quick garlic bread made with soft Hawaiian rolls and plenty of cheese will impress your guests. It’s the perfect side dish or appetizer to complement any meal. Enjoy this best-ever recipe for any festive occasion or simple family dinner. Check out the recipe at bakewithzoha.com

Print

clock clock iconcutlery cutlery iconflag flag iconfolder folder iconinstagram instagram iconpinterest pinterest iconfacebook facebook iconprint print iconsquares squares iconheart heart iconheart solid heart solid icon

Best Cheesy Garlic Bread


  • Author: Chef Emy

Description

This Cheesy Garlic Bread is life changing: buttery, garlicky, cheesy and crispy without being heavy – exactly how it should be.


Ingredients

Scale
  • 810 garlic cloves
  • 2 tbsp olive oil
  • Pinch of salt
  • Roasted garlic from above
  • ½ cup butter, melted(113g)
  • 1 egg
  • ¼ cup milk (60g)
  • ½ tsp salt
  • ½ tsp paprika
  • 2 tbsp chopped fresh parsley
  • 12 King's Hawaiian Original Hawaiian Sheet Rolls, kept in the full sheet form (or replace with a French baguette of similar size)
  • 2 cups shredded mozzarella cheese
  • Chopped parsley and chili flakes for serving

Instructions

  1. Pre-heat oven to 400F
  2. Mix the peeled garlic cloves in the olive oil and salt. Transfer to a mini oven safe pot with a lid (or cover with foil) and bake for ~20 minutes until they are soft and golden
  3. Mash with a fork and set aside
  4. Add the mashed roasted garlic, melted butter, egg, milk, salt, paprika and parsley to a bowl
  5. Thoroughly whisk to combine
  6. Change the oven temperature to 350F after roasting the garlic
  7. Use a sharp knife to divide the sheet of bread rolls into 2 halves (as seen in pictures above). Place on a large baking sheet and bake for 8-10 minutes until light golden and crispy
  8. Transfer the garlic butter custard to a larger pan. Carefully dip the baked bread sheets / loaves into the garlic butter custard, getting them well coated on all sides
  9. Place the bread back on the baking sheet and bake at 350F for 15-18 minutes until golden
  10. Cover the bread with the shredded mozzarella cheese. Change the oven setting to broil / grill and broil for ~5 minutes until the cheese is melted and golden
  11. Garnish with fresh parsley and chili flakes. Slice up, serve and enjoy!
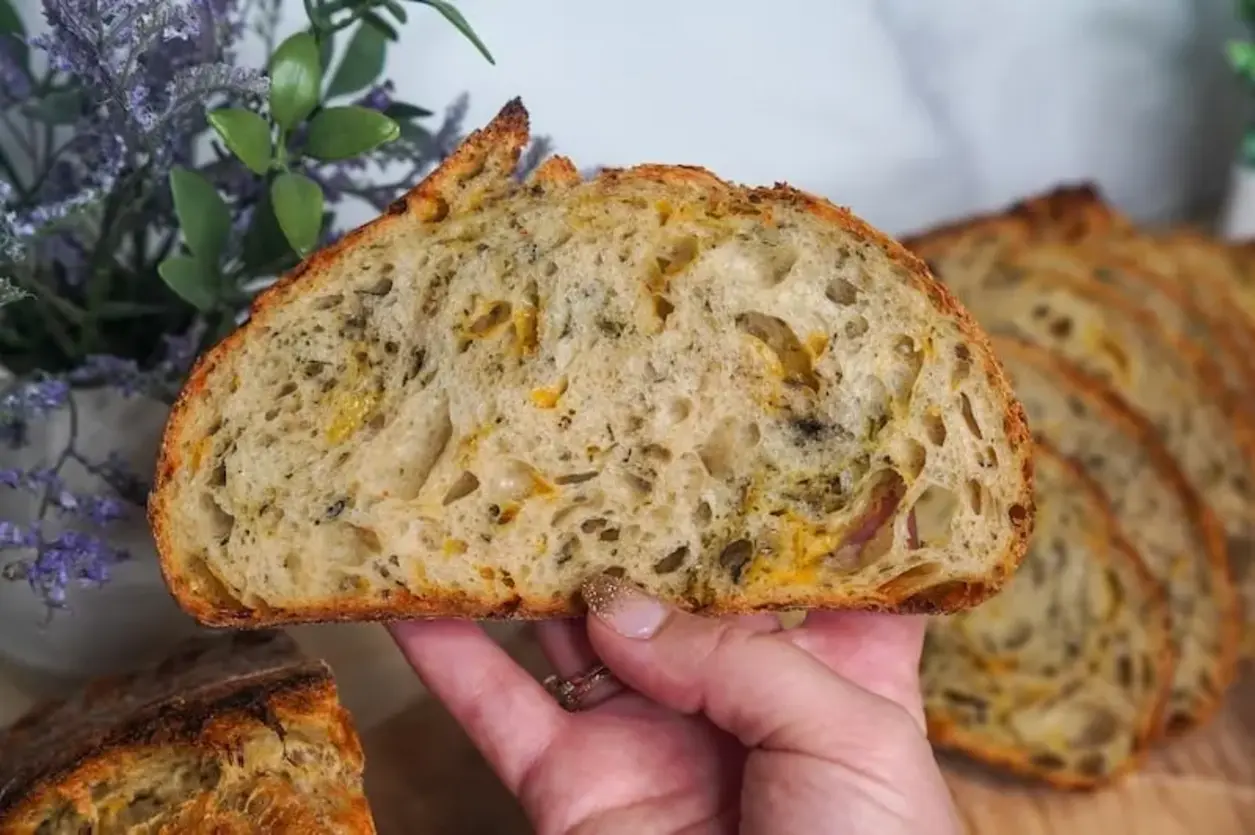
Italian Herbs & Cheese Artisan Sourdough Bread Recipe

Print
clock clock iconcutlery cutlery iconflag flag iconfolder folder iconinstagram instagram iconpinterest pinterest iconfacebook facebook iconprint print iconsquares squares iconheart heart iconheart solid heart solid icon

Italian Herbs and Cheese Artisan Sourdough Bread


  • Author: Chef Emy

Description

Inspired by nostalgic flavors but elevated with the tang and complexity of homemade sourdough, this Italian Herbs and Cheese Artisan Sourdough Loaf combines aromatic Italian spices, lightly dried basil, and a blend of Colby Jack and Parmigiano Reggiano cheese. The result? A soft, flavorful bread with a perfectly crisp crust thats as delicious on its own as it is stacked into a sandwich. Beginner-friendly and versatile, this recipe is ideal for anyone ready to explore the world of sourdough inclusions.


Ingredients

Scale
  • 12 g sourdough starter (active or discard)
  • 60 g water
  • 60 g bread flour (unbleached, King Arthur)

Instructions

  1. The night before you plan to make your dough, feed your starter. Mix together 12 g sourdough starter, 60 g water, and 60 g bread flour. This gives you a little more than you need so you don't have to scrape out every last bit from the jar (you can also feed the leftovers to maintain your starter). At this feeding ratio, your starter should peak by morning (about 10-12 hours after you feed).
  2. In the morning, mix 450 g bread flour, 50 g whole wheat flour, 120 g active sourdough starter, and 325 g water. (This is the beginning of the bulk fermentation.) Knead the ingredients together until fully incorporated and you have a shaggy dough. Cover with plastic wrap, a shower cap bowl cover, or cloth bowl cover, and let rest for about 1 hour.Optional: you can opt to do an autolyse by mixing just the flours and water and letting it rest for 30 minutes, up to overnight. Then, proceed by adding your starter.
  3. Add 10 g sea salt and 25 g water. Dimple in and squeeze the saltwater into the flour. The dough will break up, get stringy, and feel rubbery. This is normal. Mist your counter with water and turn out the mass of dough onto your counter. Do slap and folds for 2-4 minutes, or until the dough smooths out and the saltwater is fully incorporated. Cover and let rest for 30 minutes.
  4. Add inclusions (3 g Italian seasoning blend, 4 g lightly dried basil, 110 g Colby jack cheese, shredded, and 15 g Parmigiano Reggiano, shredded) on top of the dough in the bowl. Stretch and fold the inclusions into the dough. Cover and let rest for 30 minutes.
  5. Stretch and fold the dough. Cover and let rest for 30 minutes.
  6. Coil fold the dough. Cover and let rest for 30 minutes.
  7. Coil fold the dough. Cover and let rest for 30 minutes.
  8. The dough strengthening is now completed, so we wait until the dough has finished its bulk fermentation.Bulk fermentation is done when the dough is visibly larger (the exact percentage rise is not as important as the other visual signs), with bubbles all around the sides and underneath the surface. The dough should jiggle like jelly when you shake the bowl and feel light, airy, and puffy to the touch. It should be domed on the edges where the dough meets the bowl. Dont worry about exact timing; trust these visual and tactile cues to guide you. Warmer dough ferments faster, colder dough takes longer, but slightly overproofed dough often makes better bread than underproofed. Don't be afraid to push the limits. For me, bulk fermentation took 7.5 hours; my dough was 70-72°F (21-22°C) and my home was 71°F (21.6°C), for reference.
  9. When bulk fermentation is done, dump out dough onto the counter. Gently pre-shape using a bench scraper to coax the dough into a tight ball. This is the end of the bulk fermentation.
  10. Final shape the dough using the single caddy clasp method. Flip into a floured banneton, seam-side up. Pinch the seam shut. Optional: Let the dough rest for about 10 minutes. Stitch the top of the dough to increase surface tension and cover. Put in the fridge overnight.
  11. The next day, at any time, preheat oven to 450°F/230°C with a Dutch oven inside.
  12. Score the dough and place it in the preheated Dutch oven. Cover and bake for 30 minutes.
  13. Remove lid and lower oven temperature to 425°F/220°C. Bake for an additional 15-20 minutes, or until the top is as golden brown as you prefer. Feel free to temp the bread to ensure it is fully baked. It should be around 205-210°F (96-99°C).
  14. Wait for the bread to cool down, about 2 hours. Cut into the cooled bread and enjoy!!

Notes

Lightly dried basil: To clarify, this isnt dried basil in a spice jar. Its found in the produce section and lasts up to 4 weeks in the fridge. Its basically halfway between fresh basil and dried basil.
To make two loaves, simply double the recipe.

Flavorful Dill Pickle Sourdough Bread

SAVE FOR LATER ❤️ You’ve gotta try this Crusty Dill Pickle Sourdough Bread—it’s tangy, crunchy, and totally unique! Perfect for jazzing up your sandwich at lunch or impressing friends at weekend brunch.

Print

clock clock iconcutlery cutlery iconflag flag iconfolder folder iconinstagram instagram iconpinterest pinterest iconfacebook facebook iconprint print iconsquares squares iconheart heart iconheart solid heart solid icon

Tangy Dill Pickle Sourdough Bread


  • Author: Chef Emy

Instructions

    Quick Sourdough Discard French Bread

    Try this Tasty Sourdough Discard French Bread Recipe for a delicious way to use your sourdough leftovers! It’s perfect for impressing guests at brunch or enjoying a cozy evening with homemade bread fresh out of the oven.

    Print

    clock clock iconcutlery cutlery iconflag flag iconfolder folder iconinstagram instagram iconpinterest pinterest iconfacebook facebook iconprint print iconsquares squares iconheart heart iconheart solid heart solid icon

    Perfect Sourdough Discard French Bread


    • Author: Chef Emy

    Instructions

      Soft and Chewy Sourdough Bread Made from Scratch

      Make soft sourdough bread with this homemade sourdough bread recipe that’s great for beginners. It includes a complete guide to sourdough bread starter and shows how to bake crusty Dutch oven sourdough bread with no kneading required. If you’re interested in sourdough bread recipes that work every time, this one’s worth trying. Perfect for anyone learning about bread starter or making sourdough bread the easy way.

      Print

      clock clock iconcutlery cutlery iconflag flag iconfolder folder iconinstagram instagram iconpinterest pinterest iconfacebook facebook iconprint print iconsquares squares iconheart heart iconheart solid heart solid icon

      Sourdough Bread


      • Author: Chef Emy

      Description

      This classic sourdough bread has a chewy center, crisp golden crust, and simple ingredients. Its naturally leavened and baked to perfection in a Dutch ovenno kneading needed.


      Ingredients

      Scale
      • 4 cups 500g bread flour or all-purpose flour
      • 1 cups 375g warm water
      • 1 cup 200g active sourdough starter
      • 2 teaspoons 10g salt

      Instructions

      1. In a large mixing bowl, combine 4 cups of flour and 1 cups of warm water.
      2. Stir until a shaggy dough forms, then let it rest for 30 minutes.
      3. After resting, add 1 cup of active sourdough starter and 2 teaspoons of salt.
      4. Mix well until everything is fully combined.
      5. Cover the bowl with a clean towel or plastic wrap.
      6. Let the dough sit at room temperature.
      7. Every 30 minutes for 2 hours, perform a set of stretch and folds.
      8. To stretch and fold, pull one side of the dough upward and fold it over itself.
      9. Turn the bowl a quarter turn and repeat three more times.
      10. After the final fold, cover the bowl again and let the dough rise for 6 to 8 hours.
      11. It should double in size and appear bubbly and puffy.
      12. Gently transfer the dough to a lightly floured surface.
      13. Shape it into a round or oval loaf by folding and tucking the edges underneath.
      14. Place the shaped dough seam-side up into a floured proofing basket or towel-lined bowl.
      15. Cover and refrigerate for 8 to 12 hours.
      16. The next day, place a Dutch oven into your oven and preheat to 450°F (232°C).
      17. Remove the dough from the fridge and turn it out onto parchment paper.
      18. Score the top of the dough with a sharp knife or razor blade.
      19. Carefully lower the dough into the hot Dutch oven using the parchment paper.
      20. Cover and bake for 20 minutes.
      21. Remove the lid and bake uncovered for another 25 minutes.
      22. Take the bread out of the Dutch oven and let it cool completely on a wire rack before slicing.

      Sourdough Bread for Beginners

      Everything you need to know to start baking delicious sourdough bread. From making the starter to troubleshooting for common issues.

      Print

      clock clock iconcutlery cutlery iconflag flag iconfolder folder iconinstagram instagram iconpinterest pinterest iconfacebook facebook iconprint print iconsquares squares iconheart heart iconheart solid heart solid icon

      Sourdough Bread for Beginners


      • Author: Chef Emy

      Description

      Everything you need to know to start baking delicious sourdough bread. From making the starter to troubleshooting for common issues.


      Ingredients

      Scale
      • 100g/1/2 cup sourdough starter
      • 500g/4 cups white bread flour
      • 350ml/1 1/3 cups + 1 tablespoon water
      • 910g/ 1/2 tablespoon salt

      Instructions

      1. In the morning discard a half of your active starter, then feed it by adding 50g of flour and 50g of water. Leave to ferment at room temperature. It should double in size after 4-5 hours depending on the strength of your starter and the temperature of your house. (It will rise quicker in the summer but might take 6-7 hours in the winter.)
      2. When you starter is nearly doubled in size. Start the autolyse by mixing the flour and water. Cover with plastic wrap and set aside until the starter is ready to be used. (It will take anywhere between 30 minutes to 1 hour.)
      3. Once the starter is at its peak add 100g of it to the flour and water mixture, then add the salt and mix well. You should have some of the starter left over, keep it until the next day, then feed it as usual.
      4. Knead the dough either in the bowl of a stand mixer using a dough hook or by hand. It takes approximately 10 minutes on low speed (I use speed 1 or 2 out of 7 on the dial) if kneading in a stand mixer. We aim to develop gluten in the dough, so to check is the dough is ready, pull a small amount away and stretch it between your fingers. The dough should stretch easily into a transparent membrane and not tear. This is called a windowpane test and is a good indicator that your dough has been kneaded properly.
      5. Cover the dough with plastic wrap, so it doesn't dry out and let it ferment for 5-7 hours. Gently scrape the dough out of the bowl onto a floured work surface. With floured hands pull one side of the dough and fold it over itself, repeat the same motion with the other 3 sides. Wrap it like an envelope and pinch at the top, so it stay together. Your dough should be full of bubbles at this point, so make sure to not knock them down.
      6. Using a bench scraper pick the dough up and flip it over, so the pinched knot is facing the countertop now. Then shape it into a ball by tucking the sides of the dough inwards with your hands. Keep spinning the dough while tucking the sides in at the same time in order to create tension on the surface, so the top is smooth and round. (It helps to have very little flour on your work surface, so when you spin the dough it catches and pulls for a taut surface. Check photos for reference.)
      7. Generously dust your banneton with rice flour (it prevents the dough from sticking!) and put the shaped loaf in the seam side up. Cover with a tea towel and allow to ferment in a refrigerator for 16-20 hours.
      8. The following day preheat the oven with your Dutch Oven inside to the highest temperature 450F/220C or higher one hour before you intend to bake. Take the dough out of the proofing basket and flip it over on a piece of parchment paper. Placing the paper on a flat baking sheet helps with the flipping. Then score the dough with a sharp knife or a blade in any way you like. Take the Dutch Oven out of the oven, pick the shaped loaf by the opposite sides of parchment paper and quickly drop it into the pot, put the lid on bake for 30 minutes, then take the lid off and bake for 15 minutes longer.
      9. Cool your sourdough bread on a wire rack for at least 4-5 hours before slicing it.

      Notes

      Please note:
      You need to start this bread recipe a day before you actually bake the bread.

      Nutrition

      • Calories: 127kcal
      • Sugar: 1g
      • Protein: 4g

      Same Day Sourdough Bread Recipe

      Are you craving the delightful aroma of freshly baked bread🥖 without the wait? Look no further! This easy same day sourdough recipe will have you enjoying a delicious loaf of bread in just a matter of hours. 🌟 It is a fast⏰ sourdough bread🥖 recipe made in one day📆, including feeding your starter. If you need a quick sourdough bread recipe, try this one, I’m sure it won’t disappoint!

      Print

      clock clock iconcutlery cutlery iconflag flag iconfolder folder iconinstagram instagram iconpinterest pinterest iconfacebook facebook iconprint print iconsquares squares iconheart heart iconheart solid heart solid icon

      Same Day Sourdough Bread


      • Author: Chef Emy

      Description

      Are you craving the delightful aroma of freshly baked bread without the wait? Look no further! This easy same day sourdough bread will have you enjoying a delicious loaf of bread in just a matter of hours.


      Ingredients

      Scale
      • 410 grams all-purpose flour
      • 290 grams water
      • 160 grams starter
      • 8 grams salt

      Instructions

      1. In a large bowl, mix together your water, starter, and salt. I like mixing those up first so the starter and the salt have a chance to disperse in the water.
      2. Add the flour and mix well. I usually do this with a spoon and finish with my hands to break up all the flour. Cover with something airtight (plastic wrap, aluminum foil, plastic bag, even a shower cap works!) and let rest for 30 minutes. I find putting a plastic bag over top is the most practical.
      3. After 30 minutes, do a set of stretch and folds. That means that you grab the edge of the dough, stretch it up, and fold it under on the other side. Rotate your bowl for 90 degrees and repeat 3 more times. We're going for 4 sets of stretch and folds in total. Cover again and leave to rest for 20 minutes and so another set of stretch and folds.
      4. Repeat this process until you do 4 sets of stretch and folds (which should take 1 hour in total). Be sure to cover your dough with something airtight in-between sets of stretch and folds to prevent the dough from drying out!
      5. After you are finished with stretch and folds, cover the dough again (it should resemble a smooth ball by now) and let the dough rise for 3 – 4 hours at room temperature (I usually just leave it on the counter). It should almost double in volume.
      6. After the bulk fermentation, transfer your dough to a lightly floured surface. We are going to shape your dough. The way to do that is to grab the opposite ends of the dough and pinch them together on top. Repeat with the other two opposites.
      7. Prepare your bread basket (or banneton basket) so that you line it with a lightly floured tea towel. Carefully transfer your dough ball into a tea towel-lined basket. The pinched parts should be facing upwards. If your dough is extra wobbly, you can help yourself with a dough scraper.
      8. Cover the dough again (I use the same plastic bag as before) and let it do its final rise for 2 hours at room temperature. About an hour in, you can turn your oven on to preheat it.
      9. When your dough puffed up a bit and your dutch oven and oven are both sufficiently preheated, prepare a piece of parchment paper. Transfer your dough from the basket to the parchment paper, so the floured bottom of the dough is now the top of the dough. Score your dough with a razor blade or a sharp knife; make two deep cuts so you get a crisis cross pattern.
      10. Transfer your parchment paper with a dough on it into a hot dutch oven. Splash just a bit of water between the parchment paper and dutch oven to create some steam and cover quickly to capture it inside. Put the bread in the oven for 30 minutes at 460°F (238°C). Take the lid off and bake for an additional 10 minutes with the lid off at 440°F (227°C) to get that golden brown color. Bake time depends on the strength of your oven, so you can adjust it a bit after. After taking the bread out of the oven, put it on a cooling rack, cover it with a damp kitchen towel and leave it to cool for at least an hour before you slice into it.

      Notes

      Notes Wet your fingers with water before doing the stretch and folds. This will help prevent the dough from sticking to your fingers. Allow the dough to proof until almost double in size. Add your mix-ins like seeds, spices and cheese during the last series of stretch and folds.

      Nutrition

      • Calories: 109kcal
      • Sugar: 0.1g
      • Protein: 3g

      Sourdough Bread for Beginners

      If you have an active sourdough starter than you can make this easy sourdough bread for beginners! #sourdoughbread https://farmhouseharvest.net/no-kneed-sourdough-bread-recipe/

      Print

      clock clock iconcutlery cutlery iconflag flag iconfolder folder iconinstagram instagram iconpinterest pinterest iconfacebook facebook iconprint print iconsquares squares iconheart heart iconheart solid heart solid icon

      Easy Sourdough bread recipe: High starter method


      • Author: Chef Emy

      Description

      This recipe is designed to be forgiving and ensures your first loaf is a success by using a generous amount of starter to accelerate the rise. (with video)


      Ingredients

      Scale
      • 2 cups Active Sourdough Starter (400 grams) active and bubbly, made from equal parts flour and water
      • 3 cups Sifted All-Purpose Flour (360 grams)
      • 1 cup Warm Water (240 grams)
      • 1.5 teaspoons Salt (≈9 grams)

      Instructions

      1. In a large mixing bowl (not metal) add 2 cups (400 grams) 100% hydration active sourdough starter. (For active starter, feed it and keep it OUT of the fridge for at least 4 hours, or overnight.)
      2. Add 1 cup warm water and whisk till well combined with the starter.
      3. Add: 3 cups sifted flour. (Sift or fluff your flour before measuring so it isn’t too compact in the measuring cup.) And 1.5 teaspoons salt. (I love to use Himalayan Pink Salt)
      4. Use a large spoon to mix ingredients together. It will be wet, biscuit-like dough.
      5. Cover this shaggy dough with a clean damp kitchen towel, and let the dough rest in a warm place for 2 hours. (Or in a warm oven (about 80 degrees) for about 1 hour)
      6. First stretch and fold: After 2 hours of rising on your counter, uncover the dough, with wet hands pick up one side of the dough and fold it in half, over on top of the other side of the dough. Turn the bowl 90 degrees. Repeat 4-6 times by stretching and folding over all four sides of the dough, then rotating the bowl and repeating the stretch and folds on all sides. (The dough does not stick to wet hands as badly as dry hands.)Rise: Cover with a clean towel (or plastic wrap), and let the dough rise (about 45 minutes depending on the temperature of your kitchen) or till doubled again.
      7. Second stretch & fold: Uncover the dough, wet your hands, then pick up one side of the dough and fold it in half, over on top of the other side of the dough. Rotate bowl 90 degrees. Repeat 4-6 times by stretching and folding over all four sides of the dough. The dough is becoming more bread-like now!Rise: Cover with a clean towel, and let rise till doubled again.
      8. 3rd stretch and fold: Uncover the dough, wet your hands, then pick up one side of the dough and fold it in half, over on top of the other side of the dough. Rotate the dough 90 degrees. Repeat 4-6 times by stretching and folding over all four sides of the dough. The dough is even more smooth and bread-like now!Rise: Cover with a clean towel, and let rise till doubled again.
      9. 4th stretch and fold: Uncover the dough, wet your hands, then pick up one side of the dough and fold it in half, over on top of the other side of the dough. Turn the dough 90 degrees. Repeat stretch and folds 4-6 times by stretching and folding over all four sides of the dough, rotating the dough and doing it on all 4 sides each time. The dough is fluffy and bread-like now!
      10. After 4th stretch and fold, SHAPE YOUR DOUGH INTO A ROUND LOAF.
      11. Dust a towel, or proofing basket, generously with flour. And place shaped sourdough bread dough ball in it.
      12. Dust top of dough ball with flour, and cover the top with a clean towel.
      13. Refrigerate: Place the sourdough bread bowl into the refrigerator to chill and rise for 4 – 8 hours.
      14. Preheat Oven to 400 degrees F. and place your dutch oven into the oven to preheat too.
      15. Parchment paper: Cut a 2-foot section of parchment and place it on your counter.
      16. Gently turn out your chilled sourdough ball onto the parchment paper.
      17. Score: USE A VERY SHARP KNIFE OR RAZOR to SCORE A DESIGN INTO THE TOP OF YOUR DOUGH.
      18. Remove the hot dutch oven from your preheated oven.
      19. Place dough into the dutch oven: Lift the raw sourdough loaf into the dutch oven by the ends of the parchment paper. (It’s ok for parchment paper to hang over the sides of the dutch oven.) And put the lid on your dutch oven.
      20. Bake: Use hot pads or towels to put the hot dutch oven back into the preheated oven at 400 degrees. Bake covered for 25 minutes.
      21. Remove the dutch oven lid.
      22. Bake for 25 more minutes!
      23. Let cool and enjoy!
      24. Ask me any questions you have in the comments. And don't forget to rate this recipe card and let me know what you think!

      Notes

      Prep your sourdough starter for this recipe
      This recipe requires 2 cups (400 grams) of active, peak-rise starter. A kitchen scale is highly recommended for this step to ensure accuracy, especially since volume measurements for starter can vary wildly.
      The night before you bake, you need to feed your existing starter using a 1:1:1 ratio by weight to hit the 400 gram target. To easily get the required amount, you need to feed:
      This feed yields about 405 grams total. Let it rise until doubled and bubbly (peak activity), then measure out the 2 cups (400 grams) for your recipe.

      Nutrition

      • Calories: 152kcal
      • Sugar: 0.1g
      • Protein: 4g

      Sourdough Cheese Bread From Scratch

      This sourdough cheese bread is a soft, tangy sourdough bread twisted with cheese and baked until golden and melty. This recipe makes an already incredible bread the perfect side for dinner, an appetizer, or a spruced up sandwich.

      Print

      clock clock iconcutlery cutlery iconflag flag iconfolder folder iconinstagram instagram iconpinterest pinterest iconfacebook facebook iconprint print iconsquares squares iconheart heart iconheart solid heart solid icon

      Sourdough Cheese Bread


      • Author: Chef Emy

      Description

      A soft, tangy sourdough bread twisted with cheese and baked until golden and melty.


      Ingredients

      Scale
      • 1 cup milk, can substitute with water 244 g
      • 1/2 cup active sourdough starter, 113 g
      • 1 large egg
      • 1 tablespoon sugar, 12 g
      • 1 teaspoon salt, 5 g
      • 1 teaspoon garlic powder, 3 g
      • 3 cups flour, 420 g
      • 4 tablespoons butter, 56 g
      • 2 cups shredded cheddar cheese
      • Optional: egg yolk for egg wash and a bit of flaky salt

      Instructions

      1. Feed sourdough starter 4- 12 hours. The starter should be active and bubbly before making the dough. Take out butter and place it at room temperature.
      2. In a stand mixer, add milk, sourdough starter, egg, sugar, salt, and garlic powder. Turn on low and add in flour one cup at a time. Once the flour is added, turn the stand mixer to medium.
      3. Add in chunks of softened butter and mix until smooth and glossy. You want it to pull away from the sides of the mixing bowl and be smooth and elastic about 10 minutes. It should pass the windowpane test. Grab a small ball of the dough and stretch it into a square. It should stretch thin enough to see through without breaking.
      4. Place dough in a greased bowl with a lid (or plastic wrap) and allow to rise for 8-12 hours at room temperature.
      5. Optional step: Cant bake right away? You can also stick the dough in the fridge (covered) for a few hours before proceeding to the next step.
      6. Roll the dough out into a rectangle on a clean work surface. Dust with flour, if needed.
      7. Sprinkle cheese evenly over the dough and roll VERY tightly so the cheese doesnt fall out (if the dough is too warm, it will also be difficult to shape).
      8. Cut in half lengthwise, leaving about 1-2 inches uncut at the top.
      9. Twist the dough together and pinch the ends.
      10. Transfer to a parchment lined or a greased loaf pan.
      11. Cover with a towel and allow to rise in a warm spot for 2-4 hours at room temperature, or until doubled. In the summer when it is warmer, it may only take one hour. Just keep an eye on it.
      12. Preheat the oven to 350.
      13. Optional step: Brush with egg wash and sprinkle with flakey sea salt. This gives it an amazing crust.
      14. Bake for 45 minutes. The top should be golden.
      15. Allow to cool. Slice and serve.

      Notes

      Notes The sourdough starter needs to be super active and bubbly to make this recipe. Make sure the butter is super soft and cube it up so it blends right into the dough. Dont over ferment the dough. It will turn into a sloppy disaster that wont rise well. If it starts to rise too much and you dont have time to bake it, you can place it in the fridge. This slows down the fermentation process. The dough needs to be rolled really tightly so the cheese doesnt fall out. Also, if the dough is too warm it may be difficult to roll. If that is the case, I suggest popping in the fridge for 30 minutes to an hour to cool it down enough to roll.

      Nutrition

      • Calories: 256kcal
      • Sugar: 2g
      • Protein: 9g

      How to make Sourdough Bread for Beginners

      Beginners Sourdough Bread Recipe is an easy, no knead recipe made with sourdough starter, no yeast necessary. This homemade bread is made with bread flour but a small amount whole wheat can be used if desired. All of our recipes are tested with King Arthur flour for consistent results. We give you step by step instructions, a sample baking schedule and a video to make it as easy as possible!

      Print

      clock clock iconcutlery cutlery iconflag flag iconfolder folder iconinstagram instagram iconpinterest pinterest iconfacebook facebook iconprint print iconsquares squares iconheart heart iconheart solid heart solid icon

      Beginner Sourdough Bread


      • Author: Chef Emy

      Description

      A simple sourdough bread recipe that can be made with minimal effort. The perfect recipe for home bakers that want a healthy loaf of bread to serve with dinner or for beginner sourdough bakers looking to get their hands into bread baking.


      Ingredients

      Scale
      • 2 teaspoons (10 g) sourdough starter
      • 3 tablespoons (25 g) all-purpose flour
      • 5 teaspoons (25 g) water

      Instructions

      1. 12 hours before you plan to mix the dough, add the ingredients to make ¼ cup (50 g) of active sourdough starter to a clean jar. Stir until combined, loosely cover the jar and let the starter rise at room temperature. (The ingredients will create a total of 60 g active starter but some of it will stick to the sides of the jar during the transfer, so we are making a little more than needed.) The sourdough starter is ready to use when it has doubled in size and there are plenty of bubbles on the surface and sides of the jar.
      2. Mix the dough: Transfer 50 g of the active starter and 350 g water into a large mixing bowl. Stir to distribute the starter evenly. Add 500 g bread flour and 10 g sea salt to the bowl and use a stiff spatula or your hands to work the ingredients together until it forms a shaggy mass and there are no dry bits of flour left in the bowl. Cover the bowl and let the dough rest for one hour at room temperature.
      3. Stretch and Fold: Wet your hand with a little water to prevent sticking. Pick up the dough on one side and stretch it up and over itself. Turn the bowl a quarter turn and repeat this step until you have turned the bowl a full circle. The dough should form into a tight ball. Cover the bowl and let the dough rest for 30 minutes. Repeat the stretch and fold process one more time to help build volume in the final loaf.
      4. Bulk Fermentation: Cover the bowl and let the dough rise for 7-10 hours on your kitchen counter. The dough will have risen by about 50-75%, not doubled, when it is ready to shape. (If the dough has doubled in size and/or is hard to shape, it may be over-proofed. Reduce the rising time on your next bake.)
      5. Shape and Second Rise: Turn the dough out onto a lightly floured surface. Shape the dough into a ball by pulling 4 sides of the dough into the middle of itself. Turn the dough over so that it is seam-side down. Use your hands to gently cup the dough, pulling and twisting towards yourself until it forms a tight skin on the outside. Center the dough onto a piece of parchment paper, seam-side down. Use the parchment paper like a sling to lift the dough up and transfer it into a medium-sized bowl. Cover the bowl with a tea towel and let the dough rest at room temperature for 1-2 hours. Use your thumb to make an indentation in the dough about a ½ inch deep. If the indentation quickly springs back all the way, or almost all the way, it's under-proofed and still needs more time to rise.
      6. Score and Bake: 30 minutes before you're ready to bake, preheat the oven, with the dutch oven inside, to 450°F (232°C). Using long silicone gloves, carefully remove the hot dutch oven and take the lid off. Score the top of the dough with a razor or a sharp knife. Once again, use the parchment paper as a sling to lift the dough up and transfer it into the dutch oven. Place the lid on the dutch oven, return it to the oven and bake for 20 minutes. Remove the lid and bake an additional 25-30 minutes or until crust is golden brown. (The internal temperature of the bread should be around 205-210°F (96-99°C) using a digital food thermometer.)
      7. Cool: Transfer the baked bread to a cooling rack for 1-2 hours before slicing. The bread will continue to cook inside during this time. If you slice into it too soon, it will result in a gummy loaf.
      8. Store: Keep the bread at room temperature, in a bread bag, wrapped in a kitchen towel or beeswax wrap. You can also store the bread, cut-side down, on a cutting board with a cake-stand top covering the bread. Do not refrigerate. Freeze full loaves or individual slices wrapped tightly in plastic wrap and inserted into a freezer-safe container for up to 3 months.
      9. Serve: Nothing beats the taste of warm sourdough bread slathered with homemade butter, unless it's homemade Nutella or strawberry jam!

      Notes

      NOTES This recipe was tested in a 68°F (20°C) kitchen. If your kitchen is colder, rising times will take longer and if it’s warmer, less time. If using all-purpose flour reduce water to 325g. Add more if necessary during first set of stretch and folds. This bread can be baked in a lightly greased 9″ x 5″ loaf pan. After the first rise, shape the dough, place it seam-side down into the loaf pan and allow it to rise. Bake the loaf in a 375°F (190°C) oven for 45 minutes or until the internal temperature is 190°F (88°C).

      Nutrition

      • Calories: 154kcal
      • Sugar: 1g
      • Protein: 5g