“`html
Table of Contents
- Embark on a Flavor Journey
- Gather Your Culinary Arsenal
- The Clock is Ticking: Timing Your Teriyaki Triumph
- Crafting Your Culinary Masterpiece: Step-by-Step
- Nutritional Snapshot
- Savor Smarter: Healthier Teriyaki Swaps
- Beyond the Bowl: Serving Your Beef Teriyaki
- Avoiding the Pitfalls: Common Beef Teriyaki Mistakes
- Savoring Leftovers: Storing Your Teriyaki Treasure
- Your Teriyaki Adventure Awaits!
- Frequently Asked Questions
Easy Beef Teriyaki Recipe
Embark on a Flavor Journey
Are you constantly searching for a weeknight dinner that’s both incredibly flavorful and astonishingly quick to prepare? If you’re nodding your head, then you’re in the right place! This easy beef teriyaki recipe is your golden ticket to a restaurant-quality meal in under 30 minutes. Forget those time-consuming, complicated recipes; we’re talking tender, succulent beef glazed in a rich, savory-sweet homemade teriyaki sauce that will have your taste buds singing. It’s the perfect solution for those evenings when hunger strikes and time is of the essence, offering a delightful balance of sweet and savory that’s universally loved. Get ready to transform your ordinary weeknight into an extraordinary culinary experience!
Gather Your Culinary Arsenal
The magic of this beef teriyaki lies in its simplicity and fresh ingredients. We aim for a deep, complex flavor profile without a long list of obscure items. Here’s what you’ll need:
For the Beef:
- 1 lb flank steak or sirloin steak, thinly sliced against the grain (This ensures tenderness!)
- 1 tablespoon cornstarch (For tenderizing and creating a light coating)
- 1 tablespoon soy sauce (The salty, umami foundation)
- 1 teaspoon sesame oil (Adds a nutty, inviting aroma)
For the Teriyaki Sauce:
- ½ cup soy sauce (Low-sodium is recommended to control saltiness)
- ¼ cup mirin (A sweet, unami-rich Japanese rice wine. If unavailable, use dry sherry with a pinch of sugar.)
- ¼ cup sake (Japanese rice wine, adds depth. Dry sherry or white wine can substitute.)
- 2 tablespoons brown sugar (For that perfect caramel sweetness; adjust to your preference)
- 1 tablespoon honey (Adds a different kind of sweetness and glaze consistency)
- 1 clove garlic, minced (Pungent, aromatic goodness)
- 1 teaspoon grated fresh ginger (A warm, zesty kick that complements the beef)
- 1 tablespoon cornstarch mixed with 2 tablespoons water (This is our slurry to thicken the sauce to a glossy perfection)
For Sautéing & Serving:
- 1 tablespoon vegetable oil or other high-heat oil
- Cooked rice or noodles, for serving
- Toasted sesame seeds and sliced green onions, for garnish (Optional, but highly recommended for a pop of color and flavor!)
The Clock is Ticking: Timing Your Teriyaki Triumph
While the average beef teriyaki recipe can often stretch into an hour or more, this streamlined version gets a delicious meal on your table in just 30 minutes. The bulk of the time is dedicated to prepping your ingredients, which is crucial for a quick stir-fry. The actual cooking process is lightning-fast, ensuring maximum flavor with minimal fuss.
Crafting Your Culinary Masterpiece: Step-by-Step
Step 1: Marinate the Beef
In a medium bowl, combine your thinly sliced beef with cornstarch, soy sauce, and sesame oil. Toss gently to ensure each piece is coated. Let it sit for at least 10 minutes while you prepare the sauce. The cornstarch acts as a tenderizer and creates a light barrier that helps the sauce cling beautifully.
Step 2: Whisk Together the Teriyaki Sauce
In a small saucepan, combine the ½ cup soy sauce, mirin, sake, brown sugar, honey, minced garlic, and grated ginger. Whisk everything together until the sugars are dissolved. Bring the mixture to a gentle simmer over medium heat. Cook for about 2 minutes, allowing the flavors to meld.
Step 3: Thicken the Sauce
While the sauce is simmering, prepare your cornstarch slurry by mixing 1 tablespoon of cornstarch with 2 tablespoons of cold water in a small cup until smooth. Slowly pour this slurry into the simmering teriyaki sauce, whisking continuously. Continue to simmer and whisk for another 1-2 minutes until the sauce thickens to a lovely, glossy consistency. It should coat the back of a spoon. Remove from heat and set aside.
Step 4: Sear the Beef
Heat the vegetable oil in a large skillet or wok over medium-high heat until shimmering. Add the marinated beef in a single layer (you might need to do this in batches to avoid overcrowding the pan, which can steam the meat instead of searing it). Cook for 1-2 minutes per side, until beautifully browned and just cooked through. You want a nice sear, but don’t overcook it!
Step 5: Glaze and Combine
Pour the prepared teriyaki sauce over the seared beef in the skillet. Stir to coat all the pieces evenly. Let it bubble for about 30 seconds to a minute, allowing the sauce to thicken slightly more and beautifully glaze the beef. This is where the magic happens – your beef is now perfectly coated in that irresistible teriyaki goodness!
Step 6: Serve and Garnish
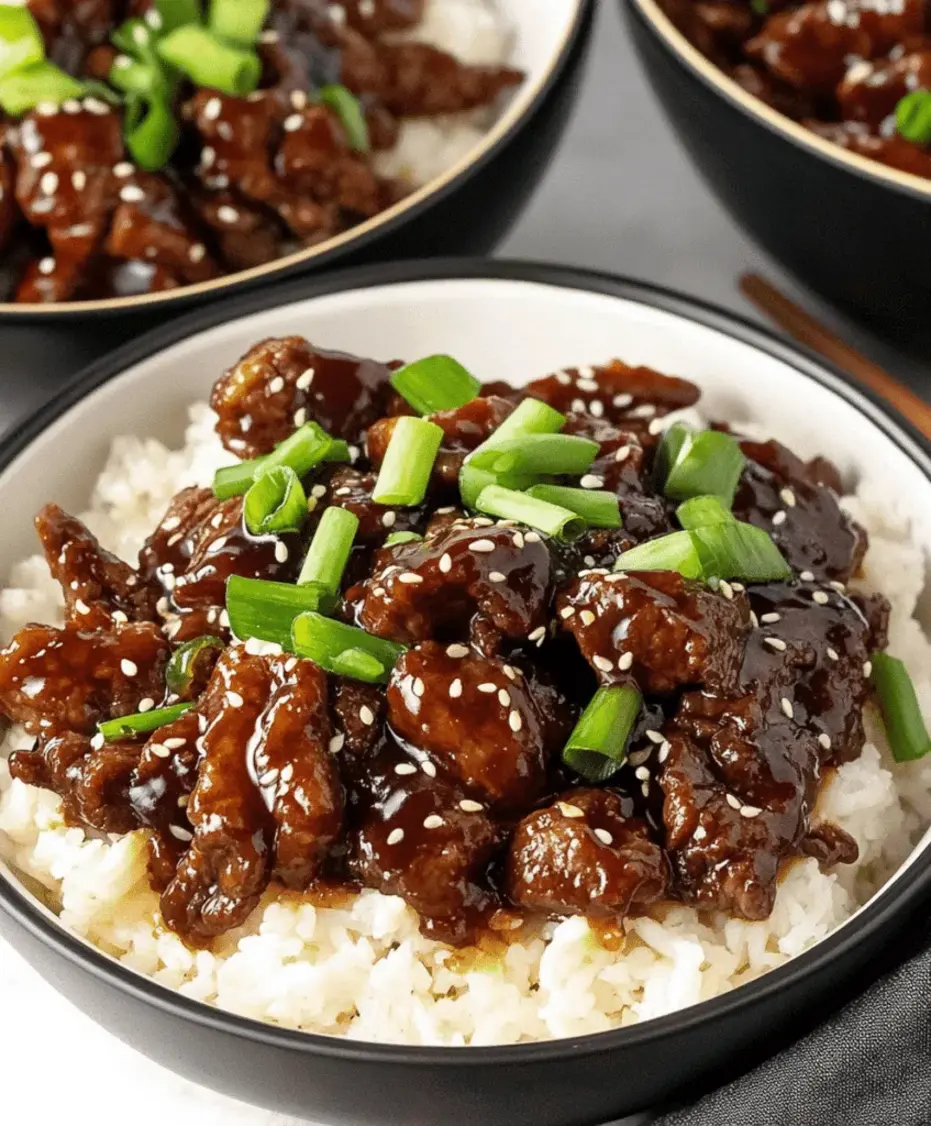
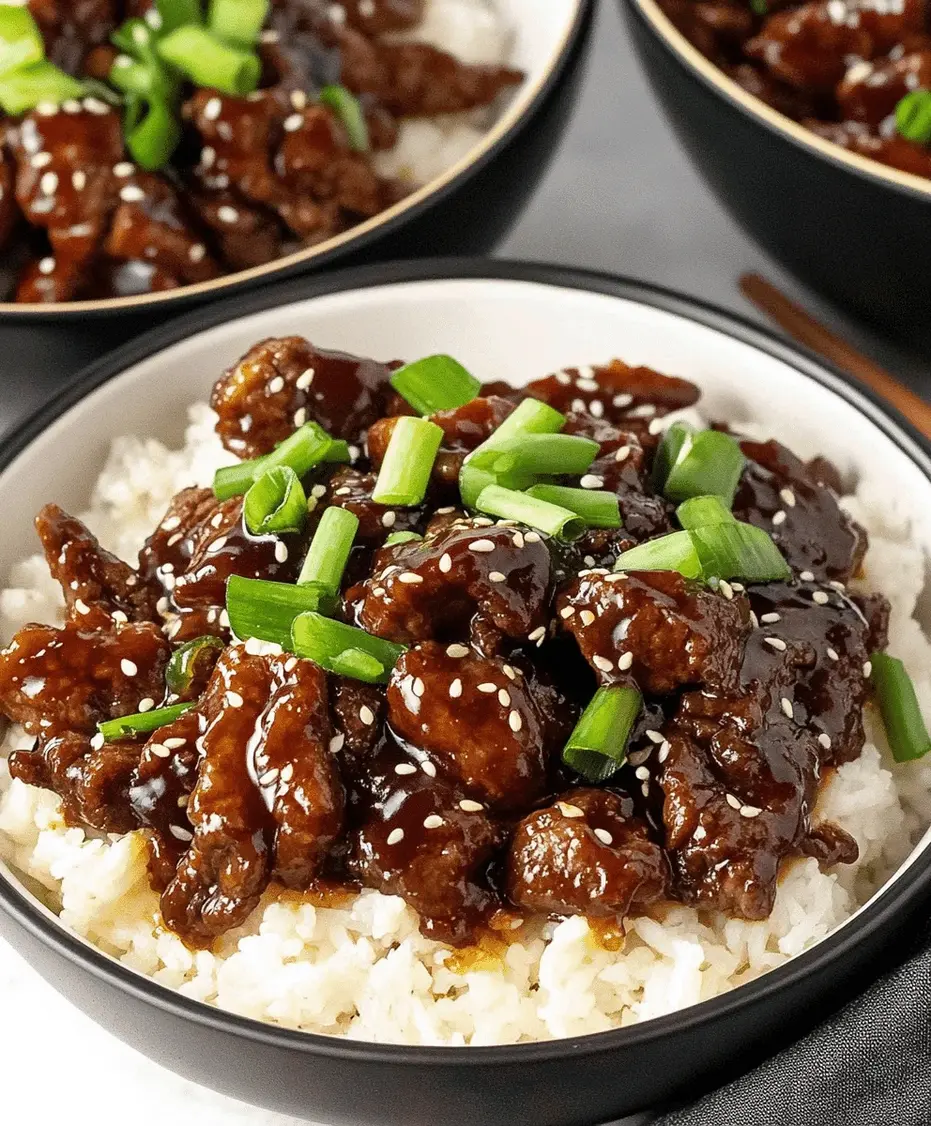
Your easy beef teriyaki is ready! Serve immediately over a bed of fluffy steamed rice or your favorite noodles. Garnish with toasted sesame seeds and thinly sliced green onions for an extra burst of flavor, texture, and visual appeal. Enjoy your homemade, restaurant-quality meal!
Nutritional Snapshot
While exact nutritional values can vary based on specific ingredients and portion sizes, a typical serving of this Easy Beef Teriyaki Recipe (approximately 4 oz beef and sauce, served over 1 cup of rice) contains roughly:
- Calories: 450-550 kcal
- Protein: 30-35g
- Fat: 15-20g
- Carbohydrates: 40-50g (largely from rice and sugar in sauce)
- Sodium: Varies depending on soy sauce used
Savor Smarter: Healthier Teriyaki Swaps
Looking to lighten things up without sacrificing flavor? Here are a few simple substitutions:
- Lower Sodium Soy Sauce: Crucial for reducing overall sodium intake.
- Coconut Aminos: A soy-free, gluten-free alternative that offers a similar savory-sweet profile with fewer calories and less sodium. The flavor is slightly different but still delicious.
- Reduced Sugar: Use a sugar substitute or significantly reduce the brown sugar and honey. The mirin and sake will still provide some natural sweetness. Be mindful that this will slightly alter the classic glaze texture.
- Leaner Protein: Opt for chicken breast or even extra-firm tofu instead of beef.
- Whole Grains: Serve over brown rice or quinoa for added fiber and nutrients.
Beyond the Bowl: Serving Your Beef Teriyaki
This versatile dish is a crowd-pleaser. Here are some ideas on how to serve it:
- Classic Rice Bowl: Served over fluffy white or brown rice, garnished with green onions and sesame seeds.
- Noodle Nirvana: Toss with stir-fried udon, soba, or even spaghetti noodles.
- Veggie Power-Up: Add a medley of stir-fried vegetables like broccoli, bell peppers, snap peas, or carrots to the skillet during the last few minutes of cooking.
- Wraps or Lettuce Cups: For a lighter take, serve the teriyaki beef in lettuce cups or small wraps.
Avoiding the Pitfalls: Common Beef Teriyaki Mistakes
Don’t let a few common errors derail your teriyaki dreams!
- Overcrowding the Pan: This steams the beef instead of searing it, resulting in tough, gray meat. Cook in batches if necessary.
- Slicing the Beef With the Grain: Always slice thinly against the grain for maximum tenderness.
- Not Tasting and Adjusting the Sauce: Your palate is key! Adjust sweetness, saltiness, and tanginess before glazing.
- Overcooking the Beef: Beef teriyaki cooks very quickly. Overcooked beef becomes dry and chewy.
- Using a Sauce That’s Too Thin: Ensure you use the cornstarch slurry correctly to get that signature glossy glaze.
Savoring Leftovers: Storing Your Teriyaki Treasure
If you’re lucky enough to have leftovers, store them properly to enjoy later:
- Allow the beef teriyaki to cool completely at room temperature.
- Transfer the cooled mixture to an airtight container.
- Refrigerate for up to 3-4 days.
- To reheat, gently warm it in a skillet over low heat or in the microwave, adding a splash of water or broth if it seems too thick.
Your Teriyaki Adventure Awaits!
There you have it – a foolproof, incredibly delicious, and lightning-fast Easy Beef Teriyaki Recipe that’s perfect for any night of the week. This dish is a testament to how simple ingredients and a little bit of know-how can create something truly special. Whether you’re a seasoned cook or just starting, this recipe is designed for success. So, fire up your stove, gather your ingredients, and get ready to impress yourself and your loved ones with this fantastic meal. What are you waiting for? Your kitchen is about to become your favorite Asian restaurant!
Frequently Asked Questions
***What is the best cut of beef for teriyaki?***
For the best results, choose tender cuts like flank steak, sirloin, or ribeye. Slicing them thinly against the grain is key to ensuring they are tender and don’t become tough when cooked quickly.
***Can I make the teriyaki sauce ahead of time?***
Absolutely! You can prepare the teriyaki sauce up to 2-3 days in advance and store it in an airtight container in the refrigerator. Reheat it gently before using it to glaze the beef.
***What if I don’t have mirin or sake?***
If you can’t find mirin, you can use dry sherry or white wine with a tablespoon of sugar. For sake, dry sherry or even a splash of white wine can be a good substitute. The key is to get a little sweetness and acidity.
***How do I prevent the beef from getting tough?***
1. Slice the beef thinly against the grain. 2. Don’t overcook it – beef teriyaki cooks very quickly, often in just a few minutes. 3. Avoid overcrowding the pan, which can lower the temperature and steam the meat.
***Can I use chicken or pork instead of beef?***
Yes! This recipe works wonderfully with thinly sliced chicken breast or pork tenderloin. Adjust the cooking time slightly as needed to ensure the meat is cooked through.

Easy Beef Teriyaki Recipe
Description
This easy beef teriyaki recipe features tender beef slices coated in a rich, savory-sweet homemade teriyaki sauce. Ready in just 30 minutes, it’s the perfect meal for busy nights. Serve it over rice or noodles for a restaurant-quality dish at home!
Ingredients
- 1lb beef (sirloin or flank steak), thinly sliced
- ¼ cupsoy sauce
- 2 tbspbrown sugar
- 1 tbsphoney
- 1 tbspsesame oil
- 1 tbspcornstarch
- ¼ cupwater
- 2cloves garlic, minced
- 1 tspginger, grated
- 1 tbsprice vinegar
- 1 tbspmirin (optional)
- ½ tspred pepper flakes (optional)
- 1 tbspvegetable oil
- Sesame seeds & green onions for garnish
Instructions
Notes
Use flank or sirloin steak for best results.
For extra flavor, marinate the beef in the sauce for 30 minutes before cooking.
Add vegetables like bell peppers or broccoli for a balanced meal.
Nutrition
- Calories: 320
- Sugar: 9g
“`