End your day with a delicious, comforting, and satisfying dinner! Whether you’re looking for quick and easy weeknight meals, cozy comfort food, or elegant dishes for special occasions, we have the perfect recipes for you.
From hearty casseroles and one-pan wonders to savory pastas, juicy meats, and flavorful vegetarian options, our collection is designed to make dinnertime effortless and enjoyable.
Busy schedule? No problem! Try our slow cooker meals, sheet pan dinners, and 30-minute recipes to save time without sacrificing flavor. Whatever your craving, these recipes will bring warmth and joy to your table every night. 🍽️✨
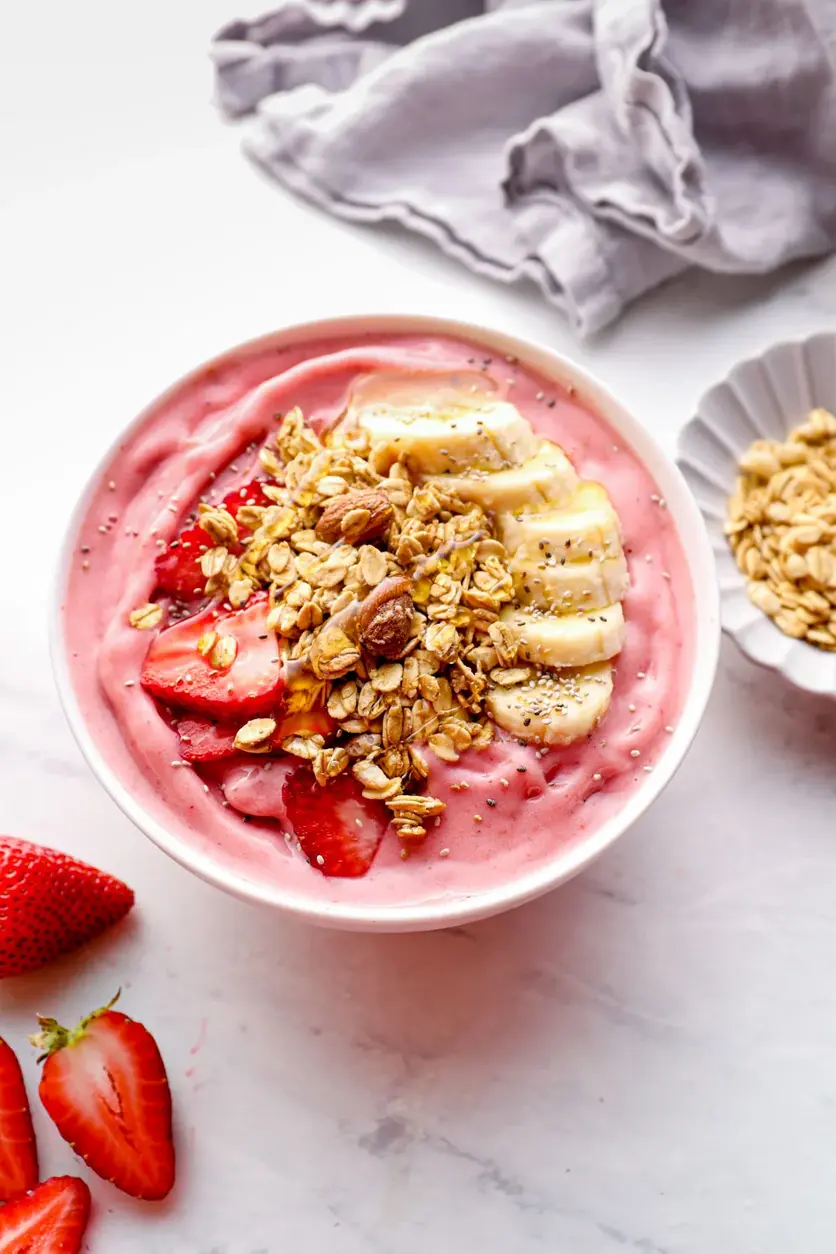
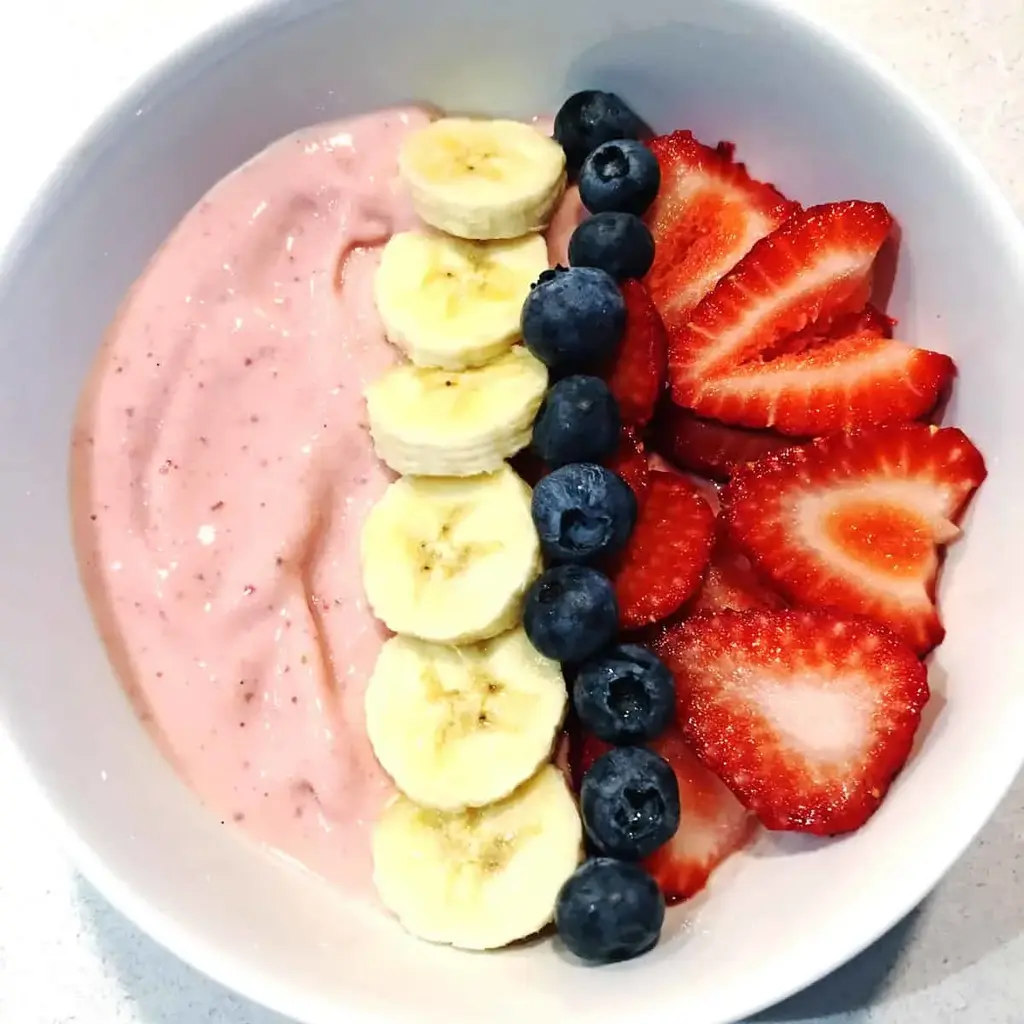
This easy smoothie bowl recipe with Greek yogurt is thick, creamy, and ready in just 5 minutes. A perfect single-serve breakfast or snack.
Ingredients
Scale
1 banana
1 cup frozen strawberries
cup frozen pineapple chunks
½ cup vanilla Greek yogurt whole milk or low-fat
Instructions
Chop banana into 1-inch pieces and freeze for at least 1-2 hours if possible (or overnight).1 banana
Add all ingredients to food processor fitted with a standard S blade and process for 2-4 minutes, stopping to scrape the sides down with a plastic spatula as needed.1 cup frozen strawberries, cup frozen pineapple chunks, ½ cup vanilla Greek yogurt
Once everything is incorporated and smooth, scoop out mixture into individual bowls. Add any desired toppings, and enjoy immediately.
Notes
Food processor: If you don’t have a food processor, a high-speed or regular blender will work too. Just choose a lower blend speed and use a plunger as necessary to push everything down towards the blade.
Storage: Best eaten right away. If needed, refrigerate up to 24 hours, but texture will soften. Stir before eating.
Nutrition
Calories:269kcal
Sugar:40g
Protein:12g
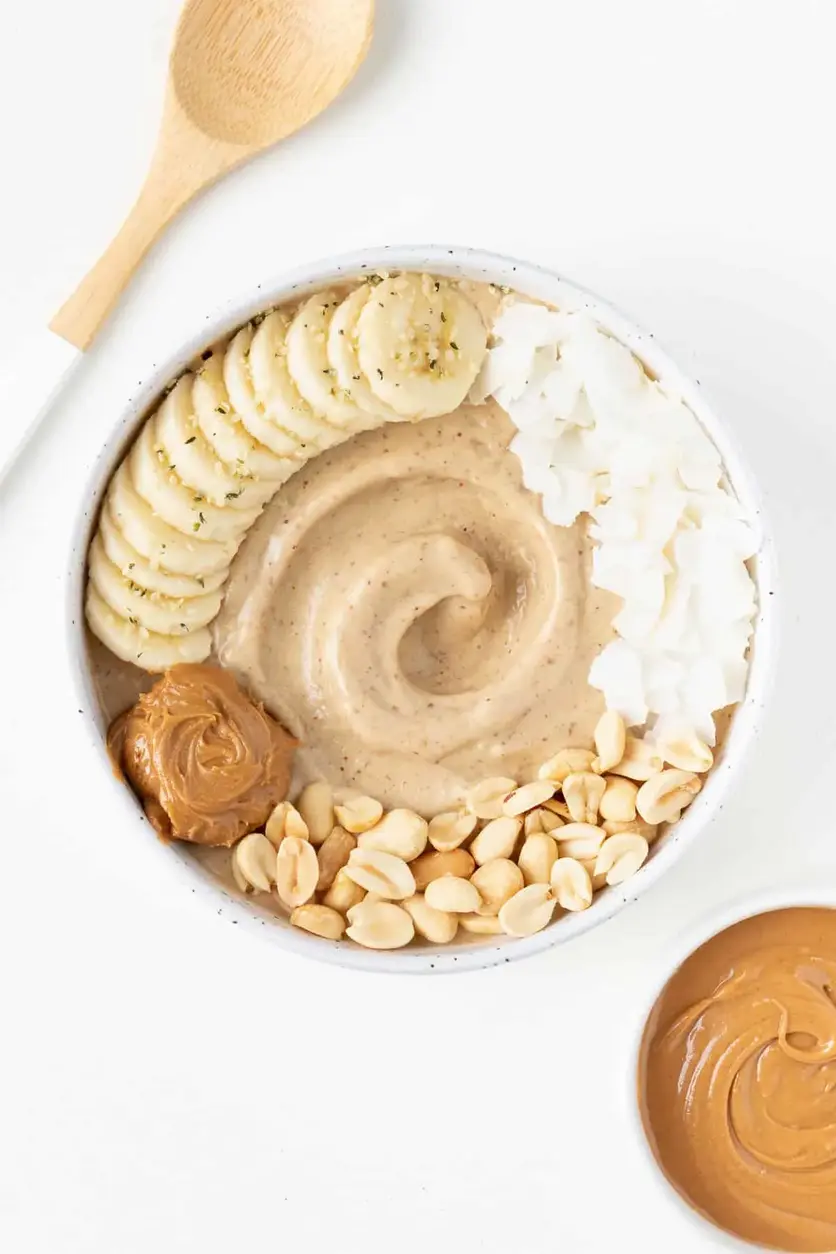
Peanut Butter Banana Smoothie Bowl
This peanut butter banana smoothie bowl recipe is healthy, easy, and packed with protein! Made with 5 ingredients and no yogurt needed. Combine bananas, peanut butter, flaxseed, vanilla, and almond milk to make this breakfast. #smoothie #bananasmoothie #peanutbuttersmoothie #smoothiebowl #vegan #dairyfree #breakfast #healthybreakfast
This peanut butter banana smoothie bowl is creamy, nutty, and so easy to make! It’s a healthy recipe that tastes just like soft serve ice cream. Enjoy it for breakfast or as a nutritious dessert!
Ingredients
Scale
2 ripe bananas, peeled and frozen
2 tbsp creamy peanut butter
2 tbsp flaxseed meal (optional)
1/2 tsp vanilla extract (optional)
1/4 cup nondairy milk (such as almond or coconut)
Instructions
Add ingredients to the blender.
Blend until smooth and creamy. Note: Adjust the amount of liquid as needed, but I highly suggest keeping it to 1/4 cup or less. Remember more liquid creates a thinner smoothie while less liquid creates a thicker smoothie. If you want it to be super thick and creamy, try to use the least amount of liquid as possible. If you have a high-powered blender (like a Vitamix blender), you can get by with no liquid at all.
Transfer smoothie to a bowl. Add any desired toppings and enjoy with a spoon.
Notes
Be sure to use frozen ripe bananas. Wait for the bananas to ripen (the peel should be yellow with brown specks), then remove the peel and place in a ziplock bag or container in the freezer. Bananas will keep fresh for at least 1 month in the freezer.
Nutrition
Calories:465
Sugar:29g
Protein:14g
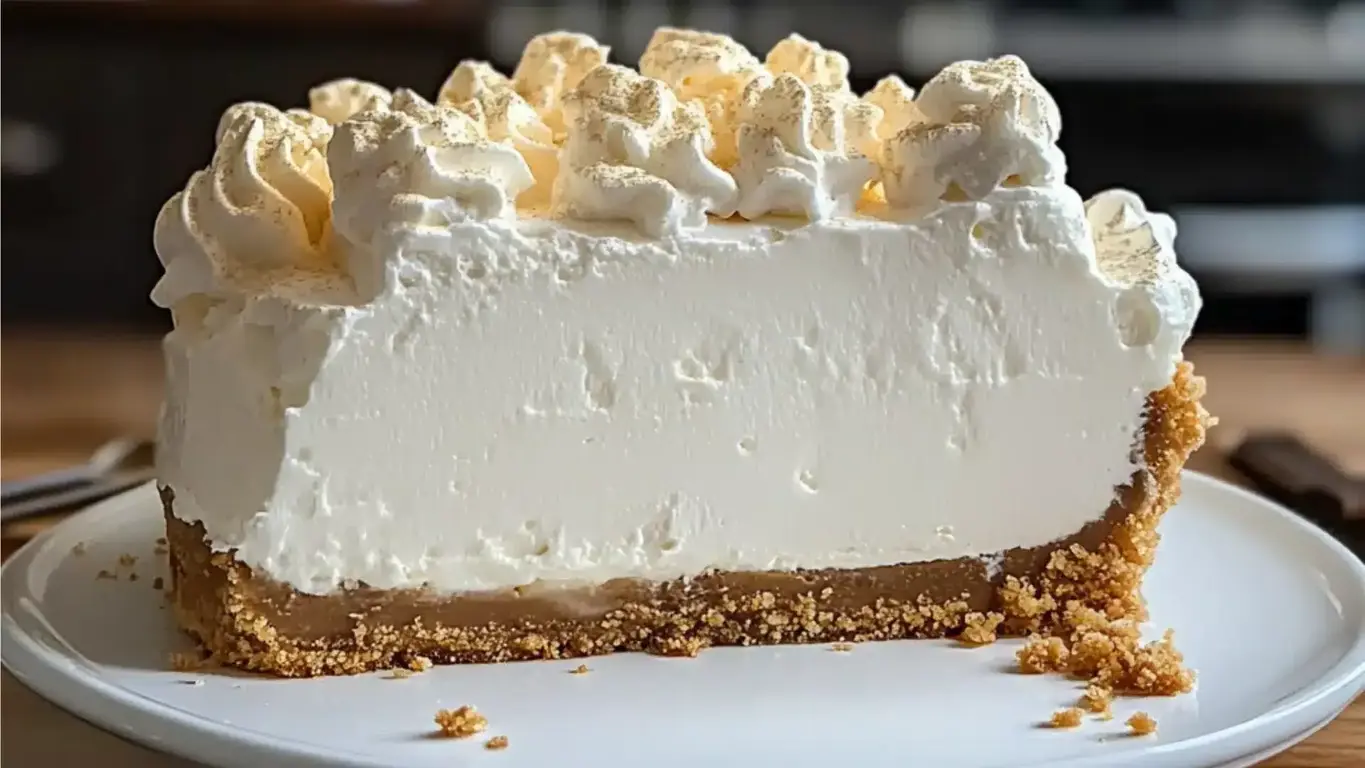
Easy Marshmallow Cheesecake – A Whipped Cream Cheese Delight
This whipped marshmallow cheesecake is a perfect dessert for no bake pies lovers and anyone who craves light, sweet indulgence. #MarshmallowWhipCheesecake #CreamCheeseDesserts #DeliciousPies #EasyCheesecakeRecipes
Crust swaps: Try chocolate wafer cookies or crushed Oreos for a different base Flavor twists: Add lemon zest to the filling for a citrusy note, or swirl in raspberry jam before chilling Make it mini: Use a muffin tin and cupcake liners to create individual cheesecakes
Nutrition
Calories:310 kcal
Protein:1g
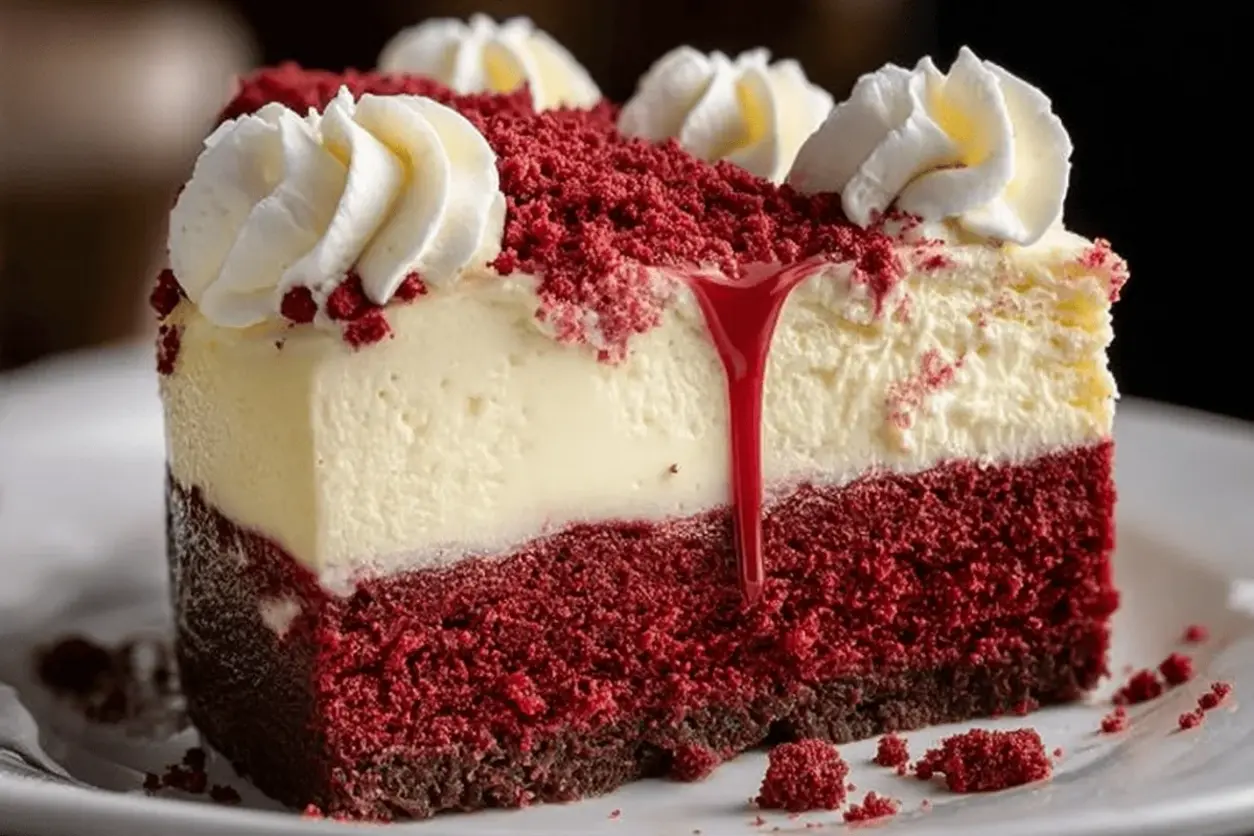
Knock You Naked Red Velvet Cheesecake 🍰❤️ | A Bold, Beautiful Layered Dessert That Turns Heads
Bold in color and unforgettable in flavor, this Knock You Naked Red Velvet Cheesecake combines the richness of red velvet cake with a silky vanilla cheesecake layer and fluffy whipped topping. With dramatic presentation and decadent texture, this showstopping dessert is perfect for holidays, birthdays, or any occasion that calls for a wow-worthy sweet. Ingredients For the Red Velvet Cake Base: • 1 box red velvet cake mix (plus eggs, oil, and water as directed) • 9″ springform pan, greased For the Cheesecake Layer: • 16 oz cream cheese, softened • ⅔ cup granulated sugar For the Whipped Topping: • 2 cups heavy whipping cream • 4 tbsp powdered sugar 📌 Save this ultra-decadent layered cheesecake for celebrations, date nights, or pure indulgence! #RedVelvetCheesecake #KnockYouNakedDessert
A luscious red velvet cake base topped with silky smooth cheesecake and finished with clouds of whipped vanilla cream this layered dessert is everything rich, romantic, and irresistible. Whether youre impressing dinner guests or treating yourself, this is the kind of cheesecake that truly lives up to its name.
Ingredients
For the Red Velvet Cake Base: 1 box red velvet cake mix (plus eggs, oil, and water as directed) 9 springform pan, greased
For the Cheesecake Layer: 16 oz cream cheese, softened cup granulated sugar 2 large eggs cup sour cream 1 tbsp all-purpose flour 1 tsp vanilla extract ¼ tsp salt
For the Whipped Topping: 2 cups heavy whipping cream 4 tbsp powdered sugar 2 tsp vanilla extract Optional: red velvet cake crumbs for garnish
Instructions
Notes
Make Ahead: This dessert is ideal for preparing the day before. It needs at least 4 hours to chill, but overnight chilling makes it even easier to slice and enhances flavor fusion.
Cake Mix Tip: Dont overmix your red velvet cake batter; blend just until combined to keep the crumb light and tender.
Clean Slicing Trick: Dip your knife in hot water and wipe it clean between cuts to achieve bakery-style slices.
Mini Cheesecake Variation: Use a muffin tin lined with cupcake papers to create individual servingsgreat for parties and portion control.
Flavor Twist: Add a teaspoon of espresso powder to the cake mix to deepen the chocolate flavor, or fold in crushed Oreos for added texture.
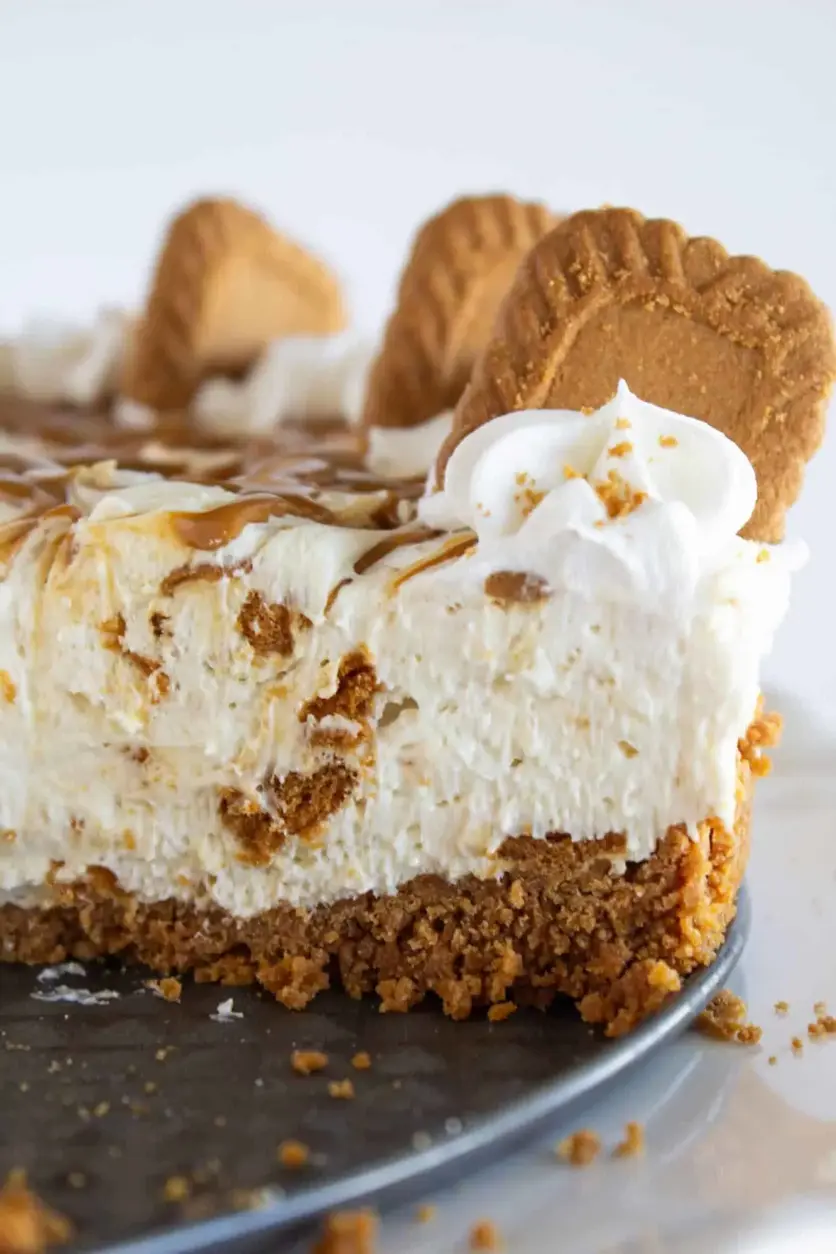
Cookie Butter No Bake Cheesecake | Practically Homemade
Cookie butter is elevated to the next level when added to this no bake cheesecake. With a cookie crust and crushed cookies in the filling, this cheesecake can’t be beat.
Ingredients
Scale
1– 8.8 ounce pkg. Biscoff cookies
½ cup butter , {melted}
Instructions
Combine Biscoff cookie crumbs {that you have pulsed in a food processor} and melted butter in a bowl. Mix together until everything is nicely incorporated. Pour into a ungreased spring form pan. Press crumbs firmly into the bottom and slightly up the sides of the spring form pan. Refrigerate until filling is ready.
Mix together cream cheese and sweetened condensed milk until creamy using a hand held {or stand mixer}. Add the whipped topping and fold into the cream cheese mixture until combined. Stir in the crushed Biscoff cookies so that they are evenly distributed.
Pour Biscoff cheesecake filling into the crust and spread out into an even layer. Drizzle melted cookie butter over the top of the cheesecake in a circular motion. Using a toothpick {or skewer} swirl the cookie butter into the filling. Refrigerate for 2-4 hours or until set up.
When ready to serve, top with whipped topping around the edge of the cheesecake {I like to use a piping bag} and Biscoff Cookies that have been halved. Store leftovers in refrigerator for up to 4 days.
Nutrition
Calories:844kcal
Sugar:57g
Protein:11g
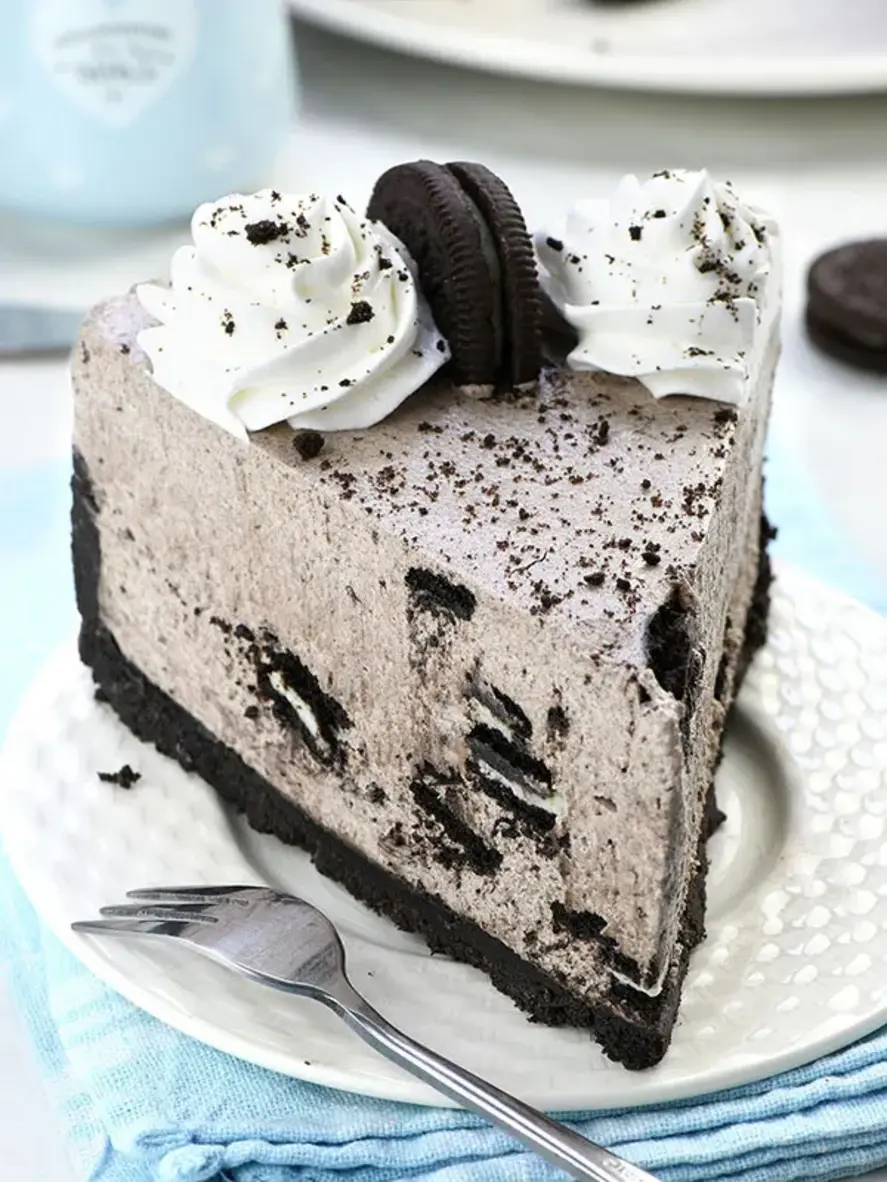
No Bake Oreo Cheesecake
No-Bake Oreo Cheesecake is the ultimate indulgent dessert! This creamy, rich cheesecake with an Oreo cookie crust is quick, easy, and perfect for any occasion. No oven needed for this crowd-pleasing treat! Save this pin for your next party or family gathering. #NoBakeCheesecake #OreoDessert #EasyCheesecakeRecipe #OreoCheesecake #NoBakeDessert
Oreo crumbs from 18 Oreos (it is about 1 1/2 cups; reserve 1 Tablespoons crumbs for decoration)
10 Oreos-chopped
3/4 cup heavy whipping cream
1/3 cup powdered sugar
1/2 tsp vanilla extract
12 Tablespoon Oreo crumbs
6 Oreos, cut in half
Instructions
Line the bottom of a 9-inch springform pan with parchment paper and grease the sides.
Ground whole Oreo cookies with the filling in a food processor to make the fine crumbs.
Add melted butter and whisk with the fork until all crumbs are evenly moistened.
Press the mixture into the bottom and about 1 inch up the sides of the springform pan. Place in the fridge or freezer to firm while you make the filling.
Mix heavy whipping cream until soft peaks form, Add powder sugar and mix until very stiff peaks form, and set aside.
In another large bowl, beat the cream cheese, sugar, and vanilla extract until well combined and smooth.
Fold the whipped cream into the cream cheese mixture in two or three additions until evenly combined.
Then, gently fold in Oreo crumbs, to combine evenly, then, fold in chopped Oreos into the filling.
Spread Oreo cheesecake filling over the firmed crust smooth the top and chill in the fridge until firm, at least 5-6 hours or preferably overnight.
Mix heavy whipping cream, powdered sugar, and vanilla extract until stiff peaks form.
Lose the ring from the springform pan, remove it carefully, and transfer the cheesecake to a serving plate.
Pipe the whipped cream around the rim of the cheesecake place Oreo halves between each swirl and sprinkle with Oreo crumbs.
Store the cheesecake in the fridge for 5-6 days, and for longer storage keep it in the freezer.
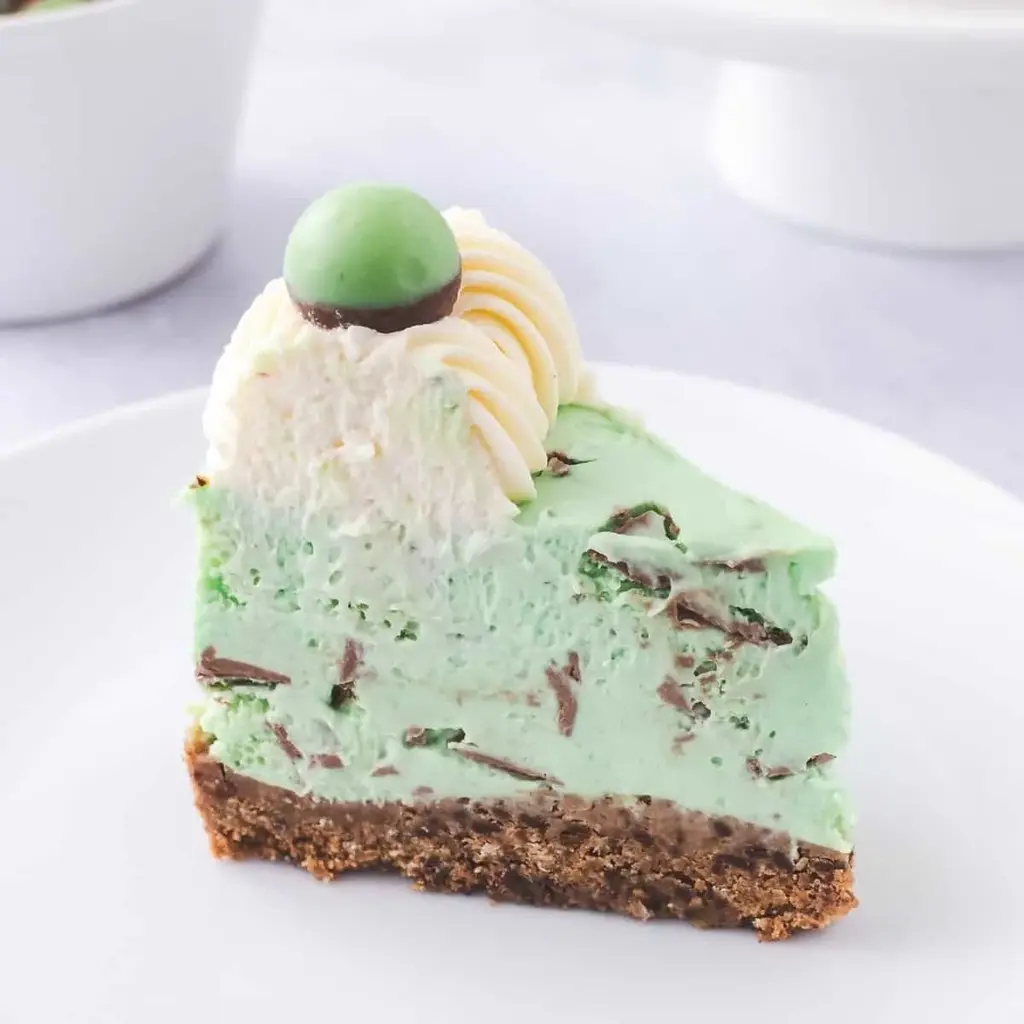
Quick and easy no-bake Mint Aero cheesecake with a velvety peppermint cheesecake filling full of Mint Aero chunks, on top of a dark chocolate Digestive biscuit crust.
Ingredients
Scale
250 g Dark Chocolate Digestive Biscuits or Oreo Cookies
60 g Butter Unsalted, Melted
500 g Cream Cheese Full Fat
75 g Icing Sugar or Powdered Sugar
300 ml Double Cream or Heavy Cream
1 tsp Peppermint Extract
200 g Mint Aero Chocolate or Mint Chocolate
Green Food Colouring Gel
Instructions
Make the biscuit base Add the biscuits into a food processor, and blitz until they form a crumb, then add to a large mixing bowl. Make a well in the centre of the biscuit crumbs, and pour in the melted butter.
Mix together until well combined, and then pour into an 8 inch springform tin. Press down onto the biscuit base and smooth out to the edges. Chill in the fridge for at least 1 hour.
Make the cheesecake filling Using a stand mixer with the paddle attachment, beat the icing sugar, cream cheese, peppermint extract and double cream together. Alternatively, you can make the cheesecake filling, in a large mixing bowl, by hand or with an electric hand whisk. Add green food colour gel to give a green colour.
Taste test the filling and if required add extra peppermint extract a drop at a time. Be careful not to add too much in one go, as the flavour can be overpowering.
Chop the Mint Aero chocolate in small chunks and addnto the cheesecake filling, and gently fold together, using a spoon or spatula, until well combined.
Assemble the cheesecake Pour the cheesecake filling over the top of the chilled biscuit base, then smooth over and level with an offset spatula. Chill the cheesecake in the fridge for at least 6 hours or overnight.
Decorate the cheesecake When ready to serve, whip up the remaining double/ heavy cream with the icing sugar and pipe on top of the cheesecake. Decorate with Mint Aero bubbles.
Notes
Read my Top Tips in the post above for some really helpful hints and tips to make this recipe successfully.
Nutrition
Calories:527kcal
Sugar:22g
Protein:6g
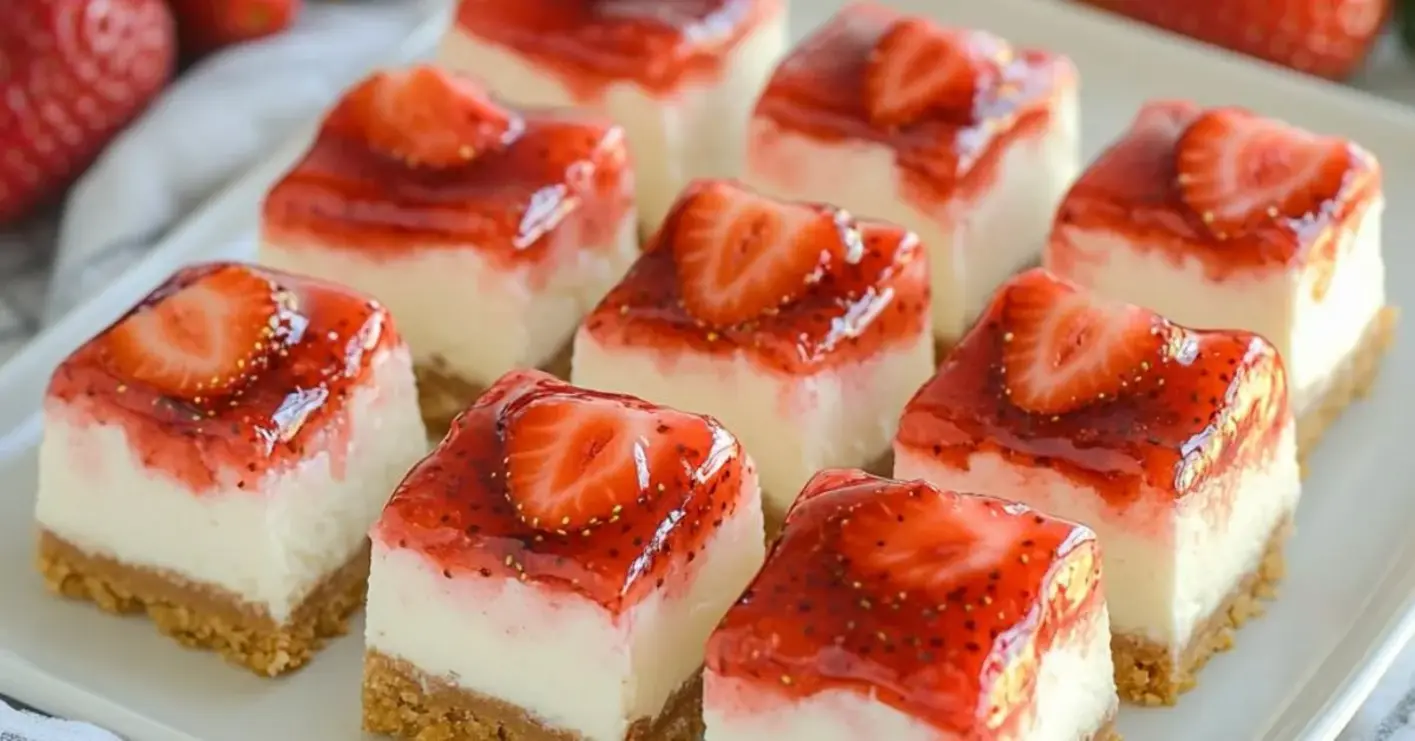
The Best No-Bake Strawberry Cheesecake Bars
These no-bake strawberry cheesecake bars are the perfect balance of creamy and fruity, with a smooth cheesecake layer and fresh strawberries on top. If you’re looking for a no-bake dessert that’s both simple and indulgent, this easy recipe will quickly become a favorite. Perfect for any occasion, these strawberry cheesecake bars offer a refreshing and delicious no-bake dessert option.
These No-Bake Strawberry Cheesecake Bars are the perfect creamy and refreshing treat! With a buttery graham cracker crust, a luscious cheesecake filling, and a sweet strawberry topping, theyre ideal for any occasion.
Instructions
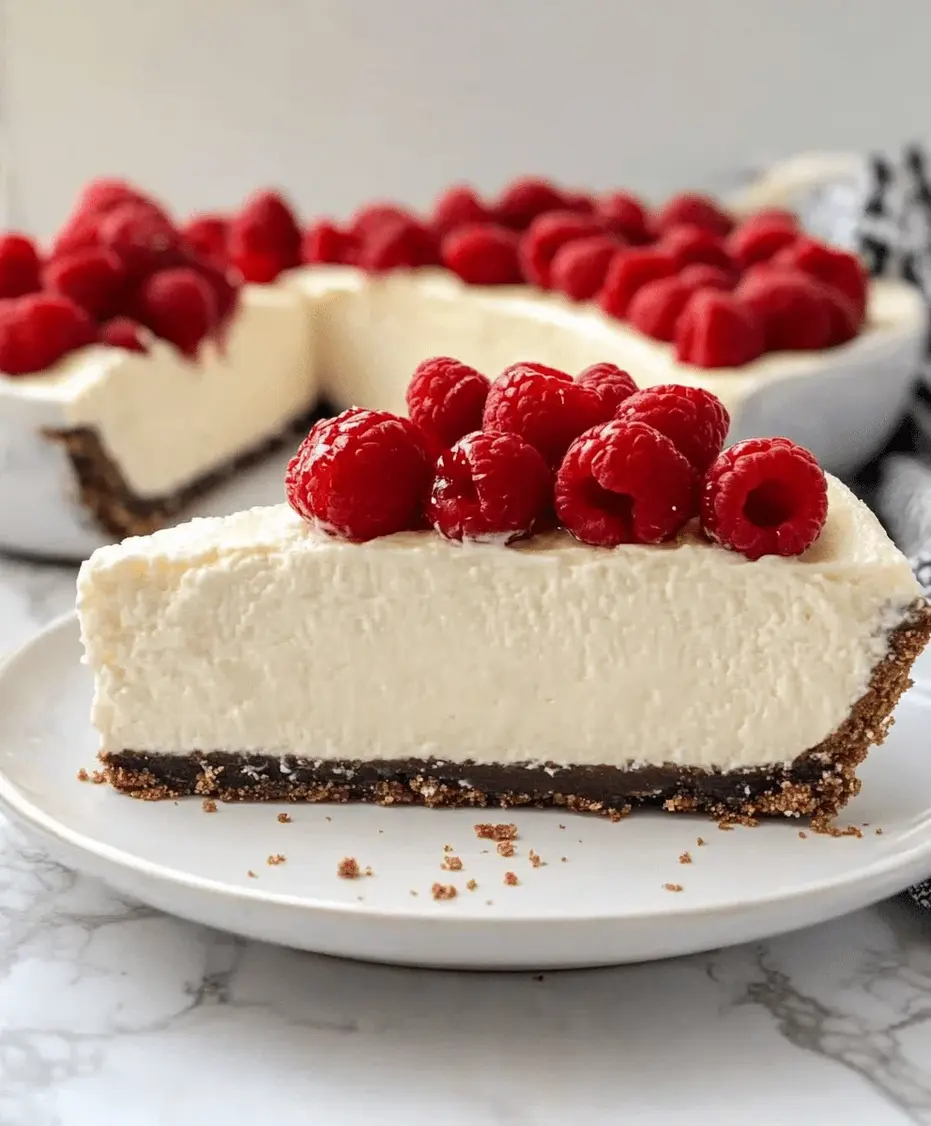
No-Bake Cheesecake Recipe – cookingwithtina.com
Looking for a delightful dessert that requires no baking? This No-Bake Cheesecake Recipe is incredibly easy to make, showcasing creamy flavors that will impress your family during any gathering or special occasion.
Refrigeration is key for setting the cheesecake; allow at least 4 hours or overnight for best results.
Add fruit toppings or chocolate for extra flavor.
Nutrition
Calories:380 kcal
Sugar:18g
Hi I'm Emy
I’m passionate about sharing a diverse collection of sweet and savory recipes that I’ve meticulously tested and perfected in my own kitchen.