End your day with a delicious, comforting, and satisfying dinner! Whether you’re looking for quick and easy weeknight meals, cozy comfort food, or elegant dishes for special occasions, we have the perfect recipes for you.
From hearty casseroles and one-pan wonders to savory pastas, juicy meats, and flavorful vegetarian options, our collection is designed to make dinnertime effortless and enjoyable.
Busy schedule? No problem! Try our slow cooker meals, sheet pan dinners, and 30-minute recipes to save time without sacrificing flavor. Whatever your craving, these recipes will bring warmth and joy to your table every night. 🍽️✨
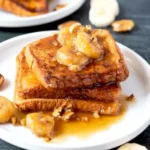
Bananas Foster French Toast are tender and golden brioche French toast topped with the most decadent caramelized brown sugar banana topping. This easy French toast recipe is mouthwatering delicious!
Ingredients
Scale
12 slices brioche bread (day old is best)
Unsalted Butter for frying, (about 6 tablespoons or more, as needed)
Whipped cream for serving (optional)
Instructions
Preheat the oven to 300 degrees Fahrenheit.
In a medium bowl or shallow dish, whisk together the eggs, sugar, Half and Half (or milk), cinnamon and vanilla.
Preheat a skillet or griddle over medium-low heat.
In batches, dip the bread into the custard to coat both sides. Remove the bread from the custard mixture letting the excess moisture drip off.
Add 1 tablespoon of unsalted butter into the skillet. Place the bread in the pan and cook for about 2 to 3 minutes per side or until lightly golden. Remove the French toast from the skillet and place on a rack or baking sheet in the oven to keep warm. Add more butter to the pan as needed and repeat with the remaining bread.
Heat the butter in a saute pan over medium-high heat. Whisk in the brown sugar and maple syrup and cook for about 5 minutes or until all the sugar has melted and thickened slightly. Add the pecans (if using) and mix to combine. Add the banana slices and cook for about a minute. Remove the pan from the heat and add the rum or rum extract. Return the pan to the heat and cook for about 3-4 minutes. This will burn off the alcohol in the rum leaving you with just the flavor.
To serve, place a couple slices of French toast on a plate and spoon the bananas and syrup over the French toast. Serve immediately with a dollop of whipped cream (optional)
Notes
Notes Stale bread or oven-dried bread works best for this recipe. The alcohol in the rum evaporates as you simmer the sauce. However, you can use rum extract, if you prefer. The bread cooking times will vary depending on the thickness and density of the bread and the amount of custard soaked into each piece of bread. You can make the custard the night before. When ready to use, place the mixture in a shallow dish, like a pie plate or baking dish to easily dip the bread. The alcohol in the rum burns off when you simmer the sauce making this French toast recipe kid friendly! Nutrition facts are only an estimate and will vary depending on brand of ingredients used.
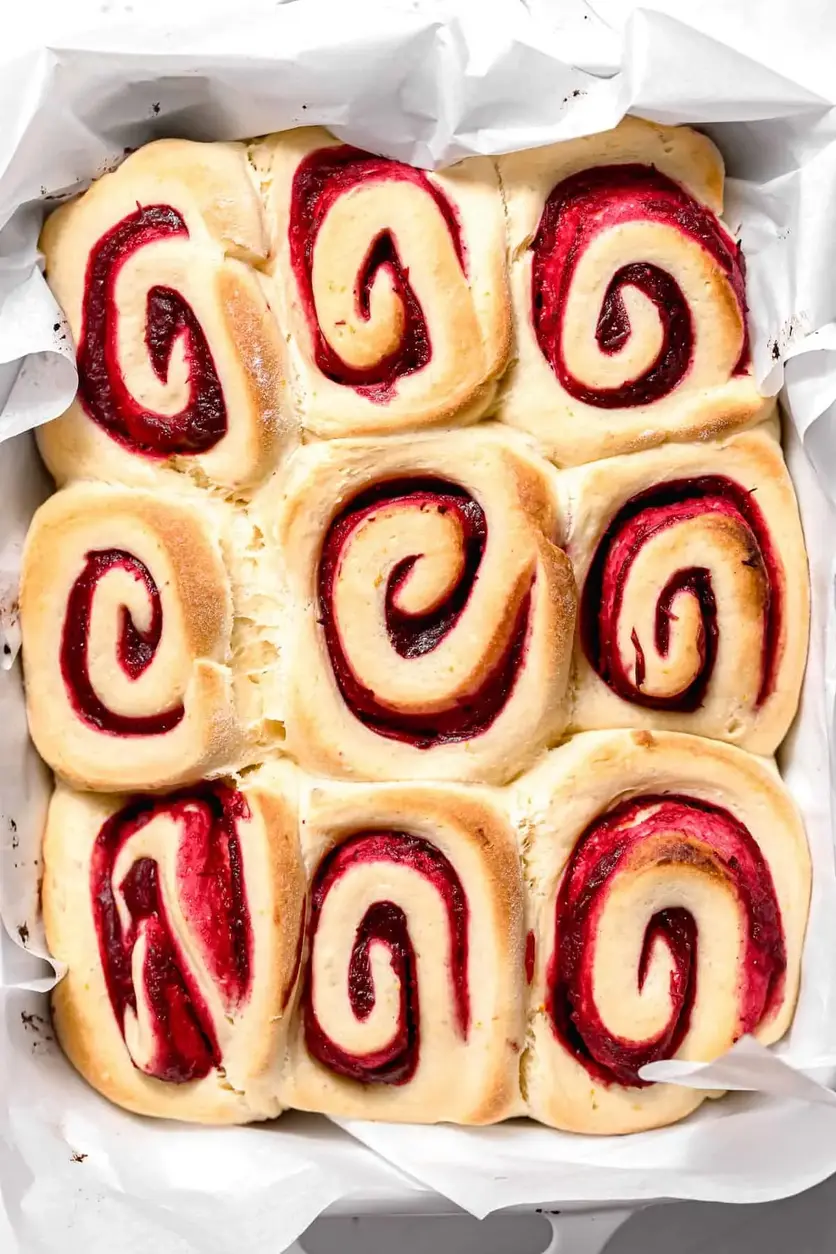
These cranberry orange cinnamon rolls are soft & pillowy brioche swirled with a cinnamon orange cranberry jam and topped with a sweet icing.
Ingredients
Scale
170 g (¾ cup) whole milk, warmed to 110 degrees F
30 g (2 ½ tablespoon) granulated sugar
11 g (3 ¼ teaspoon) instant or active dry yeast
3 eggs, room temp
1 teaspoon vanilla paste or extract
450 g (3 ¾ cups) all-purpose flour
zest of one orange
½ teaspoon kosher salt
127 g (½ cup + 1 tbsp) unsalted butter, room temp
Instructions
Heat the milk to 110 degrees F and stir in yeast and sugar. If using active dry yeast, allow to sit for 15 minutes. If using instant yeast, simply move on to the next step.
Mix the eggs and vanilla into the milk yeast mixture.
Combine flour and salt together in the bowl of a stand mixer fitted with a dough hook.
Pour the wet ingredients into the flour and mix on low-medium speed for about 3 minutes, or until it forms a ball around the hook.
Add in one piece of butter at a time, allowing it to fully incorporate before adding the next.
Once all of the butter is incorporated, turn the mixer up to medium-high speed and mix for 8-12 minutes. To check if the dough is ready, tear off a small piece and carefully spread it out to see if you can see the light through it without it tearing. If it tears, mix for another minute and check again.
Once the dough is ready, transfer it to a lightly greased bowl, cover, and allow to proof overnight in the fridge. Alternatively, you can let the dough rise in a warm place for about 1 hour or until doubled in size.
Add the cranberries, sugar, orange zest, orange juice, cinnamon, and salt to a medium saucepan.
Heat over medium heat for 10-12 minutes stirring often until the cranberries start to break down.
Reduce heat to low, and cook for another 8-10 minutes, stirring frequently until it has thickened.
Remove from heat and use an immersion blender (or transfer to a blender) and blend until smooth.
Pour into a glass jar to cool completely, then chill in the fridge until ready to use.
On a lightly floured surface, roll the brioche dough out into a rough rectangle about ¼'' in thickness.
Spread about 225g (about 1 cup) of the jam out evenly over the dough.
Roll the dough up from the long end and seal the edge. Cut off about an inch on either end of the log.
Using a ruler (or you can eyeball it), measure out 9 1 ½-inch rolls by scoring lines with a knife.
Use dental floss to cut each roll by placing the floss under the dough, wrapping around, and pulling to cut through.
Place each roll in a baking dish (measuring at least 10.5"x7.5"), cover, and allow to rise at room temperature for 30 minutes.
Towards the end of the proof time, preheat the oven to 350 degrees F.
Bake the cranberry orange cinnamon rolls for 22-25 minutes until barely golden.
While the cinnamon rolls are baking, make the icing. In a medium bowl, add the cream cheese, melted butter, and sifted powdered sugar.
Whisk vigorously until smooth and the mixture flows off of the whisk.
Spread all over the warm cranberry orange cinnamon rolls.
Top each roll with some orange zest, and enjoy!
Notes
Notes I recommend allowing your brioche dough to rise slowly overnight in the fridge. Cold dough is so much nicer to work with! But you can also let it proof at room temperature for one hour and make the cinnamon rolls immediately. The cinnamon orange cranberry jam needs time to cool down, so I recommend making this the day before, as well! To get a clean cut of each cinnamon roll, use unflavored dental floss rather than a knife. I used this baking dish to bake the cinnamon rolls, but you could also use a 9″x13″ cake pan.
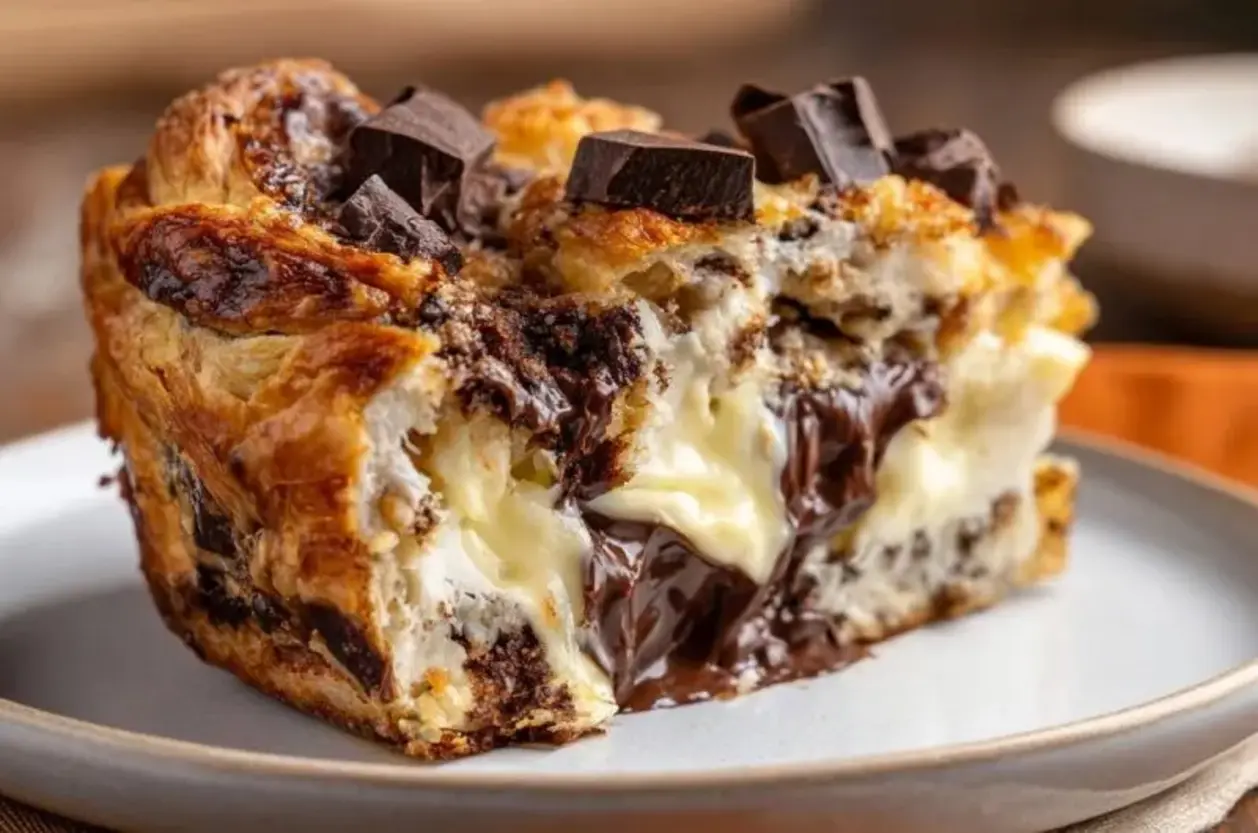
Craving a dessert that’s truly irresistible? This decadent chocolate cream cheese bread pudding recipe guarantees a luscious, gooey center every time. Made with sweet bread, rich chocolate, and tangy cream cheese, it’s a surprisingly easy and family-friendly treat perfect for any occasion. Get the full recipe on the blog!
1/2 cup (1 stick) unsalted butter, at room temperature
1 cup packed light brown sugar
1 large egg, at room temperature
2 teaspoons vanilla extract
1 1/4 cups all-purpose flour
1/3 cup Dutch-processed cocoa powder
1/2 teaspoon baking soda
1/4 teaspoon baking powder
1/2 teaspoon salt
1 cup freeze dried strawberries
1 cup semisweet chocolate chips
1 cup semisweet chocolate chips
1 teaspoon coconut oil
Instructions
First, make the cookies. Preheat the oven to 350°F. Line two baking sheets with parchment paper. Set aside.
In a stand mixer fitted with the paddle attachment, add the butter and brown sugar and beat on medium-high speed until light and fluffy, about 2 minutes.
Use a silicone spatula to scrape down the sides and bottom of the bowl, then add in the egg and vanilla.
Beat on medium-high speed until mixture is light and pale in color, about 2 minutes, scraping down the bowl as needed.
Add the flour, cocoa powder, baking soda, baking powder and salt and beat on low speed until just combined and no streaks of flour remain, about 30 seconds. Add the freeze dried strawberries and chocolate chips and fold to combine.
Use a 1 ½ ounce cookie scoop to portion out equal amounts of dough (a large spoon also works; the ball should be about 3 tablespoons). Place on the prepared baking sheets, spacing the dough balls 2 inches apart. Bake until the cookies have puffed up and are set and firm around the edges but still somewhat gooey in the middle, 10 to 12 minutes.
Remove the baking sheets from the oven and allow the cookies to cool slightly, about 15 minutes.
Once the cookies have cooled, melt the chocolate for the chocolate coated bottom and drizzle. Place the chocolate chips and coconut oil in a small microwave-safe bowl. Microwave in 30 second increments, using a silicone spatula to stir between each, until the chocolate is fully melted.
Dip the bottom of each cookie in the chocolate, scraping off the excess before placing back on the cool parchment paper lined sheet. Repeat with all the cookies. If desired, use the remaining chocolate to drizzle over the tops of the cookies. Allow the cookies to sit for 30 minutes or until the chocolate is fully set before serving.
Delicious Filled Heart-Shaped Strawberry Shortbread Cookies recipe with step-by-step instructions.
Ingredients
Scale
4.8 oz unsalted butter (I like Kerrygold for its high fat content and richness)
2.1 oz sugar
1.25 tsp vanilla
6.5 oz flour (I always use King Arthur all-purpose flour for a consistent crumb)
1/4 tsp salt
Instructions
Start by sifting the powdered sugar for the glaze to remove any lumpsthis ensures a smooth, professional-looking finish. While that's done, cut the unsalted butter into small cubes so it softens to room temperature quickly (this helps it cream evenly with the sugar). In a medium bowl, whisk together the flour and salt, then set aside. In a separate bowl, cream together the butter and sugar for 2-3 minutes until the mixture is light, fluffy, and palethis incorporates air into the dough, creating a more tender cookie. Add the vanilla extract and mix until fully combined.
Add the flour and salt mixture from Step 1 to the butter-sugar mixture and mix on low speed just until a cohesive dough formsovermixing develops gluten and creates tough cookies, which we want to avoid. Roll the dough out between two pieces of parchment paper to 1/2 cm thick, which gives you an even thickness for consistent baking. Cut the dough into heart shapes using a cookie cutter and transfer each cookie to a parchment-lined baking sheet, spacing them about 1 inch apart. Cover the baking sheet with plastic wrap and refrigerate for 30 minutesthis resting time prevents the cookies from spreading too much in the oven and helps them hold their shape.
While the dough chills, preheat your oven to 170°C (335°F). Once the cookies have finished resting, bake them for 10-12 minutes until they're set but still pale and tenderoverbaking will make them dry and hard rather than delicate and buttery. Remove from the oven and let them cool on the baking sheet for 2-3 minutes, then transfer to a wire rack to cool completely. I find that letting them cool completely before glazing prevents the glaze from melting unevenly.
In a small bowl, combine the sifted powdered sugar from Step 1, strawberry puree, butter, milk, and lemon juice. Mix until the glaze is completely smooth and spreadablethe lemon juice brightens the strawberry flavor and prevents the glaze from being overly sweet. The mixture should have a thick but pourable consistency; if it's too stiff, add a few more drops of milk. If it becomes too thin, add more powdered sugar a little at a time.
Separate the cooled cookies into two equal groups. Dip one half of the cookies into the strawberry glaze from Step 4, coating the top surface evenly and letting any excess drip back into the bowl. Spread about 1 teaspoon of strawberry jam onto the top of each remaining cookie, then gently press a glazed cookie and a jam-topped cookie together, glazed side and jam side facing each other, to create a sandwich. The flavors complement each other beautifullyI love how the tartness of the jam balances the sweetness of the glaze. Let the assembled cookies set on a plate for 15-20 minutes so the glaze firms up slightly before serving.
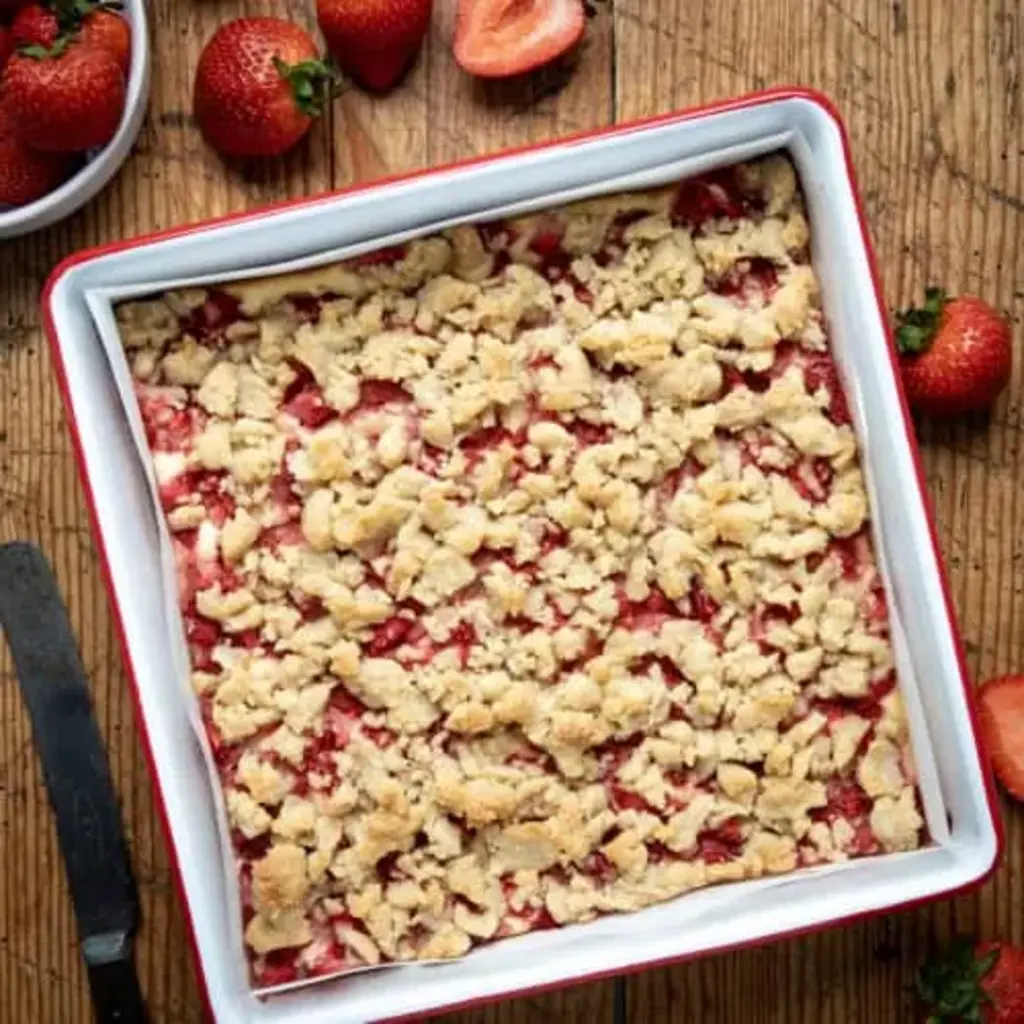
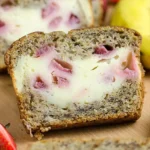
Strawberry Cheesecake Bars are dessert bars with a cheesecake filling layered fresh strawberries over a graham cracker crust and topped with a crumble topping. All three layers give you a sweet treat in every bite, perfect for any occasion!
Ingredients
Scale
1 ½ cups (126 g) graham cracker crumbs, about 10-12 crushed graham cracker sheets
6 tablespoons unsalted butter, melted
¼ cup (50 g) granulated sugar
Instructions
Preheat oven to 350°F. Line a 9×9-inch baking dish with parchment paper, including up the sides.
In a medium bowl, combine graham cracker crumbs, butter, and sugar. Mix until it resembles wet sand. Press into the lined baking dish.
In a large bowl, using a hand mixer, beat cream cheese, eggs, sugar, vanilla, and salt until smooth. Spread the cream cheese filling evenly over the crust.
Top with diced strawberries.
In a medium bowl, whisk together flour, brown sugar, and salt. Stir in melted butter until a crumbly dough forms.
Sprinkle the crumble topping evenly over the strawberries.
Bake for 35-40 minutes, or until set.
Transfer to a wire rack and let cool completely (about 1 hour). Then, transfer to the refrigerator until chilled, another hour. Serve chilled.
Did you know that over 80% of home cooks report feeling stressed about weeknight dinners? In the quest for a solution, the humble slow cooker has emerged as a hero, transforming simple ingredients into comforting meals with minimal effort. This Crockpot Cheesy Chicken and Rice recipe is the ultimate answer to that dinner-time dilemma. Imagine coming home to the irresistible aroma of tender chicken thighs simmering in a creamy, cheesy sauce with perfectly cooked rice—a complete, hearty meal that cooked itself while you were busy. This isn’t just another casserole; it’s a foolproof path to a satisfying dinner that will have everyone asking for seconds. The magic lies in the slow melding of flavors, where the richness of the cheese complements the savory chicken and the rice absorbs every bit of deliciousness.
Ingredients List
Gather these simple ingredients for a flavor-packed meal. Sensory notes are included to help you understand the role of each component.
2 lbs boneless, skinless chicken thighs – Thighs are preferred for their higher fat content, which keeps them incredibly juicy and tender through the long cook time. (Substitution: Use 2 lbs of boneless, skinless chicken breasts for a leaner option, but reduce cook time by 1 hour to prevent dryness).
1 cup long-grain white rice, uncooked – Provides the perfect starchy base that soaks up the creamy sauce. (Substitution: Use brown rice for more fiber, but note it will require an extra ½ cup of broth and may need longer cooking).
1 (10.5 oz) can cream of chicken soup – The cornerstone of the creamy sauce, offering a savory, velvety texture. (Substitution: For a homemade touch, blend ¼ cup butter, ¼ cup flour, 1 cup chicken broth, and ½ cup milk, simmered until thick).
1 ½ cups chicken broth – Infuses the dish with deep, savory flavor and ensures the rice cooks perfectly.
1 cup shredded cheddar cheese – Melts into gooey, tangy pockets of joy. Use sharp cheddar for a more pronounced flavor.
1 cup shredded Monterey Jack cheese – Adds a creamy, mild meltability that balances the cheddar.
1 medium yellow onion, diced – Becomes sweet and translucent, building a foundational aromatic layer.
3 cloves garlic, minced – Provides a pungent, earthy kick that cuts through the richness.
1 tsp paprika – Adds a subtle smokiness and a beautiful red hue.
½ tsp black pepper – For a gentle, warming spice.
½ tsp salt – Enhances all the other flavors. Adjust to taste after cooking.
Fresh parsley or chives for garnish (optional) – A pop of green color and fresh flavor for serving.
Timing
Prep Time15 minutes
Cook Time4 hours (Low) / 2-3 hours (High)
Total Time4 hours 15 minutes
Compared to the average stovetop chicken and rice recipe, which requires about 45 minutes of active monitoring and stirring, this Crockpot method saves you significant hands-on time. The “set-it-and-forget-it” nature means you gain back nearly an hour of your evening. The longer, slower cook time at a low temperature is the secret to achieving fall-apart tender chicken and rice that’s infused with flavor, rather than just boiled.
Step-by-Step Instructions
Step 1: Prepare Your Chicken
Pat your chicken thighs completely dry with paper towels. This simple step is crucial—it helps the seasonings stick and promotes better browning (if you choose to sear) and texture. Season both sides generously with the salt, pepper, and paprika. For an extra flavor boost, I sometimes quickly sear the thighs in a hot skillet for 2 minutes per side until golden. This isn’t mandatory for the slow cooker, but it adds a wonderful depth of flavor that permeates the entire dish.
Step 2: Layer the Aromatics
Spread the diced onion evenly across the bottom of your 6-quart or larger slow cooker. Scatter the minced garlic over the onions. This creates a fragrant bed that will steam and sweeten as it cooks, flavoring the chicken from below. Place the seasoned chicken thighs on top of this aromatic layer in a single layer if possible.
Step 3: Add the Liquid and Rice
In a medium bowl, whisk together the uncooked rice, cream of chicken soup, and chicken broth until well combined. The mixture will be thick. Pour this evenly over the chicken and onions in the slow cooker. Use a spatula to gently spread it, ensuring the rice is mostly submerged in the liquid. Do not stir at this point. We want the chicken to remain on the bottom, directly over the heat source, to cook through properly.
Step 4: The Slow Cook Magic
Cover with the lid and cook on LOW for 4 hours or on HIGH for 2 to 2.5 hours. The key here is patience—resist the urge to open the lid and stir, as this releases heat and steam and can significantly increase cooking time. The dish is done when the chicken reaches an internal temperature of 165°F and the rice is tender and has absorbed most of the liquid.
Step 5: The Cheesy Finish
Once the chicken and rice are fully cooked, use two forks to shred the chicken thighs directly in the pot. They should be so tender they practically fall apart. Now, stir in the shredded cheddar and Monterey Jack cheeses until they are completely melted and create a luxuriously creamy sauce. Let it sit for 5-10 minutes with the lid off to thicken slightly. Garnish with fresh parsley or chives for a vibrant finish.
Nutritional Information
Estimated values per serving (based on 6 servings):
Calories: ~520 kcal
Protein: ~38g
Carbohydrates: ~35g
Dietary Fiber: ~1g
Sugars: ~2g
Fat: ~25g
Saturated Fat: ~11g
Cholesterol: ~165mg
Sodium: ~950mg
Healthier Alternatives
You can easily adapt this recipe to fit various dietary needs without sacrificing the comforting, cheesy essence:
Lower-Fat/Lower-Sodium: Use a 98% fat-free cream of chicken soup, low-sodium chicken broth, and reduced-fat cheese blends. The texture will be slightly less creamy but still delicious.
Higher Protein/More Veggies: Add 1-2 cups of frozen mixed vegetables (peas, carrots, corn) or fresh chopped broccoli florets during the last 30 minutes of cooking. You can also use quinoa instead of rice for a complete protein boost.
Dairy-Free: Substitute the cream of chicken soup with a dairy-free condensed “cream” soup alternative (often made with coconut milk). Use a meltable dairy-free cheese shreds or a creamy sauce made from blended silken tofu, nutritional yeast, and lemon juice.
Serving Suggestions
This dish is a complete meal in a bowl, but it pairs beautifully with simple sides to round out the dinner table:
A crisp, green salad with a tangy vinaigrette to cut through the richness.
Steamed green beans, broccoli, or asparagus.
A loaf of crusty garlic bread or warm dinner rolls for dipping.
For a fun twist, serve it in a baked potato shell or use it as a hearty filling for burritos or wraps.
Common Mistakes
Using Instant Rice: This will turn to mush. Always use regular, long-grain white rice.
Stirring During Cooking: This disrupts the cooking process and can make the rice gummy. Trust the process!
Overcooking on High: Cooking on HIGH for too long can cause the chicken to dry out and the rice to become mushy. Stick to the recommended times.
Not Letting it Rest: Adding the cheese and letting the dish sit for 5-10 minutes off heat allows the sauce to thicken and the flavors to settle.
Storing Tips
Refrigeration: Store leftovers in an airtight container in the refrigerator for up to 4 days. The rice will continue to absorb moisture, so you may want to add a splash of broth or milk when reheating.
Freezing: This dish freezes reasonably well for up to 2 months. Thaw overnight in the refrigerator. Reheat gently on the stovetop or in the microwave, stirring often and adding liquid as needed to restore the creamy consistency.
Reheating: Reheat individual portions in the microwave, covered, stirring every 60 seconds. For larger amounts, reheat on the stovetop over low heat, adding a little broth or milk to prevent sticking and drying out.
Conclusion
This Crockpot Cheesy Chicken and Rice recipe is more than just a meal; it’s a reliable strategy for reclaiming your weeknights. It delivers maximum comfort with minimal effort, proving that a delicious, home-cooked dinner doesn’t have to be complicated. The combination of tender chicken, creamy cheese, and fluffy rice is a timeless crowd-pleaser that both kids and adults will love. Give it a try this week, and experience the joy of walking into a kitchen filled with the promise of a ready-made feast.
Made this recipe? We’d love to see your creation! Tag @spicemingle on social media or leave a comment below with your experience and any clever twists you added. Your feedback helps our community grow!
Frequently Asked Questions
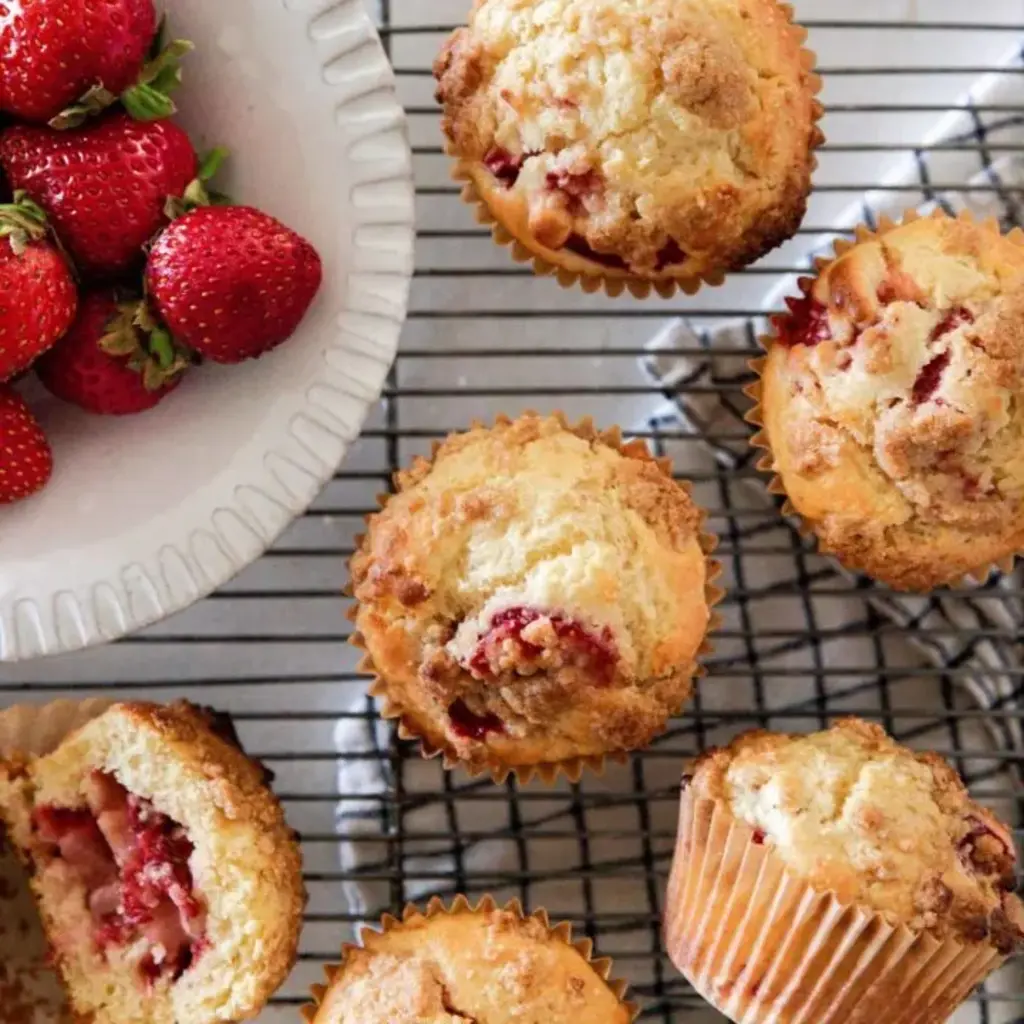
The Best Strawberry Muffins Recipe – Boxwood Ave
This strawberry muffins recipe is absolutely delicious! Light and fluffy with a delicious streusel crumb topping and filled with just the right amount of strawberries! #strawberrymuffins #muffinrecipes #easyrecipes #breakfastrecipes
Strawberry muffins made from scratch are such a delicious treat! With a yummy streusel crumb topping, this is sure to become a weekend favorite!
Ingredients
Scale
2 tablespoons butter softened
1/8 cup lightly packed brown sugar
1/4 cup all purpose flour
Instructions
Preheat oven to 400 F, and line a cupcake tin with cupcake liners.
Prepare the streusel crumb topping: combine flour, butter, and brown sugar. Use a pastry cutter or fork to cut the butter into the flour until crumbly.
In a medium sized mixing bowl, whisk together the dry ingredients: flour, sugar, baking powder, and salt.
In a separate bowl, whisk together the wet ingredients: eggs, milk, oil, vanilla. Once combined, stir in the sliced strawberries.
Pour the wet ingredients into the dry ingredients and stir until just combined. It is important to not overmix, a few lumps are okay.
Fill each muffin mold with batter 2/3 full. Sprinkle each muffin with streusel topping (approximately 1 tablespoon per muffin).
Bake at 400 F for 15-17 minutes. Or until muffins spring back like a sponge when pressed gently.
Notes
If using frozen strawberries, do not thaw. You may need to increase cooking time 2-5 minutes. Reduce milk to 3/4 cup.
This recipe makes 12-18 muffins depending how full you fill your muffin liners.
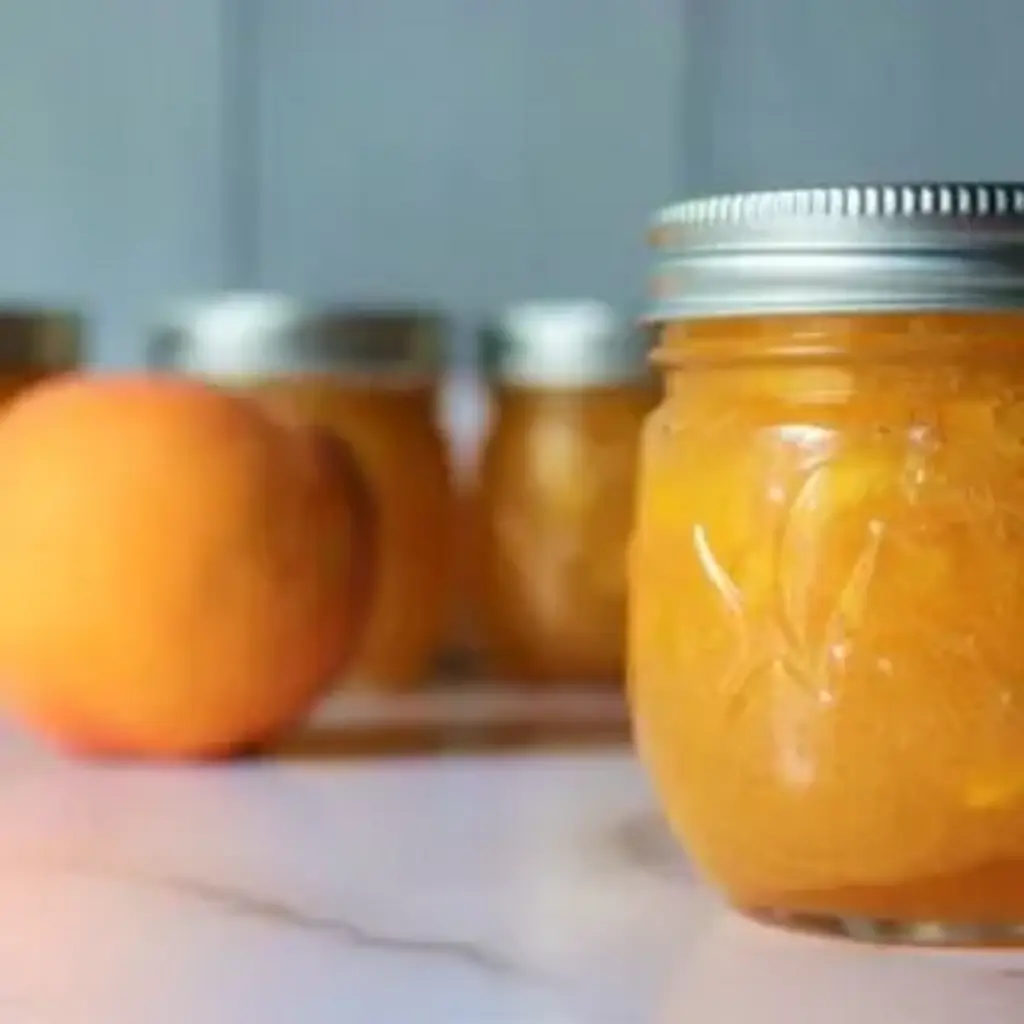
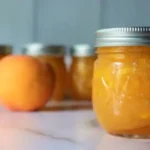
Step into the world of home canning with our old fashioned peach jam recipe. Discover how preserving fruit in jars is a delightful way to capture the essence of summer peaches. With pectin as a gelling agent, you can now make your own jar of sun-kissed sweetness to enjoy year-round.
Toss chopped peaches in lemon juice to prevent browning.
Place the peaches and lemon juice in a deep, heavy-bottomed saucepan.
Add the pectin (but not the sugar) and bring the mixture to a boil. Cook 2-3 minutes, mashing the peaches for a smoother preserve or leaving them whole for a chunky peach jam.
Add the sugar and stir to incorporate. Return the pot to a boil and cook for 1 minute, stirring to distribute heat.
Turn off the heat and ladle the finished peach jam into jars, leaving 1/4 inch headspace. Cap with 2 part lids.
Store in the refrigerator for immediate use, or freeze for up to 6 months, or water bath can for longer storage.
Canning Peach Jam (Optional): If canning, process jars in a water bath canner for 10 minutes if below 1000 feet in elevation (adjust for altitude by adding 1 minute for every 1000 feet in elevation rise). Remove jars to cool on a towel on the counter and check seals after 24 hours. Store any unsealed jars in the refrigerator for immediate use.
Properly canned peach jam should maintain quality on the pantry shelf for 12-18 months.
Notes
Low Sugar Peach Jam ~ Standard pectin requires at least 50% sugar to gel properly. You can reduce the sugar to 4 cups and the jam will still have a loose set. If you’d like to reduce the sugar further, use a low sugar pectin such as Pomona’s pectin and follow the instructions on the packet.
Peach Jam with Liquid Pectin ~ If using liquid pectin, you’ll need at least 7 cups of sugar to get the jam to gel properly. I’m not a fan of liquid pectin, and I don’t suggest using it, as that’s just too darn sweet.
A note on lemon juice ~ The lemon in this recipe is optional and helps to add a bit of tartness to balance the sugar. Omit it if you’d like, but I’d strongly suggest it for improved flavor. Feel free to use fresh lemon juice or bottled, since it’s not added for canning safety.
White Peaches ~ White peaches are less acidic than yellow peaches, and they’re not approved for canning. If you make peach jam with white peaches, preseve it as a refrigerator or freezer recipe (but don’t can it).