“`html
Table of Contents
- Craving Comfort Food? Burger Meets Pasta!
- Gather Your Burger-Pasta All-Stars
- The Need for Speed: Timing This Delight
- Let’s Cook Up Some Magic!
- Nutritional Lowdown
- Healthier Remixes for Your Burger Pasta
- Serving Up Happiness
- Steering Clear of Pitfalls
- Savoring Every Bite: Storage Secrets
- Your New Favorite Weeknight Winner
- Frequently Asked Burger-Tortellini Questions
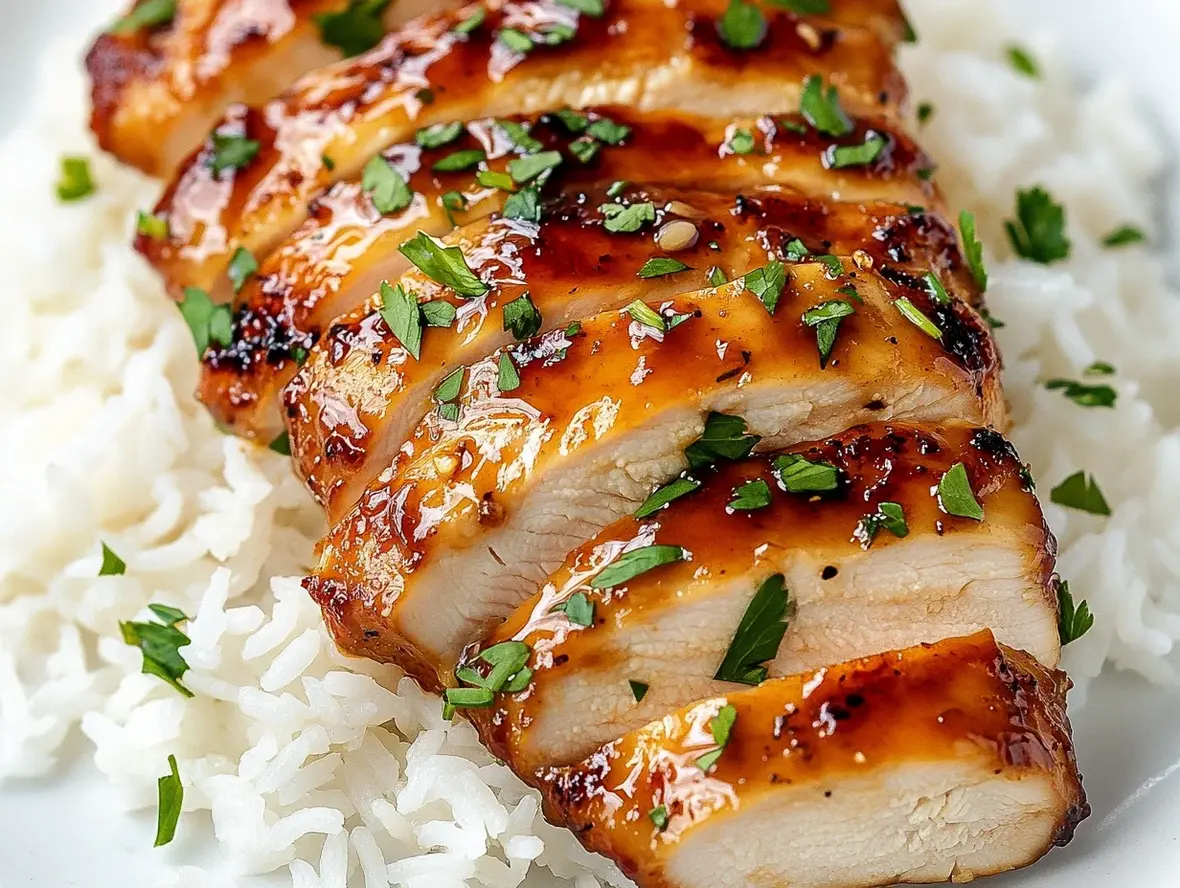
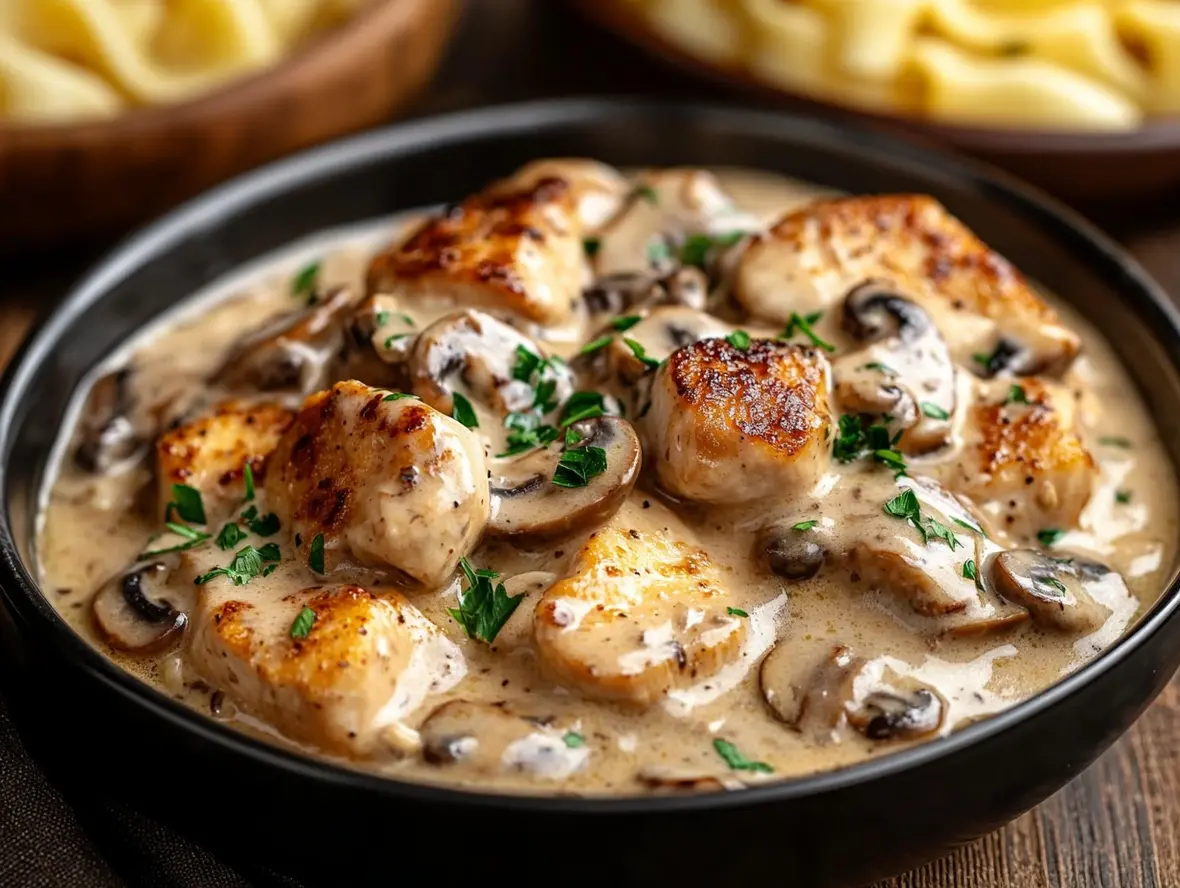
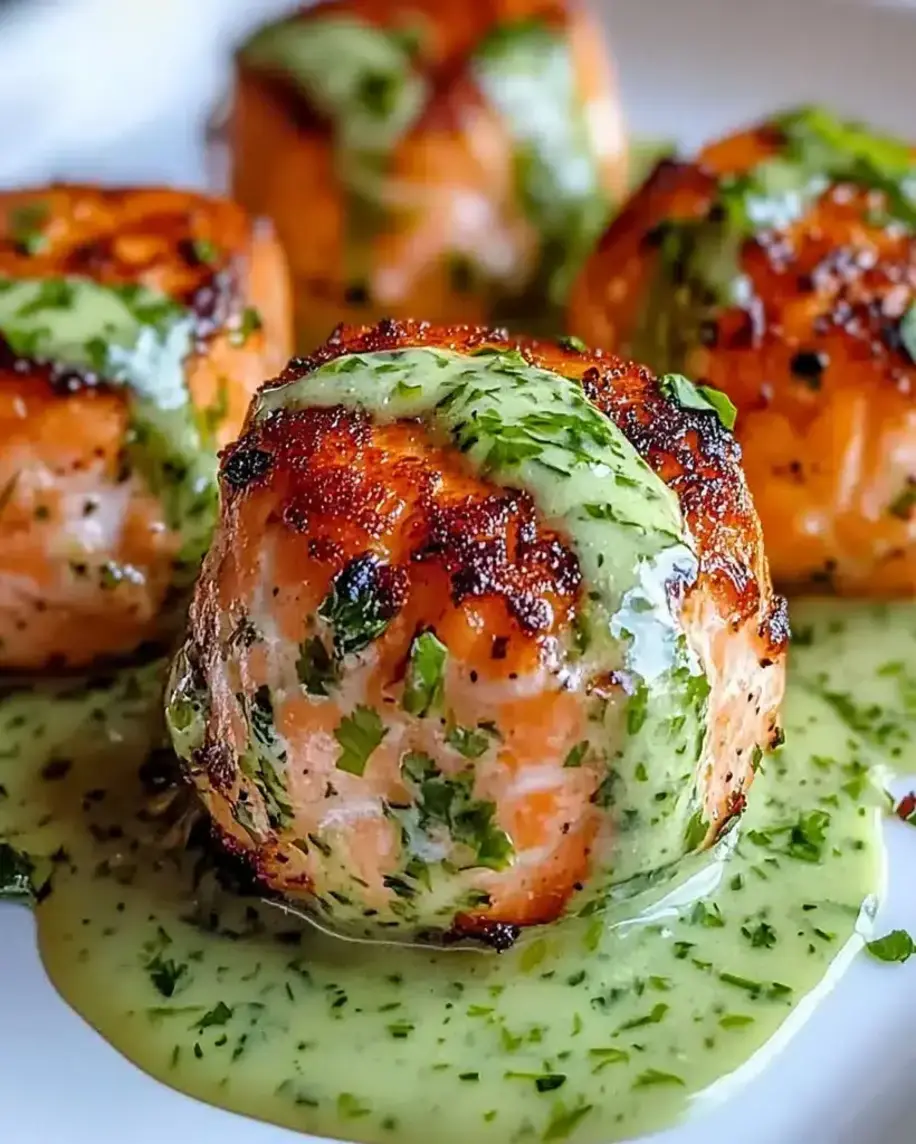
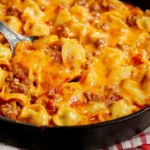
Cheeseburger Tortellini: A One-Pot Dinner Recipe
Are you looking for a dinner that combines the ultimate comfort of a cheeseburger with the comforting ease of pasta, all in under 30 minutes? You’ve landed in the right place!
Craving Comfort Food? Burger Meets Pasta!
In the hustle and bustle of modern life, weeknight dinners often become a source of stress. We strive for meals that are not only delicious and satisfying but also quick and easy to prepare. Enter the Cheeseburger Tortellini Skillet – a brilliant culinary fusion that captures the heart and soul of a juicy cheeseburger and marries it with tender, cheesy tortellini in a lusciously creamy sauce. Imagine all the iconic flavors you love – savory beef, tangy pickles, rich cheese – all coming together in a single, harmonious pot. This recipe is designed for those nights when you need a hearty meal without the fuss. It’s a game-changer for busy families, novice cooks, and anyone who simply adores a flavor explosion. Get ready to transform your dinner routine with a dish that’s as fun to make as it is to devour!
Gather Your Burger-Pasta All-Stars
The magic of this Cheeseburger Tortellini Skillet lies in its simple yet impactful ingredients. We’re aiming for that classic cheeseburger essence, so don’t be afraid to embrace the familiar flavors!
- 1 lb Ground Beef (80/20 recommended): The savory heart of our dish. Choose a beef with a little fat for maximum flavor and juiciness. For a leaner option, 90/10 works, but you might need a touch more oil.
- 1 small Onion, finely chopped: Adds a sweet, aromatic foundation. Yellow or white onions are perfect here.
- 2 cloves Garlic, minced: The pungent, essential flavor booster. Fresh is always best for that vibrant kick.
- 1 tsp Smoked Paprika: Brings a subtle smoky depth reminiscent of grilled burgers.
- 1/2 tsp Garlic Powder & 1/2 tsp Onion Powder: These amplify the core aromatics and add that unmistakable burger seasoning.
- 1/4 tsp Black Pepper: To taste, adding a gentle warmth.
- 1 (15 oz) can Diced Tomatoes, undrained: These form the saucy base, adding moisture and a touch of acidity. Fire-roasted tomatoes would be a delightful upgrade!
- 2 cups Beef Broth: Provides richness and liquid for cooking the tortellini. Low-sodium is a good choice to control saltiness.
- 1/2 cup Heavy Cream: The key to our luscious, creamy sauce. For a lighter sauce, half-and-half or evaporated milk can be used, though it might be slightly less rich.
- 1 (9 oz) package Refrigerated Cheese Tortellini: The delightful pasta pillows that absorb all the amazing flavors. Fresh tortellini cook faster than frozen.
- 1 cup Shredded Cheddar Cheese: Because, cheeseburger! Sharp cheddar offers the best punch. Monterey Jack or a Colby-Jack blend are also excellent choices.
- 1/4 cup Dill Pickle Slices, chopped (optional, for serving): The tangy, briny crunch that elevates a cheeseburger. Essential for that authentic experience!
- Sesame Seed Buns (optional, for serving): Toasting these and serving the pasta inside is a fun presentation!
- Ketchup & Mustard (for serving, optional): The classic burger condiments for a final flavor flourish.
The Need for Speed: Timing This Delight
One of the biggest wins of this Cheeseburger Tortellini Skillet is its speed. Compared to the average cooking time for a hearty pasta dish (often 45-60 minutes), this one is a champion of efficiency.
Let’s Cook Up Some Magic!
Get ready to witness the simple, beautiful transformation of everyday ingredients into an extraordinary meal. Each step is designed to build flavor and texture flawlessly.
Step 1: The Savory Foundation
Grab your favorite large skillet or Dutch oven and place it over medium-high heat. Add your ground beef. Break it apart with a spoon and let it cook, stirring occasionally, until it’s beautifully browned and no pink remains. This usually takes about 5-7 minutes. Once cooked, drain off any excess grease. Leaving a little bit of fat can add flavor, but too much will make the dish greasy, so use your best judgment!
Step 2: Building the Flavor Base
Lower the heat to medium. Add the finely chopped onion to the browned beef in the skillet. Stir and cook for about 3-4 minutes, until the onion softens and becomes translucent. Then, stir in the minced garlic, smoked paprika, garlic powder, onion powder, and black pepper. Cook for another minute until fragrant. Make sure you stir well to combine these fantastic seasonings with the beef and onions. This blooming of spices awakens their aromas and infuses them deeply into the mixture.
Step 3: Simmering to Creamy Perfection
Pour in the undrained diced tomatoes and the beef broth. Stir everything together, making sure to scrape up any browned bits from the bottom of the skillet – that’s pure flavor! Bring this mixture to a simmer, then reduce the heat to low, cover, and let it gently bubble away for about 5 minutes. This allows the flavors to meld beautifully. After simmering, stir in the heavy cream. The sauce will start to look wonderfully rich and creamy.
Step 4: The Star of the Show
Now it’s time for the tortellini! Add the refrigerated cheese tortellini directly into the simmering sauce. Stir them in gently so they are mostly submerged. Increase the heat slightly to bring the sauce back to a gentle simmer. Cover the skillet again and cook for about 5-7 minutes, or according to your tortellini package instructions, until the tortellini are tender and plump. Stir occasionally to prevent sticking.
Step 5: The Grand Finale
Once the tortellini are perfectly cooked, remove the skillet from the heat. Sprinkle the shredded cheddar cheese evenly over the top. Cover the skillet for a minute or two, allowing the cheese to melt into a blissful, gooey blanket. Give it one final gentle stir to incorporate the melted cheese into the sauce, making it even more decadent. Serve immediately, topped with chopped dill pickles if desired, and perhaps with a side of toasted sesame seed buns for the ultimate cheeseburger experience! A drizzle of ketchup or mustard is optional but highly recommended for authenticity.
Nutritional Lowdown
While this dish is a comfort food champion, it’s good to have an idea of its nutritional profile. Nutritional information can vary based on specific ingredients used (e.g., fat content of beef, type of tortellini, amount of cheese). Here’s an approximate breakdown per serving (assuming 4 servings):
- Calories: Around 550-700 kcal
- Protein: Approximately 25-30g
- Fat: Around 30-45g (depending on beef and cream)
- Carbohydrates: Roughly 40-50g
- Fiber: ~3-5g
Disclaimer: These values are estimates. For precise nutritional information, please calculate using your specific ingredients.
Healthier Remixes for Your Burger Pasta
Love the idea but want to lighten it up? Here are some smart swaps that keep the flavor party going:
- Leaner Protein: Opt for 93% or 96% lean ground turkey or chicken instead of beef.
- Lighter Cream Sauce: Substitute half-and-half or evaporated milk for heavy cream. For an even lighter option, a small amount of milk thickened with a cornstarch slurry can work, though the richness will be slightly diminished.
- Whole Wheat Tortellini: If available, whole wheat tortellini will add fiber and nutrients.
- Veggie Power: Sauté finely chopped mushrooms, bell peppers, or zucchini along with the onions to boost vegetable content and fiber.
- Reduced Cheese: Use a sharp cheddar so you get maximum flavor with less cheese, or opt for a reduced-fat shredded cheddar.
Serving Up Happiness
This dish is practically a meal in itself, but here are a few ideas to complete your burger pasta experience:
- Classic Condiments: Offer ketchup, mustard, and chopped dill pickles on the side for everyone to customize their own bowl.
- Toasted Buns: Serve with toasted mini sesame seed buns – scoop the tortellini mixture into them for a fun, handheld meal!
- Simple Salad: A crisp green salad with a light vinaigrette provides a refreshing contrast to the rich pasta.
- Crispy Fries: For a true diner feel, a small side of oven-baked fries or sweet potato fries would be a hit.
Steering Clear of Pitfalls
Avoid these common mishaps for the best Cheeseburger Tortellini ever:
- Overcrowding the Pan: If your skillet is too small when browning the beef, it will steam instead of brown, leading to less flavor. Brown in batches if necessary.
- Burning Garlic: Add minced garlic towards the end of sautéing onions so it doesn’t burn, which can make it bitter.
- Overcooking Tortellini: Tortellini cook quickly. Overcooking can make them mushy and unpleasant. Keep an eye on them and test for doneness.
- Not Draining Grease: Excessive grease can make the final dish unpleasantly heavy and oily.
Savoring Every Bite: Storage Secrets
Leftovers are a treasure! Store any remaining Cheeseburger Tortellini in an airtight container in the refrigerator for up to 3-4 days. Reheat gently on the stovetop, adding a splash of broth or milk if the sauce seems too thick, or in the microwave until warmed through.
Your New Favorite Weeknight Winner
The Cheeseburger Tortellini Skillet is more than just a meal; it’s a celebration of two beloved classics coming together in perfect harmony. It’s the ultimate comfort food, delivering incredible flavor with minimal effort, making it an ideal solution for busy weeknights or whenever a craving strikes. Easy, hearty, and undeniably delicious, this one-pot wonder is sure to become a staple in your recipe rotation. Give it a try and let the joy of cheeseburger flavor in pasta form delight your taste buds!
Frequently Asked Burger-Tortellini Questions
***What kind of tortellini works best?***
Refrigerated fresh cheese tortellini are ideal as they cook quickly and absorb the sauce beautifully. Frozen tortellini can also be used, but they may require a slightly longer cooking time and can sometimes release more water. Dried tortellini are not recommended for this one-pot method as they require separate boiling and will not absorb the sauce flavors as well.
***Can I prepare parts of this dish ahead of time?***
You can brown the ground beef and sauté the onions and garlic ahead of time. Store them separately in the refrigerator. When ready to cook, reheat the beef mixture in the skillet, then proceed with adding the liquids and tortellini as per the recipe instructions. The sauce is best made fresh for optimal creaminess.
***How can I make this dish spicier?***
For a spicier kick, you can add a pinch of cayenne pepper or red pepper flakes along with the other spices in Step 2. You could also stir in a tablespoon of your favorite hot sauce into the sauce towards the end of cooking, or top with sliced jalapeños!
***Is there a vegetarian or vegan version of this recipe?***
For a vegetarian option, swap the ground beef for plant-based crumbles or extra mushrooms and onions. For a vegan version, use vegan ground crumbles, vegan cheese, and a dairy-free cream alternative (like cashew cream or full-fat coconut milk). Ensure your tortellini are also vegan!
***My sauce is too thick/thin, what can I do?***
If the sauce is too thick, stir in a little more beef broth or milk, 1/4 cup at a time, until it reaches your desired consistency. If it’s too thin, you can let it simmer uncovered for a few extra minutes to reduce, or you can mix a tablespoon of cornstarch with a couple of tablespoons of cold water to make a slurry, then stir it into the simmering sauce until thickened. Be careful not to add the cornstarch slurry directly to boiling liquid as it can clump.
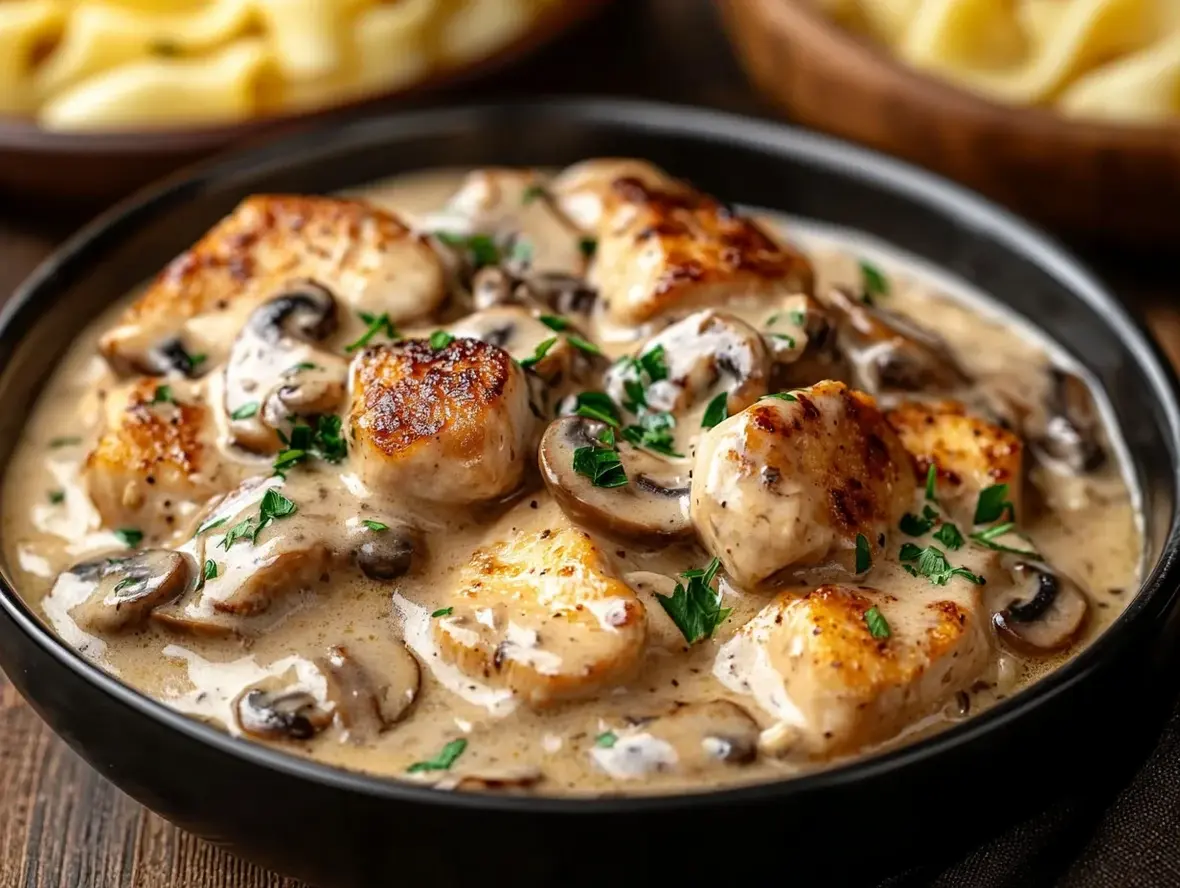
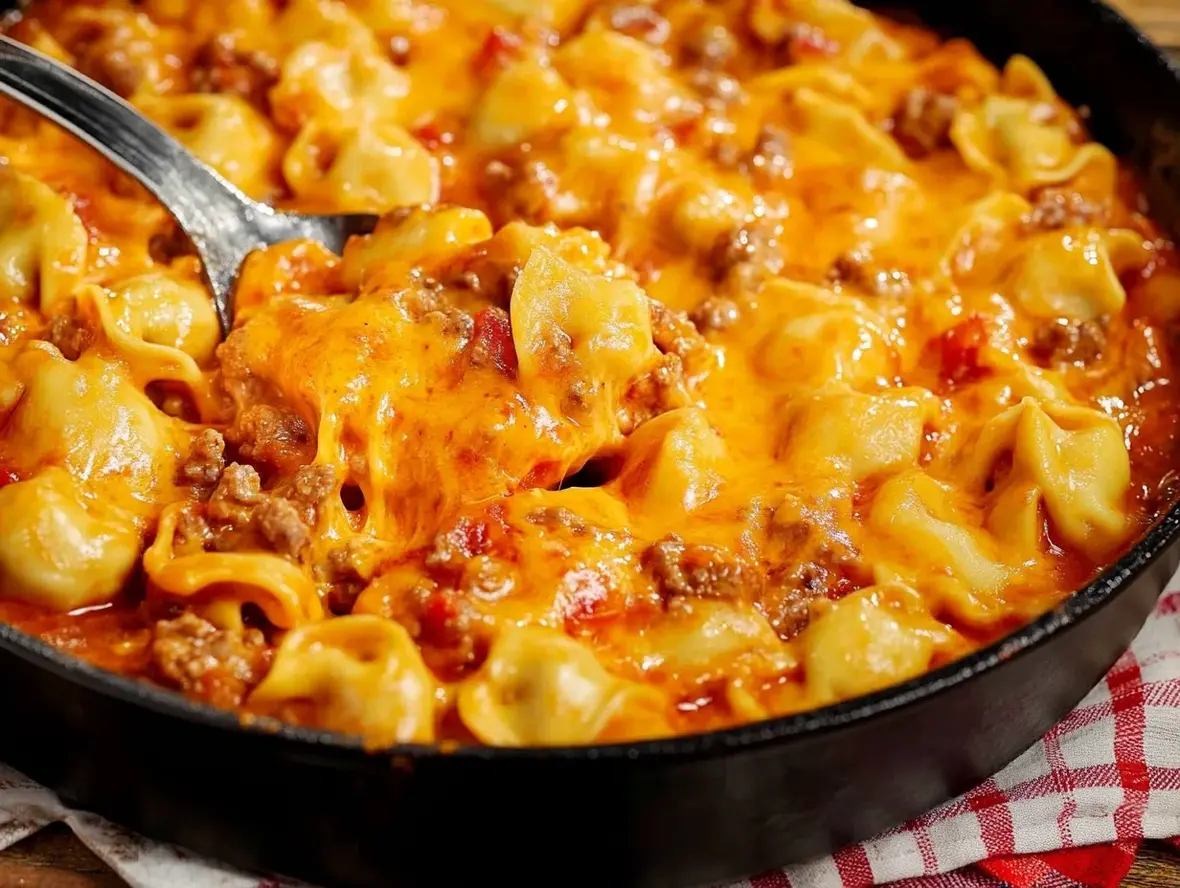
Cheeseburger Tortellini Skillet
Description
This one-panCheeseburger Tortellini Skilletcombines the comforting flavors of a cheeseburger with cheesy tortellini in a creamy, flavorful sauce. A perfect weeknight meal that’s quick, hearty, and satisfying!
Ingredients
- 1lb lean ground beef1 cupdiced yellow onion1/2 tspsalt1/2 tsppepper1 tbspminced garlic19 ozfrozen cheese tortellini10.5 ozcondensed cheddar soup10 ozRotel diced tomatoes and green chilies (not drained)1 cupmilk1 tbspyellow mustard1/4 cupketchup2 cupsshredded cheddar cheese
- 1 cupdiced yellow onion1/2 tspsalt1/2 tsppepper1 tbspminced garlic19 ozfrozen cheese tortellini10.5 ozcondensed cheddar soup10 ozRotel diced tomatoes and green chilies (not drained)1 cupmilk1 tbspyellow mustard1/4 cupketchup2 cupsshredded cheddar cheese
- 1/2 tspsalt1/2 tsppepper1 tbspminced garlic19 ozfrozen cheese tortellini10.5 ozcondensed cheddar soup10 ozRotel diced tomatoes and green chilies (not drained)1 cupmilk1 tbspyellow mustard1/4 cupketchup2 cupsshredded cheddar cheese
- 1/2 tsppepper1 tbspminced garlic19 ozfrozen cheese tortellini10.5 ozcondensed cheddar soup10 ozRotel diced tomatoes and green chilies (not drained)1 cupmilk1 tbspyellow mustard1/4 cupketchup2 cupsshredded cheddar cheese
- 1 tbspminced garlic19 ozfrozen cheese tortellini10.5 ozcondensed cheddar soup10 ozRotel diced tomatoes and green chilies (not drained)1 cupmilk1 tbspyellow mustard1/4 cupketchup2 cupsshredded cheddar cheese
- 19 ozfrozen cheese tortellini10.5 ozcondensed cheddar soup10 ozRotel diced tomatoes and green chilies (not drained)1 cupmilk1 tbspyellow mustard1/4 cupketchup2 cupsshredded cheddar cheese
- 10.5 ozcondensed cheddar soup10 ozRotel diced tomatoes and green chilies (not drained)1 cupmilk1 tbspyellow mustard1/4 cupketchup2 cupsshredded cheddar cheese
- 10 ozRotel diced tomatoes and green chilies (not drained)1 cupmilk1 tbspyellow mustard1/4 cupketchup2 cupsshredded cheddar cheese
- 1 cupmilk1 tbspyellow mustard1/4 cupketchup2 cupsshredded cheddar cheese
- 1 tbspyellow mustard1/4 cupketchup2 cupsshredded cheddar cheese
- 1/4 cupketchup2 cupsshredded cheddar cheese
- 2 cupsshredded cheddar cheese
Instructions
- 1️⃣Cook the Ground Beef:
- Place a large, oven-safe skillet over medium-high heat and add the ground beef and diced onions.Stir and crumble the beef as it cooks, ensuring the onions soften.Once the beef is fully browned, drain any excess grease.2️⃣Season the Beef:Add the salt, pepper, and minced garlic to the skillet. Stir well and cook for one more minute to release the garlic’s aroma.3️⃣Add Tortellini and Base Ingredients:Stir the frozen cheese tortellini into the skillet.Add the condensed cheddar soup and the Rotel (with its juices), stirring until well combined.4️⃣Create the Sauce:Pour in the milk, yellow mustard, and ketchup. Stir thoroughly.Bring the mixture to a boil.5️⃣Simmer the Tortellini:Reduce the heat to medium-low and cover the skillet with a lid.Allow the tortellini to simmer for 5-6 minutes, stirring once halfway through to prevent sticking.6️⃣Melt the Cheese:Remove the lid and stir well to combine everything.Sprinkle the shredded cheddar cheese evenly over the top.Place the skillet under the broiler for 2-3 minutes, or until the cheese is melted and golden brown. Alternatively, you can cover the skillet with the lid and let the cheese melt on the stovetop.7️⃣Rest and Serve:Remove the skillet from the oven and let it rest for a few minutes.Serve hot and enjoy your cheeseburger-inspired tortellini dish!
- Stir and crumble the beef as it cooks, ensuring the onions soften.Once the beef is fully browned, drain any excess grease.2️⃣Season the Beef:Add the salt, pepper, and minced garlic to the skillet. Stir well and cook for one more minute to release the garlic’s aroma.3️⃣Add Tortellini and Base Ingredients:Stir the frozen cheese tortellini into the skillet.Add the condensed cheddar soup and the Rotel (with its juices), stirring until well combined.4️⃣Create the Sauce:Pour in the milk, yellow mustard, and ketchup. Stir thoroughly.Bring the mixture to a boil.5️⃣Simmer the Tortellini:Reduce the heat to medium-low and cover the skillet with a lid.Allow the tortellini to simmer for 5-6 minutes, stirring once halfway through to prevent sticking.6️⃣Melt the Cheese:Remove the lid and stir well to combine everything.Sprinkle the shredded cheddar cheese evenly over the top.Place the skillet under the broiler for 2-3 minutes, or until the cheese is melted and golden brown. Alternatively, you can cover the skillet with the lid and let the cheese melt on the stovetop.7️⃣Rest and Serve:Remove the skillet from the oven and let it rest for a few minutes.Serve hot and enjoy your cheeseburger-inspired tortellini dish!
- Once the beef is fully browned, drain any excess grease.
- 2️⃣Season the Beef:Add the salt, pepper, and minced garlic to the skillet. Stir well and cook for one more minute to release the garlic’s aroma.3️⃣Add Tortellini and Base Ingredients:Stir the frozen cheese tortellini into the skillet.Add the condensed cheddar soup and the Rotel (with its juices), stirring until well combined.4️⃣Create the Sauce:Pour in the milk, yellow mustard, and ketchup. Stir thoroughly.Bring the mixture to a boil.5️⃣Simmer the Tortellini:Reduce the heat to medium-low and cover the skillet with a lid.Allow the tortellini to simmer for 5-6 minutes, stirring once halfway through to prevent sticking.6️⃣Melt the Cheese:Remove the lid and stir well to combine everything.Sprinkle the shredded cheddar cheese evenly over the top.Place the skillet under the broiler for 2-3 minutes, or until the cheese is melted and golden brown. Alternatively, you can cover the skillet with the lid and let the cheese melt on the stovetop.7️⃣Rest and Serve:Remove the skillet from the oven and let it rest for a few minutes.Serve hot and enjoy your cheeseburger-inspired tortellini dish!
- Add the salt, pepper, and minced garlic to the skillet. Stir well and cook for one more minute to release the garlic’s aroma.3️⃣Add Tortellini and Base Ingredients:Stir the frozen cheese tortellini into the skillet.Add the condensed cheddar soup and the Rotel (with its juices), stirring until well combined.4️⃣Create the Sauce:Pour in the milk, yellow mustard, and ketchup. Stir thoroughly.Bring the mixture to a boil.5️⃣Simmer the Tortellini:Reduce the heat to medium-low and cover the skillet with a lid.Allow the tortellini to simmer for 5-6 minutes, stirring once halfway through to prevent sticking.6️⃣Melt the Cheese:Remove the lid and stir well to combine everything.Sprinkle the shredded cheddar cheese evenly over the top.Place the skillet under the broiler for 2-3 minutes, or until the cheese is melted and golden brown. Alternatively, you can cover the skillet with the lid and let the cheese melt on the stovetop.7️⃣Rest and Serve:Remove the skillet from the oven and let it rest for a few minutes.Serve hot and enjoy your cheeseburger-inspired tortellini dish!
- 3️⃣Add Tortellini and Base Ingredients:
- Stir the frozen cheese tortellini into the skillet.Add the condensed cheddar soup and the Rotel (with its juices), stirring until well combined.4️⃣Create the Sauce:Pour in the milk, yellow mustard, and ketchup. Stir thoroughly.Bring the mixture to a boil.5️⃣Simmer the Tortellini:Reduce the heat to medium-low and cover the skillet with a lid.Allow the tortellini to simmer for 5-6 minutes, stirring once halfway through to prevent sticking.6️⃣Melt the Cheese:Remove the lid and stir well to combine everything.Sprinkle the shredded cheddar cheese evenly over the top.Place the skillet under the broiler for 2-3 minutes, or until the cheese is melted and golden brown. Alternatively, you can cover the skillet with the lid and let the cheese melt on the stovetop.7️⃣Rest and Serve:Remove the skillet from the oven and let it rest for a few minutes.Serve hot and enjoy your cheeseburger-inspired tortellini dish!
- Add the condensed cheddar soup and the Rotel (with its juices), stirring until well combined.4️⃣Create the Sauce:Pour in the milk, yellow mustard, and ketchup. Stir thoroughly.Bring the mixture to a boil.5️⃣Simmer the Tortellini:Reduce the heat to medium-low and cover the skillet with a lid.Allow the tortellini to simmer for 5-6 minutes, stirring once halfway through to prevent sticking.6️⃣Melt the Cheese:Remove the lid and stir well to combine everything.Sprinkle the shredded cheddar cheese evenly over the top.Place the skillet under the broiler for 2-3 minutes, or until the cheese is melted and golden brown. Alternatively, you can cover the skillet with the lid and let the cheese melt on the stovetop.7️⃣Rest and Serve:Remove the skillet from the oven and let it rest for a few minutes.Serve hot and enjoy your cheeseburger-inspired tortellini dish!
- 4️⃣Create the Sauce:
- Pour in the milk, yellow mustard, and ketchup. Stir thoroughly.Bring the mixture to a boil.5️⃣Simmer the Tortellini:Reduce the heat to medium-low and cover the skillet with a lid.Allow the tortellini to simmer for 5-6 minutes, stirring once halfway through to prevent sticking.6️⃣Melt the Cheese:Remove the lid and stir well to combine everything.Sprinkle the shredded cheddar cheese evenly over the top.Place the skillet under the broiler for 2-3 minutes, or until the cheese is melted and golden brown. Alternatively, you can cover the skillet with the lid and let the cheese melt on the stovetop.7️⃣Rest and Serve:Remove the skillet from the oven and let it rest for a few minutes.Serve hot and enjoy your cheeseburger-inspired tortellini dish!
- Bring the mixture to a boil.5️⃣Simmer the Tortellini:Reduce the heat to medium-low and cover the skillet with a lid.Allow the tortellini to simmer for 5-6 minutes, stirring once halfway through to prevent sticking.6️⃣Melt the Cheese:Remove the lid and stir well to combine everything.Sprinkle the shredded cheddar cheese evenly over the top.Place the skillet under the broiler for 2-3 minutes, or until the cheese is melted and golden brown. Alternatively, you can cover the skillet with the lid and let the cheese melt on the stovetop.7️⃣Rest and Serve:Remove the skillet from the oven and let it rest for a few minutes.Serve hot and enjoy your cheeseburger-inspired tortellini dish!
- 5️⃣Simmer the Tortellini:
- Reduce the heat to medium-low and cover the skillet with a lid.Allow the tortellini to simmer for 5-6 minutes, stirring once halfway through to prevent sticking.6️⃣Melt the Cheese:Remove the lid and stir well to combine everything.Sprinkle the shredded cheddar cheese evenly over the top.Place the skillet under the broiler for 2-3 minutes, or until the cheese is melted and golden brown. Alternatively, you can cover the skillet with the lid and let the cheese melt on the stovetop.7️⃣Rest and Serve:Remove the skillet from the oven and let it rest for a few minutes.Serve hot and enjoy your cheeseburger-inspired tortellini dish!
- Allow the tortellini to simmer for 5-6 minutes, stirring once halfway through to prevent sticking.6️⃣Melt the Cheese:Remove the lid and stir well to combine everything.Sprinkle the shredded cheddar cheese evenly over the top.Place the skillet under the broiler for 2-3 minutes, or until the cheese is melted and golden brown. Alternatively, you can cover the skillet with the lid and let the cheese melt on the stovetop.7️⃣Rest and Serve:Remove the skillet from the oven and let it rest for a few minutes.Serve hot and enjoy your cheeseburger-inspired tortellini dish!
- 6️⃣Melt the Cheese:
- Remove the lid and stir well to combine everything.Sprinkle the shredded cheddar cheese evenly over the top.Place the skillet under the broiler for 2-3 minutes, or until the cheese is melted and golden brown. Alternatively, you can cover the skillet with the lid and let the cheese melt on the stovetop.7️⃣Rest and Serve:Remove the skillet from the oven and let it rest for a few minutes.Serve hot and enjoy your cheeseburger-inspired tortellini dish!
- Sprinkle the shredded cheddar cheese evenly over the top.Place the skillet under the broiler for 2-3 minutes, or until the cheese is melted and golden brown. Alternatively, you can cover the skillet with the lid and let the cheese melt on the stovetop.7️⃣Rest and Serve:Remove the skillet from the oven and let it rest for a few minutes.Serve hot and enjoy your cheeseburger-inspired tortellini dish!
- Place the skillet under the broiler for 2-3 minutes, or until the cheese is melted and golden brown. Alternatively, you can cover the skillet with the lid and let the cheese melt on the stovetop.
- 7️⃣Rest and Serve:Remove the skillet from the oven and let it rest for a few minutes.Serve hot and enjoy your cheeseburger-inspired tortellini dish!
- Remove the skillet from the oven and let it rest for a few minutes.Serve hot and enjoy your cheeseburger-inspired tortellini dish!
- Serve hot and enjoy your cheeseburger-inspired tortellini dish!
Notes
Customizations:Add crumbled cooked bacon, diced pickles, or even a drizzle of BBQ sauce for a twist.Storage:Refrigerate leftovers in an airtight container for up to 3 days. Reheat on the stovetop or in the microwave, adding a splash of milk if the sauce thickens.Make It Spicy:Use spicy Rotel or add a dash of hot sauce for a little heat.
Storage:Refrigerate leftovers in an airtight container for up to 3 days. Reheat on the stovetop or in the microwave, adding a splash of milk if the sauce thickens.Make It Spicy:Use spicy Rotel or add a dash of hot sauce for a little heat.
Make It Spicy:Use spicy Rotel or add a dash of hot sauce for a little heat.
“`