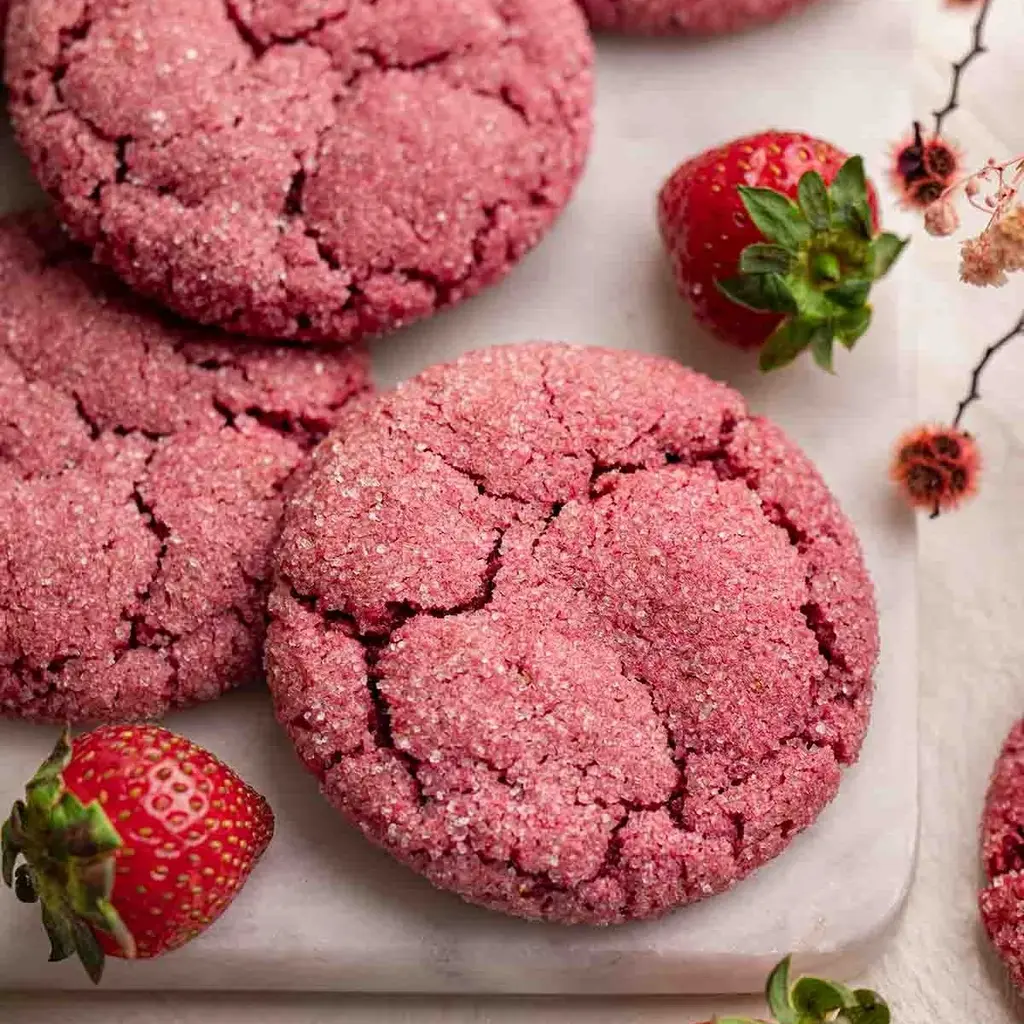

Strawberry Sugar Cookies (vegan)
Description
These vegan strawberry cookies are packed with 3 cups of fresh strawberries and use only common pantry ingredients. They are soft and chewy, rather than cakey because we skipped the eggs and use a strawberry reduction.
Ingredients
- 3 cups (360g) strawberries, fresh or frozen (note 1)
- 1 cup (200g) granulated sugar
- cup (150g) vegan butter, room temperature
- 1 teaspoon vanilla extract, optional
- 1/4–1 teaspoon pink food coloring, or red food coloring, as needed (note 2)
- 2 ¼ cups (280g) all-purpose plain flour, (note 3)
- 1 teaspoon baking soda
- Pinch of salt, if using unsalted butter
Instructions
- Optional: Blend or puree the strawberries with a stick blender or food processor. You should have about 1 1/2 cups of pure strawberry puree. If you don't blend the puree, you'll just have very small chunks of strawberries in your cookies.
- Add the strawberry puree (or whole strawberries with a dash of water) to a large pot or saucepan over medium heat. Cook the strawberries while stirring occasionally. Or turn the heat to high and stir constantly. This can take 15-30 minutes, depending on your stovetop and pot/saucepan. Your puree is ready when it weighs 120g (heaped 1/3 cup) and is thick like tomato paste. If you're in doubt, it's better to have less puree rather than more. Allow the strawberry puree to cool.
- Preheat the oven to 180°C (350°F). Line 2-3 baking sheets with parchment paper.
- Add the sugar and butter to a large bowl and beat until well combined. Add the strawberry puree, vanilla extract, and food coloring and beat until combined.
- Add the flour, baking soda, and salt and beat until just combined. Mix in more food coloring if desired, keeping in mind that the color will fade in the oven. My dough was almost hot pink but the cookies baked into a medium-pink color. The cookie dough should be soft and tacky but not too sticky. If your cookie dough is too sticky, cover the dough and refrigerate for 10-20 minutes.
- Use a small cookie scoop or spoon to divide the dough into about 20 balls (around 2 tablespoons or 38g of dough each).
- Add the remaining 1/4 cup (50g) of granulated sugar to a small bowl. Toss and roll each ball of cookie dough in the sugar.
- Arrange the cookie dough balls on the prepared baking sheets about 2 inches (5 cm) apart as they will spread in the oven. If you'd like thinner chewier cookies, slightly flatten each cookie dough ball.
- Bake the cookies for 13-15 minutes or until the edges appear cooked then remove from the oven. Allow them to cool on the baking sheets for 10 minutes then transfer them to a cooling rack (note 4).
- Enjoy the strawberry sugar cookies warm or at room temperature. Store them in an airtight container at room temperature for up to 5 days, in the fridge for up to 10 days or in the freezer for up to 1 month.
Notes
Notes For the best results, I recommend weighing the strawberries and flour. The volume of strawberries varies a lot and adding too much flour to the dough will prevent the cookies from spreading. Plus, using a scale means you can wash less utensils! For a medium-pink color, I used 3/4 teaspoon of liquid pink food coloring (preferred) or a heaped 1/4 teaspoon of pink gel food coloring. Red food coloring is stronger than pink so youll need less. Keep in mind that the color will fade in the oven so add more than you think you will need. You can also use beetroot powder but the color doesnt always stick during baking and it can dull the strawberry flavor. With my old beetroot powder, I added around 3 tablespoons to get a pale pink color and flattened the cookies before baking. For chewier cookies with slightly more strawberry flavor, you can reduce the flour to 2 cups (250g). The cookies will crack more and the dough will be stickier. You dont need to chill your dough, unless its very sticky. For gluten-free cookies, this recipe also works well with King Arthurs measure for measure flour. The dough will be a little softer than the original, but will bake beautifully. If the ingredients are measured accurately, these cookies will spread in the oven. If they dont spread, flatten the cookies with a fork or bottom of a glass when they come out of the oven.
Nutrition
- Calories: 162kcal
- Sugar: 15g
- Protein: 2g