End your day with a delicious, comforting, and satisfying dinner! Whether you’re looking for quick and easy weeknight meals, cozy comfort food, or elegant dishes for special occasions, we have the perfect recipes for you.
From hearty casseroles and one-pan wonders to savory pastas, juicy meats, and flavorful vegetarian options, our collection is designed to make dinnertime effortless and enjoyable.
Busy schedule? No problem! Try our slow cooker meals, sheet pan dinners, and 30-minute recipes to save time without sacrificing flavor. Whatever your craving, these recipes will bring warmth and joy to your table every night. 🍽️✨
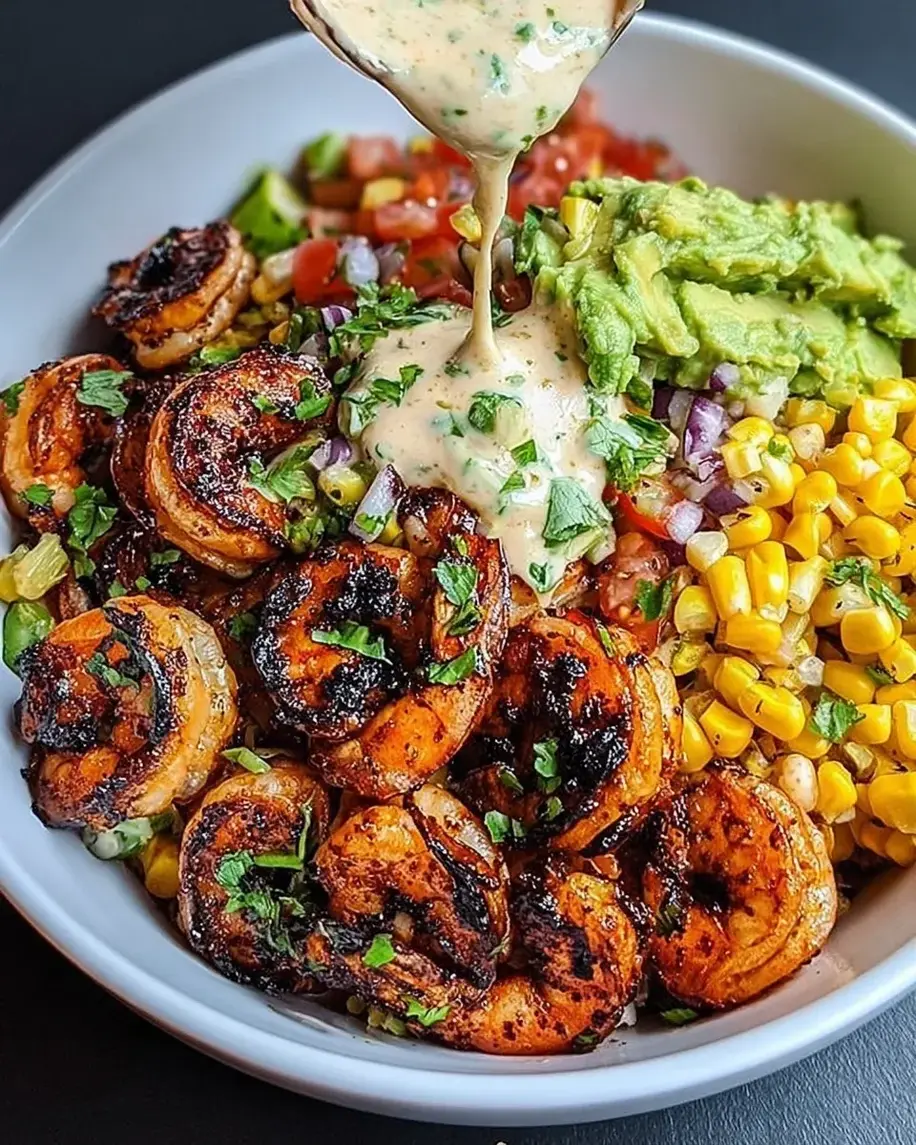
Grilled Shrimp Bowl Recipe with Creamy Garlic Sauce and Seafood Dishes
Creamy Garlic Sauce makes these Grilled Shrimp Bowl recipes feel truly special, pairing perfectly with fresh avocado and sweet corn salsa. If you love flavorful Seafood Dishes that are also surprisingly easy to make, this is your new go-to meal idea. Get the simple steps for preparing perfect grilled shrimp and assembling this bright, satisfying bowl. This recipe shows you how to get maximum flavor with minimal effort for your next lunch or dinner. Save this for later when you want a fantastic and light meal experience.
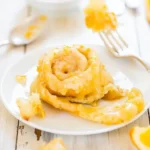
These homemade orange rolls are filled with a buttery orange filling and are topped with a simple orange glaze. They can be prepped the night before, if needed.
Ingredients
Scale
3 cups all-purpose flour, or as needed
¼ cup granulated sugar
2 ¼ teaspoons instant dry yeast, one 1/4-ounce packet, I use Red Star Platinum
pinch salt, to taste
½ cup unsalted butter, melted (1 stick)
½ cup buttermilk
2 large eggs, lightly whisked
Instructions
Make the Dough
To the bowl of a stand mixer fitted with the dough hook (or use a large mixing bowl and wooden spoon and your hands), add 3 cups flour, sugar, yeast, salt; set aside.
In 2-cup glass measuring cup or microwave-safe bowl, and the butter and heat to melt, about 1 minute on high power.
Add buttermilk to melted butter and warm to temperature, about 45 seconds on high power in the microwave. (Based on the type of yeast used, milk temperatures will vary. Red Star Platinum yeast calls for warmer temperatures than most, 120 to 130F; other brands and yeast call for much lower temperatures, about 95 to 105F. Heat the mixture according to manufacturers recommendations on the packaging. Taking the temperature with a digital thermometer is highly recommended, but if youre not, make sure the milk is warm, not hot. Err on the cooler rather than hotter side so you dont kill the yeast.) If the milk separates or gets a little funny looking after being warmed, whisk it to smooth it out.
Add butter-buttermilk mixture to the dry ingredients in mixing bowl.
In a small bowl, crack and lightly whisk the eggs, and then add eggs to mixing bowl.
Turn mixer on low speed and allow it to knead dough for about 5 to 7 minutes (about 7 to 10 minutes by hand using a wooden spoon and then switching to your hands). 3 cups of flour and 5 minutes is perfect for me, but if after 5 minutes your dough is very sloppy, wet, and wont come together, add up to 1/4 cup flour, or as needed until it does come together. However, the more flour added, the denser and heavier the rolls will be; wetter dough is preferred to overly dry. If dough is dry or crumbly, drizzle in buttermilk until it comes together.
Remove dough from the mixing bowl, spray a large bowl with cooking spray, place the dough in the bowl, and flip it over once so its lightly oiled on both top and bottom.
Cover bowl with plasticwrap and place it in a warm, draft-free place to rise for about 2 to 2 1/2 hours, or doubled in size. I keep my bowl inside a powered-off oven that I preheated for 1 minute to 400F, then its powered off. Do not, repeat do not, keep the oven on. The pre-heated, warm oven creates a nice 85F-ish environment, ideal for yeast. If your rising spot is cold, rising will likely take longer than 2 1/2 hours.
While dough rises, line a 9×13-inch pan with aluminum foil, spray with cooking spray; set aside.
Roll Out the Dough & Fill
After dough has doubled in size, punch it down. Turn dough out onto a Silpat or floured countertop.
With a rolling pin, roll it out to about 26-by-13-inches. Use the 13-inch side of the 9-x13 pan to eyeball it, no need use a ruler.
Using a knife, evenly spread butter over dough, leaving a 1/2-inch bare margin.
Add about 3/4 cup marmalade, more as needed, and smooth it with a knife. It should be a thin-ish layer; too much and you risk it leaking, but not enough and the rolls arent orangey enough; use your judgment. The butter and marmalade get smeared together, which is okay.
Evenly sprinkle the brown sugar over the top, and lightly pat it down with your fingertips to help it adhere.
Slice the Dough
Starting with a long edge (the 26-inch side), roll the dough into a tightly wound log, with the seam side down.
Using a knife, make small hash marks so there will be 20 evenly sized rolls (about 1 to 1 1/2 inches wide; or make bigger rolls and yield 12 to 16). Hash marks create less guesswork once you start slicing and things get messier and harder to eyeball where to slice; the hash marks are nice place-markers.
Use plain, unwaxed dental floss to slice the rolls. I highly recommend slicing the rolls with floss, not knives. Floss does not squish or compact the log like knives do.
Arrange the rolls in the prepared pan, 5 rows of 4 rolls across. Cover with plastic wrap.
Let rise in a warm, draft-free place until the rolls have nearly doubled in size, about 1 hour. (See note below)*
Bake the Orange Rolls
Bake at 375F for about 15 minutes, or until lightly golden on top and cooked through (ovens, dough, and climates vary and so will baking duration, but 1 to 2 minutes matters in this recipe). Watch rolls like a hawk and dont overbake or they wont taste nearly as good.
Make the Orange Glaze
In a medium bowl, add the orange juice, vanilla, confectioners sugar, optional salt, and whisk to combine; mixture will be thick.
Drizzle in the milk as needed until mixture can be whisked smooth and is to desired consistency.
Whisk in 2 teaspoons zest; set aside remainder.
Evenly pour glaze over rolls.
Evenly sprinkle with remaining 1 teaspoon zest.
Serve immediately. Rolls are best warm and fresh, but will keep airtight at room temp for up to 4 days; reheat in micro for about 5 seconds to re-soften or as desired. I am comfortable keeping glazed rolls at room temp and do not recommend storing them in the fridge because they will dry out.
Notes
*To make the orange rolls the night before: Dont let rolls rise after theyve been sliced and placed in covered pan. Place pan in refrigerator for up to 16 hours. Before baking, let the rolls rise at room temperature until they have nearly doubled in size, about 1 hour. Then move onto the section labeled “Bake the Orange Rolls.”
To freeze these rolls: Rolls can be made and baked to completion, and then frozen for up to 6 months; unthaw and glaze immediately prior to serving. I recommend baking them from start to finish and then freezing, rather than trying to freeze unbaked dough, if you want to make in bulk in advance.
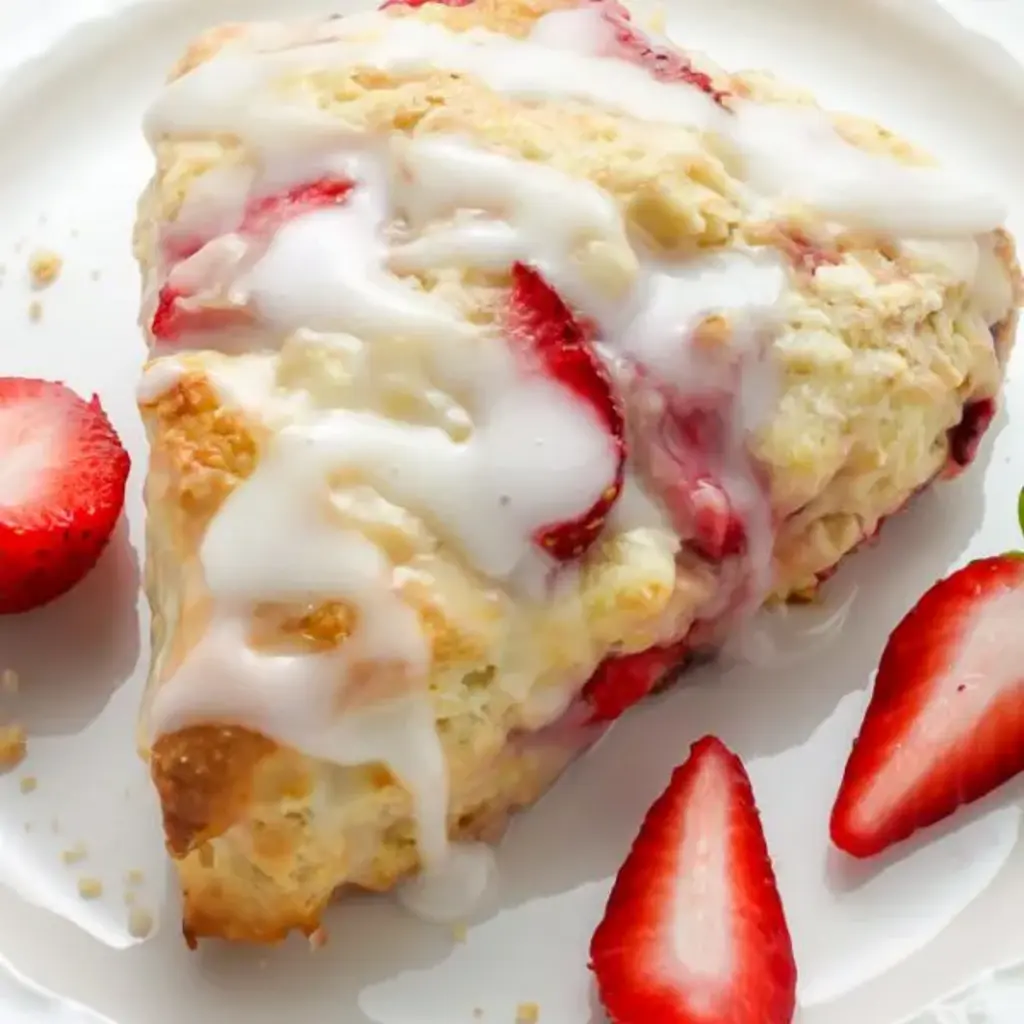
Classic and crumbly fresh strawberry scones topped with vanilla cream. Even scone haters LOVE these.
Ingredients
Scale
2 and 3/4 cups all-purpose flour
1/2 teaspoon salt
2 teaspoons baking powder
1/2 teaspoon baking soda
1/3 cup granulated sugar
1 stick (4 ounces) unsalted butter, VERY cold and cut into tiny pieces
1 large egg
1/2 cup whole milk
2 tablespoons heavy cream
1 cup fresh strawberries, hulled and quartered
Instructions
Preheat oven to 400°(F). Line a large baking sheet with parchment paper; set aside.
In a large bowl combine flour, salt, baking powder, baking soda, and sugar; mix well to combine.
Cut the butter into small cubes then work it into the mixture (using your fingers, two forks, or a pastry cutter) until lit resembles a coarse meal.
In a small bowl whisk together the egg milk, and cream. Add to flour/butter mixture and use a fork to stir everything together until just moistened.
Add strawberries and using a rubber spatula gently fold them into the dough. Dont worry if some of the berries break up a bit.
Empty the loose dough out onto a clean, floured work surface, then shape the dough into an 8-inch circle. *You may need to knead the mixture a few times to get it to a workable texture.
Cut the dough into 8 wedges and carefully transfer them to the prepared sheet, placing them 2 apart.
Lightly brush each scone with the egg wash, then sprinkle the tops with sugar.
Bake for 18 minutes, or until light golden brown.
Allow scones to cool for 10 minutes on the baking sheet. In the meantime you can make your glaze.
In a small bowl whisk together the heavy cream, confectioners sugar, vanilla, and salt. Drizzle over semi-warm scones and serve at once.
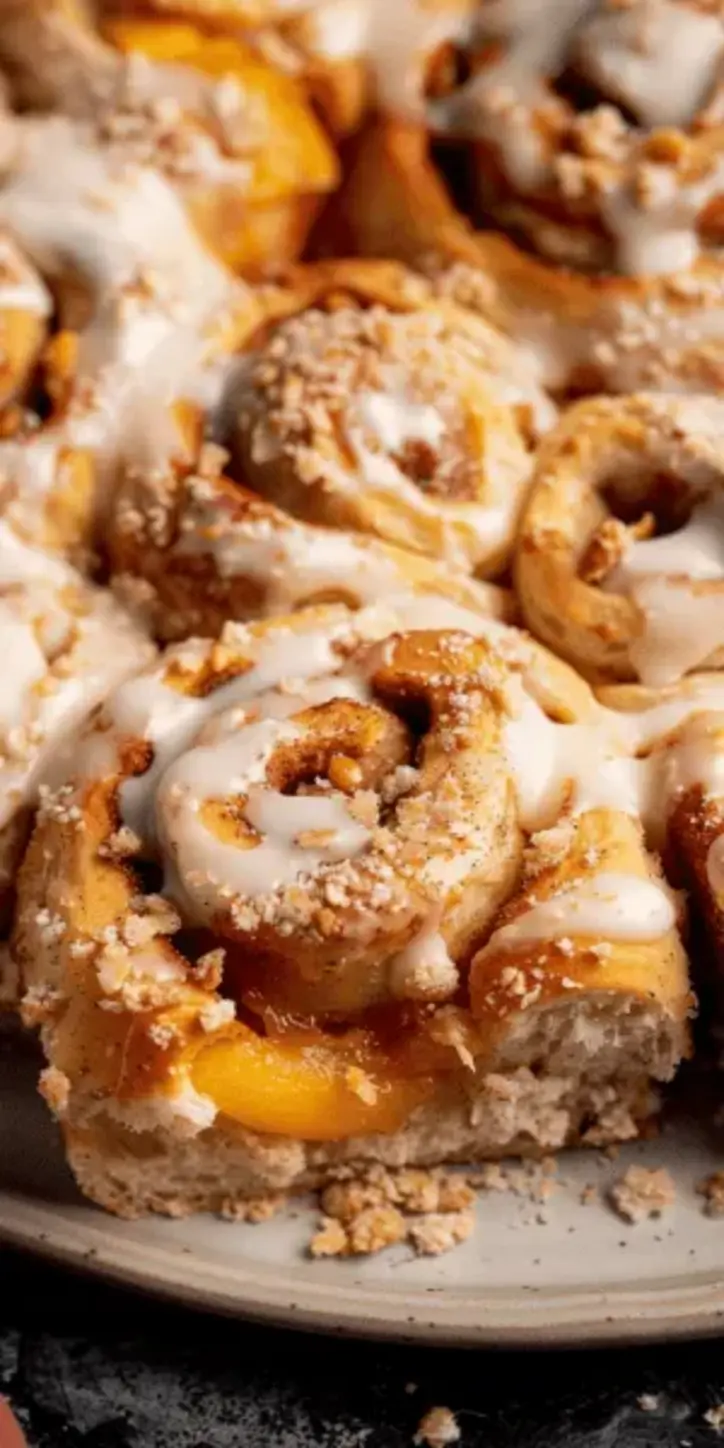
Start your day with a sweet twist with our Peach Cobbler Cinnamon Rolls, blending spiced, juicy peaches with soft, fluffy dough. These delightful rolls are perfect for brunch or a decadent treat, topped with creamy frosting.
Ingredients
Scale
1 cup warm milk (about 110°F)
2 teaspoons active dry yeast
1/4 cup granulated sugar
1/4 cup melted butter
1 teaspoon salt
2 large eggs
4 cups all-purpose flour
2 cups diced peaches (fresh or canned)
1/2 cup brown sugar
2 teaspoons ground cinnamon
4 oz cream cheese, softened
1/4 cup butter, softened
1 cup powdered sugar
1 teaspoon vanilla extract
Instructions
Prepare the Dough: Dissolve yeast in warm milk with a pinch of sugar. Let sit until frothy, about 5 minutes. Add sugar, butter, salt, eggs, and flour to a large bowl. Mix in the yeast mixture. Knead until smooth. Let rise until doubled, about 1 hour.
Make the Filling: Mix diced peaches with brown sugar and cinnamon.
Assemble Rolls: Roll out the dough into a rectangle. Spread the peach filling evenly. Roll up tightly and cut into 12 slices. Place in a greased baking dish. Let rise for 30 minutes.
Bake: Preheat the oven to 350°F. Bake the rolls for 25 minutes or until golden.
Prepare Frosting: Beat cream cheese, butter, powdered sugar, and vanilla until smooth.
Finish: Drizzle frosting over warm rolls before serving.
Notes
Thick Filling: If using juicy peaches, toss them with a tablespoon of flour to help thicken the filling.
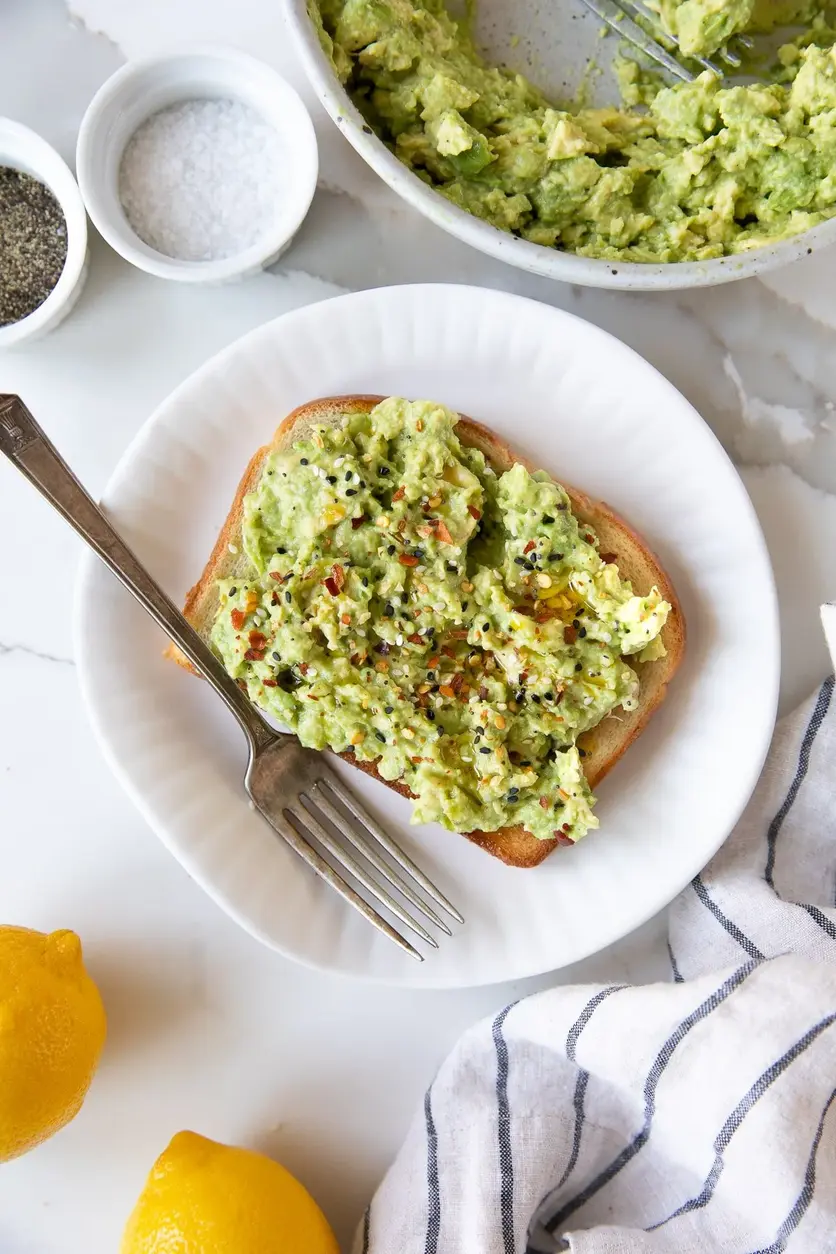
This is the best Avocado Toast you’ll ever make. No need for fancy, over-the-top toppings, all you need is toasted bread, smashed avocado, a little lemon juice, olive oil, and a sprinkle of salt, pepper, and red pepper flakes.
sea salt, black pepper, red pepper flakes, sesame seeds, to taste (optional)
Instructions
In a small bowl gently mash the peeled and pitted avocado with approximately 1 teaspoon fresh lemon juice.
Divide and spread the mashed avocado across the two slices of toasted bread.
Drizzle each slice of avocado toast with approximately 1 teaspoon of extra virgin olive oil and sprinkle with sea salt, freshly cracked black pepper, red pepper flakes, and sesame seeds (optional, to taste).
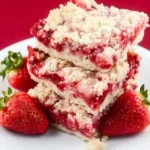
These easy Strawberry Crumb Bars, with a buttery crust, sweet strawberry filling, and crunchy butter crumb topping, make wonderful dessert bars. Whether you use juicy fresh berries or a bag from the freezer, they are perfect for an afternoon snack, party, or potluck year-round.
Ingredients
Scale
1/2 cup white sugar
1/2 teaspoon baking powder
1 1/2 cups all-purpose flour
1/4 teaspoon salt
1/2 cup very cold butter, (8 Tablespoons or 1 stick of butter)
1 egg, beaten
1 teaspoon vanilla
2 cups fresh strawberries, chopped
1/3 cup white sugar
2 teaspoons cornstarch
Instructions
Preheat the oven to 375 degrees F.
Place parchment paper on the bottom of the 8×8 pan that hangs over the side of the pan. (This is to make it easier to remove the Strawberry Crumb Bars after cooking.)
In a medium bowl, stir together 1/2 cup white sugar, flour, baking powder and salt.
Using a fork or a pastry cutter, cut the butter into the flour mixture. (VERY IMPORTANT: Make sure the butter is very cold.) Work with the dough until the pieces are very small. Dough will be crumbly. You can also pulse in a food processor to until you get pea sized crumbs.
In a separate measuring cup or small bowl, beat an egg with a fork. Add the egg and vanilla to the flour mixture, and combine until you have a crumbly mixture.
Pat half of the dough evenly into the bottom of the prepared pan.
In another bowl, stir together 1/3 cup sugar and cornstarch. Stir in the strawberries.
Spoon the strawberry mixture evenly over the bottom crust.
Crumble the remaining dough over the strawberry filling layer.
Bake in a preheated oven for 45 minutes, or until top is slightly golden brown. (My oven runs hot and baked in about 38 minutes.)
Cool completely before cutting into squares. I recommend refrigerating until ready to serve.
Notes
Notes It is very important that your butter be very cold. Also, when working with the crumb crust, be careful not to over work it because you dont want your hands to warm up the crust. You want the crust to be very cold. The sweetness of the strawberries used matters. If your strawberries are not very sweet, you may need to increase the amount of sugar used in step 7 to about 1/2 a cup. You can easily double the ingredients to make a 9×13 pan of the Strawberry Crumb Bars. Just change the number of servings above and it will adjust the amounts of the ingredients.
Nutrition
Calories:207kcal
Sugar:20g
Protein:1g
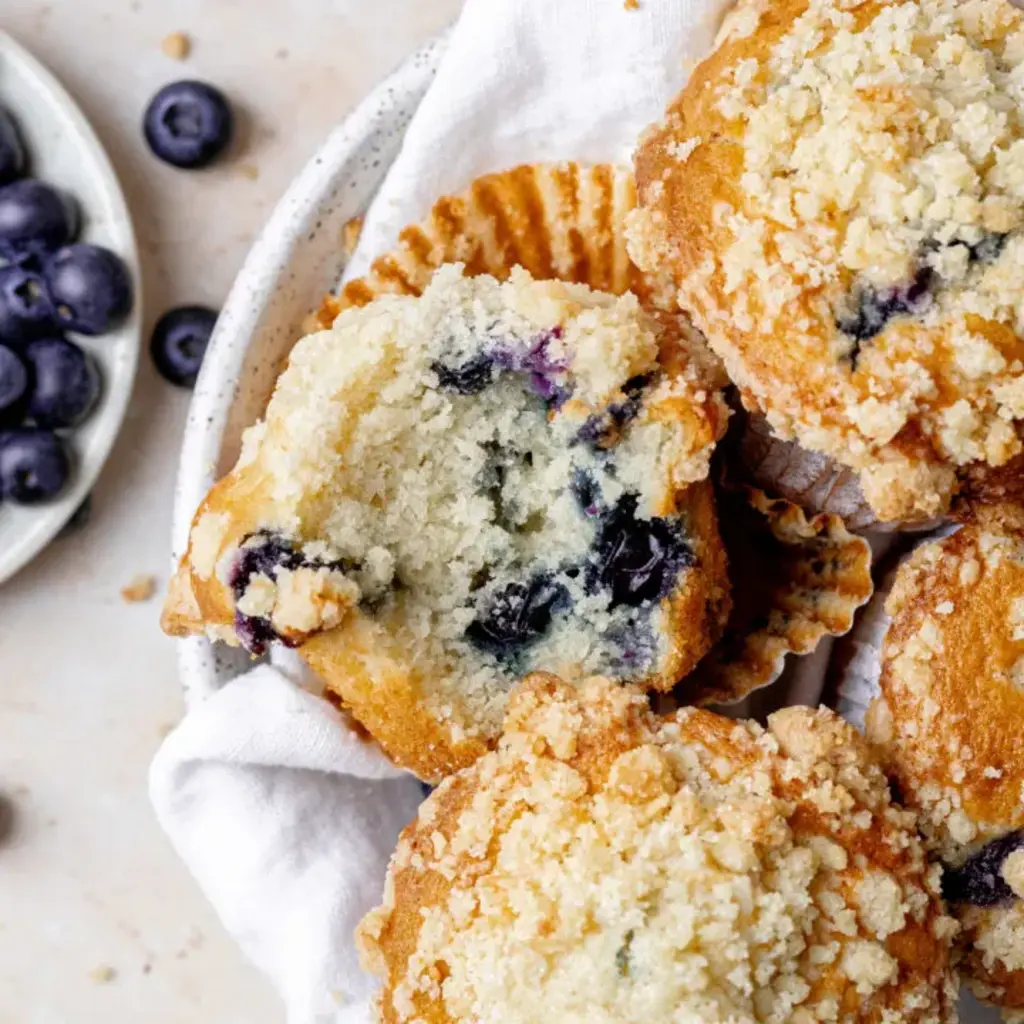
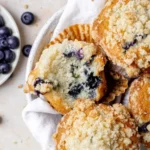
Bakery Style Blueberry Muffins
These are the best and softest Bakery Style Blueberry Muffins. These tall muffins has a streusel crumb topping giving a perfect crunch to the soft muffins!
These are the best and softest Bakery Style Blueberry Muffins. These tall muffins has a streusel crumb topping giving a perfect crunch to the soft muffins. These jumbo sized muffins are incredibly moist and super easy to make, making them sure to be a family hit!
Ingredients
Scale
100 g butter
100 g granulated sugar
1 large eggs
50 g sour cream or full-fat plain greek yoghourt, room temperature
90 g whole milk room temperature
1 teaspoon vanilla extract
160 g all-purpose flour
1 ¼ teaspoon baking powder
¼ teaspoon baking soda
¼ teaspoon salt
100 g fresh or frozen blueberries + 1 tablespoon flour
Instructions
Start by melting the butter. In a large mixing bowl add the melted butter and granulated sugar and whisk together until combined.100 g butter, 100 g granulated sugar
Then add the egg, whole milk, sour cream and vanilla extract and whisk it together until combined.1 large eggs, 50 g sour cream, 90 g whole milk, 1 teaspoon vanilla extract
Place a sieve on the bowl and sift in the all-purpose flour, baking powder, baking soda and salt together. Stir in the dry ingredients into the batter until combined.160 g all-purpose flour, 1 ¼ teaspoon baking powder, ¼ teaspoon baking soda, ¼ teaspoon salt
In a separate bowl, add blueberries and 1 tablespoon of flour and stir to coat the blueberries with flour.100 g fresh or frozen blueberries + 1 tablespoon flour
Add the blueberries and the extra flour and gently fold it into the batter.
Cover the bowl with some plastic wrap and let the batter rest for 1 hour at room temperature.
While the batter rests, preheat the oven to 220ºC/425ºF conventional oven. Prepare a 12-cup cupcake pan with 6 cupcake liners, only lining every other cupcake hole, as it helps them to dome up. Grease around the edge of the cupcake holes, for the muffins to release easily. Then make the streusel.
Add the all-purpose flour and granulated sugar to a bowl. Give it a mix with a fork until combined. Melt the butter and add it to the dry ingredients and mix it together with a fork until it forms a crumble structure and there is no dry flour left.50 g all-purpose flour, 40 g granulated sugar, 25 g butter
After the hour has passed, divide the muffin batter into the 6 cupcake liners, so each cupcake holder is filled to the top. Be careful not to deflate the batter, so try not to mix it around it too much. Top the muffins with the streusel and bake them for 7 minutes and then reduce the heat to 175ºC/350ºF and further bake for 10 -13 minutes or until cake tester comes out clean.
Let the muffins cool in the hot pan on a wire rack. After 5 minutes, remove the muffins from the pan and let them cool down additionally for 15-20 minutes before eating.
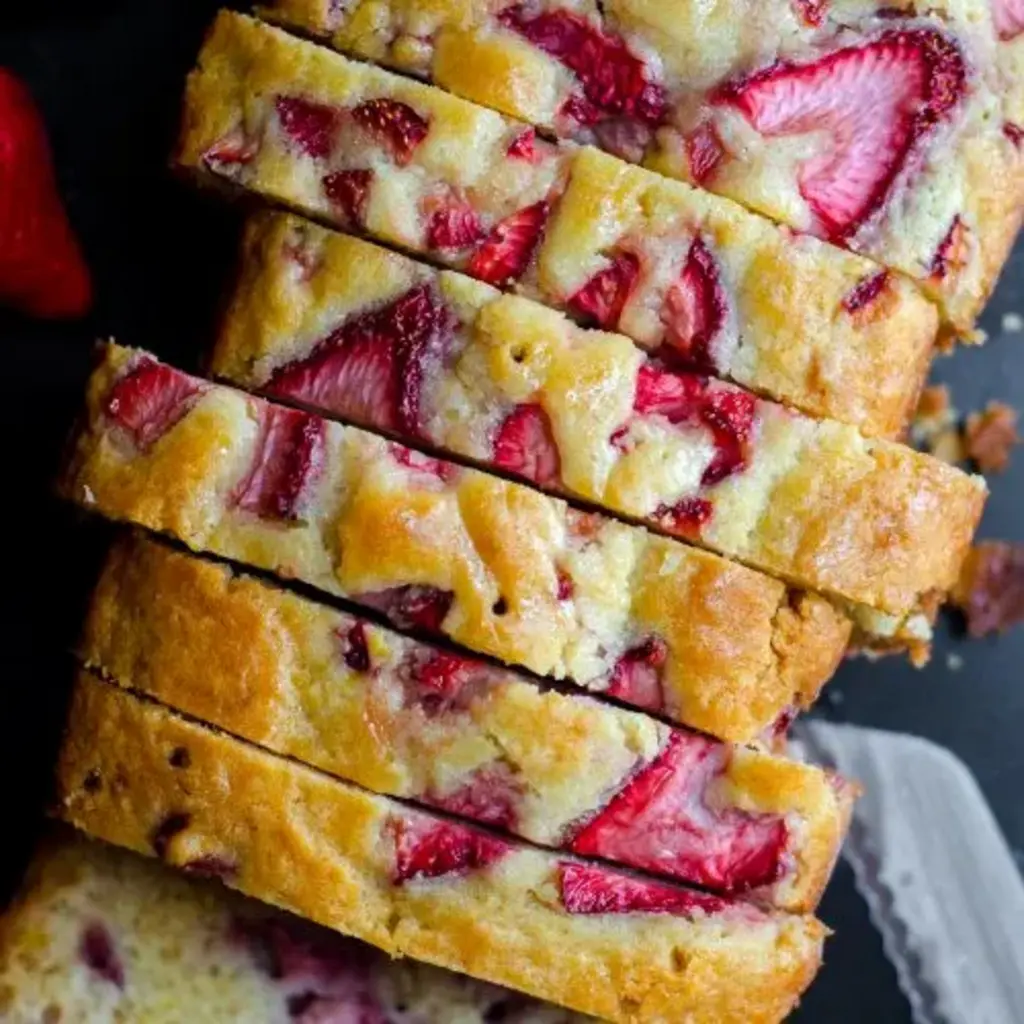
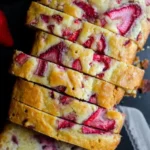
A simple quick bread loaded with strawberries and covered in a lemonade glaze. Perfect for summer!
Ingredients
Scale
2 cups (240g) all-purpose flour be sure to measure properly
½ cup (100g) granulated sugar
1 teaspoon baking soda
¼ teaspoon salt
8 ounces (227g) fresh strawberries (about 10 medium strawberries)* hulled and chopped
¾ cup (180mL) milk
½ cup (113g) unsalted butter melted
1 large egg
½ teaspoon vanilla extract
the juice of half of a lemon about 2 Tablespoons
zest of one lemon
Instructions
Preheat the oven to 350ºF (177ºC). Spray a 9" x 5" loaf pan with non-stick spray. Set aside.
In a large bowl, whisk together the flour, sugar, baking soda, and salt. Gently fold in the strawberries, reserving some to press into the top of the loaf before baking, if desired. Set aside.2 cups (240g) all-purpose flour, ½ cup (100g) granulated sugar, 1 teaspoon baking soda, ¼ teaspoon salt, 8 ounces (227g) fresh strawberries (about 10 medium strawberries)*
In a medium size bowl, whisk together the milk, butter, egg, vanilla extract, lemon juice, and lemon zest until everything is combined. ¾ cup (180mL) milk, ½ cup (113g) unsalted butter, 1 large egg, ½ teaspoon vanilla extract, the juice of half of a lemon, zest of one lemon
Pour the wet ingredients into the dry ingredients and, using a spatula, gently stir the mixture together until no flour pockets remain. Pour the batter into the prepared loaf pan and press reserved strawberries into the top, if desired. Bake loaf for 55-60 minutes or until a toothpick inserted in the center comes out mostly clean.
Remove the loaf from the oven and, while the loaf is still hot, poke several holes into the top of the loaf with a skewer or knife. Then, prepare the glaze.
In a small container with a spout, whisk together the sugar, lemon juice, and warm water.¼ cup (50g) granulated sugar, the juice of half of a lemon, 2 Tablespoons (30mL) warm water
Pour the lemon glaze slowly and evenly over the hot loaf. Allow loaf to cool completely before removing from the baking pan and serving. Leftovers can be kept in the refrigerator, covered tightly, up to 5 days. Loaf freezes well, up to 2 months. Thaw in refrigerator overnight.
Notes
*If using frozen strawberries, do not thaw.
Nutrition
Calories:255kcal
Sugar:17g
Protein:4g
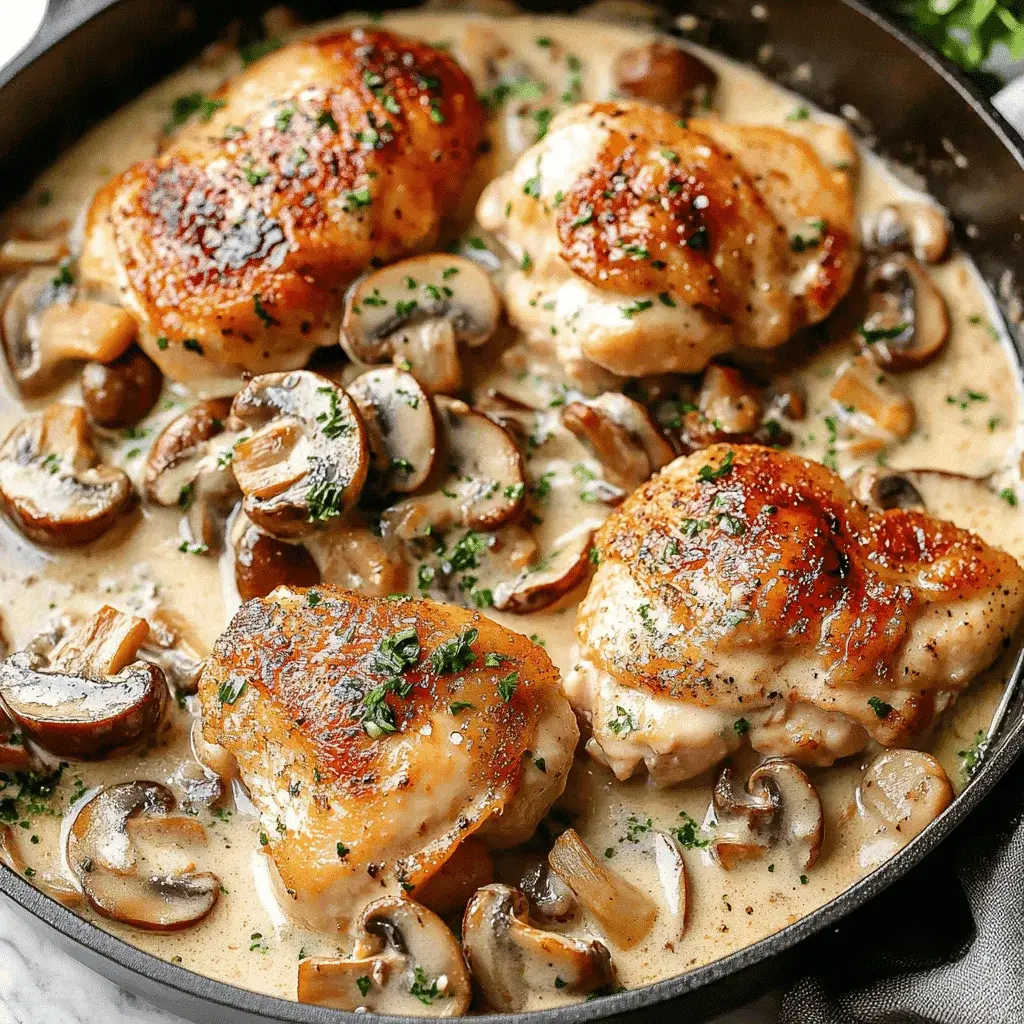
Chicken Thighs With Creamy Mushroom Garlic Sauce Recipe
Chicken Thighs With Creamy Mushroom Garlic Sauce Recipe
Introduction
Did you know that chicken thighs are not only more flavorful but also 30% more forgiving during cooking than chicken breasts, making them the ideal choice for a foolproof gourmet dinner? This fact is the secret behind the incredible success of this Chicken Thighs With Creamy Mushroom Garlic Sauce recipe. It’s the perfect answer to the age-old question: how can you create a restaurant-quality, indulgent meal on a busy weeknight without spending hours in the kitchen?
This dish is a symphony of comfort and elegance. Imagine tender, juicy chicken thighs, their skin crisped to golden perfection, nestled in a velvety, umami-rich sauce bursting with earthy mushrooms and aromatic garlic, thyme, and rosemary. It’s a meal that feels decadent yet comes together with stunning simplicity. Whether you’re cooking for a special date night or simply treating your family to something extraordinary, this recipe promises to deliver rich, satisfying flavors that will have everyone asking for seconds. Let’s dive into creating this irresistible masterpiece.
Ingredients List
Gather these simple ingredients for a flavor-packed meal. Sensory notes and substitutions are included to help you customize.
For the Chicken:
6 bone-in, skin-on chicken thighs (about 2 lbs): The bone and skin lock in incredible moisture and flavor. For a leaner option, use boneless skinless thighs, but reduce cook time slightly.
1 ½ tsp kosher salt: Enhances the natural savoriness of the chicken.
1 tsp freshly ground black pepper: Adds a warm, pungent kick.
2 tbsp olive oil or avocado oil: For a high-heat sear with a neutral flavor.
For the Creamy Mushroom Garlic Sauce:
8 oz cremini or baby bella mushrooms, sliced: These offer a deep, earthy flavor and meaty texture. Substitute with white button mushrooms or wild mushrooms like shiitake for a more complex profile.
4-5 large garlic cloves, minced: The aromatic heart of the sauce. Use 1 tsp garlic powder in a pinch, but fresh is best.
1 medium yellow onion, finely diced: Provides a sweet, savory base note.
1 cup chicken broth: Use low-sodium to control saltiness. Vegetable broth works for a variation.
1 cup heavy cream: Creates the luxurious, silky texture. For a lighter sauce, use half-and-half or full-fat coconut milk (for a dairy-free, slightly sweet twist).
1 tsp fresh thyme leaves (or ½ tsp dried): Lends a subtle, floral earthiness.
1 tsp fresh rosemary, finely chopped (or ½ tsp dried): Adds a piney, fragrant note.
2 tbsp unsalted butter: Used for sautéing, it builds a rich, fond (browned bits) in the pan essential for flavor.
2 tbsp all-purpose flour: The thickening agent for the sauce. For a gluten-free version, use 1 tbsp cornstarch mixed with 2 tbsp cold water, added at the end.
¼ cup dry white wine (optional but recommended): Like Sauvignon Blanc or Pinot Grigio, it deglazes the pan and adds acidity to balance the cream. Substitute with more broth.
Fresh parsley, chopped: For a bright, colorful garnish.
Timing
Prep Time 15 minutes
Cook Time 35 minutes
Total Time 50 minutes
Compared to many creamy chicken dishes that require lengthy marinating or complicated steps, this recipe is remarkably efficient. The total time of under one hour is about 25% faster than the average gourmet chicken recipe, making it a practical choice for a quick yet indulgent dinner. The active cook time is focused and straightforward, leaving you free to prepare sides or simply enjoy the incredible aromas filling your kitchen.
Searing the chicken thighs creates a flavorful foundation for the creamy mushroom garlic sauce.
Step-by-Step Instructions
Step 1: Prepare the Chicken
Pat the chicken thighs completely dry with paper towels. This is the most crucial step for achieving crispy skin, as moisture steams the skin instead of browning it. Season both sides generously with the salt and black pepper. Let them sit at room temperature for 10-15 minutes while you prep your vegetables. This brief rest allows the seasoning to penetrate and helps the chicken cook more evenly.
Step 2: Sear to Perfection
Heat the olive oil in a large, heavy-bottomed skillet or Dutch oven over medium-high heat. Once the oil is shimmering (not smoking), carefully add the chicken thighs, skin-side down. Do not overcrowd the pan; work in batches if necessary. Resist the urge to move them! Let them sear undisturbed for 6-8 minutes until the skin is deeply golden brown and crispy. Flip and cook for another 4-5 minutes on the other side. Transfer the chicken to a plate. It will not be fully cooked through yet—that’s intentional. The glorious browned bits left in the pan are pure flavor gold.
Step 3: Build the Sauce
Reduce the heat to medium. Add the butter to the same skillet. Once melted, add the diced onion and a pinch of salt. Sauté for 3-4 minutes until softened. Add the sliced mushrooms and cook, stirring occasionally, for 6-8 minutes until they have released their moisture and are beautifully browned. Stir in the minced garlic, thyme, and rosemary, and cook for just 60 seconds until fragrant—be careful not to burn the garlic.
Sprinkle the flour over the mushroom mixture and stir constantly for about 2 minutes to cook out the raw flour taste. This creates a roux that will thicken your sauce. Now, pour in the white wine (if using) to deglaze the pan, scraping up all those delicious browned bits with your wooden spoon. Let it simmer for 1-2 minutes until slightly reduced. Slowly whisk in the chicken broth, followed by the heavy cream. Bring the sauce to a gentle simmer.
Step 4: Simmer and Serve
Nestle the seared chicken thighs back into the skillet, along with any accumulated juices. Spoon some of the sauce over the top. Reduce the heat to low, cover the skillet with a lid (or foil), and let it simmer gently for 15-20 minutes, or until the chicken is cooked through and reaches an internal temperature of 165°F (74°C). The sauce will thicken further into a luxurious, coating consistency. Taste and adjust seasoning with more salt or pepper if needed. Garnish with a generous sprinkle of fresh chopped parsley for a pop of color and freshness.
Nutritional Information
Estimated per serving (1 chicken thigh with sauce):
Calories: ~520 kcal
Protein: 32g
Total Fat: 38g (Saturated Fat: 16g)
Carbohydrates: 10g
Fiber: 1g
Sugar: 3g
Sodium: ~850mg (varies with broth saltiness)
Healthier Alternatives
You can easily lighten this dish without sacrificing its soul-satisfying essence:
Cream Swap: Replace heavy cream with half-and-half, whole milk, or even plain, unsweetened Greek yogurt (temper it with a little hot sauce first to prevent curdling). For a dairy-free version, full-fat canned coconut milk adds a lovely richness with a subtle sweet note.
Thickener Swap: Omit the flour and butter roux. Instead, create a slurry with 1 tablespoon of cornstarch or arrowroot powder mixed with 2 tablespoons of cold water. Whisk it into the simmering sauce at the very end and cook for 1-2 minutes until thickened.
Leaner Protein: Use boneless, skinless chicken thighs or even chicken breasts. Adjust cook time downward to prevent dryness—breasts will need less simmering time in the sauce.
Boost Veggies: Add a handful of fresh spinach or kale in the last 2 minutes of cooking, or stir in some roasted cauliflower florets with the chicken.
Serving Suggestions
This creamy chicken dish is incredibly versatile. Here are perfect pairings to complete your meal:
For Soaking Up Sauce: Creamy mashed potatoes, buttery egg noodles, fluffy white rice, or crusty artisan bread are non-negotiable for enjoying every last drop of the sauce.
For a Lighter Touch: Serve over cauliflower mash, zucchini noodles, or with a simple side salad dressed with a bright vinaigrette to cut through the richness.
Vegetable Sides: Roasted asparagus, garlic green beans, or a simple steamed broccoli florets add color and nutrition.
Wine Pairing: A glass of oaked Chardonnay, Pinot Noir, or a dry Riesling complements the creamy, earthy flavors beautifully.
Common Mistakes
Not Drying the Chicken: Wet skin = soggy, pale skin. Always pat it dry.
Overcrowding the Pan: This steams the chicken instead of searing it. Cook in batches if your pan isn’t large enough.
Moving the Chicken Too Soon: Let it form a proper crust. It will release from the pan naturally when ready.
Burning the Garlic: Add it with the herbs and cook for only 60 seconds. Burnt garlic turns bitter.
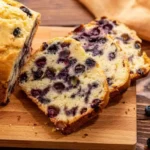
A moist, tender blueberry bread made in one bowl with simple pantry ingredients. Packed with juicy blueberries and ready for the oven in minutes! Perfect for breakfast, snacking, or dessert.
Ingredients
Scale
¾ cup sugar
½ cup butter
2 eggs
1 cup milk
2 cups flour
2 teaspoon baking powder
1 ½ cups blueberries fresh or frozen
Instructions
In a large bowl, cream together the butter and sugar until smooth.
Add the eggs and milk and mix until combined.
Stir in the flour and baking powder just until combined. Do not overmix.
Gently fold in the blueberries.
Pour batter into greased loaf or mini loaf pans, filling about full.
Bake at 350°F for 70 minutes (large loaf) or 35 minutes (mini loaves), until a toothpick inserted in the center comes out clean.
Let cool slightly before removing from the pan and slicing.
Notes
Notes Frozen blueberries can be added straight from the freezer. Toss with a little flour before folding in to help prevent sinking and color bleeding. Batter will be thick, this helps keep the blueberries evenly distributed.
Nutrition
Calories:339kcal
Sugar:23g
Protein:6g
Hi I'm Emy
I’m passionate about sharing a diverse collection of sweet and savory recipes that I’ve meticulously tested and perfected in my own kitchen.