End your day with a delicious, comforting, and satisfying dinner! Whether you’re looking for quick and easy weeknight meals, cozy comfort food, or elegant dishes for special occasions, we have the perfect recipes for you.
From hearty casseroles and one-pan wonders to savory pastas, juicy meats, and flavorful vegetarian options, our collection is designed to make dinnertime effortless and enjoyable.
Busy schedule? No problem! Try our slow cooker meals, sheet pan dinners, and 30-minute recipes to save time without sacrificing flavor. Whatever your craving, these recipes will bring warmth and joy to your table every night. 🍽️✨
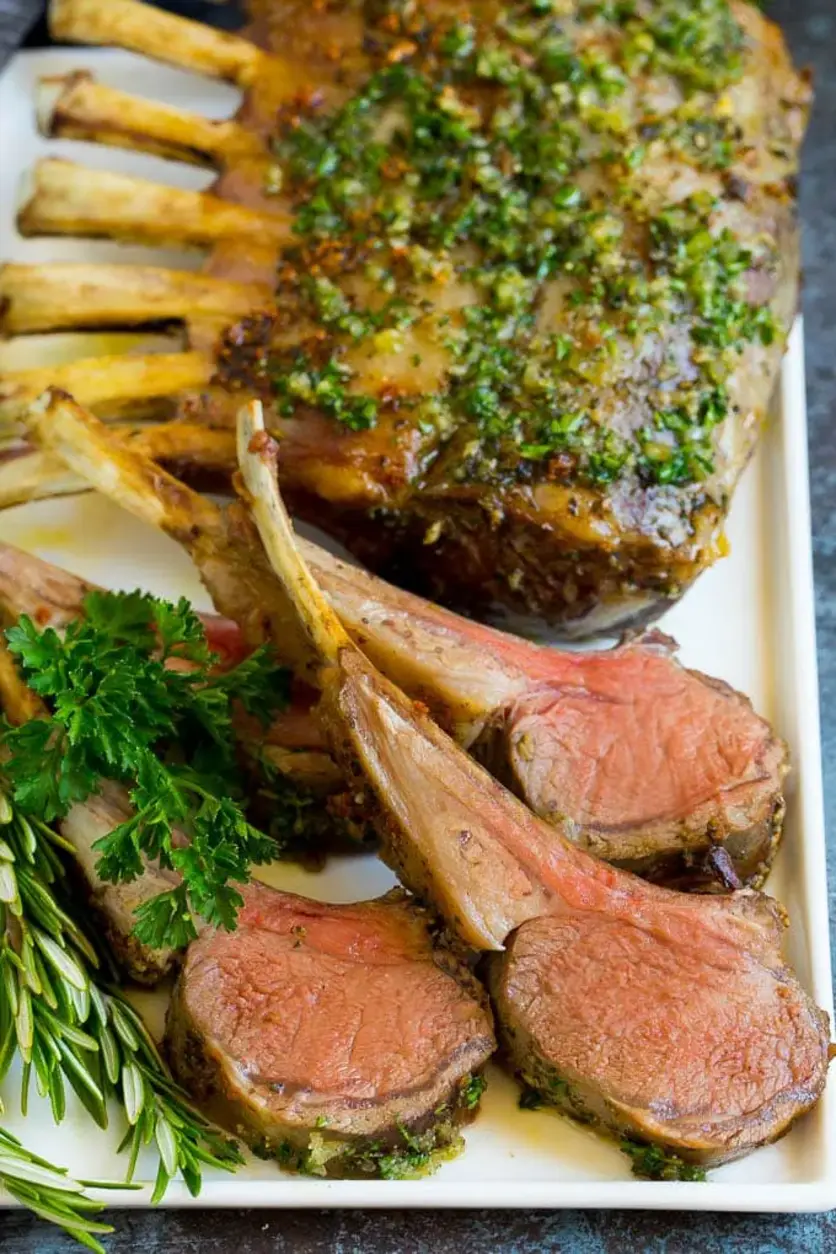
Rack of Lamb
This rack of lamb is coated with garlic and fresh herbs, then roasted in the oven until tender and juicy. The perfect recipe for any special occasion that takes just minutes to put together!
This rack of lamb is coated with garlic and fresh herbs, then roasted in the oven until tender and juicy. The perfect recipe for any special occasion that takes just minutes to put together!
Ingredients
Scale
2 racks of lamb 8 bones each, frenched
3 tablespoons olive oil
1 tablespoon garlic minced
2 tablespoons fresh rosemary leaves minced
1 tablespoon thyme leaves minced
1 tablespoon parsley leaves minced, plus more for garnish
salt and pepper to taste
cooking spray
Instructions
Preheat the oven to 450 degrees F. Line a sheet pan with foil and coat the foil with cooking spray.
Place the olive oil, garlic, rosemary, thyme, parsley and salt and pepper in a bowl. Stir to combine.
Rub the olive oil mixture all over both racks of lamb. Let the lamb sit at room temperature for 30-45 minutes.
Bake for 20-25 minutes or until a thermometer inserted into the thickest part of the meat registers 120 degrees F (for medium rare meat).
Remove the racks from the oven. Cover with foil and let rest for 10 minutes, or until the thermometer registers 125 degrees F.
Slice the lamb in between the bones. Sprinkle with additional parsley, then serve.
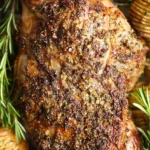
An easy, fool-proof recipe, even for first-timers! So so tender and juicy, perfect for Easter, Christmas, and holidays!
Ingredients
Scale
1 (5 pound) bone-in leg of lamb, trimmed
4 cloves garlic, minced
1 tablespoon olive oil
1 tablespoon chopped fresh rosemary
1 tablespoon chopped fresh thyme leaves
1 tablespoon Dijon mustard
1 tablespoon kosher salt
2 teaspoons ground black pepper
Instructions
Preheat oven to 350 degrees F. Line a shallow roasting pan with aluminum foil.
Using paper towels, pat lamb dry. Using a sharp knife, score the top side of the lamb by making shallow cuts in a diamond pattern.
In a small bowl, combine garlic, olive oil, rosemary, thyme, Dijon, salt and pepper.
Place lamb, fat side up, on a rack in the prepared roasting pan. Spread garlic mixture evenly over the lamb, rubbing in thoroughly into the scored cuts.
Place into oven and roast until it reaches an internal temperature of 135 degrees F for medium, about 1 hour 30 minutes to 1 hour 45 minutes, or until desired doneness. Let rest 15 minutes before slicing.
Serve immediately with mini hasselback potatoes.
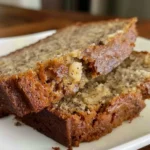
Moist Banana Bread Recipe Easy – Super Soft & Foolproof
This super moist banana bread recipe is easy to make and full of rich banana flavor, just like the best banana bread recipes you love. Perfect for beginners, with simple baking tips for soft, fluffy results every time. Start exploring
This easy banana bread recipe makes a soft, moist, and flavorful loaf using simple pantry ingredients and one bowl. Its perfect for breakfast, snacks, or dessert and works beautifully with add-ins like chocolate chips or nuts. Whether youre a beginner baker or just craving something cozy, this banana bread delivers every time.
Ingredients
Scale
3 ripe bananas, mashed
½ cup unsalted butter, melted
¾ cup brown sugar
2 large eggs
1 teaspoon vanilla extract
1 teaspoon baking soda
½ teaspoon salt
1 ½ cups all-purpose flour
¾ cup chocolate chips
½ cup chopped walnuts or pecans
Instructions
Preheat oven to 350°F and grease a 9×5-inch loaf pan.
In a large bowl, mash bananas until mostly smooth.
Stir in melted butter, brown sugar, eggs, and vanilla until well combined.
Sprinkle baking soda and salt over the mixture, then gently mix.
Add flour and fold until just combined. Do not overmix.
Fold in chocolate chips or nuts if using.
Pour batter into prepared pan and smooth the top.
Bake for 5060 minutes, or until a toothpick inserted in the center comes out clean.
Cool in the pan for 10 minutes, then transfer to a wire rack to cool completely before slicing.
Notes
Use very ripe bananas with brown spots for the best flavor and moisture.
Dont overmix the batter once the flour is added, or the bread may turn dense.
Check for doneness at 50 minutes since oven temperatures vary.
For extra moisture, replace one egg with ¼ cup Greek yogurt or sour cream.
Let the bread cool before slicing to prevent crumbling.
Moist Strawberry Milkshake Pound Cake Recipe
This strawberry milkshake pound cake is a perfect dessert for any occasion. It’s rich, moist, and bursting with fresh strawberry flavor, topped with an easy strawberry glaze. With simple ingredients and straightforward baking steps, it’s a great sweet treat to make for gatherings or weekend indulgence. Perfect for dessert lovers looking for a fruity pound cake recipe that’s both impressive and simple to bake. Save this recipe for your next baking day! #strawberrycake #dessertrecipe #poundcake…
Strawberry Milkshake Pound Cake is a rich and moist dessert infused with sweet strawberry flavor and topped with a creamy strawberry glaze. Inspired by the classic strawberry milkshake drink, this cake combines the dense texture of traditional pound cake with fruity notes, making it perfect for spring gatherings, birthdays, or anytime youre craving a nostalgic, indulgent treat.
Ingredients
Scale
1 cup unsalted butter (softened)
2 cups granulated sugar
4 large eggs
1/2 cup strawberry milk
1/2 cup sour cream
2 teaspoons vanilla extract
2 1/2 cups all-purpose flour
1/2 teaspoon baking powder
1/2 teaspoon salt
1/2 cup strawberry preserves or puree
1/2 cup finely chopped fresh strawberries
1 cup powdered sugar
23 tablespoons strawberry milk
1/2 teaspoon vanilla extract
Pinch of salt
Instructions
Preheat and Prepare Pan: Preheat the oven to 325°F (163°C) and grease and flour a 10-inch bundt or loaf pan to ensure the cake doesnt stick.
Cream Butter and Sugar: In a large mixing bowl, use an electric mixer to cream together the softened butter and granulated sugar until light and fluffy, about 3 to 4 minutes, which incorporates air for a tender crumb.
Add Eggs: Add the eggs one at a time, beating well after each addition to fully incorporate and maintain a smooth batter.
Combine Wet Ingredients: In a small bowl, whisk together the strawberry milk, sour cream, and vanilla extract until smooth.
Mix Dry Ingredients: In another bowl, sift together the all-purpose flour, baking powder, and salt to evenly distribute the leavening agents and salt.
Alternate Adding Ingredients: Gradually add the flour mixture and the wet mixture alternately to the creamed butter mixture, beginning and ending with the dry ingredients, mixing just until combined to avoid overmixing.
Fold in Strawberries: Gently fold in the strawberry preserves and finely chopped fresh strawberries to evenly disperse the fruity flavor throughout the batter.
Bake the Cake: Pour the batter into the prepared pan and smooth the top. Bake in the preheated oven for 60 to 70 minutes or until a toothpick inserted into the center comes out clean, indicating doneness.
Cool Cake: Allow the cake to cool in the pan for 15 minutes before carefully turning it out onto a wire rack to cool completely, preventing condensation and sogginess.
Prepare Glaze: Whisk together the powdered sugar, strawberry milk, vanilla extract, and a pinch of salt until smooth and pourable.
Glaze the Cake: Once the cake is completely cooled, drizzle the glaze evenly over the top and let it set before slicing and serving to allow the flavors to meld.
Notes
Use room temperature ingredients for best texture and easier mixing.
If strawberry milk is unavailable, substitute regular milk with a few drops of strawberry extract or strawberry syrup for flavor.
Store the cake at room temperature, covered, for up to 3 days or refrigerate to extend freshness.
Easy Strawberry Crackle Salad with Crunchy Pretzel Topping
This Strawberry Crackle Salad is a quick and crowd-pleasing dessert perfect for any dinner or potluck. With a creamy cream cheese base, fresh strawberries, and a crunchy pretzel-pecan topping, it’s a delicious mix of sweet and salty flavors. Ready in just 30 minutes, this no-bake strawberry salad is great for summer gatherings or holiday meals. Save this easy strawberry salad recipe to your favorites for your next get-together! #StrawberryDessert #EasySaladRecipe #SummerDessert #PotluckRecipe…
Strawberry Crackle Salad is a delightful dessert salad featuring a crunchy pretzel and pecan topping baked to perfection, layered over a creamy blend of cream cheese, sugar, and Cool Whip, and finished with fresh sliced strawberries. This dish combines sweet, tangy, and salty flavors with a variety of textures, making it a crowd-pleaser for gatherings and potlucks.
Ingredients
Scale
2 cups crushed pretzels
1 cup chopped pecans
1 cup brown sugar
1 cup butter, melted
2 (8 oz) packages cream cheese, softened
¾ cup granulated sugar
2 teaspoons vanilla extract
16 oz Cool Whip
4 cups sliced strawberries
Instructions
Preheat and Prepare Baking Sheet: Preheat your oven to 400°F (205°C) and line a baking sheet with parchment paper to prevent sticking and for easy cleanup.
Mix Pretzel Topping: In a medium bowl, combine the crushed pretzels, chopped pecans, and brown sugar. Pour the melted butter over the mixture and stir until everything is evenly coated and well combined.
Bake Pretzel Mixture: Spread the pretzel mixture evenly on the prepared baking sheet. Bake in the preheated oven for 8-10 minutes until the mixture is bubbling and golden. Remove from the oven and allow it to cool completely on the baking sheet before breaking into small pieces.
Prepare Cream Cheese Mixture: In a large bowl, beat the softened cream cheese with the granulated sugar and vanilla extract until smooth and creamy. Gently fold in the Cool Whip until just combined. Cover the bowl and refrigerate the mixture until you are ready to serve.
Assemble the Salad: Just before serving, spread the cream cheese mixture in a serving dish or bowl. Top evenly with the sliced strawberries, then sprinkle the cooled pretzel crunch mixture over the top. Optionally, mix some pretzel crunch into the cream layer or reserve extra for garnish.
Notes
Ensure the pretzel mixture is completely cooled before breaking into pieces to avoid melting the cream cheese layer when assembling.
Use fresh, ripe strawberries for the best flavor and texture.
This salad is best served chilled and consumed within 24 hours for optimal freshness.
Can be stored covered in the refrigerator for up to 2 days.
For a nut-free version, omit the pecans and increase the pretzels accordingly.
The Ultimate Gooey Cinnamon Rolls Recipe (Easy & Fluffy!)
Discover the secret to the best homemade cinnamon rolls you’ll ever bake! This recipe guides you through creating incredibly soft, fluffy rolls with a warm, buttery cinnamon-sugar filling, all topped with a rich and creamy cream cheese frosting. They are unbelievably gooey and decadent, making them the perfect treat for a cozy weekend breakfast, holiday brunch, or a sweet afternoon snack. Your kitchen will smell absolutely divine! Get the full step-by-step recipe and bake a batch today!
The ultimate cinnamon rolls recipe for the softest, fluffiest, and gooiest homemade cinnamon rolls you’ve ever had. This foolproof guide guarantees perfect, bakery-quality results with a rich cream cheese frosting.
Ingredients
Scale
1 cup whole milk warmed to 110°F
2 1/4 teaspoons active dry yeast 1 standard packet
1/4 cup granulated sugar
1 large egg plus 1 egg yolk, at room temperature
1/4 cup unsalted butter melted
3 cups all-purpose flour plus more for dusting
1/2 teaspoon salt
Instructions
Warm the milk to 110°F. In a stand mixer bowl, combine warm milk, yeast, and 1 tbsp sugar. Let sit for 5-10 minutes until foamy.
To the yeast mixture, add the remaining sugar, melted butter, egg, and egg yolk. Whisk to combine. Attach the dough hook and add the flour and salt.
Knead on medium speed for 7-8 minutes until the dough is smooth and pulls away from the sides. Place dough in a greased bowl, cover, and let rise in a warm place for 60-90 minutes, or until doubled.
While the dough rises, mix the filling ingredients (melted butter, brown sugar, cinnamon) in a small bowl to form a paste.
Punch down the risen dough. On a floured surface, roll it into an 18×12-inch rectangle. Spread the filling evenly over the dough.
Tightly roll the dough into a log and cut into 12 equal rolls. Place in a greased 9×13-inch pan.
Cover and let the rolls rise for 30-45 minutes until puffy. Preheat oven to 375°F (190°C).
Bake for 20-25 minutes until golden brown. Let cool slightly.
To make the frosting, beat the softened cream cheese and butter until smooth. Add powdered sugar and vanilla and beat until light and fluffy.
Spread the frosting generously over the warm cinnamon rolls and serve immediately.
Notes
For Overnight Rolls: After placing rolls in the pan (Step 6), cover tightly and refrigerate for up to 18 hours. The next day, let them rest at room temperature for 45-60 minutes before baking. Storage: Store in an airtight container at room temperature for up to 3 days.
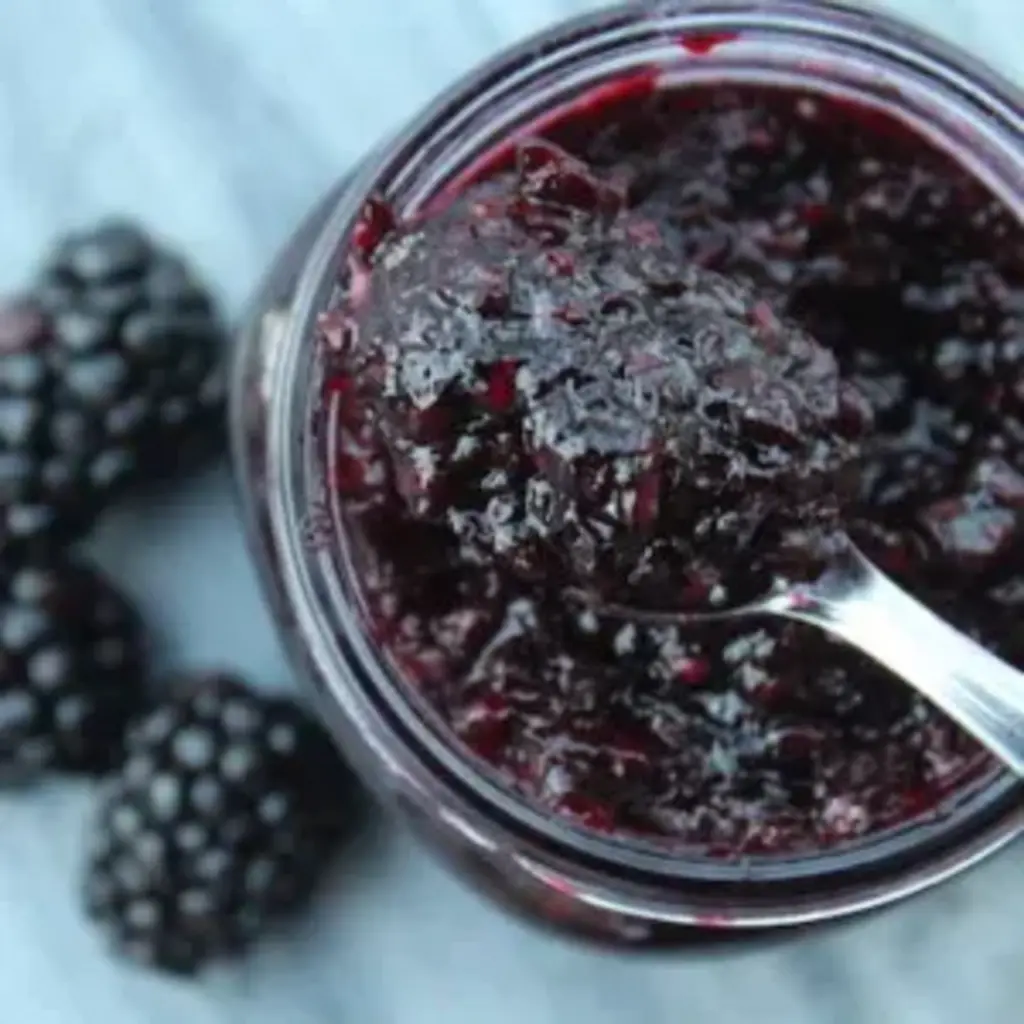
Easy Blackberry Jam Recipe No Pectin: Canning Blackberries & Blackberry Jam
This Easy Blackberry Jam Recipe No Pectin is a great way to start canning blackberries. Preserve the natural flavors of fresh blackberries in jars of sweet and tangy jam. Perfect for spreading on toast, scones, or using in your favorite recipes. Discover the joy of canning fruit and enjoy the taste of summer all year round. Elevate your jam-making skills and create a pantry staple with this simple blackberry jam canning recipe.
Blackberry jam is a classic preserve made with just berries, sugar, and time. This no-pectin version highlights the bold flavor of summer blackberries in a thick, spreadable jam that’s perfect on toast or stirred into yogurt.
Ingredients
Scale
6 cups mashed blackberries, see note
4 cups granulated sugar
2 tablespoons lemon juice, optional, see notes
Instructions
Prepare the canning setup: Wash and sterilize 6 to 7 half-pint jars. Place new lids in hot water (not boiling) and prepare your boiling water bath canner. Keep everything hot until ready to fill.
Crush the berries: Rinse and sort your fresh blackberries, removing any stems or debris. Use a potato masher to crush them in a large mixing bowl or directly in the jam pot. It generally takes 2 cups whole fruit to make 1 cup mashed.
Combine fruit and sugar: Place the crushed blackberries in a large, deep jam pot. Stir in the sugar and optional lemon juice (if using, see notes). Mix thoroughly to help the sugar dissolve slightly before heating.
Bring to a boil: Turn the heat to medium-high and bring the mixture to a steady boil, stirring frequently to prevent scorching. Blackberry jam tends to foam quite a bit, so stay nearby and stir often.
Cook to gel stage: Continue boiling the jam, stirring constantly, until it thickens and reaches gel stage. This typically takes 20 to 30 minutes, but times vary. Test for doneness using one or more of the following methods (see notes).
Remove from heat and skim foam: Once gel stage is reached, remove the pot from heat and skim off any remaining foam if desired.
Ladle into jars: Carefully ladle the hot jam into prepared jars, leaving ¼ inch headspace. Wipe the rims with a clean damp cloth, apply lids and screw on bands until fingertip tight.
Process in a water bath canner: Place the jars in the boiling water bath canner, ensuring they’re fully submerged with at least 1–2 inches of water above the lids.Process both pint and half pint jars for 10 minutes, or 15 minutes if above 6,000 feet in elevation.
Cool and store: After processing, remove jars and let them sit undisturbed for 12–24 hours. Check seals, label, and store in a cool, dark place for up to 18 months.
Notes
Blackberry Measurements: Generally, 1 cup crushed berries is equal to 2 cups whole fruit. A cup of crushed fruit is about ½ pound, so for this recipe you’ll need about 3 lbs whole fruit or 12 cups as purchased.
Lemon Juice (Optional): Blackberries are naturally high in acid, so added lemon juice isn’t required for safety. However,
of fresh lemon juice can brighten the flavor and help balance sweeter cultivated berries. Skip it if your berries are already quite tart.
Testing for Gel Stage:
Place a spoon and plate in the freezer. When you think the jam is ready, spoon a small amount onto the plate. After 30 seconds, run your finger through it. If it wrinkles and holds a line, it’s done.
Jam sets at
. Subtract
of elevation. Use an instant-read thermometer to check.
Dip a spoon into the jam, hold it sideways over the pot, and watch how the jam falls. If it falls off in a sheet or a slow blob (not individual droplets), it’s likely ready.
Foam Management: Blackberry jam foams quite a bit. You can add
during cooking to reduce foaming, which is safe even for canning, but may slightly affect long-term flavor. Skimming foam off after cooking works just as well.
Yield Variations: This batch usually yields
, but final volume depends on the berries’ moisture content and how thick you cook the jam. Longer cooking = thicker jam = lower yield.
Sugar Adjustments: You can use as little as
for a lower-sugar jam, but it may take longer to reach gel stage and yield will be reduced. This recipe strikes a balance between fruit-forward flavor and good yield. Alternatively, you can make an “old fashioned” high sugar preserve by using 5 to 6 cups sugar. That’s way too much for my tastes, but it is an option.
Storage: Properly sealed jars will last
in the pantry. Once opened, refrigerate and use within 2–3 weeks.
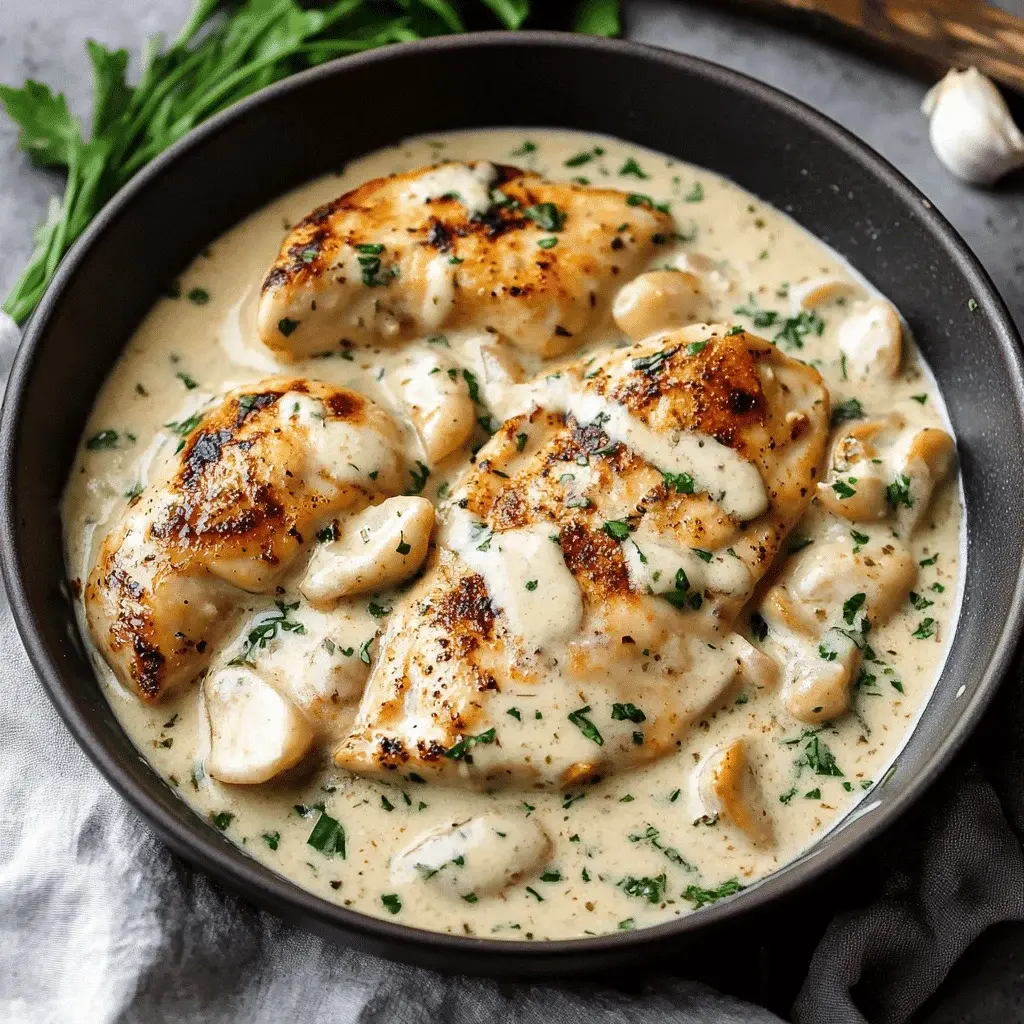
Did you know that a recent survey of home cooks found that garlic is the number one flavor enhancer used in savory dishes worldwide? It’s no wonder that this Creamy Garlic Chicken Recipe has become a beloved staple for its perfect balance of comfort and elegance. Imagine tender, juicy chicken breasts, seared to golden perfection, then nestled in a luxurious, velvety sauce infused with the aromatic, mellow sweetness of garlic. This dish is the culinary equivalent of a warm hug, transforming simple ingredients into a restaurant-quality meal right in your own kitchen. Whether you’re racing against the clock on a busy Tuesday or setting the table for a romantic Friday night, this recipe delivers consistent, mouthwatering results. The magic lies in the technique of building layers of flavor, from the initial sear to the final reduction of the cream. Let’s dive into how you can master this classic, creating a creamy garlic chicken that will have everyone asking for seconds.
Ingredients List
Gathering high-quality ingredients is the first step to an unforgettable creamy garlic chicken. Here’s what you’ll need for about 4 servings:
For the Chicken:
4 boneless, skinless chicken breasts (about 1.5 lbs): Look for plump, even-sized breasts for uniform cooking. Substitution: Chicken thighs offer richer flavor and are more forgiving if slightly overcooked.
1 tsp kosher salt & ½ tsp black pepper: For seasoning the meat deeply.
2 tbsp all-purpose flour: Creates a light crust and helps thicken the sauce later. Substitution: Gluten-free 1-to-1 flour or arrowroot powder.
2 tbsp olive oil & 1 tbsp unsalted butter: The oil has a high smoke point for searing, while the butter adds rich, nutty flavor.
For the Creamy Garlic Sauce:
8-10 large garlic cloves, minced (about 3 tbsp): Fresh is best! The pungent, sharp aroma will mellow into a sweet, fragrant base. Sensory Tip: You should smell that beautiful garlic fragrance as soon as it hits the pan.
1 cup low-sodium chicken broth: Provides the savory backbone. Substitution: Vegetable broth or even white wine for a more complex acidity.
1 cup heavy cream: The star for that luscious, silky texture. It should coat the back of a spoon. Substitution: Half-and-half for a lighter sauce (simmer longer to thicken).
1 cup freshly grated Parmesan cheese: Adds a salty, umami depth and helps thicken the sauce. Key: Freshly grated melts smoother than pre-shredded.
1 tsp dried Italian seasoning or 1 tbsp fresh thyme: The herbal notes cut through the richness.
Fresh parsley, chopped (for garnish): Adds a pop of color and fresh flavor.
Timing
Prep Time15 minutes
Cook Time20 minutes
Total Time35 minutes
At just 35 minutes from start to finish, this creamy garlic chicken recipe is a true weeknight warrior. Compared to the average creamy pasta or chicken dish that can take 45-50 minutes, this recipe is streamlined for efficiency without sacrificing an ounce of flavor. The secret is the quick sear and the fast-reducing sauce. While some recipes might have you bake the chicken or simmer the sauce for an extended period, our method focuses on high-heat techniques that develop maximum flavor in minimal time. You’ll spend less than 20 minutes actively cooking, giving you more time to relax and enjoy your meal.
Golden chicken breasts resting in a velvety, aromatic garlic cream sauce.
Step-by-Step Instructions
Step 1: Prepare the Chicken
Place the chicken breasts on a cutting board and cover them with plastic wrap. Using a meat mallet or the bottom of a heavy skillet, gently pound them to an even ½-inch thickness. This is my non-negotiable tip for preventing dry, overcooked edges and undercooked centers. Pat them completely dry with paper towels—this is crucial for getting a perfect sear. Season both sides generously with salt and pepper, then lightly dredge each breast in the flour, shaking off any excess. The flour will create a beautiful golden crust and act as a thickening agent for our sauce later.
Step 2: Cook the Chicken
Heat the olive oil and butter in a large skillet or Dutch oven over medium-high heat. Once the butter has melted and the mixture is hot (a drop of water should sizzle), add the chicken breasts. Don’t crowd the pan; cook in batches if necessary. Let them cook undisturbed for 5-6 minutes per side, until they develop a deep golden-brown crust and reach an internal temperature of 165°F. Transfer the chicken to a clean plate and tent loosely with foil. Don’t wipe out the pan! Those browned bits (fond) left behind are pure flavor gold.
Step 3: Build the Garlic Cream Sauce
Reduce the heat to medium. In the same skillet with all those delicious browned bits, add the minced garlic. Sauté for about 60-90 seconds until it becomes incredibly fragrant and just starts to turn golden. Do not let it brown, or it will turn bitter. Pour in the chicken broth to deglaze the pan, using a wooden spoon to scrape up all the fond from the bottom. Let it simmer for 3-4 minutes until reduced by about half. This concentrates the savory flavor.
Step 4: Simmer and Serve
Stir in the heavy cream, Italian seasoning, and a pinch of salt and pepper. Bring the mixture to a gentle simmer (not a rolling boil). Let it cook for 3-4 minutes, allowing it to thicken slightly. Reduce the heat to low and gradually whisk in the grated Parmesan cheese until it’s fully melted and the sauce is smooth and creamy. Taste and adjust seasoning. Return the chicken breasts (and any accumulated juices) to the skillet, spooning the sauce over them. Let them warm through for 2-3 minutes. Garnish with a generous sprinkle of fresh parsley before serving.
Nutritional Information
(Per serving, based on 4 servings)
Calories: ~520 kcal
Protein: 42g
Carbohydrates: 8g
Dietary Fiber: 0.5g
Sugars: 2g
Fat: 35g (Saturated Fat: 18g)
Cholesterol: 185mg
Sodium: 850mg (can be lowered with reduced-sodium broth and less added salt)
Healthier Alternatives
You can absolutely enjoy this creamy garlic chicken while aligning with different dietary goals. The key is making smart swaps that preserve the soul of the dish—its rich, garlicky comfort.
Lighter Cream Base: Swap heavy cream for half-and-half or full-fat canned coconut milk. For a dairy-free version, use raw cashews blended with broth until ultra-smooth. The fat is necessary for the luxurious mouthfeel.
Leaner Protein: Use chicken breast as called for, or try turkey cutlets. For a plant-based twist, large portobello mushroom caps or firm, pressed tofu slabs seared until golden are fantastic.
Reduce Sodium: Use homemade or no-salt-added chicken broth and be mindful of added salt. The Parmesan contributes saltiness, so you may need less than you think.
Thicken Smartly: Instead of flour, use a cornstarch slurry (1 tbsp cornstarch + 2 tbsp cold water) stirred in at the end, or rely on the natural thickening power of reduced broth and Parmesan.
Serving Suggestions
This versatile dish pairs beautifully with a variety of sides to soak up every drop of that incredible sauce.
Classic Comfort: Serve over a bed of fettuccine, egg noodles, or creamy mashed potatoes.
Lighter Options: Spoon it alongside roasted asparagus, green beans, or a crisp garden salad. Cauliflower rice or zucchini noodles are excellent low-carb vehicles.
For Bread Lovers: A slice of crusty artisan bread or a warm, fluffy dinner roll is mandatory for sauce-mopping duty.
Wine Pairing: A crisp, unoaked Chardonnay or a Pinot Grigio complements the creamy garlic flavors perfectly. For red drinkers, a light Pinot Noir works well.
Common Mistakes
Overcooking the Chicken: Pounding to even thickness and using a meat thermometer (165°F) are your best defenses against dry, tough chicken.
Burning the Garlic: Garlic burns in seconds. Keep the heat at medium after searing the chicken and stir constantly until just fragrant.
Using Pre-Shredded Cheese: Pre-shredded cheese contains anti-caking agents that can make your sauce grainy. Always grate your own Parmesan for a silky-smooth result.
Boiling the Cream: A vigorous boil can cause the cream to separate or become oily. Maintain a gentle simmer once the cream is added.
Skipping the Deglazing: Those browned bits in the pan are packed with flavor. Deglazing with broth is essential for building a complex sauce base.
Storing Tips
Refrigeration: Allow the dish to cool completely, then store in an airtight container in the refrigerator for up to 3-4 days.
Freezing: While you can freeze it, cream-based sauces can sometimes separate upon thawing. For best results, freeze the cooked chicken separately from the sauce.
This Sourdough Discard Banana Bread is soft, moist, and packed with rich banana flavor and a subtle tang from your sourdough starter. It’s the perfect way to use up sourdough discard without wasting a drop! Great for breakfast, snacks, or cozy baking days. Save this easy no-waste recipe now!
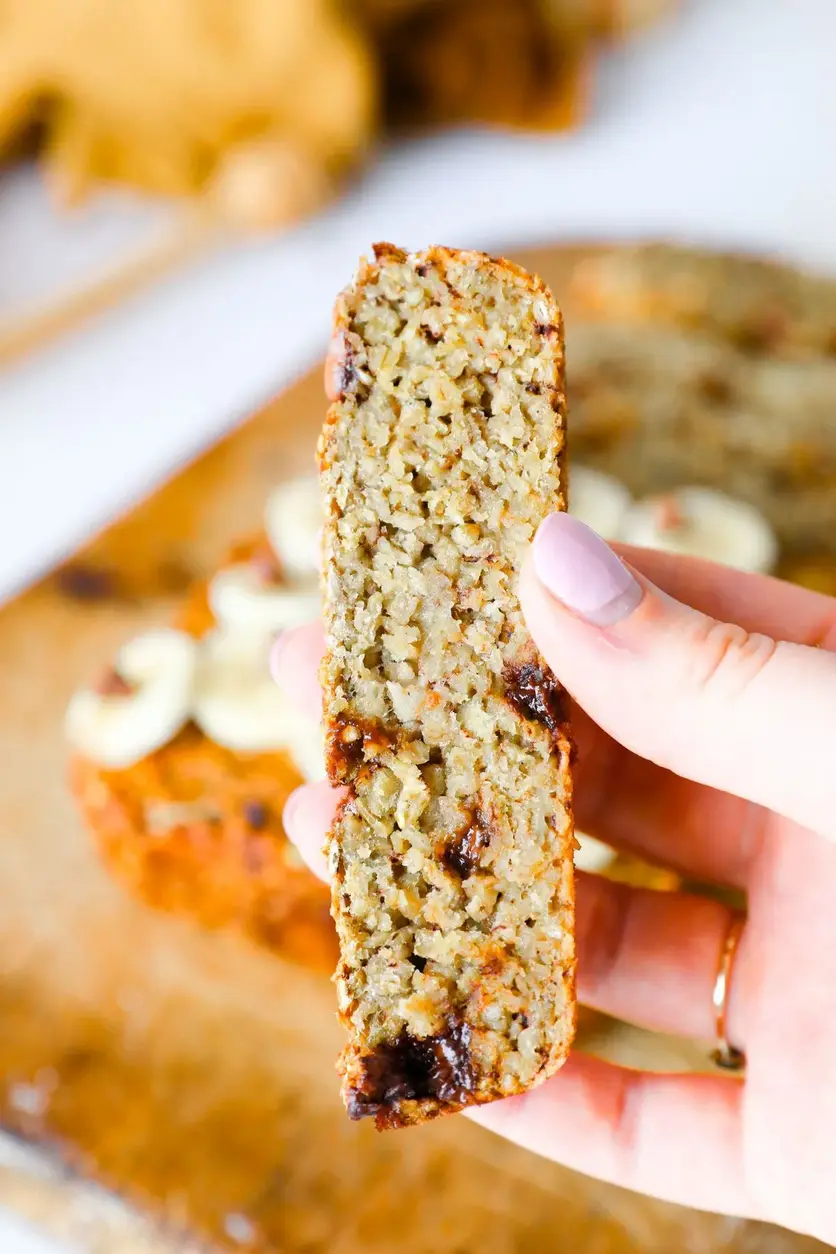
Discover the ultimate gluten-free recipe with our scrumptious oatmeal banana bread! Easy to make, this is a healthy dessert idea and delicious for the whole family. Your new go-to treat awaits! This is one of the breakfast recipes you’ll want to try over and over again.