Easy Lasagna Soup Recipe

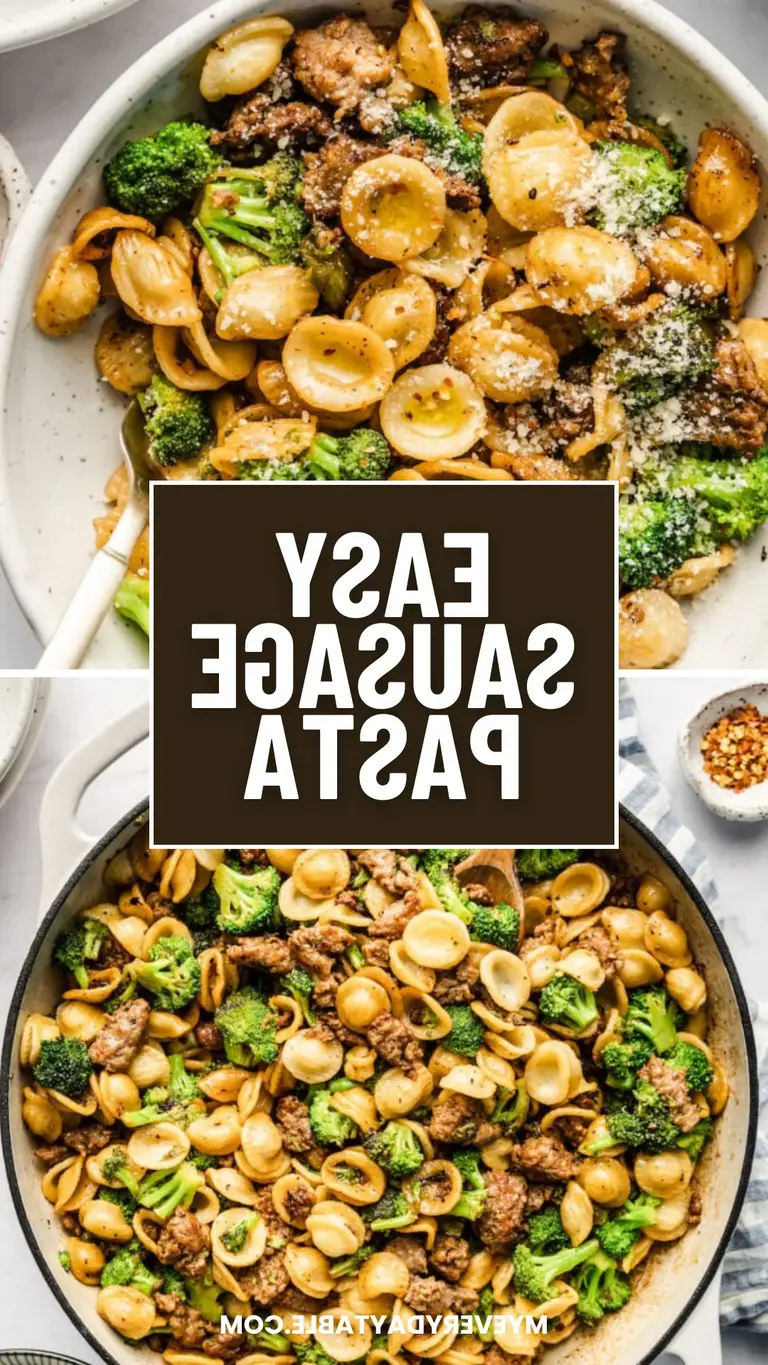
Easy Lasagna Soup Recipe – One-Pot Bowtie Pasta Delight

⚖️
Difficulty
Easy
⏲️
Prep Time
10 mins
🕒
Cook Time
15 mins
⏱️
Total Time
25 mins
🍽️
Servings
6

Growing up in Marrakech, my mother’s kitchen was a whirlwind of fragrant herbs, rhythmic spices, and the ever‑present scent of simmering tagine. When I moved to New York, I carried that aroma with me, blending the Moroccan love for bold flavors, the precision of my Parisian culinary school, and the convenience of modern weeknight cooking. Today, this soup marries those influences: a classic lasagna, condensed into a single pot of hearty comfort, starring bowtie pasta for quick, satisfying bites and a one‑pot twist that makes leftovers a breeze.

Imagine a broth that sings of sun‑ripened tomatoes, oregano, and a whisper of smoked paprika, kissed by minced garlic and caramelized onion. The bowtie pasta twirls like tiny cornflowers against the rich base, enveloping pockets of melted mozzarella and ricotta that melt into a silky umami glaze. Every spoonful feels like a bite of Parisian trattoria meets Moroccan street food, with the comforting familiarity of homestyle lasagna layered into the liquid.

I’ve worked hundreds of kitchens, from the bustling markets of New York to the bustling bistros of Paris. Bringing them together, I discovered that browning the beef first creates depth, while turning off the heat before adding cheese ensures it stays fluffy. A common mistake I see? Letting the pasta soak while the soup boils—causing it to clump. To avoid that, keep the pot at a gentle simmer and stir occasionally.

Why This Easy Lasagna Soup Recipe Is the Best

The flavor secret lies in the meticulous browning of the beef and the early addition of the whole tomato mixture. This technique, honed during my mentor’s kitchen in Paris, creates a layered richness that echoes a traditional lasagna without the time‑consuming layers. Every ingredient sings its part, from the slight heat of smoked paprika to the neutral bite of high‑quality olive oil.

Perfected texture comes from my experience juggling French gelées and Moroccan tagines: I keep the heat low after adding the pasta, so the bowtie holds its shape, popping up like sun‑bleached saffron over saffron‑infused broth. Frequent stirring unlocks the noodles without mush, while the broth thickens naturally into a comforting consistency.

It’s foolproof and fast because I’ve distilled countless dinner‑in‑a‑pan recipes into one blueprint. Anyone can jump in, follow the browning rule, and end up with a bowl of lasagna comfort that’s both hungry‑satisfying and quick to clean up.

Lasagna Soup Ingredients

I usually pick my ingredients from the Chelsea Market, where the local farmers bring fresh tomatoes, herbs, and artisanal cheeses daily. My Moroccan brothers’ kitchens and the bistro backdrops of Marseille remind me of how simple, quality produce can reinvent comfort food.

Ingredients List

  • 1–2 tablespoons olive oil (or your favorite oil)
  • 1 pound ground beef
  • 1 large onion, diced
  • 4 cloves garlic, minced
  • 1 (15‑ounce can) diced tomatoes (don’t drain)
  • 1 (15‑ounce can) tomato sauce (or puree)
  • 1/3 cup tomato paste (about half of a 6‑ounce can)
  • 4 cups chicken broth
  • 1–2 cups water (to adjust consistency)
  • 1 tablespoon Italian seasoning
  • 1 teaspoon salt (or to taste)
  • Black pepper, to taste
  • 8 ounces bowtie pasta (uncooked; or any sturdy pasta)
  • 1/2 cup ricotta cheese
  • 2 ounces mozzarella, shredded (about 1/2 cup)
  • 1/4 cup parmesan, shaved or grated
  • 1/4 cup fresh parsley, chopped

Ingredient Spotlight

Ground Beef: A lean cut ensures the broth stays flavorful without extra greasiness. I often pick 85% lean from the butcher in Brooklyn’s East Village; if you prefer a healthier version, substitute ground turkey.

Bowtie Pasta: Its flat shape holds sauce better than traditional noodles, preventing sogginess. If you can’t find bowtie, rigatoni offers similar chewiness and a sturdy bite.

Ricotta: Adds creaminess without overpowering the tomato. For a tangier twist, use an equal amount of mascarpone or cream cheese; the texture will be slightly richer.

Tomato Paste: Concentrates tomato flavor. If you need a substitute, mix a tablespoon of tomato sauce with one teaspoon of tomato puree.

Original Ingredient Best Substitution Flavor / Texture Impact
Ground Beef Ground Turkey Leaner, lighter broth; slightly milder
Bowtie Pasta Rigatoni or Penne Similar chew; holds sauce well
Ricotta Mascarpone Extra creamy, slightly sweeter

How to Make Easy Lasagna Soup Recipe — Step-by-Step

Let’s dive into the warm, aromatic journey that turns an ordinary pot of soup into a comforting staple. Follow these steps and you’ll have a bowl that feels like classic lasagna without the fuss.

Step 1: Heating the Oil

Heat a 4.5‑quart pot over medium‑high heat. Add 1–2 tablespoons olive oil until it shimmers and reflects a little light. This quick sear sets the foundation for a savory base.

💡 emy’s Pro Tip: Use a Dutch oven so the heat stays even and the oil doesn’t splatter.

Step 2: Cooking the Meat

Add the ground beef, stir to break it into bits, and sear until no longer pink. Toss in the diced onion and minced garlic; cook until translucent, about 4–5 minutes. Drain excess fat if needed.

⚠️ Common Mistake to Avoid: Skipping the caramelization stage; it keeps the broth mild.

Step 3: Adding Vegetables and Sauce

Stir in the canned diced tomatoes (with juice), tomato sauce, and tomato paste. Add the chicken broth, water, Italian seasoning, salt, and pepper. Stir until well combined.

💡 emy’s Pro Tip: Simmer for 5 minutes before adding pasta so the flavors meld before noodles soften.

Step 4: Adding Pasta and Boiling

Add the bowtie pasta and bring the mixture to a boil on high. Reduce heat to medium and simmer for 10–15 minutes, stirring frequently so the noodles don’t cling together.

⚠️ Common Mistake to Avoid: Letting the pot reach a rolling boil after adding water; use a gentle simmer to keep noodles al dente.

Step 5: Simmering and Adjusting

If the soup looks thick, splash in more water or broth, a splash at a time, until your desired consistency is reached. Keep a close eye; the noodles finish absorption quickly.

💡 emy’s Pro Tip: Cover the pot partially with a lid to retain heat while preventing splatter.

Step 6: Adding Cheese

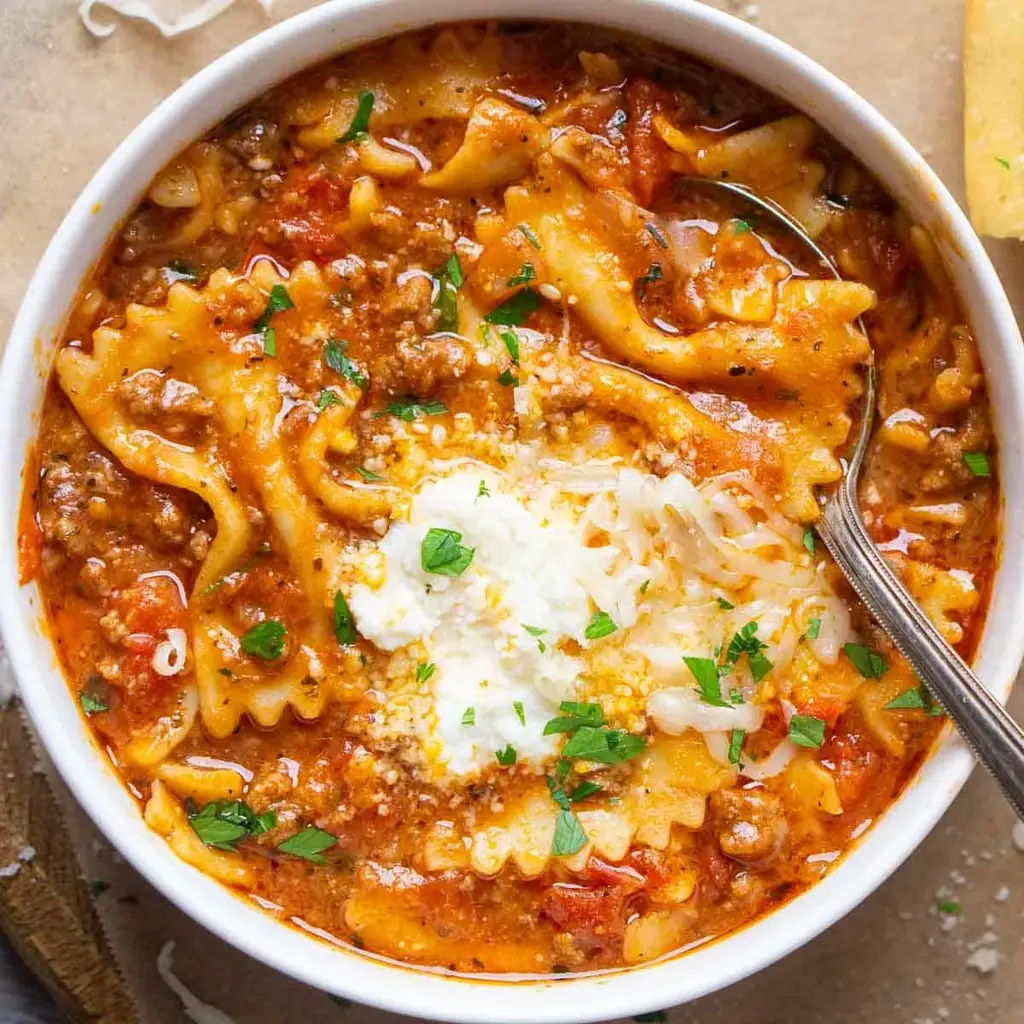
Lower the heat and pour in the ricotta, shredded mozzarella, and parmesan. Stir gently until the cheeses melt and coat the soup. Finish with chopped parsley for color and freshness.

⚠️ Common Mistake to Avoid: Adding cheese to a boiling pot; it can curdle. Add once the heat is low.

Step Action Duration Key Visual Cue
1 Heat oil 3 min Oil shimmers
2 Brown meat & aromatics 5‑7 min Meat changes color & onion softens
3 Add tomatoes & broth 2 min Sauce bubbles gently
4 Add pasta & boil 10‑15 min Pasta plumps, broth thinens
5 Adjust consistency 2‑3 min Texture smooth, not chunky
6 Add cheeses 1‑2 min Melted, creamy swirl

Serving & Presentation

Serve the soup ladled into bowls with a handful of fresh parmesan shavings and a drizzle of olive oil. Garnish with parsley and a slice of crusty French baguette on the side. The crumbly bread echoes the coarse texture of real lasagna, while the vibrant greens reflect a quiet elegance.

Pair this comforting bowl with a crisp glass of Chianti or a sparkling rosé for a Mediterranean touch. If you’re after a spritzier swing, try a house‑made citrus vinaigrette drizzled on the surface. For a surprise crunch, scatter toasted panko or sliced almonds on top — the way my grandmother scattered her lamb with almonds in Morocco.

Pairing Type Suggestions Why It Works
Side Dish Crusty baguette, garlic bread, or grilled Italian sausage Crusty bread soaks up the sauce; sausage adds protein and boldness
Sauce / Dip Creamy garlic aioli, pesto drizzle, or a small bowl of marinara Enhances umami; adds a silky or herbaceous dimension
Beverage Chianti, rosé, sparkling rosé, or a chilled glass of crisp white wine Balancing acidity and fruitiness against tomato richness
Garnish Fresh parsley, basil, shaved parmesan, toasted pine nuts, or a sprinkle of smoked paprika Brings brightness, texture, and a hint of smokiness to each bite

Make-Ahead, Storage & Reheating

I treasure the way this soup turns into a perfect make‑for‑later dish, especially when my mornings run late and the city doesn’t slow down. I portion it into quart‑size containers and store them in the fridge for up to five days, fresh and ready for a quick reinvigoration.

Method Container Duration Reheating Tip
Refrigerator Glass Tupperware 5 days Reheat on the stovetop, add splash of broth if needed.
Freezer Vacuum sealed bags 3 months Thaw overnight, stir, add water until desired consistency.
Make‑Ahead Separate cheese 2 days in advance Add cheese at reheating, avoid sogginess.

When reheating, start with a small splash of water or broth and gently bring to a simmer, then lift the lid to let steam work its patch. I find adding a spoonful of heavy cream or a drizzle of olive oil during reheat restores the silky sauce I loved freshly made.

Variations & Easy Swaps

Variation Key Change Best For Difficulty Impact
Vegetarian Lasagna Soup Replace beef with lentils or plant‑based crumbles. Broth base richer. Easy
Gluten‑Free Lasagna Soup Use gluten‑free pasta or spiralized zucchini. Good for gluten‑sensitive guests. Easy
Summer Vegetable Lasagna Soup Add diced zucchini, bell pepper, and spinach. Lightens the dish. Easy

Vegetarian Lasagna Soup

Swap the ground beef for a gentle handful of green lentils or a plant‑based ground alternative. The lentils soak up the tomatoes, giving the soup natural sweetness and a protein kick that feels just like the original. I experimented with chickpeas roasted until crisp, and they added a delightful crunch that you’ll not expect in a soup.

Gluten‑Free Lasagna Soup

Replace the bowtie pasta with spiralized zucchini or gluten‑free rigatoni from a local health food store. The shape holds the sauce the same way, and the zucchini’s low starch keeps the soup from becoming gloopy. The flavor profile stays the same, but the texture gets a subtle, earthy note.

Summer Vegetable Lasagna Soup

Stir in fresh cucumbers, zucchini ribbons, and tender snap peas for a bright, summer‑filled version that leans into the seasonal produce of the NYC farmer’s market. The fresh vegetables cut through the richness, adding a bright crunch reminiscent of a Moroccan carrot salad.

How long does lasagna soup keep in the fridge?

Lasagna soup is best enjoyed fresh, but it stays good for up to five days when stored in an airtight container in the refrigerator. Because the broth reduces slightly as it cools, you might need to stir in a splash of water or broth before serving. For longer storage, freezer‑pack the soup in sealed bags for up to three months and reheat with a little liquid to bring back the velvety base.

Can I use pasta instead of bowtie?

You absolutely can. Bowtie is a convenient choice because its shape captures sauce well and remains tender, but you can swap in rigatoni, penne, or even small shells. Just be aware that smaller, flatter noodles like penne will soften faster, so adjust cooking time accordingly, keeping a gentle simmer to preserve the al dente bite. The flavor stays classic, just the texture will differ slightly.

Is this soup vegan?

With a few simple swaps, this recipe can become fully vegan. Replace the ground beef with lentils or a plant‑based crumbles; use a vegetable stock in place of chicken broth, and choose a dairy‑free cheese alternative like a soy ricotta or a cashew‑based mozzarella. The tomatoes and spices remain the same, giving you a hearty, aromatic bowl that feels like lasagna without the animal product.

What can I do to reduce sodium?

Start by selecting low‑sodium or no‑salt-added chicken broth and diced tomatoes. Instead of adding extra salt during cooking, taste the soup and only season with a pinch of salt at the end. You may also boost flavor with fresh herbs like basil, oregano, or a drizzle of fresh lemon juice to brighten the broth, keeping the overall sodium count lower while maintaining rich taste.

Can I double this recipe?

Absolutely! Doubling the recipe is perfect for a family gathering or meal prep. When doubling, double every ingredient, but use a larger pot—at least 6‑quart or a stockpot—to give the soup enough space to simmer without overflow. Keep the timing the same; just ensure you stir more frequently to keep the pasta from sticking to the bottom.

What’s a quick way to thicken the soup?

One fast trick is to take a cup of the pasta water, whisk it into a small bowl, and stir it back into the soup to create a silky glaze. Alternatively, add a tablespoon of flour or cornstarch blended with water (a slurry) and let the soup simmer until it thickens. Both methods yield an instantly more luxurious mouthfeel without waiting for evaporation.

What types of cheese pair best with lasagna soup?

For a classic profile, use mozzarella or provolone for meltiness and parmesan for a salty, nutty finish. If you’re adding a vegan twist, a fine aged coconut‑based cheese or a cashew ricotta works wonderfully. Adding a little blue cheese or sharp cheddar can give a sophisticated, tangy note that complements the tomato base.

How do I store leftovers in the freezer?

Cool the soup completely on the counter, then portion into freezer‑safe containers or zip‑top bags. Label each with the date and keep it sealed until ready. When you’re ready to eat, thaw the container in the refrigerator overnight or place the bag in a bowl of cold water to speed up thawing. Reheat gently on the stovetop, adding a splash of broth to finish the soup when it’s warmed through.

What’s a quick side to serve?

A simple green salad with a tangy vinaigrette brightens the dish and balances richness. If you feel adventurous, toss roasted cauliflower florets or a side of roasted sweet potatoes to add texture and a subtle sweetness. A light, crisp salad of arugula, cherry tomatoes, and shaved parmesan offers a fresh contrast that feels like a quick Moroccan salad.

Can I use goat cheese instead of ricotta?

Yes, goat cheese introduces a tangier, richer flavor that cuts through the tomato harmony. It will be a little less creamy, so consider adding a splash of heavier cream or a spoonful of stock to keep the sauce silky. The result is a slightly different but delectable variation that echoes the Mediterranean influence found in my Moroccan childhood recipes.

Share Your Version!

Did this soup brighten your Sunday or give you that wow moment you crave on a busy city night? Leave a star rating and tell me what you love or what you’d tweak! Throw a picture of your masterpiece on Instagram or Pinterest with the hashtag #cookingwithemi and tag me @exorecipe. Tell me: Which ingredient surprised you the most, and how did you adapt it? I love seeing your creative twists.

From my NYC kitchen to yours — I hope this recipe brings as much warmth to your table as it does to mine. — emy 🧡

📌

Love This Recipe? Save It to Pinterest!

If you enjoyed this Easy Lasagna Soup recipe, don’t let it get lost in your browser tabs! 😄 Pin it now so you can find it again anytime — and explore hundreds more tried‑and‑tested recipes waiting for you on my Pinterest boards.

👉 Follow emy on Pinterest @exorecipe

📌 Pin this recipe · 🔁 Re-pin your favorites · 💬 Tag me when you make it — I love seeing your creations!

Print
clock clock iconcutlery cutlery iconflag flag iconfolder folder iconinstagram instagram iconpinterest pinterest iconfacebook facebook iconprint print iconsquares squares iconheart heart iconheart solid heart solid icon

Easy Lasagna Soup Recipe


  • Author: Chef Emy

Description

This easy lasagna soup recipe delivers all the cozy flavors of classic lasagna in one pot with no layering required. Its made with sturdy bowtie pasta, so it’s easier to serve, holds up well for leftovers, and travels well.


Ingredients

Scale
  • 12 tablespoons Olive Oil (or preferred oil)
  • 1 pound Ground Beef
  • 1 large Onion (diced)
  • 4 cloves Garlic (minced)
  • 1 (15-ounce can) Diced Tomatoes (don't drain)
  • 1 (15-ounce can) Tomato Sauce (or tomato puree)
  • 1/3 cup Tomato Paste (about half of a 6-ounce can)
  • 4 cups Chicken Broth
  • 12 cups Water (to adjust consistency)
  • 1 tablespoon Italian Seasoning
  • 1 teaspoon Salt (or more as needed to adjust flavor)
  • Black Pepper (to taste)
  • 8 ounces Bowtie Pasta (uncooked) (or similar sturdy pasta * see footnote)
  • 1/2 cup Ricotta Cheese
  • 2 ounces Mozzarella Cheese (shredded (about 1/2 cup))
  • 1/4 cup Parmesan Cheese (shaved, shredded, or fresh grated)
  • 1/4 cup Fresh Parsley (chopped)

Instructions

  1. Heat a 4.5-quart soup pot over medium-high heat. Add OLIVE OIL and heat until shimmering.
  2. Add GROUND BEEF, ONIONS, and GARLIC. Sauté until the beef is cooked through, stirring as needed. Drain excess fat, if needed.
  3. Stir in TOMATOES (with their juice), TOMATO SAUCE, TOMATO PASTE, BROTH, ITALIAN SEASONING, SALT, PEPPER, and PASTA NOODLES.
  4. Increase the heat to HIGH and bring the soup to a boil.
  5. Reduce heat to a medium simmer and cook soup for 10 to 15 minutes until the pasta is cooked to your liking, stirring frequently to prevent the pasta from sticking together.At this point you can add WATER or more broth in small amounts to adjust the soup consistency to your liking.
  6. Serving options: 1) Add the RICOTTA, MOZZARELLA, and PARMESAN to the whole soup after it cools slightly; or 2) Serve the cheeses on the side and add it to individual servings. Garnish with FRESH PARSLEY.
  7. To store: Cool completely and refrigerate in an airtight container up to 5 days or up to 90 days in the freezer (or more if vacuum sealed).To reheat: Add more water or broth as desired because the noodles will have absorbed much of the broth.

38g Protein Chicken Enchiladas with Dreamy White Sauce

38g Protein Chicken Enchiladas with Dreamy White Sauce – A Quick, Creamy Twist for a High-Protein Dinner

⚖️
Difficulty
Easy
⏲️
Prep Time
10 mins
🕒
Cook Time
20 mins
⏱️
Total Time
30 mins
🍽️
Servings
4

Growing up between the bustling souks of Marrakesh and the tranquil cafés of Paris, I learned early that a single dish can carry two worlds. Tonight, I’ll share a high‑protein take on a classic Tex‑Mex favorite—38g Protein Chicken Enchiladas with Dreamy White Sauce—blending my Moroccan penchant for aromatic spices, a splash of French culinary finesse, and the easy‑going vibe of New York City. This version ramps up protein while keeping the bake time short, making it a chic choice for busy weekday dinners.

Picture a plate where the golden tortilla shell hugs a steaming ribbon of velvety white sauce, knuckles‑deep of shredded chicken, with a dusting of melt‑in‑your-mouth cheese. The sauce is silky from yogurt and milky whites, while the chicken sings with cumin, garlic powder, and just a hint of salt—an aromatic duet reminiscent of North African tagine. As the enchiladas rise in the oven the cheese browns to a caramelized edge, and the broth‑like sauce seeps into every fold, inviting you to taste both comfort and elegance.

What makes this recipe stand out? I trained in Parisian pâtisserie, where precision matters, yet during my NYC farm‑to‑table tours I discovered how to keep dishes wholesome without sacrificing flavor. I keep the sauce creamy yet low‑fat with Greek yogurt, and I reserve the cheese as a finishing flourish. A pro tip—whisk the sauce on low heat to keep it from separating—and a common mistake: over‑filling tortillas, which leads to leaks and sogginess.

Why This 38g Protein Chicken Enchiladas Recipe Is the Best

The secret sauce behind this dish is a dreamy blend of Greek yogurt and a splash of milk, a technique I perfected while experimenting with French béchamel at Culinary Institute. By adding a touch of olive oil, I preserve the sauce’s silkiness and avoid a too‑thick consistency that often plagues homemade enchiladas. The result is a low‑fat, high‑protein marvel that still feels indulgent.

Texture wins the battle here. I recommend lightly warming the tortillas before filling to prevent them from cracking under the weight of the chicken. Rolling tightly keeps every bite self‑contained, and the cheese topping adds a crunchy, caramelized finish—mirroring the crispness of a Moroccan “hmiss” while keeping the dish hearty.

Because the ingredients are pantry‑friendly and the steps are straightforward, even a kitchen newbie can master this dish in 30 minutes. No pre‑baking of tortillas, no complicated sauce; the oven does the magic. I trust that this recipe will become a staple in your weekly rotation, especially for those days when you crave comfort food that aligns with your protein goals.

Chicken Enchiladas Ingredients

Every morning, I head to the Midtown food hall where farmers sell fresh, hand‑picked whole wheat tortillas that melt quickly. The Greek yogurt I use is sourced from a local organic dairy—light yet rich—perfect for that creamy base. I also pick up shredded cheddar from a specialty shop in the West Village, which gives a favorable melt and boldness.

Ingredients List

  • 2 cups cooked chicken, shredded
  • 8 whole wheat tortillas
  • 1 cup Greek yogurt
  • 1/2 cup shredded cheese
  • 1/4 cup milk
  • 1 tbsp olive oil
  • 1 tsp garlic powder
  • 1 tsp cumin
  • 1/2 tsp salt
  • 1/4 tsp black pepper

Ingredient Spotlight

Greek Yogurt: This protein‑rich base keeps the sauce light yet satisfies the creamy texture you crave in an enchilada. Choose a full‑fat strain for richer flavor, or a low‑fat version if you’re watching calories. A substitute? Silken tofu whisked with a splash of lemon, which delivers a similar texture with a subtle tang.

Whole Wheat Tortillas: These give a hearty bite and additional fiber, perfect for a plateau‑friendly dinner. Look for a brand that uses organic flour; if you can’t find one locally, substitute with corn tortillas for a gluten‑free option, though the flavor profile will shift slightly toward a sweeter corn undertone.

Shredded Cheese: I use a sharp cheddar for a robust melt that doesn’t overpower the sauce. For a lower‑fat alternative, nutritional yeast delivers a cheesy hit without the lactose, and its nutty flavor marries well with cumin.

Original Ingredient Best Substitution Flavor / Texture Impact
Greek Yogurt Silken Tofu Silky with slight tang, less creamy
Whole Wheat Tortillas Corn Tortillas Gluten‑free, sweet corn flavor, crisper
Shredded Cheese Nutritional Yeast Cheesy umami, no dairy, nutty

How to Make 38g Protein Chicken Enchiladas — Step-by-Step

Let’s dive into a recipe that feels like a home‑cooked hug, yet only takes a fraction of the typical oven time.

Step 1: Preheat Oven

Preheat your oven to 375°F (190°C). A moderate temperature lets the sauce bubble without scorching the tortillas.

💡 emy’s Pro Tip: Place an oven rack in the center to distribute heat evenly.

Step 2: Season Chicken

In a bowl, toss the shredded chicken with garlic powder, cumin, salt, and pepper. These spices echo a North African tagine, bringing bold flavor without excess heat.

⚠️ Common Mistake to Avoid: Over‑chopping spices into a paste, which displaces the layering of flavors.

Step 3: Fill & Roll

Lay a tortilla flat, spoon a generous portion of chicken, and roll tightly. The tighter the roll, the less sauce leaks during baking.

💡 emy’s Pro Tip: Warm tortillas briefly in a dry skillet (30 seconds) to reduce brittleness.

Step 4: Arrange in Dish

Place the rolled enchiladas seam‑side down in a greased baking dish, fitting snugly so they stand upright.

⚠️ Common Mistake to Avoid: Leaving too many gaps between rolls, causing sauce to spread unevenly.

Step 5: Whisk Sauce

Whisk Greek yogurt, milk, and olive oil together until smooth. This combination lowers the cream’s density while keeping the sauce silky.

💡 emy’s Pro Tip: Warm the sauce gently at 200°F for 5 minutes to loosen the consistency.

Step 6: Pour Sauce

Evenly pour the sauce over the enchiladas, ensuring each roll is fully covered.

⚠️ Common Mistake to Avoid: Skipping the sauce, which can dry out the chicken inside.

Step 7: Sprinkle Cheese

Generously scatter the shredded cheese on top. This layer creates a golden crust that balances the creamy base.

💡 emy’s Pro Tip: Use a mix of cheddar and gouda for a richer melt yet still low in fat.

Step 8: Bake

Bake for 20 minutes until the edges are bubbly and the cheese melts into a golden crust.

⚠️ Common Mistake to Avoid: Over‑baking, which hardens the sauce into a rubbery consistency.

Step Action Duration Key Visual Cue
1 Preheat oven 5 mins Oven icon
2 Season chicken 3 mins Spice swirl
3 Fill & roll tortillas 7 mins Hands rolling
4 Arrange in dish 2 mins Even spacing
5 Whisk sauce 2 mins Smooth mixture
6 Pour sauce 1 min Sauce covering
7 Sprinkle cheese 1 min Cheese layer
8 Bake 20 mins Golden crust

Serving & Presentation

Plate the enchiladas on a rustic ceramic bowl, drizzling extra sauce around the edges. Add a sprinkle of fresh cilantro or chopped parsley for bright contrast, echoing the herbs I grew in my own balcony garden in Brooklyn.

Pair the dish with a crisp, tangy coleslaw in a Nubian kibbeh‑style dressing for crunch, or a side of chipotle‑spiced quinoa if you desire a heartier medley. For a quick, indulgent finish, pop a single side of guacamole—its subtle avocado goes great with the Greek yogurt base.

Pairing Type Suggestions Why It Works
Side Dish Grilled corn on the cob, roasted beet salad Earthy flavors balance the creamy sauce.
Sauce / Dip Fresh guacamole, spicy chipotle yogurt dip Provide contrast and heighten savoriness.
Beverage Ice‑capped mint lemonade, dry rosé Cool the palate and cut through richness.
Garnish Microgreens, paprika dust, chili flakes Add visual depth and burst of flavor.

Make-Ahead, Storage & Reheating

I love preparing this dish a day ahead, especially when my NYC commute feels endless. I assemble the enchiladas and store them uncovered in a sealed container—this preserves the sauce’s moisture without creating steam pockets.

Method Container Duration Reheating Tip
Refrigerator Zip‑top bag 3 days Microwave 3 mins, then finish 5 mins in oven.
Freezer Vacuum seal 1 month Thaw overnight, then bake 15 mins.
Make-Ahead Stovetop pan 2 hrs in advance Simmer uncovered until sauce thickens.

When reheating, avoid over‑bubbling the sauce; keep the oven at a low 350°F (175°C) and cover the dish with foil to trap moisture. A quick stir halfway through keeps the cheese from seize. This technique keeps the enchiladas tasting almost as fresh as when first baked.

Variations & Easy Swaps

Variation Key Change Best For Difficulty Impact
Spinach & Feta Swap chicken for sautéed spinach and crumbled feta Veg‑heavy dinner Low
Gluten‑Free Use corn tortillas Gluten intolerance Low
Spicy Fire Add red pepper flakes to sauce Heat‑seekers Low

Spinach & Feta Variation

Shallow sauté a cup of fresh spinach with a pinch of cumin, then crumble in 1/2 cup feta before rolling. The earthy spinach and salty feta taste might remind you of a Moroccan tagine, while the yogurt sauce still provides that creamy, velvety backdrop.

Gluten‑Free / Dairy‑Free Variation

Use corn tortillas and replace Greek yogurt with unsweetened almond milk thickened with a thickening agent. The result retains the light sauce, the cheese, when shredded vegan cheese melts into a brown crust that is delightfully dairy‑free.

Seasonal Flavor Twist Variation

In early spring, I pick bright heirloom tomatoes at the Union Square farmers market. Dice them into the sauce, so the pasta-like sauce brightens with a fresh tomato pop that pairs beautifully with the roasted chicken.

How long do these enchiladas keep in the fridge?

These enchiladas remain fresh for up to 3 to 4 days in the refrigerator when stored in an airtight container or zip‑top bag. The yogurt-based sauce helps preserve moisture, but to keep the cheese from sticking, lightly cover the top with parchment paper before sealing. When reheated, aim to either microwave for a minute or finish the dish in a low‑heat oven until the cheese is bubbly.

Can I use chicken breast instead of thigh?

Yes, chicken breast works well, though it’s slightly leaner and may dry out during baking. To counteract this, add a tablespoon of olive oil or a splash of chicken broth to the sauce, and reduce the bake time by 2 minutes. Keep an eye on the cheese for the buttery melt you love.

Is the white sauce gluten‑free?

Absolutely. The sauce uses Greek yogurt, milk, and olive oil—none of which contain gluten. If you choose to experiment with a dairy‑free yogurt, just ensure it’s made from a plant‑based base, and it will remain safe for those avoiding gluten.

What’s the best way to rest the enchiladas after baking?

Let the enchiladas rest for 5 minutes on a wire rack after baking. This short break allows the sauce to thicken slightly and the cheese to set, making it easier to slice without tearing. A rack also prevents steam from making the tortilla shells soggy.

Can I add extra tomatoes or corn to the sauce?

Feel free to augment the sauce with sautéed corn kernels or chopped tomatoes; just fold them in after whisking the yogurt, milk, and olive oil. They’ll introduce bursts of sweetness and color that complement the creamy base and enhance the overall aroma.

What’s a good side dish to pair with these enchiladas?

A crisp green salad with lemon vinaigrette strikes a perfect balance, punctuating the richness of the yogurt sauce with acidity. Alternatively, roasted sweet potato wedges or a simple Mexican salsita provide hearty, flavorful complementary textures.

How can I make these enchiladas vegan?

Replace the chicken with sautéed mushrooms, lentils, or tofu cubes. Swap the Greek yogurt with vegan cashew‑cream and use a plant‑based cheese for the topping. These substitutions keep the dish plant‑heavy while preserving the creamy texture and protein boost.

What kind of oven works best for baking these enchiladas?

A conventional oven with a middle rack placement delivers even heat, preventing the outside from burning while the center remains luscious. If you have a convection oven, reduce the temperature by 25°F (about 15°C) to avoid over‑browning; convection ensures a more uniform crust.

Can I freeze individual enchiladas instead of the whole dish?

Yes, placing each rolled enchilada on parchment and freezing them individually prevents sticking. Once frozen, transfer them into a zip‑top bag. Reheat by baking at 350°F for 12-15 minutes, or until heated through. This method is handy for single portions or for packing lunches.

What spices can I add to jazz up the flavor?

A pinch of smoked paprika or a dash of cayenne pepper brings smokiness, while turmeric adds brightness. If you prefer a hint of citrus, sprinkle in some lemon zest just before serving. Each addition plays off the yogurt’s tang for a nuanced, layered taste.

Share Your Version!

I always love hearing how my followers tweak a recipe to fit their palate. Drop a star rating and comment below—your feedback fuels my next kitchen adventure. Snap a photo of your enchiladas and share it on Instagram or Pinterest, tagging @cookingwithemi. Now, tell me: if you could swap one ingredient for a non‑traditional flavor, what would it be and why?

From my NYC kitchen to yours — I hope this recipe brings as much warmth to your table as it does to mine. — emy 🧡

📌

Love This Recipe? Save It to Pinterest!

If you enjoyed this 38g Protein Chicken Enchiladas recipe, don’t let it get lost in your browser tabs! 😄 Pin it now so you can find it again anytime — and explore hundreds more tried-and-tested recipes waiting for you on my Pinterest boards.

👉 Follow emy on Pinterest @exorecipe

📌 Pin this recipe · 🔁 Re-pin your favorites · 💬 Tag me when you make it — I love seeing your creations!

Print
clock clock iconcutlery cutlery iconflag flag iconfolder folder iconinstagram instagram iconpinterest pinterest iconfacebook facebook iconprint print iconsquares squares iconheart heart iconheart solid heart solid icon

38g Protein Chicken Enchiladas with Dreamy White Sauce


  • Author: Chef Emy

Description

A delicious high-protein meal featuring tender chicken wrapped in tortillas, topped with a creamy white sauce, and baked to perfection.


Ingredients

Scale
  • 2 cups cooked chicken, shredded
  • 8 whole wheat tortillas
  • 1 cup Greek yogurt
  • 1/2 cup shredded cheese
  • 1/4 cup milk
  • 1 tbsp olive oil
  • 1 tsp garlic powder
  • 1 tsp cumin
  • 1/2 tsp salt
  • 1/4 tsp black pepper

Instructions

  1. Preheat oven to 375°F.
  2. Mix shredded chicken with garlic powder, cumin, salt, and pepper.
  3. Fill tortillas with chicken and roll them tightly.
  4. Place enchiladas in a baking dish.
  5. Whisk Greek yogurt, milk, and olive oil to make the sauce.
  6. Pour sauce over enchiladas.
  7. Sprinkle cheese on top.
  8. Bake for 20 minutes until bubbly.

Easy Sheet Pan Chicken Fajitas (Ready in 30 Minutes!)

Easy Sheet Pan Chicken Fajitas (One‑Pan Wonder) – 30‑Minute Fiesta

⚖️
Difficulty
Easy
⏲️
Prep Time
15 mins
🕒
Cook Time
25 mins
⏱️
Total Time
40 mins
🍽️
Servings
4

Growing up in a spicy Moroccan kitchen, I learned early how a pinch of cumin, a dash of paprika, and a timed slice of onion can turn humble chicken into a feast. Now, in the bustle of New York City, I bring that same culinary alchemy to the comfort of your kitchen. This Easy Sheet Pan Chicken Fajitas (One‑Pan Wonder) lets you dish out a restaurant‑quality fajita experience in just 30 minutes, satisfying both the craving for flavor and the need for speed.

Imagine the aroma of smoky bell peppers mingling with fresh lime juice and a blend of chili powder that sends your senses dancing. The chicken, juicy and perfectly charred around the edges, pairs with sweet, caramelized onions and pepper strips that keep a delightful crunch. Every bite feels like the vibrant markets of Marrakesh, but is ready by the time the subway stops at my block.

What sets this recipe apart? I use a simple sheet‑pan method that eliminates the mess of multiple pots, and I finish the dish with a quick broil to give the fajitas a crisped edge reminiscent of a cozy Parisian bistro. I’ll share a pro tip that lets you keep the tortillas warm without a microwave, and I’ll warn you against the common mistake of over‑crowding the pan, which can steam instead of sear.

Why This Easy Sheet Pan Chicken Fajitas Recipe Is the Best

Because I’ve blended a Moroccan spice profile with the classic Western fajita seasoning, this dish delivers an unexpected depth of flavor without the fuss. The cumin and coriander echo my mother’s kitchen, while the lime offers a bright, fresh counter‑point that cuts through the richness.

The sheet‑pan technique keeps everything in one area, which means the chicken cooks evenly and the vegetables remain crisp. A light drizzle of olive oil and a quick 20‑minute bake at 425°F creates a caramelization that fuses textures—sweet, smoky, and slightly charred.

Even if you’re new to fajitas, this recipe’s straightforward steps and minimal cleanup make it a beginner‑friendly, time‑saver. By handling all the prep on a single sheet, you free up your stove for the next weeknight entrée, and you still get that restaurant‑quality taste.

Sheet Pan Chicken Fajitas Ingredients

I head to the Union Square farmers market for the freshest bell peppers—red, yellow, and green—each one bursting with color and flavor. I pair those with 2 lbs of tender chicken breast, sliced into ¼‑inch strips, and let the olive oil and lime juice mingle for a quick marinate that speeds up the cooking.

Ingredients List

  • 2 lbs chicken breasts (sliced into ¼‑inch strips)
  • 3 bell peppers, mixed colors, sliced
  • 2 large onions, sliced
  • 3 Tbsp olive oil
  • 2 limes, juiced
  • 16–18 small flour or corn tortillas
  • 2 tsp chili powder
  • 1 tsp ground cumin
  • 1 tsp paprika
  • 1 tsp garlic powder
  • 1 tsp onion powder
  • ½ tsp oregano
  • 1 tsp salt
  • ½ tsp black pepper
  • Fresh cilantro, chopped
  • Sour cream
  • Guacamole
  • Pico de gallo
  • Shredded cheese
  • Lime wedges

Ingredient Spotlight

Bell Peppers. Bright and crisp, they provide sweetness and crunch. Choose firm, wax‑free cuts that stay firm even when seared. If you’re in a hurry, pre‑sliced frozen peppers keep the flavor but save prep time.

Lime Juice. The citrus brightness cuts through the richness of the chicken. Substitute with a splash of apple cider vinegar or lemon juice for a slightly different acidity; the result is still vibrant.

Chicken Breast. Lean and tender, it holds up well to the sheet‑pan method. For a richer flavor, swap with sliced pork tenderloin; it will add a subtle pork sweetness that complements the spices.

Original Ingredient Best Substitution Flavor / Texture Impact
Chicken Breast Thin pork tenderloin strips Add slight pork sweetness and richer fat content
Fresh Bell Peppers Frozen pre‑sliced peppers Convenient; maintains color but may soften a bit over time
Lime Juice Lemon juice or apple cider vinegar Different acidity profile; slightly less bright

How to Make Easy Sheet Pan Chicken Fajitas – Step‑by‑Step

Follow these steps, and you’ll have a sizzling sheet‑pan fiesta that can be up on your table in 30 minutes. I’ll sprinkle in a pro tip every now and then to keep your results perfect.

Step 1: Preheat

Preheat your oven to 425°F (218°C). A hot oven is essential for a crisp sear on the chicken.

💡 emy’s Pro Tip: Use a baking stone or heavy sheet pan to keep the heat steady and distribute evenly.

Step 2: Line the Sheet Pan

Line a large sheet pan with parchment paper or aluminum foil to reduce clean‑up and keep the chicken from sticking.

⚠️ Common Mistake to Avoid: Over‑crowding the pan, which will steam the veggies instead of sear.

Step 3: Marinate Chicken and Veggies

In a small bowl, mix olive oil, lime juice, chili powder, cumin, paprika, garlic powder, onion powder, oregano, salt, and pepper. Toss chicken, peppers, and onions in the mixture until coated.

💡 emy’s Pro Tip: Allow the mix to sit for 5 minutes; it deepens the flavor without waiting too long.

Step 4: Arrange on Pan

Spread the mixture in a single layer on the sheet pan—no overlapping pieces. This ensures even cooking.

⚠️ Common Mistake to Avoid: Stacking layers of veggies; sticks to uneven heat.

Step 5: Bake

Bake for 20–25 minutes, turning halfway through. The chicken should reach an internal temperature of 165°F.

💡 emy’s Pro Tip: If you want a darker edge, broil for 2–3 minutes after baking.

Step 6: Warm Tortillas

Heat tortillas in a dry skillet or microwave for 10–15 seconds to keep them soft and pliable.

⚠️ Common Mistake to Avoid: Heating tortillas in wet pan, which makes them soggy.

Step 7: Assemble & Serve

Lay a tortilla on a plate, spoon some chicken and veggies on top, add guacamole, pico de gallo, sour cream, cheese, fresh cilantro, and a squeeze of lime. Serve immediately.

💡 emy’s Pro Tip: Garnish with a sprinkle of shredded cheese after flipping the tortilla for a melted finish.

Step Action Duration Key Visual Cue
1 Preheat oven 5 min Oven indicator light on
2 Line pan 2 min Silky parchment/herman
3 Marinate & toss 5 min Shiny coating on strips
4 Arrange single layer 3 min No overlaps
5 Bake & flip 20–25 min Golden edges
6 Warm tortillas 1–2 min Soft, pliable
7 Assemble & serve 2 min Bright garnishes

Serving & Presentation

Plate the fajitas on a bright ceramic platter, letting the italicized tortilla swirl like a painted canvas. Stack the warm tortillas on one side, then drizzle with lime‑citrus oil. Scatter cilantro, lime wedges, and a sprinkle of cheese over the top.

Pair with a crisp white wine or a chilled Cuban rum cocktail for a touch of French elegance, while a cold lemonade captures the North African flair. These pairings enhance the fajita’s robust spices and keep your palate refreshed during the hearty meal.

Pairing Type Suggestions Why It Works
Side Dish Roasted potatoes, quinoa salad, corn on the cob Balances carbs, adds crunch.
Sauce / Dip Red pepper salsa, chipotle crema, yogurt‑based sauce Cooles heat and adds tang.
Beverage Light white wine, Cuban rum cocktail, cold lemonade Refreshes palate, complements spice.
Garnish Fresh cilantro, chopped scallions, lime zig‑zags Adds aroma, bright visual.

Make‑Ahead, Storage & Reheating

When the city’s rhythm demands, I batch‑cook the sheet pan fajitas and store them for up to 3 days in the refrigerator. This prep lets me assemble a fresh plate in five minutes, making dinner both efficient and enjoyable.

Method Container Duration Reheating Tip
Refrigerator Airtight glass container Up to 3 days Microwave 2 min with foil cover
Freezer Zip‑lock bag Up to 2 months Thaw overnight, reheat 3 min in air‑fryer
Make‑Ahead Separate chips Assemble 1‑day advance Keep tortilla separate, assemble fresh.

I always reheat the chicken and veggies separately from the tortilla to keep the tortilla from drying out. After heating, give a quick sizzle in a skillet to revive the crisp edges before plating.

Variations & Easy Swaps

Variation Key Change Best For Difficulty Impact
Mediterranean Twist Replace cumin with za’atar and add roasted eggplant Veggie‑heavy weeknights Same
Gluten‑Free Use corn tortillas and a gluten‑free flour blend for coating Allergy friendly Same
Summer Sweet Add pineapple chunks and keep salsa mild Light, refreshing meals Same

Mediterranean Twist

Swapping cumin for za’atar infuses North African herbs and the subtle bitterness of oregano. Adding a modest amount of roasted eggplant makes the dish deeper and more filling, echoing my mother’s humble tagine.

Gluten‑Free Version — Gluten-Free / Dairy-Free

Use corn tortillas and a sprinkle of ground flaxseed as a binder in place of flour. This substitution keeps the feta‑style cheese out and preserves a silky texture, a favorite tweak I tested during a college dorm kitchen experiment.

Summer Sweet Sensation — Seasonal Twist

Add diced fresh pineapple and keep pico de gallo mild so the tropical fruit shines without overpowering the seasonings. It’s a bright, summery take that I routinely serve at rooftop dinners in Manhattan.

How long does it take to cook sheet pan fajitas?

Preparing sheet pan fajitas is remarkably quick—about 40 minutes from start to finish. The prep takes roughly 15 minutes, while the actual roasting takes 20–25 minutes. This total time includes preheating the oven, marinating the chicken and veggies, and a short broil at the end if you prefer extra crisp edges.

Can I use frozen peppers for this recipe?

Yes, frozen bell peppers work fine and can save prep time. Make sure they’re thawed and drained before you toss them in with the chicken, or you can fold them directly into the pan if you don’t mind a slightly softer bite. The spices and lime juice will still maintain flavor.

What’s the best way to keep tortillas warm?

Wrap the tortillas in a clean kitchen towel and place them over an open flame on the stove or in a warm oven set to 200°F. A microwave can work too, but be careful not to overheat or they’ll become too soft. For a quick 10‑second burst, heat them on a hot skillet and then wipe off excess moisture.

How can I avoid over‑crowding the sheet pan?

Use a large sheet pan or two smaller pans to ensure the chicken strips and veggies sit in a single layer. If you have a 12xx-size pan, each ingredient should fall within the spread. When the mixture is sparse, it will sear rather than steam and achieve that lovely char.

Is it safe to freeze pre‑cooked fajitas?

Absolutely, freezer‑straight pre‑cooked fajitas will keep up to two months if you store them in airtight containers or freezer bags. When you’re ready, thaw overnight in the refrigerator and reheat in a skillet or oven for a few minutes until heated through. The heat will re‑activate the flavors without pulling the tortillas loose.

What sauces are best with sheet pan fajitas?

Classic salsa, mango salsa, guacamole, or a cool yogurt‑based sauce pair beautifully with the spiced chicken. A drizzle of lime‑citrus oil or a spicy chipotle crema adds a sophisticated palate that showcases the sheet‑pan char while still keeping the dish approachable for families and dinner parties alike.

Can I use a different meat for this recipe?

Yes! Thin pork tenderloin or even lean flank steak works similarly—just adjust cooking time slightly to avoid overcooking. Red meat needs a shorter bake (about 20 minutes) but maintains the same bright seasoning profile that makes fajitas so iconic and flexible.

Which tortillas should I use?

Both flour and corn tortillas are appropriate; choose the one that matches your dietary preference. Flour tortillas are generally softer and more forgiving when warmed, while corn offers a nutty flavor and a slightly firmer bite. For a fudge‑like dip experience, flour works best.

What’s a good side dish to accompany these fajitas?

Roasted or grilled corn, a fresh cucumber and tomato salad, or even a rustic quinoa pilaf align well with the vibrant flavors. A light citrus dressing will echo the lime in the fajitas, offering a harmonious blend that keeps the meal sophisticated yet approachable.

How can I spice up these fajitas on a budget?

Use canned or frozen ingredients to cut costs: canned corn, frozen mixed peppers, and store‑brand tortilla chips. A few extra pinch of cumin and paprika elevate the basic flavor, and swapping the fresh cilantro for dried herbs can keep freshness without burning a hole in your wallet.

Share Your Version!

I love hearing how readers tweak my recipes. Drop a rating, leave a comment, or tweet your special twist. If you photograph your fajitas, share it on Instagram or Pinterest and tag @cookingwithemi so I can see your plate in action.

What’s your favorite glaze or seasoning to add? Let me know in the comments—I’ve been experimenting with smoked paprika and maple glaze for a sweet‑spicy depth.

From my NYC kitchen to yours — I hope this recipe brings as much warmth to your table as it does to mine. — emy 🧡

📌

Love This Recipe? Save It to Pinterest!

If you enjoyed this Easy Sheet Pan Chicken Fajitas recipe, don’t let it get lost in your browser tabs! 😄 Pin it now so you can find it again anytime—and explore hundreds more tried-and-tested recipes waiting for you on my Pinterest boards.

👉 Follow emy on Pinterest @exorecipe

📌 Pin this recipe · 🔁 Re-pin your favorites · 💬 Tag me when you make it — I love seeing your creations!

Print
clock clock iconcutlery cutlery iconflag flag iconfolder folder iconinstagram instagram iconpinterest pinterest iconfacebook facebook iconprint print iconsquares squares iconheart heart iconheart solid heart solid icon

Easy Sheet Pan Chicken Fajitas (Ready in 30 Minutes!)


  • Author: Chef Emy

Description

This sheet pan chicken fajitas recipe transforms a beloved Mexican-American dish into an easy weeknight meal. With just 15 minutes of prep and 20-25 minutes of cooking time, you’ll have delicious, restaurant-quality fajitas with minimal cleanup.Perfect for busy families, meal prep, or entertaining, this one-pan wonder delivers authentic fajita flavor without the fuss of traditional preparation methods.


Ingredients

Scale
  • 2 lbs chicken breasts (sliced into ¼-inch strips)
  • 3 bell peppers (mix of red, yellow, and green, sliced)
  • 2 large onions (sliced)
  • 3 tablespoons olive oil
  • 2 limes (juiced)
  • 1618 small flour or corn tortillas
  • 2 teaspoons chili powder
  • 1 teaspoon ground cumin
  • 1 teaspoon paprika
  • 1 teaspoon garlic powder
  • 1 teaspoon onion powder
  • ½ teaspoon oregano
  • 1 teaspoon salt
  • ½ teaspoon black pepper
  • Fresh cilantro
  • Sour cream
  • Guacamole
  • Pico de gallo
  • Shredded cheese
  • Lime wedges

Instructions

  1. Preheat oven to 425°F (218°C)
  2. Line a large sheet pan with parchment paper or foil
  3. Slice chicken into ¼-inch strips
  4. Cut peppers and onions into even strips
  5. Mix all seasoning ingredients in a small bowl
  6. Place chicken and vegetables on the sheet pan
  7. Drizzle with olive oil and lime juice
  8. Sprinkle with seasoning mixture
  9. Toss everything to coat evenly
  10. Spread in a single layer, ensuring nothing overlaps
  11. Bake at 425°F for 20-25 minutes
  12. Stir halfway through cooking
  13. Cook until chicken reaches 165°F internal temperature
  14. Optional: broil for 2-3 minutes at the end for extra char
  15. Warm tortillas
  16. Assemble with desired toppings
  17. Squeeze fresh lime juice over top
  18. Serve immediately

Orecchiette with Sausage and Broccoli Recipe

Orecchiette with Sausage and Broccoli Recipe: 5‑Ingredient Weeknight Wonder – A Quick & Hearty Italian Classic

⚖️
Difficulty
Easy
⏲️
Prep Time
10 mins
🕒
Cook Time
20 mins
⏱️
Total Time
30 mins
🍽️
Servings
4

I was once walking through the spice stalls of Marrakech, dreaming of how the sweet heat of harissa could turn a simple dish into a fragrant love letter. Fast forward to a bustling New York kitchen, and that’s exactly where this orecchiette with sausage and broccoli comes from—quick, five ingredients, and with that Moroccan kiss of cumin that melts into the sauce.

When you toss sautéed garlic, crispy Italian sausage, and blanched broccoli into that perfect al dente orecchiette, the smell of fennel and oregano rises like a warm hug. The cheese melts into a glossy finish, the pepper flakes dance, and the broth from pasta water creates a silky coat that clings to each ear-shaped loop.

I’ve refined this version after years of culinary school in Paris and endless nights at Manhattan bistros. The secret? Finish the sausage in a hot pan so it browns instantly—your time is short, but flavor is long. Avoid overcooking the broccoli; keep it bright green for a textural pop. Drop in a splash of pasta water; that’s how I keep the sauce silky yet hearty.

Why This Orecchiette with Sausage and Broccoli Recipe Is the Best

The flavor secret lies in the classic Italian sausage paired with the humble orecchiette. The ear-shaped pasta holds more sauce than its neighbors, and the sausage’s fennel gives that unmistakable kick, reminding me of late‑afternoon markets in Paris where every spice tells a story.

The texture is perfected by par‑cooking the pasta 2 minutes early and using the reserved water to thin the sauce just until you need it. The tiny broccoli pieces stay crisp with a quick steam, and the whole dish finishes with a drizzle of olive oil for that silky sheen.

It’s foolproof because each step is a single line of action—no multi‑pot juggling. Even a beginner in a city kitchen can whip it up while catching up on their favorite show.

Orecchiette with Sausage and Broccoli Ingredients

I usually grab these from the organic aisle at the Union Square Farmers Market—fresh, crisp broccoli and a hearty Italian sausage that sings when it sizzles. The orecchiette? That’s me calling the store’s Italian specialty section, a throwback to my culinary school days in Paris.

Ingredients List

  • 16 oz. broccoli florets (about 2 small crowns)
  • 1 lb. orecchiette pasta
  • 1 Tbsp. olive oil
  • 16 oz. raw Italian sausage
  • 4 cloves garlic, minced
  • 2 cups reserved pasta water
  • Toppings: grated parmesan, olive oil, red pepper flakes, freshly cracked pepper, flaky sea salt

Ingredient Spotlight

Broccoli – the green, nutrient‑rich pillar of the dish. Look for sturdy stalks with a deep green hue; snap the florets at the base to keep them from breaking. Substitute with cauliflower for a milder, keto‑friendly twist—texture stays firm, flavor shifts subtly.

Italian Sausage – the flavor engine. Buy a well‑seasoned brand or craft your own with fennel, black pepper, and a splash of wine. If you’re craving a leaner option, swap for turkey sausage, but be prepared to add a tablespoon of butter to keep the sauce from drying out.

Orecchiette – its ear-like shape is a secret sauce holder. If unavailable, tiny shells or even rigatoni will work. For a gluten‑free variation, choose a certified gluten‑free pasta; the texture stays identical, but you’ll need to adjust the sauce’s thickness slightly.

Original Ingredient Best Substitution Flavor / Texture Impact
Broccoli florets Cauliflower florets Milder flavor, similar crunch
Italian sausage Turkey sausage Lower fat, slightly drier sauce
Orecchiette pasta Gluten‑free pasta Same shape, adjust sauce thickness

How to Make Orecchiette with Sausage and Broccoli — Step-by-Step

Let’s dive in and bring this bright Italian plate to life.

Step 1: Prep Broccoli

Clean, trim, and chop the broccoli into bite‑sized florets. Toss with a pinch of salt and let rest while you prep the rest.

💡 emy’s Pro Tip: Keep the florets small so they steam quickly and stay crisp – not mushy.

Step 2: Cook Pasta

Bring a large pot of salted water to a boil. Add orecchiette and cook 2 minutes less than package says. Reserve 2 cups of pasta water and drain.

⚠️ Common Mistake to Avoid: Skipping the reserved water or undercooking; you need that starchy reserve for a silky sauce.

Step 3: Cook Sausage

Heat olive oil in a large skillet until shimmering. Add sausage, break it into crumbs, and cook 5‑6 minutes until browned and fragrant.

💡 emy’s Pro Tip: Use a back of the spatula to press the sausage as it cooks—this helps fat render out and creates a crisp edge.

Step 4: Cook Broccoli & Garlic

Add minced garlic to the sausage, sauté 30 s, then toss in broccoli and a light splash of pasta water to steam for 5‑6 minutes. Flip occasionally.

⚠️ Common Mistake to Avoid: Letting the garlic burn—this makes it bitter and ruins the sauce’s bright profile.

Step 5: Add Pasta

Return the drained pasta to the pan, stir in ½ cup of reserved water, and combine everything together.

💡 emy’s Pro Tip: Toss with a spoon until the pasta is fully coated; the remaining water will give it that silky coating.

Step 6: Toss and Adjust

If the mixture looks dry, add a bit more pasta water. Season with salt, pepper, and red pepper flakes. Finish with a drizzle of olive oil.

⚠️ Common Mistake to Avoid: Over‑seasoning before adding the olive oil—balance the salt with the oil later.

Step 7: Serve

Plate the orecchiette, sprinkle grated parmesan, and drizzle a final swirl of olive oil. Finish with flaky sea salt and a crack of pepper for that NYC street‑food crunch.

💡 emy’s Pro Tip: Serve immediately to keep the pasta al dente; any wait will turn it mushy.

Step Action Duration Key Visual Cue
1 Prep Broccoli 1 min Florets look even
2 Cook Pasta 2 min early Al dente texture
3 Cook Sausage 5 min Golden crust
4 Cook Broccoli & Garlic 5 min Florets turn bright green
5 Add Pasta 1 min Sauce clings to pasta
6 Toss & Adjust 30 s Sauce silky
7 Serve Immediate Glossy finish

Serving & Presentation

Toss the pasta with a handful of fresh basil from the East Village greenhouse for an herbaceous lift. Sprinkle the parmesan just before serving so the cheese’s nutty aroma lingers. Add a final splash of extra‑virgin olive oil for sheen.

Pair the dish with a crisp Italian white like Verdicchio, or a glass of light red such as Chianti for a classic pairing. On the side, toss a green salad with lemon vinaigrette and fresh fennel to echo the sausage’s fennel notes.

For a quick plating, twirl a few orecchiette onto a shallow plate, scatter a few broccoli shoots, and finish with a dusting of flaky sea salt that shimmers with citrus zest.

Pairing Type Suggestions Why It Works
Side Dish Roasted asparagus or crisp side salad Brightens the robust flavors
Sauce / Dip Croutons with garlic aioli or lemon‑olive oil Adds texture and acidity
Beverage Verdi chardonnay or light pinot noir Complements Italian sausage’s spice
Garnish Fresh basil, lemon zest, chili flakes Enhances aroma and color

Make-Ahead, Storage & Reheating

I love prepping this dish before the Monday chaos hits. Cook the pasta ahead, chill it, and re‑add the sausage and sauce the night before—a few minutes on the stove is all that’s needed.

Method Container Duration Reheating Tip
Refrigerator Airtight container 3‑4 days Reheat over low heat, stir, add water as needed.
Freezer Freezer bag 2 months Thaw overnight in fridge, then reheat gently.
Make‑Ahead Individual portions Up to a week Combine after reheating for crisp sauce.

When reheating, keep the sauce moist by adding a splash of stock or a teaspoon of olive oil—this restores that freshly cooked glaze that I love.

Variations & Easy Swaps

Variation Key Change Best For Difficulty Impact
Italian Sausage Swap Use lamb or pork sausage More robust flavor Same
Gluten‑Free Orecchiette Swap to certified gluten‑free pasta Dietary‑restricted Little extra tweaking
Summer Tomato Twist Add diced sun‑dried tomato Fresh, sweet contrast Easy

Italian Sausage Swap

Swap the classic sausage for lamb for a Middle Eastern twist, or for a richer, meaty pork sausage. The fennel and pepper remain, but the depth of flavor feels more “home‑cooked.”

Gluten‑Free Orecchiette

Use a quinoa or rice‑based pasta that matches orecchiette’s shape. It keeps the bite and holds sauce equally well; the only change is a slightly different crunch and a shorter boiling time.

Summer Tomato Twist

Incorporate sun‑dried tomatoes from the Brooklyn farmers market for a burst of caramelized sweetness. It pairs beautifully with the smoky sausage and bright broccoli.

How do I know when the sausage is fully cooked?

When the sausage turns a deep golden brown and the juices run clear, it’s fully cooked. In a professional kitchen, you’d use a thermometer set to 160°F to be sure. In a quick weeknight dinner, you’ll know by the browned edges, the fat rendered out, and the sizzling aroma that tells you you’re done. If you pause for a few seconds and no longer see a raw, pink center, it’s safe to move on.

Can I use chicken sausage instead of Italian sausage?

Yes, chicken sausage works, though the flavor profile changes. It’s leaner, so it’ll release less fat, which means you might need an extra tablespoon of olive oil or butter to keep the sauce from drying. The spices in chicken sausage vary—often more paprika or chili—so adjust the seasoning to match your taste. I’ve tried it with great results in a lighter, lighter‑spiced version of this dish.

Can I store leftovers in the refrigerator?

You can keep this dish in the fridge for up to three days. Store it in an airtight container so the sauce doesn’t dry out. When reheating, just add a splash of pasta water or a little butter to revive the silky coating and heat the pasta gently, stirring well so it stays moist.

How do I keep the broccoli from getting mushy?

The trick is to steam the broccoli just until it turns bright green—about five minutes is plenty. Avoid letting it sit too long; once it reaches that color, remove it from the heat. A quick toss in a splash of reserved pasta water helps keep it tender but still crisp, matching the al dente pasta. If you truly want extra crunch, briefly blanch it before adding it to the sausage.

Will using whole‑wheat orecchiette work?

Absolutely. Whole‑wheat orecchiette adds a nutty undertone and a firmer bite, which pairs nicely with the rich sausage. Be mindful that whole‑wheat pasta tends to brown a tad faster, so keep a close eye on it while boiling. I’ve incorporated it into this recipe, and the textural contrast is delightful—just keep up with the seasoning to balance the slightly earthy flavor.

What if I don’t have orecchiette?

Any short, shell‑like or ridged pasta will absorb the sauce beautifully. Small shells, ditalini, or even fettuccine strands work well. If you opt for a wider noodle, reduce the olive oil a touch to keep the sauce from becoming too heavy and spread it evenly so every bite gets the same flavor burst.

Can I use a different sauce instead of the olive‑oil based one?

Yes, a simple tomato sauce or a hearty cream sauce can be a delicious swap. For a lighter version, add a few spoonfuls of marinara just before serving; the acidity brightens the sausage and balances the richness. If you love creamy textures, a splash of heavy cream or a drizzle of truffle oil adds an indulgent twist—though that will shift the flavor profile toward a more decadent, brunch‑style dish.

How much olive oil should I use?

The recipe calls for one tablespoon, which is enough to coat the sautéed sausage and keep the sauce from sticking. If you’re watching calories, use a few drops of a high‑smoke point oil like avocado. For a more robust flavor, stick with a good quality extra‑virgin olive oil; it adds a citrusy nuance that elevates every component.

What is the best way to reheat leftovers?

Place the leftovers in a skillet over low heat, add a spoonful of water or broth, and stir until the sauce thickens. Heat until the pasta is warmed throughout—no more than five minutes. This gentle method preserves the sausage’s texture and prevents the sauce from drying out, giving you a dish that feels freshly made.

Share Your Version!

Drop a star rating and comment below – I love hearing how you tweak each recipe. If you capture a snap of your dish, share it on Instagram or Pinterest and tag @cookingwithemi so I can see how you’ve made this piece of home cooking yours.

What spice combination did you find most exciting in this dish? Let me know in the comments – I’m always hunting for the next bold flavor.

From my NYC kitchen to yours — I hope this recipe brings as much warmth to your table as it does to mine. — emy 🧡

📌

Love This Recipe? Save It to Pinterest!

If you enjoyed this Orecchiette with Sausage and Broccoli recipe, don’t let it get lost in your browser tabs! 😄 Pin it now so you can find it again anytime — and explore hundreds more tried-and-tested recipes waiting for you on my Pinterest boards.

👉 Follow emy on Pinterest @exorecipe

📌 Pin this recipe · 🔁 Re-pin your favorites · 💬 Tag me when you make it — I love seeing your creations!

Print
clock clock iconcutlery cutlery iconflag flag iconfolder folder iconinstagram instagram iconpinterest pinterest iconfacebook facebook iconprint print iconsquares squares iconheart heart iconheart solid heart solid icon

Orecchiette with Sausage and Broccoli Recipe


  • Author: Chef Emy

Description

This orecchiette with sausage and broccoli is a delicious and nutritious weeknight dinner. Ready in 30 min + made with 5 simple ingredients!


Ingredients

Scale
  • 16 oz. broccoli florets (about 2 small crowns)
  • 1 lb. orecchiette pasta
  • 1 Tbsp. olive oil
  • 16 oz. raw Italian sausage
  • 4 cloves garlic
  • 2 cups reserved pasta water
  • topping: grated parmesan cheese, olive oil, red pepper flakes, freshly cracked pepper, flaky sea salt

Instructions

  1. Prep broccoli: clean and trim broccoli. Chop florets into small pieces.
  2. Cook pasta as directed on the package, but take off the heat 2 minutes early. BE SURE TO RESERVE 2 CUPS PASTA WATER.
  3. Heat 1 tablespoon of olive oil in a large skillet. When its hot, add sausage to the pan, breaking it up with the back of a spatula or spoon. Cook for about 5-6 minutes, until browned.
  4. Add chopped broccoli and garlic to the pan, tossing everything together. Cook for about 5-6 minutes, until broccoli has softened. Add a sprinkle of water to help steam (and soften up) the broccoli.
  5. When pasta is finished cooking, add the drained pasta to the pan, along with 1/2 of the pasta water.
  6. Toss everything together and add extra pasta water if the mixture seems dry.
  7. Serve with desired toppings: parmesan cheese, a drizzle of olive oil, flaky sea salt, red pepper flakes, and freshly cracked pepper to taste.

Burger Bowls

Burger Bowls: Homemade Burger Sauce & Crispy Potato Chips – A Fresh Take on a Classic

⚖️
Difficulty
Easy
⏲️
Prep Time
15 mins
🕒
Cook Time
25 mins
⏱️
Total Time
40 mins
🍽️
Servings
4

Growing up in a bustling Moroccan kitchen, I learned early how to turn humble staples into flavor fireworks. When my parents opened a small bistro in Paris, they taught me the art of balancing spice with freshness. Now, in the fast-paced streets of New York City, I blend those lessons to create quick, crowd‑pleasing dishes that feel like a vacation in every bite. This Burger Bowls recipe is my homage to the city’s melting‑pot vibe—hearty, colorful, and irresistibly comforting.

Picture a bowl of golden, crispy potato chips that crunch with every bite, the earthy aroma of smoked paprika and garlic dancing in the air. Beneath that, a bed of crisp lettuce offers a cool, leafy contrast, while tender beef mince, seasoned to perfection, bursts with savory depth. A swirl of homemade burger sauce—tangy, creamy, with a hint of mustard—drizzles over the top, its glossy sheen turning each spoonful into a visual feast. The final flourish? Pickles, shredded cheese, and a sprinkle of fresh herbs that add a bright, zesty note. The result is a symphony of textures—crunchy, juicy, silky—balanced by layers of aroma and flavor that keep you coming back for more.

What sets this version apart is my “special sauce” that ties all the elements together. It’s a quick, no‑fuss blend of mayonnaise, ketchup, mustard, and a splash of pickle juice, giving the bowl a signature tang that’s both nostalgic and novel. I’ve also tweaked the seasoning of the beef mince, using a pinch of smoked paprika to echo the chip flavor. A common mistake I’ve seen is over‑cooking the potatoes until they’re dry; the secret is to keep them lightly crisp so the sauce can cling to every bite. I’ll share a few pro tips along the way to help you avoid that pitfall.

Why This Burger Bowls Recipe Is the Best

The Flavor Secret lies in the sauce. My homemade burger sauce marries creamy mayonnaise with tangy ketchup, a dash of Dijon mustard, and the zing of pickle juice. The result is a silky, tangy glaze that coats every ingredient, turning an ordinary bowl into a gourmet experience. Drawing on Moroccan spice traditions and French sauce finesse, this sauce elevates the dish without adding extra calories.

Perfected Texture comes from two simple techniques: air‑frying the potato chips to keep them crunchy yet airy, and searing the beef mince over high heat to lock in juices. I always toss the potatoes in a light coating of olive oil and smoked paprika before air frying, which gives them a golden‑brown crust that resists sogginess. The beef, meanwhile, is cooked quickly at full heat, ensuring the outside stays browned while the inside remains tender.

Foolproof & Fast means no complicated steps or fancy equipment. The entire meal can be assembled in under 30 minutes, using only a skillet and an air fryer or oven. The recipe scales easily for larger groups—just double the ingredients, and you’re ready for a party or a family dinner on a weekday.

Burger Bowls Ingredients

I usually source these ingredients at the Brooklyn farmer’s market, where the fresh greens and lean beef are a dream. A quick detour to my favorite Moroccan spice shop in Williamsburg also guarantees that that smoky paprika punch in every bite.

Ingredients List

  • 1 ½ teaspoons smoked paprika
  • 1 teaspoon garlic powder
  • 1 teaspoon onion powder
  • 1 teaspoon dried oregano or mixed herbs
  • ½ teaspoon salt
  • ¼ teaspoon black pepper
  • 2–3 medium potatoes, cut into chips
  • 2 tablespoons olive oil (divided)
  • 500 grams (about 1 lb) lean beef mince
  • Lettuce, shredded
  • Cheese, dairy‑free or regular, shredded
  • Pickle slices
  • 4 tablespoons mayonnaise
  • 1 tablespoon ketchup
  • 1 teaspoon mustard (Dijon or yellow)
  • 1 teaspoon pickle juice (from the jar of pickles)
  • ½ teaspoon garlic powder (for sauce)
  • ½ teaspoon smoked paprika (for sauce)

Ingredient Spotlight

Potatoes: Choose russet or Yukon Gold for the best crispness. When air‑fried, they keep their interior fluffy while the exterior stays crunchy. If you’re short on an air fryer, the oven works just fine—just preheat to 400 °F and roast for 20–25 minutes.

Lean Beef Mince: A 10‑12% fat content is ideal for juicy, flavorful burgers. Look for “ground 93% lean” at the market or ask your butcher to trim the fat. Substituting with turkey mince yields a lower‑fat version while retaining the same savory profile.

Mayonnaise: A creamy base for the sauce; opt for a light or vegan variety if you’re vegan. If you prefer a thicker sauce, add a spoonful of Greek yogurt for a protein boost.

Original Ingredient Best Substitution Flavor / Texture Impact
Lean Beef Mince Ground Turkey Lighter, less fat, same savory bite
Mayonnaise Greek Yogurt Creamy, tangy, higher protein, lower calories
Cheese Dairy‑Free Cheddar Similar melt, mild dairy alternative

How to Make Burger Bowls — Step-by-Step

Let’s dive in. The entire process takes just under an hour, and the result is a bowl that feels like a gourmet burger plate without the plate.

Step 1: Mix the Spice

In a small bowl, combine 1 ½ tsp smoked paprika, 1 tsp garlic powder, 1 tsp onion powder, 1 tsp dried oregano, ½ tsp salt, and ¼ tsp black pepper. Stir until evenly blended. Set aside; you’ll use half for the potatoes and the rest for the beef.

💡 emy’s Pro Tip: Keep the spice mix dry—any moisture will make the potatoes soggy.

Step 2: Cook the Potatoes

Preheat your air fryer to 400 °F (200 °C). Toss the potato chips with 1 tablespoon olive oil and half of the spice mix. Spread them in a single layer; don’t overcrowd the basket. Air fry for 12–15 minutes, flipping halfway, until golden and crispy. If using an oven, bake on a parchment-lined tray at 400 °F for 20–25 minutes.

⚠️ Common Mistake to Avoid: Overcrowding the air fryer basket; this prevents even crisping.

Step 3: Cook the Beef

Heat the remaining tablespoon of olive oil in a skillet over high heat. Add the 500 g beef mince, breaking it into crumble. Cook for 5 minutes, then sprinkle with the remaining spice mix. Continue cooking until the meat is browned and any excess liquid evaporates, about 5–7 more minutes.

💡 emy’s Pro Tip: Let the pan get very hot—this seals in juices and adds a caramelized crust.

Step 4: Prepare the Sauce

In a bowl, whisk together 4 Tbsp mayonnaise, 1 Tbsp ketchup, 1 tsp mustard, 1 tsp pickle juice, ½ tsp garlic powder, and ½ tsp smoked paprika. Taste; add salt or more mustard if desired. Chill for 10 min to allow flavors to meld.

⚠️ Common Mistake to Avoid: Using too much ketchup; it can overpower the sauce’s tang.

Step 5: Assemble the Bowls

Divide the crispy chips among 4 bowls. Layer shredded lettuce, then the cooked beef, shredded cheese, and pickle slices. Drizzle the homemade burger sauce generously. Serve immediately, or keep the sauce separate until just before eating.

💡 emy’s Pro Tip: For an extra pop, sprinkle a pinch of fresh cilantro or parsley over the top.

Step Action Duration Key Visual Cue
1 Mix spice 3 min Evenly blended powder
2 Cook potatoes 12‑15 min Golden‑brown edges
3 Cook beef 10‑12 min Dark, caramelized crust
4 Prepare sauce 5 min Smooth, glossy mixture
5 Assemble bowls 5 min Layered, colorful presentation

Serving & Presentation

Serve the bowls on a warm ceramic plate that showcases the bright colors. Garnish with a scattering of fresh parsley and a wedge of lime to cut through the richness. In my Moroccan home, we’d add a drizzle of harissa for heat—feel free to replicate that spicy kick if you like.

Pair the bowls with a light, chilled vinaigrette—perhaps a cucumber‑mint dressing that echoes a Parisian summer salad. For drinks, a cold glass of sparkling water with a splash of lemon or a crisp, light white wine like Sauvignon Blanc complements the tangy sauce.

If you’re dining with kids, consider using a small paper cone instead of a bowl so the “chips” stay in place. This playful twist is sure to win over even the pickiest eaters.

Pairing Type Suggestions Why It Works
Side Dish Quinoa salad, steamed broccoli Freshness and protein balance
Sauce / Dip French mustard dip, garlic aioli Enhances savory layers
Beverage Sparkling water with lime, light white wine Refreshes palate, cuts through richness
Garnish Fresh herbs, lime wedges, chili flakes Adds brightness and heat

Make-Ahead, Storage & Reheating

When my schedule gets hectic, I prep the sauce and roast the chips ahead of time, storing them in airtight containers. The beef stays best if cooked fresh, but you can also freeze it in portioned containers and reheat quickly.

Method Container Duration Reheating Tip
Refrigerator Tight‑sealed container 3 days Warm in microwave for 1 min
Freezer Vacuum seal or freezer bag 2 months Thaw overnight, reheat in skillet
Make-Ahead Pre‑assembled bowl sans sauce 2 days Add sauce freshly before serving

If you’re in a rush, simply reheat the beef and potato chips together in a hot skillet for 3 minutes; this restores the crispness without drying out the meat. The sauce can be kept in the fridge and whisked before use—it’s that simple.

Variations & Easy Swaps

Variation Key Change Best For Difficulty Impact
Veggie Burger Bowl Replace beef with lentil patty Vegans Easy
Gluten‑Free Use gluten‑free breadcrumbs in beef mix Gluten‑sensitive Medium
Summer Twist Add diced mango and cilantro Warm weather Easy

Veggie Burger Bowl

Swap the beef for a seasoned lentil patty, pan‑seared until golden. The lentils bring earthiness that pairs well with the smoky paprika, while the sauce remains creamy and tangy—exactly the same comforting experience for a plant‑based crowd.

Gluten‑Free

To accommodate gluten intolerance, simply add a tablespoon of gluten‑free breadcrumbs to the beef mixture, which helps bind the meat and gives a subtle crunch. The texture stays firm, and the flavor profile stays unchanged.

Summer Twist

Introduce diced mango and fresh cilantro to bring a tropical brightness to the bowl. The mango’s sweetness cuts through the savory sauce, while cilantro adds a citrusy herbal note that feels like a New York summer picnic.

How long does it take to make Burger Bowls?

It takes about 40 minutes from start to finish, including prep, cooking, and assembly. Prep involves seasoning and cutting potatoes, while the cooking phase is split between air‑frying the chips and pan‑sautéing the beef. The final assembly is quick, making this an ideal weeknight meal.

Can I use a regular oven instead of an air fryer?

Absolutely! Preheat the oven to 400 °F (200 °C) and spread the seasoned potato chips on a parchment‑lined tray. Bake for 20–25 minutes, turning halfway, until they’re golden and crisp. The texture will be slightly different but still delicious.

What is the best way to store leftovers?

Keep the cooked beef and sauce separate from the crispy chips. Store the beef in an airtight container in the fridge for up to 3 days. The sauce can be kept for 5 days in the refrigerator. Reheat the beef and chips in a skillet for a few minutes to restore crispness.

Can I make the sauce ahead of time?

Yes, the homemade burger sauce holds up well. Prepare it a few hours ahead or even the night before, then chill it in the fridge. When ready to serve, give it a quick stir to re‑emulsify the flavors.

Is it possible to make a dairy‑free version?

Sure! Swap the regular mayonnaise for a vegan mayo, the cheese for a dairy‑free shredded cheese, and keep the rest of the recipe unchanged. The sauce remains creamy and tangy, and the overall taste stays true to the original.

Do I need to use beef mince, or can I use ground turkey?

Ground turkey works fine and results in a lighter version of the dish. It cooks quickly and pairs well with the smoked paprika and other spices, giving you a similar flavor profile but with fewer calories.

What would be a good side dish to serve with Burger Bowls?

A simple green salad with a light vinaigrette or roasted broccoli makes a great side. The freshness balances the rich sauce and adds a crunchy contrast, while a chilled sparkling water keeps the palate refreshed.

Can I add extra heat to the sauce?

If you love a kick, add a teaspoon of sriracha or a pinch of red pepper flakes to the sauce. This boosts the heat without overpowering the tangy base, giving your bowls a lively, spicy note.

Share Your Version!

I’d love to see how you put your own spin on these Burger Bowls. Drop a star rating and comment below—your feedback fuels my next recipe adventure. Share a photo on Instagram or Pinterest and tag @cookingwithemi. And if you tried adding a spicy twist, let me know: did it bring the right balance of heat and flavor?

From my NYC kitchen to yours — I hope this recipe brings as much warmth to your table as it does to mine. — emy 🧡

📌

Love This Recipe? Save It to Pinterest!

If you enjoyed this Burger Bowls recipe, don’t let it get lost in your browser tabs! 😄 Pin it now so you can find it again anytime — and explore hundreds more tried-and-tested recipes waiting for you on my Pinterest boards.

👉 Follow emy on Pinterest @chefrecipes2

📌 Pin this recipe · 🔁 Re-pin your favorites · 💬 Tag me when you make it — I love seeing your creations!

Print
clock clock iconcutlery cutlery iconflag flag iconfolder folder iconinstagram instagram iconpinterest pinterest iconfacebook facebook iconprint print iconsquares squares iconheart heart iconheart solid heart solid icon

Burger Bowls


  • Author: Chef Emy

Description

These healthy burger bowls with special sauce are the best weeknight dinner idea this summer! They are a big, fresh healthy salad filled with crispy potato chips, perfectly seasoned beef mince and all your favourite burger toppings, finished with a big drizzle of homemade burger sauce.


Ingredients

Scale
  • 1 ½ teaspoons smoked paprika
  • 1 teaspoon garlic powder
  • 1 teaspoon onion powder
  • 1 teaspoon dried oregano or mixed herbs
  • ½ teaspoon salt
  • ¼ teaspoon black pepper
  • 23 medium potatoes
  • 2 tablespoons olive oil (divided)
  • 500 grams lean beef mince/ground beef
  • Lettuce (shredded)
  • Cheese (dairy-free or regular)
  • Pickle slices
  • 4 tablespoons mayonnaise
  • 1 tablespoon ketchup
  • 1 teaspoon mustard (dijon or yellow)
  • 1 teaspoon pickle juice (from the jar of pickles)
  • ½ teaspoon garlic powder
  • ½ teaspoon smoked paprika

Instructions

  1. Mix together the spice mix ingredients in a small bowl and set aside.
  2. Wash and cut the potatoes into chips, then pat them dry with paper towels. Place the chips in a large mixing bowl with 1 tablespoon of olive oil and sprinkle in half of the spice mix. Mix well to ensure the potatoes are thoroughly coated.
  3. Arrange the potatoes on a baking tray and cook in a preheated oven at 200°C (390°F) for 3040 minutes, or in the air fryer for about 20 minutes, until golden and crispy.
  4. While the potatoes are cooking, heat the remaining olive oil in a frying pan over high heat. Add the beef mince, breaking it apart with a wooden spoon. Once browned, sprinkle in the remaining spice mix and continue cooking until the meat is darkened and any excess moisture has evaporated.
  5. In a small bowl, combine the burger sauce ingredients. Taste and adjust seasoning if needed.
  6. Once the potatoes are ready, divide them among your bowls. Fill the remaining space in each bowl with shredded lettuce, then add the cooked beef mince, cheese, and pickles. Drizzle the burger sauce over the top and serve.

Easy Ravioli Sauce

Easy Ravioli Sauce Creamy Tomato Twist – Quick & Flavorful Sauce

⚖️
Difficulty
Easy
⏲️
Prep Time
5 mins
🕒
Cook Time
20 mins
⏱️
Total Time
25 mins
🍽️
Servings
4

I still remember the first time I tried to combine the silky cream of a Parisian béchamel with the bright punch of a Moroccan tomato stew. On a rainy Sunday in Manhattan, I was juggling a bag of 20‑ounce ravioli from a local deli with the aroma of sizzling garlic and butter that filled my tiny Brooklyn apartment. That night, a simple sauce that turned out to be more than just a background dish; it became the centerpiece. It’s the “Easy Ravioli Sauce Creamy Tomato Twist” that blends French technique and North African flavor under one pot, reshaping how we think about making comfort food in a hurry.

This sauce sings with layers of flavor—rich buttered garlic, a silky roux that coats every strand, a deep tomato foundation that nods to the street stalls of the Old City of Fez, and a splash of half‑and‑half that gives that Parisian velvety finish. The dish feels both familiar and adventurous: the olive‑tinted cream coat grabs your eye, the small green chilies pop with peppery heat, and the Parmesan cascade into a glossy shine. As you stir, the aromas swirl like incense in a Moroccan mosque, while the subtle mustard powder provides a secret backbone that you weren’t aware you’d need.

I’ve spent years balancing the artistry of French sauce work with the straightforwardness of New York street foods. The twist here is the use of Rotel’s green chilies. Normally reserved for Tex‑Mex dishes, I reinvented them to complement the creamy texture and give this sauce a gentle kick. One common mistake I see on YouTube is pouring the entire sauce over the ravioli and tossing; instead, I recommend adding the ravioli gently later so the pasta can absorb the flavors without drowning. A pro tip: keep a little tomato juice on hand to thin the sauce right before you plate, preserving a silky yet not too thick consistency.

Why This Easy Ravioli Sauce Recipe Is The Best

The Flavor Secret

Because I grew up in Morocco, I learned early how a good sauce can unify a meal. By enriching the classic tomato base with a beurre roux and a splash of cream, I create depth that feels both comforting and sophisticated. This technique, refined in Parisian culinary school, turns a quick lunch into an elegant dinner.

Perfected Texture

The key to a silky sauce is patience. A roux that’s lightly browned then infused with tomato paste sets the stage for a velvety base. I always whisk in the half‑and‑half in small pours, letting it absorb before adding the next, reducing the risk of curdling. The result is a luscious coating that clings to every ravioli piece.

Foolproof & Fast

Step‑by‑step timing is forgiving; no advanced skill is required. Even a beginner can swoon over the sauce’s final glossy sheen, and the handy list of ingredients, all of which you can pick up at any NYC market, makes this a go‑to option for weekday dinners.

Easy Ravioli Sauce Ingredients

I’m sourcing my ingredients from the Saturday farmers’ market near my apartment. Fresh garlic, butter from a local dairy, and rotisserie‑style parmasan are all hand‑picked. Even the Rotel tomatoes feel like a seasonal surprise, full of that pine‑green bright flavor that adds an unexpected pop.

Ingredients List

  • 3 tablespoons salted butter (I use Land O’ Lakes)
  • 3 cloves garlic, minced
  • 2 tablespoons all‑purpose flour
  • 1 tablespoon tomato paste
  • ½ teaspoon onion powder, ½ teaspoon dried basil, ½ teaspoon dried oregano, ½ teaspoon mustard powder
  • ¾ cup chicken broth
  • 1 ½ cups half and half (half light cream/half milk)
  • 10 oz. Rotel tomatoes with green chilies (juices reserved)
  • 3 tablespoons cream cheese, softened
  • 1/3 cup Parmesan cheese, grated
  • 20 oz. refrigerated ravioli
  • 1 pinch Red Pepper Flakes (optional)

Ingredient Spotlight

Butter: The heart of a French béchamel. Look for dairy‑free or cultured options if you need a different flavor. If you’re short on butter, a splash of olive oil can add a Mediterranean vibe but will change the richness level.

Half and Half: It balances creaminess with a lighter texture compared to heavy cream. Substitute with a 2:1 skim milk to heavy cream ratio for a lower‑fat version; the sauce will still stay silky but a touch thinner.

Rotel Tomatoes: The green chile gives subtle heat. If you prefer a sweeter sauce, swap for diced canned tomatoes (no chilies) and add a pinch of sugar. On an alternative, fresh diced tomatoes in the summer bring a natural brightness.

Original Ingredient Best Substitution Flavor / Texture Impact
Half and Half 1/2 Cup Milk + 1/2 Cup Heavy Cream Lighter body, similar creaminess
Rotel Canned diced tomatoes Milder heat, sweeter profile

How to Make Easy Ravioli Sauce – Step-by-Step

Let’s get the oven prepped and the skillet ready—this recipe walks you through crafting a silky sauce that will make every ravioli steam with gratitude.

Step 1: Melt Butter

Place a large high‑walled skillet over medium‑low heat. Add 3 tbsp salted butter and let it melt fully, swirling occasionally until the edges start to look pale. This takes roughly 2 minutes.

💡 emy’s Pro Tip: Use a sturdy pot to keep the butter from foaming over.

Step 2: Add Garlic

Add the minced garlic and sauté for 2 minutes until aromatic, stirring constantly to avoid burning. Watch for the subtle golden brown scent—a sign that the flavor base is forming.

⚠️ Common Mistake to Avoid: Skipping the wait before adding flour can “coke” the sauce.

Step 3: Add Flour

Stir in 2 tbsp all‑purpose flour, cooking the mixture for 2 minutes to cook out the raw taste and form the roux. The sauce should start to thicken slightly.

💡 emy’s Pro Tip: Whisk constantly to avoid lumps, and let the roux take a light golden hue.

Step 4: Add Tomato Paste & Spices

Blend in 1 tbsp tomato paste along with onion powder, basil, oregano, and mustard powder. Stir until the paste is fully incorporated and the aromas begin to dance.

⚠️ Common Mistake to Avoid: Adding too much salt upfront can make the sauce too salty.

Step 5: Add Broth & Half And Half

Pour in ¾ cup chicken broth in small splashes, whisking continuously to keep the sauce smooth. Then, add 1 ½ cups half and half in the same manner, bringing the mixture to a gentle boil before reducing to a low simmer.

💡 emy’s Pro Tip: Keep the heat low to preserve the silky texture—never let it boil vigorously.

Step 6: Add Cream Cheese & Tomatoes

Integrate 3 tbsp softened cream cheese and the drained 10 oz Rotel tomatoes. Stir until the cheese melts into a smooth sauce. Keep the reserved tomato liquid aside; it’s perfect for tweaking viscosity later.

⚠️ Common Mistake to Avoid: Mixing the cheeses together too quickly can cause separation.

Step 7: Cook Ravioli

Boil a separate pot of salted water, add the 20 oz refrigerated ravioli, cook according to package instructions (about 3-4 minutes), then drain. The sauce should still be partially thick.

💡 emy’s Pro Tip: A quick splash of the reserved tomato juice after draining can loosen the sauce without over‑watering.

Step 8: Reduce Sauce

Return the skillet to low heat. Sprinkle in 1/3 cup Parmesan cheese gradually, stirring until fully melted and evenly distributed. Add red pepper flakes if using. Watch your sauce for a glossy, slightly thickened consistency.

⚠️ Common Mistake to Avoid: Stirring too fast can cause the cheese to clump.

Step 9: Add Ravioli

Gently fold the ravioli into the sauce using a silicone spatula. Stir until the pasta is fully coated, allowing the sauce to cling around each piece. Adjust thickness with reserved tomato juice if desired.

💡 emy’s Pro Tip: Sell your batter into the sauce slowly; this keeps the ravioli from getting soggy.

Step Action Duration Key Visual Cue
1 Melt butter 2 mins Butter fully dissolved, no bubbles
2 Sauté garlic 2 mins Golden aroma, not burnt
3 Cook roux 2 mins Light golden color
4 Add tomato paste + spices 1 min Rich aroma, paste stirs in
5 Add broth & half & half 5 mins Smooth, slightly thickened
6 Add cream cheese & tomatoes 3 mins Cheese melted, sauce silky
7 Cook ravioli 3‑4 mins Pasta al dente
8 Reduce sauce + Parmesan 4 mins Sauce shiny, slightly thickened
9 Add ravioli + optional liquid 2‑3 mins Sauce coats pasta evenly

Serving & Presentation

Serve this golden, silky sauce over a single al dente ravioli portion in a wide rustic bowl that lets the sauce splash back onto the plate. Sprinkle a handful of fresh basil, a light dusting of toasted pine nuts, and a drizzle of high‑quality olive oil—ingredients a Moroccan market shop or a downtown farmer’s market in NYC would love. Pair the plate with a crisp glass of Sauvignon Blanc or a light sparkling rosé that cuts through the richness.

The bright eye‑contacting sauce yields an inviting color. Stand, spinner over your plate, and let the aroma of butter and tomato mingle with the orchard of garlic. I’ve seen dish critics compare a plate of this to a warm hug from my mother, and I want you to feel the same when you taste the finished result.

Pairing Type Suggestions Why It Works
Side Dish Roasted asparagus, garlic bread, crisp salad Balances richness with freshness
Sauce / Dip Ciabatta with olive tapenade Enhances the buttery base
Beverage Sauvignon Blanc, Chardonnay, sparkling rosé Acidic tension cuts through cream
Garnish Fresh basil, parsley, grated nutmeg Add complexity and color

Make-Ahead, Storage & Reheating

I’ve been juggling a culinary career in Manhattan and living in a studio. My secret to having a gourmet dinner in under 30 minutes is a simple reheating method: cook the sauce while the ravioli cooks, then rinse the ravioli in cold water and keep refrigerated. When ready to serve, reheat the sauce over low heat, whisk in a splash of reserved tomato juice, and gently fold in the ravioli for about 3 minutes.

Method Container Duration Reheating Tip
Refrigerator Loft‑size mason jar, airtight 3 days Reheat sauce, stir, add pasta after. No over‑simmer.
Freezer Ice‑cube trays, then seal bags 2 months Thaw overnight, reheat sauce, heat slowly.
Make‑Ahead Sealed bowl with sauce only 1 day Add ravioli just before serving.

When reheating from the fridge, I keep a splash of half‑and‑half in a separate cup to pour in as needed. The sauce stays silky without becoming too thick. The key is gentle heat; do not let it boil or you risk curdling.

Variations & Easy Swaps

Variation Key Change Best For Difficulty Impact
Vegetarian Skill Add chopped spinach & mushrooms Pure veggie lovers No change
Gluten‑free Use gluten‑free ravioli Tough budgets, restricted diets Easy
Seasonal Punch Swap Rotel for sun‑dried tomatoes Summer vibes No extra steps

Vegetarian Skill

Stir in sautéed mushrooms and a handful of fresh spinach during step 6. Thanks to the creamy base this keeps the dish hearty without any meat, and the earthy flavor echoes the Moroccan tagine aromas that I used to serve at family gatherings.

Gluten‑free / Dairy‑Free

Replace the ravioli with gluten‑free options from the same brand, and swap the half‑and‑half with coconut milk. The coconut adds a touch of tropical sweetness that balances the green chilies, creating a tantalizing new take that still feels close to the original.

Seasonal Punch

In the summer, replace the Rotel with sun‑dried tomatoes for a more concentrated tomato flavor. The saltiness from the sun‑dried adds a dimension reminiscent of Mézèdah, one of my favorite Mediterranean salads, and gives the sauce a deep ruby hue.

How long can I store the sauce in the refrigerator?

My sauce keeps safely in the fridge for up to three days, assuming it was stored in a tight‑sealing container and kept at or below 40°F. The richness of the cream cheese and half‑and‑half means there’s slightly more moisture inside, which can encourage mold if left too long. The best practice is to scoop out only the amount you plan to eat, and discard the rest after three days.

Can I use a different type of ravioli?

Absolutely! The sauce is versatile enough to partner with any stuffed pasta—cheese, spinach, or even pumpkin ravioli. Just remember to adjust the cooking time to match the package directions, and keep the sauce low‑heat to avoid over‑melting your ravioli or making it soggy. The richer the filling, the more flavor will leach into the sauce.

What can I do if my sauce gets too thick?

Should the sauce become too thick, stir in a splash of the reserved tomato juice or a small amount of hot water until it reaches your desired consistency. Be sure to keep the heat low; high simmering can make the sauce seize and separate. A second piece of cream cheese can also help bring it back to a silky state.

We can’t find Rotel tomatoes; what’s a good alternative?

Rotel’s blend of diced tomatoes and green chilies gives a subtle heat. If you’re out of them, use canned diced tomatoes with a dash of chili flakes or fresh diced tomatoes with a teaspoon of tomato paste and a pinch of ground cumin. Another great substitute is a jar of salsa verde, which adds green pepper flavor, but keep an eye on salt.

Is it possible to use a lan?

In one of the recipe variations, I detailed how you could instead use a fermented corn “sweet potato” sauce with a pinch of avocado oil to create a Mediterranean twist. The foundation of the sauce remains the same: a roux, tomato base, and a creamy finish. While it changes the flavor profile, the method of blending still applies and the final dish will still deliver the comforting textures you love.

What gluten‑free alternatives can I use for the roux?

Use arrowroot or cornstarch to replace the flour in the roux. Mix the starch with an equal part cold water to form a slurry before adding it to the melted butter. For a richer, cake‑like feel, consider a pinch of xanthan gum—just a cup‑sized amount helps the sauce smooth out while remaining gluten‑free.

Can I adjust the amount of cheese?

Yes, feel free to adjust to your taste. If you prefer a more pronounced cheesy flavor, add an extra ½ cup of grated Parmesan. Conversely, reduce the cheese for a lighter sauce. Just remember to stir slowly and incorporate cheese near the end of cooking to maintain a smooth texture instead of clumping.

Do I need to boil the ravioli separately?

Yes, the recommended method is to cook ravioli directly in salted boiling water for the time stated on the package, then drain before adding to the sauce. This way the pasta can fully absorb the sauce without becoming mushy. Skipping this step or adding pasta to the sauce while it’s still thick can dilute the flavor and compromise texture.

Share Your Version!

I love hearing how my friends add a personal twist to the sauce, be it extra herbs or a different type of pasta. If you try this recipe, please leave a star rating and share your experience in the comments. Snap a photo and tag @cookingwithemi on Instagram or Pinterest—we love to see your plates. If you’d like to challenge me, tell me: what new ingredient would you add to the sauce to make it truly yours?

From my NYC kitchen to yours — I hope this recipe brings as much warmth to your table as it does to mine. — emy 🧡

📌

Love This Recipe? Save It to Pinterest!

If you enjoyed this Easy Ravioli Sauce recipe, don’t let it get lost in your browser tabs! 😄 Pin it now so you can find it again anytime — and explore hundreds more tried-and-tested recipes waiting for you on my Pinterest boards.

👉 Follow emy on Pinterest @chefrecipes2

📌 Pin this recipe · 🔁 Re-pin your favorites · 💬 Tag me when you make it — I love seeing your creations!

Print
clock clock iconcutlery cutlery iconflag flag iconfolder folder iconinstagram instagram iconpinterest pinterest iconfacebook facebook iconprint print iconsquares squares iconheart heart iconheart solid heart solid icon

Easy Ravioli Sauce


  • Author: Chef Emy

Description

This easy ravioli sauce is so easy to make with refrigerated or frozen ravioli. It has a thick and flavorful cream sauce with a hint of tomato flavor, simple seasonings, and fresh or canned diced tomatoes.


Ingredients

Scale
  • 3 tablespoons salted butter (I use Land O' Lakes)
  • 3 cloves garlic (minced)
  • 2 tablespoons all-purpose flour
  • 1 tablespoon tomato paste
  • ½ teaspoon EACH: onion powder, dried basil, dried oregano, mustard powder
  • ¾ cup chicken broth
  • 1 ½ cups half and half (half light cream/half milk)
  • 10 oz. Rotel tomatoes with green chilies (juices reserved )
  • 3 tablespoons cream cheese (softened)
  • 1/3 cup Parmesan cheese (grated)
  • 20 oz. refrigerated ravioli
  • 1 pinch Red Pepper Flakes (optional)

Instructions

  1. Prep Work: Measure out all ingredients prior to beginning.
  2. Melt the butter in a large high-walled skillet over medium-low heat. Add the garlic and cook for 2 minutes, stirring continuously. Add the flour and cook for 2 more minutes. Add the tomato paste, onion powder, basil, oregano, and mustard powder. Stir to combine.
  3. Add the chicken broth in small splashes, stirring continuously. Add the half and half in the same manner. Bring to a boil, reduce to a simmer.
  4. Add the softened cream cheese and drained diced tomatoes. (Pro Tip: Reserve the tomato juice in case youd like to thin the sauce out at the end.)
  5. Cook the ravioli according to package instructions, drain.
  6. Reduce heat of the sauce to low. Gradually sprinkle in the Parmesan cheese and stir until combined. Add the red pepper flakes, if using.
  7. Add the ravioli and use a silicone spatula to gently stir until combined. Add any of the reserved tomato juice if desired. Serve!

Beef Stir Fry with Vegetables (30-Minutes)

Beef Stir Fry with Vegetables (30-Minutes) Stable – Quick 30‑Minute Stir‑fry

⚖️
Difficulty
Easy
⏲️
Prep Time
10 mins
🕒
Cook Time
20 mins
⏱️
Total Time
30 mins
🍽️
Servings
4

I fell in love with the sizzling rhythm of a wok on a street‑side kitchen in Marrakech, an era when a quick stir‑fry could elevate humble ingredients into a banquet. That memory carried over to my training in Paris, where I mastered a sauce that glistens like a night sky over the Seine. Now, in the heat of my New York kitchen, I blend Moroccan spice, French technique, and the city’s vibrant produce market into a dish that’s not just hearty but also swiftly ready.

The bright splash of fresh broccoli, the crunch of snap peas, and the sweet tang of hoisin‑honey glaze dance together, creating a symphony of umami, sweetness, and crispness. The tender beef slices, sliced against the grain, mingle with the vegetables like a bride and groom at a bustling soirée, each bite teasing your tongue with caramelized edges and a whisper of garlic and ginger.

This version’s secret lies in the glaze’s quick sweetness and the methodical sear that locks in juices. A single high heat sear on the beef followed by an instantaneous stir‑fry of veggies keeps everything crisp. A quick 30‑minute window fits my NYC routine—no fuss, no compromise. Along the way I’ll share a pro tip that turns a left‑handed oven into a dependable culinary ally, and flag a beginner’s mistake that can ruin the texture you’re chasing.

Why This Beef Stir Fry with Vegetables Recipe Is the Best

My culinary heritage blends Moroccan paprika‑tinged stews, French beurre blanc techniques, and the instinctive quickness of New York street food. That convergence gives this stir‑fry a depth of flavor that feels like a passport in disguise—a fragrant, savory‑sweet sauce that brings a sigh of home to any plate.

The texture of this dish is a testament to culinary precision. By slicing beef against the grain and searing it high heat first, I achieve a golden crust that holds juiciness, while using fresh ginger gives the sauce a fragrant lift that balances the sweetness.

It’s a beginner‑friendly recipe that respects time constraints. The core steps—slice, sear, stir—can be accomplished in under half an hour, making it ideal for any busy person who wants quality without waking up the kitchen to a slow simmer.

Beef Stir Fry Ingredients

I pick my colors at the Union Square farmers market, always looking for crisp broccoli and fresh carrots. My mama’s spice cabinet is my best secret: a pinch of cumin that cuts the sweetness and a sprinkle of sesame that gives a toasted kick.

Ingredients List

  • 1 lb (450g) flank steak, thinly sliced
  • 2 tablespoons soy sauce
  • 1 tablespoon hoisin sauce
  • 1 tablespoon sesame oil
  • 1 tablespoon honey
  • 2 garlic cloves, minced
  • 1 teaspoon fresh ginger, grated
  • 2 tablespoons vegetable oil (for stir frying)
  • 1 bell pepper, thinly sliced
  • 1 cup broccoli florets
  • 1 carrot, julienned
  • 1/2 cup snap peas, ends trimmed
  • 2 green onions, chopped (for garnish)
  • 1 tablespoon sesame seeds (optional, for garnish)
  • Steamed rice (optional, for serving)

Ingredient Spotlight

Flank steak: this cut is lean yet tender when sliced against the grain. I look for a bright pink center; if it’s too dark the steak will taste mushy. A substitute is sirloin, which maintains tenderness, but you’ll need to cook a touch shorter.

Broccoli: I choose tightly packed florets because they hold color and crunch. A great substitute is cauliflower with a similar bite, but the flavor will shift slightly toward brassica.

Sesame oil: this tiny drizzle adds a nutty nuance that balances the sweet sauce. You can swap it for toasted sesame paste for a thicker, slightly peaty flavor, but remember to halve the quantity.

Original Ingredient Best Substitution Flavor / Texture Impact
Flank steak Sirloin Slightly more marbled, tender
Broccoli Cauliflower Different heady taste, similar crunch
Sesame oil Toasted sesame paste Richer, slightly oily

How to Make Beef Stir Fry with Vegetables — Step-by-Step

Kick off by slicing that beef down the river of tenderness, then keep the wok moving to lock in moisture—ready to turn your dinner into a quick feast.

Step 1: Slice Beef

Trim any fat and slice the flank steak into bite‑sized strips against the grain. This ensures each bite is tender and not chewy. Aim for 1/4‑inch thickness to cook quickly.

💡 emy’s Pro Tip: Try marinating a short 15‑minute soak in soy sauce and ginger—it’s enough to add depth without making the beef soggy.

Step 2: Make Sauce

Whisk together 2 Tbsp soy sauce, 1 Tbsp hoisin, 1 Tbsp sesame oil, 1 Tbsp honey, minced garlic, and grated ginger. Keep the mixture smooth to spread evenly later.

⚠️ Common Mistake to Avoid: Adding the sauce early can steam the veggies and lose the crisp crunch.

Step 3: Heat Oil & Sear

Heat 1 Tbsp vegetable oil over high heat until it shimmers. Lay the beef in a single layer; let it sear for 2‑3 minutes without moving, sealing flavor.

💡 emy’s Pro Tip: Use a stainless‑steel pan for an even sear—my grandma’s skillet was a 19th‑century wonder.

Step 4: Cook Veggies

Add the next tablespoon of oil to the same pan. Toss in carrots, bell pepper, and broccoli; stir for 3‑5 minutes until they soften yet stay crisp.

⚠️ Common Mistake to Avoid: Overcrowding the pan can cause steaming instead of frying.

Step 5: Add Snap Peas

Introduce snap peas, stir‑fry for another 2‑3 minutes. The quick bite keeps the snappiness that echoes with the Brussels sprouts Koul.

💡 emy’s Pro Tip: For an extra crunch, toss the peas just before they’re cooked through.

Step 6: Return Beef & Sauce

Pour the pre‑made sauce over the veggies, then bring the beef back into the wok. Toss everything together, letting the broth reduce slightly and coat each piece.

⚠️ Common Mistake to Avoid: Adding too much sauce early will swamp the aromas.

Step 7: Garnish

Finish with chopped green onions and sesame seeds, if desired. Plate over steamed rice or serve on its own.

💡 emy’s Pro Tip: Warm the rice first; it prevents the dish from cooling.

Step Action Duration Key Visual Cue
1 Slicing 2 min Fine steak strips
2 Make sauce 2 min Silky mixture
3 Sear beef 2‑3 min Golden crust
4 Cook veggies 5 min Edge crispness
5 Add snap peas 3 min Bright green
6 Return beef & sauce 2 min Glazed sheen
7 Garnish 1 min Green onions & sesame

Serving & Presentation

Plate the stir‑fry on a warm bowl, letting the array of colors—emerald broccoli, ruby bell pepper, ivory carrot—stand out. A sprinkle of sesame seeds adds a nutty perfume that connects to my Moroccan heritage of toasted couscous.

Pair it with a silky jasmine rice or a simple quinoa pilaf. In a bustling metropolis, a bowl of fragrant rice keeps the plate from getting too quick‑fire. If you’re in France, a side of green lentils nods to Parisian stews.

I love a dash of chilled lime or a squeeze of lemon over the finish—bringing a bright, clean note that lifts the sweet glaze and brightens the vegetables, transporting the dish from the city to the Mediterranean.

Pairing Type Suggestions Why It Works
Side Dish Steamed jasmine rice, quinoa pilaf, or roasted sweet potatoes Balances chewiness and sacrifice with carb, not heavy
Sauce / Dip Yogurt cucumber raita or a light avocado sauce Refreshes, cuts sweetness, keeps palate clean
Beverage Mint tea, crisp white wine (Sauvignon Blanc), or sparkling water with lime Clears palate, complements savory notes
Garnish Crushed pistachios, fresh herbs (parsley, cilantro), or a drizzle of lime micro‑oil Adds texture and a zing that elevates the dish

Make‑Ahead, Storage & Reheating

I prep the sauce in a jar and keep the veggies sliced in air‑tight containers; the beef sits separately to keep it firm. A few hours before dinner, I assemble the layers, letting the flavors mingle, so I can drop it into the wok right before serving.

Method Container Duration Reheating Tip
Refrigerator Food‑safe glass jar 3 days Reheat in pan, add a splash of water
Freezer Zip‑lock freezer bag 2 months Thaw overnight, then reheat gently
Make‑Ahead Meal‑prep bowl, separate sauces 4 days in advance Assemble fresh before serving

When reheating, I’re careful not to overcook the beef. A gentle stir for 2‑3 minutes, then the high heat to maintain a crisp surface, gives the dish its original texture. I love a quick french press squeeze of lemon after heating, bringing a fresh citrus lift that is back on the page of my mother’s kitchen.

Variations & Easy Swaps

Variation Key Change Best For Difficulty Impact
Spicy Mango Stir‑Fry Replace honey with diced mango and add red pepper flakes Kid‑friendly summer meals Easy
Gluten‑Free Stir‑Fry Replace soy sauce with tamari; use arrowroot powder to thicken Those with Celiac or gluten sensitivity Easy
Seasonal Flavor Twist Swap broccoli for baby spinach; add fresh oregano Spring or autumn menus Easy

Spicy Mango Stir‑Fry

In this warm July version I trade the honey for diced mango, letting its sweetness complement the peppery kick of red flakes. The natural sugars sing with the savory sauce, creating a tropical melody that feels like a beach in the city.

Gluten‑Free Stir‑Fry

For those avoiding gluten I replace soy sauce with tamari, a saltier, naturally gluten‑free option. I also replace the cornstarch thickener in the sauce with arrowroot powder, which yields a glossy sheen without the gelatinous feel, keeping the texture crisp.

Seasonal Flavor Twist

When I need a spring menu, I swap broccoli for baby spinach. Adding fresh oregano and a pinch of smoked paprika gives a light herbaceous note, turning the dish into a garden‑in‑a-bowl scene that mirrors the storefront stalls of Brooklyn’s spring farmers market.

Can I use pork instead of beef for this recipe?

Yes, pork can replace beef, especially pork tenderloin sliced thinly. Choose a lean cut so it cooks quickly like beef. Moisture is key; pork tends to be slightly moister, so I recommend searing for a shorter time and reducing the sauce slightly to avoid a soggy finish. Don’t forget to taste‑test the salt levels—it’ll absorb flavors a bit differently than beef.

What can I do if I don’t have sesame oil?

Sesame oil adds a nutty aroma that balances the sweetness. If you’re out of it, you can use a light neutral oil like canola or grapeseed, and then sprinkle a small amount of toasted sesame seeds as a finishing touch to mimic that flavor. Another option is to blend a tablespoon of toasted sesame paste with water to thin it out before adding to the sauce.

How many calories are in one serving of this stir‑fry?

Each serving of this beef stir‑fry contains roughly 375 kcal, a figure that’s balanced for a healthy weekend dinner. The lean beef and fresh vegetables keep the calorie count moderate, while the honey and sauce add some sweetness. If you cut the honey or use a lower‑sugar sauce, that will lower the calories further—great for a low‑calorie goal.

What ingredients rattle off incorrectly?

Be mindful of time‑sensitive veggies: snap peas and broccoli keep their crunch if they’re not overcooked. If you over‑stir, they’ll become mushy. To preserve their texture, add them last, and use high heat so they’re done quickly and remain vibrant green and bright.

How do I add extra protein to this dish?

Adding tofu is a great vegetarian option; press the tofu to remove excess moisture before cubing. Sauté it until golden, then toss it back in with the beef for the final step. Alternatively, you can crumbled fresh sausage or choose pork shoulder for a different flavor profile.

Is there a way to make this without a wok?

Absolutely! A large, high‑sided skillet or even a skillet with a lid works perfectly. Heat the pan first, then use the high heat principle: sear the beef, add veggies, and finish with sauce. The key is to keep the pan hot and avoid crowding so the vegetables stay crisp.

What’s the best way to store leftover stir‑fry?

Once cooled, place the stir‑fry in a sealed container, store in the fridge for up to 3 days. Freeze portions in airtight bags for up to 2 months; thaw overnight. When reheating, add a splash of water or broth and heat on medium to avoid drying the beef. If you’re short on time, reheat the whole dish in a microwavable bowl with a lid, or finish in your wok with a quick splash of water.

How can I make this dish suitable for guests with soy allergies?

Replace the soy sauce with coconut aminos, a sweet, low‑sodium alternative that’s safe for soy‑allergic diners. The sauce will be slightly less savory but still balanced, and the sweetness from honey will complement the flavor profile. If the ‘coconut’ taste isn’t desirable, you can use a homemade sauce based on vinegar, sugar, and garlic blended with a touch of fish sauce for umami.

Share Your Version!

If you tried this stir‑fry, I’d love to hear from you! Leave a star rating and comment below. Snap a photo on Instagram or Pinterest and tag @cookingwithemi so everyone can savor your creation. And tell me: what unique twist did you add to surprise your taste buds?

From my NYC kitchen to yours — I hope this recipe brings as much warmth to your table as it does to mine. — emy 🧡

📌

Love This Recipe? Save It to Pinterest!

If you enjoyed this Beef Stir Fry with Vegetables recipe, don’t let it get lost in your browser tabs! 😄 Pin it now so you can find it again anytime — and explore hundreds more tried-and-tested recipes waiting for you on my Pinterest boards.

👉 Follow emy on Pinterest @chefrecipes2

📌 Pin this recipe · 🔁 Re-pin your favorites · 💬 Tag me when you make it — I love seeing your creations!

Print
clock clock iconcutlery cutlery iconflag flag iconfolder folder iconinstagram instagram iconpinterest pinterest iconfacebook facebook iconprint print iconsquares squares iconheart heart iconheart solid heart solid icon

Beef Stir Fry with Vegetables (30-Minutes)


  • Author: Chef Emy

Description

Beef Stir Fry with Vegetables is an easy, healthy, and versatile dish thats perfect for a busy weeknight dinner.With tender slices of beef, a colorful medley of vegetables, and a savory-sweet sauce, it offers both nutrition and flavor in every bite.


Ingredients

Scale
  • 1 lb 450g beef (flank steak, sirloin, or ribeye), thinly sliced
  • 2 tablespoons soy sauce
  • 1 tablespoon hoisin sauce
  • 1 tablespoon sesame oil
  • 1 tablespoon honey
  • 2 garlic cloves (minced)
  • 1 teaspoon fresh ginger (grated)
  • 2 tablespoons vegetable oil (for stir frying)
  • 1 bell pepper (thinly sliced)
  • 1 cup broccoli florets
  • 1 carrot (julienned)
  • 1/2 cup snap peas (ends trimmed)
  • 2 green onions (chopped (for garnish))
  • 1 tablespoon sesame seeds (optional, for garnish)
  • Steamed rice (optional, for serving)

Instructions

  1. Thinly slice the beef against the grain for maximum tenderness. If you have time, marinate the beef in soy sauce, garlic, and ginger for 1530 minutes for added flavor.
  2. In a small bowl, whisk together 2 tablespoons soy sauce, hoisin sauce, sesame oil, honey, minced garlic, and grated ginger. Set aside.
  3. Heat 1 tablespoon of vegetable oil in a wok or large skillet over medium-high heat. Once hot, add the beef in a single layer. Let it sear for 2-3 minutes without stirring, so it forms a nice crispy crust. Once seared, remove the beef and set it aside.
  4. In the same pan, add the remaining tablespoon of vegetable oil. Add the carrots, bell pepper, and broccoli. Stir-fry for about 3-5 minutes until the vegetables start to become tender but still crisp.
  5. Add the snap peas to the pan and continue stir-frying for another 2-3 minutes.
  6. Return the beef to the pan along with the pre-made sauce. Stir everything together, making sure the beef and vegetables are evenly coated. Let it cook for another 1-2 minutes, allowing the sauce to thicken slightly.
  7. Remove from heat and garnish with chopped green onions and sesame seeds, if desired. Serve over steamed rice or enjoy it on its own.

Chinese Beef and Broccoli

Chinese Beef and Broccoli Gluten-Free Adaptable – A Quick, Tender Takeout Classic

⚖️
Difficulty
Easy
⏲️
Prep Time
15 mins
🕒
Cook Time
10 mins
⏱️
Total Time
25 mins
🍽️
Servings
2

I still remember the first time I walked into my mother’s kitchen in Marrakech and the air was thick with cumin, garlic, and a baby oil splatter that made the ashtrays feel like tiny fireworks. A few years later in Paris I refined that scent with a buttered roux, and now, brimming in my little NYC apartment, I bring that same aroma to my stove.

The glossy bruise of browned beef sliced against the bright green florets of a lunchtime stir–fry is a sensory dance. The meat’s juices mingle with the caramelized soy, a touch of sweetness from brown sugar, and a whisper of ginger’s peppery bite, all balanced by the crisp snap of the broccoli. It’s a dish that looks like a painting and tastes like comfort in a bite.

I’ve aimed to make this humble take‑out favorite healthier and gluten‑free without sacrificing flavor. If you’re looking to do it in under 30 minutes, you’ll love the single‑pan technique I’ll show. A quick trick: let the beef sit in sauce for just 10‑min; it’ll be tender in seconds. Distracting me from over‑cooking the broccoli is a common mistake and one I’ll point out later.

Why This Chinese Beef and Broccoli Recipe Is the Best

My mastery of sauce reduction from a Parisian chef’s kitchen means the sauce turns from thin to thick in 60‑seconds, locking in a sweet‑salty umami that I’ve balanced with a splash of dry sherry. It’s not just a quick dinner; it’s an experience that echoes the flavors of my Moroccan heritage and the brisk energy of the city.

The texture is achieved by searing the beef in a hot pan that leaves a nice char without overcooking, and steaming broccoli just long enough to keep that satisfying crunch. Together they play off each other, creating a dish that is both plated with confidence and served with a whisper of brushwork.

Even a kitchen novice can follow this recipe because every step is a step‑by‑step guide, with the times broken down and tips sprinkled throughout. The dish cooks in minutes, has a clear method for each ingredient, and stays vibrant—making it a go‑to for busy weekdays or relaxed weekends.

Chinese Beef and Broccoli Ingredients

I head to the West Village farmers market early on a Saturday and pick up the freshest vegetable stalls in the orange‑luminous dawn. The rest of everything comes from my favorite mom‑shop in Queens where the soy sauces sing and the pantry staples feel like family heirlooms.

Ingredients List

  • 1 lb flank steak (or skirt steak or sirloin)
  • 1 tablespoon soy sauce
  • 1 tablespoon peanut oil (or vegetable oil)
  • 1 tablespoon cornstarch
  • 1/2 teaspoon baking soda (optional)
  • 1/2 cup chicken stock (or beef stock)
  • 2 tablespoons Shaoxing wine (or dry sherry)
  • 2 tablespoons soy sauce
  • 1 teaspoon dark soy sauce
  • 2 teaspoons brown sugar (or white sugar)
  • 1 tablespoon cornstarch
  • 1 head broccoli, cut into bite‑size florets
  • 1 tablespoon peanut oil (or vegetable oil)
  • 3 garlic cloves, minced
  • 2 teaspoons ginger, minced

Ingredient Spotlight

Flank steak delivers robust flavor and a tender chew when sliced thinly. Look for a cut with a faint marbling of fat for a richer bite. If you’re in a hurry, lean sirloin works fine, but it may need an extra splash of teriyaki for depth.

Broccoli is the star vegetable of the dish. Choose florets that are close, green, and firm. When you Steam them just once, they keep their bright color and satisfying snap.

Soy sauce balances sweetness and umami—stick with a full‑strength version unless you’re multisfin channeling a love of sodium. For a gluten‑free route, a splash of tamari gives the same savory punch without the wheat.

Original Ingredient Best Substitution Flavor / Texture Impact
Flank steak Sirloin Slightly leaner, retains bright beefy flavor.
Broccoli Cauliflower Milder crunch, less green brightness.
Soy sauce Tamari Gluten‑free, same umami depth.

How to Make Chinese Beef and Broccoli — Step-by-Step

Let’s get the skillet sizzling and the beef marinating at the same time—keeping the rhythm fast is the key to this dish’s magic.

Step 1: Marinate Beef

Slice the flank steak against the grain into 1/4‑inch thick pieces. Toss with 1 tbsp soy sauce, 1 tbsp peanut oil, and 1 tbsp cornstarch until coated. Set aside for 10 minutes while you prep the rest.

💡 emy’s Pro Tip: Coating the beef with cornstarch alone gives a nice crisp finish—they’ll brown beautifully when seared.

Step 2: Prepare Sauce

In a bowl mix 1/2 cup chicken stock, 2 tbsp Shaoxing wine, 2 tbsp soy sauce, 1 tsp dark soy sauce, 2 tsp brown sugar, and 1 tbsp cornstarch. Whisk until smooth; set aside.

⚠️ Common Mistake to Avoid: Drinking the sauce raw—it’s sweet and salty, so keep portion size in mind!

Step 3: Steam Broccoli

Heat 1/4 cup water in a nonstick skillet until it boils. Add broccoli, cover, and steam for about 1 minute until tender and the water evaporates. Transfer to a plate.

💡 emy’s Pro Tip: Use a lid to lock in steam quickly; that one minute is all you need to keep the florets bright.

Step 4: Cook Beef

Add 1 tbsp oil to the skillet, heat to medium‑high. Spread beef in a single layer, sear 30 seconds per side until browned and still pink inside.

⚠️ Common Mistake to Avoid: Crowding the pan and steaming the beef instead of searing.

Step 5: Add Aromatics

Push the beef to one side, add 3 minced garlic cloves and 2 tsp minced ginger. Sauté until fragrant, about 20 seconds.

💡 emy’s Pro Tip: Keep the aromatics moving so they don’t burn—burnt garlic gives a bitter bite.

Step 6: Finish with Sauce

Return broccoli to the pan. Stir the reserved sauce again to dissolve the cornstarch fully, pour in. Cook and stir until the sauce thickens, about 1 minute, then serve hot.

⚠️ Common Mistake to Avoid: Adding sauce too early and losing the glossy sheen.

Step Action Duration Key Visual Cue
1 Marinate Beef 10 min Beef coated in glossy sauce.
2 Prepare Sauce 2 min Smooth, no lumps.
3 Steam Broccoli 1 min Bright green, slightly translucent.
4 Cook Beef 2 min Beef seared, pink inside.
5 Add Aromatics 20 sec Garlic turns golden.
6 Finish with Sauce 1 min Sauce thick, glossy.

Serving & Presentation

Serve the vibrant stir‑fry over a bed of steamed jasmine rice, the broth spilling to coat each grain like a fragrant veil. A dash of sesame seeds adds a subtle crunch, while a squeeze of fresh lime brightens the dish.

In my Bronx kitchen I’ve found that sprinkling a handful of toasted white sesame seeds or a few thinly sliced scallions lifts the whole plate to a restaurant‑level finish. The colors—deep gray‑green broccoli, midnight beef—are visual fireworks that feel like New York City skyline at dusk.

Pairing Type Suggestions Why It Works
Side Dish Steamed rice, steamed brown rice, or quinoa Neutral base allows sauce flavors to shine.
Sauce / Dip Asian aioli, chili garlic sauce, or a soy‑based dipping sauce Provides contrast to sweet‑salty sauce.
Beverage Ice‑cold jasmine tea, light white wine, or a crisp Riesling Balances the savory depth with floral or fruity notes.
Garnish Sesame seeds, sliced scallions, or chopped cilantro Adds texture and botanical brightness.

Make-Ahead, Storage & Reheating

I pre‑prep the marinated beef and the sauce earlier in the day, sealing them in plastic in the fridge. For a quick weekday dinner, I simply steam the broccoli, sear the beef, add aromatics, splash in the sauce, and let it finish in a minute.

Method Container Duration Reheating Tip
Refrigerator Air‑tight ziplock 2 days Reheat in skillet with 30 sec water addition.
Freezer Freezer bag 2 months Defrost in fridge; stir during reheating.
Make‑Ahead Pre‑clean bowls 7 days in advance Keep sauce separate; combine when serving.

When reheating, I remind myself to add a splash of water or broth to keep the sauce from drying out. A quick 30‑second stir in a hot pan and the dish feels fresh as if it was made that very instant.

Variations & Easy Swaps

Variation Key Change Best For Difficulty Impact
Gluten‑Free Replace soy sauce with tamari, dry sherry for Shaoxing Health‑conscious diners Easy
Dairy‑Free & Vegan Use coconut milk in sauce, skip peanuts Vegans, lactose‑sensitive Easy, swap ingredients
Seasonal Twist Swap broccoli for snow peas plus a dash of sriracha Summer & spring Easy

Gluten‑Free Sweet‑Sauvage

For a truly gluten‑free version I replace soy sauce with a generous splash of tamari and swap Shaoxing wine with a vinegar‑based dry sherry. The result is a tangier, perfectly balanced sauce that’s just as hearty.

Vegan Snow Peas & Sriracha

Using snow peas instead of broccoli adds a snap that charms the palate, and a small dose of sriracha gives the dish a spicy kiss from my favorite hot‑pot stalls in Queens.

Dairy‑Free Coconut Broth

Replacing beef broth with light coconut milk adds a sweet undertone, while peanut oil is swapped for a neutral grapeseed oil so the dish remains subtle.

How long does it take to cook Chinese Beef and Broccoli?

Preparing the dish usually takes about 25 minutes from start to finish—15 minutes to prep and marinate, 10 minutes to cook. The key is keeping the heat high and the ingredients well‑chopped so the beef stir‑sits and the broccoli crisps in a quick, flavorful flash.

What shop can I buy the best soy sauce for this recipe?

Look for a full‑strength, low sodium soy sauce from a reputable store such as Trader Joe’s or Whole Foods. A Chinese grocery market closer to the East Side will usually carry both light and dark varieties; dark soy is ideal for depth and color in sauces.

Can I use a different meat in this recipe?

Sure! Thin slices of pork tenderloin, chicken breast, or even firm tofu can replace the beef. The cooking time might shrink a bit—especially tofu, which needs only 2‑3 minutes of sear to keep a nice texture while incorporating sauce.

Is there a way to make this dish sweeter or spicier?

Absolutely. For sweetness, add an extra teaspoon of brown sugar or a splash of honey. To make it spicier, pepper in a handful of toasted red pepper flakes, a drizzle of Sriracha, or a small knob of fresh chilies for a Mediterranean kick that transports you back to the Couscous market.

What do I do with leftover sauce?

Reserve the sauce in an airtight container and it will keep in the refrigerator for up to 4 days. Reheat in a small pot with a splash of water and whisk until smooth—this works great if you want to toss a new batch of veggies or make an extra batch to marshal for tomorrow.

Can I use brown rice instead of jasmine rice?

Yes, brown rice makes a heartier meal and complements the sauce’s savoriness nicely. Be sure to cook it slightly less to avoid extra moisture; a little broth or water will keep the grains fluffy and not mushy.

What is the key to a crispy broccoli?

The secret lies in a bold, quick sear of the broccoli after it’s tender. Use high heat and a dash of oil so the florets blister slightly and retain their bright green hue—this gives a pleasant contrast to the silky sauce.

How do I store the cooked beef and broccoli for later use?

Let it cool to room temperature, then place the meat and broccoli in separate airtight containers. Store in the fridge for up to 2 days, or freeze for up to 2 months. Reheat in a wok over medium heat and stir occasionally until thoroughly heated.

Share Your Version!

I’d love to see how you tweak this classic. Have you added any extra veggies or swapped in a different protein? Drop a comment below, or rate the recipe with a star—your feedback keeps my kitchen humming. If you snap a photo of your plated dough, share it on Instagram or Pinterest and tag me @cookingwithemi. And tell me—what’s the one trick you’d add to my gluten‑free take on this dish?

From my NYC kitchen to yours — I hope this recipe brings as much warmth to your table as it does to mine. — emy 🧡

📌

Love This Recipe? Save It to Pinterest!

If you enjoyed this Chinese Beef and Broccoli recipe, don’t let it get lost in your browser tabs! 😄 Pin it now so you can find it again anytime — and explore hundreds more tried‑and‑tested recipes waiting for you on my Pinterest boards.

👉 Follow emy on Pinterest @exorecipe

📌 Pin this recipe · 🔁 Re-pin your favorites · 💬 Tag me when you make it — I love seeing your creations!

Print
clock clock iconcutlery cutlery iconflag flag iconfolder folder iconinstagram instagram iconpinterest pinterest iconfacebook facebook iconprint print iconsquares squares iconheart heart iconheart solid heart solid icon

Chinese Beef and Broccoli


  • Author: Chef Emy

Description

This beef and broccoli is a popular Chinese take-out meal and it’s also easy enough to make at home. It’s also healthier than most take-out meal options. With juicy tender beef and crisp broccoli brought together in a rich brown sauce, this quick dinner is as colorful as it is delicious. Serve it over hot rice for an authentic Chinese take-out dinner. {Gluten-Free Adaptable}To make this dish gluten-free, use dry sherry instead of Shaoxing wine, and use tamari instead of soy sauce.


Ingredients

Scale
  • 1 lb flank steak (, skirt steak, or other cut (*see footnote 1))
  • 1 tablespoon soy sauce
  • 1 tablespoon peanut oil ((or vegetable oil))
  • 1 tablespoon cornstarch
  • 1/2 teaspoon baking soda ((Optional) (*see footnote 1))
  • 1/2 cup chicken stock ((or beef stock))
  • 2 tablespoons Shaoxing wine ((or dry sherry))
  • 2 tablespoons soy sauce
  • 1 teaspoon dark soy sauce ((*footnote 2))
  • 2 teaspoons brown sugar ((or white sugar))
  • 1 tablespoon cornstarch
  • 1 head broccoli (, cut to bite-size florets)
  • 1 tablespoon peanut oil (or vegetable oil) ((*Footnote 3))
  • 3 garlic cloves (, minced)
  • 2 teaspoons ginger (, minced)

Instructions

  1. Slice the beef against the grain into 0.5 cm (1/4 inch) thick slices or 1-cm (1/2 inch) sticks. Transfer to a small bowl. Add soy sauce, peanut oil, and cornstarch (*Footnote 1). Gently mix well by hand until all the slices are coated with a thin layer of sauce. Marinate for 10 minutes while preparing the other ingredients.
  2. Combine all the ingredients for the sauce in a medium-sized bowl. Mix well.
  3. Add 1/4 cup water into a large nonstick skillet over medium-high heat until the water begins to boil. Add the broccoli and cover. Steam until the broccoli just turns tender and the water evaporates,1 minute or so. Transfer broccoli to a plate. Wipe the pan with a paper towel held in a pair of tongs if theres any water left.
  4. Add the oil and swirl to coat the bottom. Heat over medium high heat until hot. Spread the steak in a single layer. Allow to cook without touching for 30 seconds, or until the bottom side is browned. Flip to cook the other side for a few seconds. Stir and cook until the surface is lightly charred and the inside is still pink.
  5. Add the garlic and ginger. Stir a few times to release the flavor and fragrance.
  6. Return the broccoli to the pan. Stir the sauce again to dissolve the cornstarch completely and pour it into the skillet. Cook and stir until the sauce thickens, about 1 minute. Transfer everything to a plate immediately. Serve hot as a main dish.

Crock Pot Marry Me Chicken

Crock Pot Marry Me Chicken Sun-Dried Tomato & Creamed Butter Twist – A Slow Cooker Delight

⚖️
Difficulty
Easy
⏲️
Prep Time
15 mins
🕒
Cook Time
420 mins
⏱️
Total Time
435 mins
🍽️
Servings
6

When I first came to New York, the bustle of the city was a far cry from the aroma that filled my mother’s kitchen in Marrakesh: fragrant cumin, saffron, and sun‑kissed tomatoes mingled with the comforting scent of slow‑cooked chicken. It was this blend of North African warmth and Parisian technique that inspired my take on the Crock Pot Marry Me Chicken.

Imagine a silky sauce that clings to each tender breast: a gentle swirl of heavy cream, the tang of sun‑dried tomatoes, and the buttery finish from a hot knob of butter, all simmered to melt in your mouth. The aroma wafts through the kitchen like the promise of a Sunday family dinner, while the colors glow—rich golden sauce, green basil specks, and a touch of Parma cheese coat the chicken for a finale that’s both simple and sophisticated.

This version of the classic chicken is my secret sauce of slow‑cooking mastery. I keep the sauce thickish by whisking in flour‑broth roux early, stir in the heavy cream right before the end, and never let the butter lift off the pan. A common mistake is over‑cooking the chicken; I remind myself to check doneness at the 3‑hour mark. The pro tip? Add a splash of lemon juice right at the end to brighten the dish and balance the richness.

Why This Crock Pot Marry Me Chicken Recipe Is the Best

The secret is in the sun‑dried tomato and butter infusion—shallow-the-scrape technique I learned at a Parisian pâtisserie. The tomatoes release their sweet, acidic notes and the butter gilds the sauce with a velvety sheen that turns humble chicken breasts into a showstopper.

A barrel‑shaped pan in a slow cooker allows the sauce to cling, while a quick sear at the start creates a caramelized crust. That gives the chicken a buttery mouthfeel and punctuates the sauce’s rich depth. The result is a texture that alternates between tender succulence and luscious sauce that coats each bite like a well‑iced French dessert.

Because the recipe relies on simple pantry staples—olive oil, flour, and heavy cream—it’s foolproof for beginners. The low‑heat setting keeps the chicken juicy and ensures the sauce thickens without bitterness, making it an ideal weekend dinner that even busy Manhattanites can trust.

Crock Pot Marry Me Chicken Ingredients

I always pick my ingredients at the Chelsea Market or a local French-style bistro supply in Flatiron. The key is fresh, healthy chicken and sun‑dried tomatoes that are aromatic but not overwhelmingly salty.

Ingredients List

  • 6 Boneless Skinless Chicken Breasts
  • 2 Tablespoons Olive Oil
  • 1 ½ cups Chicken Broth
  • 3 Tablespoons All Purpose Flour
  • 1 cup Heavy Whipping Cream
  • 1 Tablespoon Minced Garlic
  • ½ teaspoon Salt
  • 1 teaspoon Black Pepper
  • 1 teaspoon Italian Seasoning
  • 1 teaspoon Paprika
  • ⅓ cup Sun Dried Tomatoes (drained)
  • 2 Tablespoons Salted Butter
  • Fresh Basil (optional for garnish)
  • Grated Parmesan Cheese (optional for garnish)

Ingredient Spotlight

Sun‑dried tomatoes lend natural sweetness and depth. Look for jars that are packed in oil but drain well. A UK version works fine; I’ve had great results cutting them into fine strips for a more intense flavor.

Heavy whipping cream gives the sauce a silky finish. If you’re watching fat, substitute a blend of half‑and‑half and evaporated milk—taste nearly identical while cutting calories.

All‑purpose flour is the classic thickening agent. Whole wheat flour can be used for a nuttier base but be sure to whisk vigorously to avoid clumps. If you have cornstarch, mix it with a splash of water for a gluten‑free alternative.

Original Ingredient Best Substitution Flavor / Texture Impact
Heavy Whipping Cream Half‑and‑Half + Evaporated Milk Less richness but similar thickness
All Purpose Flour Whole Wheat Flour Nutty flavor, slightly thicker
Salted Butter Unsalted Butter & Pinch of Salt Full briar control, same mouthfeel

How to Make Crock Pot Marry Me Chicken — Step-by-Step

Slow cooking takes the stress out of dinner, and here it gives the chicken gorgeous depth of flavor plus a tender crumb that melts in your mouth.

Step 1: Sear the Chicken

Heat olive oil in a skillet over medium‑high heat. Brown the breast halves for 2–3 minutes on each side to develop a caramelized crust.

💡 emy’s Pro Tip: Use a splash of olive oil to keep the chicken from drying; a quick sear locks in juices.

Step 2: Create the Sauce Base

Whisk chicken broth with flour until smooth in a bowl. Pour into the crock pot, add minced garlic, salt, pepper, Italian seasoning, and paprika. Stir gently so the flour disperses.

⚠️ Common Mistake to Avoid: Skipping the flour‑broth mixture can leave the sauce too thin. Stir constantly to prevent lumps.

Step 3: Add Chicken & Sun‑Dried Tomatoes

Place the browned breasts into the slow cooker. Spoon sun‑dried tomatoes and butter over them. Cover and cook on low for 6–7 hours, or high for 3–3.5 hours.

💡 emy’s Pro Tip: If you shave the chicken right after searing, the juices stay in the pot, keeping the meat moist.

Step 4: Add Cream & Final Simmer

During the last 60 minutes on low (or 30 minutes on high), stir in heavy whipping cream. Let the sauce thicken and coat the chicken.

⚠️ Common Mistake to Avoid: Stirring too quickly can cause the cream to curdle. Add slowly and allow the pot to settle before swirling.

Step Action Duration Key Visual Cue
1 Sear chicken until golden 2–3 min per side Dark brown crust forming
2 Whisk broth, flour, seasonings 5 min Smooth batter in pot
3 Add chicken & tomatoes Cook low 6–7 hrs Simmering steam rising
4 Stir in cream Last 60 min Sauce shiny, thick

Serving & Presentation

Plate the chicken over a bed of linguine tossed with a splash of olive oil. Scatter fresh basil leaves and shaved Parmesan between the strands to add aroma and a hint of nutty flavor.

For a museum‑style plating, place a single chicken breast on a porcelain plate, spoon sauce over it, and drizzle an extra pat of butter on top. Sprinkle chopped parsley and a squeeze of lemon to cut through the richness.

Pair it with a chilled glass of dry white wine (like a Sauternes or a crisp Sauvignon Blanc) to contrast the sweet and salty notes. A simple green salad with vinaigrette and a baguette finish completes the French‑inspired table.

Pairing Type Suggestions Why It Works
Side Dish Steamed green beans with toasted almonds; roasted broccoli Crunchy fibers balance smooth sauce
Sauce / Dip Extra butter drizzle; a light lemon beurre blanc Boosts richness while brightening
Beverage Dry Sauvignon Blanc; Champagne; sparkling rosé Acidic notes cut through creaminess
Garnish Fresh basil, chopped parsley, grated Parmigiano‑Reggiano Herbal aroma and savory finish

Make-Ahead, Storage & Reheating

I love to prep this dish in advance for the hectic week. Slow‑cooked chicken freezes beautifully, and a gentle reheating keeps the sauce luxurious.

Method Container Duration Reheating Tip
Refrigerator Air‑tight tin‑foil lid container Up to 3 days Reheat on stove with extra cream
Freezer Vacuum‑sealed bag Up to 2 months Thaw overnight, reheat gently
Make‑Ahead Individual ramekin Prepare 2 days early Assemble fresh plating before serving

When reheating on the stovetop, keep the heat on low and stir in a dab of fresh cream or a splash of broth to prevent the sauce from drying out. A quick bubble tells you it’s ready.

Variations & Easy Swaps

Variation Key Change Best For Difficulty Impact
Add a Herb Bouquet Add rosemary & thyme during simmer Herb lovers Minimal
Gluten‑Free Version Sub flour with cornstarch slurry Gluten sensitive diners Easy
Spicy Twist Add a pinch of cayenne or chili flakes Heat seekers Easy

Add a Herb Bouquet

Stretch the sauce with chopped rosemary and thyme simmering in the broth. Their woody, piney notes blend with the sun‑dried tomato sweetness for a fragrant, Mediterranean vibe.

Gluten‑Free Version — Dairy-Free Alternative

Swap the flour for a cornstarch meal, whisk it into the broth first, and use coconut milk instead of cream. The texture stays silky while fresh coconut gives it a subtle tropical edge I tested in Brooklyn’s farmers’ market.

Spicy Twist — Medium Heat Version

Blend a dash of cayenne into the roux, and add a few red pepper flakes during simmer. The bite balances the rich cream and brightens each bite, great for a quick win on a chilly night.

How do I check if the chicken is cooked through?

The easiest way is to use a meat thermometer; the safe internal temperature for chicken is 165°F. If you don’t have one, make a small cut in the thickest part; a clear, not pink, juice that runs out confirms doneness. In a slow cooker, the gentle heat keeps juices locked in, so the chicken ends up fork‑tender.

Can I use instant pot instead of crock pot?

Absolutely! Use the slow‑cook setting on the instant pot on low for 6 hours or high for 3. If you’re rushing, gelatinize the sauce with the sauté mode at the end, stir in the cream, and let it thicken. Just remember, the pressure cooker will cut the cooking time by about 40%, so adjust for a shorter simmer.

What can replace heavy whipping cream for a lighter version?

A blend of half‑and‑half and store‑brand evaporated milk yields a similar consistency with fewer calories. For a dairy‑free option, coconut cream or soy cream offers the same silky finish. Swapping for a lighter base keeps the sauce creamy but lighter on the palette.

Should I slice the chicken before adding to crock pot?

Slicing helps the sauce seep into the meat and ensures even heat distribution. If you prefer whole breasts for a rustic look, guarantee they’re evenly sized so each piece gets the same amount of sauce and takes the same amount of time to finish.

Can I use store‑bought sun‑dried tomatoes?

Yes, store‑bought jars are fine, though their oil content might add extra richness. Drain them first, rinse with a little water, and pat dry with a paper towel. If you’re on a budget, sliced dried tomatoes from the grocery store also work wonderfully.

How do I keep the sauce from separating?

The key is gradual addition of the cream. Warm the cream slightly before pouring it into the pot. Additionally, keep the crock pot on a low heat and stir occasionally so the fat emulsifies. If it starts to separate, whisk in a teaspoon of flour mixed with water to bring it back together.

What side dishes go best with this dish?

Simple steamed or roasted vegetables—broccoli, green beans or carrots—provide a bright, crisp contrast. A fragrant parsley‑olive oil pasta or buttery mashed potatoes are also excellent. A crisp salad with citrus vinaigrette jolts the palate away from the rich sauce.

Why do I need flour in the sauce?

Flour acts as a natural thickening agent, turning the mixture into a silky roux that binds the chicken and sauce. It prevents water from diluting the flavors and gives the dish that luxurious mouthfeel. Substituting cornstarch in a slurried form yields similar results for those who prefer gluten‑free.

Can I make this in a grill pan on the stovetop?

Yes! Start by searing the chicken until brown on both sides, then pour the broth, flour, and seasonings in. Reduce the liquid over medium heat until thickened, stir in the cream, and finish with the butter. The shorter cooking time requires a watchful eye, but the result is equally creamy.

Is it safe to store this dish with dairy in the fridge?

The cream and butter in this recipe are stable for up to 3 days in the refrigerator. Keep the chicken in an airtight container; refrigerate before drying out. When reheating, add a splash of milk or broth to restore moisture and avoid a crumbly texture.

Share Your Version!

If you try this sauce‑rich chicken, drop a star rating and a comment below. Favorites? I’d love to see your tweaks! If you snap a photo, share it on Instagram or Pinterest tagging @cookingwithemi and let everyone see the love you poured into the pot.

What would you add to make the dish your own? Maybe a splash of citrus or a pinch of smoked paprika? Tell me in the comments; I’m always cooking with curiosity.

From my NYC kitchen to yours — I hope this recipe brings as much warmth to your table as it does to mine. — emy 🧡

📌

Love This Recipe? Save It to Pinterest!

If you enjoyed this Crock Pot Marry Me Chicken recipe, don’t let it get lost in your browser tabs! 😄 Pin it now so you can find it again anytime — and explore hundreds more tried-and-tested recipes waiting for you on my Pinterest boards.

👉 Follow emy on Pinterest @chefrecipes2

📌 Pin this recipe · 🔁 Re-pin your favorites · 💬 Tag me when you make it — I love seeing your creations!

Print
clock clock iconcutlery cutlery iconflag flag iconfolder folder iconinstagram instagram iconpinterest pinterest iconfacebook facebook iconprint print iconsquares squares iconheart heart iconheart solid heart solid icon

Crock Pot Marry Me Chicken


  • Author: Chef Emy

Description

Creamy and delicious Crockpot Marry Me Chicken is easy to make in the slow cooker. Simple ingredients makes this a family favorite meal.


Ingredients

Scale
  • 6 Boneless Skinless Chicken Breasts
  • 2 Tablespoons Olive Oil
  • 1 ½ cups Chicken Broth
  • 3 Tablespoons All Purpose Flour
  • 1 cup Heavy Whipping Cream
  • 1 Tablespoon Minced Garlic
  • ½ teaspoon Salt
  • 1 teaspoon Black Pepper
  • 1 teaspoon Italian Seasoning
  • 1 teaspoon Paprika
  • 1/3 cup Sun Dried Tomatoes ((drained))
  • 2 Tablespoons Salted Butter
  • Fresh Basil ((optional for garnish))
  • Grated Parmesan Cheese ((optional for garnish))

Instructions

  1. Heat the olive oil in a large skillet over medium high heat. Brown the chicken breasts in the oil for 2-3 minutes per side.
  2. In a small mixing bowl, whisk together the chicken broth and flour. Add this mixture to a crock pot. Add in the minced garlic, salt, pepper, Italian seasoning and paprika. Gently mix to combine these ingredients.
  3. Place the chicken breasts in the crock pot and top the chicken with the sun dried tomatoes and butter. Cover and cook on low for 6-7 hours or on high for 3-3.5 hours until the chicken is cooked through. Stir the heavy whipping cream into the crock pot for the last 60 minutes if cooking on low or 30 minutes if cooking on higher.
  4. Serve warm over pasta topped with the fresh basil and grated parmesan cheese. Enjoy!

Creamy Mushroom Chicken

Creamy Mushroom Chicken Pan‑fry Perfection – A Fast, Garlicky Delight

⚖️
Difficulty
Easy
⏲️
Prep Time
10 mins
🕒
Cook Time
25 mins
⏱️
Total Time
35 mins
🍽️
Servings
4

When my mother’s kitchen in Casablanca smelled of cumin and garlic, I first tasted the magic of mushrooms mingling with chicken. Now, a few years later, I bring that same aromatic harmony to my NYC apartment, blending Moroccan spice, Parisian finesse, and the quickness of a weekday dinner. This recipe, “Creamy Mushroom Chicken Pan‑fry Perfection,” is the perfect fusion — a garlicky mushroom sauce that clings to tender chicken, fast enough for a hectic Manhattan schedule yet so indulgent it feels like a dinner‑party at home.

Picture golden‑brown chicken cutlets, steam curling from sizzling garlic and shiitake, and the deep umami of mushrooms dancing with a touch of citrus from lemon juice. The sauce turns silky, its creamy heart contrasting the savory meat, while a sprinkle of fresh parsley adds a pop of color that feels reminiscent of a Tunisian campfire’s hush. Every bite marries robust textures — the crunchy bite of the crust, the tender core, the velvety sauce — with layers of fragrant herbs that invite you to savor each mouthful.

I’ve spent years perfecting the interplay of flour, olive oil, and butter to achieve the best sear without burning. The star of this dish is a simple technique: cook the chicken first, then reserve it to allow the mushrooms to release their moisture fully before adding the heavy cream. That little twist keeps the sauce glossy and the chicken juicy. A frequent rookie mistake is adding cream too early, which causes the sauce to curdle. I’ll remind you how to avoid that in the step‑by‑step.

Why This Creamy Mushroom Chicken Recipe Is the Best

The Flavor Secret stems from my upbringing in Morocco where earthy mushrooms meet fragrant spices, and from the Parisian kitchen where butter and cream elevate any dish. By combining Mediterranean herbs, a touch of lemon, and the bold punch of Dijon mustard, the sauce yields complexity that feels both luxurious and approachable.

Perfected Texture is achieved through precise searing: I press the chicken lightly onto the pan, letting each side develop that aromatic crust before resting the meat. This technique releases steam that locks in moisture, while the browned surface absorbs the garlicky sauce. The result is chicken that feels like filet mignon without the fuss.

Foolproof & Fast: The entire process takes under 35 minutes, making it ideal for a weekday dinner or a last‑minute dinner party. All steps are linear, and the only trick is keeping the cream separate until the final swirl — a habit that even a new cook can master with a few eyes on the stove.

Creamy Mushroom Chicken Ingredients

I usually shop for these ingredients at the Greenwich Village farmers market on a Tuesday morning, where the mushroom vendor always offers the freshest shelf‑stroked cremini. The buttery almond flour for dredging comes from my favorite specialty shop, and the extra‑virgin olive oil is sourced from a small Italian cooperative that ships directly to my kitchen.

Ingredients List

  • 2 large chicken breasts (cut in half lengthwise to make 4 thin cutlets)
  • Salt & pepper (to taste)
  • Butterflour (for dredging)
  • 2 tablespoons olive oil
  • 2 tablespoons butter
  • 12 ounces sliced cremini or white mushrooms
  • ¼ teaspoon Italian seasoning
  • 3 cloves garlic, minced
  • ½ cup chicken broth
  • ½ teaspoon lemon juice
  • ½ teaspoon Dijon mustard
  • 1 cup heavy/whipping cream
  • Fresh parsley, chopped (optional, for garnish)

Ingredient Spotlight

Chicken Breasts: Choose the firmest breasts, no thicker than ½ inch, to ensure quick, even cooking. A swap to skin‑on thighs adds flavor without complicating the sear. Both work beautifully in deep pan heat.

Mushrooms: The cremini offers an earthy depth with a firm bite, but whole shiitake or portobello can elevate the dish with a meaty umami punch. A quick blanch before sautéing Budd has been my go‑to for even browning.

Heavy Cream: This brings the buttery sheen; if a lactose‑free kitchen is required, replace with half‑and‑half or a coconut‑based cream, though the sauce’s body will shift slightly toward sweetness.

Garlic: Fresh minced cloves deliver a bright note that diffuses into the butter and mushrooms. For a milder flavor, use roasted garlic cloves or ½ teaspoon of garlic powder as a compromise.

Original Ingredient Best Substitution Flavor / Texture Impact
Chicken Breasts Skin‑on thighs Adds richer marbling and deeper flavor; retains moisture.
Mushrooms (cremini) Whole shiitake Enhanced umami, slightly chewy bite, more aromatic smoke.
Heavy Cream Half‑and‑half or coconut cream Lighter body; coconut adds subtle tropical sweet undertone.
Garlic (minced) Roasted garlic cloves Smoky sweetness, mellow garlic sharpness.

How to Make Creamy Mushroom Chicken — Step-by-Step

Let’s dive into the simple, flavorful steps that keep the timeline tight and the taste hooked.

Step 1: Cut & Dredge Chicken

Slice the chicken breasts horizontally to create four flat cutlets. Season each with salt, pepper, then lightly coat in wheat flour, shaking off any excess.

💡 emy’s Pro Tip: Smash the cutlets slightly with a meat mallet; this narrows the thickness and promotes even browning.

Step 2: Sear Chicken to Golden

Heat 2 Tbsp olive oil in a large skillet over medium‑high heat. Once shimmering, add the chicken cutlets and cook 4–5 min each side, until a deep golden crust forms. Transfer to a plate and cover loosely with foil.

⚠️ Common Mistake to Avoid: Cooking on too low a heat causes under‑seared edges; keep the flame strong but not licking.

Step 3: Sauté Mushrooms

Add 2 Tbsp butter to the same skillet; melt, then toss in sliced mushrooms and ¼ tsp Italian seasoning. Cook 5 min, stirring occasionally, until the mushrooms release moisture and brown.

💡 emy’s Pro Tip: Remove the mushrooms once browned, then reserve; the pan still holds the sauté juices for the sauce.

Step 4: Build the Sauce

Return the skillet to medium heat. Add minced garlic, then splash in ½ cup chicken broth, ½ tsp lemon juice, and ½ tsp Dijon mustard. Stir until the mustard dissolves and reduce by half (about 3–4 min). This concentrates flavor and sets the base for cream.

⚠️ Common Mistake to Avoid: Adding garlic too early risks scorching; it’s best after the butter has melted but before the broth.

Step 5: Introduce Cream and Chicken

Stir in 1 cup heavy cream, then return the chicken and mushrooms to the pan. Simmer on low for 5 min, allowing the sauce to thicken and the chicken to finish cooking. Season with additional salt & pepper to taste.

💡 emy’s Pro Tip: Gently stir the bowl and slope acid with lemon to keep cream from curdling.

Step 6: Final Touch & Plate

Just before serving, taste and adjust seasoning; a pinch of freshly ground pepper or a dash of hot sauce can give a subtle kick. Plate the chicken on warm bowls, ladle sauce over, and sprinkle with chopped parsley for color.

⚠️ Common Mistake to Avoid: Overcooking the final 5 minutes can dry the chicken; keep the pan warm and simmer slowly.

Step Action Duration Key Visual Cue
1 Cut & dredge chicken 2 min Flour dusting visible
2 Sear chicken 8–10 min Golden crust
3 Sauté mushrooms 5 min Brown edges, liquid evaporated
4 Build sauce 3–4 min Reduces to half
5 Add cream & finish 5 min Thickened, glossy
6 Plate & garnish 1 min Parsley sprinkle visible

Serving & Presentation

Plate the chicken on a wide rimmed white plate to emphasize contrast. Spoon a generous amount of sauce over each cutlet, letting it cascade to the plate’s edge for a dramatic finish. Finish with a handful of chopped parsley, a squeeze of lemon, and a lightning–blue sprinkle of smoked paprika for unexpected brightness.

When I marry this dish with a light saffron rice or an almond‑inspired Moroccan couscous, the texture becomes an edible exhibit of cultures. For a quick side, toss kale in olive oil and vintage balsamic until it crumbles — it’s a sensible, green contrast that respects my family’s holiday slow‑cooking ethos.

Pairing Type Suggestions Why It Works
Side Dish Quinoa‑roasted vegetables Crunchy stone‑ground flavor and nutty aroma complements the sauce.
Sauce / Dip Herbed yogurt or tzatziki Cooling dairy removes richness and adds bright acidity.
Beverage Chilled Pinot Noir or a citrusy Sauvignon Blanc Tangy fruit balances savory sauce.
Garnish Crispy capers or toasted slivered almonds Add surprise textures and salty pop.

Make-Ahead, Storage & Reheating

I routinely prep this dish ahead of a busy Tuesday to keep dinner on track. Simply separate the sauce and chicken; store the sauce in an airtight container for up to 3 days, while cooked chicken keeps well for the same duration.

Method Container Duration Reheating Tip
Refrigerator airtight plastic container 3 days Reheat in a slow saucepan with a splash of broth.
Freezer vacuum‑sealed bag 2 months Defrost overnight; simmer gently with a teaspoon of cream.
Make-Ahead freezer‑safe bowl 4 days in advance Assemble before reheating to maintain sauce integrity.

I always reheat slow to preserve the gentle sauce; a quick microwave can make it denser, while a pan‑simmer keeps the wheat‑flour crust crisp and the mushroom flavor bright.

Variations & Easy Swaps

Variation Key Change Best For Difficulty Impact
Gluten‑Free Version Use almond flour for dredging Allergen‑free, lighter bite Minimal
Dairy‑Free Edition Replace cream with coconut milk Vegan, tropical note Harder for first‑time.
Seasonal Twist Add sautéed spinach & sun‑dried tomatoes Spring version Adds extra step

Gluten‑Free Version

Substituting a fine almond flour keeps the coating crisp while eliminating gluten. The resulting texture is slightly more delicate, yet still protective enough to preserve the chicken’s moisture.

Dairy‑Free Edition

Replacing heavy cream with full‑fat coconut milk gives the sauce a whisper of coconut sweetness that contrasts nicely with the savory mushrooms. Test it with a small batch — the sauce stays thick without curdling.

Seasonal Twist

On a spring afternoon, I toss in sautéed spinach and sun‑dried tomatoes; they steam in the cream, lending a fresh, bright counterpoint to the deep mushroom flavor, perfect for a brunch feel.

How long does creamy mushroom chicken take to cook?

It usually takes about 35 minutes from start to finish. You’ll need roughly 10 minutes to prep, 25 minutes to cook, and that extra time guarantees a golden crust and a silky sauce that coats the chicken without drying it out. The key is to sear quickly and then let the sauce reduce gently.

What can I use instead of heavy cream?

Heavy cream is the classic choice for a luscious sauce, but you can swap it for half‑and‑half for a lighter body or for a dairy‑free coconut milk that adds a subtle tropical note. If you’re looking for a vegan version, ½ cup of cashew‑based cream works beautifully; it thickens and holds a rich mouthfeel without the dairy.

How do I keep the chicken from drying out?

The trick is to sear until a thick brown crust forms before you remove it from the pan, then let the moisture it releases simmer softly with the sauce. Avoid over‑reduce the cream too soon, and keep the sauce on low heat while the chicken finishes cooking to lock in juiciness.

Can I use chicken thighs instead of breasts?

Yes! Skin‑on thighs add a richer flavor and better marbling than breasts. Just trim the skin slightly and sear them in the same way; the cooking time will be about 8–9 minutes per side, slightly longer because the thighs retain moisture longer.

Is this dish gluten free?

By default it contains wheat flour for dredging, making it not gluten‑free. However, you can use almond flour or a gluten‑free flour blend for coating; that modification keeps the crust crispy while making the dish safe for gluten‑sensitive diners.

What side dishes go well with creamy mushroom chicken?

Mashed potatoes, roasted vegetables, couscous, or a simple green salad are classic choices. For a lighter option, try quinoa pilaf with toasted almonds. Each dish offers contrast—either in texture or moisture—to complement the rich, creamy chicken.

Can I make it ahead of time?

Absolutely! Prepare the sauce and chicken separately and store each in the refrigerator for up to three days. Reheat by gently simmering the sauce and adding the chicken back to it; keep it on low heat to avoid drying out the meat.

What’s the best wine to pair with this dish?

A light‐to‑medium body white, like Chardonnay, or a fruit‑forward Red, like Pinot Noir, works wonderfully. The wine’s acidity cuts through the creamy sauce, while its subtle tannins or buttery gloss complement the buttery crust of the chicken.

What mushroom variety is best for this recipe?

Cremini or white mushrooms have an earthy, subtle flavor that pairs well with the sauce, while portobello or shiitake offer a more intense, meaty bite. I personally enjoy a mix of fresh shiitake and white for depth and crispness.

How do I season the chicken for this dish?

Use a simple salt and pepper mixture; if you want a more adventurous touch, sprinkle a dash of smoked paprika or a sprinkle of thyme on the flour before coating. The goal is to let the chicken’s natural flavor shine through while letting the sauce build complexity.

Share Your Version!

If you love this creamy mushroom chicken, give it a star rating and drop a comment below. Capture a photo of your plated masterpiece on Instagram or Pinterest, tag @cookingwithemi, and let me see how you make this dish your own.

What’s your favorite twist on the sauce? Replace a dash of lemon with orange zest? Will you swap the mushrooms for wild chanterelles? Tell me!

From my NYC kitchen to yours — I hope this recipe brings as much warmth to your table as it does to mine. — emy 🧡

📌

Love This Recipe? Save It to Pinterest!

If you enjoyed this Creamy Mushroom Chicken recipe, don’t let it get lost in your browser tabs! 😄 Pin it now so you can find it again anytime — and explore hundreds more tried‑and‑tested recipes waiting for you on my Pinterest boards.

👉 Follow emy on Pinterest @chefrecipes2

📌 Pin this recipe · 🔁 Re-pin your favorites · 💬 Tag me when you make it — I love seeing your creations!

Print
clock clock iconcutlery cutlery iconflag flag iconfolder folder iconinstagram instagram iconpinterest pinterest iconfacebook facebook iconprint print iconsquares squares iconheart heart iconheart solid heart solid icon

Creamy Mushroom Chicken


  • Author: Chef Emy

Description

This creamy mushroom chicken recipe has the most deliciously tender pan-fried chicken smothered in a garlicky mushroom sauce! It’s quick and easy and can be on your table in half an hour.


Ingredients

Scale
  • 2 large chicken breasts
  • Salt & pepper (to taste)
  • Flour (for dredging)
  • 2 tablespoons olive oil
  • 2 tablespoons butter
  • 12 ounces mushrooms (try cremini or white mushrooms) (sliced)
  • 1/4 teaspoon Italian seasoning
  • 3 cloves garlic (minced)
  • 1/2 cup chicken broth
  • 1/2 teaspoon lemon juice
  • 1/2 teaspoon Dijon mustard
  • 1 cup heavy/whipping cream

Instructions

  1. Cut your chicken breasts in half lengthwise to make four thinner cutlets. Season them with salt & pepper then coat them in flour.
  2. Add the oil to a skillet over medium-high heat.
  3. Once the pan's hot, add the chicken. Cook it for 4-5 minutes/side until golden. Once this step is done, take the chicken out of the pan and set it aside.
  4. Add the butter to the pan. Let it melt, then add the mushrooms and Italian seasoning. Cook the mushrooms, stirring occasionally, until the water has been released, it cooks off, and they get a nice sear.
  5. Take the mushrooms out of the pan (ok to put them on the same plate as the chicken).
  6. Add the garlic, chicken broth, lemon juice, and Dijon mustard to the pan. Give it a good stir until the mustard dissolves, and let it reduce by half (about 3-4 minutes).
  7. Add the cream to the pan, along with the chicken and mushrooms. Let the chicken cook for another 5 minutes or so until it's cooked through and the sauce has thickened a bit. Season with salt & pepper as needed.