“`html
Table of Contents
- Unraveling the Philly Cheesesteak Mystery
- The Anatomy of a Perfect Philly Cheesesteak
- Timing is Everything: Prep, Cook, and Savor
- Step-by-Step Guide to Cheesesteak Bliss
- Nutritional Lowdown
- Healthier Alternatives for the Conscious Connoisseur
- Serving Suggestions: Elevate Your Experience
- Common Mistakes to Avoid
- Storing Your Masterpiece
- Frequently Asked Questions
Ultimate Philly Cheese Steak Sandwich Recipe for Food Lovers
Unraveling the Philly Cheesesteak Mystery
Did you know that the average American consumes roughly 10 cheesesteaks per year? If you’re a Philadelphia resident or just a dedicated food lover, chances are you’re aiming for even higher numbers! The iconic Philly cheesesteak is more than just a sandwich; it’s a cultural phenomenon, a symphony of savory steak, sweet caramelized onions, and glorious melted cheese, all nestled within a perfectly toasted roll. But what truly elevates a good cheesesteak to an *ultimate* one? It’s all in the details: the cut of steak, the type of cheese, the bread’s texture, and the precise cooking technique. Today, we’re diving deep into creating the ultimate Philly cheesesteak sandwich recipe that will transport your taste buds straight to the streets of Philadelphia, right from your own kitchen. Get ready for a flavor explosion and a culinary journey that’s truly satisfying!
The Anatomy of a Perfect Philly Cheesesteak
Crafting the ultimate Philly cheesesteak is all about selecting the finest ingredients and treating them with respect. This recipe focuses on those key components that make the sandwich sing.
Steak Selection: The Heart of the Matter
The star of our show is the steak. For that authentic, melt-in-your-mouth experience, you’ll want a tender, well-marbled cut that cooks quickly. Aim for about 1 to 1.5 pounds for 4 generous sandwiches.
- Ribeye Steak: This is the gold standard. Its high fat content renders beautifully, making each bite incredibly juicy and flavorful. Look for thinly sliced ribeye, or freeze your steak for about 30 minutes to make it easier to slice paper-thin at home.
- Alternative: Sirloin Steak If ribeye is out of reach, a good quality sirloin can also work, though it might be slightly less tender. Ensure it’s thinly sliced.
Bread: The Unsung Hero
The roll is the vehicle, and it needs to be sturdy enough to hold all that deliciousness without falling apart, yet soft enough to yield to a gentle bite.
- Hoagie Rolls/Italian Rolls: These are traditionally used in Philadelphia. They are typically long, soft inside, and slightly crusty on the outside. When shopping, look for rolls that are fresh but not too airy.
- Submarine Rolls: A good substitute if hoagie rolls aren’t available in your area.
- Key Preparation: Lightly toast or grill the inside of your rolls. This adds texture and prevents sogginess.
Cheese Choices: Gooey Goodness
This is where much of the magic happens! The cheese should melt seamlessly into the steak and onions, creating that signature gooey, indulgent texture.
- Provolone Cheese: The most classic choice. Its mild, slightly nutty flavor melts beautifully. Use slices or shredded Provolone.
- Cheez Whiz: For the purists and those who crave that undeniably authentic, rich, and salty flavor. Gently warm it before adding for an even smoother melt.
- American Cheese: A reliable melter that provides a creamy, mild counterpart to the savory steak and onions.
- Recommendation: A combination of Provolone and Cheez Whiz is a popular and delicious choice.
Essential Aromatics and Flavor Boosters
These ingredients add depth and aroma, transforming simple components into a flavor powerhouse.
- Onions: 1 large yellow onion, thinly sliced. Yellow onions offer a perfect balance of sweetness and pungency when sautéed.
- Mushrooms (Optional but Recommended): 8 oz cremini mushrooms, sliced. They add an earthy, umami-rich flavor that complements the steak and onions wonderfully.
- Garlic: 2-3 cloves, minced. A little goes a long way to boost the savory notes.
- Olive Oil or Butter: For sautéing. About 2-3 tablespoons. Butter adds richness, while olive oil offers a cleaner flavor.
- Salt and Black Pepper: To taste. Essential for enhancing all the flavors.
Optional Additions
- Bell Peppers: Thinly sliced green bell peppers can be sautéed with the onions and mushrooms for a touch of sweetness and color.
- Jalapeños: For those who love a little heat, a few slivers of pickled or fresh jalapeños can be a fantastic addition.
Timing is Everything: Prep, Cook, and Savor
Compared to many complex dishes, the Philly Cheesesteak is remarkably quick to prepare. While the average homestyle dinner might take upwards of 45-60 minutes, this recipe focuses on efficiency without sacrificing flavor. The 15-minute prep time allows for minimal chopping and slicing, and the 20-minute cook time means you can have this delicious meal on the table in under an hour, making it perfect for a weeknight treat!
Step-by-Step Guide to Cheesesteak Bliss
Follow these simple steps to achieve cheesesteak perfection. The key is not to overcrowd the pan to ensure everything cooks evenly and gets that desirable sizzle.
Step 1: Prepare the Steak
If your steak isn’t pre-sliced, place it in the freezer for about 30 minutes until slightly firm. This makes it much easier to slice thinly. Use a sharp knife to slice the steak against the grain as thinly as possible, creating fine shreds. If using Cheez Whiz, you can gently warm it in a small saucepan over low heat or in the microwave. Set aside.
Step 2: Sauté the Onions and Mushrooms
Heat 1 tablespoon of olive oil or butter in a large skillet or cast-iron pan over medium-high heat. Add the thinly sliced onions and cook, stirring occasionally, until they are softened and begin to caramelize, about 5-7 minutes. If using mushrooms, add them to the pan with the onions and cook until they release their moisture and start to brown, another 5-7 minutes. Add the minced garlic in the last minute of cooking until fragrant. Season with salt and pepper. Remove the onion and mushroom mixture from the skillet and set aside.
Step 3: Cook the Steak
Add another tablespoon of olive oil or butter to the same skillet. Increase the heat to high. Add the thinly sliced steak to the hot pan in a single layer. Avoid overcrowding; cook in batches if necessary. Sear the steak for 1-2 minutes per side until it’s mostly browned but still slightly pink in the center. Season generously with salt and pepper. You want a good sizzle here!
Step 4: Melt the Cheese
Once the steak is cooked, return the sautéed onions and mushrooms to the skillet. Toss everything together. Now, it’s time for the cheese! If using Provolone or American slices, lay them directly over the steak and onion mixture. Cover the pan for about 1-2 minutes, or until the cheese is completely melted and gooey. If using Cheez Whiz, dollop it over the mixture and gently stir until it coats everything beautifully. Alternatively, you can spoon the warmed Cheez Whiz over the steak mixture.
Step 5: Assemble Your Masterpiece
While the cheese is melting, lightly toast the inside of your hoagie rolls. You can do this in a toaster oven, under the broiler, or even on a dry skillet. Once the filling is ready and the cheese is perfectly melted, spoon generous portions of the steak, onion, and mushroom mixture into the prepared rolls. Serve immediately and marvel at your creation!
Nutritional Lowdown
A typical Philly cheesesteak can be quite indulgent. Please note that nutritional values can vary significantly based on portion size, specific ingredients used (especially cheese and any added sauces), and whether it’s prepared at home or purchased. This is an approximate nutritional breakdown per sandwich, assuming standard portions and ingredients (e.g., ribeye, provolone, hoagie roll):
- Calories: 600-900 kcal
- Protein: 30-45g
- Fat: 35-55g (saturated fat will be higher)
- Carbohydrates: 40-60g
- Sodium: 1000-1800mg (can be very high depending on cheese and seasoning)
Healthier Alternatives for the Conscious Connoisseur
Enjoying a classic cheesesteak doesn’t mean you have to completely derail your healthy eating goals. Here are a few swaps you can make:
- Leaner Steak: Opt for thinly sliced sirloin or even lean flank steak. While less inherently rich, they still offer great flavor when seasoned correctly.
- Reduced Fat Cheese: Use reduced-fat Provolone or a light version of American cheese. You might need to use a bit more to achieve that same cheesy pull.
- Whole Wheat Rolls: Swap the traditional white hoagie roll for a whole wheat or multi-grain sub roll to boost fiber content.
- Load Up on Veggies: Add more mushrooms, onions, bell peppers, spinach, or even a sprinkle of microgreens. This increases nutrient density and fiber.
- Portion Control: Consider making smaller sandwiches or enjoying them open-faced.
- Mindful Cheese Application: Instead of covering the entire steak, use cheese more judiciously. A light drizzle of Cheez Whiz or a few well-placed slices of Provolone can still deliver flavor.
Serving Suggestions: Elevate Your Experience
A classic Philly cheesesteak is a meal in itself, but here are some ideas to round out your dining experience:
- Classic Sides: French fries are the quintessential companion. For a healthier twist, try sweet potato fries or a side salad.
- Pickles: The tangy crunch of dill pickles offers a refreshing contrast to the rich cheesesteak.
- Kalamata Olives: For a Mediterranean twist, serve with a side of briny Kalamata olives.
- Beverages: A classic American lager, a crisp soda, or even a creamy milkshake pairs wonderfully.
Common Mistakes to Avoid
Even a beloved classic can go awry if a few common pitfalls aren’t avoided:
- Overcrowding the Pan: This leads to steaming rather than searing the steak, resulting in tough, gray meat. Cook in batches!
- Using the Wrong Cut of Steak: Tough, chewy cuts will not yield the desired tender results.
- Soggy Rolls: Failing to toast the inside of the roll will result in a bread that disintegrates under the weight of the filling.
- Under-seasoning: Steak and onions need to be seasoned adequately throughout the cooking process.
- Dicing the Steak: Philly cheesesteaks are traditionally made with thinly sliced steak, not diced.
Storing Your Masterpiece
Philly cheesesteaks are best enjoyed immediately after preparation. However, if you have leftovers:
- Store Separately: Allow the steak and onion mixture to cool completely. Store it in an airtight container in the refrigerator for up to 2 days.
- Reheating: Reheat the filling gently in a skillet or microwave until heated through. Toast your roll separately before assembling. Reheating the entire sandwich can result in a soggy roll.
Frequently Asked Questions
***What is the most authentic cheese for a Philly Cheesesteak?***
Traditionally, Provolone cheese is the most authentic choice. However, Cheez Whiz is also a very popular and authentic option, particularly for those who grew up with it.
***Can I use pre-sliced deli steak?***
While you could, it’s not ideal. Deli steak is often processed and may not have the same texture or flavor profile as thinly sliced ribeye or sirloin steak. It might also be pre-cooked and seasoned, which could affect the final outcome.
***How do I get my steak really thin?***
The best method is to partially freeze the steak (about 30 minutes in the freezer) until it’s firm but not solid. This allows for very thin, uniform slices with a sharp knife.
***Should I add peppers and mushrooms?***
While classic Philly cheesesteaks often focus on steak, onions, and cheese, many popular variations include sautéed mushrooms and bell peppers. They add great flavor and texture, so we highly recommend them!
***Can I make the steak and onion mixture ahead of time?***
Yes, the cooked steak, onion, and mushroom mixture can be made a day in advance and stored in the refrigerator. Gently reheat it in a skillet before assembling your sandwiches.
Ready to recreate this iconic sandwich? Share your Ultimate Philly Cheesesteak creations with us in the comments below or tag us on social media! We’d love to see what you come up with.
Conclusion
Bringing the authentic taste of Philadelphia to your table is a delicious and rewarding endeavor. This Ultimate Philly Cheesesteak Sandwich recipe is designed to be accessible for home cooks while delivering all the robust flavors and satisfying textures that make this sandwich a legend. From the perfect cut of steak and the ideal cheese melt to the crucial role of the hoagie roll, every element plays a part in this culinary masterpiece. So grab your ingredients, fire up that skillet, and prepare to indulge in a truly unforgettable meal. Enjoy!
Print
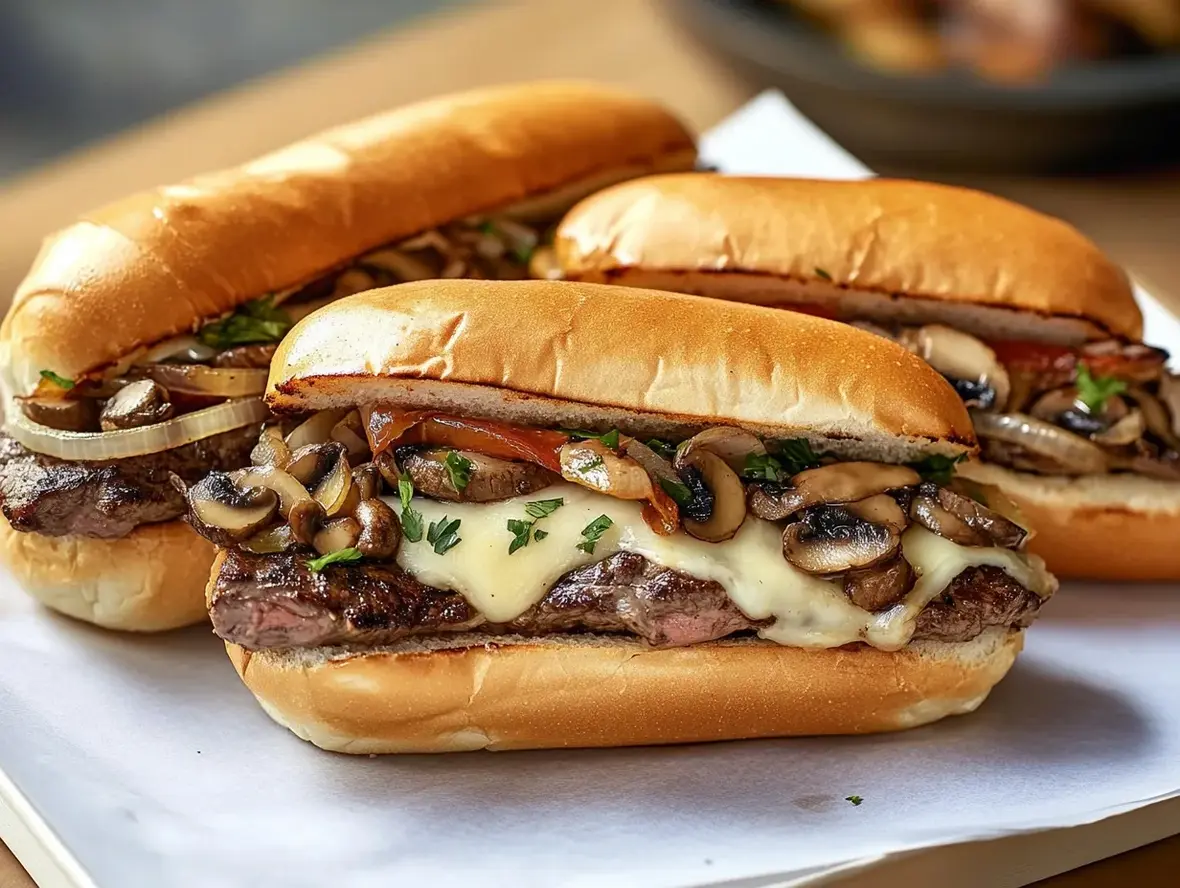
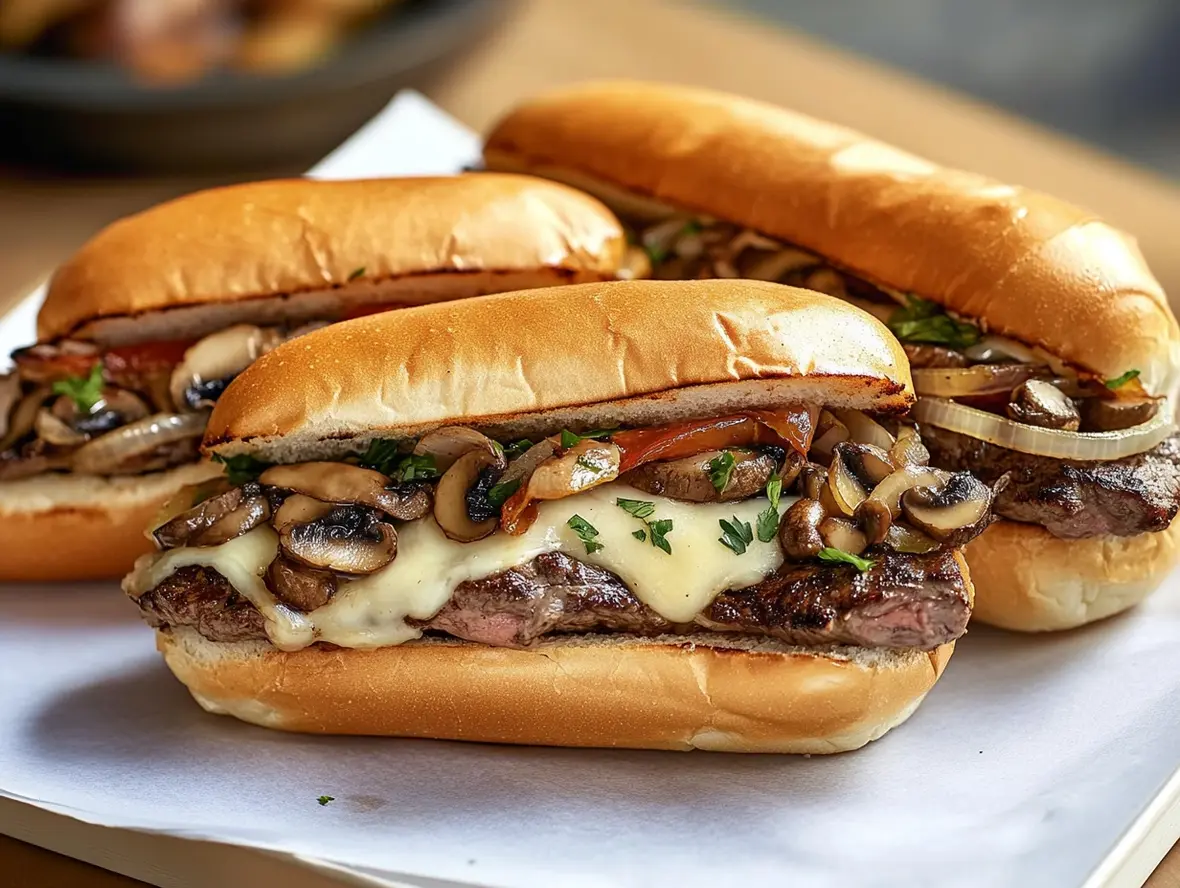
Philly Cheese Steak Sandwich with Mushrooms
Description
Experience the ultimate comfort food with thisPhilly Cheese Steak Sandwich! Packed with tender ribeye steak, sautéed onions, bell peppers, and mushrooms, all topped with melty provolone cheese, it’s a delicious classic with an added mushroom twist. Perfect for lunch, dinner, or anytime indulgence.
Ingredients
- 1pound ribeye steak, thinly sliced1 tablespoonolive oil1medium onion, sliced1bell pepper, sliced (green or red)8 ouncesmushrooms, sliced2cloves garlic, mincedSalt and pepper, to taste4hoagie rolls8 ouncesprovolone cheese, slicedOptional: Worcestershire sauce, to taste
- 1 tablespoonolive oil1medium onion, sliced1bell pepper, sliced (green or red)8 ouncesmushrooms, sliced2cloves garlic, mincedSalt and pepper, to taste4hoagie rolls8 ouncesprovolone cheese, slicedOptional: Worcestershire sauce, to taste
- 1medium onion, sliced1bell pepper, sliced (green or red)8 ouncesmushrooms, sliced2cloves garlic, mincedSalt and pepper, to taste4hoagie rolls8 ouncesprovolone cheese, slicedOptional: Worcestershire sauce, to taste
- 1bell pepper, sliced (green or red)8 ouncesmushrooms, sliced2cloves garlic, mincedSalt and pepper, to taste4hoagie rolls8 ouncesprovolone cheese, slicedOptional: Worcestershire sauce, to taste
- 8 ouncesmushrooms, sliced2cloves garlic, mincedSalt and pepper, to taste4hoagie rolls8 ouncesprovolone cheese, slicedOptional: Worcestershire sauce, to taste
- 2cloves garlic, mincedSalt and pepper, to taste4hoagie rolls8 ouncesprovolone cheese, slicedOptional: Worcestershire sauce, to taste
- Salt and pepper, to taste4hoagie rolls8 ouncesprovolone cheese, slicedOptional: Worcestershire sauce, to taste
- 4hoagie rolls8 ouncesprovolone cheese, slicedOptional: Worcestershire sauce, to taste
- 8 ouncesprovolone cheese, slicedOptional: Worcestershire sauce, to taste
- Optional: Worcestershire sauce, to taste
Instructions
- 1️⃣Sauté the Vegetables:Heat olive oil in a large skillet over medium-high heat. Add the sliced onions and bell peppers, cooking until the onions turn translucent and the peppers are tender, about 5-7 minutes.2️⃣Cook the Mushrooms and Garlic:Add the sliced mushrooms and minced garlic to the skillet. Cook until the mushrooms are browned and their moisture has evaporated, about 5 minutes. Season with salt and pepper to taste.3️⃣Cook the Steak:Push the vegetables to one side of the skillet. Add the thinly sliced ribeye steak to the other side, seasoning with salt, pepper, and optional Worcestershire sauce. Cook for 3-4 minutes, stirring occasionally, until the steak is just browned.4️⃣Combine:Stir the steak and vegetables together in the skillet to combine all the flavors.5️⃣Assemble the Sandwiches:Preheat your broiler. Split the hoagie rolls and fill each with the steak and vegetable mixture. Top generously with slices of provolone cheese.6️⃣Melt the Cheese:Place the sandwiches on a baking sheet and broil for 2-4 minutes, just until the cheese is melted and bubbly. Keep an eye on them to prevent burning!7️⃣Serve:Remove the sandwiches from the oven, let them cool slightly, and serve hot.
- 2️⃣Cook the Mushrooms and Garlic:Add the sliced mushrooms and minced garlic to the skillet. Cook until the mushrooms are browned and their moisture has evaporated, about 5 minutes. Season with salt and pepper to taste.
- 3️⃣Cook the Steak:Push the vegetables to one side of the skillet. Add the thinly sliced ribeye steak to the other side, seasoning with salt, pepper, and optional Worcestershire sauce. Cook for 3-4 minutes, stirring occasionally, until the steak is just browned.4️⃣Combine:Stir the steak and vegetables together in the skillet to combine all the flavors.5️⃣Assemble the Sandwiches:Preheat your broiler. Split the hoagie rolls and fill each with the steak and vegetable mixture. Top generously with slices of provolone cheese.6️⃣Melt the Cheese:Place the sandwiches on a baking sheet and broil for 2-4 minutes, just until the cheese is melted and bubbly. Keep an eye on them to prevent burning!7️⃣Serve:Remove the sandwiches from the oven, let them cool slightly, and serve hot.
- 4️⃣Combine:Stir the steak and vegetables together in the skillet to combine all the flavors.5️⃣Assemble the Sandwiches:Preheat your broiler. Split the hoagie rolls and fill each with the steak and vegetable mixture. Top generously with slices of provolone cheese.6️⃣Melt the Cheese:Place the sandwiches on a baking sheet and broil for 2-4 minutes, just until the cheese is melted and bubbly. Keep an eye on them to prevent burning!7️⃣Serve:Remove the sandwiches from the oven, let them cool slightly, and serve hot.
- 5️⃣Assemble the Sandwiches:Preheat your broiler. Split the hoagie rolls and fill each with the steak and vegetable mixture. Top generously with slices of provolone cheese.
- 6️⃣Melt the Cheese:Place the sandwiches on a baking sheet and broil for 2-4 minutes, just until the cheese is melted and bubbly. Keep an eye on them to prevent burning!7️⃣Serve:Remove the sandwiches from the oven, let them cool slightly, and serve hot.
- 7️⃣Serve:Remove the sandwiches from the oven, let them cool slightly, and serve hot.
Notes
Steak Tip:Partially freeze the ribeye for 30 minutes to make slicing it thinly much easier.Cheese Substitute:Swap out provolone for mozzarella or American cheese if preferred.Add a Kick:Toss in some red pepper flakes or a splash of hot sauce for added heat.Leftovers:Wrap leftover sandwiches in foil and reheat in the oven at 350°F (175°C) for 10 minutes.
Cheese Substitute:Swap out provolone for mozzarella or American cheese if preferred.Add a Kick:Toss in some red pepper flakes or a splash of hot sauce for added heat.Leftovers:Wrap leftover sandwiches in foil and reheat in the oven at 350°F (175°C) for 10 minutes.
Add a Kick:Toss in some red pepper flakes or a splash of hot sauce for added heat.Leftovers:Wrap leftover sandwiches in foil and reheat in the oven at 350°F (175°C) for 10 minutes.
Leftovers:Wrap leftover sandwiches in foil and reheat in the oven at 350°F (175°C) for 10 minutes.
“`