Let’s get this delicious recipe ready for your blog!
## Part 1: Article Content Generation
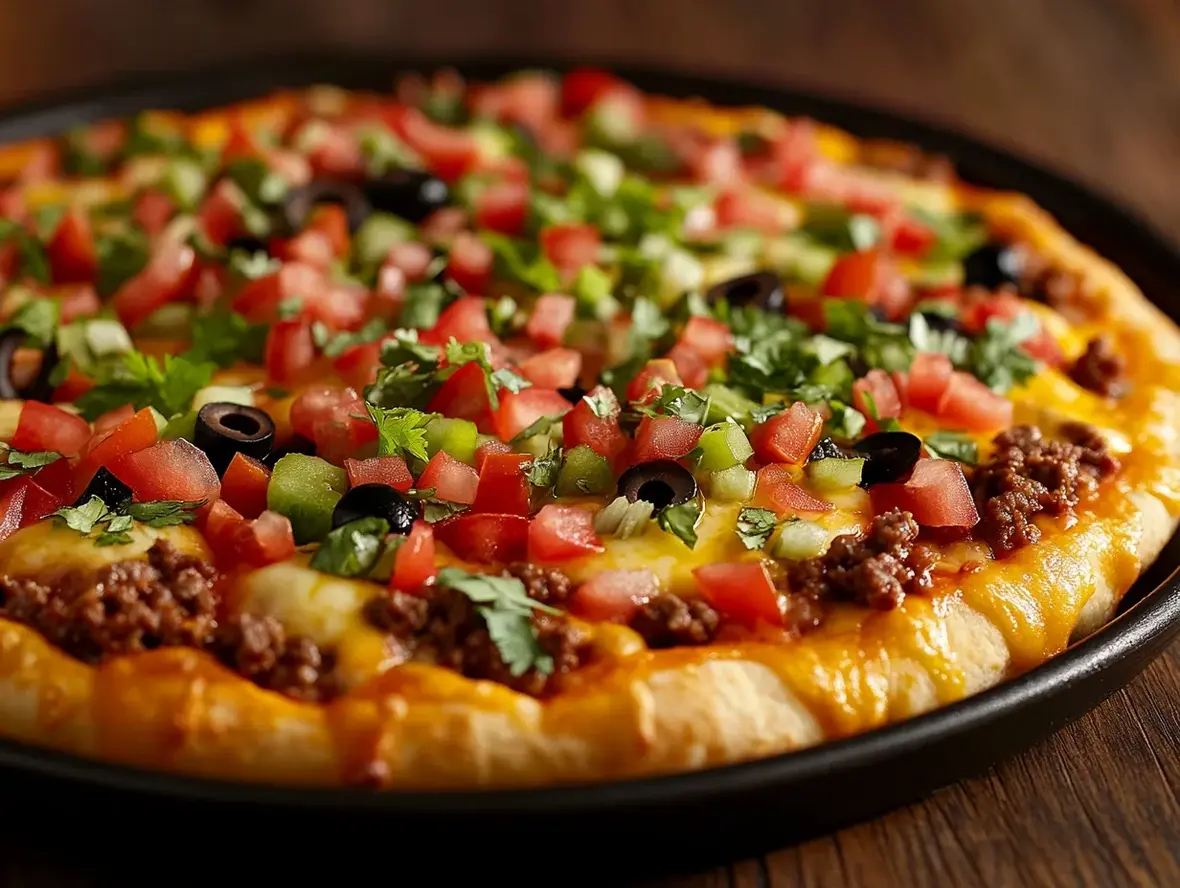
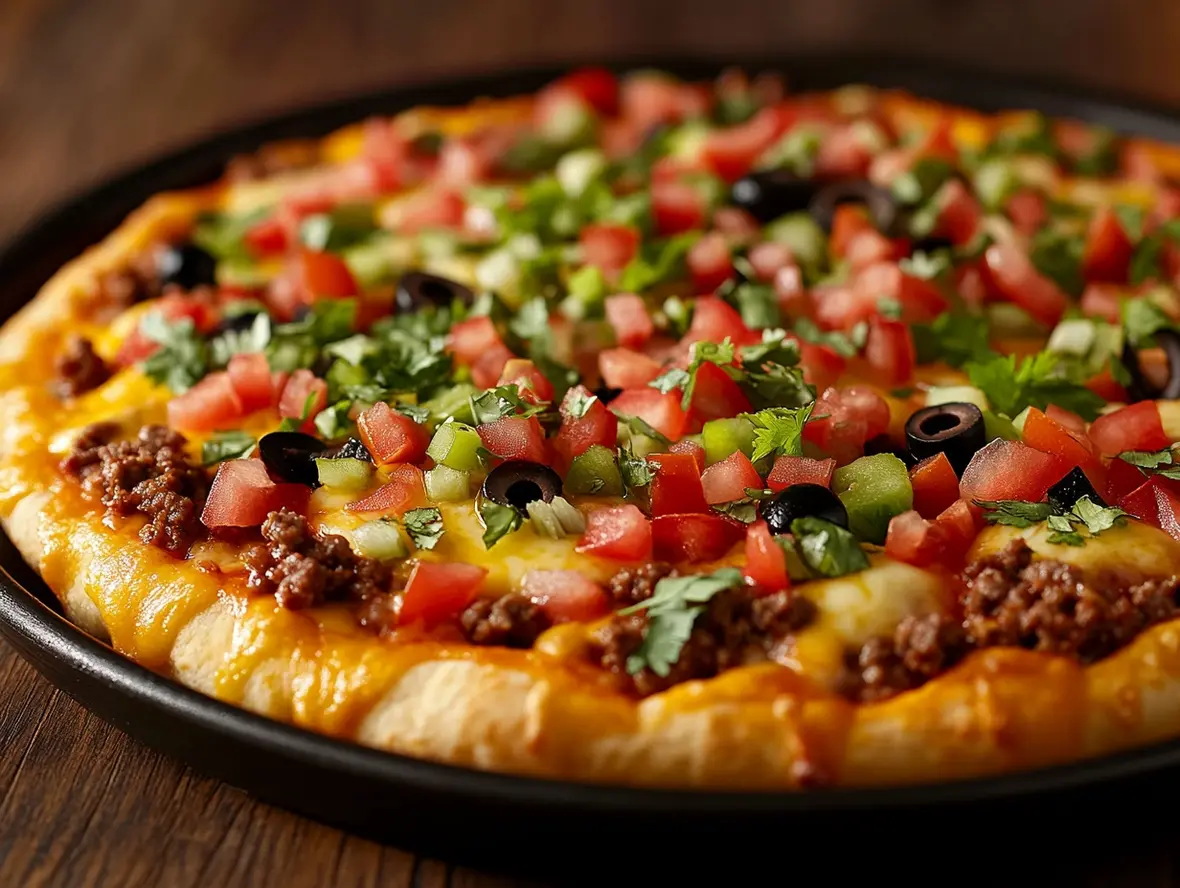
# Easy Sheet Pan Taco Pizza for Quick Family Dinners
## Tired of the Weeknight Dinner Rut? Meet Your New Best Friend!
Are you searching for a dinner solution that’s lightning-fast, incredibly delicious, and guaranteed to please even the pickiest eaters? If you’re like many families, the answer is a resounding yes! The daily challenge of getting a wholesome and satisfying meal on the table can feel overwhelming. That’s where our Easy Sheet Pan Taco Pizza comes in. This recipe transforms the bold, exciting flavors of your favorite tacos into a crowd-pleasing pizza, all cooked on a single sheet pan. It’s the ultimate weeknight warrior, minimizing cleanup and maximizing flavor. Get ready to revolutionize your dinner routine!
## Deconstructed Taco Flavors, Reimagined as Pizza
Imagine the vibrant spices of seasoned ground beef, the fresh zest of salsa, the creamy richness of cheese, and the satisfying crunch of taco shells – all coming together on a crispy pizza crust. This Sheet Pan Taco Pizza is designed for maximum flavor impact with minimal effort. It’s a fusion dish that’s sure to become a family favorite.
## Ingredients: A Symphony of Taco & Pizza Bliss
Gathering your ingredients is the first step towards taco pizza pandemonium! We’ve made sure to include notes for substitutions because we know that ingredients can sometimes be a pantry puzzle.
* **For the Crispy Base:**
* 1 large (13-14 inch) pre-made pizza crust or a large tortilla (like a giant flour tortilla or a couple of smaller ones overlapped). *Sensory Note: Look for a sturdy crust that can hold up to toppings. A slightly browned, crisp edge is pure joy!*
* **Substitution:** If you don’t have a pre-made crust, you can use a large rectangular piece of puff pastry, or even make your own pizza dough.
* **For the Savory Taco Filling:**
* 1 lb ground beef (80/20 or 90/10 recommended). *Sensory Note: A bit of fat in the beef ensures juicy, flavorful crumbles.*
* 1 packet (1 oz) taco seasoning.
* 2/3 cup water.
* **Substitution:** Ground turkey or chicken can be used. For a vegetarian option, use crumbled firm tofu or plant-based grounds.
* **For the Flavorful “Sauce” Layer:**
* 1/2 cup salsa (your favorite mild, medium, or hot). *Sensory Note: A chunky salsa adds interesting texture and bursts of flavor.*
* **Substitution:** Refried beans seasoned with a pinch of cumin and chili powder can also work as a fantastic base layer.
* **For the Cheesy Topping:**
* 2 cups shredded Mexican blend cheese (or a mix of cheddar and Monterey Jack). *Sensory Note: Melty, gooey cheese is non-negotiable for pizza perfection!*
* **Substitution:** Use your favorite melting cheese like mozzarella, pepper jack, or a dairy-free alternative.
* **For the Fresh, Zesty Garnishes (Choose your favorites!):**
* 1/2 cup shredded lettuce. *Sensory Note: A cool, crisp crunch that beautifully contrasts the warm toppings.*
* 1/4 cup diced tomatoes.
* 1/4 cup sliced black olives.
* 2 tablespoons chopped fresh cilantro.
* Sour cream or Greek yogurt, for drizzling.
* Sliced jalapeños (fresh or pickled), for a kick.
* Guacamole or diced avocado.
* Crushed tortilla chips, for extra crunch.
## Timing is Everything: Speed Through Dinner Prep!
This recipe is all about efficiency, making it a weeknight dream.
* **Prep time:** 15 minutes
* **Cook time:** 20-25 minutes
* **Total time:** 35-40 minutes
Compared to an average pizza recipe that might involve making dough from scratch or assembling multiple components separately, our Easy Sheet Pan Taco Pizza shaves off significant time while delivering maximum satisfaction.
## Step-by-Step Instructions: Crafting Your Taco Pizza Masterpiece
Let’s get cooking! Follow these simple steps for taco pizza success.
### Step 1: Preheat and Prep Your Pan
Preheat your oven to 400°F (200°C). Lightly grease a large baking sheet or line it with parchment paper for easiest cleanup. If using a pre-made crust, place it directly onto the prepared baking sheet. If using a large tortilla, place it on the sheet. For extra crispiness, you can pre-bake the crust or tortilla for 5 minutes before adding toppings.
### Step 2: Cook the Taco Meat
In a medium skillet over medium-high heat, crumble and brown the ground beef. Drain off any excess grease. Stir in the taco seasoning and water, then bring to a simmer. Cook for 5-7 minutes, stirring occasionally, until the sauce has thickened and the meat is well-coated.
### Step 3: Assemble Your Taco Pizza Base
Spread the salsa evenly over the pizza crust or tortilla, leaving a small border for the edges. This will be your flavorful “sauce.” Dollop and spread any refried beans here if you’re using them as an alternative.
### Step 4: Layer on the Taco Delight
Evenly distribute the seasoned taco meat over the salsa layer. Don’t be shy – make sure every bite gets a taste of that savory goodness!
### Step 5: Cheese, Please!
Sprinkle the shredded Mexican blend cheese generously over the taco meat. Go all the way to the edges to ensure a beautiful, melty crust.
### Step 6: Bake to Golden Perfection
Place the baking sheet in the preheated oven. Bake for 15-20 minutes, or until the crust is golden brown and the cheese is melted and bubbly, with a few delicious browned spots.
### Step 7: Add Your Favorite Fresh Toppings
Carefully remove the sheet pan from the oven. Now it’s time for the fun part – customizing your taco pizza! Top with shredded lettuce, diced tomatoes, olives, cilantro, a dollop of sour cream, jalapeños, avocado, or any of your other favorite garnishes.
### Step 8: Slice and Serve!
Let the pizza cool for just a minute or two before slicing it into squares or wedges using a pizza cutter or a sharp knife. Serve immediately and watch it disappear!
## Nutritional Information: A Deliciously Approximate Guide
While exact nutritional values can vary based on specific ingredients used (especially cheese and meat fat content), here’s a general estimate for a generous slice:
* **Calories:** 350-450 kcal
* **Protein:** 20-25g
* **Fat:** 18-25g
* **Carbohydrates:** 25-35g
* **Fiber:** 3-5g
*These are estimated values and will vary based on portion size and specific ingredient choices.*
## Healthier Alternatives: Deliciously Smart Swaps
Looking to lighten things up without sacrificing flavor? Try these smart swaps:
* **Leaner Protein:** Opt for ground turkey, chicken, or extra-lean ground beef.
* **Whole Wheat Crust:** Use a whole wheat pizza crust or large whole wheat tortilla.
* **Veggie Boost:** Load up on extra veggies like bell peppers, corn, or onions mixed into the taco meat or as toppings.
* **Lighter “Sauce”:** Use a salsa with no added sugar or a thin layer of black bean dip.
* **Reduced-Fat Cheese:** Use a reduced-fat Mexican blend or opt for more veggies and less cheese.
* **Greek Yogurt:** Swap sour cream for plain Greek yogurt for a protein and probiotic boost with fewer calories and fat.
## Serving Suggestions: Beyond the Slice
This Sheet Pan Taco Pizza is incredibly versatile. Serve it as a fun weeknight dinner, a party appetizer, or even for a casual brunch. It pairs wonderfully with a simple side salad, some corn on the cob, or a refreshing glass of agua fresca. For a more authentic taco experience, offer small bowls of all the garnish options so everyone can customize their own slice.
## Common Mistakes to Avoid
* **Overcrowding:** Don’t overload the pan with too many wet toppings, which can make the crust soggy.
* **Soggy Bottom:** Ensure your oven is properly preheated, and consider pre-baking the crust for extra crispness.
* **Under-Seasoning:** Use a full packet of taco seasoning and taste your meat mixture before adding it to the pizza.
* **Skipping the Garnish:** Those fresh toppings are key to balancing the richness and adding that “taco” essence!
## Storing Tips: Leftovers Love Taco Pizza Too!
Leftover Sheet Pan Taco Pizza can be stored in an airtight container in the refrigerator for up to 3 days. For the best results when reheating, place slices on a baking sheet and warm them in a 350°F (175°C) oven for about 5-10 minutes, or until heated through and the crust is re-crisped. You can also reheat individual slices in a toaster oven or air fryer. Microwaving can make the crust a bit soft.
## Conclusion: Dinner Solved, Flavor Amplified!
You’ve just unlocked the secret to incredibly easy, incredibly delicious family dinners! The Easy Sheet Pan Taco Pizza is a testament to how simple ingredients and a clever concept can create a meal that’s both fun and satisfying. It’s the perfect blend of your favorite taco flavors and the beloved comfort of pizza, all without the fuss. So, ditch the takeout menus and recipe indecision, and embrace the weeknight wonder that is this sheet pan sensation. Give it a try this week and prepare for happy eaters all around!
## Frequently Asked Questions
***_What kind of pizza crust works best?_***
A sturdy, thin-to-medium crust is ideal. Pre-made pizza crusts, large tortillas, or even flatbreads work beautifully. If you’re very concerned about sogginess, you can briefly pre-bake your chosen crust before adding toppings.
***_Can I make this ahead of time?_***
You can prepare the taco meat mixture and chop your toppings ahead of time and store them separately in the refrigerator. Then, simply assemble and bake when you’re ready to eat. Baking the assembled pizza from scratch is best for optimal texture.
***_Can I use different types of meat or a meat substitute?_***
Absolutely! Ground turkey, chicken, or a plant-based ground like tofu or tempeh crumbles are excellent alternatives. Adjust cooking times as needed for your chosen protein.
***_What if I don’t have taco seasoning?_***
No problem! You can create your own taco seasoning blend with 1 tablespoon chili powder, 1 teaspoon cumin, 1 teaspoon paprika, 1/2 teaspoon garlic powder, 1/2 teaspoon onion powder, 1/4 teaspoon dried oregano, and a pinch of cayenne pepper (for heat). Adjust to your taste!
***_How can I make the crust extra crispy?_***
For an extra crispy crust, pre-bake it on the baking sheet for 5-7 minutes at 400°F (200°C) before adding toppings. Also, ensure your oven is fully preheated, and consider using a pizza stone if you have one, though a regular baking sheet works well for this recipe.
***_Is this kid-friendly?_***
Yes! This recipe is very kid-friendly. You can adjust the spice level of the salsa and garnishes to suit your children’s preferences. Most kids love the combination of pizza and taco flavors.

Easy Taco Pizza
Description
A fusion of pizza and tacos, thisEasy Taco Pizzais a quick, family-friendly recipe perfect for game nights or casual dinners. With a flaky crescent roll crust, hearty refried beans, seasoned ground beef, melted cheese, and fresh toppings, it’s a crowd-pleaser that’s ready in under 40 minutes.
Ingredients
- For the crust:2(8 oz) cans Pillsbury crescent rolls
- For the filling:1lb ground beef1envelope taco seasoning mix1(16 oz) can refried beansFor the toppings:2–3cups shredded cheddar cheese or Mexican blend½ cupchopped tomatoes¼ cupsliced black olives4chopped green onions
- For the toppings:2–3cups shredded cheddar cheese or Mexican blend½ cupchopped tomatoes¼ cupsliced black olives4chopped green onions
Instructions
- 1️⃣Preheat Oven:Preheat your oven to 375°F (190°C).
- 2️⃣Cook Ground Beef:In a skillet over medium-high heat, brown the ground beef for 7-10 minutes. Drain any excess fat.3️⃣Add Taco Seasoning:Return the beef to the skillet. Stir in the taco seasoning mix with ½–⅔ cup water. Simmer until most of the liquid evaporates, stirring occasionally.4️⃣Prepare the Crust:Unroll the crescent rolls into rectangles and press them into an 11.5×16.5 inch jelly roll pan to form the crust. Make sure to press ½ inch up the edges to create a slight border.5️⃣Bake the Crust:Bake in the preheated oven for 11–13 minutes or until golden brown.6️⃣Heat Refried Beans:Microwave the refried beans for about 1 minute to soften.7️⃣Spread Refried Beans:Spread the warmed refried beans evenly over the baked crust.8️⃣Layer with Ground Beef:Spoon the seasoned ground beef evenly over the refried beans.9️⃣Add Cheese:Sprinkle 2–3 cups of shredded cheese over the beef layer.🔟Top with Fresh Ingredients:Evenly distribute the chopped tomatoes, sliced black olives, and chopped green onions over the cheese.1️⃣1️⃣Final Bake:Return the taco pizza to the oven and bake for another 3–6 minutes, just until the cheese melts and bubbles.1️⃣2️⃣Slice and Serve:Let the taco pizza sit for a few minutes before slicing into squares or rectangles. Serve hot and enjoy!
- 3️⃣Add Taco Seasoning:Return the beef to the skillet. Stir in the taco seasoning mix with ½–⅔ cup water. Simmer until most of the liquid evaporates, stirring occasionally.4️⃣Prepare the Crust:Unroll the crescent rolls into rectangles and press them into an 11.5×16.5 inch jelly roll pan to form the crust. Make sure to press ½ inch up the edges to create a slight border.5️⃣Bake the Crust:Bake in the preheated oven for 11–13 minutes or until golden brown.6️⃣Heat Refried Beans:Microwave the refried beans for about 1 minute to soften.7️⃣Spread Refried Beans:Spread the warmed refried beans evenly over the baked crust.8️⃣Layer with Ground Beef:Spoon the seasoned ground beef evenly over the refried beans.9️⃣Add Cheese:Sprinkle 2–3 cups of shredded cheese over the beef layer.🔟Top with Fresh Ingredients:Evenly distribute the chopped tomatoes, sliced black olives, and chopped green onions over the cheese.1️⃣1️⃣Final Bake:Return the taco pizza to the oven and bake for another 3–6 minutes, just until the cheese melts and bubbles.1️⃣2️⃣Slice and Serve:Let the taco pizza sit for a few minutes before slicing into squares or rectangles. Serve hot and enjoy!
- 4️⃣Prepare the Crust:Unroll the crescent rolls into rectangles and press them into an 11.5×16.5 inch jelly roll pan to form the crust. Make sure to press ½ inch up the edges to create a slight border.
- 5️⃣Bake the Crust:Bake in the preheated oven for 11–13 minutes or until golden brown.6️⃣Heat Refried Beans:Microwave the refried beans for about 1 minute to soften.7️⃣Spread Refried Beans:Spread the warmed refried beans evenly over the baked crust.8️⃣Layer with Ground Beef:Spoon the seasoned ground beef evenly over the refried beans.9️⃣Add Cheese:Sprinkle 2–3 cups of shredded cheese over the beef layer.🔟Top with Fresh Ingredients:Evenly distribute the chopped tomatoes, sliced black olives, and chopped green onions over the cheese.1️⃣1️⃣Final Bake:Return the taco pizza to the oven and bake for another 3–6 minutes, just until the cheese melts and bubbles.1️⃣2️⃣Slice and Serve:Let the taco pizza sit for a few minutes before slicing into squares or rectangles. Serve hot and enjoy!
- 6️⃣Heat Refried Beans:Microwave the refried beans for about 1 minute to soften.7️⃣Spread Refried Beans:Spread the warmed refried beans evenly over the baked crust.8️⃣Layer with Ground Beef:Spoon the seasoned ground beef evenly over the refried beans.9️⃣Add Cheese:Sprinkle 2–3 cups of shredded cheese over the beef layer.🔟Top with Fresh Ingredients:Evenly distribute the chopped tomatoes, sliced black olives, and chopped green onions over the cheese.1️⃣1️⃣Final Bake:Return the taco pizza to the oven and bake for another 3–6 minutes, just until the cheese melts and bubbles.1️⃣2️⃣Slice and Serve:Let the taco pizza sit for a few minutes before slicing into squares or rectangles. Serve hot and enjoy!
- 7️⃣Spread Refried Beans:Spread the warmed refried beans evenly over the baked crust.
- 8️⃣Layer with Ground Beef:Spoon the seasoned ground beef evenly over the refried beans.9️⃣Add Cheese:Sprinkle 2–3 cups of shredded cheese over the beef layer.🔟Top with Fresh Ingredients:Evenly distribute the chopped tomatoes, sliced black olives, and chopped green onions over the cheese.1️⃣1️⃣Final Bake:Return the taco pizza to the oven and bake for another 3–6 minutes, just until the cheese melts and bubbles.1️⃣2️⃣Slice and Serve:Let the taco pizza sit for a few minutes before slicing into squares or rectangles. Serve hot and enjoy!
- 9️⃣Add Cheese:Sprinkle 2–3 cups of shredded cheese over the beef layer.🔟Top with Fresh Ingredients:Evenly distribute the chopped tomatoes, sliced black olives, and chopped green onions over the cheese.1️⃣1️⃣Final Bake:Return the taco pizza to the oven and bake for another 3–6 minutes, just until the cheese melts and bubbles.1️⃣2️⃣Slice and Serve:Let the taco pizza sit for a few minutes before slicing into squares or rectangles. Serve hot and enjoy!
- 🔟Top with Fresh Ingredients:Evenly distribute the chopped tomatoes, sliced black olives, and chopped green onions over the cheese.
- 1️⃣1️⃣Final Bake:Return the taco pizza to the oven and bake for another 3–6 minutes, just until the cheese melts and bubbles.1️⃣2️⃣Slice and Serve:Let the taco pizza sit for a few minutes before slicing into squares or rectangles. Serve hot and enjoy!
- 1️⃣2️⃣Slice and Serve:Let the taco pizza sit for a few minutes before slicing into squares or rectangles. Serve hot and enjoy!
Notes
Customize toppings to your liking! Add jalapeños, avocado slices, or a dollop of sour cream for extra flavor.For a spicier version, use hot taco seasoning or add a pinch of cayenne pepper to the ground beef.
For a spicier version, use hot taco seasoning or add a pinch of cayenne pepper to the ground beef.
—
## Part 2: HTML Conversion for WordPress Gutenberg
“`html
Table of Contents
- Tired of the Weeknight Dinner Rut? Meet Your New Best Friend!
- Ingredients: A Symphony of Taco & Pizza Bliss
- Timing is Everything: Speed Through Dinner Prep!
- Step-by-Step Instructions: Crafting Your Taco Pizza Masterpiece
- Nutritional Information: A Deliciously Approximate Guide
- Healthier Alternatives: Deliciously Smart Swaps
- Serving Suggestions: Beyond the Slice
- Common Mistakes to Avoid
- Storing Tips: Leftovers Love Taco Pizza Too!
- Conclusion: Dinner Solved, Flavor Amplified!
- Frequently Asked Questions
Easy Sheet Pan Taco Pizza for Quick Family Dinners
Tired of the Weeknight Dinner Rut? Meet Your New Best Friend!
Are you searching for a dinner solution that’s lightning-fast, incredibly delicious, and guaranteed to please even the pickiest eaters? If you’re like many families, the answer is a resounding yes! The daily challenge of getting a wholesome and satisfying meal on the table can feel overwhelming. That’s where our Easy Sheet Pan Taco Pizza comes in. This recipe transforms the bold, exciting flavors of your favorite tacos into a crowd-pleasing pizza, all cooked on a single sheet pan. It’s the ultimate weeknight warrior, minimizing cleanup and maximizing flavor. Get ready to revolutionize your dinner routine!
Ingredients: A Symphony of Taco & Pizza Bliss
Gathering your ingredients is the first step towards taco pizza pandemonium! We’ve made sure to include notes for substitutions because we know that ingredients can sometimes be a pantry puzzle.
- For the Crispy Base:
- 1 large (13-14 inch) pre-made pizza crust or a large tortilla (like a giant flour tortilla or a couple of smaller ones overlapped). Sensory Note: Look for a sturdy crust that can hold up to toppings. A slightly browned, crisp edge is pure joy!
- Substitution: If you don’t have a pre-made crust, you can use a large rectangular piece of puff pastry, or even make your own pizza dough.
- For the Savory Taco Filling:
- 1 lb ground beef (80/20 or 90/10 recommended). Sensory Note: A bit of fat in the beef ensures juicy, flavorful crumbles.
- 1 packet (1 oz) taco seasoning.
- 2/3 cup water.
- Substitution: Ground turkey or chicken can be used. For a vegetarian option, use crumbled firm tofu or plant-based grounds.
- For the Flavorful “Sauce” Layer:
- 1/2 cup salsa (your favorite mild, medium, or hot). Sensory Note: A chunky salsa adds interesting texture and bursts of flavor.
- Substitution: Refried beans seasoned with a pinch of cumin and chili powder can also work as a fantastic base layer.
- For the Cheesy Topping:
- 2 cups shredded Mexican blend cheese (or a mix of cheddar and Monterey Jack). Sensory Note: Melty, gooey cheese is non-negotiable for pizza perfection!
- Substitution: Use your favorite melting cheese like mozzarella, pepper jack, or a dairy-free alternative.
- For the Fresh, Zesty Garnishes (Choose your favorites!):
- 1/2 cup shredded lettuce. Sensory Note: A cool, crisp crunch that beautifully contrasts the warm toppings.
- 1/4 cup diced tomatoes.
- 1/4 cup sliced black olives.
- 2 tablespoons chopped fresh cilantro.
- Sour cream or Greek yogurt, for drizzling.
- Sliced jalapeños (fresh or pickled), for a kick.
- Guacamole or diced avocado.
- Crushed tortilla chips, for extra crunch.
Timing is Everything: Speed Through Dinner Prep!
This recipe is all about efficiency, making it a weeknight dream.
Compared to an average pizza recipe that might involve making dough from scratch or assembling multiple components separately, our Easy Sheet Pan Taco Pizza shaves off significant time while delivering maximum satisfaction.

Step-by-Step Instructions: Crafting Your Taco Pizza Masterpiece
Let’s get cooking! Follow these simple steps for taco pizza success.
Step 1: Preheat and Prep Your Pan
Preheat your oven to 400°F (200°C). Lightly grease a large baking sheet or line it with parchment paper for easiest cleanup. If using a pre-made crust, place it directly onto the prepared baking sheet. If using a large tortilla, place it on the sheet. For extra crispiness, you can pre-bake the crust or tortilla for 5 minutes before adding toppings.
Step 2: Cook the Taco Meat
In a medium skillet over medium-high heat, crumble and brown the ground beef. Drain off any excess grease. Stir in the taco seasoning and water, then bring to a simmer. Cook for 5-7 minutes, stirring occasionally, until the sauce has thickened and the meat is well-coated.
Step 3: Assemble Your Taco Pizza Base
Spread the salsa evenly over the pizza crust or tortilla, leaving a small border for the edges. This will be your flavorful “sauce.” Dollop and spread any refried beans here if you’re using them as an alternative.
Step 4: Layer on the Taco Delight
Evenly distribute the seasoned taco meat over the salsa layer. Don’t be shy – make sure every bite gets a taste of that savory goodness!
Step 5: Cheese, Please!
Sprinkle the shredded Mexican blend cheese generously over the taco meat. Go all the way to the edges to ensure a beautiful, melty crust.
Step 6: Bake to Golden Perfection
Place the baking sheet in the preheated oven. Bake for 15-20 minutes, or until the crust is golden brown and the cheese is melted and bubbly, with a few delicious browned spots.
Step 7: Add Your Favorite Fresh Toppings
Carefully remove the sheet pan from the oven. Now it’s time for the fun part – customizing your taco pizza! Top with shredded lettuce, diced tomatoes, olives, cilantro, a dollop of sour cream, jalapeños, avocado, or any of your other favorite garnishes.
Step 8: Slice and Serve!
Let the pizza cool for just a minute or two before slicing it into squares or wedges using a pizza cutter or a sharp knife. Serve immediately and watch it disappear!
Nutritional Information: A Deliciously Approximate Guide
While exact nutritional values can vary based on specific ingredients used (especially cheese and meat fat content), here’s a general estimate for a generous slice:
- Calories: 350-450 kcal
- Protein: 20-25g
- Fat: 18-25g
- Carbohydrates: 25-35g
- Fiber: 3-5g
These are estimated values and will vary based on portion size and specific ingredient choices.
Healthier Alternatives: Deliciously Smart Swaps
Looking to lighten things up without sacrificing flavor? Try these smart swaps:
- Leaner Protein: Opt for ground turkey, chicken, or extra-lean ground beef.
- Whole Wheat Crust: Use a whole wheat pizza crust or large whole wheat tortilla.
- Veggie Boost: Load up on extra veggies like bell peppers, corn, or onions mixed into the taco meat or as toppings.
- Lighter “Sauce”: Use a salsa with no added sugar or a thin layer of black bean dip.
- Reduced-Fat Cheese: Use a reduced-fat Mexican blend or opt for more veggies and less cheese.
- Greek Yogurt: Swap sour cream for plain Greek yogurt for a protein and probiotic boost with fewer calories and fat.
Serving Suggestions: Beyond the Slice
This Sheet Pan Taco Pizza is incredibly versatile. Serve it as a fun weeknight dinner, a party appetizer, or even for a casual brunch. It pairs wonderfully with a simple side salad, some corn on the cob, or a refreshing glass of agua fresca. For a more authentic taco experience, offer small bowls of all the garnish options so everyone can customize their own slice.
Common Mistakes to Avoid
- Overcrowding: Don’t overload the pan with too many wet toppings, which can make the crust soggy.
- Soggy Bottom: Ensure your oven is properly preheated, and consider pre-baking the crust for extra crispness.
- Under-Seasoning: Use a full packet of taco seasoning and taste your meat mixture before adding it to the pizza.
- Skipping the Garnish: Those fresh toppings are key to balancing the richness and adding that “taco” essence!
Storing Tips: Leftovers Love Taco Pizza Too!
Leftover Sheet Pan Taco Pizza can be stored in an airtight container in the refrigerator for up to 3 days. For the best results when reheating, place slices on a baking sheet and warm them in a 350°F (175°C) oven for about 5-10 minutes, or until heated through and the crust is re-crisped. You can also reheat individual slices in a toaster oven or air fryer. Microwaving can make the crust a bit soft.

Conclusion: Dinner Solved, Flavor Amplified!
You’ve just unlocked the secret to incredibly easy, incredibly delicious family dinners! The Easy Sheet Pan Taco Pizza is a testament to how simple ingredients and a clever concept can create a meal that’s both fun and satisfying. It’s the perfect blend of your favorite taco flavors and the beloved comfort of pizza, all without the fuss. So, ditch the takeout menus and recipe indecision, and embrace the weeknight wonder that is this sheet pan sensation. Give it a try this week and prepare for happy eaters all around!
Frequently Asked Questions
What kind of pizza crust works best?
A sturdy, thin-to-medium crust is ideal. Pre-made pizza crusts, large tortillas, or even flatbreads work beautifully. If you’re very concerned about sogginess, you can briefly pre-bake your chosen crust before adding toppings.
Can I make this ahead of time?
You can prepare the taco meat mixture and chop your toppings ahead of time and store them separately in the refrigerator. Then, simply assemble and bake when you’re ready to eat. Baking the assembled pizza from scratch is best for optimal texture.
Can I use different types of meat or a meat substitute?
Absolutely! Ground turkey, chicken, or a plant-based ground like tofu or tempeh crumbles are excellent alternatives. Adjust cooking times as needed for your chosen protein.
What if I don’t have taco seasoning?
No problem! You can create your own taco seasoning blend with 1 tablespoon chili powder, 1 teaspoon cumin, 1 teaspoon paprika, 1/2 teaspoon garlic powder, 1/2 teaspoon onion powder, 1/4 teaspoon dried oregano, and a pinch of cayenne pepper (for heat). Adjust to your taste!
How can I make the crust extra crispy?
For an extra crispy crust, pre-bake it on the baking sheet for 5-7 minutes at 400°F (200°C) before adding toppings. Also, ensure your oven is fully preheated, and consider using a pizza stone if you have one, though a regular baking sheet works well for this recipe.
Is this kid-friendly?
Yes! This recipe is very kid-friendly. You can adjust the spice level of the salsa and garnishes to suit your children’s preferences. Most kids love the combination of pizza and taco flavors.
Easy Taco Pizza
Description
A fusion of pizza and tacos, thisEasy Taco Pizzais a quick, family-friendly recipe perfect for game nights or casual dinners. With a flaky crescent roll crust, hearty refried beans, seasoned ground beef, melted cheese, and fresh toppings, it’s a crowd-pleaser that’s ready in under 40 minutes.
Ingredients
- For the crust:2(8 oz) cans Pillsbury crescent rolls
- For the filling:1lb ground beef1envelope taco seasoning mix1(16 oz) can refried beansFor the toppings:2–3cups shredded cheddar cheese or Mexican blend½ cupchopped tomatoes¼ cupsliced black olives4chopped green onions
- For the toppings:2–3cups shredded cheddar cheese or Mexican blend½ cupchopped tomatoes¼ cupsliced black olives4chopped green onions
Instructions
- 1️⃣Preheat Oven:Preheat your oven to 375°F (190°C).
- 2️⃣Cook Ground Beef:In a skillet over medium-high heat, brown the ground beef for 7-10 minutes. Drain any excess fat.3️⃣Add Taco Seasoning:Return the beef to the skillet. Stir in the taco seasoning mix with ½–⅔ cup water. Simmer until most of the liquid evaporates, stirring occasionally.4️⃣Prepare the Crust:Unroll the crescent rolls into rectangles and press them into an 11.5×16.5 inch jelly roll pan to form the crust. Make sure to press ½ inch up the edges to create a slight border.5️⃣Bake the Crust:Bake in the preheated oven for 11–13 minutes or until golden brown.6️⃣Heat Refried Beans:Microwave the refried beans for about 1 minute to soften.7️⃣Spread Refried Beans:Spread the warmed refried beans evenly over the baked crust.8️⃣Layer with Ground Beef:Spoon the seasoned ground beef evenly over the refried beans.9️⃣Add Cheese:Sprinkle 2–3 cups of shredded cheese over the beef layer.🔟Top with Fresh Ingredients:Evenly distribute the chopped tomatoes, sliced black olives, and chopped green onions over the cheese.1️⃣1️⃣Final Bake:Return the taco pizza to the oven and bake for another 3–6 minutes, just until the cheese melts and bubbles.1️⃣2️⃣Slice and Serve:Let the taco pizza sit for a few minutes before slicing into squares or rectangles. Serve hot and enjoy!
- 3️⃣Add Taco Seasoning:Return the beef to the skillet. Stir in the taco seasoning mix with ½–⅔ cup water. Simmer until most of the liquid evaporates, stirring occasionally.4️⃣Prepare the Crust:Unroll the crescent rolls into rectangles and press them into an 11.5×16.5 inch jelly roll pan to form the crust. Make sure to press ½ inch up the edges to create a slight border.5️⃣Bake the Crust:Bake in the preheated oven for 11–13 minutes or until golden brown.6️⃣Heat Refried Beans:Microwave the refried beans for about 1 minute to soften.7️⃣Spread Refried Beans:Spread the warmed refried beans evenly over the baked crust.8️⃣Layer with Ground Beef:Spoon the seasoned ground beef evenly over the refried beans.9️⃣Add Cheese:Sprinkle 2–3 cups of shredded cheese over the beef layer.🔟Top with Fresh Ingredients:Evenly distribute the chopped tomatoes, sliced black olives, and chopped green onions over the cheese.1️⃣1️⃣Final Bake:Return the taco pizza to the oven and bake for another 3–6 minutes, just until the cheese melts and bubbles.1️⃣2️⃣Slice and Serve:Let the taco pizza sit for a few minutes before slicing into squares or rectangles. Serve hot and enjoy!
- 4️⃣Prepare the Crust:Unroll the crescent rolls into rectangles and press them into an 11.5×16.5 inch jelly roll pan to form the crust. Make sure to press ½ inch up the edges to create a slight border.
- 5️⃣Bake the Crust:Bake in the preheated oven for 11–13 minutes or until golden brown.6️⃣Heat Refried Beans:Microwave the refried beans for about 1 minute to soften.7️⃣Spread Refried Beans:Spread the warmed refried beans evenly over the baked crust.8️⃣Layer with Ground Beef:Spoon the seasoned ground beef evenly over the refried beans.9️⃣Add Cheese:Sprinkle 2–3 cups of shredded cheese over the beef layer.🔟Top with Fresh Ingredients:Evenly distribute the chopped tomatoes, sliced black olives, and chopped green onions over the cheese.1️⃣1️⃣Final Bake:Return the taco pizza to the oven and bake for another 3–6 minutes, just until the cheese melts and bubbles.1️⃣2️⃣Slice and Serve:Let the taco pizza sit for a few minutes before slicing into squares or rectangles. Serve hot and enjoy!
- 6️⃣Heat Refried Beans:Microwave the refried beans for about 1 minute to soften.7️⃣Spread Refried Beans:Spread the warmed refried beans evenly over the baked crust.8️⃣Layer with Ground Beef:Spoon the seasoned ground beef evenly over the refried beans.9️⃣Add Cheese:Sprinkle 2–3 cups of shredded cheese over the beef layer.🔟Top with Fresh Ingredients:Evenly distribute the chopped tomatoes, sliced black olives, and chopped green onions over the cheese.1️⃣1️⃣Final Bake:Return the taco pizza to the oven and bake for another 3–6 minutes, just until the cheese melts and bubbles.1️⃣2️⃣Slice and Serve:Let the taco pizza sit for a few minutes before slicing into squares or rectangles. Serve hot and enjoy!
- 7️⃣Spread Refried Beans:Spread the warmed refried beans evenly over the baked crust.
- 8️⃣Layer with Ground Beef:Spoon the seasoned ground beef evenly over the refried beans.9️⃣Add Cheese:Sprinkle 2–3 cups of shredded cheese over the beef layer.🔟Top with Fresh Ingredients:Evenly distribute the chopped tomatoes, sliced black olives, and chopped green onions over the cheese.1️⃣1️⃣Final Bake:Return the taco pizza to the oven and bake for another 3–6 minutes, just until the cheese melts and bubbles.1️⃣2️⃣Slice and Serve:Let the taco pizza sit for a few minutes before slicing into squares or rectangles. Serve hot and enjoy!
- 9️⃣Add Cheese:Sprinkle 2–3 cups of shredded cheese over the beef layer.🔟Top with Fresh Ingredients:Evenly distribute the chopped tomatoes, sliced black olives, and chopped green onions over the cheese.1️⃣1️⃣Final Bake:Return the taco pizza to the oven and bake for another 3–6 minutes, just until the cheese melts and bubbles.1️⃣2️⃣Slice and Serve:Let the taco pizza sit for a few minutes before slicing into squares or rectangles. Serve hot and enjoy!
- 🔟Top with Fresh Ingredients:Evenly distribute the chopped tomatoes, sliced black olives, and chopped green onions over the cheese.
- 1️⃣1️⃣Final Bake:Return the taco pizza to the oven and bake for another 3–6 minutes, just until the cheese melts and bubbles.1️⃣2️⃣Slice and Serve:Let the taco pizza sit for a few minutes before slicing into squares or rectangles. Serve hot and enjoy!
- 1️⃣2️⃣Slice and Serve:Let the taco pizza sit for a few minutes before slicing into squares or rectangles. Serve hot and enjoy!
Notes
Customize toppings to your liking! Add jalapeños, avocado slices, or a dollop of sour cream for extra flavor.For a spicier version, use hot taco seasoning or add a pinch of cayenne pepper to the ground beef.
For a spicier version, use hot taco seasoning or add a pinch of cayenne pepper to the ground beef.
“`