“`html
Table of Contents
- Discover Easy Ground Beef Stroganoff for Quick Dinners
- Ingredients for Your Creamy Ground Beef Stroganoff
- Time Your Stroganoff Perfection
- Step-by-Step: Crafting Your Ground Beef Stroganoff
- Nutritional Snapshot
- Healthier Swaps for a Lighter Stroganoff
- Serving Suggestions to Elevate the Meal
- Avoid These Common Stroganoff Mistakes
- Storing Your Delicious Stroganoff
- Frequently Asked Questions
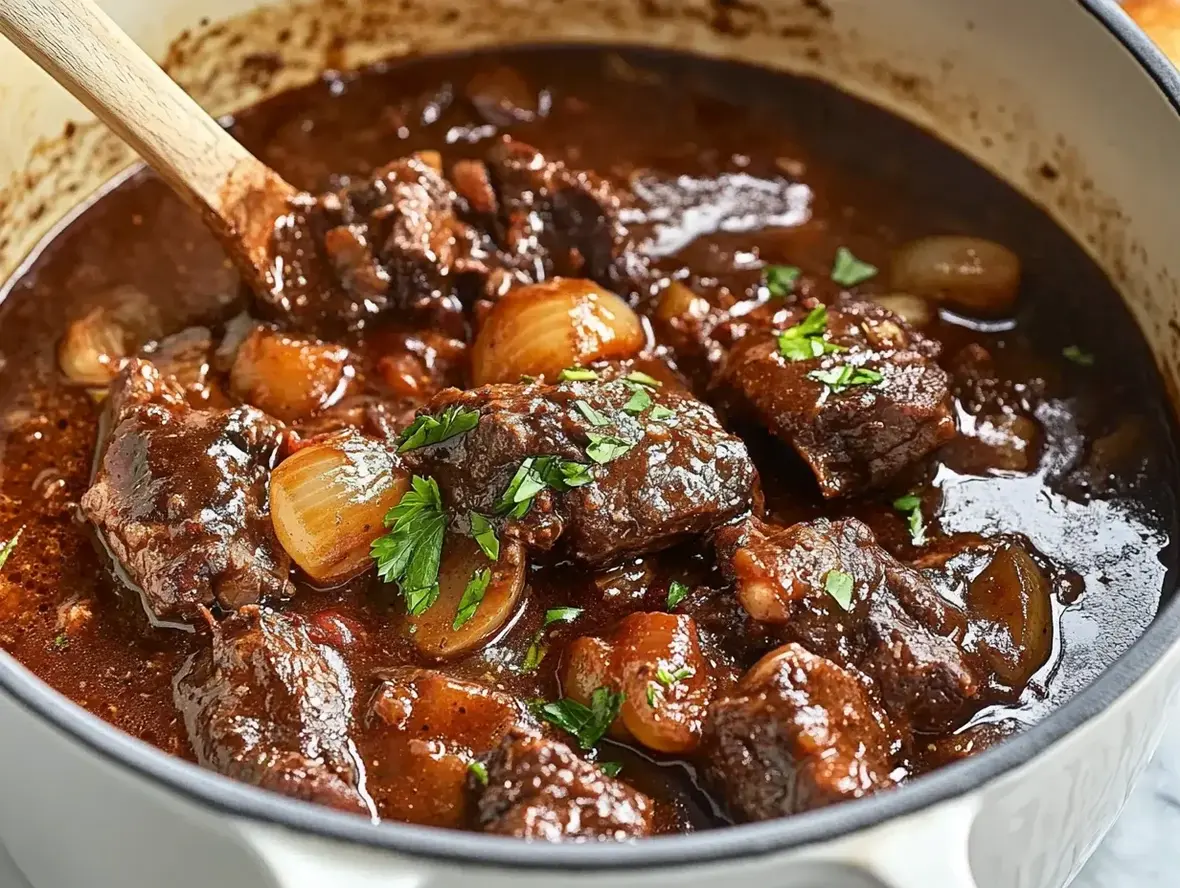
Easy Ground Beef Stroganoff Recipe for Quick Dinners
Discover Easy Ground Beef Stroganoff for Quick Dinners
Are you struggling to find dinner recipes that are both quick to prepare and incredibly satisfying, especially on a weeknight? On average, many people spend over 30 minutes each evening deciding what to cook, let alone preparing it. This is where a classic like Ground Beef Stroganoff truly shines. We’ve perfected an easy Ground Beef Stroganoff recipe that minimizes prep and maximizes flavor, ensuring you can get a creamy, delicious meal on the table in no time. Forget complicated steps; this recipe is designed for busy individuals and families who crave comfort food without the fuss. Get ready to experience a deeply flavorful, velvety stroganoff that feels gourmet but is surprisingly simple to execute.
Ingredients for Your Creamy Ground Beef Stroganoff
The magic of a great stroganoff lies in the harmonious blend of simple, high-quality ingredients. Here’s what you’ll need to create this comforting classic:
The Heart of the Dish: Ground Beef
- 1.5 lbs Ground Beef (80/20 lean recommended): The foundation of our stroganoff. An 80/20 blend offers the perfect balance of richness and flavor without being greasy. For a leaner option, use 90/10, but be prepared for a slightly less decadent sauce.
Aromatic Foundation: Onion and Garlic
- 1 medium Yellow Onion, finely chopped: Provides a sweet, pungent base that mellows beautifully when sautéed. White or sweet onions can be used as substitutes.
- 2-3 cloves Garlic, minced: Essential for depth of flavor, garlic adds a warm, pungent kick. Adjust to your garlic preference!
Earthy Mushrooms
- 8 oz Cremini Mushrooms (or button mushrooms), sliced: These add a wonderful earthy, umami flavor and a tender, slightly chewy texture. For a more robust flavor, try a mix of cremini and shiitake mushrooms. Make sure they are wiped clean, not washed, to prevent sogginess.
The Creamy Sauce Base
- 1 tbsp Olive Oil (or butter): To sauté the aromatics and mushrooms. Butter adds a lovely richness.
- 2 tbsp All-Purpose Flour: This acts as a thickener for our creamy sauce. You can substitute with cornstarch (use 1 tbsp mixed with a little cold water) if you are avoiding gluten.
- 2 cups Beef Broth: The savory liquid that forms the base of our sauce. Low-sodium varieties are a good choice to control saltiness.
- ½ cup Sour Cream: The key to stroganoff’s signature tang and creaminess. Full-fat sour cream yields the richest result. Greek yogurt can be a good substitute for a tangier, slightly healthier option, but ensure it’s full-fat.
- ¼ cup Heavy Cream (optional): For an extra luxurious texture.
Flavor Boosters
- 1 tsp Dijon Mustard: Adds a subtle yet crucial zesty tang and depth.
- ½ tsp Worcestershire Sauce: Contributes a complex savory umami note.
- Salt and Freshly Ground Black Pepper, to taste: Essential for enhancing all the flavors.
- Fresh Parsley, chopped (for garnish): Adds a touch of freshness and vibrant color.
The Perfect Pairing
- 12 oz Egg Noodles (or your favorite pasta): The classic accompaniment. Cooked al dente, they provide a perfect vehicle for the rich sauce.
Time Your Stroganoff Perfection
This recipe is designed for efficiency, making it ideal for busy weeknights. Here’s a breakdown of the time commitment:
Compared to the average dinner recipe that can easily stretch to an hour or more, our 40-minute Ground Beef Stroganoff is a true weeknight warrior. The minimal prep time ensures you can get started right away, and the active cooking is quick and straightforward.
Step-by-Step: Crafting Your Ground Beef Stroganoff
Let’s get cooking! Follow these simple steps for a truly magnificent Ground Beef Stroganoff.
Step 1: Brown the Ground Beef
In a large skillet or Dutch oven over medium-high heat, add the ground beef. Break it apart with a spoon and cook, stirring occasionally, until it’s nicely browned and no pink remains. Drain off any excess grease, leaving about a tablespoon in the pan for flavor. Transfer the browned beef to a plate, setting it aside for now. You want it nicely seared for optimal flavor!
Step 2: Sauté Aromatics and Mushrooms
Add the olive oil (or butter) to the same skillet if needed, then add the chopped onion. Sauté for about 3-4 minutes until it begins to soften and turn translucent. Next, add the minced garlic and sliced mushrooms. Cook, stirring occasionally, for another 5-7 minutes, or until the mushrooms have released their liquid and started to brown. Don’t rush this step; browning the mushrooms develops a deeper, richer flavor!
Step 3: Create the Creamy Sauce
Sprinkle the flour over the sautéed onions and mushrooms. Stir well to coat everything and cook for about 1 minute to cook out the raw flour taste. Gradually whisk in the beef broth, ensuring no lumps form. Bring the mixture to a simmer, stirring frequently, until it begins to thicken slightly. Stir in the Dijon mustard and Worcestershire sauce. Let it bubble gently for 2-3 minutes.
Step 4: Combine and Heat Through
Return the browned ground beef to the skillet with the sauce. Stir well to combine. Reduce the heat to low. In a separate bowl, whisk together the sour cream and heavy cream (if using) until smooth. Temper the sour cream mixture by adding a ladleful of the hot sauce mixture to it, whisking constantly. Then, stir the tempered sour cream mixture back into the skillet with the ground beef and sauce. Stir gently until everything is well combined and the sauce is creamy and heated through. Do not let the stroganoff boil after adding the sour cream, as it can cause it to curdle. Season generously with salt and freshly ground black pepper to your taste.
Step 5: Serve Piping Hot
While the stroganoff is finishing, cook your egg noodles (or pasta) according to package directions until al dente. Drain well. Serve the hot Ground Beef Stroganoff immediately over the cooked noodles. Garnish with fresh chopped parsley for a burst of color and freshness. Enjoy this comforting, flavorful meal!
Nutritional Snapshot
While exact nutritional values can vary based on specific ingredients and portion sizes, a typical serving of this Ground Beef Stroganoff (about 1/6th of the recipe, served over egg noodles) is approximately:
- Calories: 450-600 kcal
- Protein: 25-35g
- Fat: 25-35g
- Carbohydrates: 30-40g
This is a hearty meal, rich in protein from the beef. The carbohydrates come primarily from the noodles. Remember these are estimates; adjust based on your specific ingredients and preferred serving size.
Healthier Swaps for a Lighter Stroganoff
Looking to make this classic even lighter without sacrificing flavor? Try these simple modifications:
- Leaner Protein: Opt for 93% or 95% lean ground beef.
- Reduce Fat: Use a tablespoon of olive oil instead of butter for sautéing and skip the heavy cream.
- Creamy Swap: Replace some or all of the sour cream with plain Greek yogurt (full-fat is best for texture).
- Whole Wheat Noodles: Serve over whole wheat egg noodles or whole wheat pasta for added fiber.
- More Veggies: Bulk up the dish with extra mushrooms, or add some spinach or peas towards the end of cooking.
Serving Suggestions to Elevate the Meal
While delicious on egg noodles, Ground Beef Stroganoff is versatile!
- Over Mashed Potatoes: A classic comfort food pairing.
- With Rice: A simple yet satisfying alternative to noodles.
- In a Bread Bowl: For an extra decadent treat.
- Over Zucchini Noodles (Zoodles): A low-carb, healthier option.
- As a Filling: Use it to stuff baked potatoes or savory crepes.
Avoid These Common Stroganoff Mistakes
Even with a simple recipe, a few common pitfalls can occur:
- Boiling the Sour Cream: This is the number one reason for a broken or curdled sauce. Always add sour cream over low heat and stir gently until just heated through.
- Not Browning the Beef Properly: Skipping browning or steaming the beef means less flavor. Ensure good searing!
- Overcooking the Mushrooms: Waterlogged mushrooms lack flavor and texture. Cook them until they’re nicely browned.
- Under-seasoning: Stroganoff needs a good amount of salt and pepper to bring out all its savory notes. Taste and adjust!
Storing Your Delicious Stroganoff
Leftover stroganoff can be stored in an airtight container in the refrigerator for up to 3-4 days. Reheat gently on the stovetop over low heat, stirring occasionally. You may need to add a splash of broth or cream to loosen the sauce. It does not freeze particularly well, as the sour cream can separate upon thawing.
Frequently Asked Questions
***Can I use a different type of meat?***
While this recipe is for ground beef, you could adapt it for ground turkey or chicken. For a classic stroganoff, thinly sliced beef sirloin or tenderloin is traditionally used, but that would significantly increase prep time.
***Why is my stroganoff sauce lumpy or curdled?***
This usually happens when the sour cream is added to a sauce that is too hot and then boiled. Always temper the sour cream by mixing a little hot sauce into it first, then add it to the main sauce over low heat, stirring gently until just warm. Never let it boil.
***Can I make this gluten-free?***
Yes! To make it gluten-free, use cornstarch (about 1 tbsp mixed with 2 tbsp cold water) instead of flour as a thickener, and serve it over gluten-free pasta, rice, quinoa, or mashed potatoes. Ensure your beef broth and Worcestershire sauce are also gluten-free.
***How can I make the mushrooms more flavorful?***
Ensure you cook the mushrooms until they release their water and start to brown nicely. This browning process is key to developing their deep, earthy flavor. Don’t overcrowd the pan when sautéing them, as this will cause them to steam rather than brown.
This Easy Ground Beef Stroganoff recipe is a true lifesaver for busy weeknights. **Have you tried it yet? Let us know in the comments below how it turned out, or share your favorite stroganoff variations!**

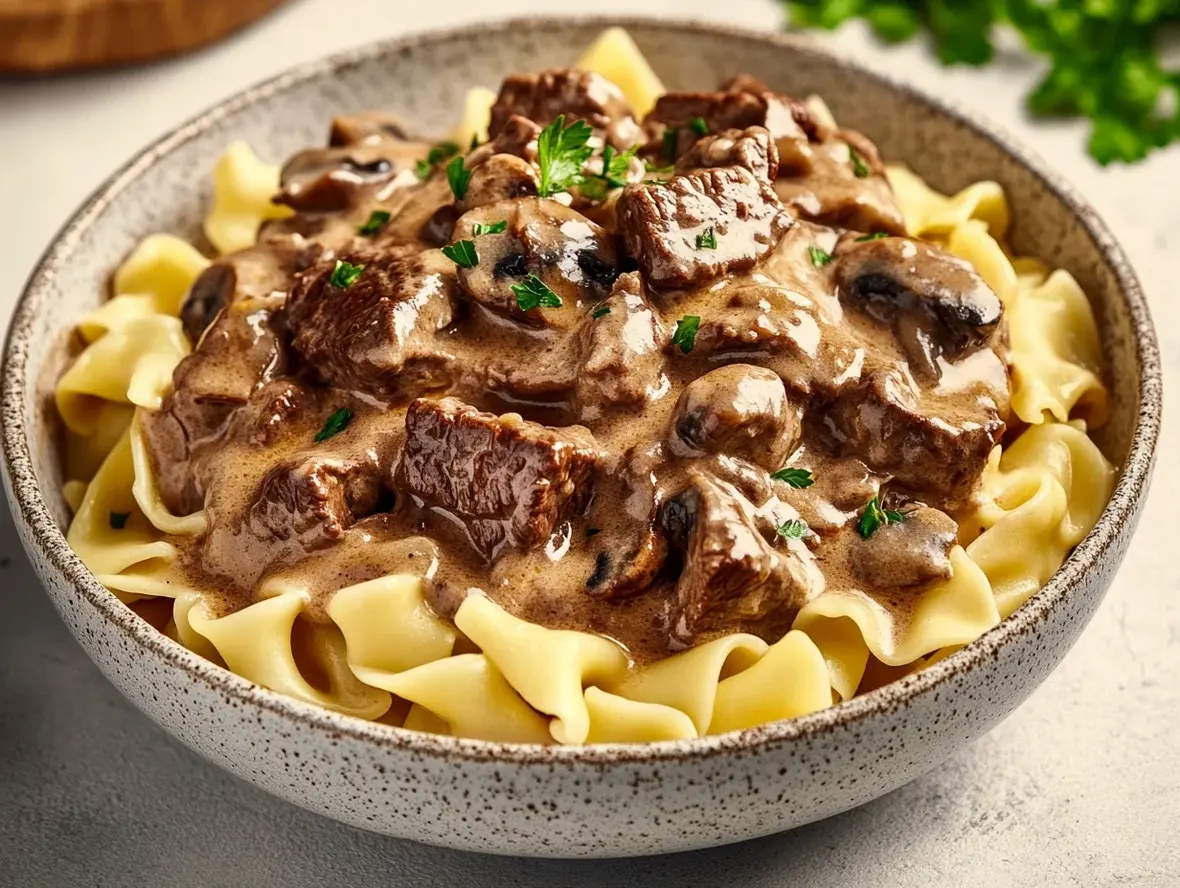
Beef Stroganoff with Egg Noodles
Description
Rich, creamy, and comforting, this classic Beef Stroganoff combines tender beef, earthy mushrooms, and a luxurious sauce served over hearty egg noodles. A perfect meal for any occasion!
Ingredients
- For the Beef Stroganoff:1lb. wide egg noodles1–1.5lbs. beef (ribeye, sirloin, or ground beef)Kosher salt and black pepper, to taste2 tbspolive oil2 tbspbutter1medium yellow onion, chopped8 ozcremini or baby bella mushrooms, sliced2cloves garlic, minced½ tspdried thyme2 tbspall-purpose flour2 cupsbeef broth or stock (reduced sodium recommended)1 tbspWorcestershire sauce1 tspDijon mustard½ cupsour cream (tempered)Optional Additions:2 tbspcognac or dry white wine1 tsppaprika (for garnish and flavor)1 tbsptomato paste¼ cupheavy cream (for extra richness)For the Egg Noodles:Water for boilingSalt for the water2 tbspbutter (optional, for tossing noodles)
- Optional Additions:2 tbspcognac or dry white wine1 tsppaprika (for garnish and flavor)1 tbsptomato paste¼ cupheavy cream (for extra richness)For the Egg Noodles:Water for boilingSalt for the water2 tbspbutter (optional, for tossing noodles)
- For the Egg Noodles:Water for boilingSalt for the water2 tbspbutter (optional, for tossing noodles)
Instructions
- 1️⃣Cook the egg noodles:Bring a large pot of salted water to a boil. Cook the egg noodles according to the package instructions until al dente. Drain and toss with butter if desired. Set aside.2️⃣Sear the beef:Heat olive oil and butter in a large skillet over medium-high heat.Season the beef with salt and pepper. If using strips, sear for about 1 minute per side; for ground beef, cook until browned. Remove from the skillet and set aside.3️⃣Sauté the vegetables:In the same skillet, add more olive oil if needed. Add onions and mushrooms. Sauté for 5-8 minutes until the onions are translucent and the mushrooms are golden.Stir in the garlic and thyme, cooking for an additional 30 seconds until fragrant.4️⃣Make the sauce:Sprinkle the flour over the vegetables and stir to form a roux. Cook for 1-2 minutes to eliminate the raw flour taste.Gradually add the beef broth or stock, whisking to prevent lumps. Stir in Worcestershire sauce, Dijon mustard, and optional ingredients like cognac or wine.Simmer the sauce until slightly thickened, about 3-5 minutes.5️⃣Combine beef and sauce:Reduce the heat to low and return the beef to the skillet. Stir gently to coat the beef in the sauce.Add the sour cream, stirring slowly to combine. To prevent curdling, temper the sour cream by adding a small amount of the hot sauce to it first before mixing it into the skillet.6️⃣Simmer and adjust:Let the sauce simmer until it reaches your desired consistency. Season with additional salt, pepper, and paprika, if desired.7️⃣Serve:Serve the stroganoff over the cooked egg noodles or mix the noodles directly into the skillet. Garnish with fresh parsley or extra paprika for a pop of color.
- Bring a large pot of salted water to a boil. Cook the egg noodles according to the package instructions until al dente. Drain and toss with butter if desired. Set aside.
- 2️⃣Sear the beef:Heat olive oil and butter in a large skillet over medium-high heat.Season the beef with salt and pepper. If using strips, sear for about 1 minute per side; for ground beef, cook until browned. Remove from the skillet and set aside.3️⃣Sauté the vegetables:In the same skillet, add more olive oil if needed. Add onions and mushrooms. Sauté for 5-8 minutes until the onions are translucent and the mushrooms are golden.Stir in the garlic and thyme, cooking for an additional 30 seconds until fragrant.4️⃣Make the sauce:Sprinkle the flour over the vegetables and stir to form a roux. Cook for 1-2 minutes to eliminate the raw flour taste.Gradually add the beef broth or stock, whisking to prevent lumps. Stir in Worcestershire sauce, Dijon mustard, and optional ingredients like cognac or wine.Simmer the sauce until slightly thickened, about 3-5 minutes.5️⃣Combine beef and sauce:Reduce the heat to low and return the beef to the skillet. Stir gently to coat the beef in the sauce.Add the sour cream, stirring slowly to combine. To prevent curdling, temper the sour cream by adding a small amount of the hot sauce to it first before mixing it into the skillet.6️⃣Simmer and adjust:Let the sauce simmer until it reaches your desired consistency. Season with additional salt, pepper, and paprika, if desired.7️⃣Serve:Serve the stroganoff over the cooked egg noodles or mix the noodles directly into the skillet. Garnish with fresh parsley or extra paprika for a pop of color.
- Heat olive oil and butter in a large skillet over medium-high heat.Season the beef with salt and pepper. If using strips, sear for about 1 minute per side; for ground beef, cook until browned. Remove from the skillet and set aside.3️⃣Sauté the vegetables:In the same skillet, add more olive oil if needed. Add onions and mushrooms. Sauté for 5-8 minutes until the onions are translucent and the mushrooms are golden.Stir in the garlic and thyme, cooking for an additional 30 seconds until fragrant.4️⃣Make the sauce:Sprinkle the flour over the vegetables and stir to form a roux. Cook for 1-2 minutes to eliminate the raw flour taste.Gradually add the beef broth or stock, whisking to prevent lumps. Stir in Worcestershire sauce, Dijon mustard, and optional ingredients like cognac or wine.Simmer the sauce until slightly thickened, about 3-5 minutes.5️⃣Combine beef and sauce:Reduce the heat to low and return the beef to the skillet. Stir gently to coat the beef in the sauce.Add the sour cream, stirring slowly to combine. To prevent curdling, temper the sour cream by adding a small amount of the hot sauce to it first before mixing it into the skillet.6️⃣Simmer and adjust:Let the sauce simmer until it reaches your desired consistency. Season with additional salt, pepper, and paprika, if desired.7️⃣Serve:Serve the stroganoff over the cooked egg noodles or mix the noodles directly into the skillet. Garnish with fresh parsley or extra paprika for a pop of color.
- Season the beef with salt and pepper. If using strips, sear for about 1 minute per side; for ground beef, cook until browned. Remove from the skillet and set aside.
- 3️⃣Sauté the vegetables:In the same skillet, add more olive oil if needed. Add onions and mushrooms. Sauté for 5-8 minutes until the onions are translucent and the mushrooms are golden.Stir in the garlic and thyme, cooking for an additional 30 seconds until fragrant.4️⃣Make the sauce:Sprinkle the flour over the vegetables and stir to form a roux. Cook for 1-2 minutes to eliminate the raw flour taste.Gradually add the beef broth or stock, whisking to prevent lumps. Stir in Worcestershire sauce, Dijon mustard, and optional ingredients like cognac or wine.Simmer the sauce until slightly thickened, about 3-5 minutes.5️⃣Combine beef and sauce:Reduce the heat to low and return the beef to the skillet. Stir gently to coat the beef in the sauce.Add the sour cream, stirring slowly to combine. To prevent curdling, temper the sour cream by adding a small amount of the hot sauce to it first before mixing it into the skillet.6️⃣Simmer and adjust:Let the sauce simmer until it reaches your desired consistency. Season with additional salt, pepper, and paprika, if desired.7️⃣Serve:Serve the stroganoff over the cooked egg noodles or mix the noodles directly into the skillet. Garnish with fresh parsley or extra paprika for a pop of color.
- In the same skillet, add more olive oil if needed. Add onions and mushrooms. Sauté for 5-8 minutes until the onions are translucent and the mushrooms are golden.Stir in the garlic and thyme, cooking for an additional 30 seconds until fragrant.4️⃣Make the sauce:Sprinkle the flour over the vegetables and stir to form a roux. Cook for 1-2 minutes to eliminate the raw flour taste.Gradually add the beef broth or stock, whisking to prevent lumps. Stir in Worcestershire sauce, Dijon mustard, and optional ingredients like cognac or wine.Simmer the sauce until slightly thickened, about 3-5 minutes.5️⃣Combine beef and sauce:Reduce the heat to low and return the beef to the skillet. Stir gently to coat the beef in the sauce.Add the sour cream, stirring slowly to combine. To prevent curdling, temper the sour cream by adding a small amount of the hot sauce to it first before mixing it into the skillet.6️⃣Simmer and adjust:Let the sauce simmer until it reaches your desired consistency. Season with additional salt, pepper, and paprika, if desired.7️⃣Serve:Serve the stroganoff over the cooked egg noodles or mix the noodles directly into the skillet. Garnish with fresh parsley or extra paprika for a pop of color.
- Stir in the garlic and thyme, cooking for an additional 30 seconds until fragrant.
- 4️⃣Make the sauce:Sprinkle the flour over the vegetables and stir to form a roux. Cook for 1-2 minutes to eliminate the raw flour taste.Gradually add the beef broth or stock, whisking to prevent lumps. Stir in Worcestershire sauce, Dijon mustard, and optional ingredients like cognac or wine.Simmer the sauce until slightly thickened, about 3-5 minutes.5️⃣Combine beef and sauce:Reduce the heat to low and return the beef to the skillet. Stir gently to coat the beef in the sauce.Add the sour cream, stirring slowly to combine. To prevent curdling, temper the sour cream by adding a small amount of the hot sauce to it first before mixing it into the skillet.6️⃣Simmer and adjust:Let the sauce simmer until it reaches your desired consistency. Season with additional salt, pepper, and paprika, if desired.7️⃣Serve:Serve the stroganoff over the cooked egg noodles or mix the noodles directly into the skillet. Garnish with fresh parsley or extra paprika for a pop of color.
- Sprinkle the flour over the vegetables and stir to form a roux. Cook for 1-2 minutes to eliminate the raw flour taste.Gradually add the beef broth or stock, whisking to prevent lumps. Stir in Worcestershire sauce, Dijon mustard, and optional ingredients like cognac or wine.Simmer the sauce until slightly thickened, about 3-5 minutes.5️⃣Combine beef and sauce:Reduce the heat to low and return the beef to the skillet. Stir gently to coat the beef in the sauce.Add the sour cream, stirring slowly to combine. To prevent curdling, temper the sour cream by adding a small amount of the hot sauce to it first before mixing it into the skillet.6️⃣Simmer and adjust:Let the sauce simmer until it reaches your desired consistency. Season with additional salt, pepper, and paprika, if desired.7️⃣Serve:Serve the stroganoff over the cooked egg noodles or mix the noodles directly into the skillet. Garnish with fresh parsley or extra paprika for a pop of color.
- Gradually add the beef broth or stock, whisking to prevent lumps. Stir in Worcestershire sauce, Dijon mustard, and optional ingredients like cognac or wine.
- Simmer the sauce until slightly thickened, about 3-5 minutes.5️⃣Combine beef and sauce:Reduce the heat to low and return the beef to the skillet. Stir gently to coat the beef in the sauce.Add the sour cream, stirring slowly to combine. To prevent curdling, temper the sour cream by adding a small amount of the hot sauce to it first before mixing it into the skillet.6️⃣Simmer and adjust:Let the sauce simmer until it reaches your desired consistency. Season with additional salt, pepper, and paprika, if desired.7️⃣Serve:Serve the stroganoff over the cooked egg noodles or mix the noodles directly into the skillet. Garnish with fresh parsley or extra paprika for a pop of color.
- 5️⃣Combine beef and sauce:Reduce the heat to low and return the beef to the skillet. Stir gently to coat the beef in the sauce.Add the sour cream, stirring slowly to combine. To prevent curdling, temper the sour cream by adding a small amount of the hot sauce to it first before mixing it into the skillet.6️⃣Simmer and adjust:Let the sauce simmer until it reaches your desired consistency. Season with additional salt, pepper, and paprika, if desired.7️⃣Serve:Serve the stroganoff over the cooked egg noodles or mix the noodles directly into the skillet. Garnish with fresh parsley or extra paprika for a pop of color.
- Reduce the heat to low and return the beef to the skillet. Stir gently to coat the beef in the sauce.
- Add the sour cream, stirring slowly to combine. To prevent curdling, temper the sour cream by adding a small amount of the hot sauce to it first before mixing it into the skillet.6️⃣Simmer and adjust:Let the sauce simmer until it reaches your desired consistency. Season with additional salt, pepper, and paprika, if desired.7️⃣Serve:Serve the stroganoff over the cooked egg noodles or mix the noodles directly into the skillet. Garnish with fresh parsley or extra paprika for a pop of color.
- 6️⃣Simmer and adjust:Let the sauce simmer until it reaches your desired consistency. Season with additional salt, pepper, and paprika, if desired.7️⃣Serve:Serve the stroganoff over the cooked egg noodles or mix the noodles directly into the skillet. Garnish with fresh parsley or extra paprika for a pop of color.
- Let the sauce simmer until it reaches your desired consistency. Season with additional salt, pepper, and paprika, if desired.
- 7️⃣Serve:Serve the stroganoff over the cooked egg noodles or mix the noodles directly into the skillet. Garnish with fresh parsley or extra paprika for a pop of color.
- Serve the stroganoff over the cooked egg noodles or mix the noodles directly into the skillet. Garnish with fresh parsley or extra paprika for a pop of color.
Notes
Use well-marbled beef for maximum flavor and tenderness.For a vegetarian option, substitute beef with extra mushrooms and use vegetable broth.Store leftovers in an airtight container in the fridge for up to 3 days. Reheat gently to maintain the creamy texture.
For a vegetarian option, substitute beef with extra mushrooms and use vegetable broth.Store leftovers in an airtight container in the fridge for up to 3 days. Reheat gently to maintain the creamy texture.
Store leftovers in an airtight container in the fridge for up to 3 days. Reheat gently to maintain the creamy texture.
“`