End your day with a delicious, comforting, and satisfying dinner! Whether you’re looking for quick and easy weeknight meals, cozy comfort food, or elegant dishes for special occasions, we have the perfect recipes for you.
From hearty casseroles and one-pan wonders to savory pastas, juicy meats, and flavorful vegetarian options, our collection is designed to make dinnertime effortless and enjoyable.
Busy schedule? No problem! Try our slow cooker meals, sheet pan dinners, and 30-minute recipes to save time without sacrificing flavor. Whatever your craving, these recipes will bring warmth and joy to your table every night. 🍽️✨
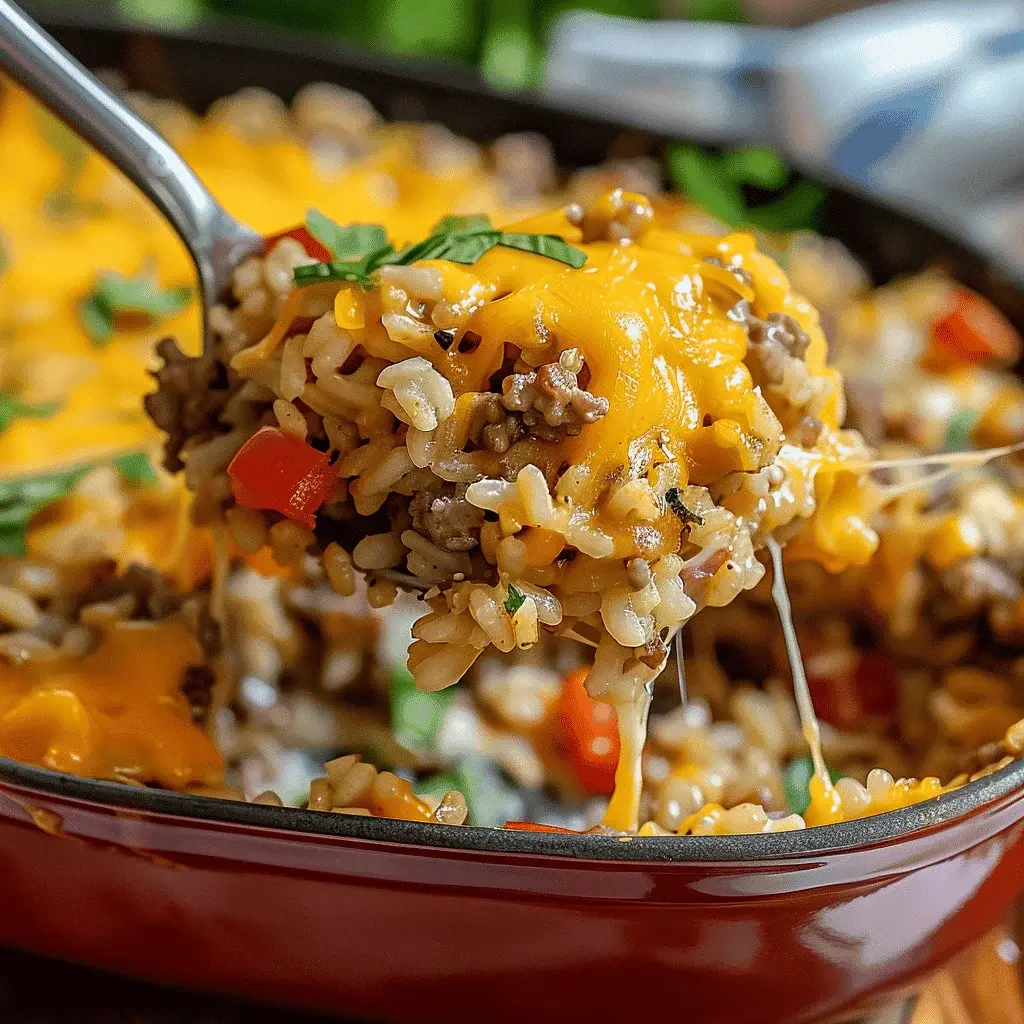
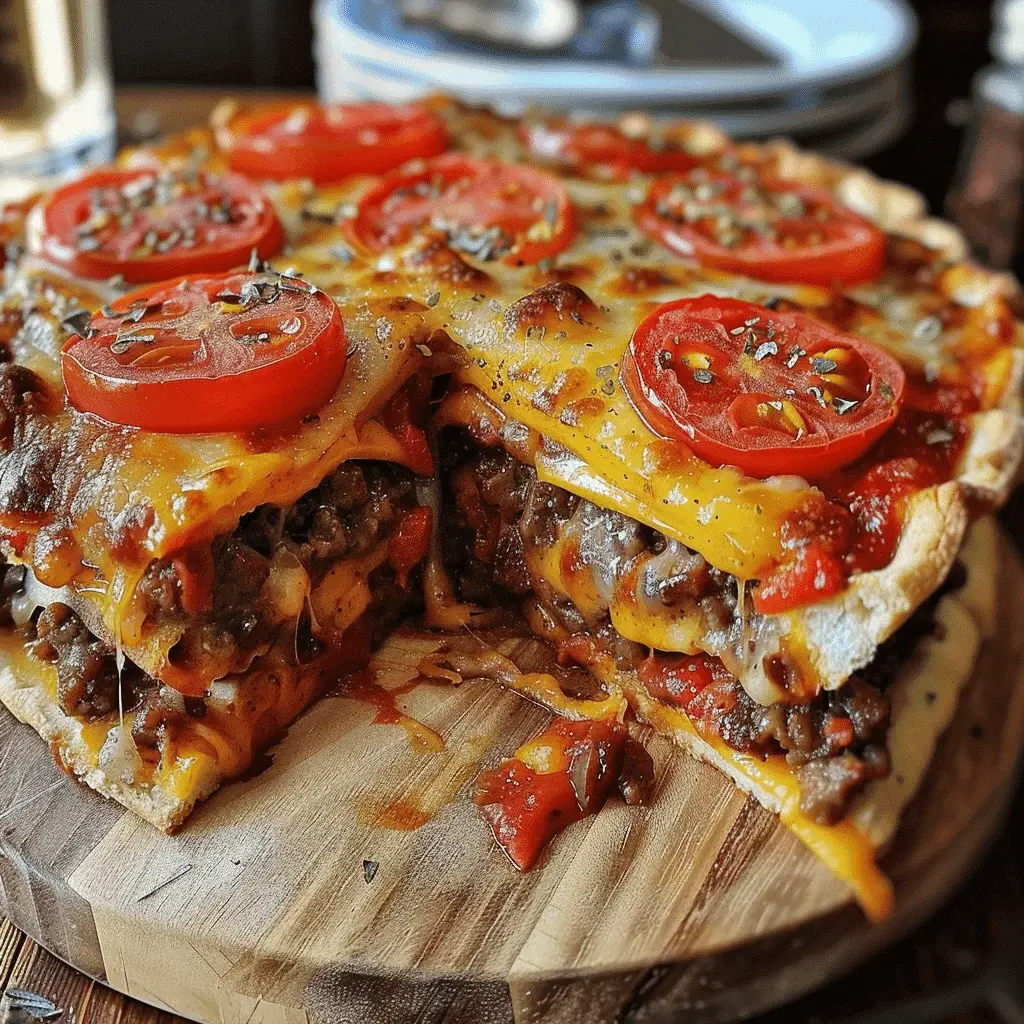
Did you know that over 70% of home cooks report seeking “one-pan comfort meals” to simplify busy weeknights? If you’re part of that majority searching for a dish that delivers maximum satisfaction with minimal cleanup, this Cheesy Hamburger Rice Casserole is your culinary answer. This recipe is the epitome of hearty, family-friendly comfort food, masterfully combining savory ground beef, tender rice, and a blanket of melted cheese into a single, glorious dish. It’s the kind of meal that fills your kitchen with an irresistible, savory aroma and guarantees empty plates all around the dinner table. Perfect for potlucks, meal prep, or a cozy night in, this casserole is a versatile champion that proves delicious doesn’t have to be complicated. Let’s dive into creating this beloved classic.
Ingredients List
Gather these simple, flavorful ingredients. I’ve included sensory notes and easy substitutions to make this recipe your own.
1 lb (450g) Lean Ground Beef (85/15 or 90/10): The star protein. Look for beef with a rich, red color and fine texture. For a deeper flavor, try ground chuck. Substitution: Ground turkey, chicken, or a plant-based crumble for a lighter or vegetarian version.
1 medium Yellow Onion, diced: Adds a sweet, aromatic base. You should hear a satisfying sizzle when it hits the pan.
2 cloves Garlic, minced: For that essential pungent, savory kick. Fresh is best for the brightest flavor.
1 ½ cups Long-Grain White Rice (uncooked): Provides the tender, fluffy foundation that soaks up all the flavors. Substitution: Brown rice (adjust liquid and cooking time) or cauliflower rice for a low-carb option.
1 (10.5 oz) can Cream of Mushroom Soup: The creamy binder, offering an earthy, umami depth. Substitution: Cream of chicken, celery, or a homemade roux with broth for a from-scratch version.
1 (14.5 oz) can Beef Broth: Infuses the rice with rich, savory notes. Use low-sodium to control salt levels.
1 (14.5 oz) can Diced Tomatoes, undrained: Brings a tangy brightness and juicy texture. The liquid is crucial for cooking the rice.
2 cups Shredded Cheddar Cheese, divided: The gooey, golden crown. Use a block you shred yourself for superior meltability (pre-shredded contains anti-caking agents). Substitution: A Mexican blend, Monterey Jack, or Colby for a different flavor profile.
1 tsp Paprika: Adds a subtle smokiness and beautiful color.
Salt and Black Pepper to taste: The essential flavor enhancers. Season in layers.
Fresh Parsley or Chives, chopped (for garnish): A pop of fresh color and flavor to finish.
Timing
Prep Time 15 minutes
Cook Time 45 minutes
Total Time 1 hour
Compared to the average casserole recipe that often requires pre-cooking components separately, this Cheesy Hamburger Rice Casserole is remarkably efficient. The “dump-and-bake” style, where ingredients cook together, saves you about 20-30 minutes of active kitchen time. The 45-minute bake time is mostly hands-off, allowing the oven to do the work while you prepare sides or simply relax.
The ultimate comfort food: a bubbling, cheesy hamburger rice casserole fresh from the oven.
Step-by-Step Instructions
Step 1: Prepare the Base
Preheat your oven to 375°F (190°C). In a large, deep skillet or Dutch oven (one that’s oven-safe if you want to use a single pan), brown the ground beef over medium-high heat. As it cooks, use your spoon to break it into small, bite-sized crumbles. This ensures every spoonful has a perfect meaty bite. Once the beef is no longer pink, add the diced onion. Cook for 4-5 minutes until the onion turns soft and translucent, and you can smell its sweet fragrance mingling with the beef. Stir in the minced garlic and cook for just one more minute—until fragrant—to prevent it from burning and turning bitter.
Step 2: Build the Flavor
This is where the magic happens. To the beef and onion mixture, add the uncooked rice, paprika, dried oregano, and a good pinch of salt and pepper. Stir everything together for about a minute. This toasts the rice and spices slightly, unlocking their full aromatic potential and coating each grain with savory fat. Next, pour in the undrained diced tomatoes (the juice is key!), the cream of mushroom soup, and the beef broth. Give it a vigorous stir, scraping up any flavorful browned bits from the bottom of the pan. This “fond” is pure flavor gold.
Step 3: Simmer and Cook
Bring the entire mixture to a gentle boil. Once bubbling, give it one final stir, then cover the skillet tightly with a lid or aluminum foil. If your skillet isn’t oven-safe, now is the time to transfer everything to a greased 9×13 inch casserole dish and cover it. Place it in the preheated oven and bake for 35-40 minutes. The casserole is done when the rice is tender and has absorbed most of the liquid. You’ll see small steam holes on the surface.
Step 4: The Cheesy Finish
Carefully remove the casserole from the oven (it will be steaming hot!). Uncover it and marvel at the transformation. Immediately sprinkle 1 ½ cups of the shredded cheddar cheese evenly over the top. Return the casserole to the oven, uncovered, for 5-7 minutes, or just until the cheese is completely melted, bubbly, and starting to get those irresistible golden spots. For a more browned top, you can broil for the last 1-2 minutes, but watch it like a hawk! Let the casserole stand for 5-10 minutes after baking. This crucial step allows the flavors to settle and makes serving much easier. Garnish with fresh parsley or chives before serving.
Nutritional Information
Estimated per serving (based on 6 servings):
Calories: ~480 kcal
Protein: 28g
Carbohydrates: 42g
Dietary Fiber: 2g
Sugars: 4g
Fat: 22g (Saturated: 10g)
Cholesterol: 85mg
Sodium: ~900mg (can be reduced with low-sodium broth and soup)
Healthier Alternatives
You can easily adapt this Cheesy Hamburger Rice Casserole to fit various dietary needs without sacrificing the comforting essence.
Leaner Protein: Swap ground beef for 93% lean ground turkey or chicken. For a plant-based version, use lentils or a high-quality meatless crumble.
Whole Grains: Substitute white rice with brown rice. You’ll need to increase the beef broth by ½ cup and the bake time by 15-20 minutes for the rice to become tender.
Low-Carb/Keto: Replace the rice with 4-5 cups of riced cauliflower. Add it in the last 15 minutes of baking to prevent it from becoming mushy. Use a cream-based sauce instead of canned soup.
Reduced Sodium: Use no-salt-added diced tomatoes, low-sodium beef broth, and a low-sodium cream soup. You control the salt with your own seasoning.
Lighter Cheese: Opt for a reduced-fat sharp cheddar. Its strong flavor means you can use less without missing out.
Serving Suggestions
This hearty casserole is a complete meal on its own, but it pairs beautifully with simple sides to create a balanced dinner:
Fresh & Crisp: A simple green salad with a tangy vinaigrette cuts through the richness perfectly.
Steamed Veggies: Bright green broccoli, green beans, or asparagus add color and nutrients.
Bread Basket: Warm, crusty garlic bread or soft dinner rolls are ideal for scooping up every last cheesy bit.
Toppings Bar: Set out sour cream, diced avocado, pickled jalapeños, or hot sauce for customizable bowls.
Common Mistakes
Using Instant or Minute Rice: This will result in a mushy, overcooked texture. Always use regular long-grain or medium-grain white rice for the right bite.
Not Browning the Beef Properly: Don’t just gray the meat. Get a good sear and those browned bits (fond) for maximum flavor.
Forgetting to Let it Rest: Serving immediately will cause it to be soupy. The 5-10 minute rest allows the residual heat to finish setting the casserole.
Overcrowding the Pan: If your skillet is too small, the ingredients won’t cook evenly. Use a large, deep oven-safe skillet or a 9×13 casserole dish.
Storing Tips
Refrigeration: Cool completely, then store in an airtight container for up to 4 days.
Freezing: This casserole freezes exceptionally well. Portion into freezer-safe containers or wrap the entire dish tightly. It will keep for 2-3 months. Thaw overnight in the
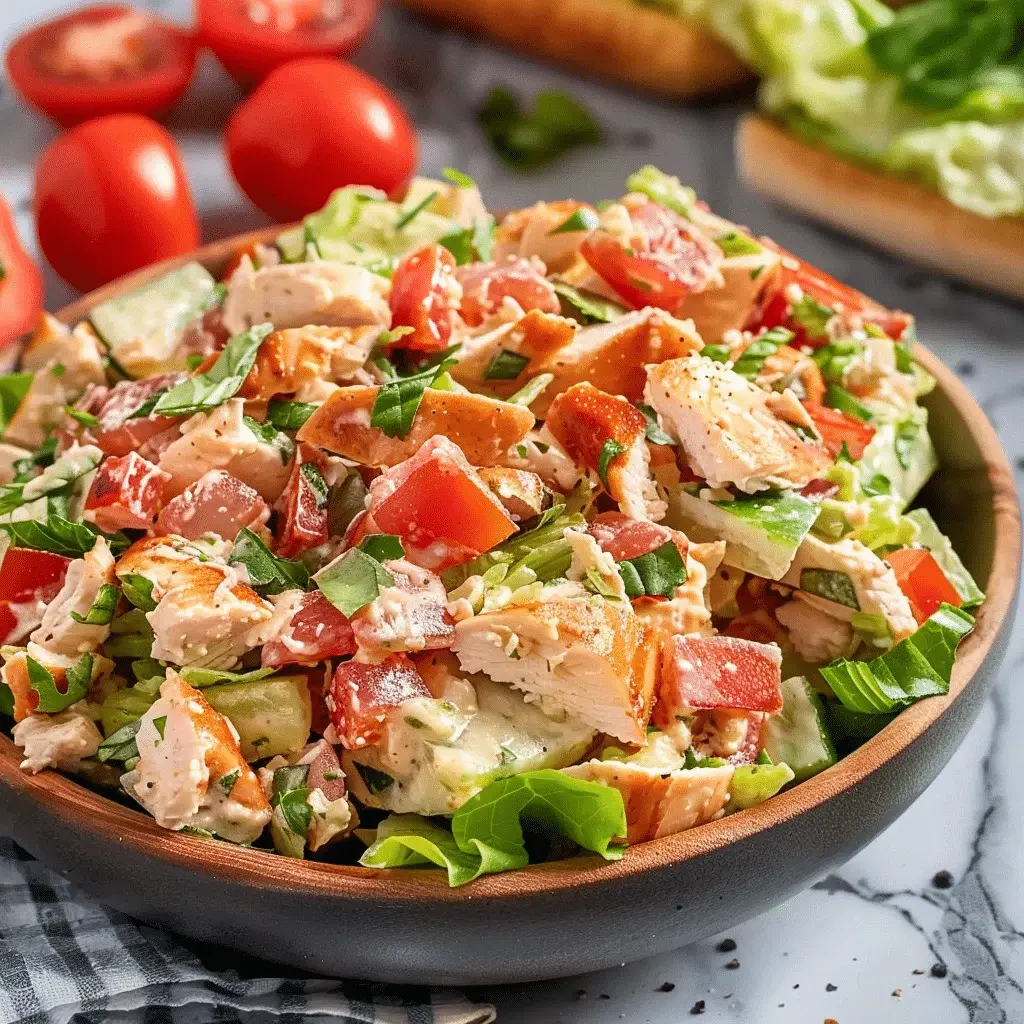
Did you know that the classic BLT sandwich is one of the top 5 most popular sandwiches in America, with over 60% of restaurants featuring it on their menu? What if you could take that beloved combination of bacon, lettuce, and tomato and transform it into a protein-packed, fork-friendly meal that’s perfect for any occasion? This BLT Chicken Salad recipe does exactly that, elevating the familiar flavors into a satisfying, creamy salad that’s as perfect for a quick weekday lunch as it is for a weekend picnic. The secret lies in the harmony of textures: tender, seasoned chicken, shatteringly crisp bacon, and juicy, sweet cherry tomatoes, all brought together with a tangy, creamy mayo-based dressing that ties every bite together. This isn’t just another chicken salad recipe; it’s a deconstructed, gourmet take on a comfort food icon that delivers on flavor without demanding hours in the kitchen.
Ingredients List
Gather these fresh, simple ingredients to create a salad bursting with flavor and texture. Each component plays a specific role, and I’ve included smart substitutions to customize it to your pantry or dietary needs.
For the Chicken & Salad:
2 large boneless, skinless chicken breasts (about 1.5 lbs): The star protein. For a richer flavor, substitute with 3 cups of shredded rotisserie chicken. The texture should be moist and shreddable.
1 tbsp olive oil: For searing. Avocado oil is a great high-heat alternative.
1 tsp smoked paprika, 1/2 tsp garlic powder, 1/2 tsp onion powder, Salt & Black Pepper: The seasoning trifecta. Smoked paprika adds a deep, almost bacony aroma that complements the dish perfectly.
8 slices thick-cut bacon: The “B” in BLT! Look for a smoky, applewood-smoked variety for maximum flavor. For a pork-free version, use crispy coconut bacon or tempeh bacon.
1 pint (about 2 cups) cherry or grape tomatoes, halved: These little bursts of juicy, sweet acidity are non-negotiable. Heirloom cherry tomatoes add beautiful color.
1 large head of romaine lettuce, chopped: Provides the crucial crisp, refreshing crunch. Butter lettuce or a mix of baby greens can be used for a softer texture.
1/2 a small red onion, thinly sliced: Adds a sharp, pungent bite that cuts through the creaminess. Soak in ice water for 10 minutes to mellow the flavor if desired.
For the Creamy Dressing:
3/4 cup mayonnaise: The creamy base. For a tangier twist, use Greek yogurt or a 50/50 mix of mayo and sour cream.
2 tbsp fresh lemon juice (about 1 lemon): Brightens the entire dish. White wine vinegar is a suitable substitute.
1 tbsp Dijon mustard: Adds depth and a subtle sharpness. Yellow mustard works in a pinch but is milder.
1 tsp honey or maple syrup: A touch of sweetness to balance the acidity. Omit for a sugar-free version.
2 tbsp fresh chives or dill, chopped: The herbal finish. Dried dill (1 tsp) can be used, but fresh is vastly superior.
Salt and freshly ground black pepper to taste.
Timing
Prep Time 20 minutes
Cook Time 20 minutes
Total Time 40 minutes
At just 40 minutes from start to finish, this BLT Chicken Salad is a time-saver compared to many elaborate salad recipes that can take over an hour. The efficiency comes from multitasking: while the chicken cooks, you can crisp the bacon and prep the vegetables. This is nearly 30% faster than recipes requiring marinating or roasting components separately, making it a genuinely easy salad recipe for busy schedules.
Step-by-Step Instructions
Step 1: Prepare the Chicken
Pat the chicken breasts completely dry with paper towels—this is the golden rule for a perfect sear. Drizzle them with olive oil and rub it in. In a small bowl, combine the smoked paprika, garlic powder, onion powder, 1 teaspoon of salt, and 1/2 teaspoon of black pepper. Generously season both sides of the chicken with this spice blend, pressing it gently into the flesh. Heat a skillet or grill pan over medium-high heat. Cook the chicken for 6-7 minutes per side, or until the internal temperature reaches 165°F (74°C) and the exterior has beautiful grill marks or a golden-brown crust. Transfer to a cutting board, tent with foil, and let it rest for at least 5 minutes. This allows the juices to redistribute, ensuring every bite is succulent. Once rested, chop or shred the chicken into bite-sized pieces.
Step 2: Crisp the Bacon
While the chicken rests, cook the bacon. Lay the strips in a single layer in a cold, large skillet. Turn the heat to medium. Cooking from a cold start renders the fat slowly, leading to evenly crisp, not burnt, bacon. Cook for 8-10 minutes, flipping occasionally, until deeply browned and crispy. Transfer the bacon to a plate lined with paper towels to drain. Once cool enough to handle, crumble it into hearty, rustic pieces. Pro Tip: Reserve 1 tablespoon of the rendered bacon fat. Whisk it into the dressing for an incredible, smoky flavor boost that truly makes this a BLT experience.
Step 3: Assemble the Base
In your largest serving bowl, combine the chopped romaine lettuce, halved cherry tomatoes, and thinly sliced red onion. The goal here is a vibrant, colorful base. If you’re prepping ahead, keep this bowl covered and refrigerated. Just before serving, add the chopped, room-temperature chicken and most of the crumbled bacon (reserve a small handful for a gorgeous garnish on top).
Step 4: Make the Dressing
In a medium bowl or jar, combine the mayonnaise, fresh lemon juice, Dijon mustard, honey, and chopped fresh herbs. Season with a pinch of salt and a few cracks of black pepper. If you saved that tablespoon of bacon fat, whisk it in now—it’s a game-changer. Whisk or shake vigorously until the dressing is completely smooth, creamy, and emulsified. Taste and adjust seasoning; you might want an extra squeeze of lemon for brightness.
Step 5: Combine and Serve
This is the moment of truth. Pour about two-thirds of the dressing over the salad mixture in the large bowl. Using a pair of large salad tongs or two big spoons, gently toss everything together until the chicken and vegetables are evenly and lightly coated. The key is a gentle fold to keep the lettuce crisp. Add the remaining dressing only if needed—you want cohesion, not a pool at the bottom of the bowl. Transfer to plates or a platter and sprinkle the reserved bacon crumbles over the top for a final touch of texture and visual appeal.
Nutritional Information
(Per serving, based on 4 servings)
Calories: ~480 kcal
Protein: 35g (Excellent source for muscle repair and satiety)
Carbohydrates: 12g (Primarily from vegetables, making it low-carb friendly)
Dietary Fiber: 3g
Sugars: 6g (Naturally occurring from tomatoes and a touch of honey)
Fat: 32g (A mix of saturated from bacon and unsaturated from mayo & olive oil)
Saturated Fat: 7g
Healthier Alternatives
You can easily lighten up this BLT Chicken Salad without sacrificing the creamy, tangy essence that makes it so delicious.
Dressing Base: Swap full-fat mayonnaise for an equal amount of plain, non-fat Greek yogurt. You’ll boost the protein content significantly while cutting calories and fat. For the best flavor, use a 50/50 blend of mayo and Greek yogurt.
Bacon: Opt for turkey bacon or center-cut bacon, which is leaner. For a plant-based version, bake coconut flakes with smoked paprika and tamari until crisp.
Chicken: Use skinless chicken breasts and cook them by baking or poaching instead of pan-searing in oil.
Sweetener: Omit the honey or use a tiny drop of liquid stevia.
Add More Veggies: Bulk up the volume and nutrients by adding diced cucumber, shredded carrots, or avocado chunks.
Serving Suggestions
This salad is incredibly versatile. For a classic presentation, serve it in a large bowl with the dressing on the side for DIY assembly. It makes a fantastic filling for wraps, pita pockets, or as a topping for a baked potato. For a heartier meal, serve it over a bed of quinoa or farro. For a low-carb option, use it as a filling for lettuce cups (butter lettuce works perfectly). It’s also the star of any potluck or picnic—just keep the dressing separate until ready to serve to maintain maximum crunch.
Common Mistakes
Overcooking the Chicken: This leads to dry, stringy meat. Always use a meat thermometer and let it rest.
Adding Dressing Too Early: Tossing the salad with dressing more than 10-15 minutes before serving will wilt the lettuce into a soggy mess.
Using Floppy Bacon: Undercooked bacon won’t provide the necessary texture. Ensure it’s truly crisp before crumbling.
Skimping on Seasoning: Chicken and the dressing itself need adequate salt and acid. Taste as you go!
Not Drying the Tomatoes: Excess moisture from washed tomatoes can water down the dressing. Halve them and give them a gentle pat dry.
Storing Tips
Store the salad components separately for best results. Keep the chopped lettuce, tomatoes, and onion in one airtight container. Store the cooked, chopped chicken and crumbled bacon in another. The dressing can be kept in a sealed jar in the fridge. Assembled, the salad will keep for 1 day, but the lettuce will lose its crispness. The undressed components will stay fresh for up to 3 days. The dressing will last for up to 5 days. This salad does not freeze well due to the high moisture content of the vegetables and mayo-based dressing.
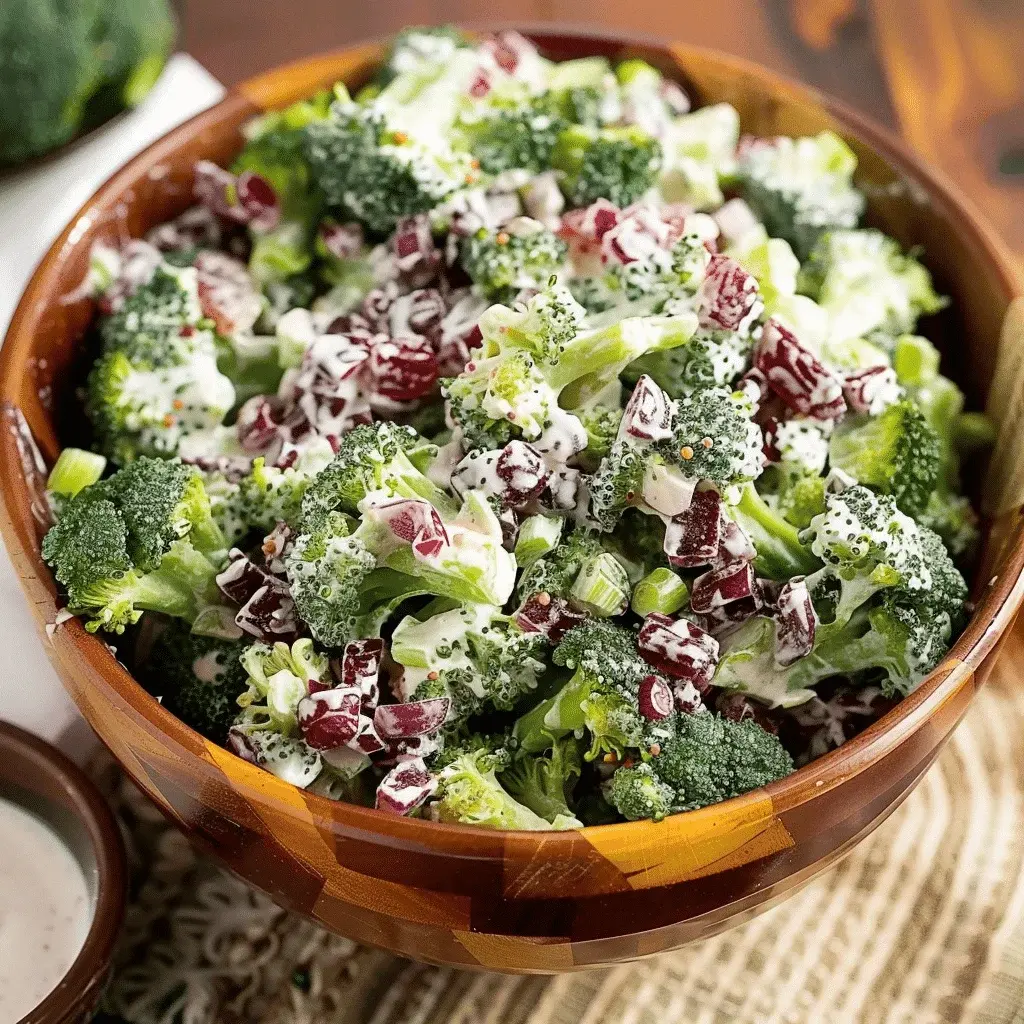
Did you know that a single cup of raw broccoli provides over 100% of your daily vitamin C and K needs? This powerhouse vegetable is the star of our ultimate broccoli salad recipe, a dish that transforms simple ingredients into a crave-worthy side. Perfect for potlucks, barbecues, or a quick weekday lunch, this salad strikes the perfect balance between creamy, crunchy, sweet, and tangy. Forget the bland, soggy versions you might have tried before. Our recipe is packed with fresh broccoli florets, sharp red onion, and chewy dried cranberries, all coated in a homemade dressing that’s rich without being heavy. Whether you’re feeding a crowd or just your family, this is the best broccoli salad recipe you’ll find—guaranteed to become a staple in your recipe rotation.
Ingredients List
For the best flavor and texture, use fresh, high-quality ingredients. Here’s what you’ll need:
For the Salad:
2 large heads of broccoli (about 1.5 lbs): Look for firm, dark green florets with tightly closed buds. The stems should be crisp, not rubbery. (Substitution: You can use 4-5 cups of pre-cut broccoli florets for convenience.)
1/2 cup red onion, finely diced: Provides a sharp, peppery bite that cuts through the creaminess. Soak in cold water for 10 minutes if you prefer a milder flavor. (Substitution: Sweet white onion or shallots.)
1/2 cup dried cranberries: Adds a chewy texture and bursts of tart-sweetness. (Substitution: Raisins, chopped dried cherries, or dried apricots.)
1/2 cup sunflower seeds (shelled & roasted): For essential nutty crunch. (Substitution: Sliced almonds, chopped pecans, or pepitas.)
1/2 cup cooked, crumbled bacon (about 6 strips): Offers a savory, smoky, salty element. (Substitution: For a vegetarian version, use 1/3 cup grated smoked cheddar or crispy chickpeas.)
For the Tangy & Creamy Dressing:
1 cup mayonnaise: Use full-fat for the creamiest, most luxurious texture. (Substitution: Greek yogurt or a mayo/yogurt blend for a lighter option.)
2 tablespoons apple cider vinegar: The key to the “tangy” profile, brightening the entire dish. (Substitution: White wine vinegar or fresh lemon juice.)
2 tablespoons granulated sugar: Balances the vinegar’s acidity. You’ll taste a subtle sweetness, not an overt sugary flavor. (Substitution: Honey or maple syrup.)
1/2 teaspoon salt & 1/4 teaspoon black pepper: Essential seasonings to enhance all the other flavors.
Timing
Prep Time 20 minutes
Cook Time 0 minutes (No Cook!)
Total Time 1 hour 20 minutes (includes chilling)
Compared to the average broccoli salad recipe that requires 30+ minutes of active prep, our streamlined method gets you to the chilling stage in just 20 minutes. The “no-cook” aspect (aside from optional bacon) is a major time-saver. The crucial 1-hour chill time allows the flavors to marry and the broccoli to slightly tenderize in the dressing, which is non-negotiable for the best texture. Plan accordingly for the most flavorful results.
Fresh ingredients ready to be transformed into the ultimate broccoli salad.
Step-by-Step Instructions
Step 1: Prepare the Broccoli
Wash the broccoli heads thoroughly. Using a sharp knife, cut the florets off the main stem into small, bite-sized pieces. Don’t discard the stem! Peel the tough outer layer with a vegetable peeler, then slice the tender inner stem into small, matchstick-sized pieces. This adds great texture and reduces waste. You should have about 6-7 cups of broccoli pieces. Place them all in a large mixing bowl—the biggest one you have.
Step 2: Chop the Add-Ins
Finely dice the red onion. If its sharpness is too potent for your taste, soak the diced pieces in a bowl of cold water for 10 minutes, then drain and pat dry. This tames the bite significantly. Add the onion to the broccoli bowl. Next, measure out your dried cranberries, sunflower seeds, and cooked, crumbled bacon. Add them all to the bowl. I like to reserve a small handful of each for a pretty garnish on top before serving.
Step 3: Make the Dressing
In a separate medium bowl, combine the mayonnaise, apple cider vinegar, sugar, salt, and black pepper. Whisk vigorously until the mixture is completely smooth, the sugar has dissolved, and the ingredients are fully emulsified. Taste it! This is your chance to adjust. Want it tangier? Add a splash more vinegar. Sweeter? A pinch more sugar. The dressing should be creamy, luscious, and perfectly balanced.
Step 4: Combine and Chill
Pour the dressing over the broccoli mixture in the large bowl. Using a large spatula or salad tongs, gently fold everything together until every piece of broccoli is evenly coated with the creamy dressing. Be thorough but gentle to avoid breaking the florets. Now, for the most important step: cover the bowl tightly with plastic wrap and refrigerate for at least 1 hour, but ideally 2-3 hours. This chilling time is magical—it softens the broccoli just enough, allows the flavors to penetrate, and thickens the dressing.
Nutritional Information
(Per serving, based on 8 servings. Values are approximate.)
Calories: ~280 kcal
Total Fat: 22g
Saturated Fat: 4g
Cholesterol: 15mg
Sodium: 320mg
Total Carbohydrates: 16g
Dietary Fiber: 3g
Sugars: 10g
Protein: 6g
This salad is a good source of Vitamin C, Vitamin K, and fiber from the broccoli.
Healthier Alternatives
You can easily lighten up this salad without sacrificing the creamy, tangy flavor profile:
Dressing Base: Swap half or all of the mayonnaise for plain, non-fat Greek yogurt. This adds protein, reduces fat, and maintains a thick, creamy consistency. Add a teaspoon of Dijon mustard for extra tang.
Sweetener: Replace granulated sugar with pure maple syrup, honey, or a zero-calorie sweetener like monk fruit blend that measures 1:1 like sugar.
Bacon: Use turkey bacon or simply omit it. For a plant-based protein crunch, add roasted chickpeas tossed in smoked paprika.
Seeds/Nuts: Keep them! They provide healthy fats and are calorie-dense for a reason. Just be mindful of portion size.
Serving Suggestions
This versatile salad complements a wide range of mains:
Classic BBQ: The perfect side for grilled chicken, burgers, hot dogs, or ribs.
Potluck Star: Transport it in a sealed container. It travels well and serves a crowd.
Weekday Lunch: Portion it into containers for a satisfying, make-ahead lunch. It gets better by day two!
Holiday Spread: Its bright colors and fresh flavor are excellent alongside richer holiday dishes like ham or turkey.
Common Mistakes
Skipping the Chill Time: Serving immediately results in hard, raw-tasting broccoli and a dressing that hasn’t melded. Patience is key.
Using Frozen Broccoli: It becomes mushy and waters down the dressing. Always use fresh.
Over-mixing: Aggressive stirring can break the florets into crumbs. Fold gently.
Not Tasting the Dressing: Always taste and adjust seasoning before combining. Personalize it to your palate.
Storing Tips
Refrigeration: Store in an airtight container in the refrigerator for up to 3-4 days. The flavors continue to develop.
Preventing Sogginess: If making more than a day ahead, consider storing the dressing separately and combining a few hours before serving.
Freezing: Not recommended. The mayonnaise-based dressing will separate and the broccoli’s texture will become unpleasantly soft upon thawing.
Reviving: If the salad seems dry after storage, stir in a tablespoon of milk or a squeeze of lemon juice to loosen the dressing.
The finished, perfectly chilled broccoli salad ready to delight at any table.
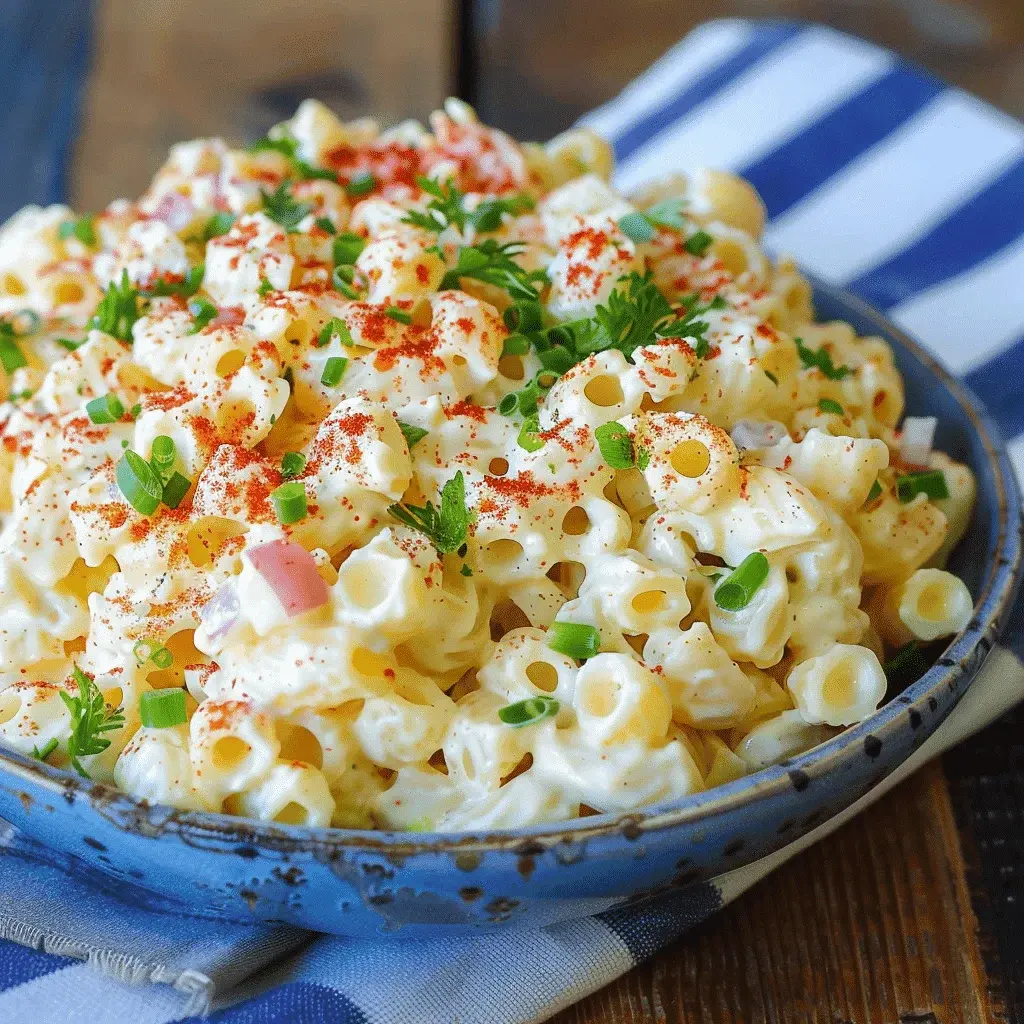
Did you know that over 75% of potluck attendees cite pasta salad as a top-three favorite dish, yet nearly half find traditional versions too bland? This is where our Deviled Egg Pasta Salad revolutionizes the game. By fusing the nostalgic, creamy tang of a classic deviled egg with the satisfying heartiness of pasta, this recipe creates a flavor-packed sensation that’s anything but ordinary. It’s the ultimate crowd-pleaser, designed to be the star of your summer picnic, potluck spread, or weeknight dinner table. The secret lies in the harmonious blend of rich mayonnaise, sharp Dijon mustard, and the warm, smoky whisper of paprika, all clinging to tender pasta and chunks of perfectly hard-boiled egg. Get ready to elevate a simple side dish into a memorable main attraction.
Ingredients List
Gather these simple ingredients for a salad that’s bursting with flavor and texture. Each component plays a crucial role in creating that signature “deviled” taste.
8 large eggs: The star of the show. Look for eggs with bright orange yolks for the richest color and flavor. For a substitution, you can use 1 cup of store-bought hard-boiled eggs, though fresh is always best.
12 oz (340g) short pasta: Elbow macaroni, rotini, or cavatappi are perfect. Their nooks and crannies trap the creamy dressing. Use gluten-free pasta if needed.
1 cup mayonnaise: Full-fat mayo provides the luxurious, creamy base. For a tangier twist, substitute with 3/4 cup mayo + 1/4 cup sour cream or Greek yogurt.
2 tablespoons Dijon mustard: This is the “devil” in deviled eggs, offering a complex, sharp tang. Yellow mustard can be used for a milder flavor.
1 tablespoon apple cider vinegar or white vinegar: Adds the essential bright acidity that cuts through the richness.
1 teaspoon smoked paprika + more for garnish: Provides the iconic smoky depth and a beautiful red hue. Sweet paprika works in a pinch.
1/2 teaspoon garlic powder: Offers a subtle, savory backbone without the harshness of raw garlic.
1/4 teaspoon cayenne pepper (optional): For those who like a genuine “deviled” kick. Omit for a mild salad.
Salt and freshly ground black pepper to taste.
1/4 cup finely chopped red onion: Soak in cold water for 10 minutes to mellow the sharpness if desired.
2 tablespoons fresh chives or parsley, chopped: For a pop of green color and fresh herbal finish.
Timing
Prep Time 25 minutes
Cook Time 15 minutes
Chill Time 1 hour (minimum)
Total Time 1 hour 40 minutes
Compared to the average pasta salad which often skips the chilling step, this recipe’s mandatory 1-hour chill is non-negotiable. It allows the flavors to marry and intensify, transforming it from a simple mix into a cohesive, crave-worthy dish. The active time of about 40 minutes is efficient, especially if you boil the eggs and pasta concurrently.
This vibrant Deviled Egg Pasta Salad is the perfect make-ahead dish for any gathering.
Step-by-Step Instructions
Step 1: Prepare the Eggs
Place your eggs in a single layer in a saucepan and cover with at least an inch of cold water. Bring to a rolling boil over high heat. Once boiling, immediately cover the pot, remove it from the heat, and let it sit for 12 minutes exactly. This method is foolproof for preventing the dreaded green ring around the yolk. Prepare an ice bath in a large bowl. After 12 minutes, transfer the eggs to the ice bath using a slotted spoon. Let them cool completely for at least 15 minutes. Once cool, peel the eggs under running water for easier shell removal. Chop 6 of the eggs into bite-sized pieces. Reserve the remaining 2 eggs for garnish, slicing them into pretty wedges or halves.
Step 2: Cook the Pasta
While the eggs are cooking or cooling, bring a large pot of generously salted water to a boil. Add your chosen pasta and cook according to package directions for al dente—it should still have a slight bite. Overcooked pasta becomes mushy in the salad. Drain the pasta in a colander and rinse briefly under cold water to stop the cooking process and remove excess starch. This ensures your salad stays creamy, not gummy. Let it drain thoroughly.
Step 3: Make the Devilish Dressing
In a large mixing bowl—big enough to hold all ingredients—whisk together the mayonnaise, Dijon mustard, apple cider vinegar, smoked paprika, garlic powder, and cayenne (if using). Whisk vigorously until the mixture is completely smooth and a uniform, pale orange color. Season generously with salt and black pepper. Taste! This is your chance to adjust the “devil” factor—add more mustard for tang, more paprika for smoke, or more vinegar for brightness.
Step 4: Combine and Chill
To the bowl with the dressing, add the cooled pasta, chopped hard-boiled eggs, red onion, and diced celery. Using a large spatula, gently fold everything together until every piece of pasta and egg is lovingly coated in the creamy dressing. Be gentle to avoid breaking the egg pieces further. Transfer the salad to a serving bowl or airtight container. Cover and refrigerate for at least 1 hour, though 2-3 hours is ideal. Before serving, give it a gentle stir, top with the reserved egg slices/wedges, a sprinkle of fresh chives, and an extra dusting of smoked paprika for visual appeal.
Nutritional Information
(Approximate values per 1-cup serving, based on 8 servings)
Calories: 380 kcal
Total Fat: 24g
Saturated Fat: 4.5g
Cholesterol: 195mg
Sodium: 320mg
Total Carbohydrates: 28g
Dietary Fiber: 2g
Sugars: 2g
Protein: 12g
Healthier Alternatives
You can lighten this dish without sacrificing its iconic flavor profile:
Mayo Swap: Replace half or all of the mayonnaise with plain, non-fat Greek yogurt. It provides the same creamy texture and a protein boost with a pleasant tang.
Pasta Power: Use a high-protein lentil or chickpea pasta, or a whole-wheat/blend pasta for added fiber and nutrients.
Egg-cellent Adjustment: Use 4 whole eggs and 4 egg whites only to reduce cholesterol and fat while maintaining protein content.
Veggie Boost: Bulk up the salad with more non-starchy vegetables like diced bell peppers, shredded carrots, or blanched broccoli florets to increase volume and nutrients per serving.
Serving Suggestions
This versatile salad shines in many settings:
Potluck Perfection: Serve as a standout side alongside grilled chicken, burgers, or hot dogs.
Light Main Course: For a satisfying lunch, serve over a bed of leafy greens with a side of crusty bread.
Brunch Brilliance: Pair with fresh fruit, pastries, and mimosas for a delightful brunch spread.
Garnish Game: Elevate with extra toppings like crispy bacon bits, capers, or a sprinkle of everything bagel seasoning just before serving.
Common Mistakes
Overcooking the Eggs/Pasta: This leads to a chalky yolk and mushy pasta. Follow the steam method for eggs and cook pasta al dente.
Skipping the Chill Time: Serving immediately results in a warm, runny salad where the flavors haven’t melded. Patience is key.
Not Seasoning the Dressing Enough: The cold mutes flavors. Season the dressing aggressively before mixing.
Over-mixing: Vigorous stirring will break the eggs down into a paste. Fold gently.
Storing Tips
Refrigeration: Store in an airtight container in the refrigerator for up to 3-4 days. The flavor often improves on day two.
Preventing Dryness: If the salad seems dry after storing, stir in a tablespoon of milk, water, or extra mayo to refresh the creaminess.
Freezing: Not recommended. Mayonnaise-based dressings and hard-boiled eggs do not freeze well, becoming grainy and watery upon thawing.
Make-Ahead: This is an ideal make-ahead dish. Prepare fully 1 day in advance, but add fresh garnishes (chives, paprika, reserved egg slices) right before serving.
The creamy, tangy dressing clings perfectly to every bite of pasta and egg.
Conclusion
This Deviled Egg Pasta Salad is more than just a recipe; it’s a guaranteed hit that bridges the gap between comforting classic and exciting innovation. With its creamy texture, tangy dressing, and satisfying protein-packed ingredients, it solves the problem of bland potluck dishes forever. Whether you’re feeding a crowd or prepping lunches for the week, this salad delivers on flavor, ease, and versatility. So, grab your ingredients and get ready to devil up something delicious!
Made this recipe? We’d love to see your creation! Tag @spicemingle on social media and share your potluck triumphs. Don’t forget to pin this recipe to your favorite board for later!
FAQs
***Can I make this Deviled Egg Pasta Salad the night before?
Did you know that over 70% of home cooks are actively seeking recipes that deliver restaurant-quality flavor in under 30 minutes? If you’re part of that majority searching for a fast and delicious meal, this Quick Apricot Chicken is your culinary answer. This dish masterfully transforms simple pantry staples into a vibrant, tangy, and sweet masterpiece that feels gourmet without the gourmet effort. The magic lies in the harmony of sticky apricot jam, bright orange juice, and smoky BBQ sauce, creating a glossy glaze that clings perfectly to tender, juicy chicken breast. It’s the ideal solution for busy weeknights, last-minute guests, or when you simply crave something comforting and extraordinary without spending hours in the kitchen. Let’s dive into how you can make this flavor-packed dish a regular in your dinner rotation.
Ingredients List
Gather these simple ingredients for a symphony of sweet, savory, and tangy flavors. Each plays a crucial role in building the dish’s signature profile.
1.5 lbs (680g) Boneless, Skinless Chicken Breast: Diced into 1-inch cubes. This cut is lean, cooks quickly, and perfectly soaks up the sauce. (Substitution: Chicken thighs for a richer, more forgiving texture.)
1 cup Apricot Jam or Preserves: The star ingredient! It provides a lush, fruity sweetness and helps thicken the sauce into a gorgeous glaze. (Substitution: Peach or mango jam for a similar stone-fruit vibe.)
1/2 cup Orange Juice: Freshly squeezed is ideal for a burst of citrusy acidity that cuts through the sweetness. (Substitution: Pineapple juice or a mix of lemon juice and water.)
1/3 cup BBQ Sauce: Choose your favorite—smoky, hickory, or sweet—to add depth and a savory backbone. (Substitution: 2 tbsp soy sauce + 1 tbsp tomato paste + 1 tsp smoked paprika for a DIY version.)
2 tbsp Olive Oil or Avocado Oil: For sautéing. Its high smoke point and neutral flavor are perfect.
3 cloves Garlic, minced: Adds an essential aromatic, savory punch.
1 tbsp Fresh Ginger, grated: Brings a warm, zesty note that complements the apricot beautifully.
1 tsp Onion Powder: Enhances the overall savoriness without adding texture.
Salt and Freshly Ground Black Pepper: To taste. Season in layers for the best result.
Optional Garnishes: Thinly sliced green onions, toasted sesame seeds, or chopped fresh cilantro for color and a fresh finish.
Timing
Prep Time10 minutes
Cook Time15 minutes
Total Time25 minutes
This Quick Apricot Chicken clocks in at a remarkable 25 minutes from fridge to table. Compared to the average chicken dinner recipe, which often requires 45-60 minutes including marination, this recipe is a true speed champion. The efficiency comes from dicing the chicken for faster, more even cooking and using a simple, no-cook sauce that comes together in the pan. You’re saving precious time without sacrificing an ounce of complexity in flavor.
A visual of the apricot glaze caramelizing to perfection on the chicken.
Step-by-Step Instructions
Step 1: Prepare Your Chicken
Pat your chicken breasts completely dry with paper towels—this is the secret to getting a beautiful sear instead of steam. Dice them into uniform 1-inch cubes. This size ensures quick, even cooking and maximizes surface area for the sauce to cling to. Season generously on all sides with salt, pepper, and the onion powder. Let it sit for just a minute while you prep your aromatics; this brief rest allows the seasoning to penetrate.
Step 2: Create the Sweet & Savory Sauce
In a medium bowl, whisk together the apricot jam, orange juice, and BBQ sauce until smooth. Don’t worry if the jam is chunky; it will melt beautifully in the heat. Take a moment to smell the combination—the bright citrus and smoky notes mingling with the sweet apricot is a preview of the final dish. Set this sauce mixture aside, but keep it within arm’s reach.
Step 3: Sauté and Simmer
Heat the oil in a large skillet or sauté pan over medium-high heat. Once the oil shimmers, add the diced chicken in a single layer, working in batches if necessary to avoid crowding. Crowding the pan lowers the temperature and leads to boiled chicken, not seared. Cook for 3-4 minutes, undisturbed, to get a golden-brown crust on one side, then stir and cook for another 2-3 minutes until mostly cooked through. Reduce the heat to medium, push the chicken to the sides, and add the minced garlic and grated ginger to the center of the pan. Sauté for just 30 seconds until fragrant—be careful not to burn it.
Step 4: Finish and Serve
Pour your pre-mixed sauce over the chicken and stir to combine, ensuring every piece is coated. Bring the mixture to a gentle simmer. Let it cook for 4-5 minutes, stirring occasionally. You’ll see the sauce reduce, thicken, and turn into a shiny, luxurious glaze that coats the back of a spoon. This is when the magic happens—the flavors concentrate and marry. Taste and adjust seasoning with an extra pinch of salt or pepper if needed. Remove from heat immediately to prevent overcooking the chicken.
Nutritional Information
The following estimates are per serving (assuming this recipe serves 4). Values can vary based on specific ingredient brands and portion sizes.
Calories: ~380 kcal
Protein: ~35g (Excellent source for muscle repair and satiety)
Carbohydrates: ~42g (Primarily from the natural fruit sugars and sauce)
Fat: ~8g (Mostly healthy unsaturated fat from the oil)
Fiber: ~1g
Sugar: ~32g (Note: A significant portion comes from the natural fruit in the jam and juice. See healthier alternatives below for lower-sugar options.)
Healthier Alternatives
You can easily adapt this Quick Apricot Chicken to fit various dietary needs without losing its signature charm.
Lower Sugar: Swap the apricot jam for a no-sugar-added apricot spread or preserves. Use fresh-squeezed orange juice (which has less sugar than concentrate) or dilute it with a splash of water.
Whole30/Paleo: Use compliant apricot puree (check for no added sugars or sulfites) and substitute the BBQ sauce with a homemade version using tomato paste, apple cider vinegar, and date paste for sweetness.
Less Sodium: Opt for a low-sodium BBQ sauce or make your own. Use a salt substitute or simply rely on the natural flavors from the garlic, ginger, and pepper.
More Veggies: Bulk it up nutritionally by adding diced bell peppers, snap peas, or broccoli florets to the pan when you add the sauce. They’ll cook in the simmering liquid and absorb the fantastic flavor.
Serving Suggestions
This versatile chicken is a canvas for your favorite sides. Here are some perfect pairings:
For a Light Meal: Serve over a bed of fluffy quinoa, cauliflower rice, or a simple green salad dressed with a light vinaigrette to balance the sweetness.
For Comfort Food Vibes: Spoon it alongside creamy mashed potatoes, buttery egg noodles, or jasmine rice to soak up every last drop of the incredible sauce.
For Extra Crunch: Top with a sprinkle of toasted slivered almonds or chopped water chestnuts added at the end of cooking.
Common Mistakes
Overcrowding the Pan: This is the #1 reason for soggy, steamed chicken. Give the pieces space to sear. Cook in batches if your pan isn’t large enough.
Boiling the Sauce: After adding the sauce, keep it at a gentle simmer, not a rolling boil. A vigorous boil can make the sauce separate and toughen the chicken.
Using Jam with Large Fruit Chunks: While fine, very large chunks won’t melt evenly. Give the jam a quick chop or use a smooth preserve for a more uniform glaze.
Skipping the Garlic & Ginger Sauté: Adding them directly to the cold sauce misses the opportunity to unlock their aromatic oils. That quick 30-second sauté in oil makes a world of difference.
Storing Tips
Refrigeration: Cool completely and store in an airtight container for up to 3-4 days. The flavors often meld and intensify, making fantastic leftovers.
Freezing: Freeze in a sealed container for up to 2 months. Thaw overnight in the refrigerator. Reheat gently on the stovetop with a splash of water or broth to refresh the sauce consistency.
Reheating: Gently reheat in a covered saucepan over low-medium heat, stirring occasionally. Avoid the microwave on high power, as it can make the chicken rubbery and the sauce separate.
The finished dish, plated and ready to enjoy with perfect sides.
Conclusion
This Quick Apricot Chicken Recipe proves that a spectacular, flavor-forward dinner doesn’t require complicated techniques or hours of your time. In just about 25 minutes, you can create a dish that balances sweet, tangy, and savory notes in a way that delights the whole family. It’s versatile, forgiving, and perfect for customizing to your taste or dietary needs. Whether you’re a seasoned cook or just starting out, this recipe is a guaranteed win for your weekly menu. Now, it’s your turn! Give this recipe a try tonight and share your creation with us. Did you add a personal twist? What was your favorite side dish pairing? Let us know in the
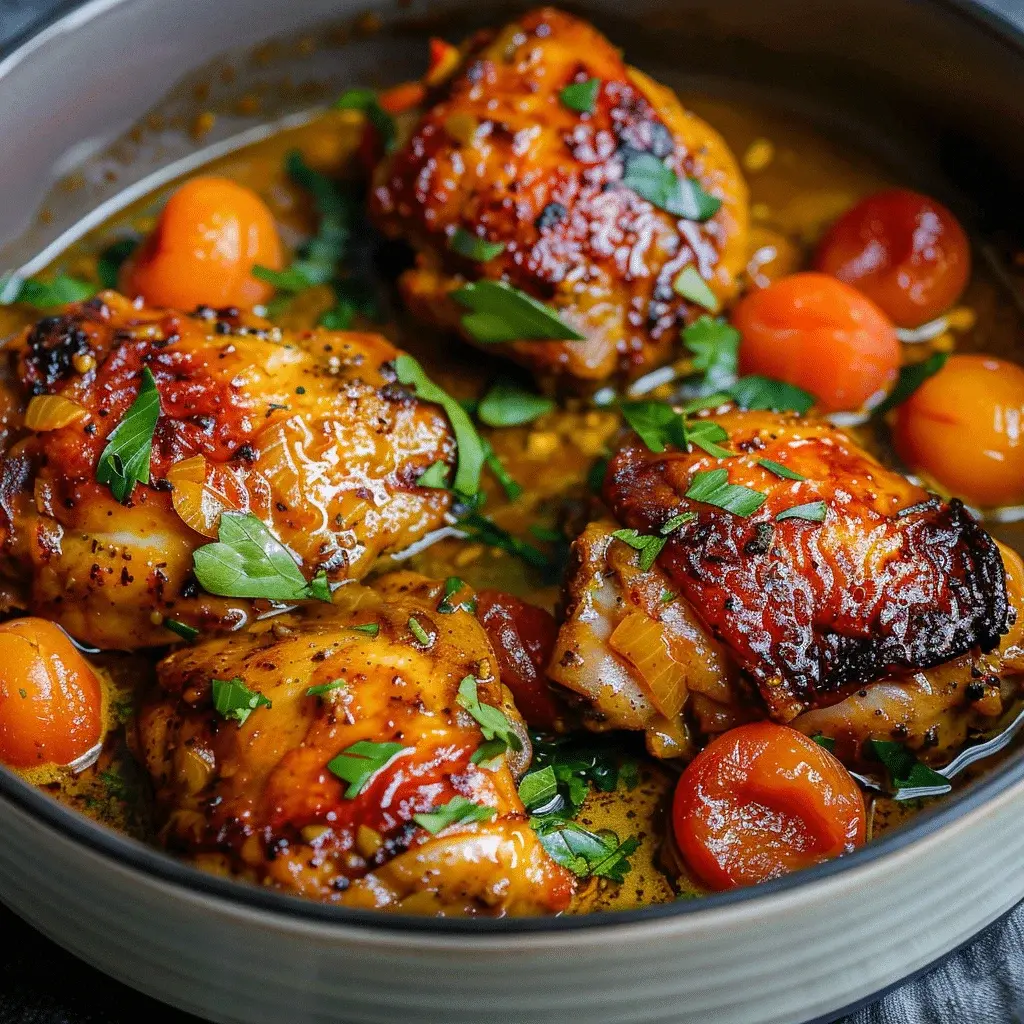
Did you know that over 75% of home cooks are looking for ways to add more fruit to their savory dishes for a natural sweetness and nutritional boost? This Barbecue Apricot Chicken recipe is the perfect answer, masterfully blending the tangy, smoky notes of classic barbecue with the lush, honeyed flavor of ripe apricots. The result is a dish that’s not just a meal, but an experience—a sticky, caramelized, and utterly irresistible centerpiece that will have everyone asking for seconds. Whether you’re firing up the grill for a summer cookout or using your oven for a cozy family dinner, this recipe delivers maximum flavor with surprisingly minimal effort. Let’s dive into how you can create this sweet-and-savory masterpiece that promises to become a new favorite in your culinary repertoire.
Ingredients List
Gather these simple ingredients to create a symphony of sweet, tangy, and savory flavors. I’ve included sensory notes and easy substitutions to make this recipe work for you.
For the Chicken & Marinade:
4 boneless, skinless chicken breasts (about 1.5 lbs): Look for plump, even-sized pieces for uniform cooking. Substitution: Chicken thighs offer richer, more forgiving dark meat.
2 tablespoons olive oil: For a golden sear and to carry flavors.
1 teaspoon smoked paprika: Provides a deep, woodsy aroma and a hint of smokiness.
1 teaspoon garlic powder & 1 teaspoon onion powder: The dynamic duo for foundational savory depth.
1/2 teaspoon salt & 1/4 teaspoon black pepper: Essential for seasoning the meat itself.
For the Apricot Barbecue Glaze:
1 cup apricot preserves or jam: The star! Seek out preserves with visible fruit pieces for the best texture and authentic apricot flavor. Substitution: Peach or mango preserves work beautifully.
1/2 cup your favorite barbecue sauce: Choose a smoky, tangy, or spicy variety based on your preference. This is where you can personalize the dish!
2 tablespoons apple cider vinegar: Adds necessary acidity to cut through the sweetness and brighten the glaze.
1 tablespoon soy sauce or tamari: The secret umami booster that makes the flavor “pop.” Substitution: Coconut aminos for a soy-free option.
1 tablespoon Dijon mustard: Adds a subtle sharpness and helps emulsify the glaze.
2 cloves garlic, minced: Fresh garlic brings a pungent, aromatic kick that powder can’t match.
Optional Garnish: Fresh chopped parsley or cilantro and thinly sliced green onions for a fresh, colorful finish.
Timing
Prep Time 15 minutes
Cook Time 20-25 minutes
Total Time 35-40 minutes
Compared to many marinated chicken dishes that require hours of waiting, this Barbecue Apricot Chicken is remarkably quick. The active prep is under 15 minutes, and the cooking process is straightforward. While a 30-minute marinate is ideal, the potent glaze ensures incredible flavor even if you cook immediately—making it a fantastic “I-need-dinner-now” solution that doesn’t sacrifice taste.
This sticky, caramelized glaze is the hallmark of perfect Barbecue Apricot Chicken.
Step-by-Step Instructions
Step 1: Prepare the Apricot Barbecue Glaze
In a medium saucepan, combine the apricot preserves, barbecue sauce, apple cider vinegar, soy sauce, Dijon mustard, and minced garlic. Whisk everything together over medium-low heat until the mixture is smooth and begins to bubble gently. Let it simmer for 5-7 minutes, stirring occasionally. You’ll see it thicken slightly and become wonderfully fragrant—the sweet apricot scent will mingle with the smoky barbecue notes. Once done, remove from heat and set aside. I like to reserve about 1/3 cup of this glaze in a separate small bowl for serving later.
Step 2: Season and Marinate the Chicken
Pat your chicken breasts completely dry with paper towels; this is crucial for getting a good sear. Place them in a shallow dish or a large zip-top bag. Drizzle with olive oil, then sprinkle evenly with smoked paprika, garlic powder, onion powder, salt, and pepper. Rub the seasonings all over the chicken until each piece is evenly coated. For maximum flavor infusion, pour about half of the warm apricot barbecue glaze over the chicken, turning to coat. Let it marinate at room temperature for 15-30 minutes. If you’re short on time, even 5 minutes will help!
Step 3: Cook the Chicken to Perfection
Heat a large skillet, grill pan, or outdoor grill to medium-high heat. If using a skillet, add a light drizzle of oil. Remove the chicken from the marinade, letting any excess drip off. Place the chicken on the hot cooking surface. Cook for 6-8 minutes on the first side, without moving it, until you get a beautiful golden-brown sear with visible grill marks if using a grill. Flip the chicken and cook for another 5-7 minutes on the second side. The chicken is done when it reaches an internal temperature of 165°F (74°C) at the thickest part. Use a meat thermometer for perfect results every time.
Step 4: Glaze and Finish
During the last 2-3 minutes of cooking, brush the cooked side of the chicken generously with more of the apricot barbecue glaze. Flip, brush the other side, and let it cook for a final minute so the glaze can caramelize and become sticky. Be watchful here, as the sugars in the glaze can burn quickly. Once done, transfer the chicken to a clean plate or cutting board. Let it rest for 5 minutes—this allows the juices to redistribute, ensuring moist, tender chicken. Slice against the grain, drizzle with the reserved fresh glaze, and garnish with fresh herbs and green onions.
Nutritional Information
(Per serving, based on 4 servings with glaze)
Calories: ~380 kcal
Protein: 36g
Carbohydrates: 32g (primarily from the natural fruit sugars and barbecue sauce)
Fat: 12g
Fiber: 1g
Sugar: 24g
Sodium: ~850mg (varies based on barbecue sauce and soy sauce used)
Healthier Alternatives
You can easily lighten up this dish without losing its signature sweet-and-tangy character:
Reduce Sugar: Use a “no sugar added” apricot fruit spread and a low-sugar or sugar-free barbecue sauce. The flavor profile remains tangy and fruity.
Boost Protein & Reduce Fat: Swap chicken breasts for lean chicken tenderloins. They cook faster and are incredibly tender.
Grill or Bake: Instead of pan-searing with oil, cook the chicken on an outdoor grill for fat to drip away, or bake on a parchment-lined sheet at 400°F (200°C) for 18-22 minutes, brushing with glaze at the end.
Add Veggies: Thread chunks of bell peppers, onions, and pineapple onto skewers with the chicken for a complete, fiber-rich meal cooked in the same glaze.
Serving Suggestions
This versatile chicken is the star of any plate. Here’s how to build a memorable meal around it:
For a Summer BBQ: Serve alongside classic potato salad, grilled corn on the cob slathered with herb butter, and a crisp, cool coleslaw to balance the sweetness.
For a Cozy Dinner: Pair with creamy mashed potatoes or cauliflower mash to soak up the extra glaze, and simple steamed green beans or roasted broccoli.
For a Lighter Meal: Serve over a bed of quinoa or brown rice with a big, colorful salad dressed with a lemony vinaigrette.
Get Creative: Shred the leftover chicken and use it as a filling for tacos with cabbage slaw, or pile it onto a bun with pickles for an incredible sandwich.
Common Mistakes
Not Drying the Chicken: Wet chicken steams instead of sears, preventing that beautiful caramelization on the glaze.
Overcooking the Chicken: Chicken breasts dry out quickly. Use a meat thermometer and pull them at 165°F. They will continue to cook slightly while resting.
Adding Glaze Too Early: Brushing on the sugary glaze at the beginning of cooking will cause it to burn. Apply it only during the last few minutes.
Using a Jarred “Apricot BBQ Sauce”: The magic is in the homemade blend of separate preserves and barbecue sauce. This allows you to control the sweetness, tang, and texture perfectly.
Storing Tips
Refrigeration: Store leftover chicken in an airtight container for up to 3-4 days. The glaze will solidify when cold but will re-liquify when reheated.
Freezing: Freeze cooked, cooled chicken (without fresh garnish) in a freezer-safe container or bag for up to 2 months. Thaw overnight in the refrigerator before reheating.
Reheating: For best results, reheat gently in a covered skillet over low heat with a splash of water or chicken broth to keep it moist. You can also use the microwave at 50% power in 30-second intervals.
Make-Ahead Glaze: The apricot barbecue glaze can be made up to 5 days in advance and stored in the fridge. Simply warm it slightly before using.
Did you know that dishes combining sweet and savory elements, like our Curried Apricot Chicken Sosaties, are scientifically proven to activate more pleasure centers in the brain? According to culinary research, this flavor contrast creates a more memorable and satisfying eating experience. This recipe is a vibrant South African-inspired delight, where tender chicken is marinated in a rich, fragrant curry paste and balanced with the natural sweetness of dried apricots. The result is a dish that’s not only bursting with complex flavors but also surprisingly simple to prepare. Whether you’re looking for a standout weeknight dinner or a show-stopping dish for your next gathering, these sosaties (skewers) promise to deliver. Let’s dive into how you can bring this delicious fusion of savory chicken and sweet apricots to your table.
Ingredients List
Gather these fresh and flavorful components for your sosaties. The key is quality ingredients for maximum taste.
For the Marinade:
1 large onion, finely chopped – Provides a sweet, aromatic base. Substitute: 1 tbsp onion powder mixed with 2 tbsp water for a smoother texture.
2 tbsp lemon juice or vinegar – Brightens the marinade and tenderizes the chicken. Substitute: White wine vinegar or apple cider vinegar.
1 tsp salt – Enhances all the other flavors.
1/2 tsp black pepper – Adds a subtle heat.
For the Skewers:
1.5 lbs (700g) boneless, skinless chicken breasts or thighs – Cut into 1-inch cubes. Thighs remain juicier, while breasts are leaner. Look for firm, pink flesh.
15-20 dried apricots – Their chewy texture and concentrated sweetness are essential. Substitute: Fresh apricot halves (adds a different, softer texture).
1 large bell pepper (any color), cut into chunks – Adds color, crunch, and a fresh contrast.
1 red onion, cut into chunks – Becomes sweet and caramelized when grilled.
Wooden or metal skewers – If using wooden, soak in water for 30 minutes to prevent burning.
Timing
Prep Time 20 minutes
Cook Time 10-12 minutes
Marinating Time 2 hours (minimum) to overnight
Total Time 2 hours 35 minutes (active: 35 mins)
Compared to many marinated grill recipes that require 4+ hours of inactive time, this Curried Apricot Chicken Sosaties recipe is relatively quick. The marinade works efficiently due to the acidity from the lemon juice/vinegar and the enzymatic action of the apricot jam, which helps tenderize the chicken in as little as two hours. The active cooking time is brief, making it perfect for a fast, flavorful dinner after marinating.
Step-by-Step Instructions
Step 1: Prepare the Marinade
In a medium-sized bowl, combine the finely chopped onion, minced garlic, curry powder, apricot jam, vegetable oil, lemon juice, salt, and black pepper. I like to use a whisk here to really break down the apricot jam and create a smooth, emulsified paste. The aroma at this stage is incredible—the warmth of the curry mingling with the sweet fruitiness of the apricot. Taste a tiny bit (avoiding the raw onion/garlic) and adjust seasoning if needed. Remember, this flavor will concentrate as it marinates.
Step 2: Marinate the Chicken
Place your cubed chicken into a large, resealable plastic bag or a non-reactive bowl (glass or ceramic). Pour the marinade over the chicken. Using your hands (wear gloves if you prefer), massage the marinade into every piece of chicken, ensuring each cube is thoroughly coated. This hands-on approach guarantees maximum flavor penetration. Seal the bag or cover the bowl tightly with plastic wrap. Refrigerate for at least 2 hours, but for the best, most tender results, let it marinate overnight. The chicken will transform in color to a deep, golden yellow.
Step 3: Assemble the Sosaties
If using wooden skewers, soak them in water for at least 30 minutes before assembling. This prevents them from charring and breaking on the grill. Thread the marinated chicken, dried apricots, bell pepper chunks, and red onion chunks onto the skewers in an alternating pattern. I find the pattern of chicken, apricot, pepper, onion, chicken creates the perfect balance of flavors and textures on each bite. Leave a small space at each end of the skewer for easy handling. Don’t pack the items too tightly to ensure even cooking.
Step 4: Grill to Perfection
Preheat your grill, grill pan, or broiler to medium-high heat. Lightly oil the grates to prevent sticking. Place the assembled sosaties on the hot grill. Cook for 4-6 minutes per side, turning once, until the chicken is cooked through and has beautiful, slightly charred grill marks. The apricots will become plump and glossy, and the vegetables will soften and caramelize. The total cook time is usually 10-12 minutes. To check for doneness, cut into the thickest piece of chicken—it should be white throughout with no pink, and the juices should run clear. Avoid constant flipping, as this prevents proper caramelization.
Nutritional Information
Per serving (approx. 2 sosaties):
Calories: ~320 kcal
Protein: 28g
Carbohydrates: 25g (of which sugars: 18g from apricots/jam)
Fat: 12g (mostly unsaturated from oil)
Fiber: 3g
Sodium: ~450mg
This dish is a good source of lean protein and provides vitamin A from the apricots and bell peppers, and vitamin C from the peppers and lemon juice.
Healthier Alternatives
You can easily adapt this recipe for various dietary needs without sacrificing the signature sweet and savory flavor profile:
Lower Sugar: Swap the apricot jam for a sugar-free apricot spread or use a mixture of unsweetened apricot puree with a touch of honey or maple syrup. This significantly reduces the refined sugar content.
Reduced Fat: Use an oil spray to lightly coat the grill instead of adding oil to the marinade. The jam provides enough moisture to prevent sticking.
Higher Protein/Lower Carb: Increase the ratio of chicken to apricots and vegetables on each skewer. You can also use turkey breast as a leaner poultry alternative.
Gluten-Free & Dairy-Free: This recipe is naturally both! Just ensure your curry powder and other condiments are certified gluten-free if required.
Serving Suggestions
These sosaties are incredibly versatile. For a traditional South African “braai” (barbecue) experience, serve them with:
Yellow Rice (Geelrys): Turmeric-infused rice with raisins, which complements the curry and apricot flavors beautifully.
A Fresh Salsa or Chutney: A mango-avocado salsa or a classic tomato-onion sambal adds a fresh, acidic counterpoint.
A Simple Green Salad: With a light lemon vinaigrette to cut through the richness.
Grilled Flatbreads or Naan: Perfect for soaking up any extra marinade and juices.
They also make excellent appetizers—simply use shorter skewers or toothpicks with smaller chicken pieces.
Common Mistakes
Not Marinating Long Enough: Two hours is the minimum. The flavor difference between a 2-hour and an overnight marinade is profound. Patience is key.
Overcrowding the Skewers: Pieces that are too close together will steam instead of grill, missing out on those essential caramelized flavors and textures.
Grilling on Too High Heat: This causes the sugar in the jam to burn before the chicken is cooked through. A consistent medium-high heat is ideal.
Using Old Curry Powder: Spices lose potency over time. If your curry powder doesn’t smell fragrant, it’s time for a new jar.
Skipping the Soak for Wooden Skewers: This leads to burnt, brittle skewers that can fall apart during cooking or serving.
Storing Tips
Refrigeration: Cooked sosaties can be stored in an airtight container in the refrigerator for up to 3 days. The flavors often meld and improve on the second day.
Freezing: You can freeze the uncooked, marinated chicken (without the skewers and vegetables) for up to 2 months. Thaw overnight in the refrigerator before assembling and grilling. Assembled,
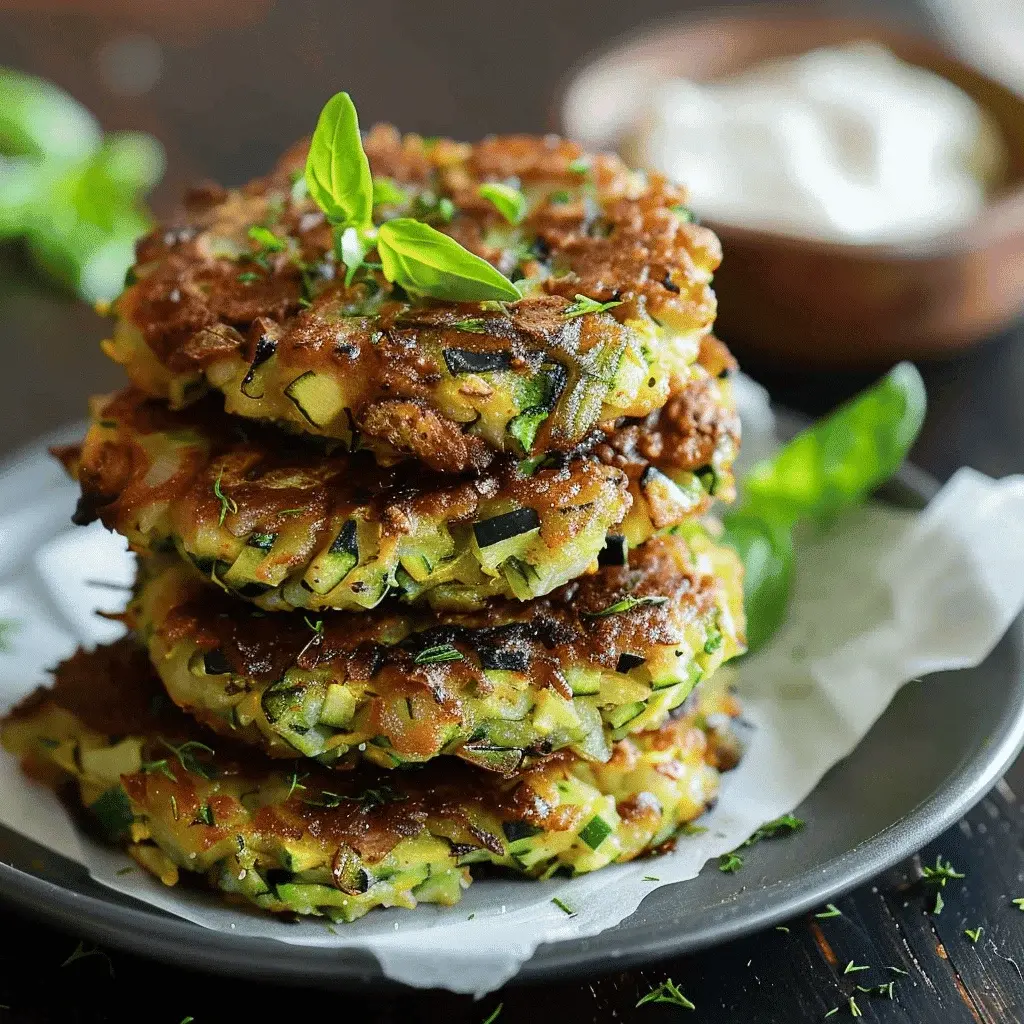
Did you know that the average American consumes less than half the recommended daily intake of vegetables? If you’re looking for a delicious, crowd-pleasing way to boost your veggie quota, you’ve found it. These zucchini patties are the perfect solution: a crispy, cheesy, and utterly satisfying dish that transforms humble summer squash into a star. More than just a side, these patties are a complete, healthy meal that comes together in minutes. The combination of nutty Parmesan and gooey Mozzarella creates a savory depth, while the grated zucchini ensures a tender, moist interior with every bite. Whether you need a quick weeknight dinner, a impressive appetizer for guests, or a make-ahead lunch, this versatile recipe delivers on flavor, texture, and nutrition without any fuss.
Ingredients List
Gather these simple, fresh ingredients for patties that are crispy on the outside and wonderfully tender inside.
2 medium zucchinis (about 1 lb) – Look for firm, glossy skins. The fresh, slightly sweet and earthy flavor is the foundation.
1 teaspoon salt – Crucial for drawing out moisture.
1 large egg – Acts as the binder, giving the patties structure. For an egg-free version, a “flax egg” (1 tbsp ground flax + 3 tbsp water) works well.
1/2 cup finely chopped yellow onion – Provides a subtle sweetness and aromatic base. A shallot can be substituted for a milder taste.
2 cloves garlic, minced – For that essential savory punch. Garlic powder (1/2 tsp) can be used in a pinch.
1/2 cup grated Parmesan cheese – Offers a salty, umami richness. Pecorino Romano is a sharper, saltier alternative.
1/2 cup shredded Mozzarella cheese – Creates delightful pockets of meltiness. Monterey Jack or a low-moisture part-skim Mozzarella are great swaps.
1/2 cup all-purpose flour or breadcrumbs – Flour yields a denser, cake-like texture, while breadcrumbs (Panko for extra crunch) make them lighter and crispier.
1/4 cup fresh parsley or basil, chopped – Adds a bright, herbal note. Dried herbs (1 tbsp) can be used but add them to the dry ingredients.
1/2 teaspoon black pepper
2-3 tablespoons olive oil or avocado oil, for frying – A high-smoke-point oil is essential for achieving a golden-brown, crispy crust without burning.
Timing
Prep Time20 minutes
Cook Time15 minutes
Total Time35 minutes
Servings4 (2 patties each)
Compared to the average veggie burger or fritter recipe that can take over an hour with complex steps, this recipe is remarkably efficient. The 20-minute prep is mostly hands-off while the zucchini drains. The active cooking time is just 15 minutes, making the total time a swift 35 minutes from fridge to plate—perfect for busy schedules.
Step-by-Step Instructions
Step 1: Prepare the Zucchini
This is the most important step for success! Grate the zucchini using the large holes of a box grater or a food processor. Place the grated zucchini in a colander set over a bowl or in the sink. Toss thoroughly with 1 teaspoon of salt. Let it sit for at least 10 minutes—this draws out the excess water that would make your patties soggy. After resting, use your hands or a clean kitchen towel to squeeze the zucchini aggressively until no more liquid drips out. You’ll be amazed at how much water comes out! This should yield about 1 to 1.5 cups of firmly packed, dry zucchini.
Step 2: Combine the Base Mixture
In a large mixing bowl, lightly beat the egg. Add the squeezed-dry zucchini, chopped onion, minced garlic, both cheeses, flour (or breadcrumbs), chopped herbs, and black pepper. I like to use a fork to mix everything together until just combined. The mixture will be thick and slightly sticky, but it should hold together when pinched. Avoid overmixing, as this can make the patties tough.
Step 3: Form and Chill the Patties
Using slightly damp hands (this prevents sticking), scoop about 1/4 cup of the mixture. Form it into a ball, then gently flatten it into a patty about 1/2-inch thick. Place the formed patties on a parchment-lined plate or baking sheet. For best results, pop them in the refrigerator for 15-20 minutes. This chilling step helps them firm up, ensuring they don’t fall apart in the pan.
Step 4: Cook to Perfection
Heat 2 tablespoons of oil in a large non-stick or cast-iron skillet over medium heat. Once the oil shimmers (test with a tiny bit of mixture—it should sizzle gently), carefully add the patties. Don’t overcrowd the pan; cook in batches if necessary. Cook for 3-4 minutes per side, or until deeply golden brown and crispy. If the patties are browning too quickly, reduce the heat slightly. Transfer cooked patties to a wire rack set over a baking sheet—this keeps them crispy on all sides. Add more oil to the pan for the second batch if needed.
Nutritional Information
(Per serving, approximately 2 patties)
Calories: ~220 kcal
Protein: 12g – A satisfying amount from eggs and cheese.
Carbohydrates: 15g – Primarily from zucchini and a small amount of flour.
Dietary Fiber: 2g – Aiding digestion.
Sugars: 3g (naturally occurring)
Fat: 14g – Mostly healthy monounsaturated fats from olive oil.
Vitamin A: 15% DV | Vitamin C: 35% DV | Calcium: 25% DV
Healthier Alternatives
You can easily tailor this recipe to various dietary needs without sacrificing the crispy, cheesy experience:
Gluten-Free: Swap all-purpose flour for almond flour, oat flour, or a gluten-free 1:1 baking blend. The texture will be slightly more delicate.
Lower-Carb/Keto: Use 1/4 cup of almond flour or crushed pork rinds instead of regular flour. Ensure your Mozzarella is full-fat and low-carb.
Dairy-Free: Replace Parmesan with nutritional yeast (for cheesiness) and use a dairy-free Mozzarella shred that melts well. A tablespoon of chickpea flour can help bind.
Baking Option: For an oil-free version, place patties on a parchment-lined baking sheet, lightly spray with oil, and bake at 400°F (200°C) for 20-25 minutes, flipping halfway. They’ll be less crispy but still delicious.
Serving Suggestions
These patties are incredibly versatile. Serve them as:
A Main Course: On a bed of mixed greens with a lemon-tahini drizzle or atop whole-wheat buns with lettuce, tomato, and a garlic aioli for a fantastic veggie burger.
A Hearty Side: Alongside grilled chicken, fish, or a simple pasta with marinara sauce.
A Appetizer or Snack: With dipping sauces like tzatziki, marinara, or a spicy sriracha mayo.
Breakfast: With a poached egg on top and a side of avocado for a power-packed start to your day.
Common Mistakes
Skipping the Salting & Squeezing: This is the #1 reason for soggy, falling-apart patties. Don’t rush this step.
Using Wet Ingredients: Ensure your grated zucchini is thoroughly dry, and pat your chopped onion dry if it seems wet.
Overcrowding the Pan: This steams the patties instead of frying them, preventing a crispy crust. Give them space.
Flipping Too Early: Be patient! Let a proper crust form before gently flipping. If they stick, they’re not ready.
Overmixing the Batter: Mix until just combined. Overworking develops gluten (from flour) and can lead to toughness.
Storing Tips
Refrigeration: Cool patties completely. Store in an airtight container in the fridge for up to 4 days.
Freezing: Place cooled patties in a single layer on a baking sheet to flash-freeze for 1 hour. Then transfer to a freezer bag or container, separating layers with parchment. Freeze for up to 3 months. Reheat from frozen in a 375°F oven or toaster oven until hot and crispy.
Reheating: To restore crispiness, reheat in a toaster oven, air fryer, or a skillet over medium heat. Avoid the microwave, which will make them soft.
Conclusion
These Zucchini Patties are proof that healthy eating doesn’t have to be bland or complicated. With their perfect contrast of a crispy, golden exterior and a tender, cheesy interior, they are a guaranteed hit for any meal. They’re forgiving, customizable, and a brilliant way to use up summer’s bounty of zucchini. I encourage you to make a double batch and freeze some for those nights when you need a wholesome meal in minutes. Now, it’s your turn! Grab those zucchinis and get cooking.
Loved this recipe? Share your crispy creations with us! Tag @spicemingle on social media or pin this recipe to your favorite board. We love seeing your kitchen triumphs!
FAQs
***Can I make these zucchini patties ahead of time?***
Absolutely! You can prepare the mixture, form the patties, and store them covered in the refrigerator for up to 24 hours before cooking. This can actually
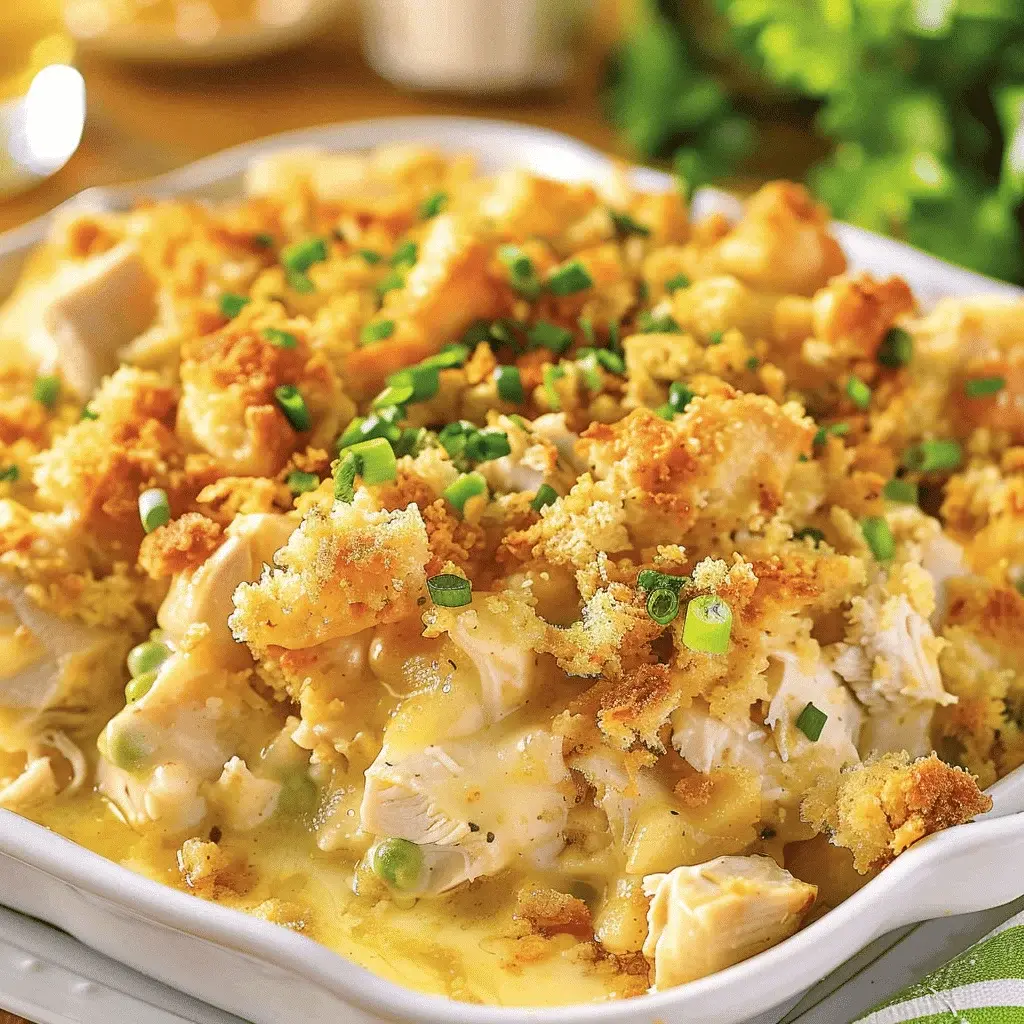
Did you know that casseroles are one of the most searched-for comfort food categories, with a 40% increase in recipe searches during the colder months? This brings us to the ultimate question: What makes a Chicken & Dressing Casserole the perfect, soul-satisfying meal for busy families and holiday gatherings alike? The answer lies in its magical combination of textures and flavors—tender, shredded chicken nestled in a savory cornbread dressing, all enveloped in a rich, creamy gravy that bakes into a golden, bubbly masterpiece.
This Chicken & Dressing Casserole is more than just a meal; it’s a hug on a plate. It’s the dish that brings everyone to the table, evoking memories of Sunday dinners and festive celebrations. The beauty of this recipe is its versatility and forgiving nature, making it a favorite for both novice cooks and seasoned chefs. Whether you’re feeding a crowd or prepping meals for the week, this hearty casserole delivers on comfort, flavor, and simplicity. Let’s dive into how you can create this beloved classic in your own kitchen.
Ingredients List
Gather these simple, flavorful ingredients to build layers of comfort. Sensory notes are included to help you understand the role of each component.
For the Chicken:
4 cups cooked chicken, shredded (about 1.5 lbs of boneless, skinless breasts or thighs). Use rotisserie chicken for a deep, roasted flavor and incredible time-saver. The chicken should be tender and juicy, pulling apart easily.
1 tablespoon olive oil or butter(for sautéing, adds a rich base note).
6 cups crumbled cornbread (day-old is best for texture). Substitution: Use a 8.5oz box of cornbread mix, baked and cooled. The cornbread should be slightly dry and crumbly, offering a sweet, gritty contrast to the savory elements.
1 cup diced celery(for a crucial crunch and fresh, aromatic flavor).
1 cup diced onion (yellow or white). Substitution: 1 tablespoon onion powder if fresh isn’t available, though fresh provides better texture.
2 large eggs, lightly beaten(acts as the binder, giving the dressing a cohesive, moist texture).
2 cups chicken broth (low-sodium recommended). The broth should be warm when added to help hydrate the cornbread evenly.
1/4 cup all-purpose flour(forms the roux, the thickening base for the gravy).
2 cups whole milk. Substitution: 2% milk or half-and-half for richer flavor. The milk should be at room temperature to prevent curdling when added to the roux.
1 cup additional chicken broth.
Salt and pepper to taste.
Timing
Prep Time 25 minutes
Cook Time 45 minutes
Total Time 1 hour 10 minutes
Compared to the average casserole recipe, which often requires pre-cooking multiple components separately, this Chicken & Dressing Casserole is remarkably efficient. Many similar recipes have a prep time of 35-40 minutes, but using shortcuts like pre-cooked chicken and day-old cornbread shaves off valuable minutes. The active hands-on time is focused on building flavor with the sauté and the gravy, while the oven does the rest of the work, melding everything together into a cohesive dish. This makes it about 20% faster to prepare than the traditional from-scratch method, without sacrificing an ounce of flavor.
A golden, bubbly Chicken & Dressing Casserole, ready to be the star of your dinner table.
Step-by-Step Instructions
Step 1: Prepare the Chicken
If you’re not using leftover or rotisserie chicken, this is your first step. Season your chicken breasts or thighs with salt, pepper, garlic powder, and onion powder. In a large skillet, heat the olive oil or butter over medium-high heat. Cook the chicken for 6-7 minutes per side, or until fully cooked through (internal temperature of 165°F). Let it rest on a cutting board for 5 minutes, then use two forks to shred it into bite-sized pieces. I find that shredding while still slightly warm gives the best texture. Place the shredded chicken in a large mixing bowl.
Step 2: Make the Cornbread Dressing
In the same skillet (don’t wash it—those browned bits are flavor!), add a touch more oil if needed and sauté the diced onion and celery over medium heat for about 5-7 minutes, until they become soft and translucent. This step is non-negotiable for building a flavorful base. In your largest mixing bowl, combine the crumbled cornbread, the sautéed onion and celery, dried sage, and dried thyme. Pour in the warm chicken broth and add the lightly beaten eggs. Using a large spoon or your hands, mix gently until everything is just moistened. You want it to be cohesive but not a paste. Let this mixture sit for 5 minutes to fully absorb the liquid.
Step 3: Create the Rich Gravy
This is the “glue” that makes the casserole irresistibly creamy. In a medium saucepan, melt the 1/4 cup of butter over medium heat. Once foamy, whisk in the 1/4 cup of flour. Cook this roux, whisking constantly, for about 2 minutes until it turns a light golden color and smells nutty—this cooks out the raw flour taste. Slowly, and I mean slowly, begin whisking in the milk, about 1/4 cup at a time, ensuring it’s fully incorporated and smooth before adding more. Once all the milk is in, whisk in the 1 cup of chicken broth. Continue cooking and whisking for 5-7 minutes until the gravy has thickened nicely to a coat-the-back-of-a-spoon consistency. Season generously with salt and pepper.
Step 4: Layer and Bake
Preheat your oven to 375°F (190°C). Grease a 9×13 inch baking dish. Now, let’s build! Spread half of the cornbread dressing mixture evenly in the bottom of the dish. Top this layer with all of the shredded chicken, distributing it evenly. Pour about two-thirds of your creamy gravy over the chicken layer, spreading it gently with a spatula. Top with the remaining half of the cornbread dressing. Finally, drizzle the remaining gravy over the very top—this will help it form a gorgeous, golden-brown crust. Cover the dish loosely with aluminum foil and bake for 30 minutes. Then, remove the foil and bake for an additional 15-20 minutes, or until the top is beautifully browned and the casserole is bubbling at the edges.
Nutritional Information
(Approximate values per serving, based on 8 servings):
Calories: ~420 kcal
Total Fat: 22g
Saturated Fat: 9g
Cholesterol: 125mg
Sodium: 780mg (can be lower with low-sodium broth)
Total Carbohydrates: 32g
Dietary Fiber: 2g
Sugars: 8g
Protein: 25g
Healthier Alternatives
You can easily adapt this comforting classic to fit various dietary needs without losing its soul-satisfying essence.
Lower-Fat/Lighter Version: Use skinless chicken breast, swap butter for a heart-healthy oil in the roux, and use 2% milk. For the cornbread, seek out or make a recipe using whole wheat flour and reduced sugar.
Gluten-Free: Ensure your cornbread is made with a gluten-free mix or recipe. Use a 1:1 gluten-free all-purpose flour blend (like Bob’s Red Mill) for the gravy roux. Double-check that your broth is certified gluten-free.
Dairy-Free: Replace the butter in the gravy with olive oil or vegan butter. Use an unsweetened, plain plant-based milk like oat milk or almond milk (the creamier, the better) and a dairy-free creamer if needed for richness.
Boost Fiber & Nutrients: Add 1 cup of finely chopped kale or spinach to the sautéing onions and celery. You can also mix in 1/2 cup of cooked, chopped mushrooms for an extra umami punch.
Serving Suggestions
This casserole is a complete meal on its own, but a few well-chosen sides can elevate it to a feast.
Classic Pairings: A simple, bright green like steamed green beans, roasted broccoli, or a crisp garden salad with a tangy vinaigrette cuts through the richness perfectly.
For Holidays: Serve alongside cranberry sauce (the tartness is divine), sweet potato casserole, and glazed carrots.
Toppings: A dollop of sour cream, a sprinkle of fresh chopped parsley or chives, or a dash of hot sauce adds a wonderful finishing touch.
Beverage Pairing: A crisp, unoaked Chardonnay, a light Pinot Noir, or even a sparkling apple cider complements the savory and slightly sweet notes beautifully.
Common Mistakes
Using Fresh, Moist Cornbread: This is the #1 mistake. Fresh cornbread turns to mush. Use day-old, stale, or lightly toasted cornbread for the perfect absorbent, textured dressing.
Not Sautéing the Aromatics: Throwing raw onion and celery into the mix results in a harsh flavor and unpleasant crunch. Sautéing until soft is essential for sweetness and integration.
Rushing the Gravy: Adding the milk all at once to the roux will almost guarantee lumps. Patience and a
Did you know that over 70% of American families struggle to find weeknight dinners that please both kids and adults? The quest for a simple, tasty meal that combines beloved flavors is a common kitchen challenge. Enter the Pizza Burger Pie, a genius culinary mashup that solves the dinner dilemma with delicious efficiency. This recipe masterfully layers the savory, juicy satisfaction of a cheeseburger with the cheesy, comforting essence of pizza, all baked into a hearty, sliceable pie. Using pantry staples like ground beef, onion, cheddar cheese, and the ever-versatile Bisquick™ mix, this dish transforms simple ingredients into a crowd-pleasing centerpiece. It’s the answer for busy nights when you crave something homemade, hearty, and guaranteed to elicit smiles around the table. Let’s dive into how you can create this family-friendly masterpiece.
Ingredients List with Substitutions
Gather these simple ingredients for your Pizza Burger Pie. Sensory descriptions are included to help you select the best quality components.
1 lb Ground Beef (80/20 blend recommended): Provides rich, savory flavor and juicy texture. The slight fat content ensures a moist pie. Substitution: Ground turkey, chicken, or a plant-based crumble for a lighter option.
1 medium Yellow Onion, finely diced: Adds a sweet, aromatic base note when sautéed. Substitution: 1 tsp onion powder in a pinch, or shallots for a milder taste.
1 ½ cups Shredded Sharp Cheddar Cheese: Delivers a tangy, creamy melt that binds the pie. Substitution: Monterey Jack, Colby, or a pre-shredded pizza blend for more complexity.
1 cup Original Bisquick™ Baking Mix: Creates the effortless, biscuit-like topping that puffs up golden brown. Substitution: Any complete pancake/baking mix or a homemade version (1 cup flour, 1 ½ tsp baking powder, ¼ tsp salt, 1 tbsp butter).
½ cup Milk (whole or 2%): Combines with the Bisquick to form a thick, spoonable batter. Substitution: Buttermilk for extra tang and tenderness, or unsweetened almond milk.
2 large Eggs: Act as the binder, giving structure and richness to the topping. Substitution: Not recommended for structure, but a flax egg (1 tbsp ground flax + 3 tbsp water per egg) can work in a bind.
1 (8 oz) can Tomato Sauce: The “pizza” layer, offering acidic brightness and moisture. Substitution: Pizza sauce, marinara, or crushed tomatoes blended smooth.
1 tsp Dried Oregano & ½ tsp Garlic Powder: Classic pizza seasonings for an herby, savory depth.
Salt & Black Pepper to taste: Essential for enhancing all the flavors.
Timing and Efficiency
Prep Time 15 minutes
Cook Time 25 minutes
Total Time 40 minutes
At just 40 minutes from start to finish, this Pizza Burger Pie significantly outpaces the average casserole or homemade pizza, which often requires over an hour. The efficiency lies in the one-pan cooking for the beef and the quick, no-fuss batter that requires no rising or rolling. You get a from-scratch, comforting meal in less time than it takes for delivery to arrive.
Golden brown and bubbling straight from the oven—the Pizza Burger Pie is a feast for the eyes and the stomach.
Step-by-Step Instructions
Step 1: Prepare the Savory Beef Base
Preheat your oven to 400°F (200°C). Grab a large, oven-safe skillet—I prefer cast iron for even heat distribution. Over medium-high heat, cook the ground beef and diced onion, breaking the meat into small crumbles with your spoon. You’ll know it’s ready when the beef is no longer pink and the onions are soft and translucent, about 6-8 minutes. This step builds the foundational flavor, so don’t rush it. Drain any excess grease (this keeps your pie from being soggy). Stir in the tomato sauce, oregano, garlic powder, salt, and pepper. Let it simmer for just 2 minutes so the flavors marry. Remove the skillet from the heat.
Step 2: Create the Bisquick™ Batter
In a medium mixing bowl, whisk together the Bisquick mix, milk, and eggs until just combined. The batter will be thick and slightly lumpy—that’s perfect! Over-mixing can lead to a tough topping. This simple batter is the magic that creates the fluffy, dumpling-like crust that crowns your pie.
Step 3: Assemble and Bake
Sprinkle 1 cup of the shredded cheddar cheese evenly over the hot beef mixture in the skillet. This creates a gooey barrier that prevents the batter from sinking. Now, carefully pour the Bisquick batter over the cheese layer, using a spatula to spread it gently to the edges. Don’t worry if it doesn’t cover every millimeter; it will expand as it bakes. Top with the remaining ½ cup of cheese. Place the skillet in the preheated oven and bake for 20-25 minutes. You’re looking for a deep golden-brown top, a set center that doesn’t jiggle, and cheese that’s beautifully melted and bubbly.
Step 4: Rest, Slice, and Serve
This is the hardest but most crucial step: let the pie rest for 5-7 minutes after pulling it from the oven. This allows the layers to set, making it much easier to slice cleanly. Use a sharp knife or a pie server to cut into wedges. The cross-section will reveal the beautiful layers—savory beef, rich tomato sauce, molten cheese, and a fluffy golden top.
Nutritional Information
(Estimated per serving, based on 6 servings)
Calories: ~420 kcal
Total Fat: 24g
Saturated Fat: 10g
Carbohydrates: 25g
Fiber: 2g
Sugars: 6g
Protein: 25g
Sodium: ~850mg
Healthier Alternatives: Flavor-Preserving Swaps
You can easily adapt this recipe for dietary needs without sacrificing the comforting essence.
Leaner Protein: Use 93% lean ground beef or ground turkey breast. Boost flavor by adding a dash of smoked paprika or Worcestershire sauce to compensate for less fat.
Lower-Sodium: Choose no-salt-added tomato sauce, low-sodium cheese, and make your own baking mix to control salt.
Whole Grain: Substitute the Bisquick with a whole-grain baking mix or a blend of whole wheat flour and baking powder.
Dairy-Free: Use your favorite plant-based cheese shreds and unsweetened almond or oat milk. The batter will still set beautifully.
Serving Suggestions
While this pie is a complete meal, a few simple sides can turn it into a feast:
The Classic Combo: A crisp, green side salad with a tangy vinaigrette cuts through the richness perfectly.
For Dipping: Serve with small bowls of extra marinara sauce, ranch dressing, or garlic aioli for those who love an extra flavor punch.
Veggie Boost: Roasted broccoli, garlic green beans, or a simple carrot and celery stick platter add color and nutrition.
Common Mistakes to Avoid
Not Draining the Beef: Excess grease will make the bottom layer soggy. Take the extra minute to drain it well.
Over-mixing the Batter: Stir until just combined. Lumps are okay and lead to a tender topping.
Skipping the Rest Time: Cutting in too soon causes the pie to fall apart. Let the layers set.
Using a Cold Skillet: If your skillet isn’t oven-safe, transfer the hot beef mixture to a greased 9-inch pie dish before adding cheese and batter.
Storing and Reheating Tips
Storage: Cool completely, then cover tightly or transfer slices to an airtight container. Refrigerate for up to 4 days.
Freezing: Wrap individual slices in plastic wrap and then foil. Freeze for up to 3 months. Thaw overnight in the fridge before reheating.
Reheating for Best Results: Reheat slices in a 350°F oven for 10-15 minutes until warmed through. This keeps the topping crisp. The microwave (1-2 minutes) is quick but will soften the topping.
A perfect slice, ready to be enjoyed with a fresh side salad for a balanced meal.
Conclusion: Your New Go-To Family Meal
The Pizza Burger Pie is more than just a recipe; it’s a reliable solution for hectic weeknights, a guaranteed hit at potlucks, and a delicious way to satisfy multiple cravings in one dish. Its simplicity, speed, and incredible flavor make it a standout in your recipe rotation. I
Hi I'm Emy
I’m passionate about sharing a diverse collection of sweet and savory recipes that I’ve meticulously tested and perfected in my own kitchen.