Table of Contents
Valentine’s Day Pizza Roses: The Only Recipe You’ll Ever Need
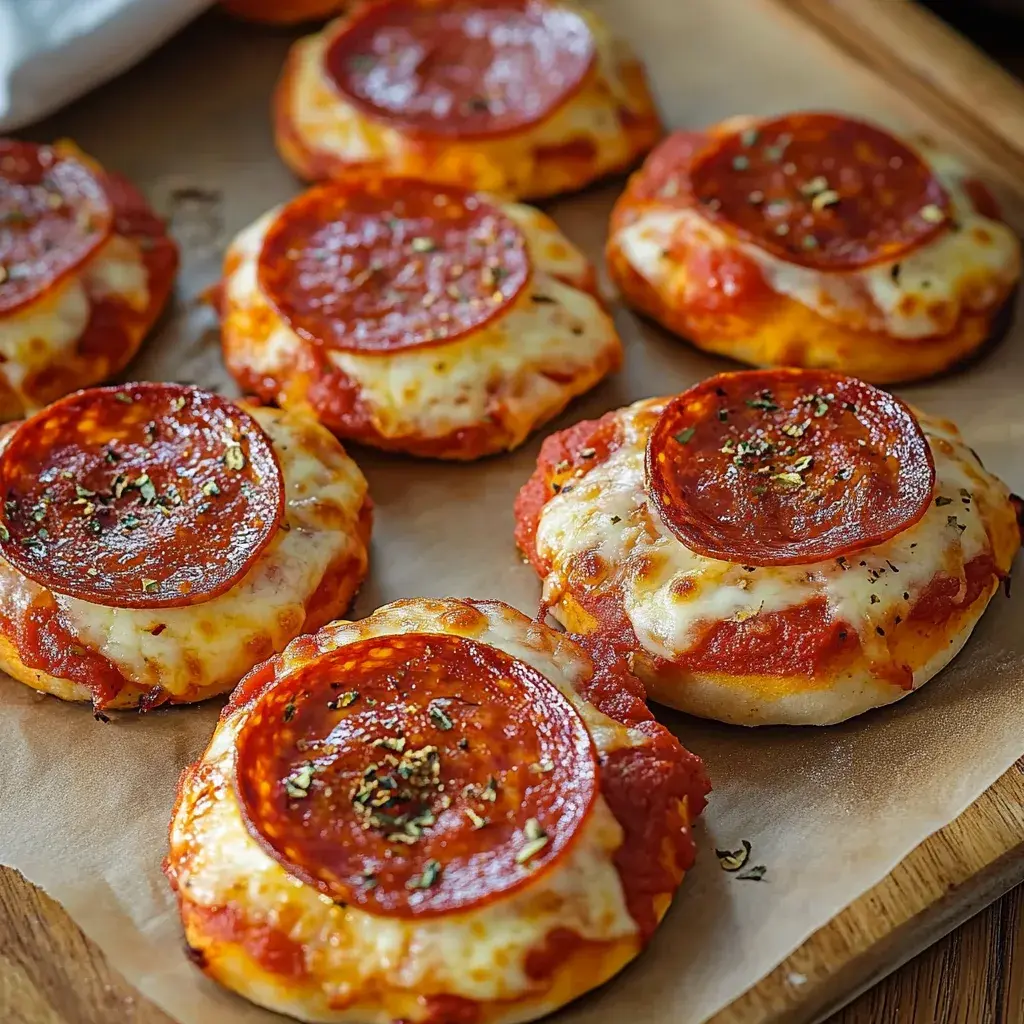
Imagine surprising your sweetheart with Valentine’s Day Pizza Roses that turn a simple dinner into a romantic masterpiece. These charming, rose-shaped pizzas are the ultimate way to celebrate the day of love, combining classic flavors with a creative twist that’s both fun and impressive. As the go-to recipe for Valentine’s Day Pizza Roses on cookingwithemy.com, this guide is packed with tips to ensure your homemade version outshines any takeout. With their romantic rose-shaped design, these pizza roses add an extra layer of whimsy, making them perfect for a cozy date night or family gathering. Whether you’re a beginner or a seasoned cook, this foolproof recipe will have you creating bakery-worthy treats in no time.
The allure of Valentine’s Day Pizza Roses lies in their irresistible sensory appeal—picture the gooey pull of melted mozzarella cheese, the tangy burst from fresh tomato sauce, and the savory crunch of pepperoni in every bite. Each rose unfurls layers of tender pizza dough that’s flaky on the outside yet soft inside, releasing an aromatic blend of herbs and spices that fills your kitchen with warmth. The textures contrast beautifully: the crisp edges give way to a melty, flavorful center, while the subtle spiciness of pepperoni dances on your palate, creating a harmonious symphony that’s as visually stunning as it is delicious. This recipe elevates the ordinary pizza into something extraordinary, ensuring every mouthful is a celebration of love and flavor.
What sets this Valentine’s Day Pizza Roses recipe apart on cookingwithemy.com is our commitment to simplicity and success, drawing from years of testing and refining to deliver reliable results every time. Unlike generic recipes, we’ve incorporated a Chef’s Secret that makes your roses picture-perfect and packed with flavor, teaching you insider techniques for the best texture and taste. In this comprehensive guide, you’ll learn everything from ingredient selection to expert tips, empowering you to impress your loved ones with confidence. Plus, we’ll cover customizations, FAQs, and storage hacks to make this the single best resource for Valentine’s Day Pizza Roses online.
Why This Valentine’s Day Pizza Roses Recipe is a Game-Changer
The Chef’s Secret to our Valentine’s Day Pizza Roses lies in the precise technique of rolling the dough strips tightly while layering ingredients just right, which creates a flawless, romantic rose-shaped design that stands out from standard pizza recipes. This method ensures even cooking and a beautiful bloom effect, elevating the presentation to make your meal feel gourmet without the effort. By focusing on this unique angle—the romantic rose-shaped design—we’ve transformed a simple appetizer into an eye-catching centerpiece that’s perfect for Valentine’s Day celebrations.
Unbeatable Texture: The key to the golden-brown, flaky exterior of these Valentine’s Day Pizza Roses comes from brushing the dough with olive oil before baking, which promotes a crisp yet tender bite. Scientifically, the oil helps create a barrier that allows the dough to rise evenly while caramelizing the edges, trapping moisture inside for a soft, chewy interior. This contrasts with over-baked pizzas, ensuring your roses maintain their structure and flavor profile through the Maillard reaction, which enhances taste and color.
Foolproof for a Reason: This recipe has been tested multiple times in our kitchen to guarantee success, even for novice bakers. We’ve accounted for common pitfalls like dough sticking or uneven baking, making it incredibly reliable for busy home cooks. With straightforward steps and precise measurements, you can achieve perfect Valentine’s Day Pizza Roses every time, turning your dinner into a memorable event.
Ingredient Spotlight: Quality Makes the Difference
Pizza dough serves as the foundation for these Valentine’s Day Pizza Roses, providing the structure that allows the roses to hold their shape beautifully. Opt for high-quality, fresh pizza dough from your local bakery or make your own for the best elasticity and flavor; pre-packaged versions often lack that homemade touch. The dough’s role is crucial for achieving the romantic rose-shaped design, as it needs to be pliable yet sturdy. If you’re short on time, a reliable substitution is store-bought whole-wheat dough, which adds a nutty undertone and boosts fiber content without compromising the texture.
Pizza sauce brings the tangy, herbaceous backbone to Valentine’s Day Pizza Roses, enhancing the overall flavor profile with its rich tomato base. Choose a sauce made from fresh, vine-ripened tomatoes for maximum taste—avoid overly sweetened varieties to keep the balance just right. This ingredient not only ties the layers together but also adds moisture that prevents the roses from drying out. For a substitution, try a homemade marinara with fresh garlic and herbs, or go for a low-sodium version if you’re watching your intake, ensuring the sauce still complements the cheese and pepperoni seamlessly.
Shredded mozzarella cheese is what gives these Valentine’s Day Pizza Roses their irresistible gooey center, melting perfectly to create that signature stringy pull. Select whole-milk mozzarella for superior creaminess and meltability, as it releases oils that enhance the romantic rose-shaped design’s visual appeal. Cheese acts as a binder, holding the layers in place while adding a mild, savory note. If you want to experiment, substitute with a mix of provolone and parmesan for a sharper flavor, but ensure it’s freshly shredded to avoid additives that could affect melting.
Sliced pepperoni adds a spicy, savory kick to Valentine’s Day Pizza Roses, providing contrast to the cheese and sauce for a well-rounded bite. High-quality, thinly sliced pepperoni from reputable brands ensures even distribution and crispiness without excess grease. It’s essential for the topping layer that defines the rose’s petals. For a vegetarian twist, swap it with sliced bell peppers or mushrooms to maintain the color and texture, keeping the romantic appeal intact while catering to dietary preferences.
Fresh basil leaves for garnish elevate the freshness of Valentine’s Day Pizza Roses, adding a burst of aromatic herbal notes that brighten the final dish. Always use fresh basil over dried for its vibrant flavor and visual pop, which complements the romantic rose-shaped design. This ingredient enhances the overall aroma and pairs beautifully with the other components. As a substitute, try spinach leaves for a milder green option, ensuring you tear them just before serving to preserve their essence.
Olive oil for brushing contributes to the golden sheen and moisture of Valentine’s Day Pizza Roses, helping to achieve that perfect bake without sogginess. Extra-virgin olive oil is ideal for its subtle fruity undertone and health benefits. It plays a key role in preventing the dough from cracking during rolling. If needed, substitute with avocado oil for a neutral flavor, but use it sparingly to maintain the recipe’s balance.
Salt and pepper to taste are the unsung heroes that fine-tune the flavors in Valentine’s Day Pizza Roses, enhancing the savory elements without overpowering them. Freshly ground sea salt and black pepper ensure even seasoning, which is vital for the layers to shine. These seasonings help draw out the natural tastes of the ingredients. For variations, try garlic salt for an extra zing, but always taste as you go to avoid over-salting.
Step-by-Step Instructions
Step 1: Preparing the Oven and Baking Sheet
Start by preheating your oven to 375°F (190°C) and lining a baking sheet with parchment paper to prevent sticking and ensure even heat distribution. This step is crucial for achieving the perfect bake on your Valentine’s Day Pizza Roses.
Pro Tip: Use a high-quality parchment paper to avoid any grease spots, which can affect the romantic rose-shaped design’s appearance.
Step 2: Rolling Out the Pizza Dough
Roll out the 1 pound of pizza dough on a lightly floured surface until it reaches about ¼ inch thickness, ensuring it’s even to make shaping easier later.
Common Mistake to Avoid: Don’t over-flour the surface, as this can make the dough tough; instead, use just enough to prevent sticking for a tender result in your Valentine’s Day Pizza Roses.
Step 3: Cutting the Dough into Strips
Cut the rolled dough into strips approximately 2 inches wide using a sharp knife or pizza cutter for clean edges, which will form the base of your roses.
Pro Tip: Measure the strips accurately with a ruler to ensure uniformity, helping maintain the romantic rose-shaped design.
Step 4: Spreading the Pizza Sauce
Spread a thin layer of the 1 cup pizza sauce over each dough strip, leaving the edges clear to allow for proper sealing when rolling.
Common Mistake to Avoid: Apply the sauce too thickly, as this can cause the roses to become soggy; use a spoon to spread evenly for the best texture in Valentine’s Day Pizza Roses.
Step 5: Adding the Mozzarella Cheese
Sprinkle 2 cups of shredded mozzarella cheese evenly over the sauced strips, ensuring full coverage for a melty, cohesive fill.
Pro Tip: Grate the cheese fresh for better melt; pre-shredded cheese often has additives that prevent optimal gooeyness.
Step 6: Layering the Pepperoni
Lay ½ cup of sliced pepperoni along one edge of each strip, overlapping slightly to create a visually appealing layer.
Common Mistake to Avoid: Overlap too much pepperoni, which can make rolling difficult and uneven; space them just right for perfect Valentine’s Day Pizza Roses.
Step 7: Rolling the Dough into Roses
Carefully roll up each strip tightly from the pepperoni edge to form rose shapes, pinching the ends to secure.
Pro Tip: Roll gently but firmly to maintain the shape; this is key to the romantic rose-shaped design that wows your guests.
Step 8: Placing and Brushing the Roses
Arrange the rolled roses on the prepared baking sheet and brush them lightly with olive oil for a golden finish.
Common Mistake to Avoid: Forget to space them apart, as they might stick together; leave room for air circulation.
Step 9: Seasoning and Baking
Sprinkle the roses with salt and pepper to taste, then bake for 20-25 minutes until they turn golden brown and bubbly.
Pro Tip: Check for doneness at 20 minutes to prevent over-baking, preserving the flavors in your Valentine’s Day Pizza Roses.
Serving & Presentation
For an unforgettable presentation of your Valentine’s Day Pizza Roses, arrange them on a platter in a circular pattern to mimic a bouquet, emphasizing the romantic rose-shaped design. Garnish with fresh basil leaves for a pop of color and aroma, which adds a fresh contrast to the savory flavors. Pair these roses with a light salad or garlic bread to create a balanced meal, or serve as an appetizer alongside a hearty pasta dish for a full Valentine’s Day feast.
Make-Ahead & Storage Solutions
For a Make-Ahead Strategy, prepare the dough strips, sauce, and toppings up to 3 days in advance: roll and fill the roses but don’t bake them, then store in an airtight container in the fridge. When ready, brush with oil and bake as directed, adding a few extra minutes if needed from cold.
Storing Leftovers: Once cooled, place any uneaten Valentine’s Day Pizza Roses in an airtight container in the refrigerator for up to 3 days, or freeze them for up to 2 months to maintain freshness—wrap individually in plastic wrap first to prevent sogginess.
The Best Way to Reheat: To restore the original texture and flavor, reheat in a 350°F oven for 5-7 minutes until warm and crispy; avoid microwaving, as it can make the dough rubbery.

Frequently Asked Questions (FAQ)
How long does it take to bake Valentine’s Day Pizza Roses?
Baking Valentine’s Day Pizza Roses typically takes 20-25 minutes at 375°F (190°C), depending on your oven’s accuracy. For the best results, check them at the 20-minute mark to ensure they’re golden brown without overcooking, which could dry out the dough.
What can I substitute for pepperoni in Valentine’s Day Pizza Roses?
For a vegetarian option, substitute pepperoni with sliced bell peppers, mushrooms, or olives to keep the flavors balanced and maintain the romantic rose-shaped design. These alternatives provide a similar texture and visual appeal while adding a fresh twist.
How do I keep Valentine’s Day Pizza Roses from becoming soggy?
To prevent sogginess, ensure you don’t overload the dough strips with sauce or toppings, and always brush the exterior with olive oil before baking. This creates a protective barrier, allowing the roses to bake evenly and retain their crisp texture.
What are the best pairing options for Valentine’s Day Pizza Roses?
The best pairings include a crisp white wine or sparkling beverage to complement the savory flavors, along with sides like a Caesar salad or antipasto platter for a complete meal. These enhance the romantic vibe without overpowering the pizza roses.
Can I make this recipe vegan or gluten-free?
Yes, you can adapt Valentine’s Day Pizza Roses for vegan or gluten-free diets. For vegan, use plant-based cheese and pepperoni alternatives, and ensure the pizza sauce is free of animal products. For gluten-free, substitute the pizza dough with a gluten-free version made from almond or rice flour, adjusting the rolling technique to prevent breaking while maintaining the rose shape.
Tried This Recipe? Leave a Comment!
Did you make this Valentine’s Day Pizza Roses recipe? I’d love to hear how it turned out! Please leave a comment and a rating below. Your feedback helps other home cooks and supports cookingwithemy!
For more delicious inspiration, follow me on Pinterest!

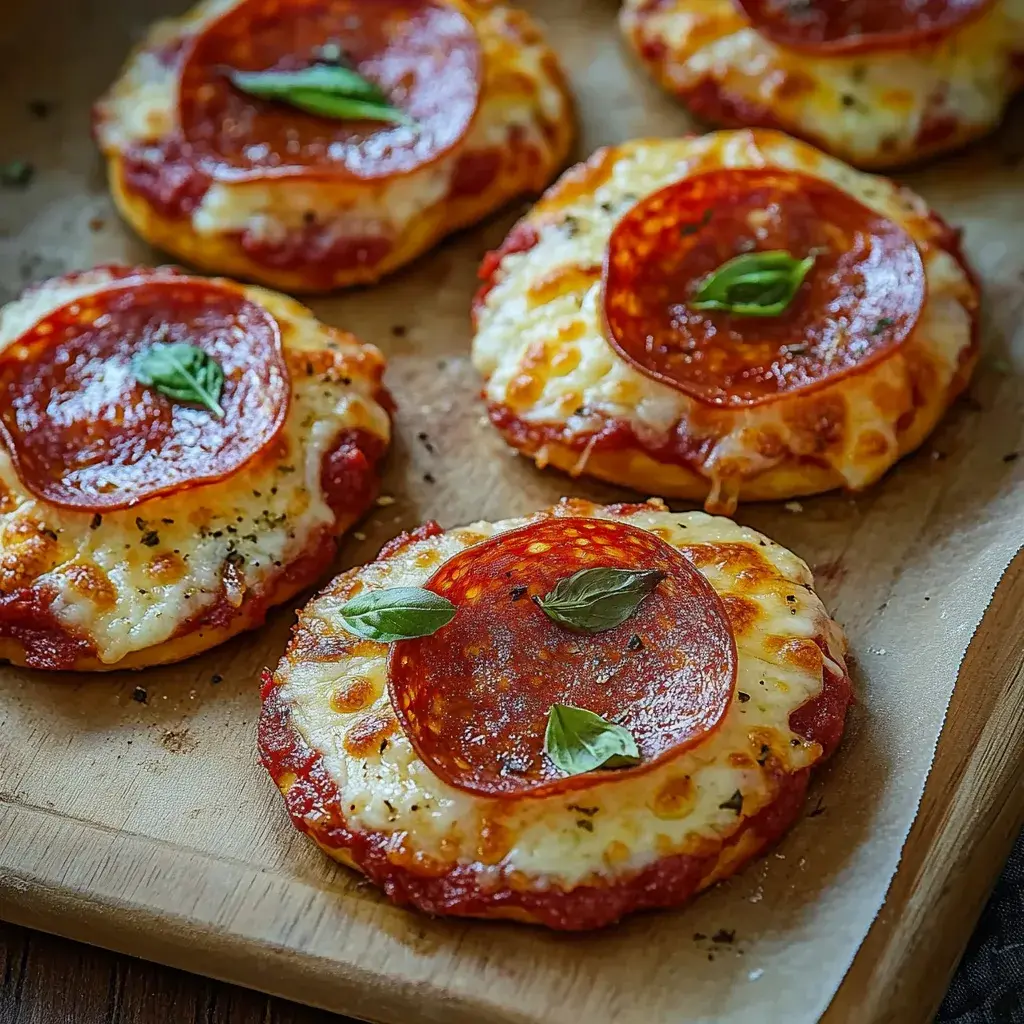
Valentine’s Day Pizza Roses
Description
Valentine’s Day Pizza Roses are a delightful twist on traditional pizza, perfect for impressing your loved one. These charming, rose-shaped pizzas are not only visually appealing but also bursting with flavor. Made from fresh pizza dough, tangy tomato sauce, and gooey mozzarella cheese, they can be customized with your favorite toppings. Whether you’re hosting a romantic dinner or planning a fun family night, these pizza roses will add a touch of creativity to your meal.
Ingredients
- 1pound pizza dough
- 1 cuppizza sauce
- 2 cupsshredded mozzarella cheese
- ½ cupsliced pepperoni
- Fresh basil leaves for garnish
- Olive oil for brushing
- Salt and pepper to taste
Instructions
- Preheat oven to 375°F (190°C) and line a baking sheet with parchment paper.
- Roll out the pizza dough on a floured surface until it reaches about ¼ inch thickness.
- Cut the dough into strips, approximately 2 inches wide.
- Spread a thin layer of pizza sauce over each strip, leaving edges clear.
- Sprinkle mozzarella cheese evenly on top.
- Lay pepperoni slices along one edge of the strips, overlapping slightly.
- Roll up each strip tightly to form rose shapes.
- Place the rolled roses on the baking sheet and brush lightly with olive oil.
- Sprinkle with salt and pepper; bake for 20-25 minutes until golden brown.
Notes
For a vegetarian option, substitute pepperoni with veggies like bell peppers or mushrooms.
Try using different cheeses like cheddar or feta for added flavor.
Nutrition
- Calories: 210
- Sugar: 3g
- Fat: 10g
- Carbohydrates: 22g
- Protein: 8g
Conclusion
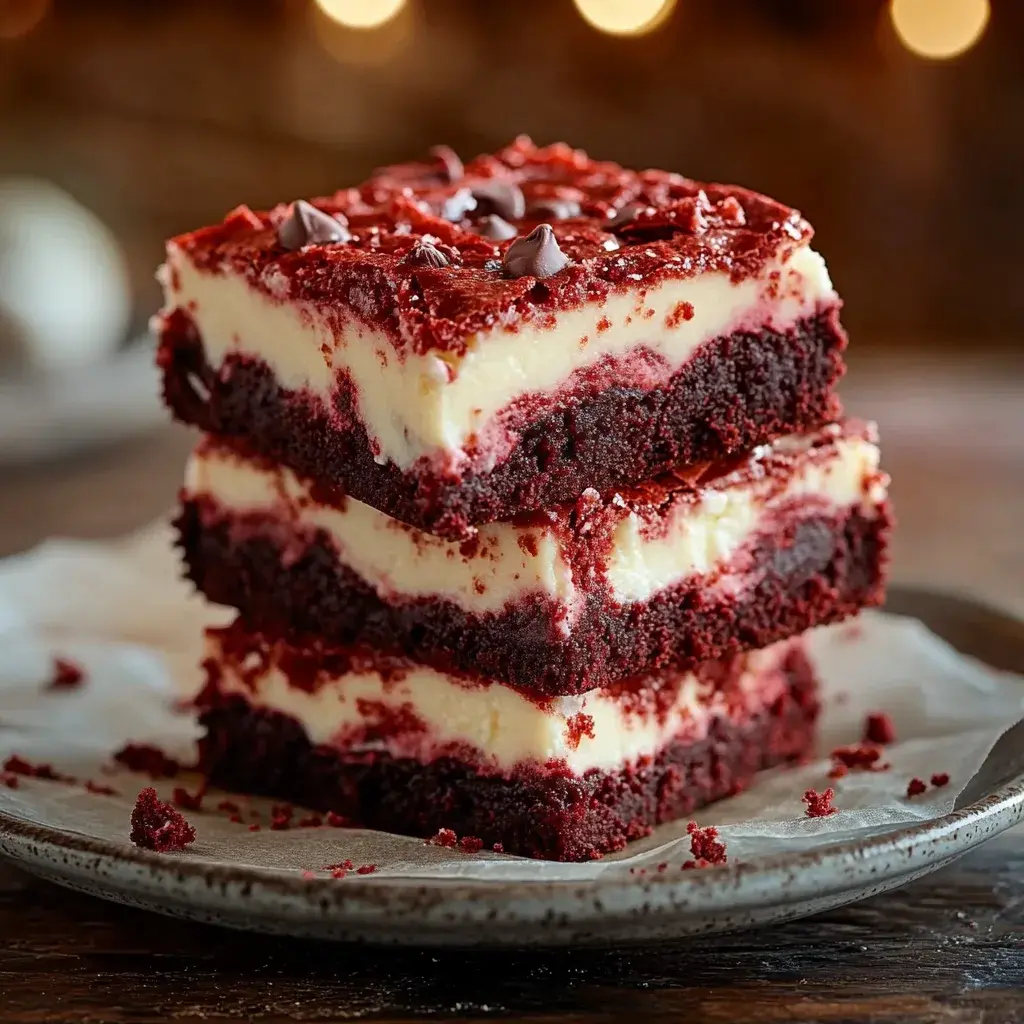
This delightful recipe brings together tangy cranberries and creamy cheese for a warm, irresistible flavor that’s perfect for holiday gatherings or casual entertaining. Its simple baking method makes it an easy crowd-pleaser, while the balance of sweet and savory notes adds a comforting touch to any table. For a fun variation, try topping it with chopped nuts for added crunch, and if you’re in the mood for more festive treats, check out our Best Red Velvet Rose Sandwich Cookies – Ready in 30 Minutes to pair with your dip, or explore Delicious Burrata Bruschetta Recipe for Perfect Summer Appetizers for lighter appetizer options.