Introduction
Is there anything more comforting than a pot of something magical simmering on the stove? As the air turns crisp and the leaves begin their fiery transformation, we all crave meals that warm us from the inside out. This yearning for deep, soul-satisfying flavor is exactly why I am so excited to share my ultimate autumn creation with you today. Get ready to cast a delicious spell on your entire family with this incredibly flavorful Witch’s Cauldron Beef Stew.
This Witch’s Cauldron Beef Stew is not your average weeknight dinner. Instead, it is a hearty, slow-braised masterpiece that transforms simple, humble ingredients into a pot of pure magic. The name itself evokes a sense of fun and seasonal whimsy, perfectly capturing the essence of a hearty Halloween feast or any cozy autumn gathering. Importantly, this dish matters because it delivers profound depth of flavor with surprisingly straightforward steps. You do not need any special culinary skills, just a little patience as the stew works its alchemy. Furthermore, it fits our blog’s philosophy perfectly: creating approachable, celebratory food that brings people together. For instance, if you enjoy making our classic Hearty Beef Stew, you will adore this seasonal twist. Ultimately, every spoonful of this Witch’s Cauldron Beef Stew promises tender beef, rich broth, and vegetables that melt in your mouth, making it the undisputed centerpiece of any fall table.
Why I Love This Recipe
This Witch’s Cauldron Beef Stew holds a special place in my heart because it is the recipe I make to officially welcome the fall season. I love how the entire house fills with an irresistible aroma that feels like a warm hug, a signal to everyone that a memorable meal is on its way. Moreover, it reminds me of cooking with my grandmother, who always taught me that the best dishes are those made with love and shared with others. It is a guaranteed crowd-pleaser that never fails to impress my friends, much like our popular Cozy Autumn Soups collection. Ultimately, this stew represents more than just food; it creates a sense of occasion and togetherness that I truly cherish.
Health and Nutrition
Why it’s good for your body
Witch’s Cauldron Beef Stew delivers a powerful nutritional punch in every single bowl. First, the lean beef provides a fantastic source of high-quality protein, which is essential for building muscle and keeping you full for hours. Furthermore, this protein also supports healthy hair, skin, and nails.
Additionally, the colorful array of vegetables like carrots and celery contributes a significant dose of vitamins and minerals. For instance, these veggies offer vitamin A for eye health and antioxidants that help combat inflammation. Moreover, the slow cooking process helps to preserve these vital nutrients, ensuring your body can easily absorb them.
Consequently, eating this stew can significantly boost your immune system, especially during colder months. The rich broth, often made from bone-in cuts, may even supply collagen and gelatin, which are renowned for supporting joint health and gut integrity. Therefore, a warm bowl of Witch’s Cauldron Beef Stew does more than just satisfy your hunger; it actively nourishes your body from the inside out. Ultimately, this makes it a wonderfully wholesome and beneficial meal for your overall well-being.
How it fits in a healthy lifestyle
This stew is a perfect ally for anyone pursuing a balanced and healthy lifestyle. It naturally fits into a high-protein diet, helping to promote satiety and manage weight by keeping those between-meal cravings at bay. You can also easily make it a complete gluten-free meal by ensuring your broth and thickeners are certified gluten-free.
For those focused on heart-healthy eating, simply opt for a lean cut of beef and skim any excess fat from the top after cooking. The hearty vegetables and lean protein make it an ideal meal prep option, providing a nutritious lunch or dinner that supports your goals all week long. If you are looking for more inspiration for make-ahead meals, explore our guide on easy meal prep ideas.
Pairing a bowl with a simple side salad creates a perfectly rounded meal. Ultimately, Witch’s Cauldron Beef Stew proves that comfort food and healthy eating can absolutely go hand-in-hand. Discover more delicious and nutritious recipes to support your journey on our healthy dinners page.

How to Prepare This Dish
Steps and time-saving tips
First, pat your beef stew meat completely dry with paper towels; this simple step guarantees a beautiful, deep sear. Next, heat a generous amount of oil in your heaviest pot or Dutch oven until it shimmers. Then, work in batches to sear the meat, making sure you do not crowd the pan. Meanwhile, chop your aromatic vegetables like onions, carrots, and celery. After the meat develops a gorgeous brown crust, remove it and sauté the vegetables right in those flavorful drippings. Subsequently, stir in tomato paste and let it cook for a full minute to deepen its flavor. Now, pour in your red wine to deglaze the pot, scraping up all the tasty browned bits from the bottom. Finally, return the beef to the pot and add enough beef broth to just cover everything. Bring your Witch’s Cauldron Beef Stew to a gentle simmer, then cover it and let time work its magic. For a brilliant time-saving tip, you can chop all your vegetables the night before. Additionally, a slow cooker works perfectly for this recipe if you need to set it and forget it. Ultimately, you will have a rich, comforting Witch’s Cauldron Beef Stew that tastes even better the next day.
Mistakes I’ve made and learned from
I have definitely learned a few lessons the hard way with this Witch’s Cauldron Beef Stew. My biggest mistake was rushing the sear on the beef, which resulted in steamed, grey meat instead of that flavorful caramelized crust. I also used to skip the step of cooking the tomato paste, which left a raw, acidic taste in the background of my stew. Another common issue I faced was ending up with a broth that was too thin. Fortunately, I discovered that a simple slurry can perfectly thicken any stew without any fuss. Choosing the right cut of meat is another crucial step I initially overlooked. Through trial and error, I found that chuck roast is the absolute best for stewing, a tip I picked up from my deep dive into choosing the right beef cut. Trust me, taking these extra minutes makes all the difference for your Witch’s Cauldron Beef Stew.
Cultural Connection and Variations
Where this recipe comes from
This particular Witch’s Cauldron Beef Stew bubbles up from a rich, cross-cultural brew. Essentially, it takes the classic French beef bourguignon and gives it a hearty, Halloween-themed twist. Families across Europe have long simmered similar one-pot wonders, each adding their own local flair. For instance, the Belgians might enrich theirs with a dark beer, while an Irish cook would likely add a generous glug of stout for depth. My own family always insisted on a secret ingredient a dash of Worcestershire sauce for a little extra umami magic.
Moreover, the name itself conjures images of chilly autumn evenings and communal gatherings. The “cauldron” is, of course, your trusty Dutch oven, bubbling away with tender beef and root vegetables. This dish truly embodies the spirit of harvest time, using sturdy ingredients that people traditionally stored for winter. Ultimately, every simmering pot tells a story of resourcefulness and warmth against the coming cold.
How it fits in today’s cooking
This stew absolutely earns its place in modern kitchens as the ultimate comfort food. Busy home cooks adore it because they can prepare it ahead of time, making it a perfect centerpiece for a hectic weeknight. Furthermore, it fits seamlessly into today’s love for seasonal, whole-food cooking. You can easily adapt the classic Witch’s Cauldron Beef Stew to be gluten-free or to accommodate whatever root vegetables you snagged from the farmers’ market.
Its versatility doesn’t end there. Many people now make it a star of their Halloween dinner party, serving it alongside other themed treats. For a truly spook-tacular spread, consider pairing it with some terrifyingly tasty Halloween cupcakes for dessert. Conversely, it also serves as a cozy staple throughout the entire fall and winter. It provides the same hearty satisfaction as other one-pot favorites, much like a robust beef pot pie without the pastry top. This timeless recipe continues to warm bellies and create new memories, one steaming bowl at a time.
Taste and Texture
What makes it delicious
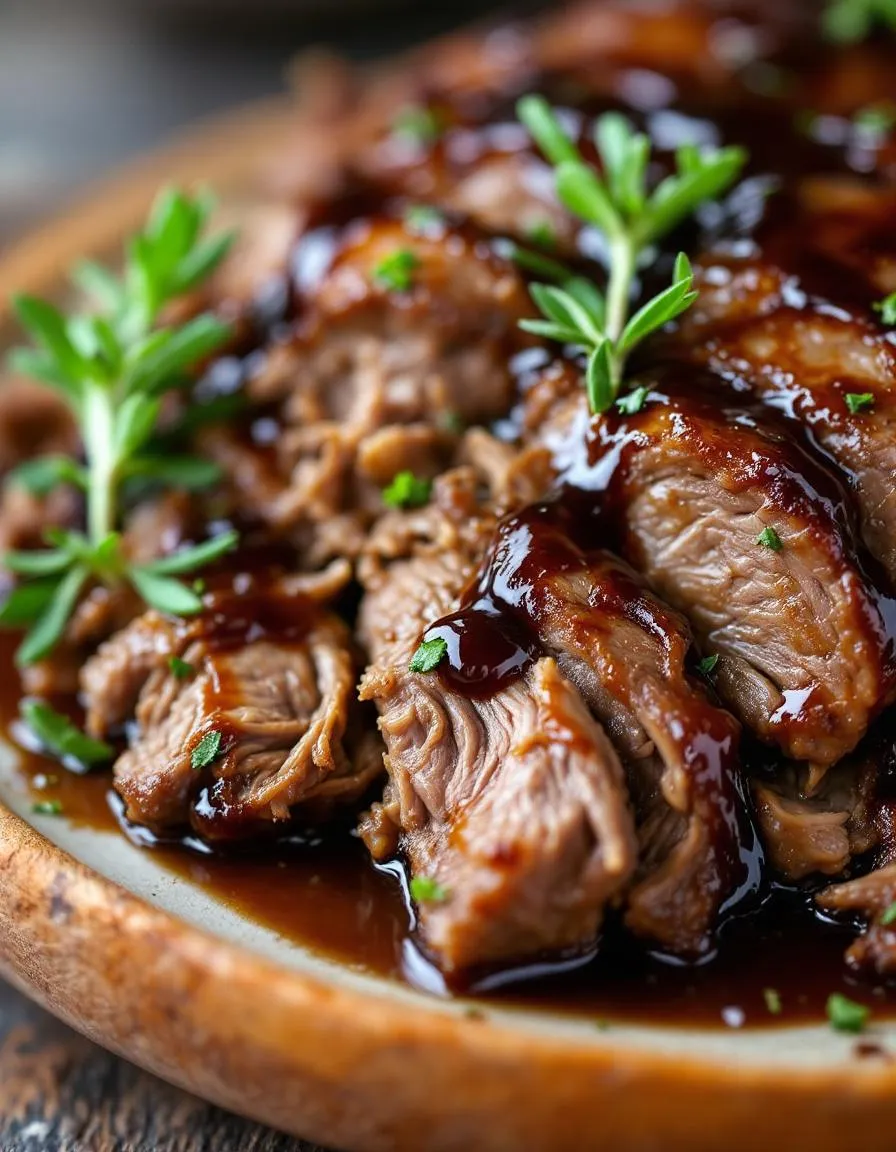
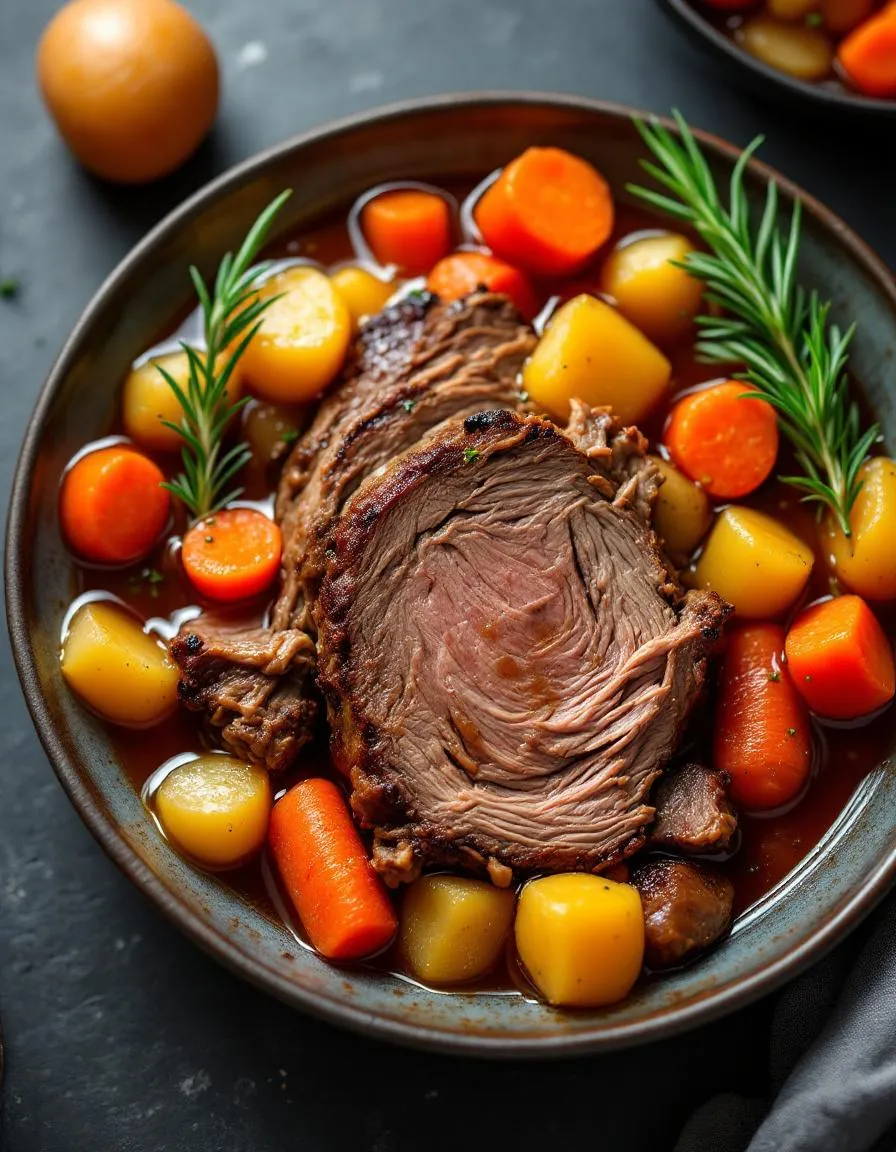
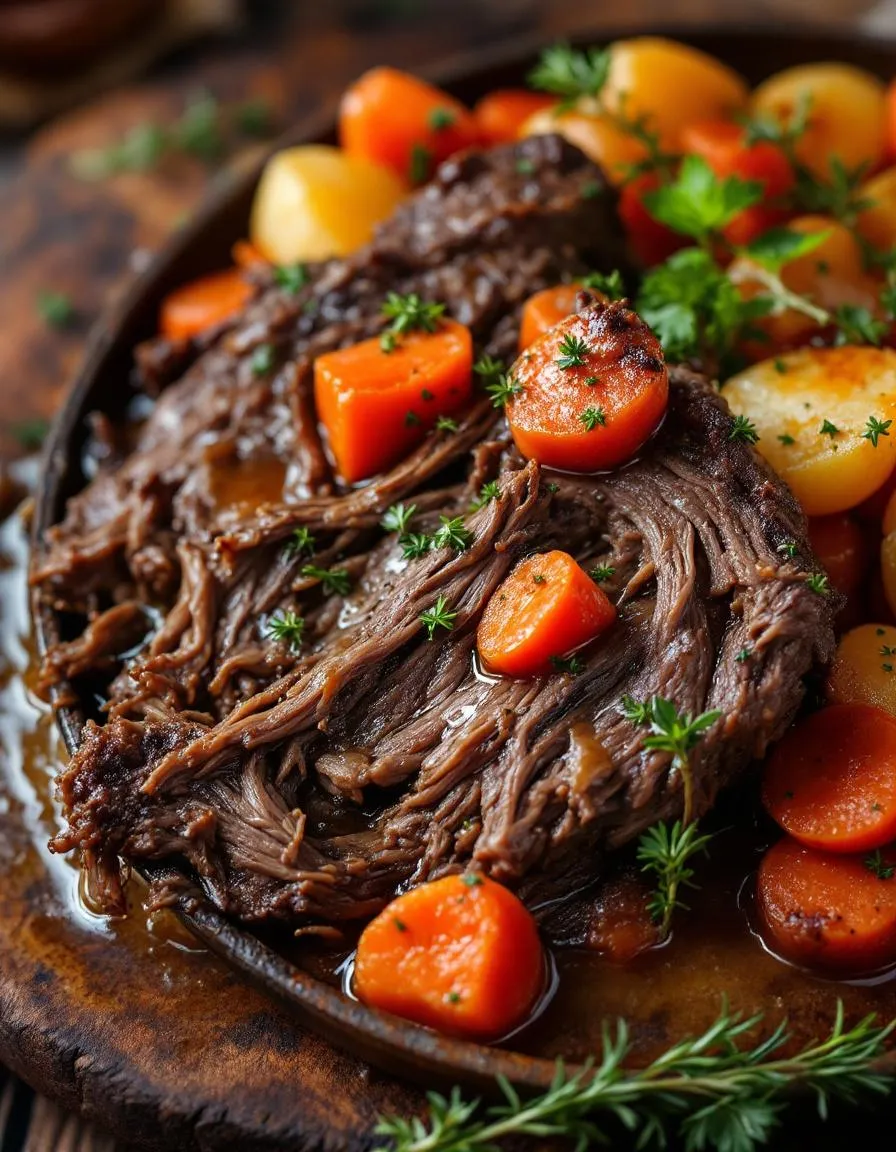
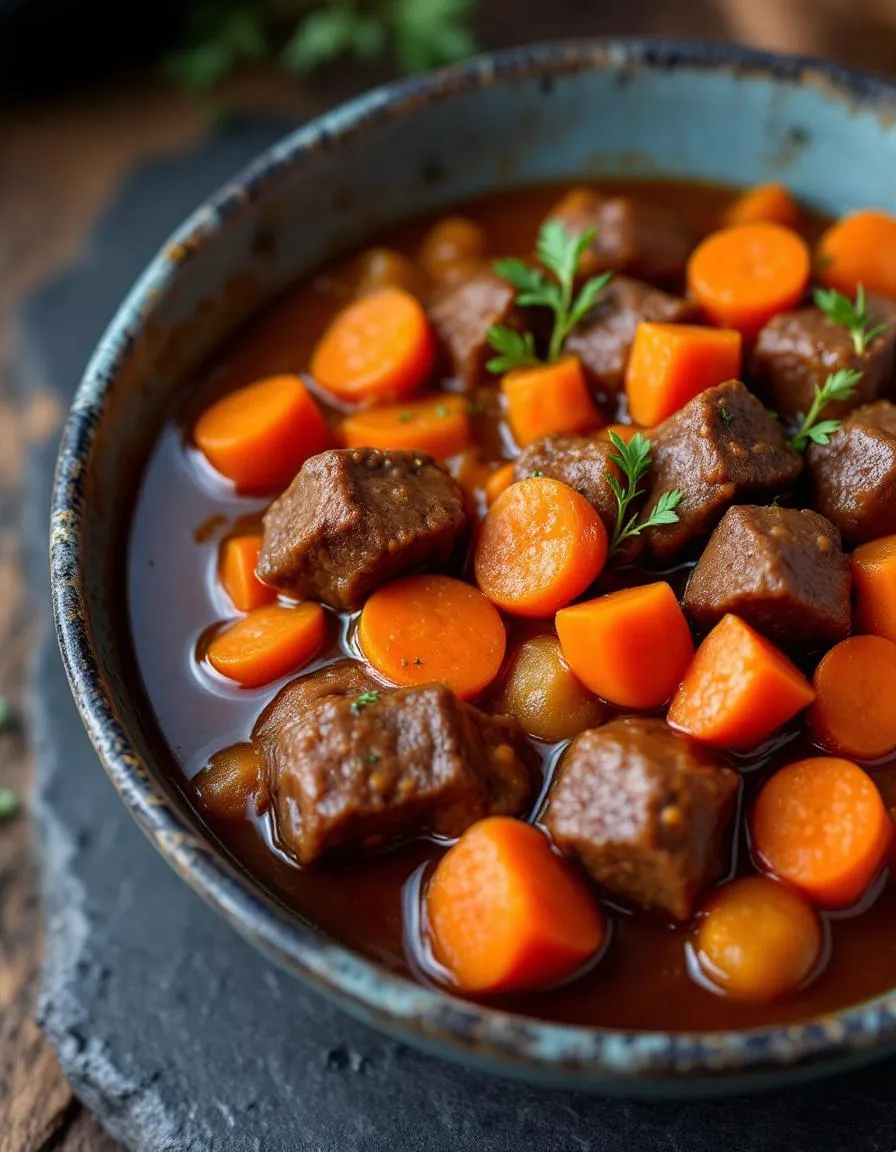
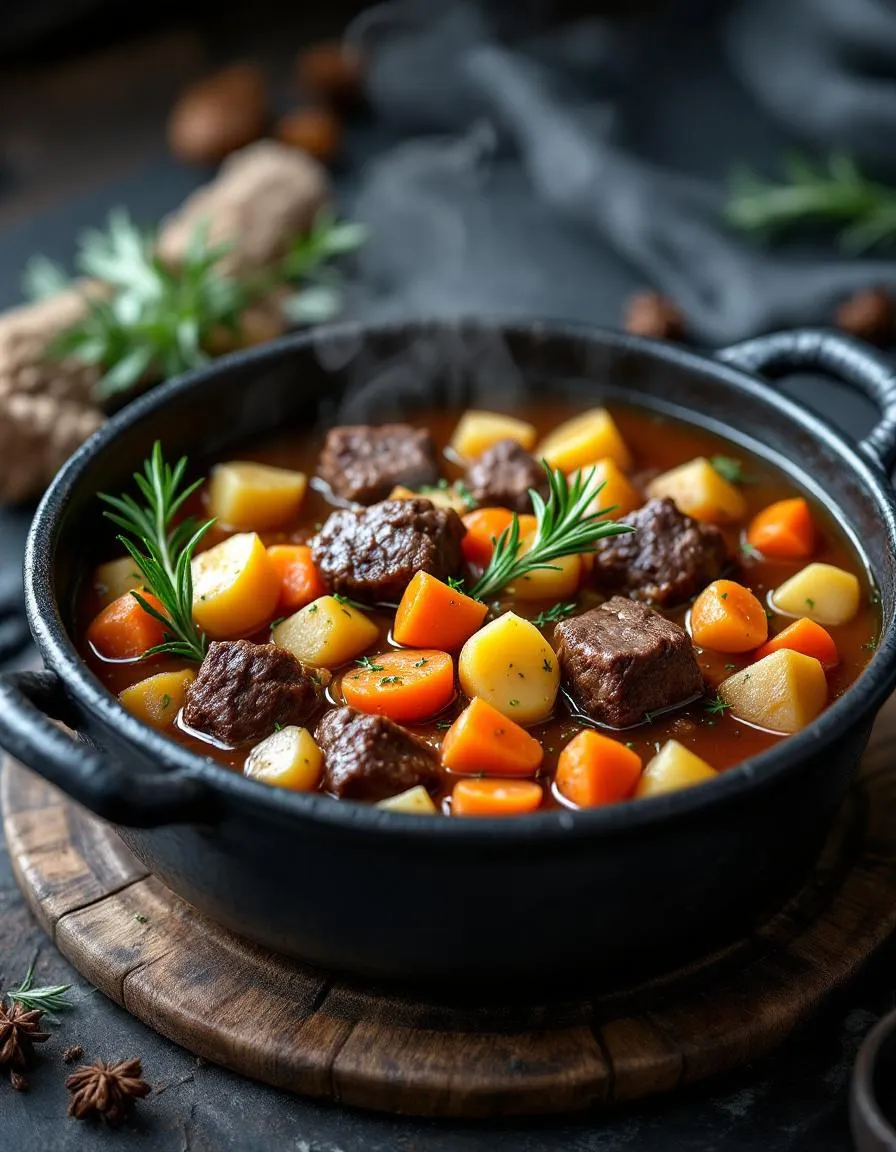
This Witch’s Cauldron Beef Stew delivers a deeply savory and complex flavor profile. Tender chunks of beef melt in your mouth while root vegetables soften into a hearty, comforting blend. Furthermore, the rich broth boasts smoky, earthy notes from the paprika and a subtle herbal aroma from the bay leaves. Each spoonful feels incredibly warming and satisfying, ultimately creating a robust and unforgettable meal. The overall experience of this Witch’s Cauldron Beef Stew is a perfect harmony of savory, tender, and aromatic elements.
Boosting the flavor
You can easily amplify the flavor of your stew with a few creative tweaks. For instance, stir in a tablespoon of tomato paste to caramelize with the beef and deepen the broth’s umami character. Alternatively, a splash of red wine or a dash of Worcestershire sauce introduces a wonderful tangy complexity. Meanwhile, consider topping each bowl with a dollop of creamy horseradish or a sprinkle of fresh herbs for a bright, contrasting finish. For more inspiration on building foundational flavors, explore our guide on how to make a roux. Additionally, serving it alongside a slice of crusty bread perfectly soaks up every last drop; find your new favorite loaf in our ultimate banana bread recipe for a surprisingly delicious pairing.

Tips for Success
Best practices for results
Always sear your beef chunks in small batches to create a beautiful, flavorful crust. Furthermore, use a good quality, full-bodied red wine for deglazing the pot, as it adds incredible depth to your Witch’s Cauldron Beef Stew. Additionally, let the stew simmer low and slow for the full recommended time; this patience is essential for tender meat. Finally, taste and adjust the seasoning just before serving to ensure a perfectly balanced flavor.
Mistakes to avoid
Avoid rushing the searing process, as crowding the pot steams the meat instead of browning it. Consequently, you will miss out on the rich, complex base that defines a great Witch’s Cauldron Beef Stew. Moreover, do not skip skimming the excess fat from the surface during cooking; otherwise, your stew can become overly greasy. For more guidance on this technique, check out our guide on how to skim fat from soup. Similarly, resist the urge to add all the vegetables at the beginning. Sturdier root vegetables can handle the long cook time, but delicate veggies will turn to mush. For a perfect side that holds up, consider our perfect roasted vegetables recipe instead.
Serving and Pairing Suggestions
How to serve this dish
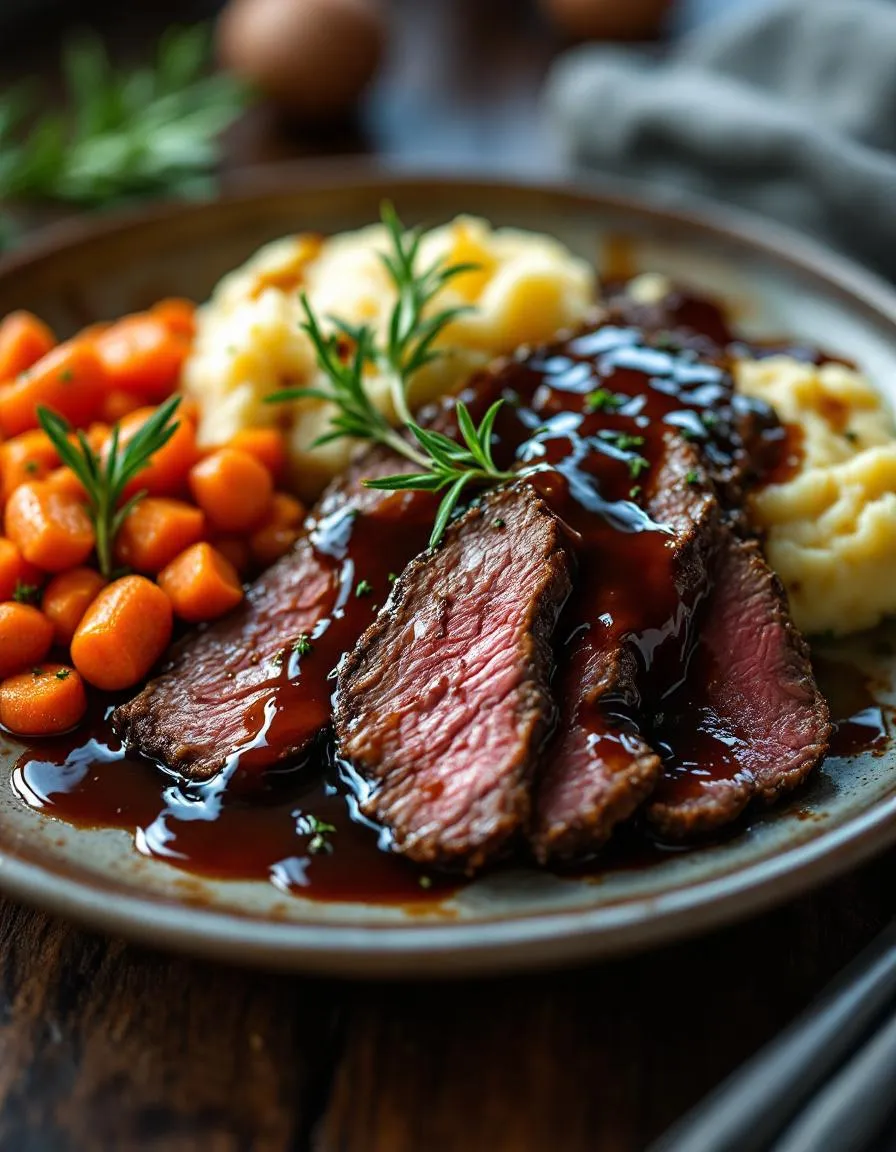
Present your Witch’s Cauldron Beef Stew in a rustic, heavy-bottomed pot for a truly enchanting tablescape. Furthermore, garnish each bowl with a fresh sprinkle of chopped parsley to add a vibrant pop of color against the rich, dark broth. This hearty stew absolutely shines as the centerpiece of a Halloween feast or any cozy family dinner. For a magical touch, serve it alongside some crusty bread for dipping directly into the cauldron.
What goes well with it
A robust red wine like a Cabernet Sauvignon beautifully complements the deep flavors of the Witch’s Cauldron Beef Stew. Alternatively, a crisp hard cider also cuts through the richness for a perfect sip. On the side, you must try our incredibly easy No Knead Bread for soaking up every last drop of the savory broth. Moreover, a simple, refreshing side salad provides a lovely contrast. For a sweet ending that continues the theme, our decadent Chocolate Cake makes the ultimate dessert pairing.
Chuck roast is the best cut for Witch’s Cauldron Beef Stew because it’s well-marbled and becomes incredibly tender when slow-cooked. This cut breaks down over the long cooking time, infusing the stew with rich flavor and creating that perfect, fall-apart texture that makes this dish so special.
Absolutely! A slow cooker is an excellent way to prepare Witch’s Cauldron Beef Stew. Simply brown the beef and onions first for maximum flavor, then transfer everything to the slow cooker and cook on low for 7-8 hours. This method makes the Witch’s Cauldron Beef Stew incredibly convenient for a hearty weeknight meal.
The name “Witch’s Cauldron” evokes the idea of a magical, bubbling pot filled with a mysterious and hearty brew. It typically refers to the deep, dark color of the stew from red wine or stout, the rustic chunks of meat and vegetables, and the long, slow cooking process that seems to conjure incredible flavor from simple ingredients.
Create a slurry by mixing one or two tablespoons of cornstarch or all-purpose flour with an equal amount of cold water or broth. Whisk this mixture into your simmering Witch’s Cauldron Beef Stew and cook for a few more minutes until it reaches your desired consistency. Alternatively, you can mash some of the cooked potatoes against the side of the pot to naturally thicken the stew.
Witch’s Cauldron Beef Stew
Description
A hearty and mystical beef stew with deep, savory flavors, perfect for a chilly evening. Its rich broth and tender meat make it a spellbinding meal.
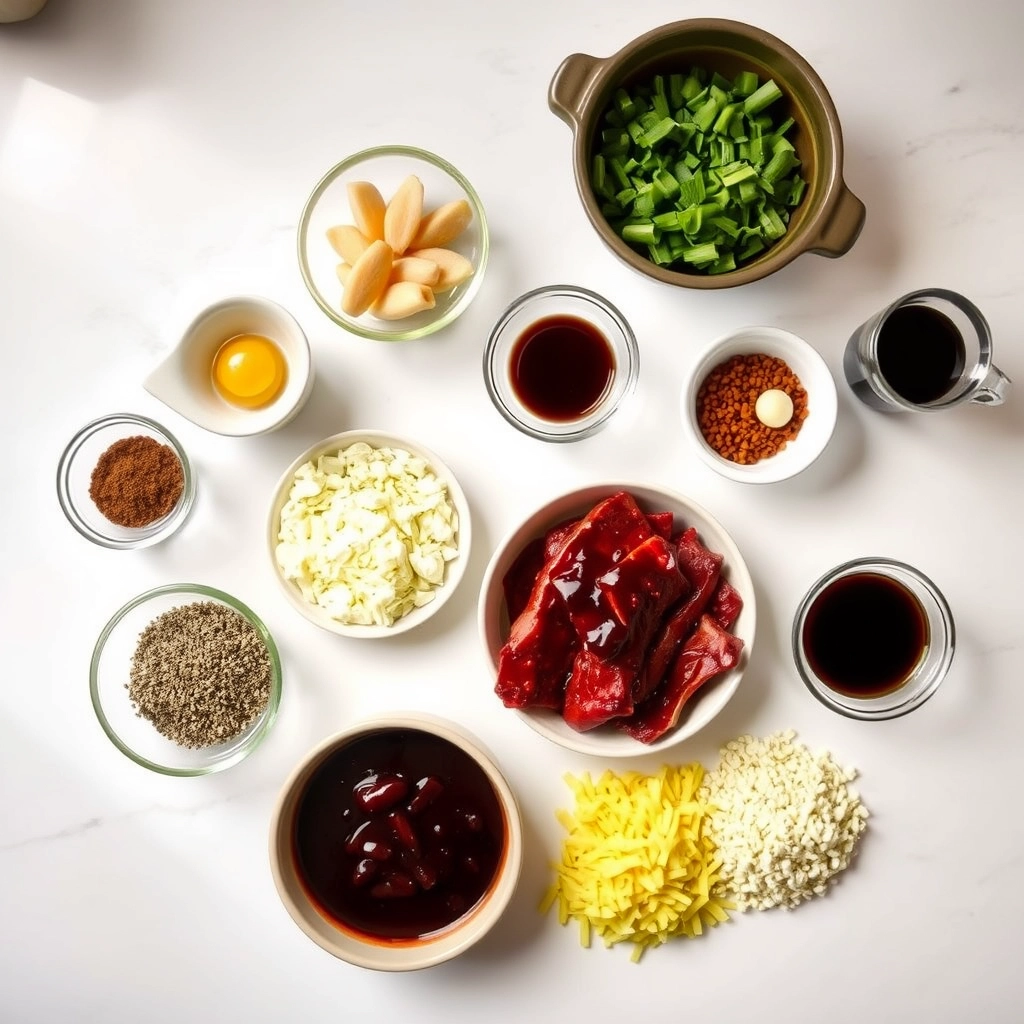
Ingredients
For the Crust:
- 2 lbs beef chuck, cubed
- 2 tbsp olive oil
- 1 large onion, chopped
- 3 cloves garlic, minced
- 4 cups beef broth
- 1 cup red wine
- 3 carrots, sliced
- 2 potatoes, cubed
- 1 tsp thyme
- 1 tsp rosemary
- Salt and pepper to taste
Instructions
1. Prepare the Crust:
- Heat olive oil in a large pot over medium heat. Brown the beef cubes on all sides, then remove and set aside.
- Sauté onion and garlic in the same pot until fragrant. Add beef back to the pot along with broth and red wine. Bring to a simmer.
- Add carrots, potatoes, thyme, rosemary, salt, and pepper. Cover and simmer for 1.5 to 2 hours, until beef is tender and vegetables are cooked through.
Notes
You can customize the seasonings to taste.