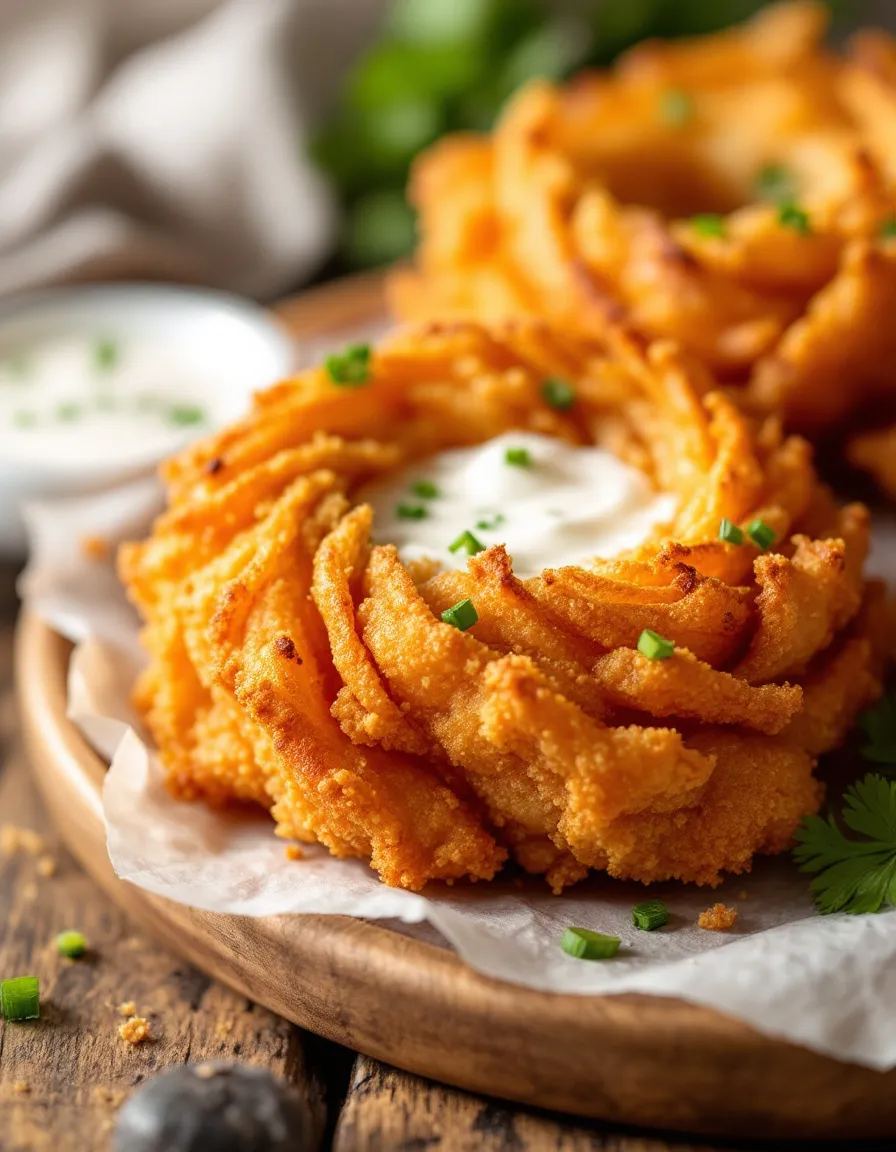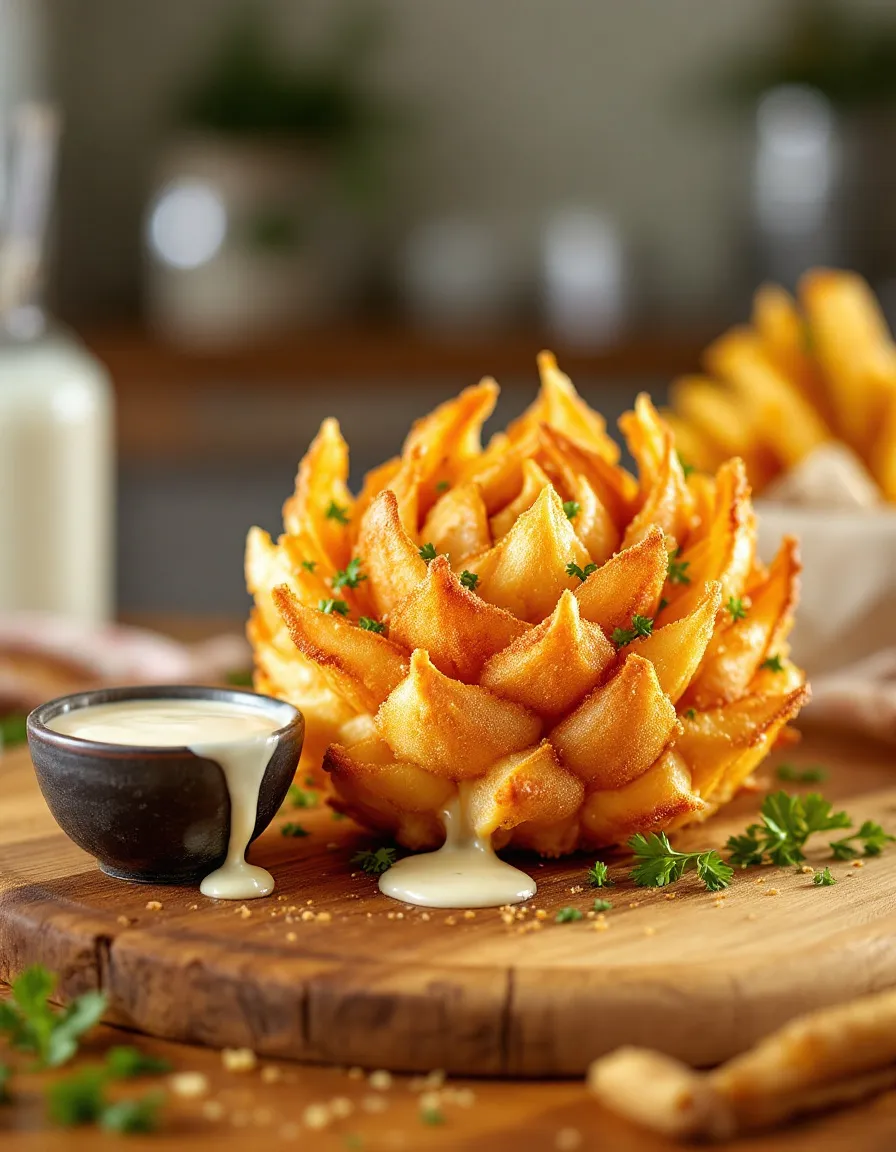
Best Air Fried Blooming Onion – Crispy, Golden, and Easy

The Original Air Fried Blooming Onion: A Crispy Delight

⚖️
Difficulty
Medium

⏲️
Prep Time
20 mins

🕒
Cook Time
15 mins

⏱️
Total Time
35 mins

🍽️
Servings
4

If you’ve ever craved that irresistible taste of a blooming onion, you’re in for a treat! The Original Air Fried Blooming Onion delivers the same delicious crunch and satisfying flavor without the need for deep frying. This recipe transforms the classic appetizer into a lighter, healthier version that’s perfect for any gathering. Imagine biting into layers of perfectly cooked onion, coated in a crispy, spiced batter that erupts with flavor. It’s a dish that pulls people in and engages the senses, making it an ideal starter for any meal or a great snack while watching the game.

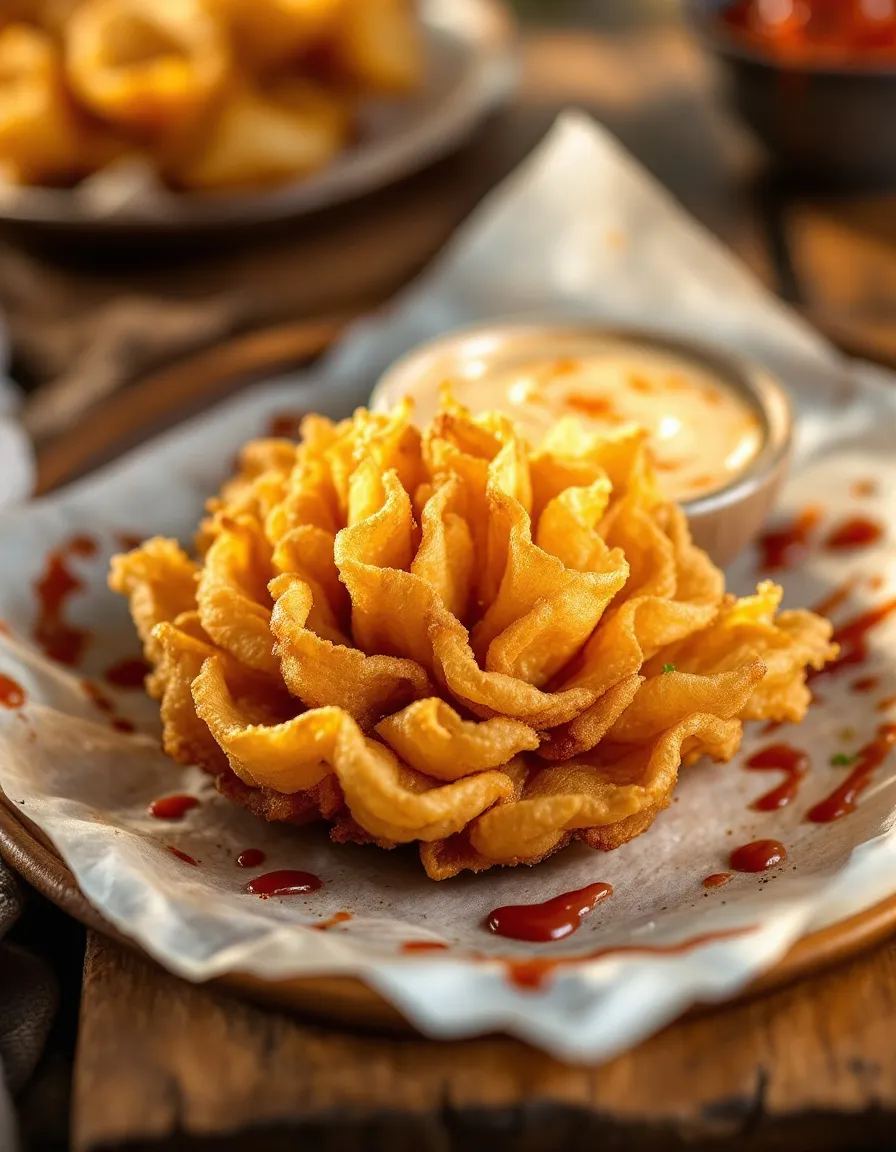
The moment you place the air-fried blooming onion on the table, the aroma wafts through the air, teasing everyone’s palate. The crispy exterior, golden brown in color, hides a tender, caramelized interior that’s bursting with flavor. Served with a tangy dipping sauce, this blooming onion isn’t just a side dish; it’s a centerpiece, ideal for sharing and sparking joy among friends and family. So, whether you’re hosting a party or looking for a fun appetizer for family movie night, this recipe is sure to become a favorite.

Quick Recipe Highlights

  • Flavor Profile: The Original Air Fried Blooming Onion features a blend of zest and subtle spices, creating a taste that lingers delightfully on the palate.
  • Texture: Expect a crunchy exterior that gives way to a tender, juicy onion, creating an exciting mouthfeel with every bite.
  • Aroma: The fusion of seasoned flour and fried onion creates a savory aroma that tantalizes the senses.
  • Visual Appeal: The elegantly arranged petals of the blooming onion provide an eye-catching centerpiece, ideal for social gatherings.
  • Skill Level Needed: This recipe requires a bit of finesse in cutting the onion, but the air frying technique is straightforward and user-friendly.
  • Special Equipment: You’ll need an air fryer for the best results, which provides that crispy texture without excess oil.

Recipe Overview

  • Difficulty Level: The Original Air Fried Blooming Onion is categorized as medium difficulty. With a few simple techniques, you can achieve a visually stunning dish.
  • Category: This dish fits perfectly as an appetizer or snack, making it versatile for various settings.
  • Cuisine: While it hails primarily from American cuisine, its flavor and technique have become popular in many cultures.
  • Cost: The ingredients are quite economical, making it accessible for everyone to recreate at home.
  • Season: Perfect year-round, this dish shines in the summer for barbecues and equally captivates in the winter as a hearty appetizer.
  • Occasion: Ideal for parties, game days, or casual get-togethers, the blooming onion never disappoints when it comes to crowd-pleasing.

Why You’ll Love This Recipe

The Original Air Fried Blooming Onion provides an unbeatable flavor experience that’s both crispy and savory. The delightful crunch on the outside coupled with the sweet tenderness of the onion creates a perfect balance that satisfies every craving. Paired with a robust dipping sauce, this dish goes beyond just taste; it creates a full flavor experience that invites every bite.

In terms of convenience, the air fryer drastically reduces cooking time while enhancing flavor, allowing you to whip up this delicacy in just a matter of minutes. Unlike traditional frying, air frying uses significantly less oil, bringing down the calorie count and making it a healthier option without sacrificing flavor. You can enjoy all the joy of the deep-fried version, guilt-free!

Furthermore, this dish is packed with nutritional benefits. Onions are rich in antioxidants and provide essential vitamins like vitamin C, plus they offer anti-inflammatory properties. This means you can enjoy your blooming onion without worrying about the health implications typically associated with deep-fried snacks.

Socially, the Original Air Fried Blooming Onion is an absolute winner. Its large, shareable size makes it perfect for gatherings, encouraging people to dig in together. Whether serving it at family gatherings or bringing it to potlucks, this recipe is sure to spark conversation and delight among friends, creating memorable moments.

Lastly, the cost-effectiveness of this dish stands out. With inexpensive ingredients and simple preparation, it’s a crowd-pleaser that won’t break the bank, allowing you to serve flavorful appetizers without the expense typically associated with dining out.

Historical Background and Cultural Significance

The original blooming onion, known as “Outback Steakhouse’s Bloomin’ Onion,” has its roots in Australia, where the culinary practice of frying onions became popular. It quickly gained fame in the U.S. as a beloved appetizer, making an appearance in many pubs and casual dining restaurants. The appeal lies not only in its intriguing presentation but also in its truly indulgent flavor profile of spices and a citrusy kick.

Culturally, the blooming onion represents the social aspect of dining. It’s a dish designed for sharing, making it a frontrunner for gatherings and celebrations. Its unique presentation captivates attention, turning an ordinary meal into a festive occasion where diners come together to enjoy food and good company.

Through the years, the recipe has evolved, with many variations surfacing. As health consciousness grew, baking and air frying emerged as healthier alternatives to deep-frying, allowing more people to enjoy this classic dish without health concerns. As such, the Original Air Fried Blooming Onion has found its way into homes across generations.

Regionally, variations abound, with each area adding its twist to the staple dish. From different spice blends to accompanying dips, the blooming onion continues to inspire creativity among culinary enthusiasts. This adaptability ensures that the dish remains relevant in today’s diverse food culture.

Ingredient Deep Dive

Onions are the star of this dish, symbolizing culinary versatility across many cultures. Historically used for flavoring and as a staple food source, onions offer a robust taste that elevates various dishes. Nutritionally, they are loaded with vitamin C, B vitamins, and plenty of antioxidants, which enhance overall health. When selecting onions for your blooming onion, look for firm, heavy bulbs with no soft spots or discoloration. They should be stored in a cool, dry place away from sunlight to prolong freshness. If you’re out of onions, consider alternatives like leeks or shallots to achieve a similar flavor profile.

Flour is essential for the crispy batter that coats the blooming onion. All-purpose flour is usually preferred, but for a gluten-free version, almond flour, or coconut flour can be utilized. When selecting flour, ensure it’s tightly sealed, dry, and stored in a cool place to maintain freshness. Substitute options include cornstarch for a lighter flour or breadcrumbs for a different texture. Each flour brings its unique flavor, influencing the overall taste of the dish.

Common Mistakes to Avoid

  • Not cutting the onion correctly can lead to uneven cooking and less attractive presentation. Ensure clean cuts without going too deep into the bulb.
  • Using too much oil can make the outer layer greasy instead of crispy. Lightly coating the onion with oil is key to achieving the perfect crunch.
  • Skipping the soaking step may result in a less flavorful onion. Soaking helps the flour mixture stick better, enhancing flavor.
  • Overcrowding the air fryer basket can lead to uneven cooking. Always leave enough space between the onions for hot air to circulate.
  • Ignoring the need to preheat the air fryer can lead to unpredictable cook times. Preheating ensures even cooking from the start.
  • Not seasoning adequately can make your onion bland. Taste your flour mix before applying it to the onion to ensure flavor balance.
  • Using low-quality ingredients diminishes the final taste. Always opt for fresh ingredients for the best results.
  • Skipping the dipping sauce can limit the flavor experience. Choose a vibrant sauce to enrich the overall enjoyment of the dish.

Essential Techniques

Proper onion cutting technique is essential for an appealing presentation. Start by slicing the top off the onion and peeling it. Then, cut the onion in half while leaving the root end intact. Make vertical cuts along the sides of each half, taking care not to cut through the base, allowing the petals to bloom. This technique maximizes both cooking efficiency and flavor while maintaining the structure of the onion.

Coating the onion is another important aspect of this recipe. It’s crucial to evenly distribute the seasoned flour mixture to achieve that signature crunch. Use a gentle tossing method to ensure all exposed areas are covered without affecting the onion’s shape. Visual cues for success include a thorough coating of flour with no wet spots, which is key to achieving a crispy exterior during air frying.

Pro Tips for Perfect Air Fried Blooming Onion

For an extra punch of flavor, consider marinating the onion in a mixture of spices and buttermilk before coating it. This adds depth and moisture that enhances the overall texture and taste.

Experiment with different seasonings in the flour mixture, such as Cajun spices or garlic powder, to personalize the flavor profile of your blooming onion.

Be mindful of the air fryer temperature. Cooking at too high a temperature can burn the outer layer while leaving the inside undercooked. A moderate temperature ensures even cooking throughout.

Using a cooking spray can help achieve a more uniform coating of oil, facilitating even browning without excess fat.

Serve your blooming onion immediately after cooking for the best texture. The onion will retain its crispness when enjoyed fresh out of the air fryer.

Lastly, try pairing the blooming onion with multiple dipping sauces like ranch, honey mustard, or even spicy ketchup to cater to diverse palates at your gathering.

Variations and Adaptations

Regionally, blooming onions can be adjusted to reflect local cuisine. For instance, adding chili powder and cumin evokes southwestern flavors, making it a great fit for summer barbecues. Similarly, during the holidays, try infusing your batter with herbs like rosemary or thyme for a festive twist.

Seasonally, adaptation is easy. In the fall, consider using sweet onions to create a sweeter version that complements dishes typically found at harvest festivals.

For dietary modifications, creating a gluten-free version is simple by swapping all-purpose flour for gluten-free flour. Likewise, for a vegan option, use plant-based milk and a flax egg substitute while ensuring that all other ingredients are plant-based.

Flavor variations can extend to the dipping sauce as well. Garlic aioli, spicy sriracha, or even a tangy yogurt-based sauce can elevate the dish’s experience. Feel free to explore various expressions to match your mood!

Serving and Presentation Guide

Plating techniques for the Original Air Fried Blooming Onion can enhance its visual appeal. Serve it on a large white platter to contrast the golden-brown petals. For added flair, garnish with fresh herbs or microgreens, encircling the onion for a pop of color.

For garnishing ideas, consider a drizzle of balsamic reduction or a sprinkle of sea salt to complement the onion’s flavors. Accompany your blooming onion with a selection of dipping sauces arranged in small bowls for variety.

Traditional accompaniments include classic ranch or blue cheese dressing, while modern suggestions can encompass spicy dips or tangy salsa for a unique twist.

Consider temperature when serving. A warm blooming onion is essential for maximizing texture and taste, so serve it straight from the fryer. Offering it at a slightly cooler temperature may result in diminished crispiness.

Lastly, portion control is important; the blooming onion can be substantial. Cut the onion into smaller sections for easy sharing while ensuring each piece maintains its dramatic presentation.

Wine and Beverage Pairing

When considering wine pairings, opt for a crisp, acidic white wine, such as Sauvignon Blanc or Prosecco, that complements the flavors of the blooming onion without overpowering it. The acidity enhances the dish’s richness, providing a delightful balance.

For non-alcoholic alternatives, consider sparkling water infused with lemon or a light iced tea to refresh the palate and cleanse the taste buds between bites.

If you enjoy hot beverages, pairing blooming onions with a mild green tea can provide a refreshing counterbalance, enhancing the savory notes of the dish while offering a soothing end to the meal.

Serving suggestions include chilling the beverage to enhance enjoyment. Ensure your chosen drink contrasts the warm and crisp nature of the blooming onion for an exceptional dining experience.

Storage and Shelf Life

To store leftovers, place your blooming onion in an airtight container, refrigerating it to maintain freshness for up to 2-3 days. Avoid stacking items on top, which could affect the texture of the crispy petals.

The optimal storage temperature for cooked dishes is between 34°F and 40°F, ensuring that your blooming onion retains its flavor without spoiling.

When reheating, use the air fryer for the best results; this method helps to restore the crispness without drying out the onion. Heat at 350°F for about 5-7 minutes until warmed through and crunchy again.

As for freezing, it’s recommended against freezing air-fried blooming onion, as the texture may suffer significantly upon thawing. It’s best enjoyed fresh for optimal taste and texture.

Make Ahead Strategies

To save time, prepare the onion ahead by slicing and soaking it in water for a few hours before cooking. This enhances the bloom effect and allows the flavors to infuse better.

A great storage tip between steps is to keep your coated onion in the refrigerator for up to 30 minutes before air frying. This helps the batter adhere better and adds to the crunchiness once cooked.

Quality can vary based on preparation methods. Take care to assemble the onion right before cooking to maintain crispness. If prepped too early, ensure it’s fully dry and stored in cool conditions.

For assembly, ensure that you have your oil and flour mixtures ready, allowing for a seamless cooking experience when you’re ready to fry.

For any fresh elements, add them right before serving. Fresh herbs or a squeeze of lemon should accompany your blooming onion to keep the flavors vibrant and bright.

Scaling Instructions

When halving the recipe, maintain the same preparation and cooking times, noting that smaller pieces may cook slightly quicker. Always check for doneness by testing the texture of the onion.

If doubling or tripling the recipe, ensure your air fryer can accommodate the extra portion. This might require you to cook in batches to achieve the same level of crispiness.

Equipment adjustments may include upgrading to an air fryer with larger capacity or switching to batch frying to manage larger quantities effectively.

If proportion sizes change, slight adjustments in timing can enhance cooking efficacy. Monitor closely to prevent overcooking.

Lastly, think about storage considerations. Larger quantities may require more spacious containers, leading to a need for more effective cooling strategies.

Nutritional Deep Dive

A macro breakdown of the Original Air Fried Blooming Onion reveals a balance of carbohydrates, fats, and proteins due to its diverse ingredients. The dish’s nutritional profile can help satisfy various dietary needs when paired correctly.

Micronutrient analysis shows the presence of vitamins A and C from onions combined with any added spices, providing health benefits like improved immune function and skin health. This highlights the dish’s potential as a nutritious foodie delight.

Health benefits extend beyond flavor. Onions contain antioxidants that can fight inflammation, making this snack a guilt-free way to indulge. Incorporating this recipe occasionally into meals can maintain essential nutrition without compromising indulgence.

For portion analysis, consider that one blooming onion serves multiple individuals, making it a great value for gatherings. Keeping portion control in check aids in overall dietary goals while still allowing guests to enjoy themselves.

Weight management tips can include pairing the blooming onion with healthier sides or salads, balancing richer elements for a nourishing meal.

Dietary Adaptations

For those seeking gluten-free options, you can easily substitute regular flour with a gluten-free blend. This ensures that everyone at the table can enjoy this delicious starter without dietary worries.

The bawdy flavor of the blooming onion can also be adapted for a dairy-free situation. Use plant-based milk instead of buttermilk, and ensure the coating is made with dairy-free ingredients to cater to various diets.

For vegan enthusiasts, the recipe can be fully modified by employing aquafaba or a mix of ground flaxseeds and water as a binding agent for the batter, enabling it to be suitable for a plant-based diet.

If low-carb living is a priority, consider using crushed almond flour or coconut flour as a substitute to achieve similar textures without significant carb content.

Other specific diets, like paleo or low-FODMAP, can also adapt this dish with the right substitutions—ensuring you can enjoy the Original Air Fried Blooming Onion across various dietary lifestyles.

Troubleshooting Guide

If you encounter texture issues, check the amount of flour used. Too little flour can lead to sogginess. Adjust the coating for a crunchier finish by ensuring an even layer.

Flavor balance can sometimes be off due to insufficient seasoning. Always taste your seasoned flour mixture and adjust accordingly before applying it to the onion.

Temperature problems may arise during frying; make sure your air fryer is properly calibrated, as incorrect temperatures can result in either undercooked interiors or burnt outsides.

Equipment challenges may involve improper air circulation. Ensure your model allows for sufficient airflow around the onion to cook evenly.

If making ingredient substitutions, always adapt cooking times and techniques. Certain flours or coatings may require different handling to maintain the dish’s integrity.

Timing concerns often come into play if working on multiple dishes. It’s best to prepare the blooming onion last to ensure freshness, though you can prep it ahead of time and cook just before serving.

Recipe Success Stories

Community feedback has shown overwhelming love for the Original Air Fried Blooming Onion. Many have expressed how simple adjustments made the recipe fit their taste, leading to countless successful variations.

Readers have shared how incorporating different spices and herbs allowed them to explore and embrace unique flavor profiles, significantly contributing to the success of the dish in their homes.

Throughout photographic tips, fellow cooks have suggested lighting techniques to capture the blooming onion’s impressive display, yielding beautiful images that inspire others to engage with the recipe.

Reciprocating suggestions among readers often encourages others to take creative liberties with their creations, expanding the blooming onion’s legacy as a shared starter for many.

Frequently Asked Questions

Can I make the blooming onion ahead of time? Yes! You can slice and soak the onion in advance. Just coat and cook just before serving to maintain crispness.

What is the best way to store leftovers? Keep any leftovers in an airtight container in the fridge for up to 2-3 days, reheating in the air fryer for the best texture.

Can I use other vegetables for a blooming style? Absolutely! Try portobello mushrooms or even zucchini for a flavorful alternative using the same batter technique.

Is the blooming onion suitable for freezing? It’s not recommended to freeze a blooming onion as it will lose its texture upon thawing.

How can I make it spicier? Add cayenne pepper or hot sauce to the flour mixture, adjusting the spice level to your preference.

Can I make it without an air fryer? Yes! You can achieve similar results by baking it in the oven, just be sure to adjust the cooking times accordingly.

What’s the best onion to use? Vidalia or sweet onions are ideal due to their sweetness and tenderness. However, any large onion will work.

Can I double the recipe? Yes! Just make sure your air fryer can accommodate the extra batch, cooking in smaller portions if needed.

What dipping sauces work well? Ranch, home-style ketchup, blue cheese, or even spicy yogurt sauces pair beautifully!

Is it possible to make this recipe vegan? Certainly! Substitute buttermilk with plant-based milk and adjust your batter accordingly.

What if my batter isn’t sticking? Ensure your onion is dry and consider adding a touch of oil to the surfaces before coating.

Additional Resources

Explore related recipes that pair well with the Original Air Fried Blooming Onion, such as spicy chicken wings or zesty shrimp tacos, for a perfect snack platter.

Technique guides on air frying can illuminate proper usage to maximize your air fryer’s capabilities, ensuring success in your culinary endeavors.

Ingredient information about various onions and spices can help you select the best options for flavor enhancement.

Equipment recommendations could include top-rated air fryers or kitchen gadgets that simplify the process and improve cooking quality.

Look into seasonal variations to adapt the blooming onion to different holiday themes or local festivals, making it a year-round favorite!

Join the Conversation

Share your experience on social media! Tag us in your blooming onion creations and show off your culinary successes. We love to see your photos and hear how you’ve made the recipe your own.

Photography tips from other readers can inspire your food styling, helping you capture your dishes in the best light.

Your recipe reviews encourage others to try the Original Air Fried Blooming Onion, creating a community of enthusiastic cooks ready to share their adaptations and flavors.

Engaging with fellow cooks not only enhances your experience but adds depth to the community by sharing unique variations and insights!

The Recipe

The Original Air Fried Blooming Onion

Serves: 4

Prep Time: 20 mins

Cook Time: 15 mins

Total Time: 35 mins

Kitchen Equipment Needed

  • Air fryer
  • Sharp knife
  • Cutting board
  • Mixing bowls
  • Measuring cups and spoons

Ingredients

  • 1 large sweet onion (like Vidalia)
  • 1 cup all-purpose flour
  • 1 teaspoon paprika
  • 1/2 teaspoon garlic powder
  • 1/2 teaspoon salt
  • 1/4 teaspoon black pepper
  • 1/4 teaspoon cayenne pepper (optional)
  • 1/2 cup buttermilk (or plant-based milk)
  • Cooking spray or oil for coating

Directions

  1. Preheat the air fryer to 400°F (200°C).
  2. Slice off the top of the onion and peel the outer skin. Carefully cut the onion in half from root to base.
  3. Make vertical cuts about 1/2 inch apart without cutting through the root, then gently separate the onion petals.
  4. In a mixing bowl, combine flour, paprika, garlic powder, salt, black pepper, and cayenne pepper.
  5. Dip the onion in buttermilk, then coat evenly with the flour mixture, ensuring all surfaces are covered.
  6. Spray the coated onion lightly with cooking oil for a crispy finish.
  7. Place the onion into the air fryer basket, being careful not to overcrowd.
  8. Cook for 12-15 minutes until the onion is golden brown and crispy. Ensure to monitor closely towards the end.
  9. Remove from the air fryer and serve immediately with your choice of dipping sauce.

Recipe Notes

  • Feel free to adjust spices based on personal preference.
  • For a gluten-free version, swap out all-purpose flour for a gluten-free flour blend.
  • Try various dipping sauces like ranch, spicy aioli, or honey mustard.
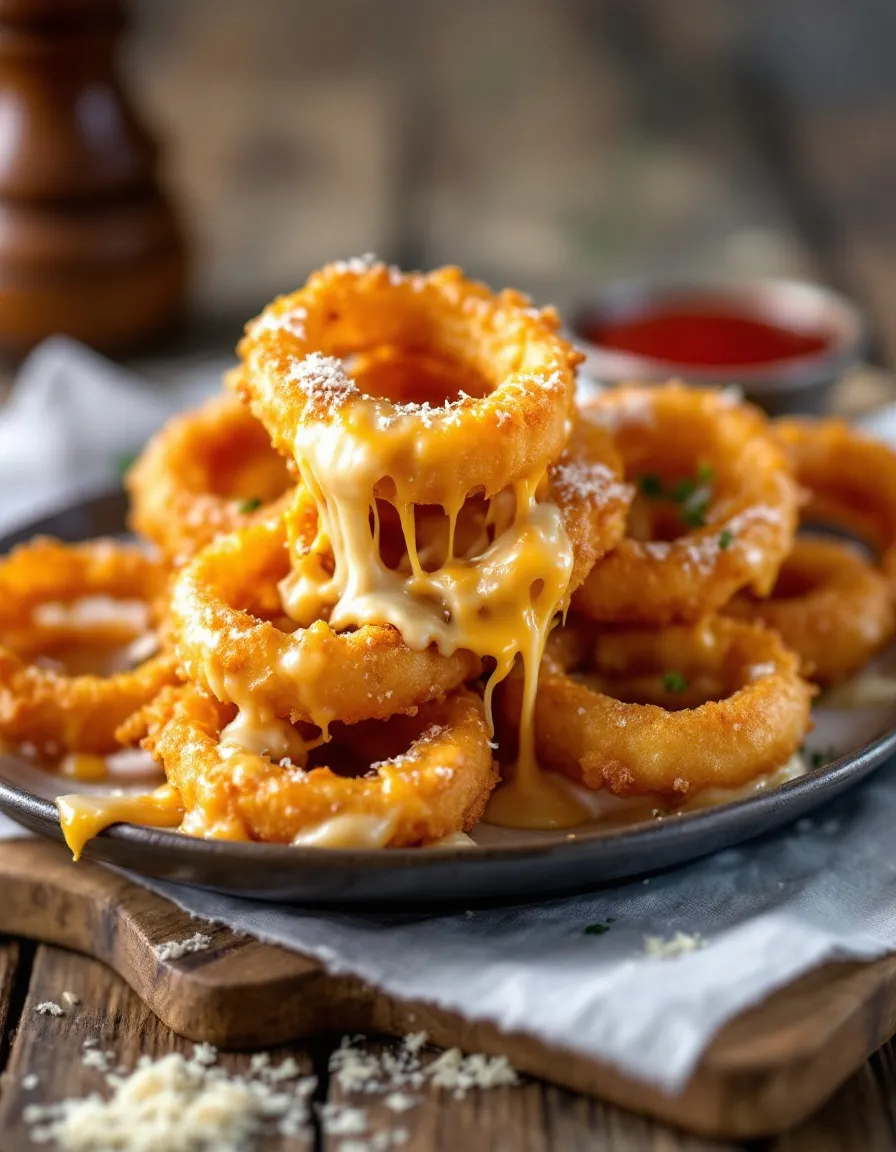
Easy Cheesy Onion Rings with Crispy Golden Coating

Cheesy Onion Rings: A Crispy Treat for Everyone

⚖️
Difficulty
Easy

⏲️
Prep Time
15 mins

🕒
Cook Time
10 mins

⏱️
Total Time
25 mins

🍽️
Servings
4 servings

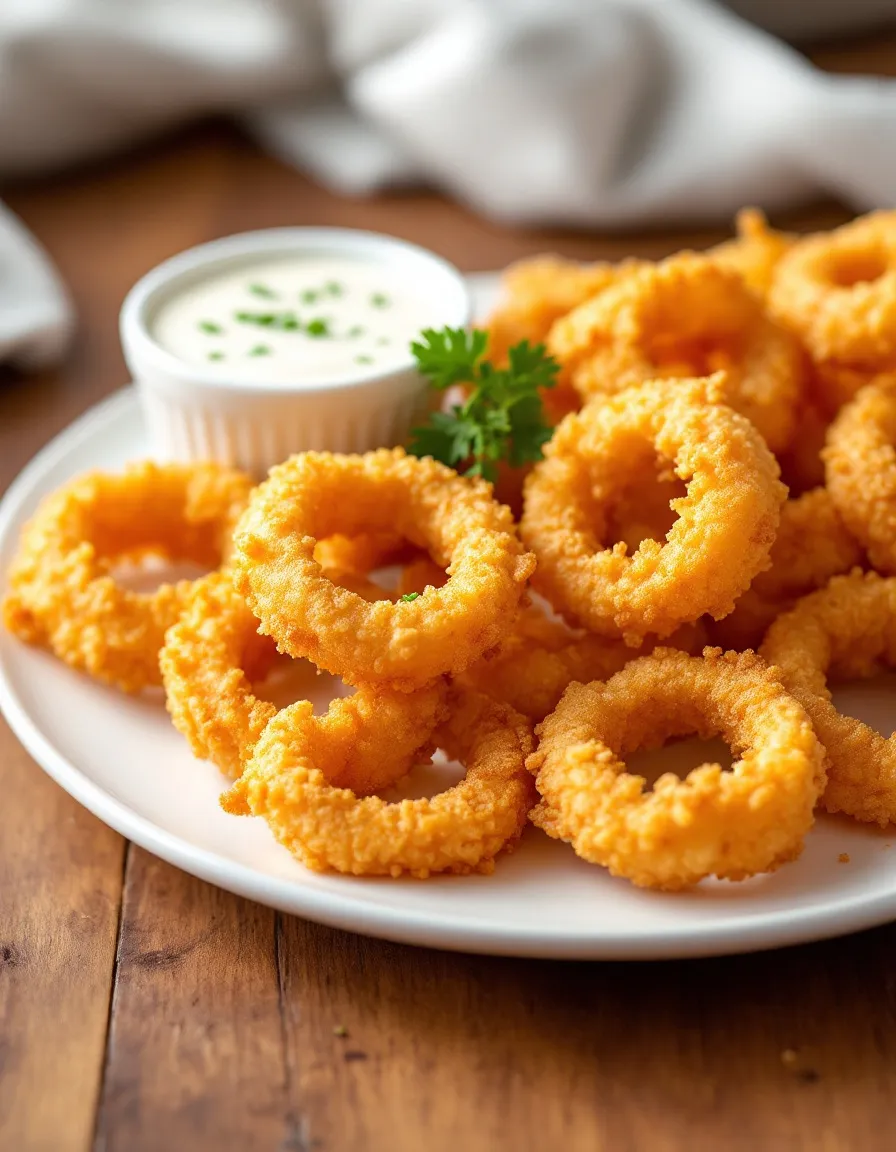
Cheesy onion rings are the ultimate appetizer that everyone loves! Imagine biting into a perfectly crispy exterior that gives way to melting, gooey cheese and sweet, caramelized onions. This recipe enhances the classic onion ring experience by loading them with cheesy goodness that adds richness and savory flavors. Whether you’re hosting a game night or simply craving something delicious, these onion rings will be the star of the show.

Not only are these cheesy onion rings a hit at parties, but they’re also incredibly easy to make at home. With just a few ingredients, you can whip up a batch in no time. Your family and friends will be begging for the recipe, and you’ll love how they disappear just seconds after being served. The crunch, combined with the rich flavor, creates the perfect bite that everyone craves.

Quick Recipe Highlights

  • Flavor Profile: A delightful blend of savory, cheesy, and sweet onion flavors.
  • Texture: Crispy on the outside with a deliciously gooey center.
  • Aroma: A mouthwatering scent of fried onions and melting cheese fills the air.
  • Visual Appeal: Golden-brown rings with melted cheese oozing out, garnished for an appealing presentation.
  • Skill Level Needed: This is an easy recipe, perfect for beginners.
  • Special Equipment: A deep fryer or large pot for frying is recommended.

Recipe Overview

  • Difficulty Level: This cheesy onion rings recipe is classified as easy, making it suitable for all skill levels, even for newly initiated cooks.
  • Category: These onion rings are perfect as an appetizer, snack, or even as a side dish for your meals.
  • Cuisine: While primarily American, cheesy onion rings can be influenced by various culinary traditions, adding a global twist to your snack table.
  • Cost: With economical ingredients, this recipe can be prepared at a low cost, making it accessible for everyone.
  • Season: Ideal for any season, but especially loved during summer gatherings and celebrations.
  • Occasion: Perfect for game nights, parties, barbecues, or family gatherings.

Why You’ll Love This Recipe

The taste and texture of cheesy onion rings make them irresistible. The combination of crispy batter and gooey cheese will excite your palate, creating an instant craving for more. Each bite provides a delightful crunch followed by the warm, melting cheese.

Convenience is another major plus. This recipe allows you to prepare a crowd-pleasing snack with minimal prep time and straightforward cooking steps. You can enjoy fresh, homemade onion rings in just about 25 minutes, giving you more time to enjoy your guests’ company.

Nutritionally, while cheesy onion rings are a treat, they can be a part of a balanced diet when enjoyed in moderation. You can explore using whole grain breadcrumbs or adding a side of refreshing salad to increase fiber intake.

Cheesy onion rings shine in social settings, making them an ideal dish for entertaining. Their fun nature invites everyone to dig in and share, enriching the communal aspect of dining.

Cost-effectiveness makes this recipe appealing. With a relatively low budget, you can create a dish that tastes gourmet, making it a delightful addition to any meal without breaking the bank.

Historical Background and Cultural Significance

Cheesy onion rings have their roots deeply planted in American culinary history, but their exact origin remains a bit hazy. Traditionally, onion rings were made to highlight the sweet and savory flavor of fried onions, which evolved into the cheesy version we know today as popular fast-food diners began experimenting with toppings.

In modern times, onion rings have come to symbolize casual dining and comfort food. They have become a staple at countless bars and restaurants across the United States. Their crispy texture and satisfying flavor embody the essence of classic American snacks.

As recipes have been shared and adapted, countless variations of onion rings can be found worldwide, from the spicy versions in some Asian cuisines to cheese-stuffed rings popular in various European eateries.

Regional variations are common — for instance, in the southern United States, they often incorporate buttermilk into the batter. This adaptation adds a unique flavor that highlights the creativity of regional cooking techniques and preferences.

Ingredient Deep Dive

Onions are the star of this recipe, and they carry significant cultural weight in many cuisines. Used to add sweetness and depth to dishes, onions are a fundamental ingredient that enhances flavor in countless recipes. Nutritionally, onions are low in calories while being rich in vitamins, minerals, and antioxidants.

Choosing the right onions can dramatically affect the outcome of your dish. Sweet onions, such as Vidalia, are preferred for their mild flavor, whereas yellow onions starkly enhance the savory while fried to caramelize beautifully. Store onions in a cool, dark place, and avoid moisture to prolong their shelf life.

Cheese, another critical component, varies widely in types and flavors. For this recipe, a blend of mozzarella and cheddar cheese creates that desirable stretch and flavor profile. This ingredient not only contributes to texture but also enhances mouthfeel and taste.

When selecting cheese, look for block cheese rather than pre-grated options, as they melt better. Store cheese in the refrigerator and allow it to come to room temperature before using for optimal melting results. You can also explore alternatives, like pepper jack, for a spicy kick.

Common Mistakes to Avoid

  • Using cold onions: Ensure your onions are sliced and at room temperature to achieve even cooking and optimal flavor.
  • Overcrowding the fryer: Cook onion rings in small batches to maintain a consistent temperature and achieve even crispiness.
  • Skipping the resting time for batter: Allow the batter to rest for at least 10 minutes; this helps develop a better texture when frying.
  • Inconsistent slicing: Slice onions evenly to ensure that they cook uniformly; inconsistent sizes can lead to uneven frying.
  • Frying oil temperature: Make sure your oil is hot enough (around 375°F) for frying; too low results in soggy onion rings.
  • Not seasoning the batter: A pinch of salt will enhance the overall flavor, so don’t skip this step.
  • Using stale breadcrumbs: Fresh breadcrumbs will give you a better crust, so make sure they are up to par.
  • Frying for too long: Keep an eye on the color; too much time in the oil can result in burnt rings.
  • Overfilling your plate: Allow onion rings to drain on paper towels to remove excess oil and maintain crispness.
  • Serving immediately after frying: Let them cool slightly before serving for the best flavor experience.

Essential Techniques

Frying is an essential technique for preparing cheesy onion rings. It is crucial as it gives the rings their characteristic crispiness. To master frying, always preheat the oil and don’t hesitate to test it with a small piece of batter for readiness. Watch for bubbles — if they form immediately, the oil is hot enough.

Batter preparation is key to achieving a good coating. Achieving a smooth and well-mixed batter ensures that the onion rings are coated evenly. Avoid the temptation to overmix, which can lead to a dense texture. Letting the batter rest allows gluten to relax, resulting in a better fry.

Pro Tips for Perfect Cheesy Onion Rings

1. Experiment with cheese blends for unique flavor profiles; try adding parmesan for a sharper taste.
2. For added crunch, consider incorporating crushed cornflakes into your breadcrumb mixture.
3. Enhance flavor with spices in the batter, such as garlic powder or smoked paprika, for an extra kick.
4. After frying, sprinkle onion rings with sea salt for an enhanced savory touch.
5. Pair with dipping sauces such as ranch, spicy ketchup, or aioli to elevate the experience.
6. Test the oil temperature with a small piece of onion; if it sizzles immediately, it’s ready for frying.
7. Serve onion rings on a wooden board to add a rustic presentation element.
8. Make a batch ahead of time and reheat in an oven for maintaining crispiness when serving.

Variations and Adaptations

Regional variations of cheesy onion rings can reflect local flavors. For instance, a Midwestern spin might include a beer batter for a crispy touch, while Southwestern-style can benefit from spicy jalapeños added to the mixture.

Seasonal adaptations might include utilizing seasonal cheese selections, such as herbed goat cheese in the spring for a fresh twist. This adds an exciting seasonal element to your classic recipe.

Dietary modifications include the option to use gluten-free flour as a substitute for traditional flour, making it more inclusive for sensitive eaters.

Flavor variations can be achieved by introducing herbs and spices into the batter. For instance, adding fresh chives or dill to give it a fresh and vibrant spin can enhance the overall taste.

Texture modifications may be explored by baking instead of frying for a healthier version. However, be mindful that this may alter the final crispiness.

Presentation alternatives can include stacking onion rings vertically for a creative serving suggestion or using small wire racks to optimize visual appeal.

Serving and Presentation Guide

Plating techniques can elevate your serving style. Pile the onion rings on a wooden platter, and artfully drizzle with sauces for an eye-catching presentation. Using parchment paper beneath can add to the rustic feel while absorbing excess oil.

Garnishing with fresh herbs, such as parsley or cilantro, can add vibrant color and enhance visual appeal. Pair onion rings with sides like crispy fries or a colorful salad for a balanced meal presentation.

Traditional accompaniments include classic sauces such as ketchup and ranch dressing, which provide familiar flavors. For modern suggestions, consider serving with a spicy garlic aioli or flavorful yogurt dip.

Be mindful of temperature when serving; onion rings are best enjoyed warm, straight from the fryer. A plate with low sides will keep them from steaming while still allowing for aesthetics.

Portion control is key, especially in family gatherings where various dishes are present. Aim for a serving size of three to four rings per person to avoid overwhelming your guests.

Wine and Beverage Pairing

For perfect wine pairings, sparkling wines like Prosecco or a crisp Sauvignon Blanc complement the salty, savory flavors of cheesy onion rings well. These wines’ acidity cuts through the richness of the dish for a balanced experience.

If you’re looking for non-alcoholic alternatives, consider pairing your onion rings with a refreshing lemonade or iced tea. The brightness of these beverages contrasts nicely with the deep-fried snack, making each bite enjoyable.

Coffee or tea can also be interesting complements, particularly iced coffee with a touch of sweetness or a mild herbal tea. Serve these beverages at cooler temperatures to balance the warmth of the onion rings.

Temperature considerations are crucial; serve the beverages chilled to provide a refreshing contrast to the hot, cheesy onion rings fresh from the fryer.

Storage and Shelf Life

Proper storage helps maintain the quality of leftover onion rings. Store in an airtight container at room temperature for up to one day, or refrigerate for longer freshness, ideally 2-3 days.

When reheating, ensure the rings are heated through for safe consumption. A good method is placing them in a preheated oven at 350°F for about 10 minutes to regain their crispness.

Signs of spoilage include changes in texture, color, or an off odor. Always check your food before reheating.

If you want to make a bulk batch, freezing is a viable option. Place the cooked onion rings on a baking sheet in the freezer until solid, then transfer to a freezer-safe bag for up to three months.

For best results, reheat from frozen using the oven; it brings back the crunch without sogginess.

Make Ahead Strategies

Planning ahead can save time without compromising quality. You can slice the onions and prepare the batter ahead of time, storing each in the refrigerator for up to one day.

Alternatively, you can damage the frying process in advance, frying them until golden and then freeze for later. When ready to serve, reheat to restore their crunchy texture.

Quality can be impacted if storing pieces for too long, leading to sogginess. Always make a batch closer to serving for the best taste and authenticity.

Assembly tips include preparing individual components separately on cooking day to streamline the cooking process when you’re ready to fry.

Consider adding fresh elements post-reheating, like avocado slices or fresh herbs, to reinvigorate flavor.

Scaling Instructions

When halving the recipe, remember to reduce the cooking time slightly as there will be fewer onion rings in the oil, allowing them to cook faster.

Doubling or tripling the recipe requires attention to oil capacity in your fryer or pot — make sure not to overcrowd to maintain a consistent frying temperature.

When adjusting quantities, consider using wider pots to accommodate more rings at once without affecting their cooking quality.

Timing modifications may be needed when increasing batches; monitor the frying time closely and check for golden-brown coloration for doneness.

For storage considerations, larger quantities shouldn’t be stored in a single container; use multiple smaller containers for easier management and quicker cooling.

Nutritional Deep Dive

Macro breakdown sheds light on the caloric content of cheesy onion rings. Each serving mainly includes carbohydrates from the onions and breadcrumbs, fats from the cheese and frying, and minimal protein.

Micronutrient analysis reveals valuable vitamins and minerals in onion rings, especially if you use nutritious variations like whole wheat flour or fresh herbs to enhance nutritional value.

Health benefits can be seen in moderation. While rich in flavor, enjoying onion rings with a side of vegetables can create a nutritionally balanced meal.

Dietary considerations highlight that while rich in flavor, controlling portion sizes helps maintain a balanced diet and weight management plans.

Portion analysis should account for the indulgent nature of this dish, aiming for small servings in a shared setting to enjoy while maintaining health guidelines.

Dietary Adaptations

For gluten-free adaptations, use gluten-free flour and breadcrumbs to create crispy batter without compromising on the flavor of cheesy onion rings.

Dairy-free options could include using vegan cheese substitutes or cashew-based cheeses that melt, ensuring those adhering to a dairy-free diet can also enjoy this treat.

Vegan modifications can also take the shape of a chickpea batter, creating a unique texture while maintaining the flavor essence of onion rings.

Low-carb substitutions can utilize almond flour or coconut flour to coat rings, providing a lower-carb choice without sacrificing crunch.

Keto-friendly adaptations focus on reducing breading altogether or using crushed pork rinds as a crunchy coating.

Considering the paleo diet could mean omitting traditional ingredients and focusing on natural, whole-food alternatives to create a more nutrient-dense snack.

Troubleshooting Guide

Texture issues, like sogginess, can often occur due to improper oil temperature. Always ensure that the oil is hot enough to create that crispy texture as described.

Flavor balance might be affected if not enough seasoning is added to the batter. Adjust salt and spices to enhance the overall flavor profile accordingly.

Temperature problems often happen if rings are added to oil that’s not hot enough, leading to a greasy rather than crispy finish; always check oil temperature first.

Equipment challenges may arise if using the wrong pot for frying. Select a deep pot that allows enough space for the rings while maintaining oil temperature.

Ingredient substitutions may lead to unexpected flavors. Stick as closely as possible to original ingredients if unsure about potential outcomes for flavor integrity.

Timing concerns usually appear as cooking longer can lead to dried or burnt rings; always monitor and adjust as necessary based on visual cues rather than just a timer.

Recipe Success Stories

Community feedback has shown overwhelmingly positive results from home cooks who have tried this recipe. Many praised its simplicity and incredible taste, calling it their go-to appetizer for gatherings.

Variation successes have highlighted the adaptability of the recipe; readers reported swapping cheeses or creating spicy versions with jalapeños, leading to delightful results.

Adaptation stories often include personal twists, such as adding herbs from home gardens or local farmer’s markets, adding freshness and uniqueness to their onion rings.

Photography tips recommend focusing on capturing the golden-brown color of the rings under natural light. This authenticity will entice viewers and encourage them to try the recipe.

Readers often share their secrets for success in the comments section, providing a sense of community and shared experiences with this beloved dish, fostering a supportive network around cooking.

Frequently Asked Questions

1. Can I bake instead of fry these onion rings?

Yes, you can bake cheesy onion rings! Preheat your oven to 425°F (220°C) and place the rings on a baking sheet lined with parchment paper. Spray lightly with oil for crispiness and bake for approximately 20-25 minutes. Be sure to flip them halfway through for even cooking.

2. How can I make these onion rings gluten-free?

To make these cheesy onion rings gluten-free, simply replace the regular all-purpose flour and breadcrumbs with gluten-free alternatives. Almond flour, chickpea flour, or gluten-free panko are great options that will still provide crunch and flavor.

3. What type of cheese works best for this recipe?

The best cheese for cheesy onion rings is a blend of mozzarella and cheddar. Mozzarella provides fantastic meltability, while cheddar adds a sharp flavor. Feel free to experiment with variations according to your preference!

4. Can I prepare the batter in advance?

Yes, you can prepare the batter ahead of time. Store it in the refrigerator for up to a day before using. Just give it a good whisk before use, as some settling might occur.

5. How do I store leftover onion rings?

Store leftover onion rings in an airtight container at room temperature for 1 day or in the refrigerator for up to 3 days. For longer storage, consider freezing them with proper techniques outlined in this post.

6. What can I serve with cheesy onion rings?

Cheesy onion rings pair excellently with a variety of dipping sauces such as ranch dressing, spiced ketchup, or garlic aioli. They can also be served alongside burgers, fried chicken, or salads for a complete meal.

7. Can I reheat onion rings?

Yes, you can reheat onion rings to restore crispiness. Preheat your oven to 350°F (175°C) and bake for about 10 minutes or until heated through and crispy again.

8. Are there healthier alternatives for this dish?

For a healthier option, you could bake the onion rings instead of frying them and use less cheese or replace it with a lighter cheese. Adding a side salad or serving them alongside grilled proteins enhances nutritional value.

9. How can I add more flavor to the onion rings?

You can add flavor by incorporating spices into the batter, such as cayenne pepper, smoked paprika, or even finely chopped herbs like chives or parsley for added freshness and flavor complexity.

10. Can I double the recipe?

Absolutely! You can double or even triple the recipe. Just ensure you’re frying in batches to avoid overcrowding your frying pot, which can impact the crispiness.

Additional Resources

If you’re looking for related recipes, check out our collection of fun appetizers that will please any crowd. Delve into technique guides that elaborate on frying and cooking methods for perfect results every time. Explore extensive ingredient information that enhances your culinary skills and allows for creative recipes in your kitchen. Last but not least, consider equipment recommendations to ensure you have the perfect tools for making onion rings and more!

Join the Conversation

Engaging with our community is vital! Share your experiences on social media, including your made-from-scratch onion rings. Use hashtag #CheesyOnionRings to join in the fun with our enthusiastic cooking community! Don’t hesitate to leave your reviews and feedback to help us grow and improve our shared recipe experiences. We love to hear how you adapt these recipes, and photography tips can be an excellent way to inspire others to try their hand at creating this delicious dish!

The Recipe

Cheesy Onion Rings

Serves: 4

Prep Time: 15 mins

Cook Time: 10 mins

Total Time: 25 mins

Kitchen Equipment Needed

  • Deep fryer or large pot
  • Slotted spoon
  • Mixing bowls
  • Cooking thermometer
  • Parchment paper

Ingredients

  • 2 large onions, sliced into rings
  • 1 cup all-purpose flour
  • 1 teaspoon baking powder
  • 1 teaspoon garlic powder
  • 1/2 teaspoon salt
  • 1 cup milk
  • 1 1/2 cups breadcrumbs
  • 2 cups shredded mozzarella cheese
  • Vegetable oil for frying

Directions

  1. In a bowl, mix flour, baking powder, garlic powder, and salt. Slowly whisk in milk until a smooth batter forms.
  2. Dip each onion ring into the batter, ensuring an even coating, and then dredge them in breadcrumbs.
  3. Heat oil in a deep fryer or large pot to 375°F (190°C).
  4. Carefully place a few coated onion rings into the hot oil and fry until golden brown, about 2-3 minutes per side.
  5. Remove with a slotted spoon and drain on paper towels.
  6. While still warm, sprinkle mozzarella cheese on top of each onion ring before serving.
  7. Serve hot with your favorite dipping sauces!

Recipe Notes

  • Feel free to add spices to the batter for an extra kick.
  • Substitute with whole wheat flour for a healthier option.
  • These rings are best when fresh, but can be stored in an airtight container for up to three days.

Easy Air Fryer Caramelized Pineapple – Sweet and Juicy

Easy Air Fryer Caramelized Pineapple Recipe: A Sweet Delight

⚖️
Difficulty
Easy

⏲️
Prep Time
10 mins

🕒
Cook Time
15 mins

⏱️
Total Time
25 mins

🍽️
Servings
4 servings

Indulging in a delicious Easy Air Fryer Caramelized Pineapple is a delightful experience that brings a tropical vibe right into your kitchen. This recipe is perfect for those seeking to enhance their fruit game with a touch of sweetness and warmth. The caramelized edges, combined with the juicy texture of fresh pineapple, create a mouthwatering treat that can elevate any meal or even serve as a standalone dessert.

The use of an air fryer in this recipe makes it not only quick and easy but also healthier compared to traditional frying methods. Enjoying warm, caramelized pineapple drizzled with a hint of honey and a sprinkle of cinnamon is sure to evoke fond memories of summer and sunny days. Whether you’re hosting a dinner party, enjoying a simple cozy night in, or looking for a vibrant addition to brunch, this air fryer recipe is sure to impress.

Quick Recipe Highlights

  • Flavor Profile: Sweet, tangy pineapple paired with a hint of caramel and cinnamon creates a deliciously balanced taste.
  • Texture: The pineapple retains its juiciness while becoming tender on the inside with perfectly caramelized edges.
  • Aroma: As it cooks, the aroma of caramelized sugar mingles beautifully with the fresh scent of pineapple, tantalizing your senses.
  • Visual Appeal: Golden, caramelized slices of pineapple create a stunning presentation, perfect for sharing.
  • Skill Level Needed: This recipe is simple enough for novice cooks, requiring minimal skills and equipment.
  • Special Equipment: An air fryer makes this quick and easy, but a baking dish can also be used if you prefer traditional cooking methods.

Recipe Overview

  • Difficulty Level: This recipe is categorized as easy, making it perfect for beginner cooks or those in need of a quick dessert option.
  • Category: This is a versatile dish that can serve as a dessert or a sweet side for savory dishes.
  • Cuisine: Inspired by tropical flavors, this recipe draws from Caribbean influences where pineapple is a staple ingredient.
  • Cost: The ingredients are inexpensive, typically costing under $5 for a delicious treat that serves four.
  • Season: Pineapples are available year-round, but they are especially sweet and plentiful during summer months.
  • Occasion: Ideal for summer barbecues, family gatherings, or a special treat after dinner.

Why You’ll Love This Recipe

The easy air fryer caramelized pineapple stands out for its unique flavor and satisfying texture that everybody loves. The rich sweetness of the caramel combined with the tang of fresh pineapple creates a delightful explosion of flavors. It’s a tropical paradise delivered to your plate, bringing a refreshing yet warm sensation, making it perfect for any occasion.

In addition to its captivating taste, this recipe is a breeze to prepare, saving you time and hassle in the kitchen. Simply cut up the pineapple, season it, and let the air fryer work its magic. In just 15 minutes, you’ll have a warm, caramelized dessert that requires minimal cleanup, making it perfect for busy weekdays or spontaneous gatherings.

Nutritionally, pineapple is loaded with vitamin C, manganese, and other beneficial nutrients, which elevate this dessert’s health factor. Rather than indulging in heavy desserts, enjoying caramelized pineapple gives you a guilt-free dessert option that doesn’t compromise on flavor or satisfaction.

Socially, sharing air fryer caramelized pineapple can be a delightful experience, sparking conversations and shared smiles. It’s an excellent dish to feature at brunch or dinner parties, inviting everyone to enjoy and relish the burst of tropical flavors together.

Finally, with its affordability and accessibility, making air fryer caramelized pineapple is an absolute win for anyone looking to impress their guests without breaking the bank. A couple of fresh pineapples can yield a stunning dessert that’s simple yet sophisticated.

Historical Background and Cultural Significance

The origin of caramelized pineapple can be traced back to tropical regions where pineapples grow abundantly. This sweet fruit has been cherished by various cultures for centuries, often symbolizing hospitality and warmth. Historically, it has been used in festive dishes, showcasing its significance in celebration and gathering.

In many Caribbean and South American cuisines, caramelizing fruits like pineapple has long been a traditional practice, enhancing their natural sweetness to complement savory dishes. This practice intertwines with various regional influences, showcasing how diverse culinary traditions celebrate fresh ingredients.

Over the years, caramelized pineapple recipes have evolved, adapting to modern cooking methods and flavors. Innovations in cooking, such as air frying, allow contemporary cooks to enjoy this classic treatment of pineapple with less fuss and healthier results.

In addition to its culinary use, pineapple grows with cultural importance, often featured in art, festivals, and culinary events, symbolizing a connection to nature and the joy of sharing delicious food with others.

Ingredient Deep Dive

The star of this recipe is, of course, the pineapple. This tropical fruit dates back centuries and has significant cultural importance in many regions. Pineapples are known for their high vitamin C content, which helps boost the immune system and promotes skin health. When selecting a pineapple, look for a firm, golden-brown exterior and a fragrant smell, indicating ripeness. Store uncut pineapples at room temperature, but once sliced, keep them in an airtight container in the refrigerator to maintain freshness. For those who cannot find fresh pineapple, canned or frozen options can be suitable alternatives.

Brown sugar is another key ingredient used for caramelization. It adds a rich, molasses-like sweetness that complements the tangy pineapple beautifully. It is a staple in many desserts and has deep roots in various culinary traditions. Brown sugar is often used in baking and cooking for its superior caramelization properties. When incorporating it into your recipes, ensure it is tightly packed when measuring for accurate sweetness. Store brown sugar in a cool, dry place, and to prevent hardening, keep it in an airtight container.

Common Mistakes to Avoid

  • Not using ripe pineapples: Ensure pineapples are fully ripe for the best sweetness.
  • Cutting slices too thick: Pineapple slices should be of even thickness to ensure uniform cooking.
  • Overloading the air fryer: Avoid overcrowding to achieve optimal caramelization; work in batches if needed.
  • Neglecting to preheat the air fryer: Preheating helps achieve the right texture and cooks evenly.
  • Ignoring cook time monitoring: Keep an eye on cooking time, as air fryers can cook quickly.
  • Forgetting to flip the pineapple: Turn the slices halfway through cooking for even caramelization.
  • Using too much sugar: Balance the sweetness; too much can create a burnt flavor.
  • Not adapting for personal taste: Experiment with spices or flavorings to enhance the dish to your liking.

Essential Techniques

One of the key techniques in this recipe is caramelization. This process enhances the flavors and texture of the pineapple, creating a delightful sweetness. To master caramelization in the air fryer, ensure the sugar is evenly distributed over the fruit. Avoid stirring too much; letting the sugar sit allows it to melt properly. Look for the visual cue of a golden-brown hue to know when it’s perfectly caramelized, creating that ideal contrast with the juicy fruit.

Another technique is slicing the pineapple correctly. Choosing the right thickness is crucial; slices that are too thick won’t cook evenly, while too thin can result in mushiness. Practice uniform cuts, and use a sharp knife to achieve clean edges. This ensures that all pieces have similar cooking times, leading to a harmonious texture.

Pro Tips for Perfect Easy Air Fryer Caramelized Pineapple

Start with fresh, ripe pineapples for the best flavor and sweetness.

Try different sweeteners, such as honey or maple syrup, to customize the flavor profile.

Experiment with spices like cinnamon, nutmeg, or ginger to add depth to the caramelized pineapple.

Cook in small batches to prevent overcrowding in the air fryer, ensuring an even cook.

Consider pairing with ice cream or yogurt for a delightful contrast in temperature and texture.

Serve warm for the best experience; the caramel notes are most pronounced when fresh.

Add a squeeze of lime juice after cooking for a burst of brightness that complements the sweetness.

Allow the caramelized pineapple to rest for a few minutes before serving; this will help enhance the flavors as they meld.

Variations and Adaptations

Regional variations of caramelized pineapple can include adding tropical fruits such as mango or papaya for a more exotic twist. Seasonal adaptations might incorporate festive spices like pumpkin spice in the fall, or a dash of mint for a refreshing summer dessert. Dietary modifications are also possible: for a low-sugar variant, substitute the brown sugar with a sugar alternative that caramelizes well, like erythritol.

Texture modifications can be achieved by grilling the pineapple instead of air frying, bringing about a different flavor experience. For a gourmet presentation, consider layering the caramelized pineapple with whipped cream or using it as a topping for cheesecake for a stunning dessert.

Serving and Presentation Guide

When presenting your air fryer caramelized pineapple, consider unique plating techniques. A simple yet elegant arrangement can be achieved by stacking the slices slightly off-center for a casual feel. Garnish with fresh herbs like mint or basil for an attractive pop of color and added flavor.

Traditional accompaniments like coconut cream or a scoop of vanilla ice cream enhance the dessert’s interesting flavors. For modern serving suggestions, consider adding toasted nuts for a crunchy texture contrast, or drizzling with chocolate sauce for an indulgent treat.

Always serve warm, as this brings out the caramel notes most distinctly. Portion control should be considered for social gatherings; small slices allow everyone to enjoy without overindulging.

Wine and Beverage Pairing

When pairing wine with air fryer caramelized pineapple, opt for a sweet dessert wine like Moscato or a light Riesling. The natural sweetness complements the caramelized flavor beautifully. For non-alcoholic options, offer sparkling water with a slice of lime for a refreshing accompaniment.

Coffee pairings, particularly lighter roasts, can contrast with the sweetness of the caramel and enhance the overall experience. Serve both coffee or tea at a medium temperature to enjoy the flavors without them being overshadowed.

Storage and Shelf Life

For storage, keep any leftover caramelized pineapple in an airtight container in the refrigerator for up to 3 days. Ensure it’s cooled completely before sealing to maintain texture. Pineapple can spoil quickly, so it’s crucial to check for any signs of spoilage, such as an off smell or a slimy texture.

Reheating can be done in the microwave or air fryer to retain that warm, delicious caramel flavor. For longer preservation, consider freezing the caramelized pineapple in a single layer before transferring it to a freezer-safe bag. This way, you can enjoy it later without sacrificing quality, lasting up to 3 months.

Make Ahead Strategies

To streamline your preparation, you can slice the pineapple a day in advance and store it in the fridge, covered, to save time on the day of serving. If you’re planning for a gathering, consider making the caramelized pineapple a few hours ahead, and simply reheat it in the air fryer for a few minutes before serving.

Quality impact assessments should consider how flavors meld over time; resting in the fridge might intensify the flavors slightly. When assembling, make sure to factor in any fresh elements you wish to add, such as whipped cream or fresh fruit, to ensure a stunning final presentation.

Scaling Instructions

Scaling the recipe can be done easily. If halving the recipe, simply reduce the amount of pineapple and sugars while keeping the cooking time the same. Doubling or tripling the recipe might require additional cooking time; monitor the air fryer to achieve the same caramelized texture.

Equipment adjustments may be necessary if your air fryer has limited capacity. Plan for timing modifications by checking the cook progress partway through. Always consider storage implications for larger batches, ensuring that you have enough airtight containers to hold leftovers.

Nutritional Deep Dive

Analyzing the macros of a serving of air fryer caramelized pineapple highlights its healthy offerings. Each slice can provide significant vitamin C and dietary fiber, which support overall health. For those tracking calories, portion sizes are crucial; a full serving is generally low in calories, especially when compared to dairy-based desserts.

Micronutrient analysis of pineapple shows high levels of manganese and antioxidants that promote healthy digestion and skin. Monitoring portion sizes can help in weight management; enjoying it in moderation as a sweet side rather than a main dessert can keep indulgences in check.

Dietary Adaptations

For those following a gluten-free diet, this Easy Air Fryer Caramelized Pineapple recipe fits perfectly, as it contains no gluten ingredients. For a dairy-free option, it’s naturally lactose-free and pairs wonderfully with coconut yogurt.

Vegans can enjoy this recipe as is; the caramelized pineapple offers delightful sweetness without any animal products. If you’re following a low-carb or keto diet, consider adjusting the sugar to a low-carb alternative that still allows for delightful caramelization.

For paleo diets, the recipe is compatible as it features whole, unprocessed ingredients without added sugars. Other specific diets like low-FODMAP may also find this recipe suitable, as pineapples are low in FODMAP content when consumed in moderation.

Troubleshooting Guide

If you’re facing texture issues with your air fryer caramelized pineapple, ensure that your slices are even and not overcrowded in the air fryer basket. Uneven cooking may cause some pieces to be mushy while others remain firm.

Flavor balance can be adjusted by adding a bit more sugar or acidity; a tiny amount of lemon juice can counterbalance excessive sweetness quickly. Temperature problems can arise if the air fryer isn’t preheated; always allow it to reach the right temperature before cooking.

Equipment challenges such as inconsistent cooking can often be solved by checking your air fryer’s calibration or even adjusting the cooking time based on observed performance in prior recipes. Keep these considerations in mind for a smoother cooking experience.

Recipe Success Stories

Community feedback on air fryer caramelized pineapple has been overwhelmingly positive, with many readers sharing their personal tips and enjoyments. From spontaneous gatherings to intricate dinner parties, this recipe has made its mark as a crowd-pleaser.

Variation successes have included the addition of spices that readers have loved, showcasing the versatility of the basic recipe. Adaptation stories shared in the community also highlight how easily the recipe can be modified to suit personal tastes, sparking creativity in the kitchen.

Photography tips have encouraged users to highlight the dish’s vibrancy by choosing plates that contrast well with the golden yellow color of caramelized pineapple, allowing even novice cooks to create an appealing dish that photographs well.

Frequently Asked Questions

Q: Can I use canned pineapple for this recipe?
A: Absolutely! Canned pineapple can be used, but make sure to drain it well to avoid excess moisture that could hinder caramelization.

Q: What other fruits can I caramelize in the air fryer?
A: You can caramelize various fruits, such as peaches, apples, and bananas, by following similar methods as this pineapple recipe.

Q: Can I make this recipe in advance?
A: Yes, you can prepare the pineapple ahead of time and reheat it in the air fryer before serving to maintain its warmth and caramelization.

Q: What can I serve caramelized pineapple with?
A: It’s delicious served with vanilla ice cream, yogurt, or as a topping for pancakes and waffles. Use your imagination!

Q: Is it possible to use a conventional oven for this recipe?
A: Yes, you can make caramelized pineapple in a conventional oven. Just place the slices on a baking sheet and roast at 400°F until caramelized, flipping halfway through.

Q: How do I store leftovers?
A: Place any remaining caramelized pineapple in an airtight container in the refrigerator. It can last up to three days if stored properly.

Q: Can I use other sweeteners aside from brown sugar?
A: Yes! Feel free to experiment with alternative sweeteners like coconut sugar, honey, or agave nectar for different flavors.

Q: How do I know when the pineapple is perfectly caramelized?
A: Look for a golden-brown color and a fragrant aroma; it will also feel tender when pierced gently with a fork.

Q: Is air fried caramelized pineapple healthy?
A: Yes! It is a lighter dessert option, and pineapple is rich in vitamins and antioxidants while being lower in calories.

Q: Can I freeze caramelized pineapple?
A: Yes, you can freeze it! Make sure it’s cooled, and then store in a freezer-safe bag. It can last up to three months.

Q: Can I add spices to the caramelized pineapple?
A: Definitely! Adding ground cinnamon, nutmeg, or even chili powder can enhance the flavors of the caramelized pineapple significantly.

Additional Resources

Explore more related recipes that showcase the versatility of air frying with fruits. Consider checking out techniques for mastering other air fryer treats, including crispy vegetables and unique desserts.

For ingredient information, delve deeper into the benefits of using fresh fruits in your cooking. Seek out equipment recommendations that can enhance your cooking experience, particularly air fryers of various sizes and capabilities tailored to home kitchens.

Lastly, explore seasonal variations that keep your cooking fresh and exciting, celebrating seasonal produce throughout the year.

Join the Conversation

We’d love to hear your stories! Share your experiences making Easy Air Fryer Caramelized Pineapple on social media, and don’t forget to tag us in your recipe photos. Your feedback can inspire others to try it out.

Get involved by leaving comments on the recipe page, sharing your adaptations, and posting suggestions based on your tastes. Engage with fellow home cooks to create a community of culinary creativity and enjoyment around this delicious recipe.

The Recipe

Easy Air Fryer Caramelized Pineapple

Serves: 4 servings

Prep Time: 10 mins

Cook Time: 15 mins

Total Time: 25 mins

Kitchen Equipment Needed

  • Air fryer
  • Knife
  • Cutting board
  • Measuring spoons
  • Bowl for mixing

Ingredients

  • 1 ripe pineapple, peeled and sliced
  • 1/4 cup brown sugar
  • 1 teaspoon cinnamon
  • 1 tablespoon olive oil (optional)
  • Fresh mint for garnish (optional)

Directions

  1. Preheat the air fryer to 375°F (190°C).
  2. In a bowl, combine the brown sugar and cinnamon.
  3. Coat the pineapple slices evenly with the mixture. Optionally drizzle with olive oil for added richness.
  4. Arrange the pineapple slices in the air fryer basket in a single layer.
  5. Air fry for 12-15 minutes or until golden brown and caramelized, flipping halfway through cooking.
  6. Once cooked, remove the pineapple from the air fryer and let it cool slightly.
  7. Garnish with fresh mint if desired and serve warm.

Recipe Notes

  • For a healthier version, consider reducing the amount of sugar or using sugar substitutes.
  • This recipe can be experimented with by adding different spices according to personal preference.
  • Feel free to serve with yogurt or ice cream for a delicious dessert experience.

Easy Keto Bacon Wrapped Onion Rings – Crispy & Low Carb

Keto Bacon Wrapped Onion Rings: A Savory Delight for Low-Carb Lovers

⚖️
Difficulty
Easy

⏲️
Prep Time
15 mins

🕒
Cook Time
25 mins

⏱️
Total Time
40 mins

🍽️
Servings
4

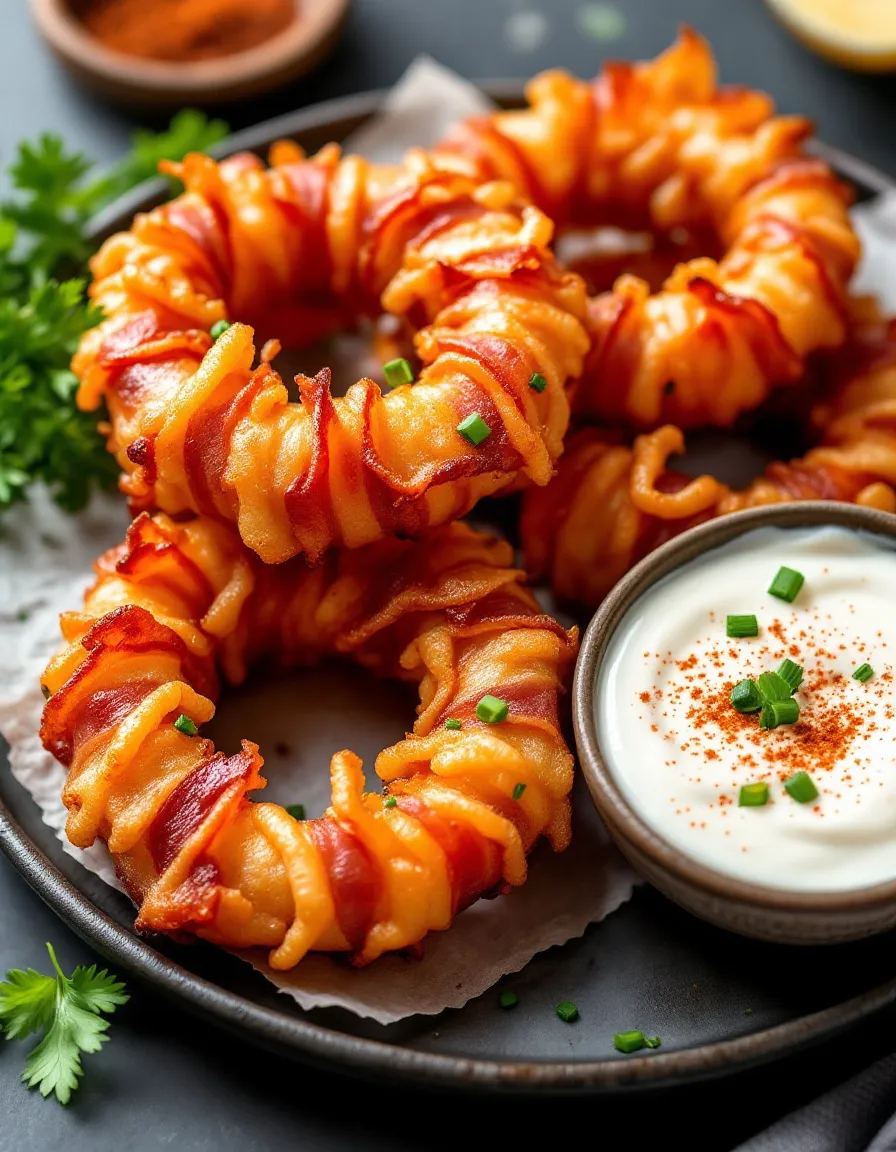
Indulge in the mouth-watering combination of crispy bacon and tender onion rings with this Keto Bacon Wrapped Onion Rings recipe. It’s perfect for a snack, appetizer, or even as a side dish for your favorite meal. Each bite delivers a satisfying crunch from the bacon, followed by the soft and slightly sweet flavors of the onion. If you’re following a ketogenic diet, you’ll love how easy this recipe is to whip up, and how it can help keep you in line with your low-carb lifestyle.

Imagine serving these delicious morsels at your next gathering, where the enticing aroma of baking bacon fills the air, tempting everyone to grab a taste. They are sure to be a hit, as each onion ring is expertly wrapped in crispy bacon that adds a savory depth to the sweetness of the onion. Not only are these rings delightful to eat, but they also make for a visually appealing dish, with the golden-brown bacon contrasting beautifully with the tender onion. So, grab your ingredients and let’s get started on this keto-friendly feast!

Quick Recipe Highlights

  • Flavor Profile: The rich smokiness of the bacon wonderfully balances the natural sweetness of the onion, delivering an explosion of flavor in every bite.
  • Texture: Expect a delightful crunch from the perfectly cooked bacon, paired with the juicy, tender onion inside, creating a satisfying mouthfeel.
  • Aroma: The enticing smell of bacon sizzling in the oven will have your mouth watering before the first bite.
  • Visual Appeal: Golden-brown, crispy bacon wrapped around perfectly caramelized onion rings provides a stunning presentation that will wow your guests.
  • Skill Level Needed: This recipe is easy enough for beginner cooks while still impressing seasoned chefs with its delicious results.
  • Special Equipment: A baking sheet and aluminum foil are all you need to keep cleanup easy and ensure even cooking.

Recipe Overview

  • Difficulty Level: This keto recipe is simple, making it approachable for cooks of all experience levels, with just a few steps to follow.
  • Category: These bacon-wrapped onion rings fit perfectly in the appetizer category, ideal for parties, game days, or just a fun snack.
  • Cuisine: This dish draws on classic American flavors, combining the beloved elements of crispy bacon and sweet onions.
  • Cost: The ingredients for this dish are budget-friendly, making it accessible without compromising flavor or quality.
  • Season: Perfect for year-round enjoyment, these onion rings hit the spot anytime, whether during summer barbecues or cozy winter meals.
  • Occasion: Great for gatherings, family dinners, or laid-back get-togethers, these keto bacon-wrapped onion rings cater to all sorts of occasions.

Why You’ll Love This Recipe

The taste of Keto Bacon Wrapped Onion Rings is truly irresistible. The salty, crispy bacon envelops the sweet, tender onions, creating a perfect harmony of flavors. Each bite offers a contrast that tantalizes the taste buds and keeps you coming back for more. The combination is so addictive that even non-keto followers will enjoy them, making these bacon wraps a versatile crowd-pleaser.

Convenience is another reason to love this recipe. The preparation is straightforward — just wrap the onion rings and bake. This means you can spend less time in the kitchen and more time enjoying your company. Plus, they can be made in advance and reheated quickly if needed, offering a stress-free appetizer for gatherings.

When it comes to nutritional advantages, these onion rings are a fantastic choice for anyone on a low-carb or keto diet. The bacon adds protein and healthy fats, while the onions provide fiber and vitamins, ensuring you’re indulging without the guilt. They’re a filling snack that won’t derail your keto goals.

These bacon-wrapped onion rings are also perfect for entertaining. They can be served as finger food, appealing to both adults and kids alike. Guests will enjoy picking them up and savoring the delicious combination of flavors. They create a fun and relaxed atmosphere, making your gathering more enjoyable.

Finally, this recipe is cost-effective and accessible. With minimal ingredients and straightforward instructions, you won’t need to dig deep into your wallet to whip up this dish. Plus, bacon and onions are pantry staples that are easy to find regardless of where you live.

Historical Background and Cultural Significance

Bacon-wrapped dishes have a long-standing place in culinary history, originating from various cultures that sought to enhance flavors through the richness of bacon. The practice of wrapping vegetables and other items in bacon came about as chefs experimented with adding depth and flavor to simple ingredients. Onion rings, while popularized in American cuisine, have roots in similar frying techniques used across different cultures.

The cultural importance of bacon-wrapped foods speaks to a universal love for indulgent recipes that bring comfort and joy during meals. As a testament to communal eating, bacon-wrapped items often appear in gatherings, reunions, and celebrations around the world, signifying both richness and sharing.

Over the years, the recipe for bacon-wrapped onion rings has evolved, gaining variations such as spicy or cheesy fillings. These adaptations often reflect local tastes and trends, making the dish a canvas for creativity while still honoring its delicious heritage. As food trends like low-carb and keto emerged, bacon-wrapped onion rings garnered renewed attention for their ability to meet dietary needs without sacrificing flavor.

Regional variations also exist, where different spices or sauces are added into the mix, demonstrating how versatile this dish can be. In some regions, barbecue sauce may be brushed on before baking, while in others, a sprinkle of cayenne pepper provides a nice kick. This adaptability is a large part of the dish’s appeal.

Ingredient Deep Dive

Bacon is a beloved ingredient around the world, often credited for its rich flavor and versatility. Historically, bacon comes from various cuts of pork and has been preserved through curing methods for centuries. Nutritionally, bacon offers protein and healthy fats, which make it a great choice for ketogenic diets. When selecting bacon, look for options that are free of added sugars and preservatives for the healthiest choice. Store bacon in the refrigerator and consume within the expiration date or freeze for longer storage.

Onions are another staple ingredient with a storied history across culinary traditions. They add sweetness and depth to dishes and come in various types, including yellow, red, and white. Nutritionally, onions are low in calories yet high in vitamins and fiber, making them a fantastic addition to a balanced diet. When choosing onions, look for firm, dry bulbs with no soft spots. Store them in a cool, dark place for maximum freshness.

Common Mistakes to Avoid

  • Underwrapping: Ensure each onion ring is tightly wrapped with bacon to avoid uncooked spots. If the bacon isn’t secure, it may fall off during cooking.
  • Choosing the wrong onion: Using sweet onions is ideal for this dish, but yellow or red onions can also work based on preference.
  • Not preheating the oven: Make sure your oven is heated to 400°F before baking. This ensures even cooking and crispiness.
  • Skipping the aluminum foil: Line your baking sheet with foil to prevent sticking and make cleanup easier.
  • Overcrowding the pan: Leave enough space between each ring on the baking sheet to ensure air circulation, promoting even cooking.
  • Not monitoring the cooking time: Keep a close eye on the onion rings as they bake, as different ovens may cook at varying rates.
  • Serving immediately: Allow the onion rings to cool slightly after baking for better texture.
  • Using thick-cut bacon: While thick-cut bacon has its merits, it may not crisp up as well in this application.
  • Rushing the cooling process: Giving the bacon-wrapped onion rings a few minutes to sit after cooking can enhance the flavors and texture.
  • Ignoring the nutritional labels: Always check for hidden sugars in bacon and opt for varieties that align with your dietary goals.

Essential Techniques

Wrapping the onion rings in bacon is the crucial first step towards achieving delicious results. To master this technique, ensure you cut the onions into thick rings, using a sharp knife to avoid crushing them. Take a slice of bacon and wrap it around each onion ring, slightly overlapping as you go for even cooking. Common pitfalls include not overlapping enough or leaving gaps in the wrap, resulting in unevenly cooked bites. Aim for a snug fit and secure the ends with toothpicks if necessary.

Baking is another essential technique that ensures crispy bacon while keeping the onion tender. Preheat your oven to 400°F, as this high temperature will help render the fat from the bacon and create a satisfying crunch. Place the wrapped onion rings on a baking sheet lined with aluminum foil for easier cleanup. Look for visual cues such as deep golden brown bacon and a tender onion for perfect doneness. Remember to rotate the baking sheet halfway through cooking for even results.

Pro Tips for Perfect Keto Bacon Wrapped Onion Rings

Use high-quality bacon that is free from added sugars and preservatives to maintain your keto diet while still savoring rich flavors.

Experiment with a variety of onions, such as sweet Vidalia or spicy red onions, to personalize the taste and add a unique twist to the dish.

For extra flavor, sprinkle some smoked paprika or garlic powder on the onion rings before wrapping them with bacon.

Make your onion rings spicy by adding a sliver of jalapeño or a dab of hot sauce in the center of each onion ring before wrapping.

Serve with a side of low-carb dipping sauce, such as ranch or garlic aioli, for added layer of flavor and enjoyment.

Use toothpicks to secure the bacon at the ends, ensuring it stays in place and won’t unravel during the cooking process.

Allow your onion rings to rest for a few minutes after baking to help keep them crisp while also allowing flavors to meld.

Batch cook these delights for meal prep and enjoy them throughout the week as snacks or quick side dishes.

Variations and Adaptations

Regional variations could include adding spices or herbs that reflect local tastes. In the Southern U.S., for instance, you might choose to incorporate a bit of cayenne pepper or a barbecue rub for added zest.

Seasonal adaptations can be fun too! In the fall, try incorporating pumpkin spice seasoning into the mixture before wrapping for a festive flare.

For dietary modifications, vegetarians may opt to substitute meat bacon with plant-based bacon varieties, which can often mimic the crispiness of traditional bacon.

Flavor variations could involve experimenting with cheese, where you place a small piece of cheese inside the onion ring before wrapping it with bacon, creating a rich and gooey center.

Texture modifications may include using air fryers if you’re looking to get a crunchier finish without as much fat from cooking oil.

Presentation alternatives may involve serving the onion rings on a wooden board or platter, garnished with fresh herbs or a drizzle of balsamic reduction.

Serving and Presentation Guide

For a visually appealing platter, arrange your keto bacon-wrapped onion rings in a circular pattern or line them up in a row on a serving tray. Use a colorful plate or platter to enhance contrast with the golden bacon. Garnishing with fresh chopped parsley or chives can add a pop of color and freshness to the dish.

For an upscale presentation, consider adding a dipping sauce in a small ramekin placed at the center of the platter, allowing guests to enhance each bite. Make sure to serve warm, allowing the rich aroma to entice your guests as they dig in.

Temperature considerations should be kept in mind, as these onion rings are best enjoyed hot out of the oven for maximum crispiness. If they cool down too much, pop them back in the oven for a quick reheat.

Portion control can also be key, particularly if serving at parties. Consider cutting each onion ring in half for easier snacking or providing smaller serving sizes to encourage moderation among guests.

Wine and Beverage Pairing

For wine pairings, a light, crisp white wine such as Sauvignon Blanc complements the salty bacon and sweet onion beautifully. Alternatively, a fruity rosé can also serve as a refreshing and vibrant pairing that balances the flavors.

If you prefer non-alcoholic alternatives, a sparkling water infused with lemon or lime can elevate the experience and cleanse the palate.

Tea or coffee can serve as delightful complements too, with a bright iced tea or a smooth roasted coffee creating a balance with the richness of the dish.

Temperature considerations for these beverages should be taken into account; serve white wine chilled, while coffee should be brewed fresh and served hot.

Storage and Shelf Life

To store your leftover onion rings, place them in an airtight container in the refrigerator where they can last up to 3 days. Reheat them in the oven instead of the microwave for best results, preserving that delicious crispiness.

For longer-term storage, consider freezing the baked onion rings. Make sure they are cooled first, then arrange them on a baking sheet to freeze individually before transferring them to a freezer-safe bag or container. They can last up to 3 months in the freezer, ready to be popped in the oven whenever you desire a tasty snack.

Signs of spoilage to look for include an off smell, changes in texture, or a slimy appearance, which indicate it’s time to discard.

For reheating, simply place them in a preheated oven at 375°F for about 10-15 minutes or until heated through and crispy. Avoid using the microwave, as it may cause sogginess.

Make Ahead Strategies

To cut down on preparation time, you can prepare the onion rings by wrapping them in bacon ahead of time and storing them in the refrigerator until you’re ready to cook. Just make sure they are stored in an airtight container to prevent drying out.

Set up a prep timeline by wrapping the onion rings and then quickly cleaning up your work area, allowing you to focus on baking when guests arrive.

Storage between steps could also be enhanced by using parchment paper to keep the onion rings separated if they’re stacked in the fridge.

Maintaining quality after the first day can be tricky, but freezing the onion rings right after wrapping before they are cooked can preserve textures and flavors very well.

When it comes time to reheat, simply bake from frozen with an adjusted cooking time, allowing for extra heat to render the bacon.

Fresh element additions, like a sprinkle of herbs or spices just prior to serving, can lift the dish and add a burst of flavor that feels like a last-minute touch.

Scaling Instructions

If you plan to halve the recipe, simply reduce the number of onions and the amount of bacon proportionately without compromising taste or texture.

Doubling or tripling the recipe may require additional baking sheets, but the temperature and cooking time will remain the same. Watch for doneness and bake in batches if necessary.

Equipment adjustments might include using multiple baking trays lined with foil to accommodate the extra servings without overcrowding, ensuring even cooking for all rings.

Timing modifications will mostly depend on your oven’s capacity. If doubling, you may need to rotate the trays halfway through for consistent results.

With proper storage considerations, remember that leftover portions can be frozen or wrapped tightly to maintain flavor and freshness for later enjoyment.

Nutritional Deep Dive

A macro breakdown shows the dish predominantly offering fats from the bacon and carbohydrates from the onions, fitting harmoniously into keto standards. Each serving is rich in protein, making it a satiating option for lunch or snacking.

Micronutrient analysis indicates that while onions provide vitamins C, B6, and essential minerals like potassium, bacon also supplies some zinc and iron. These nutrients together can play vital roles in overall health.

The health benefits of this dish can be linked to its low-carb nature, which may assist in weight management and can contribute to energy stability. With high-fat content, it can help you stay full longer, making it a satisfying option.

Dietary considerations must involve those who are watching sodium intake, as bacon can be high in salt. Opt for lower-sodium versions if desired, and balance with fresh vegetables or salads.

Portion analysis reveals that due to their rich flavor and satisfying texture, one or two onion rings can make a perfect low-carb snack without overindulgence.

For weight management tips, consider pairing bacon-wrapped onion rings with a fresh salad or low-carb vegetable side to create a more balanced meal.

Dietary Adaptations

This recipe can easily be adapted for gluten-free diets by ensuring all ingredients are clearly labeled as gluten-free. Traditional bacon is naturally gluten-free, but be mindful of any added seasonings.

Dairy-free options can also be made by avoiding any cheese additions, focusing solely on the natural flavors of bacon and onion. Many store-bought bacon options are dairy-free as well.

For vegans, switch to plant-based bacon alternatives, which can imitate the flavor profile without animal products and maintain the fresh onion filling.

Low-carb variations are inherently part of this recipe as it is designed to be keto-friendly, focusing on high protein and low carbohydrates.

Paleo practitioners can substitute conventional bacon with uncured, organic versions for a healthier take, while still enjoying the flavor of the dish.

For low-FODMAP diets, consuming smaller portions of onion or opting for the green part of spring onions may provide enjoyment without discomfort.

Troubleshooting Guide

If you encounter texture issues with the bacon not becoming crisp, consider lowering the oven temperature and cooking longer, which allows more fat to render and creates a crunchy texture.

For flavor balance, ensure that seasoning is applied before wrapping, and taste the raw onion for any adjustments. Adding spices or herbs can enhance the overall palette.

If temperature problems arise, check that your oven is calibrated correctly, as uneven temperatures can lead to burnt bacon or undercooked onions.

Equipment challenges such as overcrowding your baking sheet could result in fewer crispy outcomes. Use multiple pans if necessary to achieve best results.

Ingredient substitutions can affect flavor profiles; if using a different type of onion, be aware of their natural sweetness or bitterness and adjust seasoning accordingly.

Timing concerns may lead to uneven cooking. Rotate your pans halfway through baking to ensure all bacon-wrapped onion rings receive equal heat exposure.

Recipe Success Stories

Many readers have shared their love for this recipe, enjoying the delightful crunch and savory flavor that make these onion rings an immediate hit among guests.

Variations have surfaced through community feedback, with some readers attempting to make them with different meats or seasonings, thus tailoring them to personal preferences.

Adaptation stories are plentiful, with individuals proud of successfully creating a keto-friendly treat that meets their dietary needs while impressing friends and family.

Photography tips have been shared on social media, encouraging users to take vibrant shots to highlight the delicious contrast of colors and textures in the finished dish.

Frequently Asked Questions

Can I make these bacon-wrapped onion rings in an air fryer?

Yes! Air frying can achieve a great crispness. Just set the air fryer to 400°F and cook for about 15-18 minutes, checking for doneness.

Are these bacon-wrapped onion rings gluten-free?

Yes, naturally! Bacon and onions do not contain gluten, but make sure to choose bacon without any added gluten-containing seasonings.

What type of onion is best for this recipe?

Sweet onions like Vidalia work wonderfully, but yellow or red onions can also be used based on your flavor preference.

Can I prepare these onion rings in advance?

Absolutely! You can wrap them up and store them in the fridge for a day or freeze them before cooking for longer storage.

What dipping sauces pair well with these bacon-wrapped onion rings?

Ranch dressing, garlic aioli, or a spicy ketchup can all serve as perfect dipping sauces to complement the flavors.

How do I ensure my bacon gets crispy?

Using high-quality thin bacon and baking it on a wire rack can help it get crispier by allowing air to circulate around it while cooking.

Can I use turkey bacon instead of pork bacon?

Yes, turkey bacon can be used as an alternative. However, it may not be as crispy or flavorful as traditional bacon.

How long do leftovers last in the fridge?

Leftover bacon-wrapped onion rings can be stored in an airtight container in the refrigerator for up to three days.

What is the best way to reheat bacon-wrapped onion rings?

Reheat leftovers in the oven at 375°F for about 10-15 minutes, or until they are heated through and the bacon is crisp.

Can I make these onion rings without bacon?

Yes, you can use plant-based bacon as a substitute for a vegetarian or vegan option while maintaining similar textures.

Are these onion rings suitable for a low-carb diet?

Yes! These bacon-wrapped onion rings are low in carbohydrates, making them an ideal snack for a ketogenic diet.

Additional Resources

Explore related recipes on our blog to discover other low-carb snacks that satisfy cravings without derailing your diet.

Technique guides featuring wrapping, frying, and seasoning tips can also help elevate your cooking skills for this and other dishes.

Delve deeper into ingredient information to understand the nutritional benefits of using onions and bacon in your cooking.

Equipment recommendations can help you choose the right tools, from baking sheets to proper knives, making your cooking experience smoother.

Lastly, look out for seasonal variations in ingredients as they can enhance recipes and introduce new flavors to classic dishes like these onion rings.

Join the Conversation

Share your cooking experiences and photos of your Keto Bacon Wrapped Onion Rings on social media. We love seeing your creativity and delicious results!

Encourage reviews and feedback from those you serve these scrumptious snacks to. Engaging with your community can inspire new variations and adaptations.

Be sure to utilize photography tips to capture the best angles of your dish, showcasing its golden exterior and inviting aroma.

We want to hear your recipe variations! What unique touches have you added to make this dish your own? Sharing is a wonderful way to encourage creativity in the cooking community!

The Recipe

Keto Bacon Wrapped Onion Rings

Serves: 4

Prep Time: 15 mins

Cook Time: 25 mins

Total Time: 40 mins

Kitchen Equipment Needed

  • Baking sheet
  • Aluminum foil
  • Sharp knife
  • Cutting board

Ingredients

  • 2 large onions, sliced into rings
  • 12 slices of bacon
  • 1 teaspoon black pepper
  • 1 teaspoon garlic powder
  • Optional: toothpicks for securing

Directions

  1. Preheat the oven to 400°F (200°C) and line a baking sheet with aluminum foil.
  2. Peel and slice the onions into thick rings, carefully separating the layers.
  3. Take a slice of bacon and wrap it around each onion ring, securing with a toothpick if necessary.
  4. Place the wrapped onion rings on the baking sheet, ensuring they don’t overlap.
  5. Sprinkle with black pepper and garlic powder for added flavor.
  6. Bake in the oven for 25 minutes or until the bacon is golden-brown and crispy.
  7. Remove from the oven and let cool for a few minutes before serving.

Recipe Notes

  • For added flavor, consider marinating the onion rings in a light soy sauce before wrapping them with bacon.
  • Leftovers can be stored in an airtight container in the refrigerator for up to three days.
  • Bacon can be substituted for turkey bacon for a lighter option.
  • Feel free to explore different spices and seasonings to match your taste preferences.

Easy Air Fryer Blooming Onion – Crispy and Delicious

Easy Air Fryer Blooming Onion – Deliciously Crispy and Flavorful

⚖️
Difficulty
Medium

⏲️
Prep Time
15 mins

🕒
Cook Time
20 mins

⏱️
Total Time
35 mins

🍽️
Servings
4

When it comes to appetizer perfection, the Easy Air Fryer Blooming Onion is truly a standout dish that brings the restaurant experience directly into your home. This deliciously crispy and flavorful blooming onion mimics the iconic version often found in restaurants, bursting with spices and served hot with your favorite dipping sauce. The air fryer adds a twist to this classic recipe, providing that same delightful crunch without the need for excessive oil, making it a healthier choice without sacrificing flavor.

As you break apart the delicate petals of this blooming onion, each bite reveals a crisp texture that is complemented by a savory, zesty flavor profile. Seasoned with a mix of spices, this dish is easy to prepare and will surely impress your family and friends. Whether you’re hosting a game night or simply treating yourself, this air-fried appetizer will quickly become a household favorite.

Quick Recipe Highlights

  • Flavor Profile: This dish combines savory and spicy flavors, enhanced with a slight kick from cayenne pepper.
  • Texture: The outer layer is perfectly crispy while the inner onion retains a tender bite.
  • Aroma: Aromatic notes of garlic and onion greet you as it cooks, making your kitchen smell delightful.
  • Visual Appeal: The golden-brown hue and flower-like presentation make it visually irresistible.
  • Skill Level Needed: Suitable for cooks with some basic knife skills and familiarity with frying techniques.
  • Special Equipment: You will need an air fryer to achieve that perfect crunch.

Recipe Overview

  • Difficulty Level: The Easy Air Fryer Blooming Onion is a medium-difficulty recipe that requires some preparation and attention to detail, but it is achievable for anyone with basic cooking skills.
  • Category: This recipe fits perfectly as an appetizer but can also serve as a side dish during casual meals.
  • Cuisine: While the blooming onion originates from American cuisine, it draws inspiration from onion rings and other fried treats popular in restaurants.
  • Cost: This dish is budget-friendly, requiring easily accessible ingredients often found in your pantry.
  • Season: Great for all seasons, particularly when entertaining guests during parties or game nights.
  • Occasion: Ideal for casual gatherings, movie nights, or as a fun snack while enjoying sports events.

Why You’ll Love This Recipe

The Easy Air Fryer Blooming Onion is both a feast for the taste buds and a treat for the eyes. Featuring flavors that meld beautifully together, it offers a satisfying crunch that comes from the outer layer, contrasting the sweet and tender onion inside. Each petal pulls apart with ease, allowing for a delightful dipping experience with your desired sauces.

This recipe is incredibly convenient as it requires minimal prep time and cleans up quickly due to the air fryer. You won’t have to deal with excessive grease or long cooking times often associated with traditional frying methods. Plus, it opens up opportunities for you to experiment with spices and accompanying dipping sauces, ensuring there’s always something new to experience with this dish.

From a nutritional perspective, air frying significantly reduces calories and fat content compared to deep frying. This way, you can enjoy a delicious snack without the guilt, making it an excellent option for those who are conscious of their dietary intake.

When it comes to social gatherings, a blooming onion is a fun and interactive appetizer that will surely spark conversation. It’s a shareable dish, keeping the atmosphere lively as guests gather around to enjoy those crispy petals together. Its playful presentation lends a festive touch that is perfect for casual get-togethers.

Lastly, this recipe is cost-effective, utilizing common ingredients like onions, breading, and spices that are likely already in your pantry. Preparing this blooming onion at home ensures you save on expenses while enjoying a beloved restaurant favorite at your dining table.

Historical Background and Cultural Significance

The origin of the blooming onion is often attributed to the famous Outback Steakhouse, where it made its debut as a signature appetizer in the 1980s. This unique dish quickly became a popular item due to its eye-catching presentation and indulgent flavor, combining the best elements of an onion and a crispy fried snack.

Culturally, the blooming onion symbolizes the fun of American dining culture, where larger-than-life portions and shareable appetizers dominate the experience. It reflects the idea of food being a communal experience, where guests can gather around a dish, break it apart, and enjoy it together.

Over the years, the recipe has evolved, with variations appearing in home kitchens and restaurants alike. Some people have developed their unique spice blends or even experimented with different types of onions, showcasing the adaptability of this beloved dish.

Regional variations can also be noted, with some cooks adding their local spices or serving the onion with unique dipping sauces, further enhancing its appeal across different geographies and palates.

Ingredient Deep Dive

Onion: The star ingredient, onions carry a rich history in multiple cuisines worldwide. Nutritionally, they are low in calories but high in vitamins and minerals, such as vitamin C and dietary fiber. When selecting onions, choose firm ones with no blemishes for the best flavor. Store them in a cool, dry place, and consider using yellow onions for sweetness and robust flavor.

Breading Mixture: Typically, a blend of flour, breadcrumbs, and spices are used to create the crispy coating of the blooming onion. The flour acts as a base, while breadcrumbs add texture. This mixture can be modified with different spices to personalize the flavor profile. Be mindful of storage; keep breading in an airtight container to ensure freshness for longer periods.

Common Mistakes to Avoid

  • Not cutting the onion properly: Ensure to make deep enough cuts without cutting through to the base to maintain the onion’s shape.
  • Overcrowding the air fryer: Fry the onion in batches if necessary to allow proper hot air circulation for even cooking.
  • Skipping seasoning: Don’t forget to thoroughly season the breading; it enhances the overall flavor of the dish.
  • Using cold ingredients: Let the onion sit at room temperature for a few minutes before breading for better adhesion.
  • Insufficient preheating: Preheating the air fryer is important for achieving that perfect crispiness.
  • Failing to coat evenly: Ensure the onion is evenly coated in the breading to avoid spots that remain soggy.
  • Not pairing with the right dip: A good dipping sauce complements the blooming onion; classic choices include ranch or spicy mayo.
  • Ignoring cooking time: Cooking for too long can lead to burnt outer layers; check for doneness periodically.
  • Forgetting to spray with oil: A light spray of cooking oil helps achieve that desired golden crispiness.
  • Using stale breadcrumbs: Fresh breadcrumbs yield a better texture and flavor, so check the status of your pantry supplies.

Essential Techniques

Preparation: Understanding how to properly cut an onion for blooming requires practice. Make vertical cuts without slicing all the way through. This technique allows the onion to open up during cooking, creating the signature petal shape.

Seasoning: Mastering the balance of spices is crucial. Experiment with spices to find the right flavor profile for you – think garlic powder, paprika, and cayenne pepper. Taste-testing at various stages ensures a well-seasoned outcome.

Pro Tips for Perfect Easy Air Fryer Blooming Onion

To elevate your Easy Air Fryer Blooming Onion, consider these tips:

  • Use a sweet onion, like Vidalia, for a milder taste that contrasts beautifully with the seasoning.
  • Try different dipping sauces like spicy ketchup or garlic aioli for a creative twist.
  • For a lower-carb option, replace breadcrumbs with crushed pork rinds.
  • Experiment with unique flavor profiles by adding herbs like thyme or rosemary to the breading mix.
  • Allow the blooming onion to rest for a few minutes after cooking for enhanced flavor absorption.
  • Consider using a mix of gluten-free flour and breadcrumbs for a gluten-free variation.
  • Pepper jack cheese can be shredded and added to the center for a cheesier version.
  • Garnish with fresh herbs for an additional layer of flavor and an appealing presentation.

Variations and Adaptations

When it comes to variations of the Easy Air Fryer Blooming Onion, the possibilities are endless. For a spicier take, add chopped jalapeños to the breading mixture or create a spicy dipping sauce to accompany it. Seasonal adaptations could include serving it with a fresh salsa during summer, bringing a fresh twist to the dish.

Dietary modifications can easily be made if you’re following a specific eating plan. A vegan version can be prepared by using a plant-based batter and substituting the egg wash with flaxseed meal. Furthermore, flavor variations such as BBQ seasoning or ranch seasoning can transform the taste profile entirely while keeping the crunch intact.

If you’re looking to change the texture, consider adding crushed cornflakes or panko breadcrumbs to the breading for extra crunch. Presentation can also be diversified; serve the onion on a vibrant platter and add a sprinkle of chopped green onions or parsley to liven it up visually.

Serving and Presentation Guide

Plating your Easy Air Fryer Blooming Onion beautifully enhances its appeal. Use a large round plate or platter to allow enough space for the onion to bloom. Garnish with herbs like parsley around the base for a pop of color. Pair it with an assortment of dipping sauces presented in small bowls around the onion for an inviting look.

Temperature considerations are vital; blooming onions are best served hot. Ensure you serve immediately after cooking to retain the crispiness. Portion control can also be managed by cutting smaller pieces for sharing, keeping the dining experience communal and fun.

Wine and Beverage Pairing

When enjoying your Easy Air Fryer Blooming Onion, consider pairing it with refreshing beverages like a chilled white wine or light beer. A Sauvignon Blanc or a crisp Chardonnay complements the onion’s flavors beautifully. If you prefer non-alcoholic options, try serving it with sparkling water or a refreshing lemonade to balance out the dish’s richness.

For an additional twist, a creamy cold brew coffee can accompany the meal, offering a unique contrast to the crispy texture, making for an interesting palate experience.

Storage and Shelf Life

To store your Easy Air Fryer Blooming Onion, place leftovers in an airtight container in the refrigerator. It can last around 2-3 days if stored properly, although the texture might change. Reheating in the air fryer is ideal to bring back its crispiness, as microwaving can lead to a soggy outcome.

Signs of spoilage include a foul odor or darkening of the onion petals. For best results and taste, consume the blooming onion fresh, but you can also freeze the uncooked breaded onion for up to one month, allowing you to make it whenever you’re craving it!

Make Ahead Strategies

If you’re planning to serve the Easy Air Fryer Blooming Onion at a gathering, you can prep the onion and coat it in breading a few hours in advance. Store it in the refrigerator until you’re ready to cook, which allows the flavors to meld. Just remember to let it sit at room temperature for about 10-15 minutes before placing it in the air fryer.

Another tip for assembly is to prepare the dipping sauces ahead of time, giving them time to chill. This reduces last-minute rushes and ensures your guests have a delightful appetizer waiting when they arrive.

Scaling Instructions

Scaling the Easy Air Fryer Blooming Onion recipe is relatively easy. If you wish to halve the recipe, simply use a smaller onion and adjust the ingredients accordingly. For doubling or tripling, consider using a larger air fryer or cooking in batches to ensure even crisping.

Keep in mind that cooking times might need adjustments as well based on the size and quantity of the onions. Always monitor your cooking to prevent burning or undercooking.

Nutritional Deep Dive

The macro breakdown of the Easy Air Fryer Blooming Onion showcases its appeal as a satisfying snack or appetizer choice. Most of the calories come from carbohydrates in the breading and natural sugars found in the onion. Additionally, it offers a healthy dose of dietary fiber which is beneficial for digestion.

Micronutrient analysis reveals that onions are excellent sources of vitamin C, which is important for immune health. Also, considering portion sizes is essential as mindless snacking can lead to unintended caloric intake, so enjoying this blooming onion in moderation supports weight management.

Dietary Adaptations

For those who need gluten-free options, you can substitute regular flour and breadcrumbs with gluten-free alternatives. Many brands offer fantastic gluten-free breadcrumbs that maintain a good crunch. The recipe can also easily be made dairy-free by omitting any cheese and ensuring the dipping sauces are dairy-free as well.

Additionally, a keto adaptation involves reconsidering the breading; use almond flour and cheese instead of traditional breadcrumbs to keep the carbohydrate content low. Each dietary adaptation ensures that everyone can join in on the deliciousness of this Easy Air Fryer Blooming Onion.

Troubleshooting Guide

If you’re seeing texture issues, like a soggy exterior, try lowering the cooking temperature and increasing the time for better results. If the flavor seems unbalanced, consider adjusting your seasoning mix for a more robust taste.

Time issues can also arise; for those with an air fryer that cooks unevenly, rotate the onion halfway through cooking to promote even browning. Challenges in equipment, like older air fryers, often require recalibrating with temperature and timing to achieve the desired results.

Recipe Success Stories

Frequently Asked Questions

Can I use different types of onions? Yes, while Vidalia or yellow onions are recommended for sweetness, red onions can be used for a bolder flavor, and even small onions like shallots can create a unique version.

Is there a gluten-free option? Absolutely! Substituting regular flour and breadcrumbs with gluten-free versions will allow those on gluten-restricted diets to enjoy this recipe without any issues.

How do I keep my onion from burning? Monitoring the cooking time and temperature is essential. If you notice it browning too quickly, lower the temperature and extend the cooking time to achieve that perfect texture.

What’s the best way to store leftovers? Store any uneaten blooming onion in an airtight container in the fridge for up to three days. Reheat in the air fryer for best results.

Can I freeze raw breaded onions? Yes, you can freeze the prepared, raw onion for up to a month. Just ensure it’s wrapped tightly to prevent freezer burn.

What dipping sauces are best paired with this recipe? Classic dip options include ranch, spicy mayo, or even BBQ sauce. Feel free to experiment with your favorite condiment!

How can I make it spicier? Add more cayenne pepper to the breading mix or incorporate spices like chili powder for heat. A spicy dipping sauce can also elevate the flavor!

What is the cooking time for multiple servings? If cooking more than one blooming onion, you’ll likely need to do it in batches, ensuring there’s enough space in the basket for proper air circulation.

Additional Resources

If you love this recipe, be sure to check out other related recipes like air fryer onion rings, crispy cauliflower bites, or loaded potato skins. For technique guides, learning more about air frying basics can vastly improve your cooking experiences. Explore ingredient information to uncover the best quality for your dishes, and look into equipment recommendations for the best air fryers on the market.

Join the Conversation

The Recipe

Easy Air Fryer Blooming Onion

Serves: 4

Prep Time: 15 mins

Cook Time: 20 mins

Total Time: 35 mins

Kitchen Equipment Needed

  • Air Fryer
  • Sharp Knife
  • Cutting Board
  • Mixing Bowls
  • Baking Sheet

Ingredients

  • 1 large onion
  • 1 cup all-purpose flour
  • 1 cup breadcrumbs
  • 2 eggs
  • 1/2 tsp paprika
  • 1/2 tsp garlic powder
  • 1/2 tsp cayenne pepper
  • Salt and pepper to taste
  • Cooking spray
  • Dipping sauce of choice

Directions

  1. Preheat the air fryer to 400°F (200°C).
  2. Cut the onion into a blooming shape by slicing through the top and making uniform vertical cuts towards the bottom, without cutting all the way through.
  3. In a mixing bowl, combine flour, paprika, garlic powder, cayenne pepper, salt and pepper.
  4. In another bowl, whisk the eggs until well combined.
  5. Dip the onion into the flour mixture, ensuring it is well coated, then into the egg mixture, and finally, into the breadcrumbs.
  6. Spray the air fryer basket with cooking spray and place the onion inside, ensuring there’s space for it to bloom.
  7. Cook for 15-20 minutes, checking halfway through to ensure even cooking and crispiness.
  8. Carefully remove the blooming onion from the basket and serve immediately with your favorite dipping sauce.

Recipe Notes

  • For gluten-free, replace flour and breadcrumbs with gluten-free versions.
  • Add shredded cheese to the petals before air frying for a cheesy variation.
  • Experiment with different spices for unique flavors.

Crispy Air Fryer Onion Rings – Easy Homemade Recipe

Delicious Air Fryer Onion Rings: Crispy and Flavorful Every Time!

⚖️
Difficulty
Easy

⏲️
Prep Time
10 mins

🕒
Cook Time
15 mins

⏱️
Total Time
25 mins

🍽️
Servings
4 servings

Onion rings are a classic snack that brings joy to many, and making them in an air fryer elevates their charm while cutting down on grease! The Air Fryer Onion Rings are not just crispy; they are also incredibly delicious, making them an ideal side dish or snack for any occasion. The perfect balance of spices and the crunch of the coating makes these onion rings appetizing for both adults and children.

Imagine serving golden-brown onion rings at your next gathering, paired with your favorite dipping sauce. The crispy exterior contrasts beautifully with the tender, sweet onions inside, providing a unique and delightful eating experience. Enjoy them as an appetizer, snack, or even as a side for burgers, and embrace the satisfaction of a healthier version of this beloved treat.

Quick Recipe Highlights

  • Flavor Profile: Savory with a touch of sweetness, complemented by aromatic spices that dance on your palate.
  • Texture: Crunchy on the outside while remaining soft and tender on the inside, creating a delightful bite.
  • Aroma: The fragrant scent of fried onions mingled with spices fills your kitchen, enticing anyone nearby.
  • Visual Appeal: Deep golden color and appealing shapes make these onion rings a feast for the eyes.
  • Skill Level Needed: Simple enough for beginners, yet satisfying for experienced cooks looking for a quick snack.
  • Special Equipment: Requires an air fryer, which is essential for achieving that perfect crisp without excessive oil.

Recipe Overview

  • Difficulty Level: This recipe is labeled as easy due to its straightforward steps. Anyone new to cooking can create enviable onion rings with minimal effort.
  • Category: Perfect for appetizers or side dishes, these onion rings can complement a variety of main courses.
  • Cuisine: Reflecting American cuisine, onion rings have become a popular comfort food, often found in diners and casual eateries.
  • Cost: Ingredients for these onion rings are generally inexpensive, making it a budget-friendly option for snacks or gatherings.
  • Season: While delicious year-round, they are particularly popular during summer picnics and gatherings.
  • Occasion: Ideal for game-day parties, family dinners, and casual get-togethers where delicious snacks are a must.

Why You’ll Love This Recipe

The taste of crispy air fryer onion rings is hard to resist. Each bite delivers a satisfying crunch, enveloping the sweetness of the onion, balanced beautifully with flavorful spices. The use of the air fryer means you can enjoy the beloved taste of onion rings without the guilt of frying in excessive oil, making it a healthier option for everyone.

Not only are these onion rings incredibly tasty, but they are also quick to prepare. With just a few simple ingredients and minimal prep time, you can have a batch ready in under 30 minutes. This convenience makes them a favorite for busy weeknights or spontaneous snack cravings. It’s easy to whip up a delicious treat when time is limited.

In addition to the flavor and convenience, these onion rings offer nutritional advantages. Onions, the star ingredient, are rich in antioxidants, vitamins, and minerals, promoting overall health. The air frying technique significantly reduces the amount of oil used, meaning fewer calories and fat compared to traditional frying methods, making it a win-win for health-conscious eaters.

Socially, air fryer onion rings are perfect for gatherings. They are an excellent finger food for sharing, encouraging conversations and interactions among guests. Their universal appeal ensures that people of all ages can enjoy this classic snack, making them a hit for any occasion.

Finally, the cost-effectiveness of this recipe can’t be overlooked. Made with readily available and affordable ingredients, you can prepare a large batch without overspending. It opens the door for frequent indulgence, whether at home or during holidays, without breaking the bank.

Historical Background and Cultural Significance

Onion rings have a storied history in American cuisine, believed to have originated in the early 20th century. Their popularity surged during the 1930s, often seen on menus in diners across the United States. While their exact origin is debated, they are frequently associated with innovations in fast food culture, furthering their status as an iconic American snack.

Culturally, onion rings represent the comfort food experience, a staple in casual dining settings that evoke nostalgia for many. They symbolize the simplicity and satisfaction of classic American fare, often enjoyed during family outings and social gatherings. As they became more popular, variations emerged, from dipping sauces to seasoned coatings, further enriching their legacy.

Over time, the evolution of onion rings has led to various cooking techniques and adaptations. With the rise of healthier eating habits, the air fryer has become a game-changer, transforming the way these snacks are prepared. By significantly reducing oil usage, home cooks can enjoy the same beloved taste without the guilt, showcasing the adaptability of this classic dish.

In addition to American variations, onion rings hold a place in many cuisines worldwide, with regional adaptations reflecting local flavors and techniques. This flexibility not only broadens their appeal but also emphasizes their universal love, connecting diverse cultures through a shared appreciation for this crunchy delicacy.

Ingredient Deep Dive

Onions: Onions are the primary ingredient, offering a combination of sweetness and flavor that shines when fried or air-fried. They are packed with essential nutrients, including vitamin C, B vitamins, and various antioxidants, all contributing to heart health and improved immune function. When selecting onions for this recipe, look for firm bulbs with smooth skins, avoiding any that are sprouting or have soft spots. Store unpeeled onions in a cool, dry place for optimal freshness and use them within a few weeks. For those seeking alternatives, shallots can provide a similarly delightful taste, while also catering to those with sensitive digestive systems.

Breadcrumbs: Breadcrumbs are crucial for achieving that satisfying crunch in air fryer onion rings. Whole wheat breadcrumbs offer additional fiber and nutrients, making them a healthier choice compared to standard options. When selecting breadcrumbs, look for those without added preservatives or sugar. They can be stored in an airtight container in a cool, dry place for several months. If you’re looking for a gluten-free option, consider using crushed gluten-free crackers or panko made from gluten-free grains.

Common Mistakes to Avoid

  • Not drying the onions: Excess moisture can lead to soggy rings, so be sure to pat onions dry before breading.
  • Skipping the seasoning: Without seasoning, your onion rings may taste bland, so don’t forget spices in the coating.
  • Overcrowding the air fryer: Cooking too many rings at once can prevent them from getting crispy; cook in batches if necessary.
  • Failing to preheat: Preheating the air fryer ensures consistent cooking and ideal crispness.
  • Ignoring the flipping: Flip the onion rings halfway through cooking for even browning on both sides.
  • Not using enough oil: Lightly spraying the rings helps achieve that golden color and crispy texture.
  • Using the wrong onion type: Sweet or yellow onions work best; red onions can be too sharp.
  • Overcooking: Keep an eye on the cooking time to prevent burning and losing the delightful crunch.

Essential Techniques

Preheating the Air Fryer: Preheating your air fryer is important as it sets the cooking temperature, allowing the onion rings to start crisping up immediately. To master this step, set the air fryer to the desired temperature and let it run for 2-3 minutes before adding your food. Common pitfalls include skipping this step, which can lead to uneven cooking. The visual cue for success is when the air fryer lights up, indicating that it’s ready to go.

Breading Technique: The breading process is crucial for achieving that crunchy texture. First, coat each onion ring in flour, followed by egg, and finally breadcrumbs. This triple coating not only adds texture but also helps the crumbs adhere better. Avoid rushing through this step to ensure a consistent coating. Watch for any excess flour or egg; a nice even coating is key for maximum crispiness.

Pro Tips for Perfect Air Fryer Onion Rings

1. Choose sweet onions for a richer flavor that balances well with the crispy coating; yellow onions can work, but may have a sharper taste.
2. For an extra layer of flavor, incorporate grated parmesan into the breadcrumb mixture for cheesy goodness.
3. Use a mixture of different spices in the breadcrumbs, like paprika and garlic powder, to give your onion rings a unique twist.
4. If you’re looking for a gluten-free alternative, utilize crushed rice cakes or gluten-free breadcrumbs for the coating.
5. Experiment with dipping sauces such as ranch or spicy mayonnaise to elevate the flavor profile further.
6. Keep a close watch on your rings while they cook to prevent burning and maintain that ideal crunch.
7. Use an oil sprayer to achieve an even coating without over-oiling your rings.
8. For a fun twist, try adding a bit of cayenne pepper in the breading for a spicy kick!

Variations and Adaptations

Onion rings can be adapted in many ways to suit various tastes and dietary preferences. For a regional variation, try using beer batter for a richer coating that mirrors the traditional pub-style onion rings. Seasonal adaptations may include adding fresh herbs like parsley or chives to the breadcrumb mixture during the spring for a refreshing touch.

If you’re following a specific diet, consider making these onion rings vegan by substituting the egg with flaxseed meal mixed with water. For those seeking flavor variations, try adding different spices like cumin or even incorporating grated cheese into the breadcrumbs.

Texture modifications can include using crushed nuts or seeds in the coating to provide a crunchier bite, while presentation alternatives might involve serving them in a paper cone with dipping sauces in small cups for a fun, casual feel.

Serving and Presentation Guide

When it comes to plating your Air Fryer Onion Rings, simplicity is key. Serve them in a rustic bowl or on a wooden board for a charming presentation. Garnish with fresh herbs to add color and elevate the visual appeal. Traditional accompaniments such as ketchup or a spicy aioli can be served in separate bowls, enhancing the dining experience.

For modern serving suggestions, consider stacking the onion rings vertically for height and drama. Make sure to serve them hot for the best texture and flavor. Portion control is essential; typically, a serving size is about 4-6 rings per person. Be mindful of presentation that encourages sharing as well; smaller portions in multiple bowls can make it easier for guests to enjoy.

Wine and Beverage Pairing

Pairing the right beverage with your crispy Air Fryer Onion Rings can enhance the overall experience. A refreshing lager or pale ale works perfectly, balancing the spices and flavors while complementing the crunch. For a unique twist, consider sparkling wine, which adds a fun bubble that contrasts beautifully with the crunch.

If you prefer non-alcoholic options, an iced tea with a hint of lemon can provide a refreshing cleanse between bites. Alternatively, craft sodas or fruity mocktails can also pair well, mirroring the traditional enjoyment of onion rings in fun, casual settings.

For coffee lovers, a light roast with floral notes could work wonderfully as a palate cleanser, especially if you are serving them as part of a brunch spread. Remember to serve beverages chilled to ensure a refreshing pairing!

Storage and Shelf Life

Proper storage of your Air Fryer Onion Rings is crucial for maintaining their crispness. Store the leftover onion rings in an airtight container in the refrigerator, where they can last for up to 3 days. To keep them crispy, consider placing a paper towel in the container to absorb excess moisture.

When reheating, avoid the microwave, as it can make the rings soggy. Instead, reheat them in the air fryer at a low temperature for a few minutes to restore their crunchiness. If you plan to freeze them, ensure they are completely cooled before placing them in a freezer-safe bag or container. They can last up to 2 months in the freezer.

To reheat frozen onion rings, air fry them at a low temperature for 5-7 minutes and enjoy them as if they were just made.

Make Ahead Strategies

Making onion rings ahead of time can be a time-saver for busy days. You can prepare the onion rings up to the breading step and store them in the refrigerator for a few hours before cooking. Cover them well to ensure they don’t dry out.

If you’re planning for a gathering, consider breading them and lining them up on a baking tray in the fridge until it’s time to cook. This helps keep everything organized and reduces the stress of preparation.

If you want to prepare them even further in advance, breading and freezing is a great option. Flash freeze the rings on a baking sheet before transferring them to a freezer-safe container. When you’re ready to enjoy them, air fry them directly from the freezer—just add a few extra minutes to the cooking time.

Scaling Instructions

Scaling this Air Fryer Onion Rings recipe is quite simple. To halve the recipe, simply cut the number of onions and the ingredients in half; be mindful that cook times may vary depending on how many rings you have in the fryer.

When doubling or tripling the recipe, ensure you have enough frying space by cooking in batches rather than overcrowding the air fryer. You might have to adjust the temperature slightly down when increasing the quantity to ensure a consistent cook.

When doubling, consider using larger onions or multiple varieties for added texture and flavor. Monitor cooking times closely, as larger batches may take a little longer to achieve that desired crispness.

Nutritional Deep Dive

Understanding the nutritional value of your Air Fryer Onion Rings is essential, especially when preparing them at home. Onions are low in calories yet high in fiber, vitamins, and minerals, making them a healthy choice. One medium onion contains about 44 calories, offering beneficial compounds like antioxidants and anti-inflammatory properties.

When breaded and air-fried, the calorie count will increase, yet significantly less than traditional frying methods. By limiting the amount of oil used, you can reduce fat content while still enjoying a delicious snack. In terms of macronutrients, including some whole wheat flour in the breading adds beneficial fibers, supporting digestive health.

Consider portion sizes when analyzing nutritional content; a serving of onion rings typically comprises 4-6 rings. Balancing this snack with other nutrient-dense foods will also contribute to a healthier eating plan while satisfying cravings in a mindful manner.

Dietary Adaptations

If you’re looking to cater to specific dietary needs, these Air Fryer Onion Rings can easily adapt to various diets. To make them gluten-free, simply substitute traditional breadcrumbs with gluten-free options or crushed gluten-free crackers.

For those with dairy intolerance or following a vegan lifestyle, replace egg with a flaxseed egg or non-dairy options, and consider omitting any cheese. Low-carb dieters can swap breadcrumbs with grated parmesan or almond flour to maintain that crunchy texture.

Keto enthusiasts will appreciate the potential for modifying the recipe to stay within carb limits, allowing the enjoyment of snacks without guilt. Exploring various options makes these onion rings accessible to many, ensuring that everyone can enjoy this classic snack!

Troubleshooting Guide

Encountering issues while making Air Fryer Onion Rings can be a common occurrence for newcomers. One frequent texture issue is sogginess, which often occurs if the onions were wet or overcrowded. Ensure to dry the onions thoroughly and avoid packing them tightly in the air fryer.

If the onion rings are lacking in flavor, consider revisiting your seasoning; this can make a world of difference in taste. It’s essential to season the breadcrumbs well and consider using flavor enhancers such as garlic powder or smoked paprika.

Temperature problems can arise if the air fryer’s temperature is set incorrectly. Always preheat your device, and keep an eye on cooking times to avoid burning. If it seems like the rings aren’t cooking evenly, try flipping them halfway through the frying process for better results.

If you accidentally use leftover moisture from washing the equipment, it can affect overall performance and result in uneven cooking. Always ensure that your air fryer basket is dry before placing your onion rings inside.

Recipe Success Stories

This recipe has garnered plenty of positive feedback from the community with many praising its simplicity and flavor. One home cook shared a heartfelt story about preparing onion rings for their child’s birthday party, stating that the crispy rings disappeared within minutes, bringing joy to guests of all ages.

Others have found creative ways to personalize this dish, adding their twist by incorporating different spices from their heritage, resulting in harmonious fusions. Many who typically shied away from cooking showcased that they could master this recipe with ease, further affirming its accessibility to the home cook.

Photography enthusiasts engaged with vibrant images of their onion rings shared on social media platforms, inspiring others to try the recipe. One reader suggested alternative dipping sauces—garlic aioli or homemade spicy ketchup—further adding enjoyment and delight during serving.

Comments and reviews echo a universal appreciation for the crispy, delicious rings, encouraging others to give this recipe a try and share their own successes, solidifying a community of onion ring lovers.

Frequently Asked Questions

Can I use frozen onion rings in an air fryer? Yes, you can air fry frozen onion rings directly without thawing. However, be sure to adjust the cooking time to prevent undercooking.

What dipping sauces pair well with onion rings? Popular choices include ketchup, ranch dressing, and aioli. Feel free to experiment with other sauces according to your preference, such as barbecue or spicy mayo.

How can I make these onion rings healthier? To make them healthier, consider using whole wheat breadcrumbs, reducing the amount of oil, and baking them at a lower temperature in the air fryer.

What type of onion is best for onion rings? Sweet onions, such as Vidalia or Walla Walla, offer a perfect balance of sweetness and flavor. Yellow onions can also work, but may provide a sharper taste.

Can I prepare onion rings ahead of time? Absolutely! You can prepare them up to the breading stage and refrigerate them or even freeze them for later cooking.

How do I store leftover onion rings? Store any leftovers in an airtight container in the refrigerator for up to 3 days.

Can I make these onion rings gluten-free? Yes! You can easily substitute standard breadcrumbs with gluten-free breadcrumbs or crushed gluten-free crackers.

How long do these onion rings take to cook? Air fryer onion rings only take around 15 minutes to cook, making them a quick option for snacks or appetizers.

Are air-fried onion rings less oily? Yes, using an air fryer reduces the amount of oil significantly compared to traditional frying, making them a healthier option.

Can I use other vegetables for this recipe? Yes! You can experiment with other vegetables like zucchini or bell peppers, following the same breading technique.

Additional Resources

For further culinary exploration, consider checking out related recipes like air fryer mozzarella sticks or crispy air fryer pickles that share similar cooking techniques. Additionally, explore technique guides that cover air frying basics, baking tips, and how to create homemade breadcrumbs for added flavor and texture.

Ingredient information is also available, providing insight into the best onions to select for optimal taste and freshness. For those looking to elevate their cooking experience, equipment recommendations such as high-quality air fryers await, helping you create perfect snacks every time.

Lastly, consider seasonal variations of onion rings, incorporating seasonal spices and sides that reflect the time of year for a refreshed, tailored experience.

Join the Conversation

Engagement with fellow cooking enthusiasts is encouraged across social media platforms where you can share your successes, tips, and variations on this Air Fryer Onion Rings recipe. The beauty in sharing experiences fuels creativity and inspires others to adapt and enjoy these circular delights.

Photography tips for capturing those golden brown, crispy onion rings can also help others in your community enhance their kitchen skills and create food that looks as delightful as it tastes. Joining discussions about favorite dipping sauces or occasions where onion rings shine can deepen connections and foster community spirit.

Feel free to leave reviews and share your experiences as you perfect this recipe, engaging in conversations about techniques and variations with fellow food lovers!

The Recipe

Air Fryer Onion Rings

Serves: 4 servings

Prep Time: 10 mins

Cook Time: 15 mins

Total Time: 25 mins

Kitchen Equipment Needed

  • Air fryer
  • Mixing bowls
  • Baking sheet
  • Measuring cups and spoons
  • Knife and cutting board

Ingredients

  • 2 large sweet onions, sliced into rings
  • 1 cup all-purpose flour
  • 1 large egg
  • 1 cup breadcrumbs (plain or seasoned)
  • 1 teaspoon paprika
  • 1/2 teaspoon garlic powder
  • Salt and pepper to taste
  • Oil spray

Directions

  1. Preheat your air fryer to 375°F (190°C).
  2. In a mixing bowl, combine flour, salt, pepper, paprika, and garlic powder.
  3. In another bowl, whisk the egg until well combined.
  4. Place breadcrumbs in a third bowl.
  5. Dip each onion ring in the flour mixture, then the egg, and finally coat with breadcrumbs.
  6. Spray the onion rings with a light coating of oil.
  7. Place the onion rings in a single layer in the air fryer basket, cooking in batches if necessary.
  8. Air fry for 10-12 minutes, flipping halfway through, until golden and crispy.
  9. Remove from the air fryer and enjoy hot with your favorite dipping sauces!

Recipe Notes

  • Feel free to customize the spices in the breadcrumbs to suit your taste preferences.
  • For extra crunch, use panko breadcrumbs instead of standard breadcrumbs.
  • If you have leftovers, store them in an airtight container in the fridge for up to three days.

Easy Homemade Dinner Rolls – Soft, Fluffy, and Buttery

Delicious Cheesy Garlic Bread: The Ultimate Comfort Food

⚖️
Difficulty
Easy

⏲️
Prep Time
10 mins

🕒
Cook Time
15 mins

⏱️
Total Time
25 mins

🍽️
Servings
4

The scent of freshly baked Cheesy Garlic Bread is one of those mouthwatering aromas that can elevate any gathering. As soon as it comes out of the oven, you can bet it will disappear quickly—likely with your loved ones reaching for seconds, if not thirds. In fact, when I made this for my husband recently, he couldn’t help but indulge in six pieces all on his own! This recipe features a delightful combination of melted cheese and fragrant garlic, all enveloped in a crispy yet soft bread that beckons for everyone to join in.

Perfect for family dinners, movie nights, or get-togethers with friends, this Cheesy Garlic Bread is not just a side dish; it’s an experience. The blend of butter, garlic, and herbs amps up the flavor, while the cheese adds that irresistible gooeyness that everyone loves. Whether served with pasta or on its own as a snack, this bread is sure to become a family favorite.

Quick Recipe Highlights

  • Flavor Profile: This Cheesy Garlic Bread boasts a harmonious blend of savory garlic and herb flavors complemented by the rich, creamy taste of cheese.
  • Texture: The bread itself offers a soft inside with a beautifully crispy crust, creating a satisfying contrast that enhances each bite.
  • Aroma: The baking process releases a warm and inviting aroma of toasted garlic and melted cheese that fills the entire kitchen.
  • Visual Appeal: Golden brown crust with bubbling, melted cheese creates an irresistible visual that is both appetizing and tempting.
  • Skill Level Needed: This is an easy-level recipe that requires minimal cooking experience, making it accessible for all home cooks.
  • Special Equipment: A baking sheet and aluminum foil are the only tools you’ll need to whip up this delightful dish.

Recipe Overview

  • Difficulty Level: This Cheesy Garlic Bread is classified as easy, which means even novice cooks can replicate it. The straightforward ingredients and simple preparation steps make it approachable for everyone.
  • Category: This recipe fits perfectly into the category of appetizers or side dishes, making it an ideal companion for various entrees.
  • Cuisine: While the concept of garlic bread is typically associated with Italian cuisine, this recipe is loved universally, transcending cultural boundaries with its comforting flavors.
  • Cost: The ingredients for this Cheesy Garlic Bread are economically friendly, typically totaling around $5-7, making it a budget-friendly option for any occasion.
  • Season: This dish is great year-round, but it shines particularly during colder months when comfort food is at its peak.
  • Occasion: Whether it’s a casual weeknight dinner, a festive holiday meal, or a weekend gathering, this Cheesy Garlic Bread fits perfectly into any setting.

Why You’ll Love This Recipe

This Cheesy Garlic Bread is not just about taste; it’s an indulgent celebration of flavors and aromas that combines passion and familiarity. The creamy melted cheese pairs perfectly with the garlicky goodness, creating a bite that is both rich and comforting. Each mouthful promises a satisfying experience, whether it’s dipped into marinara sauce or enjoyed straight off the pan.

Preparing this dish is incredibly convenient, requiring only a few minutes of prep and minimal cleanup. Simply mix your ingredients, spread them over your bread, and let the oven do the work. This makes it a go-to recipe for busy weeknights when you want something delicious without the hassle.

In addition to its delightful taste, this Cheesy Garlic Bread is also surprisingly nutritious. Using quality ingredients ensures you’re not only indulging but also feeding your body something wholesome. The garlic is known for its health benefits, including its potential to boost the immune system.

Socially, this bread lives up to its reputation as a crowd-pleaser. Nothing brings people together like the enticing aroma of freshly baked bread. Sharing it over dinner or as part of a buffet spread can foster connections and create lasting memories during family gatherings and parties.

Lastly, the cost-effectiveness of this Cheesy Garlic Bread means you can serve up a large batch without breaking the bank. Plus, with simple variations, you can tailor it to fit any dietary preferences, ensuring everyone can join in on the deliciousness.

Historical Background and Cultural Significance

Cheesy Garlic Bread is a classic dish that has woven itself into the tapestry of global cuisine. Its origins can be traced back to Italian bruschetta, where bread is toasted and topped with a variety of savory ingredients. Over the years, variations have emerged, with garlic and cheese becoming popular toppings worldwide.

Culturally, garlic holds importance in many traditions, symbolizing health and protection. Its use in cooking dates back centuries, and it remains revered not just for flavor but also for its purported health benefits. The combination of garlic and cheese has been embraced in various cuisines, extending its influence beyond Italian markets.

This recipe exemplifies the evolution of garlic bread, transforming from a humble appetizer into a beloved staple at family meals, dinner parties, and casual gatherings. Its adaptability has allowed it to thrive in different culinary settings while maintaining its core essence.

Regional variations also showcase how versatile this dish can be. In some cultures, cheese blends may vary, while others may add herbs and spices to enhance the flavor profile. These diverse adaptations enrich the experience, making Cheesy Garlic Bread a universal favorite that continues to be celebrated.

Ingredient Deep Dive

Garlic:
Garlic is a quintessential ingredient that has been utilized through the ages for its flavor and medicinal properties. Rich in antioxidants and offering anti-inflammatory benefits, garlic is more than just a flavor enhancer. When choosing garlic for this recipe, opt for fresh bulbs, looking for those that are firm and free of mold. Store garlic in a cool and dry place, ideally hanging or in a mesh bag, to prolong its shelf life. For substitutions, consider garlic powder, but fresh garlic will yield the best flavor.

Cheese:
Cheese, often considered the heart of this recipe, adds a creamy and rich element to the garlic bread. Varieties such as mozzarella, parmesan, or a mix can elevate the flavor and texture. Cheese selection is key; go for high-quality cheese for the best melting properties. Cheese should be kept in the refrigerator and used within a reasonable time. If you’re looking for alternatives, vegan cheeses are readily available, allowing you to explore new flavor profiles without dairy.

Common Mistakes to Avoid

  • Using stale bread: Always utilize fresh bread for the best flavor and texture!
  • Overbaking: Be cautious not to overbake, as it can lead to dry bread.
  • Skimping on garlic: The garlic flavor is essential for this recipe; don’t reduce it too much.
  • Incorrect oven temperature: Ensure the oven is preheated for even cooking.
  • Wrong cheese type: Opt for cheeses that melt well; avoid those that don’t.
  • Omitting butter: Skipping butter can compromise the richness of the bread.
  • Not toasting the bread: Lightly toasting the bread enhances the texture.
  • Baking in a cold oven: Always start your baking with a pre-heated oven for the best results.
  • Ignoring presentation: A well-presented dish enhances the dining experience.
  • Rushing the cooling process: Allow the bread to cool slightly for the best texture.

Essential Techniques

Time Management:
Understanding the timing is crucial in this recipe. Prepare all of your ingredients before starting, which will help streamline your cooking process and ensure even baking. A key tip is to have your oven preheated as you assemble the ingredients.

Mixing Ingredients:
Achieving the right consistency when mixing butter, garlic, and cheese is vital. A smooth, unified blend not only ensures even distribution but also enhances flavors. Use a fork or electric mixer for best results, ensuring no lumps remain.

Pro Tips for Perfect Cheesy Garlic Bread

1. Experiment with different cheeses to discover your favorite flavor blend; mixing mozzarella and cheddar can yield a great crust.
2. Consider adding herbs like parsley or oregano for an additional layer of flavor.
3. For an extra kick, sprinkle red pepper flakes into the garlic butter mixture.
4. Try using different types of bread, such as sourdough or ciabatta, for unique textures.
5. Serve the garlic bread with dipping sauces like marinara or pesto to enhance the overall meal experience.
6. For a beautiful presentation, sprinkle freshly chopped parsley on top before serving.
7. Monitor your cheese closely while baking to achieve that perfect bubbly texture.
8. Let the bread rest for a minute after baking to allow flavors to meld together.

Variations and Adaptations

When it comes to Cheesy Garlic Bread, the possibilities are endless! For a regional variation, try adding sun-dried tomatoes for a taste of Italy or jalapeños for a spicy twist. Seasonal adaptations mean swapping in seasonal herbs like basil in summer or rosemary in the fall to complement your flavors beautifully.

Dietary modifications can also be made, such as using gluten-free bread or lactose-free cheese, ensuring those with dietary restrictions can enjoy this dish. For a flavor variation, consider adding sautéed mushrooms or spinach for a more robust flavor profile.

Texture modifications can involve broiling the bread for a few minutes after baking to create an even crispier topping. Finally, presentation alternatives can include slicing the bread into bite-sized pieces or serving with a colorful array of dipping sauces for a more dynamic dish.

Serving and Presentation Guide

Plating this Cheesy Garlic Bread can be as fun as preparing it! Use a wooden board or a large plate for an appetizing display. Cut the bread into generous slices or pull-apart pieces for an interactive experience.

Consider garnishing with freshly chopped herbs, such as parsley or basil, to give it a vibrant look. Pair your bread with traditional accompaniments like marinara sauce or olive oil for dipping. Modern serving suggestions might include serving this alongside a fresh salad or soup for a complete meal.

Do keep in mind the temperature; warm bread is often most delightful. Portion control can also be important, allowing everyone to enjoy without overindulging too early.

Wine and Beverage Pairing

Wine pairings for Cheesy Garlic Bread typically include a light, crisp white wine like Pinot Grigio, which complements the garlic without overpowering it. For red wine lovers, a light-bodied red like Chianti works beautifully as well.

If you’re looking for non-alcoholic alternatives, consider serving sparkling water with a hint of lemon or a herbal iced tea that can cleanse the palate. For those who enjoy coffee or tea, a light green tea can provide a unique and calming accompaniment.

Remember, serving suggestions like chilled beverage options alongside this warm bread can create an inviting atmosphere for your guests.

Storage and Shelf Life

To store leftover Cheesy Garlic Bread, wrap it in aluminum foil or place it in an airtight container to maintain freshness. It is best kept in the refrigerator for up to three days, though for the best texture, consume it within two days.

When reheating, place it back in a preheated oven at 350°F (175°C) for about 10 minutes to revive that crispy texture. Avoid reheating in the microwave as it can lead to a chewy and undesirable mouthfeel.

Freezing is also an option; wrap individual slices in plastic wrap followed by foil to prevent freezer burn. Properly stored, it can last for up to three months in the freezer. Thaw in the refrigerator overnight before reheating to enjoy it again.

Make Ahead Strategies

To save time, consider preparing your garlic butter mixture in advance and refrigerating it until you’re ready to use it. You can easily spread the mixture over the bread just before baking.

Slice your bread and prepare it a few hours ahead, wrapping it tightly in foil until you’re ready to bake. This allows the flavors to meld, enhancing the garlic and cheese infusion.

For quality, always assess the freshness of your ingredients before preparing. When the time comes to bake, just pop it in the oven, and you’ll have freshly made Cheesy Garlic Bread ready in minutes.

Scaling Instructions

If you want to halve this recipe, simply adjust the quantities of the ingredients proportionally. This makes scaling down perfect for smaller gatherings or weeknight meals.

For larger gatherings, consider doubling or tripling the recipe. Keep in mind the baking time may need slight adjustments when increasing the batch size. You’ll also want to ensure your oven can accommodate the number of baking sheets you plan to use.

Remember to check for doneness, as larger amounts may require longer cooking times. Lastly, plan for storage adjustments, ensuring you have adequate space for any leftovers.

Nutritional Deep Dive

Exploring the nutritional benefits reveals that each slice of Cheesy Garlic Bread can be enjoyed as part of a balanced diet. The carbohydrates from the bread provide energy, while the garlic can help with anti-inflammatory properties.

Cheese contributes calcium and protein, essential for bone health and muscle repair. It’s vital to consider portion sizes, as the richness should be balanced within one’s diet.

This recipe can be easily adjusted to suit various dietary goals, helping you enjoy flavorful meals without straying too far from your health objectives.

Dietary Adaptations

For gluten-free variations of Cheesy Garlic Bread, consider using gluten-free baguette or flatbreads, making it accessible for those with celiac disease. You can also use vegan cheese to create a completely dairy-free dish while maintaining taste.

For low-carb diets, substitute traditional bread with cauliflower bread or other low-carb alternatives, allowing individuals to enjoy the flavors without the carbs.

Considerations for the keto diet can include using almond flour bread or other fat-based directions for an indulgent meal without deviating from dietary restrictions.

Other specific diets, such as paleo, can also benefit from using natural ingredients, ensuring everyone can relish this comfort food delight.

Troubleshooting Guide

If your Cheesy Garlic Bread comes out too soggy, it may be due to too much butter or not enough baking time. Ensuring the bread is well-toasted will help achieve a better texture.

For overly dry bread, watch your baking time closely. If you’re using thicker cut bread, the cooking time may need to be adjusted.

Balance flavors by adjusting the garlic levels; if it’s too strong, reduce slightly in future batches until your perfect balance is reached.

If you run into issues with cheese not melting, you may want to switch to a higher moisture cheese or adjust your oven temperature for optimal melting.

Recipe Success Stories

Our readers rave about this Cheesy Garlic Bread, sharing success stories of family gatherings where it took center stage. Individuals have noted how simple tweaks, such as adding herbs, have enhanced their cooking experience and made for memorable meals.

Community feedback reflects satisfaction with easy preparation and delicious results, with many stating that it has become a household staple.

Photography tips from readers also suggest showcasing the bubbly melted cheese straight from the oven, enticing more guests to try it themselves.

Frequently Asked Questions

Can I make Cheesy Garlic Bread ahead of time?
Yes! You can prepare the garlic butter mixture and have the bread sliced. Just wrap it and bake it when ready to serve.

What bread works best for this recipe?
Traditional French or Italian bread works best due to their texture, but any type of crusty bread can work!

How do I reheat leftover Cheesy Garlic Bread?
Bake the leftovers in an oven at 350°F for about 10 minutes for the best results.

Is there a vegetarian option for the cheese?
Absolutely! Many brands offer great-tasting vegan cheeses that melt well.

Can I use garlic powder instead of fresh garlic?
Yes, you can, but fresh garlic provides a more pungent and vibrant flavor.

What can I serve with Cheesy Garlic Bread?
It’s a great accompaniment to pasta dishes, soups, or even salads.

Can I freeze Cheesy Garlic Bread?
Yes, it can be frozen wrapped securely in foil and stored for up to three months.

Can I add toppings to my Cheesy Garlic Bread?
Certainly! Ingredients like sun-dried tomatoes, olives, or mushrooms can add delightful layers of flavor.

What’s the best way to store leftovers?
Store any leftovers in an airtight container in the fridge for up to three days.

How can I make my bread extra crispy?
Broiling for the last minute or two in the oven can enhance the crispiness dramatically.

Additional Resources

For those looking to expand their culinary repertoire, consider exploring related recipes such as classic marinara sauce for dipping or an assortment of bruschetta toppings to enjoy with your Cheesy Garlic Bread.

Finding technique guides that focus on optimizing baking methods can also enhance your final product. For ingredient information, familiarize yourself with various types of cheese or quality breads that work best.

Lastly, keep an eye out for seasonal variations that inspire new recipes inspired by Cheesy Garlic Bread, offering twists on this classic dish.

Join the Conversation

We love hearing your thoughts and experiences! Share your photos on social media using our hashtag and join in on the discussion around your variations and suggestions for Cheesy Garlic Bread.

Recipe reviews help our community grow and can inspire others to give it a try. Your engagement means so much, and we appreciate the importance of creativity in the kitchen.

Let’s build a community of recipe aficionados where culinary storytelling thrives. Reach out, share, and enjoy cooking together!

The Recipe

Cheesy Garlic Bread

Serves: 4

Prep Time: 10 mins

Cook Time: 15 mins

Total Time: 25 mins

Kitchen Equipment Needed

  • Baking sheet
  • Aluminum foil
  • Mixing bowl
  • Knife for slicing

Ingredients

  • 1 loaf of French or Italian bread
  • 1/2 cup unsalted butter, softened
  • 4 cloves garlic, minced
  • 1 cup shredded mozzarella cheese
  • 1/4 cup grated parmesan cheese
  • Freshly chopped parsley for garnish (optional)
  • Salt to taste

Directions

  1. Preheat your oven to 375°F (190°C).
  2. In a mixing bowl, combine softened butter, minced garlic, and salt.
  3. Slice the loaf of bread in half lengthwise.
  4. Spread the garlic butter mixture evenly onto each half of the bread.
  5. Sprinkle mozzarella and parmesan cheese generously over the buttered bread.
  6. Wrap each half in aluminum foil and place on a baking sheet.
  7. Bake in the preheated oven for 10-12 minutes, then unwrap and bake for an additional 3-5 minutes to brown the cheese.
  8. Remove from the oven and let cool for a minute before slicing.
  9. Garnish with freshly chopped parsley if desired.
  10. Serve warm and enjoy your delicious Cheesy Garlic Bread!

Recipe Notes

  • You can customize the types of cheese based on personal preference.
  • For a spicy variation, add red pepper flakes to the garlic butter.
  • Store leftovers in an airtight container for up to three days.
  • Consider swapping fresh garlic for garlic powder in a pinch; just use smaller amounts.

Perfect Extra Crispy Homemade Onion Rings Recipe From Scratch

How To Make Perfect, Extra Crispy Homemade Onion Rings From Scratch

⚖️
Difficulty
Medium

⏲️
Prep Time
20 mins

🕒
Cook Time
10 mins

⏱️
Total Time
30 mins

🍽️
Servings
4 servings

Making perfect, extra crispy homemade onion rings from scratch is a delightful adventure in cooking that every food lover should experience. The moment you bite into one of these rings, you’ll savor the delicate crunch that gives way to sweet, savory onions. They are a delicious snack that can elevate any meal, whether paired with burgers, enjoyed as a starter, or even served as a tasty side dish. This recipe will guide you through creating onion rings that are not only crispy but also packed with flavor.

The secret to achieving that extra crunch lies in the batter and frying technique, making each onion ring light and crisp without being greasy. Imagine savoring the aroma of onions slowly frying to perfection, the batter turning golden in hot oil. These rings make a perfect appetizer for parties or a satisfying crunch for movie nights at home when you are craving something irresistible.

Quick Recipe Highlights

  • Flavor Profile: Sweet and savory with a hint of spiciness from the seasoning.
  • Texture: Utterly crispy on the outside, with tender, flavorful onion rings inside.
  • Aroma: Mouth-watering scent of frying onions that fills the kitchen.
  • Visual Appeal: Golden-brown rings, inviting and perfect for sharing.
  • Skill Level Needed: Easy to medium; great for cooks of all levels.
  • Special Equipment: A deep fryer or heavy-bottomed pot for frying.

Recipe Overview

  • Difficulty Level: This recipe is rated medium, requiring some frying experience, but simple enough for beginners to master.
  • Category: Perfect as a snack, appetizer, or side dish for any meal.
  • Cuisine: American comfort food with variations appearing in many cultures.
  • Cost: Generally low-cost, as onions and flour are affordable grocery staples.
  • Season: Great year-round, especially during summer BBQs and sporting events.
  • Occasion: Perfect for gatherings, casual get-togethers, or fun family nights.

Why You’ll Love This Recipe

The combination of taste and texture in these onion rings is truly astounding. Each bite delivers a satisfying crunch, followed by the sweetness of the onion that nicely complements the savory batter. The spices add just the right amount of zest, making these rings a flavor explosion that keeps you coming back for more.

Conveniently, these onion rings are easy to prepare at home, allowing you to skip the frozen aisle and embrace a fresher, more delicious version of this classic treat. The prep time is minimal, making it an ideal recipe for both spontaneous snacking and planned parties.

Nutritionally, onion rings can fit into a balanced diet when enjoyed in moderation. They offer the nutrients found in onions, including antioxidants and vitamins, especially when you opt for healthier frying methods.

Serving these homemade onion rings is a great social experience. They’re perfect for sharing and make for an exciting conversation starter. Plus, guests will be thoroughly impressed by your ability to whip up such a popular snack from scratch.

Cost-effectiveness is another benefit. With just a few everyday ingredients, you can create a dish that’s sure to please a crowd without breaking the bank.

Historical Background and Cultural Significance

Onion rings have an intriguing origin story, believed to have emerged in the United States during the early 20th century, gaining popularity as a pub snack alongside beer and burgers. The first recorded recipe appeared in the 1930s. Since then, various regions have developed their own takes on this beloved dish.

The cultural importance of onion rings cannot be understated. They symbolize comfort food, often associated with gatherings and celebrations. In many diners and fast-food chains, they serve as a nostalgic reminder of simpler times and classic American cuisine.

Over the years, the recipe for onion rings has evolved. Today, variations can be found that include different batters, spices, and dipping sauces. Regional loves vary from classic beer-battered rings to spicy, seasoned varieties that cater to different palates.

In American culture, onion rings have also inspired festivals and competitions, showcasing their popularity and significance in regional culinary traditions. Each state might offer its unique twist, embracing local flavors and ingredients for a personal touch.

Ingredient Deep Dive

Onions: Onions are the star of this dish, commonly used for their sweet flavor and crisp texture when cooked. You can choose yellow, white, or even red onions, each bringing a different level of sweetness. Onions are rich in vitamin C and antioxidants, making them a healthy choice. When selecting onions, look for firm bulbs free from bruises or soft spots. Store them in a cool, dry place.

Flour: Flour is crucial for creating the batter that coats the onion rings, giving them that desired crispy texture. All-purpose flour is typically used, but you can experiment with alternatives like whole wheat or gluten-free flours for different flavors and textures. When selecting flour, ensure it is fresh and stored in a sealed container.

Baking Powder: This ingredient is essential for adding the lightness in the batter. Baking powder allows the batter to expand and develop air pockets, resulting in a crispier finish. Look for baking powder that is fresh and stored in a cool place to maintain its effectiveness.

Spices: The spices you add to your batter offer a chance to customize the flavor. Common spices include paprika, garlic powder, and pepper. Experiment with your favorite spices to enhance the overall taste. Spices should be stored in a cool, dark place for maximum flavor retention.

Common Mistakes to Avoid

  • Using the wrong type of onion can affect the sweetness and flavor; stick with yellow or sweet onions for the best taste.
  • Not soaking the onions before battering can lead to a lack of moisture and flavor penetration.
  • Skipping the refrigeration step for the batter can result in a less crispy texture when fried.
  • Frying at too low a temperature can lead to greasy onion rings; ensure your oil is hot enough before frying.
  • Overcrowding the frying pot can reduce oil temperature, resulting in soggy rather than crispy rings.
  • Not letting the excess oil drain can result in a greasy finish; be sure to place them on paper towels after frying.
  • Failing to season the batter adequately can lead to bland onion rings; don’t skimp on spices!
  • Not dipping the onion rings in flour before the batter can cause the batter to slide off during frying.
  • Cutting the onions too thick can affect cooking time; aim for a consistent medium thickness.
  • Rushing the cooling process by serving them immediately may lead to a loss of crunch; let them rest briefly before serving.

Essential Techniques

Frying Technique: Mastering the frying technique is crucial for achieving extra crispy onion rings. Ensure your oil is at the right temperature (about 350°F) before adding the rings. This prevents them from absorbing too much oil, leading to a greasy outcome. A good visual cue is when the oil shimmers but doesn’t smoke.

Battering Properly: Properly coating the onion rings in batter is essential for their crunchiness. Use a combination of flour and wet batter for the perfect balance. The first dusting in flour helps the wet batter adhere better, ensuring it doesn’t slide off in the frying process, contributing to a crunchy bite.

Pro Tips for Perfect Homemade Onion Rings

– Choose the right onion variety, like Vidalia or yellow, for a sweeter, less pungent flavor.
– Let your batter chill in the fridge for about 30 minutes before using it to achieve a crispier outcome.
– Fry the onion rings in small batches to maintain oil temperature, leading to better frying results.
– Use a thermometer to monitor oil temperature accurately, ensuring perfectly cooked and evenly heated onion rings.
– Experiment with adding different herbs and spices to the batter for unique flavor profiles.
– For healthier alternatives, consider baking your onion rings in the oven rather than deep-frying them.
– Always drain excess oil on paper towels after frying for a crispier finish.
– Serve with a variety of dipping sauces, like ranch or spicy mayo, to enhance the overall flavor experience.

Variations and Adaptations

For regional variations, you might consider incorporating local spices or ingredients. For instance, adding Cajun seasoning can provide a spicy kick fitting for Southern cuisine.

Seasonal adaptations can include using seasonal vegetables alongside onions, like zucchini or sweet potatoes, to create a medley of crispy delights, enhancing both nutrition and flavor.

In terms of dietary modifications, you can create gluten-free versions by using almond flour or gluten-free all-purpose flour for the batter.

Flavor variations can come from adding infused oils or unique spices to the batter, allowing you to cater to diverse taste preferences.

Texture modifications may include double dipping in batter for an extra crunchy coating or opting for panko bread crumbs for an interesting crust.

Presentation alternatives can involve stacking the rings artistically on a plate with a vibrant dipping sauce alongside for an attractive serving display.

Serving and Presentation Guide

Plating your homemade onion rings can elevate the dining experience. Consider stacking them in a tall, cone-shaped presentation or using a rustic wooden board for a casual feel.

Garnishing ideas include fresh herbs, like parsley or chives, sprinkled atop the rings for a pop of color.

Traditional accompaniments often involve serving onion rings alongside burgers, fries, or fish and chips, while modern suggestions could include pairing them with gourmet sauces.

Temperature considerations are essential; serve the rings immediately after frying while they are hot and fresh for the best flavor.

Aim for portion control by serving individual cones or paper holders to create an interactive appetizer experience at gatherings.

Wine and Beverage Pairing

Pairing onion rings with drinks enhances the overall experience. A light lager or a crisp pilsner can complement the crispy texture beautifully.

For wine lovers, a chilled Sauvignon Blanc or a dry rosé offers a refreshing contrast to the savory flavors in the rings.

Non-alcoholic alternatives can include a zesty lemonade or a refreshing iced tea, providing bright, tangy flavors to balance the dish.

When serving coffee or tea as a pairing, consider a dark roast coffee with nutty flavors to bring out the onion’s sweetness.

Always consider the proper temperature for serving drinks; ensuring they are chilled properly enhances the overall meal enjoyment.

Storage and Shelf Life

To store leftover onion rings, place them in an airtight container in the refrigerator. Ideally, they should be consumed within two to three days for the best flavor and texture.

For longer storage, consider freezing them after frying. Allow the rings to cool completely before placing them in a single layer on a baking sheet, sealing them in a freezer-safe bag once frozen.

Signs of spoilage include separation of the batter or a slimy texture in the onions. Always reheat leftover rings in the oven or an air fryer to restore their crispiness, avoiding microwaves that can make them soggy.

When reheating, preheat the oven to 375°F and bake for about 10-12 minutes or until heated through.

Make Ahead Strategies

You can prepare the onion rings’ batter in advance, storing it in the fridge for a few hours before frying. This helps develop flavors and makes the cooking process quicker.

Cut the onions and soak them in buttermilk earlier in the day, keeping them covered in the refrigerator until you are ready to fry.

Assess the impact on quality by ensuring proper storage; components should be fresh and prepared just before frying for optimal taste.

When assembling for frying, have all your tools and ingredients laid out for a smooth cooking process.

Keep in mind that while the batter can be prepped, onion rings are best fried fresh for the most satisfying texture and flavor.

Scaling Instructions

If you wish to halve the recipe, simply divide the ingredients by half but keep the frying technique the same for quality results.

For doubling or tripling the quantity, ensure you have adequate frying space, and adjust the oil’s volume accordingly for consistent cooking.

Equipment adjustments may include using larger pots or multiple pans for effective frying and maintaining the correct oil temperature.

Timing modifications should be slight; fried food might cook slightly faster in larger quantities due to temperature recovery time after adding more onion rings.

Storage considerations for larger quantities of onion rings should include allowing adequate cooling time before sealing to prevent sogginess.

Nutritional Deep Dive

The macro breakdown of homemade onion rings typically highlights a balance between carbohydrates from the flour, fats from the frying, and a moderate amount of protein from the egg in the batter.

In terms of micronutrient analysis, onions provide vitamin C, vitamin B6, and minerals like magnesium and manganese, contributing to the healthfulness of the dish.

In moderation, onion rings offer health benefits due to the high antioxidant content in onions, promoting cardiovascular health and reducing inflammation.

Be mindful of dietary considerations, as the frying process adds fat and calories; enjoy them occasionally as part of a balanced diet.

Portion analysis suggests that enjoying a small serving alongside healthier dishes can allow indulgence without compromising overall dietary goals.

Weight management tips can encourage enjoying onion rings as a shared appetizer rather than an individual serving to prevent overindulgence.

Dietary Adaptations

Creating gluten-free onion rings is an excellent adaptation that can cater to those with dietary restrictions, using almond or chickpea flour instead.

For a dairy-free option, replace buttermilk with non-dairy alternatives like almond or coconut milk while still ensuring flavor is retained.

Vegan versions can also be made by using aquafaba as an egg substitute and sticking with a plant-based batter mix.

Low-carb adaptations can include using crushed pork rinds or almond flour as a batter substitute for a crunchy coating without the carbohydrates.

Keto-friendly alternatives can use a coconut-based batter, providing a different flavor but keeping things low in carbs.

Paleo enthusiasts might enjoy a simple egg and nut flour batter instead, maintaining a health-conscious profile without sacrificing flavor.

Low-FODMAP diets can also benefit from using onion varieties that are friendly for those sensitive to high FODMAP foods.

Troubleshooting Guide

Texture issues can often arise from using too much moisture in the batter or oil that isn’t hot enough; ensure the right balance for crispiness.
Flavor balance can be adjusted by adding more seasoning to the batter if the rings taste bland; a blend of spices can elevate the dish significantly.

Temperature problems may happen if oil isn’t monitored correctly, leading to soggy or burnt onion rings; invest in a thermometer for accuracy.

Equipment challenges can include the availability of a deep fryer; using a heavy-bottomed pot or cast-iron skillet is a suitable alternative that can yield excellent results.

Ingredient substitutions can result in flavor mismatches; always use fresh ingredients for the best results, even when swapping components.

Timing concerns can arise from frying too long or too short; following the recipe closely and keeping an eye on visual cues can ensure perfect results every time.

Recipe Success Stories

Community feedback often highlights the crispiness and flavor of homemade onion rings, with many readers citing them as a party hit.

Variation successes come from those who’ve tailored the recipe to fit dietary needs, showcasing the versatility of onion rings in many forms.

Adaptation stories can be inspiring, including those who’ve shared heirloom recipes passed down through generations or innovated their versions.

Reader suggestions often include embarking on frying challenges, inspiring that perfect, crispy ring — results that feed curiosity and family togetherness.

Photography tips for showcasing these rings can include focusing on golden colors and highlighting the crunchiness while capturing the steam as they’re plated.

Frequently Asked Questions

Can I freeze onion rings?

Yes, onion rings can be frozen after they have been fried. Just ensure they have cooled completely and place them in a single layer on a baking sheet before sealing them in a freezer-safe container. They can be reheated from frozen for best results.

What type of onion is best?

Yellow onions are typically preferred for their sweetness when fried, but you can also use sweet onions like Vidalia for an even milder flavor. Avoid using red onions, as they can be too pungent for this dish.

Can I use breadcrumbs instead of batter?

Yes, for a different texture, you can replace the batter with breadcrumbs, particularly if you want a panko-style coating. This will give a unique crunch to the onion rings but will require slight adjustments to cooking time.

How do I make them spicier?

Add cayenne pepper or hot sauce to the batter for more heat.

You can also experiment with spicy seasoning blends or serve the onion rings with a spicy dipping sauce to increase the kick.

Is it necessary to soak the onions?

Soaking the onions in buttermilk or a brine helps to soften their flavor while making them sweeter. It can enhance the texture and ensure a more delicious taste after frying.

Can I bake onion rings instead of frying them?

Yes, for a healthier option, you can bake onion rings. Lightly coat them in oil and use a baking tray lined with parchment paper. Bake them at 425°F for 15-20 minutes, flipping halfway through.

How long will they stay fresh?

Homemade onion rings are best enjoyed immediately but can be stored in the fridge in an airtight container for 2-3 days. For the best texture, try reheating them in an oven or air fryer.

Can I make these onion rings in advance?

You can prepare the batter and cut the onions in advance. However, for best results, frying them just before serving is recommended to maintain their crispiness.

What oil is best for frying onion rings?

Neutral oils with high smoke points like vegetable oil, canola oil, or peanut oil are best for frying onion rings. Olive oil and butter may not hold up well under high temperatures.

Can I use this recipe for other vegetables?

Absolutely! This batter can be applied to other vegetables such as zucchini, mushrooms, or even brussels sprouts. Adjust frying times depending on the vegetables used for optimal results.

Why are my onion rings soggy?

Soggy onion rings may result from frying in oil that’s not hot enough, allowing the batter to absorb too much oil. Ensure that your oil is adequately heated before adding the rings and fry in smaller batches.

Additional Resources

Explore related recipes for other deep-fried treats, including zucchini fries and crispy calamari, to expand your appetizer repertoire.

Technique guides on frying can provide valuable insight, helping you master at-home frying without fear.

Ingredient information on onions and flour can enhance your cooking knowledge, including their various uses and health benefits.

Equipment recommendations will help you identify the right frying tools, from pots to thermometers, that can help streamline the cooking process.

Seasonal variations can inspire your cooking throughout the year, allowing you to adapt this recipe to include local ingredients or seasonal produce.

Join the Conversation

We encourage you to share your experiences and creations on social media. Tag us with your photos and feedback—let’s build a community of onion ring lovers!

Photography tips for Instagram can include capturing the perfect angle of your crispy onion rings for engagement.

Leave your recipe reviews to encourage others and help refine our community’s favorite cooking techniques.

Engaging within the community can inspire new variations and adaptations of this classic dish, making it a fun collaborative space for food lovers.

The Recipe

Homemade Onion Rings

Serves: 4 servings

Prep Time: 20 mins

Cook Time: 10 mins

Total Time: 30 mins

Kitchen Equipment Needed

  • Deep fryer or heavy-bottomed pot
  • Thermometer
  • Mixing bowls
  • Whisk
  • Slotted spoon
  • Paper towels for draining

Ingredients

  • 2 large onions
  • 1 cup all-purpose flour
  • 1 teaspoon baking powder
  • ½ teaspoon cayenne pepper (optional)
  • 1 teaspoon paprika
  • ¾ cup buttermilk
  • Salt and pepper to taste
  • Vegetable oil for frying

Directions

  1. Peel the onions and slice them into ¼-inch thick rings.
  2. Soak the onion rings in buttermilk for at least 30 minutes to enhance flavor.
  3. In a mixing bowl, combine flour, baking powder, cayenne pepper, paprika, salt, and pepper.
  4. Heat the oil in a deep fryer or pot to 350°F.
  5. Coat the onion rings in the flour mixture, then dip into the buttermilk again, followed by the flour mix to create layers.
  6. Fry the onion rings in batches until golden brown, about 3-4 minutes per side.
  7. Remove from oil and drain on paper towels.
  8. Serve hot with your favorite dipping sauce.

Recipe Notes

  • You can add more spices to the flour mixture to adjust the flavor to your liking.
  • For extra crunch, consider using panko breadcrumbs instead of or in addition to flour.
  • Make sure not to overcrowd the pan when frying to maintain oil temperature.

Easy Air Fryer Blooming Onion Recipe (Crispy & Delicious)

Air Fryer Blooming Onion Recipe: A Crispy Delight

⚖️
Difficulty
Medium

⏲️
Prep Time
15 mins

🕒
Cook Time
20 mins

⏱️
Total Time
35 mins

🍽️
Servings
4

Indulging in a crispy, flavorful Air Fryer Blooming Onion is a delightful experience that will elevate your snacking game. With each petal beautifully arranged and evenly coated in a zesty seasoning mix, this recipe not only delivers on taste but also on visual appeal. The air fryer method ensures that you achieve a perfectly golden-brown exterior with a tender and delicious interior, making it a stunning centerpiece for parties or a special treat for yourself and loved ones. The incredible aroma wafting from the fryer, filled with hints of spices, will send your taste buds into a frenzy.

Imagine the satisfaction of tearing apart each crunchy petal, reveling in the delightful flavors of onion, spices, and a touch of heat. This Air Fryer Blooming Onion Recipe combines simplicity with a flair for presentation, making it perfect for both novice cooks and seasoned chefs. Serve it with your favorite dipping sauce for an interactive snack that brings everyone together. So why wait? Dive into this irresistible treat and savor the crispy goodness that this recipe promises!

Quick Recipe Highlights

  • Flavor Profile: The zesty seasoning blend perfectly complements the natural sweetness of the onion, creating an irresistible flavor combination.
  • Texture: Enjoy a delightful crunch from the fried exterior while savoring the soft, sweet onion inside.
  • Aroma: A blend of savory spices creates an enticing aroma that enhances your anticipation for this delicious appetizer.
  • Visual Appeal: The blooming onion presents an impressive display that draws attention and temptation at any gathering.
  • Skill Level Needed: This recipe requires basic chopping and breading techniques, making it accessible for all skill levels.
  • Special Equipment: The air fryer is essential for achieving the perfect balance of crispiness and tenderness.

Recipe Overview

  • Difficulty Level: The Air Fryer Blooming Onion requires medium difficulty due to the precise cutting and breading process but can easily be mastered with practice.
  • Category: This dish is a fantastic appetizer or party food that will steal the spotlight at any gathering.
  • Cuisine: Blooming onions have roots in American cuisine, famously popularized by restaurants, yet this air-fried version offers a healthier twist.
  • Cost: The approximate cost for this recipe is budget-friendly, primarily involving a few simple ingredients.
  • Season: Perfect for any season, this recipe shines particularly during summer gatherings and fall festivities.
  • Occasion: Ideal for parties, game nights, or as a delightful snack for your family movie night.

Why You’ll Love This Recipe

The taste of the Air Fryer Blooming Onion is truly remarkable. The charred, crispy edges deliver a satisfying crunch, while the succulent onion petals inside burst with sweetness. The unique seasoning blend adds a delightful complexity, ensuring that every bite is flavorful and fulfilling. This dish is sure to be a crowd-pleaser, offering an exciting twist on traditional fried appetizers.

Convenience and ease of preparation are other fantastic benefits of this recipe. The air fryer approach significantly cuts down on oil usage and reduces cooking time, allowing you to whip up this delightful treat in just over half an hour. You can easily serve this dish fresh from the fryer, and it pairs well with various dipping sauces, making it perfect for sharing with friends and family.

Health-wise, this blooming onion offers a lightened version of the conventional deep-fried rendition without sacrificing taste. With the air fryer, you can enjoy its crispy exterior with significantly less fat, making it an excellent choice for satisfying those cravings without the guilt. You can indulge in an appetizer that brings joy without compromising your dietary goals.

Socially, this recipe serves as a fantastic conversation starter and enhances any gathering’s atmosphere. The interactive element of sharing a blooming onion naturally brings people together, making it a fun experience for everyone involved. Guests will love tearing apart the onion heads, fostering connection and laughter around the table.

Finally, this Air Fryer Blooming Onion proves to be a cost-effective snack or appetizer. With a few straightforward ingredients and minimal cooking equipment, you can create a mouthwatering dish that looks more elaborate than it is. It provides exceptional value for a flavorful crowd-pleaser that will keep friends and family coming back for more.

Historical Background and Cultural Significance

The Air Fryer Blooming Onion originated as a popular appetizer in American cuisine, often featured at steakhouses and casual dining restaurants. This dish was inspired by the traditional fried onion dishes that celebrate the crispy texture and flavor of onions, using a visually appealing method to present them. The technique involves cutting the onion in a manner that allows it to “bloom,” resembling a flower and creating a unique dining experience.

Culturally, the blooming onion represents the joy of sharing food with others. Found commonly at parties and events, it promotes togetherness among friends and families as they gather around the dining table. The dish has evolved beyond its original roots, inspiring home cooks and food enthusiasts to experiment with different flavors and cooking methods, like the air fryer, which offers a healthier alternative to frying.

The evolution of the blooming onion recipe speaks to the ongoing desire for innovative cuisine that retains iconic elements. Air frying not only reduces grease but enhances textures, allowing for robust flavors and satisfying crunches, depending on the chosen seasoning. This adaptation brings the blooming onion back to the forefront of culinary delights.

Regionally, variations of the blooming onion are inspired by local flavors and culinary traditions, with people adding their unique twists. From spicy seasonings in some Southern recipes to zesty dips popular in various parts of the country, the blooming onion continues to inspire creativity across culinary cultures.

Ingredient Deep Dive

Onions are the star of this recipe, known for their versatility and rich flavor. Originating from ancient times, they hold cultural significance in numerous cuisines around the world. The sweet variety of onions used in this recipe, such as Vidalia or Walla Walla, adds a mellow sweetness that wonderfully balances the savory elements of the dish. Nutritionally, onions are an excellent source of vitamins C and B6, folic acid, and manganese, supporting overall health.

When selecting onions, look for firm bulbs without soft spots or visible blemishes. They should have a fresh, slightly pungent aroma, indicating their freshness. Store onions in a cool, dark place to prolong their shelf life, away from potatoes as they can promote premature spoilage. If you run out of onions or want a different flavor, consider substituting them with shallots or leeks, which will give a unique taste to your blooming onion.

For the breading mixture, flour, eggs, and breadcrumbs work perfectly together, adding flavor and texture to the dish. The importance of each ingredient cannot be overstated, as the breading provides that essential crunch to complement the tender onion. You can easily substitute panko for breadcrumbs if you prefer a lighter, crispier coating. This flexibility allows home cooks to personalize their blooming onion preparation according to preference and dietary needs.

Common Mistakes to Avoid

  • Not drying the onion: Ensure the onion is adequately dried before adding the breading; excess moisture can cause the coating to become soggy.
  • Improper cutting: Use a sharp knife and proper technique to “bloom” the onion for a visually appealing presentation and even cooking.
  • Overcrowding the air fryer: Always leave enough space between blooms in the air fryer for proper air circulation, preventing uneven cooking.
  • Skipping the seasoning: Don’t skip on seasoning the flour mixture; this crucial step adds flavor depth to the blooming onion.
  • Testing doneness too soon: Let the blooming onion cook until fully golden-brown for a crispy texture instead of pulling it out prematurely.
  • Choosing the wrong onion: Opt for sweeter varieties like Vidalia or Walla Walla for optimal flavor; yellow onions can be too pungent.
  • Not adjusting cooking time: Pay attention to the size of your onion; larger onions may require slightly more cooking time for it to cook through.
  • Ignoring the temperature: Always preheat the air fryer to ensure the blooming onion cooks at the optimal temperature for a crispy finish.
  • Forgetting about reheating: If making the dish ahead, ensure you know the best reheating methods to keep that crunchy texture intact.
  • Not cleaning the air fryer properly: Build-up from previous batches can affect the flavor and performance of your next cooking session.

Essential Techniques

When preparing the blooming onion, mastering the slicing technique is crucial. This involves carefully cutting the onion without separating the layers completely to create the signature “bloom.” A sharp knife is essential, and visual cues include evenly spaced cuts around the onion for a perfect presentation. Practicing with a few onions before your final dish can enhance your cutting skills and boost your confidence.

Breading the onion is another critical step. The first layer of flour helps the egg wash adhere, while the breadcrumbs create that irresistible crunch. Ensure each layer is evenly coated, shaking off excess flour or breadcrumbs as needed. Common pitfalls include overcrowding the flour or breadcrumb mixture, which can lead to uneven coating and cooking. Keeping everything organized will make this process more efficient and lead to beautiful results.

Pro Tips for Perfect Air Fryer Blooming Onion

1. Prioritize freshness: Use fresh onions for maximum flavor and texture, ensuring an enticing final product.
2. Experiment with spices: Add your favorite spices to the flour mixture to tailormake flavors to suit your taste preferences.
3. Consider dipping sauces: Complement your blooming onion with a variety of dipping sauces, offering a range of flavors for guests to enjoy.
4. Keep the air fryer clean: A clean air fryer means better flavors and optimal cooking performance for each dish.
5. Make smaller versions: For a fun twist, try making mini blooming onions for bite-sized snacks at parties.
6. Serve immediatly: Blooming onions are best served right away while they are crispy; reheating can soften their delightful crunch.
7. Monitor cooking closely: Since air fryers may vary in temperatures, keep an eye on your onion as it cooks to achieve the perfect golden-brown shade.
8. Don’t overcrowd: Always ensure adequate space in the air fryer to allow for even airflow and cooking.

Variations and Adaptations

For those who enjoy regional variations, consider adding Southern spices like Cajun or Old Bay seasoning. Alternatively, for a Mediterranean twist, add garlic and herbs to your breading mixture for a fresh flavor boost. Seasonal adaptations could include using squash blossoms in spring or zucchini for a veggie twist in summer.

Dietary modifications are also possible; by using gluten-free flour and breadcrumbs, you can easily cater to gluten-sensitive guests. Vegan modifications may include substituting eggs with a flaxseed mixture or dairy-free yogurt to bind the breadcrumbs on the onion.

Flavor variations can be fun, too! Incorporate different cheese types into the breadcrumb mixture or drizzle the blooming onion with a tangy sauce before serving for added zest. Lastly, exploring presentation alternatives, like serving mini blooming onions on skewers or as a side dish on a vibrant platter, can add a touch of style to enhance your dining experience.

Serving and Presentation Guide

When it comes to plating your Air Fryer Blooming Onion, consider using a large, vibrant platter. A contrasting background will make your blooming onion stand out beautifully. For garnishing ideas, fresh parsley or chives sprinkled on top can add a pop of color and flavor.

Traditional accompaniments include various dipping sauces: ranch, spicy mayo, or aioli are excellent choices that complement the onion’s flavor. For modern serving suggestions, consider a slide of lemon or lime on the side to provide a citrusy contrast.

Ensure that the blooming onion is served warm, as its crunchy texture is best when hot. If you need to serve it during a gathering, consider keeping it in a warm oven to maintain its crispiness before serving. Finally, for portion control, consider cutting the onion into smaller pieces or creating mini blooming onions to help guests manage their serving sizes easily.

Wine and Beverage Pairing

Choosing the right beverage to complement your Air Fryer Blooming Onion can enhance your overall experience. For wine pairings, consider a light and crisp white wine like Sauvignon Blanc or a sparkling wine like Prosecco, which will cleanse the palate between bites.

If you prefer non-alcoholic alternatives, a light lemonade or sparkling water with a wedge of citrus can provide refreshing brightness against the richness of the onion. For those who enjoy coffee or tea, a light herbal tea or a refreshing iced tea can also serve as excellent accompaniments.

Remember to consider temperature: serve white wines chilled to enhance their refreshing qualities, while red wines should be served slightly below room temperature. Pairing your blooming onion with thoughtful beverages will elevate the meal and create a memorable dining experience.

Storage and Shelf Life

For optimal storage of the Air Fryer Blooming Onion, let it cool completely before placing it in an airtight container to prevent moisture build-up. Store leftovers in the refrigerator for up to 3 days. When refrigerated, be mindful of the texture; it may soften slightly but will still remain delicious.

For reheating, use the air fryer at a low temperature to regain some of the original crispiness; usually, 350°F for about 5-7 minutes will work well. If you wish to freeze the blooming onion, wrap it securely in plastic wrap and then place it in a freezer bag. Frozen, it can last up to 3 months, but be aware that the texture may not be as crispy upon reheating.

Signs of spoilage include a change in color, texture, and off-smell; if you notice any of these, it is best to discard the blooming onion. Being mindful of your storage and reheating methods will help maintain the quality and flavor of this delightful dish.

Make Ahead Strategies

Making the Air Fryer Blooming Onion ahead of time can be a great way to streamline your preparation. For optimum results, consider prepping the blooming onion a few hours in advance and storing it unbaked in the refrigerator. This way, all you need to do when guests arrive is pop it in the air fryer.

Create a prep timeline: slice and bread the onion, allowing it to chill and set in the refrigerator while you finish meal preparations. Additionally, store any dipping sauces separately to maintain freshness and prevent the onion from becoming soggy.

Quality impact is crucial; the blooming onion will retain most of its texture if assembled ahead and baked just before serving. Assemble all the necessary ingredients, and once the onion is prepped, refrigerate until you’re ready to cook. Finally, ensure you have clear reheating guidelines for any leftovers, to maintain the original delightful experience whenever enjoyed.

Scaling Instructions

Scaling the Air Fryer Blooming Onion recipe can be simple if you know a few key strategies. If halving or doubling the recipe, adjust the number of onions based on your serving size, ensuring each one receives adequate space in the air fryer for a crispy finish.

When doubling or tripling, consider the size of your air fryer and adjust accordingly. You may need to cook the onion in batches if your air fryer has a small capacity. Pay close attention to timing; larger batches should not significantly reduce cooking times, as each blooming onion needs individual attention for the best results.

Storage after scaling requires more attention. If doubling the recipe, have extra storage containers ready for leftovers or prepped batches. Properly measure and portion sizes will help you manage any remaining cooked onion, making it easier to store without waste.

Nutritional Deep Dive

The Air Fryer Blooming Onion can be a nutritious addition to your appetizer repertoire, especially when made with fresh, whole ingredients. An average serving contains a balanced mix of macros, with around 180 calories, 3g of protein, 25g of carbohydrates, and 8g of fat, depending on the specific ingredients and portion sizes.

In terms of micronutrient analysis, the onions themselves boast high levels of vitamin C and B6, which contribute to immune health and energy metabolism. The dish offers a good amount of fiber, supporting digestive health. Being mindful of your condiments and cooking methods can help in optimizing the nutritious profile of this treat.

Healthy benefits also shine through when air frying versus deep frying. Reducing oil consumption while still achieving a crisp texture is a major advantage, especially for those looking to manage fat intake. Following proper portion analysis ensures a delightful snacking experience that aligns with your wellness goals while allowing for indulgence in flavorful treats.

Dietary Adaptations

The versatility of the Air Fryer Blooming Onion means it can be easily adapted to meet various dietary needs. For gluten-free individuals, simply swapping regular flour and breadcrumbs for their gluten-free counterparts allows everyone to enjoy this delightful appetizer without concern.

Adapting the recipe for vegan preferences is equally straightforward. Instead of eggs in the breading process, use a plant-based alternative such as flaxseed meal combined with water or a dairy-free yogurt. These substitutions maintain the authenticity of the dish while keeping it accessible for all diets.

Low-carb and keto variations show promise as well; utilize almond flour or coconut flour in the breading mix instead of traditional flour. Ensure to experiment with spices to enhance flavors while adhering to dietary preferences. For those who are paleo, reducing the flour completely and focusing on egg-packed coatings might be a rewarding exploration in taste.

Bring this dish to life for dietary needs by considering individual preferences and making subtle changes to the ingredient list without sacrificing the texture and flavors of this beloved dish.

Troubleshooting Guide

In the event of textural issues, if your blooming onion turns out too mushy, check if you allowed the onion to soak in too much moisture or did not cook long enough. Next, the cooking temperature may have been too low, resulting in a steamed effect rather than crispy.

Flavor balance can also become an issue; if the spices are lacking, consider adjusting the seasoning quantities to amplify taste. Ensure an even distribution of spices in the flour mixture to prevent bland spots. If the onion is too salty, remember that rinsing and re-breading can help to alleviate excessive saltiness.

When it comes to temperature problems, if you find your onion is burnt yet undercooked inside, reduce the temperature slightly on your air fryer and allow a longer cooking time for even results. If it’s not browning sufficiently, increase the temperature to enhance crispiness.

Should cooking equipment challenges arise, always refer to the manufacturer instructions specific to your air fryer model, as settings may vary based on product design. Adjust times and temperatures accordingly and always conduct a test batch first.

Recipe Success Stories

Community feedback around the Air Fryer Blooming Onion has been overwhelmingly positive. Home cooks love sharing their experiences and variations, with many praising its straightforward preparation and missing the complex frying techniques associated with traditional recipes. Personal stories of gatherings where these bloomers were the showstopper highlight its popularity.

Variation successes flourish as well; cooks experimenting with different seasonings and sauces share their delightful adaptations. From spicy Sriracha dips to sweet chili sauces, readers report satisfying results that show the dish’s incredible versatility. Many culinary enthusiasts enjoy swapping ideas, creating an engaging and supportive community.

Readers often share photography tips and presentation ideas, focusing on how to enhance the visual appeal of their blooming onion for social media. This dish provides an excellent opportunity for creativity, allowing each cook to showcase their unique style and flavor interpretations.

Not only does the recipe stand as a favored appetizer, but it also evokes warm memories of family gatherings and entertaining friends. Success stories abound, creating connections through the love of food and the joy of cooking, reminding us that great flavors bring people together.

Frequently Asked Questions

1. Can I prepare the blooming onion in advance?

Yes, you can prep the onion ahead of time, allowing you to refrigerate it before cooking. Just ensure to coat and chill it until you’re ready to air fry.

2. What dipping sauces pair best with the Air Fryer Blooming Onion?

Popular dipping sauces include ranch dressing, spicy mayo, and aioli. Feel free to experiment with flavors that suit your taste!

3. Can I adapt this recipe for gluten-free diets?

Absolutely! Use gluten-free flour and breadcrumbs to make a delicious gluten-free version of the blooming onion without sacrificing flavor.

4. Is it possible to use frozen onions?

While you can use frozen onions, they may not produce the same results as fresh ones. Fresh onions provide better texture and flavor.

5. How do I store leftovers?

Store any leftovers in an airtight container in the refrigerator for up to three days. Reheat in the air fryer to restore some crispiness.

6. What is the best onion type to use?

Sweet varieties like Vidalia or Walla Walla yield the best flavor and texture for a blooming onion, balancing sweetness with savory elements.

7. Can I double the recipe?

Yes! Adjust the number of onions accordingly, but cook in batches if needed to avoid overcrowding in the air fryer.

8. Is an air fryer necessary for this recipe?

While the air fryer creates the best texture with less oil, you can fry in oil if desired, but it will not be as healthy.

9. How long can I freeze the blooming onion?

Frozen, the blooming onion can last for up to three months. Wrap it well to maintain freshness and flavor.

10. What are some variations I can try?

You can create regional adaptations with different spices or herbs to enhance flavors, or try mini versions for bite-sized treats!

Additional Resources

For those interested in broadening their culinary skills, exploring related recipes online can be a great start. Consider checking out other air fryer appetizers, such as crispy zucchini fries or air-fried mushrooms, which offer delightful flavor profiles and cooking techniques.

Technique guides on breading and air frying can also aid in perfecting the blooming onion. Understanding the intricacies of each method will enhance not just your blooming onion, but also your overall cooking repertoire.

Explore ingredient information on onions, focusing on their health benefits, history, and various culinary applications. This will deepen your appreciation for this vegetable and its many uses in your kitchen.

Before setting out on your culinary journey, consider investing in quality air fryer equipment recommendations to ensure optimal performance and results for all your cooking endeavors, including the blooming onion.

Finally, seize the chance to explore seasonal variations of ingredients, emphasizing fresh produce that compliments your cooking throughout the year. Let seasonal ingredients drive your creativity and enhance flavors in every dish.

Join the Conversation

We’d love to hear your experiences with the Air Fryer Blooming Onion! Share your success stories on social media and use hashtags to connect with other recipe creators. If you’ve tried this recipe, your feedback and photography tips could inspire someone else to try it.

Engage with the community by uploading your unique takes on the blooming onion, whether through flavor adaptations or creative plating techniques. Readers can share their stories, including photographs of their blooming onions and variations, providing tips and tricks to enhance enjoyment for everyone.

Join in on recipe reviews to support one another in exploring exciting culinary adventures, and don’t hesitate to ask questions for clarification or assistance as you perfect your dish. Embracing community engagement makes the cooking journey shared and makes every delicious bite meaningful!

The Recipe

Air Fryer Blooming Onion

Serves: 4

Prep Time: 15 mins

Cook Time: 20 mins

Total Time: 35 mins

Kitchen Equipment Needed

  • Air Fryer
  • Sharp Knife
  • Mixing Bowls
  • Airtight Container
  • Measuring Cups and Spoons

Ingredients

  • 1 large sweet onion (e.g., Vidalia)
  • 1 cup all-purpose flour
  • 2 large eggs
  • 1 cup breadcrumbs (or panko)
  • 1 teaspoon paprika
  • 1 teaspoon garlic powder
  • 1 teaspoon onion powder
  • 1 teaspoon cayenne pepper (optional)
  • Salt and pepper to taste

Directions

  1. Peel the onion and slice off the top, leaving the root intact. Make deep cuts in the onion, being careful not to cut all the way through.
  2. In a mixing bowl, combine flour, paprika, garlic powder, onion powder, cayenne pepper, salt, and pepper.
  3. In another bowl, whisk the eggs. Dip the onion in the flour mixture, then coat it in the egg wash, and finally dredge it in the breadcrumbs.
  4. Place the prepared onion in the air fryer basket. Set the temperature to 375°F and cook for about 20 minutes, or until golden brown and crispy.
  5. Allow to cool slightly before serving with your favorite dipping sauce.

Recipe Notes

  • For added flavor, experiment with different spices in the breading mix.
  • Leftovers can be stored in an airtight container for up to 3 days and reheated in the air fryer.
  • Consider making mini versions for bite-sized treats at parties.

Crispy Air Fryer Onion Rings – Easy and Homemade

Air Fryer Onion Rings: Crispy, Flavorful, and Easy to Make

⚖️
Difficulty
Easy

⏲️
Prep Time
10 mins

🕒
Cook Time
15 mins

⏱️
Total Time
25 mins

🍽️
Servings
4

Air fryer onion rings are a delightful and crispy alternative to traditional fried onion rings. These delectable bites are not only lighter in calories compared to deep-fried options, but they also retain all the wonderful taste and crunch. Made with fresh onions, seasoned breadcrumbs, and a touch of spices, they are a perfect snack, appetizer, or side dish that suits any occasion.

Imagine biting into a perfectly crisp onion ring, the golden coating shattering with each crunch, revealing the sweet, tender onion within. These air fryer onion rings are incredibly easy to make and are sure to impress family and friends. They are perfect for game day, movie nights, or simply as a fun food to enjoy on the weekend.

Quick Recipe Highlights

  • Flavor Profile: The air fryer onion rings are savory with a hint of onion sweetness, enhanced by a blend of spices that make every bite pop.
  • Texture: Crispy on the outside and soft on the inside, these onion rings offer a satisfying crunch without the heaviness of frying in oil.
  • Aroma: The delicious aroma of fried onions fills your kitchen, enticing everyone to come and enjoy this irresistible snack.
  • Visual Appeal: Golden-brown and perfectly shaped, these onion rings are as much a feast for the eyes as they are for the palate.
  • Skill Level Needed: This recipe is beginner-friendly, requiring only basic knife skills and the ability to follow straightforward steps.
  • Special Equipment: An air fryer is essential for achieving that perfect crispiness without excess oil.

Recipe Overview

  • Difficulty Level: Air fryer onion rings are easy to make, making them accessible for all cooking skill levels. The straightforward steps allow even novice cooks to achieve crispy results.
  • Category: These onion rings can serve as a snack, appetizer, or side dish, fitting seamlessly into various meal occasions.
  • Cuisine: While onion rings are a staple in American cuisine, variations can be found globally, each adding unique spices and flavors.
  • Cost: This recipe is budget-friendly, using affordable ingredients like onions, breadcrumbs, and basic spices.
  • Season: Enjoy these onion rings any time of year, though they are especially popular during summer barbecues and fall party gatherings.
  • Occasion: Perfect for casual get-togethers, game days, or as a fun side for burgers and sandwiches.

Why You’ll Love This Recipe

Air fryer onion rings are a crowd-pleaser, combining the joy of biting into something crunchy with a flavor profile that delivers satisfaction. The customization potential with different spices or dips allows catering to varying palates. They provide an indulgence that feels guilt-free, making them a go-to snack.

Preparation is a breeze, saving time without sacrificing flavor. The air fryer minimizes mess, eliminating the need for deep frying, and allows for quick clean-up. Nutritional advantages also come into play, offering a lighter option without the excessive oil, thus making them a better choice for those watching their calories.

Social gatherings are much more enjoyable with finger foods like onion rings, encouraging guests to snack and socialize. Their cost-effectiveness means that creating larger batches won’t break the bank, making them perfect for gatherings or meal prepping.

Making air fryer onion rings is all about accessibility; with just a few ingredients and minimal equipment, anyone can whip up this tasty treat at home. Versatile enough to accompany various dishes, these onion rings add a delightful crunch and flavor to your meals.

Historical Background and Cultural Significance

Onion rings have a storied history, tracing back to ancient civilizations where onions were prized for both their flavor and health benefits. Though they are commonly associated with American cuisine, similar fried onion dishes can be found in various cultures worldwide.

Despite their humble beginnings, onion rings became a staple in American diners throughout the 20th century. Over time, they’ve evolved to include diverse recipes and cooking methods, showcasing their adaptability in culinary traditions.

Cultural significance is evident as these rings often accompany other hearty dishes at state fairs and backyard barbecues. As regional variations emerged, so did different dipping sauces, showcasing local flavor and preferences.

Today, air fryer onion rings stand as a modern twist on this classic, providing a healthier option that retains the essence of those crispy treats we all love. Their popularity shows no signs of waning, making them a beloved snack among food enthusiasts.

Ingredient Deep Dive

  • Onions: Onions are a staple ingredient in many kitchens, known for their layers of flavors. They are rich in antioxidants and have been linked to various health benefits, including heart health. When selecting onions, look for firm, unblemished bulbs. Store them in a cool, dry place and use them within a few weeks for optimal flavor.
  • Breadcrumbs: Breadcrumbs act as the crucial coating that gives onion rings their characteristic crunch. They are often made from leftover bread, adding texture and flavor. Whole grain breadcrumbs can provide healthier options loaded with fiber. Ensure to store them in an airtight container to maintain freshness, and feel free to substitute with panko for an even crunchier texture.

Common Mistakes to Avoid

  • Using old or sprouted onions, which can affect the flavor and texture.
  • Not drying the onion rings thoroughly after rinsing; moisture can prevent them from becoming crispy.
  • Overcrowding the air fryer basket, which can lead to uneven cooking and soggy rings.
  • Skipping the seasoning in the breadcrumbs, resulting in bland onion rings.
  • Not preheating the air fryer, which can alter cooking times and crisping.
  • Using excessive oil, which goes against the benefits of air frying.
  • Cooking at too high a temperature, which may burn the coating before the onion is cooked through.
  • Not cutting the onions to uniform thickness, leading to inconsistent cooking times.
  • Neglecting to flip the onion rings halfway through cooking, which affects even crispiness.
  • Serving immediately without allowing to cool slightly; overly hot rings may burn your mouth.

Essential Techniques

To achieve perfect air fryer onion rings, proper coating technique is vital. After slicing, ensure each ring is coated evenly in flour, egg, and breadcrumbs. This layering provides optimal crunch, and practicing this process will yield consistently great results.

Another essential technique is adjusting the air fryer temperature and time. Familiarity with your specific air fryer model is crucial, as different machines may require tweaks for perfect cooking. Pay attention to visual cues such as color to determine doneness and avoid overcooking.

Pro Tips for Perfect Air Fryer Onion Rings

1. Experiment with different breading mixtures, like adding herbs or spices to breadcrumbs for extra flavor.
2. Allow the coated onion rings to rest for a few minutes before air frying to help the coating stick.
3. For a gluten-free version, use almond flour and gluten-free breadcrumbs.
4. Batch cook and let onion rings cool on a wire rack to maintain crispiness.
5. Consider dipping in buttermilk before the coating for extra tenderness.
6. Preheat the air fryer for best results and consistent cooking.
7. Make variations with different types of onions, such as sweet or red onions, for different flavor profiles.
8. Serve with a variety of dips like ketchup, ranch, or spicy mayo to elevate the snack experience.

Variations and Adaptations

Onion rings can easily adapt to suit various tastes. For a spicy kick, consider adding cayenne pepper to the breadcrumb mixture or serving them alongside a sriracha dipping sauce. Seasonal adaptations can include incorporating herbs like rosemary or thyme for a fresh twist.

For dietary modifications, those following a vegan diet can replace eggs with a flaxseed mixture or a vegan egg substitute while opting for plant-based breadcrumbs. Additionally, onion rings can be made low-carb by using a coating of crushed pork rinds or grated cheese instead of traditional breadcrumbs.

Flavor variations are possible by utilizing different spices or even adding grated cheese to the breadcrumb mixture. Texture modifications are another avenue, where experimenting with thicker cuts of onion rings can create a heartier bite. Presentation alternatives might include stacking rings vertically on a platter for a fun display.

Serving and Presentation Guide

Plating onion rings can be as simple as using a wooden or ceramic platter for rustic charm. Consider garnishing with fresh herbs like parsley or chives to add a pop of color and aroma.

Traditional accompaniments include serving onion rings alongside burgers or sandwiches, but modern interpretations might see them integrated into salads or with gourmet dipping sauces. Be mindful of temperature when serving; slightly cooled rings tend to hold structure better and avoid a mouth burn.

Portion control is important for parties. Opting for smaller serving baskets with a variety of dips promotes sharing and exploration of flavors.

Wine and Beverage Pairing

Pairing wine with onion rings can be an exciting culinary experience. A crisp Sauvignon Blanc works harmoniously with the fried elements, balancing the richness with its acidity. For a red option, consider a light-bodied Pinot Noir which complements without overpowering the delicate onion flavor.

Non-alcoholic alternatives include sparkling water with a splash of lime or lemon, providing a refreshing contrast. For those who enjoy coffee or tea, an iced tea with hints of lemon can enhance the senses with its bitterness to cut through the crunchy sweetness of the rings.

When serving beverages, ensure they are chilled, enhancing the overall dining experience, especially during warmer months.

Storage and Shelf Life

Proper storage of air fryer onion rings ensures they stay crispy and fresh longer. Store leftover rings in an airtight container at room temperature for up to two days. Avoid refrigerating, as it can result in sogginess.

For longer storage, consider freezing the cooked onion rings in a single layer on a baking sheet before transferring to a freezer-safe bag. This way, they can keep for up to three months. When reheating, place them back in the air fryer for a few minutes to regain their crispiness, ensuring a delightful snack experience.

Signs of spoilage to watch out for include off-putting smells or changes in texture. If they appear soggy or wet, it’s best to discard them for safety.

Make Ahead Strategies

To streamline preparation, consider slicing onions a day in advance and storing them in cold water to keep them fresh. The breading process can also be completed ahead of time, meaning you can simply cook them right before serving.

When assembling your onion rings, once breaded, they can be kept in the refrigerator for a couple of hours. This resting period allows coatings to adhere better during cooking, enhancing texture.

Quality impact should be assessed carefully, as making ahead may alter the crispness if not reheated properly. Ensure freshness is maintained by employing reheating strategies that prioritize quality, such as re-crisping in the air fryer.

Scaling Instructions

Scaling your recipe up is simple; just multiply the ingredients proportionally while ensuring you do not overcrowd the air fryer basket, which can lead to uneven cooking. For large gatherings, consider preparing in batches for the ideal crispiness.

Conversely, halving the recipe is just as straightforward. Cut all ingredient measurements in half, and keep an eye on cooking times, as they may be slightly shorter.

Equipment adjustments may be necessary for larger quantities, particularly if utilizing a smaller air fryer, so plan accordingly. When it comes to timing, cooking in batches may require increased total cooking time, but the results will be worth the wait.

Nutritional Deep Dive

Analyzing the nutritional content of air fryer onion rings reveals macro breakdown rich in carbohydrates, primarily due to the onions and breadcrumbs. Each serving contains a moderate calorie count, making them a snack that offers indulgence without the guilt.

Micronutrient analysis shows onions provide vitamins C and B6 along with notable antioxidants, supporting overall health. Nutritional value can vary based on modifications, such as utilizing whole-grain breadcrumbs for added fiber.

Health benefits include supporting heart health and promoting digestive wellness, particularly when incorporating fresh onions. For portion analysis, consider serving sizes to manage calorie intake effectively, especially during social occasions.

Dietary Adaptations

For those on gluten-free diets, ensuring the use of gluten-free breadcrumbs is vital, while also considering gluten-free flour in the initial coating. Vegan adaptations can be achieved by replacing eggs with aquafaba or a flaxseed mixture.

Low-carb diets can rely on substituting breading with ground almonds or coconut flour to create a keto-friendly version. Paleo dieters may substitute breadcrumbs with crushed nuts and seeds for a tasty crunch.

Additional options include dairy-free adaptations, particularly in dipping sauces, allowing for broader dietary inclusion. Low-FODMAP enthusiasts will find support in using onion varieties that align with their dietary needs, ensuring enjoyment for everyone.

Troubleshooting Guide

Texture issues may arise if onion rings remain soggy. Ensure moisture is thoroughly removed before breading and keep airflow optimal in the air fryer.

Flavor balance can be problematic if seasonings are neglected; ensure a robust mixture for the breadcrumbs, allowing even flavor distribution. When faced with temperature setbacks, always preheat the air fryer adequately to ensure consistent cooking.

Challenges may emerge when cooking time isn’t aligned; watch visual cues such as a golden color to determine doneness and avoid burning.

For ingredient substitutions, adjust cooking times based on the moisture content of alternatives, ensuring the end result retains quality. Timing adjustments may be necessary for larger or thicker onion cuts to achieve a suitably cooked interior.

Recipe Success Stories

The community feedback surrounding air fryer onion rings highlights their simplicity and versatility. Many readers have shared their variations, including experimenting with different dipping sauces and spices.

Success stories often mention how easy it was to cater to diverse tastes using adaptable ingredients. Readers have suggested additions like cheese to the breadcrumbs for richer flavor, with great responses.

Photography tips shared by the community include capturing the rings with fresh dips for enticing images, emphasizing the layers of crunch and color from the coating.

Further adaptation stories showcase families who have made this a regular dish, praising its consistency in taste and ease of preparation.

Frequently Asked Questions

1. Can I use frozen onions for this recipe?

It’s best to use fresh onions for the best texture and flavor. Frozen onions can release moisture, leading to soggy results.

2. What onions are best for onion rings?

Sweet onions, like Vidalia or Walla Walla, are ideal for their mild flavor. Yellow onions also work well for a more pungent taste.

3. Can I make onion rings in advance?

Yes, you can prep the rings ahead of time and store them in the refrigerator before cooking, allowing for quick cooking when needed.

4. What dipping sauces pair well with onion rings?

Ketchup, ranch dressing, garlic aioli, and spicy mayo are popular choices that complement the flavors of onion rings beautifully.

5. Can I make these onion rings gluten-free?

Absolutely! Use gluten-free breadcrumbs and ensure all other ingredients align with gluten-free guidelines.

6. How do I store leftover onion rings?

Store leftover onion rings in an airtight container at room temperature for up to two days or freeze for longer storage.

7. What’s the best way to reheat onion rings?

Reheat in the air fryer at 350°F for 3-5 minutes to regain their crispiness without making them soggy.

8. Can I use pre-packaged breadcrumbs for this recipe?

Yes! Pre-packaged breadcrumbs can save time and are available in various flavors but ensure they suit your taste preferences.

9. How thin should I slice the onions?

Slices should be about 1/4 to 1/2 inch for optimal cooking and texture, providing the best balance of crunch and tenderness.

10. Can I bake instead of air fry?

While air frying gives the best crispiness, you can bake them in the oven at 425°F for about 20-25 minutes, flipping halfway through.

Additional Resources

Explore related recipes such as sweet potato fries or zucchini chips for more crispy and healthy snacks. Technique guides like perfect frying tips or air fryer basics can enhance your cooking skills.

Ingredient information resources can help in understanding the benefits of various vegetables and provide insights into purchasing fresh produce.

For equipment recommendations, consider investing in high-quality air fryers known for their durability and efficiency, ensuring long-term use and great results. Seasonal variations of vegetables can inspire creativity in dishes and keep your meals fresh and exciting.

Join the Conversation

Engage with fellow cooking enthusiasts by sharing your air fryer onion rings experience. Post photos on social media, showcasing your crispy creations!

Recipe reviews are encouraged to foster community engagement and feedback. Share your adaptations and variations to inspire others looking for new ideas in their kitchens.

Join local cooking groups or online forums for recipe discussions and tips on perfecting this delicious snack. Everyone loves a good onion ring, and exchanging stories can enhance the joy food brings us.

The Recipe

Air Fryer Onion Rings

Serves: 4

Prep Time: 10 mins

Cook Time: 15 mins

Total Time: 25 mins

Kitchen Equipment Needed

  • Air fryer
  • Cutting board
  • Knife
  • Mixing bowl
  • Plate for breadcrumbs
  • Tongs

Ingredients

  • 1 large onion, sliced into 1/4 inch rings
  • 1 cup all-purpose flour
  • 2 large eggs, beaten
  • 2 cups breadcrumbs
  • 1 teaspoon garlic powder
  • 1 teaspoon paprika
  • Salt and pepper to taste
  • Olive oil spray

Directions

  1. Preheat air fryer to 375°F (190°C).
  2. In a mixing bowl, season flour with salt, pepper, garlic powder, and paprika.
  3. Coat each onion ring in flour, shaking off excess.
  4. Dip into the beaten eggs, then coat thoroughly in breadcrumbs.
  5. Arrange coated rings in the air fryer basket in a single layer and mist with olive oil.
  6. Cook for 10-12 minutes, flipping halfway through until golden brown.
  7. Repeat with remaining rings, misting as needed.
  8. Serve hot with your favorite dipping sauces.

Recipe Notes

  • For a gluten-free option, substitute with gluten-free breadcrumbs and flour.
  • Add herbs or spices to breadcrumbs for a unique flavor twist.
  • Allow cooked onion rings to cool slightly to maintain crispiness.