“`html
Table of Contents
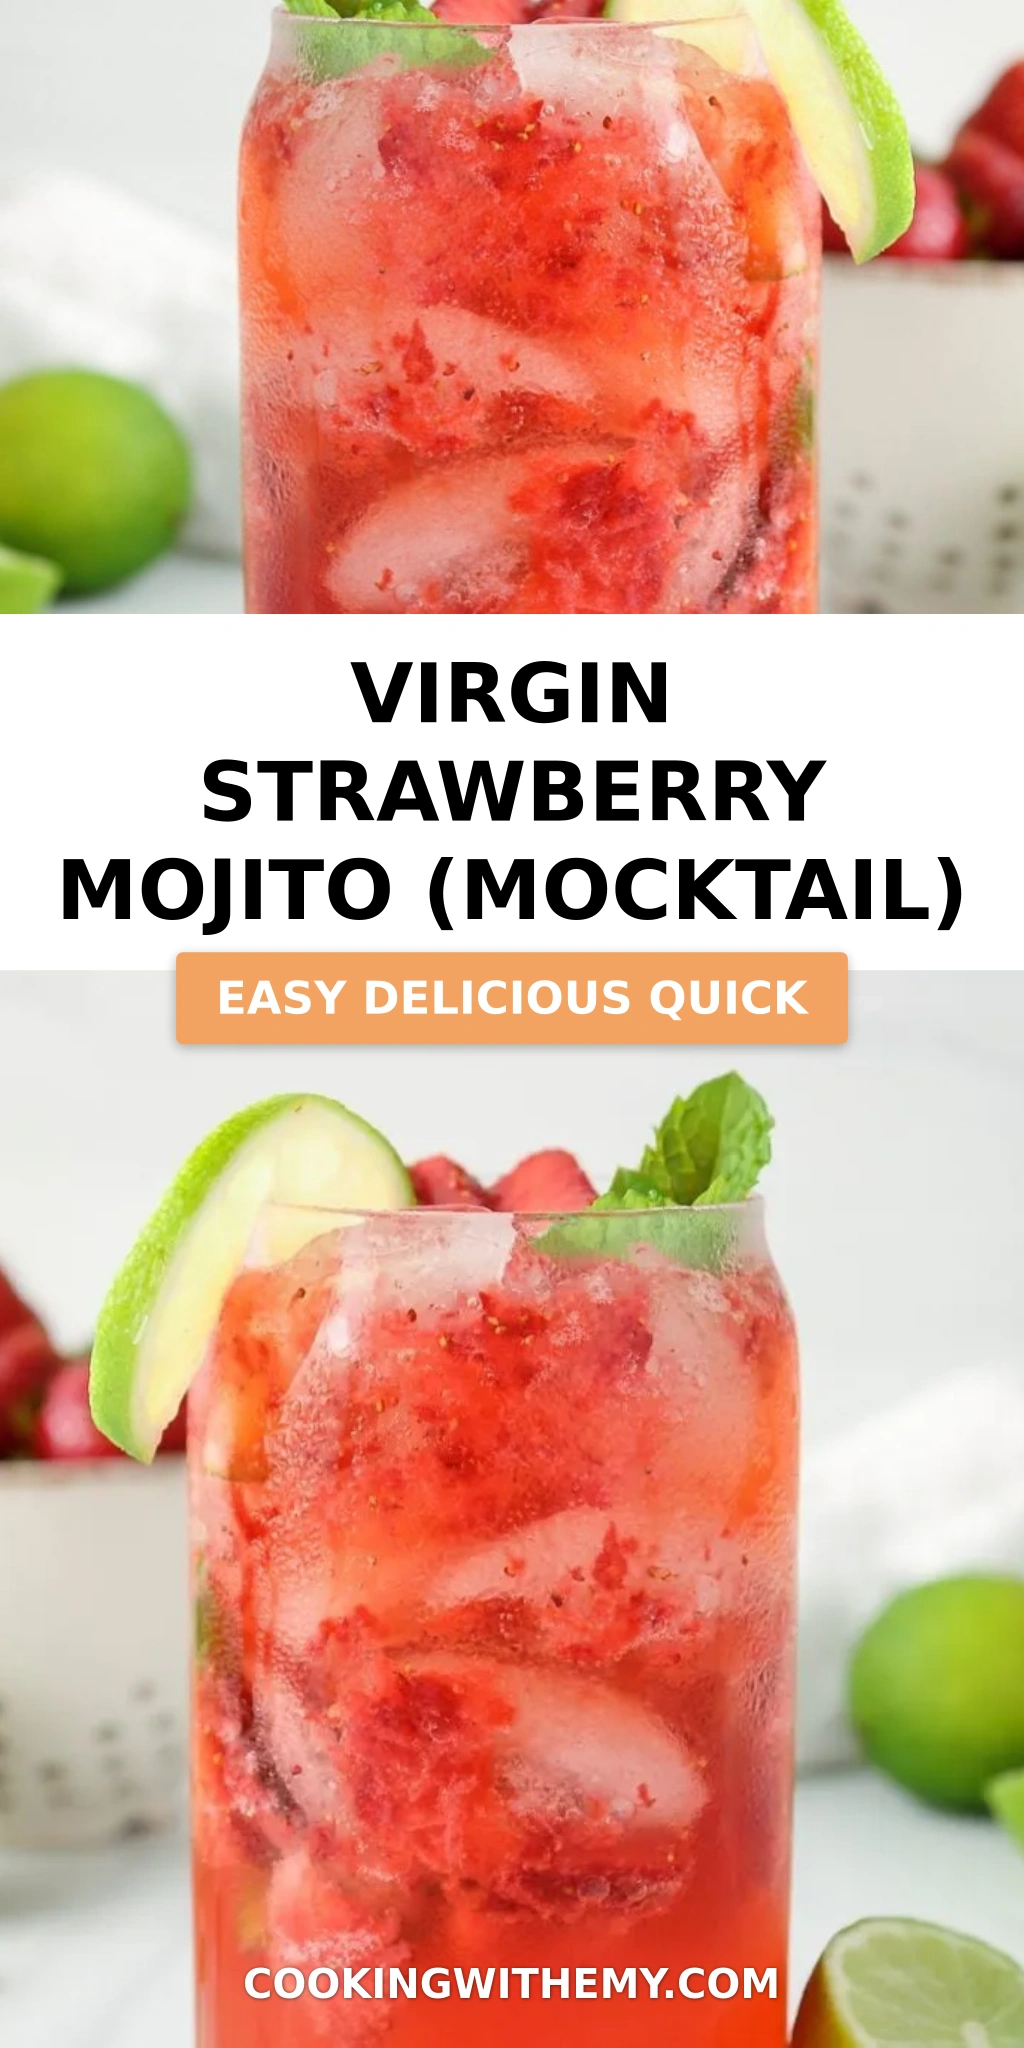
Virgin Strawberry Mojito Recipe – No Muddler? No Problem! ✨
I still remember the first time I made a virgin strawberry mojito — it was a sweltering July afternoon in my tiny NYC apartment, and I was craving something cold, fruity, and utterly refreshing. Growing up in Morocco, my mother would crush fresh mint with sugar for a post-souk tea ritual, and that same motion — the gentle pressing of leaves to release their oils — is exactly what this drink calls for. This Virgin Strawberry Mojito recipe is my go-to mocktail when I want big flavor with zero effort.
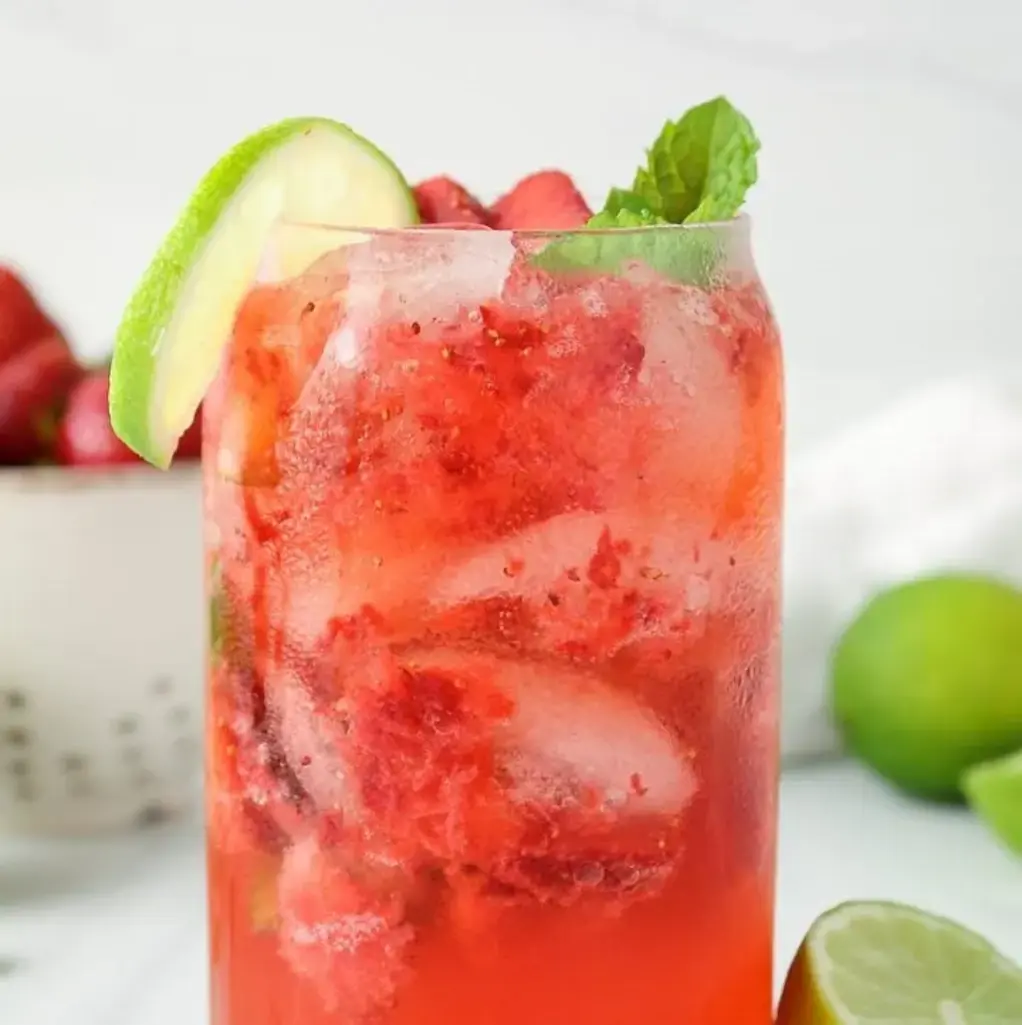
Imagine this: juicy, ripe strawberries muddled with fragrant mint and zesty lime, then topped with bubbly seltzer over a tumble of ice. The first sip hits you with bright citrus, then the berry sweetness rolls in, and finally that cool minty finish lingers. It’s the kind of drink that instantly makes you feel like you’re lounging on a Mediterranean terrace, even if you’re just sitting on your fire escape. The texture is light and effervescent, with tiny bits of strawberry and mint floating through every sip.
What I love most about this strawberry mocktail is that it’s endlessly adaptable — and you absolutely do not need a muddler to make it. In this post, I’ll show you my chef-tested method for extracting maximum flavor using common kitchen tools, plus my favorite trick for balancing sweetness without overpowering the fruit. Whether you’re hosting a summer party or just treating yourself on a Tuesday, this non-alcoholic strawberry mojito comes together in under five minutes. From my Paris pastry training to my Moroccan roots, I’ve packed every detail into this guide so you get a perfect glass every time.
Why This Virgin Strawberry Mojito Recipe Is the Best
The Flavor Secret: Most virgin mojito recipes rely on simple syrup or plain sugar, but I use a splash of maple syrup — a trick I picked up from a Parisian bartender friend. Maple syrup’s subtle caramel notes complement the strawberries without masking their natural brightness, and it dissolves instantly in cold liquid. This one swap elevates the entire drink.
Perfected Texture: The key to a great strawberry mint drink is not over-muddling the mint. In culinary school, we learned that crushing mint too aggressively releases bitter chlorophyll compounds. I teach you the gentle press-and-twist method that keeps the mint bright and the drink smooth — no stringy bits floating around.
Foolproof & Fast: With just six ingredients and two steps, this recipe is practically impossible to mess up. I’ve tested it with frozen strawberries, different sweeteners, and even without a muddler (a wooden spoon handle works beautifully). Whether you’re a seasoned home cook or a total beginner, you’ll have a gorgeous, Instagram-worthy mocktail on the table in five minutes flat.
Virgin Strawberry Mojito Recipe Ingredients
I source my strawberries from the Union Square Greenmarket when they’re in season — the smell alone stops me in my tracks. But even grocery-store berries work beautifully here. The trick is to let them sit at room temperature for an hour before using; cold strawberries don’t release their juice as readily. Here’s everything you need for one tall glass.
Ingredients List
- 1/2 cup fresh strawberries (2–4 medium), sliced
- 10–12 fresh mint leaves
- 1 lime, juiced (about 2 tablespoons)
- 1/2 tbsp sweetener to taste (optional — I use maple syrup)
- Ice cubes, for serving
- 1 to 1 1/2 cups soda water or seltzer (chilled)
Ingredient Spotlight
Strawberries: Look for berries that are deep red all the way through — no white shoulders. Fragrant ones will smell sweet even before you cut them. If strawberries aren’t in season, frozen work fine; just thaw them slightly so they’re soft enough to muddle. The natural pectin in ripe berries gives the drink a lovely silky mouthfeel.
Mint: Spearmint is the classic choice for mojitos — it’s milder and sweeter than peppermint. I buy mine at the farmers market and store it with stems in a glass of water on the counter. Never refrigerate mint; it turns black overnight. If you have a windowsill, grow your own — it’s nearly impossible to kill and tastes infinitely better.
Lime: Always use fresh lime juice. The bottled stuff has a metallic bitterness that ruins the delicate balance of this strawberry mocktail. Roll the lime on the counter before cutting to get the most juice out of it. One medium lime typically yields about 2 tablespoons — exactly what you need.
| Original Ingredient | Best Substitution | Flavor / Texture Impact |
|---|---|---|
| Fresh strawberries | Frozen strawberries (thawed) | Slightly softer texture; still excellent flavor — thaw completely and drain excess liquid |
| Fresh mint | Lemon balm or basil (if you must) | Lemon balm is gentler; basil adds a peppery note — not traditional but surprisingly good |
| Maple syrup | Agave nectar or simple syrup | Agave is neutral and lighter; simple syrup works but add 1 tsp extra for same sweetness |
| Seltzer / soda water | Club soda or sparkling mineral water | Club soda has added minerals (slightly saltier); mineral water adds a distinctive terroir |
| Lime | Lemon (in a pinch) | Less floral, more tart — add 1/2 tsp honey to balance |
How to Make Virgin Strawberry Mojito — Step-by-Step
Trust me when I say this is the easiest drink you’ll make all summer. I’ve broken it into two simple steps so you can nail it on your first try. The whole process takes about as long as it takes to toast a bagel, and the result is so much more rewarding.
Step 1: Muddle the Base
In a tall glass (at least 16 ounces), add the sliced strawberries, mint leaves, fresh lime juice, and your sweetener of choice (I use maple syrup). Using a muddler — or in a pinch, the handle of a wooden spoon — gently press and twist the ingredients 6–8 times. You want the strawberries to break down and the mint to release its aroma, but avoid crushing the mint into tiny shreds. The goal is a fragrant, chunky mash, not a purée. Stop when the strawberries look like a coarse jam and the mint is still in visible pieces.
💡 emy’s Pro Tip: If you don’t have a muddler, place the ingredients in a small bowl and use the bottom of a sturdy drinking glass or a wooden spoon handle. The key is a gentle pressing motion — not aggressive pounding — to avoid bitter mint notes. You’ll get the same bright, fresh flavor without any special equipment.
⚠️ Common Mistake to Avoid: Over-muddling the mint. If you crush the leaves into a paste, they’ll release bitter chlorophyll and your drink will taste grassy instead of fresh. Stop as soon as you smell the mint strongly — that’s your cue that it’s ready.
Step 2: Assemble and Serve
Fill the glass to the brim with ice cubes — the more ice, the less dilution, so don’t be shy. Pour the chilled seltzer or soda water over the ice, starting with about 1 cup and adding more if you prefer a lighter flavor. Give everything a gentle stir with a long spoon (or a chopstick!) to distribute the muddled ingredients evenly. Watch the color swirl from deep red to a beautiful rosy pink — that’s how you know it’s working. Garnish with a strawberry slice on the rim and a sprig of mint if you’re feeling fancy. Sip immediately while the bubbles are at their liveliest.
💡 emy’s Pro Tip: For the most dramatic presentation, fill your glass with ice first, then pour the muddled mixture over the top before adding seltzer. This keeps the strawberry bits suspended throughout the drink rather than settling at the bottom. Your guests will think you spent ten minutes on it — I won’t tell.
| Step | Action | Duration | Key Visual Cue |
|---|---|---|---|
| 1 | Muddle strawberries, mint, lime juice, and sweetener | 30–45 seconds | Strawberries break into a coarse, jammy consistency; mint is fragrant but still in visible pieces |
| 2 | Fill glass with ice, add seltzer, stir gently | 1 minute | Drink turns a uniform rosy pink; bubbles rise steadily from the bottom |
Serving & Presentation
I love serving this virgin strawberry mojito in a tall highball or a mason jar — the layers of pink and green are just gorgeous through clear glass. For a party, I set up a DIY mocktail bar with a pitcher of the muddled strawberry-mint base (minus the seltzer) and let guests top their own glasses with sparkling water. It’s always the first thing to disappear, even when there’s a full bar nearby.
Garnish each glass with a thin lime wheel, a whole strawberry sliced partway through and perched on the rim, and a sprig of mint that you’ve gently slapped between your palms to release its oils. The aroma hits before the first sip — it’s pure theater, and so simple. For an extra touch, freeze small strawberries or mint leaves into ice cubes. They look stunning and keep the drink cold without watering it down.
| Pairing Type | Suggestions | Why It Works |
|---|---|---|
| Light Snack | Cucumber sandwiches, goat cheese crostini, watermelon feta skewers | Cool, fresh flavors mirror the mocktail’s brightness; creamy elements balance the acidity |
| Main Dish | Grilled shrimp tacos, citrus-herb chicken, Moroccan couscous salad | The mint and lime echo common marinade ingredients; the bubbles cut through rich proteins |
| Beverage | Iced green tea, sparkling lemonade, coconut water | Layers of refreshment without competing flavors; all are light and hydrating |
| Garnish | Lime wheel, whole strawberry, mint sprig, edible flower | Visual appeal signals freshness; the mint sprig adds aroma with every sip |
Make-Ahead, Storage & Reheating
On busy NYC mornings, I often prep the strawberry-mint base the night before so I can have a mocktail ready in 30 seconds when I walk through the door after work. The key is to keep the seltzer separate until you’re ready to serve — otherwise you’ll end up with flat, sad bubbles. Here’s exactly how to store everything.
| Method | Container | Duration | Reheating / Finishing Tip |
|---|---|---|---|
| Refrigerator | Airtight jar (muddled base only) | Up to 2 days | Stir well, then pour over ice and top with fresh seltzer — the mint will darken slightly but flavor stays bright |
| Freezer | Ice cube tray (muddled base frozen into cubes) | Up to 3 months | Drop 2–3 cubes into a glass, top with seltzer, and stir — the cubes act as both flavor base and ice |
| Make-Ahead (Party Prep) | Pitcher with lid (base + water, no seltzer) | 1 day ahead | Keep refrigerated; when serving, pour 1/3 cup base over ice and top with seltzer — stir gently to combine |
One thing I learned the hard way: never store the completed drink with seltzer in it. Even in an airtight container, the carbonation will dissipate within a couple of hours. Always keep the fizzy water separate and add it at the last moment. If you’re prepping for a party, muddle the fruit, mint, lime, and sweetener in a large pitcher up to a day ahead, then let guests build their own glasses with ice and seltzer. It’s faster than a punch and twice as elegant.
Variations & Easy Swaps
One of the things I adore about this strawberry mocktail is how easily it bends to whatever you have on hand. Here are three of my favorite riffs, each tested in my own kitchen so you can swap with confidence.
| Variation | Key Change | Best For | Difficulty Impact |
|---|---|---|---|
| Sparkling Raspberry Mojito | Replace strawberries with raspberries + 1 tsp extra sweetener | A tarter, more vibrant twist — gorgeous deep ruby color | Easy (same method) |
| Simple Syrup Swap | Use 1 tbsp honey or agave instead of maple syrup | Those who prefer a neutral sweetener or have dietary preferences | Easy (no change) |
| Frozen Strawberry Mojito Slush | Add 1/2 cup frozen strawberries + blend with 1/2 cup seltzer | A frosty, spoonable treat on scorching days | Medium (requires blender) |
Sparkling Raspberry Mojito
This variation is my nod to the market stalls in Marrakech, where tart berries are often paired with minty tea. Swap the strawberries for an equal amount of fresh raspberries, and add an extra half-tablespoon of sweetener to balance the raspberries’ natural tartness. The result is a brilliantly ruby-red drink with a sharper, more complex flavor profile. I like to garnish it with a strip of lime zest twisted over the glass — the oils perfume every sip. If you can find golden raspberries, they make a stunning pale pink version that tastes like summer in slow motion.
Simple Syrup Swap
Not everyone keeps maple syrup on hand, and that’s perfectly okay. A classic simple syrup (equal parts sugar and water, simmered until dissolved) works beautifully here. Use 1 tablespoon of simple syrup instead of the maple syrup, and you’ll get a cleaner, more neutral sweetness that lets the strawberry and mint shine through even more. If you’re using honey, warm it slightly before adding so it incorporates smoothly. Agave nectar can be used straight from the bottle — it’s thinner and dissolves instantly even in cold liquid.
Frozen Strawberry Mojito Slush
On the days when the NYC humidity is absolutely relentless, I turn this mocktail into a slush. Add 1/2 cup frozen strawberries to the muddled base, then pour everything into a blender with 1/2 cup of the seltzer. Blend on low until smooth — you want a thick, spoonable texture, not a watery smoothie. Pour into a chilled glass and top with a splash of fresh seltzer for a frothy head. It’s like a strawberry-mint snow cone for grown-ups, and it’s become my go-to for rooftop hangs. The French in me insists on a little mint sprig on top, even for the slush version.
Can I make a virgin strawberry mojito without a muddler?
Absolutely — this is one of the most common questions I get, and the answer is yes, with zero compromise on flavor. If you don’t have a muddler, grab a wooden spoon handle or the bottom of a sturdy drinking glass. Place the strawberries, mint, lime juice, and sweetener in a small bowl or directly in your serving glass, then press and twist with your tool of choice for about 30 seconds. The key is a gentle, rotating motion rather than aggressive pounding — this releases the juices and oils without pulverizing the mint into bitter bits. You can even use a mortar and pestle if you have one. I’ve tested every method in my NYC kitchen, and the flavor difference is genuinely negligible. So muddler or not, you’re getting a perfect glass.
What can I use instead of mint leaves in a strawberry mojito mocktail?
If you’re out of mint or simply not a fan, you have several excellent options. Lemon balm is the closest substitute — it has a gentle citrus-mint flavor that complements strawberries beautifully. Basil, especially the smaller-leaf Genovese variety, adds a peppery, slightly sweet note that’s surprisingly delightful. For a more dramatic twist, try fresh cilantro (use the tender leaves only) — it pairs wonderfully with lime and berries, though it’s definitely a love-it-or-hate-it choice. Keep in mind that each substitute will change the character of the drink, so start with half the amount and taste as you go. The method remains exactly the same: gently muddle to release the oils without breaking the leaves into pieces.
How do you make a virgin strawberry mojito less sweet?
This is an easy fix, and I actually prefer my mojitos on the less sweet side. The simplest approach is to reduce or omit the sweetener entirely — ripe strawberries and fresh lime juice already provide plenty of flavor. If you want to keep a hint of sweetness without the sugar, try using a squeeze of orange juice or a splash of unsweetened coconut water instead of maple syrup. Another trick I learned in Paris: add a tiny pinch of sea salt. It sounds counterintuitive, but salt suppresses bitterness and enhances the fruit’s natural sweetness, so you need less added sugar. Start with a small pinch, stir, and taste — you’ll be amazed at how much brighter the drink becomes without any extra calories.
Can I prepare a virgin strawberry mojito ahead of time for a party?
Yes, and I do this all the time for summer gatherings. The best make-ahead strategy is to prepare the strawberry-mint base (muddled fruit, mint, lime juice, and sweetener) up to 24 hours in advance and store it in an airtight jar in the refrigerator. When guests arrive, set out a pitcher of the base, a separate pitcher of chilled seltzer, and a bucket of ice. Let everyone build their own glass: 1/4 cup base, fill with ice, top with seltzer, and stir. This DIY setup is not only practical but also a conversation starter. For larger parties, you can also freeze the muddled base into ice cube trays — pop 2–3 cubes per glass, add seltzer, and you’re done in seconds. Just never add the seltzer ahead of time or you’ll lose all the bubbles.
What type of strawberries work best for a strawberry mocktail?
For the best flavor, look for strawberries that are deep red all the way through with no white or green shoulders — this indicates they were allowed to ripen fully on the vine. The smell test is your best friend: if they smell intensely sweet and strawberry-like, they’ll taste that way too. When strawberries are in season (typically April through July in the US), local farmers market berries are unbeatable. Out of season, I actually prefer frozen strawberries over bland, pale grocery store ones. Thaw them slightly until they’re soft enough to muddle, and drain any excess liquid. The frozen berries are picked at peak ripeness, so their flavor is often superior to out-of-season fresh. Either way, this mocktail delivers.
Is this non-alcoholic strawberry mojito kid-friendly?
Absolutely — this is the perfect drink for kids, designated drivers, and anyone who wants a delicious refreshment without alcohol. It’s simply fruit, herbs, citrus, and sparkling water, so there’s nothing to worry about. My nieces and nephews go crazy for it at family gatherings, and I love that it’s naturally sweetened with maple syrup and fruit rather than artificial flavors or tons of refined sugar. For a kid-friendly presentation, serve it in a fun glass with a colorful straw and a strawberry perched on the rim. You can even let the little ones help muddle the fruit — it’s a great way to get them excited about fresh ingredients. The recipe is naturally vegan, gluten-free, and dairy-free as written.
Can I use frozen strawberries for a virgin strawberry mojito?
Yes, frozen strawberries work beautifully in this recipe, and I often use them myself during winter months when fresh berries are lackluster. The key is to let them thaw for about 15–20 minutes at room temperature before muddling — you want them soft enough to break down easily but still cold. If you muddle them while fully frozen, you’ll end up with icy chunks instead of a jammy base. Drain any excess liquid that accumulates during thawing to avoid a watery drink. One bonus: frozen strawberries are typically flash-frozen at peak ripeness, so their flavor can actually be more intense than out-of-season fresh berries. I’ve used frozen berries in taste tests with friends and nobody could tell the difference.
What is the best sweetener for a strawberry mint drink?
After testing dozens of batches in my kitchen, I’ve found that maple syrup is the best all-around sweetener for this specific drink. Its subtle caramel-woody notes complement the strawberry’s natural sweetness without overpowering it, and it dissolves instantly in cold liquid — no need to heat anything. If you prefer a neutral sweetener, agave nectar is my second choice; it’s thinner than honey and mixes effortlessly. Simple syrup (equal parts sugar and water simmered together) is another fine option, though you’ll need about 1 tablespoon compared to 1/2 tablespoon of maple syrup. Honey works but can dominate the delicate strawberry flavor, so use a mild variety like clover or orange blossom. Stevia and monk fruit sweeteners can be used, but start with a small amount and taste — they can have an aftertaste that competes with the fruit.
How many calories are in a virgin strawberry mojito?
This strawberry mocktail is surprisingly light. One serving made with 1/2 tablespoon of maple syrup contains approximately 77 calories, 21 grams of carbohydrates, 0.4 grams of fat, 1 gram of protein, and 11 grams of sugar. The majority of the sugar comes naturally from the strawberries and lime, with only about 6 grams from the maple syrup. If you’re watching your sugar intake, you can reduce or omit the sweetener — ripe strawberries are naturally quite sweet, especially when muddled. I’ve made this drink for friends who are counting calories and they’re always delighted that something this delicious is so low in calories. It’s also naturally free of fat, cholesterol, and sodium, making it a smart choice for just about any dietary plan.
Can I add other fruits to this non-alcoholic strawberry mojito?
Absolutely — this recipe is a fantastic base for fruit experimentation. Muddled blueberries add a lovely earthy sweetness and turn the drink a beautiful deep purple. Sliced peaches or nectarines bring a velvety texture and floral notes that pair wonderfully with mint. For a tropical twist, add a few chunks of fresh pineapple or mango — their acidity balances the lime beautifully. I recommend sticking to one or two fruits maximum so the flavors stay clear and recognizable. If you’re adding a second fruit, reduce the strawberry amount slightly to keep the proportions balanced. The muddling technique remains the same: press gently to release juices without turning everything into a paste. My current favorite combo is half strawberry, half peach with a tiny pinch of grated ginger — it’s like summer in a glass.
Share Your Version!
I absolutely love hearing how this recipe comes to life in your kitchen. Did you try the no-muddler hack? Swap in a different fruit? Add a pinch of something unexpected? Drop a star rating below and leave a comment — your feedback helps me create better recipes for you, and I read every single one. If you share a photo on Instagram or Pinterest, tag me at @cookingwithemy so I can see your beautiful creation and share it with our community. The question I get most often is: “Can I really make this without a muddler?” — I’d love to know how it worked for you.
From my NYC kitchen to yours — I hope this recipe brings as much warmth to your table as it does to mine. — emy 🧡
Love This Recipe? Save It to Pinterest!
If you enjoyed this Virgin Strawberry Mojito recipe, don’t let it get lost in your browser tabs! 😄 Pin it now so you can find it again anytime — and explore hundreds more tried-and-tested recipes waiting for you on my Pinterest boards.
👉 Follow emy on Pinterest @cookingwithemy
📌 Pin this recipe · 🔁 Re-pin your favorites · 💬 Tag me when you make it — I love seeing your creations!
⭐️ Loved this recipe? Leave a 5-star rating and share your strawberry mojito photos with me @cookingwithemy — your support means the world!
“`
Print
Virgin Strawberry Mojito (Mocktail)
Description
This virgin strawberry mojito is done within minutes and one of my favorite refreshing drink to enjoy on a hot day. It’s a perfect blend between sweet strawberries, zesty lime and fresh minty flavors… everything you need in a glass to get you in a summer mood!
Ingredients
- 1/2 cup fresh strawberries (2-4) (sliced)
- 10–12 fresh mint leaves
- 1 lime (juiced)
- 1/2 tbsp sweetener to taste (optional, I used maple syrup)
- ice cubes (for serving)
- soda water or seltzer (I used about 1 – 1 1/2 cup)
Instructions
- In a glass (at least 16 oz), add the strawberries, mint, lime juice and sweetener, if using. Then, using a muddler, crush the ingredients to help them release their juice and oil (avoid crushing the mint so small so it is more pleasant to drink).
- Then, fill the glass with ice cubes and top with seltzer. Stir and enjoy!
Nutrition
- Calories: 77 kcal
- Sugar: 11 g
- Fat: 0.4 g
- Carbohydrates: 21 g
- Protein: 1 g
Tried This Recipe? Leave a Comment!
Did you make this recipe? I’d love to hear how it turned out! Please leave a comment and a rating below. Your feedback helps other home cooks and supports cheerychop.com!
For more delicious inspiration, follow me on Pinterest!