📖 Table of Contents
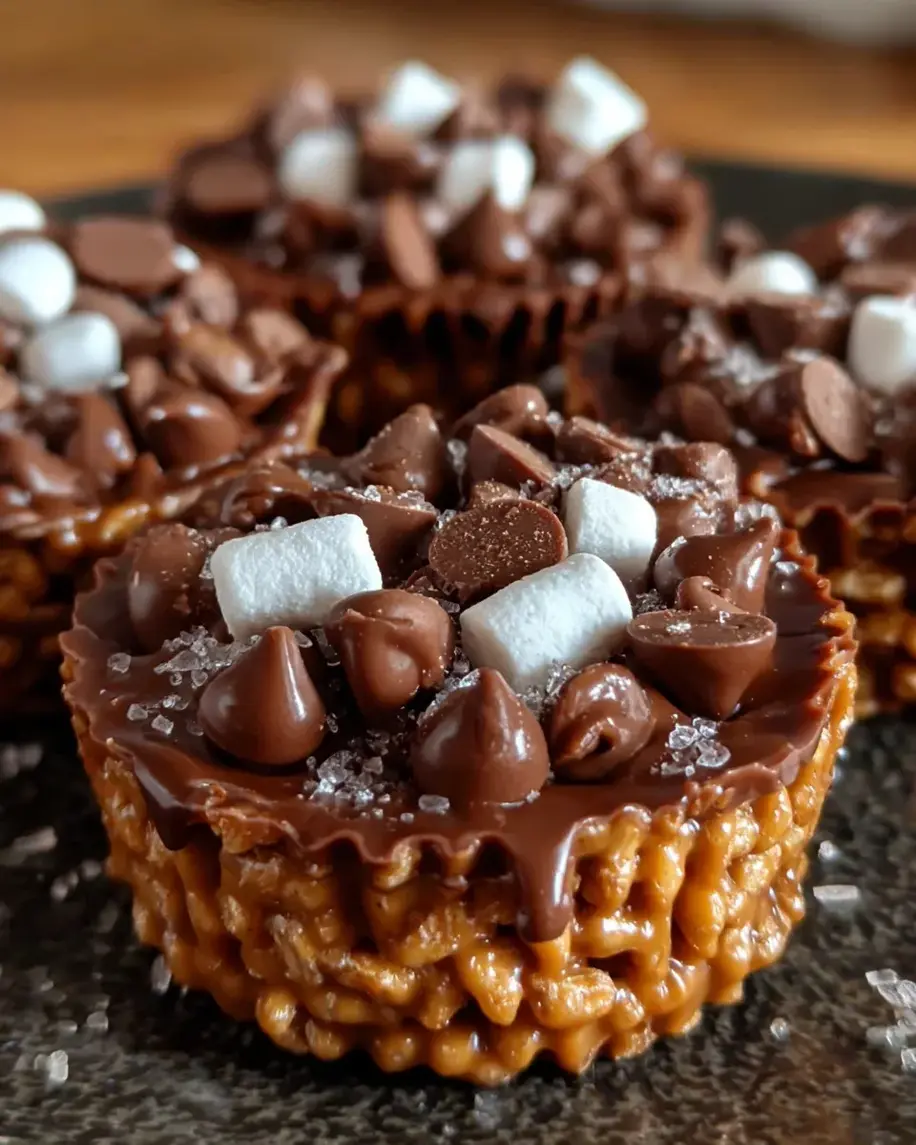
No-Bake Chocolate Peanut Butter Cups (With Crispy Cereal Surprise!)
The Ultimate Homemade Candy – Easy, Crunchy, and Irresistibly Creamy
Introduction: The Perfect Bite-Sized Indulgence
There’s something incredibly rewarding about creating a bite-sized delight that feels like a hug in candy form. Chocolate Peanut Butter Cups are exactly that—a luscious treat that brings joy with every bite. Whether you’re juggling a hectic schedule or just want to whip up something special for your loved ones, these no-bake gems are a lifesaver. With minimal fuss and maximum flavor, this recipe is perfect when you need a quick solution to satisfy your sweet tooth. Trust us, once you make these, they’ll quickly become a cherished favorite in your home!
This isn’t just any chocolate peanut butter cup recipe. We’ve added a secret ingredient—crispy Rice Krispies cereal—that gives each cup an unexpected, delightful crunch. The creamy peanut butter filling, the rich chocolate coating, and the satisfying snap of cereal make this a texture lover’s dream. Plus, it’s completely no-bake, meaning you can have a batch ready in under 30 minutes (plus a little chill time).
We’re The Kitchen Team, and we’ve tested this recipe dozens of times to ensure it’s foolproof. Whether you’re a seasoned baker or a complete beginner, these cups will turn out perfect every time. Let’s dive into why this recipe works so beautifully!
Why This Is the Best Chocolate Peanut Butter Cup Recipe
We’ve made hundreds of candy recipes, and this one stands out for several reasons. Here’s why you’ll love it:
- No-Bake Convenience: No oven required! Just a stovetop and a microwave. Perfect for hot summer days or when you need a quick treat.
- Perfect Texture Balance: The creamy peanut butter filling contrasts beautifully with the crunchy cereal and the smooth chocolate shell. Every bite is a symphony of textures.
- Simple, Pantry-Friendly Ingredients: You likely already have butter, marshmallows, peanut butter, and chocolate chips in your kitchen. No fancy ingredients needed!
- Customizable: Easily make these gluten-free, vegan, or add your favorite toppings. The base recipe is incredibly versatile.
- Kid-Approved & Adult-Loved: These cups disappear at parties, potlucks, and family gatherings. They’re nostalgic yet sophisticated enough for any occasion.
Ingredients You’ll Need
Here’s everything required to make 12 generous chocolate peanut butter cups. All measurements are in US standard units.
| Ingredient | Amount | Notes |
|---|---|---|
| Unsalted butter | 1/2 cup (115 g) | Use unsalted to control salt level |
| Mini marshmallows | 1 cup (50 g) | Regular marshmallows work too, but mini melt faster |
| Creamy peanut butter | 1 cup (250 g) | Do not use natural or crunchy varieties |
| Vanilla extract | 1/2 teaspoon | Optional but enhances flavor |
| Rice Krispies cereal | 3 cups (75 g) | Any crispy rice cereal works |
| Chocolate chips | 1 cup (175 g) | Semi-sweet or dark chocolate recommended |
| Sea salt | Pinch | Optional, for sprinkling on top |
Equipment needed: Medium saucepan, large mixing bowl, muffin tin (12-cup), paper liners, microwave-safe bowl, spatula.
Step-by-Step Instructions
Follow these simple steps to create the most delicious chocolate peanut butter cups. The process is straightforward and takes less than 20 minutes of active time.
- Melt butter and marshmallows: In a medium saucepan over low heat, combine the unsalted butter and mini marshmallows. Stir constantly until both are completely melted and the mixture is smooth and glossy. This takes about 3-4 minutes. Do not let it boil.
- Add peanut butter and vanilla: Remove the saucepan from heat. Immediately add the creamy peanut butter and vanilla extract (if using). Stir vigorously until the mixture is fully blended, creamy, and uniform in color.
- Combine with cereal: Place the Rice Krispies cereal in a large mixing bowl. Pour the warm peanut butter mixture over the cereal. Using a rubber spatula, gently fold everything together until every piece of cereal is evenly coated. Work quickly before the mixture sets.
- Prepare the muffin tin: Line a 12-cup muffin tin with paper liners. Using a cookie scoop or two spoons, divide the cereal mixture evenly among the cups (about 2 tablespoons each). Press down gently with the back of a spoon to flatten the surface. The filling should be compact but not rock hard.
- Melt the chocolate: Place the chocolate chips in a microwave-safe bowl. Microwave in 20-second intervals, stirring thoroughly between each interval, until the chocolate is smooth and fully melted. This usually takes 3-4 intervals. Be careful not to overheat.
- Top with chocolate: Spoon the melted chocolate over each peanut butter cup, dividing it evenly. Use the back of the spoon to spread the chocolate to the edges, covering the filling completely. If desired, sprinkle a pinch of sea salt on top.
- Chill to set: Place the muffin tin in the refrigerator for at least 20 minutes, or until the chocolate is firm and the cups are set. For faster results, you can pop them in the freezer for 10 minutes.
- Serve and enjoy: Once set, remove the cups from the liners and enjoy immediately. Store leftovers in an airtight container in the fridge.
Serving Suggestions
These chocolate peanut butter cups are incredibly versatile. Here are some of our favorite ways to serve them:
- As a dessert platter: Arrange them on a plate with fresh berries, sliced bananas, and a drizzle of caramel sauce for an impressive dessert board.
- Crumbled over ice cream: Chop up a cup or two and sprinkle over vanilla ice cream with hot fudge. Instant sundae upgrade!
- Gift-giving: Place them in a decorative tin or box lined with parchment paper. They make wonderful homemade gifts for birthdays, holidays, or just because.
- Party favors: Wrap each cup in a small cellophane bag tied with a ribbon for a charming party favor.
- With coffee or milk: Serve alongside a hot cup of coffee or a cold glass of milk for the ultimate pairing.
These cups are also perfect for bake sales, school events, or as a quick treat when unexpected guests arrive. They’re always a hit!
Storage Tips
Proper storage ensures your chocolate peanut butter cups stay fresh and delicious for days. Here’s what we recommend:
| Storage Method | Duration | Tips |
|---|---|---|
| Refrigerator (airtight container) | Up to 2 weeks | Layer with parchment paper to prevent sticking |
| Freezer (freezer-safe bag) | Up to 3 months | Thaw in fridge for 15 minutes before eating |
| Countertop (cool, dry place) | 3-4 days | Only if your kitchen is below 70°F |
For best texture, we recommend storing them in the refrigerator. The filling stays firm and the chocolate remains snappy. If you freeze them, they make a fantastic cold treat on a hot day!
Recipe Variations to Try
Once you’ve mastered the basic recipe, experiment with these fun twists:
- Dark Chocolate & Sea Salt: Use dark chocolate chips (60-70% cacao) and sprinkle flaky sea salt on top for a sophisticated sweet-salty combo.
- White Chocolate Peanut Butter Cups: Replace the semi-sweet chocolate with white chocolate chips. The sweetness pairs beautifully with the salty peanut butter.
- Crunchy Peanut Butter Version: Use crunchy peanut butter instead of creamy for extra texture in the filling. Or add 1/4 cup chopped peanuts to the cereal mixture.
- Vegan Option: Use vegan butter, vegan marshmallows (like Dandies), and dairy-free chocolate chips. The recipe works perfectly with these swaps.
- Add-Ins: Fold in 1/4 cup of mini chocolate chips, shredded coconut, or crushed pretzels into the cereal mixture for more flavor and crunch.
- Peanut Butter & Jelly Cups: Add a small dollop of strawberry jam or raspberry preserves on top of the peanut butter layer before adding the chocolate. Divine!
Don’t be afraid to get creative! These cups are incredibly forgiving and welcome all kinds of additions. Let us know what variations you try!
Frequently Asked Questions
We’ve answered the most common questions about this recipe. If you have more, leave a comment below!
Can I make these gluten-free?
Absolutely! Rice Krispies are naturally gluten-free, but always check the label to ensure they’re certified gluten-free if you have celiac disease. The other ingredients are also gluten-free. Just verify your chocolate chips are gluten-free as well.
Why did my chocolate seize up?
Chocolate can seize if it comes into contact with even a tiny amount of water. Make sure all your utensils are completely dry. Also, avoid overheating the chocolate—use 20-second intervals and stir well. If it does seize, you can try adding a teaspoon of coconut oil to smooth it out.
Can I use natural peanut butter?
We don’t recommend it. Natural peanut butter tends to separate and has a different fat content, which can make the filling oily and less stable. Stick with conventional creamy peanut butter for the best texture and flavor.
How do I make these dairy-free?
Use vegan butter (like Earth Balance) and dairy-free chocolate chips. Many dark chocolate chips are naturally dairy-free—just check the label. The marshmallows in this recipe are typically dairy-free as well.
Can I double the recipe?
Yes! This recipe doubles beautifully. Use a larger saucepan and bowl, and work in batches if needed. You may need two muffin tins or work in rounds. The chilling time remains the same.
Why are my cups too soft?
If the cups are too soft, they likely need more chilling time. Make sure the chocolate is fully set before removing from the liners. Also, ensure you pressed the filling firmly enough into the muffin cups. If the weather is warm, keep them refrigerated until serving.
Can I use other cereals?
Certainly! Crushed cornflakes, puffed rice, or even crushed graham crackers work well. Keep in mind that different cereals absorb moisture differently, so the texture may vary slightly. Rice Krispies give the classic crunch we love.
How long do they take to set in the freezer?
In the freezer, these cups typically set in about 10-15 minutes. Check them after 10 minutes—if the chocolate is firm to the touch, they’re ready. Don’t leave them in the freezer for more than 30 minutes or they may become too hard.
Can I use a silicone mold instead of a muffin tin?
Yes! Silicone molds work wonderfully and make removal even easier. Simply spoon the mixture into the molds and proceed as directed. You may need to adjust the amount per cup depending on the size of your mold.
What’s the best way to melt chocolate?
We recommend the microwave method for speed and convenience. However, you can also use a double boiler: place a heatproof bowl over a pot of simmering water (don’t let the bowl touch the water) and stir until melted. Both methods work great!
🍫 Save This Recipe on Pinterest!
Click the button below to pin this Chocolate Peanut Butter Cups recipe to your favorite board. Never lose a great recipe again!
Follow us on Pinterest for more delicious recipes!
Recipe by The Kitchen Team | Cooking With Emy | All Rights Reserved
Chocolate Peanut Butter Cups
Description
A delicious and easy recipe for Chocolate Peanut Butter Cups that combines creamy peanut butter with crispy cereal and rich chocolate.
Ingredients
Scale
- 1/2 cup (115 g) unsalted butter
- 1 cup (50 g) mini marshmallows
- 1 cup (250 g) creamy peanut butter
- 1/2 teaspoon vanilla extract (optional)
- 3 cups (75 g) Rice Krispies cereal
- 1 cup (175 g) chocolate chips
- Pinch of sea salt (optional)
Instructions
- In a medium saucepan over low heat, combine unsalted butter and mini marshmallows. Stir consistently until both are melted and the mixture is smooth.
- Remove from heat and add creamy peanut butter and vanilla extract, if using. Stir until fully blended and creamy.
- Transfer Rice Krispies cereal to a large bowl. Pour the peanut butter mixture over the cereal and gently fold until every piece is evenly coated.
- Line a muffin tin with paper liners. Spoon equal portions of the mixture into each cup and press down gently to flatten the surface.
- Melt chocolate chips in a microwave-safe bowl in 20-second increments, stirring between each interval until smooth. Spoon melted chocolate over each cup, spreading evenly. Sprinkle with sea salt if desired.
- Allow the cups to set at room temperature for 20 minutes or refrigerate for quicker setting. Once firm, remove paper liners and serve.
Notes
Customize with your favorite mix-ins, like nuts or dried fruits.
Store any leftovers in an airtight container in the refrigerator.
Nutrition
- Calories: 250
- Sugar: 15g
- Protein: 5g
