
Table of Contents
How to Make Crispy Rice: The Ultimate Guide to Restaurant-Style Bites at Home
| Prep Time | Cook Time | Total Time | Servings | Difficulty |
|---|---|---|---|---|
| 20 minutes | 15 minutes | 3 hours 35 minutes (includes chilling) | 24-30 rice bites | Easy |
Have you ever tasted those impossibly crunchy, savory, and utterly addictive crispy rice bites from a high-end sushi restaurant and wondered, “Could I possibly make these at home?” The answer is a resounding yes, and we’re here to show you exactly how to make crispy rice that rivals your favorite takeout spot. This isn’t just about frying leftover rice; it’s a culinary technique that transforms humble short-grain rice into a golden, crisp canvas for an endless array of toppings.
At Cooking With Emy, we believe the best dishes are often the most satisfying to master. This guide will walk you through every detail, from rinsing the rice to achieving that perfect, shatteringly crisp exterior with a slightly chewy center. Forget soggy, greasy rice cakes. We’re aiming for perfection—bite-sized pieces of joy that are surprisingly simple to create with a little patience and know-how. Let’s turn your kitchen into a crispy rice factory.
Why This Is The Best Method for Crispy Rice
Many recipes skip crucial steps, leading to bland, oily, or crumbly results. Our method, perfected by The Kitchen Team, addresses every pitfall:
- The Chill is Key: We don’t just shape and fry. The mandatory 3-hour (or overnight) chill dehydrates the surface of the rice, which is the secret to a crust that seals instantly in the oil, preventing sogginess.
- Seasoned from Within: We season the rice with a classic sushi vinegar blend (rice vinegar, sugar, salt, and sesame oil) before shaping. This ensures every single bite is flavorful, not just the toppings.
- Oil Temperature Mastery: We provide clear visual cues for oil temperature because a thermometer isn’t always handy. Getting the oil hot enough is non-negotiable for crispness without absorption.
- Texture Contrast: This recipe is engineered for the ideal contrast: a golden-brown, audible crunch giving way to a tender, seasoned interior. It’s the hallmark of professional-quality crispy rice.
Ingredients for Perfect Crispy Rice Bites
Simple ingredients, when chosen correctly, make all the difference. Here’s what you’ll need:
| Ingredient | Quantity | Notes |
|---|---|---|
| Short-grain sushi rice | 1 ½ cups (dry) | Non-negotiable. This high-starch rice is sticky and forms the perfect structure. Do not substitute with long-grain rice like Jasmine or Basmati. |
| Water | 2 cups | For cooking the rice. |
| Rice vinegar | 3 tablespoons | The mild acidity balances the richness. |
| Granulated sugar | 1 tablespoon | Dissolves into the seasoning mix, aiding caramelization during frying. |
| Salt | 1 teaspoon | Fine sea salt or kosher salt. |
| Toasted sesame oil | 1 teaspoon | The flavor powerhouse. |
| Vegetable oil | ½ – ¾ cup | For frying. Use a neutral, high-smoke-point oil like canola, avocado, or peanut oil. |
Step-by-Step Instructions: How to Make Crispy Rice
Follow these steps meticulously for foolproof results. Read through once before you begin.
Step 1: Prepare & Cook the Rice
Place your dry sushi rice in a fine-mesh strainer. Rinse under cool running water, agitating the rice with your hand, for 2-3 minutes or until the water runs completely clear. This removes excess surface starch, preventing gummy rice. Combine the rinsed rice and 2 cups of water in your rice cooker or a medium saucepan. If using a stove, bring to a boil, then reduce heat to low, cover, and simmer for 18 minutes. Remove from heat and let it sit, covered, for 10 more minutes. Do not peek while it’s cooking!
Step 2: Season the Rice
While the rice cooks, make the seasoning. In a small bowl, whisk together the rice vinegar, sugar, salt, and toasted sesame oil until the sugar and salt are fully dissolved. Transfer the hot, cooked rice to a large, non-reactive bowl (glass or ceramic is ideal). Drizzle the seasoning mixture over the rice. Using a rice paddle or a flat spatula, use a slicing and folding motion to mix and cool the rice simultaneously. Be gentle to avoid smashing the grains. Let the rice cool to room temperature.
Step 3: Shape and Chill (The Secret Step!)
Line a 8×8 inch baking pan with plastic wrap, leaving overhang on all sides. Transfer the seasoned rice to the pan. Using another piece of plastic wrap pressed directly on the surface, press the rice down firmly and evenly into a uniform layer, about ½-inch thick. Fold the overhanging plastic wrap over the top to seal. Refrigerate for at least 3 hours, but ideally overnight. This chilling step is critical for drying the surface and setting the shape.
Step 4: Cut the Rice Blocks
Remove the chilled rice block from the pan using the plastic wrap. Place it on a cutting board. Using a sharp, wet knife (to prevent sticking), trim the edges for neat squares, then cut the block into 1-inch by 2-inch rectangles, or into 1-inch cubes. Pat each piece gently with a paper towel to remove any condensation.
Step 5: Pan-Fry to Crispy Perfection
In a heavy-bottomed skillet (cast iron is excellent), heat ½ inch of vegetable oil over medium-high heat. To test if the oil is ready, carefully place a single grain of rice in the oil. It should sizzle vigorously and rise to the surface immediately. Working in batches to avoid crowding, gently place the rice cakes in the hot oil, leaving about 1 inch of space between them. Fry for 2-3 minutes per side, or until deeply golden brown and crisp. Transfer to a wire rack set over a baking sheet (this keeps them crisp—avoid paper towels which can trap steam). Repeat with remaining batches, ensuring the oil returns to temperature between each.
How to Serve Your Crispy Rice Creations
Now for the fun part—toppings! These crispy rice bites are a blank slate for your culinary creativity.
- The Classic “Takes Two Eggs” Style: Top each warm rice cake with a thin slice of fresh avocado, a piece of spicy tuna tartare (finely chopped tuna mixed with sriracha and mayo), a tiny dollop of spicy mayo, and a sprinkle of sesame seeds and chopped scallions.
- Vegetarian Delight: Try with smashed edamame, a slice of quick-pickled cucumber, and a dot of wasabi-infused Greek yogurt.
- Simple & Elegant: A thin slice of high-quality smoked salmon, a dab of cream cheese, and a fresh dill sprig.
- Party Platter: Serve a platter of plain crispy rice bites with small bowls of various toppings—chopped crab, kimchi, teriyaki chicken, tobiko (flying fish roe)—and let guests build their own.
Serve immediately after topping for the ultimate textural experience.
Storage and Reheating Instructions
Storage: Un-topped, cooled crispy rice bites can be stored in an airtight container in the refrigerator for up to 2 days. They will lose some crispness but can be revived.
Reheating for Best Results: To restore crunch, reheat in an air fryer at 375°F for 3-4 minutes or in a conventional oven at 400°F on a baking sheet for 5-7 minutes. Avoid the microwave, as it will make them tough and chewy.
Make-Ahead Tip: You can prepare the seasoned rice block and keep it wrapped in the refrigerator for up to 2 days before cutting and frying. This spreads out the work perfectly for parties.
Creative Variations on Crispy Rice
Once you’ve mastered the basic technique, the world is your oyster (or your crispy rice topping!).
- Furikake Rice: Mix 1 tablespoon of furikake (Japanese seasoning) into the rice along with the vinegar seasoning.
- Spicy Sriracha Rice: Add 1-2 teaspoons of sriracha to the seasoning mix for a pink-hued, spicy base.
- Kimchi Crispy Rice: Finely chop ¼ cup of well-fermented kimchi, squeeze out excess liquid, and fold into the cooked rice before chilling. Top with bulgogi beef.
- Dessert Crispy Rice: Omit the vinegar, salt, and sesame oil. Season the cooked rice with 1 tablespoon of melted butter and 2 tablespoons of sugar. Fry as directed and drizzle with chocolate sauce or sweetened condensed milk for a unique dessert.
Frequently Asked Questions (FAQ)
Can I use leftover rice from last night’s takeout?
My rice is sticking to the pan when I fry. What am I doing wrong?
Can I bake these instead of frying?
Why is my rice block falling apart when I cut it?
What’s the best oil for frying?
How do I make this gluten-free?
Can I make these ahead for a party?
What’s the origin of crispy rice dishes?
Love This Recipe? Save It for Later!
Pin this image to your Appetizer, Asian Recipes, or Party Food board on Pinterest to always have this guide on how to make crispy rice handy!
Follow us on Pinterest @cookingwithemy for more delicious inspiration!
[PINTEREST-READY IMAGE: A beautiful flat lay with golden crispy rice bites arranged on a slate board, topped with vibrant spicy tuna, avocado, and scallions, next to small bowls of other toppings like edamame and kimchi.]
Recipe perfected and tested by The Kitchen Team at Cooking With Emy. We hope this comprehensive guide empowers you to create stunning, restaurant-quality crispy rice at home. Share your creations with us by tagging @cookingwithemy!
Crispy Rice
Description
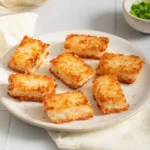
Instantly elevate your leftover rice with these fun crispy rice bites. Made with savory seasoned short-grain sushi rice, these crunchy rice cakes create a restaurant-style base for your favorite sushi toppings.
Ingredients
Scale
- 1 1/2 cups dry sushi rice (rinsed until water is clear)
- 2 cups water
- 1 teaspoon salt
- 3 tablespoon rice vinegar
- 1 tablespoon granulated sugar
- 1 teaspoon toasted sesame oil
Instructions
- Prepare the rice. Thoroughly the rice 4-5 times until the water turns clear. Cook the rice and water in a rice cooker or on the stove.
- Season the rice. In a small bowl, mix the salt, rice vinegar, sugar, and sesame oil until the sugar has dissolved. Once the rice is cooked, toss the mixture with the cooked rice in a large bowl and toss until combined.
- Shape and refrigerate the rice. Place your flavored rice into a small square baking tray lined with plastic wrap. Press and shape your rice into a 1/2-inch thick square block. Wrap and refrigerate for at least 3 hours or overnight. You want to chill the rice so that it is slightly dried out and easy to cut into cubes.
- Shape the rice. Once the rice is chilled, cut the rice into bite-sized rectangles. Pat to dry off any excess water condensation.
- Pan-fry the rice. In a medium skillet, heat about 1/2-3/4 cup of vegetable oil (or enough to fill a thin layer on your skillet) on medium-high heat until hot for about 30 seconds. Gently, place the rice into the pan leaving about 2 inches in between each piece. Be careful the oil may splatter. Cook on medium-high heat for about 1-2 minutes or until golden brown and then flip and cook for an additional 1-2 minutes or until golden brown. Remove from the pan and place on a wire rack placed over a lined baking sheet to drain any excess oil.
