
Table of Contents
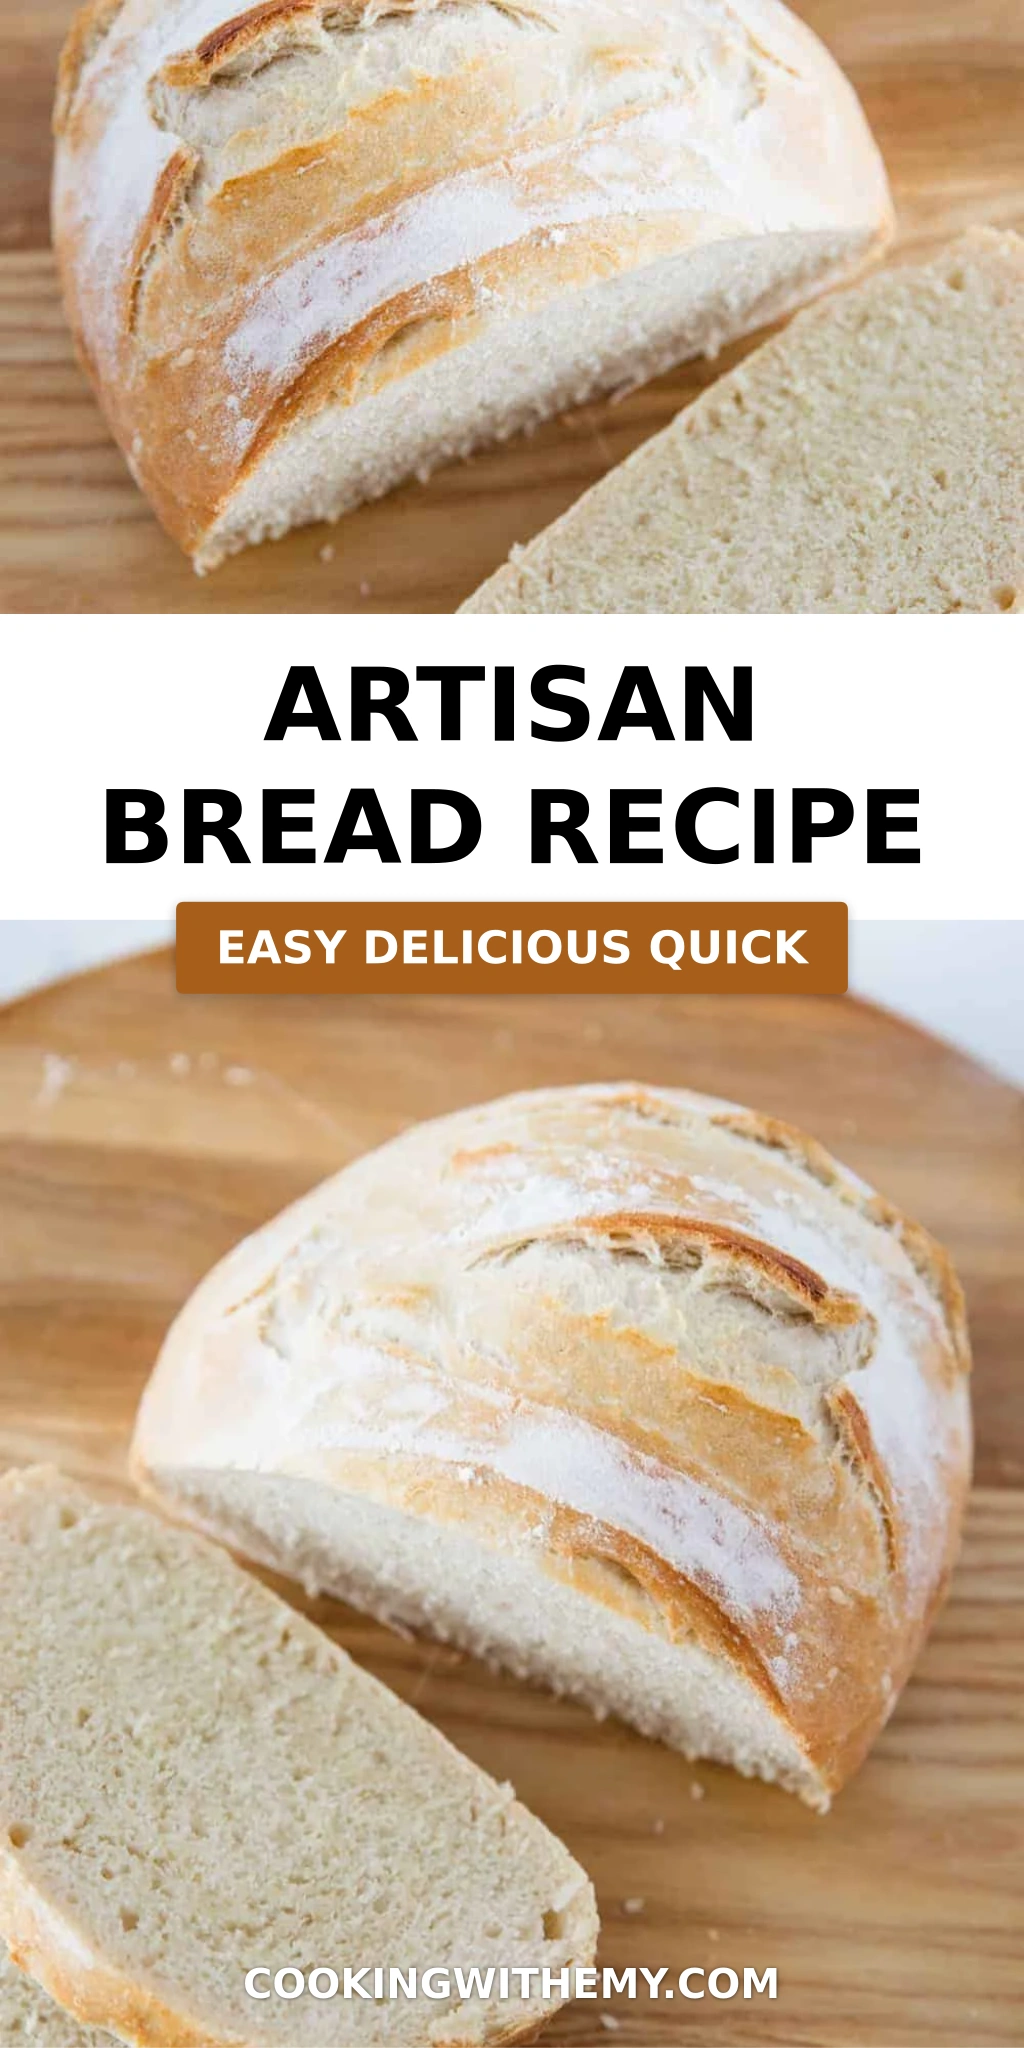
Artisan Bread Recipe – Easy No-Knead Crusty Bread You’ll Make Every Week
I still remember the first time I pulled a golden, crackling loaf of no-knead artisan bread from my tiny NYC apartment oven. The smell — that deep, yeasty, wheaty aroma — wrapped around me like a warm hug and carried me straight back to my mother’s kitchen in Morocco, where bread was the heartbeat of every meal. This easy artisan bread recipe is the one I’ve made hundreds of times since, and it never fails to stop me in my tracks. With just one bowl, four ingredients, and zero kneading, it delivers a crusty, crackling exterior and a soft, airy crumb that honestly rivals any bakery loaf in New York City.
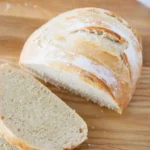
When you slice into this crusty artisan bread, the knife meets that satisfying resistance before releasing a puff of steam and that nutty, toasty fragrance that makes your kitchen feel like a Parisian boulangerie. The interior is full of irregular holes — the hallmark of a well-fermented, no-knead dough — and it comes out golden brown with a shattering crust that sings when you tap it. I love to tear off a piece while it’s still warm, let the butter melt into every nook, and close my eyes for a second. That moment is pure comfort, and it costs pennies to make.
What sets my homemade artisan bread apart is the technique I picked up during my pastry training in Paris: a long, slow fermentation that builds flavor without any effort on your part. You don’t need a stand mixer, a Dutch oven, or any fancy equipment. Just a bowl, a spoon, and a little patience. I’ve tested this no-knead bread recipe for friends, family, and even my skeptical NYC foodie neighbors — and every single person has asked for the recipe. Today I’m sharing my version, complete with the pro tips and common pitfalls I’ve learned along the way so you can nail it on your very first try. 💡 emy’s Pro Tip: The longer the rise, the deeper the flavor — aim for at least 8 hours if you can.
Why This Artisan Bread Recipe Is the Best
The Flavor Secret. My no-knead artisan bread gets its deep, complex taste from a long, room-temperature fermentation. This is a trick I learned in Paris: letting the dough rest for 8 to 10 hours allows the natural enzymes in the flour to break down starches into sugars, which then caramelize beautifully in the oven. It develops that tangy, almost sourdough-like undertone with zero added starter. And because we don’t punch down or knead, the gas bubbles stay intact, giving you that open, airy crumb that says “artisan.”
Perfected Texture. The crust on this homemade artisan bread is the real star. By adding steam to the oven — either with a pan of hot water or a handful of ice cubes — we create the humid environment that keeps the crust supple during the first part of baking, allowing the loaf to expand fully. Then as the steam dissipates, the crust turns golden and shatteringly crisp. The inside stays tender and chewy, with those beautiful irregular holes that catch every drop of olive oil or melting butter.
Foolproof & Fast (for real). This recipe is designed for absolute beginners. There’s no kneading, no double proofing, no shaping anxiety. If you can stir wet ingredients into dry ingredients, you can make this easy artisan bread. I’ve taught it to friends who had never baked anything in their lives, and they’ve all walked away with a bakery-worthy loaf. The only “hard” part is waiting for the dough to rise — but that’s the part you don’t have to do anything for.
Artisan Bread Recipe Ingredients
I pick up my all-purpose flour from the local Italian market on Arthur Avenue in the Bronx, where the bags are dusty and the smell of fresh pasta fills the air. The beautiful thing about this crusty artisan bread is that it asks almost nothing of your pantry. Here’s exactly what you need and why each ingredient matters.
Ingredients List
- 3 cups (395 grams) all-purpose flour, or bread flour
- 1/2 tablespoon kosher salt
- 1/4 ounce instant or active dry yeast packet (or 2 1/4 teaspoons)
- 1 1/2 cups warm water (105°F)
Ingredient Spotlight
All-Purpose Flour vs. Bread Flour. All-purpose flour gives a tender, soft crumb that’s perfect for a rustic loaf. Bread flour has a higher protein content (about 12–14%), which means more gluten development and a slightly chewier, more structured crumb. I often use all-purpose because it’s what most of us keep on hand, and it works beautifully. If you want a slightly more open crumb with extra chew, sub in bread flour. Either way, your no-knead artisan bread will be gorgeous.
Kosher Salt. Salt isn’t just for flavor — it controls yeast activity and strengthens the gluten network. I use Diamond Crystal kosher salt because it dissolves evenly and has a clean taste. If you’re using table salt or fine sea salt, reduce the amount to about 1 teaspoon, since those are more concentrated. Too little salt and your bread will taste flat; too much and the yeast will struggle.
Water Temperature. 105°F is the sweet spot — warm enough to wake up the yeast but not so hot that it kills it. I always test a few drops on the inside of my wrist, the same way you’d test a baby’s bottle. If it feels warm but not burning, you’re good. If it’s cool, the rise will just take longer, so don’t stress. Cold water works too — just add an extra hour or two to the rise time.
| Original Ingredient | Best Substitution | Flavor / Texture Impact |
|---|---|---|
| All-Purpose Flour | Bread flour | Chewier, slightly denser crumb; holds shape better |
| Kosher Salt | 1 tsp fine sea salt or table salt | Reduce amount — fine salt is denser; flavor unchanged |
| Instant Yeast | Active dry yeast (same amount) | No difference — dissolve active dry in the water first |
| Warm Water | Cool water (rise 1–2 hrs longer) | Slower fermentation = even more complex flavor |
How to Make Artisan Bread — Step-by-Step
Trust me when I say this is the easiest loaf you’ll ever bake. No kneading, no stand mixer, no stress. Just mix, wait, shape, and bake. Let’s break it down together.
Step 1: Mix the Dough
Place the flour, salt, and yeast in a large bowl and give them a quick stir with a spoon to distribute everything. Then pour the warm water over the top — aim for 105°F, which feels like a warm bath on your wrist. Use a dough whisk, a spatula, a wooden spoon, or (my favorite) your hands to mix until no dry patches remain. The dough should be sticky and shaggy, not stiff. If it looks too wet to handle, add a tablespoon of flour at a time, but remember: wetter dough gives you a more open crumb.
💡 emy’s Pro Tip: Resist the urge to add too much flour. A slightly sticky, wet dough is what creates those gorgeous air pockets and a tender interior. If you’re nervous, wet your hands — it makes mixing much easier!
Step 2: Let It Rise
Cover the bowl with a clean kitchen towel or plastic wrap that you’ve lightly sprayed with nonstick spray. Let it sit at room temperature for 2 to 10 hours — or leave it on the counter overnight. The longer it rises, the more fermentation happens, and the deeper the flavor becomes. By the end, the dough should be doubled in size, bubbly on top, and smell faintly sour and yeasty.
⚠️ Common Mistake to Avoid: Don’t rush the rise! A 2-hour rise will still give you bread, but an 8-hour rise gives you that complex, tangy, artisan flavor. If your kitchen is cold (below 68°F), the rise will take longer — up to 12 hours. That’s totally fine.
Step 3: Shape the Dough
Wet your hands and turn the dough onto a lightly floured surface. It will be sticky and full of bubbles — that’s exactly what you want. Do NOT punch it down, knead it, or roll it out. Gently pull the edges up and fold them into the center, working your way around the dough until you have a rough round or oval shape. I typically shape it into a French boule (a round circle) or divide it in half for two smaller loaves. Tuck the ends under for a smooth top.
💡 emy’s Pro Tip: Use a bench scraper or a spatula to help lift the dough if it’s sticking. And don’t over-shape — you want to keep as much air inside as possible. A few gentle folds is all it needs.
Step 4: Score and Rest
Place the shaped dough on a piece of parchment paper. Lightly dust the top with flour so the scoring knife doesn’t drag. Use a bread knife, a sharp serrated knife, or a lame to make 1 to 4 shallow lines across the top — these “ears” will split open as the bread bakes and give that classic artisan look. Let the dough rest for 20 to 30 minutes while the oven preheats.
⚠️ Common Mistake to Avoid: If you skip the resting step, the dough will be too tight and may not expand fully in the oven. That 20-minute rest relaxes the gluten and helps the bread spring up tall and round.
Step 5: Preheat the Oven
Preheat your oven to 450°F. Place a baking stone, a pizza stone, a Dutch oven, or a cast-iron skillet inside while the oven heats. You want a very hot surface for the dough to land on — that immediate heat shock creates the initial oven spring. If you’re using a Dutch oven, put the lid on and preheat it too.
💡 emy’s Pro Tip: If you don’t have a baking stone or Dutch oven, a heavy-duty baking sheet flipped upside down works too. The key is thermal mass — something that holds heat and transfers it to the dough quickly.
Step 6: Bake with Steam
Carefully slide the dough with the parchment paper onto the hot stone or into the Dutch oven. To create steam (which gives that incredible crust), place 1 cup of hot water in a small broiler pan on the bottom rack, or toss 5 ice cubes into the bottom of the oven and shut the door quickly. Bake for 25 to 30 minutes, or until the crust is deep golden brown and the loaf sounds hollow when tapped on the bottom.
⚠️ Common Mistake to Avoid: Don’t open the oven door for the first 20 minutes! The steam needs to stay trapped to help the bread rise and form a thin, crackly crust. Peeking lets all that precious moisture escape.
Step 7: Cool and Serve
Transfer the baked loaf to a wire cooling rack. This step is crucial — don’t skip it! Let the bread cool for at least 30 minutes before slicing. If you cut into it too early, the interior will be gummy and the steam will escape, making the crumb dense. Once cooled, slice with a serrated knife and serve warm, toasted, or at room temperature.
💡 emy’s Pro Tip: If you want an even crispier crust, leave the loaf in the turned-off oven with the door ajar for 5 minutes after baking. That extra dry heat firms up the crust beautifully.
| Step | Action | Duration | Key Visual Cue |
|---|---|---|---|
| 1 | Mix dough | 3 mins | Shaggy, sticky, no dry flour |
| 2 | First rise | 2–10 hrs | Doubled size, bubbly surface |
| 3 | Shape | 2 mins | Smooth top, gathered bottom |
| 4 | Score & rest | 20–30 mins | Slits slightly widen |
| 5 | Preheat oven | 30 mins | Oven at 450°F, stone hot |
| 6 | Bake with steam | 25–30 mins | Deep golden, sounds hollow |
| 7 | Cool | 30 mins | Firm crust, barely warm |
Serving & Presentation
I love bringing this crusty artisan bread to the table whole, with a dramatic crackling crust and a dusting of flour across the top. Place it on a wooden board or a simple linen napkin in a basket — the rustic look is part of the charm. Let everyone tear into it with their hands; that’s the Moroccan way, and it makes the meal feel instantly more communal and joyful.
For a classic NYC-style appetizer, serve thick slices alongside a bowl of good extra-virgin olive oil with a pinch of flaky salt and cracked black pepper. Or go full Parisian: a smear of salted butter and a spoonful of fig jam or honey. This bread also shines with soups, stews, and braises — it’s the perfect vehicle for sopping up every last drop of a rich tomato sauce or a hearty lentil soup.
| Pairing Type | Suggestions | Why It Works |
|---|---|---|
| Side Dish | Soup, stew, pasta, salad | Crust holds up to broths; crumb soaks up sauces |
| Sauce / Dip | Olive oil + balsamic, hummus, labneh, pesto | Clean, tangy flavors contrast with yeasty bread |
| Beverage | Red wine (Cabernet), Belgian ale, hot tea | Tannins cut through richness; tea is a Moroccan staple |
| Garnish | Flaky salt, fresh rosemary, sesame seeds | Adds texture and a pop of flavor |
Make-Ahead, Storage & Reheating
This no-knead artisan bread is perfect for my busy NYC schedule. I often mix the dough the night before, let it rise overnight while I sleep, and then shape and bake it the next morning. The aroma of fresh bread drifting through my apartment at 8 a.m. is the most luxurious way to start the day. Here’s how to store and reheat your loaf so it stays crusty and delicious for days.
| Method | Container | Duration | Reheating Tip |
|---|---|---|---|
| Refrigerator | Paper bag | Up to 3 days | 300°F oven 5-7 mins, cut side down |
| Freezer | Plastic wrap + foil or zip-top bag | Up to 3 months | Thaw at room temp, then 350°F for 10 mins |
| Make-Ahead | Bowl covered with plastic | 8–12 hrs in fridge | Shape and bake straight from fridge; add 5 mins |
Store your loaf in a paper bag at room temperature for the first day — paper lets the crust breathe and stay crisp. After that, transfer to a paper bag or wrap loosely in a kitchen towel. Never store bread in plastic unless you want a soggy, rubbery crust. For reheating, my favorite trick is to pop slices directly on the oven rack at 350°F for 4 to 5 minutes. They come out tasting almost freshly baked, with a crackly crust that makes you forget they’re a day old.
Variations & Easy Swaps
Once you’ve mastered the basic no-knead artisan bread, the possibilities are endless. I love experimenting with different flavors depending on the season and what I find at the Union Square Greenmarket. Here are three of my favorite variations.
| Variation | Key Change | Best For | Difficulty Impact |
|---|---|---|---|
| Rosemary Garlic | Add 2 tbsp fresh rosemary + 3 cloves garlic | Dinner parties, pasta nights | Easy |
| Gluten-Free | Use 1:1 gluten-free flour blend | GF diets, sensitive stomachs | Medium |
| Cheddar Jalapeño | Add 1 cup shredded cheddar + 2 diced jalapeños | Game day, burgers, snacking | Easy |
Rosemary Garlic Artisan Bread
This is the variation I make most often when I’m hosting dinner at my NYC apartment. Finely chop 2 tablespoons of fresh rosemary and 3 cloves of garlic, then fold them into the dough just after mixing. The rosemary and garlic infuse the entire loaf with a savory, aromatic flavor that pairs beautifully with roasted chicken, creamy pasta, or a simple tomato soup. I like to sprinkle a few whole rosemary leaves on top before baking for a beautiful presentation. This variation is a nod to my French training — herbes de Provence in every bite.
Gluten-Free Artisan Bread
For my gluten-free friends, I’ve tested this using a 1:1 gluten-free all-purpose flour blend (I like King Arthur Measure for Measure). The dough will be stickier and more batter-like, so you’ll want to shape it with wet hands or a spatula. The rise time stays about the same, but the loaf won’t puff up quite as tall. Still, the flavor and texture are remarkably close to the original — crisp on the outside, tender on the inside. Add a tablespoon of psyllium husk powder for extra structure if you have it.
Cheddar Jalapeño Artisan Bread
This one is pure NYC energy — bold, spicy, and utterly satisfying. Fold 1 cup of sharp shredded cheddar and 2 diced jalapeños (seeds removed if you want less heat) into the dough after the first rise. The cheese melts into pockets of gooey goodness, and the jalapeño adds a gentle kick that wakes up your taste buds. I love serving this with chili, or toasted with a smear of cream cheese for the ultimate breakfast sandwich. It’s become a favorite at my local Sunday brunch pop-ups.
Why is my artisan bread so dense and how can I make it fluffier?
A dense loaf is usually a sign of one of two things: either the dough didn’t rise long enough, or it was over-floured during shaping. Your no-knead artisan bread needs a good, long first rise — at least 6 to 10 hours at room temperature — so the yeast has time to produce enough gas to lift the dough. If your kitchen is cool, it might need even longer. Also, resist the urge to add too much flour when mixing or shaping. A wet, sticky dough yields a lighter, airier crumb with those beautiful open holes. Try reducing your flour by 2 tablespoons and extending your rise time, and you should see a big difference in texture.
Can I use all-purpose flour instead of bread flour for artisan bread?
Absolutely! All-purpose flour is perfectly fine for this easy artisan bread recipe. In fact, I use it most of the time because it’s what I always have on hand and it gives a wonderfully tender, soft crumb. Bread flour has a higher protein content (about 12 to 14 percent compared to 10 to 12 percent in all-purpose), which creates more gluten and a chewier texture. If you want a slightly more open crumb with extra chew, go ahead and use bread flour. But if you only have all-purpose, your loaf will still be delicious — just a little more tender and delicate.
How long should I let artisan bread dough rise for the best texture?
For the best texture, I recommend a rise time of 8 to 10 hours at room temperature. That long, slow fermentation allows the yeast to fully develop the gluten network and produce complex flavors that you just don’t get from a quick rise. The dough should double in size, look bubbly on the surface, and smell slightly tangy and yeasty. If your kitchen is warm (around 75°F), the rise will be on the shorter end. If it’s cooler, it may take up to 12 hours. Overnight rising is ideal — just mix the dough before bed, cover it, and bake it in the morning.
What is the best way to get a crispy crust on artisan bread?
The secret to a shatteringly crisp crust is steam. During the first 15 to 20 minutes of baking, steam keeps the surface of the dough soft and supple, allowing the loaf to expand fully before the crust sets. There are several easy ways to create steam at home: place a shallow metal pan on the bottom oven rack and pour 1 cup of hot water into it just after you slide in the bread, or toss 5 ice cubes into the bottom of the oven and quickly shut the door. A Dutch oven with the lid on for the first 20 minutes also traps steam perfectly. For an extra-crispy finish, leave the loaf in the turned-off oven with the door ajar for 5 minutes after baking.
Can I make this artisan bread without a Dutch oven?
Yes, you don’t need a Dutch oven at all! This no-knead artisan bread can be baked on a pizza stone, a baking stone, an inverted heavy baking sheet, or even a cast-iron skillet. The key is to preheat your baking surface in the oven at 450°F for at least 30 minutes so it’s hot when the dough lands on it. Then create steam using a pan of hot water or ice cubes as described above. I’ve made this loaf dozens of times using just a rimmed baking sheet and a small pan of water, and the crust comes out perfectly crisp every time.
How do I store artisan bread so it stays fresh longer?
The best way to store homemade artisan bread is in a paper bag at room temperature for up to 2 days. Paper allows the crust to breathe and stay crisp, unlike plastic which traps moisture and makes the crust soft and rubbery. If you need to keep it longer, slice the loaf and freeze the slices in a zip-top bag for up to 3 months. To refresh day-old bread, pop slices directly on the oven rack at 350°F for 4 to 5 minutes — they’ll taste almost freshly baked. Avoid storing bread in the refrigerator unless you live in a very humid climate; the fridge actually speeds up staling.
Can I add seeds or nuts to this no-knead artisan bread?
Definitely! Adding seeds or nuts is a fantastic way to customize this easy artisan bread. I love folding in ¼ cup of sunflower seeds, pumpkin seeds, or sesame seeds along with the flour before adding the water. For nuts, try ⅓ cup of roughly chopped walnuts or pecans — they toast beautifully during baking and add wonderful crunch. Just fold them in gently after mixing the dough so you don’t deflate the air bubbles. You can also press seeds onto the outside of the loaf after shaping for a decorative, crunchy crust. My Moroccan-inspired version uses anise seeds and sesame for a subtle sweetness.
Why is my artisan bread gummy inside?
A gummy or doughy interior usually means the bread wasn’t baked long enough, or it was sliced before it had cooled completely. Even if the crust looks dark and done, the interior needs to reach about 200°F to 210°F for the starches to fully set. Always use an instant-read thermometer inserted into the center of the loaf to check. If you don’t have a thermometer, tap the bottom of the loaf — it should sound hollow. And I know it’s tempting, but let the bread cool on a wire rack for at least 30 minutes before slicing. Cutting too early releases steam and leaves the crumb gummy and dense.
Can I use active dry yeast instead of instant yeast?
Yes, absolutely. Active dry yeast and instant yeast are interchangeable in this no-knead artisan bread recipe. The only difference is that active dry yeast has larger granules and needs to be “proofed” or dissolved in the warm water with a pinch of sugar for 5 to 10 minutes before adding to the flour. Instant yeast can be mixed directly with the dry ingredients. Use the same amount — 2 ¼ teaspoons or ¼ ounce — for either type. If you proof the active dry yeast and see it become foamy, you’ll know it’s alive and ready to work. Both produce the same lovely, crusty loaf.
What can I do if my dough is too sticky after rising?
First, don’t panic — sticky dough is actually a good thing! It means your hydration level is high, which will give you a lighter, airier crumb with beautiful holes. When you’re ready to shape, wet your hands with cool water (or lightly oil them) before handling the dough. This prevents sticking without adding extra flour. You can also lightly flour your work surface and the top of the dough, but use as little flour as possible — just enough to keep it from sticking to your hands. A bench scraper is incredibly helpful for lifting and folding sticky dough. If the dough is truly unmanageable (like batter), let it rest for 15 minutes; the gluten will relax and it will become easier to handle.
Share Your Version!
I absolutely love hearing how this no-knead artisan bread turns out in your kitchen. Did you go classic with a simple golden boule, or did you try one of the variations — rosemary garlic, cheddar jalapeño, or something else you dreamed up? Drop a star rating and a comment below to let me know how it went. Your feedback helps other home bakers know exactly what to expect, and it makes my day every single time.
If you snap a photo of your crusty, crackling loaf, please share it on Instagram or Pinterest and tag me @cookingwithemy. I love scrolling through your creations and seeing how this recipe travels from my NYC kitchen to yours. And if you have a question I didn’t answer here, just ask in the comments — I read every single one and I’m always happy to help you troubleshoot. From my NYC kitchen to yours — I hope this recipe brings as much warmth to your table as it does to mine. — emy 🧡
Love This Recipe? Save It to Pinterest!
If you enjoyed this Artisan Bread Recipe, don’t let it get lost in your browser tabs! 😄 Pin it now so you can find it again anytime — and explore hundreds more tried-and-tested recipes waiting for you on my Pinterest boards.
👉 Follow emy on Pinterest @cookingwithemy
📌 Pin this recipe · 🔁 Re-pin your favorites · 💬 Tag me when you make it — I love seeing your creations!
Artisan Bread Recipe
Description
This no knead artisan bread is the easiest bread recipe you’ll ever make! You only need one bowl and 3 simple ingredients. This recipe is perfect for beginners!
Ingredients
- 3 cups (395 grams) all-purpose flour (, or bread flour)
- 1/2 Tablespoon Kosher salt
- 1/4 ounce instant or active dry yeast packet (, or 2 1/4 teaspoons )
- 1 1/2 cups warm water (, 105°F)
Instructions
- Place the flour, salt and yeast in a large bowl. Then pour the warm water (about 105°F) over top, making sure it's not too hot. Then you can use a dough whisk, spatula, wooden spoon or your hands to mix together. The dough should still be somewhat wet and sticky, but add more flour if it's too sticky to handle.
- Once the flour is all mixed in, cover with a towel or plastic wrap spayed with nonstick spray for 2-10 hours, or you can leave on the counter overnight. The longer you let it rise, the more it will ferment.
- Wet your hands and turn the dough onto a lightly floured surface. The dough will be sticky. Do not punch it down, knead it or roll it out. Gently pull the sides up and fold into the middle to make your preferred shape. I typically work it into a French boule (round circle) or 2 loaves and tuck the ends under.
- Place dough on a piece of parchment paper. Lightly dust the top with flour and then use a bread knife to add 1-4 lines across the top. Let it rest about 20-30 minutes.
- Preheat the oven to 450°F. Place a baking stone, a pizza stone, dutch oven or a iron skillet into the oven.
- Slide the dough with the parchment paper onto the hot stone. To make crustier, place either 1 cup of hot water in a small broiler pan or 5 ice cubes into the bottom of the oven and shut the door to trap the steam. Then bake for 25-30 minutes or until browned.
- Allow to cool on a cooling rack for at least 30 minutes. Slice the bread and serve. Store in a paper bag so it doesn't soften.
Nutrition
- Calories: 114 kcal
- Sugar: 1 g
- Fat: 1 g
- Carbohydrates: 24 g
- Protein: 3 g
Tried This Recipe? Leave a Comment!
Did you make this recipe? I’d love to hear how it turned out! Please leave a comment and a rating below. Your feedback helps other home cooks and supports cheerychop.com!
For more delicious inspiration, follow me on Pinterest!
