Table of Contents
Peanut Butter Fudge – Only 3 Ingredients, Seconds of Prep, Cozy NYC Comfort
I first discovered this little nugget of sweetness during a chilly walk through the farmers’ market in Brooklyn, when the aroma of warm pastries drifted from a little cake stand. The vendor handed me a shiny packet of white chocolate and a jar of creamy peanut butter—no nut butter, just classic, smooth peanut butter—and somehow, the idea of a hassle‑free, instant fudge jammed in my mind like a secret recipe from my Moroccan grandmother’s kitchen blended with a pinch of Parisian elegance.
When this trio melts together, the white chocolate sharpens into creamy ivory, lifting the peanut butter’s buttery richness into a silky, almost glassy texture. A whisper of vanilla from the condensed milk adds a sweet acidity that makes each bite sing. The result is a glossy, springy fudge that looks like a chocolate‑peanut butter dream, bursting with a subtle nutty fragrance and a light, caramelized finish that leaves you craving another square before it’s even set.
I’ve spent countless evenings refining this recipe in my NYC kitchen, discovering that the key to a perfect set is an instantaneous mixture, heated in short bursts to keep the fudge cloud‑like. In so doing, I’ve learned a few backstage tricks: keep the peanut butter cool right before mixing, use a silicone spatula to avoid sticking, and a quick stir at every microwave interval prevents clumps. It’s that little discipline that turns a three‑ingredient meal into a show‑stopping confection.
Why This Peanut Butter Fudge Recipe Is the Best
The flavor secret lies in the bold simplicity of using only three ingredients. By ditching natural peanut butter, I eliminate the uneven salt levels that can throw a batch off. The creamy peanut butter’s uniformity means each bite tastes like the same silky richness I know from my mother’s kitchen in Fez, simply elegant and comforting.
The texture is perfected by quick 30‑second microwave pours, ensuring the chocolate melts without seizing. I submerge the bowl in hot water for a second before dumping the mixture into the pan so it stays smooth—an easy, professional tip my Paris training taught me: gentle heat spreads evenly like a delicate soufflé.
The recipe is also foolproof for beginners because it requires no rigorous stirring or temperature control. All you need is a timer, a microwave, and a dash of discipline. The method works for anyone who loves a sweet treat but doesn’t want to babysit a saucepan for hours.
Peanut Butter Fudge Ingredients
In the heart of Lower Manhattan, at a small vendor on 5th Avenue, I found the finest white chocolate chips that melt to a buttery gloss—just like the ivory pastries I relish back home in Rabat. The peanut butter comes from a local store that keeps their jars at room temperature, ensuring it stays silky when melted. Finally, the sweetened condensed milk supplies that needed sweetness without any extra sugar overload.
Ingredients List
- 12 ounces white chocolate chips
- 1.5 cups creamy peanut butter (no natural)
- 1 can (14 oz.) sweetened condensed milk
Ingredient Spotlight
White chocolate chips are the canvas; look for a creamy, dust‑free brand. The sparkle of light sauce on your spoon indicates the good stuff—avoid dark or semi‑sweet varieties that alter the pink hue and flavor spectrum.
Creamy peanut butter (not natural) ensures a smooth, consistent taste. You can test it by pressing a drop on your tongue—if it slides, it’s the right choice. A small jar of nut butter in a Brooklyn shop will often have a tangy note; keep away from those packed with lumps.
Sweetened condensed milk is the hidden hero, tying the sweetness and the peanut butter into one unified mouth shift. The lower the sugar content within the brand, the more balanced the fudge will be. Try a stainless‑steel jug for that silky finish—an extra step that yields maximum bliss.
| Original Ingredient | Best Substitution | Flavor / Texture Impact |
|---|---|---|
| White Chocolate Chips | Dark Chocolate Chips (70% cacao) | Rich, slightly bitter, less creamy finish |
| Creamy Peanut Butter | Almond Butter (smooth) | Nutty but lighter, loses peanut flavor |
| Sweetened Condensed Milk | Evaporated Milk + 1 tbsp sugar | Tighter, less sweet, more milky taste |
How to Make Peanut Butter Fudge — Step‑by‑Step
The easiest way to get silky fudge is to keep each step short and well‑timed, so the mixture never over‑cooks.
Step 1: Prepare the Pan
Spray an 8×8 baking pan with cooking spray, then line the bottom with waxed paper or parchment. This not only prevents sticking but also lightens the final color, giving the fudge that clear glassy sheen.
💡 emy’s Pro Tip: Use a silicone mat on a baking sheet if the pan drips; it helps the fudge lift cleanly later.
Step 2: Melt Chocolate and Peanut Butter
Place the white chocolate chips and peanut butter in a large mixing bowl that can stand inside the microwave. Heat in 30‑second bursts, stirring after each one until the mixture is fully melted and smooth.
⚠️ Common Mistake to Avoid: Over‑heating. The mixture can seize if left too long; stop as soon as it’s glossy.
Step 3: Add Condensed Milk
Stir in the sweetened condensed milk until the blend is uniform and slightly runny—this will help the fudge flow into the pan without clumps.
💡 emy’s Pro Tip: Add a pinch of salt if you like; it balances the sweetness subtly.
Step 4: Pour and Refrigerate
Pour the smooth mixture into the prepared pan. Refrigerate for 2–3 hours or until the fudge is firm enough to cut into squares.
⚠️ Common Mistake to Avoid: Cutting before firm. It will crumble.
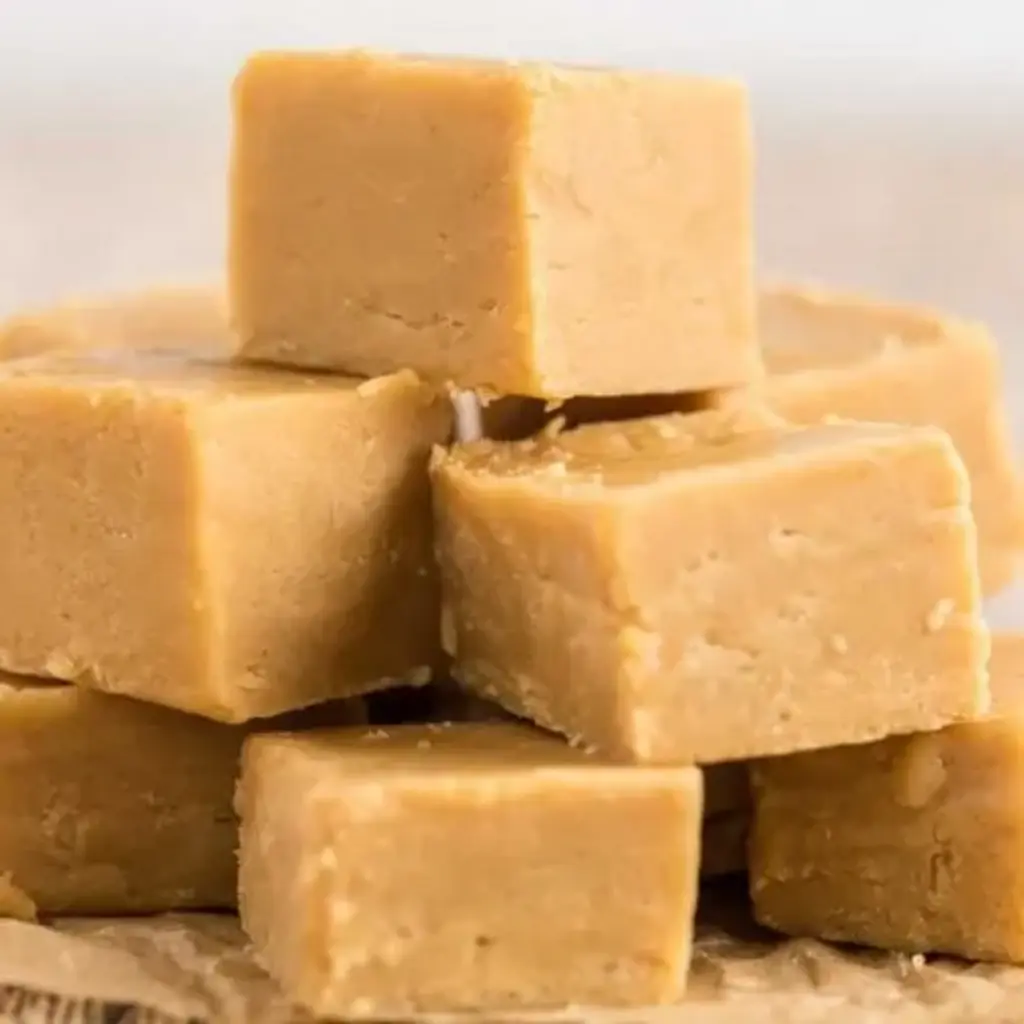
Step 5: Cut and Serve
Once set, slice the fudge into bite‑size pieces and serve immediately or store in an airtight container. You can also roll a square in crushed nuts for a quick crunch.
💡 emy’s Pro Tip: Keep a small glass jar of crushed hazelnuts; it gives a satisfying crunch to each bite.
| Step | Action | Duration | Key Visual Cue |
|---|---|---|---|
| 1 | Prepare pan | 5 min | Creamy film on paper |
| 2 | Melt chocolate & peanut butter | 1.5 min (3×30s) | Smooth, glossy sheen |
| 3 | Add condensed milk | 30 sec | Even, runny consistency |
| 4 | Pour & refrigerate | 2–3 hrs | Solid but not hard |
| 5 | Cut & serve | Instant | Smooth squares, clean edges |
Serving & Presentation
Serve your fudge on a star‑ry plate, or go avant‑garde by layering the squares in a clear glass bowl so the sheen shows through. A sprinkle of toasted coconut or chopped pistachios adds crunch and a fragrant contrast reminiscent of the medina’s spice stalls.
Pair these boosts with a light, cold espresso shot for a double‑dimensional indulgence, or drizzle a thin line of caramel over each square for a touch of French café allure. The softness of the fudge complements a robust espresso bean, while the caramel’s syrupy sweetness echoes a creamy Moroccan sweet lokum.
| Pairing Type | Suggestions | Why It Works |
|---|---|---|
| Side Dish | Leafy salad with feta, olives, lemon | Freshness cuts through sweetness |
| Sauce / Dip | Dark chocolate spread, whipped cream | Adds depth and complexity |
| Beverage | Espresso, cold brew, toasted almond milk | Caffeine balance sweet creaminess |
| Garnish | Sea salt flakes, crushed pistachios, cocoa nibs | Texture contrast and flavor punch |
Make‑Ahead, Storage & Reheating
I’m constantly juggling 9‑to‑5 in Manhattan, so having a batch that can last a week on its own is priceless. After cutting, place the squares in an airtight container and store them in the refrigerator for up to six days. For longer storage, freeze in a freezer‑safe bag—fudge maintains its quality up to 3 months without any loss of flavor or texture.
| Method | Container | Duration | Reheating Tip |
|---|---|---|---|
| Refrigerator | Plastic airtight box | Up to 6 days | Serve at room temperature for silky texture |
| Freezer | Vacuum pack | Up to 3 months | Thaw in fridge 4 hrs, or microwave 10‑15 sec |
| Make‑Ahead | Ready‑to‑eat tray | 4‑6 days | Keep at room temperature near a cool spot for immediate service |
When reheating from freezer, always let the fudge find room temperature before microwaving—this keeps the chocolate from forming a hard shell. If you’re in a rush, a warm oven at 200°F for 5 minutes can revive the richness without over‑melting the nutty base.
Variations & Easy Swaps
| Variation | Key Change | Best For | Difficulty Impact |
|---|---|---|---|
| Almond Peanut Butter Fudge | Swap peanut butter for almond butter | Gluten‑free & nut‑enriched | Same |
| Flavor‑Infused | Add saffron threads or cardamom | Moroccan twist | Same |
| Salted Caramel Fudge | Add caramel sauce & sea salt | Twilight party sweet | Harder, more hands‑on |
Almond Peanut Butter Fudge
Using almond butter gives a subtler nutty tone while maintaining the same silky texture. The slight earthy flavor pairs nicely with a drizzle of honey or a sprinkle of dried apricots—perfect for an NYC brunch where sweet meets savory.
Flavor‑Infused Fudge
Adding a pinch of saffron or cardamom during the melt phase creates an aromatic swirl reminiscent of Moroccan mint tea. The subtle spice lifts the sweetness, making the fudge feel like a small, fragrant treasure box.
Salted Caramel Fudge
Pour generous swirl of dark caramel into the center and finish with a splash of sea salt. The caramel’s buttery depth combined with salty contrast yields a dessert that is both indulgent and refined—ideal for an upscale pop‑up event in Manhattan.
Share Your Version!
If you tweak the recipe, I’d love to see your creative spin. Drop a rating and chat in the comments section—your feedback fuels my next kitchen adventure! If you snap a photo, post it on Instagram or pin it to Pinterest and tag @cookingwithemi to show me your sweet masterpieces. Tell me which of the variations took your taste buds on the most daring voyage.
From my NYC kitchen to yours — I hope this recipe brings as much warmth to your table as it does to mine. — emy 🧡
Love This Recipe? Save It to Pinterest!
If you enjoyed this Peanut Butter Fudge recipe, don’t let it get lost in your browser tabs! 😄 Pin it now so you can find it again anytime — and explore hundreds more tried-and-tested recipes waiting for you on my Pinterest boards.
Follow emy on Pinterest @exorecipe
📌 Pin this recipe · 🔁 Re-pin your favorites · 💬 Tag me when you make it — I love seeing your creations!
What makes peanut butter fudge so quick to make?
Because it relies on simple, room‑temperature ingredients that melt together instantly in a microwave. The combination of pre‑made sweetened condensed milk and creamy peanut butter eliminates the need for prolonged cooking or tempering, allowing you to have a finished treat in under fifteen minutes.
Can I use dark chocolate instead of white?
Absolutely. Dark chocolate gives a richer, slightly bitter edge and changes the fudge’s hue to a deeper brown. It still melts smoothly with peanut butter and condensed milk, but you’ll notice a more complex chocolate profile. Just keep the same cooking time.
Will this fudge keep if I store it in the fridge?
Yes. Once set, you can keep the fudge in an airtight container in the refrigerator for up to six days. The sweet, nutty flavors keep stable, and the texture remains firm yet still easy to bite. For longer storage, freeze it and thaw in the fridge before serving.
What if I don’t have a microwave?
You can melt the chocolate and peanut butter over a double boiler, stirring constantly and checking for a silky melt. Heat for approximately six minutes, moving the bowl frequently to avoid scorching, then combine with the condensed milk before pouring into the pan.
Is it safe to eat the milk after the recipe is done?
Yes, absolutely. The silicone heat‑resistant bowl and airtight container used during cooking keep the mixture safe, and the sweetened condensed milk also stabilizes the fudge, reducing potential bacterial growth. It’s just fine to eat the leftover milk in the same container, ensuring it stays chilled.
Can I add sea salt or a spice to the fudge?
Yes, a light sprinkle of sea salt or a pinch of cardamom/curry adds depth. These aromatics create a balance against the sweetness and highlight the peanut butter flavor. Apply sparingly after pouring but before refrigerating to lock in the finish.
What’s the best way to reheat leftovers?
A gentle approach works best. Place a small square in the microwave for 10‑15 seconds or let it rest at room temperature for ten minutes. The goal is to soften without melting back into a liquid mess. Avoid high heat, which can separate the chocolate and peanut butter.
Can this be made vegan?
Yes, replace the sweetened condensed milk with an equal amount of full‑fat coconut milk or a light sauce of maple syrup and coconut milk. Keep the chocolate chips dairy‑free to maintain the vegan profile, but the texture will be slightly softer due to the lack of dairy fats.
What’s the calorie count for a square?
About 224 calories for each 12‑oz batch divided into 12 squares. This accounts for the 14 oz condensed milk, 1.5 cups peanut butter, and 12 oz white chocolate. The calorie count is modest compared to other candy treats, especially if served in modest portions.
Where can I source the best white chocolate chips?
Look for brands that list only “white chocolate” or “white chocolate chips” as the first ingredient, without added flavors or excess sugars. In NYC, specialty stores like Dean & Deluca or Trader Joe’s carry premium bags that melt smoothly. In Moroccan markets, the local sweet shops have a lighter, cleaner white chocolate that’s great for this recipe.

3 Ingredient Peanut Butter Fudge
Description
This Easy Peanut Butter Fudge Recipe is the best recipe with only 3 ingredients! Homemade peanut butter fudge is perfect for your next party.
Ingredients
- 12 ounces white chocolate chips
- 1.5 cups creamy peanut butter ((do not use natural peanut butter))
- 1 can sweetened condensed milk (14 oz.)
Instructions
- Spray an 8X8 baking pan with cooking spray, then line the bottom with waxed paper or parchment paper.
- Place the white chocolate chips and peanut butter in a large mixing bowl (microwave safe bowl).
- Heat in the microwave in 30-second intervals, stirring after each interval, until the white chocolate chips and peanut butter are melted, fully combined and smooth. Then stir in the sweetened condensed milk until fully combined.
- Pour the mixture into the prepared 8X8 baking dish. Refrigerate until the fudge is set (approximately 2-3 hours).
- Once the fudge is fully set, cut into pieces and serve!
