Table of Contents
Easy Teriyaki Chicken Sweet & Tangy Sauce from Scratch – A 30‑minute Bite of Happiness
I still remember the first time I walked into a bustling North African souk in Marrakesh, the scent of cumin and sweet saffron mingling in the air. That experience taught me that flavor is a story carried through spices, a lesson I carried with me to the Parisian kitchens where I sharpened my sauce‑making skills, and now to the gleaming food scene of New York. Today, I’m excited to share a simple yet profound twist on a classic: the Easy Teriyaki Chicken with a Sweet & Tangy Sauce from Scratch – it’s a 30‑minute dish that soars past the usual take‑out fare.
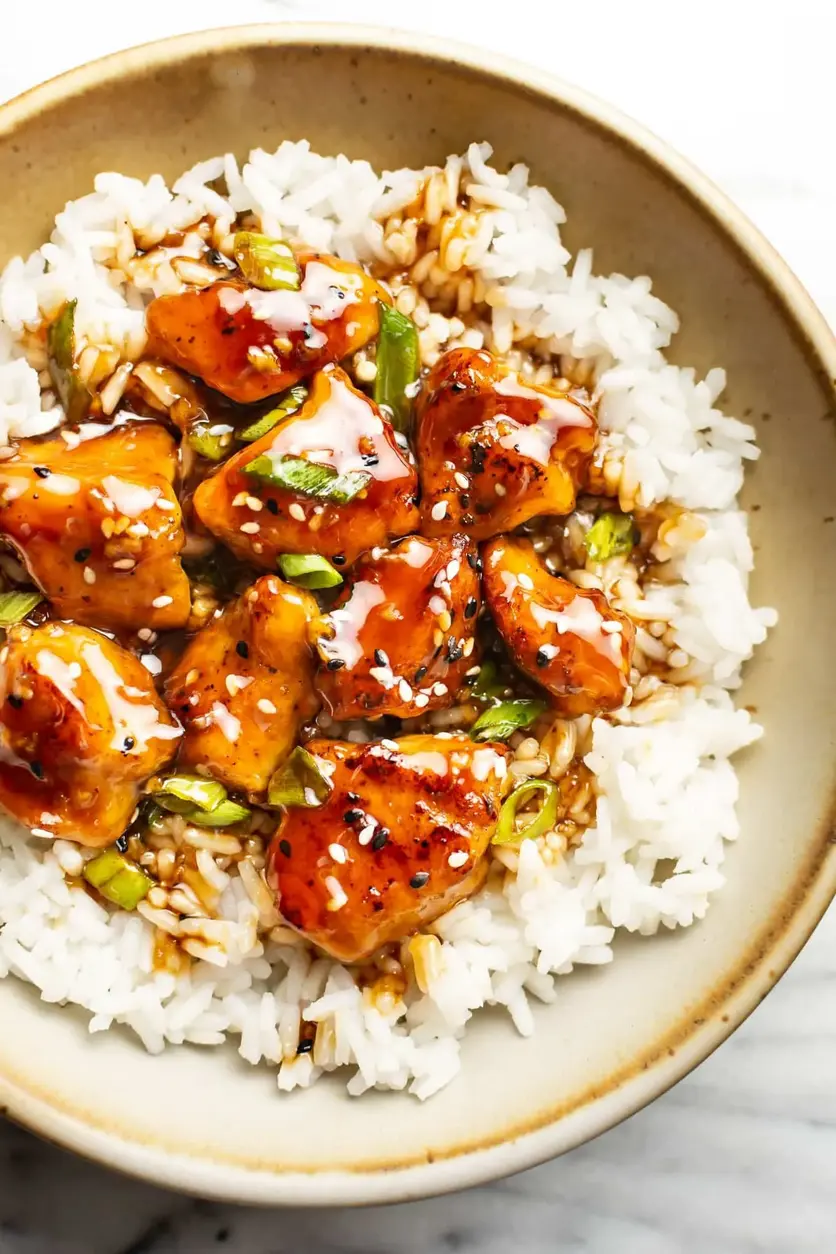
Picture a gleaming pan where tender chicken pieces are kissed by a glossy glaze that’s both caramelized and aromatic. The sauce sings with bright notes of ginger and garlic, tempered by a subtle sweetness from brown sugar and the umami richness of soy. As the heat works its alchemy, the sauce thickens, droplets cling to the meat like a fine honey, and a subtle nutty scent of toasted sesame seeds floats in the kitchen. The final bite delivers a satisfying snap of the chicken’s exterior alongside a tender, juicy interior— a harmony that has me reaching for the salt shaker just so.
I’ve favored this version for years on the kitchen side of Manhattan, and it’s become a staple when I need a reliable, low‑stress meal. My secrets? A quick cornstarch bloom to ensure the sauce coats the chicken evenly, a blend of mirin and soy that gives that unmistakable teriyaki depth, and a final spritz of rice vinegar to lift the sweetness. Common pitfalls include overcooking the chicken or letting the sauce boil too long and lose its glossy sheen—I’m going to share how to dodge those traps later.
Why This Easy Teriyaki Chicken Recipe Is the Best
The flavor secret lies in making the sauce from scratch. By blending mirin, soy sauce, and a touch of rice vinegar with fresh ginger and garlic, the dish carries a depth that pre‑made sauces can’t replicate. My Parisian training taught me to balance sweetness and umami, and the Moroccan palate for vibrant, aromatic dishes ensures each bite feels alive.
The texture is achieved by coating the chicken in a quick cornstarch slurry before searing, which creates a crisp exterior while preserving a soft interior. Cutting the chicken into 1‑inch pieces, as I do, ensures even cooking and more surface area for the sauce to cling to.
It’s foolproof and fast. With a prep of just 10 minutes and active cooking for 20, even a busy Mid‑town commuter can turn this into a wholesome dinner that feels handcrafted.
Teriyaki Chicken Ingredients
I usually pick out fresh, unbrined chicken breasts from the local Manhattan farmer’s market, then let them rest at room temperature. The brown sugar I buy from a specialty aisle gives a finer sweetness, and I grate fresh ginger right in the kitchen to unlock its aroma.
Ingredients List
- 2 chicken breasts (cut into 1″ pieces)
- 1/2 teaspoon garlic powder
- Pepper, to taste
- 3 tablespoons cornstarch
- 3 tablespoons olive oil (divided)
- ¼ cup brown sugar (packed)
- 1 teaspoon grated fresh ginger
- 2 cloves garlic, minced
- 3 tablespoons mirin (see note)
- 2 tablespoons soy sauce
- 1 teaspoon rice vinegar (or apple cider vinegar)
- ½ cup water
- 1 tablespoon cornstarch (for sauce)
- Optional garnish: chopped scallions & sesame seeds, to taste
Ingredient Spotlight
Chicken breasts: Choose firm, boneless pieces that stay juicy. For a slightly richer flavor, you can swap for thighs, but keep the cooking time in mind.
Mirin: This sweet rice wine is pivotal for the classic teriyaki sheen. If you can’t find mirin, a splash of honey or maple syrup plus a dash of rice vinegar mimics its sweetness and acidity.
Soy sauce: Opt for low‑sodium to keep salt levels in check. Regular soy gives classic depth, but you can try tamari if you’re gluten‑sensitive.
Sesame seeds: Toast them lightly in a dry pan to release their nutty fragrance—this adds a subtle crunch to the finished dish.
| Original Ingredient | Best Substitution | Flavor / Texture Impact |
|---|---|---|
| Chicken breasts | Chicken thighs | Richer, juicier; slightly longer cook time. |
| Mirin | Honey + rice vinegar | Sweet with a mild acidity; keeps glaze glossy. |
| Soy sauce | Tamari | Same umami depth; gluten‑free version. |
How to Make Easy Teriyaki Chicken — Step-by-Step
Let’s dive straight in; you’ll have a delicious meal on the table in no time.
Step 1: Whisk the Sauce
In a small bowl, combine ¼ cup brown sugar, 1 tablespoon cornstarch, 3 tablespoons mirin, 2 tablespoons soy sauce, 1 teaspoon rice vinegar, and ½ cup water. Whisk until the sugar dissolves and the mixture is unrippled. Stir in the grated ginger and minced garlic.
💡 emy’s Pro Tip: Whisking the sauce first ensures a silky, lump‑free glaze that clings beautifully to the chicken.
Step 2: Coat the Chicken
Place the chicken pieces in a bowl. Sprinkle garlic powder, pepper, and 3 tablespoons cornstarch. Toss until every bite is lightly dusted. This coating creates a crisp bite and holds the sauce.
⚠️ Common Mistake to Avoid: Skipping the cornstarch will leave the sauce running, making the dish cloyingly wet.
Step 3: Cook the Chicken
Heat 2 tablespoons olive oil in a large skillet over medium‑high heat. Add about half the chicken. Cook 4 minutes, then flip and brown another 3‑4 minutes until the internal temp reaches 165°F (74°C). Remove to a plate. Repeat with the remaining oil and chicken.
💡 emy’s Pro Tip: Cook in batches to keep the pan from steaming—this gives each piece a golden crust.
Step 4: Merge and Glaze
Return the cooked chicken to the pan, pour in the pre‑whisked sauce, and let it bubble for a minute, stirring constantly, until thickened to a glossy sheen. Serve over steamed rice, garnished with scallions and toasted sesame seeds.
⚠️ Common Mistake to Avoid: Over‑simmering the sauce will cause it to burn and become bitter—watch carefully as it thickens.
| Step | Action | Duration | Key Visual Cue |
|---|---|---|---|
| 1 | Whisk sauce | 5 mins | Smooth, no lumps |
| 2 | Coat chicken | 3 mins | Even coat, slight sheen |
| 3 | Cook chicken | 8‑10 mins | Golden crust, steam stops |
| 4 | Glaze | 2‑3 mins | Glassy coating, fragrant steam |
Serving & Presentation
Serve the glazed chicken over a bed of fluffy white rice, or for a low‑carb twist, swap for cauliflower rice. Sprinkle extra scallions and sesame seeds for a pop of color and crunch. The dish pairs wonderfully with a crisp glass of sparkling rosé or a chilled green tea, echoing the sweet‑sour notes on the plate.
If you’re bringing this to work or a roommate’s apartment, wing it with a quick side of steamed bok choy or sautéed shiitake mushrooms—both absorb the sauce beautifully.
| Pairing Type | Suggestions | Why It Works |
|---|---|---|
| Side Dish | Steamed bok choy, sautéed greens | Drains excess sauce, adds green contrast. |
| Sauce / Dip | Extra soy glaze, chili oil | Heightens umami and adds heat. |
| Beverage | Sparkling rosé, green tea | Balances sweetness and cleanses palate. |
| Garnish | Fresh cilantro, nori strips | Adds herbaceous freshness and sea‑salt flavor. |
Make‑Ahead, Storage & Reheating
I’ve built this recipe into my weekly meal‑prep routine. The dish keeps well for 2 days in the fridge and up to 3 months frozen. Reheating is a breeze—place the chicken in a skillet over medium heat, splash a little water, and cover to steam the sauce back to shine.
| Method | Container | Duration | Reheating Tip |
|---|---|---|---|
| Refrigerator | Sealed plastic tub | Up to 2 days | Warm in skillet with splash of water. |
| Freezer | Freezer‑safe zip box | Up to 3 months | Thaw overnight, reheat as above. |
| Make‑Ahead | Meal‑prep bowl | Prep 3 days in advance | Reassemble with fresh rice when ready. |
When I rush after a long subway ride, I throw a handful of pre‑soaked veggies into a hot skillet, pour the dish on top, and stir‑fry in five minutes—saving me a trip to the deli. The sauce holds up, and the chewiness makes every bite feel homemade.
Variations & Easy Swaps
| Variation | Key Change | Best For | Difficulty Impact |
|---|---|---|---|
| Soy‑Free Version | Replace soy with coconut aminos or tamari | Gluten‑free diners | Same; no extra steps. |
| Pineapple Twist | Add ½ cup fresh pineapple chunks to sauce | Summer freshness | Requires adding fruit mid‑simmer. |
| Spicy Kick | Include 1 tbsp sriracha or fresh red pepper flakes | Heat lovers | Simple glaze adjustment. |
Soy‑Free Version
Swap soy sauce for tamari or coconut aminos, keeping the same 2‑tbsp amount. The umami remains, but the sauce becomes naturally gluten‑free—tested at my community farm market and loved by my gluten‑sensitive roommates.
Pineapple Twist
Add half a cup of diced fresh pineapple to the sauce after whisking. It gives a tropical burst and mellowes the sweetness, a trick I discovered during a weekend visit to a Queens farmer’s market.
Spicy Kick
Stir in a tablespoon of sriracha or a sprinkle of crushed red pepper before cooking the chicken. The heat extends the sauce’s flavor profile and pairs great with a cooling cucumber salad.
What is the best way to keep teriyaki sauce from burning?
Teriyaki sauce can burn quickly because of its high sugar content. The trick is to stir constantly, reduce the heat after it starts bubbling, and add a splash of water or broth when it’s thickening. Another tip is to use a low‑heat setting or turn off the burner for a minute or two after the sauce has reached the right thickness to let it finish collapsing without scorching.
Can I use ground chicken instead of breast?
Yes, ground chicken can be used, and it cooks faster (about 8–10 minutes) than breast pieces. Because the flavor is more evenly distributed, you’ll still get great sauce absorption, but the texture will be more homogenous. Just cramp the ground chicken into a 1‑inch shaped patty or stick it in a thin layer and season lightly before adding the sauce.
What’s the travel‑friendly way to serve teriyaki chicken?
A mess‑free solution is a reusable silicone bento box. Pre‑cook the chicken and sauce separately, then layer rice at the bottom, tuck the glazed chicken on top, and finish with fresh scallions. When ready to eat, toss the box in a microwave for 30‑second bursts and the dish will re‑melt into a comforting steam‑powered plate.
How do I reduce sodium in this teriyaki recipe?
Cut the soy sauce by half and supplement the salty flavor with a tiny pinch of Himalayan salt or a splash of low‑sodium soy sauce. Add a dash of sesame oil after cooking to maintain aroma, and consider seasoned rice vinegar to add depth without the extra sodium. The key is to balance salty versus sweet, so taste as you go and adjust gradually.
What is the stock‑size I should use for the sauce?
For this recipe, use a stock size of about ¾ cup of liquid, which drains quickly from the thickened sauce. Keep in mind that the more you add water or stock, the thinner the glaze will become. If you prefer a firmer sauce, reduce the liquid to ½ cup or cook a few minutes longer on low heat to evaporate excess moisture.
I don’t have mirin, what can I use?
Mirin can be substituted with a mixture of 1 part honey or maple syrup and 1 part rice vinegar, a pinch of salt, and a dash of soy sauce. This blend replicates the sweetness and acidity profile closely. If the pantry is limited, just sweeten the sauce with a tablespoon of brown sugar and keep the rice vinegar for acidity.
Does the chicken stay moist after storage?
Yes, if the chicken is stored in a sealed, airtight container, it retains its juiciness for up to 2 days in the fridge. Adding a splash of broth or sesame oil during reheating helps restore moisture that might have been lost during freezing. The chicken will come back to life with the sauce’s tangy glaze, making week‑night dinners feel freshly made.
Which rice works best with teriyaki chicken?
Short‑grain jasmine rice or sushi rice is my favorite because its stickiness pairs with the sauce and keeps the flavors together. Brown rice offers a nuttier backdrop if you’re calorie‑conscious, though it requires additional cooking time. For a quick option, simply use frozen rice blends that pop in the microwave, and pour the leftover sauce over them to coat evenly.
Share Your Version!
Give this dish your personal twist and let me know how it turned out! Drop a ⭐ rating in the comments, write a quick note, and let me see your take.
Snap a photo, tag @cookingwithemi on Instagram or Pinterest, and use the hashtag #gnuslice for a chance to be featured in my weekly “Cooking in NYC” series.
If you swap the chicken for tofu, how does that change the texture and flavor? I’d love to hear your vegan version!
From my NYC kitchen to yours — I hope this recipe brings as much warmth to your table as it does to mine. — emy 🧡
Love This Recipe? Save It to Pinterest!
If you enjoyed this Easy Teriyaki Chicken recipe, don’t let it get lost in your browser tabs! 😄 Pin it now so you can find it again anytime — and explore hundreds more tried‑and‑tested recipes waiting for you on my Pinterest boards.
👉 Follow emy on Pinterest @exorecipe
📌 Pin this recipe · 🔁 Re-pin your favorites · 💬 Tag me when you make it — I love seeing your creations!

Easy Teriyaki Chicken
Description
This easy teriyaki chicken recipe has the most tender, delicious chicken bites coated in a sweet teriyaki sauce from scratch. It’s a 30-minute dish that’s better than takeout!
Ingredients
- 2 chicken breasts (cut into 1" pieces)
- 1/2 teaspoon garlic powder
- Pepper (to taste)
- 3 tablespoons cornstarch
- 3 tablespoons olive oil (divided)
- Garnish (optional): chopped scallions & sesame seeds (to taste)
- 1/4 cup brown sugar (packed)
- 1 teaspoon grated fresh ginger
- 2 cloves garlic (minced)
- 3 tablespoons mirin (see note)
- 2 tablespoons soy sauce
- 1 teaspoon rice vinegar (or apple cider vinegar)
- 1/2 cup water
- 1 tablespoon cornstarch
Instructions
- Add the sauce ingredients to a small bowl and whisk together.
- Cut the chicken into about 1" pieces and add it to another bowl. Add the garlic powder and pepper and stir until coated, then add the cornstarch and stir again to coat.
- Add 2 tablespoons of oil to a skillet. Let it heat for a few minutes over medium-high heat. Cook the chicken in 2 batches (don't crowd the pan). Cook the chicken for 4 minutes and then flip (I use tongs to make it easy) and cook for another 3-4 minutes or so. Chicken should be browned and cooked through (165F). Transfer chicken to plate. For the second batch, I add another tablespoon of olive oil to the pan.
- Once the second batch of chicken is done, add the chicken that's on the plate back to the pan. Stir in the sauce and let it bubble for a minute or so, until thickened. Serve immediately over rice with scallions & sesame seeds sprinkled on top.
