Table of Contents
Galette Dough from Scratch – Buttery Home-Baked Crust – A Delightful Start
When I first walked into the bustling farmers market in Brooklyn, the smell of fresh‑cut butter mingled with the spice‑laden air that reminded me of my mother’s kitchen back in Rabat. The thought of making a buttery galette dough from scratch, rather than scrambling for a pre‑made mix, felt like an act of culinary freedom—a sweet rebellion against bland, mass‑produced pastries.
The dough itself is a study in contrast: the silk‑smooth flour dance with cold butter cubes, the lightness of the iced water that glazes them into transparency, and the slight salty kiss from a pinch of kosher salt. There’s a subtle grain of white rice flour dusting the surface that I whisper after my training in Paris, reminding myself that texture matters. When you press it between fingers, it holds together like a gentle, buttery kiss—ready to transform any filling into a golden, crackling canvas.
I won’t lie—crafting the dough can feel a little intimidating at first, especially if it clumps or dries. The trick I learned over years of training is to keep everything cold and be patient when adding water, letting the dough come together slowly. The result is a buttery crust that’s crisp on the edges, tender in the middle, and that lets you flaunt flavors from sweet apricots to savory goat cheese while keeping the base utterly outstanding. (💡 emy’s Pro Tip: Keep portions of butter on hand to refresh the dough if it dries during its chill on a weekday lunch break.)
Why This Galette Dough Recipe Is the Best
The secret lies in the efficiency of my buttery home‑baked crust. The dough takes a matter of minutes to assemble, yet the interchange of cold and warm phases creates layers that puff like clouds when baked. My training in Paris taught me that the secret to flaky pastry is harmony—cold butter kept uniformly, and gentle, measured water intake. This recipe lives that principle and gives anyone a chance to create pastry that could only come from a polite chef class.
Texture is perfected by rolling the dough into a 12‑inch circle, leaving three‑inch borders that offer room for generous fillings. The technique of pleating adds a festival vibe; each fold crisps slightly while keeping the center supple. The result is a visually stunning, buttery flaky crust that is crisp enough to carry sweet or savory fillings and yet so tender that it melts in your mouth.
Even seasoned bakers will admit how beginner‑friendly this dough is. No sticky work or hidden tricks. You chill, you rest, and you roll. By using a food processor, you speed up the dry‑mix step, and with just a tablespoon of water each time, the dough comes together naturally. All of this means you spend even less time at the station and more time sipping a cold glass of water on the Brooklyn park bench while waiting for the dough to set.
Galette Dough Ingredients
I usually drop by Whole Foods around the Flatiron District for fresh, high‑quality ingredients. For this dough, I lean on a reliable all‑purpose flour that gives the perfect gluten blend, a generous fat content in the butter, and fresh egg yolks that glow like dawn light in the kitchen.
Ingredients List
- 1 ½ cups (213 g) all‑purpose flour, plus extra for flouring surfaces
- ½ teaspoon kosher salt
- 10 tablespoons (142.5 g) cold unsalted butter, cut into small cubes
- 4–5 tablespoons ice‑cold water
- 1 large egg yolk
Ingredient Spotlight
All-Purpose Flour: The base of most doughs—choose a high‑protein flour for structure yet maintain some lighter flour to ensure tenderness. Where you find a mix of wheat and rye in a local Brooklyn pack, feel free to experiment; it adds depth while keeping the bake crisp.
Unsalted Butter: Cold butter is the secret weapon; it creates steam pockets that puff during baking. When the butter’s temperature is low, the oil doesn’t melt too early. If you’re in a pinch, just let it sit back at room temperature for 15 min and re-chill before use.
Egg Yolk: The yolk provides glaze and a slight weight that counters the airy edges. Don’t worry if you use only the yolk; it won’t make a difference. If you prefer a dairy‑free crop, a pinch of marjoram‑infused oil works as a bright, golden finish.
| Original Ingredient | Best Substitution | Flavor / Texture Impact |
|---|---|---|
| All-Purpose Flour | Whole Wheat Flour | Heavier, nuttier flavor, slightly denser crust |
| Unsalted Butter | Salted Butter | Adds an extra layer of savory salt, slightly reduces crispness |
| Egg Yolk | Coconut Oil (for vegan) | Creamy finish, subtle coconut aroma, slightly denser crust |
How to Make Galette Dough — Step-by-Step
Let’s dive into each step, from the first gentle pulse to the final buttery glaze, so you join me in creating a galette crust that’s both simple and satisfying.
Step 1: Prepare Dry Ingredients
Place the flour and kosher salt into the food processor bowl and pulse a few times to combine them evenly.
💡 emy’s Pro Tip: If you’re feeling impatient, mixing the salt and flour together on a countertop can save a processor in busy mornings.
Step 2: Add Butter
Add the cold butter cubes into the processor and pulse 8–10 times until the pieces look like small, cobblestone clumps.
⚠️ Common Mistake to Avoid: Overmixing the butter turns it into a greasy paste, destroying the flaky layers.
Step 3: Add Water
Slowly drip in 4 tablespoons of ice‑cold water, one tablespoon at a time, and pulse. Keep adding until the dough begins to form a cohesive ball.
💡 emy’s Pro Tip: Water in cold increments lets you gauge when the dough is just right—too dry and it will be stiff; too wet and it’ll stick.
Step 4: Form Disk
Transfer the dough onto a lightly floured surface, form it into a 4‑inch disk, wrap tightly in plastic, and refrigerate for at least one hour or overnight.
⚠️ Common Mistake to Avoid: Ignoring chill time produces a tough, butterless pastry.
Step 5: Chill Again
When you’re ready to roll, take the chilled dough out of the fridge 10 minutes beforehand so it softens just enough for handling.
💡 emy’s Pro Tip: A quick dip in warm water for a few seconds helps you roll it out without pulling.
Step 6: Resting the Dough Circle
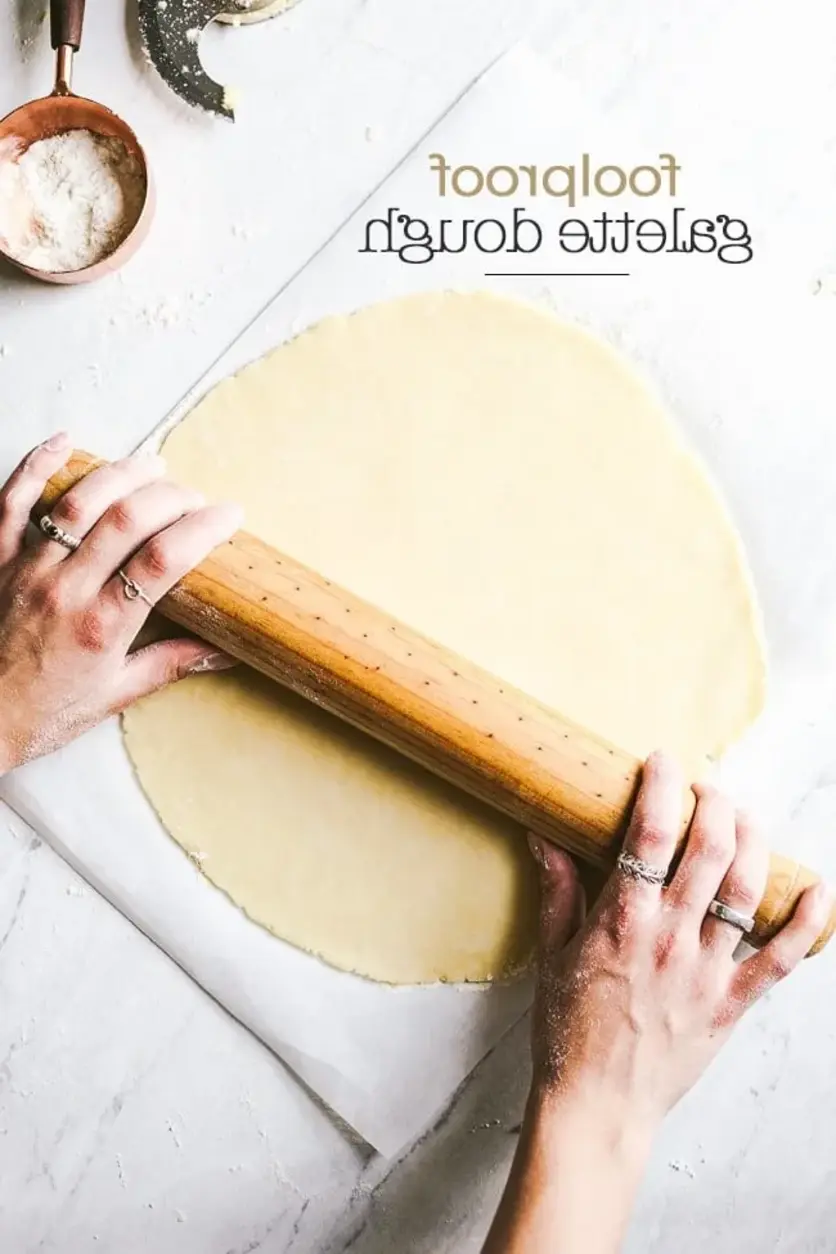
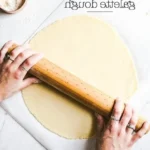
Roll the dough into a 12‑inch circle and lay it on parchment paper, placed on a baking sheet. Let it rest 10–15 minutes to relax gluten.
⚠️ Common Mistake to Avoid: Skipping the rest period can cause the crust to crack during baking.
Step 7: Roll Out
Gently roll the dough into a 12‑inch circle on a lightly floured surface, maintaining a 3‑inch edge around the circle.
💡 emy’s Pro Tip: Use a rolling pin that warms slightly at the handle—makes it easier to spread without tearing.
Step 8: Transfer Sheet
Carefully transfer the dough, still on parchment, onto your baking sheet, ready to accept your chosen filling.
⚠️ Common Mistake to Avoid: Carrying the dough by the doughed edges rather than the base can bruise the crust.
Step 9: Place Filling
Add your filling, leaving a 3‑inch border. Think sweet apricots, savory goat cheese, or pumpkin puree—answering whatever palate you fancy.
💡 emy’s Pro Tip: Arrange layers of filling in a circular pattern to keep the core moist.
Step 10: Pleat and Brush
Fold and pleat the dough edges around the filling, sealing gently, then brush the crust with egg yolk for that classic golden sheen.
⚠️ Common Mistake to Avoid: Over‑brushing can separate delicate layers, causing cracks.
| Step | Action | Duration | Key Visual Cue |
|---|---|---|---|
| 1 | Dry Mix | 2‑3 mins | Golden crumbs visible |
| 2 | Add Butter | 2‑3 mins | Small fat clumps appear |
| 3 | Add Water | 1‑2 mins | Dough glistens, holds shape |
| 4 | Form Disk | 5 mins | Disk smooth & plump |
| 5 | Chill | ≥1 hour | Firm but pliable |
| 6 | Rest Circle | 10‑15 mins | Globe relaxed, ready to roll |
| 7 | Roll Out | 5‑7 mins | Corners even, size 12″ |
| 8 | Transfer | 2‑3 mins | Smooth parchment |
| 9 | Add Filling | ≤10 mins | Layered, centered |
| 10 | Pleat & Brush | 5‑7 mins | Golden glue finish |
Serving & Presentation
When the final galette comes out of the oven still warm, it’s time to carve your masterpiece. Slice it into wedges and arrange them on a rustic wooden board. Sprinkle a pinch of sea salt, drizzle a splash of lemon‑infused olive oil, and let your guests experience that buttery aroma that screams quick comfort with a gourmet edge.
A classic side for sweet galettes is fresh arugula tossed with vinaigrette, while for savory versions, a crisp green salad with roasted beet hummus feels like a perfect counterpoint. If you’re craving something extra, bake a small side of goat‑cheese and sun‑dried tomato tartlets to mingle with the galette at the table. The duo captures both the Mediterranean heat I learned in Morocco and the bracing cool of a Brooklyn fall morning.
| Pairing Type | Suggestions | Why It Works |
|---|---|---|
| Side Dish | Balsamic roasted carrots or simple green salad with lemon vinaigrette. | Freshness balances the dough’s richness. |
| Sauce / Dip | Goat cheese cheese spread, honey‑mustard glaze, or chimichurri. | Adds brightness, cuts through buttery texture. |
| Beverage | Pour a cold glass of Sauvignon Blanc or a sparkling rosé. | Acidity glass matches the buttery base. |
| Garnish | Fresh mint leaves, microgreens, or toasted almond slivers. | Adds texture and a burst of herbal aroma. |
Make-Ahead, Storage & Reheating
For the busy crowd that me, I love prepping galettes a day in advance. Rolling the dough ahead of time, storing it chilled, and assembling the day of keeps the ingredients fresh and the dreams alive.
| Method | Container | Duration | Reheating Tip |
|---|---|---|---|
| Refrigerator | Zip‑top bag or airtight container | 2‑3 days | Transfer to a pre‑heated oven 350°F for 10‑12 mins. |
| Freezer | Plastic freezer bag, press out air | 1‑2 months | Thaw in fridge, bake at 375°F for 15‑20 mins. |
| Make‑Ahead | Pre‑rolled dough on parchment | Up to 5 days | Add filling the day before; bake directly in oven. |
I’ve found that a brief 2‑minute brush of extra‑virgin olive oil helps revive the crust’s crispness when the galette has been refrigerated or frozen. The oil seals moisture, producing a crisp, buttery finish every time.
Variations & Easy Swaps
| Variation | Key Change | Best For | Difficulty Impact |
|---|---|---|---|
| This‑Seasonal Fruit Galette | Swap caramelized pears or figs for the sweet filling. | Fall and Thanksgiving. | Same. |
| Gluten‑Free Variety | Use gluten‑free all‑purpose blend and coconut flour. | For gluten‑sensitive friends. | Easy, just no extra binders. |
| Summer Herbed Chicken Galette | Use succulent chicken thighs, rosemary, and garlic. | Wood‑fire BBQ style. |
Seasonal Fruit Galette
Pick up crisp pears, newly picked apples, or sweet figs from the Southern Queens farmers market at dawn and caramelize them before incorporating into the dough. The caramel brings out a deep, buttery flavor that pairs beautifully with the flaky base, delivering a dessert that feels like a warm hug on a cool evening.
Gluten‑Free Galette
I replace the all‑purpose flour with 1 cup almond flour and a spoonful of coconut flour. After mixing, let the dough rest a bit longer to allow the flours to moisten. The final crust is slightly denser but equally buttery, giving the same comforting bite while meeting dietary needs.
Summer Herbed Chicken Galette
Sauté chicken thighs with fresh rosemary, thyme, and minced garlic until tender, then shuffle the mixture into the dough after a brief chill. The savory galette becomes a centerpiece for house‑grilled dinners, reminiscent of family gatherings around a city’s rooftop patio.
Share Your Version!
I’d love to read about your experiments. Leave a star rating and drop a comment below—do you lean into sweet or savory? Post a photo on Instagram or Pinterest and tag @cookingwithemi so we can share the love. Tell me—what’s your favorite way to twist the classic galette dough?
From my NYC kitchen to yours — I hope this recipe brings as much warmth to your table as it does to mine. — emy 🧡
Love This Recipe? Save It to Pinterest!
If you enjoyed this Galette Dough recipe, don’t let it get lost in your browser tabs! 😄 Pin it now so you can find it again anytime — and explore hundreds more tried‑and‑tested recipes waiting for you on my Pinterest boards.
👉 Follow emy on Pinterest @chefrecipes2
📌 Pin this recipe · 🔁 Re-pin your favorites · 💬 Tag me when you make it — I love seeing your creations!
Have a question, a tweak idea, or a new filling you’re excited to try? Drop it in the comments and let’s chat—the kitchen at my home is always open!
Galette Dough
Description
A delicious galette starts with a buttery galette crust. This is my go-to galette dough recipe that I use for both sweet and savory galette recipes.
Ingredients
- 1 ½ cups (213 gr.) of all-purpose flour, more to flour the surfaces
- ½ teaspoon kosher salt
- 10 tablespoons (142.5 gr.) cold unsalted butter, cut into small cubes
- 4–5 tablespoons ice-cold water
- 1 large egg yolk
Instructions
- To make the galette dough: Place flour and salt in the bowl of a food processor. Pulse for a few times to mix. Add in the cold butter cubes. Pulse 8-10 times until butter resembles small clumps.
- Turn the machine on and add in 4 tablespoons of ice-cold water in one tablespoon increments.
- At this point, it should start to come together and form into a ball. If not add in the rest of the water until it does.
- Transfer onto a lightly floured surface, form it into a 4-inch disk, and wrap with plastic. Place in the fridge for at least 1 hour or overnight.
- Take it out of the fridge 10 minutes before you are ready to roll it out.
- Lightly flour your working surface. Roll the dough into a large 12-inch circle. Transfer onto the parchment paper and then onto the baking sheet.
- Place your filling (depending on the recipe you are using) on top slightly mounting in the middle, leaving a 3-inch border around the edges.
- Roll the sides of the dough overlapping as you go around and pleating the dough.
- Brush the edges of the dough (the outer crust) with egg yolk.
- Bake according to the instructions of the recipe you are using.
