Table of Contents
Ice Cream Sandwich Cake – Easy No-Bake Dessert Recipe: The Ultimate No-Bake Treat
I remember the first time I made this Ice Cream Sandwich Cake—it was a sweltering July afternoon in my tiny New York City apartment, and the air conditioner was fighting a losing battle. My mother’s kitchen in Morocco was always filled with the scent of rose water and cinnamon, but here I was, craving something cold, creamy, and utterly American. This no-bake dessert recipe became my summer salvation: it’s the simplest way to make your own homemade ice cream cake using ice cream sandwiches, and the best part? No oven required. The magic is in the layers: crunchy chocolate wafers, silky Cool Whip, and ribbons of chocolate and caramel—all coming together like a perfect, frosty hug. I’ve been a professional cook for years, trained in Paris and now settled in Brooklyn, and I still make this cake for every backyard barbecue and birthday party. The unique angle here is how the ice cream sandwiches soften just enough to meld into a cake-like texture, making every slice a creamy, decadent masterpiece.
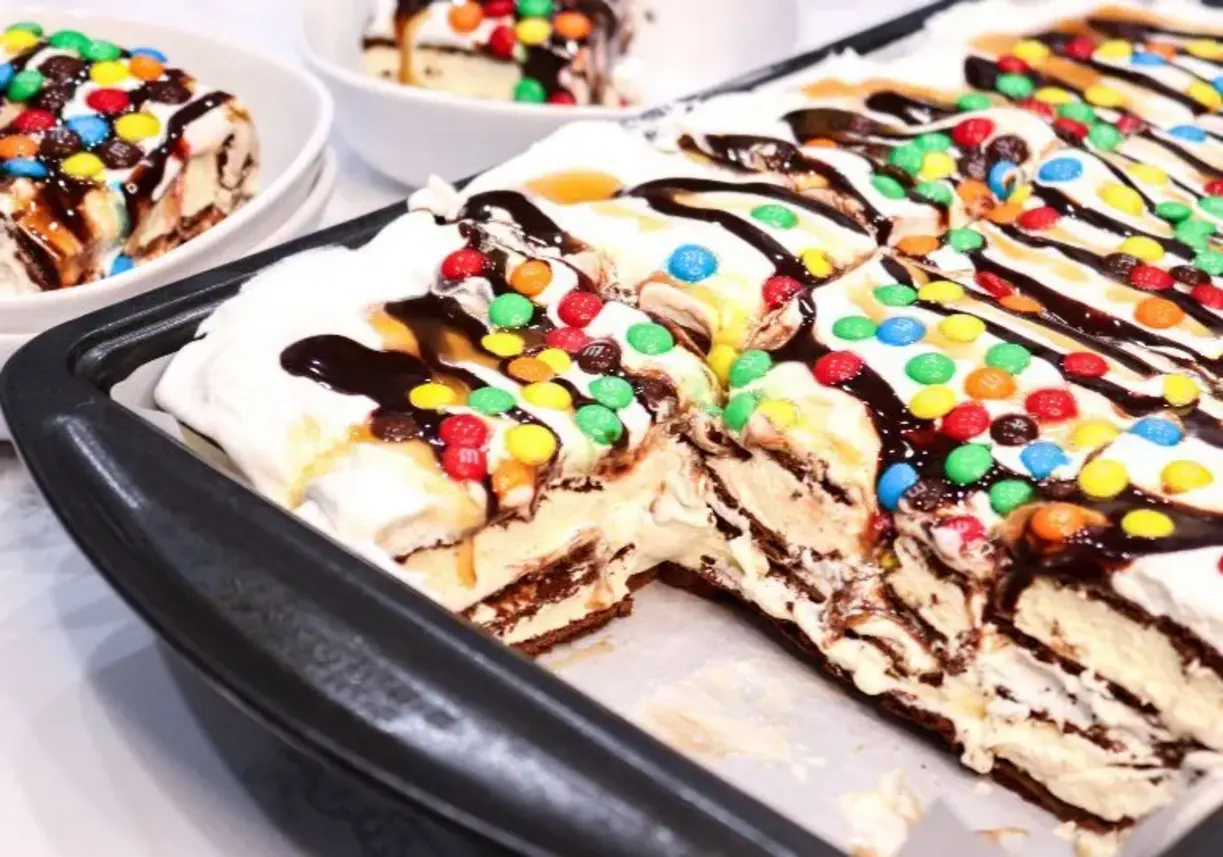
When you cut into this Ice Cream Sandwich Cake, you’ll see those beautiful strata: the chocolate wafers from the sandwiches have softened into a fudgy layer, while the Cool Whip stays light and airy like a cloud. The chocolate syrup provides a deep, rich sweetness, and the caramel adds that buttery, salty edge that makes your taste buds sing. I love drizzling a little extra sauce on top and watching it cascade down the sides—it’s like a messy, beautiful work of art. The mini M&M’s bring a pop of color and a satisfying crunch, reminding me of the candy stalls I’d visit as a child in the Marrakech souk. This cake is the ultimate crowd-pleaser: it’s easy enough for a beginner, but impressive enough for a party. And because it’s frozen, you can make it days ahead—perfect for busy hosts like me who are always juggling deadline and dinner plans.
This version of ice cream cake is truly foolproof. I’ve tested it dozens of times in my own kitchen, using everything from store-brand ice cream sandwiches to premium ones, and the result is always delicious. The key is letting the cake freeze for at least two hours—or overnight if you have the patience. One common mistake is rushing the freezing time; if you slice it too soon, the layers won’t hold together, and you’ll end up with a glorious mess. My Moroccan grandmother always said, “Patience is the secret ingredient,” and she wasn’t wrong. I’ll show you exactly how to line the pan, how to layer for even distribution, and how to get those perfect clean slices every time. This is no-bake cooking at its finest—from my kitchen to yours, I promise this will become your go-to summer dessert.
Why This Ice Cream Sandwich Cake Recipe Is the Best
The Flavor Secret: This Ice Cream Sandwich Cake recipe uses a combination of classic American ingredients—Cool Whip, chocolate syrup, and caramel sauce—that create a nostalgic flavor profile everyone loves. But I’ve added a touch of French know-how: I let the Cool Whip sit at room temperature for just a few minutes before spreading, so it layers more evenly without deflating. Plus, the salted caramel balances the sweetness perfectly, a trick I learned at Le Cordon Bleu in Paris. No other ice cream cake recipe nails this balance of creamy, crunchy, and saucy quite like this one.
Perfected Texture: The texture of this ice cream sandwich cake is what sets it apart. The sandwiches freeze back into a firm, sliceable cake, yet the Cool Whip keeps everything light and fluffy. My chef’s tip: don’t let the ice cream sandwiches thaw completely before assembling. If they’re too soft, they’ll turn into mush; if they’re too hard, they won’t stick together. I’ll show you exactly how to handle them for the perfect bite every time.
Foolproof & Fast: This recipe requires zero baking skills—just patience for freezing. It’s ideal for beginner cooks, kids helping in the kitchen, or anyone who wants a stunning dessert without stress. I’ve made it for last-minute dinner parties and it’s always a hit. The best part? You can customize it endlessly, so it never gets boring.
Ice Cream Sandwich Cake Ingredients
Shopping for this ice cream sandwich cake is a breeze. I pick up my ingredients at the local Trader Joe’s in Union Square, where the ice cream sandwiches are perfectly sized for this recipe. On a trip to the Paris markets, I learned the importance of using high-quality sauces—so I always splurge on Hershey’s chocolate syrup and a good caramel. For the mini M&M’s, I love the bright colors that remind me of the sweets I’d eat at the Marrakech souk as a child. Here’s exactly what you’ll need.
Ingredients List
- 24 Ice Cream Sandwiches (store-bought or homemade)
- 16 oz. Container of Cool Whip (thawed but still cold)
- 8 oz. Hershey’s Chocolate Syrup
- 8 oz. Caramel Sauce (I prefer salted caramel)
- 1 Cup Mini M&M’s (or your favorite sprinkles)
- Parchment paper for lining the pan (optional but recommended)
Ingredient Spotlight
Ice Cream Sandwiches: These are the backbone of your cake. Look for ones that are roughly 3×3 inches and about 1 inch thick—standard store-bought brands work beautifully. The chocolate wafers soften during freezing to create a fudgy, cake-like layer. If your sandwiches are larger, just arrange them to fit snugly in the pan. For a premium twist, try vanilla bean or chocolate chip ice cream sandwiches.
Cool Whip: This frozen whipped topping is essential for lightness. Let it thaw in the fridge for a few hours, or briefly at room temperature until it’s spreadable but still cold. Do not substitute with homemade whipped cream—it will deflate and make the cake too dense. If you must swap, use a stabilized whipped cream with gelatin.
Chocolate Syrup and Caramel Sauce: These are your flavor workhorses. Hershey’s syrup has the perfect consistency—not too thin, not too thick—and the caramel adds a buttery richness. For a saltier contrast, use a high-quality salted caramel sauce. You can also make your own caramel by melting sugar with butter and cream, but store-bought saves time.
Mini M&M’s: They add a pop of color and a satisfying crunch. If you’re avoiding candy, try crushed Oreos, toffee bits, or rainbow sprinkles. For a more grown-up version, I sometimes use chopped dark chocolate or toasted almonds.
| Original Ingredient | Best Substitution | Flavor / Texture Impact |
|---|---|---|
| Cool Whip | Stabilized whipped cream (with gelatin) | Lighter but less stable; cake may not hold shape as well |
| Hershey’s Syrup | Homemade chocolate sauce or Nutella | Nutella adds hazelnut flavor; thinner syrups may be more watery |
| Mini M&M’s | Crushed Oreos or toffee bits | Oreos add chocolate cookie crunch; toffee brings buttery sweetness |
| Standard Ice Cream Sandwiches | Large chocolate chip cookies with softened ice cream | Texture becomes chewier, less cake-like |
How to Make Ice Cream Sandwich Cake — Step-by-Step
Making this ice cream sandwich cake is incredibly straightforward, but a few chef-tested tricks will give you perfect results every time. Let me walk you through each step so you can create a beautiful, sliceable cake that wows everyone.
Step 1: Prepare the Pan
Line a 9×13 inch cake pan with parchment paper, leaving an overhang on two sides. This makes it easy to lift the cake out later. If you don’t have parchment, you can use plastic wrap, but it’s trickier to get smooth results.
💡 emy’s Pro Tip: Wet the pan slightly before pressing the parchment paper—it will stick to the sides so you can work hands-free. This little trick is a lifesaver when you’re rushing!
Step 2: First Layer of Ice Cream Sandwiches
Unwrap 12 ice cream sandwiches and arrange them snugly in the bottom of the pan. Break one in half if needed to fill gaps. They should be slightly cold but not frozen solid—if they’re too hard, let them sit for 5 minutes at room temperature.
⚠️ Common Mistake to Avoid: Don’t let the sandwiches thaw completely! If they’re too soft, they’ll turn into a soupy mess. They should be firm enough to hold their shape but pliable enough to press into the pan.
Step 3: First Layer of Cool Whip
Spread half of the Cool Whip evenly over the first layer of ice cream sandwiches. Use a spatula to create a smooth, even layer. The Cool Whip should be thawed but still cold—if it’s too runny, it will seep between the sandwiches.
💡 emy’s Pro Tip: If the Cool Whip is too stiff, let it sit on the counter for 10 minutes before using. For an airier texture, whip it briefly with a whisk—but don’t overdo it!
Step 4: First Drizzle Layer
Drizzle half of the chocolate syrup and half of the caramel sauce over the Cool Whip. Use a spoon to create ribbons—don’t drown the cake. The goal is to have pockets of syrup that surprise you in every bite.
💡 emy’s Pro Tip: Warm the caramel sauce slightly in the microwave for 10 seconds—it drizzles more easily and won’t create big clumps.
Step 5: Repeat Layers
Repeat steps 2 through 4: add another layer of 12 ice cream sandwiches, then the remaining Cool Whip, and finally the remaining chocolate and caramel drizzle. Press the second layer of sandwiches gently into the Cool Whip to seal.
⚠️ Common Mistake to Avoid: Don’t press too hard—you’ll squish the syrup out. A gentle, even pressure is all you need to get those layers to stick together.
Step 6: Add Toppings
Sprinkle the mini M&M’s evenly over the top. You can also add extra drizzles of chocolate or caramel for a more decadent finish. The toppings should be generous but not overwhelming.
💡 emy’s Pro Tip: Press the M&M’s lightly into the Cool Whip so they stick. If you add them after freezing, they’ll just roll off! For a different look, try rainbow sprinkles or crushed candy bars.
Step 7: Freeze
Place the pan in the freezer for a minimum of 2 hours, or overnight for the best texture. The cake needs to be completely firm before slicing. If you’re in a hurry, at least 2 hours works, but overnight gives you cleaner slices.
⚠️ Common Mistake to Avoid: Don’t skip the freezing time! Cutting into a semi-frozen cake will result in a melty mess that won’t hold its shape. Patience pays off here—think of it as a frozen lasagna of desserts.
Step 8: Serve
Lift the cake out of the pan using the parchment overhang. Let it sit at room temperature for 3–5 minutes to soften slightly—this makes slicing easier. Use a sharp knife, wiping it clean between cuts for neat pieces.
💡 emy’s Pro Tip: Run your knife under hot water and dry it before each slice—it cuts through the frozen layers like butter without cracking the Cool Whip.
| Step | Action | Duration | Key Visual Cue |
|---|---|---|---|
| 1 | Prepare Pan | 2 mins | Parchment paper overhang on two sides |
| 2 | First Sandwich Layer | 5 mins | Sandwiches touch edges with no gaps |
| 3 | First Cool Whip Layer | 3 mins | Smooth, even coverage |
| 4 | First Drizzle | 2 mins | Ribbons of chocolate and caramel |
| 5 | Repeat Layers | 10 mins | Two distinct layers visible |
| 6 | Toppings | 2 mins | M&M’s evenly distributed |
| 7 | Freeze | Min 2 hrs | Firm to the touch |
| 8 | Serve | 5 mins rest | Clean, neat slices |
Serving & Presentation
This ice cream sandwich cake is a showstopper on any dessert table. When I serve it at my Brooklyn rooftop parties, I love to plate it on a large wooden board and drizzle extra chocolate and caramel on top just before serving. The contrast of colors—white Cool Whip, dark syrup, and bright M&M’s—is gorgeous. For an extra touch, I sometimes add fresh strawberries or mint leaves around the base of the cake for a pop of green.
In my mother’s Moroccan kitchen, desserts were always served with a hot cup of mint tea. While this cake is all-American
Print

Ice Cream Sandwich Cake
Description
This Easy Ice Cream Sandwich Cake is the Simple way to make your Own Homemade Ice Cream Cake using Ice Cream Sandwiches.
Ingredients
- 24 Ice Cream Sandwiches
- 16 oz. Container of Cool Whip
- 8 oz. Hershey's Chocolate Syrup
- 8 oz. Caramel Sauce
- 1 Cup Mini M&M's
Instructions
- Line a 9×13 Cake Pan with Parchment Paper
- Place 12 Unwrapped Ice Cream Sandwiches in the bottom of the Cake Pan
- Spread 1/2 of the Cool Whip over the first layer of Ice Cream Sandwiches
- Drizzle with Chocolate Syrup and Caramel
- Repeat steps 2-4 again adding another layer of Ice Cream Sandwiches, Cool Whip and Chocolate and Caramel Drizzle.
- Sprinkle with Mini M&M's or your favorite sprinkles
- Place in the freezer for a minimum of 2 hours to harden
- Serve immediately out of the freezer!
