Table of Contents
Sunshine in a Bite: The Ultimate Mini No-Bake Lemon Cheesecake Tarts
Introduction: The Perfect Sunny-Day Treat
Imagine capturing the bright, cheerful essence of a sunny day and turning it into a dessert. That’s exactly what these Mini No-Bake Lemon Cheesecake Tarts do. They are more than just a sweet treat; they are a burst of citrusy joy, perfectly portioned for sharing (or not sharing!). As The Kitchen Team, we’ve perfected this recipe to deliver a flawless balance of tangy lemon and rich, creamy cheesecake, all nestled in a buttery, crumbly graham cracker crust. The best part? You don’t even need to turn on your oven. These adorable tarts are the ultimate solution for a stunning dessert that’s impressively easy, making them perfect for baby showers, bridal luncheons, Easter brunch, or simply to satisfy a craving for something sweet, tart, and refreshing.
In this comprehensive guide, we’ll walk you through every step to ensure your mini tarts are picture-perfect. We’ll also share our professional secrets for the smoothest filling, the sturdiest crust, and dazzling garnishes that will make your dessert table the talk of the party. Let’s create some sunshine!
Why This Is The Best Mini No-Bake Lemon Cheesecake Tarts Recipe
You might find other no-bake lemon cheesecake recipes, but ours stands out for several key reasons developed through extensive testing in our kitchen.
Perfect Texture Balance: Many no-bake fillings can be overly dense or, conversely, too soft and runny. Our recipe uses a specific ratio of cream cheese to whipped cream, stabilized with the acid from fresh lemon juice, to create a filling that is luxuriously creamy yet holds its shape beautifully when bitten into.
The “Plastic Wrap Trick”: Forming perfect mini tart shells in a muffin tin can be tricky. Our method of lining the pan with plastic wrap is a game-changer. It not only makes removing the fragile shells effortless but also allows you to press the crust thinly and evenly up the sides for a professional look.
Maximized Lemon Flavor: We use both fresh lemon juice and lemon zest. The zest contains potent citrus oils that provide an intense, aromatic lemon flavor without additional liquid, which is crucial for the filling’s consistency. This dual approach ensures every bite is packed with bright, authentic lemon taste.
Ingredients & Substitutions
Using high-quality, simple ingredients is the foundation of this recipe’s success. Here’s what you’ll need, along with our tested substitutions for dietary needs or pantry shortages.
| Ingredient | Quantity | Purpose & Best Substitutes |
|---|---|---|
| Graham Cracker Crumbs | 1 cup (5 oz) | Forms the classic, sweet, and sturdy crust. Can substitute with digestive biscuits, vanilla wafers, or gluten-free graham crackers. |
| Granulated Sugar (for crust) | 2 tablespoons | Sweetens the crust. Can be omitted or replaced with brown sugar for a deeper flavor. |
| Unsalted Butter, melted | 6 tablespoons | The binder for the crust. Must be melted. Salted butter can be used, but omit added salt elsewhere. |
| Cream Cheese, full-fat | 1 (8-oz) package | Must be fully softened to room temperature for a lump-free filling. Low-fat versions will result in a softer, less stable filling. |
| Granulated Sugar (for filling) | 1/2 cup | Sweetens and balances the lemon’s tartness. Powdered sugar can be used for a slightly smoother texture. |
| Fresh Lemon Zest | 2 teaspoons | Provides intense aromatic lemon flavor. Do not substitute with bottled zest. |
| Fresh Lemon Juice | 2 tablespoons | Provides the essential tang. Freshly squeezed is non-negotiable for the best flavor. |
| Heavy Whipping Cream | 1/3 cup | Whipped and folded in to lighten the filling. For a dairy-free version, use well-chilled full-fat coconut cream. |
| Pure Vanilla Extract | 1/4 teaspoon | Adds a subtle depth of flavor that complements the lemon. Can be omitted if necessary. |
| Garnish (optional) | As desired | Fresh berries (raspberries, blueberries), mint sprigs, a dollop of fruit preserves, or extra lemon zest. |
Step-by-Step Instructions
Follow these detailed steps for foolproof mini tarts. Read through all instructions before beginning.
Part 1: Preparing the Perfect Crust
Step 1: Combine Dry Ingredients. In a medium bowl, thoroughly mix the 1 cup of graham cracker crumbs and 2 tablespoons of granulated sugar.
Step 2: Add the Butter. Pour the 6 tablespoons of melted butter over the crumb mixture. Use a fork to stir until every crumb is evenly moistened and the mixture resembles wet sand. It should hold together when pinched.
Step 3: Line the Pan. Take a standard 24-cup mini muffin pan. Tear off two large sheets of plastic wrap. Place them over the pan in a cross shape, with plenty of overhang on all sides. Gently but firmly press the plastic wrap down into each cavity, smoothing out any large wrinkles from the center outward. This creates a non-stick liner.
Step 4: Form the Shells. Place a heaping tablespoon of the crumb mixture into each prepared cavity. Using your fingers or a small tamper (like the back of a measuring spoon), firmly press the crumbs onto the bottom and up the sides to form a uniform cup. Apply even pressure so the crust is compacted—this prevents crumbling later.
Step 5: Chill. Transfer the entire pan to the freezer for 15-20 minutes. This sets the butter, making the shells firm and easy to remove.
Part 2: Making the Luxurious Lemon Filling
Step 6: Whip the Cream. In a clean, cool medium bowl, combine the 1/3 cup of heavy whipping cream and 1/4 teaspoon of vanilla extract. Using a hand mixer or stand mixer with a whisk attachment, whip on medium-high speed until stiff peaks form. This means when you lift the whisk, the peak stands straight up. Set aside.
Step 7: Beat the Cream Cheese Base. In a separate medium bowl, combine the softened (8-oz) cream cheese, 1/2 cup sugar, 2 tablespoons fresh lemon juice, and 1 teaspoon of the lemon zest (reserve the other teaspoon for garnish). Beat on medium speed for 1-2 minutes until completely smooth, creamy, and free of any lumps. Scrape down the sides of the bowl as needed.
Step 8: Fold Gently. Using a flexible silicone spatula, add about one-third of the whipped cream to the cream cheese mixture. Gently fold it in to lighten the base. Then, add the remaining whipped cream and fold just until no white streaks remain. Be gentle to maintain the airy volume.
Part 3: Assembly & Final Chill
Step 9: Remove Shells. Carefully lift the plastic wrap from the muffin pan. The frozen crusts should pop out easily. Place them on a plate or baking sheet. If any break, simply press the crumbs back into shape in your hand.
Step 10: Fill the Tarts. Spoon the lemon cheesecake filling into a piping bag fitted with a large star or round tip, or simply use a small cookie scoop or spoon. Fill each tart shell to just below the rim. For a decorative swirl, pipe the filling in.
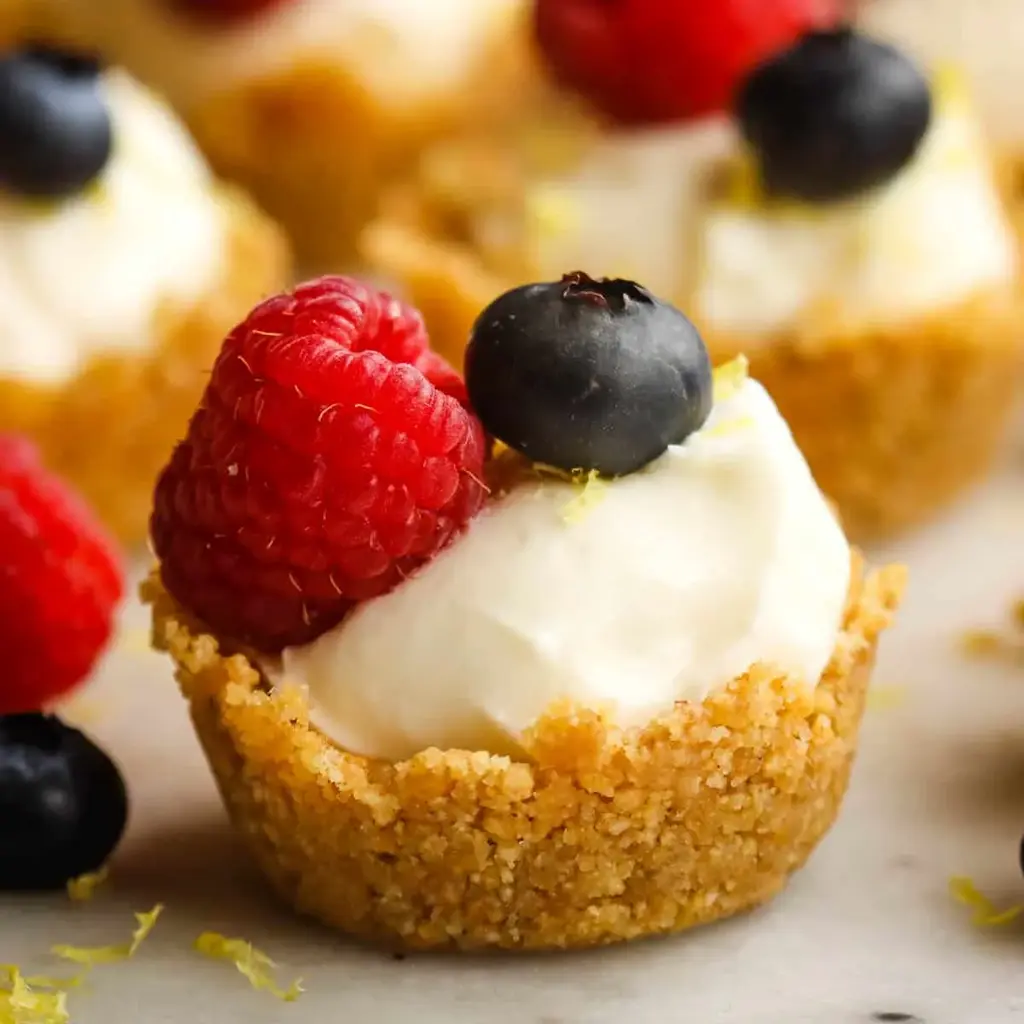
Step 11: Garnish and Set. Garnish each tart with a tiny bit of the reserved lemon zest, a blueberry, or a raspberry. Refrigerate the assembled tarts for at least 2 hours, or until the filling is completely firm to the touch.
Serving Suggestions & Presentation
Presentation transforms these tasty bites into a show-stopping dessert. Here are our favorite ways to serve them:
The Tiered Tower: Arrange the tarts on a multi-tiered dessert stand for an elegant display at parties.
Individual Plates: For a plated dessert, place 2-3 tarts on a small plate. Add a drizzle of raspberry coulis, a dusting of powdered sugar, and a fresh mint leaf.
Flavor Pairings: The bright lemon pairs wonderfully with fresh summer berries. Serve alongside a bowl of mixed berries. For an adult gathering, consider a pairing with a glass of Moscato d’Asti or a citrus-forward craft cocktail.
Storage & Make-Ahead Tips
These tarts are fantastic for planning ahead.
Refrigeration: Store assembled tarts in a single layer in an airtight container in the refrigerator for up to 4 days. If stacking is necessary, place a layer of parchment paper between layers to protect the garnishes.
Freezing: These tarts freeze exceptionally well! Freeze them in a single layer on a baking sheet until solid (about 2 hours), then transfer to a freezer-safe container or bag for up to 2 months. Thaw in the refrigerator for 2-3 hours before serving.
Make-Ahead Components:
- Crusts: Can be made, frozen in the pan, and stored in a freezer bag for up to 1 month.
- Filling: Can be made and stored in an airtight container in the fridge for 2 days. Give it a gentle stir before using.
Creative Variations
Once you’ve mastered the classic, try these delicious twists:
Berry Swirl: Before filling, place a tiny dollop (1/4 tsp) of seedless raspberry or strawberry jam in the bottom of each crust. Pipe the lemon filling on top for a surprise berry center.
Lemon Blueberry: Fold 1/4 cup of finely chopped fresh blueberries into the filling just before spooning it into the shells.
Toasted Coconut Crust: Replace 1/4 cup of the graham cracker crumbs with toasted, finely shredded coconut for a tropical flair.
Lemon Curd Topping: For an extra tangy punch, top each filled tart with a small spoonful of store-bought or homemade lemon curd before chilling.
Frequently Asked Questions
Absolutely! Press the crust mixture into a 9-inch tart pan with a removable bottom. You may need to increase the filling by 50% (1.5x the recipe) to fill it adequately. Chill for at least 4-6 hours before slicing.
The most common causes are: 1) The cream cheese wasn’t full-fat, 2) The heavy cream wasn’t whipped to stiff peaks, or 3) The assembled tarts didn’t chill long enough. Ensure you follow the ingredient specifications and chilling time. If it’s still soft, they may just need more time in the fridge.
We strongly advise against it. Fresh lemon juice provides a vibrant, clean tartness. Bottled juice often has a flat, metallic, or preservative flavor that will dull the bright taste of your tarts.
The plastic wrap method is key! Also, ensure you press the crust mixture very firmly into the cups and give it the full freezer time. The butter needs to re-solidify to act as glue.
Yes, with substitutions. Use vegan butter in the crust, a high-quality vegan cream cheese alternative, and whip well-chilled full-fat coconut cream instead of heavy whipping cream. The flavor will be different but still delicious.
This happens when the cream cheese is too cold. It must be softened at room temperature for 1-2 hours before mixing. If you have small lumps, you can press the finished filling through a fine-mesh sieve before folding in the whipped cream.
Garnish with fresh fruit or herbs just before serving (within 1-2 hours) to prevent sogginess or wilting. Lemon zest, however, can be added right after filling.
You can use a standard muffin pan to make 12 larger tarts. Double the crust recipe and increase the chill time for both crust and assembled tarts. You can also form free-form crust cups directly on a lined baking sheet, though they will be more rustic.
We hope you love these Mini No-Bake Lemon Cheesecake Tarts as much as we do! They’re a testament to how simple ingredients can create something truly magical. If you make them, share your creations with us on social media by tagging @cookingwithemy!
Love this Recipe? Save it for Later!
Pin the image below to your favorite dessert board on Pinterest to always have this sunny recipe on hand.
Follow us on Pinterest @cookingwithemy for more delicious inspiration!

Mini Lemon Cheesecake Tarts
Description
With a light and tangy lemon cheesecake filling, these adorable mini cheesecake tarts are a perfect bite-size treat for any spring or summer celebration. They come together quickly, with no baking necessary, and can be garnished with any fruit you like!
Ingredients
Scale
- 1 cup graham cracker crumbs ((5 ounces, or 10 crackers crushed))
- 2 tablespoons granulated sugar
- 6 tablespoons unsalted butter (melted)
- 1 8-oz package cream cheese (softened)
- 1/2 cup sugar
- 2 teaspoons lemon zest (divided)
- 2 tablespoons lemon juice (freshly squeezed)
- 1/3 cup heavy whipping cream
- 1/4 teaspoon vanilla extract
- fresh fruit or fruit preserves for garnish
Instructions
- In a medium bowl, combine graham cracker crumbs and sugar. Add the melted butter and stir to combine.
- Line a 24-cup mini muffin pan with plastic wrap. Use two sheets, placed crosswise across the tin, with plenty of overhang as pictured in the post, and press plastic wrap down into each cavity, working from the inside out. Place a heaping tablespoon of graham cracker crumbs in each cavity and press onto bottom and sides with your fingers.
- Transfer to freezer to chill for 15-20 minutes while you make the filling. Gently lift the plastic wrap to remove the tart shells from the pan.
- In a medium bowl, beat together the cream cheese, lemon zest, lemon juice, and sugar.
- In a separate medium bowl, whip the whipping cream and vanilla to stiff peaks. Fold the whipped cream into the cream cheese mixture until combined
- Spoon a dollop of filling into each tart shell. Chill the tarts for about two hours to firm up the filling and shell before serving. Garnish with remaining zest and fruit as desired and serve chilled.
