Table of Contents
The Ultimate No-Bake Lemon Cheesecake: Your Secret to Effortless Elegance
| Prep Time | Chill Time | Total Time | Servings | Difficulty |
|---|---|---|---|---|
| 25 minutes | 6 hours (or overnight) | 6 hours 25 minutes | 12 slices | Easy |
Why This No-Bake Lemon Cheesecake is a Game-Changer
Welcome to CookingWithEmy.com! I’m The Kitchen Team, and today we’re unlocking the secret to the most vibrant, creamy, and refreshing dessert that requires zero oven time. This No-Bake Lemon Cheesecake is more than just a recipe; it’s your ticket to a stunning, crowd-pleasing dessert that looks like you spent all day in a professional bakery. Perfect for sweltering summer days, last-minute gatherings, or when you simply crave that perfect balance of tangy and sweet without the fuss of a water bath and potential cracks.
Imagine a buttery, crumbly shortbread crust that gives way to an impossibly smooth and luscious filling, bursting with real lemon flavor. It’s sweet, but not cloying, rich yet refreshingly light. This recipe is part of our back-to-basics series, designed to build confidence and deliver flawless results every single time. Whether you’re a baking novice or a seasoned pro, this cheesecake will become a staple in your dessert repertoire.
Why This is the Best No-Bake Lemon Cheesecake Recipe
You might wonder what sets this recipe apart from the dozens of other no-bake cheesecakes out there. The answer lies in the precision and balance. We use full-fat cream cheese for unmatched richness and stability, and a specific ratio of double cream (heavy cream) to lemon juice that ensures the filling sets perfectly without being too firm or too soft. The crust is a simple 3:1 ratio of biscuit to butter, creating the ideal texture—sturdy enough to slice cleanly, but tender enough to melt in your mouth.
Many recipes use gelatin, but ours relies on the natural setting power of well-whipped cream and cream cheese, chilled to perfection. This method preserves the pure, bright flavor of the lemon without any aftertaste. We also add the lemon juice at just the right moment in the whipping process to ensure the filling doesn’t “break” or become grainy. It’s these tested, chef-approved details that guarantee a spectacular result.
Ingredients & Substitutions
Using high-quality ingredients is the first step to an exceptional no-bake lemon cheesecake. Here’s exactly what you’ll need, along with smart swaps if necessary.
| Ingredient | Quantity | Notes & Substitutions |
|---|---|---|
| Shortbread Biscuits (Cookies) | 10.5 oz (300 g) | Graham crackers, digestive biscuits, or vanilla wafers work perfectly. Avoid biscuits with strong spices. |
| Unsalted Butter | 3.5 oz (100 g / 7 tbsp) | Melted. Salted butter can be used, but omit any added salt. |
| Full-Fat Cream Cheese | 21 oz (600 g) | Must be full-fat, brick-style, and softened to room temperature for a lump-free filling. Low-fat varieties will not set properly. |
| Powdered Sugar (Icing Sugar) | 3.5 oz (100 g / 1 cup) | Sifted. Confectioners’ sugar dissolves instantly and sweetens smoothly. |
| Double Cream / Heavy Whipping Cream | 10 fl oz (300 ml / 1 ¼ cups) | For the filling. Must be cold for maximum volume when whipped. |
| Fresh Lemon Juice | 2.5 fl oz (75 ml) | Juice of about 3 medium lemons. Fresh is non-negotiable for the best flavor. |
| Double Cream / Heavy Whipping Cream | 5 fl oz (150 ml / ⅔ cup) | For the topping. Keep cold. |
| Powdered Sugar (for topping) | 2 tbsp | To sweeten the whipped cream topping. |
| Lemon Slices & Zest | For garnish | Adds a beautiful, fresh finish and extra zing. |
Step-by-Step Instructions
Follow these detailed steps for a foolproof, stunning no-bake lemon cheesecake.
Step 1: Prepare the Springform Pan
Lightly grease the bottom and sides of an 8-inch (20 cm) springform pan. For ultimate ease of removal, you can line the bottom with a round of parchment paper. Set aside.
Step 2: Make the Shortbread Crust
Place the shortbread biscuits in a food processor and pulse until you have fine, even crumbs. If you don’t have a processor, place them in a sturdy zip-top bag and crush with a rolling pin. In a microwave-safe bowl or small saucepan, melt the butter until just liquid. Pour the melted butter over the biscuit crumbs and pulse or mix until all the crumbs are evenly coated and resemble wet sand.
Pour the mixture into your prepared pan. Using the bottom of a glass or a flat measuring cup, press the crumbs firmly and evenly into the bottom of the pan. Make sure to press up the sides slightly to create a small lip, which helps contain the filling. Place the crust in the refrigerator to set while you make the filling.
Step 3: Create the Lemon Cheesecake Filling
In the bowl of a stand mixer fitted with the whisk attachment (or a large bowl using a hand mixer), add the softened cream cheese. Beat on medium speed for about 1 minute until completely smooth and pliable, scraping down the sides as needed. Add the sifted powdered sugar and whisk on medium until fully incorporated and smooth, about 2 minutes.
With the mixer running on medium-low, slowly pour in the 10 oz (300 ml) of cold double cream. Increase the speed to medium-high and whisk until the mixture thickens noticeably and leaves a trail on the surface, about 3-4 minutes. It should be the consistency of very thick cake batter.
Now, with the mixer on low, gradually add the fresh lemon juice. Once added, increase the speed to medium and whisk until the filling is very thick and holds stiff peaks. This is crucial for structure. Be careful not to over-whip, as it can become grainy. Stop and check frequently, folding with a spatula to ensure even consistency. The mixture should be thick enough that you can dollop it and the dollop holds its shape.
Step 4: Assemble and Chill
Retrieve the chilled crust from the fridge. Spoon the thick lemon filling onto the crust. Using an offset spatula or the back of a spoon, spread it into an even layer, smoothing the top. Gently tap the pan on the counter a few times to release any air bubbles.
Cover the pan loosely with plastic wrap or foil and refrigerate for at least 5-6 hours, but ideally overnight (8-12 hours). This long, slow chill is non-negotiable for the perfect sliceable texture.
Step 5: Add the Topping and Garnish
About 1-2 hours before serving, prepare the whipped cream topping. In a clean, chilled bowl, whisk the remaining 5 oz (150 ml) of cold double cream with the 2 tablespoons of powdered sugar until it forms medium-stiff peaks. Be careful not to over-whip into butter.
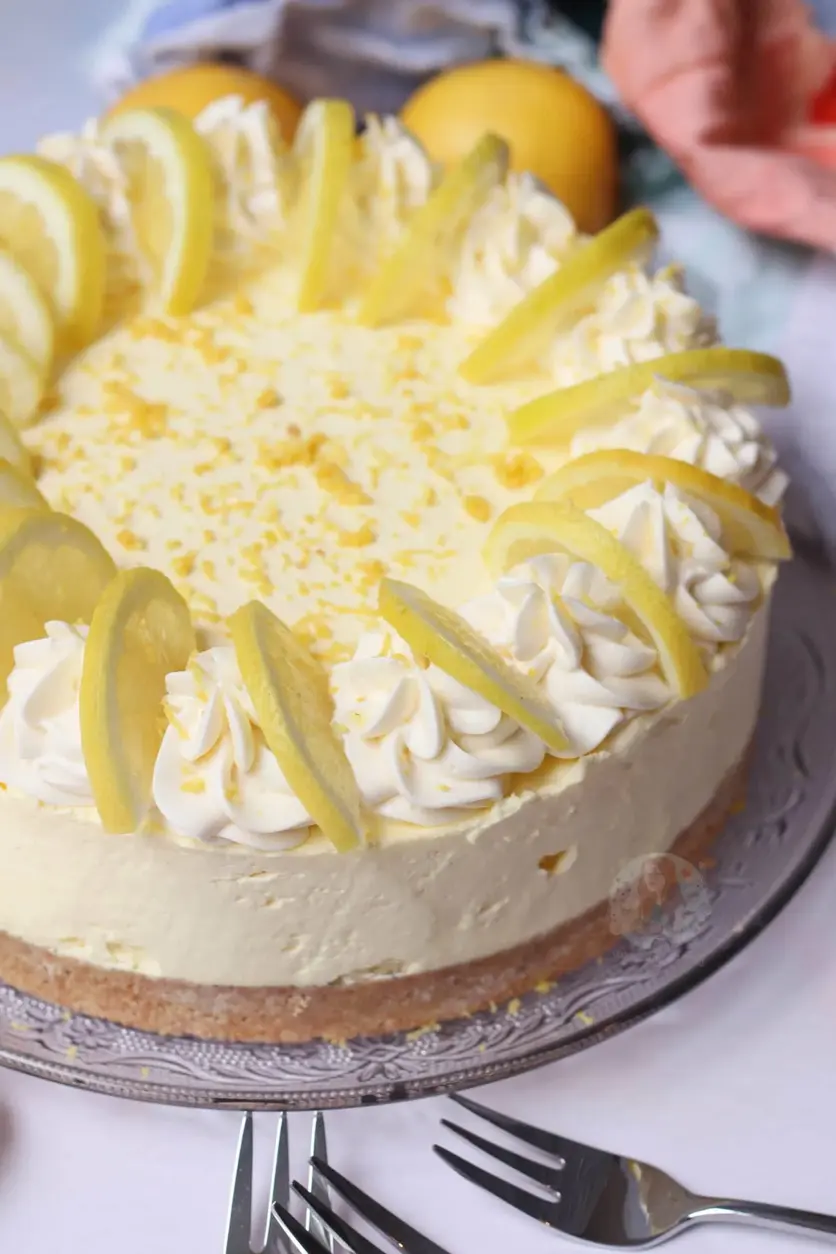
Remove the set cheesecake from the fridge. Carefully run a thin knife around the inner edge of the pan to loosen it, then release the springform clasp. Pipe or dollop the whipped cream onto the cheesecake. Garnish with thin lemon slices and a generous sprinkling of fresh lemon zest.
Serving Suggestions
This no-bake lemon cheesecake is a star on its own, but a few accompaniments can elevate it to a restaurant-quality dessert. For a beautiful presentation, use a sharp, thin-bladed knife dipped in hot water and wiped dry between each slice. This ensures clean, professional-looking pieces.
Consider serving with a drizzle of vibrant raspberry or blueberry coulis, a scattering of fresh berries (raspberries, blueberries, or strawberries), or a few sprigs of mint. For a textural contrast, a sprinkle of crushed toasted almonds or a delicate shortbread cookie on the side is divine. A glass of Moscato d’Asti or a crisp iced tea makes for the perfect pairing.
Storage & Make-Ahead Tips
This cheesecake is a dream for planning ahead. Once assembled and chilled (without the fresh whipped cream topping), it can be tightly wrapped and stored in the refrigerator for up to 3 days. Add the whipped cream and garnish the day you plan to serve it.
For longer storage, you can freeze the plain, set cheesecake (without topping) for up to 1 month. Wrap it tightly in several layers of plastic wrap and then aluminum foil. Thaw overnight in the refrigerator before garnishing and serving. Note that the texture may be slightly denser after freezing, but it will still be delicious.
Leftover slices should be stored in an airtight container in the fridge and are best enjoyed within 2 days, as the whipped cream topping may begin to soften.
Delicious Recipe Variations
The beauty of this base recipe is its versatility. Here are a few ways to customize your no-bake lemon cheesecake:
- Lemon Blueberry: Fold 1 cup of fresh or frozen (and thawed/drained) blueberries into the filling before pouring it onto the crust. Swirl in a few tablespoons of blueberry jam for a marbled effect.
- Lemon Curd Swirl: After spreading the filling, dollop ½ cup of high-quality lemon curd on top and use a knife or skewer to create beautiful swirls.
- Ginger-Lemon: Use gingersnap cookies for the crust and add 1 tablespoon of finely minced crystallized ginger to the filling.
- Meyer Lemon: Substitute Meyer lemon juice for a sweeter, less acidic, and incredibly fragrant twist.
- Mini Cheesecakes: Press the crust mixture into the bottoms of a lined muffin tin. Pipe or spoon the filling on top. Chill as directed. Perfect for parties!
Frequently Asked Questions (FAQ)
Can I use bottled lemon juice?
We strongly advise against it. Bottled lemon juice lacks the bright, fresh flavor of real lemons and often contains preservatives that can affect the taste and setting ability of your filling. Freshly squeezed juice is key to this recipe’s vibrant character.
My filling is too runny. What went wrong?
The most common causes are: 1) The cream cheese wasn’t full-fat, 2) The double cream wasn’t cold enough when whipped, or 3) The mixture wasn’t whipped to a sufficiently thick, stiff-peak consistency before chilling. Ensure you follow the ingredient specifications and whipping times closely.
Can I make this gluten-free?
Absolutely! Simply use your favorite gluten-free shortbread or biscuit for the crust. Ensure all other ingredients are certified gluten-free.
Do I really need to chill it overnight?
While a minimum of 5-6 hours will set the cheesecake, an overnight chill (8-12 hours) is highly recommended. It allows the flavors to fully meld and the texture to become perfectly firm, resulting in the cleanest slices.
Can I use a different type of pan?
A springform pan is essential for easy removal. A regular cake pan will make it nearly impossible to get the cheesecake out in one beautiful piece. If you don’t have one, consider making individual servings in glasses or jars.
Why is my crust soggy?
A soggy crust usually means the butter wasn’t fully incorporated with the crumbs, or the filling was added before the crust had a chance to set in the fridge. Always chill the crust for 15-20 minutes before adding the filling.
Can I add gelatin to make it set faster?
You can, but it’s not necessary if you follow the recipe. If you’re in a hurry, you can soften 1 teaspoon of unflavored powdered gelatin in 2 tablespoons of cold water, then melt it and mix it into the lemon juice before adding it to the filling. This will reduce the set time to about 3-4 hours.
How do I prevent cracks?
Cracks are far less common in no-bake cheesecakes than baked ones. The main cause here would be over-whipping the filling, which incorporates too much air that then deflates and cracks during chilling. Whisk until just thick and stiff, not beyond.
PIN THIS NO-BAKE LEMON CHEESECAKE FOR LATER!
Follow CookingWithEmy on Pinterest for more easy, show-stopping dessert ideas!
Click the ‘Pin’ button on the image below to save this recipe to your dessert board.
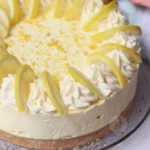
No-Bake Lemon Cheesecake!
Description
A delicious, sweet and easy no-bake lemon cheesecake! Part of my back-to-basics series!
Ingredients
Scale
- 300 g shortbread biscuits
- 100 g unsalted butter
- 600 g full-fat cream cheese
- 100 g icing sugar
- 300 ml double cream
- 75 ml lemon juice ((about 3 lemons))
- 150 ml double cream
- 2 tbsp icing sugar
- Lemon slices
- Lemon zest
Instructions
- Blitz your shortbread biscuits to a fine crumb. Melt your unsalted butter carefully, and then add into your biscuits.
- Blitz the biscuits again to combine, and add to the bottom of your 8″/20cm deep springform tin.
- Add your cream cheese to a stand mixer bowl, or a large bowl. Add in your icing sugar, and whisk until smooth using the whisk attachment on the stand mixer, or using the whisks on your electric hand whisk.
- Pour in your double cream, and whisk. As the mixture is starting to thicken, add in your lemon juice (and yellow food colouring if using), and whisk again.
- Continue to whisk until very thick. Be careful to check the mixture frequently to see how thick it is, and fold through with a spatula to make it all even.
- Once whisked, spread over the biscuit base, and then leave to set in the fridge fully for at least 5-6 hours, or preferably over night for longer.
- Whisk together your double cream and icing sugar until pipeable. Pipe onto your cheesecake with your favourite tip.
- Add a bit of lemon per slice, and sprinkle over some lemon zest.
