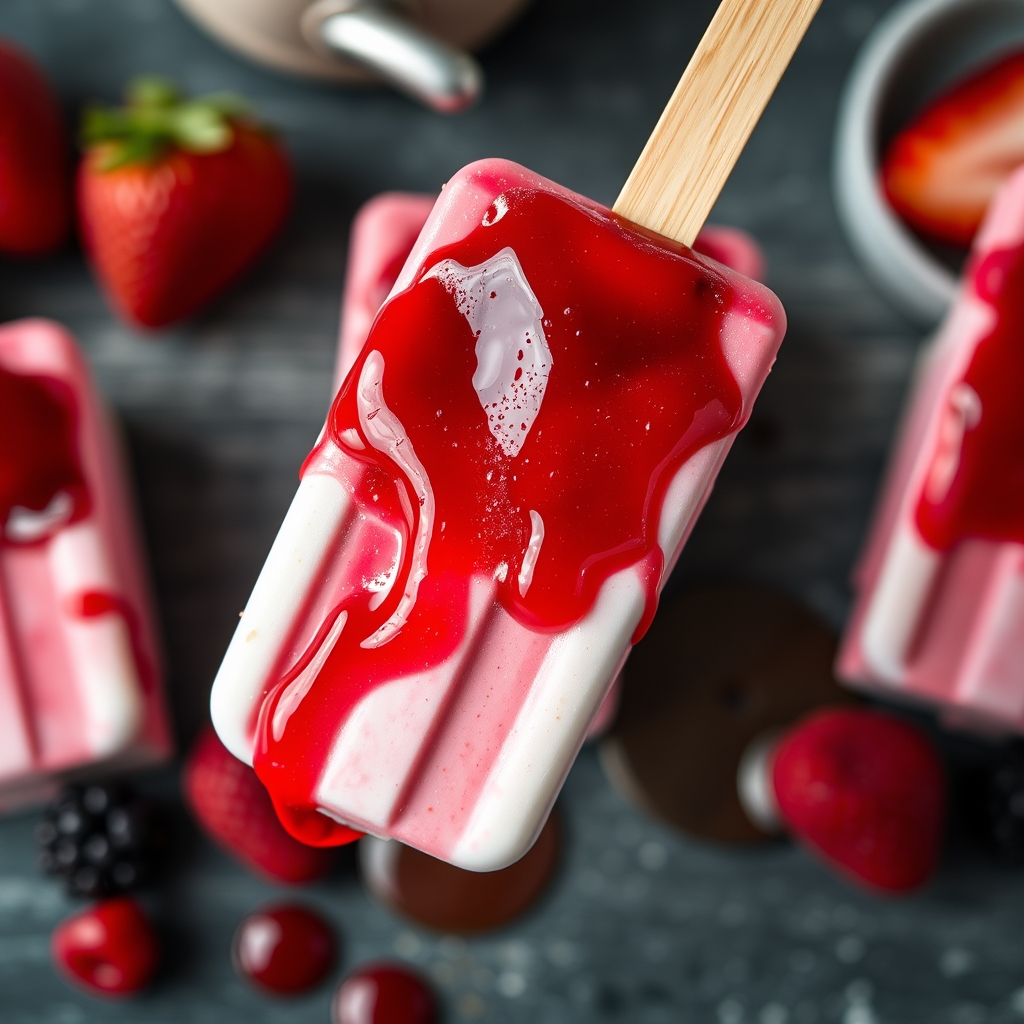
No Flour! Berry Yogurt Popsicles
There’s something undeniably magical about homemade popsicles—especially when they’re as simple, wholesome, and delicious as these No Flour Berry Yogurt Popsicles. Whether you’re looking for a refreshing summer treat, a healthy snack for the kids, or a guilt-free dessert, these popsicles deliver on all fronts. Made with just a handful of natural ingredients and absolutely no flour, they’re creamy, fruity, and packed with goodness. Let’s dive into why this recipe is a must-try and how you can make it your own.
Why You’ll Love This Recipe
First things first—why should you make these No Flour Berry Yogurt Popsicles? Here are just a few reasons:
- Naturally gluten-free and flourless: Perfect for those avoiding flour or gluten, these popsicles rely on yogurt and fresh berries for their texture and flavor.
- Packed with protein and probiotics: Yogurt adds a creamy richness while providing gut-friendly probiotics and a protein boost.
- Customizable to your taste: Swap berries, adjust sweetness, or even add a swirl of honey—this recipe is endlessly adaptable.
- Kid-approved and adult-friendly: These popsicles strike the perfect balance between healthy and indulgent, making them a hit with all ages.
- No fancy equipment needed: All you need are popsicle molds and a blender—no baking, no cooking, just pure frozen goodness.
Ingredients Breakdown
Let’s take a closer look at the simple yet powerful ingredients that make these popsicles shine:
- Greek yogurt: Thick, creamy, and packed with protein, Greek yogurt forms the base of these popsicles. Opt for full-fat for the richest texture, or use low-fat if you prefer.
- Mixed berries: Strawberries, blueberries, raspberries—any combination works. They bring natural sweetness, vibrant color, and a dose of antioxidants.
- Honey or maple syrup: A touch of natural sweetness enhances the berries and balances the yogurt’s tang. Adjust to taste.
- Vanilla extract: A splash of vanilla adds warmth and depth, elevating the overall flavor.
- Lemon juice: A squeeze brightens the berries and keeps the flavors fresh.
How to Make No Flour! Berry Yogurt Popsicles
Ready to whip up these easy, flourless popsicles? Follow these simple steps:
- Blend the berries: In a blender, combine the mixed berries, honey or maple syrup, and lemon juice. Blend until smooth. For a chunkier texture, pulse lightly.
- Mix the yogurt base: In a separate bowl, whisk together the Greek yogurt and vanilla extract until smooth and creamy.
- Layer or swirl: Now comes the fun part—you can either layer the berry puree and yogurt mixture in popsicle molds for a striped effect or gently swirl them together for a marbled look.
- Freeze: Insert popsicle sticks and freeze for at least 4-6 hours, or overnight for best results.
- Unmold and enjoy: To release the popsicles easily, run the molds under warm water for a few seconds before gently pulling them out.
Pro Tips for the Best Results
Want to take your No Flour Berry Yogurt Popsicles to the next level? Try these expert tips:
- Strain the berry puree: If you prefer a smoother texture without seeds, strain the blended berries through a fine-mesh sieve before layering.
- Use silicone molds: Silicone popsicle molds make unmolding a breeze and prevent sticking.
- Add texture: For a fun crunch, sprinkle a few chia seeds or granola between layers before freezing.
- Control sweetness: Taste the berry mixture before freezing—some berries are sweeter than others, so adjust the honey accordingly.
Variations and Substitutions
This recipe is wonderfully flexible. Here are some delicious twists to try:
- Dairy-free option: Swap Greek yogurt for coconut yogurt or almond milk yogurt for a vegan-friendly version.
- Different fruits: Mango, peach, or even kiwi can replace berries for a tropical spin.
- Protein boost: Stir in a scoop of vanilla protein powder into the yogurt layer for an extra nutrient kick.
- Chocolate drizzle: Melt dark chocolate and drizzle over frozen popsicles for a decadent finish.
What to Serve With It
While these popsicles are fantastic on their own, here are a few pairing ideas:
- Serve alongside a fresh fruit salad for a light and colorful dessert spread.
- Pair with a crisp glass of sparkling water or iced herbal tea for a refreshing summer combo.
- For a brunch treat, offer them alongside pancakes or waffles as a fun, cooling side.
How to Store and Reheat
Since these are frozen treats, storage is straightforward:
- Freezing: Keep popsicles in their molds or transfer to an airtight container once fully frozen. They’ll stay fresh for up to 2 months.
- Serving: No reheating needed! Simply let them sit at room temperature for a minute or two if they’re too hard to bite into.
Frequently Asked Questions (FAQs)
Here are answers to some common questions about No Flour Berry Yogurt Popsicles:
Can I use frozen berries instead of fresh? Absolutely! Frozen berries work just as well—just thaw them slightly before blending.
Why did my popsicles turn icy instead of creamy? This can happen if the yogurt layer is too thin or if the popsicles aren’t eaten quickly enough. Using full-fat yogurt helps maintain creaminess.
Can I make these without a blender? Yes! Simply mash the berries with a fork and mix with the other ingredients for a chunkier texture.
How do I prevent the layers from mixing? Freeze each layer for about 30 minutes before adding the next to keep them distinct.
Final Thoughts
There you have it—a simple, wholesome, and utterly delicious recipe for No Flour Berry Yogurt Popsicles that’s as fun to make as it is to eat. Whether you’re cooling off on a hot day or looking for a healthier dessert option, these popsicles are sure to become a staple in your kitchen. The best part? They’re so easy to customize that you can make a new flavor every time. So grab your blender, pick your favorite berries, and get ready to enjoy a frosty, fruity treat that’s as good for you as it tastes.
PrintNo Flour! Berry Yogurt Popsicles
Description
These refreshing berry yogurt popsicles are made without any flour, perfect for a healthy summer treat. They’re naturally sweetened and packed with protein from Greek yogurt.
Ingredients
For the Crust:
- For the berry layer:
- 2 cups mixed berries (strawberries, blueberries, raspberries)
- 2 tablespoons honey or maple syrup
- 1 tablespoon lemon juice
- For the yogurt layer:
- 1.5 cups plain Greek yogurt
- 2 tablespoons honey or maple syrup
- 1 teaspoon vanilla extract
Instructions
1. Prepare the Crust:
- 1. Blend all berry layer ingredients in a blender until smooth. Strain if desired for seedless popsicles.
- 2. In a separate bowl, whisk together yogurt layer ingredients until smooth.
- 3. Pour berry mixture into popsicle molds, filling each about 1/3 full. Freeze for 30 minutes.
- 4. Remove from freezer and add yogurt layer, filling another 1/3. Freeze for 30 minutes.
- 5. Add final berry layer. Insert popsicle sticks and freeze for at least 4 hours or overnight.
- 6. To unmold, run warm water briefly over the molds before pulling out popsicles.
Notes
Use dairy-free yogurt for vegan version. For creamier texture, blend 1/4 cup coconut milk into yogurt layer. Popsicles keep for 2 weeks in freezer.
