Table of Contents
The Best Teriyaki Chicken Rice Bowl: Your 30-Minute Flavor Escape
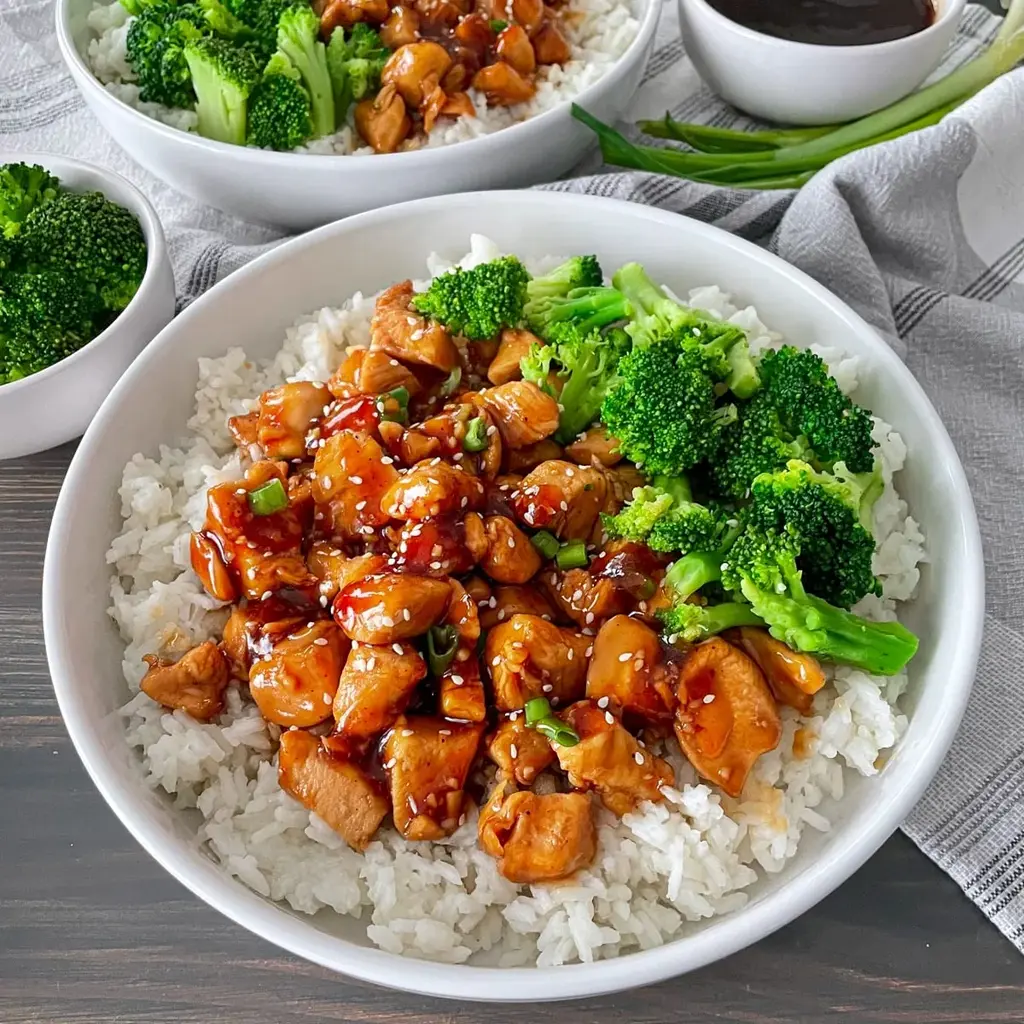
This restaurant-quality Teriyaki Chicken Rice Bowl brings bold, sweet, and savory flavors to your table in under 30 minutes. Featuring a quick homemade teriyaki sauce that’s far superior to any store-bought version.

| Prep Time | Cook Time | Total Time | Servings | Difficulty |
|---|---|---|---|---|
| 10 minutes | 20 minutes | 30 minutes | 4 people | Easy |
Why This Teriyaki Bowl is a Weeknight Hero
In the hustle of a busy week, the call for takeout can be strong. But what if you could create a meal that rivals your favorite restaurant’s teriyaki chicken, with ingredients you control, in the same amount of time it takes for delivery to arrive? This Teriyaki Chicken Rice Bowl is that solution. It’s more than just a recipe; it’s a reliable, fast, and deeply satisfying strategy for dinner. The magic lies in the homemade sauce—a perfect, glossy balance of sweet honey and brown sugar, savory soy, a touch of ginger and garlic, and the subtle complexity of rice vinegar. It clings to juicy pieces of chicken, creating a glaze that’s sticky, flavorful, and utterly irresistible. Served over a bed of fluffy rice with crisp-tender vegetables, it’s a complete, balanced meal that feels like a treat. We’ve perfected the ratios and method to ensure you get maximum flavor with minimal effort, making this the only teriyaki chicken recipe you’ll ever need for your weekly rotation.
Why This is The Best Teriyaki Chicken Rice Bowl
You might be wondering what sets this recipe apart from the dozens of others online. The answer is in the details and our tested approach to maximizing flavor in a short timeframe.
First, the sauce. Many recipes rely solely on brown sugar for sweetness, but we use a combination of brown sugar and honey. The honey adds a floral depth and helps create a shinier, more professional-looking glaze. The cornstarch is whisked in with the cold liquids, preventing any lumps and ensuring it thickens smoothly and evenly in the pan.
Second, the technique. We brown the chicken cubes first to develop fond—those delicious browned bits at the bottom of the pan. When the sauce is added, it deglazes the pan, incorporating all that caramelized flavor directly into the glaze. This is a chef’s trick that adds a layer of complexity you won’t get from simply simmering chicken in sauce.
Third, the balance. The addition of rice vinegar is non-negotiable. It cuts through the sweetness and richness with a bright, clean acidity, preventing the dish from becoming cloying. The optional sesame oil adds a final, nutty aroma that makes the dish smell incredible.
Ingredients & Substitutions
This recipe uses simple, accessible ingredients. Here’s what you’ll need and how you can adapt it based on what’s in your pantry.
| Ingredient | Quantity | Notes & Substitutions |
|---|---|---|
| Boneless, skinless chicken breasts | 4 (about 1.5-2 lbs) | Can use chicken thighs for more flavor and juiciness. Cut into uniform 1-inch cubes for even cooking. |
| Olive oil (or neutral oil) | 1 Tbsp | For browning. Avocado, vegetable, or canola oil also work perfectly. |
| Low-sodium soy sauce | 1/2 cup | Use low-sodium to control saltiness. Tamari is a great gluten-free alternative. Regular soy sauce can make the dish too salty. |
| Water | 1/2 cup | Helps create the right sauce consistency. |
| Packed light brown sugar | 3 Tbsp | Provides molasses-like sweetness and helps with glazing. Dark brown sugar can be used for a deeper flavor. |
| Rice vinegar | 2 Tbsp | Key for acidity. White wine vinegar or apple cider vinegar can be substituted in a pinch. |
| Toasted sesame oil (optional) | 1/2 tsp | Adds authentic, nutty aroma. Do not use for cooking; add only to the sauce mixture. |
| Ground ginger | 1 tsp | Convenient and potent. 1 Tbsp of freshly grated ginger can be used instead. |
| Minced garlic | 2 tsp | About 2 cloves. Fresh is best, but jarred minced garlic works in a time crunch. |
| Honey | 2 Tbsp | Adds shine and floral sweetness. Maple syrup or agave nectar can be used. |
| Cornstarch | 3 tsp | The thickening agent. Must be mixed with cold liquid first. Arrowroot powder is a 1:1 substitute. |
| For Serving/Garnish | Cooked rice (white, brown, or cauliflower), steamed vegetables (broccoli, snap peas, carrots), sesame seeds, chopped green onions. | |
Step-by-Step Instructions
Follow these simple steps for a foolproof, flavorful result every single time.
Step 1: Prep and Brown the Chicken
Start by cutting your chicken breasts into 1-inch cubes. Ensure they are similar in size so they cook at the same rate. Pat them thoroughly dry with paper towels—this is crucial for getting a good sear, not a steam. Heat 1 tablespoon of olive oil in a large skillet or wok over medium-high heat. Once the oil is shimmering, add the chicken in a single layer, working in batches if necessary to avoid overcrowding. Let the chicken cook undisturbed for 2-3 minutes to develop a golden-brown crust, then toss and continue cooking for another 4-5 minutes until cooked through and no longer pink in the center. Transfer to a plate if cooking in batches.
Step 2: Whisk the Homemade Teriyaki Sauce
While the chicken cooks, this is your sauce-making window. In a medium bowl, add the cold water and cornstarch. Whisk them together until the cornstarch is completely dissolved and no lumps remain. This “slurry” is your thickener. To the same bowl, add the low-sodium soy sauce, honey, packed light brown sugar, rice vinegar, sesame oil (if using), ground ginger, and minced garlic. Whisk everything vigorously until the honey and brown sugar are fully incorporated and the mixture is smooth.
Step 3: Combine and Thicken
Once all the chicken is browned and removed from the skillet, reduce the heat to medium. Give your sauce mixture one final whisk (the cornstarch can settle) and pour it into the hot skillet. It will bubble immediately. Use a wooden spoon or spatula to scrape up any browned bits (fond) from the bottom of the pan—this is pure flavor. Let the sauce simmer for 1-2 minutes, stirring constantly. You will see it begin to thicken and turn glossy.
Step 4: Glaze the Chicken
Return all the cooked chicken (and any accumulated juices) to the skillet with the thickening sauce. Stir constantly to coat every piece evenly. Continue to cook for another 2-3 minutes, stirring frequently, until the sauce has thickened to a rich, syrupy glaze that coats the back of a spoon and clings to the chicken.
Step 5: Serve Immediately
Remove the skillet from the heat. Your teriyaki chicken is now ready. Serve it immediately over hot, fluffy rice with your choice of steamed vegetables. Garnish generously with a sprinkle of white sesame seeds and finely sliced green onions for color, freshness, and a final flavor boost.
Serving Suggestions & Presentation
Presentation turns a great meal into a memorable one. Here’s how to plate your teriyaki bowl like a pro:
The Base: Fluffy white or brown rice is classic. For a lower-carb option, try cauliflower rice or quinoa. Place your base in a wide, shallow bowl.
The Main Event: Spoon a generous amount of the glazed teriyaki chicken directly over the rice, allowing some sauce to drizzle down the sides.
The Vegetables: Don’t just steam them—sauté them! Quickly stir-fry broccoli florets, snap peas, and sliced bell peppers in the same pan (after removing the chicken) with a tiny bit of oil and a splash of the teriyaki sauce for extra flavor. Arrange them colorfully around the chicken.
The Garnish: This is non-negotiable. A heavy sprinkle of toasted sesame seeds and a vibrant mound of chopped green onions add texture, color, and flavor. A final, very light drizzle of extra sesame oil over the top adds an incredible aroma.
Storage & Reheating Instructions
| Method | Duration | Reheating Instructions |
|---|---|---|
| Refrigeration | 3-4 days | Store chicken and sauce in an airtight container separate from rice for best results. Reheat gently in a skillet over medium-low heat with a splash of water to loosen the sauce. Microwave in 30-second intervals, stirring between. |
| Freezing | Up to 3 months | Freeze cooled chicken and sauce in a freezer-safe bag or container. Thaw overnight in fridge. Reheat in a skillet, adding a little water or broth as the sauce may separate slightly when frozen. |
💡 The Kitchen Team’s Pro Tip: The cornstarch-thickened sauce can become very thick when refrigerated. When reheating, always add a tablespoon or two of water or chicken broth to bring it back to its perfect, glossy consistency.
Creative Recipe Variations
This recipe is a fantastic template. Feel free to get creative and make it your own!
- Spicy Teriyaki: Add 1-2 teaspoons of sriracha or a few pinches of red pepper flakes to the sauce mixture.
- Pineapple Teriyaki: Add 1 cup of fresh or canned pineapple chunks to the skillet when you add the sauce. The natural sugars will caramelize beautifully.
- Teriyaki Salmon or Shrimp Bowl: Substitute the chicken with salmon fillets (cook skin-side down first) or large shrimp. Cook time will be reduced to 2-3 minutes per side for shrimp.
- Vegetarian Teriyaki Tofu Bowl: Use extra-firm tofu, pressed and cubed. Toss in 1 Tbsp cornstarch and pan-fry until crispy before adding the sauce.
- Honey Garlic Twist: Double the honey and garlic, and reduce the brown sugar to 1 tablespoon for a more forward honey-garlic flavor profile.
Frequently Asked Questions
Absolutely! You can whisk the sauce (without cooking it) and store it in an airtight container in the refrigerator for up to 5 days. Shake or whisk well before using. You can also simmer and thicken it ahead, then reheat with the chicken.
The most common culprit is not bringing the sauce to a proper simmer after adding the cornstarch slurry. Cornstarch requires a brief period of boiling to activate its thickening power. Ensure your sauce is bubbling gently for at least 60-90 seconds while stirring. Also, confirm your cornstarch is fresh and was fully dissolved in cold water first.
It easily can be! Simply ensure you use gluten-free tamari instead of soy sauce, and double-check that your other ingredients (like rice vinegar) are certified gluten-free. All other ingredients are naturally gluten-free.
You must thaw it completely first. Cubing and cooking frozen chicken will release too much water, preventing browning and resulting in a boiled, rubbery texture. Thaw in the refrigerator overnight for best results.
Short-grain white rice or jasmine rice are our top choices for their sticky, fluffy texture that holds the sauce well. Brown rice is a great whole-grain alternative but will require a longer cooking time (plan accordingly).
Yes, but the flavor profile will be different. Toss cubed chicken in 1 Tbsp oil, spread on a parchment-lined baking sheet, and bake at 400°F for 15-20 minutes until cooked. Meanwhile, make the sauce in a saucepan on the stovetop until thickened, then toss with the baked chicken.
Too Sweet: Reduce the brown sugar to 2 Tbsp next time. Too Salty: You likely used regular soy sauce instead of low-sodium. To fix a finished dish that’s too salty, add a squeeze of fresh lime juice and serve with extra plain rice and vegetables to balance it out.
Reduce the ginger to 1/2 tsp and the garlic to 1 tsp. You can also blend the sauce after mixing (before cooking) for a completely smooth texture if they are picky about “bits.” Serve with their favorite veggie, like corn or carrots.
Love This Recipe? Save It for Later!
Pin this image to your Quick Dinner Ideas or Asian Recipes board on Pinterest to always have this 30-minute teriyaki chicken recipe handy!
Follow us on Pinterest @cookingwithemy for more easy, flavor-packed recipes!
Teriyaki Chicken Rice Bowl
Description
If you love quick, easy, and delicious dinner recipes for your busy week nights, then look no further!! This Teriyaki Chicken Rice Bowl is easy to make and will be ready in less than 30 minutes.
Ingredients
Scale
- 4 boneless skinless chicken breasts, cubed
- 1 Tbsp. olive oil
- 1/2 cup low sodium soy sauce
- 1/2 cup water
- 3 Tbsp. packed light brown sugar
- 2 Tbsp. rice vinegar
- 1/2 tsp. sesame oil (optional)
- 1 tsp. ground ginger
- 2 tsp. minced garlic
- 2 Tbsp. honey
- 3 tsp. cornstarch
- sesame seeds and chopped green onions for garnish
- rice for serving
- steamed veggies for serving
Instructions
- Heat oil in a large skillet on medium high heat.
- Add cubed chicken and brown chicken until cooked through and it is no longer pink.
- While Chicken is browning, prepare your teriyaki sauce! In a medium size mixing bowl whisk together soy sauce, water, honey, brown sugar, rice vinegar, sesame oil, ginger, garlic, and cornstarch.
- Once Chicken is browned and cooked through, add your homemade teriyaki sauce to your skillet and continue to cook stirring until the sauce has thickened.
- Serve immediately with white or brown rice and vegetables of your choice. Garnish with sesame seeds and green onion
