“`html
Table of Contents
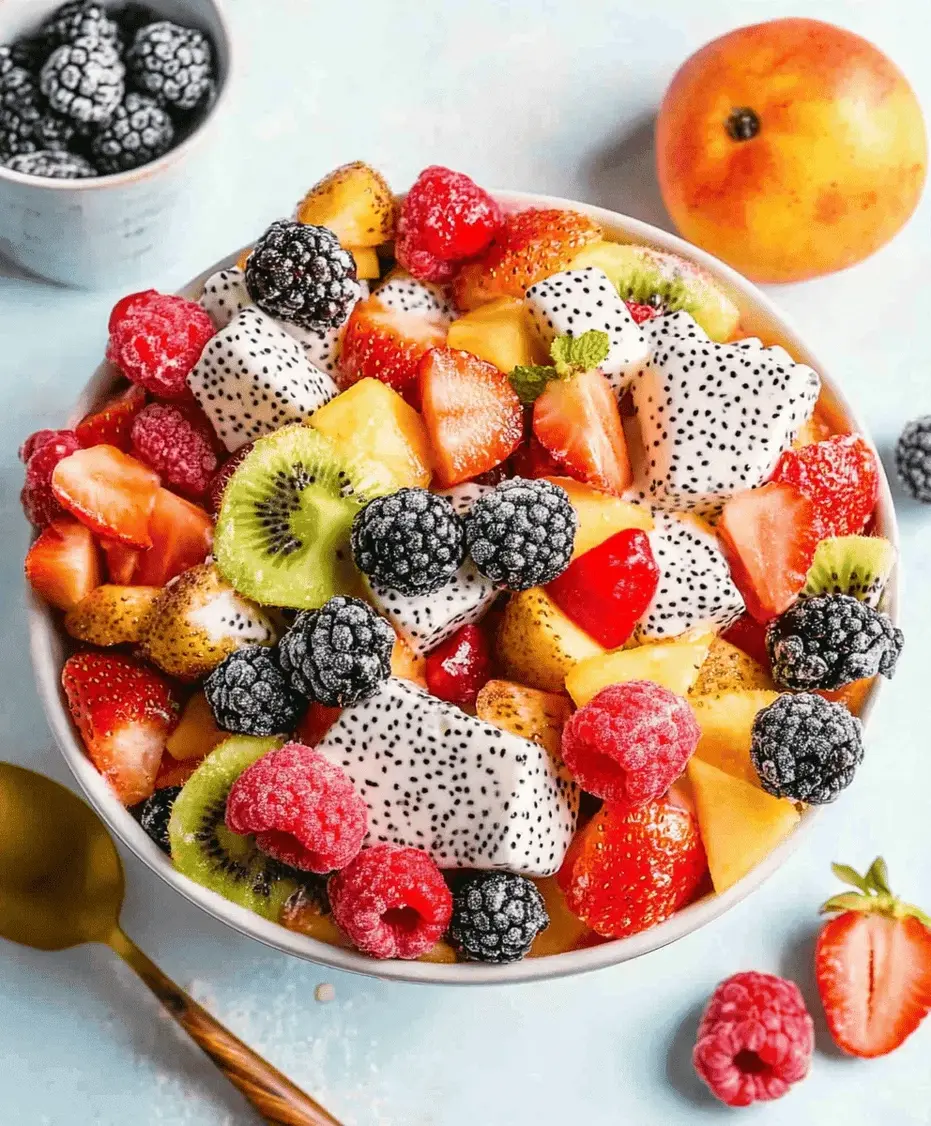
Perfect Summer Fruit Salad Recipe
Beat the Heat with the Ultimate Summer Fruit Salad
As the temperatures soar, are you looking for a refreshing and healthy way to cool down? With an average of 90 days of summer, it’s the perfect time to embrace the season’s bounty. This perfect summer fruit salad recipe is your answer! It’s a vibrant medley of nature’s sweetest gifts, artfully combined with a zesty, light dressing. Whether you’re planning a laid-back picnic, a lively backyard BBQ, or simply need a nutritious pick-me-up, this salad delivers an explosion of natural sweetness and bright flavors. It’s incredibly simple to prepare, stunning to behold, and guaranteed to be a hit with everyone!
Ingredients to Ignite Your Senses
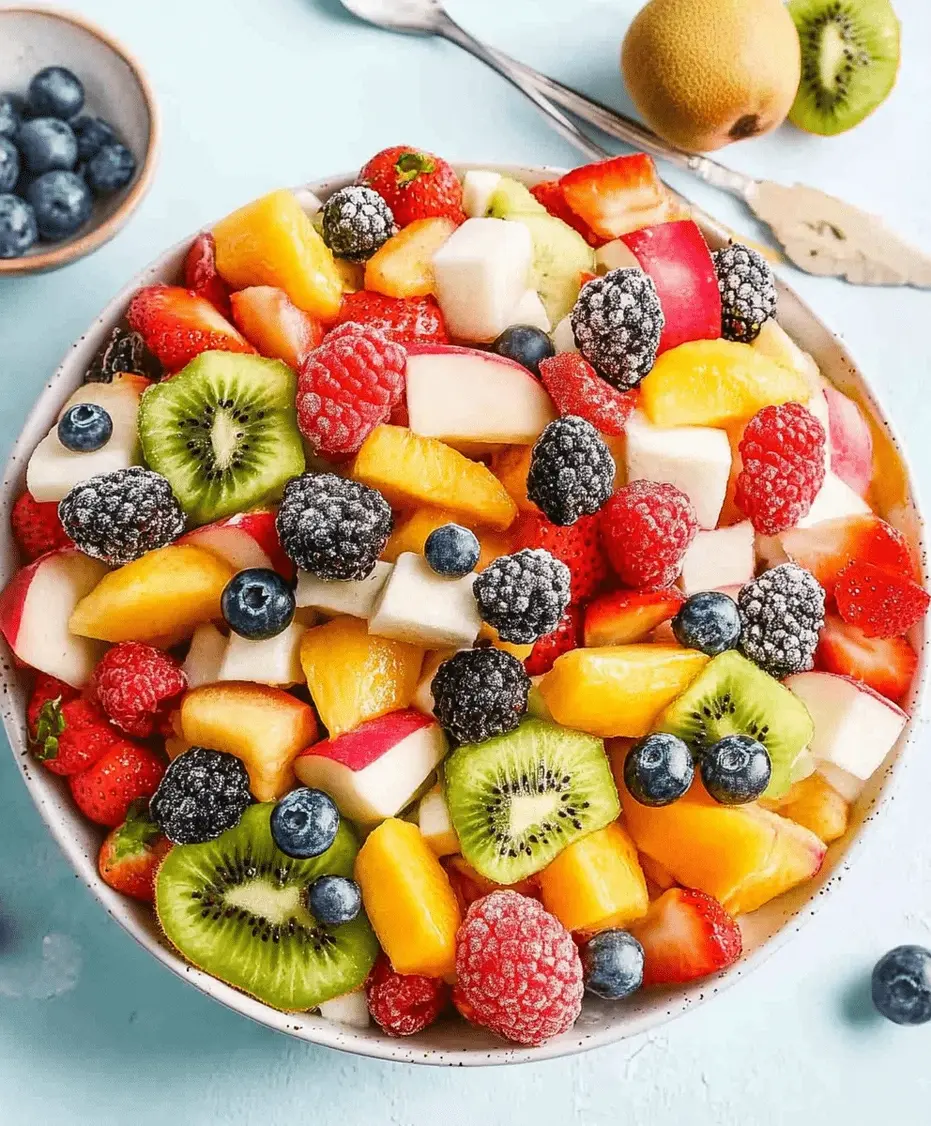
The beauty of a summer fruit salad lies in its adaptability. We’ve curated a selection of fruits that truly sing in the sunshine, but feel free to adjust based on what looks best at your local market. Each component adds a unique texture and flavor profile:
- 1 cup Strawberries: Ripe, ruby-red gems, offering a classic sweetness with a slightly tart finish. Quartered for easy eating.
- 1 cup Blueberries: Tiny bursts of deep blue, providing an antioxidant punch and a subtle, sweet juice.
- 1 cup Raspberries: Delicate and tangy, their soft texture melts in your mouth, adding a sophisticated berry note.
- 1 cup Blackberries: Plump and dark, they bring a richer, slightly earthier sweetness compared to their raspberry cousins.
- 1 cup Seedless Grapes (red or green): Crisp and juicy, offering a refreshing pop and a familiar, satisfying sweetness. Halved for better bite.
- 1 cup Cantaloupe: Sweet, fragrant, and juicy, its vibrant orange flesh adds a tropical aroma and a soft, yielding texture. Cubed into bite-sized pieces.
- 1 cup Honeydew Melon: Lightly sweet with a subtle floral note and a smooth, refreshing texture. Cubed.
- 1 cup Pineapple: Tangy and tropical, its bright acidity cuts through the sweetness of other fruits, adding a delightful chewiness. Cubed.
- For the Citrus-Honey Dressing:
- 1/4 cup Fresh Orange Juice: The bright, sunny base of our dressing, lending a natural sweetness and a touch of acidity.
- 2 tablespoons Fresh Lime Juice: A sharp, zesty counterpoint that awakens the palate and enhances the fruit flavors.
- 1 tablespoon Honey (or Maple Syrup): For a touch of golden sweetness that harmonizes the citrus notes. Adjust to your taste.
- 1 teaspoon Fresh Mint, finely chopped: An optional but highly recommended addition for a cool, aromatic finish that elevates the entire salad.
Effortless Preparation: Timing is Everything
This recipe is designed for maximum flavor with minimal effort. While the average fruit salad might take about 20-25 minutes to prepare, we’ve optimized this one to be even quicker, truly embodying summer ease.
15 minutes
0 minutes
15 minutes
6-8
Crafting Your Culinary Masterpiece
Step 1: Prep Your Fruit
Begin by giving all your fruits a gentle rinse under cool water. Pat them dry with a clean kitchen towel or paper towels. This is crucial to prevent a watery salad. Hull the strawberries and slice them into quarters. If your grapes are large, slice them in half; this makes them easier to eat and releases a bit of their juice. Cube your melons and pineapple into bite-sized pieces, ensuring they are roughly the same size for uniform presentation and texture. Gently add all the prepared fruits to a large mixing bowl.
Step 2: Whisk the Dressing
In a small bowl or a jar with a lid, combine the fresh orange juice, lime juice, and honey (or maple syrup). Whisk vigorously until the honey is completely dissolved into the citrus juices, creating a smooth, emulsified dressing. If you’re using fresh mint, finely chop the leaves and stir them into the dressing. The mint adds an incredibly refreshing aromatic quality that complements the fruits beautifully. Taste the dressing and adjust sweetness or tartness as needed. If you prefer a sweeter salad, add a touch more honey. For more zing, a squeeze of lime can be added.
Step 3: Combine and Chill
Pour the prepared citrus-honey dressing evenly over the fruits in the large mixing bowl. Gently toss everything together, using a large spoon or spatula, ensuring all the fruit pieces are lightly coated with the dressing. Be careful not to overmix, especially with delicate berries like raspberries, to avoid mashing them. Once tossed, cover the bowl and refrigerate for at least 15-30 minutes. This chilling time allows the flavors to meld together, and the fruits to absorb the delightful dressing, making the salad even more refreshing.
Nutritional Snapshot
This vibrant fruit salad is a powerhouse of vitamins, minerals, and fiber. While exact figures vary based on specific fruit choices and quantities, a typical serving offers:
- Calories: Approximately 100-150 kcal per serving.
- Vitamins: Rich in Vitamin C (from citrus and berries), Vitamin A (from cantaloupe), and various B vitamins.
- Minerals: Provides potassium (from melon), manganese, and other essential minerals.
- Fiber: Excellent source of dietary fiber, promoting digestive health.
- Antioxidants: Packed with anthocyanins (berries) and other phytonutrients that combat free radicals.
Embrace Healthier Choices
Looking to make this even healthier without sacrificing flavor? Here are a few simple swaps:
- Sweetener: Instead of honey, opt for pure maple syrup or a sugar-free liquid sweetener if you’re managing sugar intake. A splash of fruit juice can also add natural sweetness.
- Citrus Juices: Stick to freshly squeezed juices for maximum vitamin content and natural flavor. Avoid bottled juices which can contain added sugars.
- Fruit Choices: Prioritize berries and lower-sugar fruits like kiwi or grapefruit if you’re watching sugar levels.
- Additions: For added protein and healthy fats, consider serving a scoop of fresh yogurt or a sprinkle of nuts and seeds alongside the salad.
Serving Suggestions: Elevate Your Experience
This versatile fruit salad is a star on its own, but it also pairs beautifully with a variety of dishes. Serve it as a refreshing side dish at BBQs, alongside grilled chicken or fish. It’s an elegant dessert, perhaps topped with a dollop of Greek yogurt or a sprig of mint. For breakfast or brunch, it’s a fantastic accompaniment to pancakes, waffles, or a simple croissant.
Avoid These Common Pitfalls
To ensure your fruit salad is always perfect, steer clear of these common mistakes:
- Using unripe or overripe fruit: Always select fruits that are firm, fragrant, and in season for the best flavor and texture.
- Over-washing delicate berries: Rinse berries gently and briefly. Excess water can make them mushy.
- Too much dressing: The dressing should enhance, not overpower, the natural flavors of the fruit. Start with less and add more if needed.
- Not chilling the salad: Allowing the salad to chill lets the flavors meld, creating a more cohesive and refreshing taste.
- Using a metal bowl for acidic fruits: While not a major issue for a short period, prolonged contact with acidic fruits and metal can sometimes impart a slight metallic taste. Glass or ceramic bowls are ideal.
Storing Your Summer Bounty
Proper storage is key to maintaining freshness. Store the fruit salad in an airtight container in the refrigerator. It’s best enjoyed within 2-3 days. Some fruits, like bananas or apples (if you choose to add them), can brown quickly. To mitigate this, you can toss them with a little extra lemon or lime juice before adding them to the salad. Berries tend to soften over time, so the salad’s texture will change slightly with each passing day.
Frequently Asked Questions
***Can I use frozen fruit?***
While fresh fruit is always preferred for texture, you can use frozen fruit in a pinch. Thaw it gently and drain off any excess liquid before mixing. Be aware that frozen fruit can become mushy once thawed.
***What fruits are best to avoid?***
Fruits that brown quickly and don’t hold up well to mixing, such as bananas or apples, unless treated with citrus juice. Also, fruits that release a lot of water, like watermelon, can make a salad soggy if not added just before serving.
***How do I make it more appealing for kids?***
Use cookie cutters to create fun shapes with melon slices. Offer a variety of colorful fruits. A small drizzle of chocolate sauce or a sprinkle of granola can also make it more enticing.
***Can I add protein to this salad?***
Absolutely! Consider adding a side of Greek yogurt, cottage cheese, or a handful of chopped nuts and seeds like almonds, walnuts, or chia seeds to boost protein and healthy fats.
***How long does the dressing last?***
The citrus-honey dressing, if made separately and stored in an airtight container in the refrigerator, will typically last for 4-5 days. However, it’s best to use it within 2-3 days for optimal freshness.
Ready to taste the essence of summer? Try this perfect summer fruit salad recipe today and bring a burst of sunshine to your table!

Perfect Summer Fruit Salad Recipe
Description
This perfect summer fruit salad recipe is a refreshing blend of vibrant seasonal fruits tossed in a light citrus-honey dressing. Ideal for picnics, BBQs, or a healthy snack, this dish bursts with natural sweetness and flavor. Simple to make, beautiful to serve, and always a crowd-pleaser!
Ingredients
- 1 cupstrawberries, hulled and halved
- 1 cupblueberries
- 1 cupgrapes, halved
- 2kiwis, peeled and sliced
- 1mango, diced
- 1 cuppineapple chunks
- 1orange, juiced
- 1 tbsphoney
- 1 tbspfresh mint, chopped (optional)
Instructions
Notes
Feel free to substitute or add your favorite seasonal fruits.
For a vegan version, replace honey with maple syrup or agave.
Best served fresh, but can be stored in the fridge for up to 2 days
Nutrition
- Calories: 120
- Sugar: 19g
“`