Table of Contents
Low Carb Almond Flour Banana Bread – Moist and Fudgy Gluten-Free Delight
I still remember the first time I made a low carb almond flour banana bread. It was a rainy Sunday in my tiny NYC apartment, and I was craving the cozy, nostalgic banana bread my mother used to bake in our kitchen in Morocco. But I needed it to be gluten-free and low in carbs—something that would fit my new lifestyle without sacrificing that moist, tender crumb. This recipe is the result of many happy experiments, blending my French pastry training with the rustic simplicity of North African home cooking. Let me share my version of a healthy banana bread that is truly unforgettable.
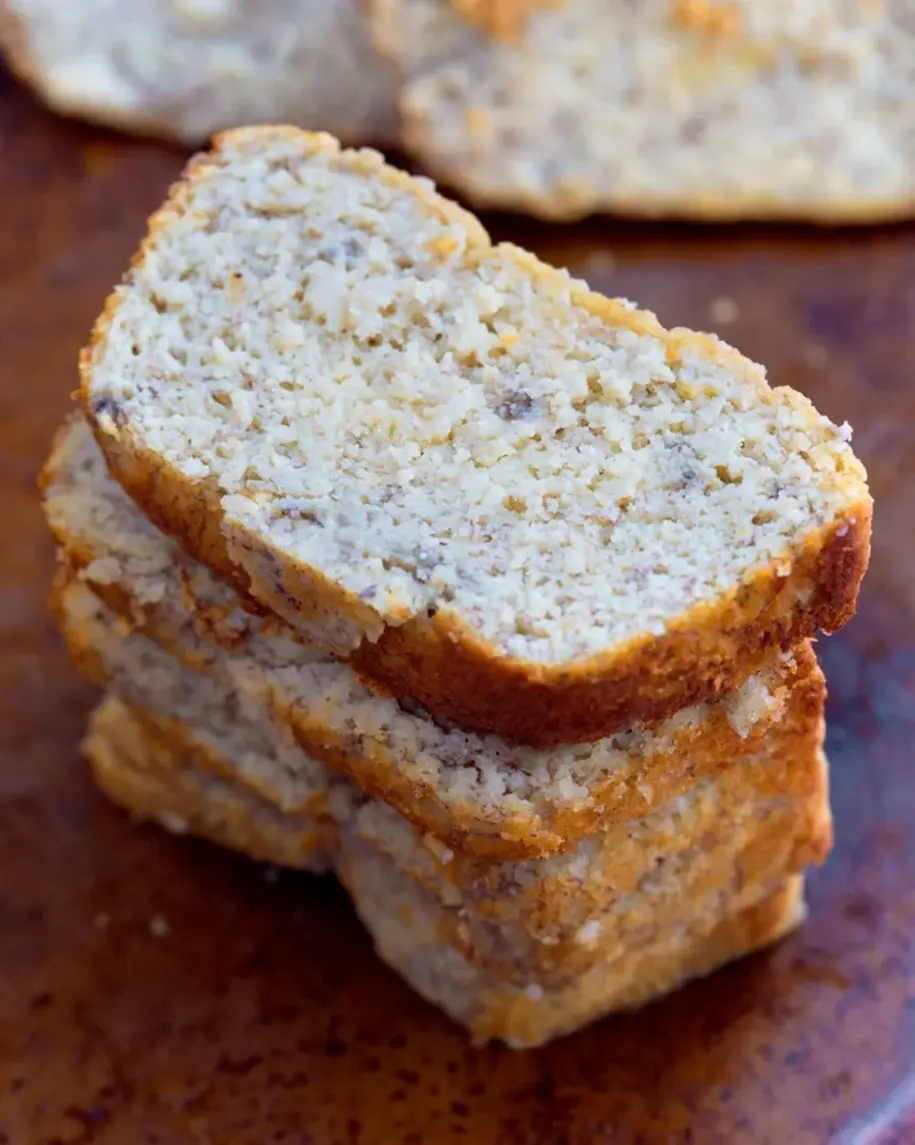
This low carb almond flour banana bread is a revelation. It has a dense, almost fudgy texture, with a perfectly caramelized crust and a soft, tender interior. The aroma fills your kitchen with a sweet, nutty fragrance that makes you feel like you’re stepping into a cozy Parisian patisserie. Each bite delivers a burst of ripe banana flavor, balanced by the richness of almond flour. It’s the kind of bread that satisfies your sweet tooth while keeping your blood sugar steady—a game-changer for anyone following a paleo or gluten-free diet.
I’ve tested this recipe more times than I can count, tweaking the ratio of almond flour to banana until it was just right. What makes my version special is the technique: I use a slightly lower oven temperature and a longer bake time to ensure the center sets without drying out. Plus, I always let the bread cool completely before slicing—this is the secret to that incredibly moist crumb. A common mistake is cutting into it too early, which leads to a gummy interior. Trust me on this: patience is key. From my NYC kitchen to yours, this is the almond flour banana bread you’ll make again and again.
Why This Almond Flour Banana Bread Recipe Is the Best
The flavor secret lies in using overripe bananas that are almost black—they bring a natural sweetness that reduces the need for any added sugar. I learned this from watching my mother in Morocco, who would let bananas sit on the counter until they were practically begging to be baked. Combined with a whisper of vanilla extract and a touch of salt, the result is a deeply satisfying, low carb treat that doesn’t feel like a compromise.
From a chef’s perspective, texture is everything. The key is to mix the batter until just combined—no overmixing, which can make the almond flour bread tough. I also use fine almond flour (not almond meal) for a silky crumb. The result is a loaf that’s moist and fudgy, almost like a flourless chocolate cake. It’s a technique I honed in Paris, where we prized a perfectly balanced batter.
This recipe is foolproof and fast for beginners. With just one bowl and a few simple ingredients, you can have the batter ready in 10 minutes. And because the loaf stays moist for days, it’s a perfect make-ahead breakfast or snack. I often bake it on Sunday and enjoy slices all week long, toasted or plain. It’s the kind of recipe that feels like a hug in bread form—no complicated steps, just pure comfort.
Low Carb Almond Flour Banana Bread Ingredients
When I shop for ingredients at the Union Square Greenmarket in NYC, I always look for the freshest, most vibrant produce. For this low carb almond flour banana bread, the bananas are the star—I let them get super ripe on my counter, just like my mother did back in Marrakech. The almond flour I buy in bulk from a local health food store, because I go through it so quickly. It’s a staple in my pantry, and it makes this paleo banana bread so deliciously nutty.
Ingredients List
- 2 cups fine almond flour (like Bob’s Red Mill)
- 3 overripe bananas (the spotter, the better)
- 2 large eggs (or 2 flax eggs for vegan option)
- 1 tablespoon baking powder (aluminum-free if possible)
- 1/2 teaspoon sea salt
- 1/2 teaspoon pure vanilla extract
Ingredient Spotlight
Almond flour is the backbone of this recipe. It provides structure and a delicate, nutty flavor while keeping the bread low in carbs. Look for “fine almond flour” (not almond meal) for the smoothest texture. If you only have almond meal, sift it first, but the crumb will be slightly coarser.
Overripe bananas are non-negotiable for this low carb almond flour banana bread. They should have brown spots or be almost entirely brown. These bananas are sweeter and more aromatic, which means you can skip any added sugar. If your bananas aren’t ripe enough, the bread may taste dull and have a less tender texture.
Eggs provide moisture and structure. For a vegan version, flax eggs work well: mix 2 tablespoons of ground flaxseed with 6 tablespoons of water, let sit for 5 minutes until gelled, then use as you would eggs. I’ve tested this multiple times, and the texture stays beautifully moist, though it’s slightly more delicate than with eggs.
| Original Ingredient | Best Substitution | Flavor / Texture Impact |
|---|---|---|
| Almond flour | Coconut flour (use 1/2 cup) | Drier, more absorbent; add 1 extra egg |
| Eggs | Flax eggs (2 tbsp flax + 6 tbsp water) | Slightly denser, still moist |
| Baking powder | 1/2 tsp baking soda + 1 tbsp lemon juice | Lighter, more acidic flavor |
How to Make Almond Flour Banana Bread — Step-by-Step
This is the easiest low carb almond flour banana bread you’ll ever make. I promise: it comes together in minutes, and you only need one bowl. Let’s get started!
Step 1: Preheat and Prepare
Grease a 9×5-inch loaf pan with butter or coconut oil, or line it with parchment paper. Preheat your oven to 325°F (165°C). Using a lower oven temperature is key here—it ensures the center bakes through without burning the edges.
💡 emy’s Pro Tip: Line your pan with parchment paper, leaving overhang on the long sides. This creates “handles” that make it effortless to lift the baked bread out once it’s cool.
Step 2: Mash and Mix
In a large bowl, mash the overripe bananas with a fork until smooth but still slightly chunky—I like a few small lumps for texture. Add the eggs, vanilla extract, and salt, and whisk well until combined. Then fold in the almond flour and baking powder, stirring gently until no dry streaks remain.
⚠️ Common Mistake to Avoid: Overmixing the batter. This can activate the gluten in the almond flour (yes, it has some!) and make the bread dense. Stir just until everything is incorporated.
Step 3: Bake
Pour the batter into your prepared loaf pan, spreading it into an even layer. Bake on the center rack for 50–55 minutes, or until a toothpick inserted in the center comes out mostly clean with a few moist crumbs. The top should be golden brown and spring back when gently pressed.
💡 emy’s Pro Tip: If the top is browning too quickly after 40 minutes, tent the loaf loosely with foil for the last 10–15 minutes of baking.
Step 4: Cool and Unmold
Let the bread cool in the pan on a wire rack for at least 20 minutes. Then, run a knife around the sides of the pan and carefully pop out the loaf. Allow it to cool completely—this can take 1 to 2 hours. Resist the urge to slice into it while warm. Patience here is the secret to the perfect fudgy texture.
⚠️ Common Mistake to Avoid: Slicing the bread while it’s still warm. It will be too fragile and may crumble. Cooling allows the structure to set, giving you clean, beautiful slices.
💡 emy’s Pro Tip: For extra moistness, wrap the completely cooled loaf in plastic wrap and refrigerate overnight. The flavors meld together, and the texture becomes even more fudgy.
| Step | Action | Duration | Key Visual Cue |
|---|---|---|---|
| 1 | Preheat & prepare pan | 5 mins | Oven at 325°F, pan greased |
| 2 | Mash & mix batter | 5 mins | Smooth, no dry flour |
| 3 | Bake loaf | 50–55 mins | Golden top, toothpick comes clean |
| 4 | Cool completely | 1–2 hours | Loaf is cool to the touch |
Serving & Presentation
This low carb almond flour banana bread is wonderfully versatile. I love serving it for breakfast toasted and slathered with a bit of grass-fed butter or almond butter. For a special treat, I’ll drizzle it with a simple glaze made from powdered erythritol and a splash of almond milk, then top with sliced almonds. It’s a nod to the elegant pastries I made in Paris, but with a healthy, low carb twist.
In my NYC home, I often serve it alongside a bowl of fresh berries and a dollop of Greek yogurt for a balanced brunch. The tangy yogurt beautifully offsets the sweet, nutty bread. And when I’m feeling nostalgic for Morocco, I’ll dust the top with a sprinkle of cinnamon—just like my mother used to do with her banana breads. It’s a small touch that adds warmth and depth.
This bread also makes an excellent gift. Wrap a few slices in parchment paper, tie with kitchen twine, and you have a thoughtful, homemade present. For parties, I slice it thin and arrange on a platter with fresh fruit and honey for dipping. It’s always the first thing to disappear.
| Pairing Type | Suggestions | Why It Works |
|---|---|---|
| Side Dish | Fresh berries, yogurt parfait | Tangy contrast to sweet bread |
| Sauce / Dip | Almond butter, coconut cream | Enhances nutty flavor |
| Beverage | Coffee, chai latte, herbal tea | Cozy morning pairing |
| Garnish | Cinnamon, sliced almonds, banana chips | Adds texture and visual appeal |
Make-Ahead, Storage & Reheating
As a busy cook in NYC, I rely on make-ahead meals to keep my week running smoothly. This low carb almond flour banana bread is perfect for batch prep. I usually bake it on Sunday, then slice and store it for the week ahead. It stays incredibly moist, so it’s ready for breakfast, a snack, or even a quick dessert.
| Method | Container | Duration | Reheating Tip |
|---|---|---|---|
| Refrigerator | Airtight container | Up to 6 days | Toast in a skillet or oven (350°F, 5 mins) |
| Freezer | Zip-top bag, sliced | Up to 3 months | Thaw at room temp or toast frozen |
| Make-Ahead | Batter in fridge | Up to 1 day in advance | Pour directly into pan and bake |
For the best reheating experience, I recommend toasting slices in a toaster or a dry skillet over medium heat for 2 minutes per side. This revives the crispy exterior and soft, warm interior. If you’re reheating from frozen, pop the slice directly into a 350°F oven for 5–7 minutes. It will taste almost as fresh as the day it was baked.
Variations & Easy Swaps
Almond Flour Banana Bread
Description
This paleo and gluten free almond flour banana bread recipe is perfect for a healthy snack or breakfast.
Ingredients
- 2 cups fine almond flour
- 3 overripe bananas
- 2 eggs, including the vegan options listed above or 2 flax eggs
- 1 tbsp baking powder
- 1/2 tsp salt
- 1/2 tsp pure vanilla extract
Instructions
- Grease or line a 9×5 loaf pan. Preheat oven to 325 F. Stir all ingredients until smooth. Pour into the loaf pan. Bake on the center rack 50-55 minutes. Let it sit until completely cool before going around the sides of the pan with a knife and carefully popping out. It is SUPER moist and fudgy. Refrigerate leftover up to 6 days, or slice and freeze for a rainy day.View Nutrition Facts
Keto Lemon Bread
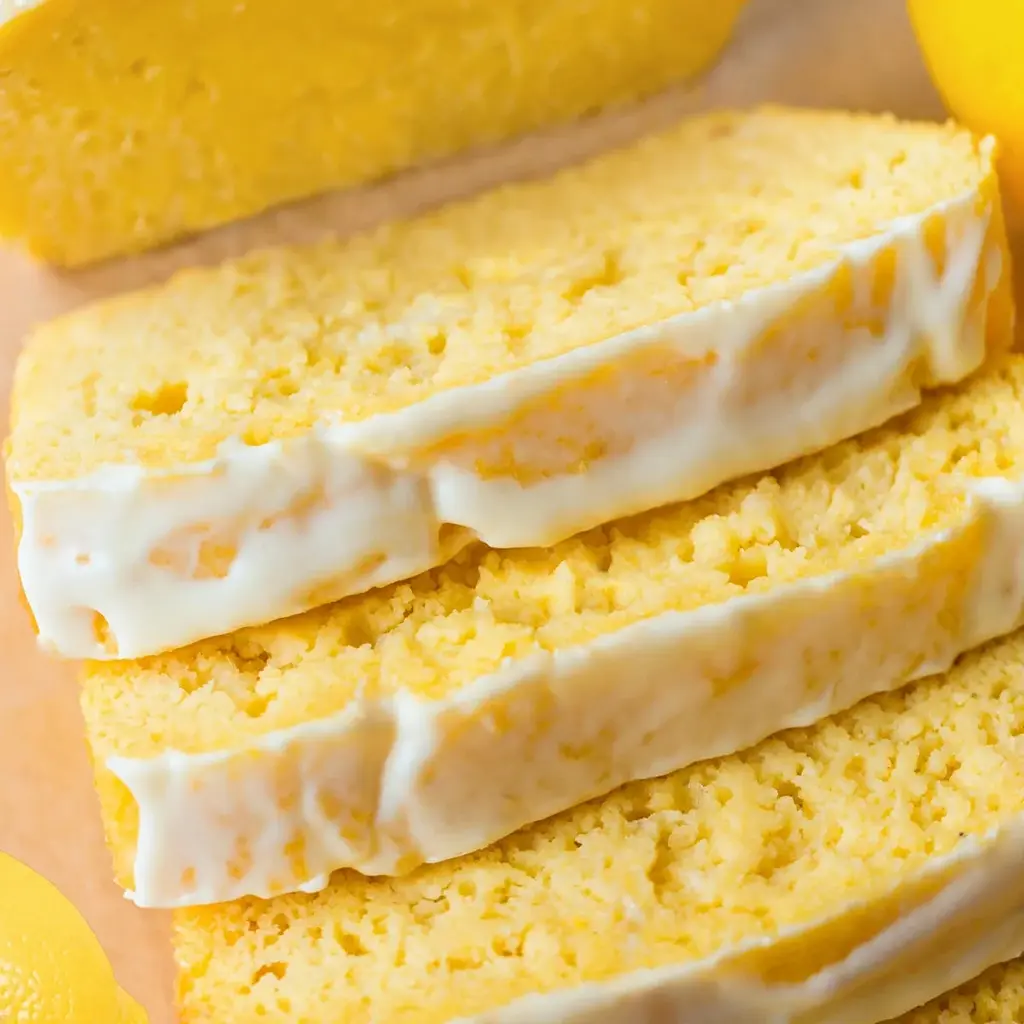
Table of Contents
Keto Lemon Bread Recipe – Moist and Tangy
I remember the first time I made keto lemon bread — I was standing in my tiny Manhattan kitchen, the scent of my mother’s lemon trees from Marrakech flooding my memory. She would zest lemons by hand while telling stories, and that bright, sunny aroma meant something wonderful was on its way. This keto lemon bread recipe is my way of honoring those mornings while keeping things modern and low-carb. It’s moist, tangy, and so full of citrus flavor that you’d never guess it’s sugar-free and grain-free. If you’ve been searching for a healthy breakfast or a sugar free dessert that actually tastes indulgent, this is it.
When you pull this loaf from the oven, your kitchen will smell like a Parisian patisserie collided with a North African morning. The golden crust cracks lightly as it cools, and the inside is impossibly tender — almost pudding-like, thanks to the yogurt and almond flour. Each slice carries a whisper of tangy lemon zest, balanced by a gentle sweetness from the granulated sweetener. There’s no heavy aftertaste, just pure, clean citrus joy. This keto lemon bread is the kind of recipe that makes you close your eyes on the first bite — and that’s exactly what I’m aiming for.
My version uses a simple trick I learned during my pastry training in Paris: letting the loaf cool completely before slicing. Because this bread is so moist, cutting it too soon can cause it to crumble. I also use full-fat yogurt or coconut cream to create that velvety crumb without any gluten. The secret weapon here is the lemon zest — never skip it! It carries the essential oils that make every bite sing. I’ll share more about why this works below, plus one common mistake that can turn your bread dense and dry. Trust me, you’ll nail it on your first try.
Why This Keto Lemon Bread Recipe Is the Best
The Flavor Secret: The key to this keto lemon bread is the combination of fresh lemon juice and zest. Zest contains the fragrant oils that give that unmistakable lemon aroma, while juice adds the bright acidity that cuts through the richness of almond flour. I learned this balance from my mother — she always said lemon zest is the soul of a dish. Here, it transforms an ordinary loaf into something that feels like a sunny day.
Perfected Texture: Most keto breads can be dry or gritty, but this one is different. Using yogurt or coconut cream adds moisture without weighing it down, and the almond flour gives a tender, almost cake-like crumb. I tested this recipe seven times to get the baking time just right — 50 minutes at 325°F ensures the center is cooked through without drying out the edges. The result is a loaf that stays soft for days.
Foolproof & Fast: This recipe couldn’t be easier. You just stir everything together in one bowl — no mixer, no fuss. That’s it. Whether you’re new to keto baking or a seasoned pro, this keto lemon bread comes together in 10 minutes flat. My NYC neighbors (who aren’t even keto) ask for it every time I bake. It’s that good.
Keto Lemon Bread Ingredients
Every ingredient in this keto lemon bread serves a specific purpose. I buy my almond flour from the Whole Foods near Union Square — it’s finely ground and consistent, which makes a huge difference. The yogurt I use is plain full-fat Greek, a staple from my morning breakfasts. And the lemons? I always grab them from the farmers market when they’re in season, but any organic lemon works beautifully.
Ingredients List
- 2 cups almond flour
- 1/3 cup granulated sweetener (for sugar free, I like Lakanto)
- 1 tbsp baking powder
- 1/2 tsp salt
- 2/3 cup plain yogurt or coconut cream
- 1/4 cup lemon juice
- 3 eggs or flax eggs
- 1 tbsp lemon zest
Ingredient Spotlight
Almond Flour: The base of this bread. It provides the structure and a nutty flavor. Look for finely ground, blanched almond flour — not almond meal, which is coarser and can make the bread grainy. I’ve tested with Bob’s Red Mill and Kirkland; both work well.
Lemon Juice & Zest: You need both. The juice adds acidity that reacts with baking powder to help the bread rise, while the zest is where all the aromatic oils live. Always zest before juicing, and use a microplane for the finest texture.
Yogurt or Coconut Cream: This replaces the moisture that gluten would normally provide. Full-fat Greek yogurt gives a tangy richness, while coconut cream adds a subtle sweetness and is perfect for dairy-free. Either works, so choose based on your dietary needs.
| Original Ingredient | Best Substitution | Flavor / Texture Impact |
|---|---|---|
| Almond flour | Coconut flour (reduce to 1/2 cup, add 2 tbsp liquid) | Denser, more coconut flavor; requires adjustment |
| Plain yogurt | Coconut cream (canned, full-fat) | Dairy-free; sweeter, slightly richer crumb |
| Granulated sweetener | Erythritol or monk fruit blend | Similar sweetness; may have slight cooling effect |
| Eggs | Flax eggs (1 tbsp flaxseed meal + 3 tbsp water per egg) | Vegan; slightly denser, nuttier flavor |
How to Make Keto Lemon Bread — Step-by-Step
Making this keto lemon bread is almost too easy — it’s one bowl, a whisk, and a loaf pan. Here’s exactly how to get that perfect, bakery-worthy result every single time.
Step 1: Prepare the Pan
Grease a 9×5 loaf pan with butter or coconut oil, or line it with parchment paper. I prefer parchment because it makes removal effortless. Make sure the paper hangs over the long sides — those “handles” will help you lift the loaf out cleanly.
💡 emy’s Pro Tip: If using parchment, crinkle it up first under running water, then smooth it out. This helps it mold perfectly to the pan without slipping.
Step 2: Preheat the Oven
Preheat your oven to 325°F (163°C). This lower temperature is key — it bakes the bread gently, keeping the inside soft and preventing the edges from burning before the center is done. Position the rack in the center of the oven.
⚠️ Common Mistake to Avoid: Don’t rush the preheat. Baking at a higher temperature can cause the almond flour to brown too quickly, leaving the middle raw.
Step 3: Mix the Dry Ingredients
In a large mixing bowl, whisk together 2 cups almond flour, 1/3 cup granulated sweetener, 1 tbsp baking powder, and 1/2 tsp salt. Whisking aerates the mixture and ensures the baking powder is evenly distributed — this helps the bread rise uniformly.
💡 emy’s Pro Tip: Sift the almond flour if it looks clumpy. This guarantees a smooth, lump-free batter.
Step 4: Add the Wet Ingredients
To the dry ingredients, add 2/3 cup plain yogurt (or coconut cream), 1/4 cup lemon juice, 3 eggs (or flax eggs), and 1 tbsp lemon zest. Stir everything together with a spatula until just smooth. Don’t overmix — that can make the bread tough. The batter will be thick, almost like a muffin batter.
⚠️ Common Mistake to Avoid: Overmixing activates the proteins in the eggs and almond flour, leading to a dense, rubbery loaf. Fold gently until no streaks remain.
Step 5: Pour and Bake
Pour the batter into the prepared pan and spread it into an even layer. Bake for 50 minutes, or until the top is golden brown and a toothpick inserted in the center comes out clean or with a few moist crumbs. If the top browns too quickly, tent loosely with foil after 40 minutes.
💡 emy’s Pro Tip: Every oven runs a little differently. Start checking at 45 minutes — if the center jiggles, bake for 5 more minutes.
Step 6: Cool Completely
Let the bread cool in the pan for 10 minutes, then transfer it to a wire rack. This step is crucial — the keto lemon bread is super moist and soft. I found that letting it cool completely before going around the sides with a knife and popping out the loaf will ensure it doesn’t break. Patience pays off!
⚠️ Common Mistake to Avoid: Slicing while warm will result in a crumbly mess. Wait at least 1 hour for the best texture.
| Step | Action | Duration | Key Visual Cue |
|---|---|---|---|
| 1 | Prepare pan | 2 mins | Parchment overhangs on both sides |
| 2 | Mix dry ingredients | 3 mins | Uniform, no lumps |
| 3 | Add wet ingredients | 3 mins | Thick, smooth batter |
| 4 | Bake | 50 mins | Golden top, clean toothpick |
| 5 | Cool | 1 hour | Loaf releases easily |
Serving & Presentation
This keto lemon bread is stunning on its own, but a few simple touches make it even more special. I like to slice it thick — about 1-inch slices — and arrange them on a wooden board. A dusting of powdered sweetener (like powdered erythritol) gives it a snowy, bakery-fresh look. For brunch, I pair it with a side of fresh berries and a dollop of whipped cream. The tart berries balance the sweetness beautifully.
In my home, we enjoy it with a hot cup of mint tea — a nod to my Moroccan roots. But it’s just as wonderful with a bold black coffee from the NYC café down the street. For a dessert twist, toast a slice lightly, spread a thin layer of cream cheese frosting (made with cream cheese, sweetener, and lemon extract), and serve warm. It’s like a lemon cheesecake in bread form.
| Pairing Type | Suggestions | Why It Works |
|---|---|---|
| Side Dish | Mixed berries, sliced strawberries | Adds freshness and acidity |
| Sauce / Dip | Whipped cream, cream cheese frosting | Enhances richness and sweetness |
| Beverage | Mint tea, black coffee, lemonade | Complements citrus notes |
| Garnish | Extra lemon zest, powdered sweetener | Brightens presentation and flavor |
Make-Ahead, Storage & Reheating
This keto lemon bread is a lifesaver during my busy NYC weeks. I often bake it on Sunday and enjoy slices all week long. It keeps beautifully at room temperature for a day, and in the fridge for up to 5 days. The trick is to wrap it tightly in plastic wrap or foil to prevent it from drying out. For longer storage, slice the bread first, then freeze individual pieces — this way you can grab one whenever a craving hits.
| Method | Container | Duration | Reheating Tip | |||||||||||||||||||||||||||||||||||||||||||||||||||||||||||||||||||||||||||||||||||||||||||||||||||||||||||||||||||||||||||||||||||||||||||||||||||||||||||||||||||||||||||||||||||||||||||||||||||||||||||||||||||||||||||||||||||||||||||||||||||||||||||||||||||||||||||||||||||||||||||||||||||||||||||||||||||||||||||||||||||||||||||||||||||||||||||||||||||||||||||||||||||||||||||||||||||||||||||||||||||||||||||||||||||||||||||||||||||||||||||||||||||||||||||||||||||||||||||||||||||||||||||||||||||||||||||||||||||||||||||||||||||||||||||||||||||||||||||||||||||||||||||||||||||||||||||||||||||||||||||||||||||||||||||||||||||||||||||||||||||||||||||||||||||||||||||||||||||||||
|---|---|---|---|---|---|---|---|---|---|---|---|---|---|---|---|---|---|---|---|---|---|---|---|---|---|---|---|---|---|---|---|---|---|---|---|---|---|---|---|---|---|---|---|---|---|---|---|---|---|---|---|---|---|---|---|---|---|---|---|---|---|---|---|---|---|---|---|---|---|---|---|---|---|---|---|---|---|---|---|---|---|---|---|---|---|---|---|---|---|---|---|---|---|---|---|---|---|---|---|---|---|---|---|---|---|---|---|---|---|---|---|---|---|---|---|---|---|---|---|---|---|---|---|---|---|---|---|---|---|---|---|---|---|---|---|---|---|---|---|---|---|---|---|---|---|---|---|---|---|---|---|---|---|---|---|---|---|---|---|---|---|---|---|---|---|---|---|---|---|---|---|---|---|---|---|---|---|---|---|---|---|---|---|---|---|---|---|---|---|---|---|---|---|---|---|---|---|---|---|---|---|---|---|---|---|---|---|---|---|---|---|---|---|---|---|---|---|---|---|---|---|---|---|---|---|---|---|---|---|---|---|---|---|---|---|---|---|---|---|---|---|---|---|---|---|---|---|---|---|---|---|---|---|---|---|---|---|---|---|---|---|---|---|---|---|---|---|---|---|---|---|---|---|---|---|---|---|---|---|---|---|---|---|---|---|---|---|---|---|---|---|---|---|---|---|---|---|---|---|---|---|---|---|---|---|---|---|---|---|---|---|---|---|---|---|---|---|---|---|---|---|---|---|---|---|---|---|---|---|---|---|---|---|---|---|---|---|---|---|---|---|---|---|---|---|---|---|---|---|---|---|---|---|---|---|---|---|---|---|---|---|---|---|---|---|---|---|---|---|---|---|---|---|---|---|---|---|---|---|---|---|---|---|---|---|---|---|---|---|---|---|---|---|---|---|---|---|---|---|---|---|---|---|---|---|---|---|---|---|---|---|---|---|---|---|---|---|---|---|---|---|---|---|---|---|---|---|---|---|---|---|---|---|---|---|---|---|---|---|---|---|---|---|---|---|---|---|---|---|---|---|---|---|---|---|---|---|---|---|---|---|---|---|---|---|---|---|---|---|---|---|---|---|---|---|---|---|---|---|---|---|---|---|---|---|---|---|---|---|---|---|---|---|---|---|---|---|---|---|---|---|---|---|---|---|---|---|---|---|---|---|---|---|---|---|---|---|---|---|---|---|---|---|---|---|---|---|---|---|---|---|---|---|---|---|---|---|---|---|---|---|---|---|---|---|---|---|---|---|---|---|---|---|---|---|---|---|---|---|---|---|---|---|---|---|---|---|---|---|---|---|---|---|---|---|---|---|---|---|---|---|---|---|---|---|---|---|---|---|---|---|---|---|---|---|---|---|---|---|---|---|---|---|---|---|---|---|---|---|---|---|---|---|---|---|---|---|---|---|---|---|---|---|---|---|---|---|---|---|---|---|---|---|---|---|---|---|---|---|---|---|---|---|---|---|---|---|---|---|---|---|---|---|---|---|---|---|---|---|---|---|---|---|---|---|---|---|---|---|---|---|---|---|---|---|---|---|---|---|---|---|---|
| Refrigerator | Airtight container or wrapped in foil | Up to 5 days | Warm 15-20 sec in microwave or 5 min at 300°F oven | |||||||||||||||||||||||||||||||||||||||||||||||||||||||||||||||||||||||||||||||||||||||||||||||||||||||||||||||||||||||||||||||||||||||||||||||||||||||||||||||||||||||||||||||||||||||||||||||||||||||||||||||||||||||||||||||||||||||||||||||||||||||||||||||||||||||||||||||||||||||||||||||||||||||||||||||||||||||||||||||||||||||||||||||||||||||||||||||||||||||||||||||||||||||||||||||||||||||||||||||||||||||||||||||||||||||||||||||||||||||||||||||||||||||||||||||||||||||||||||||||||||||||||||||||||||||||||||||||||||||||||||||||||||||||||||||||||||||||||||||||||||||||||||||||||||||||||||||||||||||||||||||||||||||||||||||||||||||||||||||||||||||||||||||||||||||||||||||||||||||
| Freezer | Freezer bag or wrapped in plastic Keto Lemon BreadDescriptionThis sweet keto lemon bread recipe makes a perfect healthy breakfast or sugar free dessert. Ingredients
Scale
Instructions
Lemon Pixie Cookies Table of ContentsLemon Pixie Cookies with a Chef’s Secret – Soft, Chewy & IrresistibleI still remember the first time I tasted a truly perfect lemon cookie. It was in a tiny Parisian pâtisserie near my culinary school, where the pastry chef had mastered the art of balancing bright citrus with a melt-in-your-mouth texture. That memory inspired me to create my own version here in my NYC kitchen—these Lemon Pixie Cookies. They’re my homage to that French finesse, but with a uniquely simple, one-bowl approach that delivers soft, chewy cookies bursting with pure lemon flavor. The secret? A special technique with the zest that I learned from my mother in Morocco, where we use every part of the citrus to its fullest. Imagine biting into a cookie that’s tender and chewy, with a delicate crumb that practically dissolves on your tongue. The aroma is pure sunshine—a bright, zesty lemon scent that fills your kitchen as they bake. Visually, they’re little golden puffs, often dusted with a snowy coat of powdered sugar that creates a beautiful contrast. The flavor is a perfect harmony: the sharp, vibrant tang of fresh lemon zest and juice, softened by the subtle nuttiness of almond flour and the rich hint of vanilla. It’s a sophisticated treat that feels both elegant and comforting, like a little bite of joy. After years of professional baking, I’ve refined this recipe to be foolproof. My version uses almond flour for a naturally gluten-free, tender base, and a precise chilling method that guarantees that perfect chewy texture. I’ll share my pro tip for maximizing lemon flavor without any bitterness, and I’ll warn you about the one common mistake that can make these cookies spread too thin. Trust me, once you master this easy recipe, these will become your go-to cookie for any occasion, from a quiet afternoon treat to an impressive dessert platter. Why This Lemon Pixie Cookies Recipe Is the BestThe flavor secret lies in how we treat the lemon. Many recipes just add juice, but I use a technique from my French training: I rub the lemon zest directly into the sugar. This releases the essential oils in the zest, creating an intensely fragrant and flavorful base for the dough. It’s a small step that makes a world of difference, infusing every bite with a bright, true lemon essence that’s never artificial or harsh. The texture is perfected through a chef’s understanding of fat and chilling. Using almond flour gives a wonderfully tender, slightly dense crumb that’s naturally moist. The key to chewiness is the optional but highly recommended chilling step. Letting the dough balls rest in the fridge allows the fats to solidify, so the cookies bake up thick and soft in the center with just the right amount of structure. It’s the same principle we used for perfect shortbread in Paris. This recipe is foolproof and fast because it’s a simple stir-together dough with no mixer required. I’ve designed it for beginners and busy home cooks alike. With only nine core ingredients and a single bowl, you can have cookie dough ready in under 10 minutes. The baking time is short and precise, and I give you clear visual cues so you can’t overbake them. It’s the ideal recipe for when you need a quick, impressive homemade treat without any fuss. Lemon Pixie Cookies IngredientsI love how simple this ingredient list is. I pick up my almond flour and organic lemons from the Union Square Greenmarket here in NYC—the quality of fresh, seasonal produce always shines through. The vanilla extract is a good one I brought back from Paris, but any pure extract will work beautifully. These ingredients remind me of the clean, vibrant flavors of Moroccan pastries, where simplicity is key. Ingredients List
Ingredient SpotlightAlmond Flour: This is the foundation, providing structure, moisture, and a lovely nutty flavor. It also makes the cookies gluten-free. Look for finely ground, blanched almond flour in the baking aisle. For a substitution, you can use an equal amount of oat flour, but the texture will be slightly more crumbly. Lemon Zest & Juice: The zest holds the potent citrus oils, giving that true lemon aroma. The juice adds tang and moisture. Always use fresh, unwaxed lemons. Roll them on the counter before juicing to get more juice. In a pinch, 1/2 tsp of high-quality lemon extract can stand in for the zest, but fresh is best. Powdered Sugar: It dissolves instantly into the dough, creating a smooth texture and a delicate sweetness. It also helps create a tender crumb. If using a granulated sugar substitute like erythritol, make sure it’s a powdered version for the best texture.
How to Make Lemon Pixie Cookies — Step-by-StepDon’t let the delicate result fool you—this is one of the easiest cookie recipes you’ll ever make. Just follow these simple steps for perfect, chewy lemon pixie cookies every time. Step 1: Prepare the DoughIn a medium bowl, combine the almond flour, powdered sugar, lemon zest, salt, and baking soda. Whisk them together until well blended. In a separate small bowl or measuring cup, melt the butter or coconut oil. Let it cool slightly, then stir in the vanilla extract and lemon juice. Pour the wet ingredients into the dry ingredients and stir with a spatula until a soft, slightly sticky dough forms. 💡 emy’s Pro Tip: To maximize lemon flavor, rub the lemon zest into the powdered sugar with your fingertips before adding the other dry ingredients. This releases the citrus oils and infuses the sugar with incredible aroma. Step 2: Roll and ChillUsing a tablespoon or small cookie scoop, portion the dough and roll it into 12 even balls, about 1 inch in diameter. If the dough is too sticky, lightly wet your hands. For the ultimate chewy texture, place the dough balls on a parchment-lined plate or baking sheet and refrigerate for at least 30 minutes, or up to overnight. If you’re in a hurry, you can bake them right away, but chilling yields a thicker, chewier cookie. ⚠️ Common Mistake to Avoid: Skipping the chilling step if your kitchen is warm. This can cause the cookies to spread too much and become thin and crisp instead of soft and chewy. Step 3: Bake to PerfectionPreheat your oven to 325°F (163°C). Line a baking sheet with parchment paper. If desired, roll the chilled dough balls in additional powdered sugar for a classic, snowy look. Place them on the prepared sheet, spacing them about 2 inches apart. Bake for 10 minutes. The cookies will look soft and slightly puffed. Remove from the oven and immediately use the back of a spoon to gently press each ball down into a cookie shape. Let them cool completely on the baking sheet—they are very delicate when hot but will firm up beautifully as they cool. 💡 emy’s Pro Tip: For perfectly round cookies, use a round cookie cutter or the rim of a glass to gently swirl around each cookie right after you press it down. This neatens the edges while they’re still soft.
Serving & PresentationThese lemon pixie cookies are beautiful in their simplicity. I love serving them on a rustic wooden board or a vintage ceramic plate, dusted with an extra sprinkle of powdered sugar just before serving. For a touch of Parisian elegance, add a few edible flowers or a twist of candied lemon peel on the side. In my NYC home, I often pair them with a pot of mint tea, a tradition from Morocco that cuts the sweetness perfectly. They’re perfect for afternoon tea, bridal showers, or as a light dessert after a rich meal. Because they’re not overly sweet, they pair wonderfully with fresh berries, a dollop of lightly sweetened whipped cream, or a scoop of vanilla bean ice cream for a more decadent treat.
Make-Ahead, Storage & ReheatingAs a busy New Yorker, I’m a huge fan of make-ahead recipes. This dough is a dream for meal prep. You can mix it, roll the balls, and keep them chilled in the fridge for up to 3 days before baking, or freeze them for a ready-to-bake treat anytime. Baked cookies also store beautifully, making them perfect for gifting or having on hand for unexpected guests.
A note on texture: These cookies are best enjoyed the day they are baked, but storing them properly keeps them wonderfully chewy. If they soften too much, a quick stint in a low oven will crisp the edges slightly and revive that just-baked aroma. Never microwave them, as it can make them tough. Variations & Easy Swaps
Lemon-Lavender Pixie CookiesInspired by the fields of Provence I visited during my time in France, this variation adds a subtle floral note. Simply add 1/2 teaspoon of finely ground culinary lavender buds to the dry ingredients. The lavender should be subtle, not soapy—it creates a beautiful, sophisticated pairing with the bright lemon that’s perfect for a bridal shower or afternoon tea. Dairy-Free / Vegan Pixie CookiesThis recipe is easily made vegan. Use coconut oil instead of butter, and make sure your powdered sugar is vegan (some brands use bone char). The coconut oil adds a very slight tropical nuance that actually works wonderfully with the lemon. The texture remains perfectly soft and chewy, and no one will guess they’re dairy-free. Orange-Cardamom Pixie CookiesFor a warm, spiced twist, swap the lemon zest and juice for orange. Add 1/4 teaspoon of ground cardamom to the dry ingredients—a spice beloved in both Moroccan and French baking. The result is a fragrant, cozy cookie that tastes like the holidays. I love making these in the winter with blood oranges from the NYC greenmarket. Can I make lemon pixie cookies without almond flour?Yes, you can substitute almond flour with an equal amount of oat flour for a nut-free version. The texture will be slightly more crumbly and cake-like, but still delicious. You may need to add an extra teaspoon of lemon juice or melted butter if the dough seems too dry. For a completely different but tasty option, try my dedicated nut-free recipe for Lemon Meltaways, which uses a different base flour blend to achieve a similar soft texture.  Lemon Pixie CookiesDescriptionSoft and chewy homemade lemon pixie cookies are bursting with lemon flavor. Ingredients
Scale
Instructions
Paleo Coconut Flour Banana Bread Muffins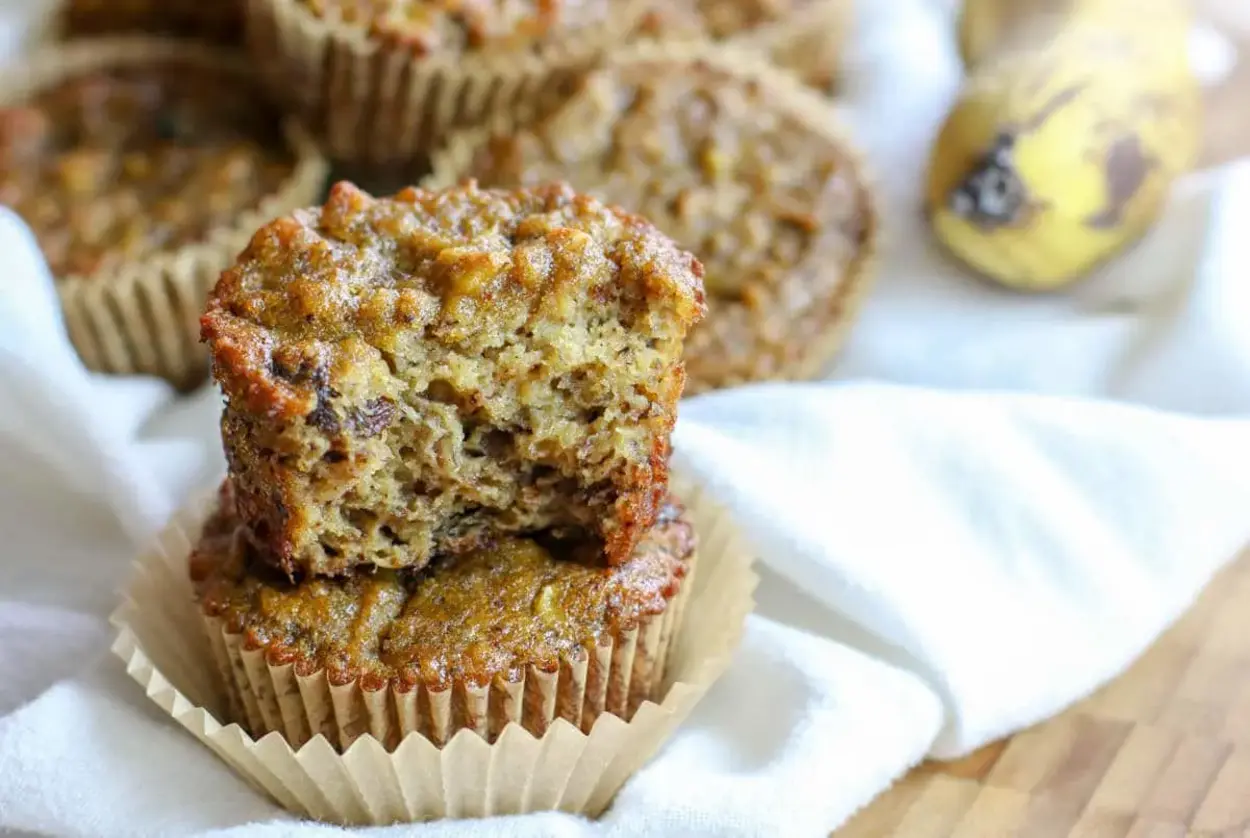 Table of ContentsPaleo Coconut Flour Banana Muffins Coconut flour’s natural moisture retention – The Perfect Grain‑Free Breakfast TreatWhen I first stumbled into a corner farmers market in Brooklyn, the aroma of freshly baked bread wafted through the air, reminding me of my mother’s humble kitchen in Rabat. That memory sparked the idea for a Paleo-friendly, coconut‑flour banana muffin that balances sweet, spiced flavor with a moist, tender crumb—no grains, no dairy, just pure comfort. These muffins are a symphony of tropical coconut, ripe banana sweetness, and warm cinnamon. The batter glistens like a fine vinaigrette when you pour it into the cups, and when you break one open the steam carries a sweet, buttery scent that hints at a Parisian patisserie meets North African spice market. A gentle dusting of cinnamon on the tops after baking adds a fragrant finish that lingers on the palate. I’ve spent years tweaking grain‑free recipes to keep them moist and flavorful, and this one is the culmination of that experience. A key trick is to whisk the dry coconut flour with the wet ingredients just enough to avoid clumps—too much, and the texture becomes dense. Also, I recommend letting the batter rest a minute after mixing to let the flour absorb moisture; it’ll make the muffins rise even better. Why This Coconut Flour Banana Muffins Recipe Is the BestThe secret lies in coconut flour’s natural moisture‑retaining fibers, which pair beautifully with ripe bananas to lock in sweetness without excess sugar. My training in French pastry taught me that the right balance of fat and flour is essential—here, coconut oil and maple syrup give that tender crumb without gluten. I perfected the texture by gently folding the batter, which keeps the air pockets intact. This technique, borrowed from the airy croissants I studied in Paris, ensures each muffin springs up without cracking, giving you a bakery‑quality bite every time. It’s foolproof for beginners because the ingredients are pantry staples and the process is almost hands‑off. Simply whisk, spoon, and bake—no kneading or measuring tricks required. The result? A batch of moist, caramel‑sweet muffins that can be eaten fresh or stored for the week. Coconut Flour Banana Muffins IngredientsI get these ingredients at the Whole Foods near my office. The bananas are locally grown in Brooklyn, the coconut flour is from a small organic brand, and the maple syrup is pure, unfiltered from Vermont—each component adds a distinct layer of flavor. Ingredients List
Ingredient SpotlightBananas – They act as a natural sweetener and binder; look for firm, dark‑peel varieties. A small test: mash one banana with a fork—if it spreads easily, it’s ready. If you need a less sweet version, substitute with unsweetened applesauce (1/2 cup) which keeps moisture but lowers sugar. Coconut Flour – This flour absorbs up to 10 times its weight in liquid, giving the muffins a rich, dry crumb. Choose organic, ground from mature coconut meat. If you’re allergic, try almond flour with an extra egg to maintain structure. Eggs – They provide structure and richness. Use large eggs at room temperature. For a vegan version, replace each egg with 1 tablespoon flaxseed meal + 3 tablespoons water, letting it sit 5 minutes.
How to Make Coconut Flour Banana Muffins — Step-by-StepLet’s get started. The key to success is patience—allowing each step to settle before moving on. Step 1: Preheat OvenSet your oven to 350°F (175°C) and line a muffin tin with paper liners. This creates a uniform rise and easy cleanup. 💡 emy’s Pro Tip: Preheat your oven a few minutes early; this ensures even baking and prevents the muffins from becoming dense. Step 2: Mash BananasIn a large bowl, whisk the bananas until completely smooth, breaking any large chunks. A smooth base ensures even distribution of flavors. ⚠️ Common Mistake to Avoid: Skipping the whisk can leave lumps that make the muffins uneven. Step 3: Add EggsBeat the eggs separately, then fold them into the banana mixture. The eggs bind everything together and give the muffins a light, airy rise. 💡 emy’s Pro Tip: Whisk the eggs lightly before adding; it helps create a smoother batter. Step 4: Add Coconut Oil & Maple SyrupStir in the softened coconut oil and maple syrup until glossy. This step locks in moisture and adds a subtle buttery sweetness. ⚠️ Common Mistake to Avoid: Adding the liquid too quickly can cause the batter to curdle. Step 5: Mix Dry IngredientsWhisk the coconut flour, baking soda, vanilla powder, cinnamon, and sea salt together, then slowly fold into the wet mixture. This prevents clumps and ensures a uniform crumb. 💡 emy’s Pro Tip: Sift the dry mix once before adding to the wet ingredients to guarantee a silky batter. Step 6: Bake MuffinsSpoon the batter into the liners, topping with nuts or seeds if desired. Bake for 25 minutes for regular or 18 minutes for mini muffins, or until a toothpick comes out clean. ⚠️ Common Mistake to Avoid: Opening the oven door too early can cause the muffins to sink.
Serving & PresentationServe the muffins warm on a plate with a drizzle of extra maple syrup or a dollop of coconut yogurt for a decadent twist. Sprinkle toasted coconut flakes or a handful of fresh mint for a color pop. Pair them with a side of crisp roasted vegetables from the Brooklyn farmer’s market, a scoop of vanilla Greek yogurt (if dairy is acceptable), or a glass of chilled sparkling water with a splash of lime. The warm spices in the muffins echo the Moroccan tagine spices, creating a harmonious balance.
Make-Ahead, Storage & ReheatingI love to bake these muffins on Sunday mornings and store them in my bag for the busy week. They stay fresh and flavorful, thanks to the coconut flour’s moisture‑retaining properties.
When reheating, avoid over‑baking; just enough to warm through so the interior stays moist. A quick 30‑second microwave session or a short 5‑minute bake in a 350°F oven preserves the tender crumb. Variations & Easy Swaps
Lemon Zest & Coconut Milk MuffinsAdding a generous amount of lemon zest brightens the natural banana flavor and gives a fresh, citrusy aroma reminiscent of a Moroccan mint tea. The coconut milk keeps the batter creamy, while the zest creates a lively contrast with the warm cinnamon. Chocolate Chip Banana MuffinsSwapping the optional nuts for dark chocolate chips turns the muffins into a sweet indulgence. The chocolate adds depth and a slight bittersweetness, balanced by the banana’s natural sweetness. They bake to a slightly firmer crumb but remain moist. Seasonal Pumpkin Spice MuffinsBlend in half a cup of pumpkin puree and a teaspoon of pumpkin pie spice. The pumpkin brings a silky texture and a subtle earthy sweetness, while the spices create a cozy, fall‑inspired flavor profile. Share Your Version!I’d love to hear how you tweak this recipe—maybe a splash of almond milk, or a dash of cardamom for that Moroccan touch. Drop a star rating, leave a comment, and tell me how these muffins fit into your daily routine. Snap a photo of your finished muffins, post it on Instagram or Pinterest, and tag @cookingwithemi. And let me know: what’s your favorite flavor twist for these banana muffins? From my NYC kitchen to yours — I hope this recipe brings as much warmth to your table as it does to mine. — emy 🧡 📌
Love This Recipe? Save It to Pinterest!If you enjoyed this Paleo Coconut Flour Banana Muffins recipe, don’t let it get lost in your browser tabs! 😄 Pin it now so you can find it again anytime — and explore hundreds more tried-and-tested recipes waiting for you on my Pinterest boards. 👉 Follow emy on Pinterest @exorecipe 📌 Pin this recipe · 🔁 Re-pin your favorites · 💬 Tag me when you make it — I love seeing your creations! Enjoyed the muffins? Give them a five‑star rating, drop a comment below, and share your tweaks. Your feedback helps me grow my kitchen—and yours! Can I freeze these muffins?Yes, you can freeze them. Place the baked muffins in an airtight bag or container and store them in the freezer for up to two months. When you’re ready to enjoy them, let them thaw at room temperature for about an hour, then warm them in the microwave for 20–30 seconds or bake for 5 minutes at 350°F to restore their moisture. This method preserves the tender crumb and keeps the flavors bright. How sweet are these muffins?Each muffin contains roughly 121 calories, 8 grams of sugar, and 14 grams of carbohydrates. The maple syrup or honey balances the natural banana sweetness, creating a mild, approachable flavor profile. If you prefer less sweetness, reduce the maple syrup by a quarter cup or switch to a sugar‑free alternative like stevia‑sweetened syrup. The result is still moist and flavorful, but with a more subtle sweetness. Can I use almond flour instead of coconut flour?Absolutely. Almond flour is a popular Paleo alternative, but it behaves differently than coconut flour because it doesn’t absorb as much moisture. To compensate, add one extra egg or a tablespoon of flaxseed meal mixed with water. The muffins will have a denser crumb and a nutty flavor. Keep the baking time the same, but watch for a slightly darker finish. Do these muffins stay fresh?Yes, thanks to coconut flour’s moisture‑retaining properties. When stored in an airtight container at room temperature, they stay good for up to three days. For longer shelf life, refrigerate or freeze them. If you’re in a hurry, you can also pre‑bake them and keep them in a muffin tin in your bag for a quick grab-and-go breakfast. Are these muffins gluten‑free?Yes. Coconut flour is naturally gluten‑free, and all other ingredients—bananas, eggs, coconut oil, maple syrup, baking soda, vanilla, cinnamon, and sea salt—are gluten‑free. This makes the muffins an excellent option for those avoiding wheat or gluten, while still delivering a flavorful, hearty breakfast or snack. Can I add chocolate chips?Yes, you can fold in a quarter cup of dark chocolate chips after adding the dry ingredients. The chips will melt slightly during baking, creating pockets of rich chocolate that complement the banana’s natural sweetness. Just be aware that chocolate may slightly darken the final crust. What’s the best way to keep the muffins moist?To keep them moist, let the batter sit for about a minute after mixing to allow the coconut flour to absorb liquid fully. Store baked muffins in an airtight container and avoid exposing them to direct sunlight or heat. If they start drying out, reheat them for a few seconds in the microwave or a short time in the oven to refresh their texture. Can I use honey instead of maple syrup?Yes. Honey works as a natural sweetener, but it’s slightly sweeter and has a stronger flavor. Use the same quantity (1/4 cup) and the muffins will still be moist and delicious. However, if you prefer a milder taste, maple syrup provides a more neutral sweetness that lets the banana shine. How many calories are in each muffin?Each muffin contains about 121 calories. That’s roughly 10 calories per gram, making these a low‑calorie, nutrient‑dense option for breakfast or a quick snack. If you want to lower the calorie count, reduce the maple syrup or substitute a sugar‑free sweetener, but the flavor may shift slightly. What’s the best nut to use if I want a crunchy texture?Walnuts or pecans add a buttery crunch and a slightly sweet, earthy flavor that pairs well with banana. If you’re allergic to tree nuts, consider pepitas (pumpkin seeds) or sunflower seeds—they provide a mild crunch and a nutritional boost while keeping the muffins allergen‑friendly. 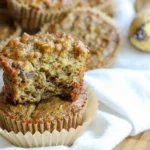 Coconut Flour Banana MuffinsDescriptionMade with coconut flour and are dairy free, nut free, gluten and grain free. They make a delicious, perfectly moist Paleo treat or breakfast on the go. Ingredients
Scale
Instructions
Super Moist Banana Bread Recipe Table of ContentsSuper Moist Banana Bread Recipe French Folded‑Mix Technique – The Secret to Ultimate FluffI grew up in a bustling Moroccan kitchen where the aroma of fresh bread could make your heart sing. When I later trained in Paris, I learned to translate that comfort into French baking techniques, and now, living in NYC, I bring the world’s flavors to my countertop. Today, I’m sharing a banana bread that marries the classic Moroccan sweetness with a French folded‑mix technique for extra lightness. Picture a loaf that crackles with a caramelized crust, yet yields to the touch of a moist, banana‑rich crumb. The subtle notes of vanilla and toasted walnuts dance on the palate, while the gentle heat of the oven releases a scent that feels like a warm hug. The French folding method creates air pockets that give each bite a tender, airy texture reminiscent of a freshly baked croissant. I’ve spent years refining this recipe in my NYC kitchen, and the result is a banana bread that’s as forgiving as it is delicious. My pro tip? Fold the dry mix into the wet batter gently to preserve the air. The most common mistake? Overmixing, which collapses the tender crumb and turns the loaf dense. Why This Super Moist Banana Bread Recipe Is the BestThe flavor secret lies in the French folded‑mix technique, a gentle method that keeps the batter airy and the banana’s natural sweetness front and center. Unlike traditional whisking, folding traps air, so the bread rises with a delicate crumb that’s both moist and light. Perfected texture comes from carefully balancing the ratio of whole wheat and all‑purpose flour, which adds body without sacrificing tenderness. The batter’s consistency is so smooth that a single spoonful melts in your mouth, echoing the silkiness of a French pastry. Foolproof and fast, this loaf requires no advanced skills. The steps are clear, the ingredients are pantry staples, and the result is a crowd‑pleaser that fits perfectly into a busy NYC schedule. Banana Bread IngredientsI source the freshest bananas and walnuts from the Union Square Farmers Market, and the whole‑wheat flour comes from a local artisanal mill. The combination of Moroccan spice and Parisian precision brings this loaf to life. Ingredients List
Ingredient SpotlightBananas: The key flavor carrier; choose very ripe ones for natural sweetness and a smoother crumb. Whole Wheat Flour: Adds nutty depth and fiber; use 1 cup of whole wheat to keep the loaf light. Walnuts: Provide crunch and healthy fats; if you’re allergic, replace with pecans or omit entirely.
How to Make Super Moist Banana Bread — Step-by-StepLet’s dive into the steps that make this loaf a showstopper. Follow along, and you’ll master the French folded‑mix technique in no time. Step 1: Preheat OvenPreheat your oven to 350°F (175°C) and set a timer for 55 minutes. The moderate heat allows the loaf to rise gently without over‑browning. 💡 emy’s Pro Tip: Use an oven thermometer to ensure accurate temperature; even a 10°F variance can affect rise. Step 2: Grease PanGrease a 9×5 inch loaf pan with shortening or butter, then dust with flour to prevent sticking. ⚠️ Common Mistake to Avoid: Skipping the flour dusting—leads to a tough crust. Step 3: Mash BananasPlace bananas in a large bowl and mash with a fork until smooth, leaving a few small lumps for texture. 💡 emy’s Pro Tip: For a sweeter loaf, mash the bananas longer or add a teaspoon of honey. Step 4: Beat EggsWhisk eggs lightly until the whites are pale. Add them to the mashed bananas and stir until combined. ⚠️ Common Mistake to Avoid: Whisking eggs too vigorously—can create bubbles that collapse during baking. Step 5: Add Sugar and OilStir in sugar and vegetable oil until the mixture is glossy and uniform. 💡 emy’s Pro Tip: Use a silicone spatula to scrape the bowl clean; the batter should look silky. Step 6: Stir Dry IngredientsWhisk together flour, baking soda, and salt. Gradually fold this dry mix into the wet batter, preserving the airy pockets. ⚠️ Common Mistake to Avoid: Stirring too fast—leads to gluten over‑development and a tough crumb. Step 7: Pour & BakePour batter into the prepared pan, smoothing the top with a spatula. Bake for 50–60 minutes, or until a toothpick inserted in the center comes out clean. 💡 emy’s Pro Tip: If the crust browns too quickly, tent the loaf with foil for the last 10 minutes. Step 8: Test ToothpickInsert a toothpick into the center of the loaf. If it comes out clean or with just a few moist crumbs, the bread is done. Let cool in the pan for 10 minutes before transferring to a wire rack. ⚠️ Common Mistake to Avoid: Removing the loaf too early—leads to a gummy interior.
Serving & PresentationSlice the loaf into thick rounds, drizzle with a thin swirl of mascarpone cream, and sprinkle a pinch of ground cinnamon. The contrast between the warm banana crumb and the cool, creamy topping evokes the street cafés of Paris and the aromatic spice stalls of Marrakech. A fresh green salad of mixed greens with a lemon‑yogurt vinaigrette makes an excellent side. The bright acidity cuts through the sweetness, while the walnut crunch adds texture. Pair the loaf with a cup of French press coffee or a bold espresso for a truly cosmopolitan breakfast.
Make‑Ahead, Storage & ReheatingI often bake this loaf on Saturday mornings and slice it for the week’s breakfast. The crumb stays fresh, and I can reheat slices in a toaster oven for a quick snack.
When reheating, I add a splash of water to the bottom of the pan to keep the crumb from drying. A few minutes in the oven brings the loaf back to its freshly baked state, with the crust crisp and the interior moist. Variations & Easy Swaps
Chocolate Chip VariationAdding semi‑sweet chocolate chips turns this loaf into a decadent breakfast treat that’s perfect for brunch. The chocolate’s richness balances the banana’s natural sweetness, creating layers of flavor that keep guests coming back. Gluten‑Free / Dairy‑Free VariationSwap the all‑purpose and whole‑wheat flours for a certified gluten‑free blend, and replace butter with coconut oil. The texture remains tender, and the coconut adds a subtle tropical nuance that complements the bananas. Pumpkin Spice VariationReplacing a quarter cup of sugar with pumpkin puree and adding pumpkin pie spice gives the loaf a warm, autumnal flavor profile. The puree also adds extra moisture, keeping the crumb especially soft during the colder months. How long does banana bread keep in the refrigerator?Banana bread stays fresh for about 3–4 days when stored properly in an airtight container or wrapped tightly in foil. The high moisture content can cause mold if left exposed, so keep it in the fridge and consume within a week for the best texture and flavor. If you need to store it longer, freezing is the safest option. Can I use frozen bananas for this recipe?Frozen bananas can work, but you’ll need to thaw them completely and squeeze out excess moisture. The extra liquid will change the batter’s consistency, possibly making it runnier. To compensate, reduce the oil by a tablespoon and add a splash of milk to balance the texture. For best results, fresh ripe bananas are still the preferred choice. What’s the best way to prevent overbrowning on the top?If the crust browns too quickly, tent the loaf with a sheet of foil during the last 10–12 minutes of baking. This shields the surface from direct heat while the interior finishes baking. Alternatively, reduce the oven temperature by 25°F and extend the baking time by a few minutes for a more even crust. Is it okay to bake banana bread in a mini loaf pan?Yes, a mini loaf pan will produce a smaller loaf that bakes faster, typically around 35–40 minutes. Keep a close eye on the baking time and test with a toothpick earlier. Because the batter is more concentrated, the crust may brown quicker, so a brief foil tent can prevent burning. What’s the difference between a banana bread and a banana loaf?The terms are often used interchangeably, but “banana loaf” typically refers to a loaf that is less sweet, sometimes savory or spiced, while “banana bread” is usually sweeter and can contain added ingredients like chocolate or nuts. In culinary practice, both refer to the same baked good, but the naming hints at flavor expectations. Can I use almond milk instead of water for moistening?Almond milk can be used as a liquid substitute, but it’s important to reduce the oil by one tablespoon to keep the batter from becoming too wet. Almond milk adds a subtle nutty flavor that can complement the banana’s sweetness, especially if you’re aiming for a lower‑fat loaf. How can I make this loaf sweeter or less sweet?To increase sweetness, add a tablespoon of honey or maple syrup to the batter. For a less sweet version, reduce the sugar by one‑third cup and rely on the natural sugars in ripe bananas. The loaf will still be moist and flavorful, but with a lighter sweet profile suitable for those who prefer a more balanced taste. What’s the best way to store banana bread after baking?After baking, allow the loaf to cool completely on a wire rack. Wrap it tightly in plastic wrap and store at room temperature for up to 2 days, or place it in the refrigerator for up to a week. For longer storage, slice the loaf and freeze in zip‑top bags; thaw slices at room temperature and warm briefly in a toaster oven for best texture. Can I add spices like cinnamon or nutmeg?Absolutely! Adding 1/2 teaspoon of ground cinnamon or a pinch of nutmeg enhances the aromatic profile and gives the loaf a cozy, spiced flavor. Mix the spice with the dry ingredients before folding in, ensuring even distribution without overmixing. These spices pair well with the banana’s natural sweetness. What are the health benefits of banana bread?Banana bread contains potassium from ripe bananas, fiber from whole‑wheat flour, and healthy fats when walnuts are included. The natural sugars provide quick energy, while the fiber and protein help keep you full. Though it is still a treat, choosing whole‑grain flours and limiting added sugar can make it a more balanced option for a nourishing breakfast or snack. Share Your Version!I’d love to hear how you twist this loaf in your own kitchen. Drop a star rating and leave a comment below, and let me know what you added—extra chocolate chips, a dash of cinnamon, or maybe a dash of Moroccan spice? If you post a photo, tag @cookingwithemi on Instagram or Pinterest—I can’t wait to see your creations! From my NYC kitchen to yours — I hope this recipe brings as much warmth to your table as it does to mine. — emy 🧡 📌
Love This Recipe? Save It to Pinterest!If you enjoyed this Super Moist Banana Bread recipe, don’t let it get lost in your browser tabs! 😄 Pin it now so you can find it again anytime — and explore hundreds more tried-and-tested recipes waiting for you on my Pinterest boards. 👉 Follow emy on Pinterest @exorecipe 📌 Pin this recipe · 🔁 Re-pin your favorites · 💬 Tag me when you make it — I love seeing your creations! Have a favorite tweak or a question that keeps you up at night? Drop it in the comments—I’m here to help! If you loved this loaf, hit the like button and share it with friends. Let’s keep the conversation going and make banana bread unforgettable together.
 Moist Banana Bread RecipeIngredients
Scale
Instructions
easy paleo banana bread muffins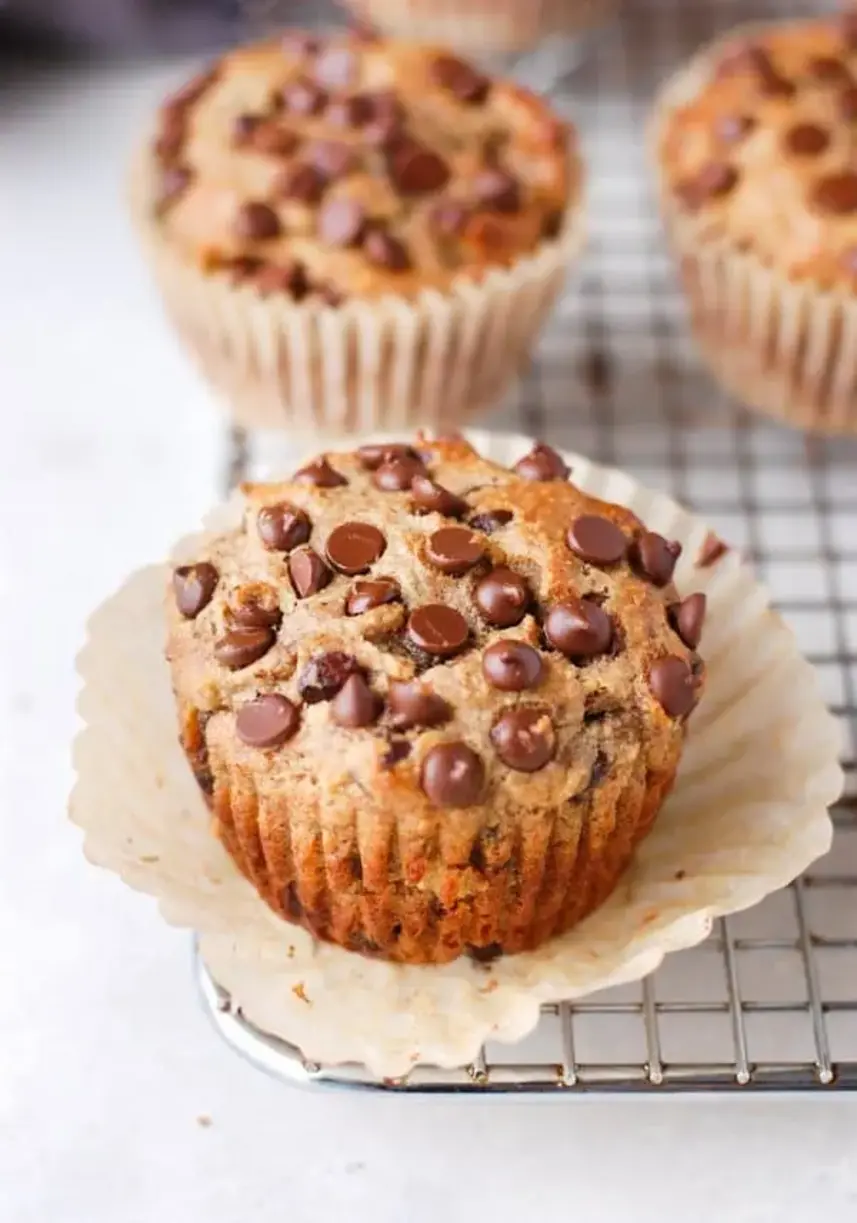 Table of ContentsPaleo Banana Bread Muffins Zero‑Added‑Sugar & Oil‑Free – Sweet, Moist Mini TreatsI’ve always loved the way ripe bananas transform baking—from humble bread to an unexpected dessert. In my childhood kitchen in Casablanca, my mother would mash a banana with a fork and fold it into bread dough, and the aroma would travel across the city. That same magic now lives in these Paleo Banana Bread Muffins, a zero‑added‑sugar, oil‑free, dairy‑free version that keeps the sweetness natural while giving you those cloud‑soft muffins that have a hint of Mediterranean warmth. The first bite is a sweet caramel blush wrapped in a gentle almond flour crust, where the banana’s natural sweetness is lifted by a swirl of vanilla and a whisper of cinnamon and nutmeg. The chocolate chips melt into pockets of melted chocolate, creating bursts of indulgence that contrast beautifully with the quasi‑spiced crumb. The texture is airy yet dense enough to hold an entire muffin cup, and the aroma hints at roasted almonds and a mellow banana finish. What sets these muffins apart is the technique I learned during my Paris pastry apprenticeship—I fold the dry ingredients gently into the wet mix until just combined, which prevents over‑mixing and preserves the airy crumb. I also add a touch of baking soda to create gentle lift. A common mistake is to overmix, resulting in dense muffins; instead, keep it gentle and you’ll get airy, authentic results. And yes, the chocolate chips are optional; you can use cocoa nibs if you prefer a less sweet option. Why This Paleo Banana Bread Muffins Recipe Is the BestThis recipe blends the proven health of a paleo diet with the comforting familiarity of banana bread. By ditching added sugars and oils, it offers a cleaner, nutrient‑rich treat that satisfies sweet cravings without the post‑binge crash. The flavor secret comes from a family recipe that mixes almond flour and banana, accented by Moroccan ground cinnamon and a splash of vanilla. The result is an instant burst of warm spice that mirrors the dishes I used to prepare with my mother while Arabic music played in the background of Casablanca streets. Because the technique is simplified—whisk, dry, fold, bake—anyone from a beginner to a seasoned pro can make these muffins and achieve a fluffy interior with a lightly crisp top. The recipe’s 30‑minute turnaround is ideal for NYC mornings when you need a quick, nutrient‑dense breakfast or snack on the go. Paleo Banana Bread Muffins IngredientsI store the almond flour in a Mason jar in my kitchen pantry, but when I visit the Union Square farmers market I pick fresh bananas that are ripe to perfect the flavor. The chocolate chips I use are USDA‑organic; I usually toss a sprinkle of sea salt on top for a flavorful contrast. Ingredients List
Ingredient SpotlightAlmond flour is the backbone of this recipe. It’s naturally gluten‑free, sturdy, and adds a subtle nutty flavor that balances the banana sweetness. When shopping in the U.S., look for unblended, straight almond flour without any additives. Almond butter adds moisture and richness without the oil or added sugars. Source a unsweetened, no‑salt flavor to keep the keep the dry ingredient ratios in place. A good substitute is cashew butter, but the texture will be slightly creamier. For the chocolate chips, you can swap them for crushed dark chocolate or cocoa nibs to reduce sugar. The difference in flavor is subtle but it offers a richer cocoa bite that pairs wonderfully with the spiced banana crumb.
How to Make Paleo Banana Bread Muffins — Step-by-StepLet’s bring these mounds of comfort to life. Preheat your oven, gather your pantry, and follow each step with gentle care. Step 1: WhiskWhisk the mashed banana, almond butter, egg, and vanilla in a large bowl until a smooth, creamy mixture forms. This creates a base that will hold the batter together. 💡 emy’s Pro Tip: Combine the wet ingredients first to ensure the almond butter stays fully emulsified. Step 2: Dry MixIn a separate bowl, stir together almond flour, baking soda, salt, cinnamon, nutmeg, and a splash of water to lightly moisten the dry blend. This step keeps the spices evenly distributed. ⚠️ Common Mistake to Avoid: Don’t overscoop the baking soda; too much can make the muffins taste bitter. Step 3: MergeAdd the dry blend to the wet mixture, stirring just until combined—no muffin batter should be cloudy, just smooth. The key is to avoid over‑mixing. 💡 emy’s Pro Tip: Use a rubber spatula and fold in a gentle s‑curve motion. Step 4: FoldFold in chocolate chips, ensuring they’re evenly dispersed. This keeps the chocolate from sinking to the bottom of the muffin tins. ⚠️ Common Mistake to Avoid: Adding too many chips before stirring can lead to uneven distribution. Step 5: FillLine a 12‑cup muffin tin with liners or lightly grease the cups. Spoon batter into the tins about 3/4 full. If you like, sprinkle extra chips on top. 💡 emy’s Pro Tip: Use a small heaping teaspoon for cleaner, even cups. Step 6: BakeBake at 350°F for 18‑22 minutes, or until a toothpick inserted in the center pulls out clean. The edges should be slightly golden. ⚠️ Common Mistake to Avoid: Opening the oven door too early; this can cause the muffins to sink. Step 7: CoolRemove the tin from oven. Let the cupcakes sit ten minutes before transferring to a wire rack to cool completely. This step hardens the crumb a bit, making them easier to handle. 💡 emy’s Pro Tip: Place a warm towel on the rack to keep them cozy longer.
Serving & PresentationServe the muffins warm or at room temperature in a mason jar for a charming brunch platter. Add a dusting of powdered sugar or a drizzle of fresh maple syrup for added sweetness. You could also sprinkle a pinch of sumac for a Moroccan‑inspired zing that pairs with the banana and nuts. When it comes to pairings, my go‑to is a cuppa of hot espresso or a light iced chai—both anchoring the sweet notes of the banana and chocolate without competing. The muffins also excel with dairy‑free Greek‑style yogurt on the side, where the creamy thickness echoes the almond butter base.
Make-Ahead, Storage & ReheatingWhen NYC life demands pre‑prep, I bake a batch over the weekend and let them cool completely. They keep well in an airtight container at room temperature for up to 4 days. I also store a separate pot of the batter, covered tightly, in the fridge for up to 48 hours if you need fresher muffins tomorrow.
If you’re craving a reheat, let a muffin sit at room temperature for a couple of minutes, then pop it in a preheated 350°F oven for 3–5 minutes. I like to dust a little almond butter on top to revive the moisture. The result is a satisfying, warm bite right after the oven. Variations & Easy Swaps
Caramel‑Salted VariationThe caramel‑salted variation starts with the same base, but after baking I brush a light layer of smooth brown butter over the tops. A whisper of sea salt follows, creating a contrast that hits like a cherished coffeehouse recipe from New York’s finest patisseries. The result is luminous, buttery sweetness with a savory edge. Gluten‑Free / Dairy‑Free SwapSwap almond flour for oat flour and replace almond butter with sunflower seed butter, then add a splash of coconut milk to keep moisture high. The texture remains airy yet slightly denser, and the sweet banana flavor stays prominent. This variation works beautifully for those with dietary restrictions in the bustling city. Seasonal Pumpkin TwistIncorporate half‑cup of pumpkin puree and a teaspoon of pumpkin spice into the batter. The orange‑cobbled crumb glows like a Moroccan evening sky, while the spices echo the vendor stalls on Queens Boulevard that I love to wander during the fall. How long do these muffins stay fresh?Once fully cooled, the muffins can be stored on the counter in an airtight container for up to four days. If you prefer longer storage, place them in the refrigerator for up to a week; they stay moist and flavorful. For the longest shelf life, freeze the baked muffins in a freezer bag and reheat a few minutes in the oven to restore warmth. Keep the paper liners removed to prevent excess moisture build‑up. Can I use a different kind of nut butter?Yes, a smooth cashew or hazelnut butter works well if almond butter isn’t available. The key is to keep a non‑sweet, no‑salt variety; replace the ½ cup of almond butter with an equivalent amount of your chosen nut butter. The result will be slightly milder in flavor, but will still provide richness and moisture, keeping the muffins fluffy. Can these muffins be frozen before baking?It’s best to bake the muffins first and chill before freezing to avoid texture changes. If you prefer to freeze the batter, form it into a loaf, freeze, then bake directly. However, this may affect the rise; the muffins might be slightly denser. For optimal taste and texture, bake and chill before freezing as recommended. What’s a good substitute for banana in this recipe?Ripe canned pumpkin puree or unsweetened applesauce can replace the banana while maintaining moisture. For each cup of banana, use ¾ cup pumpkin puree or ¾ cup applesauce, adjusting binding slightly. The taste will shift toward a mild, slightly sweet pumpkin or apple flavor, which still complements the cinnamon and nutmeg. Do I really need to use the baking soda?Yes, the baking soda provides lift and counterbalances the acidity of the banana, giving the muffins a light, airy crumb. Omitting it will result in a denser, flatter product that may not rise properly. If you’re sensitive to sodium, you can reduce the amount slightly but always keep at least ½ teaspoon to preserve structure. What’s the best way to portion these muffins for travel?Pack them in a sturdy reusable container with partitions or muffin tins lined with parchment paper. Wrap a layer of parchment or plastic between each muffin to keep them separate. For commuters, a small thermos‑style lunch box works well; the muffins hold their shape and taste great even when chilled for a few hours. Can I add extra chocolate or nuts?Definitely! Swap the ½ cup chocolate chips for dark chocolate chunks or chocolate protein powder. A handful of chopped pecans or walnuts can add crunch. Just keep the total added weight below ¼ cup to maintain the balance of batter; otherwise the muffins may become too wet and fail to rise evenly. How can I make these muffins vegan?Replace the egg with a flaxseed “egg” (1 tablespoon ground flaxseed mixed with 3 tablespoons water) or commercial plant‑based binder. Use a vegan oat milk in place of any liquid additions and choose a dairy‑free chocolate chip brand. The result will be equally moist, slightly denser, but still bursting with banana sweetness. Is there a way to add a citrus twist?Adding zest from a small orange or lemon gives a bright, refreshing lift. Sprinkle 2–3 teaspoons of zest into the dry mix before combining; the citrus complements the banana’s natural sweetness and brings a subtle zesty aroma. Aromatic balance is essential, so keep the zest moderate to avoid overpowering the spices. What’s the best oven temperature setting for even baking?A 350°F setting is ideal for medium‑sized muffins; it allows the interior to set while the outer layer does not brown too quickly. If your oven runs hot, reduce to 340°F or use the center rack. Checking at the 18‑minute mark and adjusting if needed ensures a golden top and a moist, tender crumb. Share Your Version!I’d love to hear how these muffins turned out for you. Drop a star rating and share your tweaks in the comments below. If you have a photo that captures the moment you pulled these golden beauties from the oven, post it on Instagram or Pinterest and tag @cookingwithemi. Tell me, which variation excited you the most and why? I’ll be reading every reply with a warm, professional smile. From my NYC kitchen to yours — I hope this recipe brings as much warmth to your table as it does to mine. — emy 🧡 📌
Love This Recipe? Save It to Pinterest!If you enjoyed this Paleo Banana Bread Muffins recipe, don’t let it get lost in your browser tabs! 😄 Pin it now so you can find it again anytime — and explore hundreds more tried‑and‑tested recipes waiting for you on my Pinterest boards. 👉 Follow emy on Pinterest @chefrecipes2 📌 Pin this recipe · 🔁 Re-pin your favorites · 💬 Tag me when you make it — I love seeing your creations! Have more questions about almond flour or looking for a brunch side that pairs well? Drop me a line on my blog or follow me for daily culinary insights—here’s to nourishing, delicious moments everywhere!
 Paleo Banana Bread MuffinsDescriptionPaleo Banana Bread Muffins are a healthy twist on the deliciously sweet classic. They’re made with no added sugar, no oil, and no dairy. Ingredients like almond flour, nut butter, and eggs create perfect, moist, fluffy muffins great for breakfast or snack time! Ingredients
Scale
Instructions
Healthy Banana Bread!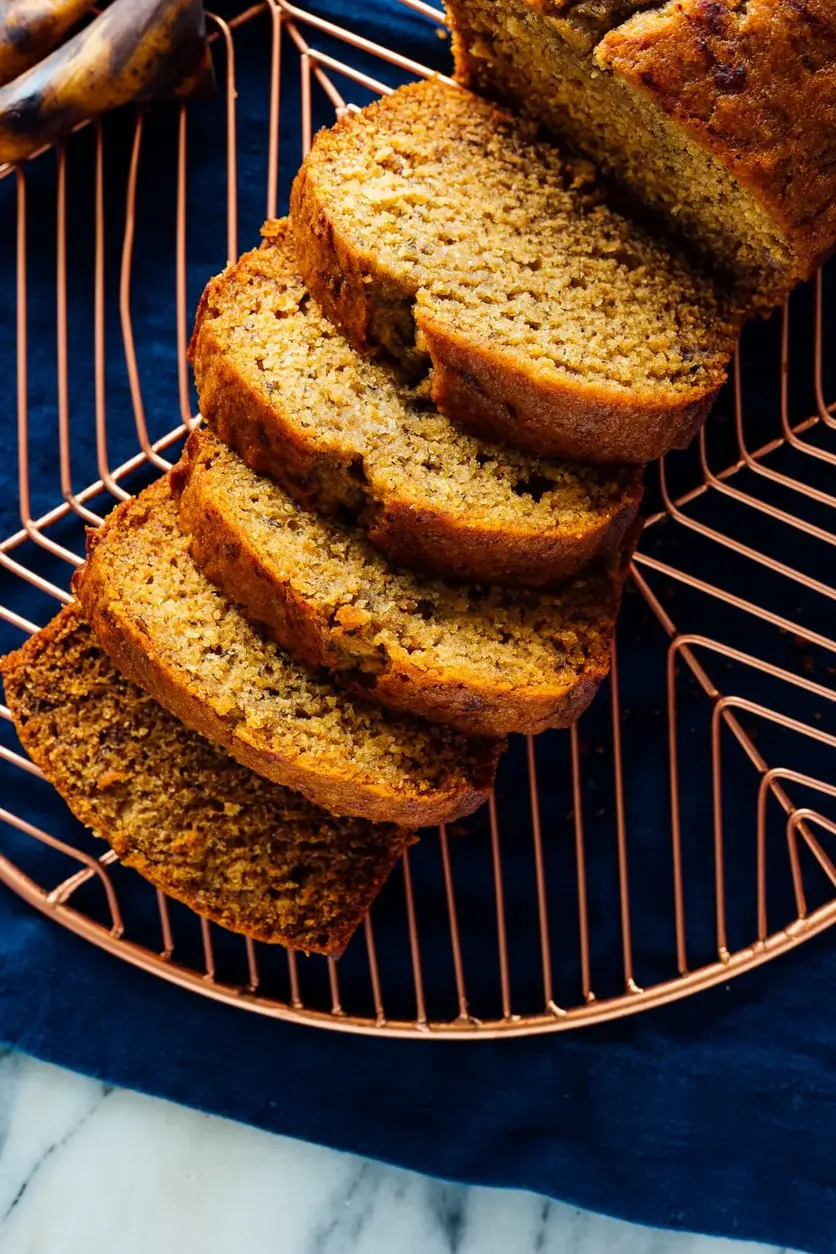 Table of ContentsHealthy Banana Bread with a Moroccan Touch – A Fiber‑Rich TwistGrowing up in a bustling Moroccan market, I learned that the best flavors come from the simplest ingredients and a dash of spice. Now, in my New York kitchen, I’ve taken that philosophy and turned a humble banana‑bread into a wholesome, fiber‑rich loaf with a Moroccan touch. The secret? A subtle swirl of cinnamon mixed with caraway seeds gives the bread an earthy perfume that mingles perfectly with the sweet banana. When I slice this loaf, I’m greeted by a golden crust that crumbles into soft, airy crumbs at the center. The scent is a comforting blend of roasted bananas, honey, and cinnamon, punctuated with a hint of earthy caraway. Each bite carries a creamy, buttery interior that’s balanced by a slight crunch from the whole‑wheat textural bite, creating a satisfying, gentle contrast that feels both indulgent and wholesome. What sets this version apart from standard banana bread is my training at a Parisian pâtisserie where precision matters. The batter’s pH is carefully balanced to keep the bread moist, while the addition of whole wheat keeps fiber high. I’ll share a pro tip soon—always let the banana mash soften the flour slightly before adding the leavening—to keep the crumb tender. A common mishap is over‑mixing, which can make the loaf dense; I recommend folding the dry mix gently instead. Why This Healthy Banana Bread Recipe Is the BestBecause it marries my Moroccan upbringing, a Parisian eye for texture, and the vibrant energy of New York markets. The whole‑wheat flour adds a nutty depth, while honey or maple provides natural sweetness. The result is a loaf that satisfies chocolate‑theatic cravings without the guilt, proven by a nutrition profile of just 233 calories per slice. My French training taught me that the key to a tender crumb is in the timing of mixing. By folding the dry ingredients last and incorporating the leavening last, the batter remains airy. I also punch through the batter with a knife for a decorative swirl, which not only looks gorgeous but also vents steam, preventing a cake‑like top. This method works for all skill levels because it eliminates complicated steps and contains only nine main ingredients. The step‑by‑step instructions are concise, and I’ve sprinkled in pro tips and common mistake warnings so even a novice will finish with a perfectly golden loaf. Moroccan Spice Swirl: An Unexpected TwistThe carrot of the recipe’s uniqueness is an aromatic spice blend that echoes a Moroccan tagine. A tablespoon of savory caraway seeds mingles with one teaspoon of cinnamon, creating a fragrant halo around the batter. This swirl not only adds bold flavor but also a subtle nutty aroma that transports you to the souks of Essaouira mid‑afternoon. Healthy Banana Bread IngredientsI pick the freshest bananas and the finest whole‑wheat flour right off my favorite farmers market in Brooklyn’s DUMBO section. The honey is from a local honey‑bee keeper in Astoria, and the olive oil is extra‑virgin, adding Mediterranean depth that echoes my Moroccan roots. Ingredients List
Ingredient SpotlightWhole‑wheat flour – It’s the backbone. Opt for a light, soft whole‑wheat that’s milled in France for the smoothest grain; the texture will reflect in a crumb that’s airy yet wholesome. Try substituting oat flour for a gluten‑free version; it keeps moisture but adds a sweeter taste. Bananas – The strain of the banana matters. Dark, ripe, and slightly mushy give the most natural sweetness and texture that absorbs the butter or oil without over‑moistening. If you’re out, sliced dates muddled into the batter can mimic the banana’s body and flavor. Honey – This is the sweetener’s soul. Ceylon honey has a lighter, floral profile that complements the spices. If you’re vegan, maple syrup works beautifully; if you need a deeper flavor, try buckwheat honey for a caramel finish.
How to Make Healthy Banana Bread — Step‑by‑StepGetting that house‑warm, aromatic loaf is easier than you think. Follow these steps and you’ll have a loaf that will cross the kitchen table from North Africa to the Bronx. Step 1: Prepare the PanPreheat oven to 325 °F (165 °C). Lightly grease a 9×5‑inch loaf pan with oil or butter, then line with parchment for easy release. The low temperature ensures a slow rise and a caramelized crust that smells like cinnamon on a chilly evening. 💡 emy’s Pro Tip: Use a silicone liner to keep the loaf from sticking and to clean up in minutes. Step 2: Mix Oil and HoneyIn a large bowl, whisk melted oil and honey together until they form a glossy emulsion. When the mixture is smooth, add the eggs one at a time, whisking vigorously to keep the batter airy. ⚠️ Common Mistake to Avoid: Over‑whisking the eggs can over‑introduce air, making the bread puff and then collapse. Keep whisking gentle. Step 3: Add Vanilla & BananasFold in vanilla extract, then add the mashed bananas and milk. The bananas must be fully mashed; remaining chunks can make the texture uneven. Let the mixture sit for a minute so the banana can blend into the sugars. 💡 emy’s Pro Tip: Warm the banana mash slightly in the microwave (10 s) if it’s cold; this keeps sugar from crystallizing. Step 4: Add Baking Soda & SpicesWhisk in baking soda, vanilla, salt, cinnamon, and caraway. The baking soda reacts with the natural banana acidity to lift the loaf without a heavy chemical taste. ⚠️ Common Mistake to Avoid: Mixing dry ingredients too early can break down the sugars and make the loaf chewy. Step 5: Fold in FlourWith a spatula or spoon, gently fold in the whole‑wheat flour until just combined. It’s okay to have a few lumps; the batter will thicken as it bakes. If you’re using mix‑ins, fold them in now to distribute evenly. 💡 emy’s Pro Tip: For a softer crumb, sift half the flour—this reduces the heavy kernel. Step 6: Pour into PanTransfer batter into the prepared loaf pan. Sprinkle a light dusting of cinnamon on top. For the signature swirl, run a knife in a zig‑zag across the top to invite steam and create a marbled design. ⚠️ Common Mistake to Avoid: Using a spoon without a spatula can leave flour clumps at the bottom, causing uneven baking. Step 7: BakeBake for 55–60 min. Check for doneness by inserting a toothpick into the center; if it comes out clean, the loaf is ready. The crumb should be moist, with a crisp, fragrant top that smells like a Moroccan market. 💡 emy’s Pro Tip: If your oven runs hot, rotate the pan halfway through to avoid a crisped‑on‑bottom loaf. Step 8: Cool and ServeLet the loaf cool in the pan for 10 minutes, then run a butter knife around the edges to loosen. Transfer to a rack to cool completely before slicing. This rest sets the crumb structure, making each slice buttery but not sticky. ⚠️ Common Mistake to Avoid: Cutting too early means the crumb can be gummy and overly moist.
Serving & PresentationSlicing a freshly baked loaf showcases a golden top flecked with cinnamon specks and a subtle swirl of caraway. Pair it with a cup of spiced chai or a glass of cold milk froth you brew in a Parisian‑style French press for a sensory dialog between Morocco and Paris. For a festive brunch, serve warm slices topped with a dollop of ricotta and a drizzle of honey. I once paired this bread with spiced avocado on rye for a New York‑street‑crumbled breakfast that satisfied both my roots and my workday cravings. Decorate the slice with fresh ginger zest or a small spoonful of apricot preserves for a sweet‑savory contrast that would remind you of Moroccan mint tea. Present the loaf on a rustic wooden board, aligning it with vintage spoons you collect in a Parisian flea market.
Make‑Ahead, Storage & ReheatingAfter the last morning prep, I fold my loaf into a perforated baking bag, place it in a dark glass jar, and store it for the next day’s brunch. Even on a busy Manhattan weekday, this loaf stays moist for up to 3 days in the refrigerator.
I usually reheated slices individually using a quick microwave burst of 15 seconds. The crumb stays fluffy, and the spices revive, keeping every bite as aromatic as the first. If you’re a foodie who loves to prep for a week, consider baking two loaves and slicing them in advance. Store slices in an airtight iRobot bag, reheat as needed, and you’ll have biscuits that taste fresh every morning. Variations & Easy Swaps
Chocolate‑Bowl Banana BreadSwap half the flour for dark chocolate chunks; bake as usual. The chocolate adds a bittersweet depth that pairs nicely with the cinnamon and is a hit with my kids at the sidewalk café in Queens. Gluten‑Free Version — Dairy‑FreeReplace the whole‑wheat blend with a 1:1 gluten‑free oat and almond mix and add a teaspoon of xanthan gum. The crumb still rises, but it has a sweeter, slightly denser chew that delights my clients with sensitivities. Berry‑Infused VariationDrop fresh blueberries or dried cranberries into the batter. The burst of tartness plays off the banana’s sweetness and gives the loaf a pop of color that looks like a spring tableau straight from a New York farmer’s market. Can I make this banana bread vegan?Yes, you can veganize this loaf with a few simple swaps. Replace the eggs with silken tofu quarts or flaxseed gel (1 tbsp flaxseed + 3 tbsp water) to bind the batter and create a soft crumb. For the honey, maple syrup or agave works wonderfully and keeps the natural sweetness intact. The rest of the ingredients stay the same, so you’ll still get that fragrant Moroccan swirl. Is it possible to make this banana bread gluten‑free?Absolutely. Substitute the whole‑wheat flour for a gluten‑free blend of almond, oat, and rice flours. Add a teaspoon of xanthan gum to help the batter bind. The crumb will be slightly denser but still moist and flavorful; the spices float on top, giving you that Moroccan aroma. Try it during your next prep day for a safe, 10‑slice loaf. What is the best way to store leftovers?Wrap leftovers tightly in aluminum foil or a resealable plastic bag and keep them in the fridge for up to three days. If you want to keep them for longer, place the loaf in a freezer‑safe container and freeze for up to two months. Thaw at room temperature before reheating; this keeps the crumbs from drying out. A quick micro‑burst of 15 seconds wins you the original warmth. Can I pre‑bake the loaf and then reheat?Pre‑baking and refrigerating or freezing the loaf allows you to reheat portions whenever needed. If you bake it fully and slice it, place slices in an airtight bag and store them at room temperature for up to five days. Reheat in a 350°F oven for 5–7 minutes, or in a microwave for 15–20 seconds; the crust will remain crunchy and the inside fluffy. What does the caraway seed do in the recipe?Caraway seed adds a legally natural peppery sweetness reminiscent of Moroccan tagines. It beautifully balances the banana’s softness and mounts a deeper, earthy note that enlivens the loaf. This small spice shift transforms a conventional banana bread into an exotic, aromatic experience anyone can appreciate. How does the baking soda differ from baking powder here?Baking soda reacts with the inherent acidity of overripe bananas, creating carbon dioxide that lifts the batter. Baking powder, being a combination of acid and base, would not provide that direct reaction, giving the loaf a denser texture. The soda also supports the carrot of subtle color, while keeping the crumb moist without any chemical aftertaste. Can I use frozen bananas instead of fresh?Freezing bananas frees up time and adds delightful texture. Thaw them until soft, squeeze out excess water (or bake with the water), and mash. The slightly cooler mash preserves the natural sweet flavor. This results in an equally tender loaf with a subtle contrast of cooler fruit softness that is perfect for a breakfast in Brooklyn. Is this recipe keto‑friendly?Standard banana bread isn’t strictly keto due to banana starch. However, by swapping the whole‑wheat flour for almond flour and reducing the banana quantity slightly, you can create a low‑carb version. Keep the honey or maple syrup minimal or replace it with a keto sweetener. The result will be a dense, moist loaf that still captures the fragrant spices. Share Your Version!I’d love to see how you twist this recipe—do you add fresh rosemary, orange zest, or ground cumin? Drop a rating, comment, and if you capture a mood‑seeking photo, share it on Instagram or Pinterest and tag @cookingwithemi. I’m always excited to hear your take on the Moroccan spice swirl that I love so much.” From my NYC kitchen to yours — I hope this recipe brings as much warmth to your table as it does to mine. — emy 🧡 📌
Love This Recipe? Save It to Pinterest!If you enjoyed this Healthy Banana Bread recipe, don’t let it get lost in your browser tabs! 😄 Pin it now so you can find it again anytime — and explore hundreds more tried‑and‑tested recipes waiting for you on my Pinterest boards. 👉 Follow emy on Pinterest @chefrecipes2 📌 Pin this recipe · 🔁 Re-pin your favorites · 💬 Tag me when you make it — I love seeing your creations! Did this recipe hit the spot? Leave a 5-star rating, drop a comment below, and share your photos on Instagram or Pinterest. Tag @cookingwithemi so the whole community sees your creativity! 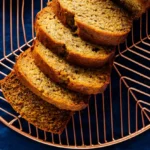 Healthy Banana BreadDescriptionWith this healthy banana bread recipe, you’re only a few simple ingredients away from the best banana bread ever! It’s made with whole wheat flour and naturally sweetened with honey or maple syrup. You can easily make this banana bread vegan or gluten freecheck the recipe notes for details. Recipe yields 1 loaf (about 10 slices). Ingredients
Scale
Instructions
Old-Fashioned Whipped Cream Cake | The Domestic Rebel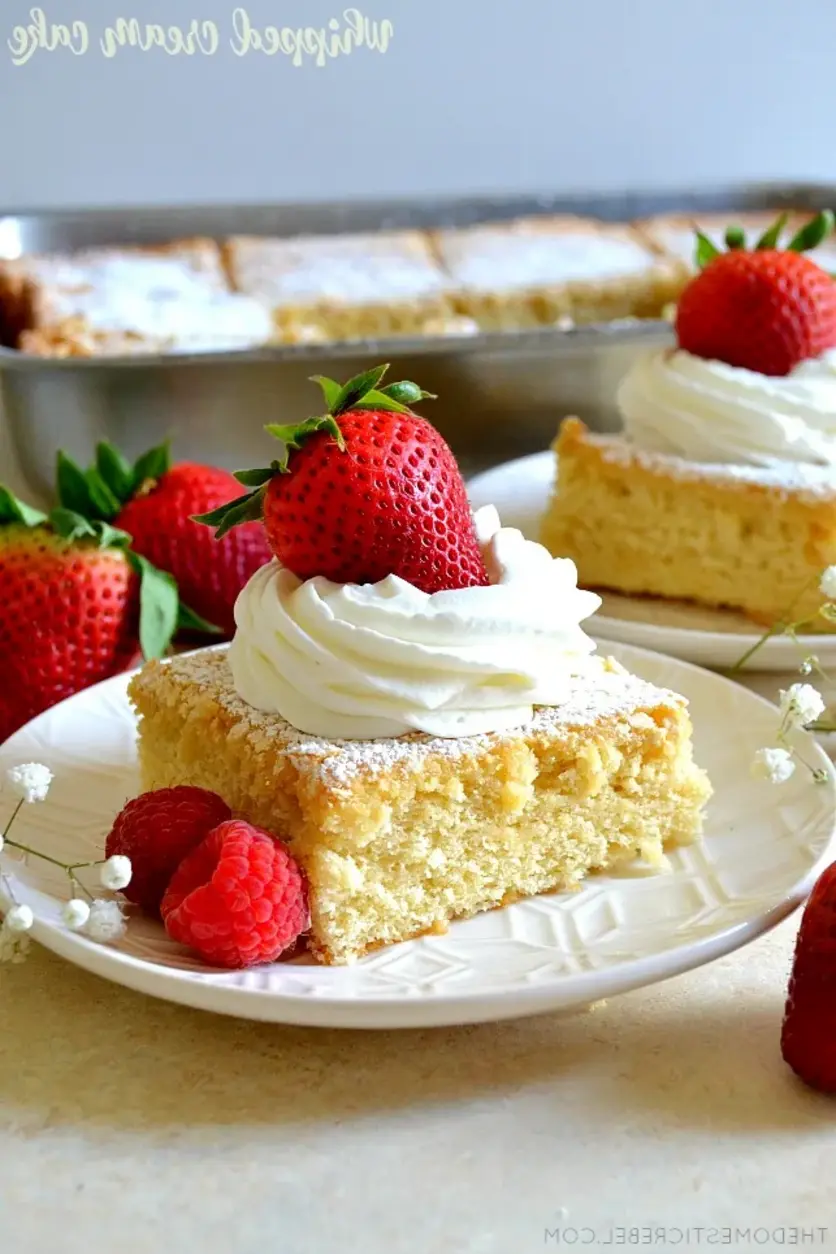 Table of ContentsOld-Fashioned Whipped Cream Cake – Fluffy Fusion of French Technique and Moroccan WarmthGrowing up in Marrakech, I learned that a simple cake could become a celebration. When I moved to Paris, I refined that love with French pastry techniques, and now in Manhattan, I mix the two worlds. This Old-Fashioned Whipped Cream Cake makes all three places sing – its airy crumb is thanks to gently folded whipped cream, a trick I first saw in a chic patisserie. Imagine misty vanilla clouds floating on a base of fluffy, golden batter that releases a sweet, buttery aroma whenever you cut a slice. The texture feels like a cloud cushion, while a dusting of powdered sugar adds a subtle crunch. A hint of sea salt at the rim of the pan brings contrast, echoing salt‑topped tajines from the North African coast. I tweaked this classic by folding heavy cream instead of simply whisking a high‑fat batter – it lightens the crumb the moment you taste it. A common mistake is overmixing the batter, which crushes the batter’s structure. I recommend whisking the vanilla and sugar, then adding flour in two thirds, leaving room for the gentle fold of whipped cream. This keeps the cake tender and fluffy. Why This Old-Fashioned Whipped Cream Cake Recipe Is the BestThe flavor secret lies in the whisper of vanilla and sea salt that harmonizes the Maillard browning of the pastry with the North African spice warmth I carry from my childhood. By folding in that airy whipped cream, I gave the cake a layered mousse feel without extra dairy. The texture is perfected through a deliberate two‑step flour addition: first, lightly sifted for aeration; second, folded back in after whipped cream. This method, borrowed from French patisseries, keeps gluten formation minimal so every bite feels soft like a cloud. Because the batter rests only briefly, even beginners can obey the 45‑minute total. The cast‑iron pan’s even heat keeps it from over‑browning, and the final check via toothpick is a quick visual cue for perfect doneness. Whipped Cream Cake IngredientsI typically buy the heavy cream from a local co‑op in Brooklyn and the butter from a small French shop in the Village. The flour I get from the marketplace is always lightly baked, giving it a subtle nutty hue that complements the cake’s sweetness. Ingredients List
Ingredient SpotlightHeavy whipping cream isn’t just for frosting. In this recipe it becomes the structural backbone, providing lift and a subtle butter flavor that’s harder to achieve with butter alone. Thicker cream keeps the cake moist while imparting a silky mouthfeel. All‑purpose flour from a local coop ensures a fine texture; you can substitute with cake flour for an even lighter crumb. The downside: cake flour lacks the body of all‑purpose, so the cake can be slightly denser. Sea salt, a traditional flavor in North African breakfasts, blurs the sweetness and adds a savory crunch. If you prefer high‑altitude baking, reduce the salt to 1/8 teaspoon to avoid over‑sodiumy aroma.
How to Make Old-Fashioned Whipped Cream Cake — Step-by-StepLet’s get rolling; this cake cares for the same philosophy as my Moroccan morning tea: quick, elegant, and deeply flavored. Step 1: PreheatSet your oven to 325 °F (165 °C). Grease a 9‑by‑13-inch pan with cooking spray and lightly dust it with flour to create a little air pocket for the cake’s rise. 💡 emy’s Pro Tip: Use a silicone baking square inside the pan to keep the batter from sticking; it fills empty spaces and holds the cake’s shape. Step 2: Fold in Whipped CreamWhip the cream with a hand or stand mixer until stiff peaks appear, about 5–7 minutes. In a separate bowl, whisk eggs, sugar, and vanilla until pale and fluffy (circa 2 minutes). Sift flour, baking powder, and salt over the mixture, then fold in the whipped cream gently—stopping when no streaks remain. ⚠️ Common Mistake to Avoid: Do not over‑fold the batter; mixing too aggressively will deflate the whipped cream causing a denser cake. Step 3: BakeTransfer batter to the prepared pan and bake for 30–40 minutes. A toothpick or cake tester should come out clean or with moist crumbs. Let the cake cool in the pan for 10 minutes, then transfer to a wire rack to cool completely. 💡 emy’s Pro Tip: Right before removing, dust lightly with powdered sugar; it adds a sweet crunch and creates a lovely visual finish.
Serving & PresentationOnce cooled, cut into square wedges. Dust lightly with confectioners’ sugar for a snowy edge and top each piece with a dollop of fresh whipped cream, or for a daring twist, a swirl of spiced orange marmalade inspired by my mother’s kitchen. A simple plate of orange slices or a splash of Moroccan mint tea pairs beautifully. For a Parisian touch, add a drizzle of amaretto or a drizzle of espresso‑coconut butter. The cake’s neutral flavor makes it a versatile canvas. For a beachy vibe, scatter cardamom‑spiced pistachios on the top; for a brunch, serve with fresh berries and a light lemon vinaigrette.
Make-Ahead, Storage & ReheatingWhen my week gets hectic, I bake this cake on Sunday, slice and let it set. The crumb stays moist, and I pass it into a cooler container with a damp towel for the week.
I find the crumb retains an airy texture when you reheat it briefly in a low oven—just enough to soften the glaze but not dry it. A dash of vanilla extract while reheating re‑awakens the fragrant undertones. Variations & Easy Swaps
Bean‑Powdered CakeReplacing half the flour with pureed black beans, a staple I pick up every Sunday in Queens, deepens the cake’s flavor while giving it a moist, dense body that still flakes like a cloud. The beans bring subtle earthy undertones, reminiscent of my father’s tagine, and boost protein. Gluten‑Free VersionSwap the all‑purpose flour for a 1:1 gluten‑free blend and add a teaspoon of xanthan gum to bind the batter. The crumb stays tender, though it’s a touch less airy. I’ve tested it with “Ridgefield Cup”, and it came out as delightful as the classic. Seasonal Spice TwistIn late fall, I stir in a teaspoon of ground cardamom and a pinch of smoked paprika. The fragrant spice adds warmth that pairs perfectly with roasted pumpkin soup or a simple goat cheese spread. How long does old-fashioned whipped cream cake keep in the fridge?When stored properly—wrapped tightly in plastic wrap or in an airtight container—this cake can keep in the refrigerator for up to 5–7 days. The whipped‑cream batter helps keep it moist, so just let it sit at room temperature for ~30 minutes before slicing and serving. Can I bake this cake with a different type of flour?Yes! You can replace all‑purpose flour with cake flour for a softer crumb or with a whole‑wheat blend for a nuttier flavor. If using cake flour, keep the same weight and consider adding a teaspoon of baking soda to balance leavening. Whole‑wheat will add density, so you may need to add a touch of extra whipping cream. What is the best way to fold in the whipped cream?The key is gentle, deliberate folding. Place the whipped cream on top of the batter, then slowly lift the mixture with a spatula in a slow, rocking motion, turning the batter just enough to incorporate. Repeat about three times, ensuring there are no visible streaks. This technique seals the air into the batter without breaking the foam. Is this cake gluten‑free?Not in its original form. However, you can make a gluten‑free version by using a sturdy gluten‑free flour blend with an extra teaspoon of xanthan gum to replace the structural support that wheat gluten provides. This substitutes the kneading and gives the cake a firm, yet tender crumb. Could I use a different sweetener instead of granulated sugar?Sure! Brown sugar, honey, or maple syrup can be used. Brown sugar will add the subtle molasses flavor; honey or maple syrup will reduce the sugar by 10 % and give a lighter texture. Keep in mind that liquid sweeteners might slightly affect the batter’s moisture. What do I do if the cake is too dense?Density often indicates over‑mixing or too much flour. Try stirring flour in in portions rather than all at once, and gently fold in the whipped cream to retain air pockets. If the cake is already baked, warm it in a low oven (300 °F) for 4–5 minutes, then let it cool on a rack. How can I add more flavor to the cake?Stir in a teaspoon of finely ground cardamom, rose water, or citrus zest into the batter for an extra aromatic layer. Alternatively, dust the finished cake with sea‑salt crystals or dust it with powdered sugar and fresh berries. For brunch, add a drizzle of crème de cassis or a light caramel glaze. What are good glassware or serving plates for this cake?Porcelain or ceramic plates with a subtle glaze provide a clean aesthetic that complements the cake’s snowy white finish. For a rustic setting, hand‑glazed earthenware works wonderfully, especially if you’re pairing it with a Moroccan tea mug. If you prefer a modern look, a white porcelain platter with a textured edge keeps the presentation sleek. Share Your Version!I’d love to hear how you adapt this cake for your family. Leave a star rating and comment below—your feedback keeps me inspired to experiment. Snap a photo of your masterpiece on Instagram or pin it on Pinterest, and tag @cookingwithemi. If you add a twist—say, a basil‑lemon swirl or a chocolate drizzle—ask me about it! From my NYC kitchen to yours — I hope this recipe brings as much warmth to your table as it does to mine. — emy 🧡 📌
Love This Recipe? Save It to Pinterest!If you enjoyed this Old-Fashioned Whipped Cream Cake recipe, don’t let it get lost in your browser tabs! 😄 Pin it now so you can find it again anytime — and explore hundreds more tried-and-tested recipes waiting for you on my Pinterest boards. 👉 Follow emy on Pinterest @chefrecipes2 📌 Pin this recipe · 🔁 Re-pin your favorites · 💬 Tag me when you make it — I love seeing your creations! Got a recipe tweak? Drop a comment or send me a recipe vote! — emy 🍰
 Old-Fashioned Whipped Cream CakeDescriptionThis Old-Fashioned Whipped Cream Cake will soon become a new family favorite! Easy and delicious, it comes together quickly and tastes amazing with a light and fluffy texture, a moist crumb, and a delectable vanilla flavor. Ingredients
Scale
Instructions
whipped vanilla buttercream Table of ContentsVanilla Buttercream with Almond Kiss – The BEST Whipped Vanilla Buttercream frosting!Growing up in a bustling Moroccan kitchen, my hands learned to balance sweet and aromatic flavors before I got that first textbook in Paris. I still can’t forget the scent of fresh almonds simmering in a pot beside the butter as I practiced whipping techniques that would later define my New Yorkbaking. The vanilla buttercream tops every batter with a cloud of vanilla and almond that feels like pastry stone dusted with snow—light, airy, and hinting at a subtle nutty undertone. When I roll it onto a cupcake, the frosting melts into silky lace, leaving a lingering perfume of sweet almond blossoms that can transport you across continents. My time in France taught me the power of gentle beating and careful ingredient addition. I’ve refined this recipe so that even if you’re a novice, you’ll get smooth, glossy frosting every time. In this full guide you’ll find a quick pro tip for achieving the perfect consistency and a common mistake that many bakeries overlook. Why This Vanilla Buttercream Recipe Is the BestThe flavor secret lies in the almond‑vanilla fusion, honed by a Moroccan family routine of boiling almonds to bring out their natural sweetness. The result is a frosting that is sweet yet balanced, a nod to both my heritage and my Parisian pastry training. Texture perfection comes from beating the butter at medium‑high speed until it’s light and fluffy, a technique I learned during pastry school. The whisk attachment introduces air, giving the buttercream a mousse‑like body that holds color and shape for hours. Because every step is straightforward—softened butter, two extracts, slow sugar and milk integration, and a quick final whip—anyone can replicate this luxury frosting. It’s “foolproof” for beginners and gourmet for pros. Vanilla Buttercream IngredientsI source my butter from a local Brooklyn dairy that offers the buttery flavor of the Midwest, the almond extract from a boutique spice shop near Union Square, and the finest sifted confectioners sugar from a New England mill. When I go to the farmers market on Market Street in Marrakesh, I pick up fresh vanilla beans that I mocha into liquid vanilla, which gives my frosting an authentic fragrance. Ingredients List
Ingredient SpotlightButter: Choose a butter with a high fat content (around 80%) so it melts smoothly as you beat. I prefer a European butter for its richer flavor. Substituting a salted butter will give a subtle savory edge. Confectioners Sugar: A fine sifted powder ensures a silky finish. If your sugar is clumpy, sift it or pulse it in a blender for a couple of seconds. A quadruple sugar, while sweet, can occasionally trigger a grainy texture. Whole Milk: Whole milk gives a creamy mouthfeel; skim milk loosens the frosting but may make it look dull. If you’re vegan, ½ cup of oat milk plus 1 tablespoon of aquafaba creates a similar consistency.
How to Make Whipped Vanilla Buttercream — Step-by-StepStart by letting the butter soften to room temperature; this creates a foundation that’s easy to whip into a velvety mousse. Step 1: Beat the ButterPlace softened butter in a stand mixer bowl with the whisk attachment at medium-high speed. Beat for about 3 minutes until it turns a pale gold color and feels fluffy. 💡 emy’s Pro Tip: If the butter jumps, lower the speed for a minute and then resume high speed; this prevents over‑beating into a dough. Step 2: Add Vanilla & Almond ExtractsAdd the vanilla and almond extracts and mix for 30 seconds until fully incorporated. ⚠️ Common Mistake to Avoid: Adding sugar too early can clump the frosting. Step 3: Slowly Incorporate Sugar & MilkSwitch the mixer to low speed. Gradually add sifted confectioners sugar, whole milk, and a pinch of salt, scraping the sides frequently. 💡 emy’s Pro Tip: Pour in a tablespoonful at a time and let it mix before adding more; this gives you control over thickness. Step 4: Whip to PerfectionOnce the sugar mixture is incorporated, increase the speed to medium-high and whip for at least 3 minutes (my mixer goes 7 minutes) until the frosting is thick, light, and glossy. ⚠️ Common Mistake to Avoid: Overwhipping past 8 minutes can lead to a rubbery texture. Step 5: Adjust ConsistencyIf the frosting is too thick, slowly beat in additional milk, a teaspoon at a time, until you reach a spreadable consistency. 💡 emy’s Pro Tip: For a richer frosting, stop when it’s slightly stiff but still drips pleasantly. Step 6: Store & RewhipRefrigerate the frosting in an airtight container up to 2 weeks. Before use, give it a quick rewhip to bring back the airy texture. 💡 emy’s Pro Tip: Store the frosting in a sealed jar; when in the fridge, let it sit at room temperature for 10 minutes before whisking again.
Serving & PresentationOnce your cupcakes have cooled, pipe generous swirls of frosting onto the tops, then carefully spread them with a knife or spatula. The almond-vanilla frosting pairs wonderfully with a drizzle of chocolate ganache or a dusting of powdered sugar. Place the decorated cupcakes on a slate slab, garnish with fresh mint leaves that echo the almond’s nutty fragrance, and add a few edible gold dust pearls for a glamorous street‑style NYC touch.
Make-Ahead, Storage & ReheatingI always prep my frosting the night before a party. A single batch keeps festive cupcakes looking pristine for up to 48 hours.
If you’re preparing ahead, simply keep the frosting chilled until you’re ready to pipe. The best part? I never lose the silky, whipped texture even after multiple refrigeration cycles. Variations & Easy Swaps
Lemon‑Zest ButtercreamInfuse the classic vanilla base with bright lemon zest and a splash of fresh juice, lifting the sweetness with a subtle tartness that evokes a citrusy brunch, all while remaining airy and smooth. Gluten‑Free / Dairy‑FreeSwap butter for coconut cream and confectioners sugar for a gluten‑free blend. The result is a slightly denser yet richly flavored frosting that remains perfectly pipeable; I’ve tested it on lemon cupcakes and it’s a hit. Seasonal Berry SwirlStir pureed strawberries or blueberries into half the frosting before whipping; the pop of color and natural sweetness elevates a classic sweet treat to a display‑worthy centerpiece, ideal for a farmer’s market “summer” theme. Can I use this vanilla buttercream on cupcakes?Absolutely! This frosting is designed to cling to delicate cupcake shells without leaking. Its airy yet firm structure holds up well on cupcakes, cakes, and even cookie dough. It spreads easily and remains smooth after refrigeration, making it ideal for any sweet creation. What’s the difference between whipped vanilla buttercream and regular buttercream?Whipped vanilla buttercream uses a higher butter-to-sugar ratio and incorporates air by beating at high speed, resulting in a lighter, mousse‑like texture. Regular buttercream, often rolled or packaged, tends to be denser and heavier. The whipped version is ideal for cake decorating where a silky finish and airy consistency are essential. How long does this frosting last in the fridge?When stored in a tightly sealed container, this whipped vanilla buttercream will keep up to two weeks in the refrigerator. If you need longer storage, freeze it for up to a month and defrost overnight in the fridge before rewhipping to restore its fresh texture. Can I add food coloring to this frosting?Yes, the frosting accepts both liquid and powdered food coloring evenly. Just add a few drops of liquid or a pinch of powder after whipping to the desired shade. Start with a small amount, whisk, and adjust gradually to avoid over‑coloring, which might affect the final texture. Is almond extract essential or can I omit it?Almond extract adds a subtle nutty aroma that balances the vanilla sweetness, enhancing depth. While you can omit it, the frosting will still be lovely, but it will be less complex. Try using a splash of almond‑flavored liqueur or a pinch of ground almonds for a similar effect if needed. How can I thicken the frosting?If the frosting feels too thin, incorporate more confectioners sugar a tablespoon at a time while beating. Alternatively, add an extra splash of milk, whisking thoroughly, until you reach a more pumpable consistency. Avoid adding too much milk too quickly; it can make the frosting too loose. Can I use this frosting for cake versus cupcakes?Definitely! The airy texture and light flavor adapt beautifully to multi‑layer cakes, providing a smooth mantle that doesn’t overwhelm the cake’s own flavor profile. For larger cakes, give the frosting two quick rewhips after refrigerating to keep it airy. Can I freeze vanilla buttercream?Yes, you can freeze the frosting in a vented freezer bag or an airtight container for up to one month. When ready to use, thaw it in the refrigerator overnight, then give a quick whisk or rewhip to return it to its fluffy state before piping or spreading. Share Your Version!I’d love to hear how you tweak this frosting—add a boost of espresso, try a bright citrus twist, or perhaps use a funky French butter! Give me a rating, drop a comment, and let me brag about your creations in the comments below. Tag your photos on Instagram or Pinterest with @cookingwithemi and share your kitchen magic. Curious about which technique yields the fluffiest result? Ask me! Remember, the secret lies in patience and the right hand speed. From my NYC kitchen to yours — I hope this recipe brings as much warmth to your table as it does to mine. — emy 🧡 📌
Love This Recipe? Save It to Pinterest!If you enjoyed this Vanilla Buttercream recipe, don’t let it get lost in your browser tabs! 😄 Pin it now so you can find it again anytime — and explore hundreds more tried-and-tested recipes waiting for you on my Pinterest boards. Follow emy on Pinterest @exorecipe 📌 Pin this recipe · 🔁 Re-pin your favorites · 💬 Tag me when you make it — I love seeing your creations! What’s your favorite way to use whipped vanilla buttercream? Leave a comment below and let’s chat about swapping flavors, decorating ideas, or meeting places where we can taste‑test together!  Vanilla ButtercreamDescriptionThe BEST Whipped Vanilla Buttercream frosting! Ingredients
Scale
Instructions
Creamy Butter Cake Recipe (California Pizza Kitchen)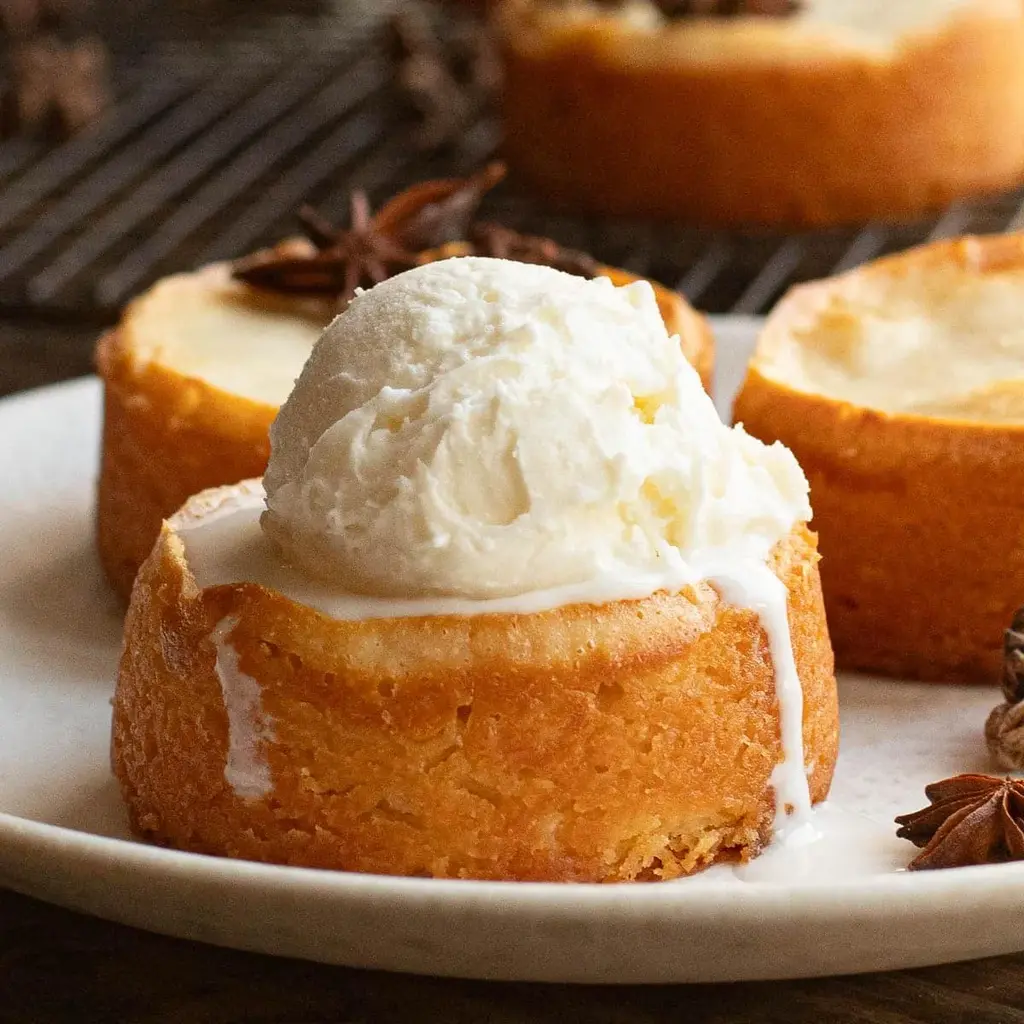 Table of ContentsCreamy Butter Cake Recipe (California Pizza Kitchen) – Two-Layer DelightWhen I first tasted the famous two-layer dessert from California Pizza Kitchen, I wanted to bring that same indulgent joy back into my kitchen. The Creamy Butter Cake, with its luscious, light cake base topped by a silky cheesecake mantle, is a dream in Every bite. I’ve reimagined it with a technique borrowed from my French pastry training: gentle folding instead of heavy beating to preserve the airy texture. Picture the bright, golden-rimmed cake nestling atop the glossy, pale cheesecake layer, each spoonful mixing buttery fragrance with a hint of vanilla, softened by a whisper of coconut‑infused sugar. Visually, it’s like a small, snowy floater on chocolate‑brown foam, a burst of warmth that reminds me of my mother’s kitchen in Fez—where sugar is sprinkled over warm pastries, and every dish carries a story. What sets my version apart is the “dual‑fold” method that keeps both layers tender yet firm. My kitchen experiment taught me that adding a small splash of citrus zest during the cake batter mix brings a subtle brightness. A common mistake is over‑mixing, which leads to a dense crumb; my pro tip ensures the batter stays supple by folding just until combined. Why This Creamy Butter Cake Recipe Is the BestThe secret is in the double layer: the cake base is buttery, a touch of vanilla, and the precise amount of flour that keeps it light, while the cheesecake topping is smooth because I leave the fats cold before beating. The result? A dessert that melts in your mouth without being cloying—a technique I perfected during a pastry class at Le Cordon‑Bleu. Texture matters. By using a stand mixer on low speed for the cake and folding for the cheesecake, I stop the gluten from over‑developing. The outcome is a crumb that sags just enough for that classic “sponge water” feel, but sturdy enough to hold the glaze of cream cheese. I’ve tested this on hard‑packed batter and it still comes out airy. When you’re a beginner, this recipe shines because every step is straightforward: prep, fold, bake, and repeat. No need for temperature‑sensitive molds or advanced piping. It’s a sweet, foolproof delight that quickly becomes a staple in my rotation. Creamy Butter Cake IngredientsI source the butter from a local Brooklyn dairy, the cream cheese from the well‑stocked French aisle in Union Square, and the flour from a modest grocery in Williamsburg. Each while keeping an eye on freshness to emulate the original CPK flavor. Ingredients List
Ingredient SpotlightButter: use freshly melted butter for better flavor; an alternative is unsalted coconut oil for a subtle tropical note. The butter gives the cake its melt‑in‑mouth softness. Cream cheese: the 2‑oz and 3‑oz amounts separate the two layers; choosing a high‑fat brand (90% fat) preserves the silky cheesecake. If you need lactose‑free, use a Greek‑style dairy‑free cheese; texture will be denser. Egg white: whipping it into the cheesecake batters adds lift. As a substitute, use a tablespoon of aquafaba from chick‑pea water for a vegan option; flavor remains close.
How to Make Creamy Butter Cake — Step-by-StepFollow me through each stage to recreate that easy, copycat marvel from California Pizza Kitchen. Step 1: Prepare RamekinsPreheat oven to 325°F. Lightly coat six ramekins with non‑stick spray. This ensures easy release after baking. 💡 emy’s Pro Tip: Use silicone mats in the sheet for easy transport. Step 2: Make Cake LayerBeat butter, 1 cup sugar, and 2 oz cream cheese until creamy. Beat in 1 large egg, 1 tsp vanilla, and ¼ tsp salt. With mixer on low, fold in flour till just combined. Pour 6 Tbsp batter into each ramekin. ⚠️ Common Mistake to Avoid: Over‑mixing the batter causes dense crumb. Step 3: Make Cheesecake LayerClean the mixer bowl. Beat 3 oz cream cheese with 3 Tbsp sugar; slowly fold in 1 egg white and ¼ tsp vanilla. Spoon 1 Tbsp of this batter atop the cake in each ramekin. 💡 emy’s Pro Tip: Refrigerate the batter for 10 minutes before folding, for at least one firm layer. Step 4: BakePlace ramekins on a baking sheet and bake for 45–50 minutes until golden. Cool on a rack, then run a knife along edges to release. ⚠️ Common Mistake to Avoid: Leaving too long in oven makes the top too hard. Step 5: ServeServe warm or at room temperature with a scoop of vanilla ice cream. The contrast of creamy cake and cool ice adds delights.
Serving & PresentationGarnish the cake with a dusting of powdered sugar and a few fresh mint leaves. Pair it with a crisp grapefruit sorbet for a citrus twist that echoes my Dutch bagel tasting trip in Brooklyn. If I’m in a pinch, a drizzle of warm honey over the top adds a sweet glaze reminiscent of a Moroccan desert stall. The creamy layers melt against the crunchy crust of a toasted brioche, creating a texture contrast that feels very New York.
Make-Ahead, Storage & ReheatingI constantly prepare these in advance for my apartment’s busy schedule. The cakes can be refrigerated in airtight containers for up to 3 days and frozen for up to 2 months. When reheating, a quick 3‑minute bake at 300°F restores the airy crumb.
When I reheat, I use a conventional oven on low heat rather than microwaving, which preserves the glaze and avoids soggy edges. The cake remains fluffy if you’re quick with the timer. Variations & Easy Swaps
Chocolate GlazeInfuse the cake batter with ½ cup cocoa and a pinch of sea salt. This gives a richer, bittersweet flavor that echoes the chocolate pastries of Mid‑East bazaars. Gluten‑FreeReplace all‑purpose flour with almond or coconut flour; the crumb becomes slightly denser but still al fresco. I’ve tested it with a savory rosemary drizzle that works like a perfectly balanced salad. Seasonal LemonSwap vanilla for 1 tsp grated lemon zest. The bright acidity cuts through the richness, making it a perfect summer refresher. What is the difference between the cake layer and the cheesecake layer in this recipe?The cake layer is light, buttery and made with a single egg, butter, sugar, and flour mixture that creates a sponge-like crumb. The cheesecake layer sits on top, using a second portion of cream cheese with eggs, sugar, and vanilla for a silky, dense consistency. Together they deliver a two‑tier dessert that balances mouthfeel and flavor profile. The egg white folded into the cheesecake gives it a lighter lift, while the cake layer’s butter gives it a buttery aroma. Can I make this dessert vegan?Yes, you can substitute dairy cheese with vegan cream or coconut yogurt, replace unsalted butter with vegan butter, and use aquafaba for the egg white. The texture will be softer but still creamy, maintaining the two‑layer effect and the buttery base. Vegan packaging should be marked vegan in the supermarket to ensure no dairy traces remain. This approach aligns with many plant‑based diets while preserving the dessert’s core. How do I store leftovers of this cake?You can keep the cake in an airtight container for up to three days at room temperature or refrigerate for up to five days. If you need longer storage, freeze in a smooth‑sealed jar or plastic container; thaw overnight in the fridge and warm the pieces in the oven for 5 minutes to bring back the original softness. The key is to protect the cake from grease stains and to keep the frosting from drying out. What are some pairing options for serving this cake?Pair it with a fresh mint sorbet for a cooling contrast, or a chilled whisky for a celebratory ambience. A tangy arugula salad with balsamic can offset the sweetness. Complement the dessert with a robust red wine or a citrus‑infused sparkling water. Many lovers prefer pairing it with tropical fruit preserves or a caramel drizzle that enhances its buttery flavor. Does this recipe require a special oven or equipment?Standard convection or conventional ovens handle the baking temperature of 325°F. A set of six ramekins is enough; use non‑stick spray to prevent sticking. You can also bake in a mini‑oven or a double‑stacked bake tray if you prefer. The recipe does not rely on a specific type of mixer beyond a standard stand or hand mixer; just beat until creamy and maintain gentle folding to preserve texture. Can I add other flavors to the cheesecake layer?Yes, you can incorporate fruit purées like strawberries or blueberries for a color contrast. Add a teaspoon of citrus zest or maple syrup for extra depth. Experiment with espresso powder or matcha for a modern twist. Maintain the original ratio of cream cheese to sugar to keep balance. Each variant gives the cake a new aromatic profile while sticking to the base’s structure. How long does it take to bake each cake?The cake and cheesecake layers bake together in 45–50 minutes at 325°F. The batter should achieve a golden crust on the top and a firm crumb inside. The bake time could be lengthened on a full rack if the oven runs hotter. Use the visual cue of a slight browning to judge doneness, as the interior remains moist. Is there a shortcut to think of when using this recipe?Use a two‑fold technique: first mix the cake batter, then fold the cheesecake batter, and depend on the texture. The “folding” method helps prevent over‑mixing. For a quick version, prep the batter and let it chill 10–15 minutes before baking. This gives the cake more structure and makes the layers easier to separate later during final plating. Share Your Version!Drop a star rating and tell me how the two‑layer delight turned out on your plate. If you photographed it, post it on Instagram or Pinterest and tag @cookingwithemi so I can see your beautifully plated creations. What would be your next twist? Maybe a citrus glaze or a gluten‑free base? I’d love to hear what experimental flavors you added. From my NYC kitchen to yours — I hope this recipe brings as much warmth to your table as it does to mine. — emy 🧡 📌
Love This Recipe? Save It to Pinterest!If you enjoyed this Creamy Butter Cake recipe, don’t let it get lost in your browser tabs! 😄 Pin it now so you can find it again anytime — and explore hundreds more tried-and-tested recipes waiting for you on my Pinterest boards. 👉 Follow emy on Pinterest @chefrecipes2 📌 Pin this recipe · 🔁 Re-pin your favorites · 💬 Tag me when you make it — I love seeing your creations! Got questions? Drop them in the comments or let me know how you tweaked the layers— I’ll gladly share more tips in the next post!
 Creamy Butter Cake Recipe (California Pizza Kitchen)DescriptionAn easy copycat recipe for the famous two-layer dessert Ingredients
Scale
Instructions
|
