“`html

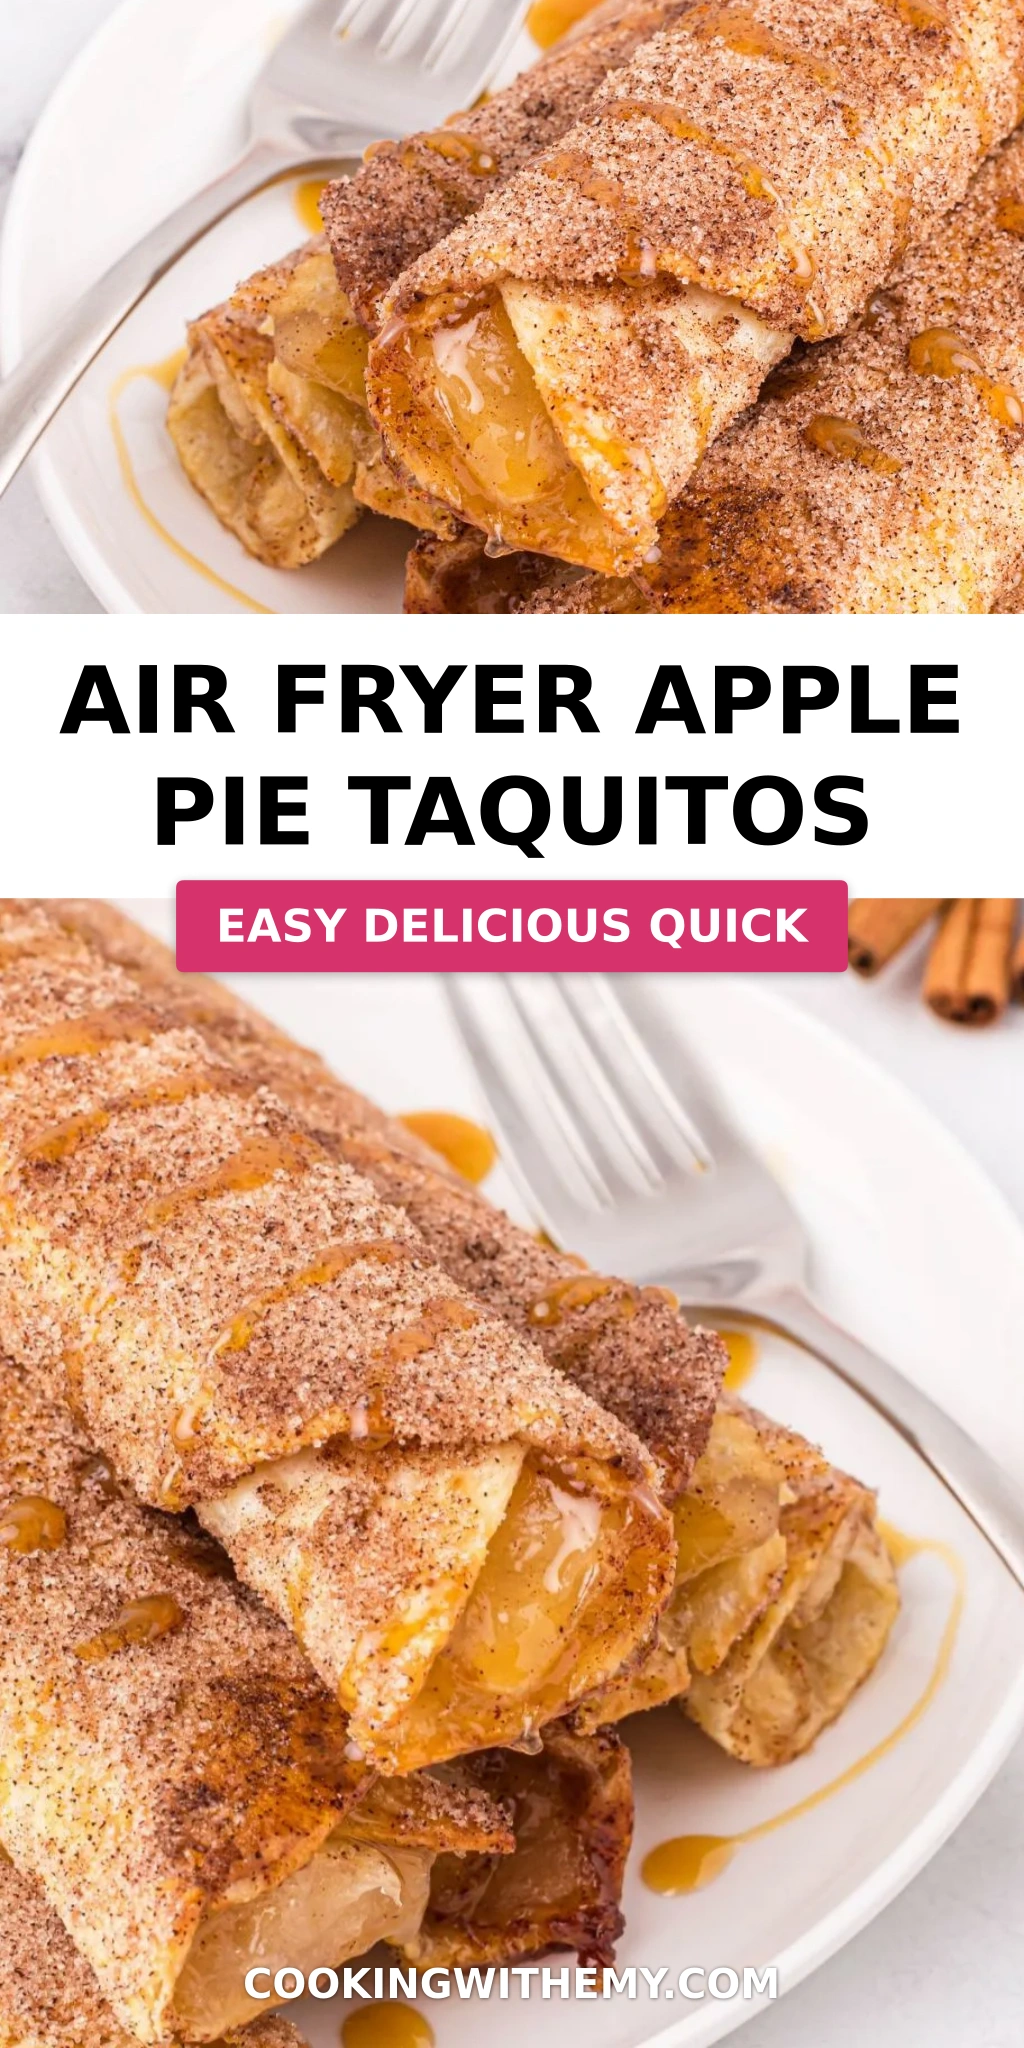
Air Fryer Apple Pie Taquitos – Quick & Crispy Cinnamon-Sugar Treat

⚖️
Difficulty
Easy
⏲️
Prep Time
10 mins
🕒
Cook Time
15 mins
⏱️
Total Time
25 mins
🍽️
Servings
6

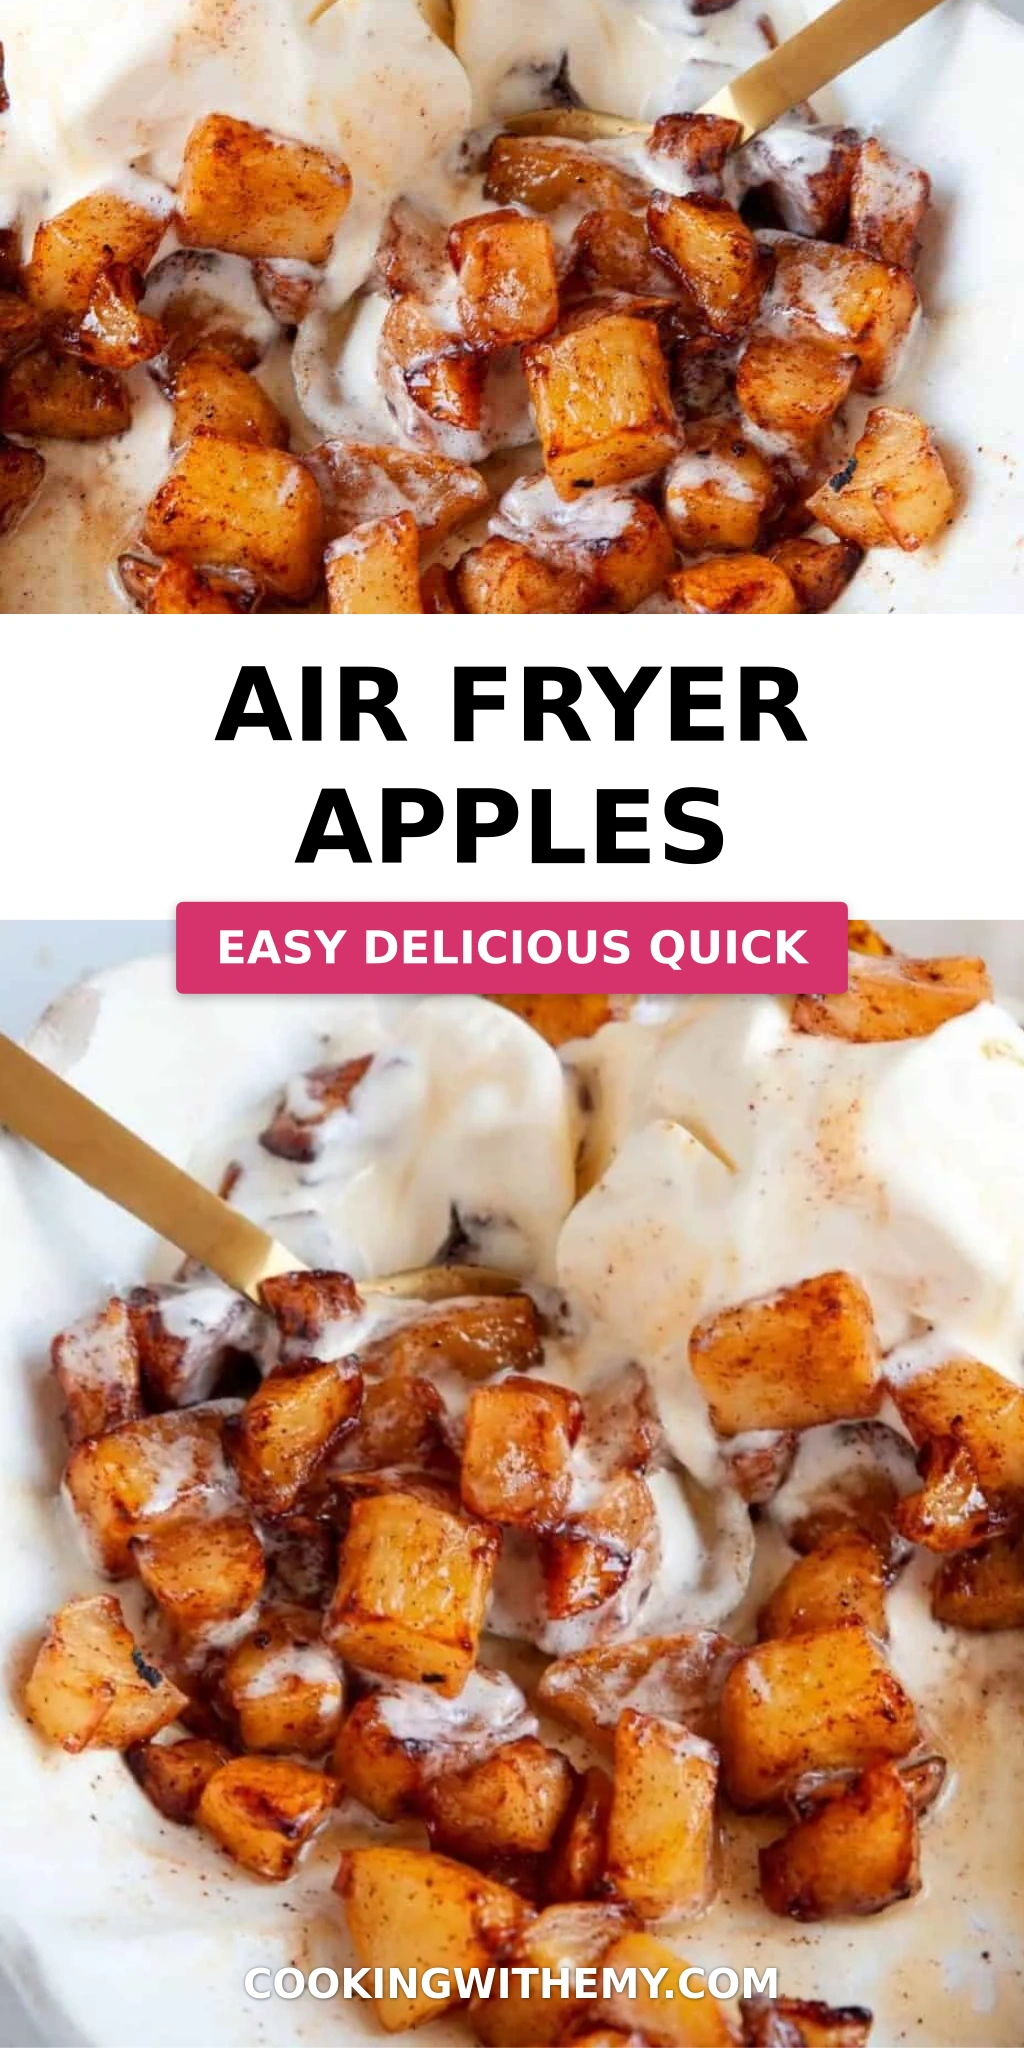
Growing up in Morocco, my mother would fill thin warqa dough with sweetened apples and fry them until golden — a simple street-side pleasure that always felt like a hug. Now, as a trained Parisian chef living in New York City, I’ve reimagined that memory into something just as soulful but infinitely quicker: air fryer apple pie taquitos. These little rolls are everything you love about classic apple pie but come together in under 30 minutes with zero fuss. The twist? A cinnamon-sugar crust that gets shatteringly crisp thanks to the air fryer, while the inside stays warm, jammy, and utterly comforting. This apple pie taquitos recipe is my weeknight dessert hero.

The first bite hits you with a audible crunch — the cinnamon-sugar shell cracks open to reveal soft, pliable tortilla wrapped around sweet, tender apple filling. There’s a whisper of caramel from the canned pie filling, a gentle warmth from the cinnamon, and a buttery richness that ties it all together. The air fryer works its magic here: it crisps every nook and cranny without the grease of deep-frying, giving you that golden-brown finish in minutes. It’s the kind of dessert that feels like a treat but fits neatly into a busy Tuesday evening.

What sets my version apart is the layering of technique I’ve honed over years in professional kitchens. I brush each rolled taquito with melted butter before coating it in cinnamon sugar — that butter acts as both glue and crisping agent, ensuring every side caramelizes evenly. A common mistake is overfilling, which causes the tortillas to burst open during cooking. I teach you exactly how much filling to use and how to roll tightly so nothing leaks. Whether you’re new to air frying or a seasoned pro, this easy apple taquitos recipe is foolproof and endlessly adaptable.

Why This Air Fryer Apple Pie Taquitos Recipe Is the Best

The flavor secret here is all about contrast. Growing up in Morocco, I learned that the best desserts balance sweetness with warmth — here, the cinnamon-spiked sugar coating meets the soft, fruity filling for a combination that hits every note. My French pastry training taught me the importance of butter as a flavor carrier, so brushing each taquito with melted butter before sugaring isn’t optional — it’s the step that gives you that deep, caramelized crunch. This air fryer dessert recipe proves that simple ingredients, treated with care, can rival anything from a bakery window.

Perfected texture comes down to the air fryer’s circulating heat and my two-stage cooking method. I start with the taquitos seam-side down at 350°F for 9–11 minutes, which sets the structure and crisps the bottom. Then I flip them and finish for another 3–4 minutes. That flip is the chef’s trick that ensures all-over golden-brown crunch — no soggy spots, no uneven browning. The result is a taquito that’s crisp all the way around, with a tender, never-gummy interior.

Foolproof and fast is what makes this recipe a keeper for home cooks. Canned apple pie filling eliminates the need for peeling, chopping, and simmering — but I’ll share how to dress it up with a pinch of nutmeg or a squeeze of lemon if you’re feeling ambitious. The entire process, from opening the can to pulling golden taquitos out of the air fryer, takes about 25 minutes. It’s the kind of recipe that looks impressive but requires almost no effort, which is exactly what I need after a long day in my NYC kitchen.

Air Fryer Apple Pie Taquitos Ingredients

When I’m shopping for these ingredients at my local NYC farmers market or bodega, I look for quality staples that do the heavy lifting. The canned apple pie filling is the star shortcut — I’ll tell you which brand I trust and how to doctor it up. Here’s everything you’ll need.

Ingredients List

  • 1 can apple pie filling (21 ounces) — I prefer Musselman’s or Comstock
  • 6 soft flour tortillas (medium, about 8-inch) — burrito-size works too, just adjust filling
  • 4 tbsp butter, melted — salted or unsalted both work
  • ½ cup granulated sugar
  • 1 tbsp ground cinnamon — Vietnamese cinnamon is especially fragrant

Ingredient Spotlight

Apple pie filling: Canned filling gives you perfectly cooked, evenly sweetened apples every time. Look for one with visible apple chunks and minimal corn syrup. If you prefer a less sweet filling, I recommend Musselman’s Lite — it has 30% less sugar while maintaining great texture. For a homemade feel, you can substitute with 2 cups of diced fresh apples (Honeycrisp or Granny Smith) cooked with ¼ cup brown sugar and 1 tsp cinnamon until tender.

Flour tortillas: Medium-sized soft flour tortillas roll easily without cracking. Avoid “low-carb” or “whole wheat” varieties as they tend to be less pliable and may split during rolling. Corn tortillas can be used but they’re smaller and more prone to breaking — if you go that route, warm them briefly in the microwave to improve flexibility. My Parisian chef training taught me that room-temperature tortillas roll tighter, so let them sit out for 10 minutes before assembly.

Butter and cinnamon sugar: The butter acts as both an adhesive and a crisping agent. I use salted butter for a subtle savory counterpoint. The cinnamon-sugar ratio of ½ cup sugar to 1 tablespoon cinnamon is my sweet spot — warm but not overpowering. For the flakiest results, brush the butter generously but not soaking wet, and roll the taquitos in the sugar mixture immediately while the butter is still molten.

Original Ingredient Best Substitution Flavor / Texture Impact
Canned apple pie filling Fresh apples + brown sugar + cinnamon Fresher, less sweet; requires extra prep time
Flour tortillas (medium) Corn tortillas (warmed) or gluten-free tortillas Corn are smaller, less pliable; GF may be more delicate
Granulated sugar Coconut sugar or brown sugar Deeper caramel notes; slightly less crisp coating

How to Make Air Fryer Apple Pie Taquitos — Step-by-Step

Trust me, this is one of the easiest air fryer dessert recipes you’ll ever make. Follow these steps, and you’ll have golden, crispy taquitos that taste like apple pie in a fraction of the time.

Step 1: Prepare the Filling

Open the can of apple pie filling and transfer it to a small bowl. Use a fork or a knife to break up any large apple chunks into smaller, bite-sized pieces — this makes rolling easier and ensures even distribution. If the filling seems too runny, drain off a tablespoon of the syrup. You want a thick, spoonable consistency that won’t seep out during cooking.

💡 emy’s Pro Tip: For extra warmth, stir in ¼ teaspoon of nutmeg and a splash of vanilla extract. It elevates the canned filling to taste almost homemade.

Step 2: Assemble the Taquitos

Lay one tortilla flat on your work surface. Spoon about 2 tablespoons of the apple filling across the center of the tortilla in a straight line, leaving about 1 inch of space on each end. Don’t overfill — this is the most common mistake. Fold the sides over slightly, then roll the tortilla tightly but gently away from you. Place it seam-side down on a plate and repeat with the remaining tortillas.

⚠️ Common Mistake to Avoid: Overfilling! More than 2 tablespoons will cause the filling to burst out during air frying. Trust me, less is more here.

Step 3: Butter and Coat

Brush each rolled taquito generously with melted butter, covering all sides. In a shallow dish, whisk together the sugar and cinnamon. Roll each buttered taquito in the cinnamon-sugar mixture, pressing gently so the coating adheres evenly. Set them aside on a clean plate as you work.

💡 emy’s Pro Tip: Use a pastry brush to get melted butter into every crease. The more surface area covered, the crispier and more golden your taquitos will be.

Step 4: Air Fry — First Side

Place the coated taquitos in the air fryer basket, seam-side down, making sure they are not stacked or overlapping. Depending on the size of your air fryer, you may need to work in batches. Air fry at 350°F for 9–11 minutes, until the bottoms are deep golden brown and the tortillas look set. No need to preheat — just load and start.

⚠️ Common Mistake to Avoid: Crowding the basket leads to steamed, soggy taquitos. Leave at least ½ inch of space around each one for proper air circulation.

Step 5: Flip and Finish

Using tongs, carefully flip each taquito over so the seam side is now facing up. Air fry for an additional 3–4 minutes, or until the tops are golden and crispy and the filling is bubbling at the ends. The total cook time should be about 12–15 minutes depending on your air fryer model. Remove them carefully — they’ll be hot!

💡 emy’s Pro Tip: The flip is where the magic happens. It guarantees 360-degree crispness. If your air fryer runs hot, check at the 3-minute mark and adjust.

Step Action Duration Key Visual Cue
1 Prepare filling 2 mins Thick, spoonable, no large chunks
2 Assemble taquitos 5 mins Tight rolls, seam intact
3 Butter and coat 3 mins Evenly coated, no dry spots
4 Air fry first side 9–11 mins Deep golden brown bottom
5 Flip and finish 3–4 mins All-over golden, filling bubbling

Serving & Presentation

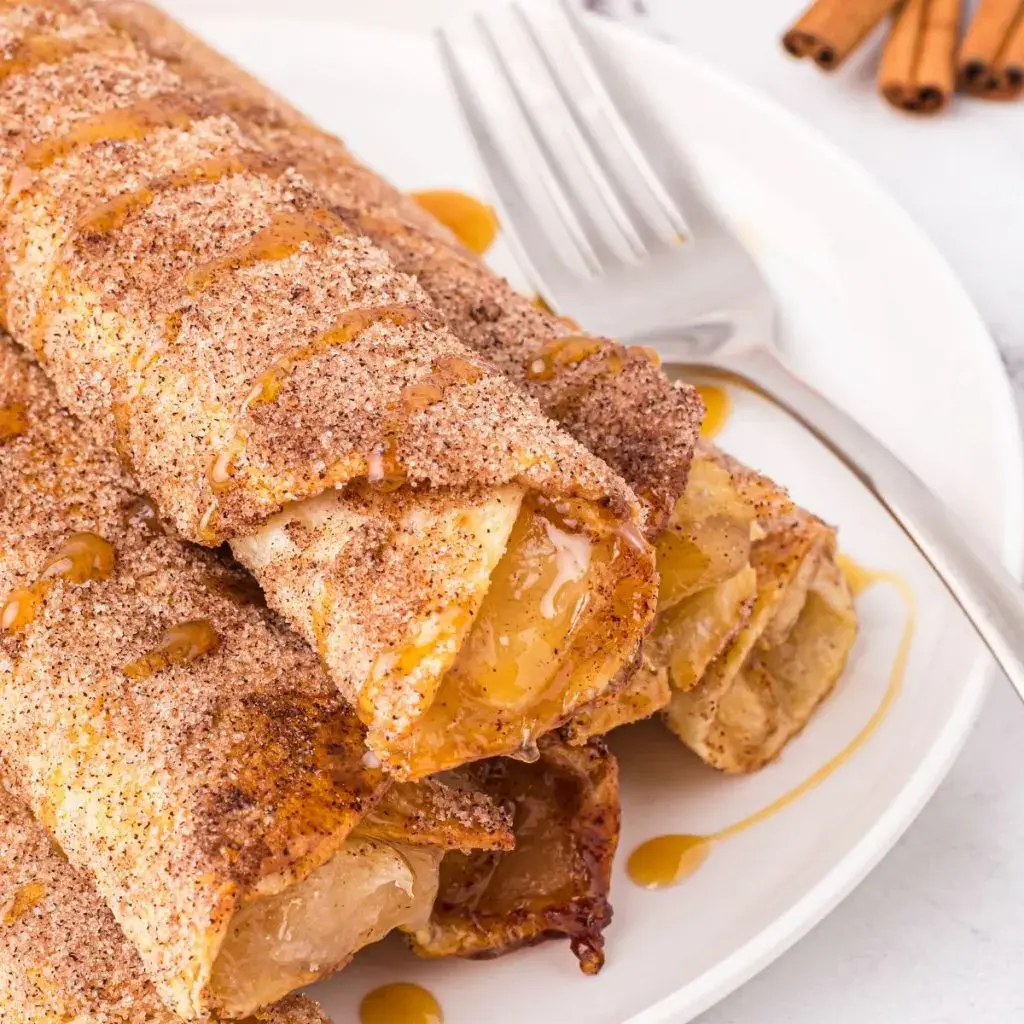
These air fryer apple pie taquitos are stunning on a plate with minimal effort. I love to arrange them on a long wooden board, slightly overlapping, with a small bowl of warm caramel sauce or vanilla ice cream for dipping. A dusting of powdered sugar and a few fresh mint leaves make them look like they came from a chic NYC dessert bar. The contrast of the crispy, sugar-crusted exterior against the cold, creamy ice cream is nothing short of magical.

In my Moroccan home, we’d serve something similar with a drizzle of honey and a sprinkle of sesame seeds. For a Parisian touch, try a dollop of crème fraîche with a pinch of fleur de sel — the tanginess cuts through the sweetness beautifully. If you’re serving a crowd, cut each taquito in half on the diagonal to reveal the beautiful apple filling inside. They’re equally delicious warm or at room temperature, making them perfect for parties, potlucks, or a cozy night in.

For the full dessert experience, pair these taquitos with a scoop of vanilla bean ice cream, a drizzle of salted caramel, and a light dusting of cinnamon. My go-to NYC trick: warm the caramel slightly so it pools around the taquitos on the plate. It’s simple, elegant, and guaranteed to impress.

Pairing Type Suggestions Why It Works
Side Dish Vanilla ice cream, whipped cream, Greek yogurt Cold & creamy balances warm & crisp
Sauce / Dip Salted caramel, chocolate sauce, honey Enhances sweetness with contrasting flavor
Beverage Hot apple cider, chai latte, espresso Warm spices complement the cinnamon
Garnish Powdered sugar, mint, cinnamon stick Adds visual appeal and aromatic lift

Make-Ahead, Storage & Reheating

In my busy NYC life, I’m all about recipes that work ahead. These taquitos are wonderfully flexible — you can prep them in advance and air fry just before serving, or fully cook them and reheat later. Here’s everything I’ve learned from testing this easy apple taquitos recipe multiple times.

Method Container Duration Reheating Tip
Refrigerator Airtight container lined with paper towel Up to 3 days Air fry at 350°F for 3–4 mins — skip the flip
Freezer Freezer-safe bag or container, parchment between layers Up to 2 months Air fry from frozen at 350°F for 6–8 mins, flip halfway
Make-Ahead Assembled, uncoated on a tray Up to 24 hours in advance Brush with butter, coat, and air fry just before serving

If you’re storing fully cooked taquitos, the key to maintaining crispness is reheating in the air fryer — never the microwave. Microwaving will make the coating soggy in seconds. I’ve tested this more times than I can count, and the air fryer brings them back to life beautifully. For frozen taquitos, there’s no need to thaw; just add an extra minute or two to the cook time.

Variations & Easy Swaps

One of the things I love most about this apple pie taquitos recipe is how easily it adapts to different tastes and dietary needs. Here are my favorite variations, each tested in my own kitchen.

Variation Key Change Best For Difficulty Impact
Moroccan Spiced Add ½ tsp ras el hanout + ¼ tsp ginger to filling Warm, aromatic twist Easy (no added steps)
Gluten-Free Use gluten-free tortillas (almond or cassava-based) Dietary restrictions Easy (handle gently)
Savory-Sweet Add 2 tbsp crumbled blue cheese + 1 tbsp honey to filling Sophisticated dessert Easy

Moroccan Spiced Version

This variation is close to my heart — it takes me straight back to my mother’s kitchen. Add ½ teaspoon of ras el hanout (a North African spice blend with cumin, coriander, cinnamon, and cardamom) and ¼ teaspoon of ground ginger to the apple filling before rolling. The warm, floral notes elevate the apple flavor in a way that’s subtle but memorable. Finish with a drizzle of honey and a sprinkle of sesame seeds before serving. It’s the kind of unexpected twist that makes people ask, “What’s in this?”

Gluten-Free / Dairy-Free Version

For a gluten-free version, I recommend Siete brand almond flour tortillas or cassava flour tortillas — they’re pliable and sturdy enough for rolling. Warm them for 10 seconds in the microwave to prevent cracking. For dairy-free, substitute the melted butter with coconut oil or a vegan butter stick (Miyoko’s works beautifully). The coating might be slightly less crunchy, but the flavor is still outstanding. I’ve tested this for my gluten-sensitive friends and it’s always a hit.

Seasonal Fruit Twist

When summer arrives at my NYC farmers market, I love swapping the apple filling for an equal amount of peach or cherry pie filling. Peaches with a pinch of cardamom, or cherries with a drop of almond extract — both are phenomenal. If using fresh fruit, cook it down with a little sugar and cornstarch until thick, about 5 minutes. The air fryer technique stays exactly the same, and you get a whole new dessert experience with zero additional effort.

FAQ

How do you keep the filling from leaking out of air fryer apple pie taquitos?

The key to leak-free taquitos is threefold: don’t overfill, roll tightly, and place seam-side down in the air fryer. Use exactly 2 tablespoons of filling per medium tortilla — any more and the filling will push out as the tortilla expands during cooking. When rolling, tuck the sides in slightly and apply gentle, even pressure. Finally, always start cooking with the seam facing down so the heat seals the edge before it has a chance to burst open. If your filling is very runny, drain off a little syrup before assembling.

What type of apples work best for making apple pie taquitos in an air fryer?

Since this recipe uses canned apple pie filling, you don’t need to worry about apple variety — the can does the work for you. However, if you decide to make your own filling from scratch, choose apples that hold their shape when cooked and offer a balance of sweet and tart. Honeycrisp, Granny Smith, or Braeburn are my top picks. Honeycrisp adds natural sweetness, Granny Smith gives a pleasant tang, and Braeburn offers a dense texture that won’t turn mushy. Peel, dice, and cook them with a little brown sugar and cinnamon until just tender before using.

Can you use flour tortillas instead of corn tortillas for air fryer apple pie taquitos?

Absolutely — and I actually recommend flour tortillas for this recipe. Medium-sized soft flour tortillas are more pliable than corn, which means they roll easily without cracking or splitting. Corn tortillas tend to be smaller, drier, and more brittle, making them harder to work with for this dessert application. If you only have corn tortillas on hand, warm them briefly in the microwave (about 15 seconds) wrapped in a damp paper towel to improve flexibility. Just note that corn tortillas will produce a slightly firmer, less flaky texture.

How long do you cook air fryer apple pie taquitos and at what temperature?

Cook the taquitos at 350°F for a total of 12–15 minutes. Start by air frying them seam-side down for 9–11 minutes, until the bottoms are deep golden brown. Then flip them over and cook for an additional 3–4 minutes to crisp the other side. The exact time depends on your air fryer model — larger models with powerful fans may cook faster, while smaller ones might need the full 15 minutes. Look for an all-over golden-brown color and a crisp, crackly sound when you tap the shell. No need to preheat the air fryer.

Can I make these air fryer apple pie taquitos ahead of time for a party?

Yes, and I do this all the time for gatherings. You have two great options: assemble the taquitos up to 24 hours in advance, keep them covered in the fridge, then brush with butter, coat in cinnamon sugar, and air fry just before serving. Alternatively, fully cook and cool the taquitos, then store them in an airtight container at room temperature for up to 4 hours. Reheat in the air fryer at 350°F for 3 minutes to restore crispness. I don’t recommend reheating in the microwave — the coating will become soggy.

What dipping sauces go well with air fryer apple pie taquitos?

The possibilities are deliciously endless! The classic pairing is vanilla ice cream or softly whipped cream — the cool creaminess contrasts beautifully with the warm, crispy taquito. For a richer option, warm salted caramel sauce or butterscotch sauce is incredible. If you want a tangy counterpoint, try crème fraîche with a drizzle of honey and a pinch of sea salt. My personal favorite is a simple cinnamon cream cheese dip: beat 4 ounces of cream cheese with 2 tablespoons of powdered sugar and ½ teaspoon of cinnamon until smooth.

Can I freeze air fryer apple pie taquitos before or after cooking?

You can freeze them both ways, but I prefer freezing after cooking for the best texture. To freeze cooked taquitos, let them cool completely, then arrange them in a single layer on a baking sheet and freeze for 1 hour. Transfer to a freezer-safe bag or container with parchment paper between layers. They’ll keep for up to 2 months. To reheat, air fry directly from frozen at 350°F for 6–8 minutes, flipping halfway. For uncooked frozen taquitos, assemble and freeze without the butter and coating; add those just before air frying.

How do I get the cinnamon sugar to stick evenly to the taquitos?

The secret is brushing the melted butter generously and evenly over every surface of the rolled taquito before rolling it in the cinnamon-sugar mixture. The butter acts as both glue and flavor carrier. I use a silicone pastry brush to work the butter into the creases and ends. Once brushed, immediately roll the taquito in the sugar mixture while the butter is still wet — if you wait too long, the butter will cool and the sugar won’t adhere as well. Press gently with your fingers to help the coating stick, and shake off any excess.

Share Your Version!

I hope these air fryer apple pie taquitos become a favorite in your kitchen the way they have in mine. They’re proof that a few simple ingredients and a smart technique can create something truly special — no complicated steps, no rare spices, just honest, delicious flavor. Leave a star rating and a comment below to let me know how yours turned out. Did you try one of the variations? Discover a new dipping sauce pairing? I read every single comment and I love hearing about your kitchen adventures.

Snap a photo of your golden taquitos and share it on Pinterest or Instagram — tag me @cookingwithemy so I can see your beautiful creations. And if you have a question about any part of this air fryer dessert recipes collection, just drop it in the comments. I’m always here to help, whether you’re a first-time air fryer user or a seasoned home cook looking for new inspiration. From my NYC kitchen to yours — I hope this recipe brings as much warmth to your table as it does to mine. — emy 🧡

📌

Love This Recipe? Save It to Pinterest!

If you enjoyed this Air Fryer Apple Pie Taquitos recipe, don’t let it get lost in your browser tabs! 😄 Pin it now so you can find it again anytime — and explore hundreds more tried-and-tested recipes waiting for you on my Pinterest boards.

👉 Follow emy on Pinterest @cookingwithemy

📌 Pin this recipe · 🔁 Re-pin your favorites · 💬 Tag me when you make it — I love seeing your creations!

Print

clock clock iconcutlery cutlery iconflag flag iconfolder folder iconinstagram instagram iconpinterest pinterest iconfacebook facebook iconprint print iconsquares squares iconheart heart iconheart solid heart solid icon

Air Fryer Apple Pie Taquitos


  • Author: Chef Emy

Description

You’ll love the ease of thse Air Fryer Apple Pie Taquitos! They’re the perfect simple dessert with loads of flavor!


Ingredients

Scale
  • 1 can apple pie filling (21 ounces)
  • 6 soft flour tortillas (medium)
  • 4 tbsp butter (melted)
  • ½ cup sugar
  • 1 tbsp ground cinnamon

Instructions

  1. Lay tortillas flat, and then spoon about 2 tablespoons of filling across the center of the tortilla.
  2. Roll tightly and then brush the rolled taquito with melted butter.
  3. In a shallow, flat dish, stir together the sugar and cinnamon, then roll the buttered taquito in the mixture, coating the outside.
  4. Place in the air fryer basket, seam side down, without stacking or overlapping.
  5. Air fry at 350 degrees F for 9-11 minutes, until the taquito is golden and crispy.
  6. Use tongs to flip them over, and air fry for an additional 3-4 minutes, or until they reach your desired crispness.

Nutrition

  • Calories: 264 kcal
  • Sugar: 32 g
  • Fat: 3 g
  • Carbohydrates: 59 g
  • Protein: 3 g


Air Fryer Apple Pie Taquitos

Air Fryer Apples Recipe – Maple-Glazed Healthy Dessert Ready in 15 Minutes

⚖️
Difficulty
Easy
⏲️
Prep Time
5 mins
🕒
Cook Time
12 mins
⏱️
Total Time
17 mins
🍽️
Servings
4

Growing up in Morocco, my mother always had a bowl of fresh apples on the counter. She’d toss them with cinnamon and honey, then bake them until the kitchen smelled like a warm hug. Now, living in New York City, I’ve given that childhood memory a modern twist: these air fryer apples are glazed with pure maple syrup and ready in just 15 minutes. This easy air fryer apple dessert is vegan, gluten-free, and refined sugar-free—a perfect healthy treat when you crave something sweet without the guilt. Whether you’re looking for air fryer cinnamon apples or a quick weeknight dessert, this recipe delivers every time.

Imagine biting into a tender, cinnamon-kissed apple cube, its edges caramelized and slightly crisp from the circulating hot air. The maple syrup adds a rich, natural sweetness that coats each piece like a glossy glaze. A gentle hint of warmth from the cinnamon ties everything together. The aroma alone will pull everyone into the kitchen. It’s the kind of dessert that feels indulgent but is actually good for you—no butter, no sugar overload, just pure fruit and spice harmony.

After years of testing—first in Paris pastry school, then at my own NYC supper clubs—I’ve perfected the technique for getting that ideal balance of soft interior and golden exterior. The secret? Not overcrowding the basket and tossing halfway through. One common mistake is peeling the apples too thin; leave a little skin for fiber and color. 💡 emy’s Pro Tip: Choose apples that hold their shape well—Pink Lady or Honeycrisp are my go-tos from the Union Square Greenmarket. They stay firm even after a quick roast.

Why This Air Fryer Apples Recipe Is the Best

The Flavor Secret – I use real maple syrup instead of granulated sugar. This not only keeps it refined sugar-free but also adds a deep, woodsy sweetness that pairs beautifully with cinnamon. Growing up, my mother would simmer apples with honey and a touch of orange blossom water. Here in NYC, I swapped in maple syrup from a farm upstate—it’s my little nod to both Morocco and America.

Perfected Texture – The air fryer mimics the convection of a French four, creating a caramelized shell while keeping the inside tender. My trick: toss the apples in melted coconut oil and maple syrup before cooking, then add an extra drizzle after they come out. This double-glaze technique ensures every bite is coated in glossy sweetness without becoming soggy.

Foolproof & Fast – Even if you’re new to air frying, this recipe is nearly impossible to mess up. The key is cutting the apples into uniform 1-inch cubes. That way they cook evenly. Because the air fryer circulates heat so efficiently, you get results in under 15 minutes—perfect for a last-minute dessert when guests show up or when you need a quick fix after a busy day.

Air Fryer Apples Recipe Ingredients

For this simple recipe you need just four main ingredients. I love picking up Pink Lady apples from the farmers market in Chelsea—they’re crisp, sweet-tart, and hold their shape beautifully.

Ingredients List

  • 2 red apples (Pink Lady, Honeycrisp, or Gala), peeled, cored, and cut into 1-inch bite-sized cubes
  • 2 Tbsp real maple syrup, divided
  • 1 Tbsp melted coconut oil
  • 1 tsp cinnamon

Ingredient Spotlight

Maple syrup is the star sweetener here. Look for 100% pure maple syrup (Grade A dark amber works wonderfully). It’s less processed than pancake syrup and brings a complexity that honey can’t match. If you need a substitute, use honey or agave—but note that honey will change the flavor slightly and may make the apples a bit stickier.

Coconut oil helps the apples brown and keeps them from sticking. It adds a subtle tropical note that complements the maple. If you don’t have coconut oil, you can use avocado oil or even melted butter (for a non-vegan version).

Cinnamon is non-negotiable. I use Ceylon cinnamon for its mild, floral sweetness. Cassia cinnamon works too but is stronger. You can also add a pinch of nutmeg or cardamom for extra warmth.

Apples: For the best results, choose firm, crisp varieties. Pink Lady and Honeycrisp are ideal because they hold their shape during cooking. Gala works but will be softer. Avoid Red Delicious—they turn mushy.

Original Ingredient Best Substitution Flavor / Texture Impact
Maple syrup Honey or agave Less woodsy, more floral; slightly thicker coat.
Coconut oil Avocado oil or melted butter Butter adds richness; avocado oil is neutral.
Cinnamon Pumpkin pie spice or apple pie spice Adds extra warm notes (clove, nutmeg).
Pink Lady apples Honeycrisp, Gala, Fuji Slightly sweeter or softer; adjust cook time –1 min.

How to Make Air Fryer Apples — Step-by-Step

Ready to get those apples sizzling? Follow these simple steps for perfect air fryer apples every time.

Step 1: Preheat and Prep

Preheat your air fryer to 380°F (190°C). Lightly spray the basket with non-stick spray to prevent sticking. While it heats, peel and core your apples, then cut them into uniform 1-inch cubes. Uniformity ensures even cooking.

💡 emy’s Pro Tip: Don’t cut the cubes too small—they’ll dry out. 1-inch cubes give you a tender center and a slightly crisp edge.

Step 2: Season the Apples

In a medium bowl, toss the apple cubes with 1 tablespoon of maple syrup, melted coconut oil, and cinnamon. Use a spatula to coat every piece evenly. The oil helps the maple syrup cling and promotes browning.

Step 3: Air Fry First Round

Add the seasoned apple cubes to the hot air fryer basket in a single layer. If your basket is small, cook in batches. Overcrowding leads to steaming instead of roasting. Air fry for 7 minutes at 380°F.

⚠️ Common Mistake to Avoid: Piling apples on top of each other. They need room for hot air to circulate. Work in batches if needed.

Step 4: Shake and Finish

After 7 minutes, remove the basket and shake it or toss the apples with a spatula. Return to the air fryer and cook another 3–7 minutes, depending on your desired doneness. For tender apples with golden edges, aim for 10–14 minutes total. They should be golden and slightly crispy on the outside, tender inside.

💡 emy’s Pro Tip: Check at the 10-minute mark. Apples continue to soften after you take them out, so pull them when they still have a little bite.

Step 5: Glaze and Serve

Remove the apples from the air fryer and immediately toss them with the remaining 1 tablespoon of maple syrup while they’re still warm. This final glaze soaks in beautifully. Serve warm with a scoop of vanilla ice cream, over oatmeal, or just on their own.

Step Action Duration Key Visual Cue
1 Preheat & prep apples 5 min Apples cut into even 1-inch cubes
2 Toss with syrup, oil, cinnamon 2 min All cubes coated evenly
3 First air fry 7 min Edges start to brown
4 Shake & continue 3–7 min Golden, caramelized surface
5 Final glaze 1 min Apples glisten with syrup

Serving & Presentation

These air fryer apples are incredibly versatile. Serve them warm in a bowl with a dollop of whipped coconut cream or a scoop of vanilla bean ice cream. In my NYC supper clubs, I layer them on yogurt parfaits with toasted pecans and a drizzle of extra maple syrup. The contrast of crisp pecans and soft apples is divine.

For a Moroccan-inspired twist, sprinkle a pinch of rose petals and a few slivered almonds on top. It reminds me of the dessert my mother would make for special occasions—simple yet elegant. You can also spoon them over oatmeal or pancakes, or use them as a topping for waffles or French toast.

If you’re entertaining, serve them in individual ramekins with a cinnamon stick as a garnish. They look beautiful and taste even better. My guests in Brooklyn always ask for seconds.

Pairing Type Suggestions Why It Works
Side Dish Pork chops, roasted chicken, game meats Sweetness cuts through savory richness
Sauce / Dip Whipped cream, caramel sauce, yogurt Creamy contrast to warm spiced apples
Beverage Hot apple cider, chai tea, bourbon Complementary warm spice notes
Garnish Cinnamon sticks, chopped nuts, mint leaves Adds aroma, texture, and visual appeal

Make-Ahead, Storage & Reheating

This is my go-to meal-prep dessert. I often make a double batch on Sunday to enjoy throughout the week. They reheat beautifully, so I can have a warm, healthy treat in minutes even on my busiest NYC days.

Method Container Duration Reheating Tip
Refrigerator Airtight container Up to 5 days Reheat in air fryer at 350°F for 3-4 minutes
Freezer Freezer-safe bag or container Up to 3 months Thaw in fridge overnight, then reheat in air fryer
Make-Ahead Cut apples and toss with oil & syrup, store in fridge Up to 2 days in advance Add cinnamon just before air frying for best flavor

To reheat, I prefer the air fryer again—just a few minutes at 350°F brings back that crisp edge. You can also microwave in 30-second bursts, but the texture will be softer. If you’re serving from frozen, let them thaw in the fridge overnight first, then reheat as above.

Variations & Easy Swaps

Variation Key Change Best For Difficulty Impact
Moroccan Spiced Apples Add 1/4 tsp cumin, 1/4 tsp ginger, pinch of saffron Savory-sweet main dish pairing Easy (just add spices)
Cranberry-Orange Apple Combo Add 1/2 cup fresh cranberries, zest of 1 orange Holiday dessert or breakfast topping Easy (extra ingredient)
Crunchy Nut Crust Toss with 2 Tbsp chopped walnuts or pecans before air frying Extra texture, protein boost Easy (just add nuts)

Moroccan Spiced Apples

Growing up, my mother would often add a pinch of cumin and ginger to her baked apples. It sounds unusual, but the warm earthiness is incredible. Add 1/4 tsp ground cumin, 1/4 tsp ground ginger, and a pinch of saffron threads (crushed) to the cinnamon mixture. This version is fantastic alongside roasted lamb or as a unique dessert with a dollop of labneh.

Cranberry-Orange Apple Combo

For a festive twist, toss in 1/2 cup fresh cranberries and the zest of one orange along with the apples. The cranberries pop and release their tart juice, which balances the maple syrup. I love this during the holidays—it’s like apple pie filling without the crust. Serve over vanilla ice cream for a showstopper.

Crunchy Nut Crust

If you want extra crunch, add 2 tablespoons of chopped walnuts or pecans when you toss the apples. The nuts toast alongside the fruit, becoming fragrant and crisp. This variation is perfect for adding protein to your breakfast—spoon over Greek yogurt with a drizzle of honey. It’s a favorite at my NYC brunch pop-ups.

How long do you cook apples in an air fryer?

Cook apple cubes in an air fryer at 380°F for 10 to 14 minutes. The exact time depends on your air fryer model, the size of your cubes, and how tender you like them. Start checking at the 10-minute mark. They should be golden on the outside and soft on the inside. If you’re making air fryer apple chips (sliced very thin), you’ll need to cook them longer at a lower temperature—around 300°F for 20–25 minutes.

Can you put raw apples in an air fryer?

Absolutely! In fact, raw apples are the perfect candidate for air frying. The high heat and circulating air transform them into tender, caramelized bites in just minutes. There’s no need to pre-cook them. Just toss raw apple cubes with a little oil and seasoning, then air fry. The heat breaks down the apples’ natural pectin, making them soft and sweet while the edges crisp up beautifully.

What are the best types of apples to use for air fryer apples?

Firm, sweet-tart apples hold up best in the air fryer. My top picks are Pink Lady, Honeycrisp, and Gala. They maintain their shape and develop a pleasant chew. Avoid Red Delicious or McIntosh, as they break down into mush. If you want a slightly softer result, Fuji or Braeburn work well. For a tangy contrast, Granny Smith apples are excellent—just increase the maple syrup by a teaspoon to balance the tartness.

Do you need to peel apples before putting them in an air fryer?

Peeling is optional. For this recipe I recommend peeling because the skin can become tough and chewy when air fried. However, if you prefer extra fiber and color, leave the skin on. Just make sure to scrub the apples well. The skin can also help the cubes hold their shape. If you leave the skin on, reduce the cook time by about 1–2 minutes, as the skin traps more moisture.

Can I make these air fryer apples sugar-free?

Yes! This recipe is already refined sugar-free because it uses pure maple syrup. For a sugar-free version, substitute the maple syrup with a sugar-free maple-flavored syrup or a monk fruit-based sweetener. However, keep in mind that the natural sweetness of the apples will still shine through. If you use a granulated sugar substitute, toss it with the coconut oil and cinnamon, and skip the final glaze. The texture may be slightly less sticky but still delicious.

What can I serve with air fryer apples?

These apples are incredibly versatile. Serve them over vanilla ice cream, Greek yogurt, or oatmeal for a quick breakfast or dessert. They also pair beautifully with savory dishes like roasted pork chops or chicken. Spoon them onto pancakes, waffles, or French toast. For a holiday spread, add them to a cheese board with sharp cheddar and toasted walnuts. The sweet, spiced flavor complements both sweet and savory creations.

How do I store leftover air fryer apples?

Store any leftovers in an airtight container in the refrigerator for up to 5 days. To reheat, return them to the air fryer at 350°F for 3–4 minutes to restore the crisp edges. You can also microwave them in 20-second bursts, but they will be softer. These apples also freeze well—place them in a freezer-safe bag for up to 3 months. Thaw overnight in the fridge before reheating.

Can I use frozen apples in the air fryer?

Yes, you can use frozen apples, but they will release more moisture and become softer. Do not thaw them first; toss frozen cubes directly with oil and syrup (they may need an extra teaspoon of oil to prevent sticking). Increase the cooking time by about 2–4 minutes, and expect a mushier texture. If you’re aiming for healthy baked apples air fryer style, fresh apples are always preferred for the best texture.

What is the best way to cut apples for air frying?

For even cooking, cut the apples into uniform 1-inch cubes. A 1-inch cube gives you a tender interior and a slightly crispy exterior. If you cut them too small, they’ll dry out; too large, they’ll be undercooked inside. For air fryer apple chips, slice them very thin (1/8-inch) and arrange in a single layer. For this recipe, stick with cubes—they’re perfect for a quick, healthy dessert.

Can I add other fruits to the air fryer with apples?

Absolutely! Pears, peaches, or plums work wonderfully alongside apples. Cut them to the same size as the apples and adjust the cook time slightly—softer fruits like peaches may need 1–2 minutes less. For a fall medley, add a handful of fresh cranberries. The combination of sweet and tart fruits creates a beautiful, colorful dessert that’s perfect for the holiday table.

📌

Love This Recipe? Save It to Pinterest!

If you enjoyed this Air Fryer Apples Recipe, don’t let it get lost in your browser tabs! 😄 Pin it now so you can find it again anytime — and explore hundreds more tried-and-tested recipes waiting for you on my Pinterest boards.

👉 Follow emy on Pinterest @cookingwithemy

📌 Pin this recipe · 🔁 Re-pin your favorites · 💬 Tag me when you make it — I love seeing your creations!

Print

clock clock iconcutlery cutlery iconflag flag iconfolder folder iconinstagram instagram iconpinterest pinterest iconfacebook facebook iconprint print iconsquares squares iconheart heart iconheart solid heart solid icon

Air Fryer Apples


  • Author: Chef Emy

Description

Warm cinnamon and maple-glazed air fryer apples are the perfect healthy dessert that everyone will love! They are vegan, gluten-free, and refined sugar-free.


Ingredients

Scale
  • 2 red apples (pink lady, honey crisp, or gala, peeled, cored, and cut into 1-inch bite-sized cubes)
  • 2 Tbsp real maple syrup (divided)
  • 1 Tbsp melted coconut oil
  • 1 tsp cinnamon

Instructions

  1. Preheat your air fryer to 380°F and lightly spray with non-stick spray.
  2. Add the peeled apple cubes into a bowl and toss with 1 Tablespoon maple syrup, coconut oil, and cinnamon.
  3. Add apple cubes to the heated air fryer basket. Make sure they dont overlap too much, or else they will not cook properly.
  4. Air fry for 10 – 14 minutes, shaking halfway through. They should be golden, slightly crispy on the outside, and tender on the inside.
  5. Remove from the air fryer and toss the warm apples in 1 Tablespoon of maple syrup.
  6. Enjoy warm with vanilla ice cream, oatmeal, or on its own!

Nutrition

  • Calories: 191 kcal
  • Sugar: 29 g
  • Fat: 7 g
  • Carbohydrates: 45 g
  • Protein: 1 g


Air Fryer Apples

No-Bake Cookies

No-Bake Cookies – Ready in 15 Minutes, No Oven Needed!

⚖️
Difficulty
Easy
⏲️
Prep Time
10 mins
🕒
Cook Time
5 mins
⏱️
Total Time
15 mins
🍽️
Servings
24 cookies

I have to be honest with you — I’ve cooked in Michelin-starred kitchens in Paris, spent years mastering pastry techniques in France, and I now run a busy home kitchen here in New York City. But when someone asks me what my absolute favorite cookie is? It’s this one: No-Bake Cookies. The same recipe my mother made for us on warm afternoons in Morocco, when turning on the oven felt impossible and we needed something sweet, fast, and utterly satisfying. These No-Bake Cookies are made with just a handful of pantry staples — sugar, milk, butter, cocoa, oats, peanut butter, and vanilla — and they come together in about 15 minutes flat. No oven, no mixer, no complicated steps. Just pure, chewy, fudgy cookie joy.

Let me describe what you’re aiming for: a perfectly glossy, deeply chocolatey cookie with a soft, chewy center and a slight resistance when you bite in — not crumbly, not dry, not rock-hard. The oats absorb just enough of the chocolate mixture to create a texture that feels substantial but tender. The peanut butter adds a velvety richness and a subtle saltiness that cuts through the sweetness. And the vanilla? It rounds everything out with a warm, almost floral note. When these cookies set on the parchment, they develop a slight sheen on top and a tender bite that reminds me of the best fudge you’ve ever had — but in cookie form. Every time I make them, my NYC apartment fills with that nostalgic, cozy aroma of chocolate and peanut butter, and suddenly everyone wanders into the kitchen.

What makes my version of No-Bake Cookies different? After years of testing (and eating more test batches than I’d like to admit), I’ve dialed in the exact boiling time and cooling technique to avoid the two most common pitfalls: cookies that never set, or cookies that turn into dry, crumbly hockey pucks. I’ll show you exactly how to get that glossy, perfectly chewy texture every time — including 💡 emy’s Pro Tip for the ideal one-minute boil, and one common mistake that even experienced home cooks make. Whether you’re a busy parent, a college student, or just someone who needs a chocolate fix right now, this recipe is about to become your new best friend.

Why These No-Bake Cookies Are the Best

The Flavor Secret
I trained in Paris under chefs who taught me that the best desserts are built on balance — sweet, salty, bitter, and umami all working together. In these No-Bake Cookies, the cocoa brings a deep, slightly bitter chocolate note, the sugar provides sweetness, and the peanut butter adds a savory-saltiness that makes every bite craveable. A full tablespoon of vanilla extract (yes, a whole tablespoon!) lifts the flavor and gives these cookies a warmth that feels almost like a hug. This is the same balance I learned in French pastry school, applied to a humble no-bake cookie — and it works brilliantly.

Perfected Texture
The texture of a No-Bake Cookie is everything — and it’s surprisingly easy to get wrong. After dozens of tests in my NYC kitchen, I found that the key is the one-minute boil (timed precisely) and using quick oats instead of old-fashioned oats. Quick oats absorb the liquid evenly and create a tender, cohesive cookie that holds its shape without being dry. Old-fashioned oats, on the other hand, can leave you with a crumbly mess. I also insist on creamy peanut butter — it blends into the mixture smoothly, creating a uniform, fudgy texture that crunchy peanut butter simply can’t match.

Foolproof & Fast
This is genuinely one of the most foolproof recipes I know. You don’t need a stand mixer, a food processor, or even a baking sheet. Just a large pot, a whisk, a spatula, and parchment paper. The entire active cooking time is about 5 minutes on the stove, and the cookies set in 15–30 minutes at room temperature. That means you can go from craving to cookie in under half an hour. I’ve made these with my kids, with friends who claim they can’t cook, and as a last-minute dessert for dinner parties — they never fail.

No-Bake Cookies Ingredients

I buy my quick oats from the farmers market in Union Square when I can, but a good old-fashioned canister from the supermarket works perfectly too. The peanut butter I use is the classic creamy kind — no fancy fresh-ground stuff here, because the uniformity matters. The cocoa powder? I prefer Dutch-process for a darker, more mellow chocolate flavor, but natural cocoa works beautifully too. Every time I measure out these ingredients, I’m transported back to my mother’s kitchen in Morocco, where she’d pull out the same simple staples and turn them into magic.

Ingredients List

  • 2 cups granulated sugar
  • 1/2 cup whole milk
  • 1/2 cup unsalted butter (1 stick)
  • 1/4 cup natural or Dutch-process cocoa powder
  • 3 cups quick oats
  • 1 cup creamy peanut butter
  • 1 tablespoon pure vanilla extract

Ingredient Spotlight

Sugar — Granulated white sugar is the sweetener and structure-builder here. It dissolves into the milk and butter mixture, then helps the cookies set firmly as they cool. Don’t substitute with brown sugar, which adds too much moisture and can make the cookies sticky or soft. If you need a lower-sugar option, use a cup-for-cup granulated monk fruit sweetener, but note that the texture may be slightly less firm.

Unsalted Butter — Butter adds richness, a silky mouthfeel, and helps the cookies set with a tender bite. I always use unsalted butter to control the salt level. Salted butter will work, but reduce the added salt elsewhere. For a dairy-free version, use a high-quality vegan butter stick (not tub margarine, which has too much water).

Quick Oats — Quick oats are essential for the right texture. They’ve been rolled thinner and cut smaller, so they absorb the chocolate mixture evenly and create a tender, cohesive cookie. Old-fashioned oats can be used, but pulse them a few times in a food processor first to break them down — otherwise your cookies may be crumbly and dry.

Creamy Peanut Butter — The peanut butter does double duty: it adds rich, savory flavor and acts as a binder that helps the cookies hold together. Always use creamy, not crunchy, for the smoothest texture. Natural peanut butter (the kind that separates) can be used, but you must stir it very thoroughly to re-incorporate the oils, and your cookies may be slightly softer.

Vanilla Extract — A full tablespoon might seem like a lot, but this is 💡 emy’s Pro Tip: vanilla amplifies the chocolate flavor and rounds out the sweetness. Use pure vanilla extract, not imitation, for the best depth.

Original Ingredient Best Substitution Flavor / Texture Impact
Granulated sugar Cup-for-cup monk fruit sweetener Slightly less firm set; mildly less sweet
Unsalted butter Vegan butter stick (e.g. Earth Balance) Slightly less rich; still firm set
Quick oats Pulsed old-fashioned oats Slightly chewier; may be less tender
Creamy peanut butter Sunflower seed butter (for nut-free) Slightly thinner texture; nut-free
Vanilla extract Vanilla bean paste Richer vanilla flavor with visible seeds

How to Make No-Bake Cookies — Step-by-Step

Trust me when I say: if you can boil water and stir, you can make these No-Bake Cookies. Here’s exactly how to do it, with all the tiny chef details that make the difference between a good cookie and a great one.

Step 1: Boil the Sugar, Milk, Butter, and Cocoa

In a large pot (at least 4-quart — the mixture bubbles up!), combine the sugar, milk, butter, and cocoa powder. Set the heat to medium and whisk continuously as the butter melts and the sugar dissolves. Once the mixture reaches a full, rolling boil (bubbles across the entire surface, not just at the edges), set a timer for exactly one minute. Keep stirring gently — just a slow, steady whisk — for that full minute. Do not skip the timer, and do not stop whisking. This one-minute boil is what activates the sugar and allows the cookies to set properly.

💡 emy’s Pro Tip: The one-minute boil is non-negotiable. If you boil for less time, the cookies won’t set and will be a sticky, gooey mess. If you boil for too long (even 30 seconds extra), the sugar can over-caramelize and your cookies will turn out dry and crumbly. Set a timer, trust it, and don’t rely on guessing.

Step 2: Mix in Oats, Peanut Butter, and Vanilla

Remove the pot from heat completely. Add the quick oats and stir vigorously with a wooden spoon or silicone spatula until all the oats are evenly coated and no dry spots remain. The mixture will look glossy and thick. Next, add the creamy peanut butter and stir until it’s fully incorporated — the mixture should look uniform and smell incredible. Finally, stir in the vanilla extract. The dough will be thick, shiny, and slightly sticky, but it should hold together when pressed.

⚠️ Common Mistake to Avoid: Adding the peanut butter and vanilla while the pot is still on the heat. The residual heat can cause the peanut butter to separate or the vanilla to burn off. Always remove the pot from the burner before adding these ingredients.

Step 3: Shape and Set the Cookies

Lay out a long sheet of parchment paper on your countertop. Using a spring-loaded cookie scoop or two spoons, drop spoonfuls of the dough onto the parchment, shaping them into round cookies about 2 inches wide. Work quickly — the mixture firms up as it cools. Leave a little space between each cookie (they won’t spread much, but a bit of air flow helps them set evenly). Let the cookies sit at room temperature for 15–30 minutes, until they are firm to the touch and lift cleanly off the parchment. If you’re in a hurry, you can pop them in the refrigerator for 10 minutes.

💡 emy’s Pro Tip: If the dough starts to stiffen before you’ve finished shaping all the cookies, place the pot back on a very low heat for 10–15 seconds, stirring constantly, just to warm it slightly. This will make it spoonable again without damaging the texture.

Step Action Duration Key Visual Cue
1 Boil sugar, milk, butter, cocoa 1 minute at rolling boil Full, even bubbles across the entire surface
2 Mix in oats, peanut butter, vanilla 2–3 minutes of stirring Uniform, glossy, thick dough with no dry spots
3 Shape and set cookies 15–30 minutes at room temp Firm to touch, lifts cleanly off parchment

Serving & Presentation

These No-Bake Cookies are wonderful as-is, but a few small touches make them truly special. I love to arrange them on a wooden board or a simple white platter — the dark, glossy cookies pop beautifully against a light surface. For a touch of Moroccan flair (a nod to my mother’s kitchen), I sometimes sprinkle a tiny pinch of flaky sea salt on top of each cookie right after shaping — the salt crystals catch the light and add a wonderful savory contrast. In the summer, I’ll serve them alongside a bowl of fresh berries or a scoop of vanilla bean ice cream. They’re also perfect crumbled over yogurt or layered into a quick icebox cake.

When I bring these to a dinner party here in NYC, I like to pair them with a cold glass of oat milk or a rich, dark roast coffee. The combination of chocolate, peanut butter, and coffee is absolutely divine. For the kids (or the kid in you), a tall glass of cold milk is the classic choice. And if you’re feeling extra indulgent, drizzle a little melted chocolate over the top and let it set — it takes these cookies from simple to stunning in seconds.

Pairing Type Suggestions Why It Works
Side Dish Fresh berries, sliced bananas, yogurt Bright acidity and creaminess balance the rich chocolate
Sauce / Dip Melted dark chocolate, caramel sauce, peanut butter drizzle Enhances the chocolate and nut flavors
Beverage Cold milk, oat milk latte, dark roast coffee Milk cuts the sweetness; coffee complements chocolate
Garnish Flaky sea salt, chopped peanuts, cocoa powder dusting Adds texture, visual appeal, and flavor contrast

Make-Ahead, Storage & Reheating

One of the best things about these No-Bake Cookies is how well they keep. I often make a double batch on Sunday afternoon and stash them for the week — perfect for lunchboxes, after-school snacks, or a quick treat when I’m editing blog posts late at night. Here’s exactly how to store them for maximum freshness.

Method Container Duration Reheating Tip
Refrigerator Airtight container, layers separated by parchment Up to 2 weeks Serve cold or let sit 5–10 minutes at room temp
Freezer Freezer-safe bag or container, parchment layers Up to 3 months Thaw at room temp 15 minutes — no microwave needed
Make-Ahead Shape dough on parchment, refrigerate uncovered 1 hr, then wrap Up to 3 days in advance Shape first, then store — no need to reheat

If you’re storing these cookies at room temperature (in a cool, dry place), they’ll keep for about 5 days in an airtight container. However, I find they stay fresher and firmer in the refrigerator. One thing I’ve learned the hard way: never microwave these cookies to soften them — the texture turns gummy and weird. If you want them softer, just let them sit at room temperature for a few minutes before eating.

Variations & Easy Swaps

Over the years, I’ve played around with this base recipe in all sorts of ways — some inspired by Moroccan flavors, some by what I find at the Union Square greenmarket, and some just from late-night kitchen curiosity. Here are my favorite variations.

Variation Key Change Best For Difficulty Impact
Classic Chocolate Peanut Butter Add 1/2 cup mini chocolate chips after cooking Extra chocolate flavor and texture No change — same process
Gluten-Free Version Use certified gluten-free quick oats Gluten-free diet No change — same process
Crunchy Nut Variation Stir in 1/3 cup chopped toasted peanuts or pecans Extra crunch and nutty depth No change — same process

Classic Chocolate Peanut Butter

This is the variation I make most often — it’s the one that gets requested at every party. After you’ve stirred in the vanilla, fold in 1/2 cup of mini chocolate chips. The residual heat will soften them just slightly, creating little pockets of melted chocolate throughout the cookie. It’s like a chocolate chip cookie and a no-bake cookie had a beautiful baby. I learned this trick from a pastry chef in Paris who always added a “surprise” element to even the simplest desserts.

Gluten-Free Version

Making this recipe gluten-free couldn’t be easier — simply swap in certified gluten-free quick oats. Oats themselves are naturally gluten-free, but they’re often processed in facilities that also process wheat, so look for a brand that’s certified gluten-free. The texture and flavor are identical to the original. This is one of the most requested recipes from my gluten-free readers, and it’s a staple in my NYC apartment when I have friends over who avoid gluten. 💡 emy’s Pro Tip: Make sure all your other ingredients (especially vanilla extract and peanut butter) are also certified gluten-free if you’re serving someone with celiac disease.

Crunchy Nut Variation

When I’m craving something with more texture, I stir in 1/3 cup of chopped toasted peanuts or pecans right at the end, along with the vanilla. The nuts add a wonderful crunch that contrasts with the soft, fudgy cookie. In the fall, I love using toasted pecans — they have a buttery, slightly sweet flavor that pairs beautifully with the chocolate. I find the best pecans at the Union Square farmers market in October, and I toast them in a dry pan until they’re fragrant, just like my mother taught me.

Share Your Version!

I absolutely love hearing how these No-Bake Cookies turn out in your kitchen. Did you add a special twist? Did you discover a new favorite variation? Did your kids devour them before they even set? Drop a star rating and a comment below — your feedback helps other home cooks know what to expect, and it honestly makes my day to read about your baking adventures.

And here’s a little request: snap a photo of your No-Bake Cookies and share it on Instagram or Pinterest, tagging me @cookingwithemi. I love seeing the creative ways you make this recipe your own. Did you try the flaky sea salt on top? The chocolate chip version? Or did you create something entirely new? Let me know in the comments — I read every single one. From my NYC kitchen to yours — I hope this recipe brings as much warmth to your table as it does to mine. — emy 🧡

📌

Love This Recipe? Save It to Pinterest!

If you enjoyed this No-Bake Cookies recipe, don’t let it get lost in your browser tabs! 😄 Pin it now so you can find it again anytime — and explore hundreds more tried-and-tested recipes waiting for you on my Pinterest boards.

👉 Follow emy on Pinterest @exorecipe

📌 Pin this recipe · 🔁 Re-pin your favorites · 💬 Tag me when you make it — I love seeing your creations!

Why didn’t my no-bake cookies set?

This is the most common issue with no-bake cookies, and it almost always comes down to the boil time. If you didn’t bring the sugar, milk, butter, and cocoa mixture to a full rolling boil for a full minute, the sugar won’t reach the right temperature to set properly. Another possible culprit is humidity — on very humid days, the cookies may take longer to set or stay slightly softer. Finally, make sure you’re using quick oats, not old-fashioned oats, which absorb liquid differently. If your cookies didn’t set, try refrigerating them for 30 minutes — that often firms them up enough to enjoy.

Can I use old-fashioned oats instead of quick oats?

You can, but I don’t recommend it without a small adjustment. Old-fashioned oats are thicker and flatter than quick oats, so they don’t absorb the liquid mixture as evenly. The result can be a drier, crumbly cookie that doesn’t hold together well. If you only have old-fashioned oats, pulse them in a food processor 3–4 times to break them down into smaller pieces before using. This mimics the texture of quick oats and will give you a much better result. Quick oats are really the ideal choice for this recipe — they create a tender, cohesive cookie every time.

Can I use crunchy peanut butter instead of creamy?

Technically yes, but the texture won’t be as smooth and uniform. Creamy peanut butter blends completely into the mixture, creating a velvety, fudgy base that coats every oat evenly. Crunchy peanut butter has small pieces of nuts that can create uneven spots in the dough, and the cookie may be slightly more crumbly as a result. If you love the idea of extra crunch, I recommend using creamy peanut butter in the base and then stirring in 1/4 cup of chopped toasted peanuts at the end. That way you get a smooth texture with intentional pockets of crunch.

How long do no-bake cookies last?

No-bake cookies stay fresh for about 5 days at room temperature in an airtight container, and up to 2 weeks in the refrigerator. I actually prefer them cold from the fridge — they firm up nicely and have a wonderful fudge-like texture. They also freeze beautifully for up to 3 months. Just layer them between parchment paper in a freezer-safe container or bag, and thaw at room temperature for about 15 minutes before eating. One note: these cookies don’t do well in heat, so avoid leaving them in a warm car or near a sunny window.

Can I freeze no-bake cookies?

Absolutely! No-bake cookies freeze exceptionally well. Once they are fully set at room temperature, transfer them to a freezer-safe container or zip-top bag with parchment paper between the layers to prevent sticking. They’ll keep for up to 3 months in the freezer. To enjoy, simply take out as many as you want and let them sit at room temperature for about 15 minutes — they’ll be perfectly firm and chewy. I often freeze a double batch so I always have a quick treat on hand for unexpected guests or late-night cravings.

Can I use margarine instead of butter?

I don’t recommend using tub margarine because it has a higher water content than butter, which can make the cookies sticky and affect their ability to set properly. If you need a dairy-free option, use a high-quality vegan butter stick (like Earth Balance or Miyoko’s) — these have a similar fat-to-water ratio as butter and will work much better. Avoid using spreads or low-fat butter alternatives, as they contain too much water and will throw off the texture. Stick with unsalted butter or a firm vegan butter stick for the best results.

Why are my no-bake cookies dry and crumbly?

Dry and crumbly no-bake cookies usually mean the mixture was boiled too long. Even 30 seconds of extra boiling time can cause the sugar to over-caramelize and the mixture to become too thick, resulting in a dry cookie that doesn’t hold together. Another possibility is that you used old-fashioned oats instead of quick oats — the larger flakes don’t absorb the liquid as evenly, leaving dry spots. Finally, make sure you’re measuring your ingredients accurately. Too many oats or not enough peanut butter can also lead to a dry, crumbly texture. Set that timer for one minute exactly and use quick oats for the best results.

Can I add chocolate chips or other mix-ins?

Yes, and I highly recommend it! Mini chocolate chips are my favorite addition — stir in 1/2 cup after the vanilla, while the mixture is still warm, so they soften slightly but don’t fully melt. You can also add chopped toasted nuts, shredded coconut, dried cherries, or even a handful of mini marshmallows for a Rocky Road twist. Just keep in mind that any add-ins should be stirred in gently at the end to avoid over-mixing. If you’re adding something chunky, you may need to press the dough together a bit more firmly when shaping the cookies to help them hold.

What is the best cocoa powder for no-bake cookies?

I recommend using a good-quality Dutch-process cocoa powder for the deepest, most mellow chocolate flavor. Dutch-process cocoa is treated with an alkali to neutralize its acidity, which gives it a smoother, richer taste and a darker color. Natural cocoa powder (like Hershey’s) works perfectly well too — it will give the cookies a slightly more intense, slightly acidic chocolate flavor and a lighter brown color. Both work, so use what you have. My personal favorite is Valrhona or Guittard Dutch-process cocoa, but I’ve made this recipe with store-brand cocoa and it’s still delicious.

Can I make these no-bake cookies without peanut butter?

Yes, you can, but the texture and flavor will change significantly. The peanut butter acts as both a binder and a flavor enhancer in this recipe. For a nut-free version, you can substitute with sunflower seed butter (like SunButter) — use the same amount, and the cookies will have a similar texture but a slightly different flavor. Cookie butter (like Biscoff spread) is another delicious alternative that adds a warm, spiced sweetness. Just note that any substitution will change the flavor profile, so choose an option that sounds appealing to you. 💡 emy’s Pro Tip: If using sunflower seed butter, add 1/2 teaspoon of baking soda to neutralize any green discoloration that can occur from a natural chemical reaction.

Print
clock clock iconcutlery cutlery iconflag flag iconfolder folder iconinstagram instagram iconpinterest pinterest iconfacebook facebook iconprint print iconsquares squares iconheart heart iconheart solid heart solid icon

No-Bake Cookies


  • Author: Chef Emy

Description

My all-time favorite cookie recipe! Just a few ingredients and no time in the oven for these delicious No-Bake Cookies. Yes, I cook and bake every day, but my favorite cookie is a No-Bake Cookie!


Ingredients

Scale
  • 2 cups sugar
  • 1/2 cup milk
  • 1/2 cup unsalted butter
  • 1/4 cup cocoa powder
  • 3 cups quick oats
  • 1 cup creamy peanut butter
  • 1 tablespoon vanilla extract

Instructions

  1. In a large pot add sugar, milk, butter, and cocoa powder. Slowly bring to a boil while whisking. Once at a boil allow to boil for one minute (I set a timer and stopped the whisking).
  2. Remove from heat and add in oats. Mix well. Add in peanut butter, mix well. Last add in vanilla extract and mix well.
  3. Lay out parchment paper on the counter and spoon out the dough into cookie shapes. Allow to set for 15-30 minutes.

Chocolate Chip Cookie Cheesecake Bars

⚖️
Difficulty
Easy
⏲️
Prep Time
15 mins
🕒
Cook Time
35 mins
⏱️
Total Time
50 mins
🍽️
Servings
16 bars

I still remember the first time I made these Chocolate Chip Cookie Cheesecake Bars. It was a rainy Sunday afternoon in my tiny NYC apartment, and I was craving something that felt both nostalgic and indulgent — the kind of dessert that reminds you of your mom’s kitchen but with a little grown-up flair. Growing up in Morocco, my mother would make these simple semolina cookies with dates and honey, and while I loved them, my American friends always begged for “the really sweet stuff.” After years of training in Paris — where I learned the art of pastry precision at Le Cordon Bleu — I came back to New York determined to create a dessert that was both elegant and ridiculously easy. That’s when this 5-ingredient recipe for Chocolate Chip Cookie Cheesecake Bars was born. It’s the dessert that never lasts long in my fridge, and the one that gets the most “can you send me that recipe?” texts after dinner parties.

What I love most about these bars is that perfect contrast of textures. The bottom layer is a soft, chewy chocolate chip cookie crust — golden at the edges, tender in the center — while the top layer is a luscious, creamy cheesecake filling that’s tangy, sweet, and luxuriously smooth. When you cut into a bar, you get that clean, sharp line between the two layers, and then the crumble of cookie dough on top bakes into these little crisp, buttery clusters that add just the right amount of crunch. The aroma that fills your kitchen is absolutely intoxicating: warm vanilla, toasted butter, and that faint, addictive scent of melting chocolate. It’s the kind of dessert that makes you close your eyes with the first bite.

Here’s what sets my version apart: I use refrigerated cookie dough as a brilliant shortcut — a trick I learned from a busy pastry chef in Paris who always said, “Cooking is about working smarter, not harder.” With only five ingredients and less than 15 minutes of active prep, you get a dessert that tastes like it took hours. But there are a few secrets to getting it just right. In this post, I’ll share my tested technique for pressing the cookie dough into the pan so it bakes evenly, my pro tip for a silky-smooth cheesecake filling with no lumps, and the most common mistake people make that leads to a soggy crust. Trust me — by the end of this recipe, you’ll be making these bars on repeat.

The Flavor Secret. The beauty of this recipe lies in its simplicity. Using refrigerated chocolate chip cookie dough as the base and crumble topping means you get that classic, bakery-style cookie flavor without measuring flour, sugar, or butter. The cream cheese filling is lightly sweetened with just ½ cup of sugar and a whisper of vanilla, which lets the tang of the cream cheese shine through and perfectly balances the sweet cookie layers. This isn’t an overly rich, heavy cheesecake — it’s light, creamy, and perfectly in harmony with the cookie dough. In Morocco, we have a phrase — hna hna — meaning “here and there,” a little bit of this and that. That’s exactly how this recipe feels: a balanced, thoughtful pairing of two beloved desserts.

Perfected Texture. The trickiest part of any bar recipe is getting the layers to bake evenly without one overcooking the other. I’ve tested this recipe a dozen times in my NYC kitchen, and the winning technique is simple: press the bottom cookie layer firmly so it creates a solid, even crust, then pour the cheesecake filling on top while it’s still slightly warm from mixing. This allows the filling to settle gently without disturbing the dough. The crumbled topping bakes into golden, buttery clusters that stay crisp even after refrigeration. The key visual cue? The edges should be lightly golden and the center should have just a slight jiggle — like a gentle wobble, not a wave.

Foolproof & Fast. If you can scoop cookie dough and beat cream cheese with a hand mixer, you can make these bars. There’s no rolling pins, no fancy equipment, and no complicated water bath. The entire active prep takes under 15 minutes, which means you can whip up a showstopping dessert even on a busy weeknight. It’s the kind of recipe I make when I’m hosting friends for a casual dinner and want to spend time with them instead of slaving over a complex dessert. And because it uses only five ingredients that are all available at any US grocery store, it’s budget-friendly too. These bars are proof that you don’t need a long ingredient list to create something unforgettable.

One of my favorite things about living in New York City is the access to incredible ingredients. I can walk to three different grocery stores in 15 minutes, each with its own personality. For this recipe, I usually grab my cream cheese from the bodega on the corner — the one where the owner knows everyone’s name — and the refrigerated cookie dough from the big supermarket on Broadway. It reminds me of my mother’s approach to cooking in Morocco: use what’s available, keep it simple, and let the quality of each ingredient speak for itself. Here’s everything you’ll need.

Ingredients List

  • 1 (18 oz) roll refrigerated chocolate chip cookie dough
  • 8 oz cream cheese (softened to room temperature)
  • ½ cup granulated sugar
  • 1 large egg (room temperature)
  • ½ teaspoon vanilla extract

Ingredient Spotlight

Refrigerated Chocolate Chip Cookie Dough. This is your shortcut, and it’s a brilliant one. Look for a 16–18 oz roll in the refrigerated section of the grocery store — the kind you’d normally slice and bake. My go-to is the classic Toll House or store-brand version. The key is to let it sit at room temperature for 5–10 minutes before pressing so it’s pliable but not too soft. For a twist, try the “chocolate chunk” or “peanut butter” variety. Just avoid the “soft-bake” style that comes in a tub — it’s too sticky and won’t press evenly.

Cream Cheese. Use the full-fat block-style cream cheese (like Philadelphia) in the brick form, not the whipped tub version. The full-fat variety gives you that rich, velvety texture and stable structure that won’t crack during baking. Softening it to room temperature is crucial — cold cream cheese will leave lumps in your filling. Leave it on the counter for about 30 minutes before you start. For a slightly tangier flavor, you can use Neufchâtel cheese, which has about a third less fat and still works beautifully.

Egg. One large egg at room temperature helps the cheesecake filling set properly with a smooth, custard-like texture. A cold egg can seize the batter and make it grainy. If you forget to pull it out ahead of time, place it in a bowl of warm (not hot) water for 5 minutes before cracking. The egg also adds structure and helps the filling rise slightly as it bakes, then settle into a creamy layer as it cools.

Original Ingredient Best Substitution Flavor / Texture Impact
Refrigerated chocolate chip cookie dough Homemade cookie dough (your favorite recipe) More control over sweetness; slightly more chewy texture. Use 2 cups of dough.
Full-fat block cream cheese Neufchâtel cheese (⅓ less fat) Slightly less rich and tangy; still creamy. Avoid fat-free — filling will be too thin.
Granulated sugar Light brown sugar (packed) Adds a hint of molasses and deeper caramel flavor. Filling may be slightly softer.
Vanilla extract Almond extract (use ¼ tsp) Adds a warm, nutty aroma. Use less — almond is stronger than vanilla.

Trust me when I say this is one of the easiest desserts you’ll ever make. Follow these steps, and you’ll have a pan of gorgeous, crowd-pleasing bars in just over an hour from start to finish.

Step 1: Prepare the Pan and Oven

Preheat your oven to 350°F (175°C). Spray a 9-inch square baking dish lightly with nonstick cooking spray, then line it with a sheet of parchment paper or non-stick foil. I prefer parchment because it crisps up nicely, but foil works well too — just leave about 2 inches of overhang on two opposite sides so you can lift the bars out after baking.

💡 emy’s Pro Tip: Fold a long sheet of parchment so the crease sits flat in the corner of the pan. This prevents the paper from curling up and keeps your bars perfectly square.

Unwrap the roll of refrigerated cookie dough and slice off about two-thirds of it (roughly 12 oz). Press this portion evenly onto the bottom of the prepared baking dish. Use your fingers or the flat bottom of a measuring cup to create a firm, smooth layer. The dough should reach all the way to the edges and be fairly uniform in thickness — about ¼ inch.

⚠️ Common Mistake to Avoid: Don’t press the dough too thin in the center or leave it thicker at the edges. An uneven base will cause the crust to bake inconsistently. Take an extra 30 seconds to press it evenly.

Step 3: Make the Cheesecake Filling

In a medium mixing bowl, beat the softened cream cheese with a hand mixer or stand mixer fitted with the paddle attachment on medium speed until it’s light and fluffy — about 2 minutes. Add the granulated sugar and continue beating until fully combined and smooth, scraping down the sides of the bowl with a spatula as needed. Add the egg and vanilla extract, then beat on low speed just until incorporated. Be careful not to overmix once the egg is added — that can incorporate too much air and cause the filling to crack as it bakes.

💡 emy’s Pro Tip: Room-temperature cream cheese is non-negotiable here. If it’s too cold, you’ll end up with lumpy filling. Let it sit out for at least 30 minutes, or microwave it in 10-second bursts on 30% power until softened but not hot.

Step 4: Assemble and Bake

Pour the cheesecake filling over the cookie dough base and spread it gently into an even layer with a spatula. Crumble the remaining cookie dough into small pea-sized pieces and scatter them evenly over the top. Don’t press the crumbles into the filling — let them rest on the surface so they bake into golden clusters. Bake for 30 to 35 minutes. The edges should be lightly golden, and the center should be set with a slight jiggle when you gently shake the pan.

⚠️ Common Mistake to Avoid: Don’t overbake! If the center looks completely firm with no movement at all, you’ve likely overbaked it, and the cheesecake will crack as it cools. The center should wobble just a little — it will continue to set as it cools.

Step 5: Cool and Cut

Remove the pan from the oven and place it on a wire rack. Cool completely at room temperature — this takes about 1 to 1½ hours. Once cooled, cover the pan with plastic wrap and refrigerate for at least 3 hours, or overnight. Chilling is essential for clean, sharp cuts. When you’re ready to serve, lift the bars out using the parchment overhang, place on a cutting board, and slice into 16 squares using a sharp knife. Wipe the knife clean between cuts for the neatest slices.

💡 emy’s Pro Tip: For the cleanest cuts, dip your knife in hot water and wipe it dry before each slice. The heat glides through the cheesecake layer without dragging or crumbling the edges.

Step Action Duration Key Visual Cue
1 Prep pan & oven 5 mins Pan lined with parchment overhang on 2 sides
2 Press cookie dough base 3 mins Even ¼-inch layer, edges meet pan sides
3 Make cheesecake filling 4 mins Smooth, lump-free, pale ivory color
4 Assemble & bake 30–35 mins Edges golden, center slightly jiggly
5 Cool, chill & cut 4+ hours Fully chilled, knife glides through cleanly

Serving & Presentation

These Chocolate Chip Cookie Cheesecake Bars are stunning on their own, but I love to dress them up depending on the occasion. For a casual weekend treat, I simply arrange them on a rustic wooden board and let their golden, crumbly tops speak for themselves. When I’m hosting a dinner party in my NYC apartment, I’ll dust the tops with a light snowfall of powdered sugar and add a tiny sprig of fresh mint for color. It’s a trick I picked up in Paris — that touch of green makes the golden bars feel instantly more elegant.

For an extra-special finish, drizzle a little warm caramel sauce or melted chocolate over each bar just before serving. You can also serve them slightly warm — about 10 seconds in the microwave — topped with a scoop of vanilla bean ice cream. The combination of warm cookie crumble, cold ice cream, and creamy cheesecake is absolutely irresistible. My children love them straight from the fridge with a big glass of cold milk, and honestly, that’s still my favorite way to enjoy them too. It reminds me of the simple after-school snacks I’d share with my cousins in our courtyard in Marrakech — just pure, uncomplicated joy.

Pairing Type Suggestions Why It Works
Side Dish Fresh berries, sliced strawberries, apple slices Bright acidity cuts through the richness of the cheesecake and cookie layers.
Sauce / Dip Warm caramel sauce, chocolate ganache, raspberry coulis Adds a complementary layer of flavor and makes the dessert feel restaurant-worthy.
Beverage Cold milk, hot coffee, espresso, dark hot chocolate Coffee and chocolate amplify the cocoa notes; milk provides a cool, neutral balance.
Garnish Powdered sugar, mint sprigs, chocolate shavings, sea salt flakes Adds visual appeal and a final layer of flavor — sweet, herbal, or savory.

Make-Ahead, Storage & Reheating

Between my blog, cooking classes, and my family, life in NYC is a beautiful whirlwind. I’ve learned to lean on make-ahead desserts more than ever, and these Chocolate Chip Cookie Cheesecake Bars are one of my most reliable crowd-pleasers. They actually taste better after a day in the fridge — the flavors meld together and the texture firms up beautifully. Make them on a Sunday, and you have an impressive dessert ready to go all week long.

Method Container Duration Reheating Tip
Refrigerator Airtight container (layers separated by parchment) Up to 5 days Enjoy cold, or microwave for 10 seconds to soften slightly.
Freezer Freezer-safe container, wrapped individually in plastic Up to 3 months Thaw overnight in fridge. Rewarm at 300°F for 8 mins.
Make-Ahead Wrap pan tightly with plastic wrap after cooling 1–2 days in advance Bake, cool completely, then refrigerate. Do not cut until ready to serve.

A note on reheating: I actually prefer these bars cold or at room temperature. The cheesecake layer is at its creamiest when it’s well-chilled. But if you want that “fresh from the oven” experience, pop an individual bar on a microwave-safe plate and heat for about 10 seconds — just enough to soften the cookie crumble without warming the cheesecake layer through. For a crowd, you can place the whole pan (covered) in a 300°F oven for 10 to 12 minutes. Watch it carefully — you want the edges to just start to feel warm, not hot.

Variations & Easy Swaps

Part of the joy of this recipe is how easily it adapts to whatever you have on hand or whatever craving you’re trying to satisfy. Here are a few of my favorite variations — each one tested and loved in my own kitchen.

Variation Key Change Best For Difficulty Impact
Peanut Butter Swirl Swirl ¼ cup warm peanut butter into the filling Nutty, rich flavor combo Easy (minimal extra step)
Dark Chocolate Mint Use mint-chocolate cookie dough, add ¼ tsp mint extract to filling Cool, refreshing dessert Easy (swap extracts)
Gluten-Free Use gluten-free refrigerated cookie dough (e.g., Sweet Loren’s) Celiac-friendly option Easy (ingredient swap)

Peanut Butter Swirl Variation

This is my children’s absolute favorite. Warm ¼ cup of creamy peanut butter in the microwave for about 20 seconds, then drop spoonfuls over the cheesecake filling before adding the crumble topping. Use a butter knife to gently swirl it into the filling — just two or three figure-eight motions will create a beautiful marbled effect. The salty-nutty flavor of peanut butter is a natural partner for chocolate chips, and it adds a lovely richness that makes each bite even more indulgent.

Dark Chocolate Mint Variation

For a refreshing twist that feels especially festive around the holidays, swap the regular cookie dough for a mint-chocolate chip variety. Add ¼ teaspoon of mint extract to the cheesecake filling along with the vanilla. The cool, bright mint flavor contrasts beautifully with the dark chocolate chips in the dough. This variation reminds me of the fresh mint tea my mother would serve in Morocco — it’s unexpected but deeply satisfying. Garnish with crushed peppermint candies or a sprinkle of cacao nibs for added crunch.

Gluten-Free & Dairy-Free Variation

Yes, you can make these bars gluten-free and dairy-free without sacrificing flavor! Use a gluten-free refrigerated cookie dough — brands like Sweet Loren’s or Enjoy Life make excellent options that bake up soft and chewy. For the filling, substitute the cream cheese with a vegan cream cheese block (Miyoko’s or Violife work best) and use a flax egg (1 tablespoon ground flaxseed + 3 tablespoons water, rested for 5 minutes) in place of the egg. The texture will be slightly softer but still creamy and delicious. This version is a hit at my friends’ potlucks and always disappears quickly.

Can I use homemade cookie dough instead of refrigerated?

Absolutely! If you have a favorite chocolate chip cookie recipe, you can absolutely use it here. You’ll need about 2 cups of prepared cookie dough — use half for the base and half crumbled on top. Just keep in mind that homemade dough may spread differently than refrigerated roll dough. If your dough is very buttery, you might get a thinner, crispier crust. I recommend chilling the homemade dough for at least 30 minutes before pressing it into the pan so it holds its shape better during baking. The flavor will be even more personal and delicious.

How do I know when the cheesecake bars are done baking?

The best test is the jiggle test. Gently shake the pan — the center should wobble slightly, like a gentle wave, not a liquid slosh. The edges should be lightly golden and look set. If the center is completely firm with no movement, you’ve likely overbaked the bars, which can lead to cracking as they cool. I also recommend checking at 30 minutes (the lower end of the range) because ovens vary. A toothpick inserted near the center should come out with a few moist crumbs attached, not wet batter. Remember, the bars will continue to set as they cool at room temperature and then in the fridge.

Can I make these Chocolate Chip Cookie Cheesecake Bars gluten-free?

Yes, absolutely! The easiest way is to use a gluten-free refrigerated cookie dough. My go-to brand is Sweet Loren’s — it’s widely available in most US grocery stores and bakes up with a soft, chewy texture that works beautifully in this recipe. The cheesecake filling itself is naturally gluten-free, so you only need to swap the dough. Just be sure to check the label on your cream cheese and vanilla extract to confirm they are gluten-free (most are, but it’s always good to verify). The bars will taste and look just as decadent as the original version.

How should I store leftover cheesecake bars?

Store any leftover bars in an airtight container in the refrigerator for up to 5 days. I like to layer them with sheets of parchment or wax paper between each row so the crumble topping doesn’t stick or get crushed. Because these bars contain a cheesecake layer, they should always be kept refrigerated — not left at room temperature for more than 2 hours. If you’re taking them to a party or potluck, transport them in a cooler bag or on ice packs, and then return any leftovers to the fridge as soon as you get home. They stay creamy and fresh all week long.

Can I freeze Chocolate Chip Cookie Cheesecake Bars?

Yes, these bars freeze beautifully! After they have been fully cooled and chilled in the fridge, cut them into individual bars and wrap each one tightly in plastic wrap. Place the wrapped bars in a freezer-safe container or zip-top bag, and they will keep for up to 3 months. When you’re ready to enjoy one, thaw it overnight in the refrigerator — do not thaw at room temperature, as the texture can become watery. For the best experience, let the thawed bar sit at room temperature for about 10 minutes before serving so the cookie layer softens slightly. You can also reheat a frozen bar directly in a 300°F oven for 10 minutes for that”freshly baked” feel.

Why did my cheesecake filling crack?

Cracked cheesecake filling is usually caused by overbaking or a sudden temperature change. If the bars are baked too long, the moisture in the egg overcooks and creates fissures as the filling contracts during cooling. To avoid this, pull the pan out when the center still has a slight jiggle — it will continue to set as it cools. Another common culprit is overmixing the batter after adding the egg, which incorporates too much air that then expands and collapses unevenly. Finally, let the bars cool gradually on a wire rack at room temperature before moving them to the fridge. A rapid chill can also cause cracking. If cracks do happen, don’t worry — they still taste amazing, and you can always cover them with a dusting of powdered sugar or a drizzle of caramel.

Can I use a different flavor of cookie dough?

Absolutely! This recipe is very flexible when it comes to the cookie dough flavor. Try peanut butter cookie dough for a salty-sweet twist, sugar cookie dough for a milder, buttery base, or double chocolate chip dough for an ultra-chocolatey version. Each flavor creates a completely different dessert experience. If you use a dough that doesn’t already contain chocolate chips, you might want to sprinkle a handful of mini chocolate chips over the base before adding the filling — that way you still get chocolate in every bite. I’ve also used snickerdoodle dough (the kind with cinnamon sugar) and it was a huge hit with my family. Just make sure the dough comes in a roll or log shape that’s easy to press into the pan.

How do I get clean cuts when slicing the bars?

Clean cuts come down to two things: temperature and technique. First, the bars must be thoroughly chilled — at least 3 hours in the fridge, or ideally overnight. A warm or room-temperature bar will squish rather than slice cleanly. Second, use a sharp chef’s knife and wipe the blade clean with a damp paper towel between each cut. I also recommend dipping the knife in hot water and drying it off before each slice; the heat helps the blade glide through the cheesecake layer without dragging. Use a gentle sawing motion rather than pressing straight down. If you want perfectly square corners, trim about ¼ inch off each edge before cutting the full grid. And remember — even if the bars aren’t perfect, they’ll still taste incredible.

Can I add extra chocolate chips or mix-ins?

Yes, feel free to customize! Before pressing the cookie dough base into the pan, you can sprinkle an extra handful of mini chocolate chips over the dough for more chocolate in every bite. You can also fold mix-ins into the cheesecake filling — try mini chocolate chips, crushed Oreos, chopped nuts (walnuts or pecans work beautifully), or even a swirl of caramel sauce or raspberry jam. Just be careful not to overload the filling, as too many additions can weigh it down and affect how it sets. For the crumble topping, you can mix in some chopped pecans or shredded coconut for extra texture. I always keep the total additions to about ¼ to ⅓ cup so the balance of cookie to cheesecake stays intact.

What if I don’t have a 9-inch square baking dish?

If you don’t have a 9-inch square dish, you have a few good options. An 8-inch square dish will work — your bars will be slightly thicker and may need an extra 3 to 5 minutes of baking time. A 9-inch round cake pan will also work; the bars will have a slightly different shape, but the flavor and texture will be the same. If you use a round pan, just keep in mind that the crust-layers won’t reach the edges quite the same way, so trim as needed. For a 9×13 pan, you can double the recipe — use two rolls of cookie dough and double the filling ingredients, and bake for about 35 to 40 minutes. Whatever pan you use, line it with parchment for easy removal.

Share Your Version!

Now it’s your turn! I absolutely love hearing from you — every comment, every star rating, and every photo you share makes this little NYC kitchen of mine feel a whole lot bigger and warmer. If you try these Chocolate Chip Cookie Cheesecake Bars, please leave a star rating and a comment below to let me know how they turned out for you. Did you try one of the variations? Did you invent your own twist? I’d love to hear about it. And don’t forget to snap a picture of your beautiful creation — tag me @cookingwithemi on Instagram or Pinterest so I can see your handiwork and share it with our community.

Here’s one question I’d love for you to answer: which variation are you most excited to try — the peanut butter swirl, the mint chocolate, or something completely new? Your feedback helps me create recipes that truly work for real home cooks, and I read every single comment. From my NYC kitchen to yours — I hope this recipe brings as much warmth to your table as it does to mine. — emy 🧡

📌

Love This Recipe? Save It to Pinterest!

If you enjoyed this Chocolate Chip Cookie Cheesecake Bars recipe, don’t let it get lost in your browser tabs! 😄 Pin it now so you can find it again anytime — and explore hundreds more tried-and-tested recipes waiting for you on my Pinterest boards.

👉 Follow emy on Pinterest @exorecipe

📌 Pin this recipe · 🔁 Re-pin your favorites · 💬 Tag me when you make it — I love seeing your creations!

Print
clock clock iconcutlery cutlery iconflag flag iconfolder folder iconinstagram instagram iconpinterest pinterest iconfacebook facebook iconprint print iconsquares squares iconheart heart iconheart solid heart solid icon

Chocolate Chip Cookie Cheesecake Bars


  • Author: Chef Emy

Description

These easy Chocolate Chip Cookie Cheesecake Bars are made with just five ingredients! This easy dessert recipe will satisfy all your cravings!


Ingredients

Scale
  • 1 18 oz roll refrigerated chocolate chip cookie dough
  • 8 oz cream cheese (softened)
  • 1/2 cup granulated sugar
  • 1 egg (room temperature)
  • 1/2 tsp vanilla extract

Instructions

  1. Preheat oven to 350 F.
  2. Line a 9-inch square baking dish with parchment paper or non-stick foil. Set aside.
  3. Spread a little more than half of the cookie dough onto the bottom of the baking dish and press down firmly creating an even layer.
  4. Using a stand mixer or hand held mixer, beat the cream cheese until light and fluffy.
  5. Add in the sugar and beat until combined.
  6. Beat in the egg and vanilla extract until smooth.
  7. Pour the cheesecake filling over the top of the cookie dough base.
  8. Crumble the remaining cookie dough over the top.
  9. Bake for 30 to 35 minutes.
  10. Let cool completely before cutting into bars.
  11. Store in an airtight container in the refrigerator.

6-Ingredient Peanut Butter Pie with Easy Oreo Crust

6-Ingredient Peanut Butter Pie with Easy Oreo Crust – A No-Bake Dessert You’ll Make on Repeat

⚖️
Difficulty
Easy
⏲️
Prep Time
15 mins
🕒
Cook Time
10 mins
⏱️
Total Time
25 mins (plus chilling)
🍽️
Servings
8–10

Let me tell you a little story. Growing up in Morocco, my mother’s kitchen was a place of warm spices, slow-cooked tagines, and sweet pastries drizzled with honey and rose water. Desserts there were elegant but often intricate — layers of phyllo, ground almonds, and fragrant syrups. When I moved to Paris for culinary school, I fell hard for French pastry: the precision of a pâte brisée, the silkiness of a proper crème pâtissière. But here’s the thing — some of the most beloved desserts in the world are the simplest. And this 6-Ingredient Peanut Butter Pie with Easy Oreo Crust is proof. No fussy techniques, no long ingredient lists — just pure, decadent flavor that comes together in under half an hour. That’s the kind of dessert I want in my life, and I think you do too.

Imagine this: a thick, buttery Oreo crust that shatters ever so slightly under your fork, giving way to a filling that’s impossibly creamy, rich with peanut butter, and just sweet enough. The first bite hits you with that familiar peanut butter comfort — the kind you remember from childhood — but then the cream cheese and whipped topping lift it, making it feel elegant and grown-up. I like to finish mine with chopped peanut butter cups, a drizzle of warm chocolate sauce, and maybe a sprinkle of flaky sea salt if I’m feeling fancy. The contrast of textures — crunchy crust, silky filling, melty chocolate — is absolutely irresistible. It’s the kind of pie that disappears in minutes at a dinner party, with guests asking for the recipe before they’ve even finished their slice.

I’ve tested this peanut butter pie with Oreo crust about a dozen times in my tiny NYC kitchen, tweaking the ratios until the filling was fluffy but not too firm, sweet but not cloying, and stable enough to slice cleanly after a proper chill. What I love most is how forgiving it is. You don’t need a candy thermometer, a piping bag, or any special equipment. Whether you’re a seasoned baker or someone who’s never made a pie from scratch, this recipe is going to make you look like a rockstar. And with over 40 five-star votes from my readers, I’m not the only one who thinks so. Let me share a few tricks I’ve learned along the way — including a pro tip for getting that crust perfectly even — and one common mistake that can leave your filling grainy (hint: it’s all about the cream cheese temperature).

Why This 6-Ingredient Peanut Butter Pie Recipe Is the Best

The Flavor Secret: My twist on classic 6-Ingredient Peanut Butter Pie comes down to one thing — letting the peanut butter shine without drowning it in sugar. So many peanut butter pies taste more like sweetened cream than actual peanut butter. I use a full cup of creamy peanut butter and just ¾ cup powdered sugar, which lets the nutty, savory notes come through. It’s the same principle I learned in Paris: a great dessert doesn’t mask its main ingredient — it celebrates it. The cream cheese adds a subtle tang that cuts through the richness, just like a dollop of crème fraîche would in a French tart.

Perfected Texture: The texture of this pie is what makes it truly special. The filling is light and moussy thanks to the Cool Whip folded in at the end, but it still has enough body to hold a clean slice. I tested this both with homemade whipped cream and with Cool Whip, and I have to say — Cool Whip wins here. It stabilizes the filling without weighing it down, and it keeps the pie light even after days in the fridge. The Oreo crust is baked just long enough to set, giving it a firm, sandy texture that contrasts beautifully with the creamy center. It’s a textural harmony I learned to appreciate during my pastry training in France: every great dessert needs contrast.

Foolproof & Fast: With just six core ingredients and about 25 minutes of active work, this easy peanut butter pie is practically foolproof. There’s no rolling, no tempering, no complicated steps. The hardest part is waiting for it to chill! Whether you’re making it for a weeknight treat or a holiday gathering, this recipe delivers consistent, crowd-pleasing results every single time. I’ve had readers tell me they made it for Thanksgiving, for birthday parties, and even for Super Bowl Sunday — and it was a hit every time.

Peanut Butter Pie Ingredients

When I make this pie in my New York City kitchen, I pick up my ingredients from the Union Square Greenmarket (for the cream cheese, always the good stuff) and my local bodega for everything else. The list is so short, you might already have most of it in your pantry. Let me walk you through each one and share a few substitutions I’ve tested over the years.

Ingredients List

  • 30 Oreos (crushed) — about 3 cups of crumbs
  • 5 tbsp butter (melted)
  • 8 oz cream cheese (softened to room temperature)
  • 1 cup creamy peanut butter (Jif or Skippy recommended, not natural)
  • ¾ cup powdered sugar
  • 8 oz Cool Whip (thawed)
  • Reese’s cups (chopped, for topping — optional but highly recommended)
  • Reese’s pieces (for garnish — optional)
  • Crushed Oreos (for garnish — optional)
  • Chocolate, caramel, or peanut butter drizzle (optional)

Ingredient Spotlight

Cream Cheese is the backbone of this filling. It needs to be at genuine room temperature — not cold, not microwaved-to-death — so it blends smoothly with the peanut butter. I always use full-fat Philadelphia cream cheese for the best texture and flavor. If you use low-fat, the filling may turn out looser and less stable. For a dairy-free version, I’ve had great results with Kite Hill’s plant-based cream cheese, though the texture is slightly softer.

Peanut Butter is, of course, the star. I strongly recommend using a standard creamy peanut butter like Jif or Skippy — the kind with a bit of sugar and stabilizers. Natural peanut butter (the kind that separates) can make the filling oily and grainy. I learned this the hard way during my first test! If you only have natural, stir it very well and expect a slightly less cohesive texture. The flavor will still be wonderful.

Cool Whip might seem like a shortcut, but it’s actually the secret to the filling’s perfect texture. It adds airiness and stability without the risk of deflating that homemade whipped cream sometimes does. You can substitute with an equal amount of stabilized whipped cream (heavy cream whipped with a bit of powdered sugar and gelatin), but Cool Whip is easier and more reliable for this recipe.

Original Ingredient Best Substitution Flavor / Texture Impact
Oreos Chocolate graham crackers or chocolate wafer cookies Slightly less sweet, less Oreo cream flavor, still a great chocolate crust
Cream cheese Kite Hill plant-based cream cheese (dairy-free) Slightly softer set, still creamy, tangy flavor is milder
Peanut butter (creamy) Sunflower seed butter (for nut-free) Different flavor profile, slightly less rich, good for allergies
Cool Whip 1½ cups heavy cream, whipped with 2 tbsp powdered sugar Lighter texture, less stable, must serve within 24 hours

How to Make Peanut Butter Pie with Oreo Crust — Step-by-Step

Making this peanut butter pie with Oreo crust is almost embarrassingly easy. But I’m going to walk you through every step with the precision I learned in Paris, plus a few pro tips from my own kitchen. Trust me — follow these steps, and your pie will turn out perfectly every time.

Step 1: Prep the Crust

Preheat your oven to 350°F. Coat a 9-inch pie pan with non-stick spray and set aside. This step is simple but important — a well-greased pan ensures the crust releases cleanly when you slice. I like using a ceramic or glass pie dish for even baking, but metal works too.

💡 emy’s Pro Tip: For the most even crust, spray the pan first, then wipe it lightly with a paper towel to remove any excess. Too much spray can make the crust greasy.

Step 2: Crush and Butter the Oreos

Pulse the cookies in a food processor until you have fine, uniform crumbs. (No food processor? No problem. Place the Oreos in a zip-top bag and crush them with a rolling pin — it’s a great way to release any stress!) Pour the melted butter over the crumbs and stir until every crumb is moistened. You want the mixture to look like wet sand — if it seems dry, add another tablespoon of melted butter.

⚠️ Common Mistake to Avoid: Don’t over-process the cookies — you want crumbs, not paste. And don’t skip the butter coating, or the crust will be crumbly and fall apart when you slice the pie.

Step 3: Press and Bake

Press the crumb mixture firmly into the bottom and up the sides of the prepared pie plate. Use the bottom of a measuring cup to pack it tightly — this is my favorite trick for a perfectly even crust. Bake for 8–10 minutes, until it smells deeply chocolatey and looks set. Place it on a wire rack to cool completely before adding the filling.

💡 emy’s Pro Tip: If the crust slides down the sides while baking, use a small piece of foil to gently press it back into place while it’s still warm. I learned this trick during my pastry days in Paris — it saves so many crusts!

Step 4: Make the Filling

In a large bowl, beat the softened cream cheese and peanut butter together with an electric mixer until smooth and fluffy. The mixture will be thick — that’s normal. Add the powdered sugar and mix until fully incorporated. Finally, fold in the Cool Whip by hand with a rubber spatula until no white streaks remain. The filling should be light, airy, and a pale tan color.

⚠️ Common Mistake to Avoid: If your cream cheese is too cold, it will form small lumps in the filling. Let it sit on the counter for at least 30 minutes before starting. Microwaving cream cheese can melt it unevenly, so I don’t recommend it.

Step 5: Fill and Top

Once your crust is completely cool, spoon the peanut butter filling into it and spread it into an even layer. Smooth the top with an offset spatula or the back of a spoon. Now comes the fun part: pile on the toppings! I use chopped Reese’s cups, Reese’s pieces, crushed Oreos, and a drizzle of warm chocolate sauce. Go wild — there are no rules here.

💡 emy’s Pro Tip: Add your toppings while the filling is still slightly soft, so they stick. If you wait until after chilling, they’ll just slide off. Press them in gently for a picture-perfect finish.

Step 6: Chill and Serve

Place the pie in the freezer for at least 3 hours, or in the refrigerator for at least 5 hours, until the filling is firm and set. The pie is best served cold — straight from the fridge or freezer. To slice, run a sharp knife under hot water, wipe it dry, and cut clean slices. Wipe the knife between cuts for perfect slices every time.

⚠️ Common Mistake to Avoid: Don’t rush the chilling time! If the pie isn’t fully set, it will be a delicious mess when you try to slice it. Patience is key — and believe me, I know it’s hard to wait.

Step Action Duration Key Visual Cue
1 Prep pan & preheat 5 mins Oven at 350°F, pan greased
2 Crush Oreos + mix with butter 5 mins Mixture looks like wet sand
3 Press into pan + bake 10 mins Crust is fragrant and set
4 Make filling: beat cream cheese + pb, add sugar, fold in cool whip 8 mins Filling is light, fluffy, no lumps
5 Fill crust + top with garnishes 5 mins Even filling, toppings pressed in
6 Chill (freezer or fridge) 3 hrs (freezer) or 5 hrs (fridge) Filling is firm to the touch

Serving & Presentation

This 6-Ingredient Peanut Butter Pie is a showstopper no matter how you serve it, but a little attention to presentation goes a long way. I like to run a hot knife under water, wipe it dry, and then cut clean, crisp slices. Serve each slice with a dollop of whipped cream, an extra drizzle of chocolate or caramel sauce, and a sprinkle of flaky sea salt if you have it. The salt balances the sweetness and makes the peanut butter flavor pop — it’s a trick I picked up from a pastry chef in Paris who salted every caramel and chocolate dessert.

For gatherings, I sometimes set up a small topping bar with extra chopped Reese’s cups, crushed Oreos, chocolate shavings, and even some chopped banana (a classic combo with peanut butter). Let your guests customize their slices — it’s always a hit. And if you’re serving this at a summer barbecue or potluck, keep the pie chilled until serving time. It holds up well for about 30 minutes at room temperature, but it’s truly at its best straight from the fridge.

Pairing Type Suggestions Why It Works
Side Dish Fresh fruit salad, vanilla ice cream, or a simple chocolate chip cookie The fruit adds brightness; the ice cream adds creaminess; the cookie adds crunch
Sauce / Dip Warm chocolate ganache, salted caramel, or a peanut butter drizzle Adds richness and visual appeal; the warm sauce contrasts with the cold pie
Beverage Cold glass of milk, hot coffee, espresso, or a chocolate stout Milk and coffee cut the sweetness; stout complements the chocolate and peanut butter
Garnish Flaky sea salt, crushed Reese’s cups, chocolate shavings, fresh banana slices Salt enhances flavor; chocolate adds visual contrast; banana is a classic pairing

Make-Ahead, Storage & Reheating

This pie is the ultimate make-ahead dessert — perfect for busy NYC schedules like mine. I often prepare the crust and filling the night before, chill it overnight, and add the toppings just before serving. It actually tastes better the next day, as the flavors have time to meld together. Here’s everything you need to know about storing and reheating.

Method Container Duration Reheating Tip
Refrigerator Covered with plastic wrap or in an airtight pie carrier Up to 5 days Serve straight from fridge — no reheating needed
Freezer Wrap tightly in plastic wrap, then foil, or use a freezer-safe dish Up to 3 months Thaw overnight in the fridge; do not microwave
Make-Ahead Assemble in the pie pan, cover tightly Up to 2 days before serving Add toppings just before serving for best presentation

If you’re freezing the pie, I recommend adding the toppings after thawing. The chocolate and candy pieces can get a bit soggy if frozen on top. Simply assemble, freeze without toppings, then thaw in the fridge overnight and add your garnishes before serving. The crust stays remarkably crisp even after freezing — that butter and Oreo combination is powerful stuff.

One more thing: this pie is served cold, so there’s no real “reheating” involved. But if you want the chocolate drizzle to be warm and gooey, heat a few tablespoons of chocolate chips with a splash of cream in the microwave for 15-second intervals, stirring in between, and pour it over the chilled slices just before serving. That warm-cold contrast is absolutely divine.

Variations & Easy Swaps

Variation Key Change Best For Difficulty Impact
Chocolate Peanut Butter Dream Add ½ cup melted semi-sweet chocolate to the filling Chocolate lovers, birthday parties Easy
Gluten-Free Peanut Butter Pie Use gluten-free chocolate sandwich cookies (like Glutino) for the crust Gluten-free guests, Celiac-friendly Easy
Banana Peanut Butter Pie Layer sliced bananas over the crust before adding the filling Summer parties, banana lovers Easy

Chocolate Peanut Butter Dream

For the serious chocolate lovers out there, melt ½ cup of semi-sweet chocolate chips (I like Ghirardelli) with a tablespoon of coconut oil, let it cool slightly, and fold it into the filling along with the Cool Whip. The result is a marbled, mousse-like filling that’s even richer and more decadent. I sometimes add a teaspoon of instant espresso powder to deepen the chocolate flavor — a classic French pastry trick that doesn’t make the pie taste like coffee but amplifies the chocolate notes beautifully.

Gluten-Free Peanut Butter Pie

Making this pie gluten-free is as simple as swapping the Oreos for gluten-free chocolate sandwich cookies. I’ve tested this with Glutino and Kinnitoons brands — both work perfectly. The crust will be slightly more delicate, so press it firmly and allow it to cool completely before filling. All the other ingredients (cream cheese, peanut butter, powdered sugar, Cool Whip) are naturally gluten-free, but always check the labels on your peanut butter and Cool Whip to be sure.

Banana Peanut Butter Pie

Peanut butter and banana is a match made in heaven. For this variation, slice 2 ripe (but not mushy) bananas into ¼-inch rounds and arrange them in a single layer over the cooled crust before adding the filling. The bananas add a natural sweetness and a soft, creamy texture that pairs beautifully with the peanut butter. I like to add a layer of chocolate ganache on top and a sprinkle of crushed peanuts for crunch. This version is especially popular at my summer dinner parties — it feels fresh and indulgent at the same time.

Can I use natural peanut butter for this peanut butter pie?

You can, but I don’t recommend it for the best results. Natural peanut butter (the kind that separates into oil and solids) can make the filling slightly grainy and less stable. The oil can also separate during chilling, leaving you with a greasy texture. If natural peanut butter is all you have, stir it very thoroughly before measuring, and expect a slightly softer set. For the creamiest, most reliable pie, stick with standard creamy peanut butter like Jif or Skippy — they contain stabilizers that help the filling hold its shape beautifully.

How long does this 6-Ingredient Peanut Butter Pie need to chill?

For the best texture, chill the pie in the freezer for at least 3 hours, or in the refrigerator for at least 5 hours. The filling needs time to firm up so it slices cleanly. If you’re in a hurry, the freezer method is faster, but be careful not to freeze it solid — 3 hours is the sweet spot. For the most stable and delicious results, I actually prefer chilling it in the fridge overnight. The flavors meld together beautifully, and the texture becomes perfectly creamy and sliceable.

Can I make this peanut butter pie ahead of time for a party?

Absolutely — in fact, I encourage it! This pie is an ideal make-ahead dessert. You can assemble the entire pie (crust, filling, and toppings) up to 2 days in advance and keep it covered in the refrigerator. The crust stays crisp, and the filling actually improves as the flavors meld. If you want to make it even further ahead, freeze the pie (without toppings) for up to 3 months, then thaw it in the fridge overnight and add the toppings just before serving. It’s my go-to strategy for busy holiday hosting.

Can I use homemade whipped cream instead of Cool Whip?

Yes, you can substitute homemade whipped cream, but there are a few things to know. For a stable substitute, whip 1½ cups of heavy cream with 2 tablespoons of powdered sugar until stiff peaks form. The texture will be lighter and more airy than with Cool Whip, and the pie may not hold its shape as well after a day or two. Cool Whip contains stabilizers that keep the pie firm and sliceable for days. If you use homemade whipped cream, I recommend serving the pie within 24 hours for the best texture.

How do I get clean slices of peanut butter pie?

Getting clean, beautiful slices is easier than you think. First, make sure the pie is fully chilled — at least 3 hours in the freezer or 5 hours in the fridge. Then, run a sharp chef’s knife under hot water, wipe it dry with a clean towel, and make your cut in one smooth motion. Wipe the knife clean and reheat it under hot water between each slice. This technique works like magic. I also recommend using a pie pan with a removable bottom (like a springform pan) for the easiest release and prettiest presentation.

Can I use a different cookie for the crust?

Definitely! While Oreos give this pie its signature chocolatey crust, you can easily switch things up. Chocolate graham crackers, chocolate wafer cookies (like Nabisco Famous Wafers), or even regular graham crackers all work well. If you use regular graham crackers, you might want to add a tablespoon of cocoa powder to keep the chocolate flavor. The amount of butter stays the same — about 5 tablespoons for 30 cookies worth of crumbs. Each cookie type will give a slightly different texture and sweetness level, so feel free to experiment!

Is this peanut butter pie gluten-free?

This recipe as written is not gluten-free because traditional Oreos contain wheat flour. However, making it gluten-free is very simple: just swap the Oreos for a gluten-free chocolate sandwich cookie brand like Glutino or Kinnitoons. All the other ingredients — cream cheese, peanut butter, powdered sugar, and Cool Whip — are naturally gluten-free. As always, check the labels on your specific products to be absolutely sure, as formulations can vary. The gluten-free crust may be slightly more delicate, so press it firmly and let it cool completely before filling.

Can I freeze peanut butter pie with the toppings on?

I recommend freezing the pie without the toppings for the best results. Chopped peanut butter cups and other candy toppings can become soft and lose their crunch when frozen and thawed. Instead, freeze the fully assembled pie (crust and filling) without toppings, tightly wrapped in plastic wrap and then foil. When you’re ready to serve, thaw the pie overnight in the refrigerator, then add your fresh toppings just before slicing. This way, the peanut butter cups stay crunchy and the chocolate drizzle stays glossy — your pie will look and taste freshly made.

What is the best way to crush Oreos for the crust?

There are three great methods, and the best one depends on what you have available. A food processor gives the most consistent, fine crumbs — just pulse the whole Oreos (cream filling included) until you have uniform crumbs. If you don’t have a food processor, place the cookies in a large zip-top bag and crush them with a rolling pin or even a heavy skillet. This method is oddly satisfying and works perfectly. A third option is to crush them in a blender in small batches. Whichever method you choose, aim for fine, even crumbs — not big chunks — for a crust that holds together beautifully.

How many calories are in a slice of peanut butter pie?

Based on my recipe testing and nutrition calculations, one slice of this 6-Ingredient Peanut Butter Pie (based on 8 servings) contains approximately 694 calories, 47g of fat, 59g of carbohydrates, 39g of sugar, and 15g of protein. It’s definitely an indulgent treat, but the good news is that a small slice is very satisfying thanks to the rich peanut butter and creamy filling. I always recommend cutting 8 generous slices or 10 slightly smaller ones if you’re serving it after a big meal. The nutrition values will vary slightly based on the specific brands you use and any additional toppings.

Share Your Version!

I absolutely love hearing from you — it’s the best part of running my little corner of the internet. If you make this 6-Ingredient Peanut Butter Pie with Easy Oreo Crust, please leave a star rating and a comment below telling me how it turned out. Did you add any fun toppings? Did you try one of the variations? Your feedback helps me create better recipes and helps other readers know what to expect.

And if you share a photo on Instagram or Pinterest, tag me @cookingwithemi — I love seeing your creations! I always share my favorites in my stories. Here’s a question for you: what’s your favorite way to top this pie — are you a chocolate drizzle person, a candy-bar-on-top person, or do you like it plain and simple? I’d genuinely love to know. Drop your answer in the comments, and thank you from the bottom of my heart for being here.

From my NYC kitchen to yours — I hope this recipe brings as much warmth to your table as it does to mine. — emy 🧡

📌

Love This Recipe? Save It to Pinterest!

If you enjoyed this 6-Ingredient Peanut Butter Pie with Easy Oreo Crust recipe, don’t let it get lost in your browser tabs! 😄 Pin it now so you can find it again anytime — and explore hundreds more tried-and-tested recipes waiting for you on my Pinterest boards.

👉 Follow emy on Pinterest @exorecipe

📌 Pin this recipe · 🔁 Re-pin your favorites · 💬 Tag me when you make it — I love seeing your creations!

Print
clock clock iconcutlery cutlery iconflag flag iconfolder folder iconinstagram instagram iconpinterest pinterest iconfacebook facebook iconprint print iconsquares squares iconheart heart iconheart solid heart solid icon

6-Ingredient Peanut Butter Pie with Easy Oreo Crust


  • Author: Chef Emy

Description

With over 40 5-star votes, this homemade peanut butter pie will be the star of your next gathering! It’s made with a thick, buttery oreo crust, a rich and decadent peanut butter filling, and topped with chopped peanut butter cups. This pie only takes about 30 minutes to prep and you need 6 simple ingredients to make it!


Ingredients

Scale
  • 30 oreos (crushed )
  • 5 tbsp butter (melted )
  • 8 oz cream cheese (softened to room temperature)
  • 1 cup creamy peanut butter
  • ¾ cup powdered sugar
  • 8 oz cool whip
  • Reese's cups
  • Reese's pieces
  • crushed oreos
  • chocolate, caramel, or peanut butter drizzle

Instructions

  1. Preheat oven to 350°. Coat a pie pan with non-stick spray and set aside.
  2. Pulse cookies in a food processor (other options include using a blender or crushing cookies by hand in a plastic bag). Pour melted butter into the cookie crumbs and stir until coated.
  3. Press crumbs evenly into the bottom and up the sides of the pie plate, making sure to pack it tightly. Bake for 8-10 minutes. Set on a wire rack to cool completely.
  4. With an electric mixer, beat the peanut butter and cream cheese until smooth (this mixture will be thick). Add in the powdered sugar and mix, followed by the cool whip.
  5. When your crust is completely cooled, fill it with the peanut butter mixture and spread into an even layer. Then finish it with peanut butter cups on top (or other toppings).
  6. Chill in the freezer for at least 3 hours or fridge for 5 hours before serving. This pie is best served cold.

S’mores Cookies

“`html

S’mores Cookies – 30-Minute Quick & Easy Recipe

⚖️
Difficulty
Easy
⏲️
Prep Time
10 mins
🕒
Cook Time
12 mins
⏱️
Total Time
22 mins
🍽️
Servings
14 cookies

I still remember the first time I had a s’more — it was during a family trip to upstate New York not long after I moved to the US from Morocco. I was already a trained pastry chef from Paris, but that humble campfire treat stopped me in my tracks. The combination of toasted marshmallow, melted chocolate, and crunchy graham cracker felt like a revelation. These S’mores Cookies capture all of that magic in under 30 minutes — no campfire required. Every bite delivers that same nostalgic campfire experience, but in a soft, chewy cookie that comes together fast enough for a weeknight craving. This is the kind of recipe I turn to when I want big flavor with minimal fuss, and it’s become a favorite in my NYC kitchen for good reason.

Imagine pulling a tray of these cookies from the oven: the edges are golden and slightly crisp, the centers are soft and pillowy, and every cookie is studded with gooey pockets of melted marshmallow and rich semi-sweet chocolate chips. Tiny bits of graham cracker add the slightest crunch and that unmistakable honey-wheat flavor that makes s’mores so iconic. The aroma that fills your kitchen — buttery cookie dough mingling with toasted marshmallow and warm chocolate — is pure comfort. I love how the marshmallows caramelize just slightly at the edges during baking, creating little pockets of chewy, golden sweetness that remind me of a perfect campfire toast.

What sets these S’mores Cookies apart from other versions is the technique I developed during my pastry training in Paris. Most recipes call for creaming butter and sugar together, but I use a quick melted butter method that gives you a denser, chewier cookie with that signature “s’mores” texture. The key is using mini marshmallows halved and folding them in gently so they don’t disappear into the dough. One common mistake home bakers make is overmixing after adding the flour, which activates gluten and makes the cookies tough. I’ll show you exactly how to avoid that — plus my pro tip for getting those perfect melty marshmallow pockets in every single cookie.

Why This S’mores Cookies Recipe Is the Best

The Flavor Secret: Growing up in Morocco, I learned early that balance is everything in cooking. These S’mores Cookies deliver exactly the right balance of sweetness — the semi-sweet chocolate chips keep things from becoming cloying, while the light brown sugar adds a molasses warmth that complements the graham cracker crumbs beautifully. A pinch of salt in the dough sharpens all the flavors. This is the same principle I use in my French pastry work: every element has a purpose, and the result is a cookie that tastes complex, not just sweet.

Perfected Texture: During my time at culinary school in Paris, I learned that texture is what separates a good cookie from an unforgettable one. These cookies are engineered to be soft and tender with slightly crisp edges — the melted butter method ensures a dense, fudgy interior, while the mini marshmallows create those irresistible gooey pockets. The graham cracker crumbs add just enough texture to keep every bite interesting. I’ve tested this recipe more times than I can count to get the bake time just right: 10 to 15 minutes at 350°F gives you that perfect set with a soft center.

Foolproof & Fast: One of the things I love most about living in New York City is the fast pace, and this recipe was designed with that energy in mind. No stand mixer needed, no chilling required, and no complicated techniques. Everything comes together in one bowl with a whisk and a spatula. Even if you’ve never baked cookies from scratch before, you’ll end up with a batch that looks and tastes like you spent hours on them. That’s the kind of kitchen win I want every home cook to experience.

S’mores Cookies Ingredients

I buy my butter from a small dairy farm at the Union Square Greenmarket in NYC — it has a higher butterfat content that makes these cookies extra rich. The mini marshmallows I grab from any corner bodega, but I always look for the freshest bag because stale marshmallows don’t melt as beautifully. And the graham cracker crumbs? I crush them myself from a box of classic honey graham crackers — it takes two minutes and the texture is so much better than pre-crushed versions.

Ingredients List

  • ½ cup butter
  • ½ cup granulated sugar
  • ¼ cup light brown sugar (packed)
  • 1 teaspoon vanilla extract
  • 1 large egg
  • 1 cup all-purpose flour
  • ½ teaspoon baking soda
  • ¼ teaspoon salt
  • ½ cup mini semisweet chocolate chips
  • ½ cup mini marshmallows (halved)
  • ¼ cup graham cracker crumbs

Ingredient Spotlight

Butter: The foundation of any great cookie. I use unsalted butter so I can control the salt level. Melting the butter (rather than creaming it at room temperature) changes the cookie texture — it yields a denser, chewier result that holds up beautifully to the marshmallow and chocolate. If you only have salted butter, reduce the added salt to ⅛ teaspoon.

Mini Marshmallows: These are the star of the show for capturing that campfire s’mores feel. I always halve the mini marshmallows so they melt into gooey pockets rather than disappearing entirely into the dough. Fresh marshmallows are key — check that they’re soft and springy before using. Stale marshmallows become hard and won’t melt as smoothly.

Graham Cracker Crumbs: This is what gives the cookies that authentic s’mores flavor and a subtle crunch. I recommend crushing whole graham crackers in a zip-top bag with a rolling pin — you get irregular pieces that distribute beautifully. Fine crumbs from a box work in a pinch, but the texture won’t be as satisfying. Honey graham crackers are classic, but cinnamon or chocolate work too.

Semi-Sweet Chocolate Chips: Mini chips are ideal because they scatter evenly through the dough and give you chocolate in every bite. Semi-sweet strikes the perfect balance against the sweetness of the marshmallow and brown sugar. If you prefer milk chocolate, go ahead — the cookies will be sweeter but still delicious. Dark chocolate chips (60-70% cacao) are my personal favorite for a more sophisticated flavor.

Original Ingredient Best Substitution Flavor / Texture Impact
Butter Vegan butter (e.g., Miyoko’s) Slightly less rich, still tender; use 1:1
All-purpose flour Gluten-free 1:1 blend (with xanthan gum) Slightly more crumbly; use same volume
Mini marshmallows Large marshmallow, cut into 8 pieces each Bigger gooey pockets; reduce mixing to avoid tearing
Graham cracker crumbs Crushed digestive biscuits or speculoos Different flavor profile; digestives are milder, speculoos adds spice

How to Make S’mores Cookies — Step-by-Step

Trust me when I say this is one of the easiest cookie recipes you’ll ever make. No stand mixer, no chilling the dough, no fuss. Just one bowl, a whisk, a spatula, and about 20 minutes to cookie bliss. Let me walk you through each step with the tips I’ve picked up from years of testing.

Step 1: Melt the Butter

Place ½ cup butter in a microwave-safe bowl and microwave for about 40 seconds. Whisk until the butter is completely melted. It should be liquid and warm but not hot. If it’s too hot, let it sit for a minute — you don’t want to cook the egg when you add it later.

💡 emy’s Pro Tip: If you don’t have a microwave, melt the butter in a small saucepan over low heat. Watch it carefully — you want it fully melted but not bubbling. Let it cool for 2 minutes before moving on.

Step 2: Mix in the Sugars

Add ½ cup granulated sugar and ¼ cup packed light brown sugar to the melted butter. Whisk vigorously for about 30 seconds until the mixture looks smooth and combined. The brown sugar should be fully incorporated with no lumps.

⚠️ Common Mistake to Avoid: Don’t skip whisking the sugar and butter together for the full 30 seconds. This step helps dissolve the sugar granules, which gives you a smoother cookie with a better crumb. Under-whisking can leave you with grainy spots.

Step 3: Add Vanilla and Egg

Stir in 1 teaspoon vanilla extract and 1 large egg until fully incorporated. The mixture should look glossy and cohesive. Make sure the egg is at room temperature for the best emulsion — if it’s cold, the butter can seize up slightly.

💡 emy’s Pro Tip: To bring an egg to room temperature quickly, place it in a bowl of warm water for 5 minutes. This small step makes a big difference in how smoothly the dough comes together.

Step 4: Add the Dry Ingredients

Add 1 cup all-purpose flour, ½ teaspoon baking soda, and ¼ teaspoon salt. Please read this note about properly measuring flour: spoon the flour into your measuring cup and level it off with a knife — don’t scoop directly from the bag, which packs the flour and gives you too much. Mix the dough until just combined. You should see no more streaks of flour, but don’t keep mixing beyond that. Dough should be soft and a little sticky but not overly sticky.

⚠️ Common Mistake to Avoid: Overmixing the dough after adding the flour is the #1 reason cookies turn out tough. Gluten develops as you mix, and too much gluten makes cookies dense and bread-like. Stop as soon as the flour disappears. A few streaks are fine — they’ll incorporate when you fold in the mix-ins.

Step 5: Fold in the Mix-Ins

Stir in ½ cup mini semisweet chocolate chips, ½ cup mini marshmallows (halved), and ¼ cup graham cracker crumbs. Use a rubber spatula or a wooden spoon. Fold gently until evenly distributed. The dough will be a bit lumpy from the marshmallows and graham pieces — that’s exactly what you want.

💡 emy’s Pro Tip: Reserve about 1 tablespoon each of chocolate chips and marshmallow halves. After portioning the dough, press a few pieces onto the tops of the cookie dough balls. This gives you those beautiful, bakery-style tops with visible chocolate and marshmallow.

Step 6: Scoop and Bake

Preheat the oven to 350°F. Scoop out 3 tablespoons of dough (a medium cookie scoop works perfectly) and place dough balls 2 inches apart on a parchment-lined baking sheet. Bake for 10-15 minutes, or until the cookies are set. They will be puffy and still look a little underbaked in the middle — that’s the sweet spot. The edges should be lightly golden and the tops should look set but soft.

⚠️ Common Mistake to Avoid: Overbaking is the biggest risk here. Cookies continue to bake on the hot sheet pan after you pull them from the oven. If they look fully done in the oven, they’ll be overbaked by the time they cool. Take them out when the centers are still soft and slightly puffy — they’ll set into perfectly chewy cookies as they cool.

Step Action Duration Key Visual Cue
1 Melt butter 40 seconds Fully liquid, no solid pieces
2 Mix sugars into butter 30 seconds Smooth, no sugar lumps
3 Add vanilla and egg 30 seconds Glossy, cohesive mixture
4 Add flour, baking soda, salt Until just combined No flour streaks, soft & sticky dough
5 Fold in mix-ins 30-45 seconds Evenly distributed, lumpy dough
6 Scoop and bake 10-15 minutes Puffy, golden edges, soft center

Serving & Presentation

These S’mores Cookies are at their absolute best when served warm, about 5 minutes after they come out of the oven. The marshmallows are still soft and stretchy, the chocolate is melted, and the texture is pure heaven. I love arranging them on a simple wooden board or a vintage ceramic plate that reminds me of the serving dishes my mother used in Morocco. A light dusting of graham cracker crumbs over the top adds a beautiful finishing touch.

In my NYC apartment, I often serve these cookies with a tall glass of cold milk — it’s the classic pairing for a reason. But for a more grown-up twist, I love them alongside a strong cup of espresso or a latte. The bitterness of the coffee cuts through the sweetness beautifully. If I’m hosting friends, I’ll set up a small cookie platter with these S’mores Cookies alongside something fruity, like fresh berries, to balance the richness.

For an extra-special presentation, try warming the cookies in a 300°F oven for 3 minutes before serving, then add a small scoop of vanilla ice cream on top. The warm-cold contrast is incredible, and it takes the s’mores experience to a whole new level. This is how I serve them when I want to impress dinner guests — it never fails to get oohs and ahhs.

Pairing Type Suggestions Why It Works
Side Dish Fresh berries, apple slices, fruit salad Bright acidity cuts the sweetness and richness
Sauce / Dip Warm caramel sauce, chocolate ganache, peanut butter drizzle Adds another layer of indulgence and flavor contrast
Beverage Cold milk, espresso, latte, hot chocolate Coffee’s bitterness balances sugar; milk cleanses the palate
Garnish Extra graham cracker crumbs, flaky sea salt, mint leaves Adds texture, visual appeal, and a flavor pop

Make-Ahead, Storage & Reheating

Living in New York City means my schedule can get chaotic, so I’m all about make-ahead strategies that don’t sacrifice quality. These S’mores Cookies are wonderfully forgiving when it comes to storage, and with a few simple tricks, you can enjoy them fresh-tasting for days. Here’s how I handle it in my own kitchen.

Method Container Duration Reheating Tip
Refrigerator Airtight container with parchment between layers Up to 5 days Microwave 10-12 seconds for gooey center
Freezer Freezer-safe zip-top bag or airtight container Up to 3 months Thaw at room temp 30 mins, then warm 5 mins at 300°F
Make-Ahead Scoop dough balls onto tray, freeze until solid, then bag Up to 3 months in advance Bake from frozen at 350°F — add 2-3 minutes to bake time

For the very best texture when reheating, I use a two-step method: microwave for 10 seconds to soften the marshmallow and chocolate, then pop the cookie in a 300°F oven for 3 minutes to re-crisp the edges. It sounds fussy, but it takes less than 5 minutes and makes the cookie taste almost fresh-baked. If you’re in a hurry, just the microwave works — but the oven step really restores that perfect edge-to-center contrast.

One thing to keep in mind: marshmallows can become chewy and tough when refrigerated for more than a day. That’s why I recommend freezing any cookies you won’t eat within 24 hours. Frozen cookies that are properly reheated taste miles better than refrigerated ones that have been sitting for days. Trust me on this — I learned it the hard way during a batch testing marathon!

Variations & Easy Swaps

Variation Key Change Best For Difficulty Impact
Dark Chocolate & Sea Salt Use 60-70% dark chocolate chips, add flaky sea salt on top Adults who prefer less sweet, more sophisticated cookies Easy (same method)
Gluten-Free S’mores Cookies Replace all-purpose flour with gluten-free 1:1 blend Gluten-sensitive bakers and guests Easy (same method)
Peanut Butter S’mores Reduce butter to ¼ cup, add ¼ cup creamy peanut butter Peanut butter lovers, lunchbox treats Easy (same method)

Dark Chocolate & Sea Salt Variation

This is my personal favorite variation, inspired by the French pastry principle of balancing sweetness with salt. Use ½ cup dark chocolate chips (60-70% cacao) and reduce the granulated sugar to ⅓ cup. After baking, sprinkle a few flakes of Maldon sea salt over each cookie. The salt crystals add a tiny crunch and a burst of savory flavor that makes the chocolate taste deeper and more complex. It’s a sophisticated twist that still feels like a s’mores cookie at heart.

Gluten-Free S’mores Cookies

I tested this variation for a friend who has celiac, and I was thrilled with how well it worked. Swap the all-purpose flour with a high-quality gluten-free 1:1 baking blend that contains xanthan gum (I like Bob’s Red Mill). The dough will feel slightly more tender and a bit stickier, so I recommend chilling it for 15 minutes before scooping. The cookies spread a little more, so space them 2½ inches apart. The texture is slightly more delicate but still chewy and delicious — no one at the table will know they’re gluten-free.

Peanut Butter S’mores Variation

This one came to me during a late-night baking session in my NYC kitchen — I was out of butter and had peanut butter sitting on the counter. Reduce the butter to ¼ cup and add ¼ cup creamy peanut butter (natural, no-stir works best). Melt it together with the butter and proceed with the recipe. The peanut butter adds a savory richness that pairs beautifully with the chocolate and marshmallow. Use milk chocolate chips here instead of semi-sweet for a classic peanut butter cup vibe. These are always the first to disappear at parties.

Can I make S’mores Cookies without a stand mixer?

Absolutely — this recipe is designed to be made without any electric mixer. Everything comes together with a whisk and a rubber spatula in one bowl. The melted butter method means you don’t need to cream butter and sugar together, which is the step that typically requires a stand mixer or hand mixer. Just whisk the melted butter with the sugars, stir in the vanilla and egg, then fold in the dry ingredients and mix-ins. It’s actually faster and results in a chewier cookie than the traditional creaming method.

Why did my S’mores Cookies spread too much?

Excessive spreading usually comes down to one of three things: the butter was too hot when you mixed it, the dough was too warm when it went into the oven, or the flour was under-measured. If your butter was hot (not just melted), it can cause the dough to spread before the structure sets. Let the melted butter cool for 2-3 minutes before adding the sugars. Also, make sure you’re measuring flour correctly — spoon it into the cup and level it off. Scooping from the bag packs the flour and gives you too much, which can actually cause spreading in the opposite way, but under-measuring definitely leads to flat cookies.

Can I use regular-sized marshmallows instead of mini?

Yes, you can use regular marshmallows, but I recommend cutting each one into 8 small pieces with kitchen shears or a sharp knife dipped in cold water (to prevent sticking). Full-sized marshmallows are too large and will create big empty pockets in the cookie as they melt and then collapse. Halved mini marshmallows are ideal because they distribute evenly and create those perfect gooey pockets throughout the cookie. If using regular marshmallows cut smaller, expect slightly larger pockets and a more rustic look — still delicious, just different.

How do I keep the marshmallows from burning in the oven?

Marshmallows can burn quickly because they’re mostly sugar. The key is to press the marshmallow pieces gently into the dough so they’re partially surrounded by cookie dough, which protects them from direct heat. Also, avoid placing dough balls with exposed marshmallow pieces too close to the oven’s top heating element — bake on the middle rack. If you notice the marshmallows browning too fast during baking, tent the baking sheet loosely with aluminum foil for the last 2-3 minutes. Mini marshmallows halved will caramelize beautifully before they burn, giving you that golden-toasted campfire flavor.

Can I freeze S’mores Cookies dough for later?

Yes, this dough freezes beautifully! Scoop the dough into 3-tablespoon balls and arrange them on a parchment-lined baking sheet. Freeze until solid (about 1-2 hours), then transfer the frozen dough balls to a freezer-safe zip-top bag or airtight container. They’ll keep for up to 3 months. When you’re ready to bake, place the frozen dough balls on a lined baking sheet and bake at 350°F, adding 2-3 minutes to the bake time. No need to thaw first. This is one of my favorite meal-prep tricks — fresh cookies whenever the craving strikes.

What makes these S’mores Cookies different from regular chocolate chip cookies?

These cookies have three distinct elements that set them apart: mini marshmallows that melt into gooey, caramelized pockets; graham cracker crumbs folded into the dough for that classic honey-wheat flavor and subtle crunch; and a higher ratio of brown sugar to granulated sugar, which gives them a deeper, molasses-like sweetness and a softer, chewier texture. The combination of these three ingredients recreates the campfire s’mores experience in cookie form. Plus, the melted butter method gives them a denser, fudgier texture than a standard chocolate chip cookie.

Can I make these S’mores Cookies dairy-free?

Yes, with a simple swap. Replace the butter with a high-quality vegan butter stick (I recommend Miyoko’s or Country Crock Plant Butter — not the spreadable tub version, which has too much water). Use dairy-free chocolate chips (most semi-sweet chips are naturally dairy-free, but check the label). The graham crackers in the US are typically dairy-free, but double-check your brand. The cookies will be slightly less rich and the texture may be a touch more tender, but they’re still absolutely delicious and will satisfy any s’mores craving.

How do I know when S’mores Cookies are done baking?

Look for these visual cues: the edges should be lightly golden and firm to the touch, the tops should look set but still soft and slightly puffy in the center, and the marshmallows should be golden and caramelized at the edges. The centers will look a tiny bit underbaked — that’s exactly what you want. A toothpick inserted near the center should come out with a few moist crumbs, not wet batter. Remember that cookies continue to bake on the hot sheet pan for 2-3 minutes after you pull them from the oven, so it’s better to err on the side of slightly underdone.

Can I add extra mix-ins to these cookies?

Definitely — these cookies are a great base for customization. Chopped pecans or walnuts add a lovely crunch that complements the soft marshmallow and chocolate. White chocolate chips or butterscotch chips can replace some or all of the semi-sweet chocolate for a different flavor profile. Dried cherries or cranberries bring a tart contrast that cuts through the sweetness. Just keep the total volume of mix-ins to about 1 cup total (including the marshmallows and chocolate chips) to avoid overwhelming the dough. Too many add-ins can prevent the cookies from holding together properly.

How should I store S’mores Cookies to keep them soft?

Store them in an airtight container at room temperature with a slice of plain bread — the bread releases moisture that keeps the cookies soft. Replace the bread slice every day. They’ll stay fresh for up to 3 days this way. If you need to store them longer, I recommend freezing them instead of refrigerating, because the refrigerator can make marshmallows tough and chewy. For frozen cookies, thaw at room temperature for 30 minutes, then warm them in a 300°F oven for 3-5 minutes to restore that fresh-baked texture with gooey centers and slightly crisp edges.

Share Your Version!

Now it’s your turn to bring these S’mores Cookies to life in your own kitchen! I’d love to hear how they turned out for you — did you try one of the variations, or did you come up with your own twist? Drop a star rating and a comment below to tell me about your experience. Your feedback helps other home cooks know what to expect, and I personally read every single comment.

If you share a photo on Instagram or Pinterest, be sure to tag me @cookingwithemi — I absolutely love seeing your creations! And here’s a question for you: which campfire memory would these cookies bring back for you? For me, it’s those crisp mountain nights in upstate New York, but I’d love to hear your story. Happy baking, friends!

From my NYC kitchen to yours — I hope this recipe brings as much warmth to your table as it does to mine. — emy 🧡

📌

Love This Recipe? Save It to Pinterest!

If you enjoyed this S’mores Cookies recipe, don’t let it get lost in your browser tabs! 😄 Pin it now so you can find it again anytime — and explore hundreds more tried-and-tested recipes waiting for you on my Pinterest boards.

👉 Follow emy on Pinterest @exorecipe

📌 Pin this recipe · 🔁 Re-pin your favorites · 💬 Tag me when you make it — I love seeing your creations!

“`

Print

clock clock iconcutlery cutlery iconflag flag iconfolder folder iconinstagram instagram iconpinterest pinterest iconfacebook facebook iconprint print iconsquares squares iconheart heart iconheart solid heart solid icon

S’mores Cookies


  • Author: Chef Emy

Description

S’mores cookies are soft cookies with melty marshmallows, chocolate chips, and graham cracker crumbs that take less than 30 minutes to make.


Ingredients

Scale
  • ½ cup butter
  • ½ cup granulated sugar
  • ¼ cup light brown sugar (packed)
  • 1 teaspoon vanilla extract
  • 1 large egg
  • 1 cups all-purpose flour
  • ½ teaspoon baking soda
  • ¼ teaspoon salt
  • ½ cup mini semisweet chocolate chips
  • ½ cup mini marshmallows (halved)
  • ¼ cup graham cracker crumbs

Instructions

  1. Preheat the oven to 350 F.
  2. Microwave the butter for about 40 seconds. Whisk until the butter is completely melted.
  3. Add the sugars, and mix until well-combined.
  4. Stir in vanilla and egg until incorporated.
  5. Add the flour, baking soda, and salt. Please read the recipe note about properly measuring flour.
  6. Mix dough until just combined. Dough should be soft and a little sticky but not overly sticky.
  7. Stir in chocolate chips, mini marshmallows, and graham cracker crumbs.
  8. Scoop out 3 tablespoons of dough (medium cookie scoop) and place 2 inches apart on baking sheet.
  9. Bake for 10-15 minutes, or until cookies are set. They will be puffy and still look a little underbaked in the middle.

Peanut Butter Chocolate Oat Cups

“`html

Peanut Butter Chocolate Oat Cups – No-Bake, Vegan & Gluten-Free Treat

⚖️
Difficulty
Easy
⏲️
Prep Time
15 mins
🕒
Cook Time
0 mins
⏱️
Total Time
30 mins
🍽️
Servings
6 cups

I still remember the first time I made these Peanut Butter Chocolate Oat Cups in my tiny Paris apartment, craving something that tasted like the peanut butter treats my mother used to make in our kitchen in Morocco. She would layer peanuts with honey and oats, pressing them into little rounds by hand — no baking, just love and patience. This no-bake, vegan and gluten-free version is my grown-up tribute to those after-school bites, now made with creamy peanut butter, rich dark chocolate, and a pinch of salt that brings it all together. Every time I make these, I feel like I am back in Marrakech, with the warm sun streaming through the window and the smell of toasted oats in the air.

The magic of these cups is all about texture. The oat base is tender yet firm, thanks to maple syrup that binds everything without making it sticky. The middle layer is pure peanut butter whipped with just a touch more maple syrup — it stays soft and luscious against the firm chocolate cap on top. When you bite into one, you get that satisfying snap of dark chocolate, then the creamy peanut butter center, then the wholesome oat foundation. It is the kind of treat that feels indulgent but is made from simple, honest ingredients. I love how the salt cuts through the sweetness and makes every bite craveable.

What sets my version apart is the optional Biscoff drizzle on top — a little nod to the European street markets I used to visit in Paris, where speculoos cookies were everywhere. It adds a caramelized warmth that pairs beautifully with the dark chocolate. In this post, I will walk you through my tested method, share a crucial pro tip for getting the oat base to hold together perfectly, and point out the most common mistake people make with no-bake cups. Whether you are new to vegan desserts or a seasoned home cook, these Peanut Butter Chocolate Oat Cups are about to become your new favorite go-to.

Why This Peanut Butter Chocolate Oat Cups Recipe Is the Best

The Flavor Secret — I use a double layer of peanut butter: one mixed into the oat base and another spread as a creamy middle layer. This gives you peanut flavor in every single bite, not just in the center. The dark chocolate on top is rich and slightly bitter, which balances the sweetness of the maple syrup beautifully. It is the same principle I learned in pastry school in Paris — contrast makes flavors pop.

Perfected Texture — The key is pressing the oat mixture firmly into the silicone mold and giving it a full 15 minutes in the freezer before adding the next layer. That short chill sets the base so it does not crumble when you spread the peanut butter filling. I tested this method a dozen times in my NYC kitchen, adjusting the oat-to-moisture ratio until the base held together like a dream — no crumbling, no sogginess, just a perfect little cup every time.

Foolproof & Fast — With just seven main ingredients and three simple steps, this recipe is practically foolproof. You do not need any special equipment — just a bowl, a spoon, and a silicone muffin tray. Even if you have never made a no-bake dessert before, you will nail it on your first try. I have made these with my niece in Brooklyn and with friends who claim they cannot cook, and every single batch turned out beautifully.

Peanut Butter Chocolate Oat Cups Ingredients

When I shop for these ingredients at the Union Square Greenmarket in NYC, I always look for the good stuff — quality peanut butter, dark chocolate with a high cocoa content, and certified gluten-free oats if I am serving friends who need them. The ingredient list is short, so each one matters. Here is what you will need.

Ingredients List

  • 70g rolled oats (use gluten-free if necessary)
  • 2 tbsp smooth peanut butter (or nut butter of choice)
  • 2 tbsp maple syrup
  • Pinch of salt
  • 100g smooth peanut butter (for the middle layer)
  • 1 tbsp maple syrup (for the middle layer)
  • 70g dark chocolate, melted
  • Optional drizzle of melted Biscoff spread

Ingredient Spotlight

Rolled Oats — These are the foundation of the base. I use rolled oats, not quick oats, because they have more structure and give the cups a pleasant chew. In a pinch, you can use quick oats, but the texture will be softer. Gluten-free rolled oats work perfectly if needed.

Peanut Butter — Smooth peanut butter is essential for both the base and the middle layer. I use a natural drip peanut butter with no added sugar — just peanuts and salt. If you use a sweetened commercial brand, reduce the maple syrup by half a tablespoon to keep the sweetness balanced.

Dark Chocolate — Choose a chocolate with 60% to 70% cocoa content for the best balance of richness and sweetness. I love using a single-origin dark bar from a brand like Mast Brothers or Valrhona. If you only have milk chocolate on hand, the cups will be sweeter and softer — still delicious, but not as firm.

Original Ingredient Best Substitution Flavor / Texture Impact
Rolled oats Quick oats Softer, less chewy base
Smooth peanut butter Almond butter or sunflower seed butter Milder nut flavor, slightly less rich
Maple syrup Agave nectar or honey (not vegan) Slightly different sweetness, honey adds floral notes
Dark chocolate (60-70%) Milk chocolate or vegan white chocolate Sweeter, softer top layer

How to Make Peanut Butter Chocolate Oat Cups — Step-by-Step

Trust me — these Peanut Butter Chocolate Oat Cups could not be easier. If you can mix ingredients in a bowl and press them into a mold, you have got this. Here is exactly how I do it in my NYC kitchen.

Step 1: Prepare the Oat Base

In a mixing bowl, combine 70g rolled oats, 2 tablespoons smooth peanut butter, 2 tablespoons maple syrup, and a pinch of salt. Stir until the mixture is evenly combined and all the oats are coated. The mixture should be sticky but not wet. Divide it evenly among the 6 cups of a silicone muffin tray, pressing down firmly with the back of a spoon or your fingers. The base should be about 1/4 inch thick and compacted well. Place the tray in the freezer for 15 minutes.

💡 emy’s Pro Tip: Press the oat mixture firmly — this is the most important step! If the base is too loose, it will fall apart when you add the peanut butter layer. Use the bottom of a small glass or a measuring cup to really pack it down.

Step 2: Layer the Peanut Butter Filling

While the bases are chilling, make the middle layer. In a small bowl, mix 100g smooth peanut butter with 1 tablespoon maple syrup until smooth and well combined. After the 15 minutes are up, remove the tray from the freezer. Divide the peanut butter mixture evenly among the 6 cups, spreading it gently over the oat bases. Aim for an even layer that does not touch the edges of the silicone mold — this will help the chocolate seal the cup later.

⚠️ Common Mistake to Avoid: Do not spread the peanut butter all the way to the edge of the cup! Leave a tiny gap around the perimeter so the melted chocolate can flow down and create a complete seal. This keeps the peanut butter layer soft and prevents it from leaking out.

Step 3: Top with Chocolate and Chill

Melt 70g of dark chocolate in a heatproof bowl over simmering water or in the microwave in 20-second bursts, stirring after each, until completely smooth. Carefully spoon or drizzle the melted chocolate over the peanut butter layer in each cup, covering it completely. Tilt the tray gently if needed to help the chocolate spread evenly. If you are using the Biscoff drizzle, warm a spoonful of Biscoff spread and drizzle it over the chocolate before it sets. Refrigerate for at least 1 hour, or until the chocolate is fully hardened.

💡 emy’s Pro Tip: For a glossy, snap-worthy chocolate top, temper the chocolate by chopping it finely, melting two-thirds of it over low heat, then stirring in the remaining third until it melts. This gives you a professional-looking finish that stays firm at room temperature.

Step Action Duration Key Visual Cue
1 Mix base and press into mold 5 min + 15 min freeze Base is firm and compacted
2 Mix peanut butter filling and spread 5 min Smooth, even layer
3 Top with melted chocolate 5 min + 1 hour chill Chocolate is set and glossy

Serving & Presentation

These Peanut Butter Chocolate Oat Cups are beautiful as they are, but I love to dress them up for company. Pop them out of the silicone molds just before serving — they release easily and look stunning on a simple white plate. A light sprinkle of flaky sea salt on top of the chocolate right after it sets adds a savory crunch that makes the flavors sing. In my Moroccan kitchen, we would serve these with a pot of hot mint tea on the side, but here in NYC, they disappear just as fast next to a cold oat milk latte.

For a brunch spread, I often arrange the cups on a wooden board alongside fresh berries, a bowl of coconut whip, and a few dates stuffed with almond butter. They also make a lovely homemade gift — tuck them into a pretty box lined with parchment and tie it with twine. I have brought these to dinner parties in Brooklyn more times than I can count, and they always get the same response: “Wait — these are vegan? No way.”

Pairing Type Suggestions Why It Works
Side Dish Fresh berries, sliced banana, coconut whip Bright acidity cuts the richness
Sauce / Dip Extra melted dark chocolate, warm Biscoff dip Adds a decadent finishing touch
Beverage Hot mint tea, oat milk latte, cold brew The bitterness balances the sweetness
Garnish Flaky sea salt, crushed peanuts, cacao nibs Adds texture and a savory pop

Make-Ahead, Storage & Reheating

Living in NYC means my schedule is always full, so I love recipes that let me get ahead. These Peanut Butter Chocolate Oat Cups are perfect for that — I often make a double batch on Sunday afternoon and stash them in the fridge for the week ahead. They are the perfect little treat to grab after a long day or to pack in a lunchbox for a midday pick-me-up.

Method Container Duration Reheating Tip
Refrigerator Airtight container, layered with parchment Up to 7 days Enjoy straight from the fridge — no reheating needed
Freezer Freezer-safe container or zip-top bag Up to 3 months Thaw in the fridge for 30 minutes before serving
Make-Ahead Silicone mold in the fridge Up to 3 days in advance Keep in the mold until ready to serve for best shape

If you freeze these cups, let them sit at room temperature for about 5 minutes before eating — it softens the peanut butter layer just enough to make it luscious again. I do not recommend microwaving them because the chocolate can seize and the peanut butter can get too runny. Trust me, straight from the fridge is the best way to enjoy them.

Variations & Easy Swaps

Variation Key Change Best For Difficulty Impact
Biscoff Drizzle Add melted Biscoff on top Holiday gifts, special occasions Easy (no extra skill needed)
Gluten-Free & Nut-Free Use certified GF oats + sunflower seed butter Allergy-friendly snacking Easy (simple swap)
Seasonal Flavor Twist Add cinnamon + orange zest to base Fall and winter holidays Easy (just mix in spices)

Biscoff Drizzle Variation

This is my favorite way to dress up the cups for company. After you pour the melted dark chocolate over the peanut butter layer, warm a spoonful of Biscoff spread in the microwave for 10 seconds and drizzle it in thin lines over the chocolate. Use a toothpick to swirl it gently for a marbled look. The Biscoff adds a caramelized, spiced flavor that reminds me of the cookie stalls I used to pass in Parisian train stations. It is a small touch that makes these feel extra special.

Gluten-Free & Nut-Free Variation

To make these cups friendly for nut-free kitchens, swap the peanut butter in both the base and the middle layer for sunflower seed butter. Sunflower seed butter has a similar creamy texture, though it is slightly less rich. I recommend adding an extra pinch of salt to compensate. Use certified gluten-free rolled oats to keep the recipe fully gluten-free. The texture will be a bit looser, so press the base extra firmly. My neighbor in Queens has a nut allergy, and she told me these are the best nut-free treats she has ever had.

Seasonal Flavor Twist

In the fall, I love adding 1/2 teaspoon of ground cinnamon and the finely grated zest of half an orange to the oat base mixture. The cinnamon warms up the flavor, and the orange zest brightens everything — it is a combination I picked up from a pastry chef I worked with in Paris. You can also swap the dark chocolate for white chocolate in this version for a sweeter, creamier finish. It is a beautiful way to make these cups feel cozy and festive for Thanksgiving or holiday gatherings.

Can I make Peanut Butter Chocolate Oat Cups without a silicone muffin tray?

Yes, you absolutely can. If you do not have a silicone muffin tray, you can use a regular metal or non-stick muffin pan lined with paper liners. The cups will still set perfectly. Just make sure to press the oat base firmly into the liners so they hold their shape. The only difference is that the cups may be slightly harder to unmold compared to a silicone tray, but the paper liners make it easy to peel away. I have tested both methods, and both work beautifully.

How long do these no-bake oat cups need to chill in the refrigerator?

I recommend at least 1 hour in the refrigerator for the chocolate to fully set. If you are in a hurry, you can speed things up by placing them in the freezer for 20 minutes instead — just keep an eye on them so the chocolate does not get too hard. For the best texture, I actually prefer to chill them in the fridge for 2 hours. The chocolate becomes perfectly snappy, the peanut butter layer stays creamy but firm, and the oat base holds together beautifully when you bite into it.

Can I use quick oats instead of rolled oats for the base?

Yes, you can use quick oats, but the texture will be noticeably different. Rolled oats give the base a hearty, chewy texture that provides a nice contrast to the creamy peanut butter and smooth chocolate. Quick oats are cut into smaller pieces, so they absorb moisture more quickly and create a softer, more uniform base. If you only have quick oats on hand, reduce the maple syrup by about half a tablespoon so the base does not get too sticky. The cups will still taste great.

Is this recipe truly vegan and gluten-free?

Yes, this recipe is naturally vegan and can easily be made gluten-free. The base is made from oats, peanut butter, and maple syrup — all plant-based. The middle layer is just peanut butter and maple syrup, and the top is dark chocolate. Just make sure to use certified gluten-free rolled oats if you are serving someone with celiac disease or a gluten sensitivity. Also, check the label on your dark chocolate — some brands add milk powder, so look for one labeled vegan or dairy-free if that matters to you.

What is the best way to melt dark chocolate for these oat cups?

I have tested several methods, and the easiest way is to chop the chocolate finely, place it in a heatproof bowl, and microwave it in 20-second bursts, stirring well after each burst. This prevents the chocolate from burning or seizing. Alternatively, you can use a double boiler — set the bowl over a pot of simmering water and stir until smooth. If you want a glossy, professional finish, try tempering the chocolate by melting two-thirds of it, then stirring in the remaining third until it melts. That extra step keeps the chocolate firm at room temperature.

Can I use crunchy peanut butter instead of smooth?

You can use crunchy peanut butter if you prefer extra texture, but keep in mind that the pieces of peanuts can make it harder to spread the middle layer evenly over the oat base. For the base itself, crunchy peanut butter works fine — just mix it thoroughly so the peanuts are distributed throughout. If you want a completely smooth middle layer but only have crunchy on hand, you can strain the peanut butter through a fine-mesh sieve to remove the peanut pieces. Honestly, I prefer smooth for both layers for a more cohesive cup.

How do I store Peanut Butter Chocolate Oat Cups so they stay fresh?

Store the cups in an airtight container in the refrigerator for up to 7 days. Layer them with parchment paper if you are stacking them so the chocolate does not get scratched. For longer storage, you can freeze them for up to 3 months — just wrap each cup individually in plastic wrap and place them in a freezer-safe bag. When you are ready to eat one, let it thaw in the fridge for about 30 minutes. I do not recommend leaving them at room temperature for more than a couple of hours, as the peanut butter layer can soften too much.

Can I add protein powder to the oat base for a post-workout snack?

Yes, you can add a scoop of your favorite protein powder to the oat base, but you will need to adjust the moisture. Protein powder absorbs liquid differently than oats, so the mixture may become too dry and crumbly. I recommend starting with 1 tablespoon of protein powder and adding an extra teaspoon of maple syrup or a splash of plant-based milk if the mixture feels dry. Chocolate or vanilla protein powder works best, as it complements the peanut butter and dark chocolate flavors.

What can I use instead of maple syrup to keep this recipe vegan?

Agave nectar is the best alternative to maple syrup for keeping this recipe vegan. It has a similar sweetness level and consistency, so you can use it in the same 1:1 ratio. Brown rice syrup also works, though it is thicker and less sweet, so you may want to add an extra half tablespoon. If you are not strictly vegan, honey is a delicious substitute — it adds a floral note that pairs beautifully with the peanut butter. Just keep in mind that honey will make the filling slightly thicker.

Why did my oat base fall apart when I tried to remove the cups from the mold?

This usually happens when the oat base was not pressed firmly enough into the mold or was not chilled long enough before the peanut butter layer was added. The base needs to be compacted well — I use the back of a measuring cup to really press it down. The 15-minute freeze is also essential because it gives the maple syrup time to firm up and act as a binder. If you skipped the freeze or rushed the pressing, the base will be crumbly. Silicone molds also help because they flex, making it easier to pop the cups out cleanly.

Share Your Version!

I truly hope you love these Peanut Butter Chocolate Oat Cups as much as I do. They are one of those recipes that prove simple ingredients can create something genuinely special. If you try them, please leave a star rating and a comment below — I read every single one and it means the world to me. Did you add the Biscoff drizzle? Did you try a different nut butter? I would love to hear how you made it your own.

Snap a photo of your creation and share it on Instagram or Pinterest — tag me @cookingwithemi so I can see your beautiful cups and feature them in my stories. And if you have a question about any step, just ask in the comments. I answer every question personally, because that is how we build a kitchen community — one recipe at a time. From my NYC kitchen to yours — I hope this recipe brings as much warmth to your table as it does to mine. — emy 🧡

📌

Love This Recipe? Save It to Pinterest!

If you enjoyed this Peanut Butter Chocolate Oat Cups recipe, don’t let it get lost in your browser tabs! 😄 Pin it now so you can find it again anytime — and explore hundreds more tried-and-tested recipes waiting for you on my Pinterest boards.

👉 Follow emy on Pinterest @exorecipe

📌 Pin this recipe · 🔁 Re-pin your favorites · 💬 Tag me when you make it — I love seeing your creations!

“`

Print

clock clock iconcutlery cutlery iconflag flag iconfolder folder iconinstagram instagram iconpinterest pinterest iconfacebook facebook iconprint print iconsquares squares iconheart heart iconheart solid heart solid icon

Peanut Butter Chocolate Oat Cups


  • Author: Chef Emy

Description

A simple treat with a layer of peanut butter all topped with rich dark chocolate. No-bake, vegan AND gluten-free!


Ingredients

Scale
  • 70g rolled oats (used gluten-free if necessary)
  • 2 tbsp smooth peanut butter (or nut butter of choice)
  • 2 tbsp maple syrup
  • Pinch of salt
  • 100g smooth peanut butter
  • 1 tbsp maple syrup
  • 70 g dark chocolate (melted)
  • Optional drizzle of melted Biscoff spread

Instructions

  1. Mix all the base ingredients in a bowl, then press into a 6 cup silicon muffin tray. Freeze for 15 minutes.
  2. In the meantime mix the peanut butter and maple syrup in a small bowl to create the middle layer, then spread over the oat bases and top with the melted chocolate.
  3. Refrigerate until hardened. Enjoy!

Mississippi Mud Pie

Mississippi Mud Pie – Over-the-Top Triple Chocolate Decadence

⚖️
Difficulty
Medium
⏲️
Prep Time
30 mins
🕒
Cook Time
45 mins
⏱️
Total Time
3 hrs 45 mins (incl. chilling)
🍽️
Servings
10

Growing up in Morocco, my mother often made a simple chocolate tart with a crumb crust – the kind that disappeared before it even cooled. Years later, after training in Paris and settling in New York, I found myself craving that rich, fudgy experience but with a showstopping twist. That’s how my Mississippi Mud Pie was born: an Oreo cookie crust, a fudgy brownie layer, silky chocolate mousse, and clouds of chocolate whipped cream, all topped with crunchy Oreo crumbles. This is over-the-top triple chocolate decadence at its finest, and it’s exactly what you need for your next celebration.

Imagine biting into a cold slice – the crunchy cookie crust gives way to a dense, almost truffle-like brownie layer, then a luscious mousse that melts on your tongue, all crowned with airy whipped cream and those irresistible crunchy bits. The cocoa aromas mingle with vanilla and a whisper of salt, while the texture journey from crisp to fudgy to creamy is pure bliss. In my NYC kitchen, I often make this dessert for dinner parties, and the first spoonful always draws a moment of silence – that’s how you know it’s a hit.

What sets my Mississippi Mud Pie apart? I use a precise baking temperature for the brownie layer to keep it fudgy, and I make a quick Oreo crumble that bakes into crunchy little nuggets. The mousse gets its silkiness from a French technique: folding whipped cream into cooled melted chocolate. One common mistake is overbaking the brownie – it should still be a bit wet on the toothpick. But I’ll guide you through every step so you get that perfect fudgy center. Let’s dive in!

Why This Mississippi Mud Pie Recipe Is the Best

The Flavor Secret: My recipe layers three types of chocolate – bittersweet for the brownie, milk chocolate for the mousse, and cocoa in the whipped cream. This creates a complex, not-too-sweet flavor profile that keeps you coming back for more. Growing up in Morocco, I learned to balance sweetness with a pinch of salt and a hint of coffee (though not listed, feel free to add a teaspoon of espresso powder to the brownie batter for an even deeper note).

Perfected Texture: The brownie layer is the star – I bake it to an internal temperature of 180°F, which guarantees a fudgy, almost molten center. The mousse is made with a French-style “ganache montée” technique: whipped cream folded into tempered chocolate for a light yet stable mousse. No gelatin, no fuss – just pure chocolate airiness.

Foolproof & Fast: This pie comes together in four simple components, and you can make each one ahead. The crust is simply crushed Oreos and butter; the brownie layer takes ten minutes of active time; the mousse sets in the fridge while you whip the cream. Even beginner bakers will feel like pros with my step-by-step cues. Plus, the Oreo crumble adds that addictive crunch that makes every slice special.

Mississippi Mud Pie Ingredients

I remember the first time I made this pie for a friend’s birthday in my tiny NYC apartment – I bought the Oreos from a corner bodega and the chocolate from a specialty shop in Chelsea Market. Every ingredient plays a role. Here’s what you’ll need:

Ingredients List

  • 25 Oreo cookies (for the crust)
  • 6 Tablespoons salted butter, melted (for crust)
  • 4 ounces bittersweet chocolate, chopped (brownie layer)
  • 3 Tablespoons salted butter, melted (brownie layer)
  • 3 Tablespoons vegetable oil
  • 2 Tablespoons unsweetened cocoa powder
  • 2/3 cup light brown sugar, packed
  • 2 large eggs
  • 2 teaspoons vanilla extract
  • 1/4 teaspoon salt
  • 3 Tablespoons all-purpose flour
  • 8 Oreo cookies (for crumble topping)
  • 2 Tablespoons powdered sugar
  • 1 Tablespoon Dutch-processed cocoa powder
  • Pinch of salt
  • 2 Tablespoons salted butter, melted (for crumble)
  • 6 ounces milk chocolate, chopped (mousse)
  • 1 cup cold heavy cream (mousse)
  • 2 Tablespoons Dutch-processed cocoa powder (mousse)
  • 2 Tablespoons powdered sugar (mousse)
  • Pinch of salt (mousse)
  • 1 cup heavy cream (whipped topping)
  • 1/4 cup granulated sugar (whipped topping)
  • 3 Tablespoons unsweetened cocoa powder (whipped topping)

Ingredient Spotlight

Oreo Cookies: The star of the crust and crumble. Use regular Oreos (not Double Stuf) for the best crunch. For the crust, you need the whole cookie – cream filling and all. For the crumble, we lightly crush them so you get bits of cookie and cream. If you can’t find Oreos, any chocolate sandwich cookie works, but the texture will vary slightly.

Bittersweet Chocolate (60-70% cacao): This provides the deep, dark chocolate base for the brownie layer. I recommend a brand like Ghirardelli or Valrhona. Avoid chocolate chips, which contain stabilizers that can affect melting. Chop from a bar for smooth melting.

Dutch-Processed Cocoa Powder: Used in the mousse and whipped cream, Dutch-process has a milder, more cocoa-forward flavor and darker color. It’s essential for that rich, dark appearance. If you only have natural unsweetened, you can use it but expect a lighter color and slightly different texture. For the brownie, unsweetened cocoa is fine.

Heavy Cream: Must be cold for both the mousse and whipped cream. In my Paris training, we always chilled the bowl and whisk for at least 15 minutes before whipping – this guarantees stiff peaks. Use at least 36% milk fat.

Milk Chocolate: I use milk chocolate for the mousse to balance the bittersweet brownie. Choose a good-quality milk chocolate like Lindt or Guittard. If you prefer a darker mousse, substitute semisweet – the mousse will be less sweet but still delicious.

Original Ingredient Best Substitution Flavor / Texture Impact
Oreo cookies (crust) Chocolate wafer cookies + 2 tbsp sugar Less sweet, slightly different crumb, but still good
Bittersweet chocolate Semisweet chocolate (50-60%) Slightly sweeter, less intense chocolate flavor
Dutch-process cocoa Natural unsweetened cocoa Lighter color, slightly more acidic flavor; use 1:1
Milk chocolate (mousse) Semisweet or dark chocolate + 1 tsp sugar Darker, richer mousse; adjust sugar to taste
Heavy cream (mousse topping) Coconut cream (chilled, separated) Dairy-free, slightly coconut flavor; whip well

How to Make Mississippi Mud Pie – Step-by-Step

Making this pie is a series of simple, rewarding steps. Don’t be intimidated – I’ll walk you through each layer with clear cues so you know exactly when it’s perfect.

Step 1: Prepare the Oreo Crust

Preheat your oven to 325°F. Finely crush 25 Oreos into crumbs using a food processor (or seal them in a heavy-duty ziplock bag and roll with a rolling pin). Transfer the crumbs to a bowl, add 6 tablespoons melted salted butter, and stir until evenly moistened. Press the mixture firmly into the bottom and up the sides of a 9-inch pie plate. Use the bottom of a measuring cup to pack it tightly. Bake for 12-15 minutes until the crust is set and slightly darkened. Let it cool on a wire rack while you make the brownie layer.

💡 emy’s Pro Tip: For a cleaner press, use a small piece of parchment paper over the crust to keep your fingers from sticking. Also, the crust will firm up as it cools, so don’t worry if it seems fragile right out of the oven.

Step 2: Make the Fudgy Brownie Layer

In a large microwave-safe bowl, combine 4 ounces chopped bittersweet chocolate, 3 tablespoons melted salted butter, 3 tablespoons vegetable oil, and 2 tablespoons unsweetened cocoa powder. Microwave in 20-second bursts, stirring well after each, until completely melted and smooth. Stir in 2/3 cup packed light brown sugar, 2 large eggs (one at a time), 2 teaspoons vanilla extract, and 1/4 teaspoon salt. Whisk until smooth and glossy. Finally, fold in 3 tablespoons all-purpose flour just until combined – do not overmix.

⚠️ Common Mistake to Avoid: Overmixing the flour develops gluten, making the brownie tough. Stir only until you see the last streak of flour disappear. A few lumps are fine.

Step 3: Bake the Brownie Layer

Pour the brownie batter into the cooled Oreo crust and spread evenly. Bake at 325°F for 25-30 minutes. The brownie is done when a toothpick inserted into the center comes out barely wet with a little batter clinging to it – not completely clean. For an accurate test, use an instant-read thermometer; the internal temperature should read 180°F. This ensures a fudgy, not cakey, layer. Cool the pie completely on a rack (about 1 hour), then refrigerate while you prepare the toppings.

💡 emy’s Pro Tip: If the brownie layer puffs up slightly, don’t worry – it will sink as it cools. To avoid a domed top, you can gently press it down with a spatula while still warm, but it’s not necessary.

Step 4: Prepare the Oreo Crunch Topping

Reduce oven temperature to 350°F (or keep at 325°F for a crispier result). Roughly crush 8 Oreo cookies into 1/4- to 1/2-inch pieces by pounding them a few times in a ziplock bag with a rolling pin. Transfer to a bowl and toss with 2 tablespoons powdered sugar, 1 tablespoon Dutch-processed cocoa powder, and a pinch of salt. Drizzle 2 tablespoons melted butter over the mixture and toss until evenly moistened. Spread on a parchment-lined baking sheet and bake for 10 minutes. Let cool completely – they will become crunchy. Set aside for the final garnish.

⚠️ Common Mistake to Avoid: Don’t over-crush the cookies into powder – you want chunky bits that stay crunchy. Also, let them cool completely; they’ll crisp up as they cool.

Step 5: Make the Chocolate Mousse

Melt 6 ounces chopped milk chocolate in a microwave-safe bowl in 20-second bursts, stirring after each, until smooth. Let the melted chocolate cool for about 10 minutes until it reaches 90-100°F (warm to the touch but not hot). Meanwhile, in a large bowl (preferably chilled), beat 1 cup cold heavy cream, 2 tablespoons Dutch-processed cocoa powder, 2 tablespoons powdered sugar, and a pinch of salt with an electric mixer or stand mixer with whisk attachment until soft peaks form. Stir about one-third of the whipped cream into the cooled chocolate to lighten it, then fold the remaining whipped cream into the chocolate mixture using a rubber spatula. Fold gently until no white streaks remain – you want a smooth, airy mousse.

💡 emy’s Pro Tip: For the lightest mousse, chill your mixing bowl and whisk in the freezer for 15 minutes before whipping the cream. This helps the cream whip faster and hold its volume longer.

Step 6: Assemble and Chill

Spread the chocolate mousse over the cooled brownie layer in the pie plate. Smooth the top with a spatula. Transfer the pie to the refrigerator and chill for at least 3 hours, or overnight. This step is crucial – the mousse needs time to set so the pie slices cleanly.

⚠️ Common Mistake to Avoid: If you rush the chilling, the mousse will be too soft and the layers will blend together when you slice. Patience pays off – 3 hours minimum, 6 hours is even better.

Step 7: Finish with Chocolate Whipped Cream

Just before serving, beat 1 cup heavy cream, 1/4 cup granulated sugar, and 3 tablespoons unsweetened cocoa powder in a large bowl until stiff peaks form. Spread the whipped cream over the chilled mousse layer, creating swoops and peaks. Sprinkle the reserved Oreo crunch topping generously over the top. Slice with a sharp knife (wipe the blade clean between cuts for neat slices) and serve immediately. Refrigerate leftovers.

💡 emy’s Pro Tip: For a prettier presentation, pipe the whipped cream using a star tip. You can also sprinkle a few extra chocolate shavings or a dusting of cocoa powder before adding the crumbles.

Step Action Duration Key Visual Cue
1 Crush Oreos + butter, press into pie plate 10 min prep + 12-15 min bake Crust is darkened and set; not sticky
2 Melt chocolate and butter, mix with sugar, eggs, vanilla, flour 8 min active Glossy, thick batter
3 Bake brownie layer 25-30 min Toothpick with wet batter, internal temp 180°F
4 Crush Oreos, mix with dry ingredients and butter, bake 5 min prep + 10 min bake + 15 min cool Glistening, slightly puffed pieces; crunchy when cool
5 Melt milk chocolate, cool; whip cream; fold together 15 min active + 10 min cooling Mousse is smooth, light, and holds soft peaks
6 Spread mousse over cooled brownie, chill 5 min + 3 hrs min chill Mousse is firm and set, not jiggly
7 Whip cream with cocoa and sugar; spread; top with crumble 10 min active Stiff peaks, creamy topping with crunchy bits

Serving & Presentation

This Mississippi Mud Pie is a showstopper as is – slice it cold directly from the fridge for the best texture. I like to serve it on a simple white plate to let the dark chocolate layers shine. For an extra touch, dust the top with a little cocoa powder or add a few fresh raspberries for a pop of color and tartness – a tip I picked up at the Union Square farmers market in NYC. In Morocco, we often serve strong mint tea alongside rich desserts; here, a glass of cold milk or a scoop of vanilla ice cream works beautifully.

When I make this for dinner parties, I sometimes drizzle a little warm salted caramel sauce over each slice just before serving. The combination of chocolate, caramel, and salt is irresistible. If you’re serving a crowd, you can also cut the pie into smaller wedges – it’s rich, so smaller portions go a long way. A dollop of extra whipped cream never hurts either!

Pairing Type Suggestions Why It Works
Side Dish Vanilla ice cream, fresh raspberries, whipped cream Creamy/cold contrast to rich chocolate; raspberry acidity cuts sweetness
Sauce / Dip Warm salted caramel, hot fudge, or coffee liqueur drizzles Enhances chocolate notes; caramel adds buttery depth
Beverage Cold milk, dark roast coffee, espresso, or a dark stout beer Milk cuts richness; coffee/beer complement chocolate’s bitterness
Garnish Cocoa powder dusting, chocolate shavings, mint leaves Adds visual appeal and fresh herb contrast

Make-Ahead, Storage & Reheating

This pie is perfect for busy schedules – you can make it a day or two ahead (without the final whipped cream and crumble) and finish it right before serving. I often prep the brownie layer and mousse on a Friday night, chill overnight, then add the whipped cream and topping on Saturday when guests arrive. Trust me, the flavors only get better as they meld.

Method Container Duration Reheating Tip
Refrigerator Covered pie plate or airtight container Up to 4 days Serve cold; no reheating needed
Freezer Wrap entire pie in plastic wrap then foil; freeze up to 2 months Up to 2 months Thaw in fridge overnight before serving; add fresh whipped cream after thawing
Make-Ahead Assemble through mousse, chill; finish with whipped cream and crumble before serving Up to 2 days ahead Best to add whipped cream and crumble no more than 4 hours before serving to keep them fresh

If you have leftover pie (unlikely but possible!), cover it loosely with plastic wrap and refrigerate. The crumble may soften slightly, but the flavors remain wonderful. I don’t recommend reheating this pie – it’s meant to be enjoyed cold, like a decadent frozen treat. However, if you prefer a warm brownie layer, you can briefly microwave individual slices for 10-15 seconds, but note the mousse and whipped cream will soften.

Variations & Easy Swaps

One of my favorite things about this recipe is how adaptable it is. Whether you need a gluten-free version or want to switch up the flavors, here are some ideas I’ve tested in my own kitchen:

Variation Key Change Best For Difficulty Impact
Gluten-Free Use gluten-free chocolate sandwich cookies; replace flour with almond flour (1:1 by weight) GF guests; slightly nuttier flavor Easy
Mocha Twist Add 1 tsp espresso powder to brownie batter and to mousse Coffee lovers; deepens chocolate flavor Easy
Peanut Butter Swirl Drop spoonfuls of peanut butter onto brownie before baking; swirl with knife Peanut butter chocolate fans; extra richness Medium (swirling may affect texture)

Gluten-Free Variation

For a gluten-free Mississippi Mud Pie that doesn’t compromise on taste, use gluten-free chocolate sandwich cookies (like Glutino or Kinnikinnick) for the crust and crumble. Replace the 3 tablespoons of all-purpose flour with a fine almond flour – it adds a subtle nuttiness that pairs beautifully with chocolate. The texture will be slightly more tender, but just as fudgy. I’ve tested this for a friend’s celiac-safe dinner, and it was a hit. Just be sure to check that all other ingredients (like cocoa powder) are certified gluten-free.

Mocha or Spice Variation

Add a teaspoon of espresso powder to the brownie batter and to the mousse to create a mocha version. This is a trick I learned at a Parisian patisserie – coffee doesn’t make it taste like coffee; it intensifies the chocolate’s depth. For a Moroccan-inspired twist, add 1/2 teaspoon of ground cinnamon and a pinch of cayenne to the brownie batter. The warmth of spices cuts through the richness beautifully. Serve with a dollop of whipped cream flavored with a drop of orange blossom water – a nod to my North African roots.

Dairy-Free Option

To make this pie dairy-free, use vegan butter for the crust and crumble (melted coconut oil works for the crust but not the crumble; use a vegan butter stick). Substitute dark chocolate that’s dairy-free (check labels) and use full-fat coconut cream (chilled, solid part only) for both the mousse and whipped cream. Whip the coconut cream with the dry ingredients until stiff – it works surprisingly well. Keep in mind that the texture will be slightly different – the mousse will be a bit firmer – but the chocolate flavor still shines.

Why is it called Mississippi Mud Pie?

The name comes from the dessert’s appearance – dark, rich, and mud-like, reminiscent of the Mississippi River’s muddy banks. Traditional versions often include a fudgy brownie layer, chocolate pudding, or mousse, and sometimes coffee or bourbon. My version stays true to that over-the-top chocolate theme while adding an Oreo crust and crunchy crumbles.

Can I use store-bought brownie mix instead?

You could, but I don’t recommend it. The homemade brownie layer is what gives this pie its signature fudgy texture – it’s denser and richer than a box mix. If you’re short on time, use a high-quality fudgy brownie mix, replace the eggs with an extra yolk for more richness, and bake it slightly underdone (internal temp 180°F). The flavor won’t be as deep, but it’ll still be delicious.

Do I have to chill the pie overnight?

Not strictly, but it helps. The mousse needs at least 3 hours to set firm enough for clean slices. Overnight chilling (8-12 hours) allows the flavors to meld and the texture to become perfectly creamy. If you’re in a rush, pour the mousse into a shallow dish to speed up cooling – still give it at least 3 hours. Remember, the final whipped cream and crumble should be added just before serving.

What is the best way to crush Oreos for the crust?

I recommend using a food processor for the crust – it gives you a fine, even crumb that packs well. If you don’t have one, place the cookies in a heavy-duty ziplock bag and crush with a rolling pin. For the crumble, you want chunky pieces, so use the rolling pin method and only a few firm whacks – don’t overdo it. The cream filling helps bind the crust, so include it fully.

Can I freeze Mississippi Mud Pie?

Yes! You can freeze the pie (without the final whipped cream and crumble) for up to 2 months. Wrap it tightly in plastic wrap then aluminum foil. Thaw overnight in the refrigerator, then add the whipped cream and crumble just before serving. If you freeze the whole pie with the whipped cream, the texture may become slightly icy. For best results, freeze after the mousse layer sets, then finish fresh.

What can I use instead of Oreos?

Any chocolate sandwich cookie works – look for brands like Keebler’s Fudge Stripes or store-brand versions. If you want a homemade crust, you can use chocolate graham crackers or chocolate wafer cookies (like Nabisco Famous Chocolate Wafers) and add extra sugar. For the crumble, you can also use crushed chocolate-covered pretzels for a salty-sweet twist.

Why is my brownie layer too dry?

Overbaking is the most common culprit. The brownie should be baked until a toothpick comes out with a bit of wet batter – not clean. Also, using too much flour or overmixing can make it dry. Make sure you measure the flour correctly (spoon and level) and take the brownie out at 180°F internal temperature. Every oven is different, so start checking at 22 minutes.

Can I make this pie with a different crust?

Absolutely. A traditional graham cracker crust works, though you’ll lose the Oreo flavor. Use 1 1/2 cups graham cracker crumbs, 1/4 cup sugar, and 6 tablespoons melted butter. Bake at 325°F for 10 minutes. You can also use a chocolate shortbread crust. Keep in mind that the bake time for the brownie layer won’t change, but the crust may be slightly less sturdy.

Share Your Version!

I hope this Mississippi Mud Pie becomes a new favorite in your kitchen – it certainly is in mine. When you make it, I’d love to hear how it turned out! Leave a star rating and a comment below – tell me if you tried a variation or added your own twist. Did you use the mocha version? Did your guests swoon? Share your photos on Instagram or Pinterest and tag @cookingwithemi so I can cheer you on.

One thing I always ask: what’s your favorite chocolate dessert memory? For me, it was the first time I made this pie for a Thanksgiving potluck in Brooklyn – someone said it was the best chocolate thing they’d ever eaten. That made my whole month. I can’t wait to hear your stories. Until next time, keep stirring up something delicious.

From my NYC kitchen to yours — I hope this recipe brings as much warmth to your table as it does to mine. — emy 🧡

📌

Love This Recipe? Save It to Pinterest!

If you enjoyed this Mississippi Mud Pie recipe, don’t let it get lost in your browser tabs! 😄 Pin it now so you can find it again anytime — and explore hundreds more tried-and-tested recipes waiting for you on my Pinterest boards.

👉 Follow emy on Pinterest @exorecipe

📌 Pin this recipe · 🔁 Re-pin your favorites · 💬 Tag me when you make it — I love seeing your creations!

Print
clock clock iconcutlery cutlery iconflag flag iconfolder folder iconinstagram instagram iconpinterest pinterest iconfacebook facebook iconprint print iconsquares squares iconheart heart iconheart solid heart solid icon

Mississippi Mud Pie


  • Author: Chef Emy

Description

Rich and dark as the muddy Mississippi itself, this Mississippi Mud Pie recipe is any chocolate lover’s dream dessert with an Oreo cookie crust, a fudgy brownie-like base, chocolate mousse and chocolate whipped cream with Oreo crumbles sprinkled on top! It’s decadent and over-the-top in the best possible way!


Ingredients

Scale
  • 25 Oreo cookies
  • 6 Tablespoons salted butter (melted)
  • 4 ounces bittersweet chocolate (chopped)
  • 3 Tablespoons salted butter (melted)
  • 3 Tablespoons vegetable oil
  • 2 Tablespoons unsweetened cocoa powder
  • 2/3 cup light brown sugar
  • 2 large eggs
  • 2 teaspoons vanilla extract
  • 1/4 teaspoon salt
  • 3 Tablespoons all-purpose flour
  • 8 Oreo cookies
  • 2 Tablespoons powdered sugar
  • 1 Tablespoon dutch-processed cocoa powder
  • Pinch of salt
  • 2 Tablespoons salted butter (melted)
  • 6 ounces milk chocolate, (chopped)
  • 1 cup cold heavy cream
  • 2 Tablespoons dutch-processed cocoa powder
  • 2 Tablespoons powdered sugar
  • Pinch of salt
  • 1 cup heavy cream
  • 1/4 cup granulated sugar
  • 3 Tablespoons unsweetened cocoa powder

Instructions

  1. Preheat oven to 325°F. Finely crush Oreos into crumbs in a food processor or using a rolling pin and a heavy-duty ziplock bag.
  2. Add melted butter and stir until evenly moistened. Press into a 9-inch pie plate.
  3. Bake for 12-15 minutes until set.
  4. Heat chocolate, butter, oil, and cocoa powder in 20 second increments in the microwave, stirring between each burst of heat until completely melted.
  5. Add brown sugar, eggs, vanilla, and salt. Whisk well to combine.
  6. Stir in flour. Pour brownie batter into the prepared Oreo cookie crust.
  7. Bake 25-30 minutes just until a toothpick inserted into the brownie layer comes out barely wet with a little batter on it still. You can also test the brownie layer with an instant digital thermometer. It should read 180 degrees F when this layer is done so the pie will set up nice and fudgy.
  8. Roughly crush the cookies by pounding them a few times in a ziplock bag with a rolling pin.
  9. Add the powdered sugar, cocoa powder, and salt. Toss well.
  10. Drizzle the melted butter into the crushed cookie mixture and toss until evenly moistened. Spread the cookie pieces onto a baking sheet lined with parchment paper and bake for 10 minutes. Cool completely before sprinkling on top of the finished pie.
  11. Melt the chocolate in a large microwave-safe bowl by heating it for 20 second bursts and stirring well between each burst of heat. Once melted, let the chocolate cool for 10 minutes until about 90 to 100 degrees F.
  12. Meanwhile, beat cream, cocoa powder, powdered sugar, and salt the large bowl of a stand mixer fitted with the whisk attachment or with an electric mixer until soft peaks form.
  13. Stir 1/3 of the chocolate whipped cream into the cooled, melted chocolate. Then fold the remaining whipped cream into the chocolate mixture using a rubber spatula.
  14. Spread the chocolate mousse on top of the cooled brownie layer. Transfer the pie to the fridge and let it chill for at least 3 hours or overnight.
  15. Beat cream, sugar, and cocoa powder in a large bowl with a whisk attachment until stiff peaks form. Spread over the finished pie, then sprinkle with the crushed cookie pieces to finish.

Chocolate Peanut Butter Cookies


Chocolate Peanut Butter Cookies – The Perfect Blend of Rich Chocolate & Peanut Butter

⚖️
Difficulty
Easy
⏲️
Prep Time
15 mins
🕒
Cook Time
8 mins
⏱️
Total Time
23 mins
🍽️
Servings
24 cookies

I’ll never forget the first time I bit into a Chocolate Peanut Butter Cookie that truly tasted like both chocolate and peanut butter — not just one overshadowing the other. It was a rainy afternoon in my tiny Paris apartment during culinary school, and I had just finished a grueling week of sauce work. I wanted something comforting, something that reminded me of the peanut butter cookies my mother used to make back in Morocco, but with a deep, French-chocolate sophistication. That day, I set out to create the perfect balance: a cookie where the rich cocoa doesn’t bully the peanut butter, and the peanut butter doesn’t drown out the chocolate. This recipe is the result of that mission — a delicious twist on the classic peanut butter cookie that delivers both flavors in every single bite.

Imagine sinking your teeth into a cookie that’s crisp around the edges, soft and tender in the center, with the warm aroma of cocoa and toasted peanuts filling your kitchen. The first flavor that hits you is the deep, slightly bittersweet notes of unsweetened cocoa powder — the kind that tells you this cookie means business. Then, right behind it, the creamy, savory-sweet richness of peanut butter spreads across your tongue, with just a hint of salt to keep everything bright. The brown sugar adds a subtle caramel undertone, and the shortening gives it that old-fashioned, melt-in-your-mouth tenderness. It’s the kind of cookie that makes you close your eyes for a second and just… savor.

What sets my version apart is a technique I picked up in Paris: using a combination of shortening and peanut butter to create a uniquely tender crumb, plus a precise baking window — just 7 to 8 minutes — that ensures the centers stay soft while the edges set perfectly. I’ve tested this recipe more times than I can count, adjusting the cocoa-to-peanut butter ratio until it sang. One common mistake I see home bakers make is overbaking, which turns the chocolate flavor bitter and the texture dry. But don’t worry — I’ll show you exactly what to look for. 💡 emy’s Pro Tip: Pull the cookies out when the edges look set but the centers still appear slightly soft and puffed. They’ll continue baking on the hot sheet as they cool.

Why This Chocolate Peanut Butter Cookies Recipe Is the Best

The Flavor Secret: The magic here is in the balance. Most chocolate peanut butter cookies lean too heavily on one flavor, but I’ve calibrated the ratio of unsweetened cocoa powder to creamy peanut butter so that each flavor shines equally. The brown sugar adds moisture and a caramelized depth that bridges the two. Growing up in Morocco, I learned that the best dishes — whether savory or sweet — are about layering flavors, not overpowering. That philosophy is baked into every cookie.

Perfected Texture: My training in Paris taught me the importance of fat composition. Shortening gives these cookies a tender, almost velvety crumb, while the peanut butter adds structure and a slight chewiness. The fork-pressing technique isn’t just for looks — it creates those signature ridges that crisp up beautifully, giving you a contrast of crunchy edges and a soft, fudgy center. It’s textural heaven.

Foolproof & Fast: From prep to cooling, you’re looking at just over 20 minutes. The dough comes together in one bowl with an electric mixer, no chilling required, and the ingredient list uses pantry staples. Whether you’re a seasoned baker or a beginner, these Chocolate Peanut Butter Cookies are forgiving, reliable, and absolutely delicious. I’ve made them for my neighbors in NYC and for my family back in Morocco — they’re always a hit.

Chocolate Peanut Butter Cookies Ingredients

Every time I walk through the Union Square Greenmarket in NYC, I pick up fresh eggs and butter, but for these cookies, I also grab a jar of good-quality creamy peanut butter. I remember my mother in Morocco using a locally ground peanut paste that was a bit grittier than what we get here, but the creamy American-style peanut butter works beautifully in this recipe. Here’s everything you’ll need.

Ingredients List

  • 1/2 cup shortening (regular or butter flavor)
  • 3/4 cup creamy peanut butter
  • 1 1/2 cups brown sugar (packed)
  • 3 tablespoons milk
  • 1 teaspoon vanilla extract
  • 1 large egg
  • 1 1/4 cups all-purpose flour
  • 1/2 cup unsweetened cocoa powder
  • 1 teaspoon baking soda
  • 1/2 teaspoon salt

Ingredient Spotlight

Shortening: Shortening is key for that soft, tender crumb. It has a higher melting point than butter, which helps the cookies hold their shape and stay soft. I typically use butter-flavored shortening for a hint of richness. In a pinch, you can substitute unsalted butter, but the cookies will spread a bit more and have a slightly different texture.

Creamy Peanut Butter: This is the backbone of the flavor. Use a standard creamy peanut butter like Skippy or Jif — natural peanut butter that separates can make the cookies greasy. The creamy texture ensures the crisscross pattern holds. If you only have crunchy, it will still work, but the texture will be chunkier.

Unsweetened Cocoa Powder: This is where the deep chocolate flavor comes from. I recommend a Dutch-process or regular unsweetened cocoa — both work well. Do NOT use hot chocolate mix or sweetened cocoa, as it will throw off the sugar balance and make the cookies too sweet. The bitterness of the cocoa is what makes the peanut butter pop.

Brown Sugar: Packed brown sugar adds moisture, chewiness, and a subtle caramel undertone. Light or dark brown sugar both work; dark will give a deeper molasses flavor. If you only have granulated sugar, add 1 tablespoon of molasses to approximate the moisture.

Original Ingredient Best Substitution Flavor / Texture Impact
Shortening Unsalted butter (softened) More spread, slightly richer flavor, less tender crumb
Creamy peanut butter Crunchy peanut butter Adds texture, crisscross pattern may be less defined
Unsweetened cocoa powder Dutch-process cocoa powder Smoother, less acidic chocolate flavor
Brown sugar Granulated sugar + 1 tbsp molasses Similar moisture and caramel notes
All-purpose flour Gluten-free 1:1 baking blend Slightly more delicate texture, works well

How to Make Chocolate Peanut Butter Cookies — Step-by-Step

Making these Chocolate Peanut Butter Cookies is a joy. The dough comes together quickly, and the aroma as they bake is absolutely intoxicating. Follow these steps carefully, and you’ll have a batch of perfect cookies every time.

Step 1: Prep the Oven and Bowls

Preheat your oven to 375°F. Line a baking sheet with parchment paper or leave it ungreased — this recipe works beautifully either way. Set out a large mixing bowl and a small mixing bowl.

💡 emy’s Pro Tip: For even baking, position your oven rack in the center. If you’re baking multiple trays, rotate them halfway through and bake one tray at a time for the most consistent results.

Step 2: Cream the Wet Ingredients

In the large mixing bowl, beat together the shortening, creamy peanut butter, packed brown sugar, milk, and vanilla extract with an electric mixer on medium speed until the mixture is light, fluffy, and well blended — about 2 minutes. Add the egg and mix just until combined. Do not overmix; you want the egg to be fully incorporated but not beaten to death.

⚠️ Common Mistake to Avoid: Overmixing the egg can make the cookies tough. Mix on low speed for just 15–20 seconds after adding the egg, until you no longer see yellow streaks.

Step 3: Combine Dry Ingredients

In the small mixing bowl, whisk together the all-purpose flour, unsweetened cocoa powder, baking soda, and salt. This ensures the cocoa and leavening are evenly distributed throughout the dough — no bitter pockets of cocoa! Add the dry mixture to the wet mixture in two additions, stirring with a wooden spoon or spatula until just combined. The dough will be thick and slightly sticky.

💡 emy’s Pro Tip: Sift the cocoa powder if it looks lumpy. This step, which I learned in Paris, prevents those bitter clumps from sneaking into your cookies.

Step 4: Scoop and Press

Scoop the cookie dough onto your ungreased cookie sheet, forming 1 to 1½ inch dough balls. Space them about 2 inches apart — they will spread slightly. Lightly dip a fork in water or granulated sugar (to prevent sticking), then press down gently on each dough ball to create the traditional crisscross pattern. Press until the cookie is about ½ inch thick.

⚠️ Common Mistake to Avoid: Pressing too hard can make the cookies too thin and crispy. A gentle, even press is all you need. Dip the fork in water between each cookie to keep the lines clean.

Step 5: Bake and Cool

Bake for 7–8 minutes at 375°F, just until the edges are set and the tops look slightly crackly. The centers will still look soft and slightly puffed — that’s perfect. Let the cookies cool on the baking sheet for exactly 2 minutes; this allows them to finish setting without overbaking. Then transfer them to a wire cooling rack to cool completely.

💡 emy’s Pro Tip: For soft, chewy cookies, err on the side of underbaking. If you prefer crisper cookies, add 1 minute to the bake time. Every oven is different, so keep an eye on them at the 7-minute mark.

Step Action Duration Key Visual Cue
1 Preheat oven 10–15 mins Oven indicator light turns off
2 Cream wet ingredients 2 mins Light, fluffy, uniform color
3 Combine dry ingredients 1 min No dry streaks, thick dough
4 Scoop and press 5 mins Clean crisscross pattern, ½ in thick
5 Bake 7–8 mins Edges set, centers soft and puffed

Serving & Presentation

These Chocolate Peanut Butter Cookies are stunning on their own, but I love to dress them up for company. Arrange them on a rustic wooden board or a ceramic platter — the dark cocoa color pops beautifully against light stoneware. For a touch of elegance, dust the cookies lightly with powdered sugar or flaky sea salt right before serving. The salt enhances both the chocolate and the peanut butter flavors beautifully.

In my NYC apartment, I often serve these alongside a tall glass of cold almond milk or a scoop of vanilla bean ice cream for an indulgent dessert. Back in Morocco, my mother would have paired them with a glass of hot mint tea — the sweetness and warmth are a lovely contrast. For a true American classic, try them with a cold glass of whole milk. They also make fantastic ice cream sandwiches: just sandwich a scoop of vanilla or chocolate ice cream between two cookies and freeze for 30 minutes.

These cookies are also wonderful for cookie swaps, bake sales, or as a lunchbox treat. They travel well and stay fresh for days. If you’re feeling fancy, drizzle a little melted dark chocolate over the top and sprinkle with chopped peanuts for a bakery-style finish.

Pairing Type Suggestions Why It Works
Side Dish Fresh fruit salad, sliced bananas Bright acidity cuts through richness
Sauce / Dip Chocolate ganache, caramel sauce, peanut butter glaze Elevates the chocolate and peanut butter notes
Beverage Cold milk, hot coffee, mint tea, vanilla milkshake Creamy or bitter contrasts balance sweetness
Garnish Flaky sea salt, powdered sugar, chopped peanuts, chocolate drizzle Adds texture, visual appeal, and flavor depth

Make-Ahead, Storage & Reheating

Living in NYC means my schedule is always full, so I love that these Chocolate Peanut Butter Cookies are as practical as they are delicious. You can prep the dough ahead of time, bake just what you need, and save the rest for last-minute cravings or unexpected guests. Here’s my tested system for storing and reheating.

Method Container Duration Reheating Tip
Refrigerator Airtight container (baked cookies) Up to 1 week Microwave for 10 seconds for “fresh from the oven” softness
Freezer Freezer-safe bag or container (baked or unbaked dough balls) Up to 3 months Bake frozen dough: add 2 mins; reheat baked cookies at 300°F for 5 mins
Make-Ahead Covered bowl (unbaked dough) in fridge Up to 3 days in advance Let dough sit at room temp for 10 mins before scooping

For the best texture, I recommend storing baked cookies in an airtight container at room temperature for up to 5 days — they’ll stay soft and chewy. If you’re in a humid climate (hello, NYC summer), pop them in the fridge to keep them from getting too soft. To reheat, a quick 10-second blast in the microwave brings back that just-baked warmth. For frozen unbaked dough, bake directly from frozen at 375°F for 9–10 minutes — no thawing needed. This is my go-to move for last-minute cookie emergencies.

Variations & Easy Swaps

One of the things I love about this Chocolate Peanut Butter Cookies recipe is how adaptable it is. Whether you’re catering to dietary needs or just want to shake things up, these variations have all been tested in my kitchen. Here’s a quick overview, followed by detailed descriptions.

Variation Key Change Best For Difficulty Impact
Chunky Peanut & Sea Salt Crunchy peanut butter + flaky sea salt on top Texture lovers, sweet-salty fans No change
Gluten-Free Version 1:1 gluten-free flour blend Gluten-sensitive bakers No change
Double Chocolate Drizzle Add 1/2 cup chocolate chips + drizzle melted dark chocolate Chocolate lovers, special occasions Slightly more hands-on

Chunky Peanut & Sea Salt

This is my favorite variation when I want a little extra crunch. Simply swap the creamy peanut butter for crunchy peanut butter, and just before baking, sprinkle a pinch of flaky sea salt (like Maldon) on top of each cookie. The salt amplifies the chocolate and peanut butter flavors and adds a delightful textural contrast. It’s a trick I picked up from a pastry chef in Paris who salted all her chocolate desserts — it makes the flavors sing.

Gluten-Free Version

To make these cookies gluten-free, swap the all-purpose flour with a 1:1 gluten-free baking blend that contains xanthan gum (like Bob’s Red Mill or King Arthur). The texture will be slightly more delicate, but the flavor remains identical. I’ve tested this for my gluten-sensitive friends, and they couldn’t tell the difference. Make sure your baking soda and cocoa powder are certified gluten-free if needed. The crisscross pattern may be a bit softer, so press gently.

Double Chocolate Drizzle

For the ultimate chocolate indulgence, fold 1/2 cup of semi-sweet chocolate chips into the dough along with the dry ingredients. After baking and cooling, melt 1/4 cup of dark chocolate chips with 1 teaspoon of coconut oil and drizzle it over the cookies. This variation is perfect for birthdays, holidays, or any day you want to feel extra special. I love making these when I’m missing the chocolate shops of Paris — they’re like a patisserie in cookie form.

Can I use butter instead of shortening in Chocolate Peanut Butter Cookies?

Yes, you can substitute unsalted butter for the shortening in this Chocolate Peanut Butter Cookies recipe. Use the same amount — 1/2 cup (1 stick) of unsalted butter, softened to room temperature. The cookies will spread a bit more and have a slightly richer, buttery flavor, but the texture will be a little less tender than with shortening. If you use butter, consider chilling the dough for 15 minutes before baking to control spread. I’ve tested both, and while shortening gives a more classic crumb, butter adds a lovely flavor that many home bakers prefer.

Why are my chocolate peanut butter cookies turning out dry?

Dry cookies are usually the result of overbaking or overmeasuring flour. In this Chocolate Peanut Butter Cookies recipe, the key is to bake for just 7–8 minutes — the edges should look set, but the centers will still appear slightly puffed and soft. They continue baking on the hot sheet as they cool. Also, make sure you’re measuring your flour correctly: spoon it into the measuring cup and level it off with a knife, rather than scooping directly, which packs in too much flour. The brown sugar and peanut butter in this recipe add moisture, so if they’re still dry, try adding 1–2 extra tablespoons of milk next time.

Can I freeze the dough for Chocolate Peanut Butter Cookies?

Absolutely! Freezing the dough is one of my favorite timesaving tricks. Scoop the dough into 1½-inch balls and place them on a parchment-lined baking sheet. Freeze until solid (about 1 hour), then transfer the frozen dough balls to a freezer-safe bag or container. They’ll keep for up to 3 months. When you’re ready to bake, place the frozen dough balls on a cookie sheet and bake at 375°F for 9–10 minutes — no need to thaw. The cookies will be just as delicious as fresh. This is my go-to method for having homemade cookies ready at a moment’s notice.

What is the best cocoa powder for chocolate peanut butter cookies?

For this Chocolate Peanut Butter Cookies recipe, I recommend using unsweetened natural cocoa powder or Dutch-process cocoa powder. Natural cocoa powder has a slightly more acidic, fruity flavor that pairs beautifully with the sweetness of brown sugar and the savory notes of peanut butter. Dutch-process cocoa is smoother and milder. Both work well, so choose based on your preference. I typically use natural cocoa for its bold chocolate punch. Avoid sweetened cocoa mixes or hot chocolate powder, as they contain sugar and additives that will alter the texture and sweetness balance of the cookies.

How do I store Chocolate Peanut Butter Cookies to keep them fresh?

To keep your Chocolate Peanut Butter Cookies soft and fresh, store them in an airtight container at room temperature for up to 5 days. If your kitchen is warm or humid (like mine in NYC during summer), refrigerate them in an airtight container — they’ll stay fresh for up to 1 week. To prevent cookies from drying out, you can add a slice of bread to the container; it absorbs excess moisture and keeps the cookies soft. For longer storage, freeze baked cookies in a freezer-safe bag for up to 3 months. Thaw at room temperature for 15 minutes or microwave for 10 seconds.

Can I make these cookies without an electric mixer?

Yes, you can absolutely make these Chocolate Peanut Butter Cookies by hand! Use a sturdy wooden spoon and a large bowl. Start by softening the shortening and peanut butter to room temperature, then cream them together with the brown sugar, milk, and vanilla. This will take a bit of elbow grease — about 3–4 minutes of vigorous stirring — until the mixture is smooth and light. Add the egg and beat well. Then stir in the dry ingredients until just combined. The dough will be thick, but it’s completely doable by hand. In fact, I sometimes make them this way when I want a more meditative baking experience.

Why do my cookies spread too much during baking?

If your Chocolate Peanut Butter Cookies spread too much, it’s usually due to one of three reasons: the dough was too warm, the baking sheet was too hot, or there wasn’t enough structure from the flour. Make sure your shortening and peanut butter are at room temperature but not overly soft. If the dough feels sticky, refrigerate it for 15 minutes before scooping. Also, use a cool, ungreased baking sheet — if you’re reusing a hot sheet, the cookies will start spreading before they set. Finally, measure your flour accurately: too little flour can cause excess spread. Spoon and level for the best results.

Can I add chocolate chips to this recipe?

Yes, chocolate chips are a wonderful addition to this Chocolate Peanut Butter Cookies recipe! You can fold in 1/2 to 3/4 cup of semi-sweet, milk, or dark chocolate chips after you’ve combined the wet and dry ingredients. The chips add extra pockets of melted chocolate that complement the cocoa base. If you’re feeling adventurous, try white chocolate chips or peanut butter chips for a double dose of peanut butter flavor. Just note that adding chips may slightly increase the spread, so keep an eye on baking time. This is an easy way to customize the cookies to your taste.

What can I use instead of shortening in this cookie recipe?

If you don’t have shortening, the best substitute is unsalted butter at room temperature. Use the same amount (1/2 cup, or 1 stick). The cookies will have a slightly richer flavor and a bit more spread. You can also use coconut oil (solid, not melted), but the cookies will have a subtle coconut flavor and a slightly different texture. For a dairy-free option, plant-based butter sticks work beautifully. I’ve tested all of these, and while shortening gives the most tender, classic crumb, each substitute produces delicious cookies. If using butter, you may want to chill the dough for 10–15 minutes before baking.

How do I get the perfect crisscross pattern on peanut butter cookies?

The classic crisscross pattern is easier than you think! First, scoop uniform 1 to 1½-inch dough balls. Lightly dip a fork in granulated sugar or water — this prevents sticking. Press the fork gently into the dough ball, then press again in the opposite direction to create a cross. Press until the cookie is about ½ inch thick. Don’t press too hard, or the cookies will be too thin and crispy. Dip the fork in sugar or water between each cookie for clean lines. The sugar also adds a subtle sparkle and lightly crispy edge. This pattern isn’t just decorative — it helps the cookies bake evenly and gives them those lovely ridges that crisp up beautifully.

Share Your Version!

I absolutely love hearing how this Chocolate Peanut Butter Cookies recipe turns out in your kitchen. Did you try the classic version, or did you go for one of the variations? Did you add chocolate chips, a sprinkle of sea salt, or maybe a drizzle of caramel? Every baker brings their own touch, and I’d be thrilled to see yours. Leave a star rating and a comment below — your feedback helps other readers know what to expect, and it truly makes my day to hear from you. If you’re on Instagram or Pinterest, snap a photo of your cookies and tag me @cookingwithemi. I love sharing your creations with our community.

One thing I’m especially curious about: did the 7–8 minute baking window work for your oven? Ovens can vary so much, and I’d love to know if you needed to adjust the timing. Also, which variation are you most excited to try? The Double Chocolate Drizzle is always a crowd-pleaser, but the Chunky Peanut & Sea Salt has a special place in my heart. Drop your thoughts in the comments — I read every single one!

From my NYC kitchen to yours — I hope this recipe brings as much warmth to your table as it does to mine. — emy 🧡

📌

Love This Recipe? Save It to Pinterest!

If you enjoyed this Chocolate Peanut Butter Cookies recipe, don’t let it get lost in your browser tabs! 😄 Pin it now so you can find it again anytime — and explore hundreds more tried-and-tested recipes waiting for you on my Pinterest boards.

👉 Follow emy on Pinterest @exorecipe

📌 Pin this recipe · 🔁 Re-pin your favorites · 💬 Tag me when you make it — I love seeing your creations!


Print

clock clock iconcutlery cutlery iconflag flag iconfolder folder iconinstagram instagram iconpinterest pinterest iconfacebook facebook iconprint print iconsquares squares iconheart heart iconheart solid heart solid icon

Chocolate Peanut Butter Cookies


  • Author: Chef Emy

Description

Chocolate Peanut Butter Cookies are the perfect blend of rich chocolate and peanut butter. You will love this delicious twist on the classic peanut butter cookie!


Ingredients

Scale
  • 1/2 cup shortening (regular or butter flavor)
  • 3/4 cup creamy peanut butter
  • 1 1/2 cups brown sugar (packed)
  • 3 tablespoons milk
  • 1 teaspoon vanilla extract
  • 1 large egg
  • 1 1/4 cups all-purpose flour
  • 1/2 cup unsweetened cocoa powder
  • 1 teaspoon baking soda
  • 1/2 teaspoon salt

Instructions

  1. Preheat oven to 375F.
  2. In a large mixing bowl, beat together the shortening, peanut butter, brown sugar, milk, and vanilla with an electric mixer until well blended. Add the egg and mix just until combined.
  3. In a small mixing bowl, whisk together the flour, cocoa powder, baking soda, and salt. Add the dry mixture to the wet mixture and stir until combined.
  4. Scoop the cookie dough onto an ungreased cookie sheet to form 1 to 1 ½ inch dough balls. Use a fork to press the dough down and create the traditional crisscross pattern on each cookie.
  5. Bake for 7-8 minutes at 375F just until set around the edges. Cool for 2 minutes on the cookie sheet, then transfer to a wire cooling rack to cool.

Easy Chocolate Mousse Recipe (Without Eggs)

Easy Chocolate Mousse (Without Eggs) – Silky, 3-Ingredient Wonder

⚖️
Difficulty
Easy
⏲️
Prep Time
15 mins
🕒
Cook Time
5 mins
⏱️
Total Time
2 hrs 20 mins
🍽️
Servings
4

I still remember the first time I made chocolate mousse in Paris — my instructor at Le Cordon Bleu insisted on a classic French recipe with raw eggs, and it was glorious. But when I moved back to New York and started cooking for friends with young kids and pregnant mamas, I realized I needed a version that everyone could enjoy without worry. That’s how this Easy Chocolate Mousse (Without Eggs) was born — it’s silky, decadent, and made with only three ingredients you probably already have in your kitchen. No eggs, no fuss, no compromise on flavor.

The texture is pure velvet — light as a cloud yet rich as the best French dark chocolate you’ve ever tasted. Each spoonful glides across your tongue with a luscious creaminess that lingers just long enough to make you close your eyes and savor it. The deep cocoa aroma fills your kitchen as you melt the chocolate, and the whipped cream folds in like billowy silk. It’s the kind of dessert that feels fancy enough for a dinner party but simple enough to make on a random Tuesday when only chocolate will do.

What sets this egg-free chocolate mousse apart is a technique I perfected in my tiny NYC apartment kitchen — gently folding chilled whipped cream into cooled melted chocolate at just the right temperature. It’s foolproof once you know the visual cues. In this post, I’ll share my best tip for getting that airy, stable texture every single time, plus the one mistake that can turn your mousse grainy (and exactly how to avoid it). Trust me, after one batch, you’ll never buy store-bought mousse again.

Why This Easy Chocolate Mousse Recipe Is the Best

The Flavor Secret – By using quality semisweet chocolate chips and letting the melted chocolate cool to just the right temperature before folding, you get a deep, complex chocolate flavor that tastes nothing like a packaged mix. Growing up in Morocco, my mother always said the best sweets come from the best ingredients — and she was right. I use Ghirardelli or Guittard chips from my local NYC bodega, and the result is restaurant-quality.

Perfected Texture – The key is in the folding. I learned this in Paris: you must fold the whipped cream into the melted chocolate using a gentle figure-eight motion, scraping the bottom and sides of the bowl. Stop as soon as no white streaks remain. Over-folding deflates the air bubbles and turns your mousse dense. Under-folding leaves streaks. I’ll show you exactly what to look for.

Foolproof & Fast – With just three main ingredients and three simple steps, this might be the easiest dessert you’ll ever make. No double boiler, no tempering eggs, no gelatin. My neighbor in Brooklyn, who claims she can’t cook, made this for her book club and they demanded the recipe. If she can do it, so can you.

Easy Chocolate Mousse Ingredients

I buy my chocolate chips from the Fairway Market on the Upper West Side, and my cream from the farmers market in Union Square on Saturday mornings. There’s something about knowing exactly where your ingredients come from that makes the final dish taste even better. This simple chocolate mousse recipe calls for pantry staples, so you’re likely already set.

Ingredients List

  • 1 cup chocolate chips (I use semisweet)
  • ½ cup heavy whipping cream (for melting chocolate chips)
  • 1 cup chilled heavy whipping cream (for whipping)
  • 1–2 tablespoons powdered sugar
  • ¼ teaspoon pure vanilla extract (optional, use it if you have it)

Ingredient Spotlight

Chocolate Chips – Semisweet is my go-to for balanced sweetness. If you prefer a darker, more intense mousse, use bittersweet (60–70% cacao). For a milkier version, use milk chocolate chips — but reduce the powdered sugar to 1 tablespoon since milk chocolate is sweeter. I tested this with Trader Joe’s dark chocolate chips and it was phenomenal.

Heavy Whipping Cream – This does double duty: ½ cup gets melted with the chocolate to create a silky ganache base, and 1 cup is whipped to create structure. Look for cream with at least 36% milk fat. I’ve used both Organic Valley and Horizon brands from my local Whole Foods with excellent results. Do not substitute half-and-half or milk — the mousse won’t set properly.

Powdered Sugar – Also called confectioners’ sugar, this dissolves instantly into the whipped cream with no grittiness. You can substitute granulated sugar, but you’ll need to grind it in a spice grinder or use a superfine sugar to avoid a sandy texture. I’ve also made this with maple sugar for a more complex sweetness — it works, but the color darkens slightly.

Original Ingredient Best Substitution Flavor / Texture Impact
Semisweet chocolate chips Bittersweet (60–70%) or milk chocolate chips Bittersweet = deeper, less sweet; milk = creamier, sweeter
Heavy whipping cream Coconut cream (full fat, chilled) Slightly coconut flavor, lighter texture, dairy-free
Powdered sugar Superfine sugar (blended in grinder) Same sweetness, slightly more mixing needed

How to Make Easy Chocolate Mousse — Step-by-Step

I promise you, this is one of the simplest yet most rewarding desserts you’ll ever make. Follow these steps and you’ll have a silky mousse that rivals any French bistro — without turning on the oven or cracking a single egg.

Step 1: Melt Chocolate with Cream

In a large microwave-safe bowl, combine 1 cup chocolate chips and ½ cup heavy whipping cream. Microwave in 20-second increments, stirring well between each, until the chocolate is completely melted and the mixture is smooth and glossy. This usually takes about 60–80 seconds total. Set aside to cool to room temperature, stirring occasionally — this took about 15 minutes. You want it warm to the touch but not hot, or it will melt the whipped cream later.

💡 emy’s Pro Tip: Place the bowl in the fridge for 5 minutes if you’re short on time, but stir every minute to ensure even cooling. Do not let it get cold — room temperature is the sweet spot.

Step 2: Whip the Cream

In the bowl of a hand mixer or stand mixer fitted with the whisk attachment, beat 1 cup chilled heavy whipping cream with 1–2 tablespoons powdered sugar and ¼ teaspoon vanilla extract (if using) until stiff peaks form. Start on low speed to avoid splattering, then gradually increase to medium-high. Watch closely — you want peaks that stand straight up when you lift the whisk, not floppy. Transfer the whipped cream to the refrigerator until the chocolate has cooled to room temperature.

⚠️ Common Mistake to Avoid: Over-whipping the cream turns it into butter. Stop the mixer the moment you see stiff peaks. If you see yellow specks or a curdled appearance, you’ve gone too far — start fresh with chilled cream.

Step 3: Fold and Chill

Using a rubber or silicone spatula, fold the whipped cream into the cooled melted chocolate. Use a gentle figure-eight motion, scraping the bottom and sides of the bowl. Fold just until no white streaks remain — about 6 to 8 folds. Over-folding will deflate the mousse. Divide the mixture evenly among 4 serving dishes (ramekins, wine glasses, or small jars all work beautifully). Refrigerate for at least 2 hours. The colder it is, the more firm it will be. If you’d like it softer, leave it at room temperature for about 15 minutes before serving.

💡 emy’s Pro Tip: For the fluffiest mousse, fold in three additions — add one-third of the whipped cream first to lighten the chocolate mixture, then gently fold in the remaining two-thirds. This technique, called “sacrificing,” ensures a uniform texture without over-mixing.

Step Action Duration Key Visual Cue
1 Melt chocolate + ½ cup cream 1–2 mins + 15 mins cooling Smooth, glossy, no lumps
2 Whip cream + sugar + vanilla 3–5 mins Stiff peaks stand upright
3 Fold cream into chocolate 1–2 mins No white streaks, uniform color

Serving & Presentation

I love serving this chocolate mousse in mismatched vintage teacups I collect from flea markets in Brooklyn. It adds a touch of whimsy and makes each serving feel personal. Top with a dollop of extra whipped cream, a few fresh raspberries, and a light dusting of cocoa powder or shaved chocolate. In the summer, I add a sprinkle of flaky sea salt (Maldon is my favorite) to cut through the richness — a trick I picked up from a pastry chef friend in SoHo.

For a party, layer the mousse in small clear glasses with crushed cookie crumbs or fresh berries for a parfait-style presentation. My mother in Morocco would serve this with mint tea on the side — the herbal brightness is a perfect foil for the deep chocolate. And if you’re feeling extra indulgent, a drizzle of warm caramel sauce or a splash of espresso on top takes this to another level.

Pairing Type Suggestions Why It Works
Side Dish Shortbread cookies, biscotti, fresh strawberries Crunchy texture contrast, fruit cuts richness
Sauce / Dip Warm caramel sauce, raspberry coulis, whipped cream Adds sweetness or tartness, extra creaminess
Beverage Mint tea, espresso, dark red wine (Merlot) Herbal or bitter notes balance chocolate
Garnish Flaky sea salt, cocoa powder, shaved chocolate, mint Visual appeal, flavor contrast, aromatic lift

Make-Ahead, Storage & Reheating

This egg-free chocolate mousse is the ultimate make-ahead dessert for busy weeknights or dinner parties. I often prepare it the morning of a gathering and let it chill in the fridge until dessert time. It actually tastes better after a few hours — the flavors meld and the texture sets perfectly. Here’s how to store it so it stays silky.

Method Container Duration Reheating Tip
Refrigerator Covered ramekin or jar with lid Up to 4 days Serve cold; let sit 10 mins at room temp to soften
Freezer Airtight freezer-safe container Up to 1 month Thaw overnight in fridge; stir gently before serving
Make-Ahead Individual serving dishes with plastic wrap 1–2 days in advance Add toppings just before serving for best appearance

If you’ve frozen the mousse, thaw it slowly in the refrigerator overnight — do not microwave, as it will separate and turn grainy. Once thawed, give it a gentle stir with a spoon to bring back its silky texture. I’ve kept this mousse in the fridge for up to 4 days and it was still delicious, though the texture becomes slightly denser over time (which some people actually prefer!).

Variations & Easy Swaps

Variation Key Change Best For Difficulty Impact
Vegan Coconut Mousse Use coconut cream instead of dairy cream Dairy-free, plant-based diets Same — chill coconut cream overnight first
Spiced Moroccan Mousse Add ½ tsp cinnamon + pinch of cayenne Holidays, adventurous palates Same — stir spices into melted chocolate
Mocha Mousse Add 1 tbsp instant espresso powder to melted chocolate Coffee lovers, after-dinner treat Same — dissolve espresso powder in cream before melting

Vegan Coconut Mousse

For a dairy-free version, substitute the heavy whipping cream with full-fat coconut cream. Chill two cans of coconut milk overnight, then scoop the solid cream from the top (save the liquid for smoothies). Whip it just like dairy cream — it will be slightly softer, so fold it gently. The coconut flavor pairs beautifully with dark chocolate. I tested this for a friend’s vegan birthday party in Williamsburg and it was a hit.

Spiced Moroccan Mousse

This variation is inspired by my childhood in Morocco, where we often add warm spices to chocolate desserts. Stir ½ teaspoon of cinnamon and a tiny pinch of cayenne pepper into the melted chocolate before cooling. The cinnamon adds warmth and depth, while the cayenne lingers subtly on the finish. It’s sophisticated enough for a dinner party and unexpected enough to spark conversation.

Mocha Mousse

For a caffeinated twist, dissolve 1 tablespoon of instant espresso powder in the ½ cup of cream before melting it with the chocolate. The coffee doesn’t overpower the chocolate — it enhances it, bringing out the cocoa’s natural notes. This is my go-to when I need a little extra pep after dinner. I buy my espresso powder from the Italian market in Chelsea Market.

Can I make chocolate mousse without eggs?

Absolutely — and you don’t need any special ingredients or techniques. This egg-free chocolate mousse uses heavy whipping cream as both the base and the aerator. The cream is whipped to stiff peaks and then folded into melted chocolate, creating a light, airy texture that’s just as luxurious as traditional French mousse. The absence of eggs also means you don’t have to worry about raw egg safety, making it perfect for pregnant women, young children, and anyone with a compromised immune system. Plus, it stores beautifully in the fridge for up to 4 days.

How long does it take for chocolate mousse to set in the fridge?

This easy chocolate mousse needs at least 2 hours in the refrigerator to set properly. For the best texture, I recommend chilling it for 3 to 4 hours. The cold solidifies the cream fat and stabilizes the structure, giving you that perfect mousse consistency — firm enough to hold its shape but soft enough to melt on your tongue. If you’re in a hurry, you can serve it after 1 hour for a softer, pudding-like texture. Overnight is ideal for make-ahead entertaining — the flavors deepen and the texture becomes even more velvety.

Why is my chocolate mousse not setting?

If your mousse isn’t setting, the most common cause is that the melted chocolate was too warm when you folded in the whipped cream. Hot chocolate will melt the cream, deflating the air bubbles that provide structure. Always let the chocolate cool to room temperature (about 15 minutes, stirring occasionally) before folding. Another culprit is under-whipped cream — it needs to reach stiff peaks, not soft peaks. Finally, make sure you’re using full-fat heavy whipping cream (at least 36% milk fat). Low-fat cream or half-and-half won’t set properly because they lack enough fat to stabilize the mousse.

Can I use milk chocolate instead of semisweet in this mousse?

Yes, you can use milk chocolate — but the texture will be slightly softer and sweeter. Milk chocolate has a higher sugar and milk fat content and less cocoa solids, which means it sets a bit less firmly than semisweet. If you use milk chocolate, reduce the powdered sugar to 1 tablespoon (or omit it entirely) to avoid an overly sweet mousse. I’ve tested this with Ghirardelli milk chocolate chips and it turned out delightful — just note that the chocolate flavor is milder and the mousse is more pudding-like. For a firmer milk chocolate mousse, add an extra tablespoon of chilled cream and whip it longer.

How do I fold whipped cream into chocolate without deflating it?

Folding is all about gentle, deliberate motion. Start by adding about one-third of the whipped cream to the cooled melted chocolate and stir it in vigorously — this “sacrifices” a portion to lighten the chocolate mixture without worrying about deflating. Then add the remaining whipped cream and switch to a gentle figure-eight motion with a silicone spatula, scraping the bottom and sides of the bowl. Use a light hand and stop the moment you no longer see white streaks. Over-folding is the number one cause of dense mousse. If you see the mixture becoming runny or losing volume, you’ve folded too much.

What can I use instead of heavy cream in chocolate mousse?

For a dairy-free option, full-fat coconut cream is the best substitute — chill two cans of coconut milk overnight and scoop the solid cream from the top. Whip it just like dairy cream; it will be slightly softer but still works beautifully. For a lower-calorie version, you can use chilled evaporated milk, but the texture will be less rich and stable. I do not recommend using milk, half-and-half, or plant-based milks (like almond or oat) as they lack the fat content needed to whip and set. If you’re looking for a completely different approach, you can also make avocado chocolate mousse, but that’s a totally different recipe with a denser, fudgier texture.

Is chocolate mousse gluten-free?

Yes, this easy chocolate mousse recipe is naturally gluten-free — it contains no flour, wheat, or any gluten-containing ingredients. The main components are chocolate, heavy cream, sugar, and vanilla, none of which contain gluten. However, always check the label on your chocolate chips to ensure they haven’t been processed in a facility that handles wheat (some brands add cookie pieces or have cross-contamination risks). I recommend Ghirardelli, Guittard, or Enjoy Life chocolate chips, which are certified gluten-free. Also check your vanilla extract — pure vanilla extract is gluten-free, but imitation vanilla may contain additives.

Can I freeze chocolate mousse?

Yes, you can freeze this chocolate mousse for up to 1 month. Transfer the mousse to an airtight container or wrap individual ramekins tightly with plastic wrap and then foil. Thaw it overnight in the refrigerator — never at room temperature, as rapid temperature changes can cause the mousse to separate and become grainy. After thawing, stir it gently with a spoon to restore its silky texture. Note that the texture after freezing will be slightly denser than freshly made mousse, but it’s still delicious. I often make a double batch and freeze half for last-minute cravings or unexpected guests.

What’s the best way to melt chocolate for mousse?

I recommend melting chocolate in the microwave for convenience — it’s fast and requires no extra equipment. Use a large microwave-safe bowl and heat in 20-second increments at 50% power, stirring well between each interval. The residual heat will finish melting any remaining solid pieces. Alternatively, you can use the double-boiler method: place a heatproof bowl over a pot of barely simmering water (don’t let the bowl touch the water) and stir until melted. Whichever method you choose, avoid overheating — chocolate scorches easily and will become grainy. For this recipe, you melt the chocolate with ½ cup of cream, which helps it stay smooth and prevents scorching.

How do I know when chocolate mousse is ready to serve?

Your chocolate mousse is ready to serve when it holds its shape when spooned and has a smooth, silky appearance. After at least 2 hours of chilling, it should be firm enough that a spoon pressed gently into the surface leaves a clean indent. The ideal serving temperature is cold but not icy — straight from the fridge is perfect. If you prefer a softer texture, let it sit at room temperature for 10–15 minutes before serving. For the best flavor experience, I recommend taking the mousse out of the fridge 5 minutes before garnishing and serving. The cold temperature mutes sweetness slightly, so giving it a few minutes off the chill allows the chocolate flavor to shine.

Share Your Version!

I truly believe this easy chocolate mousse recipe is meant to be shared — and adapted. If you make it, I’d love to hear how it turned out! Did you add a pinch of cinnamon like my Moroccan mother would? Or maybe you topped it with fresh berries you picked up from the Union Square Greenmarket? Drop a star rating in the comments below — it helps other home cooks find this recipe and know it works.

And if you’re on Instagram or Pinterest, snap a photo of your mousse and tag me @cookingwithemi. I love nothing more than seeing my recipes come to life in your kitchens. One question for you: what’s your favorite way to customize this mousse — spices, extracts, or toppings? Let me know in the comments, and let’s inspire each other! From my NYC kitchen to yours — I hope this recipe brings as much warmth to your table as it does to mine. — emy 🧡

📌

Love This Recipe? Save It to Pinterest!

If you enjoyed this Easy Chocolate Mousse recipe, don’t let it get lost in your browser tabs! 😄 Pin it now so you can find it again anytime — and explore hundreds more tried-and-tested recipes waiting for you on my Pinterest boards.

👉 Follow emy on Pinterest @exorecipe

📌 Pin this recipe · 🔁 Re-pin your favorites · 💬 Tag me when you make it — I love seeing your creations!

Print
clock clock iconcutlery cutlery iconflag flag iconfolder folder iconinstagram instagram iconpinterest pinterest iconfacebook facebook iconprint print iconsquares squares iconheart heart iconheart solid heart solid icon

Easy Chocolate Mousse Recipe (Without Eggs)


  • Author: Chef Emy

Description

This silky smooth Chocolate Mousse is made with only three ingredients and three simple steps. You won’t believe how easy it is!


Ingredients

Scale
  • 1 cup chocolate chips (I use semisweet)
  • ½ cup heavy whipping cream (for melting chocolate chips)
  • cup chilled heavy whipping cream (for whipping)
  • 12 tablespoons powdered sugar
  • ¼ teaspoon pure vanilla extract (optional, use it if you have it)

Instructions

  1. In a large bowl, heat chocolate chips and ½ cup cream until the chocolate is melted and the mixture is smooth. I do this in the microwave in 20 seconds increments, stirring well between each. Set aside to cool to room temperature, stirring occasionally (this took about 15 minutes).
  2. In the bowl of a hand mixer or stand mixer fitted with the whisk attachment, beat cups chilled cream with powdered sugar and vanilla until stiff peaks form (see note about making extra for topping). Transfer the whipped cream to the refrigerator until the chocolate has cooled to room temperature.
  3. Using a rubber/silicone spatula, fold* the whipped cream into the melted chocolate. Once fully combined, transfer the mousse into individual serving dishes and chill for at least 2 hours. The colder it is, the more firm it will be. If you'd like it softer you can leave it at room temperature for about 15 minutes before serving.