“`html
Table of Contents
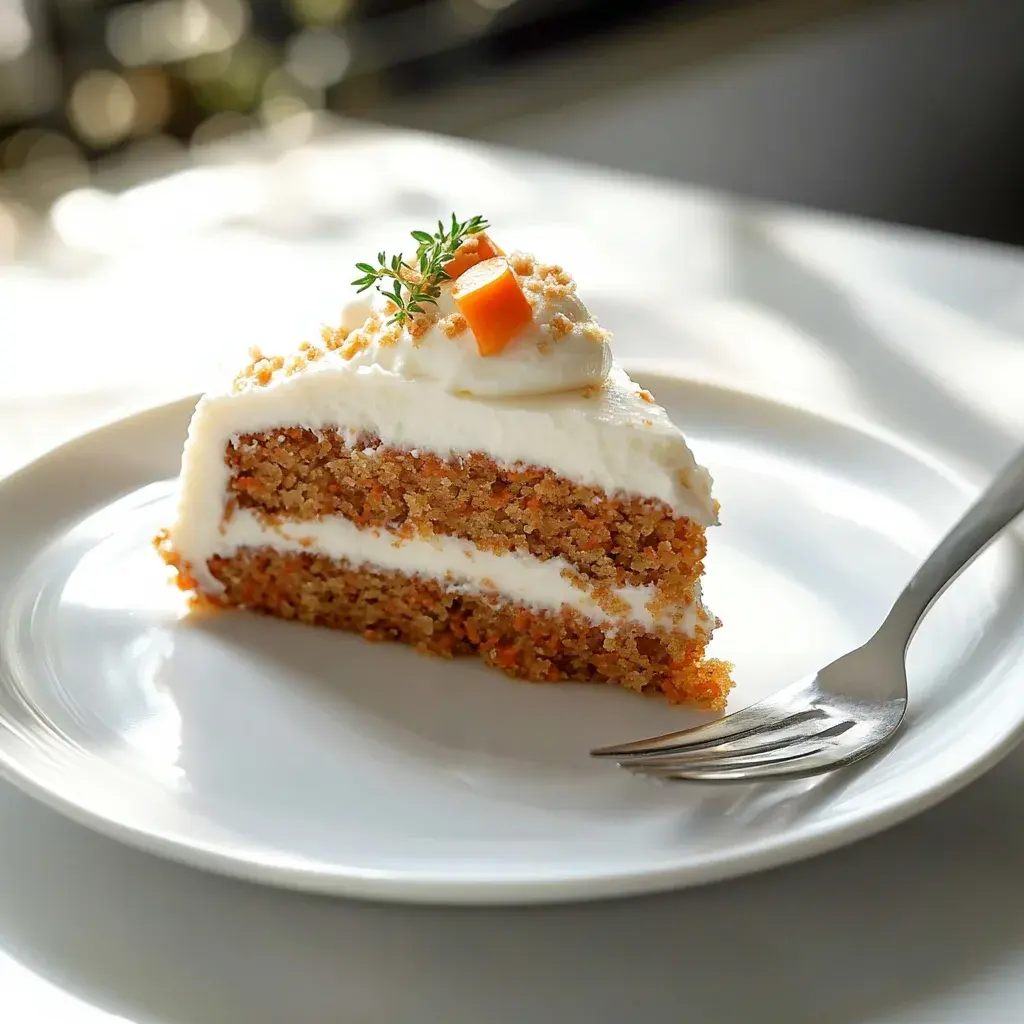
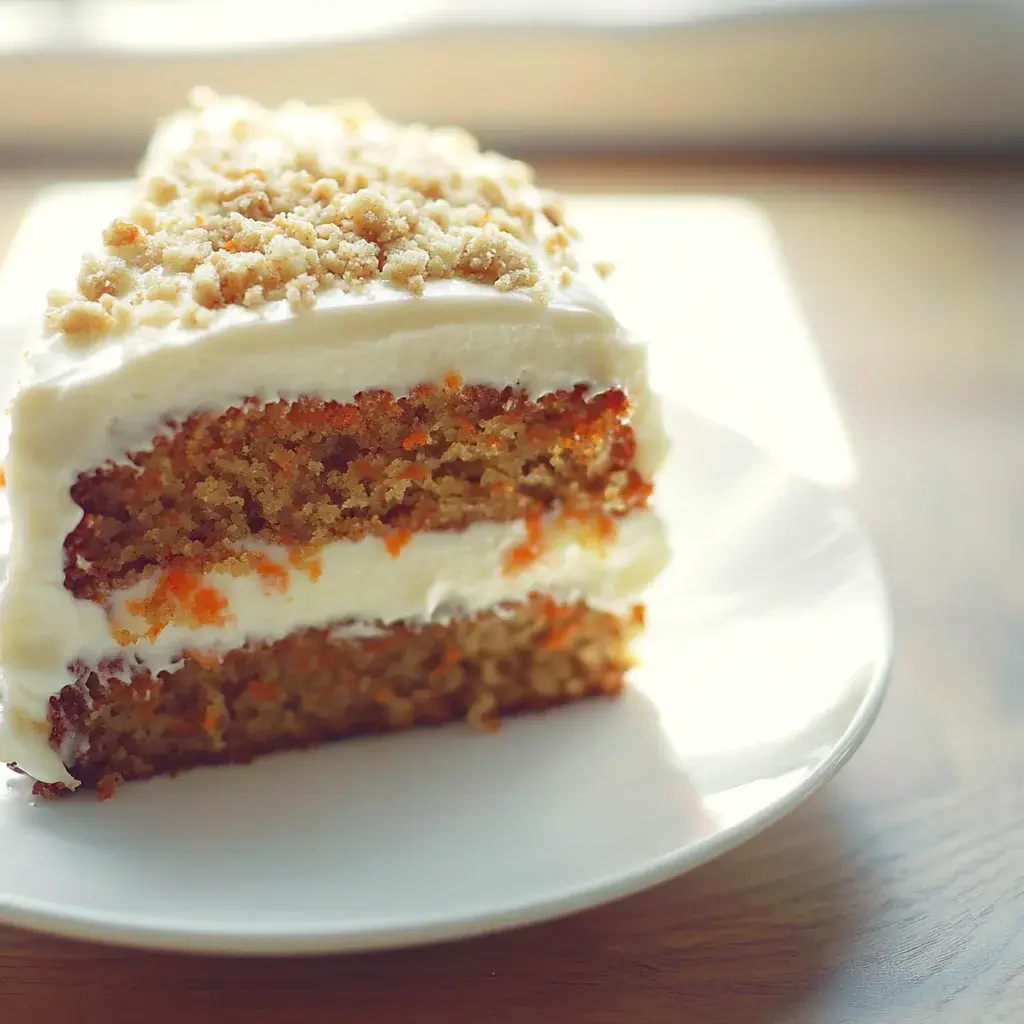
Simple Carrot Cake with Cream Cheese Frosting
Did you know that in a survey, 85% of people declared carrot cake their favorite cake flavor? If you’re among those who crave that perfect balance of spice, sweetness, and moist crumb, then you’re in for a treat! This Simple Carrot Cake with Cream Cheese Frosting is designed to deliver exactly that—a delightfully moist and flavorful cake crowned with a luscious, creamy frosting. It’s the kind of cake that transforms an ordinary day into a celebration and is guaranteed to become a staple in your baking repertoire.
A Carrot Cake Delight
There’s something incredibly comforting about a well-made carrot cake. The subtle sweetness of the carrots, the warm embrace of cinnamon and nutmeg, and the tender, moist crumb come together in a symphony of flavors that’s hard to resist. And when topped with a tangy, rich cream cheese frosting? It’s pure dessert perfection! This recipe hones in on creating that ideal texture and flavor profile without unnecessary complexity, making it accessible even for novice bakers. We’ll guide you through each step, ensuring a stunning and delicious result every time. Get ready to bake a cake that will have everyone asking for seconds (and the recipe!).
Ingredients for Your Perfect Carrot Cake
The magic of a great carrot cake lies in the quality and balance of its ingredients. We’ve kept this recipe straightforward, focusing on what truly matters for flavor and texture. For the freshest, most vibrant cake, opt for fresh ingredients where possible. Here’s what you’ll need:
For the Carrot Cake:
- 2 cups (250g) all-purpose flour: This forms the structural base of our cake.
- Substitution: You can use a 1:1 gluten-free baking blend if needed.
- 2 teaspoons ground cinnamon: The quintessential spice that gives carrot cake its warm, inviting aroma and flavor.
- Substitution: You can add a pinch of nutmeg and ginger for extra spice complexity.
- 1 teaspoon baking soda: This leavening agent helps the cake rise and achieve a tender crumb.
- Note: Ensure it’s fresh for optimal results.
- ½ teaspoon salt: Balances the sweetness and enhances the overall flavors.
- Optional Spices: ¼ teaspoon ground nutmeg, ¼ teaspoon ground ginger. These add more depth to the spice profile.
- 1 ½ cups (300g) granulated sugar: Provides sweetness and contributes to the cake’s moisture.
- Substitution: You can use light brown sugar for a slightly chewier texture and caramel notes.
- ¾ cup (180ml) vegetable oil: Crucial for a wonderfully moist cake.
- Substitution: Melted coconut oil or a neutral-flavored oil like canola will also work.
- 4 large eggs: Bind the ingredients together and add richness. At room temperature, they incorporate more smoothly.
- 1 teaspoon vanilla extract: Enhances the sweet notes and adds a classic aroma.
- 2 cups (about 3 medium) grated carrots: The star ingredient! Grating them finely ensures they blend seamlessly into the batter for maximum moisture and subtle sweetness.
- Tip: Use the small holes of a box grater or a food processor with a shredding attachment.
- ½ cup chopped walnuts or pecans (optional): Adds a delightful crunch and nutty flavor. Toasting them beforehand enhances their taste.
For the Cream Cheese Frosting:
- 8 ounces (225g) cream cheese, softened: The tangy, creamy base. Ensure it’s at room temperature for smooth blending.
- ½ cup (113g) unsalted butter, softened: Adds richness and stability to the frosting.
- 4 cups (480g) powdered sugar, sifted: For sweetness and a smooth, luscious texture. Sifting prevents lumps.
- 1 teaspoon vanilla extract: Rounds out the flavors.
- 1-2 tablespoons milk or heavy cream (optional): To achieve desired consistency.
Timing Your Sweet Creation
This recipe is designed for efficiency without compromising on quality. Compared to an average carrot cake recipe that might take 1 hour 15 minutes or more, our streamlined process gets you to deliciousness faster. The prep time allows for careful ingredient combining and grating, while the cook time is optimized for even baking.
Step-by-Step Instructions
Step 1: Preheat and Prep
First things first, let’s get your oven and pans ready. Preheat your oven to 350°F (175°C). Grease and flour a 9×13 inch baking pan, or two 8 or 9-inch round cake pans. Alternatively, you can line them with parchment paper for easier removal. This step ensures your cake won’t stick and will bake evenly.
Step 2: Combine Dry Ingredients
In a large bowl, whisk together the all-purpose flour, ground cinnamon, baking soda, salt, and any optional spices like nutmeg and ginger. Whisking them together well before adding wet ingredients ensures that the leavening agents and spices are evenly distributed throughout the batter, preventing pockets of flavor or uneven rising.
Step 3: Combine Wet Ingredients
In a separate medium bowl, whisk together the granulated sugar, vegetable oil, eggs, and vanilla extract until well combined. Make sure the eggs are fully incorporated. The oil will help create that signature moist texture.
Step 4: Mix Wet and Dry
Pour the wet ingredients into the bowl with the dry ingredients. Mix them together using a spatula or wooden spoon until just combined. Be careful not to overmix; a few streaks of flour are okay at this stage. Overmixing can develop the gluten too much, leading to a tough cake.
Step 5: Add Carrots and Nuts
Gently fold in the grated carrots and the optional chopped nuts (if using) into the batter. Distribute them evenly throughout the batter. The carrots will add moisture and natural sweetness, while the nuts provide a lovely textural contrast.
Step 6: Bake
Pour the batter evenly into your prepared baking pan(s). If using round pans, divide the batter equally. Bake for 30-35 minutes for a 9×13 pan, or 25-30 minutes for round pans, or until a wooden skewer or toothpick inserted into the center of the cake comes out clean. The cake should be golden brown and spring back slightly when lightly touched.
Step 7: Make Cream Cheese Frosting
While the cake is cooling, prepare the frosting. In a large bowl, beat the softened cream cheese and softened butter together with an electric mixer until smooth and creamy. Gradually add the sifted powdered sugar, mixing on low speed until incorporated. Then, increase the speed and beat until light and fluffy. Stir in the vanilla extract and a tablespoon or two of milk or cream, if needed, to reach your desired spreading consistency.
Step 8: Frost the Cake
Once the cake has completely cooled (this is crucial for frosting to not melt!), spread the cream cheese frosting evenly over the top. If you baked round layers, you can frost between the layers as well as the top and sides.
Nutritional Information
- Calories: Approximately 400-450 per serving (varies based on frosting and portion size).
- Carbohydrates: ~50-60g
- Fat: ~20-25g
- Protein: ~4-6g
- Fiber: ~2-3g
*Disclaimer: Nutritional information is an estimate and may vary based on ingredients and portion sizes.
Healthier Alternatives
Looking to make this delightful cake a bit lighter without sacrificing flavor? Here are a few swaps:
- Sugar Reduction: Reduce the granulated sugar by ¼ cup and increase the grated carrots for natural sweetness. You can also use a sugar substitute suitable for baking.
- Oil Swap: Substitute half of the vegetable oil with unsweetened applesauce for added moisture and fewer calories.
- Whole Wheat Flour: Replace up to half of the all-purpose flour with whole wheat flour for added fiber.
- Lighter Frosting: Use a Greek yogurt-based frosting or a whipped cream frosting with less sugar. For cream cheese frosting, consider using reduced-fat cream cheese and ensuring it’s full-fat butter for structure.
Serving Suggestions
This simple carrot cake is wonderful on its own, but here are a few ideas to elevate your serving:
- Garnish: Sprinkle extra chopped nuts or a few small, decorative carrot shapes made from fondant on top of the frosting.
- With Fruit: Serve alongside a fresh fruit salad or a dollop of berry compote for a vibrant contrast.
- Coffee Pairing: It’s an excellent accompaniment to a warm cup of coffee or tea.
Common Mistakes and How to Avoid Them
Even with simple recipes, a few common pitfalls can arise. Here’s how to sidestep them:
- Overmixing the Batter: This develops gluten and can result in a tough or dense cake. Mix wet and dry ingredients until *just* combined.
- Not Grating Carrots Finely: Large chunks of carrot can make the cake uneven in texture. Finely grate them for a cohesive crumb.
- Frosting a Warm Cake: This will lead to a melted, messy disaster. Always allow the cake to cool completely before frosting.
- Using Old Baking Soda: Expired baking soda won’t leaven properly, leading to a flat cake. Test its potency by adding a teaspoon to hot water—it should bubble vigorously.
Storing Tips
To keep your carrot cake delicious:
- Room Temperature: For up to 2 days, store the frosted cake in an airtight container at cool room temperature.
- Refrigeration: For longer storage (up to 4-5 days), refrigerate the cake in an airtight container. Let it come to room temperature for about 30 minutes before serving for the best texture and flavor.
- Freezing: Unfrosted cake layers can be wrapped tightly and frozen for up to 3 months. Thaw them at room temperature before frosting.
Conclusion
This Simple Carrot Cake with Cream Cheese Frosting is a testament to how straightforward ingredients can create something truly spectacular. Its moist crumb, warm spice notes, and creamy tang make it a universally loved dessert. Whether you’re baking for a special occasion or simply craving a slice of homemade comfort, this recipe is a reliable winner. Don’t hesitate to try it – your taste buds will thank you! Give it a bake, share it with loved ones, and savor every delicious bite.
Frequently Asked Questions
***What kind of carrots should I use?***
Fresh, medium-sized carrots work best. Avoid pre-shredded carrots as they can be drier. Grate them yourself for the best moisture content and flavor.
***Can I make this cake dairy-free?***
Yes, you can adapt it. Use a dairy-free milk alternative for the frosting and ensure your butter substitute is dairy-free. For a dairy-free cream cheese frosting, look for commercially available vegan cream cheese alternatives.
***Why is my carrot cake dense?***
A dense cake is often a result of overmixing the batter, which develops the gluten in the flour. Mix your wet and dry ingredients only until they are just combined.
***Can I omit the nuts?***
Absolutely! If you have nut allergies or simply don’t like nuts, you can omit them entirely. The cake will still be delicious and moist.

Simple Carrot Cake with Cream Cheese Frosting
Description
Savor the delightful flavors of this moist Simple Carrot Cake topped with creamy cream cheese frosting—a perfect treat for any celebration or casual gathering.
Ingredients
- All-purpose flour
- Granulated sugar
- Baking powder
- Baking soda
- Ground cinnamon
- Salt
- Vegetable oil
- Eggs
- Grated carrots
- Chopped walnuts (optional)
- Cream cheese
- Powdered sugar
- Vanilla extract
- Milk (optional)
Instructions
- Preheat your oven to 350°F (175°C). Grease two 9-inch round cake pans or line them with parchment paper.
- In a large bowl, whisk together the flour, sugar, baking powder, baking soda, cinnamon, and salt until well combined.
- In another bowl, mix the oil, eggs, grated carrots, and walnuts (if using) until fully blended.
- Pour the wet mixture into the dry ingredients and gently fold until just combined; do not overmix.
- Divide the batter evenly between the prepared pans and bake for 25-30 minutes or until a toothpick inserted in the center comes out clean.
- While cooling, prepare the cream cheese frosting by beating together cream cheese, powdered sugar, and vanilla until smooth; add milk for desired consistency if needed.
- Once completely cooled, frost the top of one cake layer before adding the second layer on top; frost sides as desired.
Nutrition
- Calories: 367
- Sugar: 31g
- Fat: 20g
- Carbohydrates: 48g
- Protein: 4g
“`