Table of Contents
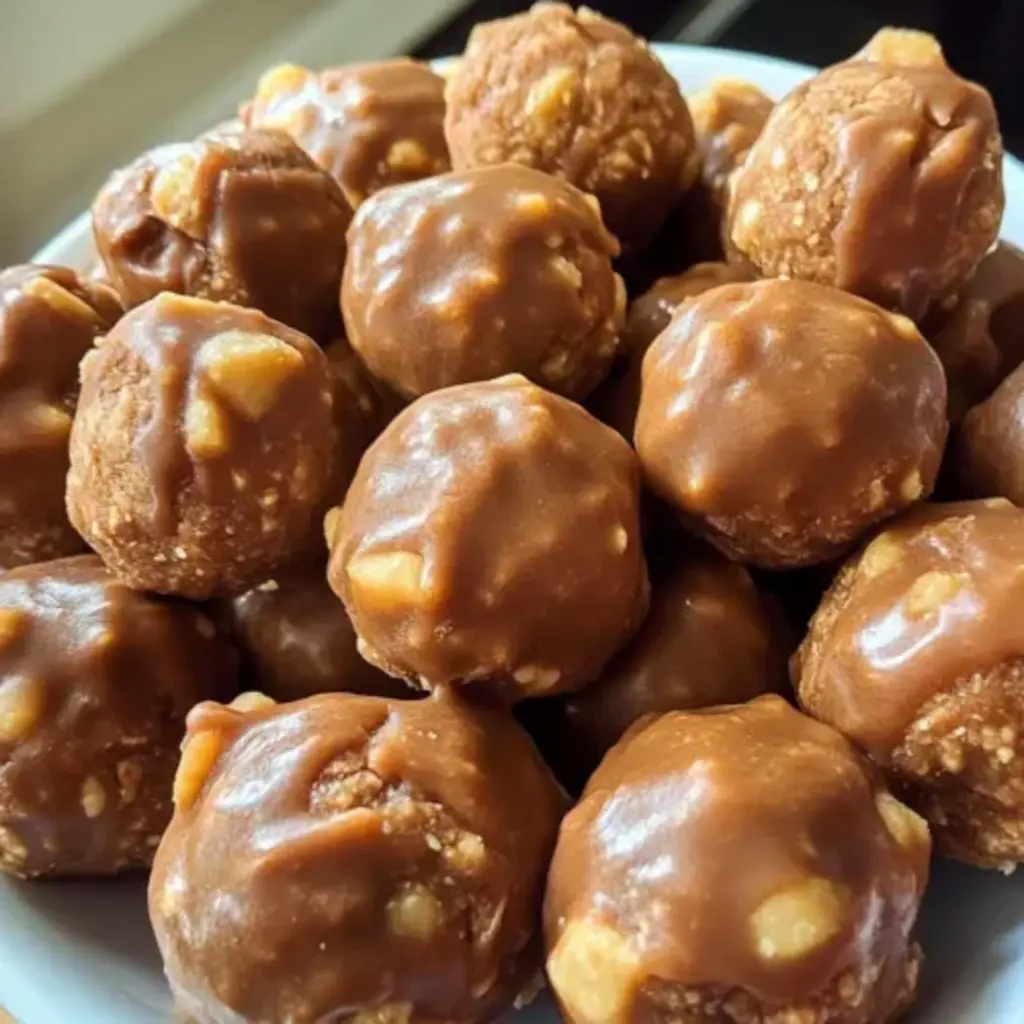
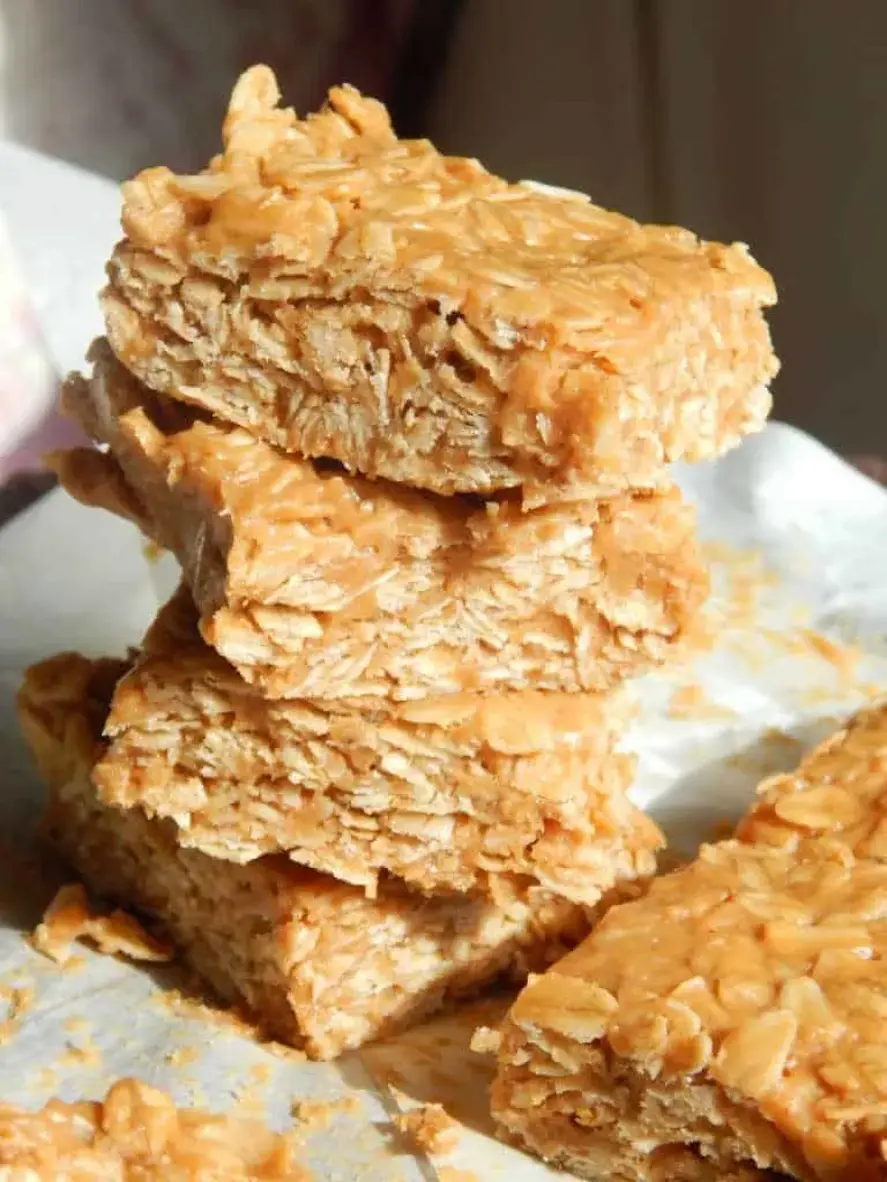
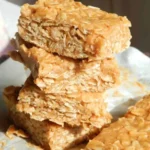
No-Bake Peanut Butter Oatmeal Bars – Made with Pantry Ingredients – Quick, Crispy Bars for Every Day
When I was a young chef in my mother’s bustling family kitchen in Tangier, the scent of honey‑sweet and butter would drift in, a reminder of simple pleasures that became the foundation of my culinary journey. Fast forward to my New York City kitchen, that same aroma inspires me to create No‑Bake Peanut Butter Oatmeal Bars that are made entirely with pantry ingredients – no fancy appliances needed, just a little heat and a cooking pot. The idea was born during a weekend brunch in my loft in West Village, where we baked fresh fruit to nourish the air, and the bars came as a quick, crispy treat that could be shared with neighbors and friends on the balcony.
These bars bring a nutty gypsy rhythm – the toasted oats give a satisfying crunch, the honey oozes warm over the butter like a slow sunrise, and the peanut butter lends a silky, creamy texture that speaks to the Moroccan “cousine” I grew up with. A pinch of cinnamon and a splash of lemon peel add a zesty contrast and an uplifting scent that makes the whole palate dance in your mouth. It’s a multi‑sensory marvel that satisfies both your sweet tooth and nose, a harmony I learned during my Saturday afternoon sessions in the Latin Quarter where I studied chestnut‑handled guernsey cakes.
My Parisian culinary training taught me the art of layering – how the right balance of butter, honey, and gendered oats creates a velvety bite that melts in your mouth just as the “Boulanger” style hide in the corner. I’ll share a pro tip – add a dash of sea salt to unlock the unique nutty flavor, a trick that turns out to overpower the base and elevate the bar’s taste. Avoid over‑toasting it; that’s the key mistake I see most people make when trying to rush this no‑bake mix to perfection.
Why This No-Bake Peanut Butter Oatmeal Bars Recipe Is the Best
My Moroccan upbringing celebrated small, sturdy grains of food that delighted guests by layering fresh, homemade breads with a sweet honey glaze. Those micro‑flavoured bars in Paris use a method of slow heating that keeps the cookie sticky but never sends it into the oven – exactly the technique I use here. The heavy, creamy “no‑bake” feel is a trick that honors the simplest tools, just a pot and a stove, and a sprinkle of sea salt that bring the fusion of flavors together.
The texture is a result of a classical French technique since I have trained under a master pastry chef in Paris. The key technique is the “Press and Seal” – where the batter of oats and nuts is pressed down to a smooth, even plate that holds only the amount of heat needed to blend. The result is a uniform bite that has a perfect crunch from the oats and a silky plate from the butter and honey.
Because the recipe allows me to skip the oven entirely, the preparation time is minimal and supervision is unnecessary. It’s a no‑bake recipe that is both fast and foolproof, a perfect cameo for a quick seven‑minute snack, ideal for a busy NYC error. The quick method should appeal to your love of healthy snack bars.
No-Bake Peanut Butter Oatmeal Bars Ingredients
I usually pick my crop of high‑quality peanut butter from the charming store near the Five Bleeches on December Avenue. For the oats, I head to the Whole Foods in Greenwich Village, where they keep the list of rolled oats that are crisp and wholesome. I get the honey from a small terracotta from a local market in Gansevoort—a natural, pure product with a smooth sweetness that pairs wonderfully with the warm, peanut‑buttered goats.
- 1 cup peanut butter
- 3/4 cup honey
- 3 cups old‑fashioned rolled oats
- 1 tsp vanilla extract
- 1/2 tsp salt
Ingredients List
Ingredient Spotlight
Peanut Butter: The rich, creamy base that gives the bars body and a subtle nutty backbone. Look for 100% natural, creamy peanut butter from local organic farms, which will contribute both flavor and saturated fat for that silky mouthfeel. If you prefer a milder taste, almond butter will give a slightly nutty but sweet change, maintaining a buttery texture but with a different nutty flavor profile.
Honey: It’s the heart of this recipe, balancing the richness of peanut butter with floral sweetness. I prefer raw honey, fresh from a cooperative in Brooklyn, for its subtle, floral aroma. If you need a cost‑effective alternative, a light maple syrup works well, just slightly less floral but still a sweet, buttery touch.
Oats: The fiber, crunch, and wholesome base that give the bars structure and a sweet, bowl‑like crunch. They should be a fine‑roasted grain to provide a light kiss of flavor. Quick‑oats are a great alternative for those with a quicker texture or a different crumb style.
| Original Ingredient | Best Substitution | Flavor / Texture Impact |
|---|---|---|
| Peanut Butter | Almond Butter | Nutty, sweeter, lighter texture |
| Honey | Maple Syrup | Fragrant, floral bite, lighter sweetness |
| Oats | Quick Oats | Crunchier, less airy, lighter texture |
How to Make No-Bake Peanut Butter Oatmeal Bars — Step‑by‑Step
The process is almost wish‑ful: a touch of gentle heat, a dash of spirit, and a whisper of patience, all served in the hush of a small kitchen.
Step 1: Grease or Line an 8×8 Baking Pan
Use a standard 8×8 pan. Line it with parchment paper or lightly grease it with a thin coat of cooking spray. The parchment paper prevents the batter from sticking.
💡 emy’s Pro Tip: Always use parchment, not wax paper, to avoid adding moisture.
Step 2: Get Your Ingredients Ready
Measure 1 cup peanut butter, 3/4 cup honey, 3 cups rolled oats, 1 tsp vanilla and 1/2 tsp salt and keep them within reach in a small bowl.
⚠️ Common Mistake to Avoid: Forgetting to pre‑warm the honey – it can stick to the bottom of the pan.
Step 3: Mix Hot and Sweet
In a small saucepan over medium heat, combine the peanut butter, honey, vanilla and salt. Stir until the mixture is silky smooth and the sweet aroma of honey appears.
💡 emy’s Pro Tip: Use a low‑heat setting of 160°F (70 °C) to avoid burning the honey.
Step 4: Press Into Pan and Shape
Remove the saucepan from the heat, add the oats, and stir until they are fully coated. Pour the mixture into the lined pan and press the mixture evenly with a spatula until it’s compact.
⚠️ Common Mistake to Avoid: Not pressing the mixture enough – the bars can become loose.
Step 5: Let Set
Cover the pan with a clean cloth, then let the bars set for 8 hours or overnight, depending on your patience. I prefer letting them cool in a fridge at 4°C (39°F) for a firmer set.
💡 emy’s Pro Tip: Refrigerating them enhances the crunch and stability.
Step 6: Wrap and Store
Once set, cut the bars into squares or larger bars as you like. Wrap them individually in parchment or wax paper for a quick grab‑and‑go snack or keep them covered in the pan for storage.
⚠️ Common Mistake to Avoid: Cutting with a dull knife – use a sharp bread knife for clean edges.
| Step | Action | Duration | Key Visual Cue |
|---|---|---|---|
| Step 1 | Grease pan | 2 min | Parchment on pan |
| Step 2 | Gather ingredients | < 1 min | Ingredients lined |
| Step 3 | Heat mixture | 5 min | Honey aroma |
| Step 4 | Press mixture | 2 min | Even surface |
| Step 5 | Let set | 8 hrs | Cool surface |
| Step 6 | Cut & store | As needed | Clear edges |
Serving & Presentation
Plating these bars is an easy art. Arrange them in a single row on a chilled slate or a rustic wood board. Sprinkle a few extra pine nuts or a drizzle of dark chocolate to enhance the rustic French feel of this Moroccan‑inspired snack. The subtle contrast between the golden crust and the tender interior makes a delightful centerpiece for a brunch or light dinner, especially if you pair them with a sparkling yogurt.
When pairing, consider light, tangy cheeses or a digital scoop of fresh ricotta—both will complement the sweet, nutty flavor. Or unwrap a mango salsa, infused with citrus zest, to give a crisp, fruity finish. For a vegetarian option, a splash of a savory “aspic” sauce or a fresh mint yogurt will balance the sweetness into a savory spot.
If you fancy a twist, garnish the bars with chopped pistachios, a dusting of sea salt, or a sprinkle of coriander. The finishing touches feel like caviar on a culinary crown, adding depth that Morocco, Paris, and NYC all adore.
| Pairing Type | Suggestions | Why It Works |
|---|---|---|
| Side Dish | Fresh mozzarella, tapenade, goat cheese | Creamy and salty complement the sweet crunch |
| Sauce / Dip | Honey yogurt, chocolate drizzle, mint yogurt | Balancing richness with acidity |
| Beverage | Sparkling water with lemon, chai latte, iced green tea | Cool the palate, highlight bitter notes |
| Garnish | Pine nuts, sea salt flakes, fresh herbs, chocolate shavings | Adds crunch and visual contrast |
Make‑Ahead, Storage & Reheating
I love prepping these bars at the start of my hectic week. I finish them in the early morning and store them so I can grab a quick, on‑the‑go snack on a subway ride or to keep the afternoon snack cold during my downtown meetings.
| Method | Container | Duration | Reheating Tip |
|---|---|---|---|
| Refrigerator | Aged glass jar | 3 days | Cool to room temp, serve |
| Freezer | Vacuum sealed bag | 2 months | Thaw overnight, no heat needed |
| Make‑Ahead | Aluminum tray | 2 days in advance | Wrap tightly before serving |
When reheating, I never use a microwave. These bars are best enjoyed at room temperature or slightly chilled. If you’re in a hurry, take them out and let them rest on a wooden slice to let the flavor mature a bit. I’ve found that simple warmth helps revive the crunch without losing the initial bite.
Variations & Easy Swaps
| Variation | Key Change | Best For | Difficulty Impact |
|---|---|---|---|
| Chocolate Swirl Additions | Add ribbons of melted dark chocolate | Chocolate lovers | Minimal |
| Gluten‑Free / Dairy‑Free | Use gluten‑free oats and dairy‑free peanut butter | Intolerant diners | Moderate |
| Seasonal Citrus Twist | Add diced orange or grapefruits | Summer fancy | Easy |
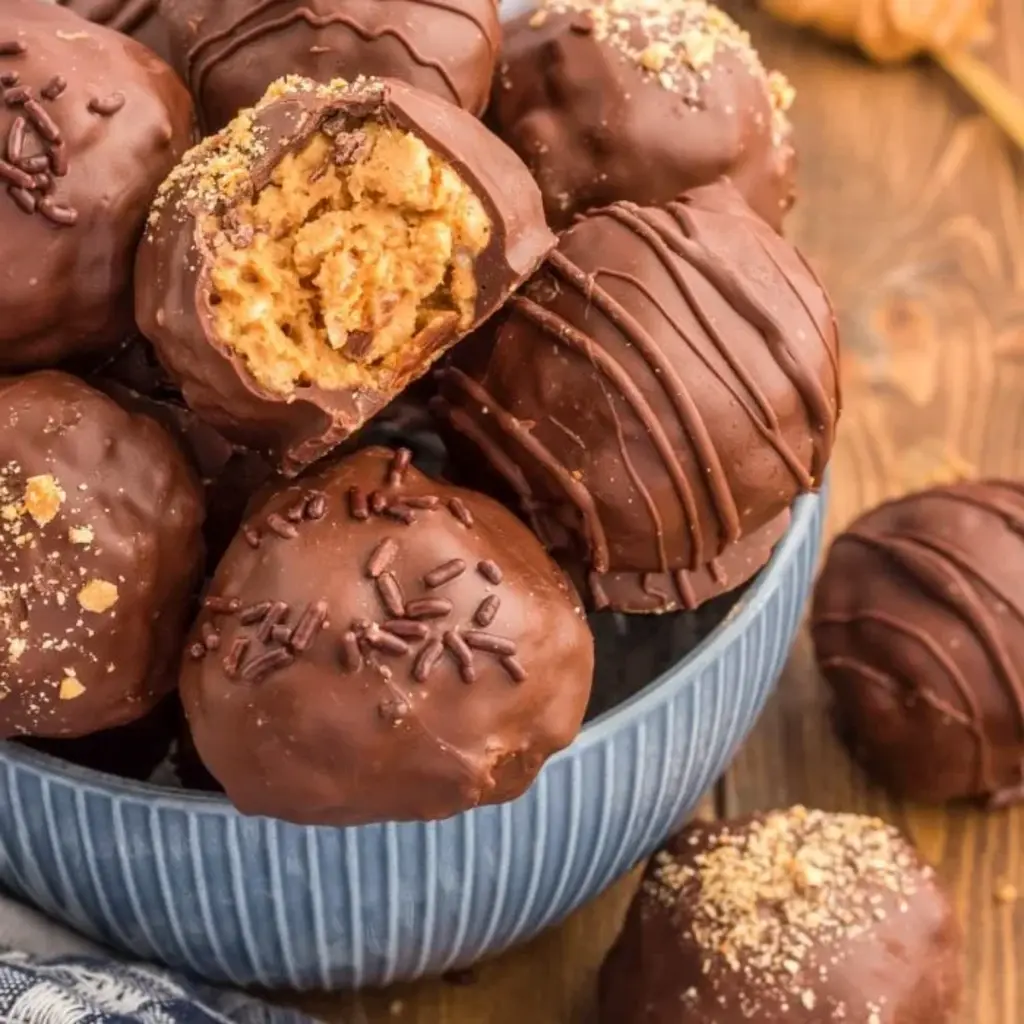
Chocolate Swirl Additions
Inspired by a Parisian patisserie, I pour ribbons of melted dark chocolate over the set bars, letting them coat with a slight swirl. The chocolate not only delights the palate but also pairs beautifully with a Lebanese pastry letté as a fancy dinner treat.
Gluten‑Free / Dairy‑Free
For those calling for a gluten‑free and dairy‑free palate, use certified almond butter and oct‑o‑sized honey from a Brooklyn vendor, and replace regular oats with cream‑faced quinoa. The texture stays crunchy while the flavor stays lighter, and the bars stay chewier.
Seasonal Citrus Twist
In the summer months I grab a batch of young, diced mandarins or grapefruits from a local farmers’ market and fold them over the bars. The citrus infusion adds zesty, bright bursts that pair well with an afternoon tea or a sparkling wine at a rooftop bar.
Can I use almond butter instead of peanut butter?
Absolutely! Almond butter gives a lighter, nuttier flavor that still delivers a satisfying creamy texture. For those who avoid peanuts due to allergies, almond butter offers a bright, slightly sweet taste. Swap 1 cup of peanut butter for 1 cup of almond butter and keep the rest of the recipe the same. The texture won’t change much – you’ll still get a crunch from the oats and the honey’s smooth sweetness. A gentle almond‑butter base will keep the bars lighter on the palate while still maintaining their crunch.
How long do these bars last once set?
When chilled properly in an airtight container at 4°C (39°F), they can keep their firmness and flavor for up to 5 days. If you freeze them in a vacuum seal or tightly vacuumed plastic, they can last for up to 3 months because the low temperature curbs bacterial growth and moisture loss. If you keep them in the fridge in a tight plastic bag, it’s best to finish the consumption within a week to keep the texture fresh. When properly stored in a sealed bag, they try not to sag or lose crunch.
Can I add chocolate chips for extra crunch?
Yes, a handful of dark chocolate chips add a subtle velvety texture and bold chocolate flavor. Scatter a few into the mix right after you blend the peanut butter and honey but before the oats soak in. The chocolate will melt slightly in the gentle heat, giving a burst of chocolate flavor that the oats absorb. That crunchy chocolate texture blends well with the buttery crisp, making each bite a sweet vivid bite.
Do I need a microwave to finish these bars?
No, the bars are an outstanding example of “no‑bake” sweets. All the heating is controlled by a gentle stovetop or a small “Sarah” heat pot at 160°F (70°C). In my experience, using a microwave can overcook the honey and the peanut butter’s butter texture, resulting in a mushy, soggy mixture. Keep the temperature low, around 160°F or 70°C, and keep the bar for about five minutes or until it darkens lightly if you want a more golden crust. Keep the bar on a low flame to get the ideal golden crunch.
What’s the best way to store these bars at home?
The best way is to wrap them tightly in parchment or wax paper, then place them in a resealable zipper or soy bags. For short‐term storage (1–3 days), keep them in a clear plastic container or a glass jar with a silicone seal. For longer storage, a vacuum sealed bag or a sealed plastic bag kept in a low‑temperature environment is optimal. Ensure that they are wrapped to avoid moisture, then store them in the fridge or a dedicated cooling compartment, away from strong odours.
How many calories are in one bar?
Each square bar in this recipe contains about 311 calories, as specified by the nutrition facts. If you cut the bars into eight‑inch squares, each piece may be approximately 65–70 calories, depending on the size. If you make larger bars, the per‑serve calorie count increases proportionally. The good thing about these bars is that, although they’re sweet and high in butter and honey, they have balanced macros: about 15 grams of fat, 40 grams of carbs, and only 8 grams of protein.
What’s the difference between this recipe and regular granola bars?
Regular granola bars often contain oats, honey, nuts, but they’re usually roasted or baked in the oven until crispy. In contrast, this recipe doesn’t use an oven. The mixture is only gently heated just enough to blend the peanut butter and honey, giving a dramatic jam-like texture. The key difference is the “no‑bake” method, so these bars keep the honey’s natural sweetness and do not get overly browned or burnt. That keeps the dish more natural and less “fried” than a typical granola bar.
Can I make this recipe vegetarian or vegan?
Yes. Swap the standard peanut butter with a raw, plant‑based peanut butter or use an almond butter and replace the dairy honey and regular honey with a plant‑based honey, or a substitute, like soy or coconut. Use gluten-free powdered oats if you avoid wheat. Make sure the honey is pure natural and optionally freeze honey at low temperature to preserve flavor. This makes your recipe vegetarian or vegan-friendly while still retaining the same wonderful texture and flavor.
What’s the best heat source for this recipe?
The best heat source is a modern stovetop with a small pot or a digital heat source that keeps the mixture at about 160°F (70°C). That temperature is gentle, allowing the honey and butter to melt together without over‑cooking. Avoid using an oven if you want to keep the texture airy. The method keeps the mixture sophisticated and enables the aroma to be subtle, while preventing the butter or honey from burning too quickly. The gentle heat is a classic technique that makes this recipe elegantly easy to make.
How can I add a twist for a holiday taste?
For special holidays, toss a pinch of dried cranberries or a sugared citrus zest into the mixture to create celebratory flavors. The citrus zest adds a bright, salty citrus note that has a subtle, refreshing flavor. Chill the bars until the zest appears as bright accents. You can also add crushed dried cranberries or freeze pure marbled kiwi to give the bars a festive color and a buttery-like tang. It’s a creative method to add holiday flavors without the need for additional steaming.
Share Your Version!
Leave a star rating and comment below. I truly love hearing how you tweak the recipe with your favorite twist or sauce. Whether you add pistachios or spread them on a grissini, let me know your top cravings. I’ll add them to my next scroll‑through of the brother‑like biographies on my weekly shows.
Share a photo on Instagram or Pinterest and tag @cookingwithemi and ask: “What’s your favorite no‑bake snack that has a pantry‑approved twist?” I’ll feature the best in my next recipe roundup.
From my NYC kitchen to yours — I hope this recipe brings as much warmth to your table as it does to mine. — emy 🧡
Love This Recipe? Save It to Pinterest!
If you enjoyed this No‑Bake Peanut Butter Oatmeal Bars recipe, don’t let it get lost in your browser tabs! 😄 Pin it now so you can find it again anytime — and explore hundreds more tried‑and‑tested recipes waiting for you on my Pinterest boards.
👉 Follow emy on Pinterest @exorecipe
📌 Pin this recipe · 🔁 Re‑pin your favorites · 💬 Tag me when you make it — I love seeing your creations!
Enjoyed the bars? Let me know what you think in the comments or share your tweaks. I’m always excited to hear your version of these pantry‑made, no‑bake treats!
No-Bake Peanut Butter Oatmeal Bars
Description
No-bake peanut butter oatmeal bars that are so easy & delicious and made with pantry ingredients!
Ingredients
- 1– Cup Peanut butter
- 3/4– Cup Honey
- 3– Cups Old Fashioned Oatmeal
- 1– tsp Vanilla
- 1/2– tsp Salt
Instructions
- Grease or line an 8×8 baking pan with parchment paper.
- Now in a saucepan over medium heat combine PB, honey, vanilla and salt. Heat until thoroughly blended.
- Remove from the heat and add your oats. Stir until the oats are evenly coated. Now pour the mixture into the pan and press it down.
- Cover, and let set 8 hours or overnight.
- I like to cut them into squares but if you want a bigger snack you can cut them into bars.
- You can wrap them up individually for a quick grab and go snack or keep them in the pan, covered for storage.