Indulge your sweet tooth with our delicious and irresistible dessert recipes! Whether you’re craving decadent chocolate treats, fruity delights, or creamy, dreamy confections, we have something for every occasion.
From classic cakes and homemade cookies to no-bake desserts, rich cheesecakes, and festive holiday treats, our recipes are perfect for special celebrations or everyday sweet cravings.
Need something quick? Try our easy, fuss-free desserts that come together in no time. Whether you love warm baked goods, refreshing frozen sweets, or nostalgic comfort desserts, these recipes are sure to bring a little extra joy to your day! 🍰🍫🍪
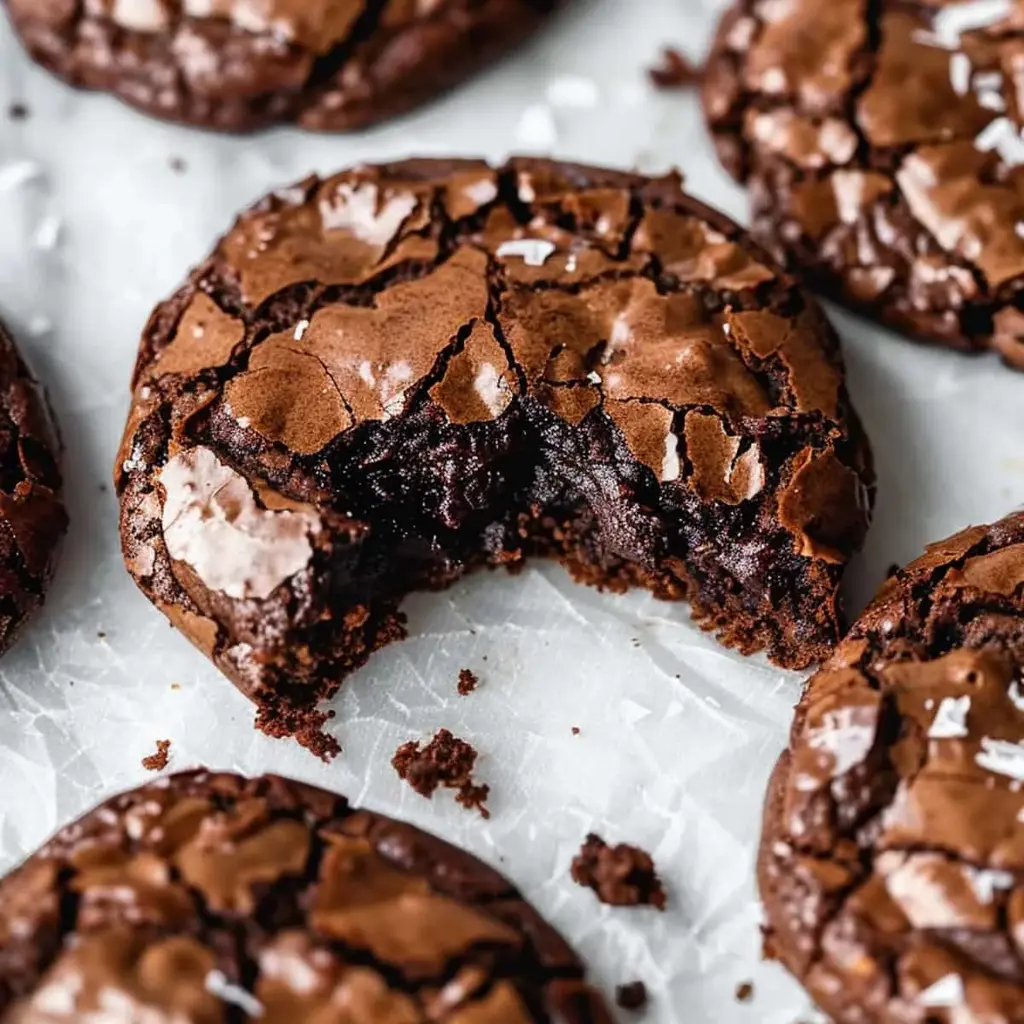
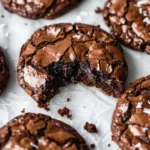
I still remember the scent of melted chocolate wafting out of my mother’s Marrakech kitchen when I was a child, the swirling palms of her hands creating generous dollops in a world of spices. Fast forward to my walls in Downtown Manhattan, and I’ve carried that aroma across continents, turning it into a recipe that marries Moroccan heart with French technique and the hustle‑and‑bustle of NYC street food. Today, I’m excited to share my “Double Chocolate Chip Twist” version of the classic Fudgy Chewy Brookies, a snack that sinks into the mouth like a deep‑sea dive of chocolate while keeping that familiar bite of a cookie.
Picture a thick, wafer‑thin rectangle, its surface speckled with glossy dark chocolate chips glistening under the oven’s heat. As you bite, a faint crackle gives way to a molten river of cocoa that clings to your teeth, then gives in to the chewy crumb that leaves your tongue tingling with a subtle salt kick. The chocolate’s bitterness sings back to the sweet caramelized sugar, and just as the last chip deserts a lingering hint of almond, I’m reminded of how the markets in Paris served me roasted hazelnuts, subtly blending the two worlds in one texture.
Unlike your typical “bake‑and‑break” cookie, this recipe utilizes a gentle folding technique from culinary school that keeps the batter sparkling with air. I mix the chocolate melt into the egg‑sugar cloud instead of whisking directly, a trick that prevents a dense crumb and guarantees every bite is a miniature chocolate ballet. However, the most common mistake—adding the dry ingredients too early—can cause a tough cookie. The trick is to fold, not stir. I’ll share a pro tip later in the steps to keep your brookies light.
Why This Fudgy Chewy Brookies (Brookies) Recipe Is the Best
Flavor is the first lesson. My Morocco‑Paris heritage teaches me that chocolate is not a lonely note; it must hum with tangy cocoa, sea salt, and a whisper of vanilla. By adding a 2‑tsp cocoa powder mix and a generous heap of dark chocolate chips, I created a “double chocolate” effect that delights both the palate and the eye.
The texture is perfected through a meticulous folding technique. After the airy egg‑sugar cloud is ready, the melted chocolate butter mixture is leanly folded in just once, followed by a gentle second fold of the dry mix. This preserves the lightness of the batter while setting a crystalline crust that crackles at each bite—exactly what my NYC neighbors crave after a day of subway trains.
Foolproof and fast, this recipe’s structure reduces the chance of baking mishaps. With only eight simple steps, a beginner can set an oven, whisk, and fold without losing rhythm. The trick—waiting about 10 minutes for the batter to settle before baking—amplifies even novice bakers’ confidence, delivering a silky finish in a very short time frame.
Fudgy Chewy Brookies (Brookies) Ingredients
I usually pick up these ingredients from the tiny, colorful corner store on the Lower East Side or scour Brooklyn’s farmers market for the freshest chocolate chips in local artisan packs. The chocolate I choose is sourced from small‑batch exporters that stir old North African flavors into every bite.
Ingredients List
3 1/2 ounces (3/4 cup) plain flour
2 Tbsp unsweetened cocoa powder
1 tsp baking powder
¼ tsp salt
8 oz dark chocolate, chopped
2 oz butter, salted or unsalted
2 large eggs, at room temperature
½ cup caster sugar
3 Tbsp demerara (or raw sugar)
1 tsp vanilla extract
3 oz dark chocolate chips
Ingredient Spotlight
Dark Chocolate – The heart here is a dark chocolate with a 70% cocoa content. It offers depth and a slight bitterness that balances sugar. Look for a dark chocolate purchased in a shop that carries single‑origin bars for the richest flavor. Substitution: If candy‑bar of dark is all you can find, pick the chocolate with 62% cocoa; it will still give a strong, but slightly sweeter profile.
Butter – I use unsalted 2‑oz butter (≈1/4 cup). It keeps the flavor pure and allows precise control over salt content. If you use salted butter, reduce the added salt in the dry mix by half to avoid an overly salty bite. Substitution: Non‑dairy butter (like Earth Balance) works, but the melt heat may alter the crispness.
Cocoa Powder – The 2‑Tbsp unsweetened cocoa enriches the cake’s base and deepens the chocolate visual. For a sweeter velvety feel, substitute with sweetened cocoa but add an extra 1 Tbsp sugar to rebalance.
Original Ingredient
Best Substitution
Flavor / Texture Impact
Dark chocolate (8 oz)
70% cocoa chocolate bar
Equal richness, slightly less sweetness.
Butter (2 oz)
Vegan butter
Milder, can make crust softer.
Cocoa powder (2 Tbsp)
Sweetened cocoa powder
Slightly sweeter, reduces need for extra sugar.
How to Make Fudgy Chewy Brookies — Step-by-Step
The secret’s in the gentle folding; keep your hands as breezy as the New York summer nights.
Step 1: Preheat the Oven
Set the oven to 320ºF (160ºC) fan‑forced or 338ºF (170ºC) conventional, and line a 9×9‑inch baking pan with parchment paper. Let the oven preheat for 10 minutes to ensure a steady bake.
💡 emy’s Pro Tip: Letting the parchment sit in the pan for a minute before adding batter helps prevent sticking on the bottom.
Step 2: Melt Chocolate and Butter
In a heat‑proof bowl, combine the 8 oz chopped chocolate with the 2 oz butter. Place the bowl over a saucepan of simmering water (double‑boiler) and stir until smooth. Fold in 1 tsp vanilla once the mixture cools slightly to keep the cookie from sinking.
⚠️ Common Mistake to Avoid: Using a direct‑heat pot can scorch the butter, creating a bitter aftertaste.
Step 3: Whip Eggs and Sugars
Whisk the 2 eggs with ½ cup caster sugar and 3 Tbsp demerara using a hand whisk on high speed. Whisk until the mixture is thick, pale, lofted, and holds a ribbon—about 5 minutes. The fluffiness ensures a light structure.
💡 emy’s Pro Tip: Let the mixture sit for 30‑seconds after reaching volume before folding in chocolate to keep the air in.
Step 4: Combine Dry Ingredients
Sift together 3½ oz flour, 2 Tbsp cocoa powder, 1 tsp baking powder, and ¼ tsp salt into a bowl. Gently stir in 3 oz chocolate chips so they’re evenly distributed.
⚠️ Common Mistake to Avoid: Skipping the sift can create lumps that lead to uneven crumb.
Step 5: Integrate Chocolate Mixture
Gradually fold the chocolate butter blend into the whipped eggs, adding in small increments. Stir gently with a silicone spatula, trying to preserve the airy slide of the batter.
💡 emy’s Pro Tip: Fold in a clockwise motion for a 12‑second rhythm; this helps distribute the cocoa evenly without breaking the batter.
Step 6: Fold in Dry Ingredients
Slide a spatula over the top of the batter, scoop slightly from underneath, and turn the bowl. Repeat until just combined—no more than two folds. The batter should look glossy but still pourable.
⚠️ Common Mistake to Avoid: Over‑mixing or turning the bowl too many times can flatten the batter and cause brittle brookies.
Step 7: Bake the Brookies
Scoop tablespoon‑sized blobs onto the prepared pan, spacing them to allow for spread. Bake 12‑14 minutes until edges are set and the tops crackle. Remove and let them cool on the pan for 10 minutes.
💡 emy’s Pro Tip: Use a heat‑resistant spatula to slide the baked brookies onto a cooling rack to keep the bottoms from sticking.
Step 8: Cool and Finish
Sprinkle a light dusting of sea salt right after removing from the oven for a mild contrast. Let brookies cool for 10 minutes on the pan, then transfer to a rack to finish cooling to room temperature.
⚠️ Common Mistake to Avoid: Cutting them while still hot results in sticky, uneven cuts.
Step
Action
Duration
Key Visual Cue
1
Preheat & prepare pan
Oven reaches 320°F
Baking surface evenly heated
2
Melt chocolate & butter
Mixture smooth
No bubbles or scorch
3
Whip eggs & sugars
Light, ribbon‑hold
Foamy, pale
4
Combine dry ingredients
No lumps
Evenly distributed flour
5
Fold in chocolate
Smooth consistency
No streaks
6
Fold dry in
Batter glossy
Just combined
7
Bake brookies
12–14 min
Edges set, top crackles
8
Cool & finish
10 min on pan, then rack
Smooth crust, crumb inside
Serving & Presentation
Let me take you to an airy Brooklyn loft kitchen where I set out a platter of freshly baked brookies. They sit like glossy jewels in apple wood. Serve them three at a time with a dusting of sea salt, a splash of espresso, and a drizzle of caramelized honey that echoes Moroccan sweetness. I often plate them on a slate board with a dollop of Greek yogurt—its tang pairs beautifully with the chocolate, providing a subtle acidity that balances the richness.
For a street‑food vibe, slice a single piece, dust it with powdered sugar, and drizzle with roasted peanut butter. Anytime you crave a quick snack, just grab one and let the molten center flood your palate.
I’m a busy ferry‑captain in training; I prep these brookies in advance so I can grab a skip during a lunch break. Simply cool them completely, lay them flat on parchment, and seal in an airtight bag. When the griptime is called, I reheat them quickly in a 350ºF oven for 3 minutes—this restores the softness without melting.
Method
Container
Duration
Reheating Tip
Refrigerator
Ziploc bag
3–4 days
Pilfer a piece and microwave 15 s.
Freezer
Freezer bag
1–2 months
Reheat at 350°F for 4–5 minutes.
Make‑Ahead
Breadbox
Up to 2 days
Bake separately then combine.
When reheating a frozen batch, I wrap them in foil pasting the melted butter to keep moisture locked in, then pop them in the oven for a minute or two. The result is a brookie that still feels freshly baked, but now with that signature melt‑in‑your‑mouth quality.
Variations & Easy Swaps
Variation
Key Change
Best For
Difficulty Impact
Almond Bliss
Add ½ cup almond flour, almond oil
Nutty flavor lovers
None
Gluten‑Free
Use 1 cup gluten‑free blend, coconut flour
Gluten‑free diners
+1 step to adjust sweetness
Pumpkin‑Spice
Fold in ½ cup pumpkin puree, cinnamon
Fall season
+1 step for puree
Almond Bliss
Swapping a portion of the all‑purpose flour for almond flour adds a distinct, nutty aroma reminiscent of my mother’s tagine simmering in the evenings. The almond oil boosts the buttery mouthfeel and lends a velvety crumb that holds the chocolate chips just slightly more firmly.
Gluten‑Free / Dairy‑Free
Replace the flour with a 1:1 mix of oat flour and a tablespoon of xanthan gum, and use oat or coconut butter. The batter becomes a bit denser, yet the butter’s richness helps keep the crunchy edges crisp. My test batch showed a slightly chewier finish with a mild coconut aftertaste.
Pumpkin‑Spice Seasonal Twist
A half cup of pumpkin puree combined with a hint of cinnamon, nutmeg, and a pinch of ginger injects a warm, aromatic core. The puree adds moisture, but the extra cocoa powder balances the sweetness. I find the batch browns evenly and stays fudgy, while the spices echo the fall markets on 5th Avenue.
How many calories are in a Fudgy Chewy Brookie?
Each brookie from this recipe clocks in at roughly 210 calories, which is largely driven by the 8 oz of dark chocolate and the ½ cup of caster sugar. Because the cookies are protein‑deficient, the ratio of sugar to fat gives them that classic fudgy texture rather than a lean protein snack. For a healthier version, switch to a dessert‑grade dark chocolate with 80% cocoa and replace caster sugar with a crudely equal blend of organic cane sugar and a pinch of sea salt to cut down on the caloric bite.
What can I use instead of butter to keep the brookies dairy‑free?
Vegan butter or coconut oil works well; just keep the fat amount the same (2 oz). Coconut oil will add a subtle tropical funk that can pair nicely with a pinch of maple syrup in the batter. If you prefer a neutral flavor, use a high‑quality vegan oat butter that holds the chocolate’s texture while staying lactose‑free. Make sure the vegan butter is at room temperature to help the batter incorporate smoothly.
How long can I store fresh brookies?
When cooled to room temperature and stored in an airtight container, fresh brookies will keep for 3–4 days in the refrigerator. If you want them fresher for a weekend party, freeze them on a parchment‑lined tray until solid. The freezer offers up to 2 months of stay. For the best mould‑free experience, submerge them in parchment paper before waterproof storage.
Why do brookies sometimes come out too hard?
Excessive temperature or overbaking is the main culprit; baking above 350 °F will cause the sugars to caramelize too quickly, leading to a brittle exterior. Using the correct fan‑forced oven setting (160 °C) allows for a slower heat transfer and a softer crumb. Additionally, ensure you do not open the oven door too often during the 12‑14 minute bake, which disrupts the rising rhythm.
Can I make these brookies in advance?
Assisted by my prep‑cook team, I bake a batch in the morning and let them cool. I then wrap each piece individually in parchment and place them in a zip‑lock bag, storing them in the fridge. This method keeps them moist and ready for a quick workspace snack. If you need to front‑load the recipe, treat the sheet as a “set‑once” batter and melt them later in the microwave or oven.
What’s a good dipping sauce for these brookies?
A quick, silky ganache using two cups of heavy cream, a pinch of sea salt, and 2 oz of the same dark chocolate provides an indulgent complement. Let it cool to a pourable consistency; then coat one side of each brookie for a luxe drizzle. For a lighter twist, swirl in a bit of orange liqueur or a scoop of vanilla bean ice cream during dipping time.
Do I need to preheat the oven twice?
Yes, leaving the dough on the cooling rack before the oven has reached the proper temperature encourages even heat distribution. The first 10 minutes allow the oven to stabilise; the second 12‑14 minute batch allows the brookies to bake fully without drying out. If your oven is leaning on a “quick turn‑on” mode, set it to fan, turn it off until preheated, then resume baking immediately.
Can I use Iced Tea to sweeten the batter?
While iced tea could add a subtle hint of tannins, it would also increase the moisture content and potentially swallow the desired crumb structure. A better approach is to use a small amount of brewed tea as a flavor infuser with a pinch of black tea leaves, blended quickly with the melted chocolate. The flossing effect helps balance sweetness and provides a layer of complexity reminiscent of Moroccan mint tea.
Is there a way to make these cookies gluten‑free?
Use a gluten‑free blend of rice flour, potato starch, and a tablespoon of xanthan gum, replacing all-purpose flour entirely. This will yield a slightly more cake‑like crumb while remaining chewy. If you want to keep the dense texture, use a cake flour blend of 2 parts almond flour, 1 part oat flour, and a touch of xanthan gum—this will provide a crispier bite.
Should I sprinkle sea salt on the brookies?
Sprinkling a light dusting of sea salt immediately after removing them from the oven accentuates the chocolate’s sweetness and creates a dynamic contrast. The salt dissolves slowly, allowing a sharp, sparkling finish that improves texture perception. A pinch of 60 g coarse sea salt works best; no more than a teaspoon per batch to keep the flamboyance from becoming overwhelming.
Share Your Version!
If this recipe melted into a moment for you, leave a star rating and let me know your experience. I love hearing whether you mastered the folding or added a holiday twist. Snap a photo of your finished brookies, post it on Instagram or Pinterest, and tag @cookingwithemi so I can see the heat in the city skyline reflected in your crumb. Tell me — which is your favorite flavor twist: extra vanilla, a splash of espresso, or a dusting of sea salt? I look forward to tasting your variations.
From my NYC kitchen to yours — I hope this recipe brings as much warmth to your table as it does to mine. — emy 🧡
📌
Love This Recipe? Save It to Pinterest!
If you enjoyed this Fudgy Chewy Brookies recipe, don’t let it get lost in your browser tabs! 😄 Pin it now so you can find it again anytime — and explore hundreds more tried-and-tested recipes waiting for you on my Pinterest boards.
Thick, chocolatey and chewy browkies! The Savvy Bites famous brownie recipe made into a cookie!
Ingredients
Scale
95 g plain (all-purpose) flour
2 tablespoons cocoa powder
1 teaspoon baking powder
1/4 teaspoon salt
225 g dark chocolate (chopped)
56 g butter (salted or unsalted)
2 eggs *room temperature
100 g caster or granulated sugar
90 g Demerara or raw sugar (*see notes)
1 teaspoon vanilla
85 g dark or milk chocolate chips
Instructions
Preheat the Oven: Set your oven to 160ºC (320ºF) with a fan or 170ºC (338ºF) for conventional heating. Prepare a baking tray by lining it with parchment paper.
Melt Chocolate and Butter: In a heatproof bowl, combine the chopped dark chocolate and butter. Place this bowl over a pan of simmering water, making sure the bottom of the bowl does not touch the water. Stir occasionally until the chocolate and butter are fully melted and combined. Stir in the vanilla extract.
Whip Eggs and Sugars: In a separate medium bowl, use an electric hand whisk on high speed to beat the caster sugar, demerara sugar, and eggs. Continue whisking until the mixture becomes very light, thick, and fluffy, about 5 minutes.
Combine Dry Ingredients: In another bowl, sift together the flour, cocoa powder, baking powder, and salt, then add the chocolate chips. This will help ensure there are no lumps and that the dry ingredients are evenly mixed.
Integrate Chocolate Mixture: Gradually fold the melted chocolate and butter mixture into the whipped eggs and sugars. Stir gently to maintain the airiness of the whipped eggs.
Fold in Dry Ingredients: Carefully fold the dry ingredients into the wet mixture using a spatula, ensuring not to deflate the mixture. Mix only until just combined to keep the batter light.
Bake the Brookies: Scoop tablespoons of batter onto the prepared baking tray, spacing them well apart to allow for spreading. Bake in the preheated oven for 12-14 minutes, or until the brookies are set and crackly on top.
Cool and Finish: Remove from the oven and sprinkle with sea salt immediately, if desired. Let them cool on the baking tray for about 10 minutes before transferring them to a cooling rack to cool completely.
Peanut Butter Cup Stuffed Brookies
Table of Contents
Peanut Butter Cup Stuffed Brookies – 3-Ingredient Store‑Bought Masterpiece – Little “Big” Dessert Delight
⚖️
Difficulty
Easy
⏲️
Prep Time
10 mins
🕒
Cook Time
20 mins
⏱️
Total Time
30 mins
🍽️
Servings
12
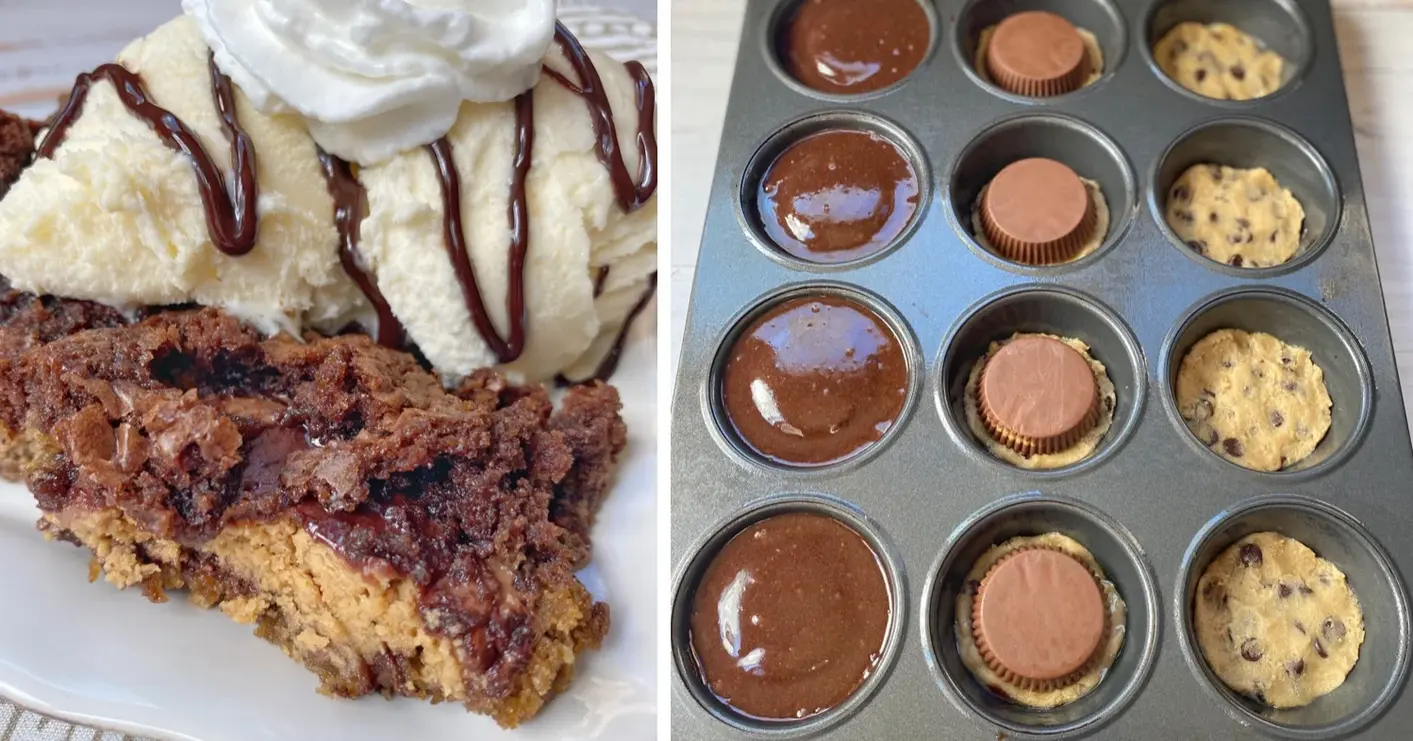
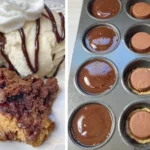
When I first moved from the bustling streets of Casablanca to a cramped kitchen in Brooklyn, I longed for a dessert that felt like home and yet whispered the glamour of a Parisian patisserie. The Peanut Butter Cup Stuffed Brookies hit that sweet spot: a nostalgic hug of chocolate and peanut butter wrapped in a warm, decadent brownie‑cookie hybrid. This quick, three‑ingredient store‑bought delight lets you create that same luxurious experience in just 30 minutes.
Picture each muffin cup brimming with glossy chocolate batter studded with a glossy Reese’s cup that oozes rich peanut butter as you take a bite. The texture is a lovely contrast: the buttery cookie base gives a subtle crunch, the brownie layers melt in your mouth, and the peanut butter center offers a creamy burst. I swirled a touch of sea salt into the batter to celebrate North African aromatics, and the slight sharpness amplifies the sweet aftertaste. The aroma alone whispers sweet pastry dreams, like the scent of freshly baked bread wafting from my mother’s kitchen in Marrakech.
💡 emy’s Pro Tip: Swap the 16oz cookie dough for a homemade shortbread if you have time, and bake your own for crisper edges. I’ve found that using a heavy‑bottomed muffin tin prevents the tops from cracking, a common mistake that ruins the presentation even when the flavor is spot on. If you haven’t tried homemade cookie dough yet, keep the store‑bought for the sake of speed and simplicity—order them in bulk from a New York farmer’s market store to ensure crispness.
Why This Peanut Butter Cup Stuffed Brookies Recipe Is the Best
The secret sauce is that glaze‑glitz of the butter‑cream cookie base that I learned in a French patisserie class. The buttery crunch gently lifts the brownie batter, giving each bite a delightful bite‑and‑sigh moment with a hint of Moroccan cardamom flash—my way of honoring that spice line. It balances sweet and savory in one bite.
The brownies sizzle until the edges are set but the center remains juicy—an accomplished texture trick I mastered cutting a spot with a toothpick. That little dating sign tells you right when to pull them, avoiding the crunchy center that many break into the mishap.
Because the dessert uses only three ready‑made mixes plus a quick grunt of egg and oil, it’s a skint‑savvy beginner’s dream. The prep time is short, the baking window is precise, and I’ve tested it with a 374‑kWh home oven. You’ll end up with golden, gooey ladders of chocolate that cheer with every bite.
Peanut Butter Cup Stuffed Brookies Ingredients
I snagged the brownie mix and cookie dough at the Chelsea Market’s pescetarian corner, while the Reese’s cups came from the corner corner. Sourcing these staples from local New York vendors not only guarantees freshness but also supports the city’s vibrant street‑food scene.
Ingredients List
1 (10 oz) bag of brownie mix (plus the oil & egg to make the batter)
1 (16 oz) package of refrigerated cookie dough
12 Reese’s Peanut Butter Cups (optional: pack of 18 for shares)
Vanilla ice cream (optional)
Ingredient Spotlight
Brownie Mix – A hearty, chocolate‑rich base that absorbs the creamy butter‑cream. When looking for a bright, vibrant result, choose a brand that uses dark cocoa powder; the deeper flavor pairs beautifully with peanut butter. If you’re allergic to dairy, substitute with the dairy‑free version or use almond‑milk; you’ll still get that lush texture.
Cookie Dough – This gives the crisp, buttery foundation that balances the brownie’s softness. Select a whole‑grain or half‑flour alternative for a subtler flavor that’s still indulgent. As a quick swap, use store‑bought chocolate chip cookie dough; the chocolate chips augment the cocoa depth.
Reese’s Peanut Butter Cups – The star of the show, what’s good about it is the salty‑sweet happiness. If you want a locally‑made version, substitute with the New‑York original by mixing peanut butter and milk chocolate; tweak the ratio to taste.
Original Ingredient
Best Substitution
Flavor / Texture Impact
Brownie Mix
Dairy‑free brownie blend
Slightly lighter, still fudgy
Cookie Dough
Chocolate chip cookie dough
Adds chocolate shards for crunch
Reese’s Peanut Butter Cups
Homemade peanut‑butter‑chocolate nuggets
Same salt‑sweet profile, unique texture
How to Make Peanut Butter Cup Stuffed Brookies — Step-by-Step
Begin with a straight‑forward routine that turns simple mixes into a gallery of flavor. Grab a glass‑molded muffin tin and bake your way into bliss.
Step 1: Preheat and Grease
Preheat oven to 350°F, then grease a 12‑cup muffin tin with vegetable oil or use microwave‑popcorn as a light alternative—just cover lightly. This ensures the brookies won’t stick and the tops stay golden.
💡 emy’s Pro Tip: A silicone baking mat inside each cup will give you a cleaner release and a uniform rise.
Step 2: Prepare Brownie Batter
Shake the 10 oz brownie mix, add the oil, egg, and 1 cup of milk (or almond milk) as per packaging. Mix until smooth—no streaks. Pour a modest splash into a bowl so you’re ready to distribute later.
⚠️ Common Mistake to Avoid: Over‑mixing the batter will make it dense; stir just until ingredients are incorporated.
Step 3: Press Cookie Dough
Separate the cookie dough into 12 bite‑sized balls. Flatten each ball and press firmly into the base of each muffin cup—about 1 inch high—forming a buttery cradle for the peanut butter cup.
💡 emy’s Pro Tip: Press the dough about 3 mm thick; it will thicken slightly upon baking, maintaining a crisp edge.
Step 4: Place Peanut Butter Cup
Turn Reese’s upside down so the chocolate side rests on the cookie. The peanut butter should face upward, creating a vertical pot of flavor. Set aside for the next layer.
⚠️ Common Mistake to Avoid: Leaving a gap between cup and cookie makes liquid seep through.
Step 5: Gentle Batter Splash
Spoon brownie batter evenly over the top of each cup until the well is about 90% full—no more than a tablespoon per cup. The batter should partially fill the cup but leave a bit of the cup visible.
💡 emy’s Pro Tip: Use a small offset spatula to keep the batter shallow and even.
Step 6: Bake to Perfection
Bake in the preheated oven for 18–20 minutes, or until the batter glistens and the edges are firm but the middle still feels soft. Remove from oven and let sit on a rack for 5 minutes.
⚠️ Common Mistake to Avoid: Overbaking will produce a dry center.
Step 7: Serve with Ice Cream
Pull the brookies from the muffin tin using a clean spatula. Serve warm, with a scoop of vanilla ice cream if desired. The ice cream offers a cooling counterpoint, making the dessert feel like a lava‑lava dance on a plate.
💡 emy’s Pro Tip: Add a pinch of sea salt atop the ice cream to elevate the sweet‑salty interplay.
Step
Action
Duration
Key Visual Cue
1
Preheat & grease
10 min
Tin to shine
2
Prepare batter
2 min
Smooth swirl
3
Press dough
3 min
Cradle perfect
4
Place cups
1 min
Visible seam
5
Spread batter
2 min
90% full
6
Bake
18–20 min
Bubbles rise, edges firm
7
Serve with milk‑cream
Immediacy
Warm ooze
Serving & Presentation
The key to a memorable presentation is to pair each warm brookie with a waffle‑crusted avocado toast and a drizzle of honey that connects Moroccan sweet‑salt traditions to New York brunch culture. Set them on a slate coaster that shows the colors, letting the chocolate shine against the creamy pearlescent coffee.
For the final garnish, scatter a pinch of edible gold dust (borrowed from a fancy Moroccan souk) and a splash of espresso foam on the ice cream topper for a dramatic, bittersweet flair. The contrast between chocolate, peanut butter, and the burnt espresso will feel both righteous and rebellious—like a symphony from Marrakesh to Manhattan.
Pairing Type
Suggestions
Why It Works
Side Dish
Mini avocado toast, toasted pita squares
Adds a crunchy, savory backdrop
Sauce / Dip
Caramel drizzle, espresso whipped cream
Enhances depth, sweet & bitter balance
Beverage
Cold brew coffee, mint‑chai latte, or sparkling water with lime
Cleans palate, keeps energy
Garnish
Edible gold dust, sea‑salt flakes, fresh mint leaves, cacao nibs
Adds sparkle, crunch, fragrance
Make-Ahead, Storage & Reheating
I love prepping to strike a balance between freshness and convenience. After baking, store a batch in a sealed container at room temperature for up to 2 days—this keeps the skins crisp while the center stays silky.
Method
Container
Duration
Reheating Tip
Refrigerator
Air‑tight plastic container
2 days
Reheat in 300°F oven 3–4 min
Freezer
Ziploc freezer bag
3 months
Finish in oven 10‑min at 350°F
Make-Ahead
Baked tray sealed
4 days in fridge
Use a chill coat then reheat lightly
When reheating the whole batch, place the tray in a preheated oven at 300°F for 4 minutes. The brief reheat restores the gooey center while the crust gets a fresh snap. If you’re serving warm at a gathering, keep a small burner with a butter slice heated just to slather over before serving.
Variations & Easy Swaps
Variation
Key Change
Best For
Difficulty Impact
Mint Chocolate (Café de Flore Twist)
Infuse batter with ¼ cup of mint‑flavored syrup
Mint lovers, brunch parties
Easy
Gluten‑Free/Dairy‑Free
Use gluten‑free brownie mix & dairy‑free cookie dough
Specialty diet
Slightly hard
Seasonal Maple‑Browned Drift
Replace some butter with maple syrup; add pumpkin flavoring
Autumn gatherings
Easy
Mint Chocolate (Café de Flore Twist)
Breathe life into the classic with a hint of fresh peppermint and a splash of French‑style iced coffee ice cream. The mint’s citrus note balances the richness, creating a twilight dessert that feels like a getaway to Paris’s sidewalk cafés.
Gluten‑Free/Dairy‑Free
Swap the base mixes for their gluten‑free and dairy‑free counterparts. From almond flour brownies to buckwheat cookie dough, you’ll get the same gooey chocolate center while accommodating dietary needs—tested, and tasted, in the kitchen.
Seasonal Maple‑Browned Drift
Introduce a maple glaze and a dash of pumpkin pie spice harvested from a local Brooklyn farmers market. The caramelized maple coat lends a caramel‑cocoa undertone that resonates with family holidays, completing the sensory soirée.
How long does it take to bake Peanut Butter Cup Stuffed Brookies?
Typically the baking process takes about 18 to 20 minutes at 350°F. Most of the listed prep time—about 10 minutes—consists of smashing the cookie dough into each muffin cup, setting the Reese’s cups and adding the batter. After the baking window, allowing the brookies to cool for about 5 minutes ensures the edges are set while the center remains satisfying gooey.
Can I use dark chocolate instead of light chocolate brownies?
Yes, swapping the brownie mix with a dark‑chocolate version intensifies the chocolate profile and gives the dessert a slightly bitter undertone that balances the sweet peanut butter. Keep the rest of the ingredients the same; the texture will remain fudgy but with an extra depth and richness that New York diners love.
What if I want to split this for a party?
Scale the ingredient quantities by the number of portions you need. For 24 brookies, double the brownie mix, cookie dough, and Reese’s cups. Baking 12 at a time still works, but using a larger 12‑cup tin or two standard tins ensures even baking. Serve warm with a chilled vanilla ice cream from the nearby Italian market for that classic contrast.
What’s the best way to keep them fresh?
The brookies stay best in an airtight container at room temperature for up to two days; the cookie base stays slightly crisp while the center remains creamy. For long‑term storage, freeze them in a Ziploc bag and reheat individually in a 300°F oven for 3–4 minutes when you’re ready to serve. The result preserves the buttery crunch and gooey interior.
Is it okay to use a different brand of peanut butter cups?
Absolutely. Homemade peanut‑butter cups baked at home or using a different brand lets you tweak the salt–sweet balance. A strong, chunky peanut butter or a soy‑based variant can pair well if you test it at small scale, noting how the ivory center melts slightly over the cookie and brownie combination.
Can I add extra flavor to the brownie batter?
Yes, a splash of espresso or a dash of almond extract makes a subtle difference, adding depth to the chocolate and giving it a coffee‑house twist. Just mix it in the batter before spooning it over the peanut butter cup. The crunchy cookie base will keep its structure.
Do you recommend using a silicone shim in the muffin tins?
Sip the marble of these brookies. Silicone muffin mats make the release near flawless, especially if the cookie sheet is uneven. They also act as a heat‑resistant shield, preventing the tops from scorching and allowing you to open your bakery window while the batter is cooking.
What garnish enhances presentation?
Powdered sugar dusted lightly, paired with toasted coconut flakes or a few cacao nibs, presents a dramatic contrast. A micro‑lettuce garnish may also add a touch of green that makes each brookie look like a bite‑size truffle with a Parisian garnish.
How do I keep the peanut butter cups from leaking into the batter?
Place a small ring or a crumpled piece of parchment around the cup before adding batter. That minor layer creates a barrier between the cocoa of the cup and the maple syrup of the batter. The result is a neat, seal‑tight baked treat that keeps the center creamy.
Is this recipe suitable for a brunch gathering?
Definitely. Serve the warm brookies with a side of fresh fruit, a scoop of vanilla ice‑cream, and cups of strong espresso or mint‑laced tea. The chewy cookie, molten brownie, and peanut‑butter core make for a biting, decadent start to any brunch that feels both comforting and extravagant.
Share Your Version!
Have you ever added a pop of spice or dimmed the chocolate bite? Drop a rating, leave a comment below, and tell me how you tweaked this treat. When you find your version on Instagram or Pinterest, tag @cookingwithemi—I can’t wait to see you inaugurating your own fluffy little delight.
From my NYC kitchen to yours — I hope this recipe brings as much warmth to your table as it does to mine. — emy 🧡
📌
Love This Recipe? Save It to Pinterest!
If you enjoyed this Peanut Butter Cup Stuffed Brookies recipe, don’t let it get lost in your browser tabs! 😄 Pin it now so you can find it again anytime — and explore hundreds more tried‑and‑tested recipes waiting for you on my Pinterest boards.
📌 Pin this recipe · 🔁 Re-pin your favorites · 💬 Tag me when you make it — I love seeing your creations!
Want more dessert secrets? Subscribe to my weekly newsletter for quirky twists, pantry hacks, and the latest foodie trends straight from my NYC kitchen. Drop your thoughts, and let’s keep the conversation sweet! 🍬
This quick and easy chocolate dessert is made with just 3 store-bought ingredients plus the egg and oil you need for the brownie batter, and they’re incredibly fun and simple to make in a muffin tin! This is seriously the BEST dessert recipe I’ve ever made. They remind me of a fancy lava cake or mini pizookie served warm with ice cream. It’s basically the marriage of a cookie, brownie and Reese’s peanut butter cup. How can you go wrong with that?
Ingredients
Scale
1 (10oz) bag of brownie mix ((plus the oil & egg to make the batter))
1 (16oz) package of refrigerated cookie dough
12 Reese's Peanut Butter Cups
vanilla ice cream ((optional))
Instructions
Preheat your oven to 350 degrees and generously grease a regular size muffin tin.
Prepare the brownie mix according the package directions; set aside.
Separate the cookie dough into 12 even balls and then squish them down into the bottom of each muffin cup.
Place a Reese's peanut butter cup upside down on top of the cookie dough.
Evenly distribute the brownie batter on top of each peanut butter cup until the wells are about 90% full.
Bake for 18-20 minutes or until the brownie batter is cooked through.
Allow them to cool for about 5 minutes before removing from the pan. Enjoy warm with vanilla ice cream!
Fluffernutter Cookies
Table of Contents
Fluffernutter Cookies – Soft & Chewy Peanut Butter Marshmallow Cookies
⚖️
Difficulty
Easy
⏲️
Prep Time
15 mins
🕒
Cook Time
12 mins
⏱️
Total Time
27 mins
🍽️
Servings
24 cookies
I remember the first time I bit into a Fluffernutter sandwich as a kid in Morocco—my mom had somehow gotten her hands on a jar of Marshmallow Fluff from an American import store in Casablanca. That gooey, sticky sweetness combined with creamy peanut butter was pure magic. These Fluffernutter Cookies take that classic New England childhood favorite and turn it into the ultimate soft and chewy peanut butter marshmallow cookies, with pockets of melted marshmallow in every single bite. This recipe is all about nailing that perfect texture: a tender peanut butter cookie base that stays soft for days, scattered with little caramelized marshmallow spots that turn into chewy, golden bursts of sweetness.
When you pull a tray of these cookies from the oven, the aroma hits you first—warm toasted peanut butter mingling with the sweet scent of vanilla and caramelized sugar. The tops are lightly cracked and golden, with tiny dark spots where the marshmallows have blistered and charred just a bit. As you break one open, you’ll see thin, stretchy webs of melted marshmallow connecting the crumb—that’s the magic of the freezing technique I learned at Le Cordon Bleu in Paris. It’s a simple trick, but it makes all the difference between flat, sad cookies and these beautifully domed, tender beauties.
After years of testing in my tiny NYC apartment kitchen, I’ve perfected a version that’s both foolproof and deeply satisfying. The secret? Freezing the mini marshmallows before baking, so they hold their shape during mixing and create those gooey pockets rather than melting into a sticky mess. I’ll walk you through every step, from creaming the butter to that crucial 2-3 minute window for rounding misshapen cookies. Plus, I’ll share the one mistake that can ruin the texture—and how to avoid it. Trust me, these Fluffernutter Cookies will become your new favorite bake.
Why This Fluffernutter Cookies Recipe Is the Best
The flavor secret here comes straight from my Moroccan and Parisian training: balancing sweet and savory. I use a combination of granulated and light brown sugar for depth, and creamy peanut butter that’s not too sweet—just enough salt to cut through the marshmallow. In my mother’s kitchen, we always touched a pinch of salt to anything sweet; it’s a principle I carry into every cookie batch. The result is a cookie that tastes nostalgic but elevated, with a richness that lingers.
Perfected texture comes from a French pastry technique: letting the dough rest after mixing. After you fold in the frozen marshmallows, the brief chill in the fridge firms up the butter, which means the cookies spread slowly in the oven. That gives you a thick, chewy center and slightly crisp edges. I learned this at Le Cordon Bleu—the importance of temperature control in baking—and it’s the single most important factor for these Fluffernutter Cookies. No flat, greasy discs here.
Foolproof and fast for home bakers because there’s no rolling or chilling the dough for hours. Just mix, scoop, and bake. The frozen marshmallows do the heavy lifting for you—they prevent the dough from becoming too sticky to handle, and they create those dreamy pockets of gooey marshmallow. Even if you’re new to baking cookies, this recipe will make you look like a pro. I’ve had friends in NYC who’ve never baked before nail these on their first try.
Fluffernutter Cookies Ingredients
I pick up most of these ingredients at the Union Square Greenmarket or my local Fairway in Manhattan. The butter I always grab from a local dairy—it makes a difference. And the peanut butter? I have a soft spot for the classic creamy Skippy my mom used to send me from Morocco, but any supermarket brand works beautifully.
Ingredients List
1 ½ cups all-purpose flour (stir, spoon & level)
1 tsp baking soda
½ tsp salt
½ cup unsalted butter (room temperature)
½ cup granulated sugar
½ cup light brown sugar (gently packed)
½ cup creamy peanut butter
1 large egg
1 tsp vanilla extract
1 cup mini marshmallows (frozen*)
Ingredient Spotlight
Peanut butter is the star here. Stick to the creamy kind—natural peanut butter that separates can make the dough oily and greasy. I recommend Jif or Skippy for consistent results. The frozen mini marshmallows are non-negotiable. Don’t skip the freezing step; it’s what creates those irresistible pockets of gooey marshmallow. For the butter, make sure it’s truly at room temperature—soft but not melted—so it creams properly with the sugars for a light, airy cookie.
Original Ingredient
Best Substitution
Flavor / Texture Impact
Creamy Peanut Butter
Crunchy Peanut Butter
Adds texture and crunch; may slightly reduce creaminess
Unsalted Butter
Salted Butter (reduce added salt to ¼ tsp)
Slightly saltier overall; works if you’re out of unsalted
All-Purpose Flour
Gluten-Free 1:1 Blend (with xanthan gum)
Slightly more crumbly; bake for 10-11 minutes
Mini Marshmallows
Large marshmallows (cut into quarters)
Similar gooeyness; larger pockets may require extra freezing
How to Make Fluffernutter Cookies — Step-by-Step
Ready to bake? I’ll walk you through each step so you can nail these soft and chewy peanut butter marshmallow cookies every single time.
Step 1: Freeze the Marshmallows
Spread 1 cup of mini marshmallows on a small baking sheet and freeze for at least 1-2 hours before you start baking. Keep them in the freezer until the moment you fold them into the dough. This prevents them from melting during mixing and keeps those pockets intact.
💡 emy’s Pro Tip: If you forget to freeze them, spread them on a tray and pop them in the freezer while you prep the dry ingredients—even 20 minutes helps significantly.
Step 2: Preheat and Prep
Preheat your oven to 350°F (175°C). Line two large cookie sheets with silicone baking mats or parchment paper. I prefer silicone mats for even browning, but parchment works great too. Set them aside.
⚠️ Common Mistake to Avoid: Don’t use wax paper or ungreased pans. The cookies will spread and stick. Always use parchment or a silicone mat.
Step 3: Mix Dry Ingredients
In a medium bowl, whisk together 1½ cups all-purpose flour, 1 teaspoon baking soda, and ½ teaspoon salt. Ensure there are no lumps. Set this aside while you work on the wet mixture.
Step 4: Cream Butter and Sugars
In a large mixing bowl, beat ½ cup room-temperature unsalted butter with ½ cup granulated sugar and ½ cup packed light brown sugar using an electric mixer on medium speed. Beat for 2-3 minutes until light, fluffy, and pale in color. This step adds air for a tender texture.
💡 emy’s Pro Tip: Don’t rush the creaming. The mixture should look like soft, spreadable frosting. If it’s still granular, keep beating another minute.
Step 5: Add Wet Ingredients
Add ½ cup creamy peanut butter, 1 large egg, and 1 teaspoon vanilla extract. Beat on medium until fully combined, about 1 minute. Scrape down the sides and bottom of the bowl with a rubber spatula to ensure everything is mixed evenly.
Step 6: Combine Wet and Dry
Add the dry flour mixture to the wet mixture. Mix on low speed until just combined—there should still be a few streaks of flour. Overmixing will make the cookies tough. Scrape the bowl one last time.
Step 7: Fold in Marshmallows
Remove the frozen marshmallows from the freezer. Use a rubber spatula to gently fold a heaping 1 cup of them into the dough. Work quickly so they stay cold. Don’t overmix—just a few folds.
⚠️ Common Mistake to Avoid: If you mix too much, the marshmallows will start melting from the warmth of your hands and the dough. Keep it brief!
Step 8: Scoop and Chill
Use a #30 cookie scoop (about 2 tablespoons) to quickly shape the dough into balls. Place them 2 inches apart on the prepared baking sheets. Immediately refrigerate any remaining dough to keep the marshmallows cold until you’re ready to bake the next batch.
Step 9: Bake and Cool
Bake at 350°F for 11-12 minutes, until the edges are lightly golden and the centers look just set. Don’t overbake—the cookies will continue cooking on the hot tray. Allow them to cool completely on the baking sheet, about 10 minutes. After 2-3 minutes, use a greased spatula to gently round any misshapen cookies.
💡 emy’s Pro Tip: Do not transfer to a wire rack while warm. The cookies may stick. Let them cool fully on the tray before moving.
Step
Action
Duration
Key Visual Cue
1
Freeze Marshmallows
1-2 hours
Firm to the touch, not sticky
2
Preheat Oven
10 mins
Oven reaches 350°F
3
Mix Dry Ingredients
2 mins
Well-blended, no lumps
4
Cream Butter & Sugars
2-3 mins
Light and fluffy, pale
5
Add Wet Ingredients
1 min
Smooth and creamy batter
6
Combine Dry & Wet
1 min
Just combined, streaks remaining
7
Fold in Marshmallows
30 seconds
Marshmallows evenly distributed
8
Scoop & Chill
5 mins
Uniform dough balls, 2 inches apart
9
Bake & Cool
11-12 mins
Edges golden, centers set
Serving & Presentation
I love serving these Fluffernutter Cookies slightly warm—just after they’ve set on the tray for 10 minutes—when the marshmallow is still stretchy and the peanut butter flavor is at its peak. Arrange them on a wooden board or a simple white platter for that rustic NYC bakery vibe. A light dusting of flaky sea salt (like the Maldon salt I always have in my Parisian-inspired pantry) adds a gorgeous finishing touch that cuts the sweetness beautifully.
For a truly indulgent experience, serve these with a cold glass of milk, or pair them with a scoop of vanilla ice cream for a cookie sundae. In my apartment, we also love dipping them in a little dark chocolate ganache—it brings back memories of the chocolate-dipped cookies I used to make at a café near the Marché Bastille. These cookies are also fantastic crumbled over yogurt or ice cream for a quick dessert.
Valentine’s Day is just around the corner, and if you’re anything like me, you’re looking for a fun, homemade treat that says “I love you” without requiring a pastry degree. This Chocolate Peanut Butter Valentines Heart recipe is exactly that — super simple, no-bake, and melt-in-your-mouth delicious. Growing up in Morocco, my mother made simple sweet bites like these for every celebration, using just a few ingredients from the pantry. Now, living in New York City and trained in classic French pastry in Paris, I still turn to these easy, heartfelt desserts. This Chocolate Peanut Butter Valentines Heart is my go-to for showing love without the stress.
Imagine biting into a smooth, creamy peanut butter center, rich with buttery sweetness and a hint of vanilla, all wrapped in a crisp, glossy chocolate shell. The contrast between the soft, almost fudge-like interior and the snap of the chocolate coating is pure heaven. Each heart is perfectly sized for a treat that feels indulgent but not overwhelming. The peanut butter filling is so silky it virtually dissolves on your tongue, while the chocolate adds a satisfying bitterness if you use semi-sweet, or a creamy sweetness with milk chocolate. The aroma is intoxicating — warm peanut butter and rich cocoa, a combination that fills your kitchen with love.
I’ve perfected this recipe over the years, blending the simplicity of Moroccan sweet-making with the precision I learned in French pastry school. The key is using room-temperature peanut butter for the smoothest texture, and a clever trick of pressing the mixture into a lined dish for perfectly even hearts. 💡 emy’s Pro Tip: Work in small batches when dipping — the peanut butter mixture softens quickly at room temperature, so keep most of your hearts in the freezer until you’re ready to coat them. One common mistake is over-melting the chocolate, which can seize and become grainy — always use a double boiler or microwave in short bursts. This recipe is foolproof for beginners yet elegant enough to impress anyone.
Why This Chocolate Peanut Butter Valentines Heart Recipe Is the Best
The Flavor Secret: The magic lies in the balance of creamy peanut butter with melted butter and brown sugar, creating a rich, caramel-like sweetness that complements the chocolate perfectly. I learned from my mother in Morocco that the best sweets come from harmonious contrasts — and here, the salty, nutty filling against the smooth dark chocolate is a match made in heaven. Unlike store-bought versions, this recipe has no artificial flavors, just real ingredients that sing together.
Perfected Texture: In Paris, I was taught that texture is everything in pastry. This filling is pressed to exactly ½ inch thick, chilled until firm, then cut into hearts. The result is a center that is dense yet creamy, not crumbly or dry. The chocolate coating is thin and even — achieved by gently tapping the fork to drip off excess — so every bite has a perfect crunch. 💡 emy’s Pro Tip: Use a small heart cookie cutter and re-roll the scraps for a second batch; there’s no waste with this method.
Foolproof & Fast: This recipe requires no oven, no baking soda, no complicated steps. It’s perfect for beginner home cooks and busy NYC moms like me who want a stunning dessert in under an hour. The hardest part is waiting for the chocolate to set! Whether you’re making these for a Valentine’s party, a classroom treat, or just for your sweetheart, you can trust that this recipe works every single time.
Chocolate Peanut Butter Heart Ingredients
I love sourcing my ingredients from the Union Square Greenmarket in NYC — the fresh butter and local honey (though not in this recipe) always inspire me. But for these hearts, standard pantry staples are all you need. The quality of your peanut butter and chocolate makes the biggest difference — I always use a creamy, natural-style peanut butter without added sugar, and good-quality chocolate bars from the grocery store. Here’s what you’ll need:
Ingredients List
1 cup creamy peanut butter, at room temperature
¼ cup unsalted butter, melted
2 tablespoons brown sugar
2 teaspoons vanilla extract
¼ teaspoon salt
2 cups powdered sugar
10–12 oz. chocolate, chopped small (I used half semi-sweet and half milk chocolate) or good quality candy coating (easier for beginners)
Ingredient Spotlight
Peanut Butter: The star of the show. Use creamy, not chunky, for a silky-smooth filling. Avoid “natural” peanut butter with separated oil — it can make the mixture too greasy. My favorite is Skippy or Jif creamy, which gives a consistent texture. 💡 emy’s Pro Tip: If you only have natural peanut butter, stir it well and add an extra tablespoon of powdered sugar to balance the oil.
Chocolate: Quality matters here. I use half semi-sweet and half milk chocolate for a balanced flavor — not too bitter, not too sweet. Avoid chocolate chips, which contain stabilizers that prevent smooth melting. Instead, buy a good-quality chocolate bar (like Ghirardelli or Callebaut) and chop it yourself. For beginners, candy coating (also called melting wafers) is more forgiving and doesn’t require tempering.
Butter: Unsalted butter is key because the peanut butter already contains salt. Melted butter binds the ingredients and adds a rich, creamy mouthfeel. If you only have salted butter, reduce the added salt to ⅛ teaspoon.
Original Ingredient
Best Substitution
Flavor / Texture Impact
Creamy peanut butter
Almond butter or sunflower seed butter
Milder, nuttier flavor; slightly grainier texture
Unsalted butter
Coconut oil (refined, solid)
Coconut flavor; slightly firmer set at room temp
Brown sugar
Coconut sugar or maple sugar
Less molasses flavor; slightly drier filling
Powdered sugar
Swerve confectioners (erythritol) for sugar-free
Slightly cooling effect; less sweet; more crumbly
Semi-sweet or milk chocolate
Dark chocolate (70%+) or white chocolate
Dark: less sweet, more intense; white: very sweet, creamy
How to Make Chocolate Peanut Butter Valentines Heart — Step-by-Step
Ready to make these adorable hearts? Let’s go step by step — I promise it’s easier than you think. Just follow these instructions, and you’ll have a gorgeous tray of chocolate-covered peanut butter hearts in no time.
Step 1: Prepare the Dish
Line an 8 x 8 inch dish with parchment paper, leaving an overhang on two opposite sides. This “sling” will allow you to lift the entire block of peanut butter mixture out later, making cutting easy and neat.
💡 emy’s Pro Tip: Grease the dish lightly with butter before adding the parchment to help it stay in place while you press the mixture in.
Step 2: Mix the Filling
In a large mixing bowl, stir together the peanut butter, melted butter, brown sugar, vanilla extract, and salt. Stir until the sugar dissolves — about 1 minute. Then gradually mix in the powdered sugar. The mixture will be thick and stiff, like a cookie dough.
⚠️ Common Mistake to Avoid: Don’t overmix once you add the powdered sugar, or the mixture can become crumbly. Stir just until combined.
Step 3: Press and Chill
Press the mixture into the prepared dish. Smooth the top with a spatula or use your palms to flatten it to an even ½-inch thick layer. Cover with plastic wrap and place in the freezer for 15–20 minutes, until firm enough to cut.
💡 emy’s Pro Tip: For perfectly even thickness, use a straight-sided glass or a small rolling pin to press the mixture flat.
Step 4: Cut the Hearts
Once firm, lift the block out using the parchment overhang. Line a baking tray with parchment. Using a small heart-shaped cookie cutter (about 2 inches wide), cut out hearts and place them on the tray. Gather the scraps, knead them together, re-press, and cut again — you should get 16–18 hearts total.
⚠️ Common Mistake to Avoid: Don’t let the mixture warm up while cutting — if it gets too soft, pop it back in the freezer for 5 minutes.
Step 5: Freeze Again
Place the tray of cut-out hearts in the freezer for at least 15 minutes, until very firm. This is crucial for the dipping step — the hearts must be ice-cold to hold their shape in warm chocolate.
💡 emy’s Pro Tip: Work in batches — take only 4–5 hearts out of the freezer at a time. Leave the rest in the freezer until you’re ready to dip them.
Step 6: Melt the Chocolate
Chop the chocolate into small, even pieces. Melt it gently using a double boiler or microwave in 30-second bursts, stirring after each, until smooth. If using candy coating, follow package instructions. Line another tray with parchment paper.
⚠️ Common Mistake to Avoid: Never let water touch the melting chocolate — even a drop can cause it to seize and become grainy. Use a completely dry bowl and utensils.
Step 7: Dip and Coat
Using a fork, dip each frozen heart into the melted chocolate, turning to coat completely. Gently tap the fork on the edge of the bowl to let excess chocolate drip off. Place the coated heart on the parchment-lined tray. Repeat with the remaining hearts, working in small batches.
💡 emy’s Pro Tip: For a professional look, drizzle a little extra chocolate over the top with a spoon after placing each heart on the tray — this covers the fork marks.
Step 8: Set and Store
Refrigerate the tray for at least 30 minutes, until the chocolate is completely set and firm to the touch. Once set, transfer the hearts to an airtight container. Store in the refrigerator for up to 2 weeks, or freeze for up to 3 months.
⚠️ Common Mistake to Avoid: Don’t skip the refrigeration step — the chocolate needs to set fully to avoid smudging when you move the hearts.
Step
Action
Duration
Key Visual Cue
1
Line dish with parchment
2 mins
Parchment overhangs on two sides
2
Mix peanut butter filling
3–5 mins
Thick, dough-like consistency
3
Press and freeze
15–20 mins
Firm to touch, not rock hard
4
Cut hearts with cookie cutter
5–10 mins
Clean shapes, no cracks
5
Freeze hearts again
15 mins
Ice-cold to the touch
6
Melt chocolate
3–5 mins
Smooth, glossy, no lumps
7
Dip hearts in chocolate
10–15 mins
Fully coated, excess dripped off
8
Refrigerate to set
30 mins
Chocolate firm, not sticky
Serving & Presentation
These Chocolate Peanut Butter Valentines Hearts are perfect on their own, but I love dressing them up for special occasions. Arrange them on a pretty platter or a tiered cake stand for a Valentine’s dessert table. Sprinkle a pinch of flaky sea salt (like Maldon) on top just after dipping — the salt crystals add a wonderful crunch and balance the sweetness. For a romantic touch, dust with a little cocoa powder or edible gold glitter.
In my NYC home, I often serve these hearts alongside a cup of strong coffee or a glass of cold milk — classic and comforting. They also make delightful gifts: pack them in a small gift box lined with tissue paper, tied with a red ribbon. I remember my mother in Morocco would wrap similar sweets in a colorful cloth for celebrations — a tradition I still love to honor.
Chocolate Peanut Butter Banana Bites – Two Bites of Pure Bliss Under 100 Calories
⚖️
Difficulty
Easy
⏲️
Prep Time
15 mins
🕒
Cook Time
2 mins
⏱️
Total Time
1 hr 17 mins
🍽️
Servings
30 bites (15 servings of 2)
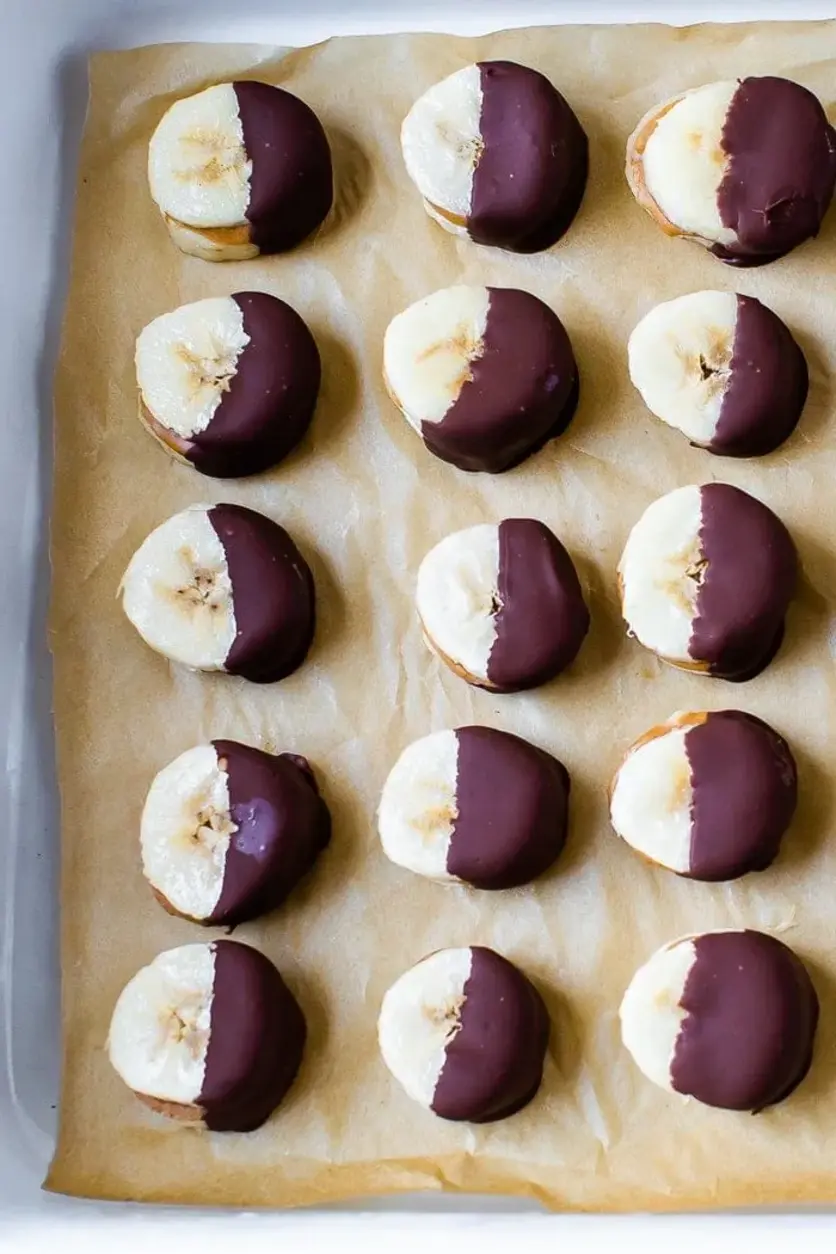
My love for frozen treats runs deep—it started in my mother’s kitchen in Morocco, where she’d freeze fresh fruit purees into icy pops to beat the Casablanca heat. But these Chocolate Peanut Butter Banana Bites, my little New York City invention, have become my absolute favorite healthy warm weather treat. They’re so simple: just banana rounds, a smear of natural peanut butter, and a quick dip in melted dark chocolate. The unique angle here is the two-bite format—you get that perfect peanut butter sandwich feel without any fuss, and with under 100 calories for two bites, you can enjoy them guilt-free all summer long.
Imagine the first bite: the chocolate shell cracks open to reveal a creamy, icy banana center that melts on your tongue, while the peanut butter adds a rich, nutty surprise. I love how the dark chocolate—with just a touch of coconut oil—turns into a glossy, snappy coating that contrasts beautifully with the soft, sweet banana. In my NYC apartment, I keep a stash in the freezer for those sweltering afternoons or late-night cravings. The aroma of the chocolate melting reminds me of my pastry days in Paris, though this recipe is far simpler.
As a professional cook trained in Paris, I’ve tested dozens of methods to get this just right. My version uses a genius shortcut: you only dip half the bite, which saves chocolate and keeps the banana from becoming too frozen. A common mistake is using overripe bananas—they get mushy and won’t stack properly. Stick with ripe but firm bananas, and you’ll get that perfect texture every time. Plus, each two-bite serving has just 99 calories, 12g carbs, and 2g protein—proof that healthy eating doesn’t have to be boring.
Why This Chocolate Peanut Butter Banana Bites Recipe Is the Best
The flavor secret here is the balance between the natural sweetness of ripe bananas and the slight bitterness of dark chocolate. Growing up in Morocco, my mother taught me that the best desserts don’t need a lot of sugar—you just need the right ingredients. The peanut butter adds a savory, salty kick that ties everything together. I like to use natural peanut butter (just peanuts and salt), which gives a cleaner taste than the sugary commercial kind.
Texture is everything with frozen treats. My Paris training taught me to respect temperatures—freezing the banana-peanut butter sandwiches for a full hour before dipping ensures they hold their shape and don’t turn into a slushy mess. The coconut oil in the chocolate is my chef’s trick: it thins the chocolate perfectly for dipping and gives a beautiful shine. Without it, the chocolate would be too thick and clumpy.
This recipe is foolproof and fast. Even a beginner can whip it up with just four ingredients and 15 minutes of active time. I tested this with my neighbor’s kids, who loved assembling the little sandwiches. The hardest part is waiting for them to freeze! Whether you’re meal-prepping for a week of snacks or impressing guests, these bites always deliver.
Chocolate Peanut Butter Banana Bites Ingredients
I love sourcing my ingredients at the Union Square Greenmarket in NYC—the bananas there are always perfectly ripe, and I grab organic peanut butter from the local vendor. Sometimes I think back to the souks of Marrakech, where fresh dates and nuts were everywhere, and I feel lucky to bring that same simple goodness to my kitchen here. For this recipe, you only need four items.
Ingredients List
3 ripe bananas
1/3 cup natural peanut butter
1/2 cup dark chocolate chips
2 teaspoons coconut oil
Ingredient Spotlight
Bananas: The star of the show. Choose bananas that are yellow with a few brown spots—firm enough to slice cleanly but sweet enough to flavor the bites. Overripe bananas turn mushy and won’t hold their shape. Ripe bananas work best and provide natural sweetness without added sugar.
Natural Peanut Butter: This provides the creamy, savory contrast. Use a brand with just peanuts and salt (no added sugar or oil). The texture is slightly gritty, which works perfectly here. If you use the stir-until-smooth kind, make sure it’s not too runny.
Dark Chocolate Chips: I prefer 60-70% cacao for the perfect bitterness that balances the banana’s sweetness. Choose high-quality chips that melt smoothly. Chocolate bars chopped into small pieces also work well.
Coconut Oil: My secret weapon from my pastry days. It thins the chocolate for easy dipping and gives a glossy, snappy finish. Refined coconut oil has no coconut taste, but unrefined adds a lovely subtle flavor.
Original Ingredient
Best Substitution
Flavor / Texture Impact
Ripe bananas
Firm ripe plantains (slightly sweeter)
Sweeter, more starchy texture; still holds shape
Natural peanut butter
Almond butter or sunflower seed butter
Less savory, more nutty or earthy; creamier texture
Dark chocolate chips
Milk chocolate or sugar-free chocolate chips
Milk chocolate is much sweeter; sugar-free may taste less rich
How to Make Chocolate Peanut Butter Banana Bites — Step-by-Step
Follow these simple steps and you’ll have a batch of frozen chocolate covered peanut butter banana bites ready in just over an hour. The key is patience with the freezing—it’s worth the wait.
Step 1: Prepare the Bananas
Peel your ripe bananas and slice them into rounds about 1/4 inch thick. Aim for even slices so the sandwiches stack neatly. You should get about 30 rounds from 3 bananas. Use a sharp knife to avoid crushing the fruit.
💡 emy’s Pro Tip: If your knife sticks to the banana, lightly dip it in water between cuts. This prevents the banana from tearing and keeps slices clean and uniform.
Step 2: Assemble the Bites
Line a platter or small baking sheet with parchment paper. Place about 1/2 teaspoon of peanut butter on a banana slice and top with another banana slice to make a little banana peanut butter sandwich. Continue until all slices are used—you should have about 30 bites. Place the bites on two parchment-lined platters or plates and freeze for at least 1 hour.
⚠️ Common Mistake to Avoid: Don’t skip the hour of freezing! If you try to dip them too early, the bites will fall apart in the warm chocolate. Patience is key.
Step 3: Melt the Chocolate
After the bites have been in the freezer for over an hour, melt your chocolate. Combine chocolate chips and coconut oil in a microwave-safe bowl. Microwave for 1 minute, stir, and then continue in 30-second increments until the chocolate is completely melted and smooth. This usually takes no more than 2 minutes total.
💡 emy’s Pro Tip: For a luxurious shine, let the melted chocolate cool for a minute before dipping. Too hot and it will melt the banana. Test on a spoon—it should feel warm but not hot to the touch.
Step 4: Dip in Chocolate
Remove one platter of frozen banana bites from the freezer. Working quickly, dip each frozen bite into the melted chocolate so that half of each bite is coated. If you want to coat the full bite, you’ll need about double the chocolate chips. Place the dipped bites back on the parchment-lined platter.
⚠️ Common Mistake to Avoid: Don’t dip too many at once—the chocolate will thicken as it cools. Work in small batches and reheat the chocolate for 10 seconds if it starts to set.
Step 5: Harden and Store
Place the platter back in the freezer to harden for about 15 minutes. Repeat with the second platter. Once all bites are firm, you can enjoy immediately or transfer them to a freezer-safe container for later. They will last at least 1-2 months in the freezer.
💡 emy’s Pro Tip: For longer storage, layer the bites between sheets of parchment paper in an airtight container. This prevents them from sticking together and makes it easy to grab just one or two.
Step
Action
Duration
Key Visual Cue
1
Slice bananas
5 mins
Even 1/4-inch rounds
2
Assemble sandwiches
10 mins
Peanut butter visible at edges
3
Freeze bites
1 hour
Bites are firm and separate easily
4
Melt chocolate
2 mins
Smooth, glossy, not steaming
5
Dip bites
15 mins
Half covered; chocolate sets quickly
6
Harden in freezer
15 mins
Chocolate is firm and snaps
Serving & Presentation
These frozen chocolate covered peanut butter banana bites are perfect straight from the freezer—no need to thaw for more than a minute or two. I love arranging them on a chilled white platter for a stunning dessert board. The contrast of the dark chocolate against the pale banana is beautiful. For a touch of elegance, I sometimes drizzle a bit of extra melted white chocolate over the top and sprinkle with flaky sea salt.
During the hot NYC summers, I serve these at backyard parties or while lounging on my fire escape. They pair wonderfully with a tall glass of cold almond milk or an iced coffee. For a Moroccan twist, dust with a pinch of cinnamon or cardamom before serving—it reminds me of the spiced teas my mother would make.
Pairing Type
Suggestions
Why It Works
Side Dish
Fresh berries, a handful of almonds, or coconut chips
Adds texture and freshness
Sauce / Dip
Extra melted chocolate, caramel sauce, or yogurt dip
Enhances sweetness and creaminess
Beverage
Iced coffee, cold almond milk, or hot mint tea
Cools or warms the palate
Garnish
Flaky sea salt, cinnamon dust, or crushed peanuts
Adds crunch and flavor contrast
Make-Ahead, Storage & Reheating
These chocolate peanut butter banana bites are a meal-prep dream. I make a double batch every Sunday and keep them in my NYC freezer for quick snacks all week. Just remember to let them sit for about 5 minutes at room temperature before eating if they’ve been frozen for a while—otherwise they’re rock hard!
Method
Container
Duration
Reheating Tip
Refrigerator
Airtight container
Up to 3 days
Not recommended—they soften too much
Freezer
Peanut Butter Oatmeal Cookies
Table of Contents
Peanut Butter Oatmeal Cookies: A Naturally Sweetened NYC Kitchen Classic
⚖️
Difficulty
Easy
⏲️
Prep Time
10 mins
🕒
Cook Time
12 mins
⏱️
Total Time
22 mins
🍽️
Servings
10-12 cookies
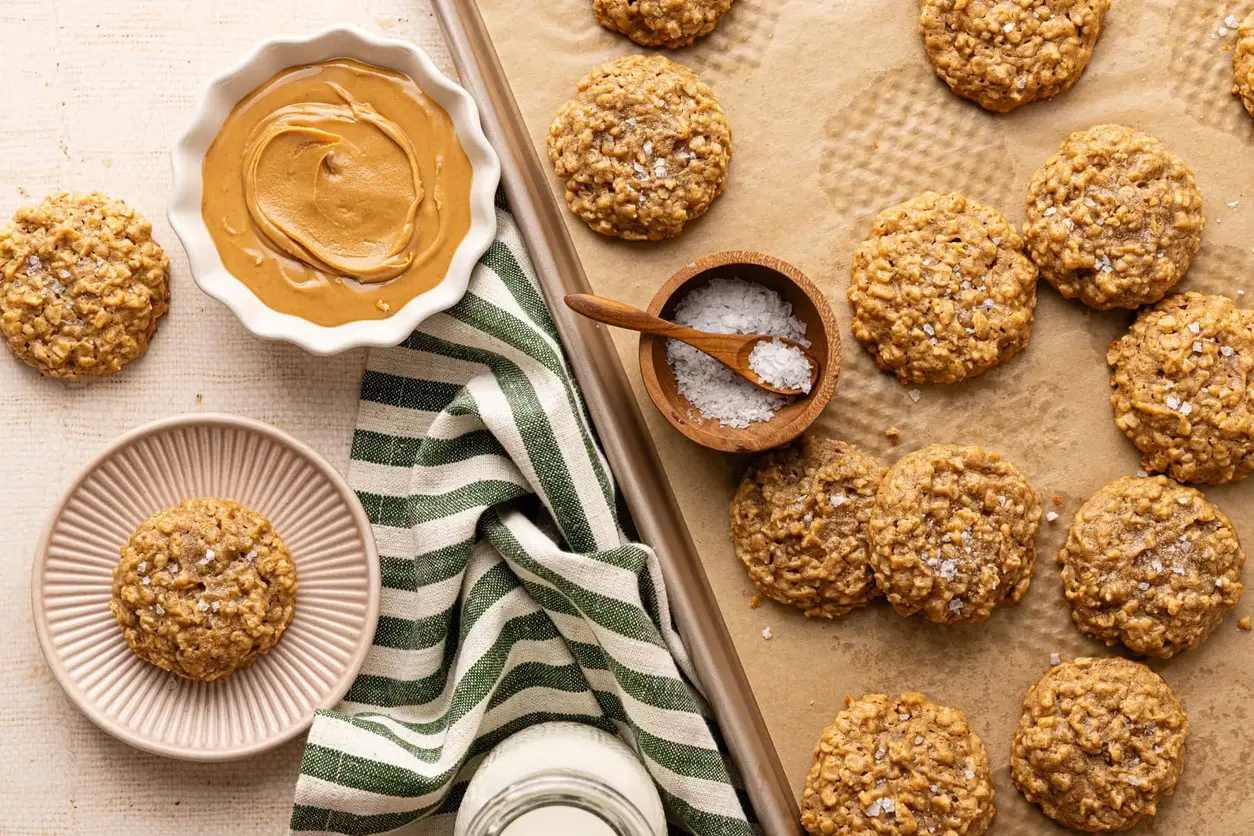
These Peanut Butter Oatmeal Cookies are pure nostalgia for me—they remind me of the simple, wholesome treats my mother would bake in our kitchen in Morocco, where peanut butter was a rare and precious ingredient she’d save for special occasions. Now, living here in New York City, I’ve taken that memory and given it a modern, naturally sweetened twist using maple syrup instead of refined sugar. The combination of creamy peanut butter and hearty rolled oats creates a cookie that’s both satisfying and nourishing—perfect for a busy NYC afternoon when you need something quick but crave real flavor.
The first bite is a gentle crunch that gives way to a soft, tender center—the oats providing a chewy texture while the peanut butter melts into every crumb. You’ll smell a warm, nutty aroma as they bake, and the maple syrup adds a subtle floral sweetness that doesn’t overpower the peanut butter. I love how these cookies stay moist for days, thanks to the egg binding everything together, and they’re just sturdy enough to hold their shape without being dry. It’s the kind of cookie you can enjoy with a cup of coffee on a crisp morning or pack for a quick snack on the go.
I’ve tested this recipe countless times to get it just right—no butter, no refined sugar, just four simple ingredients that work together beautifully. What sets my version apart is the technique of pressing the dough down slightly before baking, which ensures even cooking and that perfect chewy-meets-crisp edge. In the steps below, I’ll share my 💡 emy’s Pro Tip for preventing them from spreading too much, plus a common mistake to avoid so your cookies come out perfect every time. Let’s get baking!
Why This Peanut Butter Oatmeal Cookies Recipe Is the Best
The flavor secret here is all about the quality of your peanut butter. I use a creamy, natural peanut butter with just peanuts and a pinch of salt—no added sugar or stabilizers—and its rich, savory notes balance the sweetness of the maple syrup beautifully. This is a technique I picked up from my Parisian pastry training: let the main ingredient shine without overwhelming it. The result is a cookie that tastes genuinely peanut-buttery, not artificially sweet or greasy.
Texture is everything in a cookie, and I’ve perfected this through the right ratio of oats to wet ingredients. The rolled oats provide structure without being too dense, while the egg acts as a binder that holds everything together without making it tough. I’ve also found that letting the dough rest for a minute before scooping helps the oats absorb the moisture, giving you a more uniform texture. This is chef-level stuff that makes a real difference for home bakers.
What makes this recipe foolproof and fast is its simplicity—you only need one bowl and a spoon to mix, and there’s no mixer involved. Even if you’re a beginner, you’ll feel confident because the dough is forgiving and doesn’t require any special techniques. Plus, with only 10 minutes of prep time, it’s the perfect answer to a sudden cookie craving or a last-minute contribution to a potluck. Trust me, I’ve made these dozens of times in my tiny NYC apartment kitchen!
Peanut Butter Oatmeal Cookies Ingredients
I source my peanut butter from the NYC farmers market in Union Square, where I can find locally ground options that taste incredibly fresh. The maple syrup I use is from a small producer in Vermont—I fell in love with its deep, smoky sweetness during a trip upstate, and it reminds me of the honey my mother used to drizzle over Moroccan pancakes. And the oats? I always buy rolled oats from a bulk bin at my neighborhood grocery store in Brooklyn—they’re affordable and have the perfect texture for baking.
Ingredients List
1 cup creamy peanut butter (natural, no added sugar preferred)
1 large egg (room temperature)
1/2 cup maple syrup (pure, Grade A or B)
1 1/4 cup rolled oats (not quick oats or steel-cut)
Ingredient Spotlight
Peanut butter is the star here, providing both fat and protein. Look for a brand with no added sugar—it should list only peanuts and maybe salt as ingredients. If you use a sweetened peanut butter, your cookies will be too sweet and may spread more. A good swap is almond butter or sunflower seed butter for a nut-free version, but expect a slightly different flavor and a drier dough.
The egg acts as a binder and leavening agent. A large egg at room temperature mixes more evenly and helps the cookies rise slightly. For a vegan option, you can use a flax egg (1 tablespoon ground flaxseed mixed with 3 tablespoons water), but the cookies will be a bit denser and less fluffy. I’ve tested this with a flax egg, and they still taste great—just flatter.
Maple syrup provides natural sweetness and moisture. Using pure maple syrup—not pancake syrup—is crucial. The flavor is more complex and less cloying. You can substitute honey or agave nectar, but honey has a stronger flavor that might compete with the peanut butter. Agave is milder but thinner, so you may need to add a tablespoon more oats.
Rolled oats give the cookies their chewy texture. Quick oats will make them too soft and mushy, while steel-cut oats will remain hard and crunchy. Stick with rolled oats for the best results. If you only have quick oats, pulse them a few times in a food processor to break them down slightly—but I recommend rolling oats for this recipe.
How to Make Peanut Butter Oatmeal Cookies — Step-by-Step
Let me walk you through every step with the precision I learned in Paris, but in a way that’s easy for any home cook. You’ll be amazed at how simple this is.
Step 1: Preheat and Prep
Preheat your oven to 350°F (175°C). Line a baking sheet with parchment paper or lightly grease it with a neutral oil or spray. This ensures the cookies won’t stick and makes cleanup a breeze.
💡 emy’s Pro Tip: Use a light-colored baking sheet if possible—dark sheets can cause the bottoms to brown too quickly. If you only have dark, reduce the bake time by a minute and check for doneness visually.
Step 2: Mix the Wet Ingredients
In a large bowl, combine 1 cup creamy peanut butter, 1 large egg, and 1/2 cup maple syrup. Use a fork or a whisk to mix them together until the mixture is completely smooth and uniform. There should be no streaks of egg or syrup remaining.
⚠️ Common Mistake to Avoid: Adding the oats before the wet ingredients are fully combined. If the peanut butter isn’t evenly mixed, the oats won’t be distributed properly, leading to pockets of dry mix. Make sure your wet mixture is smooth and glossy first.
Step 3: Add the Oats
Add 1 1/4 cup rolled oats to the bowl and stir until everything is well combined. The mixture should come together into a sticky, cohesive cookie dough. If it seems too dry, you can add a teaspoon of water or maple syrup.
💡 emy’s Pro Tip: Let the dough sit for 2-3 minutes before scooping. This allows the oats to absorb the liquid, resulting in a more uniform texture and less spreading.
Step 4: Shape the Cookies
Using a small cookie scoop or a tablespoon, place heaping spoonfuls of dough onto the prepared baking sheet, spacing them about 2 inches apart. You should get about 10-12 cookies. Use your hands to gently form each into a round shape, then press down slightly to flatten them—this helps them bake evenly and gives you that perfect cookie shape.
⚠️ Common Mistake to Avoid: Not flattening the dough enough. The cookies won’t spread much during baking, so if you skip this step, you’ll end up with more like cookie balls. Press them to about 1/2-inch thickness for the best shape.
Step 5: Bake and Cool
Bake in the preheated oven for 10-12 minutes, or until the edges are lightly golden and the centers look set but still soft. They will continue to set as they cool. Let them cool on the baking sheet for 5 minutes, then transfer to a wire rack to cool completely. Serve them warm or at room temperature—either way is delicious.
💡 emy’s Pro Tip: For chewier cookies, bake for the shorter time (10 minutes). For slightly crispier edges, go for the full 12 minutes. Remember, every oven is different—start checking at 10 minutes to avoid overbaking.
Step
Action
Duration
Key Visual Cue
1
Preheat oven and prep baking sheet
5 mins
Oven reaches 350°F
2
Mix wet ingredients
2 mins
Smooth, glossy mixture
3
Add oats and combine
2 mins
Sticky, cohesive dough
4
Shape cookies
5 mins
Rounded, flattened to 1/2″
5
Bake and cool
10-12 mins + 5 mins cooling
Edges golden, centers set
Serving & Presentation
I love to serve these cookies warm from the oven, when the peanut butter is still slightly soft and the oats are fragrant. Arrange them on a simple wooden board or a ceramic platter—the rustic look suits their wholesome character. For a touch of elegance, I sometimes dust them with a pinch of flaky sea salt just before baking; that salty-sweet contrast is pure magic and reminds me of the salted caramel cookies I used to make in Paris.
These cookies pair beautifully with a tall glass of cold milk or a warm mug of coffee. In my NYC apartment, I’ve been known to enjoy them with a chai latte from my favorite Brooklyn café. They’re also fantastic crumbled over a bowl of vanilla ice cream for an easy dessert—my son loves this trick. For a Moroccan-inspired twist, try serving them alongside a cup of mint tea, the way my mother would serve cookies after a meal.
Pairing Type
Suggestions
Why It Works
Side Dish
Vanilla ice cream, fruit salad, yogurt
Creamy contrast to chewy cookies; fresh fruit balances richness
Sauce / Dip
Chocolate sauce, caramel, honey drizzle
Enhances sweetness and adds decadence
Beverage
Cold milk, coffee, chai latte, mint tea
Neutralizes sweetness and cleanses palate
Garnish
Flaky sea salt, chopped peanuts, chocolate chips
Adds texture and visual appeal
Make-Ahead, Storage & Reheating
Living in NYC means I’m always on the go, so I love that these cookies are perfect for meal prep. I often bake a batch on Sunday, and they stay fresh on my counter for days—great for packing in my son’s lunch or grabbing as a quick snack before heading out the door. Here’s how to store them for maximum freshness.
Method
Container
Duration
Reheating Tip
Homemade Nutter Butters
Table of Contents
Homemade Nutter Butters – Better Than the Original
⚖️
Difficulty
Medium
⏲️
Prep Time
25 mins
🕒
Cook Time
12 mins
⏱️
Total Time
37 mins
🍽️
Servings
18 sandwiches
I still remember the first time I tasted a Nutter Butter as a kid in Morocco — my father brought home a package from a business trip to the States, and I was utterly captivated by that salty-sweet peanut butter filling sandwiched between two crisp, peanut-shaped cookies. Now, after years of training in Parisian pastry kitchens and cooking in my own NYC apartment, I’ve created these Homemade Nutter Butters that go far beyond any store-bought version. Soft baked peanut butter cookies, perfectly chewy and rich, hugged around a creamy, luscious filling — this is comfort baking elevated with a chef’s touch.
The moment you bite into one, the warm notes of brown sugar and vanilla hit first, followed by that deep, nutty peanut butter flavor that lingers on your tongue. The cookies are soft in the center with a delicate crumb, while the filling is impossibly smooth, almost like a cloud. The fork-tine criss-cross pattern on top gives each cookie that classic peanut look, but the real magic is in the texture — a perfect balance of tenderness and structure. A sprinkle of sugar on the outside adds a subtle crunch that contrasts beautifully with the creamy center.
My version breaks the mold by using light brown sugar for extra moisture and depth, plus a pinch of kosher salt that really makes the peanut butter sing. I also bake the cookies just long enough to set the edges while keeping the centers soft — a trick I learned at Le Cordon Bleu that makes all the difference. Let me show you how to make these better-than-original Homemade Nutter Butters, with a pro tip on shaping the dough to get that perfect peanut silhouette every single time.
Why This Homemade Nutter Butters Recipe Is the Best
The flavor secret lies in using both unsalted butter and creamy peanut butter in the dough and the filling. This double dose of peanut butter ensures every bite is packed with that nutty, roasted richness — no artificial flavors needed. Growing up, my mother would roast peanuts at home in Morocco, and the fragrance of warm nuts fills my kitchen every time I make this recipe. The light brown sugar adds a subtle molasses note that deepens the overall flavor profile, making these Nutter Butters taste more complex than anything from a box.
Texture is everything with a sandwich cookie, and I perfected this over many batches in my NYC apartment. The dough is soft and pliable, shaped into logs that bake into tender cookies with a slight chew. My French pastry training taught me the importance of chilling dough for structural integrity, but here, the peanut butter does the heavy lifting — keeping the cookies from spreading too much during baking. The result is a cookie that holds its shape, crumbles just slightly when bitten, and cradles the filling without falling apart.
This recipe is foolproof even for beginner bakers because the ingredients are straightforward and the steps are simple. You don’t need any special equipment — just a mixing bowl and a fork. The total time from start to finish is under 40 minutes, and you’ll have a batch of 18 gorgeous sandwich cookies. Plus, each step includes visual cues so you know exactly when the dough is ready, when the cookies are baked to perfection, and how to assemble them like a pro. These really are better than the original, and I can’t wait for you to try them.
Homemade Nutter Butters Ingredients
When I shop for ingredients at the Union Square Greenmarket here in New York City, I always look for the creamiest, most natural peanut butter I can find — no added sugar, just peanuts and a little salt. For this recipe, I use classic creamy peanut butter from the store, which gives the perfect spreadable consistency. The brown sugar comes from a local mill, and the butter is always unsalted so I can control the seasoning myself. It reminds me of my mother’s pantry in Morocco, where everything was measured by eye and heart.
Ingredients List
1 1/2 cups all purpose flour
1 teaspoon baking soda
1/4 teaspoon kosher salt
1/2 cup unsalted butter (softened)
1 cup light brown sugar
1 cup creamy peanut butter
1 large egg
1/2 teaspoon pure vanilla extract
1/2 cup sugar (for rolling the cookie dough in)
1/4 cup unsalted butter (softened) — for filling
1/2 cup creamy peanut butter — for filling
1 1/2 cups powdered sugar
2 Tablespoons milk
1/4 teaspoon vanilla extract — for filling
Ingredient Spotlight
Creamy peanut butter is the star here. In US grocery stores, look for brands with no hydrogenated oils — they blend more smoothly into both the dough and the filling. If you use natural peanut butter that separates, stir it well before measuring; it can make the dough oilier, so I recommend a standard creamy option for best results.
Light brown sugar is my secret weapon. It adds moisture and a gentle caramel note that pairs beautifully with peanut butter. Dark brown sugar can be used in a pinch, but it will make the cookies slightly denser and darker in color. For classic Homemade Nutter Butters, stick with light brown sugar.
Unsalted butter lets you control the salt level. The recipe uses 1/2 cup in the dough and 1/4 cup in the filling. Make sure both portions are at room temperature — softened butter creams more easily with the sugar, creating a light, airy dough that bakes up tender.
Original Ingredient
Best Substitution
Flavor / Texture Impact
All purpose flour
Gluten-free 1:1 blend
Slightly crumblier, still delicious
Creamy peanut butter (dough)
Natural peanut butter (well stirred)
May spread more; less sweet
Light brown sugar
Dark brown sugar
Denser, stronger molasses flavor
Unsalted butter
Salted butter (reduce added salt)
Slightly saltier, but fine
How to Make Homemade Nutter Butters — Step-by-Step
This process is straightforward and a joy to do — you’ll be shaping little peanut-shaped cookies in no time. Just follow each step, and don’t forget the visual cues that tell you everything is on track.
Step 1: Prepare Oven and Sugar
Preheat your oven to 350°F and line a cookie sheet with parchment paper or a silicone baking mat. Pour 1/2 cup of sugar into a small shallow bowl and set aside — this is for rolling the dough logs just before baking.
💡 emy’s Pro Tip: Use a small bowl with a wide opening so you can roll the dough logs evenly without overcrowding. The sugar coating adds a delightful sparkle and slight crunch.
Step 2: Whisk Dry Ingredients
In a medium mixing bowl, whisk together 1 1/2 cups all purpose flour, 1 teaspoon baking soda, and 1/4 teaspoon kosher salt. This ensures the baking soda is distributed evenly, so the cookies rise uniformly.
⚠️ Common Mistake to Avoid: Don’t skip the whisking — if you just dump the dry ingredients together, the baking soda might clump, leading to uneven spreading and some cookies being flatter than others.
Step 3: Cream Butter and Sugars
Using a standing mixer or an electric hand mixer, beat together 1/2 cup softened unsalted butter, 1 cup light brown sugar, and 1 cup creamy peanut butter. Cream on medium speed for about 2 minutes, until the mixture looks light, fluffy, and pale in color.
💡 emy’s Pro Tip: Make sure your butter is truly softened — not melted, but soft enough to leave a fingerprint when pressed. This helps trap air for a tender cookie.
Step 4: Add Egg and Vanilla
Add 1 large egg and 1/2 teaspoon pure vanilla extract to the creamed mixture. Continue mixing on medium speed until fully incorporated, about 30 seconds. The batter will look glossy and thick.
⚠️ Common Mistake to Avoid: Overmixing after adding the egg can make the dough tough. Stop as soon as you see no streaks of egg.
Step 5: Combine Dry Ingredients
Gradually add the flour mixture into the wet ingredients while mixing on low speed. Mix just until combined and no dry flour remains. The dough will be soft and slightly sticky but should hold together when pinched.
💡 emy’s Pro Tip: If the dough feels too sticky to handle, pop it in the fridge for 10 minutes. This makes shaping much easier.
Step 6: Shape Dough into Logs
Divide the dough into small balls, about 1 1/2 tablespoons each. Roll each ball between your palms into a log shape, roughly 2 inches long. Then roll each log in the bowl of sugar until fully coated.
Step 7: Place on Cookie Sheet
Place the sugar-coated dough logs on the prepared cookie sheet, spacing them about 2 inches apart. They will spread slightly during baking, so comfortable spacing ensures even edges.
⚠️ Common Mistake to Avoid: Don’t crowd the pan. If logs touch while baking, they’ll merge into odd shapes that are hard to sandwich later.
Step 8: Create Peanut Shape
Using the tines of a fork, gently press down on each dough log to make a criss-cross pattern. Then, pinch the middle of the cookie lightly with your thumb and index finger to create the classic peanut “waist.” This gives them that iconic Nutter Butter look.
💡 emy’s Pro Tip: Dip the fork tines in a bit of sugar before pressing to prevent sticking and add extra sparkle.
Step 9: Bake Cookies
Bake for 10-12 minutes, until the edges are lightly browned and the centers still look soft and slightly puffed. They will continue to set on the sheet, so don’t overbake.
⚠️ Common Mistake to Avoid: Overbaking is the number one mistake! The cookies should look just set with pale centers. 10 minutes is often enough in a convection oven.
Step 10: Cool Cookies
Allow the cookies to cool on the baking sheet for 5 minutes before transferring them to a wire rack. Cooling on the sheet lets them finish firming up without breaking.
Step 11: Make Filling
Using a standing mixer, beat 1/4 cup softened unsalted butter and 1/2 cup creamy peanut butter on medium speed until fluffy, about 2 minutes. Mix in 1 1/2 cups powdered sugar, 2 tablespoons milk, and 1/4 teaspoon vanilla extract until smooth and spreadable.
💡 emy’s Pro Tip: If the filling is too thick, add one more teaspoon of milk at a time. If too thin, add a tablespoon of powdered sugar. Aim for a spreadable but not runny consistency.
Step 12: Assemble Sandwiches
Group your cooled cookies into pairs of similar size. Spoon about 1 tablespoon of filling onto the bottom cookie of each pair, then gently press the second cookie on top to create a sandwich. Don’t press too hard — you want a generous layer of filling visible at the edges.
⚠️ Common Mistake to Avoid: Make sure cookies are completely cool before assembling, otherwise the filling will melt and slide off.
I still remember the first time I made these 4 ingredient peanut butter banana bars. It was a busy Tuesday morning in my tiny NYC apartment—I had a pile of spotty bananas on the counter, a jar of peanut butter staring at me, and absolutely no time for complicated baking. My mother back in Morocco would have laughed; she could whip up a dozen pastries with her eyes closed, but here I was, a trained Parisian chef, feeling intimidated by three overripe bananas. That morning, I decided to strip things back to basics. No flour, no eggs, no refined sugar—just the pure, honest flavors of banana, peanut butter, oats, and a handful of chocolate chips. The result? A bar so tender, so naturally sweet, and so ridiculously easy that it became my go-to emergency snack. These peanut butter banana bars are proof that simple ingredients, when treated with care, can be truly extraordinary.
The beauty of this recipe lies in its texture. The bananas, when fully ripe, melt into the oats, creating a soft, almost fudgy interior that contrasts beautifully with the slight chewiness of the oats. The peanut butter adds a rich, nutty undertone that anchors every bite, while the chocolate chips—I use dark chocolate for a little bitterness—provide little pockets of melty sweetness. What I love most is the aroma: as the bars bake, your kitchen fills with the warm, toasty scent of bananas caramelizing and oats toasting. It’s a smell that takes me right back to the farmers market in Union Square, where I first discovered how magical simple, whole ingredients can be. There’s no complicated technique here—just mashing, mixing, and baking—but the result is a bar that feels both wholesome and indulgent.
As a professional cook, I’ve learned that the best recipes are often the simplest. These 4 ingredient peanut butter banana bars are a perfect example: they’re forgiving, adaptable, and practically foolproof. I’ve tested them with almond butter, with gluten-free oats, with added nuts and seeds—and they always deliver. But what sets my version apart is a tiny trick I picked up in Paris: I toast the oats lightly before mixing them into the batter. It takes just two extra minutes, but it deepens the flavor and gives the bars a nuttier, more complex taste. That’s the kind of detail that turns a good recipe into a great one. So whether you’re a seasoned baker or someone who’s never mashed a banana in your life, trust me—you’ve got this. Let’s make some bars.
Why This 4 Ingredient Peanut Butter Banana Bars Recipe Is the Best
The Flavor Secret: The real magic here is the natural sweetness of overripe bananas. In my Moroccan kitchen growing up, we never wasted a spotty banana—we’d mash them into everything. When bananas are fully ripe, their starches convert to sugar, so you don’t need any added sweetener. Paired with smooth natural peanut butter, the flavor is rich, nutty, and perfectly balanced. My Parisian training taught me to let ingredients speak for themselves, and that’s exactly what happens here. The chocolate chips are optional, but they add that little moment of decadence that makes these bars feel like a treat.
Perfected Texture: The key to achieving that soft, chewy texture lies in the oats. I use quick-cooking oats because they absorb moisture evenly and create a tender crumb. If you use rolled oats, the bars will be chewier and a little more rustic—still delicious, but different. The trick I learned in Paris? Lightly toast the oats in a dry skillet for 2-3 minutes before mixing. This releases their natural oils and adds a deep, nutty flavor that transforms the entire dish. The bananas provide moisture, so the bars stay soft for days—if they last that long.
Foolproof & Fast: This recipe is practically impossible to mess up. No stand mixer, no creaming butter and sugar, no folding egg whites. Just one bowl, a fork, and a loaf pan. The batter comes together in under 10 minutes, and the oven does the rest. It’s the kind of recipe you can make with a toddler on your hip or during a conference call. I’ve made it in rental kitchens, in friends’ apartments, and even in a camper van—and it never fails. That’s why these 4 ingredient peanut butter banana bars have become my most-requested recipe by friends and family.
Peanut Butter Banana Bars Ingredients
I love sourcing my ingredients from the Union Square Greenmarket in NYC, where I can get farm-fresh bananas and locally milled oats. But honestly, this recipe works with whatever you have in your pantry. The ingredients are that forgiving. Let’s talk about what you’ll need.
Ingredients List
3 very ripe bananas (the spottier, the better!)
1/4 cup smooth natural peanut butter (no added sugar or oil)
1 teaspoon vanilla extract
1 1/4 cup instant or quick-cooking oats
1/4 teaspoon salt
1/2 teaspoon baking powder
1/2 cup chocolate chips (plus a few extra for the top)
Ingredient Spotlight
Bananas: The backbone of this recipe. Choose bananas that are heavily spotted or even blackened—they’re sweeter and easier to mash. In a pinch, you can use frozen bananas (thawed and drained), but fresh ripe bananas give the best texture. If your bananas aren’t ripe enough, roast them in a 350°F oven for 15 minutes to concentrate the sugars.
Peanut Butter: Use smooth, natural peanut butter with no added sugar or oil. The kind that separates in the jar is perfect—just stir it well before measuring. The natural oils keep the bars moist. If you use processed peanut butter (like Skippy or Jif), reduce the salt in the recipe because those brands already contain salt and sugar. For a nut-free version, sunflower seed butter works beautifully, though the flavor will be slightly different.
Oats: Quick-cooking oats are ideal because they break down more during mixing, creating a bar that holds together well and has a tender crumb. Rolled oats will give you a chewier, more rustic texture. Avoid steel-cut oats—they won’t soften enough during baking. For a gluten-free version, use certified gluten-free oats.
Chocolate Chips: I use dark chocolate chips (60-70% cacao) for a little bitterness that balances the sweetness. Semi-sweet or milk chocolate also work. If you’re avoiding sugar, sugar-free chocolate chips are fine, but the texture may be slightly different. You can also omit the chocolate chips entirely for a plain banana-oat bar.
How to Make Peanut Butter Banana Bars — Step-by-Step
Don’t worry—this is one of those recipes that practically makes itself. Just follow these steps, and you’ll have warm, fragrant bars in no time.
Step 1: Prepare the Oven and Pan
Preheat your oven to 350°F. Grease a 9×5-inch loaf pan with butter or non-stick spray, or line it with parchment paper—this makes cleanup even easier. I like to leave an overhang on the long sides so I can lift the bars out after baking.
💡 emy’s Pro Tip: Lining with parchment paper ensures the bars come out perfectly clean every time. Just cut the paper so it’s wide enough to hang over both long edges of the pan.
Step 2: Mash the Bananas
In a large bowl, add the 3 very ripe bananas. Mash them with a fork until almost smooth—a few small lumps are fine, as they add texture. You want a consistency similar to baby food. The more you mash, the more evenly the bars will bake.
⚠️ Common Mistake to Avoid: Don’t under-mash the bananas—larger chunks can create uneven pockets in the bars that won’t hold together. Break them down until the mixture is fairly uniform.
Step 3: Mix the Wet Ingredients
Add the 1/4 cup smooth natural peanut butter and 1 teaspoon vanilla extract to the mashed bananas. Stir well with a wooden spoon or spatula until the peanut butter is fully incorporated. The mixture will be thick and sticky—that’s exactly what you want.
💡 emy’s Pro Tip: If your peanut butter is cold and stiff, warm it in the microwave for 10 seconds before adding. This makes it much easier to mix in evenly.
Step 4: Add the Dry Ingredients
Add the 1 1/4 cup quick-cooking oats, 1/4 teaspoon salt, and 1/2 teaspoon baking powder to the bowl. Mix until everything is just combined—don’t overmix, or the bars can become dense. Fold in 1/3 cup of the chocolate chips, reserving the rest for the top.
⚠️ Common Mistake to Avoid: Be gentle when folding in the chocolate chips. Overmixing at this stage can break the chips and turn the batter gray. Just fold until they’re evenly distributed.
Step 5: Bake to Perfection
Pour the batter into the prepared loaf pan and smooth the top with a spatula. Sprinkle the remaining chocolate chips over the top. Bake for 25-30 minutes, or until a knife inserted in the center comes out clean. The edges should be golden brown, and the center should feel set but still slightly soft.
💡 emy’s Pro Tip: Every oven is different. Start checking at 25 minutes—if the top is darkening too quickly, cover loosely with aluminum foil for the last 5 minutes. The bars are done when the center springs back slightly to the touch.
Step
Action
Duration
Key Visual Cue
1
Preheat oven & prepare pan
5 min
Oven at 350°F; pan greased or lined
2
Mash bananas
2 min
Almost smooth with no large lumps
3
Mix wet ingredients
1 min
Peanut butter fully incorporated
4
Add dry ingredients
2 min
Thick batter, no dry patches
5
Bake
25-30 min
Golden edges, clean knife test
Serving & Presentation
These peanut butter banana bars are wonderful served warm from the oven, when the chocolate chips are still melty and the bananas are at their most fragrant. I love to cut them into thick squares and serve them on a simple wooden board, maybe with a dusting of flaky sea salt on top—a trick I picked up in Paris that elevates the sweet-salty balance. A small dollop of Greek yogurt or a drizzle of extra peanut butter makes them feel even more indulgent, especially for breakfast or an afternoon snack. In my house, they never last past day two.
For a summer treat, I sometimes serve them chilled straight from the fridge—the texture firms up and becomes almost like a fudge bar. And if you’re feeling fancy, you can sandwich two bars together with a layer of peanut butter or Nutella for an irresistible dessert. At my New York dinner parties, I’ve even served these as a gluten-free dessert option alongside a scoop of vanilla ice cream—it always gets rave reviews. The key is to let them cool completely before cutting, so they hold their shape beautifully.
Pairing Type
Suggestions
Why It Works
Side Dish
Fresh berries, sliced apples, or a handful of grapes
Fresh fruit cuts the richness with acidity
Sauce / Dip
Greek yogurt, extra peanut butter drizzle, or chocolate sauce
Adds creaminess and intensifies flavor
Beverage
Cold brew coffee, iced latte, or a glass of oat milk
Flaky sea salt, chopped peanuts, a dusting of cinnamon
Oreo Ice Cream Sandwich Cake
Table of Contents
Oreo Ice Cream Sandwich Cake: The No-Bake Layered Dessert You’ve Been Dreaming Of
⚖️
Difficulty
Easy
⏲️
Prep Time
15 mins
🕒
Cook Time
0 mins
⏱️
Total Time
15 mins + freezing
🍽️
Servings
12
This Oreo Ice Cream Sandwich Cake is the dessert that makes everyone’s eyes light up — mine included — and it all started on a hot summer afternoon in my mother’s tiny kitchen in Morocco. We didn’t have air conditioning, so we lived for cold treats made from whatever we could find. Now, living in New York City, I still crave that same feeling: a no-bake, outrageously easy dessert that delivers pure joy. This Oreo Ice Cream Sandwich Cake has 6 delicious layers made from ice cream sandwiches, fluffy whipped topping, rich hot fudge, and crushed Oreos. It’s the kind of sweet treat that looks like you spent hours on it, when really, it comes together in about 15 minutes.
Imagine cutting into this cake: the first thing you see are those perfect layers of vanilla ice cream sandwich, then a cloud of whipped topping, followed by a ribbon of glossy fudge and a generous sprinkle of dark, crunchy Oreo crumbs. The texture is incredible — the ice cream sandwiches soften just enough to become cake-like, while the fudge stays rich and the Oreos add that satisfying crunch. It’s a symphony of cold, creamy, and crunchy, all in one slice. I always think back to my Paris training when I’m layering desserts like this; it’s all about building distinct layers that sing together. And the best part? No oven needed, so your kitchen stays cool.
As a professional cook, I’ve tested this Oreo Ice Cream Sandwich Cake more times than I can count, making sure every component works in perfect harmony. My secret? A quick trick with the whipped topping that keeps it light and stable, and a method for layering that prevents the whole thing from turning into a soggy mess. I’ve also seen a common mistake — using frozen whipped topping straight from the freezer, which makes it impossible to spread. Trust me, a little patience goes a long way. From my NYC kitchen to yours, this recipe is foolproof and undeniably delicious.
Why This Oreo Ice Cream Sandwich Cake Recipe Is the Best
The Flavor Secret: This isn’t just any ice cream cake — it’s a masterclass in balance. The vanilla ice cream sandwiches provide a neutral, creamy base that lets the chocolate fudge and crushed Oreos shine. I’ve learned from my French pastry training that even simple desserts need harmony, so I make sure the fudge is drizzled generously but not overwhelmingly, and the Oreos are crushed to the perfect texture — fine enough to disperse throughout, but with a few larger pieces for that satisfying crunch. It’s the same principle I use when making a classic mille-feuille: every layer must be distinct yet complementary.
Perfected Texture: The key is in how the ice cream sandwiches soften. When you layer them with the whipped topping and fudge, they absorb just enough moisture to become tender and cake-like, without turning into a puddle. I’ve perfected the ratio of whipped topping to fudge to ensure the sandwiches stay intact but still yield to that perfect, soft bite. This is a technique I picked up in Paris when making bavarois — it’s all about controlling moisture. You want each slice to hold its shape but melt in your mouth.
Foolproof & Fast: This Oreo Ice Cream Sandwich Cake is the ultimate beginner-friendly dessert. There’s no baking, no complicated techniques, and no special equipment. You just layer, freeze, and serve. It’s the kind of recipe that my neighbors in NYC ask for again and again because it’s so reliable. Whether you’re making it for a birthday party, a summer barbecue, or just a weeknight treat, it always turns out perfectly. The ingredients are simple and easy to find at any grocery store, and the assembly takes less time than watching a single episode of your favorite show.
Oreo Ice Cream Sandwich Cake Ingredients
I love sourcing my ingredients for this cake from the local grocery store near me in Chelsea, but honestly, everything you need is probably already in your kitchen. I remember my mother would make a similar layered dessert with whatever cookies and cream she could find in the market in Marrakech. Here in the US, it’s so easy — Oreos and ice cream sandwiches are staples.
Ingredients List
24 Ice cream Sandwiches (the classic vanilla kind)
12 Oreos (crushed)
Hot Fudge Topping (about 1 cup, or as needed)
8 oz Whipped Topping (thawed and divided, like Cool Whip)
Ingredient Spotlight
Ice Cream Sandwiches: These are the backbone of the cake. Look for the classic rectangular vanilla ice cream sandwiches — they fit perfectly in a 9×13 pan. The quality matters; cheaper brands may have a more icy texture, while premium ones are creamier. I usually grab the store brand at my local supermarket and they work great. If you can only find square ones, you may need to trim them to fit.
Oreos: The classic Oreo is non-negotiable for that iconic cookies-and-cream flavor. I always use the regular ones, not the Double Stuf, because the ratio of cookie to cream is perfect for crushing. You can crush them in a bag with a rolling pin or pulse them in a food processor — just aim for a mix of fine crumbs and small chunks for texture.
Hot Fudge Topping: Use a good-quality hot fudge, not chocolate syrup. The fudge needs to be thick and rich so it doesn’t just soak into the cake. I love the kind that comes in a jar and has that fudgy, almost pudding-like consistency. You can even warm it slightly to make it easier to drizzle.
Whipped Topping: I always use thawed Cool Whip or a similar non-dairy whipped topping. It’s stable, sweet, and easy to spread. Make sure it’s fully thawed in the refrigerator, not at room temperature, to avoid it becoming too liquid. I divide it in half for the two layers — this ensures each layer is perfectly coated.
Original Ingredient
Best Substitution
Flavor / Texture Impact
Ice Cream Sandwiches
Gluten-Free Ice Cream Sandwiches
Slightly different texture; may be less cake-like
Oreos
Gluten-Free Chocolate Sandwich Cookies
Similar crunch; slightly different cocoa flavor
Hot Fudge Topping
Homemade Chocolate Ganache
Richer, more sophisticated chocolate flavor
Whipped Topping
Homemade Stabilized Whipped Cream
Lighter, less sweet; may deflate faster
How to Make Oreo Ice Cream Sandwich Cake — Step-by-Step
Trust me, this is the easiest dessert you’ll ever make. Just follow these simple steps, and you’ll have a stunning, crowd-pleasing cake in no time.
Step 1: Layer the Ice Cream Sandwiches
Arrange 12 ice cream sandwiches in a single layer in the bottom of a 9×13-inch pan. You may need to cut one or two to fit the edges snugly. This forms the base of your cake.
💡 emy’s Pro Tip: Work quickly while the sandwiches are still frozen. If they start to soften too much, pop them back in the freezer for a few minutes.
Step 2: Spread the Whipped Topping
Spread half of the thawed whipped topping evenly over the first layer of ice cream sandwiches. Use an offset spatula or the back of a spoon to create an even, smooth layer. This is the creamy, cloud-like layer.
⚠️ Common Mistake to Avoid: Don’t press too hard or the whipped topping will mix into the sandwiches. Gently spread it to keep the layers distinct.
Step 3: Drizzle the Fudge
Drizzle half of the hot fudge topping over the whipped topping. You can warm the fudge slightly in the microwave for 10-15 seconds if it’s too thick to drizzle. Aim for an even distribution, but don’t worry about perfection — the swirls look beautiful.
💡 emy’s Pro Tip: If the fudge is too thick, add a teaspoon of milk and stir before drizzling. This makes it easier to spread without disturbing the whipped topping.
Step 4: Sprinkle the Crushed Oreos
Sprinkle half of the crushed Oreos evenly over the fudge layer. The crumbs add that essential crunch and chocolate flavor between the layers.
⚠️ Common Mistake to Avoid: Don’t crush the Oreos into dust. You want a mix of fine crumbs and small chunks for the best texture contrast.
Step 5: Repeat the Layers
Repeat steps 1-4 once again: add another layer of 12 ice cream sandwiches, then the remaining whipped topping, then the remaining fudge, and finally the remaining crushed Oreos on top.
💡 emy’s Pro Tip: Gently press down on the second layer of sandwiches to make sure everything is level before adding the toppings.
Step 6: Freeze the Cake
Freeze the cake for at least 30 minutes before serving. If you’re making it ahead, cover the pan tightly with plastic wrap or foil and freeze for up to a month. The longer it freezes, the more the flavors meld together.
⚠️ Common Mistake to Avoid: Don’t skip the freezing time. If you try to cut it too soon, the layers will slide apart. Give it at least 30 minutes to set.
Step 7: Thaw and Serve
Allow the cake to thaw for about 10 minutes at room temperature before slicing and serving. This softens it just enough to make cutting easy and the texture perfect. Use a sharp knife to get clean, beautiful slices.
💡 emy’s Pro Tip: Run your knife under hot water and wipe it dry between cuts for the cleanest slices. It makes a huge difference.
Step
Action
Duration
Key Visual Cue
1
Layer ice cream sandwiches
2 minutes
Pan bottom fully covered
2
Spread whipped topping
2 minutes
Even white layer
3
Drizzle hot fudge
1 minute
Swirls of chocolate over white
4
Sprinkle crushed Oreos
1 minute
Dark crumbs evenly scattered
5
Repeat layers
5 minutes
Second full stack formed
6
Freeze
30+ minutes
Firm to the touch
7
Thaw and serve
10 minutes
Edges soften slightly
Serving & Presentation
Serving this Oreo Ice Cream Sandwich Cake is where the fun begins. I like to cut it into neat squares and place each slice on a chilled plate — it keeps the cake from melting too quickly. For an extra touch, I drizzle a little extra hot fudge on top and add a dollop of whipped cream. It’s a simple presentation that feels like something from a fancy NYC diner.
This cake is the star of any gathering. At summer barbecues in Brooklyn, it’s always the first thing to disappear. I love pairing it with a cold glass of milk, a scoop of vanilla ice cream on the side, or even a drizzle of caramel sauce for extra indulgence. When I think back to France, I remember how they’d serve a simple gâteau glacé with a tiny espresso — it’s a beautiful contrast. Here, a strong cup of coffee or a cold brew works wonders.
I still remember the first summer I made these frozen s’mores. It was one of those sweltering July afternoons in New York City where the humidity just wraps around you. My mother back in Morocco would always toast marshmallows over a tiny charcoal brazier for us as kids — a simple, messy joy. But here in NYC, with the heat index hitting 100°F, the last thing I wanted was to turn on the oven or light a fire. So I dove into my French-trained pastry brain and thought: why not make a chilled, creamy version? This no-bake chocolate pudding dessert became an instant hit. The layers of silky chocolate pudding and luscious marshmallow creme are nestled between crunchy graham crackers — frozen until sliceable. It’s the best frozen s’mores recipe I’ve ever made, and it’s been my go-to for every summer gathering since.
When you take a bite of these frozen s’mores, you get that first satisfying crunch of the graham cracker, then the cool, velvety pudding melts on your tongue, followed by the sweet, airy marshmallow creme that tastes like a cloud. There’s a hint of tang from the cream cheese that balances the sweetness perfectly. It’s like a classic s’more, but with all the richness of a French-style mousse and none of the heat. The chocolate is deep and comforting, while the marshmallow layer stays soft even when frozen — a little trick I picked up from making frozen mousses in Paris pastry kitchens. The graham cracker adds that familiar American campfire nostalgia, but the texture is entirely its own. It’s the kind of dessert that disappears fast, even from the freezer.
Now, this isn’t just any frozen s’mores recipe. I’ve tested it a dozen times to get the ratios exactly right — not too sweet, not too dense. The secret is folding a bit of whipped topping into the pudding to keep it light, and beating the cream cheese into the marshmallow creme for stability. My advice? Don’t skip the cream cheese. It gives the marshmallow layer a subtle tang and a silky smoothness that makes each bite feel decadent. And avoid the common mistake of pulling the pan out too early — six hours of freezing is non-negotiable. Trust me, it’s worth the wait. These frozen treats are the perfect easy no-bake dessert for hot summer days, and they’ve become a staple in my freezer for picnics, block parties, and lazy Sunday afternoons.
Why This Frozen S’mores Recipe Is the Best
The Flavor Secret — Growing up, my mother’s kitchen in Morocco was filled with the aroma of honey and toasted sesame, but it’s the classic American s’more that always makes me smile. I’ve elevated it with a French pastry trick: mixing marshmallow creme with cream cheese. This not only stabilizes the marshmallow layer — so it doesn’t freeze into a hard block — but also adds a subtle tang that cuts through the sweetness. The result is a balanced, sophisticated flavor that both kids and adults love. It’s the same philosophy I use when I make a light cheesecake: a little bit of tang goes a long way.
Perfected Texture — In Paris, I learned how to create silky, airy textures through careful folding. Here, I fold a quarter of the whipped topping into the chocolate pudding to lighten it, then fold the remaining topping into the marshmallow-cream cheese mixture. This ensures both layers stay creamy and scoopable — not icy or dense. The graham crackers soften just slightly from the moisture, but they retain enough crunch to give each bite structure. It’s a textural symphony: crunchy, creamy, airy, and cool all at once.
Foolproof & Fast — Even if you’ve never made a frozen dessert before, you can nail this one. There’s no baking, no tempering eggs, no complicated steps. You just mix, layer, and freeze. The hardest part is waiting the six hours! I’ve designed this recipe to be forgiving — if you don’t have a 9×13 pan, a similar-sized dish works; if you only have 12 graham cracker squares, that’s fine. It’s the perfect crowd-pleasing summer dessert that looks impressive with zero effort.
Frozen S’mores Ingredients
I pick up all my ingredients from the Union Square Greenmarket or my local grocery store near Chelsea Market. When I was in Morocco, we’d make a similar layered dessert with honey and phyllo — but here, I rely on the convenience of instant pudding and marshmallow creme. It’s a beautiful blend of American pantry staples and French technique.
Ingredients List
1 box Instant Chocolate Pudding (5.9 oz)
2.5 cups Cold Milk (whole or 2%)
12-15 Graham Crackers
7 oz Marshmallow Creme
4 oz Cream Cheese (softened)
8 oz Frozen Whipped Topping (thawed)
Ingredient Spotlight
Instant Chocolate Pudding — This is the backbone of the dessert. I prefer the brand name (like Jell-O) because it sets reliably and has a deep chocolate flavor. The key is to use cold milk and beat it until smooth — no lumps! If you’re in a pinch, you can use chocolate mousse mix, but pudding gives that signature creamy texture. For a dairy-free version, try almond or oat milk, but note that the pudding might be slightly softer.
Marshmallow Creme — This is not the same as marshmallows! Marshmallow creme (like Jet-Puffed) is a smooth, spreadable syrup that stays soft when frozen. Don’t substitute with mini marshmallows unless you want a chewy, icy layer. The creme blends seamlessly with the cream cheese to create a light, airy filling.
Cream Cheese — Full-fat is best here. It adds richness and tang, and it prevents the marshmallow layer from turning into a block of ice. Make sure it’s softened to room temperature before beating — otherwise, you’ll get lumps. I’ve tested it with low-fat cream cheese, and the texture becomes grainy and less stable. Stick with the full-fat version for the best results.
Graham Crackers — These add the classic crunch. I use honey-flavored graham crackers for a touch of sweetness. You can also use chocolate or cinnamon grahams for a fun twist. Make sure they’re not too stale — fresh ones hold up better to the moisture from the filling.
Frozen Whipped Topping — I use Cool Whip (thawed) for convenience. It’s already sweetened and stabilized, so it folds beautifully. You can substitute homemade whipped cream, but it won’t hold up as well in the freezer. If you go the homemade route, add a tablespoon of cornstarch or gelatin to stabilize it.
Original Ingredient
Best Substitution
Flavor / Texture Impact
Instant Chocolate Pudding
Chocolate mousse mix
Denser, richer texture
Marshmallow Creme
Marshmallow fluff
Similar but slightly sweeter
Cream Cheese
Greek yogurt (full-fat)
Tangier, less stable
Graham Crackers
Wafer cookies
Crunchier, but different flavor
Frozen Whipped Topping
Homemade stabilized whipped cream
Lighter, but less freezer-stable
How to Make Frozen S’mores — Step-by-Step
Trust me, this is one of the easiest frozen desserts you’ll ever make. Just take your time with each layer, and don’t rush the freezing process. The payoff is a perfectly sliceable, crowd-pleasing treat.
Step 1: Prepare the Pan
Line a 9×13 pan with parchment paper, letting the paper overhang on two opposite sides — this will be your “handle” for lifting the finished dessert. Break 6 graham crackers in half and lay 12 squares (or 15 if your pan is square-edged) in a single layer on the bottom. It’s okay if they don’t cover every inch; you’ll slice around them later.
💡 emy’s Pro Tip: Press the graham crackers gently into the pan so they don’t shift when you add the pudding. If they crack, don’t worry — you can layer them as close as possible.
Step 2: Mix the Pudding Layer
In a medium bowl, beat together the pudding mix and cold milk for about 2 minutes until smooth and creamy. Then gently stir in about a quarter of the thawed whipped topping (about 1/2 cup). This lightens the pudding and makes it airier once frozen.
⚠️ Common Mistake to Avoid: Don’t over-beat the pudding. Stop as soon as it comes together — otherwise, it can become too thick and hard to spread.
Step 3: Spread and Chill
Spoon the pudding mixture over the graham crackers and spread it evenly with a spatula. Place the pan in the freezer while you prepare the marshmallow layer — this helps the pudding firm up slightly so the layers don’t mix.
💡 emy’s Pro Tip: Use an offset spatula for the smoothest even layer. And don’t skip the freezer chill — it’s a game-changer for clean layers!
Step 4: Make the Marshmallow Layer
In a medium bowl, beat together softened cream cheese and marshmallow creme until completely smooth. Fold in the remaining whipped topping gently — you want to keep it light and airy. Remove the pan from the freezer and spoon the marshmallow mixture over the pudding, spreading it out carefully.
⚠️ Common Mistake to Avoid: Cold cream cheese will leave lumps. Let it sit on the counter for at least 20 minutes before beating, or microwave for 10 seconds to soften.
Step 5: Top and Freeze
Place another 12 (or 15) graham cracker squares on top of the marshmallow layer, pressing them gently so they stick. Cover the pan with foil and freeze for at least 6 hours, or overnight. The longer it freezes, the cleaner your slices will be.
💡 emy’s Pro Tip: If you’re in a hurry, you can freeze for 4 hours, but the texture will be softer. For perfect bars, go the full 6 hours or more.
Step 6: Slice and Serve
Remove the pan from the freezer and let it rest at room temperature for about 10 minutes. Use a long, sharp knife to slice off the excess filling around the edges of the graham crackers — this reveals the clean square shapes. Then slice between each cracker to separate the individual frozen s’mores. Serve immediately.
⚠️ Common Mistake to Avoid: Don’t skip the 10-minute rest! If you try to cut them straight from the freezer, they’ll be too hard and the crackers might break.
Step
Action
Duration
Key Visual Cue
Prepare Pan
Line & layer grahams
5 mins
Crackers cover bottom
Pudding Layer
Beat & fold
3 mins
Smooth, glossy
Freeze Chill
Pan in freezer
10 mins
Pudding slightly set
Marshmallow Layer
Beat & fold
5 mins
Fluffy, no lumps
Top & Freeze
Layer grahams, cover
6+ hours
Firm to touch
Slice & Serve
Rest & cut
10 mins rest
Clean edges
Serving & Presentation
These frozen s’mores are best served straight from the freezer, with a slight rest at room temperature to soften them just enough. I love arranging them on a rustic wooden board, like the one I found at the Brooklyn Flea, with a dusting of cocoa powder or a drizzle of melted chocolate on top. For a touch of color, add a few fresh raspberries or a sprinkle of sea salt — it’s a trick I learned from a Parisian pâtissier who always balanced sweetness with a hint of salt.
In NYC, I often bring these to rooftop parties or summer barbecues. They pair beautifully with a tall glass of cold milk or a iced coffee. If you’re serving them at a birthday party, cut the s’mores into smaller triangles for bite-sized treats. The contrast between the frozen filling and the crunchy graham is always a hit. You can also serve them with a side of warm caramel sauce for dipping — a Moroccan-inspired twist that reminds me of the honey drizzle my mother used on pastries.
For a truly indulgent presentation, layer the s’mores on a platter with fresh mint leaves and extra whipped cream. I’ve also served them as part of a summer dessert board alongside fresh fruit, brownies, and a bowl of fresh berries. It’s a great way to share with a crowd, and the visual of those neat little squares just makes everyone smile.