Best Pumpkin Pie with Flaky Homemade Crust

best-pumpkin-pie-homemade-crust

“`html

Introduction

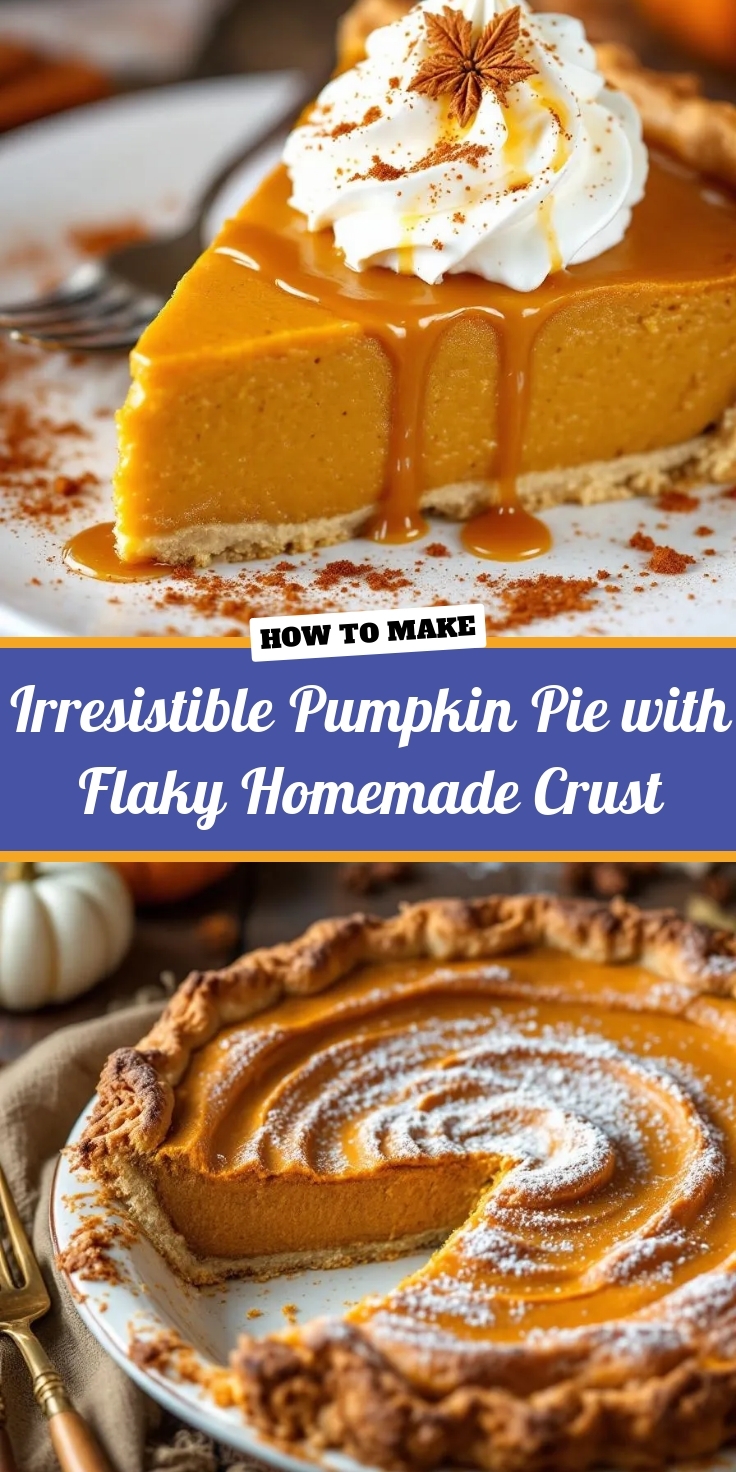
There’s something magical about the aroma of warm spices filling the kitchen as an Irresistible Pumpkin Pie with Flaky Homemade Crust bakes to golden perfection. Whether it’s the nostalgia of holiday gatherings or the simple joy of slicing into that first creamy, spiced bite, this dessert holds a special place in so many hearts. If you’ve ever craved a pie that balances velvety pumpkin filling with a buttery, crisp crust, you’re in the right place. This recipe isn’t just delicious—it’s a celebration of tradition, comfort, and the kind of homemade goodness that brings people together.

About This Recipe

An Irresistible Pumpkin Pie with Flaky Homemade Crust is more than just a seasonal treat. It’s a timeless classic that turns simple ingredients like pumpkin puree, warm spices, and a buttery dough into something extraordinary. What sets this version apart? First, the crust. Unlike store-bought alternatives, a homemade crust delivers unmatched texture—crisp yet tender, with layers that shatter with every forkful. Meanwhile, the filling strikes the perfect balance between rich and light, spiced with cinnamon, ginger, and nutmeg for that signature warmth.

This recipe matters because it elevates a familiar favorite without complicating the process. Whether you’re a baking novice or a seasoned pro, you’ll find the steps approachable and the results rewarding. Plus, it aligns perfectly with the cozy, from-scratch ethos of Brek Cakes, where we believe the best desserts start with quality ingredients and a little love. Speaking of love, if you’re looking for more fall-inspired baking ideas, check out our Perfect Apple Crisp or Spiced Pumpkin Bread for equally comforting treats.

Beyond taste, this pie embodies the spirit of togetherness. It’s the centerpiece of holiday tables, the dessert that sparks conversations, and the recipe you’ll want to pass down. From its inviting scent to its creamy, spiced filling, every element invites you to slow down and savor the moment. And let’s be honest—few things beat the pride of serving a pie made entirely from scratch.

Why I Love This Recipe

This Irresistible Pumpkin Pie with Flaky Homemade Crust reminds me of my grandmother’s kitchen, where the scent of cinnamon and toasted pastry meant family was near. She taught me that a great pie isn’t just about technique—it’s about the stories shared while rolling out the dough and the laughter that follows the first bite. Every time I make it, I feel that same connection. The flaky crust and spiced filling aren’t just delicious; they’re a tribute to those moments. And now, I hope this recipe becomes a part of your story too.

“`

Health and Nutrition

Why it’s good for your body

Irresistible Pumpkin Pie with Flaky Homemade Crust delivers more than just incredible flavor. First, pumpkin packs a powerful nutritional punch. It’s rich in vitamin A, which supports vision and immune health. Additionally, the spices like cinnamon and nutmeg offer anti-inflammatory benefits. Together, they make every slice a boost for your well-being.

Moreover, Irresistible Pumpkin Pie with Flaky Homemade Crust contains fiber from the pumpkin puree. Fiber aids digestion and helps you feel full longer. Meanwhile, the eggs in the filling provide high-quality protein. As a result, this dessert balances indulgence with nourishment.

Finally, homemade crust lets you control the ingredients. You can opt for whole-grain flour or reduce sugar without sacrificing taste. Therefore, Irresistible Pumpkin Pie with Flaky Homemade Crust becomes a smarter choice than store-bought versions. Enjoy it knowing you’re treating your body right.

How it fits in a healthy lifestyle

Irresistible Pumpkin Pie with Flaky Homemade Crust fits perfectly into balanced eating. For instance, you can pair a small slice with a protein-rich breakfast like Greek yogurt. This keeps energy levels steady. Alternatively, serve it as a mindful dessert after a nutrient-dense meal.

If you follow specific diets, this recipe adapts easily. Use almond flour for a gluten-free crust, or swap coconut sugar for a lower-glycemic option. For heart-healthy choices, try our avocado oil substitutes in the crust. You’ll add healthy fats without compromising flavor.

Planning ahead helps too. Bake Irresistible Pumpkin Pie with Flaky Homemade Crust for gatherings, so you enjoy it socially without overindulging. For more tips on balancing treats, explore our guide to healthy dessert swaps. With smart choices, this pie becomes part of a lifestyle you love.

Print
clock clock iconcutlery cutlery iconflag flag iconfolder folder iconinstagram instagram iconpinterest pinterest iconfacebook facebook iconprint print iconsquares squares iconheart heart iconheart solid heart solid icon

Irresistible Pumpkin Pie with Flaky Homemade Crust


  • Author: Chef Emy

Description

A classic pumpkin pie with a buttery, flaky homemade crust that melts in your mouth.
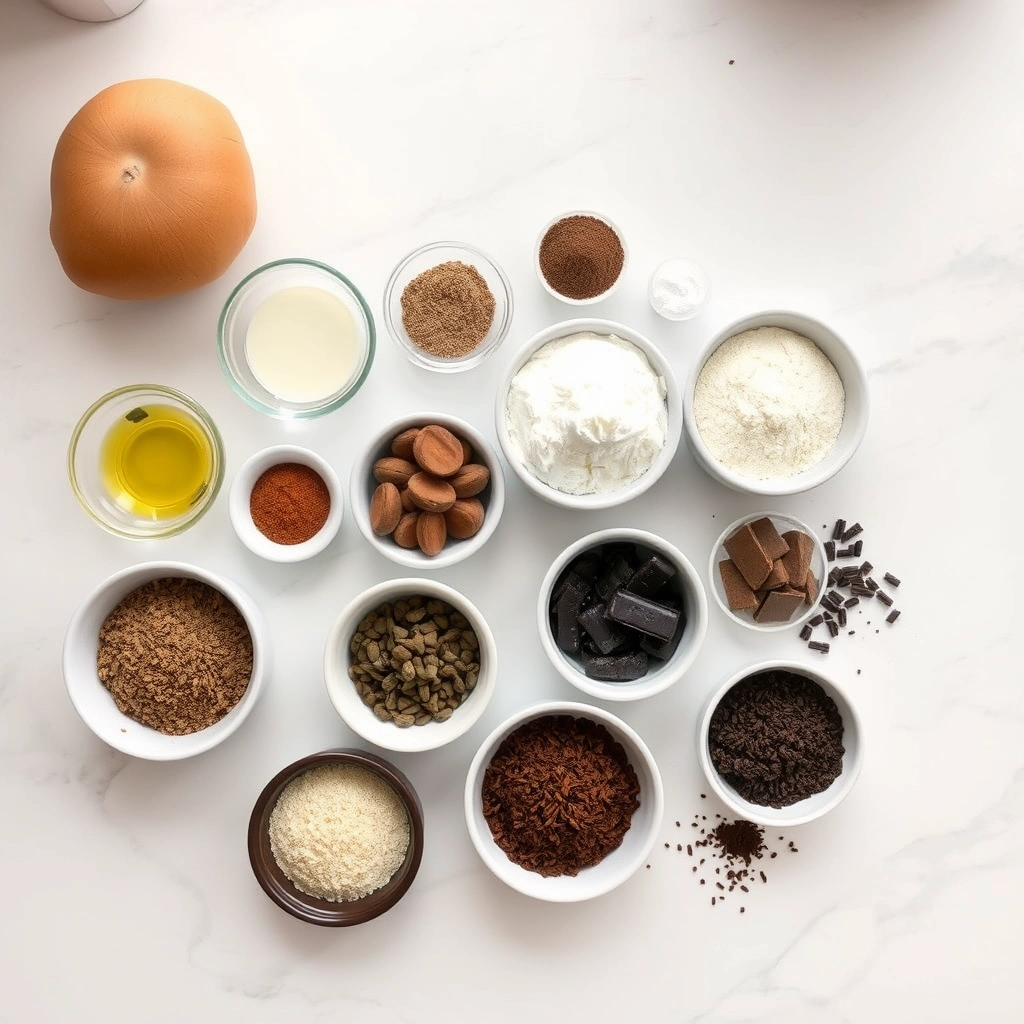

Ingredients

Scale

For the Crust:

  • 1 1/4 cups all-purpose flour
  • 1/2 teaspoon salt
  • 1/2 cup unsalted butter, chilled and cubed
  • 34 tablespoons ice water
  • 1 can (15 oz) pumpkin puree
  • 3/4 cup granulated sugar
  • 1 teaspoon ground cinnamon
  • 1/2 teaspoon ground ginger
  • 1/4 teaspoon ground cloves
  • 1/2 teaspoon salt
  • 2 large eggs
  • 1 can (12 oz) evaporated milk

Instructions

1. Prepare the Crust:

  1. Preheat oven to 425°F (220°C).
  2. Make the crust: Mix flour and salt in a bowl. Cut in butter until mixture resembles coarse crumbs. Gradually add ice water until dough forms. Roll out and place in a 9-inch pie dish.
  3. Make the filling: Whisk together pumpkin puree, sugar, spices, and salt. Beat in eggs, then gradually stir in evaporated milk until smooth.
  4. Pour filling into crust. Bake at 425°F for 15 minutes, then reduce heat to 350°F and bake for 40-45 minutes until set.
  5. Cool completely before serving.

Notes

You can customize the seasonings to taste.

How to Prepare This Dish

Steps and time-saving tips

Start by preheating your oven to 375°F so it’s ready when you need it. For the flaky homemade crust, whisk together flour, salt, and a pinch of sugar in a large bowl. Then, cut cold butter into small cubes and work it into the flour with your fingers until the mixture resembles coarse crumbs. Drizzle ice water, one tablespoon at a time, and gently fold until the dough comes together. Roll it out on a floured surface, then carefully transfer it to your pie dish. Trim the edges and crimp them for a polished look. Meanwhile, mix the pumpkin puree, eggs, brown sugar, and warm spices like cinnamon and nutmeg in a separate bowl. Whisk in evaporated milk until smooth, then pour the filling into the crust. Bake the Irresistible Pumpkin Pie for 50-55 minutes until the center barely jiggles. Let it cool completely before slicing—this prevents a soggy crust. For a time-saving hack, prepare the dough a day ahead and chill it overnight. Also, use canned pumpkin puree for consistency, but elevate it with freshly grated nutmeg.

Mistakes I’ve made and learned from

I once overworked the crust, and it turned tough instead of flaky. Now, I handle the dough as little as possible and chill it before rolling. Another blunder? Underbaking the filling because the edges looked done. The center was wobbly, and slicing was a mess. Now, I rely on the jiggle test—the pie should wobble slightly in the middle but set around the edges. If you’re new to baking pies, my guide on perfect pie crusts breaks down the science behind flakiness. Also, if your spices taste muted, try toasting them first—game changer! For more troubleshooting, check out my tips on fixing soggy bottoms, a common pumpkin pie woe. Trust me, these small tweaks make all the difference.

Cultural Connection and Variations

Where this recipe comes from

Irresistible Pumpkin Pie with Flaky Homemade Crust carries the cozy nostalgia of autumn gatherings and family traditions. Originating from early American settlers, who adapted Native American pumpkin cooking methods, this dessert became a staple of Thanksgiving feasts. However, its roots stretch even further—pumpkin pies appeared in European cookbooks as early as the 17th century, though they often skipped the crust entirely. Today, Southern bakers might add a splash of bourbon to the filling, while New Englanders swear by extra cinnamon for warmth.

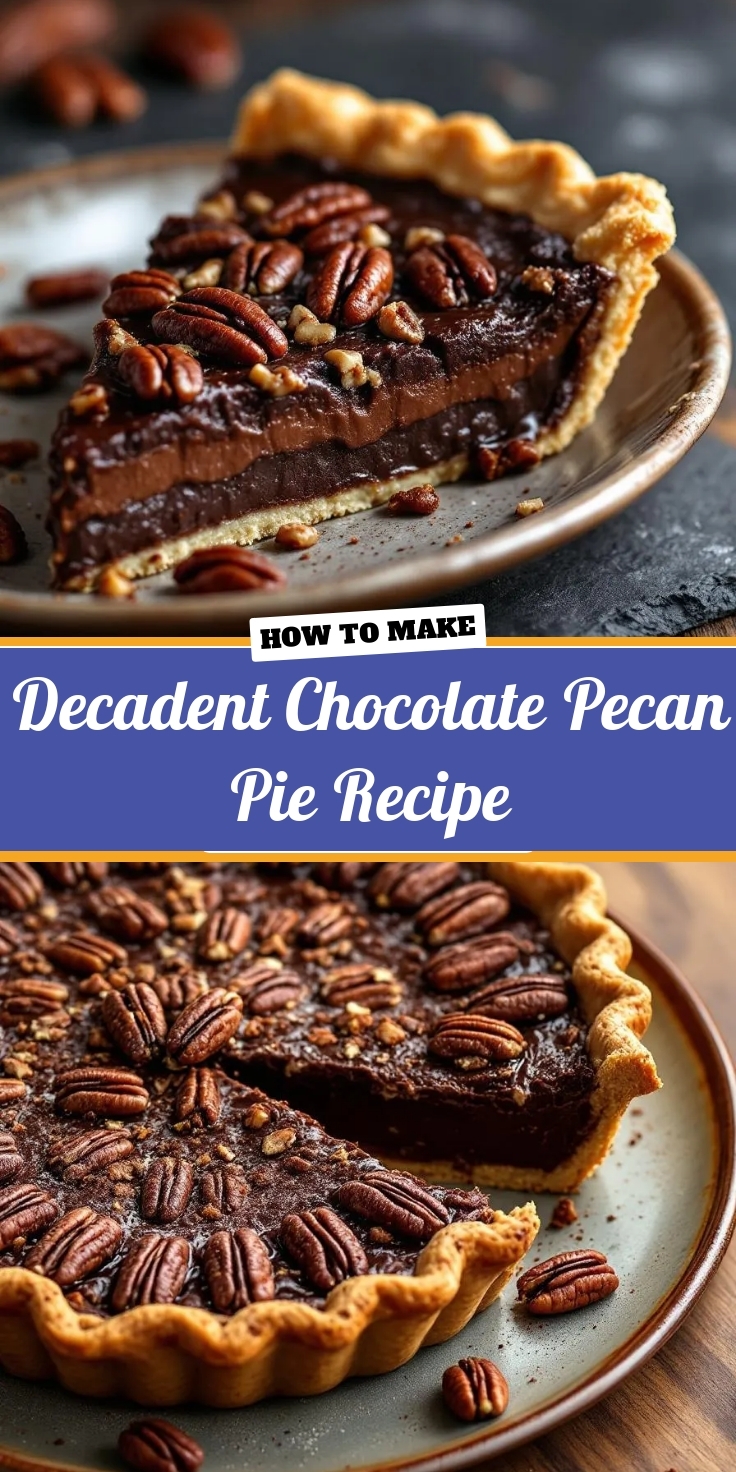
Across the globe, variations pop up in unexpected ways. In Australia, some swap pumpkin for sweet potato, while French bakers might layer the filling into a tart shell for a sleeker finish. My grandmother, meanwhile, always topped her Irresistible Pumpkin Pie with Flaky Homemade Crust with candied pecans for crunch. Whether served at harvest festivals or as a snowy December treat, this pie bridges generations and geographies with every spiced bite.

How it fits in today’s cooking

Modern kitchens keep Irresistible Pumpkin Pie with Flaky Homemade Crust alive by blending tradition with fresh twists. Meal preppers bake mini versions in muffin tins for portioned desserts, and gluten-free cooks use almond flour crusts without sacrificing flavor. It’s not just for holidays anymore—food bloggers pair slices with morning coffee, proving pumpkin deserves year-round love. For those craving more seasonal inspiration, our fall baking essentials guide highlights complementary flavors like maple and ginger.

Social media fuels creativity too, with viral hacks like swirling cream cheese into the filling or adding a crumble topping. Meanwhile, busy hosts lean on make-ahead strategies, freezing unbaked crusts or pre-mixing dry spices. If you’re exploring other cozy desserts, our comfort food classics collection offers perfect pairings. Whether you stick to the classic recipe or reinvent it, this pie still tastes like home.

Taste and Texture

What makes it delicious

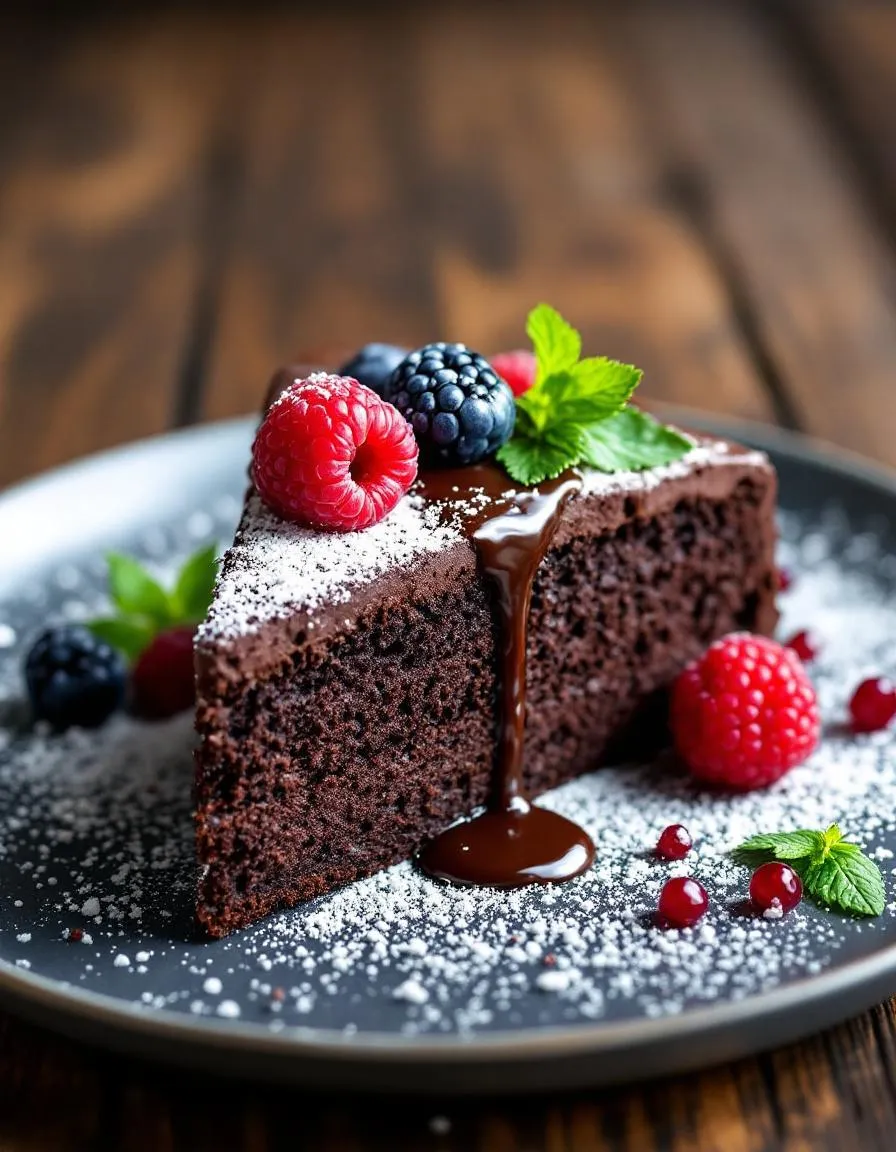
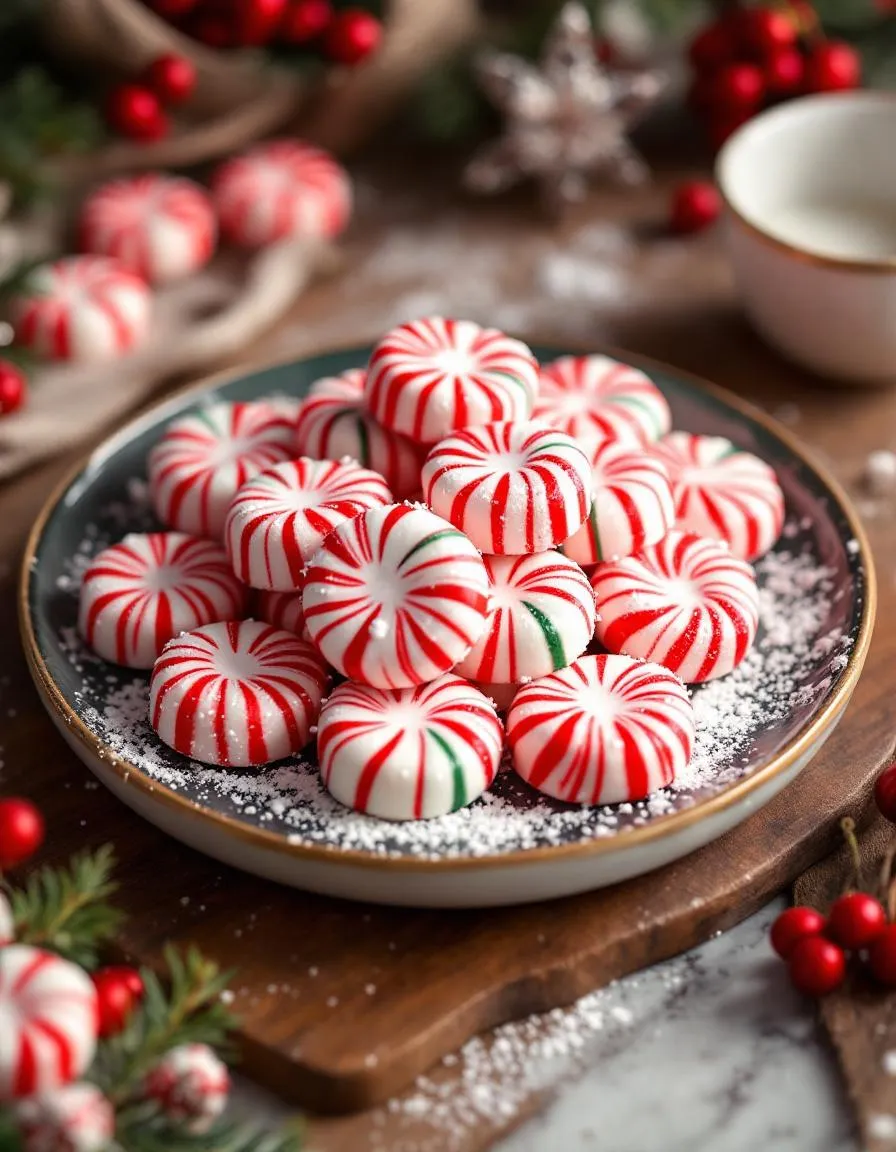
Every bite of Irresistible Pumpkin Pie with Flaky Homemade Crust delivers a symphony of cozy, comforting flavors. The velvety pumpkin filling melts on your tongue, rich with warm spices like cinnamon, nutmeg, and ginger. Meanwhile, the buttery, flaky crust crumbles just enough to add a satisfying contrast. As it bakes, your kitchen fills with the sweet, fragrant aroma of caramelized sugar and toasted pastry. Whether served chilled or slightly warm, Irresistible Pumpkin Pie with Flaky Homemade Crust balances creamy smoothness with delicate crispness for a dessert that feels like a hug in every slice.

Boosting the flavor

Elevate your pie by swapping traditional whipped cream for a spiced vanilla bean whipped cream, adding a floral depth. For extra warmth, drizzle with a bourbon caramel sauce or sprinkle candied pecans on top. If you love bold spices, try doubling the ginger or adding a pinch of cardamom to the filling. Pair it with a scoop of salted caramel ice cream to play up the pie’s sweet-savory notes. A dusting of cinnamon sugar right before serving? Perfection.

Tips for Success

Best practices for results

Always chill the dough for at least 30 minutes before rolling it out to prevent shrinking during baking. Meanwhile, use fresh pumpkin puree or high-quality canned puree for the smoothest filling in your Irresistible Pumpkin Pie with Flaky Homemade Crust. For extra flakiness, keep your butter cold and work quickly when mixing the crust. Additionally, blind bake the crust for 10 minutes to avoid a soggy bottom. Finally, let the pie cool completely before slicing to ensure clean, picture-perfect servings.

Mistakes to avoid

Overmixing the crust dough is a common mistake that leads to toughness instead of flakiness. Instead, mix just until the ingredients come together, and check out our guide to perfect pie crust for more details. Another error is overbaking the filling, which can cause cracks. To prevent this, remove the Irresistible Pumpkin Pie with Flaky Homemade Crust from the oven when the center still jiggles slightly. For more troubleshooting tips, explore our pumpkin pie FAQ to solve common issues effortlessly.

Serving and Pairing Suggestions

How to serve this dish

For a stunning presentation, slice your Irresistible Pumpkin Pie with Flaky Homemade Crust while it’s slightly warm to reveal its creamy texture. Alternatively, serve it chilled for cleaner cuts. Top each slice with a dollop of whipped cream and a sprinkle of cinnamon or toasted pecans for extra flair. Meanwhile, this pie shines at holiday gatherings, especially Thanksgiving or Christmas dessert spreads. If you’re hosting a brunch, pair it with coffee for a cozy morning treat. Finally, consider serving it on a rustic wooden board or elegant cake stand to elevate its visual appeal.

What goes well with it

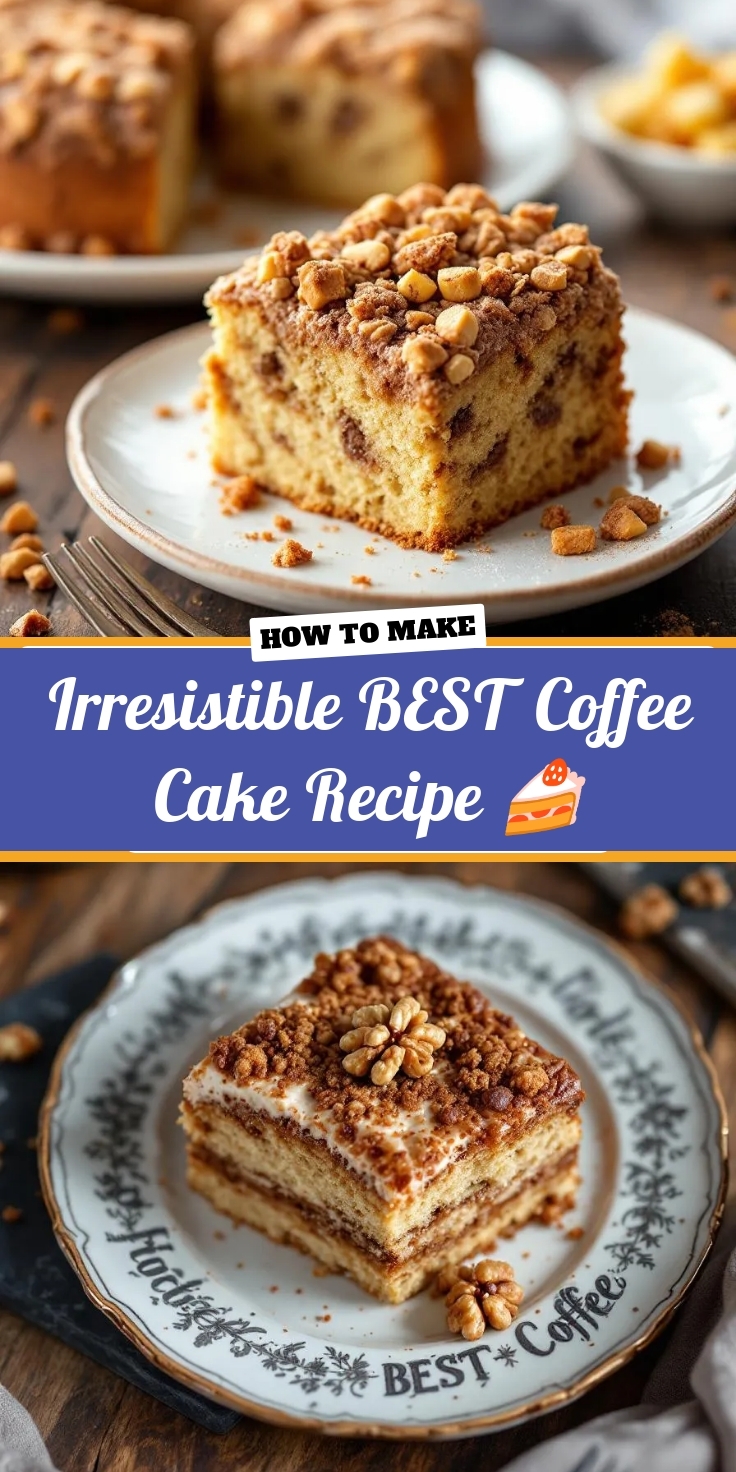
A warm mug of spiced chai latte perfectly balances the rich flavors of Irresistible Pumpkin Pie with Flaky Homemade Crust, enhancing its autumnal spices. For a refreshing contrast, try a scoop of vanilla bean ice cream—its creaminess melts into the pie for a decadent bite. If you’re planning a full dessert spread, serve it alongside our Classic Apple Crisp for a festive duo. Additionally, a drizzle of salted caramel sauce adds a sweet-salty twist. For more pairing inspiration, check out our Cinnamon Streusel Coffee Cake, which complements the pie’s spiced notes.

What’s the secret to a flaky homemade crust for pumpkin pie?

The key to a flaky crust in your Irresistible Pumpkin Pie is keeping the butter cold and handling the dough minimally. Use ice water and work quickly to prevent the fat from melting, which creates those perfect flaky layers when baked.

Can I make Irresistible Pumpkin Pie with Flaky Homemade Crust ahead of time?

Yes! Prepare the crust up to 2 days in advance and refrigerate it, or freeze it for longer storage. The filling can also be mixed a day ahead—just bake your Irresistible Pumpkin Pie with Flaky Homemade Crust fresh for the best texture.

How do I prevent a soggy bottom crust in pumpkin pie?

Blind bake your flaky homemade crust for 10-15 minutes before adding the filling to create a moisture barrier. For Irresistible Pumpkin Pie with Flaky Homemade Crust, this step ensures a crisp base that won’t get soggy from the custard filling.

What’s the best way to store leftover pumpkin pie with homemade crust?

Cover your Irresistible Pumpkin Pie with Flaky Homemade Crust loosely with plastic wrap or foil and refrigerate for up to 4 days. For longer storage, freeze individual slices wrapped tightly—the crust will stay flaky when reheated in the oven.

Best Decadent Chocolate Pecan Pie Recipe

best-chocolate-pecan-pie-recipe

“`html

Introduction

There’s something magical about the rich, gooey filling and buttery crust of a perfectly baked pecan pie—especially when chocolate joins the party. This Decadent Chocolate Pecan Pie Recipe takes a classic Southern dessert and elevates it to irresistible new heights. Whether you’re hosting a holiday gathering or simply craving a slice of comfort, this pie delivers every time. The combination of toasted pecans, velvety chocolate, and a hint of caramel creates a symphony of flavors that feels like a warm hug. Trust me, one bite and you’ll understand why this dessert deserves a spot on your table.

About This Recipe

The Decadent Chocolate Pecan Pie Recipe is more than just a dessert—it’s a celebration of texture and taste. Unlike traditional pecan pie, this version incorporates melted chocolate into the filling, adding depth and richness. Meanwhile, the pecans provide a satisfying crunch, balancing the silky sweetness. This recipe matters because it bridges nostalgia and innovation, making it perfect for both purists and adventurers. Moreover, it fits seamlessly into our blog’s tone, which celebrates approachable yet elevated baking. If you love crowd-pleasing treats, you’ll also adore our Classic Southern Pecan Pie, a timeless favorite. For those who enjoy chocolate twists, our Double Chocolate Brownies offer another indulgent option. Whether you’re a seasoned baker or a beginner, this pie promises delicious results with minimal fuss.

Why I Love This Recipe

This Decadent Chocolate Pecan Pie Recipe holds a special place in my heart because it reminds me of family gatherings during the holidays. My grandmother always made a classic pecan pie, but the first time I added chocolate to the mix, it became an instant hit. Now, it’s my go-to dessert for potlucks and cozy nights alike. The way the chocolate melds with the caramelized filling feels like pure magic, and I love how it brings people together. Every time I bake it, the aroma fills the kitchen, creating memories as sweet as the pie itself.

“`

Health and Nutrition

Why it’s good for your body

Decadent Chocolate Pecan Pie Recipe packs a surprising nutritional punch while satisfying your sweet tooth. First, pecans deliver heart-healthy monounsaturated fats, which help lower bad cholesterol. Additionally, they provide protein and fiber to keep you full longer. Meanwhile, dark chocolate offers antioxidants like flavonoids, which support brain health and reduce inflammation.

Moreover, this dessert includes eggs, a great source of high-quality protein and essential vitamins like B12. Together, these ingredients create a treat that fuels your body while indulging your cravings. Of course, moderation is key, but Decadent Chocolate Pecan Pie Recipe makes it easier to enjoy dessert without guilt.

Finally, natural sweeteners like maple syrup or honey can replace refined sugar in many versions, offering trace minerals. Whether you savor a small slice or share it with friends, Decadent Chocolate Pecan Pie Recipe balances decadence with wholesome ingredients. So go ahead and relish every bite knowing it’s doing your body some good too.

How it fits in a healthy lifestyle

Decadent Chocolate Pecan Pie Recipe fits perfectly into a balanced diet when enjoyed mindfully. For a gluten-free option, simply swap the crust for an almond flour base, which adds extra protein. If you’re watching sugar intake, try reducing the sweetener or pairing a small portion with protein-rich snacks to stabilize blood sugar.

This dessert also complements heart-healthy eating plans thanks to pecans and dark chocolate. For active lifestyles, the natural energy boost from its ingredients makes it a great post-workout treat. Plus, sharing it with loved ones turns indulgence into a joyful social experience. If you’re exploring more nutritious desserts, check out our guilt-free dessert ideas for inspiration. With smart choices, Decadent Chocolate Pecan Pie Recipe can be part of your wellness journey without compromise.

Print
clock clock iconcutlery cutlery iconflag flag iconfolder folder iconinstagram instagram iconpinterest pinterest iconfacebook facebook iconprint print iconsquares squares iconheart heart iconheart solid heart solid icon

Decadent Chocolate Pecan Pie


  • Author: Chef Emy

Description

A rich and indulgent chocolate pecan pie with a buttery crust and gooey filling.


Ingredients

Scale

For the Crust:

  • 1 9-inch pie crust (unbaked)
  • 1 cup semi-sweet chocolate chips
  • 1 cup chopped pecans
  • 3 large eggs
  • 1 cup light corn syrup
  • 1/2 cup granulated sugar
  • 1/4 cup unsalted butter (melted)
  • 1 teaspoon vanilla extract
  • 1/4 teaspoon salt

Instructions

1. Prepare the Crust:

  1. Preheat oven to 350°F (175°C).
  2. Sprinkle chocolate chips and pecans evenly over the bottom of the unbaked pie crust.
  3. In a medium bowl, whisk together eggs, corn syrup, sugar, melted butter, vanilla extract, and salt until smooth.
  4. Pour the mixture over the chocolate chips and pecans in the pie crust.
  5. Bake for 45-50 minutes or until the filling is set and the crust is golden brown.
  6. Let the pie cool completely before slicing and serving.

Notes

You can customize the seasonings to taste.

“`html

How to Prepare This Dish

Steps and time-saving tips

Start by preheating your oven to 350°F to ensure it’s ready when your filling is prepared. While the oven heats, roll out your pie crust and gently press it into a 9-inch pie dish, trimming any excess edges. Next, whisk together the eggs, corn syrup, sugar, melted butter, and vanilla extract in a large bowl until smooth. Then, fold in the chopped pecans and chocolate chips, making sure they’re evenly distributed. Pour this rich mixture into the pie crust, spreading it out with a spatula for an even layer. If you’re short on time, use a store-bought pie crust—it works just as well and saves about 10 minutes. Bake the pie for 50-55 minutes, or until the center is set but still slightly jiggly. Let it cool completely on a wire rack before slicing. For a quicker chill, pop it in the fridge for an hour. The result? A gooey, decadent chocolate pecan pie recipe that’s worth every minute.

Mistakes I’ve made and learned from

I’ve learned the hard way that overbaking this decadent chocolate pecan pie recipe turns it dry and crumbly. Once, I left it in just five minutes too long, and the filling lost its signature fudgy texture. Now, I set a timer and check at the 50-minute mark. Another mistake? Skipping the cooling step. Cutting into a warm pie makes it slump—trust me, patience pays off. If you’re new to pies, my guide on perfect pie crust tips can help avoid a soggy bottom. Also, don’t skimp on quality chocolate chips. I once used bargain-bin chips, and they seized up. For more chocolate wisdom, check out my baking with chocolate 101 post. These tweaks transformed my pie from mediocre to masterpiece.

“`

Cultural Connection and Variations

Where this recipe comes from

The Decadent Chocolate Pecan Pie Recipe we know and love today has deep roots in Southern American cuisine. Originally, pecan pie emerged as a staple in the South, where pecans grew abundantly. Over time, bakers began adding chocolate to the mix, creating a richer, more indulgent version. Families often pass down their own twists on the recipe, whether it’s a splash of bourbon or a dash of cinnamon.

Interestingly, variations of this dessert pop up worldwide. In Mexico, for example, cooks might infuse the filling with a hint of cayenne for a spicy kick. Meanwhile, some European bakers swap corn syrup for honey or maple syrup, giving the pie a distinct earthy sweetness. No matter the adaptation, the Decadent Chocolate Pecan Pie Recipe always delivers that irresistible combination of gooey chocolate and crunchy pecans.

In my family, we’ve always served this pie during Thanksgiving. My grandmother insisted on using dark chocolate chunks instead of chips, claiming they melted better. Whether you stick to tradition or experiment, the Decadent Chocolate Pecan Pie Recipe remains a timeless crowd-pleaser.

How it fits in today’s cooking

Today, the Decadent Chocolate Pecan Pie Recipe holds its place as a holiday favorite, but it’s also breaking into everyday baking. Modern cooks love how versatile it is—pair it with a scoop of vanilla ice cream for a quick dessert, or serve it at brunch alongside fluffy pancakes. Some even adapt it into bars or mini tarts for easier sharing.

Health-conscious bakers aren’t left out either. Many swap refined sugar for coconut sugar or use gluten-free crusts without sacrificing flavor. And let’s not forget how social media has revived classic recipes like this one. A slice of Decadent Chocolate Pecan Pie Recipe paired with a cup of homemade hot chocolate makes for the ultimate cozy Instagram moment. Whether you’re honoring tradition or reinventing it, this pie fits perfectly into today’s culinary landscape.

Taste and Texture

What makes it delicious

This Decadent Chocolate Pecan Pie Recipe delivers a symphony of rich, indulgent flavors and textures. The buttery, flaky crust crumbles delicately, giving way to a luscious filling that’s both gooey and velvety. Melted chocolate swirls through the caramel-like pecans, creating a deep, bittersweet contrast to the natural sweetness. Meanwhile, toasted pecans add a satisfying crunch, while a hint of vanilla and cinnamon warms each bite. As it bakes, your kitchen fills with the irresistible aroma of toasted nuts and melted chocolate, making the Decadent Chocolate Pecan Pie Recipe impossible to resist.

Boosting the flavor

For an extra layer of luxury, drizzle warm caramel sauce over each slice or sprinkle flaky sea salt to balance the sweetness. If you love bold flavors, swap semi-sweet chocolate for dark chocolate or add a splash of bourbon to the filling. Pair it with a scoop of homemade vanilla ice cream for a cool contrast, or serve it alongside a cup of spiced chai latte to enhance the warm spices. With these tweaks, the Decadent Chocolate Pecan Pie Recipe becomes even more unforgettable.

Tips for Success

Best practices for results

Always pre-bake your pie crust for 10 minutes before adding the filling to prevent a soggy bottom in your Decadent Chocolate Pecan Pie Recipe. Meanwhile, toast the pecans lightly to enhance their flavor and ensure a crispier texture. For the best consistency, mix the chocolate and syrup filling until just combined—overmixing can make it too dense. Additionally, let the pie cool completely before slicing so the layers set properly.

Mistakes to avoid

Avoid using stale pecans, as they can make your Decadent Chocolate Pecan Pie Recipe taste bitter. Instead, check for freshness by smelling them before adding to the mix. Many bakers also skip the step of blind baking the crust, which leads to uneven cooking. For more crust tips, explore our guide on perfect pie crust techniques. Finally, resist the urge to overbake the pie—pull it out when the edges are firm but the center still jiggles slightly. If you’re unsure about doneness, our baking times guide can help.

Serving and Pairing Suggestions

How to serve this dish

For a stunning presentation, slice your Decadent Chocolate Pecan Pie Recipe into generous wedges and plate them on elegant dessert dishes. Meanwhile, drizzle each piece with warm caramel sauce or dust it lightly with powdered sugar for a touch of elegance. Alternatively, serve it family-style on a decorative cake stand for holiday gatherings or potlucks. Since this pie shines as a showstopper, pair it with a scoop of vanilla bean ice cream to balance the rich flavors. Whether you’re hosting a cozy brunch or a festive dinner, this dessert always steals the spotlight.

What goes well with it

Elevate your Decadent Chocolate Pecan Pie Recipe by pairing it with a bold cup of dark roast coffee, which cuts through the sweetness and enhances the chocolate notes. If you prefer something cooler, try a glass of cold milk or a scoop of our Homemade Vanilla Ice Cream for a classic combo. For a grown-up twist, serve it alongside a small glass of bourbon or port wine, as their deep flavors complement the pie’s richness. If you’re planning a full dessert spread, consider adding our Salted Caramel Brownies for a delightful contrast in textures and flavors.

What makes a chocolate pecan pie decadent?

A Decadent Chocolate Pecan Pie Recipe gets its richness from high-quality dark chocolate, a buttery crust, and a gooey filling packed with toasted pecans. The combination of semi-sweet chocolate and caramel-like syrup creates an indulgent dessert that stands out from traditional pecan pies.

Can I use milk chocolate instead of dark chocolate in this recipe?

While you can substitute milk chocolate, dark chocolate (60-70% cacao) works best in a Decadent Chocolate Pecan Pie Recipe for balancing sweetness. Milk chocolate may make the pie overly sweet, but if you prefer milder flavors, reduce the sugar slightly when swapping.

How do I prevent my chocolate pecan pie from being too runny?

To avoid a runny filling, bake your Decadent Chocolate Pecan Pie Recipe until the center jiggles slightly but isn’t liquid. Let it cool completely (2+ hours) to set properly. Using corn syrup or a blend of sugars also helps stabilize the texture.

What’s the best way to toast pecans for chocolate pecan pie?

Toast pecans for your Decadent Chocolate Pecan Pie Recipe at 350°F for 5-8 minutes until fragrant. Stir occasionally to prevent burning. Toasting enhances their nutty flavor and adds crunch to contrast the creamy chocolate filling.

Best Coffee Cake Recipe – Moist and Irresistible

best-coffee-cake-recipe-moist

“`html

Introduction

There’s something magical about the aroma of freshly baked cake filling your kitchen, especially when it’s the Irresistible BEST Coffee Cake Recipe. Whether you’re hosting a brunch, treating yourself to a cozy morning, or surprising a loved one, this recipe delivers tender crumb, buttery streusel, and just the right touch of warmth. Imagine slicing into a piece that’s perfectly moist with a hint of cinnamon—each bite feels like a hug. Trust me, once you try this coffee cake, it’ll become your go-to for every occasion, from lazy Sundays to impromptu gatherings.

About This Recipe

The Irresistible BEST Coffee Cake Recipe isn’t just another dessert—it’s a celebration of simplicity and flavor. Unlike dry or overly sweet versions, this cake strikes the ideal balance with its soft texture, rich crumb topping, and subtle spice. Coffee cake has long been a staple in American homes, but this recipe elevates it with foolproof techniques and accessible ingredients. Whether you’re a baking novice or a seasoned pro, you’ll appreciate how effortlessly it comes together. Plus, it pairs beautifully with your morning brew or afternoon tea, making it a versatile treat for any time of day.

What sets this recipe apart is its adaptability. You can easily customize it with nuts, fruit, or even a drizzle of glaze, but the classic version stands strong on its own. If you love crowd-pleasing baked goods, you’ll also adore our easy blueberry muffins or homemade cinnamon rolls. The Irresistible BEST Coffee Cake Recipe fits perfectly with our blog’s mission: sharing reliable, delicious recipes that bring people together. After all, few things are as comforting as a slice of cake made with love.

Why I Love This Recipe

This coffee cake holds a special place in my heart because it reminds me of my grandmother’s kitchen. She baked it every Sunday, and the scent alone could drag everyone out of bed. Over the years, I’ve tweaked her recipe to perfection, but the soul of it remains the same—a humble, heartfelt dessert that never fails to delight. Whenever I make it now, I think of her laughter and the way she’d sneak an extra slice onto my plate. The Irresistible BEST Coffee Cake Recipe isn’t just about taste; it’s about memories, connection, and the joy of sharing something truly wonderful.

“`

Health and Nutrition

Why it’s good for your body

Indulging in the Irresistible BEST Coffee Cake Recipe doesn’t just satisfy your sweet tooth—it also offers some surprising health perks. First, this recipe includes ingredients like cinnamon, which supports healthy blood sugar levels. Additionally, the buttermilk in the Irresistible BEST Coffee Cake Recipe provides probiotics for gut health, making it a tasty way to support digestion.

Moreover, the recipe balances richness with moderation. While it delivers that classic coffee cake flavor, you can easily tweak it with whole wheat flour or reduce sugar slightly without sacrificing taste. The Irresistible BEST Coffee Cake Recipe also contains eggs, which add protein to keep you fuller longer. As a result, you enjoy a treat that fuels your body while delighting your senses.

Finally, baking at home lets you control ingredients, avoiding unnecessary additives. Whether you pair it with your morning coffee or serve it as an afternoon pick-me-up, the Irresistible BEST Coffee Cake Recipe brings joy without compromising wellness. After all, a little indulgence can be part of a nourishing lifestyle.

How it fits in a healthy lifestyle

The Irresistible BEST Coffee Cake Recipe fits seamlessly into a balanced diet when enjoyed mindfully. For those watching sugar intake, try pairing a smaller slice with protein-rich Greek yogurt or nuts to stabilize energy levels. If you’re exploring gluten-free options, swap in a 1:1 gluten-free flour blend—this cake adapts beautifully.

For heart-healthy choices, consider using avocado oil instead of butter, as it contains monounsaturated fats. You can also explore our guide to healthy baking swaps for more ideas. And if you love baking but want to keep portions in check, our portion control tips help you savor treats without overdoing it. With simple adjustments, this coffee cake becomes a guilt-free pleasure that aligns with your wellness goals.

Print
clock clock iconcutlery cutlery iconflag flag iconfolder folder iconinstagram instagram iconpinterest pinterest iconfacebook facebook iconprint print iconsquares squares iconheart heart iconheart solid heart solid icon

Irresistible BEST Coffee Cake


  • Author: Chef Emy

Description

A moist and tender coffee cake with a cinnamon streusel topping, perfect for breakfast or dessert.


Ingredients

Scale

For the Crust:

  • 2 cups all-purpose flour
  • 1 cup granulated sugar
  • 1/2 cup unsalted butter, softened
  • 1/2 cup sour cream
  • 1/2 cup milk
  • 2 large eggs
  • 1 tsp vanilla extract
  • 1 tsp baking powder
  • 1/2 tsp baking soda
  • 1/4 tsp salt
  • 1/2 cup brown sugar
  • 1 tsp ground cinnamon
  • 1/4 cup chopped walnuts (optional)

Instructions

1. Prepare the Crust:

  1. Preheat oven to 350°F (175°C). Grease a 9-inch square baking pan.
  2. In a large bowl, cream together butter and granulated sugar until light and fluffy. Add eggs one at a time, then mix in vanilla, sour cream, and milk.
  3. In a separate bowl, whisk together flour, baking powder, baking soda, and salt. Gradually add dry ingredients to wet ingredients, mixing until just combined.
  4. Pour half of the batter into the prepared pan. In a small bowl, mix brown sugar, cinnamon, and walnuts (if using). Sprinkle half of this mixture over the batter.
  5. Pour remaining batter over the streusel layer, then top with the remaining streusel mixture.
  6. Bake for 30-35 minutes or until a toothpick inserted in the center comes out clean. Cool slightly before serving.

Notes

You can customize the seasonings to taste.

How to Prepare This Dish

Steps and time-saving tips

Start by preheating your oven to 350°F and greasing a 9×13-inch baking pan. In a large bowl, whisk together the flour, sugar, baking powder, and salt until well combined. Next, add the softened butter, eggs, and vanilla extract, then mix everything with an electric mixer on medium speed until the batter is smooth. Meanwhile, prepare the crumb topping by combining brown sugar, cinnamon, and cold cubed butter in a separate bowl. Use your fingers to work the mixture into coarse crumbs. Pour half of the cake batter into the pan, spreading it evenly. Sprinkle half of the crumb topping over the batter, then repeat with the remaining batter and topping. Bake for 35-40 minutes or until a toothpick inserted in the center comes out clean. For a time-saving tip, measure all your dry ingredients the night before and store them in an airtight container. This way, you can quickly assemble the Irresistible BEST Coffee Cake Recipe 🍰 the next morning without the hassle.

Mistakes I’ve made and learned from

One mistake I made early on was overmixing the batter, which resulted in a dense, tough cake. Now, I mix just until the ingredients combine, ensuring a light, fluffy texture. Another issue I faced was uneven baking because my oven had hot spots. To fix this, I rotate the pan halfway through baking, and I always use an oven thermometer to verify the temperature. If your crumb topping melts too much, try chilling it for 10 minutes before sprinkling it over the batter. For more troubleshooting tips, check out my guide on common baking mistakes. Also, if you love streusel toppings, my perfect crumb topping tutorial will help you master the technique. Learning from these mistakes has made my Irresistible BEST Coffee Cake Recipe 🍰 foolproof, and I hope these tips save you some trial and error.

Cultural Connection and Variations

Where this recipe comes from

The Irresistible BEST Coffee Cake Recipe traces its roots back to European traditions, where sweet, crumb-topped cakes often paired with coffee became a morning staple. Immigrants brought these recipes to America, where they evolved into the buttery, cinnamon-spiced versions we love today. In Germany, you might find a similar cake called “Streuselkuchen,” while Scandinavians enjoy their “Kaffekage” with cardamom. Meanwhile, my grandma added a splash of vanilla and extra sour cream to her version, making it the star of every family brunch.

Across the South, bakers often fold pecans or peaches into their Irresistible BEST Coffee Cake Recipe for a regional twist. In New England, maple syrup sometimes replaces sugar for a deeper flavor. No matter where you go, though, this cake always brings people together. Whether it’s served at church potlucks or lazy Sunday breakfasts, it’s a dish that feels like home.

How it fits in today’s cooking

Today, the Irresistible BEST Coffee Cake Recipe still holds a special place in modern kitchens. Busy home cooks love it because it’s easy to whip up for weekend guests or bake ahead for weekday treats. Many adapt it with gluten-free flour or dairy alternatives, proving its versatility. For holiday mornings, it’s a must-have alongside classics like cinnamon rolls or blueberry muffins.

Social media has also given this cake new life, with food bloggers adding everything from chocolate chips to seasonal fruit. Yet, no matter how you tweak it, the Irresistible BEST Coffee Cake Recipe remains a timeless comfort food. It’s the kind of dish that turns ordinary mornings into something memorable, one delicious slice at a time.

Taste and Texture

What makes it delicious

The Irresistible BEST Coffee Cake Recipe � delivers a symphony of flavors and textures that make every bite unforgettable. Imagine a tender, buttery crumb that melts in your mouth, paired with a cinnamon-streusel topping that adds just the right crunch. The cake itself is moist and fluffy, thanks to sour cream, while brown sugar and vanilla infuse it with warm, caramel-like sweetness. Meanwhile, the aroma of freshly baked cinnamon and nutmeg fills the air, making it impossible to resist. Whether you enjoy it warm or at room temperature, the Irresistible BEST Coffee Cake Recipe 🍰 balances richness and comfort in every slice.

Boosting the flavor

Elevate your Irresistible BEST Coffee Cake Recipe 🍰 with a few creative tweaks. For a deeper flavor, swap vanilla extract for almond extract or add a pinch of cardamom to the streusel. Drizzle a simple glaze made of powdered sugar and milk over the top for extra sweetness. If you love nuts, try folding chopped pecans or walnuts into the batter for added crunch. Pair it with a dollop of whipped cream or a scoop of vanilla ice cream for a decadent twist. For more inspiration, explore our guide to perfect streusel toppings or discover how to spice up your baking with unexpected flavors.

Tips for Success

Best practices for results

Always measure your ingredients precisely for the Irresistible BEST Coffee Cake Recipe to ensure perfect texture and flavor. Use room-temperature butter and eggs, as they blend more smoothly into the batter. Additionally, avoid overmixing the batter once you add the dry ingredients to keep the cake tender. For even baking, rotate the pan halfway through the cooking time. Finally, let the cake cool slightly before slicing to maintain its structure.

Mistakes to avoid

One common mistake is baking the Irresistible BEST Coffee Cake Recipe in an oven that hasn’t fully preheated, which leads to uneven cooking. Always check your oven temperature with a thermometer if possible. Another error is skipping the crumb topping, which adds essential texture and flavor. If you struggle with crumbly toppings, check out our guide on how to make perfect crumb topping. Also, avoid overbaking the cake, as it can dry out quickly. For more troubleshooting tips, visit our common baking mistakes page.

Serving and Pairing Suggestions

How to serve this dish

Serve the Irresistible BEST Coffee Cake Recipe warm for the ultimate melt-in-your-mouth experience. For a stunning presentation, dust the top with powdered sugar or drizzle a simple vanilla glaze. Meanwhile, if you’re hosting a brunch, slice it into generous squares and arrange them on a rustic wooden board for a cozy, inviting look. Additionally, this coffee cake shines during holiday gatherings, especially when paired with seasonal spices like cinnamon or nutmeg. Finally, garnish each plate with fresh berries or a sprig of mint to add a pop of color.

What goes well with it

Pair the Irresistible BEST Coffee Cake Recipe with a steaming cup of freshly brewed coffee or a creamy latte for a classic combination. The rich flavors of the cake balance perfectly with the boldness of coffee. Alternatively, try it with a cold glass of milk or a chai latte for a comforting twist. For a heartier spread, serve it alongside our fluffy blueberry muffins or a bowl of fresh fruit salad. If you love decadent pairings, our cinnamon rolls make an excellent match, creating a delightful breakfast or dessert spread.

What makes this the BEST coffee cake recipe?

This Irresistible BEST Coffee Cake Recipe 🍰 stands out with its perfect balance of moist crumb, buttery streusel topping, and just the right amount of sweetness. The secret lies in using sour cream for richness and a cinnamon-sugar swirl for extra flavor in every bite.

Can I make this coffee cake recipe ahead of time?

Absolutely! The Irresistible BEST Coffee Cake Recipe 🍰 actually tastes better the next day as the flavors meld. Store it covered at room temperature for up to 3 days, or freeze for longer storage—just warm slices before serving.

What’s the best way to serve coffee cake?

This coffee cake shines when served slightly warm with a hot beverage. Pair slices of the Irresistible BEST Coffee Cake Recipe 🍰 with coffee, tea, or milk for the ultimate cozy breakfast or afternoon treat.

Can I substitute yogurt for sour cream in coffee cake?

Yes, plain Greek yogurt works well as a substitute in the Irresistible BEST Coffee Cake Recipe 🍰. The texture may be slightly denser, but you’ll still get that signature tang and moisture that makes this recipe special.

Ultimate Giant Chocolate Chip Cookie – Best Recipe

ultimate-giant-chocolate-chip-cookie

Introduction

There’s something magical about biting into a warm, gooey chocolate chip cookie—especially when it’s the size of your face. If you’ve ever craved that perfect blend of crispy edges, soft centers, and melty chocolate, then Ultimate Giant Chocolate Chip Cookie Delight is about to become your new obsession. Whether you’re baking for a crowd, treating yourself after a long day, or simply chasing that nostalgic childhood joy, this recipe delivers. Plus, it’s easier to make than you might think. So grab your mixing bowl and let’s create a dessert that’s as fun to make as it is to eat.

About This Recipe

Ultimate Giant Chocolate Chip Cookie Delight isn’t just a cookie—it’s an experience. Imagine a single, massive cookie with a golden-brown crust, a tender middle, and pockets of rich chocolate in every bite. This recipe stands out because it balances simplicity with showstopping results. Unlike smaller cookies, this giant version stays soft for days, making it ideal for sharing (or not). It’s also versatile: serve it warm with ice cream for an epic sundae, or pack it for picnics as a sweet centerpiece. If you love classic desserts with a twist, you’ll adore our vanilla cupcake recipe, which shares the same foolproof approach.

What makes this recipe special? First, we use a mix of brown and white sugar for depth of flavor, plus a hint of vanilla to elevate the chocolate. Second, we chill the dough briefly to prevent overspreading, ensuring your cookie stays thick and chewy. Finally, we bake it in a skillet or round pan for that signature giant shape. Whether you’re a beginner or a seasoned baker, this recipe fits seamlessly into any kitchen routine. For more baking inspiration, check out our homemade bread guide, which embraces the same joy of from-scratch cooking.

Why I Love This Recipe

I’ll never forget the first time I made Ultimate Giant Chocolate Chip Cookie Delight. It was a rainy Sunday, and my kids begged for something sweet. Instead of rolling out dozens of small cookies, I tried this version—and it was love at first bite. The sheer size made it feel like a celebration, and the way the chocolate pooled in the center reminded me of my grandma’s baking. Now, it’s my go-to for birthdays, potlucks, or just because. Every time I pull it out of the oven, that same warmth fills the kitchen, and honestly, that’s the real magic.

Health and Nutrition

Why it’s good for your body

Ultimate Giant Chocolate Chip Cookie Delight packs more than just irresistible flavor. First, it delivers a satisfying energy boost thanks to its balanced mix of carbs, fats, and proteins. While indulgent, the cookie also includes nutrient-rich ingredients like whole-grain flour or dark chocolate chips, which offer antioxidants. Additionally, the recipe often incorporates healthy fats from butter or nuts, supporting brain function and satiety.

Moreover, Ultimate Giant Chocolate Chip Cookie Delight can lift your mood. Dark chocolate, a key ingredient, contains compounds like flavonoids that may reduce stress. Meanwhile, the comforting aroma and taste trigger dopamine release, making it a feel-good treat. Of course, moderation matters, but enjoying one occasionally contributes to mental well-being.

Finally, this dessert adapts to dietary preferences. For instance, you can tweak the recipe with almond flour for extra protein or flax eggs for plant-based benefits. Whether you savor it post-workout or as a weekend reward, Ultimate Giant Chocolate Chip Cookie Delight proves treats can be both delicious and nourishing.

How it fits in a healthy lifestyle

Ultimate Giant Chocolate Chip Cookie Delight fits seamlessly into balanced eating when enjoyed mindfully. Pair it with a protein-rich snack like Greek yogurt to stabilize blood sugar, or savor it as part of a balanced indulgence strategy. For active lifestyles, it serves as a tasty carb reload after exercise.

If you follow specific diets, customize the recipe effortlessly. Swap in oat flour for gluten-free needs or reduce sugar for a heart-healthier version. Craving more smart dessert ideas? Explore our guilt-free dessert roundup for inspiration. Remember, treats like Ultimate Giant Chocolate Chip Cookie Delight thrive in moderation—making every bite count without derailing wellness goals.

Print
clock clock iconcutlery cutlery iconflag flag iconfolder folder iconinstagram instagram iconpinterest pinterest iconfacebook facebook iconprint print iconsquares squares iconheart heart iconheart solid heart solid icon

Ultimate Giant Chocolate Chip Cookie Delight


  • Author: Chef Emy

Description

A massive, gooey chocolate chip cookie that’s perfect for sharing or indulging all by yourself.


Ingredients

Scale

For the Crust:

  • 2 1/4 cups all-purpose flour
  • 1 tsp baking soda
  • 1 tsp salt
  • 1 cup unsalted butter, softened
  • 3/4 cup granulated sugar
  • 3/4 cup packed brown sugar
  • 2 large eggs
  • 2 tsp vanilla extract
  • 2 cups semi-sweet chocolate chips
  • 1/2 cup chopped walnuts (optional)

Instructions

1. Prepare the Crust:

  1. Preheat oven to 375°F (190°C). Line a large baking sheet with parchment paper.
  2. In a small bowl, whisk together flour, baking soda, and salt. Set aside.
  3. In a large bowl, beat butter, granulated sugar, and brown sugar until creamy. Add eggs one at a time, then vanilla, mixing well.
  4. Gradually beat in flour mixture. Stir in chocolate chips and walnuts (if using).
  5. Scoop entire dough onto prepared baking sheet and shape into one giant cookie (about 10-inch diameter).
  6. Bake for 18-22 minutes until edges are golden but center is still soft. Cool on baking sheet for 10 minutes before serving.

Notes

You can customize the seasonings to taste.

How to Prepare This Dish

Steps and time-saving tips

First, preheat your oven to 350°F and line a baking sheet with parchment paper. Meanwhile, cream together softened butter, brown sugar, and granulated sugar in a large bowl until fluffy. This step ensures your Ultimate Giant Chocolate Chip Cookie Delight has the perfect texture. Next, beat in eggs one at a time, followed by vanilla extract, blending until smooth. In a separate bowl, whisk flour, baking soda, and salt before gradually folding it into the wet ingredients. Stir just until combined to avoid overmixing, then fold in generous handfuls of chocolate chips. For extra indulgence, press a few extra chips on top before baking.

Now, scoop the dough onto your prepared sheet, shaping it into one giant cookie about 1-inch thick. Bake for 18-22 minutes until golden around the edges but still slightly soft in the center. Let it cool for 10 minutes—this helps it set without crumbling. Want a time-saving trick? Mix the dry ingredients the night before, or use a stand mixer to cut prep time in half. If you prefer gooey results, underbake by 2 minutes and let residual heat finish the job.

Mistakes I’ve made and learned from

I once rushed the creaming step, leaving my Ultimate Giant Chocolate Chip Cookie Delight dense instead of light. Now, I patiently beat the butter and sugars for a full 3 minutes—it makes all the difference. Another mishap? Overbaking. I learned the hard way that cookies firm up as they cool, so pulling them out when they look “almost done” is key. For more baking science tips, check out my guide on common baking mistakes. And if your dough spreads too thin, chill it for 30 minutes first—a trick I picked up from my cookie texture secrets post. Trust me, these small tweaks turn good cookies into showstoppers.

Cultural Connection and Variations

Where this recipe comes from

The Ultimate Giant Chocolate Chip Cookie Delight traces its roots back to classic American comfort baking, where oversized cookies became a symbol of indulgence and celebration. Families often baked these giant cookies for birthdays, potlucks, or just to brighten a rainy afternoon. Meanwhile, in other parts of the world, similar treats take on unique twists. For example, in Italy, bakers might add a pinch of sea salt or a drizzle of olive oil for depth, while in Japan, matcha powder sometimes finds its way into the dough for a earthy twist.

In my own kitchen, the Ultimate Giant Chocolate Chip Cookie Delight became a weekend tradition. My grandmother insisted on using dark brown sugar for extra chewiness and tossing in handfuls of walnuts for crunch. Over time, friends shared their own versions—some swapping chocolate chips for caramel chunks or even sprinkling flaky salt on top right after baking. No matter the variation, the joy of breaking into a warm, gooey center stays the same.

How it fits in today’s cooking

Today, the Ultimate Giant Chocolate Chip Cookie Delight still holds a special place in modern baking. It’s a go-to for holiday cookie exchanges, late-night cravings, or even as a showstopper at dinner parties. Many home cooks now experiment with gluten-free flour or vegan butter to suit dietary needs, proving its versatility. For those who love pairing it with other treats, try serving it alongside a slice of classic vanilla cake for the ultimate dessert spread.

Social media has also given this recipe new life, with bakers sharing their giant cookie creations topped with ice cream, fruit, or even edible flowers. Whether you stick to the traditional recipe or put your own spin on it, the Ultimate Giant Chocolate Chip Cookie Delight remains a timeless favorite. And if you’re looking for more baking inspiration, check out these easy homemade pastries to round out your dessert menu.

Taste and Texture

What makes it delicious

Ultimate Giant Chocolate Chip Cookie Delight delivers a symphony of textures and flavors in every bite. The edges boast a golden crispness, while the center stays irresistibly chewy, creating the perfect contrast. Warm, melted chocolate chips ooze richness, blending with the buttery, caramelized notes of brown sugar. A hint of vanilla and a sprinkle of sea salt elevate the sweetness, making each mouthful fragrant and deeply satisfying. Whether you enjoy it fresh from the oven or slightly cooled, Ultimate Giant Chocolate Chip Cookie Delight wraps you in comfort with its gooey, indulgent charm.

Boosting the flavor

For an extra flavor boost, try folding in chopped toasted walnuts or pecans to add a nutty crunch. A drizzle of homemade caramel sauce or a dusting of flaky sea salt right after baking enhances the sweet-salty balance. If you love warm spices, a pinch of cinnamon or a dash of espresso powder deepens the chocolate’s richness. For more inspiration, explore our guide to elevating cookie recipes with creative twists. Small tweaks can transform an already delicious treat into something extraordinary.

Tips for Success

Best practices for results

Always chill the dough for at least 30 minutes before baking Ultimate Giant Chocolate Chip Cookie Delight. This prevents spreading and ensures a thick, chewy texture. Use room-temperature butter for even mixing, and measure flour correctly by spooning it into the cup before leveling. For extra richness, slightly underbake the cookies and let them finish setting on the tray. Finally, line your baking sheet with parchment paper to guarantee a perfect golden bottom every time.

Mistakes to avoid

Overmixing the dough can make Ultimate Giant Chocolate Chip Cookie Delight tough instead of tender. Stir just until the ingredients combine, then fold in the chocolate chips gently. Another common error is using melted butter, which leads to flat cookies. For the right consistency, soften butter to a cool, spreadable texture. If your cookies spread too much, check out our baking troubleshooting guide for quick fixes. Also, avoid overcrowding the baking sheet—space dough balls at least 3 inches apart for even baking, as explained in our cookie baking tips.

Serving and Pairing Suggestions

How to serve this dish

Serve Ultimate Giant Chocolate Chip Cookie Delight warm for the best gooey texture, or let it cool slightly for a firmer bite. For a stunning presentation, place it on a rustic wooden board and dust it lightly with powdered sugar. Meanwhile, drizzle melted chocolate over the top for an extra indulgent touch. This dessert shines at gatherings, whether you’re hosting a cozy game night or celebrating a birthday. Alternatively, slice it into wedges and pair with mini scoops of ice cream for a playful twist.

What goes well with it

Pair Ultimate Giant Chocolate Chip Cookie Delight with a cold glass of milk for a classic combo that never disappoints. The creamy milk balances the rich chocolate perfectly. For coffee lovers, try it with a frothy latte or a bold espresso—the bitterness enhances the sweetness. If you’re serving it at a brunch, offer our Berry Blast Smoothie for a refreshing contrast. Finally, for an extra treat, add a scoop of our Homemade Vanilla Bean Ice Cream to create an irresistible dessert duo.

What makes Ultimate Giant Chocolate Chip Cookie Delight different from regular cookies?

Ultimate Giant Chocolate Chip Cookie Delight stands out with its extra-large size, gooey center, and perfect balance of crispy edges and soft dough. It’s packed with premium chocolate chips and often includes a sprinkle of sea salt for a gourmet twist.

How do I store Ultimate Giant Chocolate Chip Cookie Delight to keep it fresh?

Store Ultimate Giant Chocolate Chip Cookie Delight in an airtight container at room temperature for up to 3 days. For longer freshness, wrap it tightly in plastic and freeze for up to 2 months—just reheat for that freshly baked taste.

Can I make Ultimate Giant Chocolate Chip Cookie Delight gluten-free?

Yes! Substitute all-purpose flour with a 1:1 gluten-free blend to create a gluten-free version of Ultimate Giant Chocolate Chip Cookie Delight. Ensure your chocolate chips are gluten-free, and consider adding xanthan gum for better texture.

What’s the secret to getting the perfect gooey center in Ultimate Giant Chocolate Chip Cookie Delight?

The key is slightly underbaking the Ultimate Giant Chocolate Chip Cookie Delight—remove it from the oven when the edges are golden but the center still looks soft. Let it cool on the baking sheet for 10 minutes to set while staying irresistibly gooey inside.

Best Peanut Butter Bars – Irresistible Homemade Treat

best-peanut-butter-bars-recipe

“`html

Introduction

There’s something undeniably comforting about biting into a rich, chewy peanut butter bar—especially when it’s so easy to make. Whether you’re craving a nostalgic treat or need a crowd-pleasing dessert for your next gathering, this Irresistible Peanut Butter Bars Recipe delivers every time. With just a handful of pantry staples, you can whip up a batch that’s decadent, satisfying, and downright addictive. Trust me, one bite and you’ll understand why these bars disappear faster than you can make them. Plus, they’re perfect for sharing (or not—no judgment here).

About This Recipe

If you love the creamy, nutty flavor of peanut butter paired with a buttery, slightly sweet base, this Irresistible Peanut Butter Bars Recipe is your new go-to. These bars strike the perfect balance between soft and dense, with a melt-in-your-mouth texture that keeps you reaching for more. What makes them stand out? Unlike overly complicated desserts, this recipe requires no baking expertise—just mix, press, and chill. Meanwhile, the combination of salty and sweet flavors ensures they appeal to almost everyone.

This recipe fits seamlessly into the BrekCakes ethos: approachable, delicious, and designed for real-life moments. Whether you’re meal prepping snacks for the week or surprising your kids with an after-school treat, these bars check all the boxes. For more no-fuss dessert ideas, explore our easy dessert recipes collection. And if you’re a peanut butter fanatic, don’t miss our peanut butter lover’s guide for even more inspiration.

Why I Love This Recipe

These peanut butter bars remind me of childhood summers spent in my grandma’s kitchen, where she’d let me press the crumbly dough into the pan before sneaking a spoonful of peanut butter straight from the jar. Now, whenever I make this Irresistible Peanut Butter Bars Recipe, it’s like a warm hug from the past. They’re my go-to for potlucks because they always earn rave reviews, and honestly, the simplicity means I can enjoy them without stressing over technique. Some recipes just feel like home—this is one of them.

“`

Health and Nutrition

Why it’s good for your body

Irresistible Peanut Butter Bars Recipe packs a nutritious punch while satisfying your sweet tooth. First, peanut butter delivers plant-based protein, which helps keep you full and supports muscle repair. Additionally, this recipe includes natural sweeteners like honey, offering antioxidants and a slower energy release compared to refined sugar. Moreover, oats provide fiber, promoting digestion and steady blood sugar levels.

Furthermore, Irresistible Peanut Butter Bars Recipe contains healthy fats from peanut butter and nuts. These fats support brain function and heart health. For instance, monounsaturated fats in peanuts may help lower bad cholesterol. Meanwhile, dark chocolate, if used, adds flavonoids linked to improved circulation and reduced inflammation. Together, these ingredients create a snack that fuels your body without empty calories.

Finally, this recipe avoids artificial additives, making it a cleaner choice. Whether you need a post-workout boost or an afternoon pick-me-up, Irresistible Peanut Butter Bars Recipe balances indulgence with nourishment. The combination of protein, fiber, and healthy fats ensures lasting energy, so you won’t crash afterward.

How it fits in a healthy lifestyle

Irresistible Peanut Butter Bars Recipe fits seamlessly into a balanced diet. For protein-focused eaters, it’s a smart alternative to processed snacks. If you follow a gluten-free lifestyle, simply use certified gluten-free oats. The recipe also aligns with heart-healthy eating, thanks to its unsaturated fats and minimal added sugar.

For meal preppers, these bars store well, making them a convenient grab-and-go option. Pair them with a piece of fruit for a quick breakfast or enjoy one as a post-workout snack. If you love wholesome desserts, explore our healthy dessert ideas for more inspiration. You can also customize the recipe with chia seeds or flax for an extra nutrient boost.

Ultimately, Irresistible Peanut Butter Bars Recipe proves that treats can be both delicious and nutritious. For more tips on balancing indulgences, check out our guide to mindful eating. With simple swaps and portion control, you can enjoy these bars guilt-free as part of your everyday routine.

Print
clock clock iconcutlery cutlery iconflag flag iconfolder folder iconinstagram instagram iconpinterest pinterest iconfacebook facebook iconprint print iconsquares squares iconheart heart iconheart solid heart solid icon

Irresistible Peanut Butter Bars


  • Author: Chef Emy

Description

Delicious and easy-to-make peanut butter bars with a perfect balance of sweet and salty flavors.


Ingredients

Scale

For the Crust:

  • 1 cup creamy peanut butter
  • 1/2 cup honey
  • 1/2 cup unsalted butter, melted
  • 2 cups graham cracker crumbs
  • 1 1/2 cups powdered sugar
  • 1 cup semi-sweet chocolate chips
  • 1/4 cup chopped peanuts (optional)

Instructions

1. Prepare the Crust:

  1. In a large bowl, mix peanut butter, honey, and melted butter until smooth.
  2. Add graham cracker crumbs and powdered sugar, stirring until well combined.
  3. Press the mixture firmly into a greased 9×9-inch baking dish.
  4. Melt chocolate chips in the microwave or double boiler, then spread evenly over the peanut butter layer.
  5. Sprinkle chopped peanuts on top (if using) and refrigerate for at least 2 hours before cutting into bars.

Notes

You can customize the seasonings to taste.

How to Prepare This Dish

Steps and time-saving tips

Start by lining an 8×8-inch baking pan with parchment paper, leaving some overhang for easy removal later. In a large bowl, mix the graham cracker crumbs, melted butter, and powdered sugar until the texture resembles wet sand. Press this mixture firmly into the pan to create an even crust, then pop it in the freezer for 10 minutes to set. Meanwhile, whisk together the creamy peanut butter, vanilla extract, and a pinch of salt in another bowl until smooth. Spread this layer over the chilled crust, using a spatula to smooth the top. For the chocolate topping, melt semi-sweet chocolate chips with a splash of coconut oil in short bursts in the microwave, stirring every 20 seconds to avoid burning. Drizzle the melted chocolate over the peanut butter layer, then tilt the pan to spread it evenly. Chill the bars for at least two hours before slicing. To save time, use pre-crushed graham crackers or a food processor to speed up prep. If you’re in a rush, freeze the bars for 30 minutes instead of chilling, but note the texture will be slightly firmer.

Mistakes I’ve made and learned from

Early on, I rushed the chilling step and ended up with messy, crumbling bars—patience is key for clean slices! Another blunder was using natural peanut butter without adjusting the recipe, which made the filling too oily. Stick to conventional creamy peanut butter for the right consistency. For more foolproof dessert tips, check out my guide on avoiding common baking mistakes. Also, if your chocolate topping cracks when slicing, warm your knife under hot water first. I’ve found that letting the bars sit at room temperature for 5 minutes helps too. For more chocolate-related hacks, see my post on perfect chocolate tempering. Trust me, these small tweaks make all the difference between good and Irresistible Peanut Butter Bars Recipe perfection!

Cultural Connection and Variations

Where this recipe comes from

The Irresistible Peanut Butter Bars Recipe carries a nostalgic charm that spans generations. Originally inspired by classic American lunchbox treats, these bars evolved from Depression-era recipes that relied on affordable pantry staples like peanut butter and oats. Families often tweaked the formula based on what they had—some added honey for sweetness, while others tossed in chocolate chips for a richer twist.

Around the world, similar treats take on local flavors. In Australia, they might layer caramel for a “Mars Bar” effect, while in Southeast Asia, cooks sometimes mix in coconut or pandan for a tropical touch. My grandmother’s version of the Irresistible Peanut Butter Bars Recipe included a sprinkle of sea salt before baking, balancing the sweetness perfectly. Whether served at bake sales or potlucks, this dish bridges cultures through its simplicity and adaptability.

How it fits in today’s cooking

Today, the Irresistible Peanut Butter Bars Recipe thrives as both a comfort food and a crowd-pleasing dessert. Busy parents love its no-bake options for quick snacks, while fitness enthusiasts swap in almond butter or protein powder for a healthier twist. During the holidays, it’s a staple on cookie platters alongside classics like chocolate chip cookies.

Modern cooks also reinvent it for special diets, using gluten-free oats or vegan chocolate. Some even crumble it over vanilla ice cream for an easy sundae topping. Whether you stick to tradition or experiment, these bars remain a timeless favorite because they’re as versatile as they are delicious.

Taste and Texture

What makes it delicious

The Irresistible Peanut Butter Bars Recipe delivers a decadent, melt-in-your-mouth experience. First, you’ll notice the rich, nutty aroma of creamy peanut butter blending with sweet vanilla. Each bite offers a perfect contrast—smooth, velvety peanut butter filling layered over a crisp, buttery graham cracker crust. Meanwhile, a luscious chocolate topping adds a cool, glossy finish that cracks slightly before melting. Thanks to the generous peanut butter ratio, these bars taste deeply indulgent yet balanced, with just enough salt to highlight the sweetness. Whether chilled or room temperature, the Irresistible Peanut Butter Bars Recipe satisfies cravings with its irresistible chew and luxurious texture.

Boosting the flavor

For an extra flavor kick, try swirling melted caramel into the peanut butter layer or sprinkling flaky sea salt over the chocolate topping. If you love crunch, fold chopped honey-roasted peanuts into the crust or drizzle the bars with homemade salted caramel sauce for a sweet-salty twist. Coffee lovers can enhance the chocolate layer with a pinch of espresso powder, amplifying its depth. Prefer a fruity contrast? Serve the bars with a side of quick berry compote for a bright, tangy pairing. With these easy tweaks, you can tailor the Irresistible Peanut Butter Bars Recipe to match any mood or occasion.

Tips for Success

Best practices for results

Always chill the dough for at least 30 minutes before baking to prevent spreading and ensure clean cuts. Use parchment paper to line your pan for easy removal and the best texture in your Irresistible Peanut Butter Bars Recipe. Additionally, measure your peanut butter precisely—too much can make the bars overly dense. For extra flavor, lightly toast the oats before mixing them into the dough. Finally, let the bars cool completely before slicing to keep them neat and firm.

Mistakes to avoid

Avoid overmixing the dough, as this can make the bars tough instead of tender. Instead, gently fold the ingredients until just combined. Many bakers also skip the chilling step, but this leads to messy, uneven bars. For perfect results, follow our guide on how to properly chill cookie dough. Another common mistake is using natural peanut butter, which can separate and alter the texture. Stick to conventional peanut butter, or check out our tips for choosing the best peanut butter for baking.

Serving and Pairing Suggestions

How to serve this dish

For a stunning presentation, cut the Irresistible Peanut Butter Bars Recipe into neat squares and arrange them on a rustic wooden board or a pastel-colored platter. Meanwhile, drizzle melted chocolate over the top or sprinkle crushed peanuts for extra texture. These bars shine at potlucks, holiday gatherings, or even as a sweet afternoon pick-me-up. If you’re hosting a party, stack them in a tiered dessert stand for a charming centerpiece. Alternatively, wrap individual bars in parchment paper for a cute, grab-and-go treat.

What goes well with it

Pair the Irresistible Peanut Butter Bars Recipe with a cold glass of milk for a classic combo that highlights its creamy richness. Coffee lovers will adore it alongside a bold espresso or a frothy latte, as the bitterness balances the sweetness perfectly. For a fun twist, serve it with a scoop of vanilla ice cream or a dollop of whipped cream. If you’re craving more decadent desserts, try pairing it with our fudgy chocolate brownies or our salted caramel cookies for a dessert spread that delights every palate.

What are the key ingredients for Irresistible Peanut Butter Bars Recipe?

The Irresistible Peanut Butter Bars Recipe requires simple ingredients like creamy peanut butter, graham cracker crumbs, powdered sugar, butter, and chocolate chips. These staples create the perfect balance of sweetness and crunch, making the bars a crowd-pleaser every time.

Can I make Irresistible Peanut Butter Bars Recipe without graham crackers?

Yes! If you don’t have graham crackers, substitute them with crushed digestive biscuits, pretzels, or even gluten-free alternatives. The Irresistible Peanut Butter Bars Recipe stays delicious with these swaps while keeping its signature texture.

How do I store Irresistible Peanut Butter Bars Recipe to keep them fresh?

Store the Irresistible Peanut Butter Bars Recipe in an airtight container at room temperature for up to 5 days or refrigerate for up to 2 weeks. For longer storage, freeze them in a sealed bag for up to 3 months—just thaw before serving.

Can I use natural peanut butter for Irresistible Peanut Butter Bars Recipe?

Yes, but natural peanut butter may make the bars slightly softer due to its oil content. For best results in the Irresistible Peanut Butter Bars Recipe, stir the natural peanut butter well or opt for a no-stir variety to maintain the ideal consistency.

Best New Orleans Bread Pudding – Classic Recipe

best-new-orleans-bread-pudding

“`html

Introduction

There’s something magical about the warm, custardy embrace of a perfectly baked bread pudding, especially when it carries the soulful flavors of New Orleans. Whether you’re craving a nostalgic dessert or a showstopping treat to share, this Irresistible New Orleans Bread Pudding Recipe delivers every time. Picture tender chunks of bread soaked in a rich, spiced custard, baked until golden, and finished with a decadent sauce that melts into every bite. It’s comfort food at its finest, and once you try it, you’ll understand why this dish holds a special place in so many hearts.

About This Recipe

This Irresistible New Orleans Bread Pudding Recipe isn’t just another dessert—it’s a celebration of tradition and flavor. Originating from the heart of Creole cuisine, this dish transforms humble ingredients like stale bread, eggs, and milk into a luxurious masterpiece. What sets it apart is the bold use of warm spices, a touch of bourbon, and that iconic praline or whiskey sauce drizzled on top. Moreover, it’s incredibly versatile. You can serve it as a cozy weeknight indulgence or dress it up for a festive gathering. If you love classic Southern desserts, you’ll adore our creamy banana pudding, which shares the same comforting appeal.

Beyond its deliciousness, this recipe fits perfectly with our blog’s mission to bring approachable yet elevated recipes to your kitchen. We focus on dishes that feel special without requiring fancy techniques or hard-to-find ingredients. For instance, if you’re new to baking, you might start with our easy cinnamon rolls to build confidence before tackling this bread pudding. Either way, the result is a dessert that feels like a warm hug—a little taste of New Orleans magic, no matter where you are.

Why I Love This Recipe

This Irresistible New Orleans Bread Pudding Recipe holds a special spot in my heart because it reminds me of my first trip to the French Quarter. I stumbled into a tiny café where the smell of cinnamon and caramel filled the air, and one bite of their bread pudding instantly transported me. Since then, I’ve worked to recreate that moment at home, tweaking the recipe until it captured the same warmth and depth. Now, every time I make it, I’m reminded of cobblestone streets, jazz music, and the joy of sharing good food with even better company. It’s more than a dessert—it’s a memory on a plate.

“`

Health and Nutrition

Why it’s good for your body

Irresistible New Orleans Bread Pudding Recipe delivers more than just rich flavor—it packs surprising nutritional perks. First, the eggs and milk provide high-quality protein, which helps repair muscles and keeps you full longer. Additionally, cinnamon, a key spice in this dish, offers antioxidants that fight inflammation. Meanwhile, the whole-grain bread in many versions adds fiber to support digestion and steady energy levels.

Moreover, Irresistible New Orleans Bread Pudding Recipe includes raisins or nuts in some variations. These ingredients contribute iron and healthy fats, which boost heart health and cognitive function. Even better, the recipe’s natural sweetness means you can often reduce added sugars without sacrificing taste. Finally, because it’s baked, not fried, you avoid excess oils while still enjoying a decadent texture.

Of course, moderation matters. Yet when you savor Irresistible New Orleans Bread Pudding Recipe as an occasional treat, you nourish your body and soul. The combination of wholesome ingredients and comforting warmth makes it a smarter choice than many desserts. Plus, sharing it with loved ones adds emotional benefits, turning every bite into a moment of joy.

How it fits in a healthy lifestyle

Irresistible New Orleans Bread Pudding Recipe fits seamlessly into balanced eating when enjoyed mindfully. Pair a small portion with protein-rich foods like Greek yogurt or a handful of almonds to stabilize blood sugar. For gluten-free diets, simply swap traditional bread for a gluten-free alternative, keeping the same luscious texture.

If you’re watching sugar intake, reduce the sweetener by a third or try natural substitutes like mashed bananas. Heart-healthy eaters can opt for low-fat milk and sprinkle chia seeds for extra omega-3s. Planning ahead? Bake a batch and freeze individual servings to avoid overindulgence. For more tips on balancing treats with nutrition, explore our guide to smart dessert swaps.

Ultimately, Irresistible New Orleans Bread Pudding Recipe proves that indulgence and wellness can coexist. By tweaking ingredients and portions, you make it work for your goals—without missing out on flavor.

Print
clock clock iconcutlery cutlery iconflag flag iconfolder folder iconinstagram instagram iconpinterest pinterest iconfacebook facebook iconprint print iconsquares squares iconheart heart iconheart solid heart solid icon

Irresistible New Orleans Bread Pudding


  • Author: Chef Emy

Description

A classic New Orleans dessert made with French bread, rich custard, and a decadent whiskey sauce.


Ingredients

Scale

For the Crust:

  • 1 loaf French bread (stale, cut into cubes)
  • 4 cups whole milk
  • 3 large eggs
  • 1 cup granulated sugar
  • 2 tbsp vanilla extract
  • 1 tsp ground cinnamon
  • 1/2 tsp nutmeg
  • 1/2 cup raisins (optional)
  • 1/2 cup unsalted butter (melted)
  • 1 cup brown sugar
  • 1/4 cup whiskey or bourbon
  • 1/2 cup heavy cream

Instructions

1. Prepare the Crust:

  1. Preheat oven to 350°F (175°C). Grease a 9×13-inch baking dish.
  2. In a large bowl, whisk together milk, eggs, granulated sugar, vanilla, cinnamon, and nutmeg.
  3. Add bread cubes and raisins (if using) to the mixture. Let soak for 15 minutes, pressing down occasionally.
  4. Pour mixture into the prepared baking dish. Drizzle melted butter over the top.
  5. Bake for 45-50 minutes until set and golden brown.
  6. Meanwhile, make the sauce: In a saucepan, combine brown sugar, whiskey, and heavy cream. Simmer for 5 minutes until slightly thickened.
  7. Serve bread pudding warm with the whiskey sauce drizzled on top.

Notes

You can customize the seasonings to taste.

How to Prepare This Dish

Steps and time-saving tips

Start by preheating your oven to 350°F so it’s ready when you need it. Next, tear the day-old French bread into bite-sized pieces and let them dry slightly on a baking sheet for 10 minutes—this helps absorb the custard better. Meanwhile, whisk together eggs, milk, sugar, vanilla, and a pinch of cinnamon in a large bowl until smooth. Gently fold the bread into the mixture, pressing down lightly to ensure every piece soaks up the custard. Let it sit for 15 minutes while you grease a baking dish with butter. Transfer the bread mixture to the dish, spreading it evenly, then bake for 45 minutes until golden and set. For a time-saving twist, prep the custard the night before and refrigerate it overnight. Just combine it with the bread in the morning and bake. While the pudding cools slightly, whip up a quick bourbon sauce by simmering butter, sugar, and cream, then stirring in a splash of bourbon. Drizzle it warm over each serving for that classic New Orleans flair.

Mistakes I’ve made and learned from

Early on, I rushed the soaking step and ended up with dry spots in my Irresistible New Orleans Bread Pudding Recipe. Now, I always press the bread into the custard and let it rest—patience pays off! Another blunder? Overbaking. I once left it in too long, and the texture turned rubbery. A toothpick test saves the day: if it comes out clean but the center still jiggles slightly, it’s done. For more foolproof baking tips, check out my guide on avoiding common baking mistakes. And if you’re new to custards, my custard basics for beginners breaks down the science so you can nail the perfect consistency every time.

Cultural Connection and Variations

Where this recipe comes from

New Orleans bread pudding carries a rich history, blending French, Spanish, and Creole influences into one comforting dessert. The Irresistible New Orleans Bread Pudding Recipe we know today likely evolved from thrifty cooks who transformed stale bread into something decadent with eggs, milk, and spices. In the French Quarter, chefs often add a boozy bourbon sauce, while home cooks might swap in local ingredients like pecans or praline syrup.

Around the world, bread pudding takes on unique twists. In England, they serve it with custard, while in Mexico, “capirotada” layers bread with cheese and raisins. Even within Louisiana, families debate the best way to prepare the Irresistible New Orleans Bread Pudding Recipe—some swear by French bread, others use croissants for extra richness. My grandmother always added a splash of vanilla and a pinch of nutmeg, making it a holiday staple.

How it fits in today’s cooking

Today, this dessert bridges tradition and modern convenience. Busy bakers love the Irresistible New Orleans Bread Pudding Recipe because it turns pantry staples into a showstopper. Many now use gluten-free bread or dairy alternatives, proving its adaptability. For a quicker version, some even repurpose leftover cinnamon rolls, blending breakfast and dessert.

It’s also a star at gatherings, from Mardi Gras feasts to cozy winter dinners. Food bloggers often pair it with creative toppings, like salted caramel or spiced rum glaze. If you’re exploring other Southern classics, try serving it alongside pecan pie for a double dose of nostalgia. Whether you stick to tradition or experiment, this pudding remains a beloved way to savor every bite of history.

Taste and Texture

What makes it delicious

The Irresistible New Orleans Bread Pudding Recipe delivers a symphony of rich, comforting flavors and textures. Each bite melts in your mouth with a lusciously creamy custard base, while the edges crisp up slightly for a delightful contrast. Warm notes of vanilla and cinnamon mingle with the deep caramelized sweetness of brown sugar, creating a fragrant aroma that fills the kitchen. Meanwhile, the bread soaks up the custard perfectly, turning tender yet retaining a satisfying chew. Whether you enjoy it warm or chilled, the Irresistible New Orleans Bread Pudding Recipe strikes the ideal balance between indulgence and nostalgia.

Boosting the flavor

Elevate your Irresistible New Orleans Bread Pudding Recipe with a few easy tweaks. For extra depth, swap vanilla extract for bourbon or rum, adding a warm, boozy kick. Top it with a drizzle of homemade caramel sauce or a dollop of whipped cream for a silky finish. Alternatively, sprinkle toasted pecans or walnuts on top for a crunchy contrast. If you love spice, a pinch of nutmeg or cardamom enhances the warmth. Pair it with a scoop of vanilla bean ice cream to let the flavors shine even brighter. With these small upgrades, every bite becomes unforgettable.

Tips for Success

Best practices for results

Always use day-old bread for your Irresistible New Orleans Bread Pudding Recipe, as it absorbs the custard better without turning mushy. Meanwhile, whisk the eggs and milk thoroughly to create a smooth, lump-free mixture. For extra richness, substitute half the milk with heavy cream. Additionally, let the pudding rest for 15 minutes before baking so the bread soaks up the custard evenly. Finally, bake until the top turns golden but the center remains slightly jiggly for the perfect texture.

Mistakes to avoid

Avoid overbaking the Irresistible New Orleans Bread Pudding Recipe, which can make it dry instead of custardy. Instead, check for doneness a few minutes early since ovens vary. Another common mistake is skipping the vanilla extract or bourbon, which adds depth to the flavor. If you prefer a non-alcoholic version, try our vanilla extract substitutes for similar results. Also, don’t forget to grease the baking dish properly to prevent sticking. For more baking dish tips, explore our guide on best baking dishes to ensure even cooking every time.

Serving and Pairing Suggestions

How to serve this dish

Serve your Irresistible New Orleans Bread Pudding Recipe warm for the best texture and flavor. For a stunning presentation, drizzle bourbon sauce over each portion just before serving. Alternatively, top it with a scoop of vanilla ice cream or a dollop of whipped cream for a decadent touch. Meanwhile, sprinkle powdered sugar or fresh berries on top to add color and freshness. This dish shines at holiday gatherings, but it also makes a special treat for weekend brunches. Finally, consider serving it in individual ramekins for an elegant twist.

What goes well with it

Pair your Irresistible New Orleans Bread Pudding Recipe with a rich cup of chicory coffee to highlight its deep, caramelized flavors. For a refreshing contrast, try a crisp glass of Riesling or a scoop of our homemade vanilla bean ice cream. If you prefer something savory to balance the sweetness, serve it alongside our Crispy Cajun Bacon for a delightful sweet-and-salty combination. Each pairing enhances the dish’s comforting warmth and Southern charm.

What makes New Orleans bread pudding different from regular bread pudding?

New Orleans bread pudding stands out with its rich, custardy texture and signature whiskey or rum sauce. The Irresistible New Orleans Bread Pudding Recipe often uses French bread for a chewier bite and incorporates warm spices like cinnamon and nutmeg for deeper flavor.

Can I make Irresistible New Orleans Bread Pudding Recipe ahead of time?

Yes! Assemble the bread pudding the night before and refrigerate it—just bake it the next day for a time-saving twist. The flavors meld beautifully, making this Irresistible New Orleans Bread Pudding Recipe even more delicious when prepared in advance.

What’s the best bread to use for New Orleans-style bread pudding?

Stale French bread or brioche works best for the Irresistible New Orleans Bread Pudding Recipe, as they absorb the custard without turning mushy. Avoid sliced sandwich bread—it lacks the structure needed for the classic New Orleans texture.

How do I prevent my bread pudding from turning out too dry?

Ensure your custard mixture has enough eggs and cream—the Irresistible New Orleans Bread Pudding Recipe relies on this ratio for moisture. Cover with foil during the first half of baking, then uncover to let the top crisp up perfectly.

Best Pumpkin Bread with Cream Cheese Frosting

best-pumpkin-bread-cream-cheese

“`html

Introduction

There’s something magical about the warm, spiced aroma of freshly baked pumpkin bread wafting through your kitchen. Now, imagine that tender, moist loaf topped with a luscious layer of cream cheese frosting—pure bliss, right? Whether you’re craving a cozy fall treat or a showstopping dessert for your next gathering, this Irresistible Pumpkin Bread with Cream Cheese Frosting delivers every time. It’s the kind of recipe that feels like a hug in food form, and once you try it, you’ll understand why it’s a staple in so many homes.

About This Recipe

Irresistible Pumpkin Bread with Cream Cheese Frosting combines the rich, earthy flavors of pumpkin and warm spices with the tangy sweetness of velvety cream cheese frosting. This isn’t just another pumpkin bread—it’s a elevated version that balances texture and taste perfectly. The bread itself stays incredibly moist thanks to the pumpkin puree, while the frosting adds a decadent finish that makes it feel like a dessert worthy of any celebration. Whether you’re a seasoned baker or a beginner, this recipe simplifies the process without sacrificing flavor. Plus, it’s versatile enough to enjoy for breakfast, as a snack, or even as a dessert alongside your favorite coffee or tea.

At BrekCakes, we believe recipes should be approachable yet special, and this one fits that philosophy perfectly. If you love pumpkin treats, you’ll also adore our Pumpkin Spice Latte Cupcakes or our Cinnamon Roll Pumpkin Bread for more autumnal inspiration. What sets this recipe apart is its crowd-pleasing appeal—it’s a guaranteed hit at potlucks, holiday gatherings, or even as a heartfelt homemade gift. The combination of familiar flavors and a touch of indulgence makes it unforgettable.

Why I Love This Recipe

This Irresistible Pumpkin Bread with Cream Cheese Frosting holds a special place in my heart because it reminds me of crisp autumn mornings spent baking with my grandmother. She always insisted on adding extra cinnamon and a generous swirl of frosting, turning a simple loaf into something extraordinary. Now, whenever I make it, the scent alone transports me back to those cherished moments. Beyond nostalgia, though, I love how effortlessly it comes together and how it never fails to impress. It’s the kind of recipe that feels like a little celebration, no matter the occasion.

“`

Health and Nutrition

Why it’s good for your body

Irresistible Pumpkin Bread with Cream Cheese Frosting packs a nutritious punch while satisfying your sweet tooth. First, pumpkin puree delivers a hefty dose of vitamin A, which supports vision and immune health. Additionally, the warm spices like cinnamon and nutmeg not only enhance flavor but also offer anti-inflammatory benefits. Moreover, this treat includes eggs and dairy, providing protein and calcium for strong muscles and bones.

Furthermore, Irresistible Pumpkin Bread with Cream Cheese Frosting contains healthy fats from ingredients like olive oil or butter, which help absorb fat-soluble vitamins. The cream cheese frosting adds a creamy texture while contributing probiotics for gut health. Even better, you can easily tweak the recipe with whole wheat flour or reduce sugar for an even healthier version. Ultimately, this dessert balances indulgence with nourishment, making it a smarter choice than processed sweets.

How it fits in a healthy lifestyle

Irresistible Pumpkin Bread with Cream Cheese Frosting fits perfectly into a balanced diet when enjoyed mindfully. Pair a slice with a protein-rich snack like Greek yogurt or nuts to stabilize blood sugar. For gluten-free diets, simply swap regular flour for a blend like almond or oat flour—just like our Gluten-Free Baking Guide recommends.

If you’re watching sugar intake, reduce the frosting or try a natural sweetener like maple syrup. Heart-healthy eaters will appreciate the fiber from pumpkin and whole grains, which supports cholesterol levels. For more tips on balancing treats with nutrition, explore our Healthy Dessert Swaps guide. Whether as an occasional treat or a wholesome snack, this pumpkin bread adapts to your lifestyle without sacrificing flavor.

Print
clock clock iconcutlery cutlery iconflag flag iconfolder folder iconinstagram instagram iconpinterest pinterest iconfacebook facebook iconprint print iconsquares squares iconheart heart iconheart solid heart solid icon

Irresistible Pumpkin Bread with Cream Cheese Frosting


  • Author: Chef Emy

Description

Moist and flavorful pumpkin bread topped with a rich cream cheese frosting, perfect for fall.


Ingredients

Scale

For the Crust:

  • 1 3/4 cups all-purpose flour
  • 1 teaspoon baking soda
  • 1/2 teaspoon salt
  • 1 1/2 teaspoons ground cinnamon
  • 1/2 teaspoon ground nutmeg
  • 1/4 teaspoon ground cloves
  • 1/4 teaspoon ground ginger
  • 1/2 cup unsalted butter, softened
  • 1 cup granulated sugar
  • 2 large eggs
  • 1 cup canned pumpkin puree
  • 1/2 cup buttermilk
  • 1 teaspoon vanilla extract
  • 4 ounces cream cheese, softened
  • 1/4 cup unsalted butter, softened
  • 1 1/2 cups powdered sugar
  • 1/2 teaspoon vanilla extract

Instructions

1. Prepare the Crust:

  1. Preheat oven to 350°F (175°C). Grease a 9×5-inch loaf pan.
  2. In a medium bowl, whisk together flour, baking soda, salt, cinnamon, nutmeg, cloves, and ginger.
  3. In a large bowl, beat 1/2 cup butter and granulated sugar until light and fluffy. Add eggs one at a time, then mix in pumpkin puree, buttermilk, and 1 teaspoon vanilla.
  4. Gradually add dry ingredients to wet ingredients, mixing until just combined. Pour batter into prepared loaf pan.
  5. Bake for 50-60 minutes or until a toothpick inserted in the center comes out clean. Cool in pan for 10 minutes, then transfer to a wire rack to cool completely.
  6. For frosting, beat cream cheese and 1/4 cup butter until smooth. Gradually add powdered sugar and 1/2 teaspoon vanilla, beating until creamy. Spread over cooled bread.

Notes

You can customize the seasonings to taste.

How to Prepare This Dish

Steps and time-saving tips

Start by preheating your oven to 350°F and greasing a 9×5-inch loaf pan. In a large bowl, whisk together the flour, baking soda, cinnamon, and salt until evenly combined. Next, grab another bowl and mix the pumpkin puree, sugar, eggs, oil, and vanilla until smooth. Gradually fold the wet ingredients into the dry mixture, stirring just until no flour streaks remain—overmixing can make your Irresistible Pumpkin Bread with Cream Cheese Frosting dense. Pour the batter into the pan and bake for 50-60 minutes, or until a toothpick comes out clean. While the bread cools, whip the cream cheese, butter, powdered sugar, and vanilla for the frosting until fluffy. Once the bread is completely cool, spread the frosting generously on top. For a time-saving hack, bake the bread a day ahead and frost it just before serving—this also lets the flavors deepen. If you’re short on time, use canned pumpkin puree instead of fresh for consistent results every time.

Mistakes I’ve made and learned from

I once rushed the cooling process and slathered the cream cheese frosting on warm pumpkin bread—big mistake. The frosting melted into a gooey mess instead of staying fluffy. Now, I always let the bread cool for at least two hours, or even pop it in the fridge to speed things up. Another lesson? Measuring flour correctly matters. Scooping it straight from the bag packs too much into the cup, leading to dry, crumbly bread. I learned to spoon and level the flour, just like in my guide to perfect baking textures. And if your frosting turns out too runny, don’t panic. Chill it for 20 minutes, then re-whip—it’ll thicken right up. For more frosting fixes, check out my troubleshooting cream cheese frosting post. Trust me, these small tweaks make all the difference.

Cultural Connection and Variations

Where this recipe comes from

Irresistible Pumpkin Bread with Cream Cheese Frosting carries the cozy essence of autumn, deeply rooted in American harvest traditions. Families often bake it during Thanksgiving or Halloween, filling kitchens with warm spices like cinnamon and nutmeg. However, pumpkin itself has a global journey—Native Americans cultivated it for centuries, and European settlers adapted it into sweet breads. Today, some bakers add a tropical twist by folding in coconut or pineapple, while others keep it classic with a dense, spiced crumb.

In the South, you might find Irresistible Pumpkin Bread with Cream Cheese Frosting topped with pecans for extra crunch. Meanwhile, in the Midwest, bakers often swap the frosting for a simple dusting of powdered sugar. My grandma added a splash of bourbon to hers, giving it a grown-up kick. No matter the variation, this recipe always feels like a hug in loaf form, connecting generations through shared slices and stories.

How it fits in today’s cooking

Modern cooks love Irresistible Pumpkin Bread with Cream Cheese Frosting because it bridges nostalgia and convenience. Meal preppers bake it on Sundays for weekday treats, while food bloggers reinvent it with gluten-free flour or vegan cream cheese. It’s also a star at fall gatherings, pairing perfectly with spiced chai lattes or apple cider donuts for a seasonal spread.

Thanks to its versatility, this recipe thrives in today’s kitchens. Some drizzle it with caramel for extra decadence, while others serve it as a dessert-for-breakfast indulgence. Whether you’re reviving family traditions or starting new ones, Irresistible Pumpkin Bread with Cream Cheese Frosting remains a timeless crowd-pleaser.

Taste and Texture

What makes it delicious

Irresistible Pumpkin Bread with Cream Cheese Frosting wraps you in warmth the moment it comes out of the oven. The bread itself is moist and tender, with a rich pumpkin flavor deepened by cinnamon, nutmeg, and a hint of vanilla. Meanwhile, the cream cheese frosting adds a velvety contrast—slightly tangy, perfectly sweet, and luxuriously smooth. Every bite delivers a cozy blend of earthy spices and creamy indulgence, while the aroma of toasted pecans or walnuts (if you add them) gives it a satisfying crunch. Whether served warm or at room temperature, Irresistible Pumpkin Bread with Cream Cheese Frosting feels like a hug in dessert form.

Boosting the flavor

For an extra layer of decadence, drizzle your pumpkin bread with a salted caramel sauce to play up the sweetness. Alternatively, fold in dark chocolate chips for a bittersweet twist that pairs beautifully with the spices. If you love texture, sprinkle crushed gingersnaps or candied pecans on top of the frosting for a delightful crunch. A dash of cardamom or a pinch of espresso powder in the batter can also elevate the depth of flavor without overpowering the pumpkin. The possibilities are endless, so don’t hesitate to experiment!

Tips for Success

Best practices for results

For the best Irresistible Pumpkin Bread with Cream Cheese Frosting, always measure your flour correctly by spooning it into the cup and leveling it off. Additionally, make sure your pumpkin puree is unsweetened to avoid overly sweet results. Meanwhile, let your cream cheese and butter soften at room temperature for smoother frosting. Finally, bake the bread until a toothpick comes out clean, but don’t overbake it—this keeps the texture moist and tender.

Mistakes to avoid

Avoid overmixing the batter, as this can make your Irresistible Pumpkin Bread with Cream Cheese Frosting dense instead of light. Instead, gently fold the ingredients until just combined. Also, don’t skip greasing the pan or using parchment paper, or the bread might stick. For more baking tips, check out our guide on perfect baking temperatures. Another common mistake is frosting the bread while it’s still warm, which can cause the frosting to melt. Instead, let it cool completely, just like we recommend in our frosting like a pro tutorial.

Serving and Pairing Suggestions

How to serve this dish

Slice your Irresistible Pumpkin Bread with Cream Cheese Frosting thick for a hearty treat or thin for elegant bites. For a festive touch, drizzle extra frosting in zigzag patterns and sprinkle chopped pecans or cinnamon on top. Serve it warm at brunch to let the creamy frosting melt slightly, or pack it in a dessert box for holiday gifts. Meanwhile, arrange slices on a wooden board with fresh berries for a rustic look that wows guests.

What goes well with it

Pair Irresistible Pumpkin Bread with Cream Cheese Frosting with a spiced chai latte to highlight its warm autumn flavors. Alternatively, try it alongside our Homemade Vanilla Ice Cream for a cool contrast to the rich bread. If you prefer savory balance, serve it with a crisp apple salad like our Apple Walnut Salad to cut through the sweetness. Each pairing enhances the dish while keeping the spotlight on its cozy, spiced charm.

How do I make Irresistible Pumpkin Bread with Cream Cheese Frosting moist?

To keep your Irresistible Pumpkin Bread with Cream Cheese Frosting moist, use the right balance of wet ingredients like pumpkin puree, oil, and eggs. Avoid overbaking—check for doneness with a toothpick at the minimum recommended time. The cream cheese frosting also adds moisture and richness to every bite.

Can I freeze Irresistible Pumpkin Bread with Cream Cheese Frosting?

Yes, you can freeze Irresistible Pumpkin Bread with Cream Cheese Frosting for up to 3 months. Wrap the unfrosted bread tightly in plastic wrap and foil, then add the frosting after thawing. For best results, store the frosting separately in an airtight container.

What’s the best cream cheese frosting for pumpkin bread?

The best cream cheese frosting for Irresistible Pumpkin Bread balances tanginess and sweetness. Use full-fat cream cheese, softened butter, powdered sugar, and a touch of vanilla for a smooth, spreadable texture. This complements the spiced pumpkin flavor perfectly.

How long does Irresistible Pumpkin Bread with Cream Cheese Frosting last?

Irresistible Pumpkin Bread with Cream Cheese Frosting stays fresh for 3-4 days at room temperature or up to a week refrigerated. Store it in an airtight container to maintain freshness. The frosting may soften over time, so chill it if your kitchen is warm.

Easy Heartfelt Slice and Bake Heart Cookies Recipe

easy-heartfelt-slice-bake-cookies

“`html

Introduction

There’s something magical about baking cookies that carry love in every bite. Whether you’re surprising a loved one or treating yourself, Heartfelt Slice and Bake Heart Cookies bring warmth and joy to any occasion. These buttery, tender cookies shaped like hearts are not just a dessert—they’re a little edible hug. Perfect for Valentine’s Day, anniversaries, or just because, they remind us that the simplest gestures often mean the most. Plus, with their easy slice-and-bake method, you can whip up a batch whenever the mood strikes.

About This Recipe

Heartfelt Slice and Bake Heart Cookies are a nostalgic twist on classic shortbread, designed to melt in your mouth while warming your heart. The dough comes together quickly with pantry staples like butter, sugar, and flour, but the real magic happens when you shape it into a log, chill, and slice it into perfect heart-shaped rounds. After baking, they turn golden and crisp with a delicate crumb that pairs beautifully with a cup of tea or coffee. What makes these cookies special isn’t just their taste—it’s the intention behind them. They’re ideal for gifting, sharing, or savoring solo, making them a versatile addition to your baking repertoire.

This recipe fits perfectly with the cozy, approachable vibe of our blog, where we celebrate homemade treats that bring people together. If you love easy yet impressive desserts, you’ll also adore our Vanilla Bean Sugar Cookies or our Chocolate-Dipped Shortbread. Heartfelt Slice and Bake Heart Cookies embody that same spirit of simplicity and joy, proving that baking doesn’t need to be complicated to feel meaningful.

Why I Love This Recipe

These cookies hold a special place in my heart because they remind me of baking with my grandmother. She always had a tin of homemade shortbread tucked away, ready to share with anyone who stopped by. When I make Heartfelt Slice and Bake Heart Cookies, I channel her generosity and the comfort of those moments. The process feels like a tribute to her, and now I get to pass that same warmth on to my own family and friends. Every time I pull a batch from the oven, I’m reminded that food isn’t just about flavor—it’s about connection.

“`

Health and Nutrition

Why it’s good for your body

Heartfelt Slice and Bake Heart Cookies offer more than just delicious flavor—they pack a surprising nutritional punch. First, these cookies often include wholesome ingredients like whole wheat flour or oats, which provide fiber to support digestion. Additionally, the recipe may incorporate heart-healthy fats, such as those from nuts or seeds, to promote cardiovascular wellness.

Moreover, Heartfelt Slice and Bake Heart Cookies can be a great source of energy. With balanced amounts of carbohydrates and healthy fats, they help sustain your energy levels without causing drastic blood sugar spikes. If the recipe includes dark chocolate or dried fruit, you also benefit from antioxidants that combat oxidative stress.

Finally, these cookies can be customized to fit dietary preferences. For instance, using almond flour instead of traditional flour boosts protein content while keeping them gluten-free. Whether you enjoy them as an occasional treat or a mindful snack, Heartfelt Slice and Bake Heart Cookies deliver both taste and nutrition in every bite.

How it fits in a healthy lifestyle

Heartfelt Slice and Bake Heart Cookies fit seamlessly into a balanced diet when enjoyed in moderation. They work well as a satisfying dessert or a midday pick-me-up, especially when paired with a protein-rich snack like Greek yogurt. For those following gluten-free diets, simply swapping in alternative flours keeps these cookies just as delicious.

If you’re focused on heart health, these cookies can align with your goals by using ingredients like olive oil or flaxseeds. For more tips on maintaining a nutritious diet without sacrificing flavor, check out our guide on healthy baking substitutes. And if you’re looking for other wholesome dessert ideas, explore our low-sugar treats for inspiration. With mindful choices, Heartfelt Slice and Bake Heart Cookies can be part of a vibrant, health-conscious lifestyle.

Print
clock clock iconcutlery cutlery iconflag flag iconfolder folder iconinstagram instagram iconpinterest pinterest iconfacebook facebook iconprint print iconsquares squares iconheart heart iconheart solid heart solid icon

Heartfelt Slice and Bake Heart Cookies


  • Author: Chef Emy

Description

Delightful heart-shaped cookies perfect for sharing love on any occasion.


Ingredients

Scale

For the Crust:

  • 1 cup unsalted butter, softened
  • 3/4 cup granulated sugar
  • 1 large egg
  • 1 teaspoon vanilla extract
  • 2 1/2 cups all-purpose flour
  • 1/4 teaspoon salt
  • Red food coloring (optional)
  • Sprinkles or decorating sugar (optional)

Instructions

1. Prepare the Crust:

  1. In a large bowl, cream together butter and sugar until light and fluffy. Beat in egg and vanilla extract.
  2. Gradually mix in flour and salt until dough comes together. If desired, add red food coloring for a pink or red hue.
  3. Divide dough in half. Shape each half into a log, then flatten one side to form a heart shape. Wrap in plastic and chill for at least 2 hours.
  4. Preheat oven to 350°F (175°C). Slice chilled dough into 1/4-inch thick slices and place on baking sheets. Decorate with sprinkles if desired.
  5. Bake for 10-12 minutes or until edges are lightly golden. Cool on wire racks before serving.

Notes

You can customize the seasonings to taste.

“`html

How to Prepare This Dish

Steps and time-saving tips

Start by preheating your oven to 350°F to ensure it’s ready when your dough is prepared. In a large bowl, whisk together the dry ingredients—flour, sugar, and a pinch of salt—until fully combined. Next, cut cold butter into small cubes and work it into the flour mixture using your fingers or a pastry cutter until the texture resembles coarse crumbs. Gradually add cold milk, stirring just until the dough comes together. Overmixing can make the Heartfelt Slice and Bake Heart Cookies tough, so stop as soon as the dough forms. Roll the dough into a log, wrap it tightly in plastic, and chill for at least 30 minutes. This step ensures clean slices and prevents spreading during baking. While the dough chills, line your baking sheets with parchment paper for easy cleanup. Once chilled, slice the log into even rounds, arrange them on the sheets, and bake for 12-15 minutes until the edges turn golden. Let the cookies cool completely before decorating with royal icing or sprinkles for a festive touch. To save time, prepare the dough a day ahead and refrigerate it overnight—slicing and baking will take just minutes the next day.

Mistakes I’ve made and learned from

When I first made Heartfelt Slice and Bake Heart Cookies, I skipped chilling the dough, eager to get them in the oven. The result? Misshapen, flat cookies that spread too much. Now I never rush this step—it’s key for perfect shapes. Another lesson came from overworking the dough, which made the cookies dense instead of tender. I’ve since learned to mix just until combined, and it’s made all the difference. If you’re new to slice-and-bake cookies, check out my guide on avoiding common baking mistakes for more tips. Also, if your butter is too soft, the dough won’t hold its shape. For foolproof results, use chilled butter straight from the fridge, as I explain in my perfect cookie texture post. Trust me, these small adjustments turn good cookies into great ones.

“`

Cultural Connection and Variations

Where this recipe comes from

Heartfelt Slice and Bake Heart Cookies trace their roots to European butter cookie traditions, where bakers crafted simple yet elegant treats for special occasions. Over time, the recipe traveled across borders, picking up local twists along the way. In Scandinavia, for instance, they often add cardamom for warmth, while French bakers might layer them with jam for a delicate sandwich effect. My grandmother, however, swore by a splash of almond extract, turning each Heartfelt Slice and Bake Heart Cookie into a fragrant little love note.

These cookies also carry seasonal charm. Many cultures bake them for Valentine’s Day or weddings, but in my family, we roll the dough year-round, shaping hearts for birthdays or just-because moments. Some bakers even dye the dough pink or dip finished cookies in chocolate, proving how versatile this recipe truly is. Whether served with tea in England or as a lunchbox surprise in America, Heartfelt Slice and Bake Heart Cookies always deliver nostalgia in every bite.

How it fits in today’s cooking

Today, Heartfelt Slice and Bake Heart Cookies thrive as a fuss-free classic for busy bakers. Modern twists like gluten-free flour or vegan butter keep them inclusive, while their make-ahead dough fits perfectly with meal-prepping routines. They’ve also found a home in holiday cookie swaps, often sharing the spotlight with chocolate chip cookies or vanilla cupcakes on dessert tables.

What makes them timeless? Their adaptability. Home cooks now experiment with matcha, citrus zest, or even edible glitter, yet the heart shape stays constant—a sweet symbol of connection. Whether you’re baking them for a Galentine’s party or a rainy afternoon, these cookies remind us that some traditions only get better with time.

Taste and Texture

What makes it delicious

Heartfelt Slice and Bake Heart Cookies deliver a buttery, melt-in-your-mouth experience with just the right balance of sweetness. The tender crumb practically dissolves on your tongue, while the edges offer a delicate crispness for contrast. Fragrant vanilla and a hint of almond extract weave through each bite, creating a cozy, nostalgic aroma that fills the kitchen as they bake. Meanwhile, the subtle richness of real butter and a touch of brown sugar deepen the flavor, making Heartfelt Slice and Bake Heart Cookies irresistible. For an extra layer of indulgence, the dough often includes finely chopped nuts or a dusting of sparkling sugar, adding playful texture.

Boosting the flavor

Elevate your Heartfelt Slice and Bake Heart Cookies by rolling the dough in crushed freeze-dried strawberries or citrus zest before slicing for a fruity twist. Alternatively, drizzle cooled cookies with a glossy vanilla glaze or dip half in melted dark chocolate for decadence. Spice lovers can mix cinnamon or cardamom into the dough, while nut enthusiasts might swap almond extract for hazelnut. For more inspiration, explore our guide to creative cookie decorating to turn these treats into edible gifts. Every small tweak lets you personalize the flavor while keeping the charm of the original recipe.

Tips for Success

Best practices for results

Always chill the dough for at least 30 minutes before slicing to prevent spreading during baking. Use parchment paper on your baking sheets for even heat distribution and the best texture in your Heartfelt Slice and Bake Heart Cookies. For uniform shapes, roll the dough into a tight log before chilling, and rotate it occasionally to maintain a round shape. Additionally, slice the cookies with a sharp knife and wipe it clean between cuts for smooth edges. Finally, let the cookies cool completely on the baking sheet to set properly.

Mistakes to avoid

Avoid overmixing the dough, as this can make your Heartfelt Slice and Bake Heart Cookies tough instead of tender. For the right consistency, stop mixing as soon as the ingredients combine. Also, don’t skip the chilling step—soft dough spreads too much and loses its heart shape. If your cookies still spread, check your oven temperature with a thermometer, as an inaccurate setting often causes this issue. For more troubleshooting, see our guide on how to fix spreading cookies. Another common mistake is slicing unevenly, which leads to uneven baking. For perfect slices every time, review our tips on slice-and-bake techniques.

Serving and Pairing Suggestions

How to serve this dish

Heartfelt Slice and Bake Heart Cookies shine when you arrange them on a rustic wooden board or a pastel-colored platter for a charming touch. Meanwhile, sprinkle edible rose petals or dust them with powdered sugar to enhance their visual appeal. These cookies make a delightful addition to Valentine’s Day gatherings, bridal showers, or even as a sweet surprise for afternoon tea. For a cozy touch, stack them in a glass jar with a ribbon tied around it—perfect for gifting or displaying on your kitchen counter.

What goes well with it

Pair Heartfelt Slice and Bake Heart Cookies with a warm cup of lavender-infused tea for a floral contrast that balances their buttery richness. Alternatively, serve them alongside a scoop of vanilla bean ice cream for a simple yet indulgent dessert. If you love pairing baked goods with fresh flavors, try our berry chia jam for a fruity twist. For a heartwarming combo, enjoy these cookies with our homemade lavender latte, which adds a soothing aromatic note to every bite.

How do you store Heartfelt Slice and Bake Heart Cookies to keep them fresh?

Store Heartfelt Slice and Bake Heart Cookies in an airtight container at room temperature for up to 5 days. For longer freshness, freeze the dough logs or baked cookies for up to 3 months—just thaw and slice or enjoy straight from the freezer.

Can you make Heartfelt Slice and Bake Heart Cookies ahead of time?

Yes! Heartfelt Slice and Bake Heart Cookies are perfect for prepping ahead. Wrap the dough logs tightly in plastic and refrigerate for up to 3 days or freeze for later use—slice and bake whenever you’re ready for fresh, heartwarming treats.

What’s the best way to decorate Heartfelt Slice and Bake Heart Cookies?

For festive Heartfelt Slice and Bake Heart Cookies, drizzle melted chocolate or sprinkle colored sugar before baking. After cooling, add royal icing or edible glitter for extra charm—these simple touches make them perfect for Valentine’s Day or special occasions.

Can I use gluten-free flour for Heartfelt Slice and Bake Heart Cookies?

Absolutely! Substitute all-purpose flour with a 1:1 gluten-free blend for Heartfelt Slice and Bake Heart Cookies. Just ensure the dough is well-chilled before slicing, as gluten-free doughs can be more delicate—bake times may vary slightly.

Best Decadent Flourless Chocolate Cake Recipe

best-flourless-chocolate-cake-recipe

“`html

Introduction

There’s something magical about a rich, velvety chocolate cake that melts in your mouth—especially when it’s gluten-free yet irresistibly indulgent. If you’ve ever craved a dessert that feels like a hug from the inside, this Decadent Flourless Chocolate Cake Recipe is your answer. Whether you’re catering to dietary restrictions or simply chasing the ultimate chocolate experience, this cake delivers. With its deep cocoa flavor and fudgy texture, it’s a showstopper for birthdays, dinner parties, or even those nights when you deserve a little extra sweetness. Trust me, one bite and you’ll understand why this recipe earns its name.

About This Recipe

A Decadent Flourless Chocolate Cake Recipe isn’t just another dessert—it’s a celebration of simplicity and luxury. Unlike traditional cakes, this version skips the flour entirely, relying on high-quality chocolate, butter, and eggs to create a dense, almost truffle-like masterpiece. Because it’s naturally gluten-free, it’s perfect for guests with dietary needs, but honestly, no one will miss the flour. The intense chocolate flavor shines through, making it a favorite for anyone who loves dessert with depth. Plus, it’s surprisingly easy to whip up, requiring just a handful of ingredients and minimal fuss.

At BrekCakes, we believe desserts should be both accessible and extraordinary. That’s why this recipe fits our tone perfectly—it’s approachable yet impressive, just like our gluten-free dessert collection. Whether you’re a baking novice or a seasoned pro, you’ll appreciate how this cake comes together without complicated steps. And if you’re looking for more ways to satisfy your sweet tooth, our chocolate lover’s guide offers plenty of inspiration. After all, life’s too short for mediocre desserts.

Why I Love This Recipe

This Decadent Flourless Chocolate Cake Recipe holds a special place in my heart because it’s the dessert that never fails to impress. I first made it for a friend’s birthday years ago, and the way her eyes lit up after the first bite stuck with me. It’s become my go-to for celebrations and quiet moments alike—a reminder that the best things in life are often the simplest. There’s joy in sharing something so rich and satisfying, and I love how it brings people together. Every time I bake it, I’m reminded why chocolate, in its purest form, is truly timeless.

“`

Health and Nutrition

Why it’s good for your body

The Decadent Flourless Chocolate Cake Recipe packs a surprising number of health benefits into every rich bite. First, it skips refined flour, making it naturally gluten-free while still delivering a velvety texture. Additionally, dark chocolate, the star ingredient, boasts antioxidants that support heart health and may even improve mood. Since the recipe relies on high-quality cocoa, you also get a dose of minerals like iron and magnesium.

Moreover, the Decadent Flourless Chocolate Cake Recipe often uses eggs as a binding agent, which adds protein and healthy fats. These nutrients help keep you satisfied longer, preventing energy crashes. While it’s undeniably indulgent, this cake avoids excessive sugars when compared to traditional desserts. Instead, it highlights the deep, natural flavors of dark chocolate.

Finally, the simplicity of the Decadent Flourless Chocolate Cake Recipe means fewer processed ingredients. Whether you enjoy a small slice as an occasional treat or share it at gatherings, you’re choosing a dessert with mindful ingredients. Just remember, balance is key—savoring it slowly lets you appreciate both the taste and the benefits.

How it fits in a healthy lifestyle

The Decadent Flourless Chocolate Cake Recipe fits beautifully into a balanced diet, especially if you prioritize quality over quantity. Its gluten-free nature makes it a great option for those with sensitivities or celiac disease. If you’re watching your sugar intake, you can easily tweak the sweetness level without sacrificing flavor.

Pairing a small slice with fresh berries or a dollop of Greek yogurt adds fiber and protein, turning it into a more rounded treat. For those focused on heart health, the antioxidants in dark chocolate complement other heart-healthy desserts in your rotation. And if you’re exploring gluten-free baking further, check out our guide to gluten-free baking tips for more inspiration.

Ultimately, the Decadent Flourless Chocolate Cake Recipe proves that indulgence and nutrition can coexist. Enjoy it mindfully, and it becomes part of a lifestyle that values both flavor and well-being.

Print
clock clock iconcutlery cutlery iconflag flag iconfolder folder iconinstagram instagram iconpinterest pinterest iconfacebook facebook iconprint print iconsquares squares iconheart heart iconheart solid heart solid icon

Decadent Flourless Chocolate Cake


  • Author: Chef Emy

Description

A rich and indulgent flourless chocolate cake that’s gluten-free and perfect for any occasion.


Ingredients

Scale

For the Crust:

  • 1 cup unsalted butter
  • 8 oz high-quality dark chocolate (70% cocoa)
  • 1 1/4 cups granulated sugar
  • 6 large eggs
  • 1 tsp vanilla extract
  • 1/2 cup unsweetened cocoa powder
  • 1/4 tsp salt

Instructions

1. Prepare the Crust:

  1. Preheat oven to 350°F (175°C). Grease a 9-inch springform pan and line the bottom with parchment paper.
  2. Melt butter and chocolate together in a double boiler or microwave, stirring until smooth. Let cool slightly.
  3. Whisk sugar into the chocolate mixture. Add eggs one at a time, whisking well after each addition. Stir in vanilla.
  4. Sift cocoa powder and salt into the batter, folding gently until fully incorporated.
  5. Pour batter into prepared pan and bake for 30-35 minutes until edges are set but center is slightly jiggly.
  6. Cool completely in pan before removing. Dust with powdered sugar or serve with berries if desired.

Notes

You can customize the seasonings to taste.

How to Prepare This Dish

Steps and time-saving tips

Start by preheating your oven to 350°F and greasing an 8-inch round cake pan. Next, melt the chocolate and butter together in a double boiler, stirring gently until smooth. Meanwhile, whisk the eggs and sugar in a large bowl until they turn pale and fluffy. Slowly pour the melted chocolate mixture into the egg mixture, folding carefully to maintain that airy texture. Add cocoa powder and a pinch of salt, then stir just until combined. Pour the batter into the prepared pan and bake for 25 minutes—the center should still look slightly soft. Let the cake cool completely before slicing. For a time-saving trick, melt the chocolate in the microwave in 30-second bursts, stirring between each interval. If you’re short on time, chill the cake for 30 minutes to speed up setting. Serve with a dusting of powdered sugar or fresh berries for an elegant touch.

Mistakes I’ve made and learned from

Early on, I overbaked my Decadent Flourless Chocolate Cake Recipe, leaving it dry instead of fudgy. Now I set a timer for 20 minutes and check early—it’s done when the edges pull away slightly but the center jiggles. Another mishap? Not properly greasing the pan, which led to heartbreaking cracks. A generous coat of butter or parchment paper solves this, as I learned from my baking essentials guide. Once, I rushed the cooling process, causing the cake to collapse. Patience pays off, just like when perfecting cake textures. Trust me, letting it cool undisturbed makes all the difference.

Cultural Connection and Variations

Where this recipe comes from

The Decadent Flourless Chocolate Cake Recipe has roots in European baking traditions, particularly in France and Italy, where dense, rich chocolate desserts have long been celebrated. Originally, bakers created flourless cakes to accommodate gluten-free diets, but over time, the intense chocolate flavor and velvety texture won over everyone. In France, they might call it “gâteau au chocolat fondant,” while Italians often serve it with a dusting of powdered sugar or a dollop of mascarpone.

Families around the world put their own spin on the Decadent Flourless Chocolate Cake Recipe. Some add espresso powder to deepen the chocolate flavor, while others infuse it with orange zest or chili for a surprising kick. In my own kitchen, I love topping it with fresh raspberries and a drizzle of salted caramel—a sweet contrast to the cake’s bitterness. Whether it’s a holiday centerpiece or a simple weeknight treat, this cake adapts effortlessly to any occasion.

How it fits in today’s cooking

Today, the Decadent Flourless Chocolate Cake Recipe remains a star for its versatility and crowd-pleasing appeal. Modern cooks embrace it for gluten-free gatherings, elegant dinner parties, or even as a showstopper for Valentine’s Day. Many bakers now experiment with dairy-free alternatives, like coconut oil or almond milk, to suit dietary preferences without sacrificing flavor.

You’ll often find this cake paired with seasonal fruits or whipped cream, making it a year-round favorite. For inspiration, check out our guide to gluten-free desserts or explore creative twists in our chocolate lovers’ collection. Whether you stick to the classic recipe or add your own flair, this cake always delivers a slice of indulgence.

Taste and Texture

What makes it delicious

This Decadent Flourless Chocolate Cake Recipe delivers an unforgettable sensory experience. The first bite reveals a rich, velvety texture that melts effortlessly on your tongue, while deep cocoa flavors dance across your taste buds. Fragrant vanilla and a hint of espresso elevate the chocolate, creating layers of complexity. Meanwhile, the cake’s dense yet airy crumb feels luxurious, almost like a cross between fudge and a soufflé. Every forkful of this Decadent Flourless Chocolate Cake Recipe promises pure indulgence, with a bittersweet finish that keeps you reaching for another slice.

Boosting the flavor

For an extra flavor boost, try adding a pinch of sea salt to the batter—it enhances the chocolate’s depth without overpowering it. Alternatively, top slices with a dollop of whipped cream infused with orange zest or a drizzle of salted caramel sauce for contrasting sweetness. If you love texture, sprinkle crushed toasted hazelnuts or a dusting of cocoa powder for a playful crunch. Experimenting with these small tweaks can transform each bite into a new adventure while keeping the cake’s signature decadence intact.

Tips for Success

Best practices for results

For the best Decadent Flourless Chocolate Cake Recipe, always use high-quality dark chocolate with at least 70% cocoa. Meanwhile, make sure your eggs are at room temperature to help them blend smoothly into the batter. Additionally, line your cake pan with parchment paper to prevent sticking and ensure easy removal. Finally, let the cake cool completely before slicing for clean edges and the perfect texture every time.

Mistakes to avoid

Avoid overbaking the Decadent Flourless Chocolate Cake Recipe, as it can dry out the cake. Instead, check for doneness when the edges are set but the center still has a slight jiggle. Furthermore, don’t skip sifting the cocoa powder, or you might end up with lumps in your batter. For more troubleshooting tips, check out our guide on common baking mistakes. Also, if you’re unsure about ingredient substitutions, our baking ingredient guide can help you make the right choices.

Serving and Pairing Suggestions

How to serve this dish

Elevate your Decadent Flourless Chocolate Cake Recipe by serving it slightly warmed for an extra-rich texture. Meanwhile, dust the top with cocoa powder or powdered sugar for a classic finish. For special occasions, add fresh raspberries or a sprig of mint to create a vibrant contrast against the dark chocolate. Alternatively, drizzle melted chocolate or caramel sauce in artistic swirls for a restaurant-worthy presentation. Whether you serve it at holiday gatherings or as a luxurious weekend treat, this cake always impresses.

What goes well with it

Pair your Decadent Flourless Chocolate Cake Recipe with a scoop of vanilla bean ice cream to balance its intense richness. The cool creaminess melts into each bite, creating a perfect harmony. For coffee lovers, a bold espresso or a cup of spiced chai tea enhances the deep chocolate flavors. If you prefer a fruity twist, try our berry compote for a tangy contrast. Another great option is our whipped cream variations, which add a light, airy texture to every slice.

What makes a flourless chocolate cake so rich and decadent?

A Decadent Flourless Chocolate Cake Recipe relies on high-quality dark chocolate and butter for its intense richness. The absence of flour allows the deep cocoa flavors to shine, while eggs provide structure and a velvety texture. This combination creates a dense, fudgy dessert that feels luxurious with every bite.

Can I make a flourless chocolate cake without eggs?

Traditional Decadent Flourless Chocolate Cake Recipe requires eggs for binding and rise, but you can substitute with flax eggs or aquafaba for vegan versions. Keep in mind the texture will be denser without eggs. For best results, stick to the classic recipe if dietary restrictions allow.

How do I prevent my flourless chocolate cake from cracking?

To avoid cracks in your Decadent Flourless Chocolate Cake Recipe, bake at a lower temperature (325°F) and don’t overmix the batter. Let the cake cool gradually in the turned-off oven with the door slightly ajar. A water bath during baking also helps maintain even heat distribution for a smooth top.

What’s the best way to serve flourless chocolate cake?

Serve your Decadent Flourless Chocolate Cake Recipe slightly warmed with fresh berries or a dusting of powdered sugar. A dollop of whipped cream or vanilla ice cream balances the intense chocolate flavor. For elegance, drizzle with raspberry coulis or caramel sauce before plating.

Easy Festive Soft Christmas Peppermints Recipe

easy-festive-christmas-peppermints-recipe

“`html

Introduction

There’s something magical about the holidays—the twinkling lights, the cozy gatherings, and of course, the sweet treats that make the season unforgettable. If you’re looking for a simple yet festive candy to share with loved ones, this Festive Soft Christmas Peppermints Recipe is your answer. These melt-in-your-mouth mints bring a burst of cool peppermint flavor with just the right amount of sweetness, making them perfect for gifting, decorating desserts, or simply enjoying by the fire. Plus, they’re incredibly easy to make, so you can spend less time in the kitchen and more time savoring the holiday spirit.

About This Recipe

The Festive Soft Christmas Peppermints Recipe is a nostalgic holiday classic that combines smooth texture with refreshing peppermint flavor. Unlike store-bought candies, these homemade mints let you control the ingredients, ensuring a fresher, more vibrant taste. Whether you’re hosting a cookie exchange or need a last-minute edible gift, these mints fit effortlessly into your festive plans. Moreover, they pair beautifully with other holiday treats, like our Homemade Peppermint Bark, for a cohesive dessert spread.

What makes this recipe stand out is its versatility. You can shape the mints into traditional rounds, festive trees, or even tiny candy canes for a playful touch. Additionally, the recipe requires just a handful of pantry staples, so you won’t need to hunt for obscure ingredients. If you love easy-to-make sweets that still feel special, you’ll also appreciate our Vanilla Bean Fudge—another crowd-pleaser that’s perfect for gifting. Ultimately, these peppermints capture the joy of the season in every bite, making them a must-try for anyone who cherishes holiday traditions.

Why I Love This Recipe

This Festive Soft Christmas Peppermints Recipe holds a special place in my heart because it reminds me of baking with my grandmother during the holidays. She always kept a tin of these mints on her coffee table, and the moment I tasted one, I knew I had to learn her secret. Over the years, I’ve tweaked the recipe to suit my own style, but the essence remains the same—a sweet, pepperminty hug in candy form. Now, I make them every December, and they’ve become a beloved tradition in my own home. There’s nothing quite like seeing the smiles on my family’s faces when they unwrap a batch of these homemade mints.

“`

Health and Nutrition

Why it’s good for your body

Festive Soft Christmas Peppermints Recipe offers more than just holiday cheer. First, peppermint oil soothes digestion and may ease bloating, making these treats a smart choice after meals. Additionally, the recipe skips artificial dyes, relying on natural ingredients for its festive color. This means you avoid unnecessary chemicals while enjoying a sweet bite.

Moreover, Festive Soft Christmas Peppermints Recipe contains minimal sugar compared to store-bought candies. You control the sweetness, so you can adjust it to your preference. The peppermint flavor also provides a refreshing burst without extra calories. Furthermore, the soft texture makes them gentle on teeth, unlike hard candies that can damage enamel.

Finally, peppermint may boost mental clarity and energy. When you savor Festive Soft Christmas Peppermints Recipe, you get a subtle pick-me-up. Whether you need focus during holiday prep or a midday refresher, these mints deliver benefits beyond taste. They’re a small but mighty addition to your wellness routine.

How it fits in a healthy lifestyle

Festive Soft Christmas Peppermints Recipe fits seamlessly into balanced eating. Since they’re naturally gluten-free and dairy-free, they accommodate common dietary needs. Pair them with a cup of herbal tea for a satisfying yet light treat that won’t derail your goals.

For those mindful of sugar intake, these mints offer a portion-controlled option. Unlike oversized desserts, one or two peppermints curb cravings without excess. If you’re exploring healthier holiday sweets, check out our gluten-free holiday treats for more inspiration. You’ll find options that align with your lifestyle.

Peppermint also supports heart health by promoting circulation. When enjoyed in moderation, Festive Soft Christmas Peppermints Recipe becomes part of a mindful routine. For more tips on balancing indulgences, our healthy holiday eating guide helps you savor the season without guilt.

Print
clock clock iconcutlery cutlery iconflag flag iconfolder folder iconinstagram instagram iconpinterest pinterest iconfacebook facebook iconprint print iconsquares squares iconheart heart iconheart solid heart solid icon

Festive Soft Christmas Peppermints


  • Author: Chef Emy

Description

Delightful, soft peppermint candies perfect for the holiday season.


Ingredients

Scale

For the Crust:

  • 4 cups powdered sugar
  • 1/4 cup softened butter
  • 1/4 cup evaporated milk
  • 1 teaspoon peppermint extract
  • 1/2 teaspoon vanilla extract
  • Red and green food coloring (optional)

Instructions

1. Prepare the Crust:

  1. In a large bowl, mix powdered sugar, butter, evaporated milk, peppermint extract, and vanilla extract until smooth.
  2. Divide the mixture into portions and add food coloring if desired. Knead until color is even.
  3. Roll into small balls or festive shapes. Let set at room temperature for 1 hour before serving.

Notes

You can customize the seasonings to taste.

“`html

How to Prepare This Dish

Steps and time-saving tips

Start by gathering all your ingredients for the Festive Soft Christmas Peppermints Recipe to streamline the process. First, mix the powdered sugar, softened butter, and a splash of evaporated milk in a large bowl until the texture turns smooth and creamy. Next, stir in the peppermint extract for that refreshing holiday flavor. If the dough feels too sticky, dust your hands lightly with powdered sugar before rolling it into small, even-sized balls. Meanwhile, melt the white chocolate chips in short bursts in the microwave, stirring every 15 seconds to avoid burning. Once melted, quickly dip each peppermint ball into the chocolate and place it on a parchment-lined tray. For a festive touch, sprinkle crushed candy canes or holiday sprinkles on top before the chocolate sets. To save time, chill the peppermints in the fridge for just 10 minutes instead of waiting for them to harden at room temperature. Store them in an airtight container between layers of wax paper to keep them fresh for days.

Mistakes I’ve made and learned from

When I first tried making the Festive Soft Christmas Peppermints Recipe, I rushed the melting process and ended up with grainy chocolate. Now, I melt the chocolate slowly and stir frequently for a smooth consistency. Another mistake? Skipping the parchment paper—sticky peppermints stuck to the tray and ruined their shape. Lesson learned! For more tips on perfecting candy textures, check out my guide on troubleshooting candy recipes. Also, if your dough feels too dry, add a teaspoon of evaporated milk at a time until it reaches the right consistency. Trust me, I’ve been there. For extra help with holiday baking, my holiday baking hacks post covers simple fixes for common issues.

“`

Cultural Connection and Variations

Where this recipe comes from

The Festive Soft Christmas Peppermints Recipe carries the cozy nostalgia of holiday traditions, blending sweetness with a refreshing peppermint kick. Many trace its roots to early 20th-century America, where home cooks combined simple ingredients like powdered sugar and peppermint oil to create cheerful, melt-in-your-mouth treats. Families often shaped them into festive swirls or pressed them into molds, turning candy-making into a cherished December ritual.

Around the world, variations of these peppermints reflect local flavors. In Mexico, some add a hint of cinnamon for warmth, while in Scandinavia, bakers might fold in crushed cardamom. My grandmother’s version of the Festive Soft Christmas Peppermints Recipe included a dash of vanilla, making them extra tender. Whether dusted with powdered sugar or dipped in chocolate, these candies adapt beautifully to regional tastes.

How it fits in today’s cooking

Today, the Festive Soft Christmas Peppermints Recipe still shines as a holiday staple, but modern twists keep it fresh. Health-conscious cooks swap in organic cane sugar or natural food coloring, while others layer them into holiday dessert boards for a pop of color. They’re also a fun DIY gift—tied in jars with ribbon or tucked into Christmas cookie boxes.

Beyond December, these peppermints bridge generations. Kids love rolling the dough into balls, and busy parents appreciate their no-bake simplicity. Whether you stick to the classic recipe or experiment with flavors, these candies remind us that some traditions only get sweeter with time.

Taste and Texture

What makes it delicious

The Festive Soft Christmas Peppermints Recipe delivers a melt-in-your-mouth experience with its velvety, smooth texture and refreshing burst of peppermint. Each bite dissolves gently, releasing a cool, aromatic sweetness that lingers on the palate. Meanwhile, the subtle vanilla undertones balance the bright mint flavor, creating a harmonious blend. The confectionery sugar dusting adds a delicate crunch, contrasting the soft center. Whether you savor it slowly or let it dissolve, the Festive Soft Christmas Peppermints Recipe feels like a cozy holiday hug for your taste buds.

Boosting the flavor

For an extra layer of indulgence, try rolling the Festive Soft Christmas Peppermints Recipe in crushed candy canes or a sprinkle of cocoa powder. Alternatively, infuse the dough with a drop of food-grade peppermint essential oil for a bolder kick. If you love pairing flavors, serve them alongside a warm cup of homemade hot chocolate or crumble them over vanilla ice cream for a festive dessert. Experimenting with extracts like almond or orange can also add a playful twist while keeping the recipe irresistibly soft.

Tips for Success

Best practices for results

Always chill the dough for at least 30 minutes before rolling it into balls. This step ensures your Festive Soft Christmas Peppermints Recipe holds its shape and stays tender. Additionally, use parchment paper to prevent sticking and maintain the perfect texture. For even flavor, evenly distribute the peppermint extract by mixing it thoroughly into the dough. Finally, store the finished mints in an airtight container to keep them fresh for up to two weeks.

Mistakes to avoid

Avoid overworking the dough, as this can make your Festive Soft Christmas Peppermints Recipe too dense. Instead, gently mix the ingredients until just combined. Another common mistake is skipping the chilling step, which leads to misshapen mints. For more tips on handling dough, check out our guide on baking basics. Also, resist the urge to add extra peppermint extract, as too much can overpower the flavor. If you need help balancing flavors, our flavor enhancement tips can help.

Serving and Pairing Suggestions

How to serve this dish

Make your Festive Soft Christmas Peppermints Recipe shine with simple yet elegant presentation ideas. For holiday gatherings, arrange them on a tiered dessert stand with fresh mint sprigs for a pop of color. Alternatively, package them in clear cellophane bags tied with ribbon for charming edible gifts. Serve them alongside after-dinner coffee or as part of a festive cookie platter to delight guests. If you prefer a cozy vibe, place them in a rustic wooden bowl by the fireplace for easy snacking during movie nights.

What goes well with it

Pair your Festive Soft Christmas Peppermints Recipe with warm drinks like spiced hot chocolate or peppermint tea to enhance their cool, refreshing flavor. For a decadent twist, try them with our Rich Eggnog Cheesecake, as the creamy texture balances the peppermints’ lightness. If you love contrasting flavors, serve them with zesty citrus desserts like our Lemon Snowdrop Cookies for a bright, festive combo. Finally, a glass of chilled vanilla almond milk makes a soothing partner for these melt-in-your-mouth treats.

How do you make soft peppermint candies for Christmas?

To make Festive Soft Christmas Peppermints, combine powdered sugar, softened butter, evaporated milk, and peppermint extract. Knead the mixture until smooth, roll into small balls, and let them set. These melt-in-your-mouth candies are perfect for holiday gifting.

Can I use food coloring in Christmas peppermint candy?

Yes! Add a few drops of red or green food coloring to your Festive Soft Christmas Peppermints Recipe for a festive touch. Just mix it in with the other wet ingredients before combining with powdered sugar for even color distribution.

How long do homemade soft peppermints last?

Properly stored in an airtight container, Festive Soft Christmas Peppermints stay fresh for 2-3 weeks. The powdered sugar base helps preserve them, but they rarely last that long because they’re so delicious!

What’s the secret to getting the perfect soft texture?

The key to perfect Festive Soft Christmas Peppermints is using evaporated milk instead of regular milk – it creates a creamier texture. Also, don’t over-knead the dough, as this can make the candies too dense.