Best Keto Pumpkin Bread with Cream Cheese Filling

best-keto-pumpkin-bread

“`html

Introduction

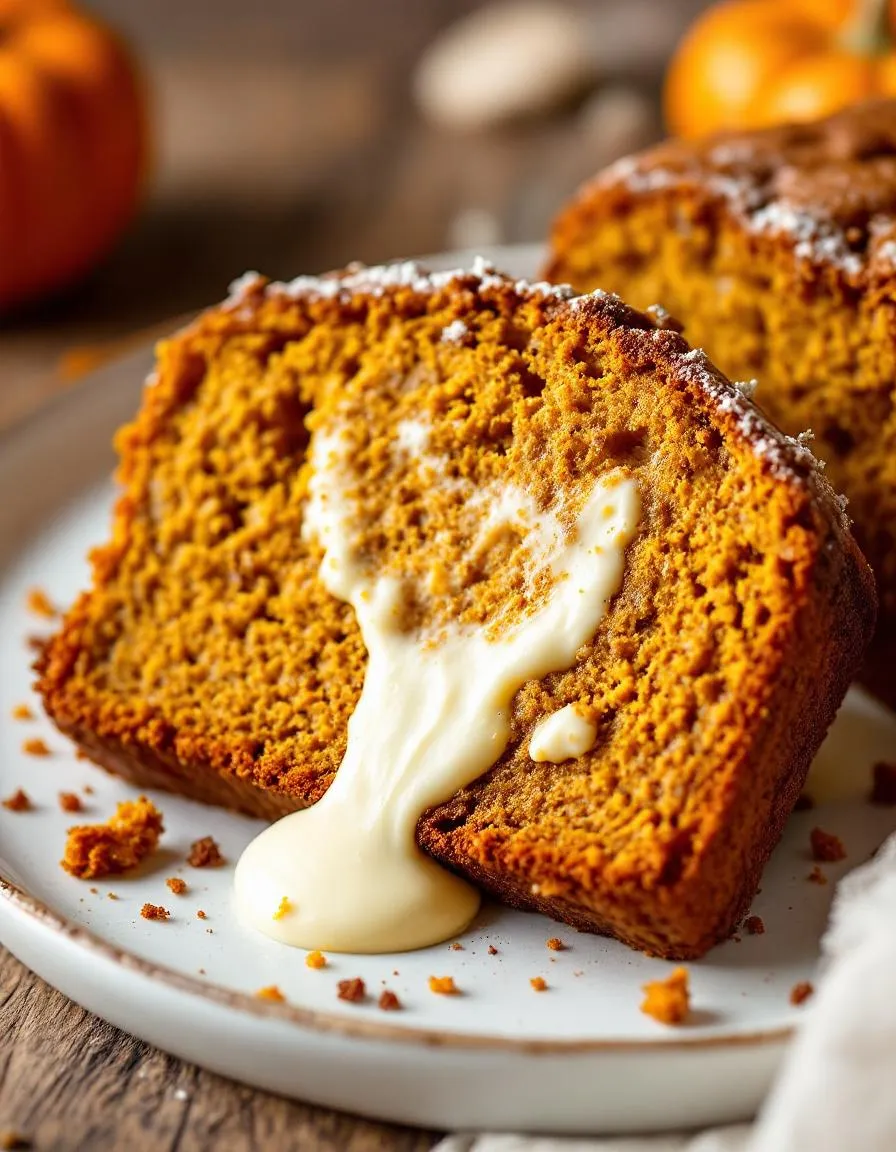
There’s something magical about the smell of warm pumpkin bread wafting through the kitchen, especially when it’s a guilt-free treat that fits your keto lifestyle. Imagine slicing into a moist, spiced loaf to reveal a swirl of creamy, tangy filling—each bite feels like a cozy autumn hug. That’s exactly what you’ll get with this Irresistible Keto Pumpkin Bread with Cream Cheese Filling. Whether you’re craving a wholesome breakfast, a satisfying snack, or a dessert that won’t derail your goals, this recipe delivers flavor and comfort without compromise. Plus, it’s so delicious, no one will guess it’s low-carb!

About This Recipe

Irresistible Keto Pumpkin Bread with Cream Cheese Filling is a game-changer for anyone following a low-carb or sugar-free diet. Unlike traditional pumpkin bread loaded with refined flour and sugar, this version uses almond flour and natural sweeteners to keep it keto-friendly. The cream cheese filling adds a luxurious touch, balancing the warm spices and earthy pumpkin perfectly. Moreover, this recipe aligns with the BrekCakes philosophy of making healthy eating joyful and effortless. If you love decadent treats that still fit your macros, you’ll adore this bread as much as our Keto Banana Bread or Almond Flour Pancakes.

What makes this recipe stand out is its simplicity. You don’t need fancy ingredients or advanced baking skills to pull it off. In fact, most of the items are pantry staples for keto bakers. The result? A tender, flavorful loaf with a ribbon of cream cheese that melts in your mouth. Additionally, it’s versatile—serve it warm with butter, pack it for lunches, or even enjoy it as a dessert with a dollop of whipped cream. Whether you’re new to keto or a seasoned pro, this bread proves that eating well never means sacrificing taste.

Why I Love This Recipe

This Irresistible Keto Pumpkin Bread with Cream Cheese Filling holds a special place in my heart because it reminds me of family gatherings during the holidays. My grandmother always baked pumpkin bread, and while her recipe wasn’t keto, this version lets me enjoy those same nostalgic flavors without straying from my goals. The first time I tested it, my kids devoured it before I could even snap a photo—proof that healthy can be downright addictive. Every time I make it, I’m reminded that the best recipes aren’t just about ingredients; they’re about the memories and joy they bring to the table.

“`

Health and Nutrition

Why it’s good for your body

Irresistible Keto Pumpkin Bread with Cream Cheese Filling packs a nutritious punch while satisfying your sweet cravings. First, it delivers healthy fats from ingredients like almond flour and cream cheese, which support brain function and keep you full longer. Additionally, pumpkin puree provides a hefty dose of vitamin A, promoting sharp vision and a strong immune system.

Moreover, this keto-friendly treat avoids refined sugars, so it won’t spike your blood sugar levels. Instead, natural sweeteners like erythritol or stevia add sweetness without the guilt. Furthermore, the high fiber content from almond flour and pumpkin aids digestion and helps maintain steady energy throughout the day.

Finally, Irresistible Keto Pumpkin Bread with Cream Cheese Filling includes protein-rich cream cheese, which helps repair muscles and keeps hunger at bay. Whether you’re following a low-carb lifestyle or simply want a healthier dessert, this bread delivers flavor and nourishment in every bite.

How it fits in a healthy lifestyle

Irresistible Keto Pumpkin Bread with Cream Cheese Filling fits seamlessly into a balanced diet, especially if you’re watching carbs or avoiding gluten. Since it uses almond flour instead of wheat, it’s perfect for gluten-free eaters. Plus, the healthy fats align with heart-healthy eating plans, making it a smart choice for long-term wellness.

If you’re exploring keto baking, this recipe pairs well with other low-carb favorites like our Keto Blueberry Muffins for variety. For those focused on protein intake, consider serving it with a scoop of High-Protein Ice Cream to boost your macros. Whether as a breakfast treat or an afternoon snack, this pumpkin bread keeps your health goals on track without sacrificing flavor.

Print
clock clock iconcutlery cutlery iconflag flag iconfolder folder iconinstagram instagram iconpinterest pinterest iconfacebook facebook iconprint print iconsquares squares iconheart heart iconheart solid heart solid icon

Irresistible Keto Pumpkin Bread with Cream Cheese Filling


  • Author: Chef Emy

Description

A moist and flavorful keto-friendly pumpkin bread with a creamy cheese filling, perfect for fall.
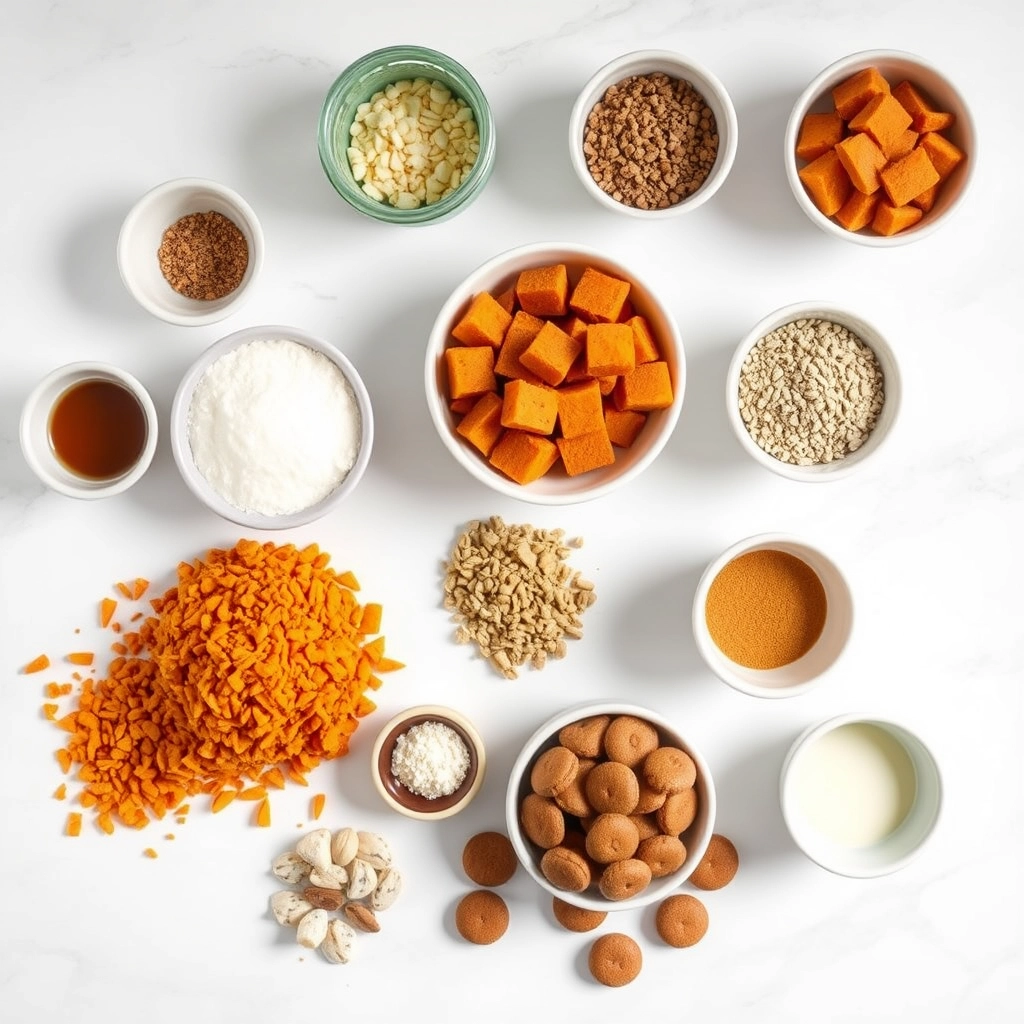
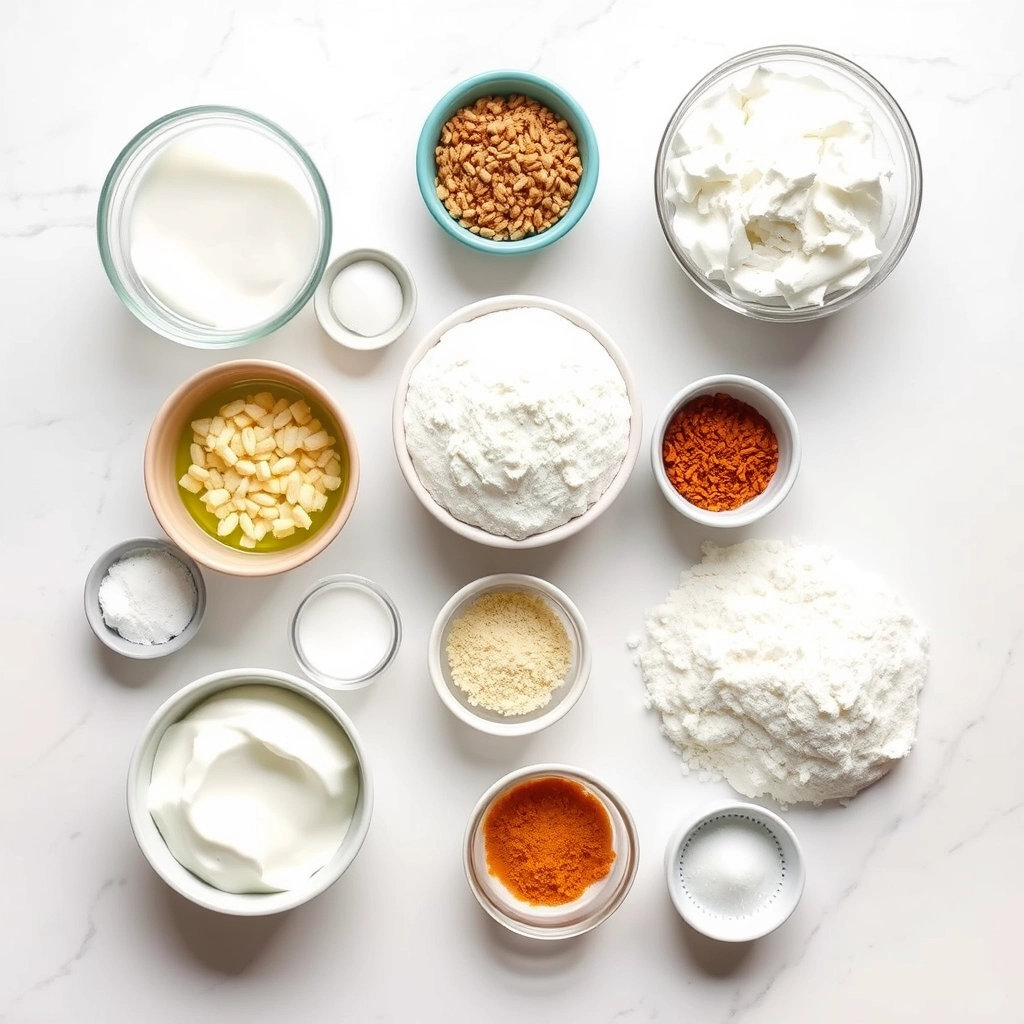
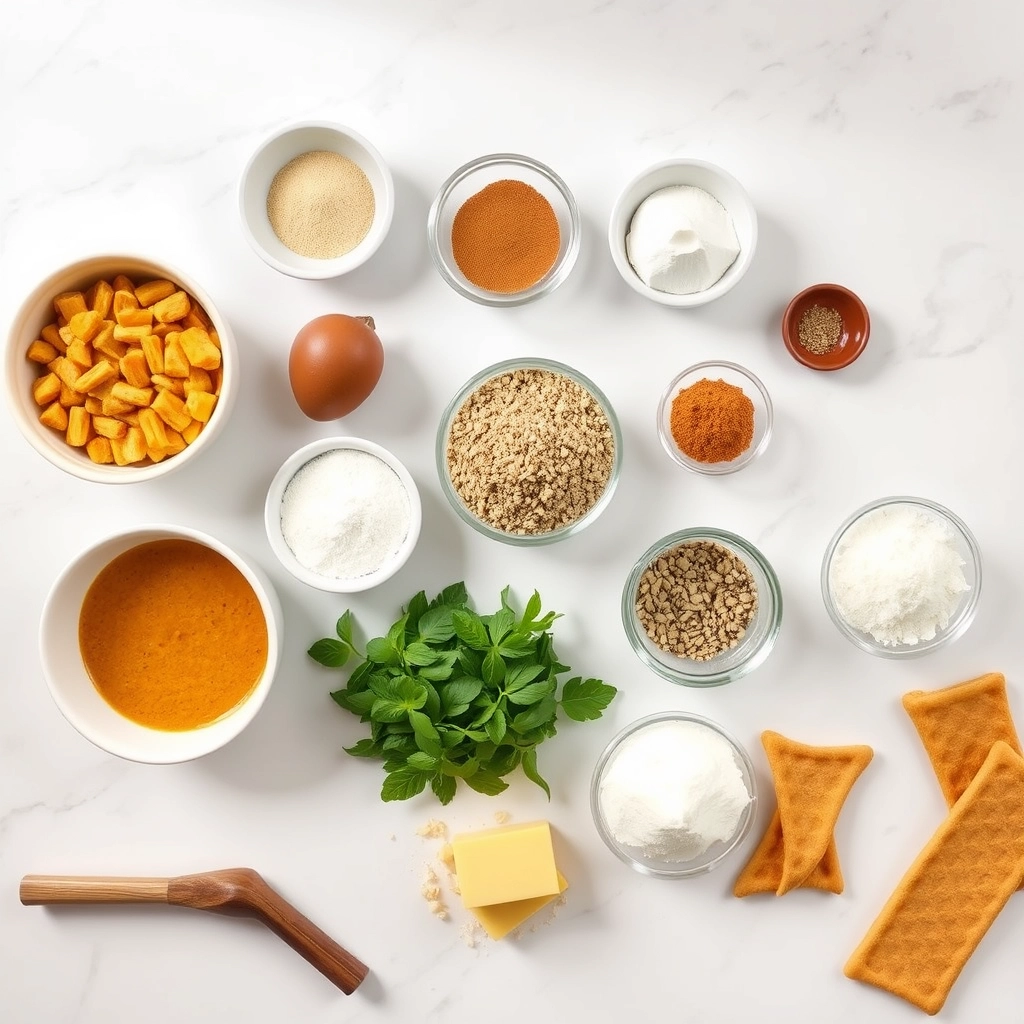
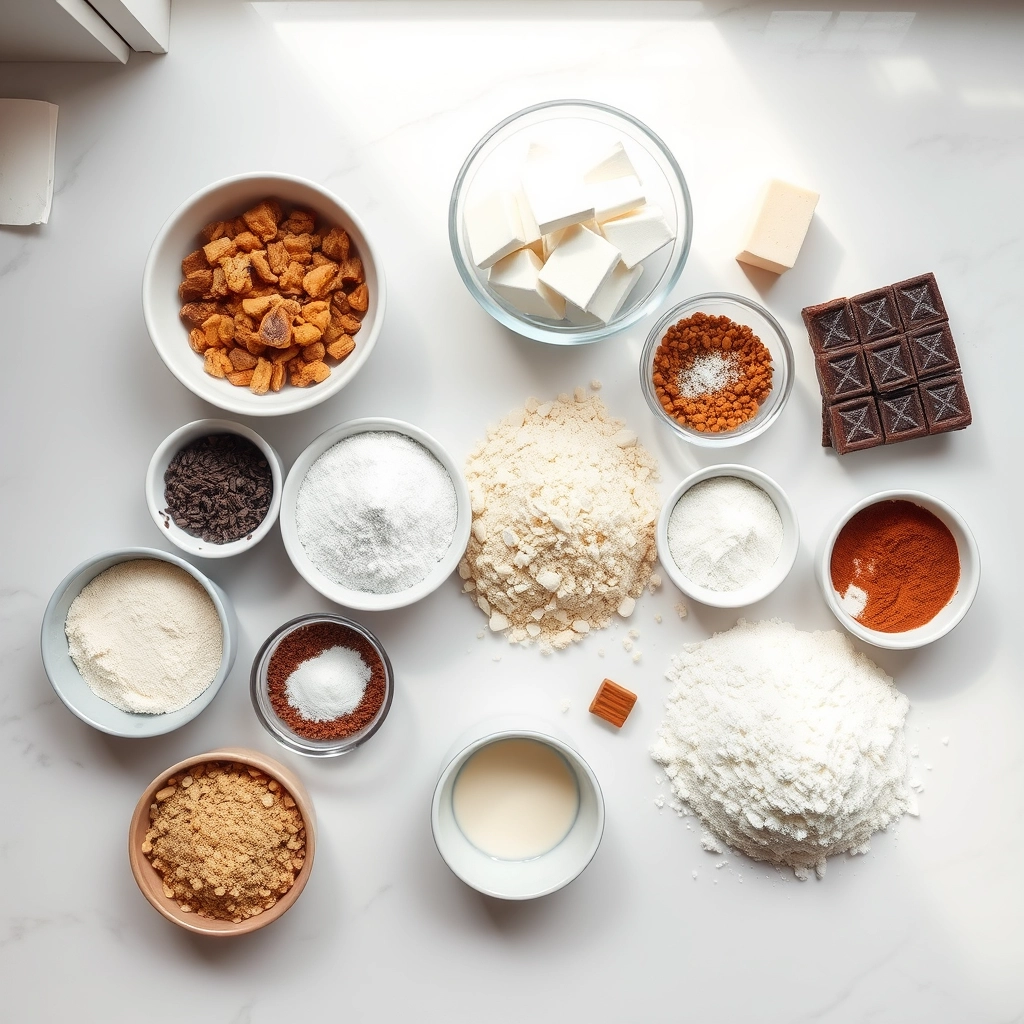

Ingredients

Scale

For the Crust:

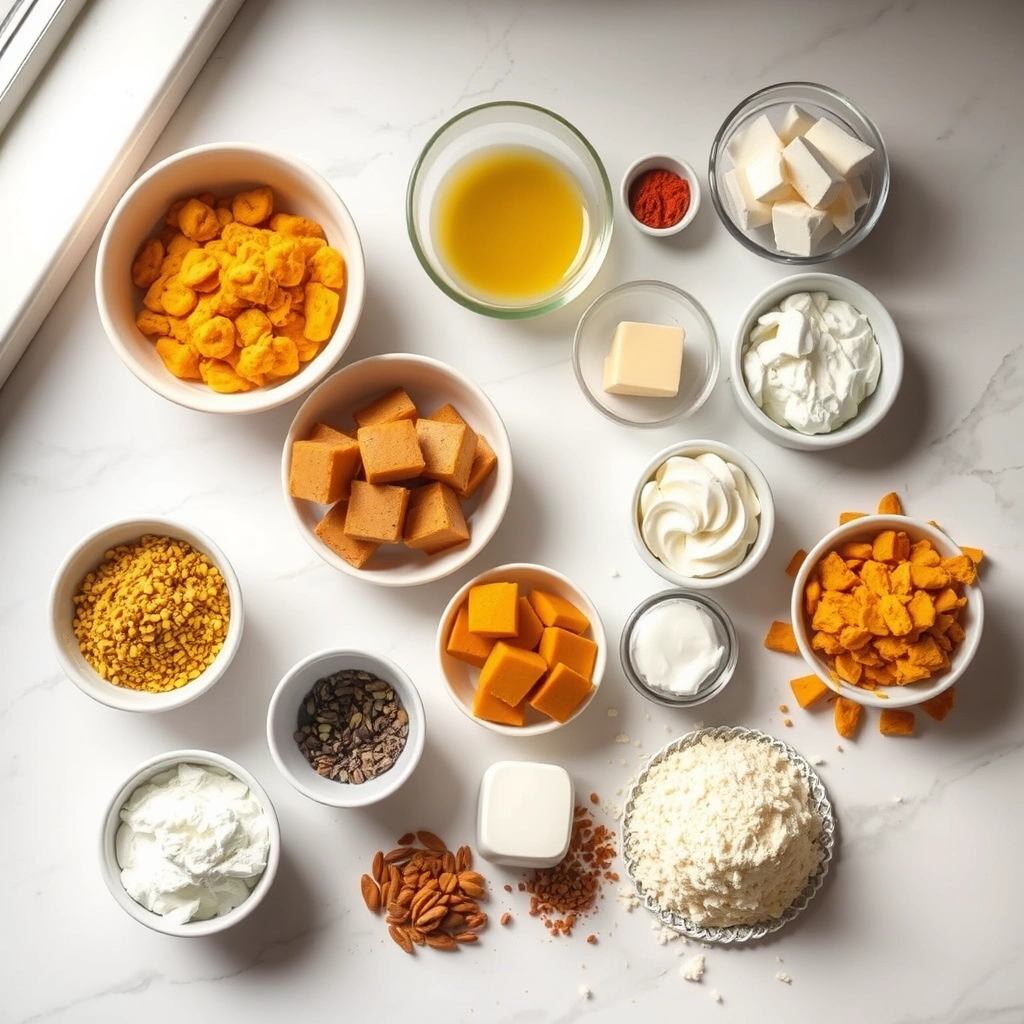
  • 1 1/2 cups almond flour
  • 1/4 cup coconut flour
  • 1/2 cup granulated erythritol
  • 1 tsp baking powder
  • 1 tsp pumpkin pie spice
  • 1/2 tsp cinnamon
  • 1/4 tsp salt
  • 3 large eggs
  • 1/2 cup pumpkin puree
  • 1/4 cup melted butter
  • 1 tsp vanilla extract
  • 4 oz cream cheese, softened
  • 2 tbsp powdered erythritol
  • 1/2 tsp vanilla extract

Instructions

1. Prepare the Crust:

  1. Preheat oven to 350°F (175°C) and grease a loaf pan.
  2. In a bowl, mix almond flour, coconut flour, erythritol, baking powder, pumpkin pie spice, cinnamon, and salt.
  3. In another bowl, whisk eggs, pumpkin puree, melted butter, and vanilla extract. Combine wet and dry ingredients.
  4. For the filling, beat cream cheese, powdered erythritol, and vanilla until smooth.
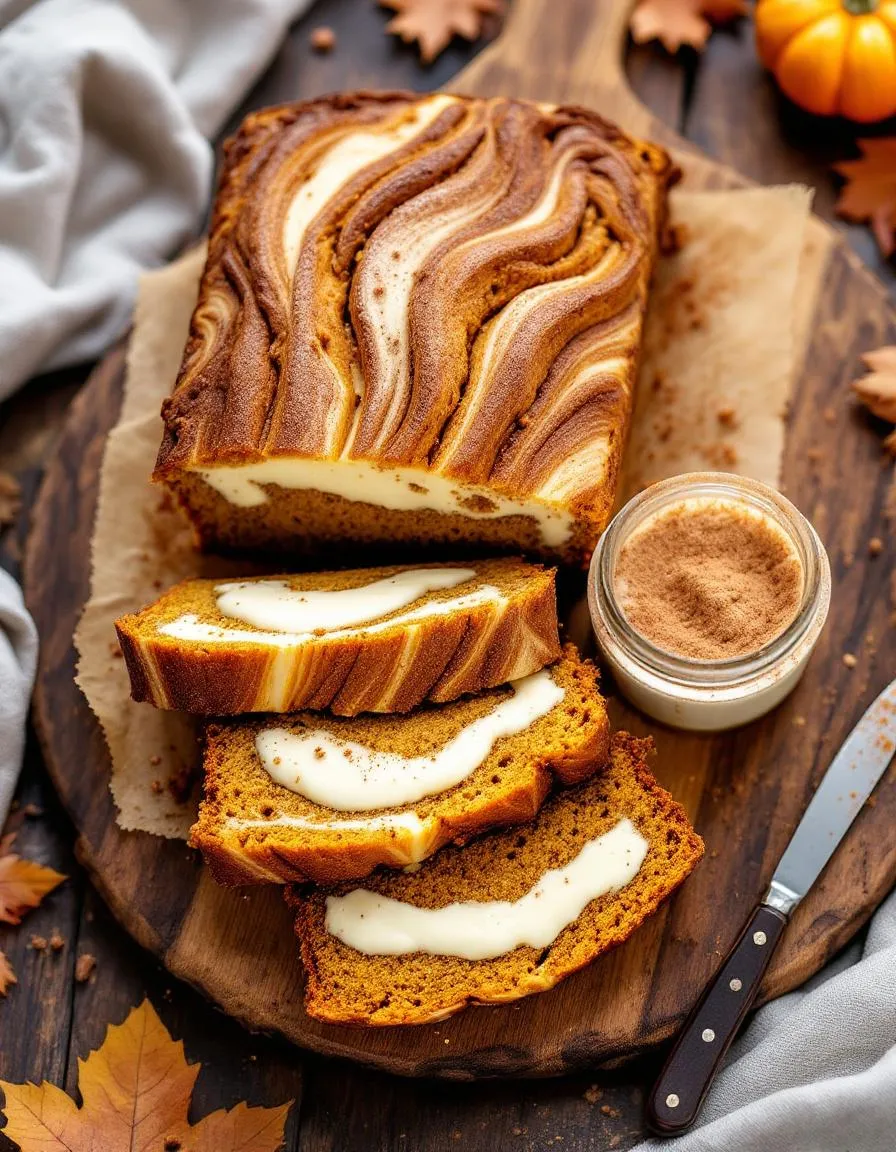
  5. Pour half the batter into the pan, spread cream cheese filling, then top with remaining batter.
  6. Bake for 45-50 minutes or until a toothpick comes out clean. Cool before slicing.

Notes

You can customize the seasonings to taste.

How to Prepare This Dish

Steps and time-saving tips

First, preheat your oven to 350°F and grease a loaf pan to prevent sticking. In a large bowl, whisk together the almond flour, keto sweetener, pumpkin spice, and baking powder until evenly combined. Next, mix in the pumpkin puree, melted butter, eggs, and vanilla extract until the batter is smooth. For the cream cheese filling, beat softened cream cheese with a hand mixer until fluffy, then blend in sweetener and a splash of vanilla. Pour half the pumpkin batter into the pan, layer the cream cheese mixture on top, and swirl gently with a knife. Finally, add the remaining batter and bake for 45-50 minutes until a toothpick comes out clean. To save time, measure all dry ingredients the night before and store them in an airtight container. If you’re short on time, skip the swirling step—the layers will still taste amazing. Let the Irresistible Keto Pumpkin Bread with Cream Cheese Filling cool completely before slicing to avoid crumbling.

Mistakes I’ve made and learned from

Early on, I rushed the cooling process and ended up with a crumbly mess—patience is key for clean slices! Another blunder was overmixing the cream cheese filling, which made it too runny. Now I beat it just until smooth and chill it for 10 minutes if needed. If your bread sinks in the middle, check your baking powder’s freshness or try my keto baking troubleshooting guide. For extra insurance, I use an oven thermometer to avoid underbaking, a lesson I learned after one too many gooey centers. If you’re new to keto desserts, my ingredient swaps guide helps avoid texture pitfalls. Trust me, even imperfect batches taste delicious—just keep tweaking!

Cultural Connection and Variations

Where this recipe comes from

Irresistible Keto Pumpkin Bread with Cream Cheese Filling has roots in classic American baking, where pumpkin spice and cream cheese swirls have long been fall favorites. Families often bake it during harvest season, celebrating the warmth of cinnamon and nutmeg alongside the richness of cream cheese. However, this keto-friendly twist swaps traditional sugar for alternatives like erythritol, making it a modern take on a beloved treat.

Around the world, pumpkin bread takes different forms. In the Caribbean, bakers might add coconut or rum-soaked raisins for extra flair. Meanwhile, in Australia, pumpkin scones often steal the spotlight, though they skip the cream cheese filling. Even within the U.S., some Southern cooks fold pecans into the batter, while others in the Midwest might drizzle caramel on top. No matter the variation, Irresistible Keto Pumpkin Bread with Cream Cheese Filling keeps its cozy charm while fitting into low-carb lifestyles.

How it fits in today’s cooking

Today, this recipe shines as a guilt-free indulgence for health-conscious bakers. Whether you’re prepping for Thanksgiving or just craving a slice with your morning coffee, it fits seamlessly into modern routines. Many home cooks pair it with keto coffee cake for a brunch spread, or serve it alongside low-carb pancakes for a hearty breakfast.

Thanks to its versatility, you can also tweak it to match dietary needs. Some add chocolate chips for extra sweetness, while others swap pumpkin puree for butternut squash. No matter how you adapt it, Irresistible Keto Pumpkin Bread with Cream Cheese Filling remains a staple for those who want comfort without compromise.

Taste and Texture

What makes it delicious

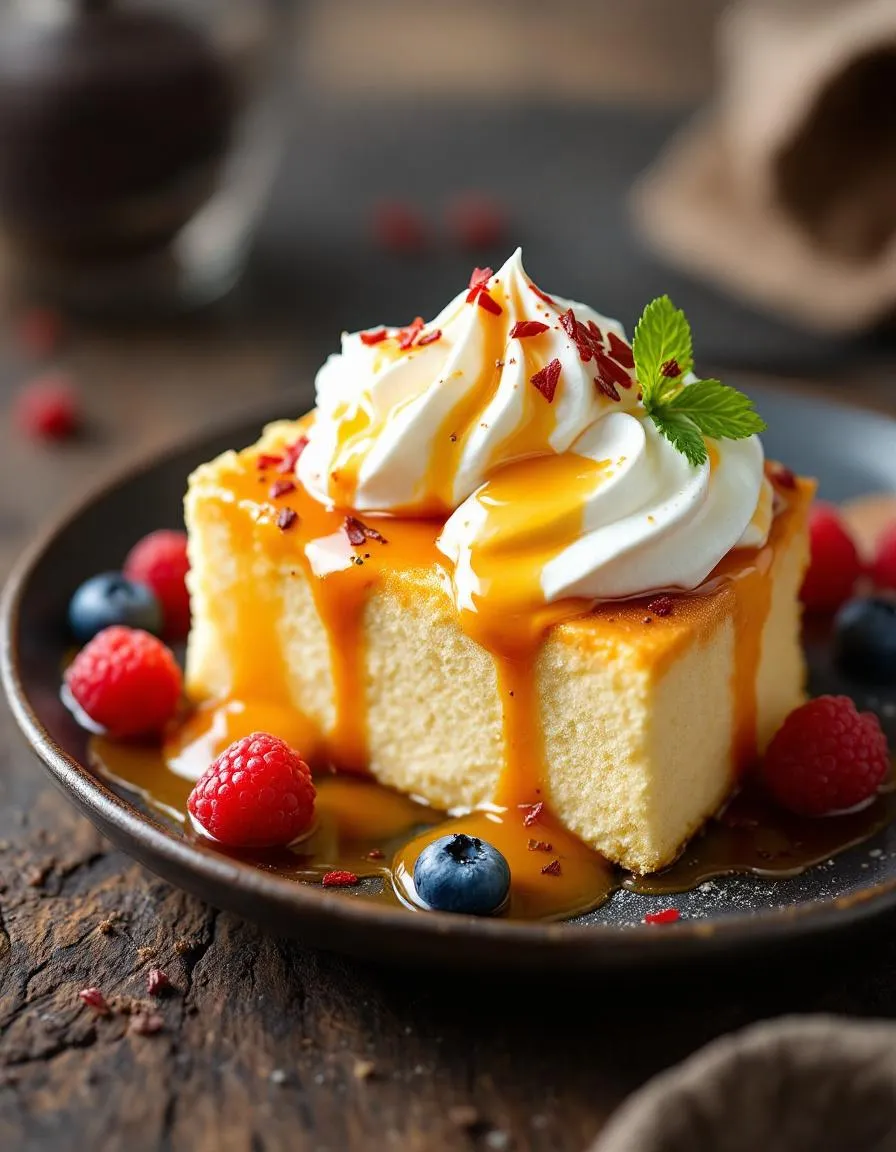
Irresistible Keto Pumpkin Bread with Cream Cheese Filling delivers a cozy, spiced aroma that fills your kitchen as it bakes. The first bite reveals a tender, moist crumb infused with warm pumpkin and cinnamon, while the rich cream cheese filling adds a velvety contrast. Each slice balances earthy sweetness with a hint of nuttiness from almond flour, creating a satisfying depth of flavor. Meanwhile, the subtle tang of cream cheese cuts through the warmth, making every mouthful irresistible. Whether enjoyed warm or at room temperature, this keto-friendly treat feels indulgent yet light—perfect for fall mornings or afternoon cravings.

Boosting the flavor

Elevate your Irresistible Keto Pumpkin Bread with Cream Cheese Filling by drizzling it with a sugar-free caramel sauce or sprinkling toasted pecans for crunch. For a bolder spice profile, add a pinch of cardamom or clove to the batter. If you love extra creaminess, swirl in more filling or serve slices with a dollop of whipped coconut cream. Craving more keto dessert ideas? Try our Keto Chocolate Avocado Mousse for another decadent option. Or, if you’re exploring spice blends, our Keto Pumpkin Spice Latte pairs perfectly with this bread. Small tweaks make each bite even more memorable!

Tips for Success

Best practices for results

Always measure your almond flour correctly by spooning it into the cup and leveling it off—this prevents dense Irresistible Keto Pumpkin Bread with Cream Cheese Filling. Meanwhile, chill the cream cheese filling for at least 20 minutes before swirling it into the batter, as this helps maintain distinct layers. For the best texture, use parchment paper to line your loaf pan, ensuring easy removal and even baking. Additionally, let the bread cool completely before slicing to avoid a crumbly mess.

Mistakes to avoid

Avoid overmixing the batter, since this can make your Irresistible Keto Pumpkin Bread with Cream Cheese Filling tough instead of tender. Instead, gently fold the dry ingredients into the wet until just combined. Furthermore, don’t skip the step of checking your oven temperature with a thermometer—uneven heat can lead to undercooked centers or burnt edges. For more troubleshooting, check our guide on fixing dense keto breads. Finally, resist the urge to slice the bread warm; patience ensures clean cuts and perfect layers, as explained in our keto baking tips.

Serving and Pairing Suggestions

How to serve this dish

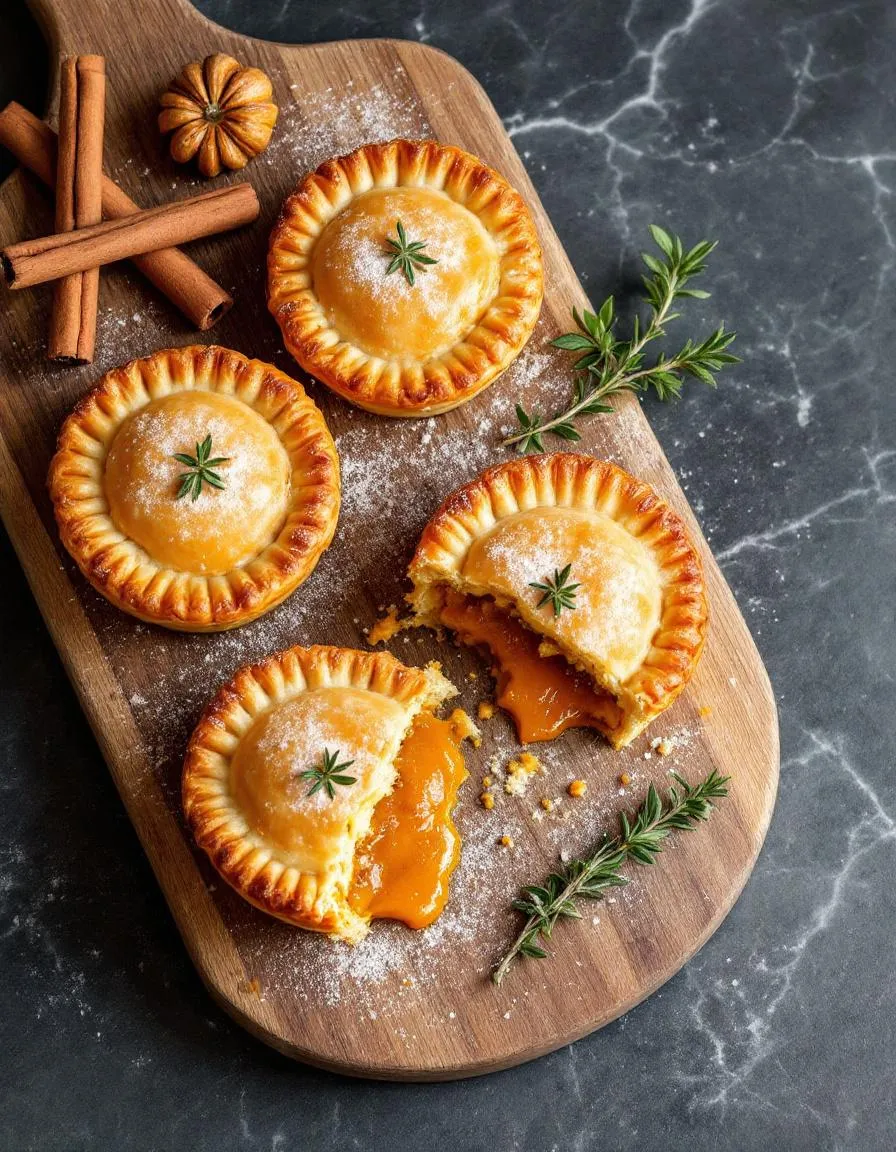
Slice Irresistible Keto Pumpkin Bread with Cream Cheese Filling into thick, even pieces to showcase its rich swirls. For a festive touch, dust the top with cinnamon or chopped pecans before serving. Meanwhile, warm it slightly to enhance the aromas if you prefer a cozy treat. Serve it at brunch alongside other keto favorites or as a standout dessert during holiday gatherings. Additionally, arrange it on a wooden board with fresh berries for a rustic yet elegant presentation.

What goes well with it

Pair Irresistible Keto Pumpkin Bread with Cream Cheese Filling with a hot cup of spiced chai tea for a comforting flavor harmony. The warm spices in both create a perfect balance. Alternatively, enjoy it with a scoop of sugar-free vanilla ice cream for a decadent twist. If you love pairing baked goods with creamy drinks, try our Keto Hot Chocolate for a cozy combination. For a savory contrast, serve it with crispy Keto Bacon-Wrapped Asparagus at brunch to balance sweetness with smoky flavors.

How many carbs are in Irresistible Keto Pumpkin Bread with Cream Cheese Filling?

This Irresistible Keto Pumpkin Bread with Cream Cheese Filling contains just 4g net carbs per serving, making it perfect for low-carb diets. The recipe uses almond flour and sugar substitutes to keep carbs low while delivering rich pumpkin flavor.

Can I freeze Keto Pumpkin Bread with Cream Cheese Filling?

Yes, you can freeze Irresistible Keto Pumpkin Bread with Cream Cheese Filling for up to 3 months. Slice it first and wrap individual portions tightly to maintain freshness. Thaw overnight in the refrigerator before serving.

What’s the best sugar substitute for Keto Pumpkin Bread?

For Irresistible Keto Pumpkin Bread with Cream Cheese Filling, erythritol or monk fruit blends work best as they measure like sugar without aftertaste. These keto-friendly sweeteners caramelize slightly during baking, enhancing the bread’s texture.

How do you prevent the cream cheese filling from sinking in Keto Pumpkin Bread?

To keep the cream cheese layer centered in your Irresistible Keto Pumpkin Bread, chill the filling until firm before layering. Also avoid overmixing the batter, which creates air pockets that can displace the filling during baking.

Best Creamy Whipped Feta Dip with Roasted Strawberries

creamy-whipped-feta-dip-strawberries

“`html

Introduction

Imagine a dip so creamy, tangy, and slightly sweet that it instantly becomes the star of any gathering. That’s exactly what you get with this Creamy Whipped Feta Dip with Roasted Strawberries. Whether you’re hosting a summer party, prepping a cozy night in, or just craving something uniquely delicious, this recipe delivers. The contrast of rich feta and caramelized strawberries creates a flavor explosion that’s impossible to resist. Plus, it’s surprisingly easy to make. If you love bold flavors and effortless elegance, this dip will quickly become your go-to.

About This Recipe

Creamy Whipped Feta Dip with Roasted Strawberries combines the salty sharpness of feta cheese with the deep, jammy sweetness of roasted strawberries. First, we whip the feta into a smooth, airy texture, then top it with strawberries caramelized to perfection. The result? A dip that’s equal parts sophisticated and approachable. This dish fits perfectly into any occasion, from casual picnics to fancy appetizer spreads. It also pairs beautifully with crusty bread, crackers, or even fresh veggies. If you’re a fan of unique flavor combinations, you’ll adore how this recipe balances savory and sweet.

What makes this recipe special is its versatility. You can serve it warm or chilled, adjust the sweetness to your liking, or even swap the strawberries for other roasted fruits like figs or peaches. For more inspiration on creative dips, check out our guide to easy party dips. Additionally, if you’re looking for other ways to use feta, our feta recipe collection has plenty of delicious ideas. Whether you’re a seasoned cook or a beginner, this dip guarantees impressive results with minimal effort.

Why I Love This Recipe

I first made Creamy Whipped Feta Dip with Roasted Strawberries for a small dinner party, and it stole the show. The way the flavors meld together—creamy, salty, and just a touch of sweetness—reminds me of lazy summer evenings with friends. It’s one of those recipes that feels fancy but requires hardly any work, which I always appreciate. Every time I serve it, people ask for the recipe, and that’s the best kind of compliment. For me, this dip isn’t just food; it’s a way to bring people together and create memories.

“`

Health and Nutrition

Why it’s good for your body

Creamy Whipped Feta Dip with Roasted Strawberries packs a nutritious punch while delighting your taste buds. First, the feta cheese delivers a rich source of calcium and protein, which strengthens bones and supports muscle repair. Meanwhile, roasted strawberries add a burst of antioxidants and vitamin C, helping to combat inflammation and boost immunity. Together, these ingredients create a dish that’s as wholesome as it is delicious.

Additionally, the healthy fats from olive oil and feta promote heart health by balancing cholesterol levels. Since the dip uses natural ingredients, you avoid processed additives often found in store-bought alternatives. Plus, the roasted strawberries caramelize slightly, enhancing their natural sweetness without refined sugars. Whether you enjoy it as a snack or appetizer, Creamy Whipped Feta Dip with Roasted Strawberries nourishes your body without sacrificing flavor.

Finally, the probiotics in feta aid digestion, while the fiber from strawberries keeps you full longer. This combination makes the dip a smart choice for gut health and sustained energy. With every bite, you get a balance of macronutrients and micronutrients, proving that indulgence and nutrition can go hand in hand.

How it fits in a healthy lifestyle

Creamy Whipped Feta Dip with Roasted Strawberries fits seamlessly into a balanced diet. If you follow a gluten-free lifestyle, this dip naturally meets your needs while offering a satisfying alternative to carb-heavy snacks. For those focusing on heart health, the olive oil and feta provide monounsaturated fats that support cardiovascular wellness.

Pair this dip with fresh veggies or whole-grain crackers for a fiber-rich snack that keeps cravings in check. It also works beautifully as part of a meal prep routine, adding variety to your weekly menu without extra effort. If you’re exploring high-protein options, feta’s protein content helps meet daily goals while keeping portions light.

For more inspiration on incorporating nutritious dips into your diet, check out these healthy entertaining recipes. Whether you’re hosting guests or enjoying a solo treat, Creamy Whipped Feta Dip with Roasted Strawberries proves that eating well never has to feel restrictive.

Print
clock clock iconcutlery cutlery iconflag flag iconfolder folder iconinstagram instagram iconpinterest pinterest iconfacebook facebook iconprint print iconsquares squares iconheart heart iconheart solid heart solid icon

Creamy Whipped Feta Dip with Roasted Strawberries


  • Author: Chef Emy

Description

A tangy and creamy whipped feta dip topped with sweet roasted strawberries, perfect for pairing with crackers or bread.


Ingredients

Scale

For the Crust:

  • 8 oz feta cheese, crumbled
  • 4 oz cream cheese, softened
  • 2 tbsp Greek yogurt
  • 1 tbsp honey
  • 1 tbsp lemon juice
  • 1/2 tsp black pepper
  • 1 cup fresh strawberries, hulled and halved
  • 1 tbsp olive oil
  • 1 tsp balsamic vinegar
  • 1 tsp fresh thyme leaves

Instructions

1. Prepare the Crust:

  1. Preheat oven to 375°F (190°C). Toss strawberries with olive oil and balsamic vinegar, then spread on a baking sheet. Roast for 15-20 minutes until softened.
  2. In a food processor, combine feta, cream cheese, Greek yogurt, honey, lemon juice, and black pepper. Blend until smooth and creamy.
  3. Transfer the whipped feta to a serving bowl. Top with roasted strawberries and garnish with fresh thyme. Serve with crackers or toasted bread.

Notes

You can customize the seasonings to taste.

“`html

How to Prepare This Dish

Steps and time-saving tips

Start by preheating your oven to 400°F to roast the strawberries while you prepare the whipped feta base. Toss the strawberries with olive oil and a pinch of salt on a baking sheet, then pop them in the oven for 15 minutes until they soften and release their juices. Meanwhile, crumble the feta into a food processor and blend it with Greek yogurt, garlic, lemon zest, and a splash of olive oil until smooth and creamy. Scrape down the sides as needed to ensure even mixing. Once the strawberries finish roasting, let them cool slightly before gently folding them into the whipped feta or layering them on top for a stunning presentation. Drizzle with honey and sprinkle fresh thyme for a finishing touch. If you’re short on time, use store-bought roasted strawberries or prep the dip a day ahead—just store it covered in the fridge and bring it to room temperature before serving.

Mistakes I’ve made and learned from

I once over-processed the feta, turning it grainy instead of luxuriously smooth. Now I pulse the food processor in short bursts and stop as soon as the texture resembles whipped cream. Another mishap? Skipping the cooling step for the roasted strawberries, which made the dip too runny. Letting them cool completely (or even chilling them) ensures the whipped feta holds its shape. If you’re new to working with feta, my guide on choosing the right feta explains how moisture content affects the final texture. And if your strawberries aren’t sweet enough, a trick from my roasting fruit guide—tossing them with a touch of balsamic vinegar—balances their tartness beautifully.

“`

Cultural Connection and Variations

Where this recipe comes from

Creamy Whipped Feta Dip with Roasted Strawberries blends Mediterranean tradition with a modern, sweet-savory twist. Feta cheese has deep roots in Greek cuisine, often served as part of a mezze platter or paired with honey and nuts. Meanwhile, roasting strawberries brings out their natural sweetness, a technique that chefs worldwide now embrace. In some regions, cooks might swap the strawberries for figs or cherries, while others add a drizzle of balsamic glaze for extra depth.

My grandmother first introduced me to whipped feta during summer gatherings, though she kept it simple with garlic and olive oil. Over time, I experimented with seasonal fruits, landing on roasted strawberries for their jammy texture and bright flavor. Interestingly, in the Middle East, you might find a similar dip with labneh instead of feta, topped with pomegranate seeds. No matter the variation, Creamy Whipped Feta Dip with Roasted Strawberries always feels like a celebration of fresh, bold flavors.

How it fits in today’s cooking

Today, this dish shines as a versatile crowd-pleaser, perfect for everything from brunch spreads to holiday appetizers. Its balance of tangy feta and caramelized strawberries fits right into modern food trends, where contrasting flavors steal the show. Busy home cooks love that they can prep it ahead, just like these easy meal prep ideas, making it a stress-free addition to any menu.

You’ll also spot it at picnics and potlucks, often paired with crusty bread or fresh veggies. For a lighter twist, some swap the feta for goat cheese or fold in fresh herbs like mint or basil. Whether you serve it as a snack or part of a larger spread—maybe alongside these weekend brunch recipes—Creamy Whipped Feta Dip with Roasted Strawberries keeps proving its place in today’s kitchens.

Taste and Texture

What makes it delicious

The Creamy Whipped Feta Dip with Roasted Strawberries delivers a symphony of flavors and textures. First, the whipped feta boasts a tangy, salty creaminess that melts luxuriously on your tongue. Meanwhile, the roasted strawberries add a jammy sweetness with caramelized edges, creating a perfect contrast. Each bite offers a velvety dip base, punctuated by bursts of juicy, fragrant berries. A drizzle of honey ties it all together with floral notes, while fresh herbs like mint or thyme lend an earthy brightness. Whether scooped with crusty bread or crisp veggies, the Creamy Whipped Feta Dip with Roasted Strawberries feels indulgent yet balanced—a crowd-pleaser in every sense.

Boosting the flavor

Elevate your Creamy Whipped Feta Dip with Roasted Strawberries by experimenting with bold twists. For extra depth, fold in roasted garlic or a pinch of smoked paprika. Alternatively, swap the honey for a balsamic reduction to amplify the strawberries’ richness. Crumbled nuts like pistachios add crunch, while a sprinkle of chili flakes brings subtle heat. Pair it with homemade garlic herb focaccia for a savory bite, or try it alongside zaatar flatbread for an herby kick. The possibilities are endless, so trust your palate and play with flavors!

Tips for Success

Best practices for results

Always use full-fat feta for the creamiest texture in your Creamy Whipped Feta Dip with Roasted Strawberries. Meanwhile, roast the strawberries at a high temperature to caramelize their natural sugars. For the smoothest consistency, blend the feta while it’s cold, and scrape down the food processor bowl frequently. Additionally, let the dip chill for at least 30 minutes before serving to enhance the flavors. Finally, garnish with fresh herbs right before serving for a vibrant finish.

Mistakes to avoid

Avoid over-roasting the strawberries, as they can turn too mushy and lose their sweetness. Instead, check them halfway through cooking to ensure perfect caramelization. Another common mistake is using pre-crumbled feta, which often contains anti-caking agents that affect texture. For best results, opt for a block of feta and crumble it yourself. If you need guidance on selecting quality ingredients, check out our guide on choosing the best cheese. Also, don’t skip the resting time for the dip—rushing this step prevents the flavors from melding properly. For more timing tips, explore our perfect party dips article.

Serving and Pairing Suggestions

How to serve this dish

For a stunning presentation, serve Creamy Whipped Feta Dip with Roasted Strawberries in a shallow bowl or a rustic wooden board. Drizzle extra honey over the top and sprinkle fresh mint leaves for a pop of color. Meanwhile, arrange toasted baguette slices or crisp pita chips around the dip for easy dipping. This dish shines at brunch gatherings or as a show-stopping appetizer during holiday parties. If you want to elevate the experience, pair it with a charcuterie board featuring cured meats and olives.

What goes well with it

A crisp rosé or sparkling Prosecco balances the tangy richness of Creamy Whipped Feta Dip with Roasted Strawberries, making it perfect for summer entertaining. For a non-alcoholic option, try a chilled lavender lemonade, which highlights the dip’s sweet and savory notes. If you’re serving it as part of a larger spread, consider adding our Herbed Flatbread for a satisfying crunch. Alternatively, pair it with a light salad like our Arugula and Watermelon Salad to refresh the palate between bites.

What does Creamy Whipped Feta Dip with Roasted Strawberries taste like?

Creamy Whipped Feta Dip with Roasted Strawberries combines the tangy, salty flavor of whipped feta with the sweet, caramelized notes of roasted strawberries. The contrast creates a rich, balanced appetizer that’s both refreshing and indulgent. It’s perfect for pairing with crackers, bread, or fresh veggies.

Can I make Creamy Whipped Feta Dip with Roasted Strawberries ahead of time?

Yes! You can prepare the whipped feta dip and roasted strawberries separately up to 2 days in advance. Store them in airtight containers in the fridge, then assemble before serving. The flavors meld beautifully, making this dish ideal for entertaining.

What’s the best way to serve Creamy Whipped Feta Dip with Roasted Strawberries?

Serve this dip chilled or at room temperature with toasted baguette slices, pita chips, or crisp cucumber rounds. The Creamy Whipped Feta Dip with Roasted Strawberries also works as a gourmet spread for sandwiches or a topping for grilled meats.

Can I use frozen strawberries for this recipe?

Absolutely! Thaw and drain frozen strawberries before roasting to avoid excess moisture. While fresh strawberries are ideal, frozen ones still work well for Creamy Whipped Feta Dip with Roasted Strawberries—just adjust roasting time slightly to account for extra water content.

Best Funfetti Birthday Cake Overnight Oats Recipe

best-funfetti-birthday-cake-oats

“`html

Introduction

Remember the pure joy of biting into a slice of Funfetti birthday cake as a kid? That nostalgic burst of color and sweetness can now brighten your mornings in the healthiest way possible. Funfetti Birthday Cake Overnight Oats bring that celebratory magic to your breakfast routine—no baking required. Whether you’re meal-prepping for busy weekdays or craving a guilt-free treat, this recipe turns ordinary oats into a festive, creamy delight. Plus, it’s packed with protein and fiber to keep you energized. Who says you can’t have cake for breakfast?

About This Recipe

Funfetti Birthday Cake Overnight Oats combine the whimsy of rainbow sprinkles with the wholesome goodness of oats, yogurt, and a touch of vanilla. Unlike traditional cake, this version skips the sugar crash and delivers sustained energy, making it perfect for adults and kids alike. The recipe leans into simplicity: just mix, refrigerate, and wake up to a ready-to-eat jar of joy. It’s also endlessly customizable—swap dairy for plant-based options or adjust sweetness to your taste. For more creative breakfast twists, check out our Peanut Butter Overnight Oats or Chocolate Chip Pancake Overnight Oats.

This dish fits our blog’s philosophy of balancing indulgence with nutrition. We believe healthy eating should feel exciting, not restrictive. With Funfetti Birthday Cake Overnight Oats, you get the best of both worlds: a dessert-like treat that fuels your day. The sprinkles add playful texture, while the base keeps things nourishing. It’s a win-win for anyone who wants to start their morning with a smile. Best of all, it takes mere minutes to prepare the night before, so you can savor every spoonful without rushing.

Why I Love This Recipe

Funfetti Birthday Cake Overnight Oats hold a special place in my heart because they remind me of my daughter’s fifth birthday. She insisted on rainbow sprinkles for every meal that week, and this recipe was our compromise. Seeing her eyes light up over a “cake” she could eat before school made those chaotic mornings feel magical. Now, whenever I make it, I’m transported back to that tiny kitchen, her giggles mixing with the clink of mason jars. It’s more than breakfast—it’s a little edible happiness.

“`

Health and Nutrition

Why it’s good for your body

Funfetti Birthday Cake Overnight Oats pack a surprising nutritional punch while satisfying your sweet tooth. First, oats deliver a hearty dose of fiber, which keeps you full longer and supports digestion. Additionally, they provide slow-release energy, so you avoid mid-morning crashes. Meanwhile, Greek yogurt or milk adds protein, helping to maintain muscle and stabilize blood sugar.

Moreover, Funfetti Birthday Cake Overnight Oats include colorful sprinkles, which may seem indulgent but actually boost joy—a key part of mindful eating. The recipe also incorporates natural sweetness from vanilla and honey, reducing the need for refined sugars. Furthermore, chia seeds or flaxseeds often sneak in, offering omega-3s for brain health.

Finally, preparing Funfetti Birthday Cake Overnight Oats ahead of time means you’re less likely to grab unhealthy breakfast options. Because they’re loaded with nutrients and customizable, they fit seamlessly into a balanced diet. Whether you need sustained energy or a mood-boosting morning meal, this dish delivers.

How it fits in a healthy lifestyle

Funfetti Birthday Cake Overnight Oats adapt effortlessly to various dietary needs. For a gluten-free version, simply use certified gluten-free oats. If you’re aiming for higher protein, swap regular milk for almond milk and stir in an extra scoop of Greek yogurt. The recipe also fits heart-healthy goals, as oats naturally help lower cholesterol.

Busy mornings won’t derail your nutrition when you rely on this make-ahead breakfast. Pair it with a nutrient-packed smoothie for extra vitamins, or enjoy it solo for a quick, balanced start. Plus, the fun presentation makes it easier to stick to healthy habits—especially for picky eaters or kids. For more ideas on wholesome breakfasts, explore these easy meal prep strategies to keep your routine on track.

Print
clock clock iconcutlery cutlery iconflag flag iconfolder folder iconinstagram instagram iconpinterest pinterest iconfacebook facebook iconprint print iconsquares squares iconheart heart iconheart solid heart solid icon

Funfetti Birthday Cake Overnight Oats


  • Author: Chef Emy

Description

A festive and easy breakfast that tastes like birthday cake but is packed with wholesome ingredients.


Ingredients

Scale

For the Crust:

  • 1/2 cup rolled oats
  • 1/2 cup milk (any kind)
  • 1/4 cup Greek yogurt
  • 1 tbsp honey or maple syrup
  • 1/2 tsp vanilla extract
  • 1 tbsp rainbow sprinkles
  • 1/4 tsp almond extract (optional)

Instructions

1. Prepare the Crust:

  1. In a mason jar or bowl, combine oats, milk, yogurt, honey, vanilla extract, and almond extract (if using). Stir well.
  2. Fold in rainbow sprinkles, reserving a few for topping.
  3. Cover and refrigerate overnight (or at least 4 hours). Top with extra sprinkles before serving.

Notes

You can customize the seasonings to taste.

How to Prepare This Dish

Steps and time-saving tips

Start by gathering all your ingredients for Funfetti Birthday Cake Overnight Oats so everything is within reach. In a large mixing bowl, whisk together the rolled oats, chia seeds, and a pinch of salt. Next, pour in the milk and vanilla extract, then stir until the mixture is smooth and well combined. Gently fold in the rainbow sprinkles for that classic funfetti look. If you want extra creaminess, add a spoonful of Greek yogurt or a splash of almond milk. Transfer the mixture into individual jars or airtight containers, leaving a little space at the top. Seal the jars tightly and refrigerate them overnight—or for at least six hours—to let the flavors meld. In the morning, give the oats a quick stir and top them with a dollop of whipped cream, more sprinkles, and a drizzle of honey if you like it sweeter. For a time-saving hack, prep multiple jars at once so you have breakfast ready for the week. If you’re in a rush, two hours in the fridge will work, but overnight yields the best texture.

Mistakes I’ve made and learned from

When I first made Funfetti Birthday Cake Overnight Oats, I used too many sprinkles, and they bled into the mixture, turning it a muddy color. Now, I add them just before serving for vibrant, confetti-like flecks. Another mistake? Skipping the chia seeds, which left the oats too runny. Chia seeds thicken the mixture perfectly, as I learned from my overnight oats texture guide. Once, I also forgot to seal the jars tightly, and the oats absorbed fridge odors—yuck! Airtight containers are a must, as emphasized in my meal prep storage tips. These small tweaks made all the difference, and now my Funfetti Birthday Cake Overnight Oats turn out flawless every time.

Cultural Connection and Variations

Where this recipe comes from

Funfetti Birthday Cake Overnight Oats bring the joy of celebration to your breakfast bowl. Inspired by classic birthday cake flavors, this recipe twists a nostalgic dessert into a wholesome morning meal. Originally, funfetti cakes gained popularity in the 1980s thanks to their colorful sprinkles and festive vibe. Now, overnight oats give the same playful energy but with a healthy, make-ahead twist.

Around the world, cultures adapt similar concepts. In Denmark, they enjoy “havregrød med sprinkles,” a warm porridge topped with sprinkles for special occasions. Meanwhile, in Mexico, “arroz con leche” often gets a festive upgrade with cinnamon and raisins. Funfetti Birthday Cake Overnight Oats, however, stand out for their no-cook convenience and protein-packed base. Some families even personalize it by swapping yogurt for coconut milk or adding a dash of vanilla extract for extra warmth.

Seasonally, this dish shines during birthdays or holidays, but it’s versatile enough for any day. Whether you grew up loving boxed funfetti mix or prefer homemade versions, these oats bridge tradition and modern convenience. After all, who says you can’t have cake for breakfast?

How it fits in today’s cooking

Today, Funfetti Birthday Cake Overnight Oats fit perfectly into busy lifestyles. Meal preppers love them because they save time, while health-conscious eaters appreciate the balanced nutrients. Modern cooks often tweak the recipe—like using almond butter for extra creaminess or blending in protein powder for a post-workout boost. It’s a dish that adapts without losing its fun spirit.

Social media has also played a role. Food bloggers showcase vibrant variations, from layered parfaits to vegan-friendly versions with chia seeds. Whether you enjoy it as a quick weekday breakfast or a festive brunch centerpiece, these oats prove that comfort food can be both nostalgic and nutritious. Best of all, they remind us that a little sprinkle of joy belongs in every day.

Taste and Texture

What makes it delicious

Funfetti Birthday Cake Overnight Oats deliver a nostalgic, dessert-like breakfast that feels like a celebration in every bite. The creamy, velvety texture of soaked oats blends perfectly with the subtle crunch of rainbow sprinkles, creating a playful contrast. Sweet vanilla and almond extracts infuse the dish with a warm, bakery-style aroma, while a touch of honey or maple syrup enhances the natural richness. Meanwhile, the sprinkles soften just enough to release bursts of sugary joy without losing their cheerful color. Whether you eat it cold or slightly warmed, Funfetti Birthday Cake Overnight Oats taste like a guilt-free treat that’s both comforting and indulgent.

Boosting the flavor

For an extra layer of decadence, swirl in a spoonful of whipped cream cheese or Greek yogurt to amplify the creaminess. If you love a crunch, top your Funfetti Birthday Cake Overnight Oats with toasted coconut flakes or crushed graham crackers. A drizzle of vanilla almond sauce adds depth, while a sprinkle of cinnamon or nutmeg brings warmth. For a protein boost, mix in a scoop of vanilla whey powder—it blends seamlessly with the flavors. Experiment with fresh berries or a dollop of nut butter for a twist that keeps every bite exciting.

Tips for Success

Best practices for results

Always use fresh sprinkles for your Funfetti Birthday Cake Overnight Oats to ensure vibrant colors and a festive look. Meanwhile, stir the mixture well before refrigerating to evenly distribute the flavors. For the best texture, let the oats chill for at least six hours, though overnight works even better. Additionally, use full-fat yogurt or milk if you prefer a creamier consistency. Finally, top with extra sprinkles just before serving to keep them crunchy.

Mistakes to avoid

Avoid overloading the oats with sprinkles too early, as they can bleed color into the mixture if added before chilling. Instead, fold them in gently right before serving. Also, don’t skip the sweetener—without it, the Funfetti Birthday Cake Overnight Oats may taste bland. For more flavor-balancing tips, check out our guide on perfecting overnight oats. Another common mistake is using old-fashioned oats instead of rolled oats, which can turn mushy. For the right oat selection, read our breakdown of oats 101.

Serving and Pairing Suggestions

How to serve this dish

Make your Funfetti Birthday Cake Overnight Oats feel extra special by serving them in clear mason jars or colorful bowls. For a festive touch, top them with extra rainbow sprinkles, a dollop of whipped cream, or even a drizzle of vanilla glaze. Since this dish tastes like dessert but works for breakfast, it’s perfect for birthdays, holiday brunches, or any morning when you want to treat yourself. If you’re hosting guests, layer the oats with fresh berries or banana slices for a vibrant, Instagram-worthy look.

What goes well with it

Pair your Funfetti Birthday Cake Overnight Oats with a creamy iced vanilla latte for a balanced, indulgent breakfast. Alternatively, try it alongside a refreshing fruit salad to add a light, fresh contrast to the sweet oats. If you love pairing desserts with coffee, our cold brew recipe enhances the flavors without overpowering them. For a heartier meal, serve it with our fluffy buttermilk pancakes to create a brunch spread that feels like a celebration.

Can you make Funfetti Birthday Cake Overnight Oats with almond milk?

Yes, almond milk works perfectly for Funfetti Birthday Cake Overnight Oats! It creates a creamy texture while keeping the recipe dairy-free. Just substitute it 1:1 for regular milk and enjoy the same festive flavor.

How long do Funfetti Birthday Cake Overnight Oats last in the fridge?

Funfetti Birthday Cake Overnight Oats stay fresh for up to 3 days when stored in an airtight container. For the best texture and sprinkles vibrancy, we recommend eating them within 48 hours.

What kind of sprinkles work best for Funfetti Birthday Cake Overnight Oats?

Jimmies-style sprinkles hold up best in Funfetti Birthday Cake Overnight Oats because they won’t bleed color overnight. Avoid nonpareils if possible, as they tend to dissolve and create speckled oats instead of distinct colorful dots.

Can you heat up Funfetti Birthday Cake Overnight Oats?

While traditionally served cold, you can gently warm Funfetti Birthday Cake Overnight Oats for 30-45 seconds. Note that heating may slightly soften the sprinkles, but the cake batter flavor still shines through beautifully.

Easy Homemade Sweet Potato Dog Cookies for Your Pup

easy-homemade-sweet-potato-dog-cookies

“`html

Introduction

There’s nothing quite like the joy of spoiling our furry friends with treats made just for them. If you’ve ever watched your pup’s tail wag wildly over a simple snack, you know how rewarding it feels to give them something special. That’s why I’m thrilled to share these Homemade Sweet Potato Dog Cookies for Your Pup—a wholesome, tail-wagging delight packed with natural goodness. Not only do these cookies taste delicious (according to my very picky taste-tester), but they’re also easy to make with simple ingredients you likely already have. Plus, baking them fills your home with a cozy, comforting aroma that even humans will love.

About This Recipe

Homemade Sweet Potato Dog Cookies for Your Pup are more than just a treat—they’re a labor of love. Unlike store-bought options that often contain preservatives or fillers, these cookies let you control exactly what goes into your dog’s diet. Sweet potatoes, the star ingredient, offer fiber, vitamins, and a natural sweetness dogs adore. Whether you’re celebrating a training milestone or just want to show your pup some extra love, these cookies fit the bill perfectly. They’re also a great way to use up leftover sweet potatoes, reducing food waste while keeping your dog happy.

At BrekCakes, we believe in recipes that blend simplicity with quality, and this one nails it. If you’re new to baking dog treats, don’t worry—this recipe is beginner-friendly and requires no fancy equipment. For more pup-friendly inspiration, check out our guide to dog-friendly desserts or explore our tips for homemade dog treats. After all, our pets deserve the same care and attention we put into our own meals.

Why I Love This Recipe

I’ll never forget the first time I baked these Homemade Sweet Potato Dog Cookies for Your Pup. My rescue dog, Buddy, who usually turns his nose up at store-bought treats, devoured them in seconds. Seeing his excitement reminded me how much love goes into the little things we do for our pets. Now, these cookies are a staple in our house—whether as a reward after a long walk or just because. There’s something incredibly fulfilling about handing your dog a treat you made yourself, knowing it’s as healthy as it is delicious. Trust me, once you try this recipe, you’ll understand why it’s a favorite in our furry family.

“`

Health and Nutrition

Why it’s good for your body

Homemade Sweet Potato Dog Cookies for Your Pup pack a nutritious punch while keeping tails wagging. First, sweet potatoes deliver a hefty dose of fiber, which supports healthy digestion and keeps your dog feeling full longer. Additionally, they’re rich in beta-carotene, a powerful antioxidant that promotes eye health and a strong immune system. Since these cookies skip artificial additives, you can trust every bite nourishes your pup naturally.

Moreover, sweet potatoes provide essential vitamins like vitamin C and B6, which help maintain energy levels and skin health. Unlike store-bought treats loaded with preservatives, Homemade Sweet Potato Dog Cookies for Your Pup use wholesome ingredients you recognize. Transitioning to these treats means fewer empty calories and more balanced nutrition for your furry friend.

Finally, these cookies often include other healthy add-ins like oats or peanut butter, boosting protein and healthy fats. Whether your dog needs a post-walk snack or a training reward, Homemade Sweet Potato Dog Cookies for Your Pup offer guilt-free indulgence. Over time, they contribute to shinier coats, better digestion, and overall vitality.

How it fits in a healthy lifestyle

Homemade Sweet Potato Dog Cookies for Your Pup fit seamlessly into a balanced canine diet. They’re naturally gluten-free, making them ideal for dogs with sensitivities or allergies. Since they’re baked at home, you control the ingredients, avoiding fillers and excess salt found in commercial treats. Pair them with high-quality kibble or use them as training rewards to reinforce good behavior without overloading on calories.

For pups with weight management goals, these cookies offer a low-fat alternative to processed snacks. Combine them with regular exercise and portion control for optimal results. If your dog thrives on grain-free options, try pairing these treats with our Grain-Free Dog Treat Recipes for variety. And if you’re curious about other healthy snack ideas, explore our Homemade Dog Food Guide for more inspiration. With Homemade Sweet Potato Dog Cookies for Your Pup, you’re not just giving a treat—you’re supporting lifelong wellness.

Print
clock clock iconcutlery cutlery iconflag flag iconfolder folder iconinstagram instagram iconpinterest pinterest iconfacebook facebook iconprint print iconsquares squares iconheart heart iconheart solid heart solid icon

Homemade Sweet Potato Dog Cookies for Your Pup


  • Author: Chef Emy

Description

Healthy and delicious homemade dog treats made with sweet potatoes, perfect for your furry friend.


Ingredients

Scale

For the Crust:

  • 1 cup mashed sweet potato
  • 2 cups whole wheat flour
  • 1 egg
  • 1/4 cup water

Instructions

1. Prepare the Crust:

  1. Preheat oven to 350°F (175°C). Line a baking sheet with parchment paper.
  2. In a large bowl, mix mashed sweet potato, whole wheat flour, egg, and water until a dough forms.
  3. Roll out the dough to 1/4-inch thickness and cut into desired shapes using cookie cutters.
  4. Place cookies on the prepared baking sheet and bake for 25-30 minutes or until firm and lightly browned.
  5. Let cool completely before serving to your pup.

Notes

You can customize the seasonings to taste.

How to Prepare This Dish

Steps and time-saving tips

Start by preheating your oven to 350°F and lining a baking sheet with parchment paper. Meanwhile, peel and mash one large cooked sweet potato until smooth. In a large bowl, whisk together the mashed sweet potato, two cups of whole wheat flour, and one egg. If the dough feels too sticky, gradually add more flour until it becomes manageable. Roll the dough out on a floured surface to about ¼-inch thickness, then use cookie cutters to create fun shapes your pup will love. Transfer the cutouts to the baking sheet, leaving a little space between each. Bake for 25-30 minutes or until the edges turn golden brown. For extra crunch, let the Homemade Sweet Potato Dog Cookies for Your Pup cool in the oven with the door slightly ajar. Store them in an airtight container for up to two weeks, or freeze for longer freshness. To save time, bake a double batch and freeze half—your future self will thank you when treats run low.

Mistakes I’ve made and learned from

Early on, I rushed the baking process and pulled the Homemade Sweet Potato Dog Cookies for Your Pup out too soon, leaving them soft and chewy instead of crisp. My pup still gobbled them up, but I learned patience pays off—wait for that golden hue. Another blunder? Skipping the parchment paper, which led to stubborn sticking. Now I never bake without it. If your dough feels too wet, don’t panic. Just add flour slowly, as I explain in my guide to perfect dog treat dough. And if your pup has a sensitive stomach, consider swapping wheat flour for oat flour, like I did after some trial and error. For more tweaks, check out my list of dog-friendly ingredients. Trust me, a little extra care makes all the difference.

Cultural Connection and Variations

Where this recipe comes from

Homemade Sweet Potato Dog Cookies for Your Pup might seem like a modern trend, but their roots stretch back to ancient cultures that valued natural, wholesome ingredients for their pets. Indigenous communities in the Americas, for example, often shared simple, nutrient-rich foods like sweet potatoes with their dogs. Over time, pet owners worldwide adapted similar recipes, blending local flavors with their furry friends’ needs.

In Japan, pet owners might add a hint of fish powder to their version of Homemade Sweet Potato Dog Cookies for Your Pup, while in Italy, some sprinkle a touch of rosemary for extra aroma. Meanwhile, my grandmother always swore by a dash of cinnamon in her batch, claiming it made her golden retriever’s tail wag faster. Whether you stick to the basics or experiment with regional twists, these treats carry a universal love for pets across cultures.

Seasonal variations also shine. During fall, many bakers roast sweet potatoes with pumpkin for a festive twist, while summer versions might include dehydrated slices for a chewier texture. No matter the adaptation, the heart of the recipe stays the same—a delicious, healthy snack that shows our pups how much we care.

How it fits in today’s cooking

Today, Homemade Sweet Potato Dog Cookies for Your Pup fit perfectly into the growing demand for natural, DIY pet treats. With more pet owners prioritizing clean ingredients, this recipe offers a guilt-free alternative to store-bought snacks. Plus, it’s a fun way to involve the whole family in baking, turning treat-making into a cherished routine.

Modern cooks also get creative with shapes, using bone-shaped cutters or even custom molds for special occasions. For holiday gifting, pair these cookies with other homemade dog treats for a paws-itively delightful present. And if you’re short on time, dehydrating sweet potato slices simplifies the process while keeping all the flavor.

Beyond everyday snacking, these cookies shine during pet birthdays or training sessions. For more inspiration, check out our guide to dog-friendly recipes that keep tails wagging year-round. Whether you bake them weekly or save them for special moments, this recipe remains a timeless way to spoil your pup.

Taste and Texture

What makes it delicious

Homemade Sweet Potato Dog Cookies for Your Pup deliver a naturally sweet and earthy flavor that dogs adore. The roasted sweet potato lends a subtle caramelized richness, while the oats add a wholesome, slightly nutty undertone. These treats bake up with a satisfying crunch on the outside, yet they remain tender and chewy inside—perfect for pups who love a mix of textures. The aroma alone will have your dog begging, thanks to the warm, comforting scent of baked sweet potato and cinnamon. Plus, the simplicity of the ingredients ensures every bite is both nutritious and irresistible for your furry friend.

Boosting the flavor

For an extra flavor kick, try mixing in a spoonful of pure pumpkin puree or unsweetened applesauce to the dough. These additions keep the treats moist while adding a layer of natural sweetness. Alternatively, a sprinkle of turmeric or parsley not only boosts taste but also offers health benefits. If your dog loves variety, pair these cookies with a dollop of dog-friendly peanut butter frosting or crumble them over homemade dog food recipes for a fun twist. Small tweaks can make Homemade Sweet Potato Dog Cookies for Your Pup even more tail-waggingly delicious.

Tips for Success

Best practices for results

Always use fresh, organic sweet potatoes for the best flavor and nutrition in your Homemade Sweet Potato Dog Cookies for Your Pup. Additionally, roll the dough evenly to ensure uniform baking, and chill it for at least 30 minutes to prevent spreading. For extra crispiness, bake the cookies on parchment paper, and let them cool completely before serving. Finally, store leftovers in an airtight container to keep them fresh for your furry friend.

Mistakes to avoid

Avoid overmixing the dough, as this can make your Homemade Sweet Potato Dog Cookies for Your Pup too dense. Instead, gently fold the ingredients until just combined. Also, never skip the chilling step, or the cookies may lose their shape. If you’re unsure about portion sizes, check out our guide on dog treat portions for guidance. Lastly, remember that dogs have sensitive stomachs, so stick to dog-safe ingredients and avoid substitutions like xylitol, which we cover in our dog-safe foods article.

Serving and Pairing Suggestions

How to serve this dish

Make your Homemade Sweet Potato Dog Cookies for Your Pup extra special by serving them in a fun, dog-friendly way. For example, arrange them on a pet-safe plate or in a colorful silicone bowl to catch your pup’s attention. If you’re celebrating a birthday or holiday, stack the cookies like a mini cake and top them with a dollop of dog-safe peanut butter. Alternatively, tuck a few into a puzzle toy to turn snack time into a stimulating game. No matter how you serve them, these treats will have your furry friend wagging their tail with joy.

What goes well with it

Pair your Homemade Sweet Potato Dog Cookies for Your Pup with other dog-approved favorites for a well-rounded treat experience. A scoop of plain Greek yogurt makes a creamy, protein-rich dip that complements the natural sweetness of the cookies. For hydration, offer a side of fresh water or a splash of bone broth, which adds extra flavor and nutrients. If you’re planning a full doggy menu, try serving these cookies alongside our Dog-Friendly Carrot Cake or Peanut Butter Pupcakes for a tail-wagging feast. Together, these treats create a balanced and delicious spread your pup will love.

Are sweet potato dog cookies safe for dogs?

Yes, Homemade Sweet Potato Dog Cookies for Your Pup are safe when prepared properly. Sweet potatoes are rich in fiber and vitamins, making them a healthy treat. Just avoid adding harmful ingredients like sugar, salt, or artificial flavors.

How do you make sweet potato dog treats chewy or crunchy?

For chewy Homemade Sweet Potato Dog Cookies for Your Pup, bake them at a lower temperature (around 250°F) for 2-3 hours. For crunchier treats, slice them thinner and bake at 350°F for 20-30 minutes until crisp.

Can I freeze homemade sweet potato dog cookies?

Absolutely! Homemade Sweet Potato Dog Cookies for Your Pup freeze well for up to 3 months. Store them in an airtight container or freezer bag, and thaw at room temperature before serving.

What other ingredients can I add to sweet potato dog treats?

You can mix pumpkin puree, peanut butter (xylitol-free), or oats into Homemade Sweet Potato Dog Cookies for Your Pup. Always check that added ingredients are dog-safe and avoid anything toxic like chocolate or raisins.

Best Whipped Yogurt Cloud Cake – Light & Fluffy

best-whipped-yogurt-cloud-cake

“`html

Introduction

Imagine biting into a dessert so light and airy it feels like a sweet cloud melting on your tongue. That’s exactly what you’ll experience with this Whipped Yogurt Cloud Cake Delight—a dreamy, guilt-free treat that’s as easy to make as it is delicious. Whether you’re craving a refreshing summer dessert or a showstopping finale for your next gathering, this recipe delivers. Plus, it’s perfect for anyone who loves fluffy textures and bright, tangy flavors. Trust me, one bite and you’ll understand why this dessert deserves a permanent spot in your recipe rotation.

About This Recipe

Whipped Yogurt Cloud Cake Delight is a modern twist on classic no-bake desserts, combining creamy Greek yogurt, whipped cream, and a touch of honey for a balanced sweetness. Unlike heavier cakes, this version feels indulgent yet refreshing, making it ideal for warm days or when you want something satisfying without the sugar crash. The magic lies in its simplicity—just a handful of ingredients transform into an elegant dessert that wows every time. If you love effortless recipes with big flavor payoffs, you’ll adore this one.

This recipe fits perfectly with our blog’s mission to share approachable, crowd-pleasing dishes that don’t skimp on taste. Whether you’re a seasoned baker or a kitchen newbie, you’ll find success here. For more inspiration, check out our guide to easy dessert recipes or explore creative ways to elevate your dessert presentation. After all, great food should look as good as it tastes.

Why I Love This Recipe

Whipped Yogurt Cloud Cake Delight holds a special place in my heart because it reminds me of summer evenings spent with family. My aunt first made a version of this dessert for a backyard barbecue, and I couldn’t believe how something so simple could taste so heavenly. Now, I make it for my own family, and it’s become our go-to celebration treat. The lightness of the yogurt paired with the richness of whipped cream creates a harmony that feels both nostalgic and exciting. Every time I serve it, I’m reminded that the best recipes are the ones that bring people together.

“`

Health and Nutrition

Why it’s good for your body

Whipped Yogurt Cloud Cake Delight packs a nutritious punch while satisfying your sweet tooth. First, the yogurt base delivers probiotics, which support gut health and digestion. Additionally, the light whipped texture means you enjoy a decadent dessert without heavy fats or excessive calories. Moreover, the recipe often includes fresh fruit toppings, adding vitamins and antioxidants to every bite.

Unlike traditional cakes, Whipped Yogurt Cloud Cake Delight relies on natural sweetness, reducing refined sugar intake. Furthermore, the yogurt provides a protein boost, helping you stay full longer. Whether you choose Greek or plant-based yogurt, you benefit from calcium and essential nutrients. Finally, the airy consistency makes it a guilt-free treat, perfect for those mindful of portion control.

With Whipped Yogurt Cloud Cake Delight, you also get versatility. For instance, you can customize it with nuts for healthy fats or berries for fiber. Ultimately, this dessert proves that indulgence and nutrition can go hand in hand.

How it fits in a healthy lifestyle

Whipped Yogurt Cloud Cake Delight fits seamlessly into balanced eating habits. If you follow a gluten-free diet, simply swap the base for almond flour or another gluten-free alternative. For a heart-healthy option, top it with omega-3-rich walnuts or chia seeds. The recipe also adapts well to high-protein diets, especially when using Greek yogurt.

Pair it with a nutritious breakfast for a satisfying start to your day, or enjoy it as a light afternoon snack. Because it’s lower in sugar than traditional desserts, it aligns with mindful eating goals. You can even explore our meal prep guide to make batches ahead for busy weeks. Whipped Yogurt Cloud Cake Delight proves that healthy living doesn’t mean sacrificing flavor.

Print
clock clock iconcutlery cutlery iconflag flag iconfolder folder iconinstagram instagram iconpinterest pinterest iconfacebook facebook iconprint print iconsquares squares iconheart heart iconheart solid heart solid icon

Whipped Yogurt Cloud Cake Delight


  • Author: Chef Emy

Description

A light and fluffy cake made with whipped yogurt for a delicate, airy texture.


Ingredients

Scale

For the Crust:

  • 2 cups Greek yogurt
  • 1 cup granulated sugar
  • 3 large eggs
  • 1 1/2 cups all-purpose flour
  • 1 tsp baking powder
  • 1 tsp vanilla extract
  • 1/4 tsp salt
  • 1 tbsp lemon zest

Instructions

1. Prepare the Crust:

  1. Preheat oven to 350°F (175°C) and grease a 9-inch round cake pan.
  2. In a large bowl, whip Greek yogurt and sugar until light and fluffy.
  3. Add eggs one at a time, mixing well after each addition. Stir in vanilla extract and lemon zest.
  4. Sift together flour, baking powder, and salt. Gently fold into the yogurt mixture.
  5. Pour batter into prepared pan and bake for 30 minutes or until a toothpick comes out clean.
  6. Let cool before serving.

Notes

You can customize the seasonings to taste.

How to Prepare This Dish

Steps and time-saving tips

Start by preheating your oven to 350°F and greasing a 9-inch springform pan for the Whipped Yogurt Cloud Cake Delight. Meanwhile, whisk together the dry ingredients—flour, baking powder, and a pinch of salt—in a medium bowl. In a separate large bowl, beat the softened butter and sugar until fluffy, then blend in the eggs one at a time. Next, fold in the yogurt gently to keep the batter light and airy. Alternate adding the dry mixture and a splash of milk, stirring just until combined. Pour the batter into the pan and bake for 30-35 minutes, or until a toothpick comes out clean. While the cake cools, whip the cream with a hint of vanilla until stiff peaks form. Once the cake is room temperature, spread the whipped cream evenly over the top and drizzle with honey or fresh berries for a finishing touch. To save time, you can prepare the cake a day ahead and store it covered in the fridge—just add the whipped cream topping before serving.

Mistakes I’ve made and learned from

When I first made Whipped Yogurt Cloud Cake Delight, I overmixed the batter, which turned the cake dense instead of light. Now, I stop stirring as soon as the ingredients blend, and the texture is perfect every time. Another lesson? Chilling the bowl and beaters before whipping the cream makes a huge difference—otherwise, it can turn grainy. If you’re new to baking, check out my guide to common baking mistakes for more troubleshooting tips. Also, if your cake sticks to the pan, don’t panic—just run a knife around the edges and try lining the bottom with parchment paper next time. For extra help, my cake release techniques post covers all the tricks to keep desserts intact.

Cultural Connection and Variations

Where this recipe comes from

Whipped Yogurt Cloud Cake Delight traces its roots to the light, airy desserts of Mediterranean and Middle Eastern kitchens, where yogurt has long been a staple. Families in Greece might sweeten it with honey and top it with nuts, while in Turkey, they often layer it with rosewater-infused syrup. Over time, the recipe evolved into a fluffy, no-bake treat that feels like biting into a sweet cloud.

In my own kitchen, Whipped Yogurt Cloud Cake Delight became a summer favorite after a trip to Lebanon, where I tasted a similar dessert at a family gathering. The hostess used labneh instead of regular yogurt, giving it a tangier kick. Nowadays, I love experimenting with seasonal fruits—think mango in the summer or spiced apples in the fall. Some bakers even fold in cocoa powder for a chocolate twist or swap yogurt for coconut milk to keep it vegan.

How it fits in today’s cooking

Today, Whipped Yogurt Cloud Cake Delight fits perfectly into our love for easy, no-fuss desserts that still feel special. Busy home cooks appreciate how quickly it comes together, and health-conscious eaters adore its protein-rich base. Plus, it’s a star at potlucks or as a light finish to summer dinner parties.

Modern twists include layering it in jars for grab-and-go treats or turning it into a showstopper with edible flowers. Some even use it as a filling for crepe cakes, adding a creamy contrast to thin, delicate layers. Whether you serve it at a holiday gathering or as a weeknight indulgence, this dessert proves that simple ingredients can create something unforgettable.

Taste and Texture

What makes it delicious

Whipped Yogurt Cloud Cake Delight melts in your mouth like a sweet, airy dream. The yogurt lends a tangy brightness, while the whipped texture feels impossibly light and fluffy—almost like biting into a cloud. Each forkful delivers a delicate balance of creamy richness and subtle sweetness, with a hint of vanilla or citrus zest dancing on your tongue. Meanwhile, the cake base adds just enough structure for a satisfying contrast. Whether you serve it chilled or slightly softened, Whipped Yogurt Cloud Cake Delight leaves a refreshing, indulgent finish that keeps you reaching for another bite.

Boosting the flavor

For an extra burst of flavor, try drizzling honey or a berry compote over your Whipped Yogurt Cloud Cake Delight. The natural sweetness pairs perfectly with the tangy yogurt. Alternatively, fold in a spoonful of lemon curd or a dash of cinnamon for warmth. If you love texture, sprinkle crushed pistachios or toasted coconut on top. For more inspiration, explore our easy fruit sauces or crunchy toppings to elevate every bite. A little creativity goes a long way!

Tips for Success

Best practices for results

Always use full-fat yogurt for the Whipped Yogurt Cloud Cake Delight to ensure a rich, creamy texture. Meanwhile, whip the egg whites until stiff peaks form for maximum fluffiness. Additionally, gently fold the ingredients to maintain the cake’s airy structure. For best results, bake the cake in the center of the oven to promote even rising. Finally, let it cool completely before slicing to prevent crumbling.

Mistakes to avoid

Avoid overmixing the batter, as this can deflate the whipped yogurt and eggs, resulting in a dense cake. Instead, use a spatula to fold the ingredients just until combined. Furthermore, don’t skip greasing the pan properly, or the Whipped Yogurt Cloud Cake Delight may stick. For more baking tips, check out our guide on perfect cake texture. Also, ensure your oven is preheated—an uneven temperature can cause the cake to collapse, as explained in our oven temperatures guide.

Serving and Pairing Suggestions

How to serve this dish

Whipped Yogurt Cloud Cake Delight shines when served with a touch of elegance. For a stunning presentation, layer it on a cake stand and dust the top with edible flowers or a sprinkle of citrus zest. Alternatively, slice it into individual portions and plate them with a drizzle of honey or a dollop of fresh berry compote. This dessert works beautifully for brunch gatherings, afternoon tea, or even as a light finale to a holiday feast. To make it extra special, pair each serving with a mint leaf or a few crushed pistachios for a pop of color and texture.

What goes well with it

A cup of lightly sweetened iced tea or a frothy latte perfectly balances the airy texture of Whipped Yogurt Cloud Cake Delight. For a more indulgent pairing, try it with a scoop of our Homemade Vanilla Bean Ice Cream, which adds a creamy contrast. If you prefer something tangy, serve it alongside a refreshing fruit salad or our Mixed Berry Coulis for a burst of bright flavor. Each pairing enhances the delicate taste of this dessert without overpowering it.

What is Whipped Yogurt Cloud Cake Delight made of?

Whipped Yogurt Cloud Cake Delight combines fluffy whipped yogurt, light sponge cake, and airy meringue for a dreamy dessert. Key ingredients include Greek yogurt, egg whites, sugar, and vanilla extract, creating a melt-in-your-mouth texture. It’s a perfect balance of tangy yogurt and sweet cloud-like layers.

How do you keep Whipped Yogurt Cloud Cake Delight from deflating?

To prevent deflating, gently fold the whipped yogurt into the meringue and avoid overmixing. Chill the Whipped Yogurt Cloud Cake Delight for at least 4 hours before serving to stabilize the structure. Using cream of tartar in the meringue also helps maintain its airy texture.

Can I make Whipped Yogurt Cloud Cake Delight ahead of time?

Yes! Whipped Yogurt Cloud Cake Delight actually tastes better when made a day ahead, as the flavors meld together. Store it covered in the refrigerator for up to 3 days—the texture stays light and fluffy if properly chilled.

Is Whipped Yogurt Cloud Cake Delight healthier than regular cake?

Whipped Yogurt Cloud Cake Delight is lighter, with fewer calories than butter-based cakes due to its yogurt and meringue base. While still a dessert, it offers protein from Greek yogurt and less fat, making it a slightly healthier indulgence.

Easy Pumpkin Spice Protein Balls – Healthy Fall Snack

easy-pumpkin-spice-protein-balls

“`html

Introduction

There’s something magical about the cozy flavors of fall, and nothing captures that warmth quite like these Pumpkin Spice Protein Balls – Easy Fall Snack Recipe. Whether you’re craving a quick energy boost or a wholesome treat to savor with your morning coffee, these little bites deliver. Imagine the rich aroma of cinnamon, nutmeg, and pumpkin swirling together in a no-bake, protein-packed snack. Not only do they taste like autumn in every bite, but they also come together in minutes. Plus, they’re perfect for busy days when you need something nutritious yet indulgent. Trust me, once you try them, you’ll want to keep a batch stocked all season long.

About This Recipe

Pumpkin Spice Protein Balls – Easy Fall Snack Recipe combines the beloved flavors of pumpkin pie with the convenience of a grab-and-go snack. These little powerhouses blend oats, pumpkin puree, nut butter, and warm spices into bite-sized delights. Unlike store-bought snacks loaded with sugar, this recipe keeps things wholesome with natural ingredients. Moreover, they’re gluten-free, dairy-free, and easily customizable for dietary preferences. Whether you’re meal prepping for the week or need a post-workout refuel, these protein balls fit seamlessly into any routine.

Fall baking often means spending hours in the kitchen, but this recipe skips the fuss. Simply mix, roll, and chill. The result? A snack that feels decadent yet fuels your body. If you love easy, healthy treats, you’ll adore our No-Bake Energy Bites or our Healthy Pumpkin Muffins. Both share the same simplicity and nourishing qualities. Ultimately, Pumpkin Spice Protein Balls – Easy Fall Snack Recipe embodies everything we love about seasonal cooking—flavor, convenience, and a touch of nostalgia.

Why I Love This Recipe

Pumpkin Spice Protein Balls – Easy Fall Snack Recipe holds a special place in my heart because it reminds me of crisp mornings and family gatherings. My kids love helping me roll the mixture into balls, and I love knowing they’re eating something wholesome. The scent of pumpkin and spices instantly transports me to my favorite fall memories. Best of all, they’re a lifesaver on hectic days when I need a quick pick-me-up. Every bite feels like a hug in snack form, and that’s why this recipe stays in my rotation year after year.

“`

Health and Nutrition

Why it’s good for your body

Pumpkin Spice Protein Balls – Easy Fall Snack Recipe packs a nutritious punch while satisfying your seasonal cravings. First, these protein balls deliver a solid dose of plant-based protein, thanks to ingredients like nut butter and pumpkin seeds. Protein keeps you full longer and supports muscle recovery, making this snack ideal for active lifestyles. Additionally, pumpkin puree adds fiber, which aids digestion and helps stabilize blood sugar levels.

Moreover, Pumpkin Spice Protein Balls – Easy Fall Snack Recipe includes warming spices like cinnamon and nutmeg. These spices not only enhance flavor but also offer anti-inflammatory benefits. For instance, cinnamon may help regulate blood sugar, while nutmeg provides antioxidants. Furthermore, the recipe skips refined sugars, relying instead on natural sweeteners like maple syrup or dates. This makes it a smarter choice for energy without the crash.

Finally, these protein balls are rich in healthy fats from nuts and seeds. These fats support brain function and heart health. Whether you need a post-workout boost or a midday pick-me-up, Pumpkin Spice Protein Balls – Easy Fall Snack Recipe fuels your body with wholesome ingredients. With every bite, you get a balance of macros and micronutrients that keep you energized and satisfied.

How it fits in a healthy lifestyle

Pumpkin Spice Protein Balls – Easy Fall Snack Recipe fits seamlessly into a balanced diet. If you follow a gluten-free or plant-based lifestyle, this snack checks all the boxes. The recipe avoids processed ingredients, aligning with clean-eating goals. Plus, it’s portable, making it perfect for busy days when you need a quick, nourishing option.

For those focused on high-protein diets, these protein balls complement meals or workouts. Pair them with a smoothie bowl for a complete breakfast or enjoy them post-exercise. They also work well as part of a heart-healthy eating plan, since nuts and seeds provide unsaturated fats. If you’re meal prepping, try pairing them with other make-ahead snacks to stay on track all week.

Ultimately, Pumpkin Spice Protein Balls – Easy Fall Snack Recipe supports mindful eating without sacrificing flavor. It’s a simple way to enjoy seasonal treats while staying committed to your health goals.

Print
clock clock iconcutlery cutlery iconflag flag iconfolder folder iconinstagram instagram iconpinterest pinterest iconfacebook facebook iconprint print iconsquares squares iconheart heart iconheart solid heart solid icon

Pumpkin Spice Protein Balls – Easy Fall Snack Recipe


  • Author: Chef Emy

Description

Delicious and healthy pumpkin spice protein balls packed with fall flavors and protein for a quick snack.


Ingredients

Scale

For the Crust:

  • 1 cup rolled oats
  • 1/2 cup pumpkin puree
  • 1/4 cup almond butter
  • 2 tbsp honey or maple syrup
  • 1 scoop vanilla protein powder
  • 1 tsp pumpkin pie spice
  • 1/2 tsp cinnamon
  • 1/4 cup mini chocolate chips (optional)

Instructions

1. Prepare the Crust:

  1. In a large bowl, mix together all ingredients until well combined.
  2. Roll the mixture into 1-inch balls and place on a lined baking sheet.
  3. Refrigerate for at least 30 minutes to firm up before serving.

Notes

You can customize the seasonings to taste.

How to Prepare This Dish

Steps and time-saving tips

Start by gathering all your ingredients for Pumpkin Spice Protein Balls – Easy Fall Snack Recipe to streamline the process. First, combine rolled oats, protein powder, and pumpkin pie spice in a large mixing bowl. Whisk them together until evenly distributed. Next, add pumpkin puree, almond butter, and maple syrup to the dry ingredients. Use a sturdy spatula to fold everything together until the mixture forms a thick, sticky dough. If the dough feels too wet, sprinkle in extra oats. If it’s too dry, drizzle in a teaspoon of almond milk. Once the texture is perfect, chill the dough for 10 minutes to make rolling easier. Meanwhile, line a baking sheet with parchment paper. Scoop tablespoon-sized portions of dough and roll them into smooth balls with your hands. For a finishing touch, dust them with cinnamon or dip them in melted dark chocolate. Finally, refrigerate the Pumpkin Spice Protein Balls for at least 30 minutes to firm up. Store them in an airtight container for up to a week, or freeze them for longer shelf life. To save time, double the batch and prep a week’s worth of snacks in one go.

Mistakes I’ve made and learned from

When I first made Pumpkin Spice Protein Balls – Easy Fall Snack Recipe, I rushed the chilling step and ended up with sticky, misshapen balls. Now, I never skip the 10-minute fridge rest—it makes rolling so much smoother. Another blunder? Using watery pumpkin puree. It threw off the texture, leaving the dough too soft. I learned to blot excess moisture from the puree with a paper towel first. If you’ve struggled with protein balls falling apart, my guide on fixing crumbly protein balls has saved me countless times. Also, don’t overmix the dough! I once turned mine gummy by overworking it. For more foolproof tips, check out my no-bake snack hacks to avoid common pitfalls. Trust me, these small tweaks make all the difference.

Cultural Connection and Variations

Where this recipe comes from

Pumpkin Spice Protein Balls – Easy Fall Snack Recipe captures the cozy essence of autumn, blending tradition with modern convenience. While pumpkin spice itself traces back to ancient spice trade routes, the protein ball twist reflects today’s love for healthy, grab-and-go treats. In the U.S., families often bake pumpkin desserts during Thanksgiving, but this no-bake version skips the oven for busy lifestyles. Meanwhile, in the Middle East, similar date-based energy balls might include cardamom or rosewater instead of pumpkin spice. Some European cooks might swap oats for almond flour, proving how versatile this recipe can be.

My grandma always made pumpkin pies, but I reinvented her flavors into these portable Pumpkin Spice Protein Balls – Easy Fall Snack Recipe for my kids’ lunchboxes. Friends from Mexico sometimes add a pinch of chili powder for warmth, while others in Australia use golden syrup for extra chewiness. No matter where you are, the blend of cinnamon, nutmeg, and pumpkin puree feels like a hug in snack form. Whether you enjoy them after a hike or with your morning coffee, these little bites carry the spirit of fall wherever they go.

How it fits in today’s cooking

Today, Pumpkin Spice Protein Balls – Easy Fall Snack Recipe fits perfectly into our fast-paced, health-conscious lives. Meal preppers love them because they stash well in the fridge, and gym-goers appreciate the protein boost. They’re also a hit at holiday potlucks, offering a lighter alternative to heavy desserts. For busy parents, these balls pair wonderfully with quick breakfast ideas, making mornings smoother. Plus, food bloggers keep reinventing them—some add collagen peptides, while others mix in dark chocolate chunks.

Modern twists keep this recipe fresh, like using almond butter instead of peanut butter for allergies or tossing in chia seeds for extra crunch. Even coffee shops have caught on, serving similar snacks alongside healthy coffee recipes. Whether you’re craving nostalgia or need fuel for a hectic day, Pumpkin Spice Protein Balls – Easy Fall Snack Recipe bridges the gap between comfort and convenience. After all, who can resist a treat that tastes like autumn and fuels your adventures?

Taste and Texture

What makes it delicious

Pumpkin Spice Protein Balls – Easy Fall Snack Recipe delivers a cozy, irresistible treat that feels like autumn in every bite. The rich, earthy sweetness of pumpkin puree blends perfectly with warm spices like cinnamon and nutmeg, creating a fragrant aroma that fills the room. Meanwhile, creamy almond butter and chewy oats give these protein balls a satisfyingly dense yet tender texture. A hint of maple syrup adds a delicate caramel-like finish, while vanilla extract rounds out the flavor with its comforting warmth. Whether you enjoy them as a quick snack or a post-workout boost, Pumpkin Spice Protein Balls – Easy Fall Snack Recipe offers a delicious balance of soft, hearty, and subtly spiced goodness.

Boosting the flavor

For an extra flavor kick, try rolling your Pumpkin Spice Protein Balls – Easy Fall Snack Recipe in crushed pecans or dark chocolate chips. The nutty crunch or bittersweet cocoa pairs beautifully with the warm spices. Alternatively, swap almond butter for cashew butter to add a buttery depth, or drizzle them with a light date syrup glaze for natural sweetness. A pinch of sea salt on top can also amplify the savory-sweet contrast, making each bite even more addictive. Get creative—these little upgrades transform an already delicious snack into something truly unforgettable.

Tips for Success

Best practices for results

Always chill the dough for at least 30 minutes before rolling your Pumpkin Spice Protein Balls – Easy Fall Snack Recipe into balls. This step prevents sticking and ensures a firm texture. Additionally, use parchment paper when storing them to maintain freshness and avoid clumping. For the best flavor, toast the oats lightly before mixing them into the dough. Finally, measure ingredients precisely, especially the pumpkin puree, to keep the consistency perfect every time.

Mistakes to avoid

Avoid overmixing the dough, as this can make your Pumpkin Spice Protein Balls – Easy Fall Snack Recipe too dense. Instead, stir just until combined for a lighter texture. Also, don’t skip the chia seeds or flaxseed—they add binding power and nutrition. If your mixture feels too wet, add a tablespoon of oat flour, like in our No-Bake Energy Bites. Conversely, if it’s too dry, a splash of almond milk helps, similar to our Healthy Protein Bars recipe adjustments.

Serving and Pairing Suggestions

How to serve this dish

For a festive touch, arrange your Pumpkin Spice Protein Balls on a rustic wooden board or a small ceramic platter. Meanwhile, sprinkle them with a light dusting of cinnamon or drizzle melted white chocolate for extra flair. These protein balls shine at fall gatherings, whether you set them out as a healthy dessert option or pack them in lunchboxes for a midday energy boost. Additionally, consider serving them alongside seasonal decor like mini pumpkins or autumn leaves to enhance the cozy vibe.

What goes well with it

Pair your Pumpkin Spice Protein Balls with a steaming cup of spiced chai tea for a comforting snack that highlights the warm fall flavors. Alternatively, try them with a scoop of vanilla yogurt for a creamy contrast that balances the spices. If you love seasonal treats, serve them alongside our Healthy Pumpkin Muffins for a wholesome brunch spread. For a refreshing twist, a glass of cold almond milk or our Cinnamon Apple Smoothie complements the rich pumpkin spice notes perfectly.

Can I make Pumpkin Spice Protein Balls without protein powder?

Yes! You can substitute protein powder with almond flour or oat flour for a similar texture. Pumpkin Spice Protein Balls – Easy Fall Snack Recipe still tastes delicious while keeping the energy-boosting benefits.

How long do Pumpkin Spice Protein Balls last in the fridge?

Pumpkin Spice Protein Balls – Easy Fall Snack Recipe stays fresh for up to 2 weeks when stored in an airtight container in the fridge. For longer storage, freeze them for up to 3 months.

Are Pumpkin Spice Protein Balls healthy?

Absolutely! Pumpkin Spice Protein Balls – Easy Fall Snack Recipe is packed with protein, fiber, and healthy fats. Using natural sweeteners like dates or maple syrup keeps them nutritious while satisfying sweet cravings.

Can I use fresh pumpkin instead of canned for Pumpkin Spice Protein Balls?

Yes, but make sure to cook and puree fresh pumpkin first to avoid excess moisture. Pumpkin Spice Protein Balls – Easy Fall Snack Recipe works best with thick, consistent pumpkin puree for the right texture.

Best Pumpkin Hand Pies – Easy Homemade Recipe

best-pumpkin-hand-pies-recipe

“`html

Introduction

There’s something magical about the smell of warm pumpkin spice wafting through the kitchen, especially when it leads to a batch of flaky, golden-brown hand pies. Whether you’re craving a cozy fall treat or need a portable dessert for your next gathering, this Irresistible Pumpkin Hand Pies Recipe delivers. Imagine biting into a buttery crust filled with velvety pumpkin filling—just sweet enough, spiced to perfection, and utterly comforting. These hand pies capture the essence of autumn in every bite, and once you try them, you’ll understand why they’re a seasonal must-have.

About This Recipe

Irresistible Pumpkin Hand Pies Recipe combines the nostalgic charm of homemade pie with the convenience of a handheld treat. Unlike traditional pies, these mini delights require no slicing or plates, making them ideal for parties, lunchboxes, or even a quick sweet fix. The recipe features a tender, flaky crust that encases a rich pumpkin filling, spiced with cinnamon, nutmeg, and a hint of ginger. Moreover, the process is straightforward, so even beginner bakers can achieve bakery-worthy results. If you love pumpkin desserts, you’ll appreciate how these hand pies balance sweetness and spice without overwhelming the palate.

This recipe fits perfectly with the warm, approachable tone of our blog, where we celebrate simple yet impressive baking. For more seasonal inspiration, check out our Fall Dessert Ideas or explore our guide to Perfect Pie Crust. Whether you’re baking for a crowd or just treating yourself, these pumpkin hand pies promise to become a fall favorite. They’re versatile too—serve them warm with a scoop of vanilla ice cream or pack them for a picnic. No matter how you enjoy them, their irresistible flavor and charming presentation will win everyone over.

Why I Love This Recipe

I’ll never forget the first time I made these Irresistible Pumpkin Hand Pies Recipe. It was a chilly October afternoon, and I wanted to surprise my family with something special. The moment they took their first bites, their faces lit up—just like mine did when my grandma used to bake pumpkin pies during the holidays. These hand pies remind me of those cherished moments, but with a fun, modern twist. They’re my go-to when I need a dose of comfort or want to share a little joy. Every time I pull a batch from the oven, I’m reminded why baking is so much more than following a recipe—it’s about creating memories.

“`

Health and Nutrition

Why it’s good for your body

Irresistible Pumpkin Hand Pies Recipe packs a nutritious punch while satisfying your sweet cravings. First, pumpkin puree delivers a hefty dose of vitamin A, which supports vision and immune health. Additionally, the warm spices like cinnamon and nutmeg not only enhance flavor but also offer anti-inflammatory benefits. Moreover, these hand pies use wholesome ingredients like whole wheat flour or almond flour for a fiber boost, keeping you fuller longer.

Furthermore, Irresistible Pumpkin Hand Pies Recipe balances indulgence with nourishment. Unlike store-bought pastries, you control the sugar content, reducing empty calories. Meanwhile, pumpkin provides potassium, which helps regulate blood pressure. For a protein boost, consider adding a dollop of Greek yogurt when serving. Ultimately, these hand pies prove that treats can be both delicious and nutritious.

Finally, the portability of Irresistible Pumpkin Hand Pies Recipe makes them a smart choice for busy lifestyles. Whether you need a post-workout snack or an afternoon pick-me-up, they deliver energy without the crash. By choosing homemade over processed options, you prioritize both flavor and well-being.

How it fits in a healthy lifestyle

Irresistible Pumpkin Hand Pies Recipe easily adapts to various dietary needs. For a gluten-free version, swap regular flour with almond or oat flour. If you follow a heart-healthy diet, reduce the butter and opt for coconut oil instead. These small tweaks let you enjoy the recipe without compromising your goals.

Pair these hand pies with a protein-rich snack like our Healthy Protein Snacks for a balanced treat. They also fit perfectly into meal prep routines, so you always have a wholesome option on hand. For more ideas on balancing indulgences, explore our Guilt-Free Desserts guide. With mindful choices, Irresistible Pumpkin Hand Pies Recipe becomes a tasty part of your wellness journey.

Print
clock clock iconcutlery cutlery iconflag flag iconfolder folder iconinstagram instagram iconpinterest pinterest iconfacebook facebook iconprint print iconsquares squares iconheart heart iconheart solid heart solid icon

Irresistible Pumpkin Hand Pies


  • Author: Chef Emy

Description

Delicious, flaky hand pies filled with spiced pumpkin puree, perfect for fall treats.


Ingredients

Scale

For the Crust:

  • 2 cups all-purpose flour
  • 1/2 teaspoon salt
  • 1/2 cup unsalted butter, chilled and cubed
  • 1/4 cup ice water
  • 1 cup pumpkin puree
  • 1/4 cup brown sugar
  • 1 teaspoon pumpkin pie spice
  • 1 egg, beaten (for egg wash)
  • 1 tablespoon granulated sugar (for sprinkling)

Instructions

1. Prepare the Crust:

  1. In a large bowl, whisk together flour and salt. Cut in the butter until the mixture resembles coarse crumbs.
  2. Gradually add ice water, 1 tablespoon at a time, until the dough comes together. Shape into a disk, wrap in plastic, and refrigerate for 30 minutes.
  3. In another bowl, mix pumpkin puree, brown sugar, and pumpkin pie spice until smooth.
  4. Preheat oven to 375°F (190°C). Roll out the dough to 1/8-inch thickness and cut into circles.
  5. Place a spoonful of pumpkin filling on half of each circle, leaving a border. Fold dough over and crimp edges with a fork.
  6. Brush pies with egg wash and sprinkle with granulated sugar. Bake for 20-25 minutes until golden brown.

Notes

You can customize the seasonings to taste.

How to Prepare This Dish

Steps and time-saving tips

Start by preheating your oven to 375°F and lining a baking sheet with parchment paper. While the oven heats, whisk together the pumpkin puree, brown sugar, and warm spices in a bowl until smooth. Next, roll out your pie dough on a lightly floured surface and cut it into even circles using a biscuit cutter or glass. Spoon a generous tablespoon of the pumpkin filling onto each circle, then fold the dough over to create half-moon shapes. Crimp the edges with a fork to seal the Irresistible Pumpkin Hand Pies Recipe filling inside. For a golden finish, brush the tops with an egg wash and sprinkle with coarse sugar. Bake for 18-20 minutes until the crust turns crisp and flaky. Let them cool slightly before serving, or store them in an airtight container for later. To save time, prep the filling a day ahead or use store-bought pie dough for quicker assembly.

Mistakes I’ve made and learned from

My first batch of Irresistible Pumpkin Hand Pies Recipe turned into a sticky disaster because I overfilled the dough, causing leaks during baking. Now, I measure the filling precisely and leave a half-inch border for sealing. Another lesson? Chilling the dough before baking prevents spreading. If your kitchen runs warm, pop the assembled pies in the fridge for 10 minutes—it makes all the difference. For more dough-handling tricks, check out my guide on perfect pie crust. Also, if your filling tastes bland, don’t skip toasting the spices first, as explained in my pumpkin spice blend post. Trust me, it’s a game-changer.

Cultural Connection and Variations

Where this recipe comes from

The Irresistible Pumpkin Hand Pies Recipe carries the cozy spirit of autumn, blending the warmth of pumpkin spice with the convenience of handheld treats. While pumpkin pies trace their roots to early American settlers, who adapted European pie techniques to native ingredients, hand pies likely emerged as a practical twist. After all, who wouldn’t want a portable version of this classic dessert? In the South, bakers might add a dash of bourbon to the filling, while in Mexico, you’ll find similar empanadas de calabaza spiked with cinnamon and piloncillo. My grandma, however, always swore by a secret ingredient—a pinch of cardamom—to make her Irresistible Pumpkin Hand Pies Recipe unforgettable.

Across the globe, cultures put their own spin on pumpkin-filled pastries. In Australia, they might pair pumpkin with golden syrup for a sticky-sweet bite, while British bakers often opt for savory versions with sage and cheese. Even within the U.S., regional preferences shine. Some New Englanders insist on maple-glazed crusts, whereas Midwestern families (like mine) load their hand pies with extra nutmeg. No matter the variation, one thing stays true: these little pockets of joy bring people together, whether at harvest festivals, Thanksgiving potlucks, or just a rainy afternoon tea.

How it fits in today’s cooking

Today, the Irresistible Pumpkin Hand Pies Recipe thrives as a versatile star of modern kitchens. Busy home cooks love them for meal prep—they freeze beautifully and reheat in minutes, making them perfect for school lunches or quick breakfasts. Meanwhile, food bloggers and bakers reinvent the classic with gluten-free crusts or vegan fillings, proving this treat adapts to any diet. During the holidays, they’re a festive alternative to bulky pies, fitting neatly onto dessert boards alongside holiday cookies.

What keeps this recipe timeless? Perhaps it’s the nostalgia of pumpkin spice season or the sheer convenience of a dessert you can eat on the go. Either way, the Irresistible Pumpkin Hand Pies Recipe bridges generations, inviting us to savor tradition while embracing new twists. Whether you’re baking them for a fall party or just because, these hand pies deliver comfort in every bite.

Taste and Texture

What makes it delicious

The Irresistible Pumpkin Hand Pies Recipe delivers a warm, spiced aroma that fills the kitchen with cozy autumn vibes. Each bite offers a buttery, flaky crust that shatters delicately, giving way to a velvety pumpkin filling. The filling itself is rich and creamy, with deep caramel-like notes from brown sugar and a hint of warmth from cinnamon and nutmeg. Meanwhile, the subtle tang of cream cheese in the dough balances the sweetness perfectly. Whether served warm or at room temperature, the Irresistible Pumpkin Hand Pies Recipe melts in your mouth, leaving behind a comforting, spiced aftertaste that begs for another bite.

Boosting the flavor

For an extra layer of indulgence, drizzle the hand pies with a simple vanilla glaze or sprinkle them with coarse sugar before baking for a sparkling crunch. If you love bold spices, try adding a pinch of cardamom or ginger to the pumpkin filling for a zesty kick. Alternatively, serve them with a scoop of homemade whipped cream to contrast the warm spices with cool, creamy richness. Either way, these small tweaks elevate the flavors without overpowering the star of the show—the pumpkin itself.

Tips for Success

Best practices for results

Always chill the dough for at least 30 minutes before rolling it out to prevent sticking and ensure flaky layers in your Irresistible Pumpkin Hand Pies Recipe. Meanwhile, use fresh pumpkin puree or high-quality canned puree for the filling to guarantee rich flavor. Additionally, brush the hand pies with an egg wash before baking for a golden, glossy finish. Finally, let them cool slightly before serving so the filling sets properly.

Mistakes to avoid

Avoid overfilling the hand pies, as this can cause the seams to burst open during baking. Instead, stick to about one tablespoon of filling per pie for the best results. Also, resist the urge to skip the egg wash—it’s key for that perfect bakery-style shine. If you’re new to working with pastry dough, check out our guide on how to roll out pie crust for pro tips. For more troubleshooting help, our common baking mistakes post covers solutions to other frequent issues.

Serving and Pairing Suggestions

How to serve this dish

Serve your Irresistible Pumpkin Hand Pies warm for the best flavor and texture. Meanwhile, arrange them on a rustic wooden board or a vintage platter to enhance their cozy autumn vibe. For special occasions like Thanksgiving or Halloween, dust them lightly with powdered sugar or drizzle with caramel for an elegant touch. Additionally, pair them with mini flags or decorative picks to make them stand out at brunch gatherings. These hand pies also make a delightful addition to dessert charcuterie boards alongside seasonal fruits and nuts.

What goes well with it

Elevate your Irresistible Pumpkin Hand Pies by serving them with a spiced chai latte or a creamy pumpkin spice cold brew. The warm spices in both drinks highlight the pie’s rich filling perfectly. Alternatively, try them with a scoop of vanilla bean ice cream for a decadent twist. If you prefer a savory balance, pair them with a crisp apple and arugula salad from our fall salad collection. For another sweet option, drizzle them with our homemade caramel sauce to amplify their autumnal flavors.

What’s the best crust for Irresistible Pumpkin Hand Pies?

A flaky, buttery pie crust works best for Irresistible Pumpkin Hand Pies. You can use store-bought dough for convenience or make homemade crust with cold butter and ice water for extra texture. The crust should hold its shape while baking and complement the spiced pumpkin filling.

Can I make Irresistible Pumpkin Hand Pies ahead of time?

Yes! Assemble the hand pies and refrigerate them for up to 24 hours before baking. For longer storage, freeze unbaked pies for up to 3 months. Just add a few extra minutes to the baking time if cooking from frozen.

How do I prevent my pumpkin hand pies from getting soggy?

To avoid sogginess in Irresistible Pumpkin Hand Pies, lightly brush the crust with egg wash before adding the filling. Also, ensure your pumpkin mixture isn’t too watery—cook it down slightly if needed. Proper sealing and venting the pies also helps maintain crispness.

What’s a good glaze for Irresistible Pumpkin Hand Pies?

A simple powdered sugar glaze with vanilla or maple syrup pairs perfectly with Irresistible Pumpkin Hand Pies. For extra flavor, try a cream cheese glaze or drizzle with caramel. Apply the glaze after baking while the pies are still slightly warm.

Best Decadent Cheesecake Brownies – Ultimate Recipe

best-decadent-cheesecake-brownies-recipe

“`html

Introduction

There’s something magical about biting into a rich, fudgy brownie swirled with creamy cheesecake—it’s pure indulgence in every bite. If you’ve ever craved a dessert that combines the best of both worlds, this Decadent Cheesecake Brownies Recipe is your answer. Whether you’re baking for a special occasion or simply treating yourself, these brownies deliver a luscious texture and unforgettable flavor. Trust me, one taste and you’ll understand why they’re a crowd favorite. Plus, they’re surprisingly easy to make, even if you’re not a seasoned baker. Ready to dive into this irresistible treat? Let’s get started.

About This Recipe

Decadent Cheesecake Brownies Recipe brings together two beloved desserts into one showstopping treat. Imagine a dense, chocolatey brownie base topped with a tangy, velvety cheesecake layer, all swirled into a marbled masterpiece. This recipe matters because it solves the age-old dilemma of choosing between brownies and cheesecake—why not have both? Perfect for potlucks, birthdays, or even a cozy night in, these brownies always impress. Moreover, they fit right into the Brekcakes ethos of approachable yet elevated baking. If you love our Classic Fudge Brownies, you’ll adore this twist.

What sets this recipe apart is its balance of simplicity and sophistication. While the ingredients are straightforward, the result feels gourmet. The brownie layer stays moist and fudgy, while the cheesecake adds a refreshing contrast. Additionally, the marbling technique creates a stunning visual effect, making these brownies as beautiful as they are delicious. For more cheesecake inspiration, check out our No-Bake Cheesecake—it’s another fuss-free favorite. Whether you’re a beginner or a pro, this recipe guarantees success and smiles all around.

Why I Love This Recipe

I’ll never forget the first time I made these Decadent Cheesecake Brownies. It was for a friend’s birthday, and the moment they took a bite, their face lit up with pure joy. That’s the power of this recipe—it creates moments of happiness. Beyond the taste, I love how versatile it is. Sometimes I add a sprinkle of sea salt for contrast, or a drizzle of caramel for extra decadence. Every time I bake them, they remind me why I fell in love with sharing desserts in the first place. If you’re looking for a recipe that feels like a hug in dessert form, this is it.

“`

Health and Nutrition

Why it’s good for your body

Decadent Cheesecake Brownies Recipe combines rich flavors with surprising nutritional perks. First, dark chocolate in the brownie layer delivers antioxidants, which support heart health and reduce inflammation. Meanwhile, cream cheese in the cheesecake swirl adds a dose of protein and calcium for stronger bones. Together, these ingredients create a treat that satisfies cravings while offering more than empty calories.

Additionally, Decadent Cheesecake Brownies Recipe includes eggs, which provide essential amino acids and vitamin D. These nutrients help maintain muscle function and boost immunity. Because the recipe balances indulgence with wholesome ingredients, you can enjoy a square guilt-free. Plus, the fiber from cocoa powder aids digestion, making it a smarter choice than overly processed desserts.

Finally, moderation is key, and Decadent Cheesecake Brownies Recipe fits perfectly into an occasional treat routine. The combination of protein, healthy fats, and complex carbs helps stabilize blood sugar levels. As a result, you avoid the energy crashes that come with sugar-heavy snacks. Whether you savor one after dinner or share them at gatherings, these brownies bring joy and nourishment.

How it fits in a healthy lifestyle

Decadent Cheesecake Brownies Recipe works well in a balanced diet when enjoyed mindfully. Pair a small portion with fresh berries or a handful of nuts to add fiber and healthy fats. If you follow a gluten-free diet, simply swap the flour for a gluten-free alternative like almond flour—just like in our Gluten-Free Baking Guide.

For those watching sugar intake, reduce the sweetener slightly or use natural substitutes like maple syrup. The protein-rich cream cheese and eggs also make these brownies a satisfying post-workout treat. Craving more healthy dessert ideas? Explore our Balanced Indulgence Collection for recipes that prioritize flavor and nutrition. With smart swaps and portion control, Decadent Cheesecake Brownies Recipe proves that delicious desserts can have a place in your wellness journey.

Print
clock clock iconcutlery cutlery iconflag flag iconfolder folder iconinstagram instagram iconpinterest pinterest iconfacebook facebook iconprint print iconsquares squares iconheart heart iconheart solid heart solid icon

Decadent Cheesecake Brownies


  • Author: Chef Emy

Description

A rich and fudgy brownie swirled with creamy cheesecake for the ultimate dessert experience.


Ingredients

Scale

For the Crust:

  • 1 cup unsalted butter
  • 2 cups granulated sugar
  • 4 large eggs
  • 1 tsp vanilla extract
  • 1 cup all-purpose flour
  • 1/2 cup cocoa powder
  • 1/4 tsp salt
  • 8 oz cream cheese, softened
  • 1/4 cup granulated sugar
  • 1 egg yolk
  • 1/2 tsp vanilla extract

Instructions

1. Prepare the Crust:

  1. Preheat oven to 350°F (175°C). Grease a 9×13-inch baking pan.
  2. Melt butter in a saucepan over low heat. Remove from heat and stir in sugar, eggs, and vanilla.
  3. Whisk in flour, cocoa powder, and salt until just combined. Spread batter into prepared pan.
  4. In a separate bowl, beat cream cheese, sugar, egg yolk, and vanilla until smooth.
  5. Drop spoonfuls of cheesecake mixture over brownie batter. Swirl with a knife to create a marbled effect.
  6. Bake for 30-35 minutes until edges are set but center is slightly jiggly. Cool completely before slicing.

Notes

You can customize the seasonings to taste.

How to Prepare This Dish

Steps and time-saving tips

Start by preheating your oven to 350°F and lining an 8×8 baking pan with parchment paper for easy removal later. In a large bowl, whisk together melted butter, sugar, and vanilla until smooth, then mix in the eggs one at a time. Gradually fold in the flour, cocoa powder, and salt until just combined—overmixing can make the brownies dense. Meanwhile, prepare the cheesecake layer by beating cream cheese, sugar, and egg until creamy. Pour half the brownie batter into the pan, then gently spread the cheesecake mixture on top. Use a knife to swirl the remaining brownie batter into the cheesecake for a marbled effect. Bake for 30-35 minutes until the edges are set but the center still jiggles slightly. Let the Decadent Cheesecake Brownies Recipe cool completely before slicing to avoid a messy cut. For a time-saving hack, use room-temperature ingredients to ensure even mixing and quicker baking.

Mistakes I’ve made and learned from

I once rushed the cooling process and ended up with crumbly brownies that fell apart—patience is key! Now, I let them chill in the fridge for at least an hour, which also enhances the fudgy texture. Another blunder? Overbaking. I learned to trust the jiggle test and pull them out when the edges are firm but the center still has a slight wobble. If you’re new to baking, check out my guide on perfect brownie texture for more tips. Also, I used to skip sifting the dry ingredients, resulting in lumpy batter. A quick sift makes all the difference, just like in my avoid common baking mistakes post. Learn from my errors, and your Decadent Cheesecake Brownies Recipe will turn out flawless every time.

Cultural Connection and Variations

Where this recipe comes from

The Decadent Cheesecake Brownies Recipe is a delicious fusion of two beloved desserts, blending the rich, fudgy depth of brownies with the creamy tang of cheesecake. While brownies trace their roots to early 20th-century America, cheesecake has a much older history, dating back to ancient Greece. This recipe marries these traditions into a modern treat that feels both nostalgic and innovative.

Around the world, bakers put their own spin on similar desserts. In France, you might find a chocolate marquise with a silky cream layer, while in Japan, matcha-infused versions offer a earthy twist. Some families, like mine, add a splash of vanilla or a swirl of raspberry jam to the cheesecake layer for extra flair. No matter the variation, the Decadent Cheesecake Brownies Recipe always delivers a crowd-pleasing combination of textures and flavors.

How it fits in today’s cooking

Today, the Decadent Cheesecake Brownies Recipe remains a staple for potlucks, birthdays, and cozy nights in. Its versatility makes it perfect for any occasion, whether you’re celebrating a holiday or just craving something indulgent. Modern bakers often tweak the recipe, using gluten-free flour or dairy-free cream cheese to suit dietary needs.

For those who love experimenting, pairing these brownies with a scoop of homemade ice cream takes them to the next level. Others might enjoy them alongside a warm cup of spiced coffee for a comforting dessert duo. No matter how you serve them, the Decadent Cheesecake Brownies Recipe continues to win hearts with its timeless appeal.

Taste and Texture

What makes it delicious

Decadent Cheesecake Brownies Recipe delivers a dreamy contrast of rich, fudgy chocolate and velvety cream cheese swirls. Each bite melts in your mouth, blending the deep cocoa flavor with a tangy, slightly sweet cheesecake layer. The brownie base stays dense and chewy, while the cheesecake topping adds a creamy smoothness that feels indulgent. Warm from the oven, the aroma of melted chocolate and vanilla fills the kitchen, making it impossible to resist. Whether you enjoy them chilled or fresh, Decadent Cheesecake Brownies Recipe offers a luxurious treat that satisfies every craving.

Boosting the flavor

Elevate your Decadent Cheesecake Brownies Recipe with a sprinkle of flaky sea salt for a sweet-salty balance. Alternatively, fold in dark chocolate chunks for extra gooey pockets or swirl in a spoonful of raspberry sauce to brighten the richness. For a nutty crunch, top with toasted pecans or drizzle with salted caramel glaze. A dusting of cocoa powder or a scoop of vanilla ice cream also turns these brownies into a showstopping dessert. Experiment with espresso powder in the batter to deepen the chocolate flavor without overpowering the cheesecake swirl.

Tips for Success

Best practices for results

Always use room-temperature cream cheese for the cheesecake swirl to ensure a smooth, lump-free texture in your Decadent Cheesecake Brownies Recipe. Meanwhile, line your baking pan with parchment paper for easy removal and clean edges. For the best fudgy results, avoid overmixing the brownie batter after adding flour, and bake just until the center passes the toothpick test. Finally, let the brownies cool completely before slicing to maintain their rich, layered structure.

Mistakes to avoid

One common error is overbaking the brownies, which dries them out. Instead, pull them from the oven when the edges are set but the center still jiggles slightly. Another mistake is skipping the chilling step for the cheesecake mixture, which can cause it to sink into the brownie layer. For more troubleshooting tips, check out our guide on fixing dense brownies. Also, if your swirls disappear during baking, gently fold them with a knife right after swirling—our perfect swirl techniques explain how to master this step.

Serving and Pairing Suggestions

How to serve this dish

Elevate your Decadent Cheesecake Brownies Recipe by serving them warm with a dusting of powdered sugar for a simple yet elegant touch. Alternatively, drizzle melted chocolate or caramel sauce over each slice to enhance the rich flavors. For special occasions, top them with fresh berries or a dollop of whipped cream to add color and freshness. These brownies shine at holiday gatherings, potlucks, or even as a sweet ending to a dinner party. Meanwhile, cutting them into small squares makes them perfect for casual brunches or afternoon tea.

What goes well with it

Pair your Decadent Cheesecake Brownies Recipe with a scoop of vanilla ice cream for a delightful contrast of warm and cool textures. If you prefer beverages, a cup of freshly brewed coffee or a glass of cold milk balances the richness perfectly. For a more indulgent experience, try serving them alongside our salted caramel sauce or a slice of our classic New York cheesecake. Each pairing enhances the creamy, chocolatey layers without overpowering the dessert.

What makes cheesecake brownies so decadent?

Decadent Cheesecake Brownies Recipe combines rich fudgy brownies with a creamy cheesecake swirl, creating a luxurious texture and flavor contrast. The addition of high-quality chocolate and full-fat cream cheese elevates the dessert to an indulgent treat.

Can I make Decadent Cheesecake Brownies without a mixer?

Yes! While a mixer makes the cheesecake layer smoother, you can make Decadent Cheesecake Brownies by hand-whisking the cream cheese with sugar until smooth. Just ensure all ingredients are at room temperature for easier mixing.

How do I get perfect swirls in my cheesecake brownies?

For beautiful swirls in your Decadent Cheesecake Brownies Recipe, dollop the cheesecake mixture over the brownie batter and use a toothpick or knife to gently swirl. Don’t overmix – just 3-4 passes creates the perfect marbled effect.

Can I freeze Decadent Cheesecake Brownies?

Absolutely! These Decadent Cheesecake Brownies freeze beautifully for up to 3 months. Wrap them tightly in plastic wrap and store in an airtight container. Thaw overnight in the refrigerator for best texture.

Best Mint Chocolate Chip Snowball Cookies – Holiday Treat

best-mint-chocolate-chip-cookies

“`html

Introduction

There’s something magical about holiday baking—the warmth of the oven, the scent of peppermint and chocolate filling the air, and the joy of sharing sweet treats with loved ones. If you’re craving a festive dessert that’s as delightful to make as it is to eat, these Mint Chocolate Chip Snowball Cookies – Festive Holiday Treat will steal the show. With their melt-in-your-mouth texture and refreshing minty flavor, they’re the perfect bite-sized indulgence for cookie exchanges, cozy gatherings, or even a quiet moment with a cup of cocoa. Plus, their snowy appearance makes them an instant holiday favorite.

About This Recipe

Mint Chocolate Chip Snowball Cookies – Festive Holiday Treat are buttery, crumbly cookies packed with cool mint and rich chocolate chips, then rolled in powdered sugar for a snowy finish. These cookies stand out because they combine the nostalgic charm of classic snowballs with the irresistible duo of mint and chocolate. Whether you’re a seasoned baker or just starting out, this recipe simplifies the process without sacrificing flavor. Moreover, they fit perfectly into holiday traditions, offering a twist on the usual sugar cookie or gingerbread. If you love easy yet impressive desserts, you’ll appreciate how these come together with minimal effort.

This recipe aligns with the cozy, approachable vibe of our blog, where we celebrate simple ingredients with big results. For more holiday inspiration, check out our holiday baking guide or explore our favorite Christmas cookie ideas. The Mint Chocolate Chip Snowball Cookies – Festive Holiday Treat also make a wonderful edible gift, so consider doubling the batch to spread some cheer. After all, nothing says “happy holidays” like a tin full of homemade cookies.

Why I Love This Recipe

These cookies hold a special place in my heart because they remind me of baking with my grandmother during the holidays. She always made classic snowballs, but one year, we decided to experiment by adding mint extract and chocolate chips. The result was so delicious that it became our new tradition. Now, every time I make Mint Chocolate Chip Snowball Cookies – Festive Holiday Treat, I feel that same warmth and creativity in the kitchen. They’re not just cookies—they’re little bites of joy and memory, perfect for sharing with the people who matter most.

“`

Health and Nutrition

Why it’s good for your body

Mint Chocolate Chip Snowball Cookies – Festive Holiday Treat offer more than just delicious flavor. First, the mint provides a refreshing burst that can aid digestion and even help soothe minor stomach discomfort. Additionally, dark chocolate chips pack antioxidants, which support heart health and may reduce inflammation. Meanwhile, the cookie base often includes wholesome ingredients like almond flour or oats, adding fiber and healthy fats.

Moreover, Mint Chocolate Chip Snowball Cookies – Festive Holiday Treat deliver a satisfying sweetness without excessive sugar, especially if you use natural sweeteners like honey or maple syrup. The combination of mint and chocolate also creates a balanced flavor profile, reducing the need for overloaded sugary toppings. Furthermore, these cookies can provide a quick energy boost thanks to their mix of carbs and fats, making them a smarter choice than heavily processed snacks.

Finally, the festive treat brings joy, which indirectly supports mental well-being. Sharing Mint Chocolate Chip Snowball Cookies – Festive Holiday Treat with loved ones fosters connection, and enjoying them mindfully can fit into a holistic approach to health. After all, food should nourish both body and soul.

How it fits in a healthy lifestyle

Mint Chocolate Chip Snowball Cookies – Festive Holiday Treat can easily align with balanced eating habits when enjoyed in moderation. For gluten-free diets, simply swap traditional flour for almond or coconut flour, keeping the texture light while adding protein. If heart health is a priority, opt for dark chocolate with at least 70% cacao to maximize antioxidants and minimize added sugars.

Pair these cookies with a protein-rich snack, like a handful of nuts, to stabilize blood sugar levels. You can also explore our guide on healthy holiday desserts for more festive ideas that don’t derail wellness goals. And if you’re curious about balancing indulgences with nutrition, check out our tips for mindful eating during the holidays. With smart choices, Mint Chocolate Chip Snowball Cookies – Festive Holiday Treat become a guilt-free part of your seasonal celebrations.

Print
clock clock iconcutlery cutlery iconflag flag iconfolder folder iconinstagram instagram iconpinterest pinterest iconfacebook facebook iconprint print iconsquares squares iconheart heart iconheart solid heart solid icon

Mint Chocolate Chip Snowball Cookies – Festive Holiday Treat


  • Author: Chef Emy

Description

Delightful mint chocolate chip cookies rolled in powdered sugar for a festive snowball effect.


Ingredients

Scale

For the Crust:

  • 1 cup unsalted butter, softened
  • 1/2 cup powdered sugar, plus more for rolling
  • 1 teaspoon peppermint extract
  • 2 1/4 cups all-purpose flour
  • 1/4 teaspoon salt
  • 3/4 cup mini chocolate chips
  • Green food coloring (optional)

Instructions

1. Prepare the Crust:

  1. Preheat oven to 350°F (175°C) and line baking sheets with parchment paper.
  2. In a large bowl, cream together butter and powdered sugar until light and fluffy. Mix in peppermint extract and food coloring if using.
  3. Gradually add flour and salt, mixing until just combined. Fold in mini chocolate chips.
  4. Roll dough into 1-inch balls and place on prepared baking sheets, spacing about 2 inches apart.
  5. Bake for 12-15 minutes until bottoms are lightly golden. Let cool for 5 minutes.
  6. While still warm, roll cookies in powdered sugar to coat completely. Let cool completely before serving.

Notes

You can customize the seasonings to taste.

How to Prepare This Dish

Steps and time-saving tips

Start by preheating your oven to 350°F and lining a baking sheet with parchment paper. Meanwhile, cream together softened butter and powdered sugar in a large bowl until light and fluffy. Add a splash of peppermint extract for that refreshing minty kick, then gradually mix in flour and a pinch of salt until the dough comes together. Gently fold in mini chocolate chips for bursts of rich flavor. Roll tablespoon-sized portions of dough into smooth balls and place them on the baking sheet, spacing them about an inch apart. Bake for 12-14 minutes until the edges turn lightly golden. Let the cookies cool slightly before rolling them in powdered sugar while still warm—this creates that classic snowball effect. For a time-saving hack, chill the dough for 15 minutes before baking to prevent spreading. If you’re short on time, skip the rolling step and simply dust the cooled cookies with powdered sugar instead.

Mistakes I’ve made and learned from

I once overmixed the dough, which made my Mint Chocolate Chip Snowball Cookies – Festive Holiday Treat dense instead of tender. Now, I stop mixing as soon as the flour disappears to keep them light. Another blunder? Using cold butter straight from the fridge—it clumped instead of creaming smoothly. Softening it first made all the difference. If your cookies spread too much, check out my guide on cookie baking tips for troubleshooting. And if you love festive flavors, don’t miss my holiday dessert ideas for more inspiration. Trust me, learning these lessons the hard way means you won’t have to!

Cultural Connection and Variations

Where this recipe comes from

Mint Chocolate Chip Snowball Cookies – Festive Holiday Treat carries a nostalgic charm, blending classic holiday flavors with a playful twist. These cookies likely draw inspiration from traditional Mexican wedding cookies or Russian tea cakes, which feature buttery dough rolled in powdered sugar. However, the addition of mint and chocolate chips gives them a modern, festive spin perfect for winter celebrations.

In some regions, bakers swap the mint extract for peppermint oil for a stronger kick, while others fold in crushed candy canes for extra crunch. Families often personalize the recipe too—some prefer dark chocolate chunks for richness, while others use white chocolate to balance the mint’s coolness. No matter the variation, Mint Chocolate Chip Snowball Cookies – Festive Holiday Treat always brings a touch of whimsy to cookie exchanges and cozy gatherings.

Interestingly, Scandinavian bakers sometimes add a hint of cardamom to their snowball cookies, creating a spiced contrast to the mint. Meanwhile, in the southern U.S., you might find a version with a bourbon-infused glaze. Whether served at a Christmas party or packed into tins as edible gifts, these cookies bridge traditions and tastes across cultures.

How it fits in today’s cooking

Today, Mint Chocolate Chip Snowball Cookies – Festive Holiday Treat remains a staple for bakers who crave both nostalgia and convenience. Their no-fuss shape—simply rolled and dusted—makes them ideal for busy hosts, while their vibrant flavor satisfies modern palates. Many home cooks now pair them with spiced hot chocolate for a cozy winter duo or include them in holiday dessert platters alongside other seasonal treats.

Health-conscious adaptations also thrive, with some bakers using almond flour or coconut sugar for a gluten-free or lower-glycemic version. Others add matcha powder for an earthy twist or vegan butter to keep the recipe dairy-free. Despite these tweaks, the cookies still deliver that signature melt-in-your-mouth texture and festive cheer. Whether you’re baking them for a cookie swap or just to savor with family, Mint Chocolate Chip Snowball Cookies – Festive Holiday Treat proves that some traditions only get better with time.

Taste and Texture

What makes it delicious

Mint Chocolate Chip Snowball Cookies – Festive Holiday Treat delivers a burst of cool, refreshing mint paired with rich, melty chocolate chips in every bite. The buttery cookie base crumbles delicately, while the peppermint extract infuses each morsel with a bright, invigorating aroma. Meanwhile, the chocolate chips add pockets of creamy sweetness, creating a delightful contrast to the crisp, powdered sugar coating. These cookies melt in your mouth, leaving behind a festive blend of warmth and freshness that makes them irresistible. Whether you savor them with tea or enjoy them as a standalone treat, Mint Chocolate Chip Snowball Cookies – Festive Holiday Treat brings holiday cheer to every bite.

Boosting the flavor

For an extra flavor boost, try swapping regular chocolate chips for dark chocolate chunks—their deeper cocoa notes balance the mint beautifully. Alternatively, drizzle melted white chocolate over the cooled cookies for a decadent finish. If you love bold minty flavors, add a pinch of finely crushed candy canes to the dough or roll the finished cookies in peppermint sugar. For more holiday baking inspiration, explore our holiday cookie recipes or discover how to perfect your cookie texture with our guide to baking chewy cookies. A little creativity goes a long way in making these cookies even more memorable!

Tips for Success

Best practices for results

Always chill the dough for at least 30 minutes before baking your Mint Chocolate Chip Snowball Cookies – Festive Holiday Treat. This prevents spreading and keeps them perfectly round. Additionally, use high-quality mint extract for a fresh, vibrant flavor. For even baking, rotate the tray halfway through and check for lightly golden bottoms. Finally, roll the warm cookies in powdered sugar right away, then again once cooled for a snowy finish.

Mistakes to avoid

Overmixing the dough can make your Mint Chocolate Chip Snowball Cookies – Festive Holiday Treat dense instead of tender. Instead, mix just until combined for the best texture. Another common error is skipping the parchment paper, which helps prevent sticking and ensures even browning. If your cookies spread too much, check out our guide on cookie baking tips for troubleshooting. Also, avoid adding extra mint extract—too much can overpower the chocolate. For more flavor-balancing tricks, explore our flavor pairing guide.

Serving and Pairing Suggestions

How to serve this dish

Make your Mint Chocolate Chip Snowball Cookies – Festive Holiday Treat shine by arranging them on a tiered dessert stand for holiday gatherings. Alternatively, place them in a festive tin or wrap them in cellophane with a ribbon for charming edible gifts. For a cozy touch, serve them warm alongside a scoop of vanilla ice cream, letting the minty chocolate flavors melt into creamy perfection. During cookie exchanges, highlight their snowy appearance by dusting them with extra powdered sugar right before serving.

What goes well with it

Pair these minty delights with a steaming mug of peppermint mocha to amplify the holiday flavors. The coffee’s richness balances the cookies’ sweetness while the peppermint ties everything together. For a refreshing contrast, try them with a cold glass of milk or a creamy hot white chocolate, which enhances the chocolate chips. If you’re hosting a dessert spread, layer them with other festive treats like gingerbread or sugar cookies for a colorful holiday platter.

Can I use peppermint extract instead of mint extract for Mint Chocolate Chip Snowball Cookies?

Yes, peppermint extract works perfectly for Mint Chocolate Chip Snowball Cookies – Festive Holiday Treat, but use half the amount since it’s stronger than regular mint extract. Adjust to taste for a balanced minty flavor that complements the chocolate chips.

How do I prevent my snowball cookies from spreading too much while baking?

Chill the dough for at least 30 minutes before baking to maintain the round shape of your Mint Chocolate Chip Snowball Cookies – Festive Holiday Treat. Also, avoid over-creaming the butter and sugar, as this can cause excess spreading.

What’s the best way to store Mint Chocolate Chip Snowball Cookies to keep them fresh?

Store these festive holiday treats in an airtight container at room temperature for up to 5 days. For longer freshness, freeze the Mint Chocolate Chip Snowball Cookies in a sealed bag for up to 3 months—thaw before serving.

Can I make these cookies gluten-free without changing the texture?

Absolutely! Substitute all-purpose flour with a 1:1 gluten-free baking blend for Mint Chocolate Chip Snowball Cookies – Festive Holiday Treat. The dough’s consistency and the cookies’ crumbly texture will remain nearly identical.

Best Pecan Pie Pudding Cake – Rich & Decadent Recipe

best-pecan-pie-pudding-cake

“`html

Introduction

There’s something magical about desserts that blend nostalgia with indulgence, and this Irresistible Pecan Pie Pudding Cake does exactly that. Imagine biting into a warm, gooey slice where the rich flavors of pecan pie melt into a soft, pudding-like cake. Whether you’re craving comfort food or need a showstopper for your next gathering, this recipe delivers. Plus, it’s easier to make than you might think. From the first bite to the last crumb, this dessert wraps you in cozy sweetness, making it impossible to resist.

About This Recipe

Irresistible Pecan Pie Pudding Cake combines the best of two worlds: the caramelized crunch of pecan pie and the tender, moist texture of pudding cake. Unlike traditional pecan pie, this dessert bakes into layers—a fluffy cake top with a luscious, syrupy filling underneath. The result? A dessert that feels both familiar and excitingly new. For anyone who loves Southern-inspired sweets, this recipe is a must-try. It fits perfectly with our blog’s focus on approachable yet impressive bakes, like our Decadent Chocolate Lava Cake or Cinnamon Roll Cheesecake.

What makes this recipe stand out is its versatility. You can serve it warm with ice cream for a decadent treat or enjoy it at room temperature as an afternoon snack. The ingredients are simple—think pantry staples like pecans, brown sugar, and vanilla—but the outcome feels gourmet. Moreover, the baking process is forgiving, so even beginners can achieve stunning results. If you’ve ever struggled with finicky pie crusts, this cake offers all the flavor without the stress. It’s the kind of dessert that earns compliments every time, whether you’re baking for family or guests.

Why I Love This Recipe

This Irresistible Pecan Pie Pudding Cake holds a special place in my heart because it reminds me of holiday gatherings at my grandma’s house. She always made pecan pie, but the first time I tried this pudding cake version, it became an instant favorite. The way the flavors deepen as it cools, the contrast between the crisp pecans and the velvety filling—it’s pure comfort. Now, I bake it for my own family, and it’s become a tradition. Every bite feels like a hug, and that’s why I keep coming back to this recipe year after year.

“`

Health and Nutrition

Why it’s good for your body

Irresistible Pecan Pie Pudding Cake packs more than just incredible flavor—it also offers surprising nutritional perks. First, pecans deliver heart-healthy monounsaturated fats, which help lower bad cholesterol while keeping you satisfied. Additionally, they provide antioxidants like vitamin E, which combat oxidative stress in your body. Since Irresistible Pecan Pie Pudding Cake includes these nuts, you get a tasty way to support your cardiovascular health.

Moreover, this dessert contains protein and fiber from ingredients like eggs and whole wheat flour (if used), helping stabilize blood sugar levels. Unlike overly processed sweets, Irresistible Pecan Pie Pudding Cake offers a more balanced energy boost. The natural sweetness from maple syrup or honey (if substituted) also means fewer refined sugars, reducing energy crashes later.

Finally, the dish includes metabolism-friendly spices like cinnamon, which may help regulate blood sugar. While it’s still a treat, Irresistible Pecan Pie Pudding Cake gives you nutrients you won’t find in typical store-bought desserts. Enjoy it knowing you’re treating your body right—without sacrificing indulgence.

How it fits in a healthy lifestyle

Irresistible Pecan Pie Pudding Cake fits perfectly into a balanced diet when enjoyed mindfully. For gluten-free diets, simply swap regular flour for almond or oat flour—it’s an easy tweak that keeps the texture rich. If you’re watching sugar intake, reduce the sweetener slightly or opt for natural alternatives like dates, as suggested in our guide to healthy baking substitutes.

Pairing a small portion with protein-rich Greek yogurt or fresh fruit can turn it into a satisfying snack rather than an occasional dessert. For heart-conscious eaters, the pecans’ healthy fats align with Mediterranean diet principles, which our heart-healthy desserts post explores further. Remember, balance is key—indulge in moderation while prioritizing nutrient-dense meals the rest of the day.

Print
clock clock iconcutlery cutlery iconflag flag iconfolder folder iconinstagram instagram iconpinterest pinterest iconfacebook facebook iconprint print iconsquares squares iconheart heart iconheart solid heart solid icon

Irresistible Pecan Pie Pudding Cake


  • Author: Chef Emy

Description

A decadent dessert combining the rich flavors of pecan pie with a moist pudding cake texture.


Ingredients

Scale

For the Crust:

  • 1 cup all-purpose flour
  • 1 cup granulated sugar
  • 2 teaspoons baking powder
  • 1/2 teaspoon salt
  • 1/2 cup milk
  • 2 tablespoons melted butter
  • 1 teaspoon vanilla extract
  • 1 cup chopped pecans
  • 1 cup brown sugar
  • 1 3/4 cups hot water

Instructions

1. Prepare the Crust:

  1. Preheat oven to 350°F (175°C). Grease a 9-inch square baking dish.
  2. In a medium bowl, whisk together flour, granulated sugar, baking powder, and salt.
  3. Stir in milk, melted butter, and vanilla extract until just combined. Fold in chopped pecans.
  4. Spread batter evenly in the prepared baking dish.
  5. Sprinkle brown sugar evenly over the batter. Carefully pour hot water over the top (do not stir).
  6. Bake for 35-40 minutes until the top is golden and the pudding layer forms beneath.
  7. Let cool for 10 minutes before serving warm.

Notes

You can customize the seasonings to taste.

“`html

How to Prepare This Dish

Steps and time-saving tips

Start by preheating your oven to 350°F and greasing a 9×13-inch baking dish. Next, whisk together the dry ingredients—flour, sugar, and baking powder—in a large bowl. In a separate bowl, mix the wet ingredients like eggs, milk, and melted butter until smooth. Gradually fold the wet mixture into the dry ingredients, stirring just until combined. Meanwhile, prepare the pecan pie topping by combining corn syrup, brown sugar, and chopped pecans in a saucepan over low heat. Stir until the sugar dissolves, then drizzle this glossy mixture over the cake batter. Bake for 35-40 minutes until the edges turn golden and the center sets. For a time-saving hack, use a store-bought pecan pie filling if you’re in a pinch, but homemade delivers the best flavor. Let the Irresistible Pecan Pie Pudding Cake cool slightly before serving to allow the layers to firm up. Pro tip: Warm leftovers for 10 seconds in the microwave to revive that gooey texture.

Mistakes I’ve made and learned from

Early on, I overmixed the batter, which made the cake dense instead of light. Now, I stir just until the flour disappears, and the texture is perfect every time. Another blunder? Burning the pecan topping because I walked away while it simmered. Stand by the stove and stir constantly—it takes only 3 minutes. If your pecans toast too quickly, try lowering the heat as I learned from my perfect pecan recipes guide. Also, don’t skip greasing the pan; I once had to serve a crumbled cake (tasty but messy!). For more foolproof baking, check out my baking hacks for beginners. Trust me, these small tweaks make the Irresistible Pecan Pie Pudding Cake foolproof.

“`

Cultural Connection and Variations

Where this recipe comes from

Irresistible Pecan Pie Pudding Cake feels like a warm hug from Southern kitchens, where pecan pies reign supreme. This dessert blends the rich, gooey goodness of pecan pie with the comforting texture of pudding cake, creating something truly special. Many families in the South serve it during holidays, especially Thanksgiving, where pecans shine as a seasonal staple. However, some bakers add bourbon or maple syrup for a deeper flavor, while others keep it classic with just vanilla and brown sugar.

Across the globe, variations pop up in surprising ways. In Mexico, cooks might infuse the cake with cinnamon or drizzle it with cajeta, a caramel-like sauce. Meanwhile, Australian versions sometimes swap pecans for macadamias, embracing local ingredients. Even within the U.S., regional twists emerge. In Texas, for example, Irresistible Pecan Pie Pudding Cake often gets a spicy kick with a pinch of chili powder. No matter where it’s made, this dessert always brings people together, whether at potlucks or cozy family dinners.

How it fits in today’s cooking

Today, Irresistible Pecan Pie Pudding Cake holds its own as both a nostalgic treat and a modern favorite. Busy home cooks love how it combines two beloved desserts into one easy-to-make dish. Many even prep it ahead for holiday gatherings, pairing it with Decadent Chocolate Mousse Cake for a showstopping dessert spread. Others adapt it for smaller batches, baking it in ramekins for weeknight indulgence.

Seasonal versatility keeps it relevant, too. In fall, it’s a star at Thanksgiving feasts, while summer picnics might feature a chilled version topped with whipped cream. Health-conscious bakers even experiment with gluten-free flours or coconut sugar, proving this cake can evolve with dietary trends. For more inspiration, check out our guide to Classic Vanilla Cupcake Recipes, which shares the same timeless appeal. Whether you stick to tradition or put your own spin on it, Irresistible Pecan Pie Pudding Cake never goes out of style.

Taste and Texture

What makes it delicious

Irresistible Pecan Pie Pudding Cake delivers a symphony of flavors and textures in every bite. The rich, buttery cake base melts in your mouth, while the gooey pecan pie filling adds a luscious, caramel-like sweetness. Toasted pecans provide a satisfying crunch, contrasting perfectly with the velvety pudding layer. Warm notes of vanilla and cinnamon dance on your tongue, making each forkful feel like a cozy hug. The aroma alone—a mix of brown sugar, toasted nuts, and baked goodness—will have everyone hovering near the oven. Whether served warm or chilled, Irresistible Pecan Pie Pudding Cake balances decadence and comfort effortlessly.

Boosting the flavor

For an extra flavor kick, drizzle warm caramel sauce over your Irresistible Pecan Pie Pudding Cake just before serving. Alternatively, swap regular pecans for candied ones to amplify the sweetness and texture. A sprinkle of flaky sea salt elevates the caramel notes, while a dollop of whipped cream adds lightness. If you love spice, try a pinch of nutmeg or a splash of bourbon in the batter. For more dessert inspiration, check out our homemade caramel sauce or explore creative twists with our spiced pecan recipes. Small tweaks make this dessert even more unforgettable.

Tips for Success

Best practices for results

Always preheat your oven before baking Irresistible Pecan Pie Pudding Cake to ensure even cooking. For the best texture, use room-temperature ingredients, especially butter and eggs, since they blend more smoothly. Additionally, measure your flour correctly by spooning it into the measuring cup and leveling it off—this prevents a dense cake. Finally, let the cake cool slightly before serving so the flavors fully develop.

Mistakes to avoid

Avoid overmixing the batter once you add the dry ingredients, as this can make Irresistible Pecan Pie Pudding Cake tough. Instead, gently fold until just combined. Another common mistake is skipping the parchment paper lining, which helps with easy removal and clean slices. For more baking essentials, check out our guide on must-have baking tools. Also, don’t rush the cooling process—letting the cake set properly ensures the perfect pudding-like consistency. If you’re unsure about doneness, our testing baked goods article has helpful tips.

Serving and Pairing Suggestions

How to serve this dish

For a stunning presentation, slice Irresistible Pecan Pie Pudding Cake into generous squares and plate them with a drizzle of caramel sauce. Meanwhile, a scoop of vanilla ice cream on the side adds both visual appeal and creamy contrast. Alternatively, serve it warm in individual ramekins for a cozy, rustic feel. Since this dessert shines during holidays, consider garnishing with toasted pecans or a dusting of powdered sugar for festive flair. Whether you’re hosting a brunch or a dinner party, Irresistible Pecan Pie Pudding Cake always steals the spotlight.

What goes well with it

A hot cup of spiced chai tea perfectly balances the rich sweetness of Irresistible Pecan Pie Pudding Cake, while a cold glass of bourbon-spiked eggnog adds a decadent twist. If you prefer something lighter, pair it with our Homemade Vanilla Whipped Cream for a fluffy, airy contrast. For a savory counterpoint, try serving it alongside our Salted Caramel Cheesecake Bites to create a delightful dessert spread. Each pairing enhances the warm, nutty flavors of this irresistible treat.

What makes Irresistible Pecan Pie Pudding Cake so moist?

Irresistible Pecan Pie Pudding Cake gets its moist texture from a combination of buttermilk, brown sugar, and the natural caramelization of pecans during baking. The pudding layer also seeps into the cake as it cools, creating a rich, gooey consistency that’s hard to resist.

Can I use store-bought caramel sauce for Irresistible Pecan Pie Pudding Cake?

Yes, store-bought caramel sauce works in a pinch, but homemade caramel enhances the flavor of Irresistible Pecan Pie Pudding Cake. If using store-bought, opt for a thick, high-quality sauce to mimic the richness of the traditional recipe.

How do I store Irresistible Pecan Pie Pudding Cake to keep it fresh?

Store Irresistible Pecan Pie Pudding Cake covered at room temperature for up to 2 days or refrigerate for up to 5 days. For best results, reheat slices briefly in the microwave to restore the pudding-like texture.

Can I make Irresistible Pecan Pie Pudding Cake gluten-free?

Absolutely! Substitute all-purpose flour with a 1:1 gluten-free baking blend for Irresistible Pecan Pie Pudding Cake. Ensure your other ingredients, like vanilla extract and caramel sauce, are gluten-free certified for safety.