Best Fresh Strawberry Cake – Heavenly Homemade Recipe

best-fresh-strawberry-cake

Introduction

There’s something undeniably special about a dessert that captures the essence of summer in every bite. That’s exactly why I’m thrilled to share my Heavenly Fresh Strawberry Cake Recipe with you today. Whether you’re celebrating a special occasion or simply craving a slice of sunshine, this cake delivers pure joy. With its tender crumb, juicy strawberries, and dreamy frosting, it’s the kind of treat that brings people together—and trust me, one bite will have everyone asking for seconds.

The Heavenly Fresh Strawberry Cake Recipe is more than just a dessert; it’s a celebration of seasonal flavors and homemade goodness. Unlike store-bought cakes, this version bursts with real strawberry flavor, thanks to fresh berries folded into the batter and layered between clouds of whipped cream. Perfect for birthdays, picnics, or even a quiet afternoon pick-me-up, it’s versatile enough for any occasion. If you’ve ever struggled with dry or bland strawberry cakes, this recipe solves those problems with a moist, tender texture and balanced sweetness. Plus, it aligns perfectly with brekcakes.com’s mission to share approachable, crowd-pleasing recipes that feel like a hug on a plate. For more inspiration, check out my Best Vanilla Cake Recipe or explore tips for decorating cakes like a pro.

Why I Love This Recipe

This Heavenly Fresh Strawberry Cake Recipe holds a special place in my heart because it reminds me of my grandmother’s summer gatherings. She always made a similar cake for family reunions, and the moment I taste it, I’m transported back to her sunlit kitchen. What I adore most is how the strawberries shine without overpowering the cake—each layer feels like a love letter to the season. Every time I bake it, I’m reminded that the simplest ingredients, handled with care, can create something truly magical.

Health and Nutrition

Why it’s good for your body

Heavenly Fresh Strawberry Cake Recipe packs a nutritious punch while satisfying your sweet tooth. First, fresh strawberries deliver a burst of antioxidants, which help combat inflammation and support heart health. Additionally, the natural sweetness of strawberries reduces the need for excessive refined sugar, making this dessert a smarter choice. Moreover, strawberries provide a hefty dose of vitamin C, boosting your immune system and promoting glowing skin.

Beyond the berries, Heavenly Fresh Strawberry Cake Recipe often incorporates whole-grain flour or almond flour alternatives, adding fiber and healthy fats. Fiber keeps you full longer, while healthy fats support brain function. Furthermore, many versions use Greek yogurt or buttermilk, which contribute probiotics for gut health. Even better, these ingredients create a moist, tender crumb without relying on heavy creams or excessive butter.

Finally, Heavenly Fresh Strawberry Cake Recipe balances indulgence with nourishment. Whether you enjoy it as an occasional treat or a celebratory dessert, you can feel good about the wholesome ingredients. After all, desserts like this prove that eating well doesn’t mean sacrificing flavor.

How it fits in a healthy lifestyle

Heavenly Fresh Strawberry Cake Recipe fits seamlessly into a balanced diet. For gluten-free eaters, simply swap traditional flour for almond or oat flour, keeping the texture light and delicious. If you’re watching your sugar intake, reduce the sweetener slightly and let the strawberries shine. Pair a slice with a protein-rich snack, like a handful of nuts, to stabilize blood sugar levels.

This recipe also aligns with heart-healthy goals. Strawberries support cardiovascular health, and using olive oil instead of butter can enhance the benefits. For more tips on baking with better-for-you ingredients, check out our guide to healthy baking substitutes. And if you love fruit-forward desserts, explore our summer fruit recipes for more inspiration. Heavenly Fresh Strawberry Cake Recipe proves that mindful eating can still include moments of joy.

Print

clock clock iconcutlery cutlery iconflag flag iconfolder folder iconinstagram instagram iconpinterest pinterest iconfacebook facebook iconprint print iconsquares squares iconheart heart iconheart solid heart solid icon

Heavenly Fresh Strawberry Cake


  • Author:
    Chef Emy

Description

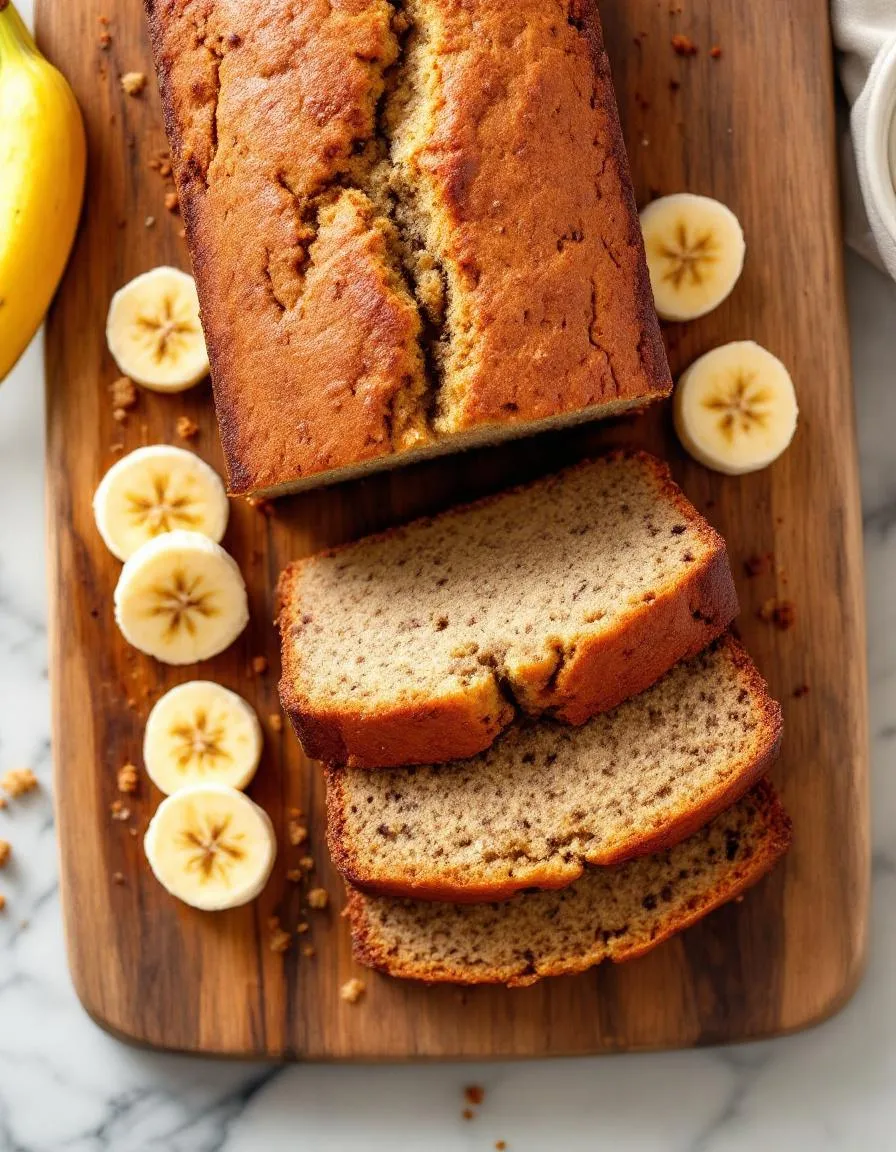
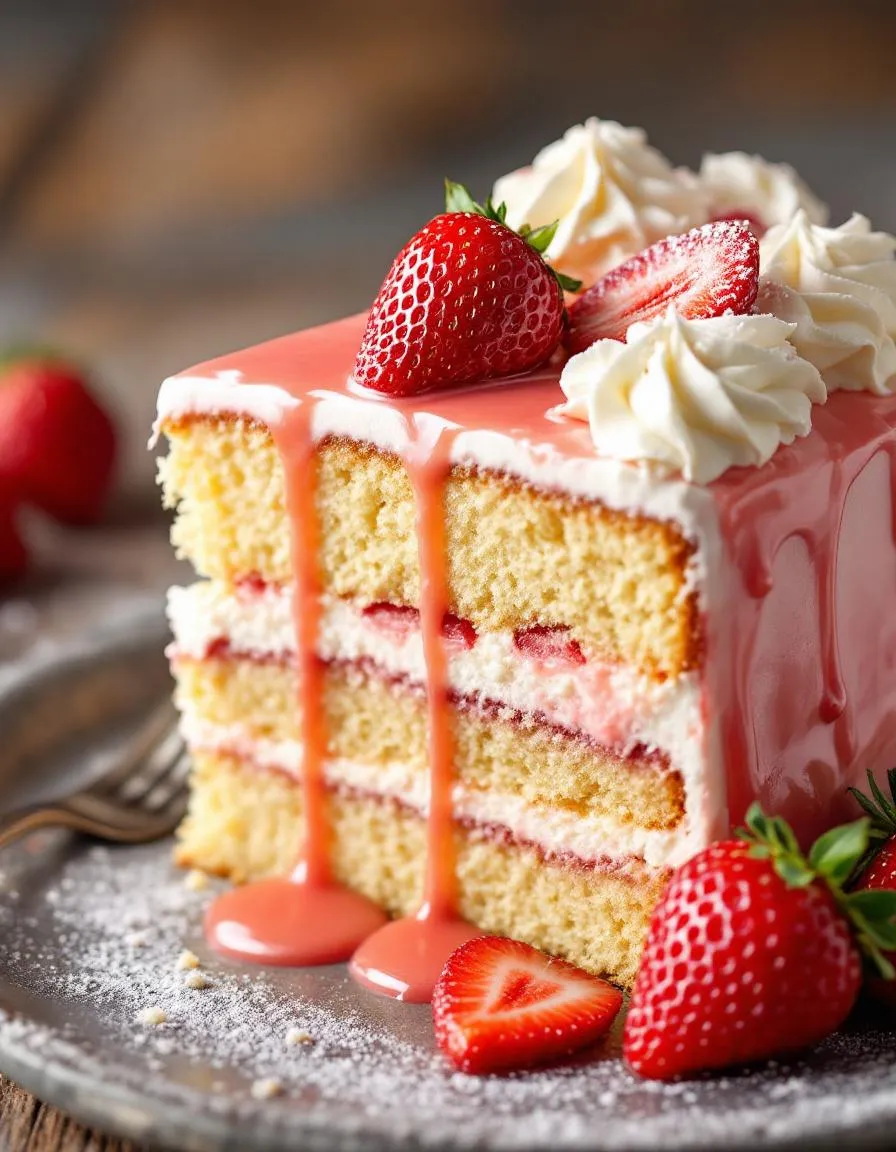
A light and fluffy strawberry cake bursting with fresh strawberry flavor, perfect for any occasion.
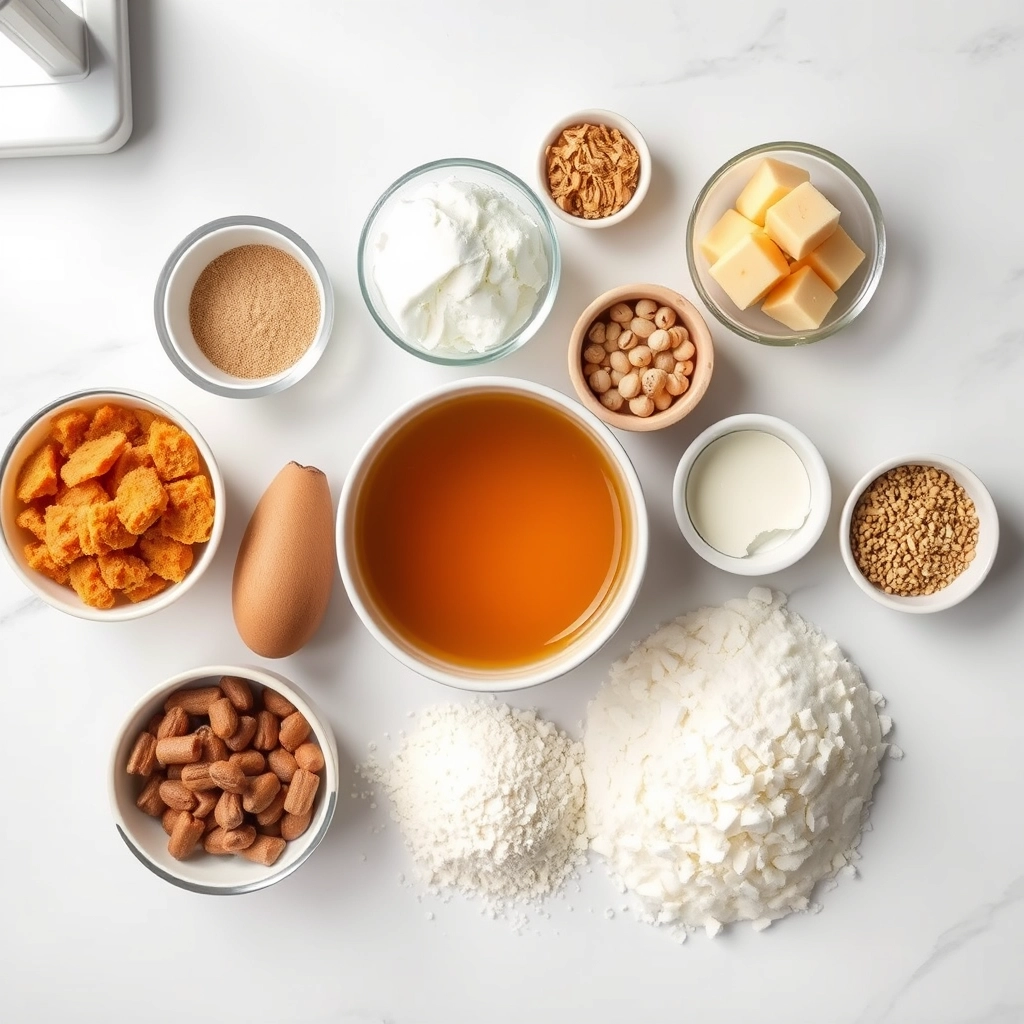
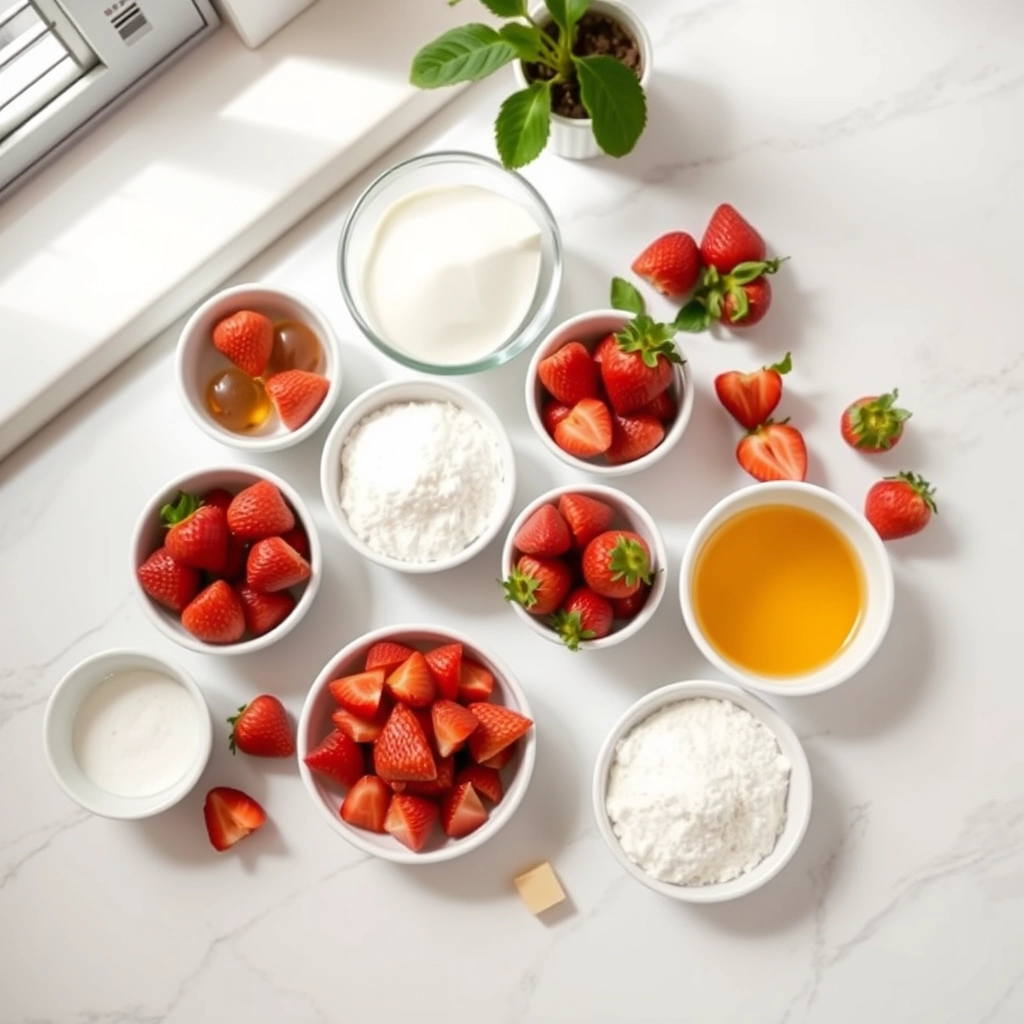

Ingredients


Scale

For the Crust:

  • 2 cups all-purpose flour
  • 1 1/2 cups granulated sugar
  • 1/2 cup unsalted butter, softened
  • 2 large eggs
  • 1 cup fresh strawberries, pureed
  • 1/2 cup whole milk
  • 2 tsp baking powder
  • 1 tsp vanilla extract
  • 1/4 tsp salt


Instructions

1. Prepare the Crust:

  1. Preheat oven to 350°F (175°C). Grease and flour a 9-inch round cake pan.
  2. In a large bowl, cream together butter and sugar until light and fluffy. Beat in eggs one at a time, then stir in vanilla extract.
  3. Mix in the strawberry puree. Combine flour, baking powder, and salt; gradually add to the butter mixture, alternating with milk.
  4. Pour batter into the prepared pan. Bake for 30-35 minutes or until a toothpick inserted into the center comes out clean.
  5. Allow cake to cool in the pan for 10 minutes, then transfer to a wire rack to cool completely.

Notes

You can customize the seasonings to taste.


How to Prepare This Dish

Steps and time-saving tips

Start by preheating your oven to 350°F and greasing two 9-inch cake pans. Meanwhile, whisk together the dry ingredients—flour, baking powder, and salt—in a large bowl. In another bowl, cream the butter and sugar until light and fluffy, then beat in the eggs one at a time. Alternate adding the dry mixture and buttermilk to the butter mixture, stirring just until combined. Fold in the diced strawberries gently to keep the batter airy. Divide the batter evenly between the pans and bake for 25-30 minutes, or until a toothpick comes out clean. Let the cakes cool completely before frosting.

For the frosting, whip the cream cheese and butter until smooth, then gradually add powdered sugar and vanilla. Spread a generous layer between the cake tiers and over the top. Finally, decorate with fresh strawberry slices for a stunning finish. To save time, you can bake the cakes a day ahead and store them wrapped tightly at room temperature. Another tip: freeze the strawberries before dicing them to prevent excess moisture in the batter. If you’re short on time, a store-bought vanilla cake mix works in a pinch—just fold in the strawberries and reduce the baking time slightly.

Mistakes I’ve made and learned from

I once rushed the cooling process and tried to frost a warm cake—big mistake! The frosting melted into a gooey mess, and I had to scrape it all off and start over. Now, I always let the layers cool for at least an hour, or I pop them in the fridge for 20 minutes if I’m impatient. Another lesson? Overmixing the batter. I used to stir vigorously, thinking it would make the Heavenly Fresh Strawberry Cake Recipe fluffier, but it resulted in a dense, tough texture. Gentle folding is key. For more cake-baking wisdom, check out my guides on common cake mistakes and frosting tips. Trust me, learning these the hard way saved me countless kitchen disasters!

Cultural Connection and Variations

Where this recipe comes from

The Heavenly Fresh Strawberry Cake Recipe whispers of summer picnics, family gatherings, and sun-ripened berries straight from the patch. While its exact origins blur like jam on warm bread, many tie it to Southern U.S. traditions where strawberries thrive in late spring. Generations of home bakers have layered it with cream, tucked it into trifles, or served it bare with a dusting of sugar to let the fruit shine.

Across the globe, variations bloom like strawberry flowers. In Japan, they might fold matcha into the batter for an earthy contrast. Meanwhile, French patisseries often soak the sponge in syrup and crown it with Chantilly cream. Even within families, secrets twist the tale—maybe a splash of citrus zest or a swap for brown sugar. No matter the tweaks, the Heavenly Fresh Strawberry Cake Recipe always centers on celebrating the berry’s fleeting sweetness.

How it fits in today’s cooking

Today, this cake bridges nostalgia and modern ease. Busy bakers streamline it with no-bake shortcuts, while food bloggers riff with gluten-free flour or coconut whipped cream. Yet it still stars at weddings, showers, and summer parties, proving some traditions only grow sweeter.

Seasonal eating trends also give it new life. Farmers’ market fans pile on local berries, and meal preppers stash slices for weekday joy. Whether you bake it classic or twist it trendy, the Heavenly Fresh Strawberry Cake Recipe stays a timeless bite of sunshine.

Taste and Texture

What makes it delicious

The Heavenly Fresh Strawberry Cake Recipe delivers a burst of juicy sweetness with every bite. Ripe strawberries infuse the moist, tender crumb with a vibrant, fruity flavor, while a hint of vanilla adds warmth. The cream cheese frosting balances the tangy richness with a velvety smoothness, creating a luscious contrast. Meanwhile, fresh strawberry slices on top add a refreshing crunch. As you savor it, the aroma of baked strawberries and buttery cake fills the air, making the Heavenly Fresh Strawberry Cake Recipe irresistible from the first whiff to the last crumb.

Boosting the flavor

For an extra flavor boost, try folding lemon zest into the batter to brighten the strawberries. Alternatively, drizzle a homemade strawberry reduction sauce over each slice for deeper berry intensity. If you love texture, sprinkle toasted almond slivers on top for a nutty crunch. Pairing this cake with a scoop of vanilla bean ice cream also elevates the experience, blending creamy coolness with the cake’s soft warmth. With these tweaks, the Heavenly Fresh Strawberry Cake Recipe becomes even more unforgettable.

Tips for Success

Best practices for results

Always use fresh, ripe strawberries for the Heavenly Fresh Strawberry Cake Recipe to ensure the best flavor and natural sweetness. Meanwhile, measure your flour correctly by spooning it into the cup and leveling it off—this prevents a dense cake. Additionally, chill your cake layers before frosting to avoid crumbs and achieve smooth, professional results. For extra moisture, brush the layers with a simple syrup before assembling. Finally, let the cake rest at room temperature for 30 minutes before serving to enhance the texture.

Mistakes to avoid

One common mistake is overmixing the batter, which can make the Heavenly Fresh Strawberry Cake Recipe tough instead of tender. Instead, mix just until the ingredients combine. Another error is using cold ingredients straight from the fridge—always bring eggs and butter to room temperature first for even mixing. If your strawberries release too much juice, pat them dry lightly to prevent a soggy cake. For more frosting tips, check out our guide on how to frost like a pro. Also, avoid overbaking by testing with a toothpick a few minutes early—our baking time hacks can help you nail the perfect bake every time.

Serving and Pairing Suggestions

How to serve this dish

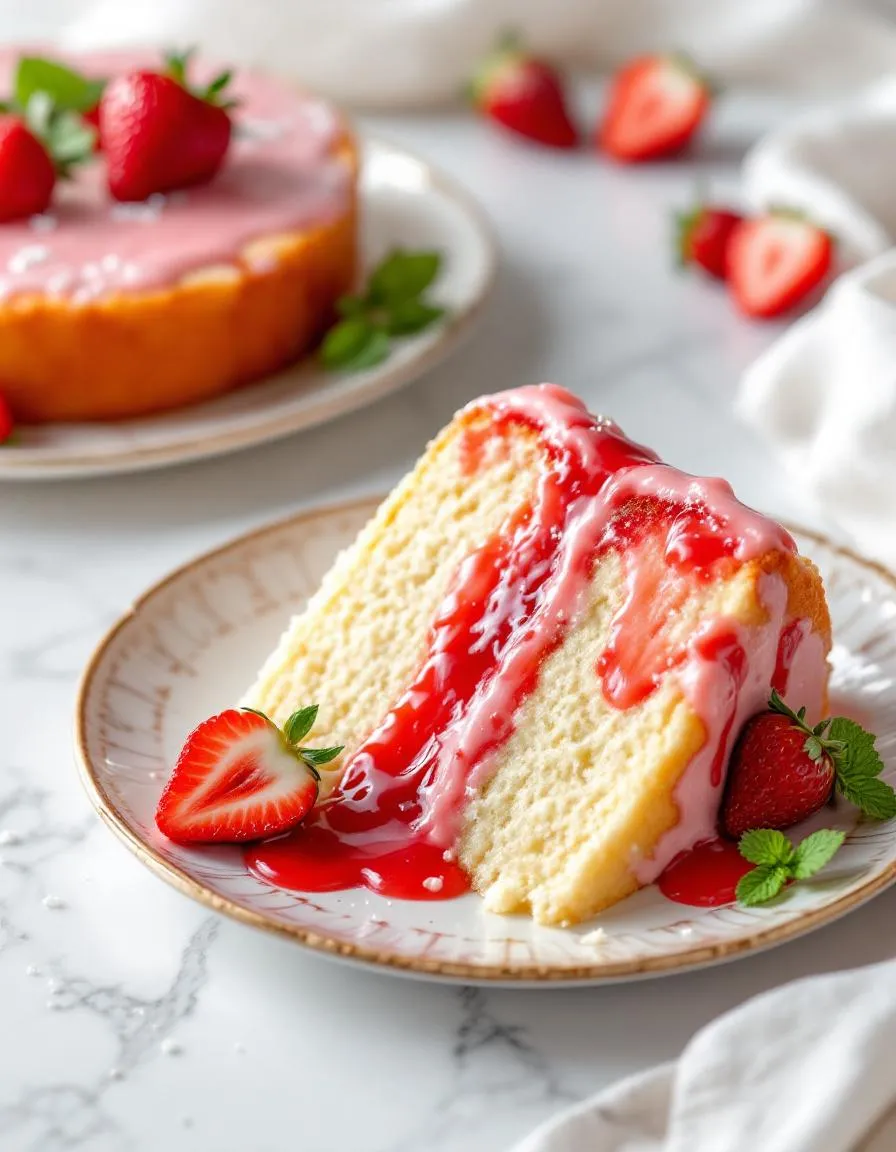
Showcase your Heavenly Fresh Strawberry Cake Recipe by slicing it into generous wedges and arranging them on a vintage cake stand for a charming touch. For special occasions, top each slice with a dollop of whipped cream and fresh strawberry halves to enhance both flavor and presentation. Meanwhile, if you’re serving it at a summer brunch, pair individual portions with a light dusting of powdered sugar for an elegant finish. Whether you’re celebrating a birthday or simply treating yourself, this cake shines as the centerpiece of any dessert table.

What goes well with it

Elevate your Heavenly Fresh Strawberry Cake Recipe by serving it with a chilled glass of sparkling rosé, which balances the cake’s sweetness with crisp acidity. Alternatively, a scoop of vanilla bean ice cream adds a creamy contrast that melts perfectly into each bite. For a refreshing twist, try pairing it with our Lemon Mint Iced Tea, as the citrusy notes highlight the strawberries’ natural brightness. If you’re planning a full dessert spread, our Classic Vanilla Cupcakes make a delightful companion, offering a subtle flavor that lets the strawberry cake take center stage.

What makes Heavenly Fresh Strawberry Cake Recipe different from other strawberry cakes?

The Heavenly Fresh Strawberry Cake Recipe stands out because it uses real, fresh strawberries in both the batter and frosting for an intense natural flavor. Unlike recipes relying on extracts or artificial flavors, this cake delivers a bright, fruity taste with a moist texture.

Can I use frozen strawberries for Heavenly Fresh Strawberry Cake Recipe?

Yes, you can substitute frozen strawberries if fresh ones aren’t available, but thaw and drain them thoroughly to avoid excess moisture. For best results, pat them dry before folding into the Heavenly Fresh Strawberry Cake Recipe batter to maintain the perfect consistency.

How do I prevent my Heavenly Fresh Strawberry Cake from becoming soggy?

To avoid a soggy cake, toss diced strawberries in a light dusting of flour before adding them to the batter. This trick helps suspend the fruit evenly and keeps the Heavenly Fresh Strawberry Cake Recipe perfectly moist without excess liquid.

What’s the best frosting to pair with Heavenly Fresh Strawberry Cake?

A classic cream cheese frosting complements the Heavenly Fresh Strawberry Cake Recipe beautifully, balancing the tartness of the strawberries. For a lighter option, try whipped cream frosting with a hint of vanilla to let the fresh fruit flavor shine.

Best Banana Bread Recipe – Moist and Irresistible

best-banana-bread-recipe

Introduction

There’s something undeniably comforting about the aroma of freshly baked banana bread wafting through the house. Whether you’re a seasoned baker or just starting out, this Irresistible Banana Bread Recipe will quickly become a staple in your kitchen. Not only does it deliver moist, flavorful perfection every time, but it also brings people together—because few things say “home” like a warm slice straight from the oven. Plus, it’s the perfect way to use up those overripe bananas sitting on your counter!

Banana bread holds a special place in the world of baking. It’s forgiving, versatile, and universally loved. This Irresistible Banana Bread Recipe stands out because it strikes the ideal balance between sweetness and texture, with a tender crumb and just the right amount of richness. Unlike store-bought versions, this recipe lets you control the ingredients, ensuring every bite is wholesome and satisfying. Whether you enjoy it plain, with a smear of butter, or even toasted for extra crunch, it’s a treat that never disappoints. At brekcakes.com, we celebrate recipes that are both approachable and exceptional, and this one fits perfectly. If you’re looking for more baking inspiration, check out our Classic Vanilla Cupcakes or explore our guide to Baking Tips for Beginners.

Why I Love This Recipe

This Irresistible Banana Bread Recipe isn’t just a recipe to me—it’s a memory. I baked my first loaf with my grandmother, who taught me that baking is as much about patience as it is about passion. Every time I make it, I’m reminded of her laughter and the way she’d sneak an extra handful of chocolate chips into the batter. Now, I love sharing it with my own family, watching their faces light up with that first bite. It’s more than bread; it’s a little piece of love, baked to perfection.

Health and Nutrition

Why it’s good for your body

Irresistible Banana Bread Recipe packs a nutritious punch while satisfying your sweet tooth. First, ripe bananas provide potassium, which helps regulate blood pressure and supports muscle function. Additionally, they offer fiber to aid digestion and keep you feeling full longer. Because Irresistible Banana Bread Recipe uses whole wheat flour, it delivers more fiber and nutrients than traditional refined flour versions.

Moreover, this recipe includes healthy fats from ingredients like olive oil or nuts, which promote heart health. Unlike many store-bought desserts, Irresistible Banana Bread Recipe skips excessive processed sugars, relying instead on natural sweetness from bananas and a touch of honey or maple syrup. As a result, it helps stabilize energy levels without causing sugar crashes.

Finally, eggs or Greek yogurt in the recipe add protein, making it a more balanced snack. Whether you enjoy it for breakfast or an afternoon pick-me-up, Irresistible Banana Bread Recipe fuels your body with wholesome ingredients. Plus, the antioxidants from bananas and optional add-ins like walnuts boost overall wellness.

How it fits in a healthy lifestyle

Irresistible Banana Bread Recipe fits seamlessly into a balanced diet. For gluten-free eaters, simply swap the flour for a gluten-free blend, and you’ll still enjoy the same moist texture. If you’re aiming for heart-healthy choices, the recipe’s unsaturated fats and fiber support cardiovascular health. Pair a slice with a protein source like almond butter or Greek yogurt for a satisfying, well-rounded snack.

This recipe also aligns with mindful eating habits. Instead of reaching for processed sweets, you can bake a batch of Irresistible Banana Bread Recipe ahead of time for quick, wholesome portions. For more healthy baking ideas, check out our gluten-free dessert guide or explore meal-prep snack tips. Whether you’re fueling a busy day or treating yourself, this banana bread keeps nutrition simple and delicious.

Print

clock clock iconcutlery cutlery iconflag flag iconfolder folder iconinstagram instagram iconpinterest pinterest iconfacebook facebook iconprint print iconsquares squares iconheart heart iconheart solid heart solid icon

Irresistible Banana Bread


  • Author:
    Chef Emy

Description

A moist and flavorful banana bread that’s perfect for breakfast or a snack.


Ingredients


Scale

For the Crust:

  • 3 ripe bananas, mashed
  • 1/3 cup melted butter
  • 1 teaspoon vanilla extract
  • 1 egg
  • 3/4 cup sugar
  • 1 1/2 cups all-purpose flour
  • 1 teaspoon baking soda
  • 1/2 teaspoon salt


Instructions

1. Prepare the Crust:

  1. Preheat oven to 350°F (175°C) and grease a 4×8 inch loaf pan.
  2. In a mixing bowl, combine mashed bananas, melted butter, vanilla extract, and egg. Mix well.
  3. Stir in sugar, flour, baking soda, and salt until just combined.
  4. Pour batter into the prepared loaf pan and bake for 50-60 minutes, or until a toothpick inserted comes out clean.
  5. Let cool in pan for 10 minutes, then transfer to a wire rack to cool completely.

Notes

You can customize the seasonings to taste.


How to Prepare This Dish

Steps and time-saving tips

Start by preheating your oven to 350°F and greasing a 9×5-inch loaf pan. Meanwhile, mash three ripe bananas in a large bowl until smooth, leaving a few small chunks for texture. Next, whisk together the melted butter and sugar until creamy, then beat in the eggs and vanilla. Gradually fold the dry ingredients—flour, baking soda, and salt—into the wet mixture, but avoid overmixing to keep the Irresistible Banana Bread Recipe tender. For a quicker cleanup, measure your dry ingredients directly into a sifter or use a fork to blend them beforehand. If you’re short on time, skip the mixer and stir everything by hand—it works just as well. Pour the batter into the prepared pan and bake for 50-60 minutes, or until a toothpick comes out clean. Let it cool slightly before slicing, though I know resisting the aroma is tough. For an extra flourish, drizzle with honey or sprinkle walnuts on top before baking.

Mistakes I’ve made and learned from

Early on, I rushed the banana mashing and ended up with uneven pockets of sweetness in my Irresistible Banana Bread Recipe. Now, I take an extra minute to mash thoroughly—or even use a fork for control. Another blunder? Overbaking. I’d ignore visual cues, relying solely on time, which led to dry loaves. A game-changer was learning the perfect bake times for quick breads, which taught me to check at the 45-minute mark. And once, I swapped baking soda for powder (oops!), resulting in a dense brick. Now, I always double-check labels, just like I do with my essential baking tools. Trust me, these small tweaks make all the difference.

Cultural Connection and Variations

Where this recipe comes from

The Irresistible Banana Bread Recipe we know and love today has roots in resourcefulness. During the Great Depression, home cooks refused to let overripe bananas go to waste. Instead, they transformed them into a moist, sweet loaf that became a staple. Over time, this humble dish traveled across borders, picking up unique twists along the way. In the Caribbean, bakers often add rum or coconut for a tropical flair. Meanwhile, in Australia, they might toss in macadamia nuts for extra crunch.

In my family, the Irresistible Banana Bread Recipe always meant Sunday mornings. My grandma swore by a dash of cinnamon and a handful of chocolate chips, claiming it made the loaf “sing.” Some regions, like the American South, prefer a denser texture with buttermilk, while others opt for a lighter crumb with yogurt. No matter the variation, the magic lies in those spotty bananas—nature’s perfect sweetener.

How it fits in today’s cooking

Today, the Irresistible Banana Bread Recipe still holds a special place in kitchens worldwide. Busy parents bake it as a lunchbox treat, while health-conscious cooks swap flour for almond meal or add flaxseeds. It’s also a star during holidays, especially when paired with spiced chai or a scoop of homemade vanilla ice cream. Modern bakers even turn it into muffins or layer it into decadent dessert cakes for a creative twist.

What keeps it relevant? Versatility. Whether you’re gluten-free, vegan, or just craving nostalgia, this recipe adapts. Some toast slices for breakfast, while others serve it warm with coffee for afternoon comfort. No matter how you slice it, banana bread bridges generations—one ripe banana at a time.

Taste and Texture

What makes it delicious

This Irresistible Banana Bread Recipe delivers a melt-in-your-mouth experience with its moist, tender crumb and rich caramelized sweetness. Ripe bananas infuse every bite with a natural fruity depth, while a hint of cinnamon and vanilla adds warmth and fragrance. The crust turns golden and slightly crisp, creating a delightful contrast to the soft, buttery interior. Each slice feels indulgent yet comforting, with pockets of gooey chocolate chips or crunchy walnuts if you add them. The aroma alone—a mix of toasted sugar, ripe bananas, and spice—will make your kitchen smell heavenly. Whether enjoyed warm or at room temperature, the Irresistible Banana Bread Recipe satisfies cravings with its balanced sweetness and irresistible texture.

Boosting the flavor

Elevate your Irresistible Banana Bread Recipe with a few easy tweaks. For extra richness, swirl in a spoonful of peanut butter before baking—it pairs perfectly with bananas. Alternatively, sprinkle turbinado sugar on top for a sparkling, crunchy finish. A dash of nutmeg or cardamom deepens the spice profile, while a drizzle of salted caramel sauce adds a luxurious touch. Toast slices lightly and spread with butter for a cozy breakfast upgrade. With these simple enhancements, your banana bread will taste even more decadent.

Tips for Success

Best practices for results

Always use overripe bananas for the Irresistible Banana Bread Recipe, as they add natural sweetness and moisture. Meanwhile, measure your flour correctly by spooning it into the cup and leveling it off—packing it down can make the bread dense. Additionally, let the batter rest for 10 minutes before baking to ensure even texture. For best results, check doneness with a toothpick; it should come out clean or with just a few crumbs. Finally, cool the loaf completely before slicing to prevent crumbling.

Mistakes to avoid

Avoid overmixing the batter, as this can make the Irresistible Banana Bread Recipe tough instead of tender. Instead, gently fold the ingredients until just combined. Many bakers also forget to grease the pan properly, leading to sticking—use butter or nonstick spray for easy release. If your bread browns too quickly, tent it with foil halfway through baking. For more baking tips, check out our guides on perfect baking temperatures and ingredient substitutions to troubleshoot any issues.

Serving and Pairing Suggestions

How to serve this dish

Slice your Irresistible Banana Bread Recipe thick for a hearty treat or thin for delicate bites. For a cozy breakfast, toast it lightly and spread with butter or cream cheese. Meanwhile, warm slices with a scoop of vanilla ice cream turn it into a decadent dessert. If you’re hosting brunch, arrange the banana bread on a wooden board with fresh berries and a drizzle of honey for a rustic yet elegant look. During holidays, wrap individual slices in parchment paper tied with twine for charming edible gifts.

What goes well with it

Pair your Irresistible Banana Bread Recipe with a steaming cup of spiced chai latte for a comforting afternoon snack. The warm spices in the chai enhance the bread’s rich banana flavor. Alternatively, try it with a scoop of our homemade whipped cream for a light, creamy contrast. For a heartier option, serve alongside a tangy fruit salad, like our berry yogurt parfait, to balance the sweetness with fresh, bright flavors.

What makes banana bread irresistible?

An Irresistible Banana Bread Recipe combines ripe bananas for natural sweetness, a moist texture from ingredients like yogurt or sour cream, and warm spices like cinnamon. The perfect balance of flavors and a tender crumb make it hard to resist.

Can I make irresistible banana bread without eggs?

Yes! Substitute eggs with mashed bananas, applesauce, or flaxseed meal mixed with water to keep your Irresistible Banana Bread Recipe moist and fluffy. The result will still be delicious and crowd-pleasing.

How do I store banana bread to keep it fresh?

Wrap your Irresistible Banana Bread Recipe tightly in plastic wrap or store it in an airtight container at room temperature for 2-3 days. For longer freshness, refrigerate for up to a week or freeze slices for up to 3 months.

What can I add to banana bread to make it more flavorful?

Enhance your Irresistible Banana Bread Recipe with mix-ins like chocolate chips, chopped nuts, or a swirl of peanut butter. A dash of vanilla extract or a sprinkle of brown sugar on top before baking adds extra depth and richness.

Best Chocolate Chip Muffins – Easy Homemade Recipe

best-chocolate-chip-muffins-recipe

Introduction

There’s something undeniably comforting about the aroma of freshly baked goods wafting through the house. Whether you’re a seasoned baker or just starting out, these Irresistible Chocolate Chip Muffins promise to bring joy to your kitchen. Perfect for breakfast, snacks, or even a sweet midnight treat, they’re the kind of recipe that makes everyone gather around the table. Plus, with their soft, fluffy texture and pockets of melty chocolate, they’re guaranteed to become a family favorite in no time.

Irresistible Chocolate Chip Muffins are more than just a baked good—they’re a little piece of happiness. What sets them apart is their perfect balance of sweetness and richness, making them ideal for any occasion. Whether you’re hosting a brunch or simply craving a homemade treat, this recipe delivers every time. At brekcakes.com, we believe baking should be fun and approachable, and these muffins embody that spirit. They’re easy to whip up with pantry staples, yet impressive enough to share with friends. If you love simple yet decadent recipes, you’ll also adore our Classic Banana Bread or Vanilla Cupcakes for more baking inspiration.

Why I Love This Recipe

These Irresistible Chocolate Chip Muffins hold a special place in my heart because they remind me of lazy Sunday mornings with my family. I’ve tweaked this recipe over the years to achieve the perfect texture—moist but not dense, with just the right amount of chocolate in every bite. Every time I bake them, the house fills with warmth, and I’m transported back to those simple, joyful moments. Sharing them with loved ones only makes the experience sweeter, and I hope they bring the same happiness to your home.

Health and Nutrition

Why it’s good for your body

Irresistible Chocolate Chip Muffins pack more than just delicious flavor—they also offer surprising health benefits. First, they provide a quick energy boost thanks to their balanced mix of carbs and healthy fats. Additionally, dark chocolate chips add antioxidants, which help fight inflammation and support heart health. Meanwhile, whole wheat flour or oat flour options boost fiber, keeping you fuller longer and aiding digestion.

Moreover, Irresistible Chocolate Chip Muffins can be a smart choice for satisfying sweet cravings without overindulging. By using natural sweeteners like honey or maple syrup, they reduce refined sugar intake while still tasting indulgent. Furthermore, adding nuts or seeds boosts protein and healthy fats, making them a satisfying snack. Whether enjoyed as a breakfast treat or an afternoon pick-me-up, these muffins deliver both flavor and nourishment.

Finally, homemade versions let you control ingredients, avoiding preservatives found in store-bought options. For instance, you can substitute Greek yogurt for butter to add protein and reduce saturated fat. With each bite, Irresistible Chocolate Chip Muffins prove that treats can be both tasty and wholesome.

How it fits in a healthy lifestyle

Irresistible Chocolate Chip Muffins fit seamlessly into a balanced diet when enjoyed mindfully. Pair one with a protein-rich snack like Greek yogurt or a handful of almonds to create a satisfying, nutrient-dense meal. For those following gluten-free diets, simply swap in almond or coconut flour—an easy tweak that keeps the muffins just as delicious.

If you’re focused on heart health, opt for dark chocolate chips and heart-smart fats like avocado oil. These small changes align with a lifestyle that prioritizes wellness without sacrificing flavor. For more ideas on balancing treats with nutrition, explore our guide to healthy baking swaps. And if you’re curious about portion control, our tips on smart snacking can help you enjoy these muffins guilt-free. Whether as an occasional indulgence or a weekly staple, Irresistible Chocolate Chip Muffins prove that healthy eating can still be joyful.

Print

clock clock iconcutlery cutlery iconflag flag iconfolder folder iconinstagram instagram iconpinterest pinterest iconfacebook facebook iconprint print iconsquares squares iconheart heart iconheart solid heart solid icon

Irresistible Chocolate Chip Muffins


  • Author:
    Chef Emy

Description

Soft, fluffy muffins packed with melty chocolate chips for the perfect sweet treat.


Ingredients


Scale

For the Crust:

  • 2 cups all-purpose flour
  • 1/2 cup granulated sugar
  • 1 tbsp baking powder
  • 1/2 tsp salt
  • 1 cup milk
  • 1/3 cup vegetable oil
  • 1 large egg
  • 1 tsp vanilla extract
  • 1 cup semi-sweet chocolate chips


Instructions

1. Prepare the Crust:

  1. Preheat oven to 375°F (190°C) and line a muffin tin with paper liners.
  2. In a large bowl, whisk together flour, sugar, baking powder, and salt.
  3. In another bowl, mix milk, oil, egg, and vanilla until well combined.
  4. Pour wet ingredients into dry ingredients and stir until just combined (do not overmix).
  5. Fold in chocolate chips gently.
  6. Divide batter evenly among muffin cups (about 3/4 full).
  7. Bake for 18-20 minutes or until a toothpick comes out clean.
  8. Cool in pan for 5 minutes, then transfer to a wire rack.

Notes

You can customize the seasonings to taste.


How to Prepare This Dish

Steps and time-saving tips

Start by preheating your oven to 375°F and lining a muffin tin with paper liners or greasing it lightly. In a large bowl, whisk together the flour, baking powder, and salt until well combined. Next, grab another bowl and beat the softened butter with sugar until it turns light and fluffy. Crack in the eggs one at a time, mixing thoroughly after each addition. Then, stir in the vanilla extract and milk until the mixture looks smooth. Gradually fold the wet ingredients into the dry mix, but don’t overwork the batter—just combine until no flour streaks remain. Gently fold in the chocolate chips for that irresistible touch. Spoon the batter evenly into the muffin cups, filling each about two-thirds full. For extra flavor, sprinkle a few extra chocolate chips on top before baking. Pop the tray into the oven and bake for 18-20 minutes, or until a toothpick comes out clean. Let the muffins cool for 5 minutes in the pan before transferring them to a wire rack. To save time, measure all your ingredients ahead and use a cookie scoop for evenly portioned batter.

Mistakes I’ve made and learned from

When I first made these Irresistible Chocolate Chip Muffins, I overmixed the batter, which left them dense instead of light and fluffy. Now, I stop stirring as soon as the ingredients combine. Another blunder? I once skipped lining the muffin tin, thinking a light grease would suffice—big mistake. The muffins stuck stubbornly, and I ended up with crumbled tops. Lesson learned: always use liners or a non-stick spray. If you’re new to baking, check out my guide on common baking mistakes to avoid similar pitfalls. Also, if your chocolate chips sink to the bottom, toss them in a bit of flour before folding them in—this trick from my baking hacks post keeps them perfectly distributed. Trust me, a little patience goes a long way with these muffins!

Cultural Connection and Variations

Where this recipe comes from

Irresistible Chocolate Chip Muffins trace their roots back to the classic American bake sale, where home bakers perfected the balance of tender crumb and melty chocolate. However, their story stretches further. In France, bakers might swap chocolate chips for dark chocolate chunks and add a pinch of sea salt, turning them into a sophisticated treat. Meanwhile, in Australia, you’ll often find them studded with macadamia nuts for extra crunch.

Growing up, many of us remember these muffins as a weekend staple—warm from the oven, with a glass of cold milk. Some families even sneak in a dash of cinnamon or a swirl of peanut butter for a personal twist. No matter the variation, Irresistible Chocolate Chip Muffins always bring people together, whether at brunch gatherings or as a lunchbox surprise.

Seasonally, they adapt effortlessly. In winter, bakers might fold in peppermint bits for a festive touch, while summer versions burst with fresh berries alongside the chocolate. No wonder this recipe has traveled so far—it’s a canvas for creativity, yet always feels like home.

How it fits in today’s cooking

Today, Irresistible Chocolate Chip Muffins hold their own as a quick breakfast hero or an afternoon pick-me-up. Busy parents love them because they freeze beautifully, making meal prep a breeze. Health-conscious bakers tweak the recipe too, using whole wheat flour or sneaky healthy swaps like applesauce for oil.

They’ve also found a place in modern food trends. Think matcha-infused batter or vegan chocolate chips for plant-based diets. Even coffee shops reinvent them, adding espresso powder for a mocha twist. For more inspiration, check out these easy muffin hacks to elevate your baking game.

Ultimately, these muffins endure because they’re versatile, nostalgic, and downright delicious. Whether you’re baking them for a holiday brunch or a Tuesday snack, they never go out of style.

Taste and Texture

What makes it delicious

Irresistible Chocolate Chip Muffins deliver a perfect balance of rich, buttery sweetness and deep chocolatey goodness. Each bite reveals a tender, moist crumb that practically melts in your mouth, while the gooey chocolate chips add pockets of melty decadence. The aroma alone is heavenly—warm vanilla and toasted sugar mingle with the comforting scent of baked cocoa. Thanks to the generous amount of high-quality chocolate, every muffin bursts with intense flavor, making them impossible to resist. Whether enjoyed warm or at room temperature, Irresistible Chocolate Chip Muffins offer a satisfying contrast between the soft interior and slightly crisp, golden-brown edges.

Boosting the flavor

Elevate your Irresistible Chocolate Chip Muffins with a few easy tweaks. For extra depth, fold in a handful of toasted walnuts or pecans, which add a delightful crunch and nutty richness. A sprinkle of flaky sea salt on top before baking enhances the chocolate’s sweetness, creating a gourmet touch. If you love warm spices, try adding a pinch of cinnamon or a dash of espresso powder to the batter for a subtle, sophisticated twist. For even more inspiration, explore our guide to baking with chocolate or discover creative ways to upgrade your muffin mix-ins. With these simple adjustments, you can customize the flavor to match any craving.

Tips for Success

Best practices for results

Always measure your flour correctly by spooning it into the cup and leveling it off—this prevents dense Irresistible Chocolate Chip Muffins. Additionally, use room-temperature eggs and butter for even mixing. For extra flavor, toast the chocolate chips lightly before folding them into the batter. Finally, avoid overmixing the dough to keep your muffins tender and fluffy every time.

Mistakes to avoid

One common error is overfilling the muffin cups, which leads to uneven baking. Instead, fill each liner only two-thirds full for perfect domes. Another mistake is skipping the rest time for the batter; letting it sit for 10 minutes ensures better texture. If you struggle with dry muffins, check out our guide on how to keep muffins moist. For more troubleshooting, our common baking mistakes article covers additional fixes.

Serving and Pairing Suggestions

How to serve this dish

Serve Irresistible Chocolate Chip Muffins warm for the ultimate gooey chocolate experience. For a brunch spread, arrange them on a rustic wooden board with fresh berries and a dusting of powdered sugar. Meanwhile, during holidays, tie them in festive parchment paper for a charming edible gift. If you want to impress guests, slice one open and add a dollop of whipped cream for an extra indulgent touch.

What goes well with it

Pair Irresistible Chocolate Chip Muffins with a cold glass of milk for a classic combo that highlights their rich flavor. Alternatively, try them with a creamy latte or our Homemade Vanilla Latte to balance the sweetness. For a heartier option, serve alongside our Berry Yogurt Parfait to add a refreshing contrast to each bite.

What makes chocolate chip muffins moist and fluffy?

The secret to moist and fluffy Irresistible Chocolate Chip Muffins lies in using buttermilk or yogurt for acidity, which reacts with baking soda. Properly creaming butter and sugar also incorporates air, while avoiding overmixing keeps the texture light.

Can I use melted butter instead of softened in chocolate chip muffins?

Yes, melted butter works in Irresistible Chocolate Chip Muffins but creates a denser crumb. Softened butter creamed with sugar yields a lighter texture, while melted butter gives a richer, bakery-style result—just mix gently to avoid toughness.

How do you keep chocolate chips from sinking in muffins?

Toss chocolate chips with 1 tbsp flour before folding them into Irresistible Chocolate Chip Muffin batter—this coating helps suspend them. Also, let the batter rest 10 minutes before baking so chips adhere better to the rising structure.

Why did my chocolate chip muffins turn out dry?

Dry Irresistible Chocolate Chip Muffins often result from overbaking or too much flour—always measure flour by spooning it into cups. Check doneness 2-3 minutes early with a toothpick; residual heat continues cooking them in the pan.

Best Banana Bread Muffins – Easy Homemade Recipe

best-banana-bread-muffins-recipe

Introduction

There’s something undeniably comforting about the aroma of freshly baked goods filling your home. Whether you’re a seasoned baker or just starting out, this Delicious Banana Bread Muffins Recipe will quickly become a favorite. Not only do these muffins capture the cozy essence of banana bread, but they also offer the perfect grab-and-go convenience. Plus, they’re a fantastic way to use up those overripe bananas sitting on your counter. Trust me, one bite and you’ll understand why these muffins have earned a permanent spot in my baking rotation.

The Delicious Banana Bread Muffins Recipe combines the nostalgic flavors of classic banana bread with the portable ease of muffins. Moist, tender, and packed with ripe banana goodness, these treats strike the perfect balance between sweetness and warmth. What makes them special is their versatility—whether you enjoy them as a quick breakfast, an afternoon snack, or a dessert, they never disappoint. Moreover, this recipe aligns perfectly with brekcakes.com’s mission to deliver approachable, crowd-pleasing recipes that anyone can master. If you love simple yet satisfying bakes, you’ll also appreciate our Classic Vanilla Cupcakes or our Easy Chocolate Chip Cookies for more foolproof favorites.

Why I Love This Recipe

This Delicious Banana Bread Muffins Recipe holds a special place in my heart because it reminds me of lazy Sunday mornings with my family. My mom used to whip up a batch whenever we had leftover bananas, and the smell alone would bring everyone to the kitchen. Now, I love sharing that same joy with my readers. These muffins aren’t just delicious—they’re a little taste of home, and I hope they become a cherished part of your baking routine too.

Health and Nutrition

Why it’s good for your body

Delicious Banana Bread Muffins Recipe packs a nutritious punch while satisfying your sweet tooth. First, ripe bananas provide natural sweetness and a boost of potassium, which helps regulate blood pressure. Additionally, they deliver fiber to support digestion and keep you feeling full longer. Since this recipe uses whole wheat flour, you also get extra fiber and nutrients compared to refined flour options.

Moreover, Delicious Banana Bread Muffins Recipe includes healthy fats from ingredients like nuts or coconut oil. These fats promote heart health and help your body absorb vitamins. If you opt for Greek yogurt or applesauce, you’ll add protein or reduce sugar without sacrificing flavor. Transitioning to healthier ingredients doesn’t mean skipping taste—this recipe proves it.

Finally, bananas offer antioxidants like dopamine, which may support mood and reduce oxidative stress. Whether you enjoy Delicious Banana Bread Muffins Recipe for breakfast or a snack, you’re fueling your body with energy and nutrients. With every bite, you get a balance of carbs, fats, and natural sweetness that keeps cravings in check.

How it fits in a healthy lifestyle

Delicious Banana Bread Muffins Recipe fits perfectly into a balanced diet. For a heart-healthy twist, swap butter for avocado oil or add walnuts. If you’re watching sugar intake, reduce added sweeteners and let the bananas shine. Pair a muffin with a protein source like Greek yogurt or nut butter for a satisfying snack.

This recipe also adapts to gluten-free diets—just use almond or oat flour instead. For more gluten-free baking tips, check out our guide on gluten-free baking. If you’re meal prepping, freeze muffins and reheat them for quick breakfasts. They’re a smarter alternative to processed pastries.

Looking for more wholesome recipes? Explore our healthy snack ideas to keep your energy steady all day. Delicious Banana Bread Muffins Recipe proves that treats can be both indulgent and nourishing when you choose the right ingredients.

Print

clock clock iconcutlery cutlery iconflag flag iconfolder folder iconinstagram instagram iconpinterest pinterest iconfacebook facebook iconprint print iconsquares squares iconheart heart iconheart solid heart solid icon

Delicious Banana Bread Muffins


  • Author:
    Chef Emy

Description

Moist and flavorful banana bread muffins that are perfect for breakfast or a snack.


Ingredients


Scale

For the Crust:

  • 3 ripe bananas, mashed
  • 1/3 cup melted butter
  • 3/4 cup sugar
  • 1 egg, beaten
  • 1 teaspoon vanilla extract
  • 1 teaspoon baking soda
  • 1 1/2 cups all-purpose flour
  • 1/2 teaspoon salt
  • 1/2 cup chopped walnuts (optional)


Instructions

1. Prepare the Crust:

  1. Preheat oven to 350°F (175°C) and line a muffin tin with paper liners.
  2. In a large bowl, mix mashed bananas, melted butter, sugar, egg, and vanilla extract.
  3. Stir in baking soda, flour, and salt until just combined. Fold in walnuts if using.
  4. Divide batter evenly among muffin cups, filling each about 3/4 full.
  5. Bake for 20-25 minutes or until a toothpick inserted comes out clean.
  6. Let cool in the pan for 5 minutes, then transfer to a wire rack to cool completely.

Notes

You can customize the seasonings to taste.


How to Prepare This Dish

Steps and time-saving tips

Start by preheating your oven to 350°F and lining a muffin tin with paper liners. Meanwhile, mash three ripe bananas in a large bowl until smooth. Add melted butter, sugar, and eggs, then whisk everything together until well combined. In a separate bowl, mix flour, baking soda, salt, and a pinch of cinnamon for extra warmth. Gradually fold the dry ingredients into the wet mixture, but avoid overmixing to keep the Delicious Banana Bread Muffins Recipe tender. For a quick shortcut, use a stand mixer on low speed to blend the batter in half the time. Spoon the batter into the muffin cups, filling each about two-thirds full. If you love added texture, sprinkle chopped walnuts or chocolate chips on top before baking. Bake for 18-22 minutes or until a toothpick comes out clean. Let the muffins cool for five minutes in the pan, then transfer them to a wire rack. To save time, bake a double batch and freeze extras for later. These muffins taste even better the next day as the flavors meld together.

Mistakes I’ve made and learned from

I once rushed the process and used underripe bananas, which left my Delicious Banana Bread Muffins Recipe bland and dry. Now I wait until the bananas are speckled and soft for maximum sweetness. Another mistake? Overmixing the batter, which made the muffins dense instead of fluffy. I learned to gently fold the ingredients just until combined, and the results improved instantly. If you’re new to baking, check out my guide to common baking mistakes to avoid similar pitfalls. Also, don’t skip the muffin liners like I did once—sticking muffins are no fun! For more tips on perfecting banana-based treats, my banana recipe roundup has plenty of inspiration. Trust me, a little patience goes a long way with this recipe.

Cultural Connection and Variations

Where this recipe comes from

The Delicious Banana Bread Muffins Recipe we love today has roots in resourcefulness. During the Great Depression, home cooks refused to waste overripe bananas, transforming them into moist, sweet bread. Over time, this humble dish evolved into the portable, muffin-sized treats we enjoy now. Meanwhile, in the Caribbean, bakers often add rum or coconut for a tropical twist, while in Australia, they might toss in macadamia nuts for extra crunch.

In my family, the Delicious Banana Bread Muffins Recipe became a Sunday ritual. My grandma always added chocolate chips, claiming they “made the bananas happier.” Across the South, you’ll find versions with pecans or a bourbon glaze, while health-conscious bakers might swap flour for almond meal. No matter the variation, the goal stays the same: turn speckled bananas into something magical.

How it fits in today’s cooking

Today, the Delicious Banana Bread Muffins Recipe bridges nostalgia and convenience. Busy parents bake them for lunchboxes, while meal preppers stash them in freezers for quick breakfasts. During holidays, they appear alongside spiced lattes as cozy seasonal treats. Modern twists, like vegan butter or protein powder, keep the recipe fresh for new generations.

Food bloggers often pair these muffins with streusel-topped coffee cake for brunch spreads. Others love serving them with pumpkin scones during autumn gatherings. Whether you stick to tradition or experiment with mix-ins, these muffins remain a timeless way to savor simplicity.

Taste and Texture

What makes it delicious

These Delicious Banana Bread Muffins Recipe deliver a warm, comforting experience with every bite. The muffins boast a moist, tender crumb that practically melts in your mouth, thanks to ripe bananas and a touch of Greek yogurt. Meanwhile, a hint of cinnamon and vanilla wraps the sweetness in cozy, aromatic warmth. As you take a bite, you’ll notice pockets of gooey chocolate chips or crunchy walnuts—depending on your mix-ins—adding playful contrast. The aroma alone, rich with caramelized banana and buttery notes, will have everyone gathering in the kitchen. Whether enjoyed fresh from the oven or the next day, the Delicious Banana Bread Muffins Recipe never loses its irresistible charm.

Boosting the flavor

For an extra flavor kick, try swirling in a spoonful of peanut butter or almond butter before baking—it adds a nutty depth that pairs perfectly with the bananas. Alternatively, a sprinkle of turbinado sugar on top before baking creates a delicate, crackly crust. If you love warm spices, a pinch of nutmeg or cardamom alongside the cinnamon will elevate the muffins even further. For a fruity twist, fold in diced strawberries or blueberries, as seen in our Berry Banana Bread. And if you’re craving something indulgent, drizzle the muffins with our Cinnamon Glaze for a sweet, spiced finish.

Tips for Success

Best practices for results

For the best Delicious Banana Bread Muffins Recipe, always use ripe bananas with plenty of brown spots—they add natural sweetness and moisture. Meanwhile, lightly coat your muffin tin with nonstick spray or line it with parchment to prevent sticking. Additionally, avoid overmixing the batter; gently fold the ingredients until just combined for tender muffins. Finally, test doneness with a toothpick before removing them from the oven to ensure perfect texture every time.

Mistakes to avoid

One common mistake is baking with underripe bananas, which results in less flavor and dryness. Instead, let them ripen on the counter or speed up the process using our guide to ripening bananas quickly. Another error is overfilling the muffin cups, causing uneven baking. For consistent results, fill each cup only two-thirds full and refer to our muffin baking tips for more precision. By avoiding these pitfalls, your Delicious Banana Bread Muffins Recipe will turn out flawless.

Serving and Pairing Suggestions

How to serve this dish

Serve these Delicious Banana Bread Muffins Recipe warm for the best flavor and texture. For a cozy breakfast, arrange them on a wooden board with a drizzle of honey and a sprinkle of chopped nuts. Alternatively, pack them in a cute basket for picnics or potlucks. During holidays, add a festive touch by dusting them with powdered sugar or topping them with a cinnamon swirl. No matter the occasion, these muffins always shine when you pair them with a warm cup of coffee or tea.

What goes well with it

Pair your Delicious Banana Bread Muffins Recipe with a creamy latte for a comforting morning treat. The rich coffee flavor balances the sweetness perfectly. For a refreshing twist, try them with a glass of cold almond milk or a scoop of vanilla ice cream. If you love fruity combinations, serve them alongside our Berry Chia Jam for a burst of tangy flavor. For a heartier option, enjoy them with our Savory Sausage Bites to create a satisfying sweet-and-savory brunch spread.

How do you make banana bread muffins moist?

The key to moist Delicious Banana Bread Muffins is using very ripe bananas and not overmixing the batter. Adding a tablespoon of sour cream or Greek yogurt also helps keep them tender. For extra moisture, you can brush the tops with melted butter right after baking.

Can I freeze banana bread muffins?

Yes! Delicious Banana Bread Muffins freeze beautifully for up to 3 months. Let them cool completely, then wrap individually in plastic wrap before placing in a freezer bag. Thaw at room temperature or microwave for 15-20 seconds when ready to enjoy.

What’s the best way to store banana bread muffins?

Store your Delicious Banana Bread Muffins in an airtight container at room temperature for 2-3 days. For longer freshness, refrigerate them for up to a week. If they dry out, a quick 10-second microwave zap will revive their soft texture.

Can I add chocolate chips to banana bread muffins?

Absolutely! Chocolate chips pair perfectly with Delicious Banana Bread Muffins. Fold in ½ to ¾ cup of semi-sweet or dark chocolate chips into the batter before baking. For even distribution, toss the chips with a bit of flour to prevent sinking.

Best Creamy Vanilla Coffee Recipe – Easy & Delicious

best-creamy-vanilla-coffee-recipe

Introduction

There’s something undeniably comforting about a perfectly brewed cup of coffee, especially when it’s infused with rich, creamy vanilla. Whether you’re starting your morning or need a midday pick-me-up, this Creamy Vanilla Coffee Recipe delivers warmth and indulgence in every sip. Moreover, it’s incredibly easy to make, so you can enjoy a café-quality drink without leaving your kitchen. Trust me, once you try it, you’ll wonder how you ever settled for plain coffee.

The Creamy Vanilla Coffee Recipe combines smooth, bold coffee with the sweet, aromatic notes of vanilla for a drink that feels like a hug in a mug. Unlike store-bought versions loaded with artificial flavors, this recipe uses simple, wholesome ingredients to create a balanced and luxurious experience. It’s perfect for those who crave a little extra sweetness without overpowering the coffee’s natural richness. Additionally, it aligns perfectly with brekcakes.com’s mission to share approachable, delicious recipes that elevate everyday moments. If you love cozy drinks, you’ll also adore our Homemade Caramel Latte, which pairs wonderfully with a slice of Classic Vanilla Cake for the ultimate treat.

Why I Love This Recipe

This Creamy Vanilla Coffee Recipe holds a special place in my heart because it reminds me of slow Sunday mornings with my grandmother. She used to stir a dash of vanilla into her coffee, and the scent alone would fill the house with warmth. Now, whenever I make it, I feel that same sense of comfort and connection. It’s more than just a drink—it’s a little moment of joy that turns an ordinary day into something sweet and memorable.

Health and Nutrition

Why it’s good for your body

The Creamy Vanilla Coffee Recipe packs a nutritious punch while satisfying your caffeine cravings. First, it delivers a steady energy boost thanks to the natural caffeine in coffee, which enhances focus without the crash of sugary drinks. Additionally, the recipe includes healthy fats from ingredients like almond milk or coconut cream, which support brain function and keep you full longer.

Moreover, the Creamy Vanilla Coffee Recipe contains antioxidants from both coffee and vanilla. These compounds help combat inflammation and protect your cells from damage. If you opt for unsweetened vanilla, you also avoid unnecessary added sugars, making it a smarter choice than store-bought flavored coffees.

Finally, this recipe offers flexibility for dietary needs. For instance, you can easily swap dairy for plant-based milk to accommodate lactose intolerance. Whether you enjoy it hot or iced, the Creamy Vanilla Coffee Recipe fits seamlessly into a health-conscious routine while keeping flavor front and center.

How it fits in a healthy lifestyle

The Creamy Vanilla Coffee Recipe aligns perfectly with balanced eating habits. It works as a satisfying morning pick-me-up or an afternoon treat without derailing your nutrition goals. For those following a gluten-free or dairy-free diet, simple substitutions make it an inclusive option.

If you’re focused on heart health, using low-fat milk or unsweetened almond milk keeps saturated fats in check. Pair it with a protein-rich breakfast like our High-Protein Pancakes for a well-rounded meal. Alternatively, enjoy it alongside our Energy-Boosting Smoothies for a hydrating, nutrient-dense combo.

By moderating sweeteners and choosing quality ingredients, this coffee recipe becomes a guilt-free indulgence. It proves that small, mindful choices can elevate everyday routines without sacrificing taste or health.

Print

clock clock iconcutlery cutlery iconflag flag iconfolder folder iconinstagram instagram iconpinterest pinterest iconfacebook facebook iconprint print iconsquares squares iconheart heart iconheart solid heart solid icon

Creamy Vanilla Coffee


  • Author:
    Chef Emy

Description

A rich and smooth vanilla-infused coffee with a creamy texture.


Ingredients


Scale

For the Crust:

  • 1 cup freshly brewed coffee
  • 1/2 cup milk
  • 1 tablespoon heavy cream
  • 1 teaspoon vanilla extract
  • 1 tablespoon sugar (optional)
  • Whipped cream (optional)


Instructions

1. Prepare the Crust:

  1. Brew a cup of your favorite coffee.
  2. In a small saucepan, heat the milk and heavy cream over medium heat until warm (do not boil).
  3. Stir in the vanilla extract and sugar (if using) until dissolved.
  4. Pour the warm milk mixture into the brewed coffee and stir well.
  5. Top with whipped cream if desired and serve immediately.

Notes

You can customize the seasonings to taste.


How to Prepare This Dish

Steps and time-saving tips

Start by brewing a strong cup of your favorite coffee—this ensures the bold flavor shines through in your Creamy Vanilla Coffee Recipe. While the coffee cools slightly, warm your milk in a small saucepan over low heat, but don’t let it boil. Next, whisk in a splash of vanilla extract and a teaspoon of sugar for sweetness. If you’re short on time, microwave the milk for 30 seconds instead. Pour the coffee into a large mug, then slowly add the vanilla milk while stirring gently to blend. For extra creaminess, top it with a dollop of whipped cream or a splash of half-and-half. Finally, sprinkle a pinch of cinnamon or cocoa powder for a finishing touch. To save time in the morning, prep the vanilla milk mixture the night before and store it in the fridge. Just reheat it for 20 seconds before mixing with your coffee.

Mistakes I’ve made and learned from

I once rushed the process and added vanilla extract directly to hot coffee, which made it taste bitter. Now I always mix it with warm milk first for a smoother flavor. Another mistake? Using low-quality vanilla—it made my Creamy Vanilla Coffee Recipe taste artificial. Investing in pure vanilla extract makes all the difference, just like I learned when perfecting my homemade vanilla extract. And if your coffee turns out too sweet, balance it with a pinch of salt, a trick I picked up from my coffee hacks for beginners post. Trust me, these small tweaks transform an okay drink into something unforgettable.

Cultural Connection and Variations

Where this recipe comes from

The Creamy Vanilla Coffee Recipe whispers of cozy European cafés, where baristas perfected the art of blending rich coffee with velvety vanilla. Originally inspired by the French “café vanille,” this drink traveled across borders, adapting to local tastes. In Italy, they might spike it with a shot of espresso, while in Mexico, a sprinkle of cinnamon adds warmth. Even at home, families tweak it—some stir in honey for sweetness, others swirl in whipped cream for extra indulgence.

My grandmother made her version of the Creamy Vanilla Coffee Recipe every Sunday, using fresh vanilla beans she’d stash in her pantry. Meanwhile, in Scandinavia, they often pair it with cardamom for a spiced twist. No matter where you go, this drink carries a sense of comfort, whether sipped during snowy mornings or as an afternoon pick-me-up. Its simplicity lets creativity shine, making it a global favorite with countless personal touches.

How it fits in today’s cooking

Today, the Creamy Vanilla Coffee Recipe still wins hearts as a versatile staple. Busy home cooks love it for its quick prep, while coffee shops elevate it with latte art or dairy-free alternatives like oat milk. It’s a star during holidays, too—imagine serving it alongside chocolate chip cookies for a festive touch. Even fitness enthusiasts adapt it, swapping sugar for protein powder in their post-workout brew.

Modern twists keep it fresh, like cold-brew versions for summer or adding a dash of pumpkin spice in fall. Pair it with banana bread for a cozy breakfast, and you’ve got instant nostalgia. Whether you’re a purist or an innovator, this recipe bridges tradition and trend, proving some flavors never go out of style.

Taste and Texture

What makes it delicious

The Creamy Vanilla Coffee Recipe delivers a luxurious sip every time. Imagine smooth, velvety coffee with a sweet vanilla aroma that lingers in the air. Each mouthful feels rich and indulgent, thanks to the silky blend of fresh cream and pure vanilla extract. The warmth of the coffee balances the sweetness, while a hint of caramelized sugar adds depth. Whether hot or iced, the Creamy Vanilla Coffee Recipe satisfies with its comforting, dessert-like quality—perfect for mornings or afternoon pick-me-ups.

Boosting the flavor

Elevate your Creamy Vanilla Coffee Recipe with a sprinkle of cinnamon or a drizzle of homemade caramel sauce for extra decadence. Swap regular milk for frothy oat milk to add a nutty undertone, or try a dash of cardamom for a fragrant twist. For more coffee inspiration, explore our Iced Caramel Latte or learn how to perfect your brew with our French Press Coffee Guide. Small tweaks make big differences, so experiment and enjoy!

Tips for Success

Best practices for results

Always use freshly brewed coffee for the best flavor in your Creamy Vanilla Coffee Recipe. Meanwhile, warm your milk slightly before frothing to achieve a silky texture. Additionally, measure your vanilla extract precisely to avoid overpowering the drink. Finally, stir gently after adding sweeteners to ensure even distribution without losing foam.

Mistakes to avoid

Avoid overfrothing the milk, as it can create large bubbles instead of a smooth consistency. For perfect frothing, check out our guide on milk frothing techniques. Another common mistake is using low-quality vanilla extract, which can make your Creamy Vanilla Coffee Recipe taste artificial. Instead, opt for pure vanilla or try our homemade vanilla extract recipe for richer flavor.

Serving and Pairing Suggestions

How to serve this dish

Elevate your Creamy Vanilla Coffee Recipe by serving it in clear glass mugs to showcase its rich, velvety texture. For a cozy touch, top it with a swirl of whipped cream and a sprinkle of cinnamon or cocoa powder. Meanwhile, if you’re hosting brunch, pair it with a side of fresh pastries for a delightful morning treat. During the holidays, serve it in festive mugs with a candy cane stirrer for a seasonal twist. No matter the occasion, this drink always feels indulgent.

What goes well with it

For a perfect match, enjoy your Creamy Vanilla Coffee Recipe with a warm slice of cinnamon coffee cake. The spiced sweetness balances the smooth vanilla notes beautifully. Alternatively, try it alongside a buttery almond croissant for a decadent breakfast combo. If you prefer something savory, our fluffy scrambled eggs make a satisfying contrast to the drink’s creamy richness. Each pairing enhances the experience, turning your coffee break into a mini feast.

How do you make creamy vanilla coffee at home?

To make a creamy vanilla coffee recipe, brew strong coffee and mix in warm milk, vanilla extract, and a touch of sugar or sweetener. For extra creaminess, froth the milk or add a splash of heavy cream. This simple method creates a smooth, flavorful drink that rivals café-quality versions.

What’s the best vanilla for creamy vanilla coffee?

Pure vanilla extract works best for a creamy vanilla coffee recipe because it delivers rich, authentic flavor. Avoid imitation vanilla for the best results. You can also use vanilla bean paste or scraped vanilla beans for a more intense taste.

Can I make dairy-free creamy vanilla coffee?

Yes! Substitute dairy milk with oat milk, almond milk, or coconut milk in your creamy vanilla coffee recipe. These alternatives froth well and provide a similar creamy texture. Add a dash of vanilla extract and sweetener to mimic the classic flavor.

How many calories are in creamy vanilla coffee?

A standard creamy vanilla coffee recipe with whole milk and sugar contains about 150-200 calories per cup. Reduce calories by using skim milk, sugar-free sweeteners, or lighter dairy alternatives while keeping the rich vanilla flavor.

Easy Decadent Chocolate Chaffle Delight Recipe

easy-chocolate-chaffle-delight-recipe

Introduction

If you’ve ever craved a dessert that feels indulgent yet fits seamlessly into a low-carb lifestyle, you’re in the right place. Today, I’m thrilled to share my Decadent Chocolate Chaffle Delight—a recipe that combines rich cocoa flavor with a satisfyingly crisp texture. Whether you’re new to chaffles or a longtime fan, this treat promises to become a staple in your kitchen. Plus, it’s so easy to customize, making it perfect for busy weeknights or lazy weekends alike.

The Decadent Chocolate Chaffle Delight is more than just a dessert—it’s a game-changer for anyone who loves chocolate but wants to keep things simple and wholesome. Unlike traditional waffles, this recipe uses almond flour and cream cheese for a fluffy yet sturdy base, while melted dark chocolate adds depth without overpowering sweetness. What makes it special? It’s gluten-free, keto-friendly, and ready in under 15 minutes. For those exploring healthier alternatives, this chaffle delivers all the satisfaction of a classic waffle without the guilt. If you’re curious about other creative twists, check out my savory chaffle variations or dive into my guide to keto desserts for more inspiration.

Why I Love This Recipe

This Decadent Chocolate Chaffle Delight holds a special place in my heart because it reminds me of Sunday mornings with my family. I developed it during a time when I was experimenting with keto baking, and it quickly became my go-to for satisfying sweet cravings without derailing my goals. The aroma of cocoa filling the kitchen always brings smiles, and I love how versatile it is—sometimes I top it with berries, other times with a dollop of whipped cream. Most importantly, it proves that eating well doesn’t mean sacrificing flavor, and that’s a lesson worth sharing.

Health and Nutrition

Why it’s good for your body

Decadent Chocolate Chaffle Delight packs a surprising nutritional punch while satisfying your sweet tooth. First, it delivers a rich dose of antioxidants from high-quality cocoa, which helps combat oxidative stress. Additionally, the recipe often includes almond flour or coconut flour, boosting healthy fats and fiber to keep you full longer. These ingredients also support stable blood sugar levels, making it a smarter choice than traditional desserts.

Moreover, Decadent Chocolate Chaffle Delight can be a great source of protein if you use eggs or protein powder in the batter. Protein not only fuels muscle repair but also curbs cravings, so you’re less likely to overindulge later. Transitioning to healthier treats like this one can reduce refined sugar intake without sacrificing flavor. Plus, many versions are naturally gluten-free, making them gentler on digestion for those with sensitivities.

Finally, dark chocolate in Decadent Chocolate Chaffle Delight may improve heart health by promoting better circulation and lowering inflammation. When you enjoy this treat in moderation, you’re treating your body to benefits beyond just taste. Whether you’re craving something sweet or need a post-workout snack, this chaffle delivers both satisfaction and nourishment.

How it fits in a healthy lifestyle

Decadent Chocolate Chaffle Delight fits seamlessly into balanced eating habits, especially if you’re mindful of portion sizes. For gluten-free diets, it’s a delicious alternative to flour-based desserts, and its high-protein versions align perfectly with fitness goals. Pair it with a handful of berries or a dollop of Greek yogurt for extra nutrients without guilt.

If you’re exploring keto or low-carb eating, this recipe adapts easily by swapping sweeteners. For more keto-friendly ideas, check out our guide to keto breakfasts. Even if you’re not following a specific diet, Decadent Chocolate Chaffle Delight helps you enjoy treats responsibly. Learn how to balance indulgences with our tips on smart dessert swaps. With simple tweaks, this chaffle becomes a versatile part of your wellness routine.

Print

clock clock iconcutlery cutlery iconflag flag iconfolder folder iconinstagram instagram iconpinterest pinterest iconfacebook facebook iconprint print iconsquares squares iconheart heart iconheart solid heart solid icon

Decadent Chocolate Chaffle Delight


  • Author:
    Chef Emy

Description

A rich and fluffy chocolate chaffle that satisfies your sweet tooth while being low-carb.


Ingredients


Scale

For the Crust:

  • 1 large egg
  • 1/2 cup shredded mozzarella cheese
  • 1 tbsp almond flour
  • 1 tbsp cocoa powder
  • 1 tbsp erythritol (or sweetener of choice)
  • 1/2 tsp vanilla extract
  • 1/4 tsp baking powder


Instructions

1. Prepare the Crust:

  1. Preheat your waffle maker (chaffle maker preferred).
  2. In a bowl, whisk the egg, then add all other ingredients and mix until smooth.
  3. Pour half the batter into the waffle maker and cook for 3-4 minutes until crispy. Repeat for the second chaffle.
  4. Serve warm with whipped cream or sugar-free syrup if desired.

Notes

You can customize the seasonings to taste.


How to Prepare This Dish

Steps and time-saving tips

Start by preheating your waffle maker to medium-high heat so it’s ready when your batter is. While it warms up, whisk together almond flour, cocoa powder, and a pinch of salt in a large bowl. In a separate bowl, beat the eggs until frothy, then mix in melted butter, vanilla extract, and a touch of sweetener. Combine the wet and dry ingredients, stirring gently until just incorporated—overmixing can make your Decadent Chocolate Chaffle Delight dense. Lightly grease the waffle iron with coconut oil spray, then pour in half the batter, spreading it evenly. Close the lid and cook for 3-4 minutes until crisp. Repeat with the remaining batter. For a time-saving hack, double the batch and freeze extras for later. While the chaffles cool, whip up a quick chocolate ganache by melting dark chocolate with heavy cream, then drizzle it generously over each layer. Top with fresh berries or a dusting of powdered sugar for a stunning finish.

Mistakes I’ve made and learned from

My first attempt at Decadent Chocolate Chaffle Delight ended in disaster because I didn’t let the waffle maker fully preheat—the result was a soggy mess. Now, I always wait for the indicator light or test with a drop of water to ensure it sizzles. Another lesson? Measuring ingredients by weight, not volume, for consistent texture. I once eyeballed the almond flour and ended up with crumbly chaffles that fell apart. If you’re new to low-carb baking, my guide on perfecting chaffle texture dives deeper into troubleshooting. Oh, and don’t skip the resting time for the batter! Letting it sit for 5 minutes helps the flour absorb moisture, a tip I picked up from my post on common chaffle mistakes. Trust me, these small tweaks make all the difference between good and unforgettable.

Cultural Connection and Variations

Where this recipe comes from

The Decadent Chocolate Chaffle Delight might feel like a modern keto twist, but its roots weave through centuries of chocolate-loving cultures. Originally, waffles trace back to medieval Europe, where cooks pressed batter between hot irons over open flames. Meanwhile, chocolate’s journey began with Mesoamerican civilizations, who prized it as a sacred drink. Fast forward to today, and the Decadent Chocolate Chaffle Delight merges these traditions into a low-carb masterpiece.

Around the world, variations of this treat pop up in surprising ways. In Belgium, street vendors drizzle chocolate sauce over crisp Liège waffles. In Mexico, cooks might fold cocoa into masa for a richer texture. Even at home, families put their spin on it—some add cinnamon for warmth, while others layer it with whipped cream for extra indulgence. No matter the version, the Decadent Chocolate Chaffle Delight always brings people together, whether as a breakfast splurge or a midnight snack.

How it fits in today’s cooking

Today, the Decadent Chocolate Chaffle Delight fits perfectly into our fast-paced, health-conscious lives. Busy parents love it for quick after-school treats, while keto dieters rely on it to satisfy sweet cravings without guilt. Seasonal twists keep it fresh year-round—think peppermint extract for winter holidays or fresh berries in summer. Plus, modern cooks experiment with mix-ins like peanut butter or keto-friendly syrups to make it their own.

Its versatility also shines in meal prep routines. Whip up a batch on Sunday, and you’ve got grab-and-go breakfasts all week. For special occasions, layer it with luxurious chocolate ganache to impress guests. Whether you’re a novice or a pro, the Decadent Chocolate Chaffle Delight adapts to your kitchen, proving some classics never go out of style.

Taste and Texture

What makes it delicious

Decadent Chocolate Chaffle Delight delivers a rich, indulgent experience with every bite. The warm, gooey chocolate center contrasts perfectly with the crisp, golden edges, creating a satisfying crunch. Meanwhile, the melted chocolate chips add bursts of sweetness, while the almond flour base keeps it subtly nutty and tender. As it bakes, your kitchen fills with the irresistible aroma of cocoa and vanilla, making it impossible to resist. Whether you enjoy it fresh off the waffle iron or slightly cooled, Decadent Chocolate Chaffle Delight promises a melt-in-your-mouth texture that feels like dessert for breakfast.

Boosting the flavor

Elevate your Decadent Chocolate Chaffle Delight by drizzling it with a velvety keto chocolate sauce for extra decadence. Alternatively, sprinkle crushed walnuts or toasted coconut on top for a delightful crunch. If you love a hint of spice, a pinch of cinnamon or a dash of espresso powder will deepen the chocolate flavor. For a fruity twist, pair it with fresh berries or a dollop of sugar-free whipped cream. The possibilities are endless, so don’t hesitate to get creative!

Tips for Success

Best practices for results

Preheat your waffle maker thoroughly before adding the batter to ensure even cooking for your Decadent Chocolate Chaffle Delight. Meanwhile, lightly grease the plates with coconut oil or butter to prevent sticking and achieve a crisp exterior. For the best texture, let the batter rest for 2-3 minutes so the ingredients fully combine. Additionally, avoid overmixing to keep your chaffles light and fluffy. Finally, let them cool slightly on a wire rack to maintain their perfect crunch.

Mistakes to avoid

One common mistake is overfilling the waffle maker, which can cause messy spills and uneven cooking. Instead, use just enough batter to cover the center without touching the edges. Another error is skipping the resting time for the batter, leading to dense chaffles. For more troubleshooting tips, check out our guide on fixing soggy chaffles. Also, resist the urge to peek too early—opening the waffle maker before the chaffles set can make them fall apart. If you need help choosing the right equipment, our waffle maker recommendations will steer you in the right direction.

Serving and Pairing Suggestions

How to serve this dish

For a stunning presentation, stack your Decadent Chocolate Chaffle Delight high and drizzle it with melted chocolate or a dusting of powdered sugar. Meanwhile, fresh berries like raspberries or strawberries add a pop of color and freshness. Serve it warm for brunch with friends or as a show-stopping dessert during holidays. If you want extra indulgence, top it with a scoop of vanilla ice cream that melts slightly over the warm chaffle.

What goes well with it

A rich cup of cold brew coffee balances the sweetness of Decadent Chocolate Chaffle Delight perfectly. Alternatively, try pairing it with our Creamy Vanilla Whipped Cream for an extra layer of decadence. If you prefer something lighter, our Berry Compote adds a tangy contrast that enhances every bite. Each pairing brings out the deep chocolate flavor while keeping the experience fresh and exciting.

What is a Decadent Chocolate Chaffle Delight made of?

A Decadent Chocolate Chaffle Delight combines almond flour, cocoa powder, eggs, and melted sugar-free chocolate for a rich, low-carb treat. The batter is cooked in a waffle maker to create a crispy yet fluffy texture, perfect for satisfying chocolate cravings without guilt.

How do you keep Decadent Chocolate Chaffle Delight from sticking to the waffle maker?

Lightly coat your waffle maker with non-stick spray or melted butter before pouring the Decadent Chocolate Chaffle Delight batter. Let the chaffle cook fully until crisp to prevent tearing—this ensures easy removal and maintains that perfect texture.

Can you make Decadent Chocolate Chaffle Delight ahead of time?

Yes! Store cooled Decadent Chocolate Chaffle Delight in an airtight container for up to 3 days or freeze for a month. Reheat in a toaster or oven to restore the crispy exterior—ideal for quick, indulgent snacks.

What toppings go best with Decadent Chocolate Chaffle Delight?

Enhance your Decadent Chocolate Chaffle Delight with whipped cream, fresh berries, or a drizzle of sugar-free syrup. For extra richness, add a scoop of keto-friendly ice cream or crushed nuts for contrasting texture.

Best Crunchy Coconut Flakes – Easy Homemade Recipe

best-crunchy-coconut-flakes-recipe

Introduction

If you’ve ever craved a snack that’s both wholesome and indulgent, you’re in the right place. Today, I’m sharing my irresistible Crunchy Coconut Flakes Recipe—a treat that’s as versatile as it is delicious. Whether you’re topping yogurt, sprinkling over desserts, or enjoying it straight from the jar, this recipe brings a touch of tropical bliss to every bite. Plus, it’s incredibly easy to make, even if you’re short on time.

The Crunchy Coconut Flakes Recipe is a game-changer for anyone who loves texture and flavor in their snacks. Unlike store-bought versions, which often contain additives, this homemade alternative lets you control the ingredients while delivering unmatched crispiness. Coconut flakes toast to golden perfection, offering a subtle sweetness that pairs beautifully with both sweet and savory dishes. For instance, try them on my classic banana bread or as a crunchy garnish for smoothie bowls. What makes this recipe special is its simplicity—just a few pantry staples and 15 minutes of your time. Moreover, it aligns perfectly with brekcakes.com’s mission to share approachable, joy-filled recipes that anyone can master.

Why I Love This Recipe

This Crunchy Coconut Flakes Recipe holds a special place in my heart because it reminds me of lazy Sunday mornings with my grandmother. She used to toast coconut flakes in her cast-iron skillet, filling the house with the most comforting aroma. Now, every time I make this recipe, I feel that same warmth and nostalgia. It’s also a staple in my kitchen because it elevates so many dishes—like my overnight oats—with minimal effort. Trust me, once you try it, you’ll wonder how you ever lived without it.

Health and Nutrition

Why it’s good for your body

Crunchy Coconut Flakes Recipe packs a nutritious punch while satisfying your snack cravings. First, coconut flakes provide healthy fats, which support brain function and energy levels. Additionally, they contain fiber to aid digestion and keep you feeling full longer. Unlike processed snacks, this recipe avoids artificial additives, making it a cleaner choice for your body.

Moreover, Crunchy Coconut Flakes Recipe delivers essential minerals like manganese and copper. These nutrients help maintain strong bones and a healthy immune system. Since coconut flakes are naturally sweet, you can enjoy them without relying on refined sugars. As a result, they offer a guilt-free way to curb sugar cravings while still tasting delicious.

Finally, this recipe includes a light toast for extra crispiness without excessive oil. Consequently, you get a satisfying crunch with fewer empty calories. Whether you eat them alone or sprinkle them over yogurt, Crunchy Coconut Flakes Recipe adds both texture and nutrition to your day. With every bite, you nourish your body while enjoying a flavorful treat.

How it fits in a healthy lifestyle

Crunchy Coconut Flakes Recipe fits seamlessly into a balanced diet. If you follow a gluten-free or dairy-free lifestyle, this snack aligns perfectly with your needs. You can also pair it with protein-rich foods like Greek yogurt or chia pudding for a more filling option. For more gluten-free inspiration, check out our gluten-free baking guide.

For those focused on heart health, the natural fats in coconut flakes may support cholesterol balance when eaten in moderation. Plus, the recipe’s simplicity makes it easy to incorporate into meal prep or on-the-go snacking. If you’re looking for other wholesome snack ideas, explore our energy-boosting snacks roundup. Whether you need a quick bite or a topping for smoothie bowls, Crunchy Coconut Flakes Recipe keeps your eating habits both tasty and nutritious.

Print

clock clock iconcutlery cutlery iconflag flag iconfolder folder iconinstagram instagram iconpinterest pinterest iconfacebook facebook iconprint print iconsquares squares iconheart heart iconheart solid heart solid icon

Crunchy Coconut Flakes


  • Author:
    Chef Emy

Description

A simple and delicious homemade crunchy coconut flakes recipe, perfect for snacking or topping desserts.


Ingredients


Scale

For the Crust:

  • 2 cups unsweetened coconut flakes
  • 1 tablespoon honey or maple syrup
  • 1/2 teaspoon vanilla extract
  • Pinch of salt


Instructions

1. Prepare the Crust:

  1. Preheat oven to 325°F (160°C) and line a baking sheet with parchment paper.
  2. In a bowl, mix coconut flakes with honey (or maple syrup), vanilla extract, and salt until evenly coated.
  3. Spread the mixture in a thin layer on the prepared baking sheet.
  4. Bake for 10-15 minutes, stirring occasionally, until golden brown and crispy.
  5. Let cool completely before storing in an airtight container.

Notes

You can customize the seasonings to taste.


How to Prepare This Dish

Steps and time-saving tips

Start by preheating your oven to 325°F and lining a baking sheet with parchment paper. This ensures your Crunchy Coconut Flakes Recipe turns out perfectly golden without sticking. In a large bowl, whisk together the shredded coconut, melted coconut oil, and a pinch of salt until everything is evenly coated. For extra flavor, drizzle in a touch of honey or maple syrup and mix well. Spread the coconut mixture in a thin, even layer on the prepared baking sheet. Bake for 8-10 minutes, stirring halfway through to prevent burning. Keep a close eye during the last few minutes since coconut browns quickly. Once golden, remove the tray and let the flakes cool completely—they’ll crisp up as they sit. For a shortcut, use pre-toasted coconut flakes and simply warm them with the oil and sweetener for 3-4 minutes. Store your Crunchy Coconut Flakes Recipe in an airtight container to maintain freshness. They’re perfect for topping yogurt, smoothie bowls, or even homemade granola.

Mistakes I’ve made and learned from

When I first tried this Crunchy Coconut Flakes Recipe, I learned the hard way that overcrowding the baking sheet leads to uneven cooking. Some flakes burned while others stayed soft. Now, I always spread the coconut in a thin layer, even if it means using two trays. Another mistake? Skipping the stirring step. Without flipping the flakes halfway, they clumped together and didn’t crisp evenly. If you’re short on time, try my no-bake energy bites for a quick coconut fix. Also, I once stored warm flakes in a jar, and the trapped steam made them soggy. Let them cool fully first! For more tips on avoiding kitchen mishaps, check out my common baking mistakes guide. Trust me, these small tweaks make all the difference.

Cultural Connection and Variations

Where this recipe comes from

Crunchy Coconut Flakes Recipe traces its roots to tropical regions where coconut trees thrive, especially in Southeast Asia and the Caribbean. Families there often sun-dry fresh coconut meat, then toast it with a touch of salt or sugar for a snack that’s both simple and deeply satisfying. In Thailand, for instance, vendors sell crispy coconut flakes at markets, sometimes spiced with chili or turmeric for an extra kick. Meanwhile, in the Philippines, people might toss them with caramelized sugar to make a sweet treat called “bukayo.”

My grandmother used to make her own version of Crunchy Coconut Flakes Recipe during holidays, baking them slowly until golden brown. She’d sprinkle them over desserts or pack them into jars as gifts. Over time, I’ve seen friends add their own twists—like drizzling dark chocolate over the flakes or mixing them into granola. Whether enjoyed plain or dressed up, this recipe carries the warmth of shared kitchens and sunny afternoons.

How it fits in today’s cooking

Today, Crunchy Coconut Flakes Recipe fits perfectly into modern cooking because it’s versatile, healthy, and quick to prepare. Busy home cooks love sprinkling them over overnight oats for a tropical twist, or using them as a gluten-free topping for yogurt bowls. They’re also a star in holiday baking, adding texture to cookies and cakes—especially when paired with recipes like our vegan banana bread.

Moreover, food bloggers and chefs keep reinventing this classic. Some toast the flakes with maple syrup for a vegan crunch, while others blend them into energy bars. No matter how you use them, Crunchy Coconut Flakes Recipe bridges tradition and innovation, making it a pantry staple for anyone craving a taste of nostalgia or a dash of adventure.

Taste and Texture

What makes it delicious

The Crunchy Coconut Flakes Recipe delivers a symphony of textures and flavors that make every bite irresistible. First, toasted coconut flakes offer a satisfying crispness, while their natural sweetness caramelizes into a rich, nutty depth. Meanwhile, a hint of vanilla or cinnamon adds warmth, wrapping the flakes in a fragrant, almost tropical aroma. When you taste the Crunchy Coconut Flakes Recipe, you’ll notice how the light crunch gives way to a buttery melt-in-your-mouth finish. Whether eaten alone or sprinkled over yogurt, the contrast between the crispy flakes and creamy accompaniments creates a delightful balance.

Boosting the flavor

Elevate your Crunchy Coconut Flakes Recipe with a few creative tweaks. For extra richness, drizzle them with melted dark chocolate or toss them with a pinch of sea salt to heighten the sweetness. If you love spice, a dusting of cayenne or cardamom adds an unexpected kick. Pair them with tropical fruits like mango or pineapple for a refreshing twist, or mix them into granola for added crunch. For more inspiration, explore our Homemade Granola Clusters or try them atop our Creamy Chia Pudding for a textural masterpiece. Small changes can transform this recipe into something truly extraordinary.

Tips for Success

Best practices for results

Always toast the coconut flakes evenly by spreading them in a single layer on the baking sheet. This ensures your Crunchy Coconut Flakes Recipe turns out perfectly golden every time. For extra crispiness, stir the flakes halfway through baking. Additionally, use fresh coconut flakes rather than pre-shredded varieties for the best texture. If you prefer a sweeter flavor, lightly drizzle honey before toasting, but avoid overdoing it to prevent burning.

Mistakes to avoid

One common mistake is overcrowding the baking sheet, which leads to uneven toasting. Instead, spread the flakes thinly for consistent results. Another error is skipping the stirring step, which can cause some flakes to burn while others remain undercooked. For more tips on perfecting baked toppings, check out our guide on baking essentials. Also, avoid storing the Crunchy Coconut Flakes Recipe in a humid environment, as moisture makes them lose their crispiness. Learn how to keep baked goods fresh with our storage solutions.

Serving and Pairing Suggestions

How to serve this dish

Serve your Crunchy Coconut Flakes Recipe in a stylish glass bowl or mason jar for a charming, rustic look. For extra flair, sprinkle a handful of fresh berries or edible flowers on top. Alternatively, layer them with yogurt and granola for a stunning breakfast parfait. This dish shines at brunch gatherings, holiday buffets, or even as a light dessert after a summer barbecue. If you want to impress guests, try serving the Crunchy Coconut Flakes Recipe in individual mini cups with a drizzle of honey for a personalized touch.

What goes well with it

Pair your Crunchy Coconut Flakes Recipe with a tropical smoothie for a refreshing breakfast combo. The creamy texture of a mango smoothie bowl balances the crunch perfectly. For a heartier option, try it alongside warm pancakes or waffles—the contrast of textures makes every bite exciting. If you’re serving it as a snack, dip the flakes into dark chocolate or enjoy them with a scoop of vegan ice cream for a sweet, satisfying treat.

How do you make coconut flakes crunchy?

To make coconut flakes crunchy, spread them evenly on a baking sheet and bake at 325°F (165°C) for 5–10 minutes, stirring occasionally. This Crunchy Coconut Flakes Recipe works best with unsweetened flakes, which toast evenly and develop a golden color. Let them cool completely to crisp up.

Can I use sweetened coconut flakes for this recipe?

Sweetened coconut flakes can work, but they brown faster and may burn if not watched closely. For the best Crunchy Coconut Flakes Recipe, unsweetened flakes are ideal because they toast more evenly and let the natural coconut flavor shine.

How long do homemade crunchy coconut flakes last?

Homemade crunchy coconut flakes stay fresh for up to 2 weeks when stored in an airtight container at room temperature. For longer shelf life, refrigerate them for up to a month. This Crunchy Coconut Flakes Recipe yields a snack that retains its crisp texture when stored properly.

What can I use crunchy coconut flakes for?

Crunchy coconut flakes add texture to yogurt, oatmeal, salads, and baked goods like muffins or granola bars. This Crunchy Coconut Flakes Recipe also makes a great topping for ice cream or a standalone snack. Their versatility makes them a pantry staple.

Best Crunchy Coconut Keto Cluster Delight Recipe

best-crunchy-coconut-keto-cluster

Introduction

If you’ve ever craved a snack that’s both indulgent and guilt-free, you’re in the right place. Today, I want to share something truly special—my Crunchy Coconut Keto Cluster Delight. Whether you’re following a keto lifestyle or simply love a satisfying crunch, this recipe delivers flavor and texture in every bite. Plus, it’s incredibly easy to make, so you can enjoy a wholesome treat without spending hours in the kitchen.

Crunchy Coconut Keto Cluster Delight is a game-changer for anyone seeking a delicious, low-carb snack. Combining toasted coconut flakes, rich dark chocolate, and a hint of sea salt, these clusters strike the perfect balance between sweet and savory. What makes them stand out? They’re not just keto-friendly—they’re also packed with healthy fats and natural sweetness, making them a smarter choice for mindful eaters. If you’ve tried my keto dessert recipes, you’ll love how this one fits seamlessly into your routine. Best of all, they’re perfect for meal prep, so you can always have a wholesome snack on hand. Whether you’re packing lunchboxes or need a quick energy boost, these clusters deliver every time. And if you’re new to keto baking, don’t worry—this recipe is as simple as my easy keto snacks, so you’ll feel confident from the first step.

Why I Love This Recipe

Crunchy Coconut Keto Cluster Delight holds a special place in my heart because it reminds me of lazy Sunday afternoons spent experimenting in the kitchen. I created this recipe during a time when I needed a quick, energizing snack that wouldn’t derail my health goals. The moment I took my first bite, I knew I’d stumbled onto something magical. Now, it’s become a staple in my home—and I can’t wait for you to experience that same joy.

Health and Nutrition

Why it’s good for your body

Crunchy Coconut Keto Cluster Delight packs a powerful nutritional punch while satisfying your sweet cravings. First, its coconut base delivers healthy fats that support brain function and energy levels. Additionally, the recipe skips refined sugars, making it a smarter choice for blood sugar balance. Because it’s keto-friendly, Crunchy Coconut Keto Cluster Delight helps maintain ketosis, which can aid in weight management.

Moreover, coconut provides fiber to promote digestion and keep you feeling full longer. The nuts and seeds often included add plant-based protein and essential minerals like magnesium. Unlike processed snacks, Crunchy Coconut Keto Cluster Delight avoids artificial additives, so you get clean, wholesome ingredients. Finally, the natural sweetness from ingredients like monk fruit or stevia means no energy crashes afterward.

How it fits in a healthy lifestyle

Crunchy Coconut Keto Cluster Delight fits seamlessly into a balanced diet, whether you’re keto, gluten-free, or just mindful of sugar intake. Its high-fat, low-carb profile aligns perfectly with ketogenic goals, while the absence of grains makes it ideal for gluten-sensitive eaters. For a heart-healthy boost, pair it with other nutrient-dense snacks like our almond flour pancakes for a satisfying meal.

Busy lifestyles also benefit from this snack’s convenience. Keep a batch in your bag for quick energy without derailing your diet. If you’re exploring more keto-friendly options, try our keto chocolate avocado mousse for another delicious way to stay on track. With Crunchy Coconut Keto Cluster Delight, you’re choosing a snack that supports your health without sacrificing flavor.

Print

clock clock iconcutlery cutlery iconflag flag iconfolder folder iconinstagram instagram iconpinterest pinterest iconfacebook facebook iconprint print iconsquares squares iconheart heart iconheart solid heart solid icon

Crunchy Coconut Keto Cluster Delight


  • Author:
    Chef Emy

Description

A delicious low-carb, keto-friendly snack with crunchy coconut clusters.


Ingredients


Scale

For the Crust:

  • 1 cup unsweetened shredded coconut
  • 1/4 cup almond flour
  • 2 tbsp coconut oil, melted
  • 1/4 cup keto-friendly sweetener (like erythritol)
  • 1/2 tsp vanilla extract
  • Pinch of salt


Instructions

1. Prepare the Crust:

  1. Preheat oven to 325°F (165°C) and line a baking sheet with parchment paper.
  2. In a bowl, mix shredded coconut, almond flour, sweetener, and salt.
  3. Add melted coconut oil and vanilla extract, stirring until well combined.
  4. Drop tablespoon-sized clusters onto the baking sheet and press lightly.
  5. Bake for 12-15 minutes until golden brown. Let cool completely before serving.

Notes

You can customize the seasonings to taste.


“`html

How to Prepare This Dish

Steps and time-saving tips

Start by preheating your oven to 325°F to ensure it reaches the right temperature while you prepare the ingredients. In a large mixing bowl, combine shredded coconut, almond flour, and a pinch of sea salt. Whisk these dry ingredients until they blend evenly. Next, melt coconut oil and sugar-free sweetener in a small saucepan over low heat, stirring constantly to avoid burning. Once melted, drizzle this mixture over the dry ingredients and fold everything together until the coconut flakes clump slightly. Spread the mixture evenly on a parchment-lined baking sheet and bake for 12-15 minutes, checking often to prevent over-browning. While the Crunchy Coconut Keto Cluster Delight cools, melt sugar-free chocolate chips in short bursts in the microwave, stirring between intervals for a smooth texture. Drizzle the chocolate over the clusters and sprinkle with crushed nuts if desired. Chill in the fridge for 20 minutes to set, then break into pieces. For a time-saving hack, prepare a double batch and store half in an airtight container—they stay fresh for up to two weeks!

Mistakes I’ve made and learned from

When I first made Crunchy Coconut Keto Cluster Delight, I rushed the baking step and ended up with unevenly toasted coconut—some bits were golden while others stayed pale. Now I stir the mixture halfway through baking for even color. Another blunder? I once skipped the parchment paper, and the clusters stuck stubbornly to the pan. Lesson learned: always line your tray! If you’re new to keto baking, check out my guide on keto-friendly substitutions to avoid common pitfalls. Also, if your chocolate seizes when melting, a splash of coconut oil saves the day—just like in my sugar-free chocolate tips post. Trust me, a little patience and the right tools make all the difference.

“`

Cultural Connection and Variations

Where this recipe comes from

Crunchy Coconut Keto Cluster Delight has roots that stretch across tropical kitchens and modern health-conscious homes. Originally inspired by traditional coconut candies from Southeast Asia, this recipe blends the rich, toasty flavor of coconut with a satisfying crunch. In places like Thailand and the Philippines, families often prepare similar treats during festivals, using palm sugar or honey. Meanwhile, in the Caribbean, coconut clusters might include spices like nutmeg or cinnamon for extra warmth.

In my own kitchen, Crunchy Coconut Keto Cluster Delight became a staple during holiday gatherings. My grandmother used to make a version with condensed milk, but we’ve since adapted it to fit low-carb lifestyles. Some cooks add dark chocolate drizzle, while others mix in nuts for extra texture. No matter the twist, the essence remains—a bite of sweet, crispy joy that feels both nostalgic and fresh.

How it fits in today’s cooking

Today, Crunchy Coconut Keto Cluster Delight fits perfectly into modern routines, whether as a quick snack or a guilt-free dessert. Busy parents love it for lunchboxes, and keto dieters rely on it to satisfy sweet cravings without derailing their goals. Seasonal twists, like peppermint extract during winter or citrus zest in summer, keep it exciting year-round.

Many home cooks also pair it with other keto-friendly treats, such as these fluffy keto blueberry muffins, for a balanced breakfast spread. Others crumble it over creamy keto chia pudding for added texture. However you enjoy it, this recipe proves that tradition and innovation can deliciously coexist.

Taste and Texture

What makes it delicious

Crunchy Coconut Keto Cluster Delight delivers a symphony of textures and flavors that make every bite irresistible. The toasted coconut flakes bring a crisp, nutty sweetness, while the rich dark chocolate adds a velvety smoothness that melts on your tongue. Meanwhile, the keto-friendly nuts provide a satisfying crunch, balancing the creamy undertones. As you take a bite, the fragrant aroma of coconut and cocoa fills your senses, making it impossible to stop at just one piece. Whether you savor it slowly or enjoy it as a quick snack, Crunchy Coconut Keto Cluster Delight keeps you coming back for more.

Boosting the flavor

For an extra flavor kick, try drizzling melted keto chocolate sauce over the clusters before they set—it deepens the richness without overpowering the coconut. Alternatively, sprinkle a pinch of sea salt or cinnamon to highlight the natural sweetness. If you love a tropical twist, fold in diced macadamia nuts for buttery contrast. These small tweaks elevate Crunchy Coconut Keto Cluster Delight into a customizable treat that suits any craving.

Tips for Success

Best practices for results

Always measure your ingredients precisely for the best Crunchy Coconut Keto Cluster Delight texture. Use parchment paper to prevent sticking and ensure easy removal. Chill the mixture for at least 30 minutes before shaping to help it hold together. Additionally, toast the coconut flakes lightly for extra crunch and flavor. Finally, store the clusters in an airtight container to keep them fresh longer.

Mistakes to avoid

Avoid overmixing the dough, as this can make your Crunchy Coconut Keto Cluster Delight too dense. Instead, gently fold the ingredients until just combined. Also, don’t skip the chilling step—otherwise, the clusters may fall apart. For more keto-friendly baking tips, check out our guide on keto baking basics. If your clusters turn out too soft, you might need a binding agent like xanthan gum, which we cover in our keto ingredient swaps post.

Serving and Pairing Suggestions

How to serve this dish

For a stunning presentation, arrange your Crunchy Coconut Keto Cluster Delight on a rustic wooden board or a pastel-colored dessert plate. Meanwhile, sprinkle extra toasted coconut flakes on top for texture and a pop of visual appeal. Since these clusters are naturally elegant, they shine at holiday gatherings or as a sweet finish to brunch. Alternatively, pack them in mini mason jars for a charming on-the-go treat. Whether you serve them warm or chilled, their golden crunch always delights.

What goes well with it

Pair your Crunchy Coconut Keto Cluster Delight with a creamy keto vanilla latte for a cozy morning combo. The latte’s smooth richness balances the clusters’ crisp texture perfectly. For a refreshing contrast, try it alongside our Berry Chia Pudding, which adds a tangy twist. Finally, if you’re hosting a dessert spread, our Almond Flour Brownies make a decadent partner, creating a satisfying mix of chewy and crunchy bites.

What are the main ingredients in Crunchy Coconut Keto Cluster Delight?

Crunchy Coconut Keto Cluster Delight typically includes unsweetened shredded coconut, keto-friendly sweeteners like erythritol or stevia, coconut oil, and nuts like almonds or pecans. These ingredients create a delicious low-carb treat that’s perfect for satisfying sweet cravings while staying in ketosis.

How many net carbs are in Crunchy Coconut Keto Cluster Delight?

A serving of Crunchy Coconut Keto Cluster Delight usually contains around 2–4 grams of net carbs, depending on the specific recipe and ingredients used. This makes it an excellent snack for those following a strict keto diet while still enjoying a crunchy, coconutty treat.

Can I make Crunchy Coconut Keto Cluster Delight without nuts?

Yes! You can easily customize Crunchy Coconut Keto Cluster Delight by omitting nuts or replacing them with seeds like sunflower or pumpkin seeds for a nut-free version. The coconut and sweetener still provide plenty of flavor and crunch, making it a versatile keto-friendly snack.

How should I store Crunchy Coconut Keto Cluster Delight to keep it fresh?

Store Crunchy Coconut Keto Cluster Delight in an airtight container at room temperature for up to a week, or refrigerate for up to two weeks. For longer storage, freeze the clusters and thaw them at room temperature before enjoying their crispy texture.

Best Decadent Chocolate Overnight Oats Recipe

best-chocolate-overnight-oats-recipe

Introduction

Mornings can feel chaotic, but they don’t have to be. Imagine waking up to a creamy, chocolatey breakfast that’s ready the moment you are. That’s the beauty of these Decadent Chocolate Overnight Oats—a dreamy, no-fuss meal that feels indulgent yet nourishes you from the inside out. Whether you’re rushing out the door or savoring a slow start, this recipe promises to make your day a little sweeter.

Decadent Chocolate Overnight Oats combine the richness of cocoa with the wholesome goodness of oats, creating a breakfast that’s as satisfying as dessert. Unlike traditional oatmeal, this no-cook method lets the flavors meld overnight, resulting in a velvety texture that melts in your mouth. Perfect for busy lifestyles, it’s a meal prep superstar that aligns with my philosophy of effortless, joy-filled cooking. Plus, it’s customizable—swap in your favorite milk or toppings to make it your own. If you love easy morning solutions, you’ll adore my 5-Minute Berry Smoothie Bowl, another quick fix for hectic days. And if you’re craving more chocolatey treats, my Flourless Chocolate Avocado Cake proves healthy can still be heavenly.

Why I Love This Recipe

This recipe holds a special place in my heart because it reminds me of lazy Sunday mornings with my family. My kids beg for these oats, and I love how something so simple brings them so much joy. It’s also my secret weapon for busy weeks—prepping jars the night before means I never skip breakfast, even on the craziest days. Every spoonful feels like a hug, and that’s exactly the kind of food I want to share with you.

Health and Nutrition

Why it’s good for your body

Decadent Chocolate Overnight Oats pack a nutritious punch while satisfying your sweet tooth. First, they deliver a hearty dose of fiber from rolled oats, which keeps you full and supports digestion. Additionally, the cocoa powder adds antioxidants that fight inflammation and boost heart health. Plus, you get plant-based protein from chia seeds or nut butter, making it a balanced breakfast.

Moreover, Decadent Chocolate Overnight Oats stabilize blood sugar levels thanks to their low glycemic index. Unlike sugary cereals, this meal avoids energy crashes. Meanwhile, the healthy fats from ingredients like almond milk or flaxseeds nourish your brain and skin. And let’s not forget the magnesium in dark chocolate, which helps muscles relax and improves sleep quality.

Finally, this recipe saves time without sacrificing nutrition. Since you prepare Decadent Chocolate Overnight Oats the night before, you grab a wholesome meal on busy mornings. Whether you need sustained energy or a guilt-free treat, this dish delivers both flavor and wellness in every bite.

How it fits in a healthy lifestyle

Decadent Chocolate Overnight Oats fit seamlessly into a balanced diet. For gluten-free eaters, simply use certified gluten-free oats. If you’re aiming for more protein, stir in Greek yogurt or a scoop of your favorite plant-based powder. This recipe also works well for meal preppers who want ready-to-go breakfasts all week.

Heart-healthy eaters will appreciate the cholesterol-lowering benefits of oats and the flavonoids in dark chocolate. Pair it with a superfood smoothie bowl for an extra antioxidant boost. And if you’re watching sugar intake, swap honey for mashed banana or stevia. For more ideas on balancing indulgences, check out our healthy dessert swaps guide.

Whether you’re fueling a workout or craving a mindful treat, Decadent Chocolate Overnight Oats adapt to your goals. They prove that healthy eating can still feel indulgent.

Print

clock clock iconcutlery cutlery iconflag flag iconfolder folder iconinstagram instagram iconpinterest pinterest iconfacebook facebook iconprint print iconsquares squares iconheart heart iconheart solid heart solid icon

Decadent Chocolate Overnight Oats


  • Author:
    Chef Emy

Description

A rich and creamy chocolate-infused overnight oats recipe perfect for a quick breakfast or dessert.


Ingredients


Scale

For the Crust:

  • 1 cup rolled oats
  • 1 cup almond milk
  • 2 tbsp cocoa powder
  • 1 tbsp maple syrup
  • 1 tbsp chia seeds
  • 1/2 tsp vanilla extract
  • 1/4 cup dark chocolate chips
  • Pinch of salt


Instructions

1. Prepare the Crust:

  1. In a mixing bowl, combine rolled oats, almond milk, cocoa powder, maple syrup, chia seeds, vanilla extract, and salt.
  2. Stir well until all ingredients are fully incorporated and the mixture is smooth.
  3. Fold in the dark chocolate chips, then transfer the mixture to a jar or container with a lid.
  4. Refrigerate overnight or for at least 6 hours. Serve chilled with optional toppings like fresh berries or nuts.

Notes

You can customize the seasonings to taste.


“`html

How to Prepare This Dish

Steps and time-saving tips

Start by gathering all your ingredients for Decadent Chocolate Overnight Oats—this ensures a smooth process without mid-prep interruptions. In a large mixing bowl, whisk together the rolled oats, cocoa powder, chia seeds, and a pinch of salt. Next, pour in the milk of your choice, stirring gently to combine everything evenly. For extra richness, fold in a spoonful of Greek yogurt or almond butter. Then, drizzle in the maple syrup or honey, adjusting the sweetness to your taste. Once the mixture looks uniform, divide it evenly between two mason jars or airtight containers. Seal them tightly and refrigerate overnight, or for at least six hours. In the morning, give the oats a quick stir and top with fresh berries, chocolate chips, or a dollop of whipped cream. If you’re short on time, skip the chia seeds—they add texture but aren’t essential. For a quicker set, use quick oats instead of rolled oats, though the texture will be slightly softer. Always taste before serving and add a splash of milk if the consistency feels too thick.

Mistakes I’ve made and learned from

When I first made Decadent Chocolate Overnight Oats, I underestimated how much the chia seeds would expand—overnight, my mixture turned into a thick paste! Now, I stick to just one tablespoon per serving. Another time, I used dark cocoa powder without adjusting the sweetness, and the bitterness overpowered the dish. Lesson learned: balance bold flavors with extra honey or a ripe mashed banana. If you’re new to overnight oats, check out my guide on perfecting the base recipe to avoid common pitfalls. Also, don’t skip the salt—it might seem minor, but it makes all the difference in enhancing the chocolate flavor. For more tips on texture tweaks, my post on fixing soggy or dry oats has saved many breakfasts.

“`

Cultural Connection and Variations

Where this recipe comes from

Decadent Chocolate Overnight Oats might feel like a modern breakfast trend, but its roots stretch back to simpler, time-honored traditions. Oats have long been a staple in cooler climates like Scotland and Scandinavia, where people soaked them overnight to soften before cooking. Adding chocolate, however, gives this humble dish a luxurious twist—one that feels indulgent yet effortless.

Around the world, cultures adapt overnight oats to local tastes. In Mexico, cooks might mix in cinnamon and top them with cajeta, a caramel-like sauce. Meanwhile, in Australia, coconut flakes and fresh mango often brighten the dish. Even within families, recipes evolve. Some swear by almond butter for richness, while others blend in espresso for a morning kick. No matter the variation, Decadent Chocolate Overnight Oats always delivers comfort with a touch of sweetness.

Seasonally, this recipe shines year-round. In winter, warm spices like nutmeg make it cozy. Come summer, fresh berries lighten it up. Whether you grew up with a family version or discovered it online, one thing’s clear: this dish bridges tradition and creativity.

How it fits in today’s cooking

Decadent Chocolate Overnight Oats fits perfectly into today’s fast-paced, health-conscious world. Busy mornings demand quick solutions, and this no-cook recipe delivers. Plus, modern cooks tweak it endlessly—swapping dairy for oat milk or adding superfoods like chia seeds. It’s a blank canvas for personalization.

Meal preppers adore it because it keeps for days, making breakfast effortless. Fitness enthusiasts love it too, since it packs protein and fiber. For a heartier twist, try pairing it with peanut butter banana smoothies or avocado toast. Whether you enjoy it as a weekday staple or a weekend treat, this recipe proves that convenience and decadence can go hand in hand.

From its humble origins to its Instagram-worthy appeal, Decadent Chocolate Overnight Oats remains a timeless favorite. It’s proof that the best recipes adapt—without losing their soul.

Taste and Texture

What makes it delicious

Decadent Chocolate Overnight Oats deliver a rich, velvety experience that feels like dessert for breakfast. The creamy oats soak up cocoa’s deep, bittersweet notes, while a touch of maple syrup adds just the right amount of caramelized sweetness. Every spoonful melts in your mouth, thanks to the luscious texture created by chia seeds and almond milk. Meanwhile, a sprinkle of sea salt heightens the chocolatey aroma, making each bite irresistible. Decadent Chocolate Overnight Oats balance indulgence with comfort, leaving you satisfied but never overly heavy.

Boosting the flavor

Elevate your Decadent Chocolate Overnight Oats with a handful of crunchy toasted almonds or a drizzle of peanut butter sauce for extra richness. For a fruity twist, fold in mashed raspberries or layer them with berry compote to contrast the chocolate’s depth. A dash of cinnamon or espresso powder intensifies the warmth, while coconut flakes add a tropical crunch. Experiment with these tweaks to make your breakfast even more memorable.

Tips for Success

Best practices for results

Always use rolled oats for the best texture in your Decadent Chocolate Overnight Oats, as they soften perfectly without turning mushy. Meanwhile, make sure to fully mix the cocoa powder with the liquid ingredients first to prevent clumps. Additionally, chill the mixture for at least 6 hours, though overnight works even better for richer flavor. Finally, stir well before serving to evenly distribute the chocolatey goodness.

Mistakes to avoid

Avoid using quick oats, since they absorb too much liquid and leave your Decadent Chocolate Overnight Oats gluey. If you prefer a thicker consistency, simply add more oats gradually rather than pouring in excess liquid all at once. Also, don’t skip the pinch of salt—it balances the sweetness, as explained in our guide to perfecting overnight oats. For best results, store your oats in an airtight container to prevent them from drying out, just like we recommend in our meal prep basics.

Serving and Pairing Suggestions

How to serve this dish

Make your Decadent Chocolate Overnight Oats shine by serving them in elegant glass jars or colorful bowls for a visually stunning breakfast. For a special touch, top them with fresh berries, a drizzle of melted chocolate, or a sprinkle of crushed nuts. Meanwhile, if you’re hosting a brunch, layer them in mini parfait glasses for a crowd-pleasing presentation. Alternatively, pack them in portable containers for an on-the-go treat that feels indulgent yet effortless.

What goes well with it

Pair your Decadent Chocolate Overnight Oats with a creamy cold brew coffee to balance the richness with a bold, refreshing contrast. For a lighter option, try a tangy fruit smoothie, which adds a bright counterpoint to the chocolatey depth. If you’re craving something heartier, serve them alongside our almond flour pancakes for a decadent yet balanced breakfast spread.

Can you make Decadent Chocolate Overnight Oats with almond milk?

Yes, almond milk works perfectly for Decadent Chocolate Overnight Oats. Its subtle nutty flavor complements the rich cocoa, and the creamy texture helps soften the oats overnight. Just ensure you use unsweetened almond milk if you prefer to control the sweetness of your Decadent Chocolate Overnight Oats.

How long do Decadent Chocolate Overnight Oats last in the fridge?

Decadent Chocolate Overnight Oats stay fresh for up to 3-4 days when stored in an airtight container. The flavors actually deepen after the first day, making them even more delicious. For best texture, give them a quick stir before serving if they’ve been stored beyond 24 hours.

What toppings go well with Decadent Chocolate Overnight Oats?

Fresh berries, sliced bananas, chopped nuts, or shredded coconut all pair wonderfully with Decadent Chocolate Overnight Oats. For extra indulgence, drizzle with peanut butter or sprinkle dark chocolate chips. These toppings add contrasting textures while enhancing the chocolate flavor.

Are Decadent Chocolate Overnight Oats healthy?

When made with quality ingredients, Decadent Chocolate Overnight Oats can be a nutritious breakfast. Rolled oats provide fiber, while cocoa powder offers antioxidants. For a healthier version, use natural sweeteners like maple syrup and top with fresh fruit instead of processed sugars.

Best Blackberry Cobbler – Irresistible Homemade Delight

best-blackberry-cobbler-homemade-delight

Introduction

There’s something truly special about desserts that bring people together, and that’s exactly what this Irresistible Blackberry Cobbler Delight does. Whether you’re hosting a summer gathering or simply craving a cozy treat, this recipe wraps you in comfort with every bite. Moreover, it’s a dish that feels like home—simple yet unforgettable, just like the classic comfort desserts we all cherish. Let me show you why this cobbler deserves a spot in your recipe collection.

Irresistible Blackberry Cobbler Delight is a rustic yet elegant dessert that celebrates the bold, juicy flavor of fresh blackberries. The berries bubble beneath a golden, buttery crust that crumbles perfectly with each spoonful. What makes this recipe stand out is its balance of sweetness and tartness, creating a harmony that keeps you coming back for more. Unlike fussy desserts, this cobbler comes together effortlessly, making it ideal for both beginners and seasoned bakers. It’s also versatile—serve it warm with a scoop of vanilla ice cream, or enjoy it as a midday snack with a cup of tea. If you love easy-to-make treats that impress, you’ll adore this recipe as much as my quick berry desserts. Plus, it fits perfectly with brekcakes.com’s mission to deliver approachable, joy-filled recipes that anyone can master.

Why I Love This Recipe

This Irresistible Blackberry Cobbler Delight holds a special place in my heart because it reminds me of summers spent picking berries with my grandmother. She taught me that the best desserts don’t need complicated techniques—just quality ingredients and a little patience. Every time I bake this cobbler, the aroma fills my kitchen with nostalgia, and I’m transported back to those sunny afternoons. It’s more than just a recipe; it’s a story of family, simplicity, and the joy of sharing something delicious with the people you love.

Health and Nutrition

Why it’s good for your body

Irresistible Blackberry Cobbler Delight packs a nutritious punch while satisfying your sweet tooth. First, blackberries deliver a powerful dose of antioxidants, which help combat oxidative stress and support overall wellness. Additionally, these juicy berries provide fiber to promote healthy digestion and keep you feeling full longer. Moreover, the natural sweetness of blackberries means you can enjoy Irresistible Blackberry Cobbler Delight with less added sugar than many desserts.

Furthermore, this dessert often includes wholesome ingredients like oats or almond flour, boosting its nutritional profile. For example, oats contribute heart-healthy beta-glucans, while almond flour adds protein and healthy fats. Even better, Irresistible Blackberry Cobbler Delight offers a balanced treat that doesn’t derail your health goals. Finally, the combination of vitamins C and K from blackberries supports immune function and bone health, making every bite as beneficial as it is delicious.

How it fits in a healthy lifestyle

Irresistible Blackberry Cobbler Delight fits seamlessly into a balanced diet when enjoyed mindfully. For a heart-healthy twist, pair it with a dollop of Greek yogurt for extra protein and probiotics. If you follow a gluten-free lifestyle, simply swap traditional flour for almond or coconut flour, as detailed in our Gluten-Free Baking Guide.

This dessert also works well for meal preppers who want a satisfying yet nutritious treat ready to enjoy. By controlling portion sizes, you can indulge without guilt. For more tips on balancing sweets with wholesome eating, check out our Healthy Dessert Swaps guide. Whether you’re fueling an active day or winding down after dinner, Irresistible Blackberry Cobbler Delight complements your routine without compromise.

Print

clock clock iconcutlery cutlery iconflag flag iconfolder folder iconinstagram instagram iconpinterest pinterest iconfacebook facebook iconprint print iconsquares squares iconheart heart iconheart solid heart solid icon

Irresistible Blackberry Cobbler Delight


  • Author:
    Chef Emy

Description

A warm and comforting blackberry cobbler with a golden, buttery crust that melts in your mouth.


Ingredients


Scale

For the Crust:

  • 4 cups fresh blackberries
  • 1 cup granulated sugar
  • 1 cup all-purpose flour
  • 1 1/2 teaspoons baking powder
  • 1/2 teaspoon salt
  • 1 cup milk
  • 1/2 cup unsalted butter, melted
  • 1 teaspoon vanilla extract


Instructions

1. Prepare the Crust:

  1. Preheat oven to 375°F (190°C). Grease a 9×13-inch baking dish.
  2. Spread blackberries evenly in the prepared baking dish and sprinkle with 1/2 cup of the sugar.
  3. In a medium bowl, whisk together flour, remaining 1/2 cup sugar, baking powder, and salt.
  4. Stir in milk, melted butter, and vanilla extract until just combined. Pour batter over blackberries.
  5. Bake for 35-40 minutes or until the top is golden brown and a toothpick inserted comes out clean.
  6. Let cool for 10 minutes before serving. Serve warm with ice cream if desired.

Notes

You can customize the seasonings to taste.


How to Prepare This Dish

Steps and time-saving tips

Start by preheating your oven to 375°F so it’s ready when you finish mixing the Irresistible Blackberry Cobbler Delight. While it heats, gently toss fresh blackberries with sugar and a squeeze of lemon juice in a large bowl. Let them sit for 10 minutes to release their natural juices. Meanwhile, whisk together flour, sugar, baking powder, and a pinch of salt in another bowl. Cut cold butter into small cubes and work it into the dry mix until crumbly. Stir in milk just until the dough comes together—don’t overmix. Pour the juicy blackberries into a greased baking dish, then drop spoonfuls of the dough on top. Bake for 35-40 minutes until golden and bubbly. For a time-saving hack, use frozen blackberries (no thawing needed) or prep the dry mix ahead. Let the cobbler cool slightly before serving with vanilla ice cream for the perfect finish.

Mistakes I’ve made and learned from

My first attempt at Irresistible Blackberry Cobbler Delight was a soggy mess because I didn’t drain excess juice from the berries. Now, I let them macerate longer and thicken the filling with a teaspoon of cornstarch. Another blunder? Overworking the dough, which made it tough instead of fluffy. A light hand is key—stop mixing as soon as it forms clumps. If you’re new to cobblers, check out my guide to baking temperatures to avoid underbaking. And if your berries are tart, don’t skip the sugar adjustment tip in this flavor-balancing post. Trust me, a few tweaks make all the difference between good and unforgettable.

Cultural Connection and Variations

Where this recipe comes from

Irresistible Blackberry Cobbler Delight traces its roots to the American South, where cobblers became a staple dessert thanks to their simplicity and use of fresh, seasonal fruit. Early settlers adapted European fruit pies into rustic, dough-topped creations, and blackberries, abundant in summer, quickly became a favorite filling. Families often foraged for wild berries, turning them into cobblers for community gatherings or Sunday suppers. Meanwhile, in the UK, a similar dish called a “crumble” swaps the biscuit-like topping for a buttery streusel, while in Australia, they might add a scoop of vanilla ice cream right from the start.

In my own kitchen, Irresistible Blackberry Cobbler Delight brings back memories of sticky-fingered berry-picking trips with my grandparents. We’d toss in a handful of lemon zest to brighten the filling, a trick my grandma swore by. Some Southern cooks layer the berries with a dash of bourbon, while others up north might mix in apples for extra depth. No matter the twist, this dessert always feels like a warm hug from the past.

How it fits in today’s cooking

Today, Irresistible Blackberry Cobbler Delight still shines as a versatile crowd-pleaser, whether served at summer picnics or cozy winter dinners. Modern cooks love its adaptability—swap in frozen berries when fresh aren’t in season, or try a gluten-free flour blend for dietary needs. It’s also a star at holiday potlucks, pairing perfectly with whipped cream or a drizzle of caramel. For busy home chefs, prepping the cobbler in advance and baking it just before serving fits seamlessly into meal routines.

Looking for more ways to enjoy seasonal fruits? Check out our Peach Melba Parfait for a lighter option, or explore our Classic Apple Crisp for another timeless dessert. Whether you stick to tradition or experiment with new flavors, this cobbler proves some recipes never go out of style.

Taste and Texture

What makes it delicious

Irresistible Blackberry Cobbler Delight bursts with juicy, tangy blackberries that mingle with a buttery, golden crust for a perfect balance of sweet and tart. Each bite delivers a warm, jammy filling that oozes with rich berry flavor, while the topping stays crisp yet tender, almost melting in your mouth. The aroma alone—a mix of caramelized sugar, vanilla, and fresh fruit—will draw everyone to the kitchen. Thanks to the plump blackberries and a hint of cinnamon, this dessert feels both comforting and vibrant. Whether served warm or at room temperature, Irresistible Blackberry Cobbler Delight promises a satisfying contrast of textures and a flavor that lingers deliciously.

Boosting the flavor

Elevate your Irresistible Blackberry Cobbler Delight by swapping vanilla extract for almond extract, adding a subtle nutty depth that pairs beautifully with the berries. For extra indulgence, drizzle a spoonful of homemade vanilla sauce over each serving, or sprinkle toasted pecans for crunch. A pinch of cardamom or orange zest can brighten the filling, while a scoop of cinnamon ice cream turns it into a decadent treat. Experiment with these twists to make every bite even more memorable.

Tips for Success

Best practices for results

Always use fresh blackberries for the best flavor in your Irresistible Blackberry Cobbler Delight. Meanwhile, preheat your oven thoroughly to ensure even baking. For a golden, crispy topping, brush the dough with melted butter before baking. Additionally, let the cobbler rest for 10 minutes after baking so the juices thicken perfectly. Finally, serve it warm with a scoop of vanilla ice cream for an extra indulgent treat.

Mistakes to avoid

Avoid overmixing the cobbler dough, as this can make it tough instead of tender. Instead, gently fold the ingredients until just combined. Furthermore, don’t skip the cornstarch in the filling—it prevents a runny cobbler. If you’re unsure about baking times, check out our guide to perfect baking temperatures for help. Also, resist the urge to overfill your baking dish; leave room for bubbling. For more tips on avoiding soggy bottoms, read our secrets to crispy pie crusts.

Serving and Pairing Suggestions

How to serve this dish

Serve Irresistible Blackberry Cobbler Delight warm for the ultimate comfort food experience. Scoop it into rustic bowls and top with a dollop of vanilla ice cream for a classic touch. Alternatively, drizzle with honey or sprinkle powdered sugar for an elegant finish. For special occasions, garnish with fresh mint leaves or extra blackberries to make it visually stunning. Whether you’re hosting a summer barbecue or a cozy winter gathering, this dessert always steals the show.

What goes well with it

Pair Irresistible Blackberry Cobbler Delight with a scoop of homemade vanilla bean ice cream to balance its tangy sweetness. If you prefer a drink, try a warm cup of spiced chai tea, which enhances the cobbler’s rich flavors. For a brunch twist, serve it alongside fluffy buttermilk pancakes—our buttermilk pancakes recipe pairs perfectly. If you love contrasting textures, add a crunchy side like our almond brittle for a delightful crunch.

What makes Irresistible Blackberry Cobbler Delight so special?

Irresistible Blackberry Cobbler Delight stands out with its perfect balance of sweet-tart blackberries and buttery crust. The secret lies in using fresh berries and a golden, flaky topping that bakes to perfection. It’s a crowd-pleaser that feels both rustic and indulgent.

Can I use frozen blackberries for Irresistible Blackberry Cobbler Delight?

Yes! Frozen blackberries work well in Irresistible Blackberry Cobbler Delight—just thaw and drain excess liquid to prevent a soggy crust. The recipe adapts easily, though fresh berries offer a slightly brighter flavor. Either way, you’ll still get that luscious, jammy filling.

How do I store leftover Irresistible Blackberry Cobbler Delight?

Cover leftover Irresistible Blackberry Cobbler Delight tightly and refrigerate for up to 3 days. Reheat individual servings in the microwave or oven to revive the crispy topping. For longer storage, freeze portions in airtight containers for up to 2 months.

What’s the best way to serve Irresistible Blackberry Cobbler Delight?

Serve Irresistible Blackberry Cobbler Delight warm with a scoop of vanilla ice cream or a dollop of whipped cream. The contrast of cool cream and warm cobbler enhances the flavors. For breakfast, try it with Greek yogurt for a delicious twist.