“`html
Oreo Milkshake Recipe
Table of Contents
Introduction
Did you know that the average American consumes over 2,000 Oreo cookies in their lifetime? It’s no wonder that the Oreo Milkshake has become a quintessential dessert drink, beloved for its perfect balance of creamy sweetness and satisfying crunch. This rich and creamy Oreo Milkshake is a classic dessert favorite made with just a few ingredients — Oreos, milk, and ice cream. Quick, easy, and irresistible, this shake is perfect for satisfying your sweet cravings. Whether you’re looking for a party treat or a summer refresher, this indulgent milkshake hits the spot. Great for kids and adults alike!
More than just a simple blend, the magic of this recipe lies in its texture and the nostalgic flavor of Oreos transformed into a sippable delight. It’s a dessert that feels both familiar and special, requiring minimal effort for maximum reward. In this guide, we’ll walk you through creating the perfect, thick, and dreamy shake, explore clever ingredient swaps, and share pro tips to avoid common pitfalls. Let’s dive into the world of this iconic treat.
Ingredients List
Gather these simple ingredients for the ultimate creamy, chocolatey, and crunchy milkshake experience. Each component plays a specific role in building flavor and texture.
- 8 Oreo Cookies: The star of the show. Their signature chocolate wafer and sweet vanilla cream filling provide the iconic flavor and those delightful dark flecks. For a deeper chocolate hit, try Double Stuf Oreos. (Sensory: Look for the satisfying “twist and lick” snap and the sweet, slightly floral aroma of the cream.)
- 3 cups (approx. 450g) Vanilla Ice Cream: This is your shake’s body and primary creamy element. Use a high-quality, full-fat vanilla ice cream for the richest, thickest texture. For a more intense vanilla flavor, opt for a bean or French vanilla variety. (Substitution: Chocolate ice cream for a double-chocolate shake, or frozen yogurt for a tangier, lighter version.)
- 1/2 cup (120ml) Whole Milk: The liquid that brings it all together. Whole milk creates a luxuriously smooth and rich consistency. (Substitutions: 2% milk works well; for a dairy-free version, use oat milk (creamy) or almond milk (lighter). For extra decadence, substitute with chocolate milk.)
- Optional Toppings: Whipped cream, additional crushed Oreos, chocolate syrup drizzle, or a maraschino cherry. These add visual appeal and extra layers of flavor and texture.
Timing
This Oreo Milkshake comes together in a lightning-fast 5 minutes from start to finish. Compared to the average milkshake or dessert recipe, which can take 10-15 minutes with prep and assembly, this recipe is exceptionally quick. There’s no cooking involved—just measuring, quick blending, and serving. This makes it an ideal last-minute dessert for unexpected guests, a speedy after-school treat, or a instant solution for a powerful sweet tooth craving. The efficiency lies in its simplicity: three core ingredients and a blender are all you need for dessert paradise.
Step-by-Step Instructions
Step 1: Prepare Your Ingredients
Before you even turn on the blender, get everything ready. This “mise en place” approach ensures a smooth, no-fuss process. Scoop your vanilla ice cream straight from the freezer—using it while it’s fully frozen is key to a thick, not runny, shake. Measure out your milk. Have your Oreos and serving glasses ready. I like to pop my glasses in the freezer for a few minutes beforehand; a frosty glass keeps your shake colder and thicker for longer.
Step 2: Crush the Oreos
Take 6 of the 8 Oreo cookies. You can crush them in a few ways: place them in a zip-top bag and use a rolling pin for coarse, chunky pieces, or pulse them a few times in your blender or food processor for a finer crumb. I prefer a mix—some fine crumbs to infuse the shake with chocolate flavor and a few larger chunks for that satisfying bite. Reserve the remaining 2 whole cookies for garnish.
Step 3: Blend the Base
In your blender, combine the frozen vanilla ice cream and the milk. Start blending on a low speed to combine, then increase to high. Blend for about 30-45 seconds, or until the mixture is completely smooth, creamy, and has a thick, pourable consistency. Avoid over-blending, as the friction from the blender blades can start to melt the ice cream too much, making the shake thin.
Step 4: Add the Crushed Oreos
Now, add most of your crushed Oreos to the blender. Reserve a tablespoon or two for sprinkling on top later. Pulse the blender 3-5 times. The goal here is to just incorporate the cookies, not pulverize them into oblivion. You want to see visible dark streaks and small bits of cookie throughout the pale shake. This step creates that beautiful marbled effect and ensures every sip has texture.
Step 5: Serve Immediately
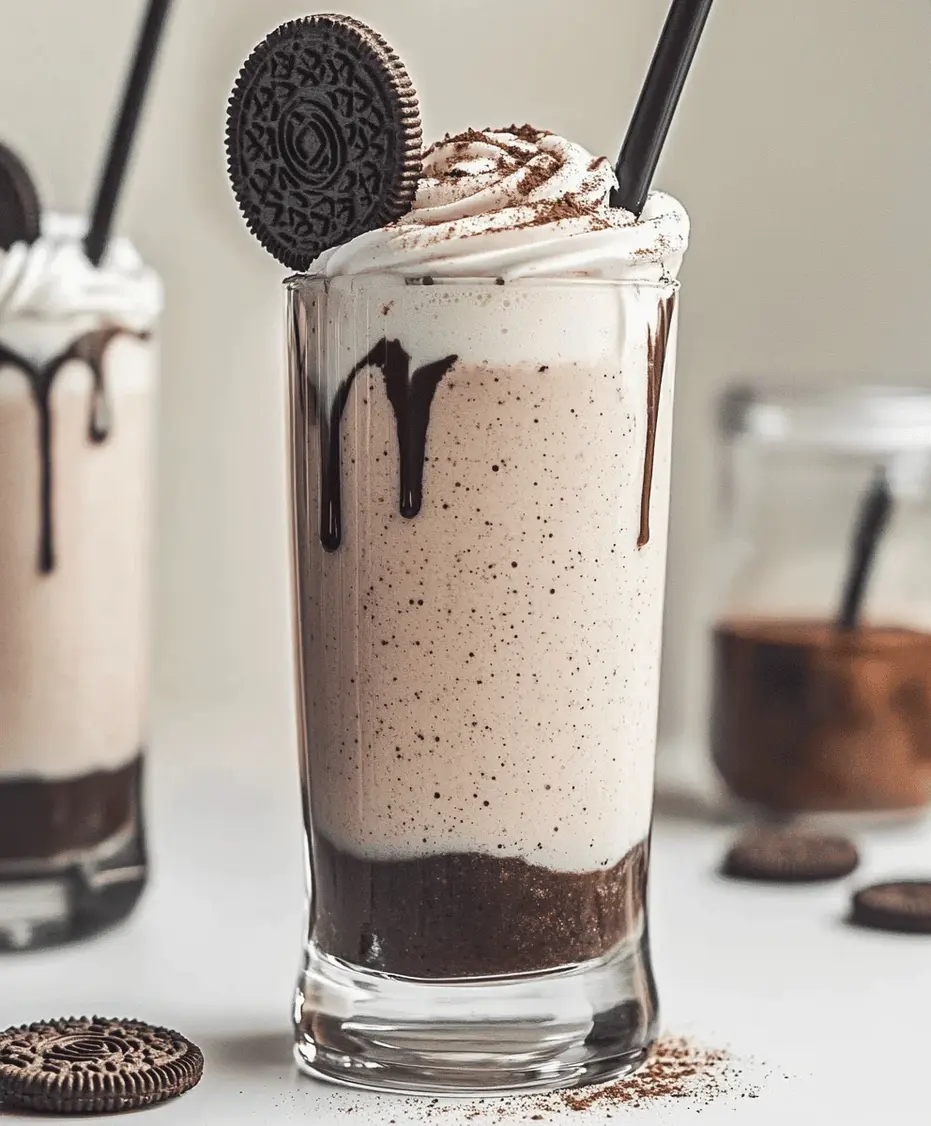
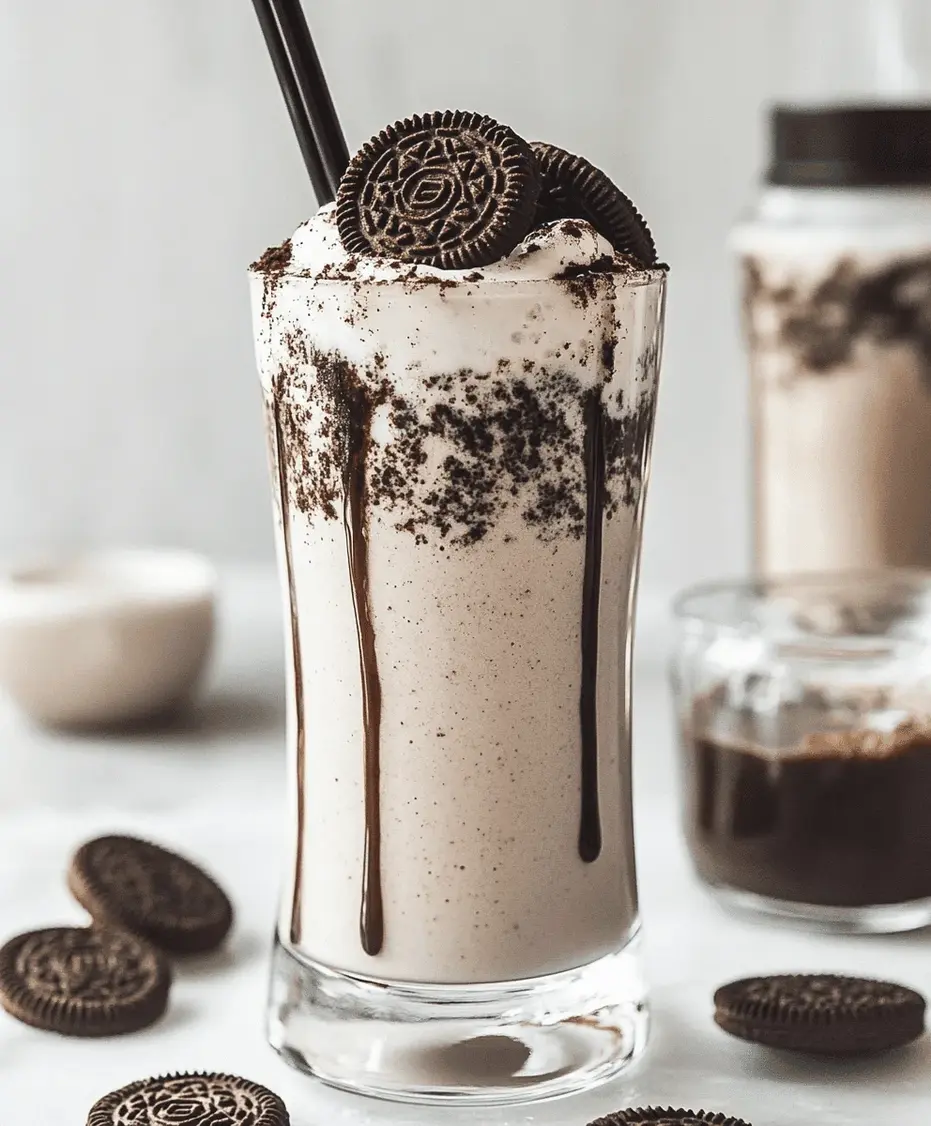
Pour the thick, luscious shake into your chilled glasses. Immediately top with a generous swirl of whipped cream. Sprinkle the reserved crushed Oreos over the whipped cream, drizzle with chocolate syrup if desired, and finish by perched a whole Oreo cookie on the rim. Serve with a sturdy straw and a long spoon. Enjoy immediately for the best texture and temperature!
Nutritional Information
(Approximate values per serving, recipe makes 2 large shakes):
- Calories: ~650 kcal
- Total Fat: 32g
- Saturated Fat: 18g
- Carbohydrates: 82g
- Sugar: 68g
- Protein: 10g
- Sodium: 280mg
Note: This is an indulgent dessert. Nutritional values can vary based on specific brands of ice cream and milk used, and optional toppings will increase these values.
Healthier Alternatives
You can enjoy a lighter version of this classic without sacrificing the core creamy, chocolatey experience. Here are flavor-preserving swaps:
- Ice Cream: Swap full-fat vanilla ice cream for a light vanilla ice cream, frozen yogurt, or banana-based “nice” cream. For nice cream, blend 3 frozen bananas until smooth and creamy, then proceed with the recipe. It adds natural sweetness and a similar thick texture.
- Milk: Use unsweetened almond milk, oat milk, or skim milk to significantly reduce calories and fat.
- Oreos: While not identical, for a lower-sugar option, look for “reduced-fat” Oreos or use a smaller quantity. You could also use a few tablespoons of cacao powder and a touch of sweetener to mimic the chocolate flavor, though you’ll lose the crunch.
- Toppings: Skip the whipped cream or use a light whipped topping. Garnish with a few cacao nibs for crunch instead of extra crushed cookies.
Serving Suggestions
- For Parties: Create an Oreo milkshake bar! Set out small glasses, the blended base, and bowls of various toppings like mini chocolate chips, sprinkles, different cookie crumbles (like Nilla Wafers or Biscoff), and multiple syrup flavors.
- Adult Version: Add a shot of coffee liqueur (like Kahlúa), Irish cream, or vodka for a boozy dessert cocktail. The coffee liqueur complements the chocolate beautifully.
- Pairings: Serve alongside salty snacks like pretzels or french fries for the ultimate sweet-and-salty contrast. It’s also fantastic with a warm brownie or chocolate chip cookie for a next-level dessert duo.
Common Mistakes
- Using Melted Ice Cream: This is the #1 reason for a thin, watery shake. Always use ice cream straight from the freezer. Letting it soften too much before blending ruins the texture.
- Over-blending the Oreos: If you blend the cookies on high speed for too long, they dissolve completely, turning your shake an unappealing grey-brown color and losing the delightful crunchy bits. Pulse briefly.
- Wrong Milk Ratio: Adding too much milk too quickly will thin the shake. Start with 1/3 cup, blend, and only add more if it’s too thick to blend. You can always add more liquid, but you can’t take it out.
- Serving in Warm Glasses: A room-temperature glass will cause your masterpiece to melt rapidly. Always chill your glasses.
Storing Tips
Milkshakes are best enjoyed immediately. However, if you must store it:
- Short-Term (1-2 hours): Pour any leftover shake into an airtight container and press plastic wrap directly onto the surface to prevent ice crystals. Store in the freezer. It will become very hard.
- To Re-Serve: Let it sit at room temperature for 10-15 minutes to soften slightly, then re-blend briefly to restore creaminess. Note: The texture will not be as perfect as fresh, and the Oreo bits may have softened.
- Do Not Refrigerate: Refrigeration will cause the shake to separate and become a watery, grainy mess. The freezer is your only option for short-term holding.
Conclusion
In just five minutes, you can transform a handful of simple ingredients into a decadent, crowd-pleasing dessert that never fails to bring a smile. This Oreo Milkshake recipe is the epitome of easy indulgence, combining creamy vanilla, cold milk, and the iconic crunch of Oreos into a drinkable treat. By following the tips for thickness, texture, and serving, you’ll create a milkshake that