Easy Mixed Berry Frozen Yogurt Bites with Granola

easy-mixed-berry-yogurt-bites

A Sweet Little Secret for Berry Lovers

There’s something magical about opening the freezer on a warm afternoon and finding a stash of these jewel-toned frozen yogurt bites. I discovered them quite by accident last summer, when a pint of overripe berries and a half-empty tub of yogurt were whispering sweet nothings to each other in my fridge. What began as a “use it up” experiment became my favorite way to capture summer’s berry bounty—no ice cream maker required!

Ingredients That Make Your Heart (and Freezer) Happy

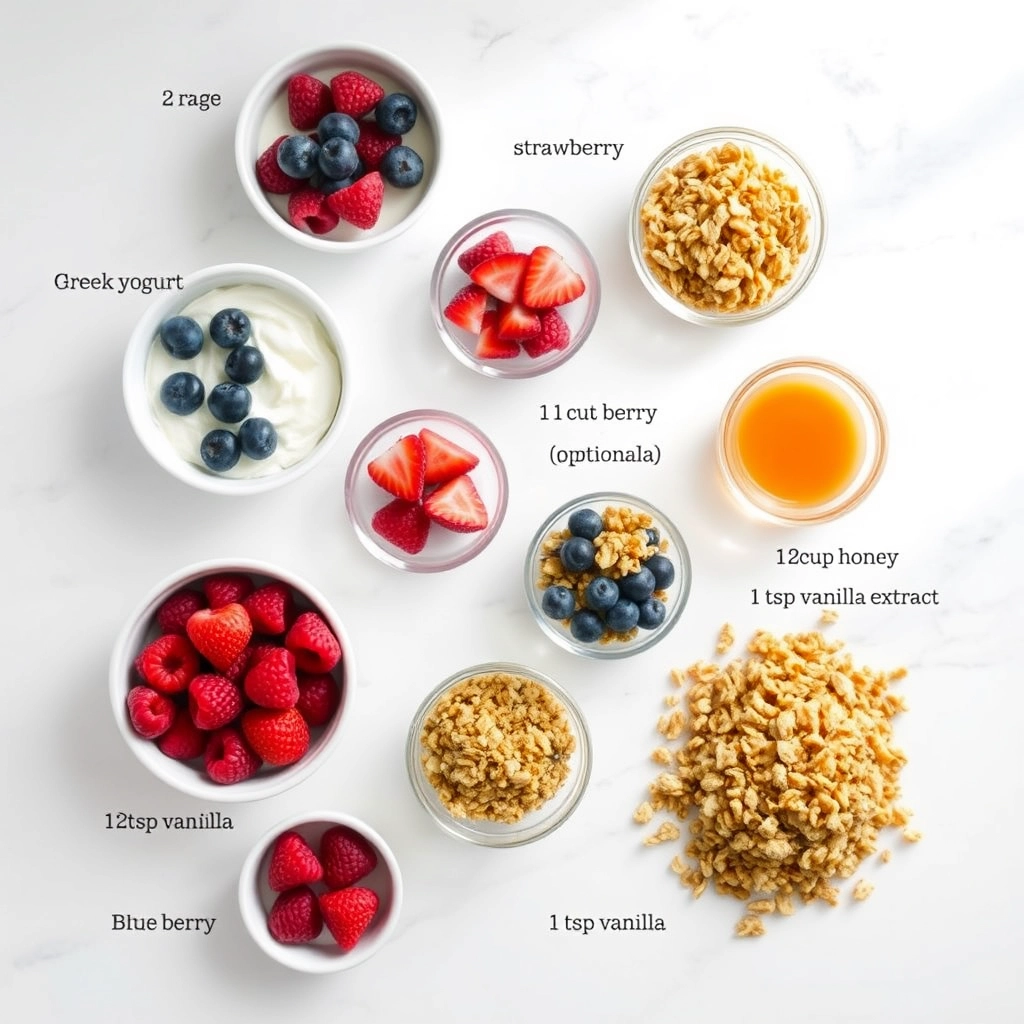
  • 2 cups mixed berries – I adore the confetti look of strawberries, blueberries, and raspberries together, but any single berry works beautifully. Frozen berries work too—just thaw and pat dry!
  • 1 cup Greek yogurt – The thicker the better! I use full-fat for creaminess, but honey-flavored or coconut yogurt make lovely variations.
  • 2 tablespoons honey or maple syrup – Just enough to kiss the tartness without overpowering the berries’ natural sweetness.
  • 1 teaspoon vanilla extract – That warm, comforting note that makes everything taste homemade.
  • 1/2 cup granola – My secret weapon! Use your favorite crunchy blend—the clusters add the most delightful texture contrast.
  • Pinch of sea salt – Trust me, this tiny addition makes all the flavors pop like fireflies at dusk.

Let’s Make Some Berry Magic

First, line a baking sheet with parchment paper—this little step saves so much frustration later! Now let’s dance through the steps:

  1. Prep your berries: If using strawberries, hull and quarter them. Other berries can stay whole for charming pops of color. Gently pat them dry—we want juicy flavor, not watery bites!
  2. Whisk the yogurt mixture: In your prettiest mixing bowl (because joy matters), combine yogurt, honey, vanilla, and that all-important pinch of salt. Taste and adjust sweetness—this is your moment to make it sing to your preferences.
  3. The dipping waltz: One by one, dip each berry about three-quarters into the yogurt mixture. I use a fork for smaller berries and my fingers for strawberries (licking them clean is absolutely permitted).
  4. Granola confetti: Before the yogurt sets, roll the dipped portion in granola. The uneven clusters create the most delightful texture—don’t worry about perfection here!

Now comes the hardest part… but I’ll share the finishing touches and serving ideas in just a moment. First, tell me—which berry combination makes your heart skip a beat?

Pro Tips, Variations, and Substitutions

Making these mixed berry frozen yogurt bites is a breeze, but a few little tricks can take them from good to great. Here are some of my favorite ways to customize them:

  • Swap the berries: Don’t have mixed berries? Use whatever you have on hand—strawberries, blueberries, or even mango chunks work beautifully.
  • Dairy-free option: Substitute coconut yogurt for a creamy, vegan-friendly version.
  • Extra crunch: Add a sprinkle of chia seeds or chopped nuts to the granola for an extra texture boost.
  • Sweeten to taste: If your yogurt is tart, drizzle a little honey or maple syrup over the berries before freezing.

What to Serve It With

These little frozen bites are fantastic on their own, but they also shine as part of a bigger spread. Try pairing them with:

  • A scoop of vanilla ice cream for an indulgent dessert.
  • Fresh fruit salad for a light and refreshing breakfast.
  • A drizzle of melted dark chocolate for a decadent touch.

Storage and Reheating Tips

These yogurt bites are best enjoyed straight from the freezer, but here’s how to keep them tasting fresh:

  • Storage: Keep them in an airtight container in the freezer for up to 2 weeks. Layer parchment paper between bites to prevent sticking.
  • Serving: Let them sit at room temperature for 1–2 minutes before eating—just enough to soften slightly but still hold their shape.
  • No reheating needed! These are meant to be enjoyed cold and refreshing.

Frequently Asked Questions

Can I use store-bought granola?

Absolutely! Homemade granola adds a special touch, but your favorite store-bought variety works just fine in a pinch.

Do I need silicone molds?

Silicone molds make popping them out easier, but a mini muffin tin lined with parchment paper works too—just be gentle when removing them.

Can I make these without granola?

Yes! Skip the granola for a simpler version, or swap in crushed graham crackers for a different texture.

How long do they take to freeze?

They’ll be firm in about 2 hours, but I recommend freezing overnight for the best texture.

Final Thoughts

There’s something so satisfying about having a stash of these little frozen yogurt bites ready to go—whether it’s for a quick snack, a light dessert, or a fun addition to breakfast. They’re sweet, tangy, and just a little crunchy, making them the perfect treat for any time of day. I hope you love them as much as I do!

Print
clock clock iconcutlery cutlery iconflag flag iconfolder folder iconinstagram instagram iconpinterest pinterest iconfacebook facebook iconprint print iconsquares squares iconheart heart iconheart solid heart solid icon

Mixed Berry Frozen Yogurt Bites with Granola


  • Author: Trusted Blog

Description

A refreshing and healthy frozen treat combining yogurt, mixed berries, and crunchy granola.


Ingredients

Scale

For the Crust:

  • 2 cups Greek yogurt
  • 1 cup mixed berries (strawberries, blueberries, raspberries)
  • 1/2 cup granola
  • 1 tbsp honey (optional)
  • 1 tsp vanilla extract

Instructions

1. Prepare the Crust:

  1. In a bowl, mix Greek yogurt, honey, and vanilla extract until well combined.
  2. Gently fold in the mixed berries.
  3. Spoon the mixture into small silicone molds or an ice cube tray.
  4. Sprinkle granola on top of each bite.
  5. Freeze for at least 3 hours or until firm.
  6. Pop out the frozen yogurt bites and store in an airtight container in the freezer.

Notes

You can customize the seasonings to taste.

Easy Garlic Knots – Soft and Buttery Recipe

easy-garlic-knots-soft-buttery

The Coziest Garlic Knots You’ll Ever Make

There’s something magical about the smell of garlic and butter wafting through the kitchen, isn’t there? I remember the first time I made garlic knots – it was a rainy Sunday afternoon, and I wanted something warm, comforting, and ridiculously easy to whip up. What emerged from my oven that day were these golden, buttery spirals of joy that became an instant family favorite. Now, whenever I hear the pitter-patter of rain against the window, my hands automatically reach for the flour and garlic powder.

Ingredients You’ll Need

  • 2 1/4 cups all-purpose flour – The foundation of our fluffy knots (I sometimes swap 1/4 cup with whole wheat flour for extra texture)
  • 1 packet (2 1/4 tsp) instant yeast – Our little magic makers that make the dough rise beautifully
  • 1 tbsp sugar – Just enough to feed the yeast and create that perfect golden crust
  • 1 tsp salt – The flavor enhancer we can’t skip
  • 3/4 cup warm water – About 110°F – think baby bathwater temperature
  • 2 tbsp olive oil – For that irresistible tenderness
  • 4 tbsp unsalted butter, melted – Because everything’s better with butter
  • 4 garlic cloves, minced – Fresh is best here, but 1 tsp garlic powder works in a pinch
  • 1 tbsp fresh parsley, chopped – That pop of color and freshness
  • 1/4 tsp red pepper flakes (optional) – For those who like a little kick

Let’s Make Some Garlicky Magic

Step 1: Wake Up the Yeast
In a small bowl, combine the warm water, sugar, and yeast. Give it a gentle stir and let it sit for about 5 minutes until it becomes frothy. This is my favorite part – watching those little yeast bubbles come to life always feels like kitchen alchemy!

Step 2: Create the Dough
In a large mixing bowl, whisk together the flour and salt. Make a well in the center and pour in the yeast mixture and olive oil. Stir with a wooden spoon until a shaggy dough forms. Tip: If the dough feels too sticky, add flour 1 tablespoon at a time, but resist the urge to add too much – we want these knots tender!

Step 3: Knead with Love
Turn the dough onto a lightly floured surface and knead for about 5 minutes. You’ll know it’s ready when it becomes smooth and elastic. Here’s my secret: I like to hum my favorite tune while kneading – it’s the perfect rhythm for working the dough!

Step 4: First Rise
Place the dough in a lightly oiled bowl, cover with a clean kitchen towel, and let it rise in a warm spot for about 1 hour or until doubled in size. My favorite trick? I sometimes place the bowl in my oven with just the light on – it creates the perfect cozy environment for rising.

Pro Tips, Variations, and Substitutions

Making the perfect garlic knots is easier than you think, but a few pro tips can take them from good to unforgettable. Here’s how to nail them every time:

  • Use fresh garlic: While garlic powder works in a pinch, freshly minced garlic gives the best flavor. For extra depth, sauté it lightly in butter before brushing it on.
  • Don’t skip the resting time: Letting the dough rest ensures soft, pillowy knots. If you rush, they’ll be dense.
  • Add herbs: A sprinkle of dried oregano, parsley, or even a pinch of red pepper flakes elevates the flavor.
  • Dairy-free? Swap butter for olive oil or vegan butter—they’ll still be delicious.
  • Cheesy twist: Sprinkle grated Parmesan or mozzarella over the knots before baking for a gooey, cheesy finish.

What to Serve With Garlic Knots

These buttery knots are incredibly versatile! Here are a few pairing ideas:

  • Pasta night: Serve alongside spaghetti marinara or creamy fettuccine Alfredo.
  • Soup’s best friend: Dunk them into tomato soup or a hearty minestrone.
  • Salad sidekick: Pair with a crisp Caesar or Caprese salad for a light meal.
  • Party appetizer: Offer them with marinara or garlic butter dipping sauce—they’ll disappear fast!

Storage and Reheating Tips

Garlic knots taste best fresh, but if you have leftovers (lucky you!), here’s how to keep them soft:

  • Room temperature: Store in an airtight container for up to 2 days.
  • Freezing: Wrap cooled knots tightly in foil and freeze for up to 1 month. Thaw at room temperature before reheating.
  • Reheating: Warm in a 350°F oven for 5–7 minutes or microwave for 10–15 seconds (though the oven keeps them crispier).

Frequently Asked Questions

Can I use store-bought dough?
Absolutely! Premade pizza dough works great—just skip the dough-making steps and start with shaping the knots.

Why are my garlic knots tough?
Over-kneading or not letting the dough rest can lead to tough knots. Handle the dough gently and give it time to relax.

Can I make these ahead?
Yes! Prepare the knots up to the shaping step, cover, and refrigerate overnight. Let them come to room temperature before baking.

How do I get extra-garlicky knots?
Double the garlic butter and brush some on after baking for an extra punch of flavor.

Final Thoughts

There’s something magical about pulling apart warm, buttery garlic knots—the aroma alone is enough to bring everyone to the table. Whether you’re serving them for a cozy family dinner or a game-day snack, these little knots are guaranteed to impress. Don’t be surprised if they become a regular request! Happy baking, and may your kitchen always smell like garlic and happiness.

Print
clock clock iconcutlery cutlery iconflag flag iconfolder folder iconinstagram instagram iconpinterest pinterest iconfacebook facebook iconprint print iconsquares squares iconheart heart iconheart solid heart solid icon

Garlic Knots


  • Author: Trusted Blog

Description

Soft and buttery garlic knots brushed with garlic butter and sprinkled with parsley.


Ingredients

Scale

For the Crust:

  • 1 lb pizza dough
  • 1/4 cup unsalted butter, melted
  • 4 cloves garlic, minced
  • 1 tbsp fresh parsley, chopped
  • 1/4 tsp salt
  • 1/4 tsp black pepper
  • 1/4 cup grated Parmesan cheese

Instructions

1. Prepare the Crust:

  1. Preheat oven to 400°F (200°C) and line a baking sheet with parchment paper.
  2. Roll out the pizza dough into a rectangle and cut into strips. Tie each strip into a knot and place on the baking sheet.
  3. Bake for 12-15 minutes or until golden brown.
  4. In a small bowl, mix melted butter, minced garlic, parsley, salt, and pepper.
  5. Brush the warm garlic knots with the butter mixture and sprinkle with Parmesan cheese.
  6. Serve warm and enjoy!

Notes

You can customize the seasonings to taste.

Best Black Icing Buttercream Frosting Recipe

best-black-buttercream-frosting

The Secret to the Best Black Icing Buttercream Frosting

There’s something magical about a cake draped in deep, velvety black frosting—it’s dramatic, elegant, and just a little mysterious. I remember the first time I attempted to make black buttercream for a Halloween cake. My kitchen looked like a crime scene, my hands were stained for days, and the frosting? Well, let’s just say it was more of a murky gray. But after years of trial and error (and a few more stained aprons), I’ve finally cracked the code to the richest, smoothest black buttercream that holds its color without tasting like food coloring. Whether you’re decorating a gothic masterpiece or adding a touch of midnight elegance to a birthday cake, this recipe is your new best friend.

Ingredients You’ll Need

  • 1 cup (2 sticks) unsalted butter, softened – The foundation of any great buttercream. Room temperature butter ensures a silky-smooth texture.
  • 4 cups powdered sugar – Sifted, of course! Lumps are the enemy of flawless frosting.
  • 2-3 tablespoons heavy cream or whole milk – Adjust for your desired consistency. Heavy cream adds extra richness.
  • 1 tablespoon pure vanilla extract – A flavor boost that balances the sweetness.
  • 1/4 teaspoon salt – Just a pinch to round out the flavors.
  • 1/2 cup black cocoa powder – The secret weapon! Black cocoa (like the kind used in Oreos) gives depth of color and a hint of chocolatey goodness.
  • Black gel food coloring – Gel is key here—liquid coloring will water down your frosting. I love Americolor Super Black for its intensity.

Step-by-Step: Crafting the Perfect Black Buttercream

  1. Cream the butter – In a stand mixer fitted with the paddle attachment, beat the softened butter on medium speed for 2-3 minutes until it’s light and fluffy. Scrape down the bowl occasionally—this ensures even mixing.
  2. Add the dry ingredients – With the mixer on low, gradually add the powdered sugar, black cocoa powder, and salt. Trust me, covering your mixer with a towel will save you from a powdered sugar snowstorm!
  3. Bring it together – Drizzle in the vanilla and 2 tablespoons of heavy cream. Increase the speed to medium and beat for another 2 minutes until the frosting is dreamily smooth. If it feels too thick, add more cream a teaspoon at a time.

Now, here’s where the magic happens: the coloring. Add your black gel food coloring a little at a time, mixing well after each addition. Don’t panic if it looks dark gray at first—black buttercream often needs time to deepen in color. Let it rest for 10 minutes, then reassess before adding more. And remember, a little goes a long way with gel coloring!

Pro Tips for Perfect Black Buttercream

After making this recipe dozens of times, I’ve learned a few secrets to getting that deep, velvety black color without compromising flavor:

  • Start with chocolate buttercream – Using cocoa powder as a base helps achieve darker color with less food coloring
  • Let it rest – The color deepens as it sits, so make it a few hours before you need it
  • Use gel food coloring – Liquid food coloring will thin your frosting and require much more to achieve black
  • Add color gradually – Build up to black by mixing equal parts red, blue, and green food coloring first

Delicious Variations to Try

While the classic version is perfect as-is, sometimes it’s fun to mix things up:

  • Black Velvet – Add 1 tsp espresso powder for depth
  • Midnight Mint – Mix in 1/2 tsp peppermint extract
  • Black Forest – Fold in chopped cherries and chocolate shavings
  • Dairy-Free – Substitute vegan butter and coconut milk

What to Serve With Black Buttercream

This dramatic frosting pairs beautifully with:

  • Vanilla or chocolate cupcakes for classic contrast
  • Red velvet cake for gothic elegance
  • Orange or lemon cakes for Halloween vibes
  • Black cocoa cookies as a fun sandwich filling
  • Piped onto sugar cookies for striking decorations

Storage & Reheating Tips

To keep your black buttercream looking its best:

  • Room temperature – Store in an airtight container for up to 2 days
  • Refrigerator – Lasts 1-2 weeks; bring to room temp and rewhip before using
  • Freezer – Freeze for up to 3 months in sealed bags (thaw overnight in fridge)
  • Reviving dried frosting – Mix in 1 tsp milk or cream and rewhip

Frequently Asked Questions

Why does my black frosting taste bitter?

This usually happens when using too much food coloring. Stick to gel colors and build up slowly – the cocoa base should do most of the work!

Can I make this without cocoa powder?

You can, but you’ll need significantly more food coloring. The cocoa provides a dark base that requires less coloring to achieve true black.

How do I prevent black stains on teeth?

Using a cocoa base helps, but for events, consider serving with black licorice sticks or dark chocolate garnishes so guests expect the color.

Can I use natural food coloring?

While you can use activated charcoal (1-2 tsp), it won’t give the same deep black and may affect texture. For truest black, gel colors work best.

There’s something magical about the way this inky black frosting transforms ordinary desserts into showstoppers. Whether you’re creating gothic wedding cakes, Halloween treats, or just want to surprise your family with something unexpectedly elegant, this recipe never fails to delight. The rich chocolate flavor beneath that dramatic color means every bite is as delicious as it is beautiful. Happy baking, and don’t be afraid to get a little messy – those blackened fingertips are just proof of your pastry artistry!

Print
clock clock iconcutlery cutlery iconflag flag iconfolder folder iconinstagram instagram iconpinterest pinterest iconfacebook facebook iconprint print iconsquares squares iconheart heart iconheart solid heart solid icon

Black Icing Buttercream Frosting


  • Author: Trusted Blog

Description

A smooth and rich black buttercream frosting perfect for decorating cakes and cookies.


Ingredients

Scale

For the Crust:

  • 1 cup unsalted butter, softened
  • 4 cups powdered sugar
  • 23 tablespoons heavy cream
  • 1 teaspoon vanilla extract
  • 1/4 teaspoon salt
  • Black gel food coloring (as needed)

Instructions

1. Prepare the Crust:

  1. In a large bowl, beat the softened butter until creamy and smooth.
  2. Gradually add powdered sugar, one cup at a time, mixing well after each addition.
  3. Add heavy cream, vanilla extract, and salt. Beat until light and fluffy.
  4. Add black gel food coloring a little at a time until desired darkness is achieved. Mix thoroughly.
  5. If the frosting is too thick, add more heavy cream, one teaspoon at a time, until desired consistency is reached.

Notes

You can customize the seasonings to taste.

Best Butter Pecan Cookies – Easy Homemade Recipe

best-butter-pecan-cookies-recipe

The Butter Pecan Cookies That Taste Like a Hug

There’s something magical about the scent of butter and toasted pecans wafting through the kitchen—it’s the kind of aroma that pulls everyone into the room, noses first. I remember the first time I baked these butter pecan cookies. It was a chilly autumn afternoon, and my grandmother’s handwritten recipe card (complete with a buttery smudge in the corner) had resurfaced in an old cookbook. One bite took me right back to her sunlit kitchen, where cookies were always warm and love was measured in heaping spoonfuls. Today, I’m sharing that same recipe with you—simple, rich, and utterly irresistible.

Ingredients You’ll Need

Gather these cozy staples, and let’s make some magic:

  • 1 cup (2 sticks) unsalted butter, softened – The star of the show! Use the good stuff—real butter makes all the difference.
  • 1 cup packed light brown sugar – For that deep, caramel-like sweetness that pairs perfectly with pecans.
  • ½ cup granulated sugar – A touch of white sugar keeps the texture just right.
  • 2 large eggs – Room temperature eggs blend seamlessly into the dough.
  • 2 teaspoons pure vanilla extract – Skip the imitation stuff; the real vanilla adds warmth.
  • 2 ½ cups all-purpose flour – Spoon and level it for the perfect measure—no dense cookies here!
  • 1 teaspoon baking soda – Our little leavening helper for a tender bite.
  • ½ teaspoon salt – Balances the sweetness and enhances all the flavors.
  • 1 ½ cups chopped pecans, toasted – Toasting is non-negotiable! It brings out their nutty, buttery richness.

Let’s Bake Together

Preheat your oven to 350°F (175°C) and let’s create some cookie bliss:

  1. Toast those pecans – Spread them on a baking sheet and pop them in the oven for 5-7 minutes until fragrant. Let them cool slightly—this keeps your dough from getting greasy.
  2. Cream the butter and sugars – In a large bowl, beat the softened butter, brown sugar, and granulated sugar until light and fluffy (about 3 minutes). Scrape down the sides—this ensures everything gets evenly mixed.
  3. Add eggs and vanilla – Crack in the eggs one at a time, mixing well after each. Then, pour in the vanilla like you’re adding a little love potion.
  4. Whisk dry ingredients – In a separate bowl, whisk together the flour, baking soda, and salt. Gradually add this to the butter mixture, mixing just until combined. Overmixing = tough cookies, and we don’t want that!
  5. Fold in the pecans – Gently stir in those glorious toasted pecans until they’re evenly distributed. The dough will be thick and dreamy.

At this point, your kitchen should smell like a cozy bakery, and your heart (and stomach) will be begging to continue. But let’s pause here—because the next steps (scooping, baking, and the all-important taste test) deserve their own spotlight. Stay tuned for the second half of this recipe, where we’ll turn this dough into golden, buttery perfection!

Pro Tips, Variations, and Substitutions

Every baker has their own little tricks to make a recipe truly shine, and these butter pecan cookies are no exception! Here are some of my favorite ways to customize them:

  • Toast the pecans for extra depth of flavor—just pop them in a dry skillet over medium heat for 3–5 minutes until fragrant.
  • For a chewier texture, swap half the butter for vegetable shortening.
  • If pecans aren’t your thing, try walnuts or almonds for a different nutty twist.
  • Add a handful of white chocolate chips for a sweet contrast to the buttery cookie base.
  • For a holiday spin, sprinkle a pinch of cinnamon or nutmeg into the dough.

What to Serve With Butter Pecan Cookies

These cookies are delightful on their own, but they also pair beautifully with so many cozy treats! Here are a few of my favorite ways to enjoy them:

  • A steaming mug of spiced chai tea or hot cocoa for dunking.
  • A scoop of vanilla ice cream sandwiched between two cookies for an indulgent dessert.
  • A warm caramel latte—the buttery notes in the cookies complement the caramel perfectly.
  • A simple fruit platter with apples and pears for a light, balanced snack.

Storage and Reheating Tips

To keep these cookies tasting fresh and buttery for as long as possible:

  • Store in an airtight container at room temperature for up to 5 days.
  • For longer storage, freeze the baked cookies in a sealed bag for up to 3 months.
  • To refresh day-old cookies, pop them in the microwave for 10 seconds or warm them in a 300°F oven for 3–5 minutes.
  • For freezing dough, scoop unbaked portions onto a tray, freeze solid, then transfer to a bag. Bake straight from frozen, adding 1–2 extra minutes.

Frequently Asked Questions

Can I use salted butter instead of unsalted?

Yes! Just reduce the added salt in the recipe by half to balance the flavors.

Why did my cookies spread too much?

This usually happens if the butter was too soft or the dough wasn’t chilled enough. Make sure to refrigerate the dough for at least 30 minutes before baking.

Can I make these gluten-free?

Absolutely! Substitute the all-purpose flour with a 1:1 gluten-free baking blend for equally delicious results.

How do I prevent the pecans from burning?

If your oven runs hot, try lowering the temperature by 25°F and baking for an extra minute or two. You can also lightly toss the pecans in flour before mixing them into the dough.

Final Thoughts

There’s something so comforting about the aroma of butter pecan cookies wafting through the kitchen—a scent that promises warmth, nostalgia, and a little moment of sweetness in your day. Whether you’re baking these for a holiday gathering, a thoughtful gift, or just because, I hope this recipe brings as much joy to your home as it does to mine. Happy baking, friends!

Print
clock clock iconcutlery cutlery iconflag flag iconfolder folder iconinstagram instagram iconpinterest pinterest iconfacebook facebook iconprint print iconsquares squares iconheart heart iconheart solid heart solid icon

Butter Pecan Cookies


  • Author: Trusted Blog

Description

Deliciously rich and nutty butter pecan cookies with a perfect crisp texture.


Ingredients

Scale

For the Crust:

  • 1 cup unsalted butter, softened
  • 1 cup brown sugar, packed
  • 1/2 cup granulated sugar
  • 2 large eggs
  • 2 teaspoons vanilla extract
  • 2 1/2 cups all-purpose flour
  • 1 teaspoon baking soda
  • 1/2 teaspoon salt
  • 1 cup chopped pecans

Instructions

1. Prepare the Crust:

  1. Preheat oven to 350°F (175°C) and line baking sheets with parchment paper.
  2. In a large bowl, cream together butter, brown sugar, and granulated sugar until light and fluffy.
  3. Beat in eggs one at a time, then stir in vanilla extract.
  4. In a separate bowl, whisk together flour, baking soda, and salt. Gradually add to the butter mixture, mixing until combined.
  5. Fold in chopped pecans.
  6. Drop tablespoon-sized dough balls onto prepared baking sheets, spacing them 2 inches apart.
  7. Bake for 10-12 minutes, or until edges are golden brown. Let cool on baking sheets for 5 minutes before transferring to a wire rack.

Notes

You can customize the seasonings to taste.

Easy 3 Ingredient Sugar Cookie Recipe – Perfect & Simple

easy-3-ingredient-sugar-cookies

When Life Calls for Simple, Sweet Comfort

There are days when the world feels a little too heavy, and all I crave is the kind of simplicity that comes from rolling out dough with flour-dusted hands. Maybe it’s the nostalgia of childhood bake sales or the way sugar cookies make even the gloomiest afternoon feel like a celebration—whatever the reason, this 3-ingredient recipe has been my quiet rebellion against complicated recipes and perfectionism. Because sometimes, the sweetest moments come from the simplest ingredients.

Ingredients That Feel Like a Hug

What I love most about this recipe is how forgiving it is—no fancy pantry staples required! Here’s all you’ll need:

  • 1 cup unsalted butter, softened (the kind that yields to your finger like a cloud—this makes all the difference!)
  • 1/2 cup granulated sugar (or a heaping 1/2 cup if you, like me, believe in generous sweetness)
  • 2 cups all-purpose flour (measured with love and a gentle hand—no packing!)

That’s it! Though I’ll confess—I sometimes add a whisper of vanilla or a pinch of salt when the mood strikes, but these three humble ingredients alone create magic.

The Joy of Making (Without the Fuss)

Now, let’s bake with the kind of ease that feels like slipping into your favorite apron:

  1. Cream the butter and sugar until just combined—about 1-2 minutes with a hand mixer or a determined wooden spoon. We’re not aiming for fluffy here, just a happy marriage of textures.
  2. Add the flour in two batches, mixing gently until the dough comes together in crumbly clumps. This is where I always pause to press a bit between my fingers—it should hold its shape without being sticky.
  3. Turn the dough onto a floured surface and knead lightly until smooth (think 5-6 gentle folds). Overworking makes tough cookies, so pretend you’re handling a delicate secret.

At this point, I usually wrap the dough in parchment and let it rest in the fridge for 30 minutes—but if you’re impatient like I often am, rolling and cutting straight away works too (just know they’ll spread a tad more).


“`html

Pro Tips, Variations, and Substitutions

These 3-ingredient sugar cookies are wonderfully forgiving, but a few extra touches can make them even more special. Here are some ways to customize them:

  • Vanilla or almond extract: Add ½ teaspoon for extra depth of flavor.
  • Lemon zest: A teaspoon brightens the cookies beautifully.
  • Gluten-free: Swap the flour for a 1:1 gluten-free blend.
  • Vegan: Use coconut oil instead of butter and a flax egg (1 tbsp ground flax + 2.5 tbsp water).
  • Sprinkles or sanding sugar: Press into the dough before baking for a festive touch.

What to Serve With Your Sugar Cookies

These cookies shine on their own but pair perfectly with:

  • A cold glass of milk (classic never fails!)
  • Hot cocoa or coffee for dunking
  • Fresh berries for a light contrast
  • A scoop of vanilla ice cream for an easy cookie sandwich

Storage and Reheating Tips

To keep your cookies tasting fresh:

  • Room temperature: Store in an airtight container for up to 5 days.
  • Freezing: Freeze baked cookies for up to 3 months—thaw at room temperature.
  • Dough: Wrap unused dough tightly and refrigerate for 3 days or freeze for 1 month.
  • Reviving stale cookies: Microwave for 5-10 seconds to soften, or place in a 300°F oven for 2 minutes.

Frequently Asked Questions

Can I make these cookies without a mixer?

Absolutely! Use a sturdy spoon and some elbow grease—the dough comes together easily by hand.

Why are my cookies spreading too much?

Your butter may have been too soft. Chill the dough for 30 minutes before baking next time.

Can I use salted butter?

Yes, but omit the added salt in the recipe to avoid over-salting.

How thin should I roll the dough?

About ¼-inch thick yields the perfect balance of crisp edges and soft centers.

A Sweet Final Thought

There’s something magical about how three simple ingredients can create such joy. Whether you’re baking with little ones, surprising a friend, or treating yourself, these sugar cookies are a little reminder that the best things in life don’t have to be complicated. May your kitchen be warm, your cookies golden, and your heart full with every buttery bite.

“`
Print

clock clock iconcutlery cutlery iconflag flag iconfolder folder iconinstagram instagram iconpinterest pinterest iconfacebook facebook iconprint print iconsquares squares iconheart heart iconheart solid heart solid icon

3 Ingredient Sugar Cookies


  • Author: Trusted Blog

Description

Simple and delicious sugar cookies made with just three ingredients.


Ingredients

Scale

For the Crust:

  • 1 cup unsalted butter, softened
  • 1/2 cup granulated sugar
  • 2 cups all-purpose flour

Instructions

1. Prepare the Crust:

  1. Preheat oven to 350°F (175°C) and line a baking sheet with parchment paper.
  2. In a large bowl, cream together the butter and sugar until light and fluffy. Gradually mix in the flour until a dough forms.
  3. Roll the dough into 1-inch balls and place on the prepared baking sheet. Flatten slightly with a fork. Bake for 12-15 minutes or until edges are lightly golden.

Notes

You can customize the seasonings to taste.

Best Oreo Lasagna – Easy No-Bake Dessert Recipe

best-oreo-lasagna-no-bake

The Day I Discovered Oreo Lasagna (And Never Looked Back)

It was one of those sweltering summer afternoons where even the thought of turning on the oven made me wilt like lettuce. My niece had begged me to make something “fun and chocolatey” for her sleepover, and as I stood staring into my pantry, the Oreo package winked at me like an old friend. What began as a desperate no-bake experiment became my most requested dessert – this glorious Oreo Lasagna that’s like if tiramisu and chocolate pudding had a baby.

Ingredients You’ll Need (And Why They Matter)

  • 36 Oreo cookies – The classic kind, though mint or peanut butter would be daring twists!
  • 6 tbsp melted butter – Salted butter adds that perfect sweet-salty contrast
  • 8 oz cream cheese, softened – Leave it on the counter while you prep other ingredients
  • 1/4 cup granulated sugar – Just enough to sweeten without overpowering the Oreos
  • 2 tbsp milk – Whole milk makes the filling extra luscious
  • 12 oz Cool Whip, divided – Keep half thawed in fridge, half frozen for layering
  • 2 (3.4 oz) packages instant chocolate pudding – The secret to that irresistible mousse texture
  • 3 cups cold milk – I use 2% but any works except skim (too watery)
  • Mini chocolate chips – For that final sprinkle of joy

Let’s Build Some Sweet Layers (The Messy, Happy Way)

Step 1: Make Your Oreo “Pasta”
Pulse the Oreos (cream filling and all!) in a food processor until they resemble coarse sand. Drizzle in melted butter while pulsing – it should clump slightly when pressed. Tip: No processor? Seal cookies in a ziplock and roll with a wine bottle!

Step 2: Press the “Noodles”
Firmly press 2/3 of the crumbs into a 9×13″ dish. I use the bottom of a measuring cup to get an even layer. Pop this in the freezer while you prep the next layer – the cold helps set the crust.

Step 3: The Creamy “Ricotta” Layer
Beat softened cream cheese until fluffy (about 1 minute). Add sugar and milk, then gently fold in half the Cool Whip. Pro tip: If your cream cheese was still chilly, microwave the bowl for 10 seconds to prevent lumps.

Step 4: Spread With Love
Pull your crust from the freezer and spread the cream cheese mixture evenly. I like making little swoops with the back of a spoon – they’ll peek through the layers beautifully.

Pro Tips for the Perfect Oreo Lasagna

Want to take your Oreo lasagna to the next level? Here are some insider secrets:

  • Freeze the Oreos first – Crushing frozen cookies gives you perfect crumbs without turning to dust
  • Use room temperature cream cheese – This prevents lumps in your creamy layers
  • Chill between layers – 15 minutes in the freezer helps maintain those beautiful defined layers
  • Try flavored Oreos – Mint, peanut butter, or golden Oreos create fun flavor twists

Delicious Variations to Try

This recipe is wonderfully adaptable! Some of our favorite variations include:

  • Chocolate overload – Add chocolate pudding and chocolate chips between layers
  • Peanut butter paradise – Mix peanut butter into the cream cheese layer
  • Berry delicious – Layer fresh strawberries or raspberries with the whipped cream
  • Mint chocolate chip – Use mint Oreos and add a drop of peppermint extract

What to Serve With Your Oreo Lasagna

While this dessert stands beautifully on its own, here are some perfect pairings:

  • A scoop of vanilla ice cream (the contrast of temperatures is divine!)
  • Fresh berries to cut through the richness
  • A drizzle of caramel or chocolate sauce for extra decadence
  • A glass of cold milk – because Oreos and milk are soulmates

Storage and Reheating Tips

This dessert keeps wonderfully when stored properly:

  • Refrigerator – Cover tightly with plastic wrap and enjoy within 3-4 days
  • Freezer – Freeze individual portions for up to 2 months (thaw in fridge overnight)
  • Serving tip – Let chilled lasagna sit at room temperature for 10 minutes before serving for perfect texture

Frequently Asked Questions

Can I make this ahead of time?
Absolutely! In fact, it’s better when made at least 4 hours ahead so the layers can set properly. Overnight is ideal.

Can I use store-bought whipped cream?
You can, but homemade whipped cream makes a noticeable difference in texture and flavor. If using store-bought, choose the extra creamy variety.

How do I prevent soggy layers?
Make sure your pudding is fully set before assembling, and don’t skip the chilling time between layers. Also, serve within the recommended time frame.

Can I make this gluten-free?
Yes! Simply use gluten-free Oreos (available in most stores now) and ensure all other ingredients are gluten-free.

A Sweet Ending

There’s something magical about how simple ingredients can come together to create such an unforgettable dessert. Whether you’re making this for a special occasion or just because it’s Tuesday, this Oreo lasagna is guaranteed to bring smiles. The best part? Watching your loved ones’ eyes light up when they take that first creamy, crunchy, chocolatey bite. Don’t be surprised if this becomes your most requested recipe – it’s that good!

Print
clock clock iconcutlery cutlery iconflag flag iconfolder folder iconinstagram instagram iconpinterest pinterest iconfacebook facebook iconprint print iconsquares squares iconheart heart iconheart solid heart solid icon

Oreo Lasagna


  • Author: Trusted Blog

Description

A decadent no-bake dessert lasagna made with layers of Oreo cookies, cream cheese, and whipped topping.


Ingredients

Scale

For the Crust:

  • 36 Oreo cookies
  • 1/4 cup unsalted butter, melted
  • 8 oz cream cheese, softened
  • 1/4 cup granulated sugar
  • 2 cups cold milk
  • 1 (3.4 oz) package instant vanilla pudding mix
  • 1 (8 oz) tub whipped topping, thawed
  • 1 cup mini chocolate chips

Instructions

1. Prepare the Crust:

  1. Crush 24 Oreo cookies into fine crumbs and mix with melted butter. Press into the bottom of a 9×9 inch dish to form the crust.
  2. In a bowl, beat cream cheese and sugar until smooth. Fold in 1 cup of whipped topping. Spread over the Oreo crust.
  3. Whisk milk and pudding mix for 2 minutes until thickened. Let stand for 5 minutes, then spread over the cream cheese layer.
  4. Spread remaining whipped topping over the pudding layer.
  5. Crush remaining 12 Oreos and sprinkle over the top along with mini chocolate chips.
  6. Refrigerate for at least 4 hours before serving.

Notes

You can customize the seasonings to taste.

Easy Red White and Blue Cake Mix Cookies Recipe

easy-red-white-blue-cookies

A Sweet Slice of Summer: Red, White & Blue Cake Mix Cookies

There’s something magical about summer evenings when the fireflies start dancing and the scent of something sweet lingers in the air. Last Fourth of July, as I watched my nieces smear blue frosting on their cheeks like war paint, I realized – sometimes the simplest treats create the most vibrant memories. That’s how these cake mix cookies came to be: a shortcut dessert that looks like you spent hours decorating, but secretly comes together in minutes. Perfect for patriotic picnics, lazy poolside afternoons, or when you need a little edible confetti to brighten an ordinary Tuesday.

Ingredients You’ll Need:

  • 1 box white cake mix – The humble hero! I prefer Betty Crocker for that nostalgic flavor, but any brand works.
  • 1/3 cup vegetable oil – This keeps the cookies tender (and makes them dangerously easy to eat by the handful).
  • 2 large eggs – Room temperature eggs blend smoother, but I won’t judge if you’re impatient like me.
  • 1 tsp vanilla extract – The secret whisper of warmth in every bite.
  • 1/2 cup red, white & blue sprinkles – The more the merrier! Look for the “jimmies” style—they hold their color better than nonpareils.
  • 1/4 cup white chocolate chips (optional) – Because everything’s better with pockets of melty sweetness.

Let’s Make Some Magic:

  1. Preheat your oven to 350°F and line two baking sheets with parchment paper. (This is when I turn on my favorite summer playlist—cookie dancing encouraged.)
  2. In a large bowl, whisk together the cake mix, oil, eggs, and vanilla until a thick, glossy dough forms. It’ll be sticky—that’s perfect! Pro tip: If the dough feels too stiff, add 1 tbsp of milk to loosen it up.
  3. Fold in the sprinkles gently with a spatula. Don’t overmix or the colors will bleed into a patriotic tie-dye situation (which, honestly, sounds delicious too). If using, add the white chocolate chips now.
  4. Scoop tablespoon-sized balls onto your prepared sheets, spacing them 2 inches apart. I use a small ice cream scoop for uniformity—and because it makes me feel like a professional bakery chef.

As the cookies bake (we’ll get to that in part two!), your kitchen will fill with the scent of vanilla and childhood joy. These little gems are like edible fireworks—crispy at the edges, chewy in the center, and bursting with color in every bite. Stay tuned for the baking secrets that make them *just* right…

Pro Tips, Variations, and Substitutions

These red, white, and blue cake mix cookies are wonderfully forgiving, but a few extra tricks can take them from good to great:

  • Chill the dough for 30 minutes if it feels too sticky—this helps prevent overspreading.
  • Swap the sprinkles for seasonal colors (think green and red for Christmas or pastels for Easter).
  • Gluten-free? Use a gluten-free cake mix—it works just as well!
  • Add citrus zest (lemon or orange) to brighten the flavor against the sweetness.

What to Serve With These Festive Cookies

These cookies shine on their own, but they’re even better with:

  • A cold glass of homemade lemonade or iced tea
  • A scoop of vanilla ice cream sandwiched between two cookies
  • A patriotic dessert spread with berry parfaits and flag-themed cupcakes

Storage and Reheating Tips

Keep these cookies fresh and chewy with these simple tricks:

  • Room temperature: Store in an airtight container for up to 5 days.
  • Freezing: Layer between parchment paper in a freezer bag for up to 3 months. Thaw at room temperature.
  • Reviving stale cookies: Microwave for 5–10 seconds to soften, or place a slice of bread in the container overnight to restore moisture.

Frequently Asked Questions

Can I use homemade cake batter instead of a mix?

Absolutely! Use your favorite vanilla cake recipe, but reduce the liquid slightly for a dough-like consistency.

Why did my cookies spread too much?

This usually happens if the dough is too warm or the baking sheet is greased. Chill the dough and use parchment paper instead.

Can I make these without eggs?

Yes! Substitute each egg with ¼ cup unsweetened applesauce or a flax egg (1 tbsp ground flax + 3 tbsp water, rested for 5 minutes).

How do I get vibrant red and blue colors?

Gel food coloring works best—add a drop or two to the divided dough before mixing in sprinkles.

A Sweet Final Thought

There’s something magical about cookies that bring people together—especially when they’re as simple and celebratory as these. Whether you’re baking for the Fourth of July, a summer picnic, or just because, these red, white, and blue treats are sure to spark joy. Whip up a batch, share them with loved ones, and savor every colorful, chewy bite. Happy baking!

Print
clock clock iconcutlery cutlery iconflag flag iconfolder folder iconinstagram instagram iconpinterest pinterest iconfacebook facebook iconprint print iconsquares squares iconheart heart iconheart solid heart solid icon

Red White and Blue Cake Mix Cookies


  • Author: Trusted Blog

Description

Easy and festive cookies made with cake mix, perfect for patriotic holidays.


Ingredients

Scale

For the Crust:

  • 1 box white cake mix
  • 1/2 cup vegetable oil
  • 2 large eggs
  • 1/2 cup red and blue sprinkles
  • 1/2 cup white chocolate chips

Instructions

1. Prepare the Crust:

  1. Preheat oven to 350°F (175°C) and line a baking sheet with parchment paper.
  2. In a large bowl, combine cake mix, vegetable oil, and eggs. Mix until well combined.
  3. Fold in red and blue sprinkles and white chocolate chips.
  4. Drop tablespoon-sized dough balls onto the prepared baking sheet, spacing them 2 inches apart.
  5. Bake for 10-12 minutes or until edges are lightly golden. Let cool on the baking sheet for 5 minutes before transferring to a wire rack.

Notes

You can customize the seasonings to taste.

No-Bake Peanut Butter Cheesecake Bars: A Dreamy Dessert Without the Oven

There’s something magical about the combination of peanut butter and cheesecake—it’s rich, creamy, and just sweet enough to satisfy your deepest dessert cravings. And when you don’t have to turn on the oven? Even better. These No-Bake Peanut Butter Cheesecake Bars are the answer to busy days, last-minute gatherings, or those moments when you simply need a little indulgence without the fuss.

I first made these bars for a friend’s potluck when I was short on time (and energy). The result? They disappeared faster than I could say, Save me one! The best part? No one guessed how effortless they were to whip up. Whether you’re a seasoned baker or a kitchen newbie, this recipe is foolproof. Plus, it’s a fantastic make-ahead treat—just stash it in the fridge until you’re ready to serve. Trust me, your future self will thank you.

Why You’ll Love These No-Bake Peanut Butter Cheesecake Bars

If you need a little more convincing (though one bite will do the trick), here’s why this dessert is a must-try:

  • No oven required: Perfect for hot summer days or tiny kitchens.
  • Creamy meets crunchy: A buttery graham cracker crust pairs perfectly with the velvety peanut butter filling.
  • Make-ahead magic: These bars taste even better after chilling overnight.
  • Crowd-pleaser: Kids, adults, and even picky eaters will beg for seconds.

How to Make No-Bake Peanut Butter Cheesecake Bars

Ingredients You’ll Need

  • For the crust: Graham cracker crumbs, melted butter, and a pinch of salt.
  • For the filling: Cream cheese, creamy peanut butter, powdered sugar, vanilla extract, and whipped cream.
  • For topping (optional): Melted chocolate, crushed peanuts, or a drizzle of caramel.

Step-by-Step Instructions

  1. Prep the crust: Mix graham cracker crumbs with melted butter and press into a lined pan. Chill for 15 minutes.
  2. Make the filling: Beat cream cheese, peanut butter, powdered sugar, and vanilla until smooth. Fold in whipped cream.
  3. Layer and chill: Spread the filling over the crust and refrigerate for at least 4 hours (or overnight).
  4. Add toppings: Slice into bars and garnish as desired. Serve cold!

Tips for the Best No-Bake Cheesecake Bars

Want to take these bars to the next level? Here are my pro tips:

  • Use full-fat cream cheese for the creamiest texture.
  • For a chocolate twist, swap half the graham crumbs for Oreo crumbs.
  • Let the bars sit at room temperature for 5 minutes before slicing for cleaner edges.
  • Freeze leftovers (if there are any!) for a frosty treat later.

If you love no-bake desserts, you’ll adore my No-Bake Chocolate Cookie Bars—they’re another easy crowd favorite!

Frequently Asked Questions

Can I use natural peanut butter?

Yes, but opt for the creamy, no-stir variety. Natural peanut butter can make the filling too oily.

How long do these cheesecake bars last?

Store them covered in the fridge for up to 5 days, or freeze for up to 2 months.

Can I make these gluten-free?

Absolutely! Use gluten-free graham crackers or almond flour for the crust.

Why is my filling too soft?

If your filling hasn’t set, it may need more chilling time. The whipped cream should be stiff before folding in.

Can I use a different nut butter?

Sure! Almond butter or cashew butter work well, though the flavor will vary. Check out Food Network’s nut butter guide for inspiration.

What’s the best way to cut cheesecake bars cleanly?

Dip a sharp knife in hot water, wipe dry, and slice. Repeat between cuts for neat bars.

There you have it—the ultimate no-fuss dessert that tastes like you spent hours in the kitchen. These No-Bake Peanut Butter Cheesecake Bars are proof that the best things in life (or at least in dessert) don’t have to be complicated. Whip up a batch, share with friends, or keep them all to yourself—I won’t judge. For more easy sweet treats, try my 5-Minute Microwave Fudge or browse Bon Appétit’s dessert collection for extra inspiration. Happy no-baking!

Strawberry Jello Poke Cake – A Moist & Refreshing Dessert

Introduction

If you’re looking for a light, fruity, and incredibly moist cake, then Strawberry Jello Poke Cake is the perfect dessert! This retro classic features a soft vanilla cake soaked with strawberry Jello, topped with a whipped, creamy layer, and finished with fresh strawberries for an irresistible treat.

Perfect for potlucks, birthdays, summer gatherings, or a simple family dessert, this easy-to-make cake is bursting with strawberry flavor and always a crowd-pleaser!

Why You’ll Love This Recipe

✔️ Super Moist & Flavorful – The Jello infuses every bite!
✔️ Light & Refreshing – Perfect for warm-weather desserts.
✔️ Easy to Make – Uses a simple cake mix as the base.
✔️ Customizable – Swap flavors or add toppings!
✔️ Perfect for Any Occasion – Great for parties, BBQs, or holidays.

Let’s dive into the ingredients, step-by-step instructions, pro tips, variations, serving ideas, and FAQs to nail this delicious dessert! 🍓✨


What is a Poke Cake?

A poke cake is a soft, baked cake that is “poked” with holes and then soaked with a flavorful Jello, pudding, or syrup mixture. This allows the cake to absorb the flavors and stay ultra-moist, creating a beautiful, marbled effect when sliced.

🌟 The Secret? The Jello seeps into the cake, making it bursting with fruity flavor and irresistibly soft!


Key Ingredients & Their Roles

1. Cake Base (The Foundation) 🎂

  • White or yellow cake mix – A light, fluffy base that absorbs the Jello well.
  • Eggs, oil, and water – Needed for the cake mix.

2. Strawberry Jello (The Flavor Infusion) 🍓

  • Strawberry Jello mix (3 oz package) – The key to the vibrant color & fruity taste.
  • Boiling water – Dissolves the Jello for easy absorption.

3. Whipped Topping (The Creamy Layer) 🥄

  • Cool Whip or homemade whipped cream – Adds a light, creamy texture on top.

4. Fresh Strawberries (For Garnish) 🍓

  • Adds a fresh, juicy touch to the cake.

5. Optional Additions (For Extra Flavor) 🍫🌿

  • Vanilla pudding – Makes the topping extra creamy.
  • Shredded coconut or white chocolate shavings – Adds texture & sweetness.
  • Strawberry glaze – For an extra fruity drizzle.

Step-by-Step Cooking Instructions

Step 1: Bake the Cake

  • Preheat oven to 350°F (175°C).
  • Grease a 9×13-inch baking dish.
  • Prepare the cake mix according to package instructions.
  • Bake for 25-30 minutes until golden brown & a toothpick comes out clean.
  • Let the cake cool for 10 minutes.

Step 2: Poke the Cake

  • Using a fork, wooden spoon handle, or chopstick, poke holes all over the cake.
  • Make sure the holes go deep enough for the Jello to seep in.

Step 3: Prepare the Jello Mixture

  • In a bowl, mix:
    1 package (3 oz) Strawberry Jello
    1 cup boiling water
    1/2 cup cold water
  • Stir until the Jello is fully dissolved.

Step 4: Pour Jello Over Cake

  • Slowly pour the Jello mixture over the cake, ensuring it fills the holes.
  • Refrigerate for 2-4 hours to allow the Jello to set.

Step 5: Make the Whipped Topping

  • If using Cool Whip, simply spread it over the chilled cake.
  • For homemade whipped cream, beat:
    2 cups heavy cream
    ¼ cup powdered sugar
    1 tsp vanilla extract
  • Spread evenly over the cake.

Step 6: Garnish & Serve

  • Decorate with fresh strawberry slices.
  • Add chocolate shavings or a drizzle of strawberry syrup for extra flavor.
  • Slice & serve chilled! 🍓🍰

Pro Tips for the Best Strawberry Jello Poke Cake

✔️ Use a fork or chopstick for smaller holes – Helps the Jello absorb better.
✔️ Let the Jello soak for at least 2 hours – Ensures maximum moisture.
✔️ Use a homemade vanilla cake – For a richer flavor.
✔️ Chill before serving – The flavors set better & taste amazing cold!
✔️ Garnish just before serving – Keeps strawberries fresh & vibrant.


Flavor Variations & Customizations

1. Strawberry Lemonade Poke Cake 🍋

  • Use lemon cake mix instead of vanilla.
  • Swap strawberry Jello for lemon Jello.
  • Garnish with lemon zest & fresh strawberries.

2. Chocolate-Covered Strawberry Cake 🍫🍓

  • Use chocolate cake mix instead of vanilla.
  • Top with chocolate ganache drizzle.

3. Strawberry Cheesecake Poke Cake 🍰

  • Add a layer of sweetened cream cheese under the whipped topping.
  • Use vanilla pudding in the frosting for extra richness.

4. Mixed Berry Poke Cake 🫐🍓

  • Use a mix of raspberry & strawberry Jello.
  • Top with blueberries & raspberries for a vibrant look.

5. Low-Sugar & Keto-Friendly Version 🌱

  • Use sugar-free cake mix & sugar-free Jello.
  • Swap Cool Whip for keto-friendly whipped cream.

Best Side Dishes & Pairings

Beverages to Serve With This Cake

Vanilla Latte or Iced Coffee – Complements the sweetness.
🍹 Strawberry Lemonade – Refreshing & fruity.
🍷 Sweet Rosé or Moscato – A perfect pairing for summer gatherings.

Other Desserts to Pair With

🍪 Strawberry Shortbread Cookies – A crunchy contrast.
🍦 Vanilla Bean Ice Cream – A creamy pairing.
🍫 Dark Chocolate Truffles – A decadent balance to the fruity cake.


FAQs – Everything You Need to Know

1. Can I make this cake ahead of time?

Yes! It actually tastes better the next day since the flavors meld together.

2. How do I store leftovers?

Store in the fridge for up to 5 days in an airtight container.

3. Can I freeze this cake?

Yes! Wrap slices in plastic wrap & freeze for up to 2 months.

4. Can I use other Jello flavors?

Absolutely! Try raspberry, cherry, or lime for fun variations.

5. What’s the best way to get clean slices?

Use a sharp knife dipped in hot water before cutting.


Conclusion

Strawberry Jello Poke Cake is moist, fruity, creamy, and absolutely delicious! Whether you make it for a summer picnic, holiday gathering, or just because, this cake is sure to be a crowd-pleaser.

🔥 Try it today for an easy, refreshing dessert that everyone will love!

Print
clock clock iconcutlery cutlery iconflag flag iconfolder folder iconinstagram instagram iconpinterest pinterest iconfacebook facebook iconprint print iconsquares squares iconheart heart iconheart solid heart solid icon

Strawberry Jello Poke Cake – A Moist & Refreshing Dessert


  • Author: Emy

Description

This Strawberry Jello Poke Cake is a fun, refreshing dessert that’s perfect for any occasion! Moist cake, infused with sweet strawberry Jello, topped with fluffy whipped cream—what’s not to love?


Ingredients

Scale

For the Cake:

  • 1 box (15.25 oz) white or vanilla cake mix
  • 1 cup water
  • 1/3 cup vegetable oil
  • 3 large eggs

For the Strawberry Jello:

  • 1 box (3 oz) strawberry Jello (or any berry Jello flavor you prefer)
  • 1 cup boiling water
  • 1/2 cup cold water

For the Topping:

  • 1 (8 oz) container whipped topping (like Cool Whip)
  • 1/2 cup powdered sugar
  • Fresh strawberries for garnish (optional)

Instructions

1. Bake the Cake:

  1. Preheat oven to 350°F (175°C).
  2. Prepare a 9×13-inch baking dish by greasing it lightly or lining it with parchment paper.
  3. In a large bowl, combine the cake mix, water, vegetable oil, and eggs. Beat according to package instructions (usually for about 2 minutes).
  4. Pour the batter into the prepared baking dish and bake for 28-30 minutes, or until a toothpick inserted in the center comes out clean.
  5. Allow the cake to cool in the pan for 15-20 minutes, then use a fork to poke holes all over the cake, about 1 inch apart.

2. Prepare the Strawberry Jello:

  1. In a bowl, dissolve the strawberry Jello in 1 cup of boiling water, stirring until the Jello completely dissolves.
  2. Add 1/2 cup cold water and mix well.
  3. Slowly pour the Jello mixture over the cooled cake, making sure to cover all the holes. The liquid will seep into the cake, creating a colorful, flavorful effect.

3. Chill the Cake:

  1. Place the cake in the refrigerator and chill for at least 2 hours, or until the Jello is fully set and the cake is cold.

4. Make the Topping:

  1. In a medium bowl, combine the whipped topping and powdered sugar. Stir gently until smooth.
  2. Spread the whipped topping evenly over the chilled cake.

5. Serve & Enjoy:

  1. Garnish with fresh strawberries for an extra pop of color and flavor.
  2. Slice and serve the cake chilled for a refreshing, light dessert!

🔥

Thin Mint Cookie Bars – The Ultimate Minty Chocolate Dessert!

Introduction

If you love the crunchy, chocolatey goodness of Thin Mint cookies, then these Thin Mint Cookie Bars will be your new favorite dessert! These bars feature a buttery, minty chocolate crust, a thick, fudgy chocolate layer, and a silky mint chocolate ganache—a combination that’s rich, refreshing, and irresistible.

Perfect for bake sales, holiday treats, or an easy homemade dessert, these bars capture the essence of Thin Mints but in a thick, chewy, bar form.

Why You’ll Love This Recipe

✔️ Easy to Make – No rolling or cutting cookies—just press, bake, and layer!
✔️ Rich & Minty Flavor – Perfect balance of chocolate & peppermint.
✔️ No Mixer Required – Simple ingredients, big flavor!
✔️ Perfect for Any Occasion – Great for parties, holidays, and gifting.
✔️ Customizable – Make it gluten-free, extra fudgy, or low-carb!

Let’s dive into the ingredients, step-by-step guide, pro tips, variations, serving ideas, and FAQs to perfect these Thin Mint Cookie Bars! 🍫🌿


What Makes These Bars So Special?

Unlike traditional Thin Mint cookies, these bars offer:
🍪 A buttery, crunchy chocolate-mint base
🍫 A thick, fudgy chocolate filling
🌿 A rich, mint chocolate ganache topping

🌟 The Secret? Using crushed Thin Mint cookies or chocolate graham crackers in the crust for authentic flavor and crunch.


Key Ingredients & Their Roles

1. Thin Mint Crust (The Base) 🍪

  • Thin Mint cookies (or chocolate graham crackers) – The classic minty base.
  • Butter – Binds the crust and adds richness.
  • Sugar (optional) – Enhances sweetness.

2. Fudgy Chocolate Layer (The Heart) 🍫

  • Semisweet or dark chocolate chips – Creates a rich, deep chocolate flavor.
  • Sweetened condensed milk – Adds chewiness and fudginess.
  • Peppermint extract – For that classic Thin Mint taste.

3. Mint Chocolate Ganache (The Silky Top) 🌿

  • Heavy cream – Makes the ganache smooth and creamy.
  • Mint chocolate chips – Adds a cool, refreshing flavor.
  • Crushed Thin Mints (for topping) – Extra crunch and minty goodness.

Step-by-Step Cooking Instructions

Step 1: Make the Thin Mint Crust

  • Preheat oven to 350°F (175°C).
  • Crush 2 cups of Thin Mints (or chocolate graham crackers) into fine crumbs.
  • Mix with ½ cup melted butter and 2 tbsp sugar (optional).
  • Press into a greased or parchment-lined 8×8-inch baking pan.
  • Bake for 8 minutes, then let cool.

Step 2: Prepare the Fudgy Chocolate Filling

  • Melt 1 ½ cups chocolate chips with ½ cup sweetened condensed milk in a microwave-safe bowl.
  • Stir until smooth, then mix in ½ tsp peppermint extract.
  • Pour over the cooled crust and spread evenly.

Step 3: Make the Mint Chocolate Ganache

  • Heat ½ cup heavy cream in a saucepan until hot but not boiling.
  • Pour over 1 cup mint chocolate chips and let sit for 2 minutes.
  • Stir until smooth, then pour over the chocolate layer.

Step 4: Chill & Set

  • Sprinkle crushed Thin Mints or extra chocolate chips on top.
  • Refrigerate for 1-2 hours until fully set.

Step 5: Slice & Serve

  • Cut into 16 bars for perfect bite-sized treats.
  • Serve chilled or at room temperature.

🔥 Enjoy the fudgy, minty goodness in every bite! 🔥


Pro Tips for the Best Thin Mint Cookie Bars

✔️ Use high-quality chocolate – Better chocolate = richer bars.
✔️ Let layers cool before adding the next – Prevents melting.
✔️ Chill for at least 1 hour – Makes slicing easier.
✔️ Use a sharp knife dipped in hot water – For clean cuts.
✔️ Store in the fridge – Keeps the bars firm & fresh.


Flavor Variations & Customizations

1. Extra Fudgy Thin Mint Bars 🍫

  • Add ¼ cup cocoa powder to the crust for a richer chocolate flavor.

2. Gluten-Free Version 🌾🚫

  • Use gluten-free chocolate cookies or Oreos.

3. Peppermint Bark Thin Mint Bars 🎄

  • Add crushed candy canes on top for a holiday twist.

4. Low-Carb Keto Thin Mint Bars 🥑

  • Use almond flour + cocoa powder for the crust.
  • Swap sugar-free chocolate chips & condensed milk substitute.

5. Mocha Mint Bars ☕🍫

  • Add 1 tsp espresso powder to the chocolate layer for a coffee kick.

Best Pairings & Serving Ideas

Beverages to Serve With These Bars

Hot Chocolate – Double the chocolate decadence.
🥛 Cold Milk – The perfect classic combo.
🍵 Peppermint Tea – Enhances the minty flavors.

Other Desserts to Pair With

🍪 Thin Mint Brownies – More chocolate + mint deliciousness.
🍦 Vanilla Ice Cream – A creamy contrast to the fudgy bars.


FAQs – Everything You Need to Know

1. How do I store Thin Mint Cookie Bars?

  • Store in an airtight container in the fridge for up to 5 days.

2. Can I freeze these bars?

Yes! Wrap bars in plastic wrap & freeze for up to 2 months.

3. Can I use a different type of cookie for the crust?

Yes! Try Oreos, chocolate wafers, or graham crackers.

4. How do I make them less sweet?

Use dark chocolate chips instead of semisweet.

5. Can I make these bars dairy-free?

Yes! Use:

  • Coconut milk instead of heavy cream
  • Dairy-free chocolate chips
  • Vegan butter instead of regular butter

Conclusion

Thin Mint Cookie Bars are rich, fudgy, crunchy, and irresistibly minty—perfect for holidays, bake sales, or just a sweet treat. Whether you serve them chilled or at room temperature, they’re guaranteed to be a hit with chocolate lovers and mint fans alike!

🔥 Try them today & enjoy the perfect blend of chocolate and mint! 🔥

Print
clock clock iconcutlery cutlery iconflag flag iconfolder folder iconinstagram instagram iconpinterest pinterest iconfacebook facebook iconprint print iconsquares squares iconheart heart iconheart solid heart solid icon

Thin Mint Cookie Bars – The Ultimate Minty Chocolate Dessert!


  • Author: Emy

Description

If you love Thin Mint cookies, these Thin Mint Cookie Bars are going to be your new favorite dessert! A buttery chocolate base topped with a minty cream layer and finished off with a rich chocolate glaze, these bars are a mint lover’s dream come true.


Ingredients

Scale

For the Cookie Base:

  • 1 1/2 cups all-purpose flour
  • 1/2 cup unsweetened cocoa powder
  • 1/2 tsp baking soda
  • 1/4 tsp salt
  • 1/2 cup unsalted butter, softened
  • 1 cup granulated sugar
  • 1 large egg
  • 1 tsp vanilla extract

For the Mint Layer:

  • 1/2 cup powdered sugar
  • 1 1/2 cups powdered mint chocolate chip ice cream or mint chocolate chips (chopped if using chips)
  • 1 tbsp unsalted butter, melted
  • 1/2 tsp peppermint extract

For the Chocolate Glaze:

  • 1/2 cup semisweet chocolate chips
  • 2 tbsp unsalted butter

Instructions

1. Prepare the Cookie Base:

  1. Preheat the oven to 350°F (175°C).
  2. Grease or line an 8×8-inch baking pan with parchment paper.
  3. In a medium bowl, whisk together flour, cocoa powder, baking soda, and salt.
  4. In a separate bowl, cream together butter and sugar until light and fluffy (about 3 minutes).
  5. Beat in egg and vanilla extract until well combined.
  6. Gradually add the dry ingredients to the wet ingredients, mixing until just combined.
  7. Press the cookie dough into the bottom of the prepared pan, smoothing it out into an even layer.

2. Make the Mint Layer:

  1. In a medium bowl, mix powdered sugar, melted butter, and peppermint extract.
  2. Add the chopped mint chocolate or mint ice cream and stir until everything is evenly combined.
  3. Spread the mint layer over the cookie base, smoothing it out into an even layer.

3. Bake & Cool:

  1. Bake the bars for 18-22 minutes, or until a toothpick inserted into the center comes out clean.
  2. Let the bars cool in the pan for 10 minutes, then transfer to a wire rack to cool completely.

4. Make the Chocolate Glaze:

  1. In a small microwave-safe bowl, melt chocolate chips and butter together in the microwave in 30-second intervals, stirring until smooth and fully melted.
  2. Once the bars are completely cooled, drizzle the chocolate glaze over the top, spreading it into an even layer.

5. Serve & Enjoy:

  1. Let the glaze set for 30 minutes before cutting the bars into squares.
  2. Serve chilled or at room temperature and enjoy the delicious minty, chocolatey goodness!

Notes

These Thin Mint Cookie Bars are the perfect way to indulge in that iconic mint-chocolate flavor without needing to wait for Girl Scout season!

#ThinMintBars #MintChocolateDessert #CookieBars #MintLovers #EasyDesserts